No-Tool Updos Guide for Busy Morning Routines
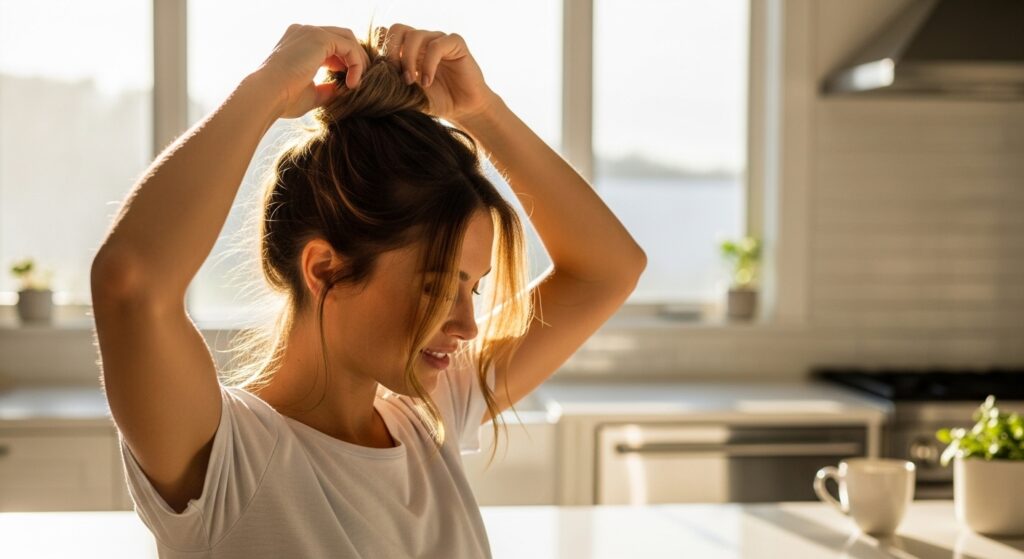
Okay, let’s be real. Most mornings, the last thing I have time for is a full-blown hairstyling session with hot tools and a million pins. I’m usually scrambling for coffee and trying to remember if I answered that important email.
But I still want to look put-together. That’s where no-tool updos become your secret weapon. They’re fast, they’re kind to your hair, and they look like you tried way harder than you actually did.
This guide is all about getting you out the door with a gorgeous style in five minutes flat. We’re ditching the curling iron and embracing what you’ve got. Let’s turn those busy mornings into your most stylish ones.
Why No-Tool Styles Are a Game-Changer
First, let’s talk about why this method is a total lifesaver. It saves you so much time. No waiting for tools to heat up, no careful sectioning. You just use your hands and go.
It’s also incredibly healthy for your hair. You’re giving it a break from daily heat damage, which means less breakage and happier ends over time. The styles often rely on gentle twisting and tying, which is much gentler than tight elastics or constant brushing.
The Essential Supplies You Already Own
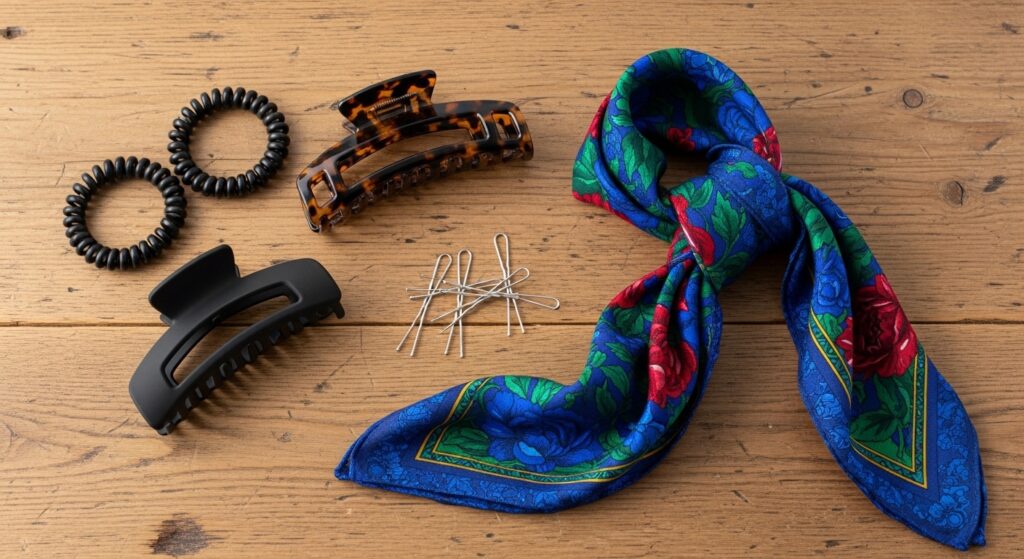
You don’t need special gear. In fact, you probably have everything in your bathroom right now. The key is choosing the right tools for a no-fuss hold.
- Coil (or telephone cord) hair ties: These are the best. They don’t crease your hair and have a super strong grip.
- Large Claw Clips: Go for one bigger than you think. It holds more hair securely and looks chic.
- Bobby Pins: A few good, sturdy ones are perfect for tucking ends.
- A Silk Scarf: This is your secret weapon for adding a polished touch.
Prep Your Hair the Night Before

A little prep goes a long way. If you shower at night, don’t just sleep on wet hair. Gently towel-dry and add a light leave-in conditioner or mousse.
Then, loosely braid it or twist it into a soft bun on top of your head. This gives you natural texture and wave to work with in the morning. When you take it down, you’ll have beautiful, lived-in volume that makes any updo easier and fuller.
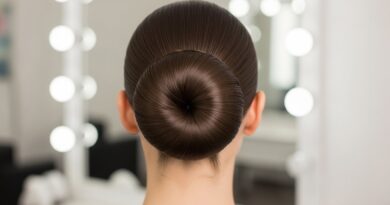
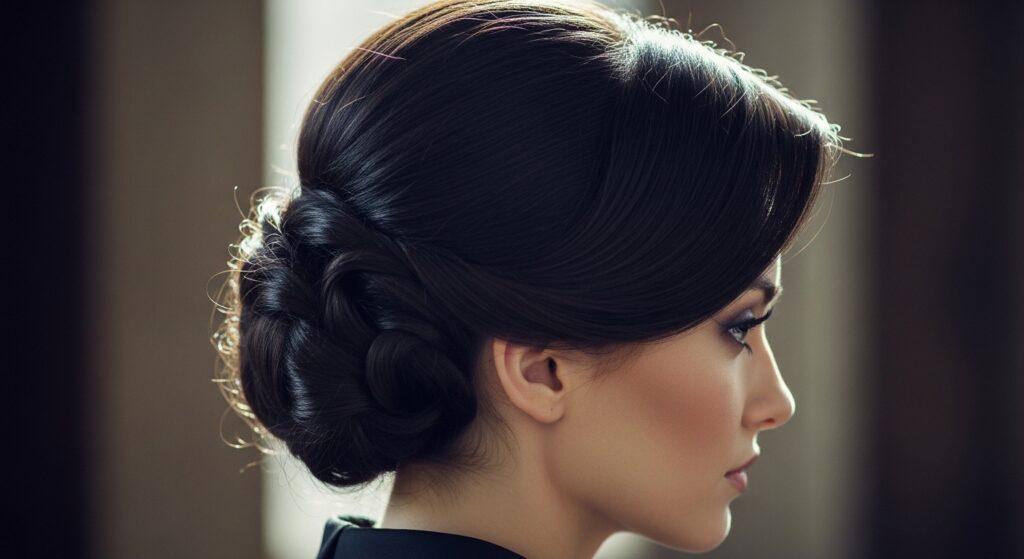
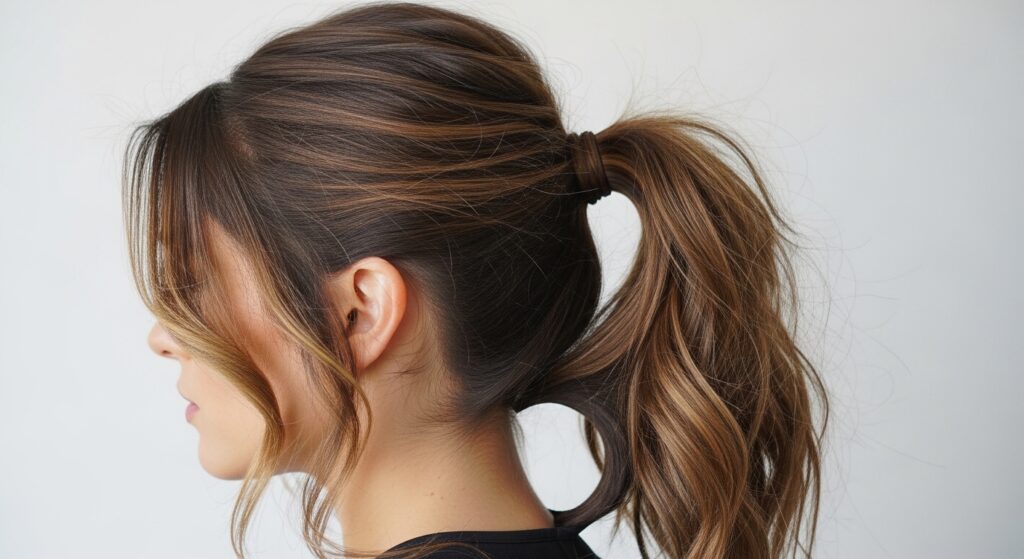
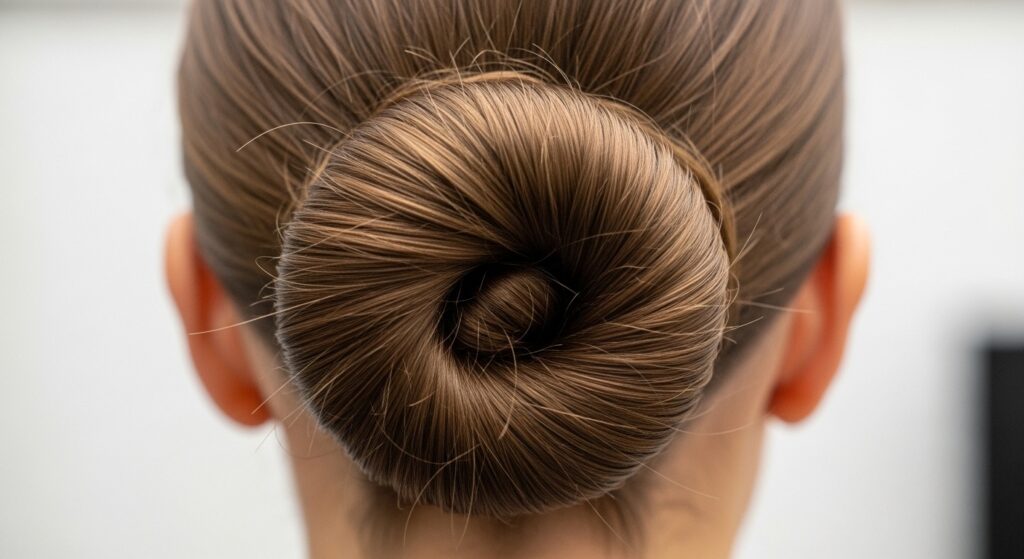
The 5-Minute Sleek Low Bun
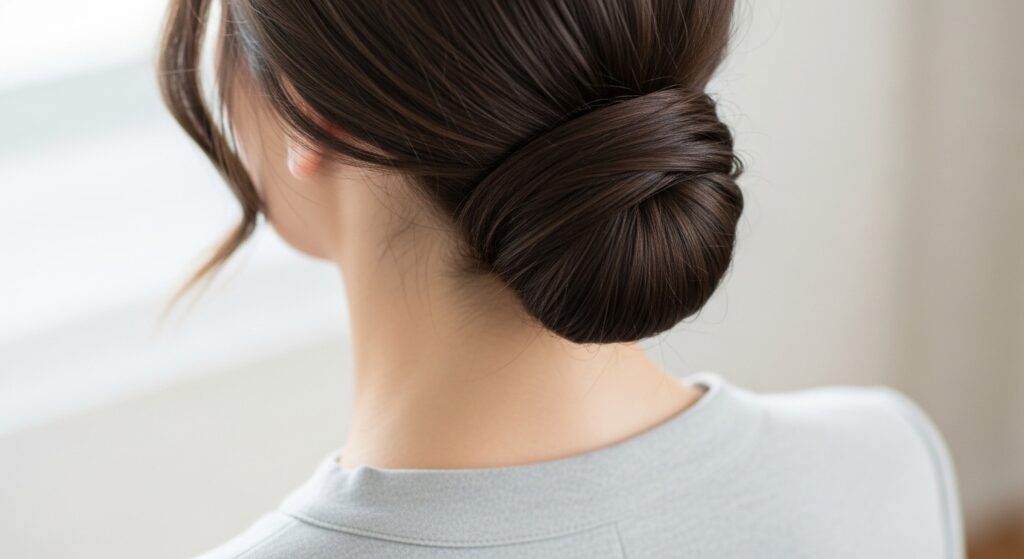
This is the ultimate quiet luxury bob upgrade if your hair is longer, or a perfect finish for an asymmetrical lob. It screams polished without the effort.
- Pull your hair into a low, loose ponytail with a coil tie.
- Twist the length of the ponytail until it coils around itself.
- Wrap it around the base and secure the ends under the bun with bobby pins.
- Gently pull at the sides for a little volume. Done!
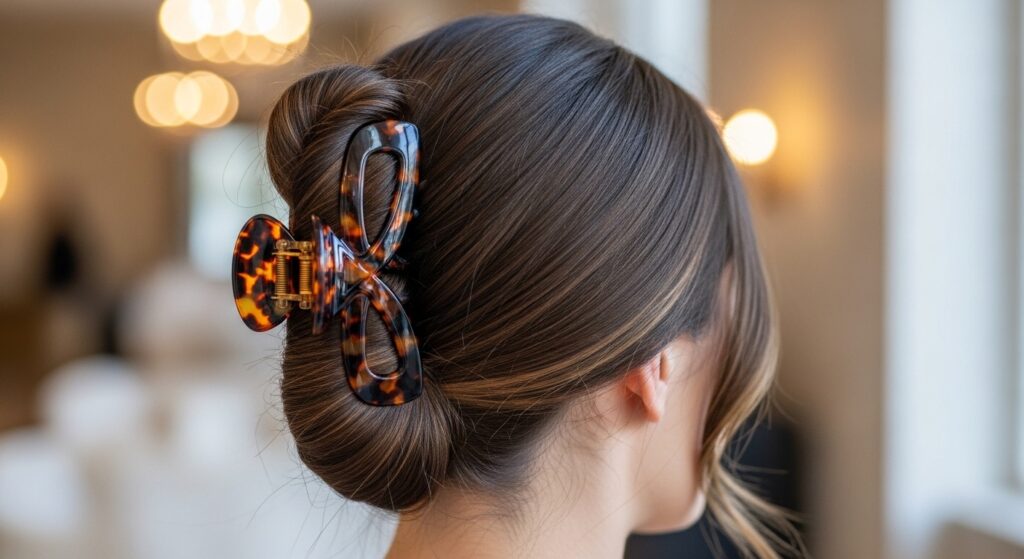
The Effortless Twist-Back with a Clip
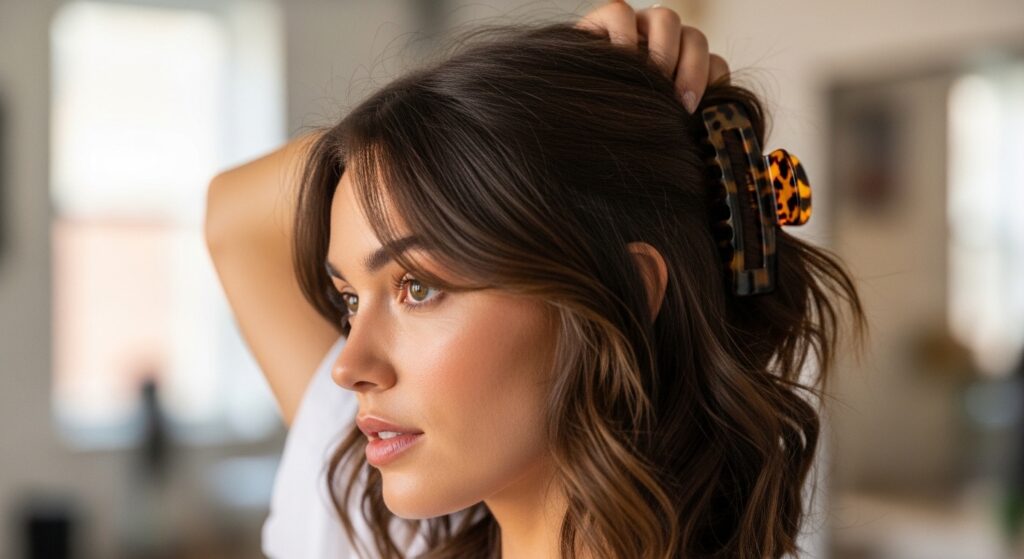
This is my personal go-to. It works on every hair length from chin-length bobs to long hair. It’s the foundation for so many 2026 hairstyles we’re seeing—effortless and functional.
Simply gather your hair as if for a low ponytail. Twist it once or twice at the nape of your neck. Then, instead of pulling it all the way through a tie, fold the twisted length up and secure it with a large claw clip. Let some pieces fall naturally.
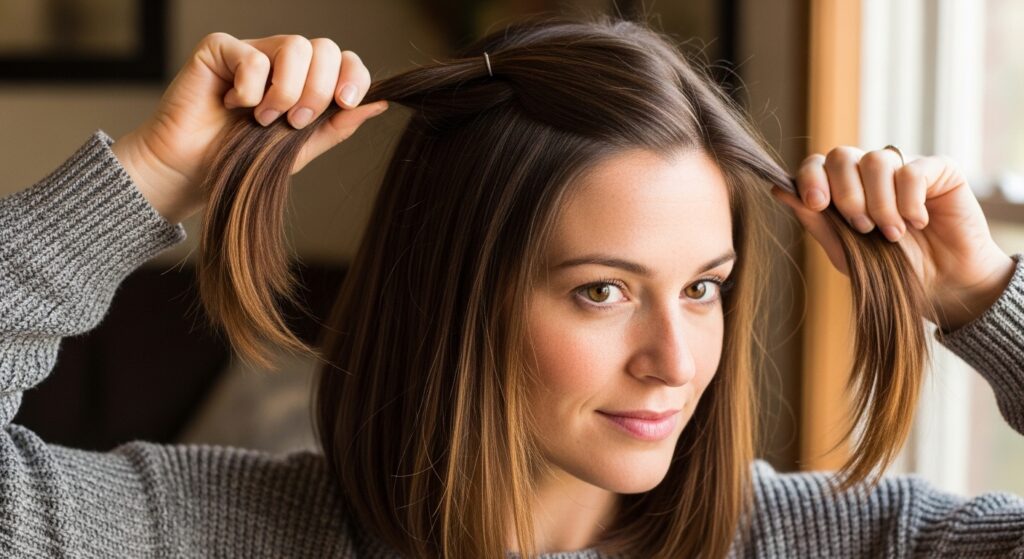
Face-Framing Half-Up Style

This style gives you the best of both worlds. It keeps hair out of your face while showing off your length and texture. It’s a great way to mimic the softness of a hime cut if you have blunt bangs or layers.
Take two small sections from the front, near your temples. Cross them over each other at the back of your crown. Secure them with a small, clear elastic or a bobby pin. Gently pull on the sections to create a little volume at the crown.
The Modern Gibson Tuck
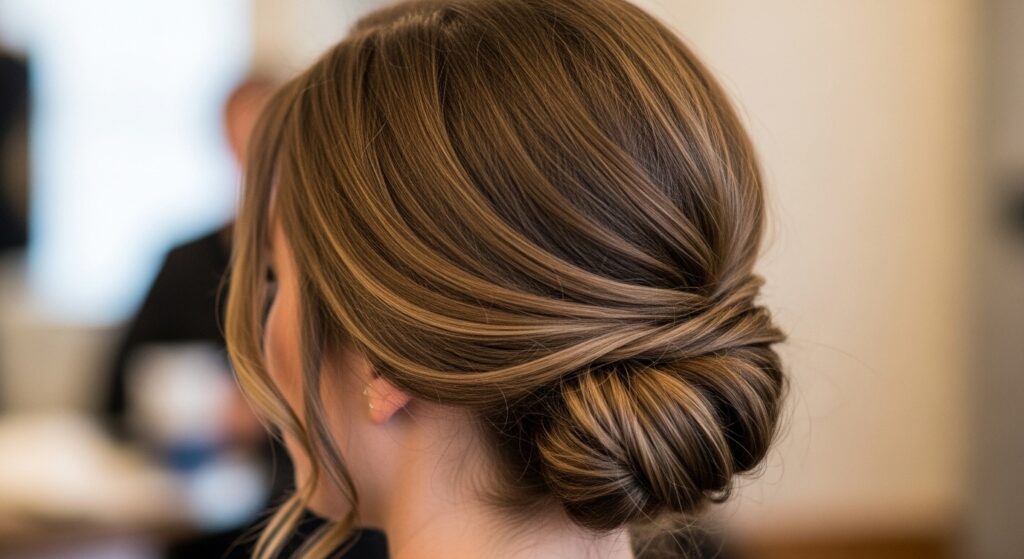
This classic style feels fresh again. It’s perfect for achieving that old money hair aesthetic—understated, elegant, and a little bit vintage.
- Make a low ponytail but don’t pull the hair all the way through on the last loop. You’ll have a loop.
- Take the tail end and tuck it up through the center of the loop.
- Pull gently to tighten the loop around the tucked ends, hiding them completely.
- Adjust for softness. It looks complicated but takes 30 seconds.
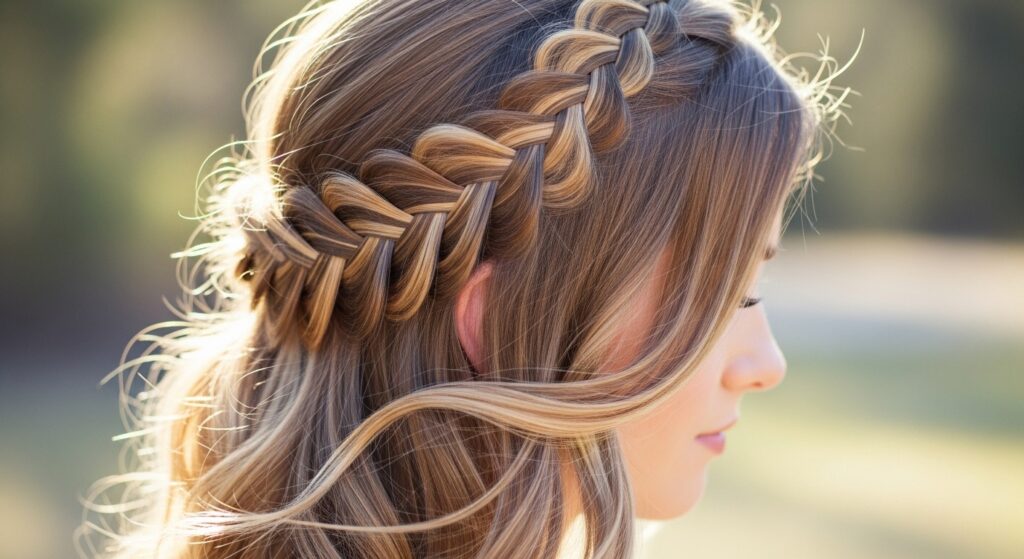
Rope Braid Crown (No Braiding Skills Needed)
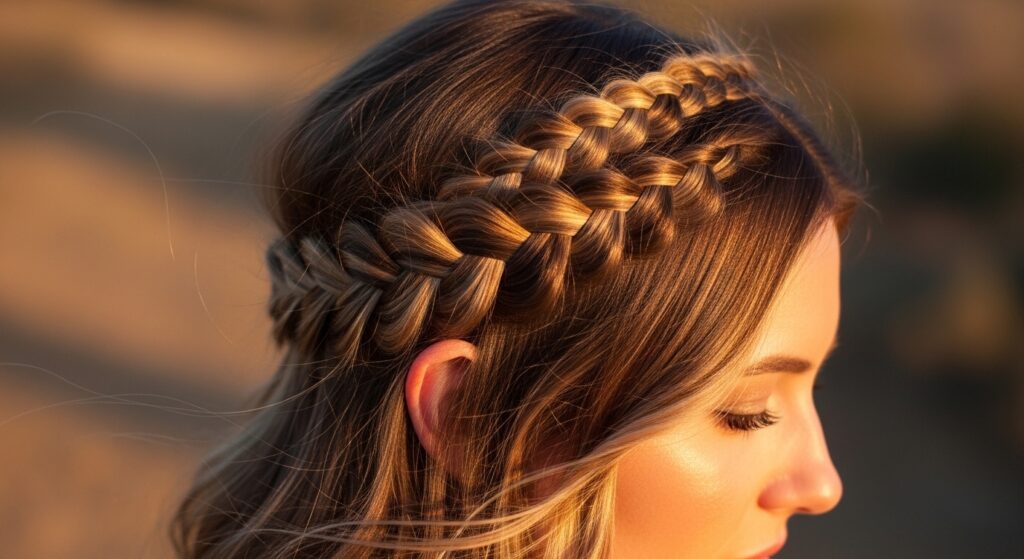
Don’t panic at the word “braid.” A rope braid is just twisting two sections around each other. It’s the easiest braid in the world and looks incredibly intricate.
Take a section of hair from one side of your part. Split it into two equal pieces. Twist them both in the same direction, then wrap them around each other in the opposite direction. Secure at the back with a pin. Repeat on the other side and join them.
Messy Bun with a Scarf Accent
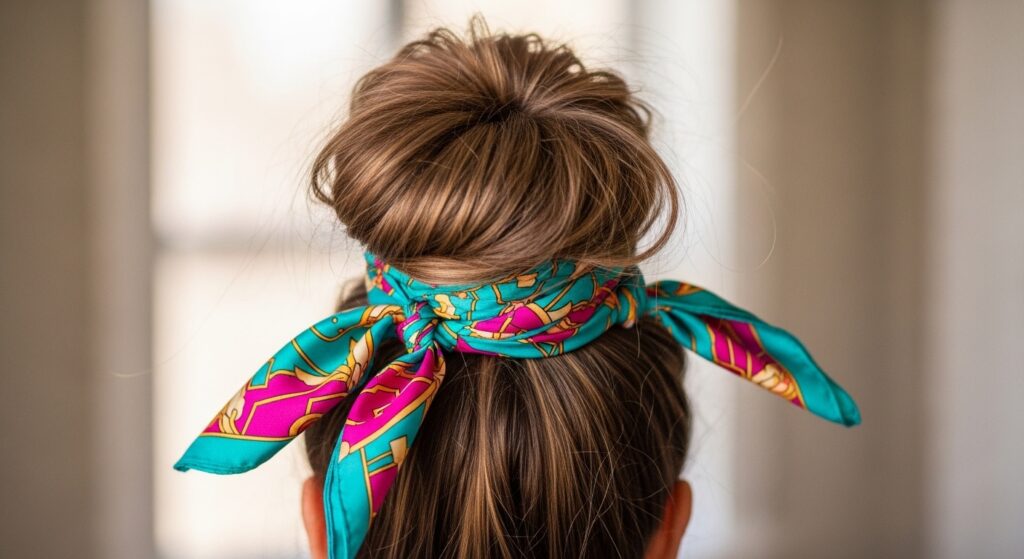
Elevate your basic messy bun instantly. This is where you can play with the glitchy glam hair trend by adding an unexpected, playful accessory.
Make a high ponytail and twist it into a messy bun, securing with a coil tie. Take a long, thin silk scarf. Tie it around the base of the bun, making a simple knot or a small bow. Let the ends flow down with any loose pieces of hair.
The “Vampire” Inspired Low Twist
Channel that vampire haircut or romantic goth hairstyles vibe with something sleek and darkly elegant. It’s all about the deep part and polished finish.
Create a deep side part. Gather all hair to the opposite side, low on your neck. Give it a single, firm twist and then coil it flat against your head, pinning as you go. The goal is a smooth, twisted knot that lies close to the head. Keep it severe or pull out a tiny wisp.
Quick French Twist with a Clip
Forget the million bobby pins. A large clip makes this classic style achievable in a minute. It works beautifully on a quiet luxury bob that’s grown out a bit.
- Gather hair at the nape. Twist it upwards toward your crown.
- Keep twisting until the hair folds in on itself against your head.
- Hold the twist in place and secure it horizontally with one large, sturdy claw clip. Tuck any ends under.
Asymmetrical Ponytail Pull-Through
This adds instant interest to a simple pony. It’s a perfect match for an asymmetrical lob cut, playing into its geometric shape.
Gather your hair into a low side ponytail and secure with a coil tie. Above the elastic, make a small hole in the hair. Pull the tail end of the ponytail up and through that hole, tugging it gently to create a soft, twisted look. Fluff the ponytail for volume.
Waterfall Twist for Soft Detail
This looks like you spent an hour on details, but it’s just a simple repeating motion. It’s incredibly romantic and works with every hair type.
Take a front section and split it into three. Start a regular braid, but after crossing a piece into the middle, drop the bottom piece and pick up a new section of hair from above to replace it. Continue along your hairline, securing the end with a tiny clear elastic.
The “Hime” Inspired Half-Up Pony
If you have a hime cut or blunt bangs, this style highlights its beautiful structure. It’s sharp, cute, and super fast.
Isolate your blunt front pieces and bangs. Gather just the top section of your hair from the crown, leaving the front pieces down. Secure this top section into a small, high ponytail. Keep it sleek or gently backcomb the base for a little lift. Your signature blunt pieces will frame your face perfectly.
Bobby Pin Criss-Cross Detail
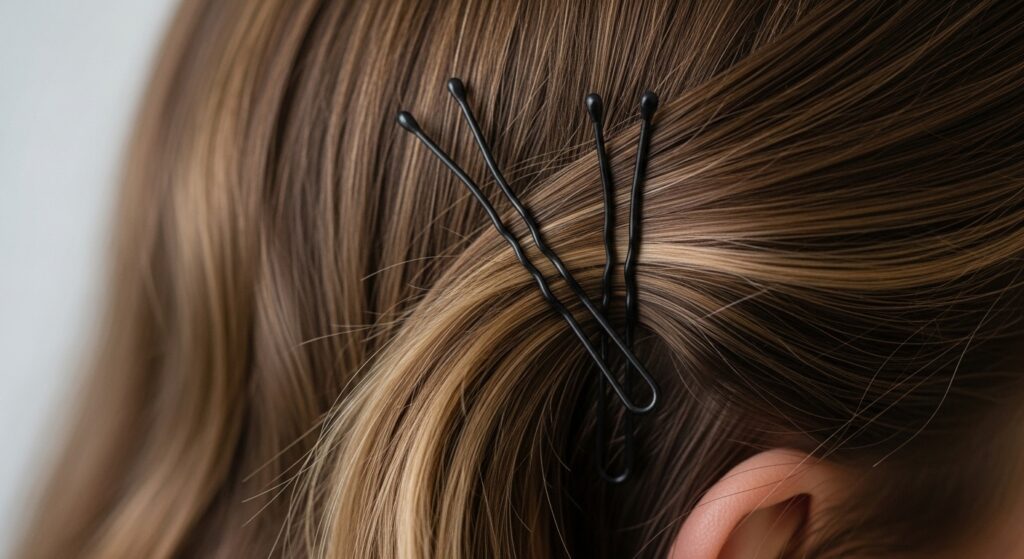
Sometimes the smallest detail makes the biggest impact. This is a trick seen in glitchy glam hair looks—using everyday items in a deliberate, artistic way.
After creating any simple updo or even with your hair down, take two bobby pins. Cross them over each other in an “X” shape to pin back a section of hair near your temple or behind your ear. It’s a purposeful, edgy accent that takes two seconds.
Tucked Braid Ends for a Clean Look
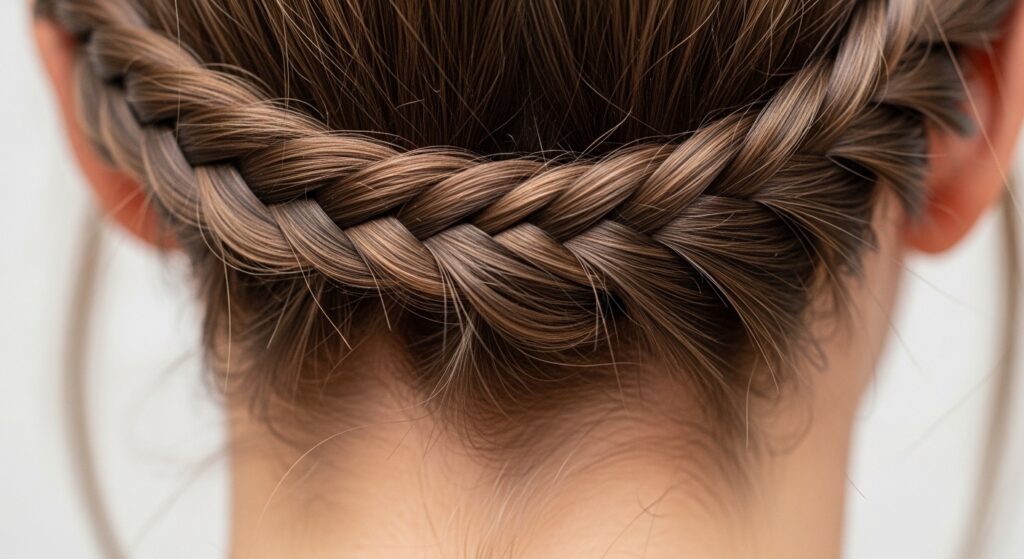
This is how you make any simple braid look more intentional and polished. It’s a great finish for the rope braid crown or a regular three-strand braid.
Once you’ve braided a section (like a side braid or a low braid), don’t tie it off with an elastic. Instead, hold the end, gently pull the braid apart to widen it, and then tuck the end up and under the top of the braid. Secure it with a discreet bobby pin or two. No visible ends!
Voluminous Top Knot
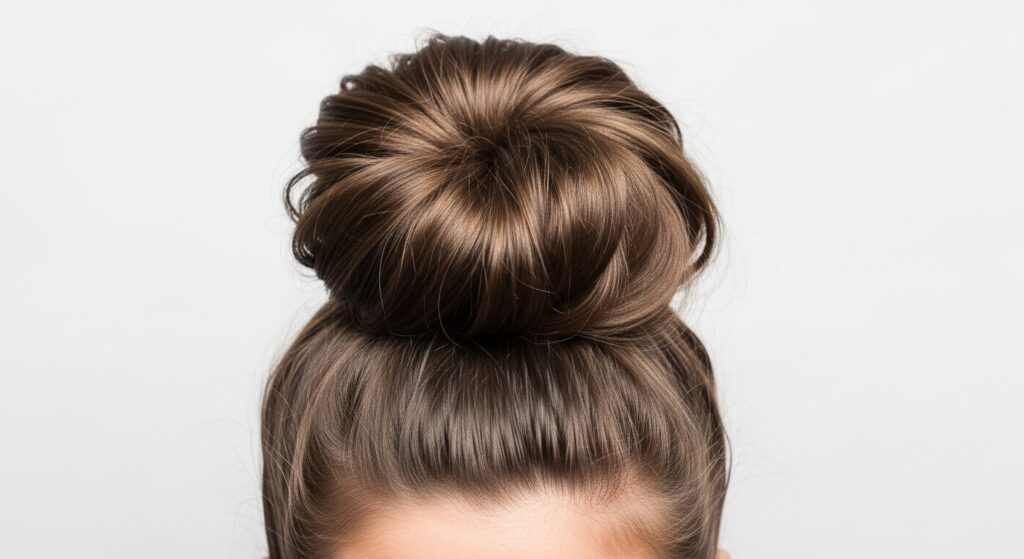
This isn’t the tight ballerina bun. This is loose, full, and full of life. It’s a great way to show off texture and works even on thinner hair with the right prep.
Flip your head over and gather all hair at the crown. Twist the length once while it’s up high, then wrap it around the base. Use a coil tie to secure it in place. The key is to not pull every strand tight. Once upright, gently pull the sides of the bun and the hair at the crown to create volume.
The “Lob” Specific Twist-Back
If you have an asymmetrical lob or any bob that’s too short for a full updo, this is for you. It keeps hair out of your face while showing off your great cut.
Take the front sections on both sides, about from your temples forward. Twist each one gently back. Bring them together at the back of your crown and secure them together with a small, decorative clip. Let the rest of your lob hair flow freely. It’s chic and takes 10 seconds.
Knotted Bun for Maximum Hold
This style uses its own tension to stay put, making it perfect for busy days, workouts, or windy weather. It looks like a fancy knot.
- Make a high ponytail. Split the tail into two sections.
- Tie these two sections into a single overhand knot (like starting to tie your shoes).
- Twist the ends around the base of the knot and pin everything securely. It won’t budge.
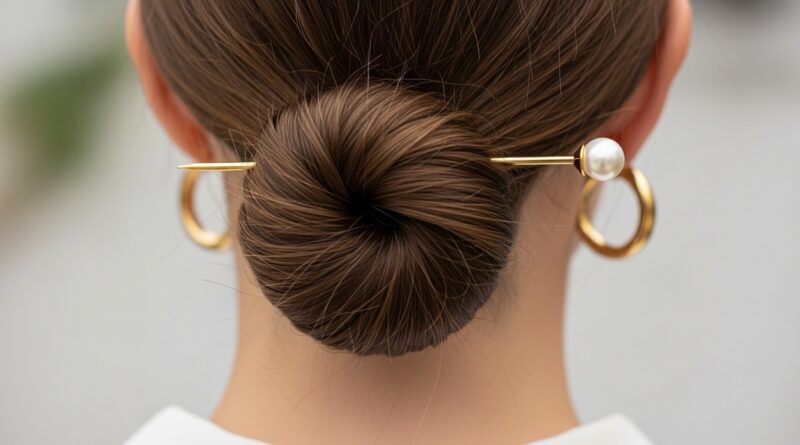
Accessorize with What You Have
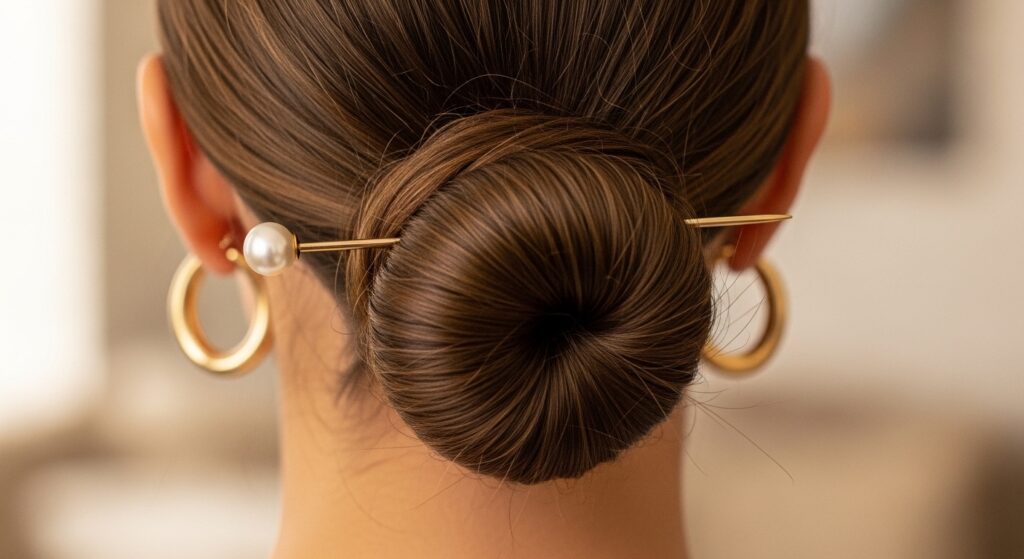
Never underestimate the power of accessories. They can transform the simplest style. Think about your earrings, headbands, or even a fancy pin.
A beautiful pair of hoops or studs complements an updo perfectly. Slide a decorative pin into the side of a bun or twist. A thin, metallic headband can add that old money hair touch in an instant. Use what’s already in your jewelry box.
Final Touch: The Texture Spray
If you have one product, make it a texturizing spray. This is your cheat code for making any no-tool updo look better, fuller, and last longer.
After you’ve styled your hair, lift sections at the crown and give a quick spray at the roots. You can also lightly mist the surface of the style to tame flyaways and add a bit of grip. It gives that perfectly undone, lived-in texture we’re all after.
And there you have it! Twenty ways to look polished without ever plugging in a single tool. The real beauty of these styles is in their imperfection—a little piece out, a soft wave, a casual twist. That’s what makes them look modern and like *you*.
I hope this guide turns your rushed mornings into a quick moment of creativity. Your hair gets a break, you save time, and you still get to walk out the door feeling confident and stylish. That’s a win in my book.
Save this post to Pinterest so you always have it on hand for your next crazy morning! Which style are you trying first? Tell me in the comments below—I love hearing from you!