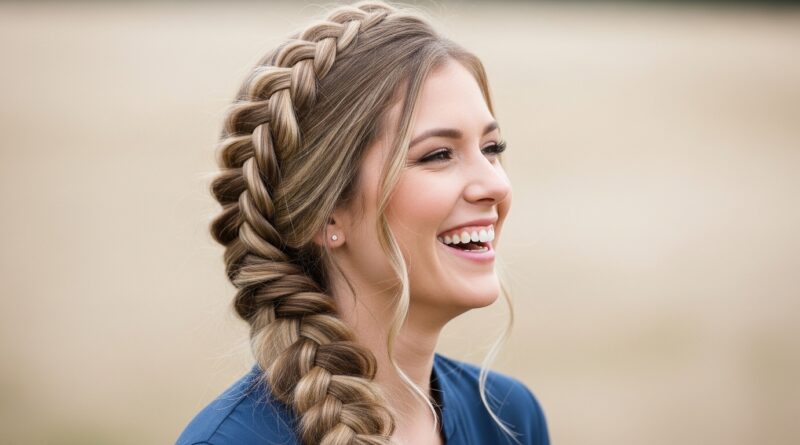
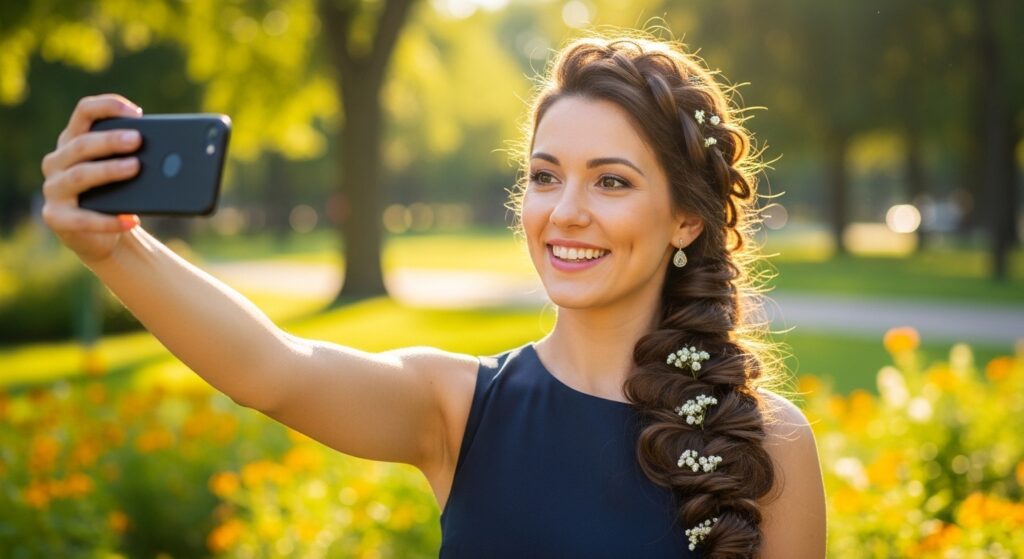
Perfect 19 Cascade Braids Mimicking Waterfalls on Long Flowing Locks
Hey there, beautiful! Have you ever stood by a waterfall and just been mesmerized by the way the water flows and cascades down? That feeling of effortless, natural movement is exactly what we’re bringing to your hair today. Forget stiff, overdone styles—this is all about soft, romantic, flowing energy.
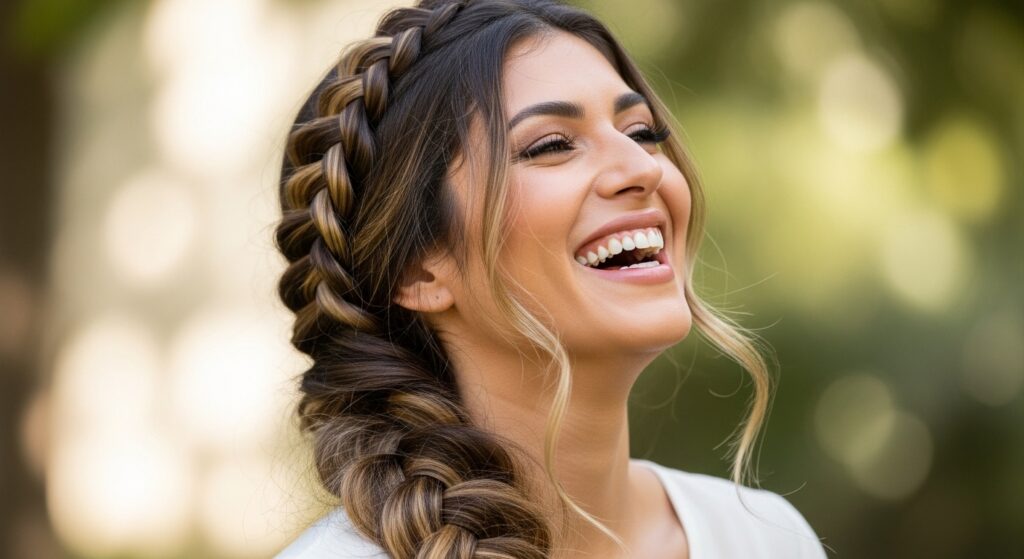
I’m talking about the Cascade Braid, and trust me, it’s about to become your new go-to. It looks intricate, but I’ve broken it down into the simplest steps. Whether you’re prepping for a big event or just want to feel a little extra on a Tuesday, this look delivers.
It’s the perfect blend of boho romance and that “old money hair” vibe—expensive-looking but completely approachable. So grab your comb and some clear elastics, and let’s turn those long locks into a living waterfall.
Why the Cascade Braid is Your New Secret Weapon
This braid is a total game-changer because it works for literally every occasion. It’s soft enough for a bridal look, cool enough for a festival, and elegant enough for a fancy dinner. It gives you major style credit without looking like you tried too hard.
What I love most is how it makes your hair look incredibly thick and textured, even if it’s fine. The cascading pieces create an illusion of volume and movement that’s just stunning. It’s a hairstyle that does the talking for you.
Gathering Your Tools: Keep It Simple

You don’t need a salon full of products to nail this look. In fact, simpler is better here. We want that soft, touchable finish, not a stiff helmet of hair. Here’s your basic toolkit:
- A fine-tooth comb for clean sections
- Clear elastic bands (they’re your best friend for invisible holds)
- A light-hold texture spray or hairspray
- A few bobby pins that match your hair color
Optionally, if your hair is very silky, a light texturizing mist can help give the braid some grip. That’s it! Now let’s get started.
Step 1: Start with the Perfect Base
This style works best on second or third-day hair. If your hair is freshly washed, add a bit of texturizing spray at the roots and through the lengths. We need some natural grip. Give your hair a good brush to remove any tangles.
Decide which side you want your waterfall to flow from. I prefer starting on the right if I’m braiding it myself—it just feels easier. Pull the top section of your hair back loosely, but leave the rest down. You’re ready to braid.
Step 2: Sectioning for Success
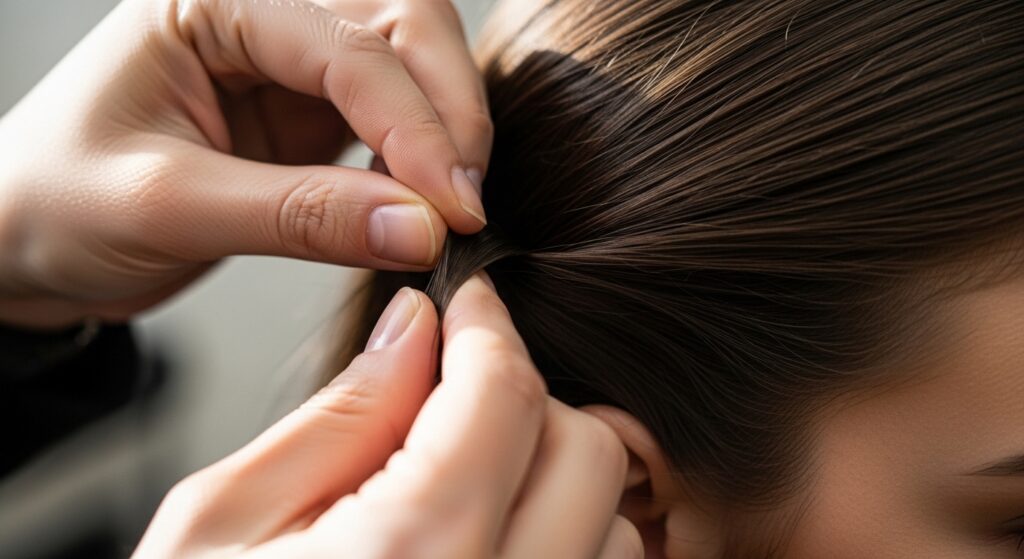
Using the fine end of your comb, take a triangular section of hair at the top front of your chosen side. This isn’t a tiny section—think about two inches wide. Clip or hold the rest of your hair out of the way for now.
Divide this top section into three even strands. This is the start of your classic three-strand braid. Hold them like you’re about to start a normal braid right by your hairline. The magic is about to happen.
Step 3: Creating the First Waterfall Drop
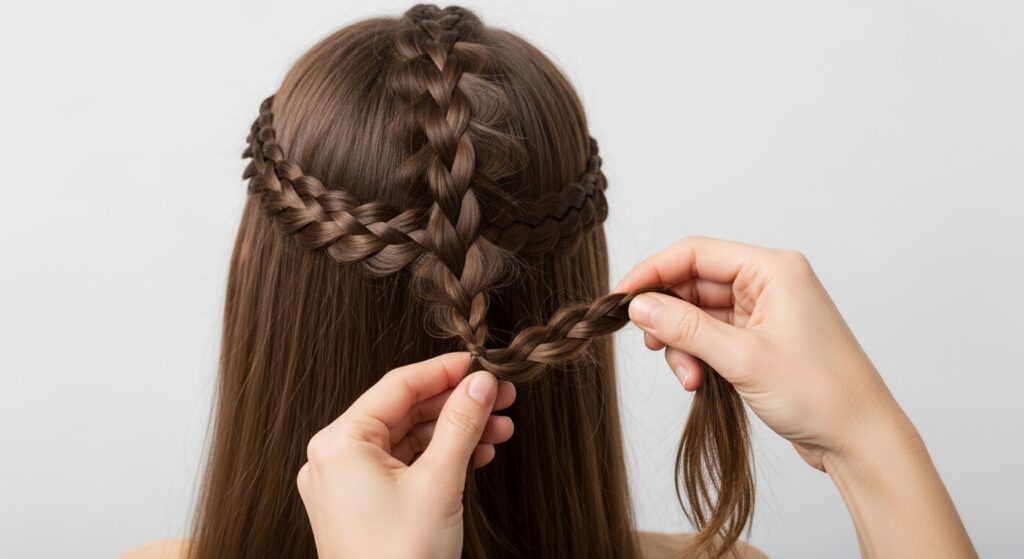
Braid once: cross the right strand under the middle, then the left strand under the new middle. Now, here’s the key move. For your next “right strand under” move, you will drop that right strand.
Let it fall to join the rest of your loose hair. Then, immediately pick up a new section of hair from the loose hair right below where you’re braiding. This new section becomes your new right strand. You’ve created your first cascade!
Step 4: Continuing the Waterfall Flow
Now, just repeat that process all the way back toward your ear. Always drop the bottom strand (the one falling toward your neck) and pick up a new section from the loose hair below to replace it. Keep the braid fairly snug against your head.
The pieces you drop will blend into your loose hair, creating that beautiful, tumbling effect. Keep going until you run out of hair to pick up from the top section, usually just behind your ear.
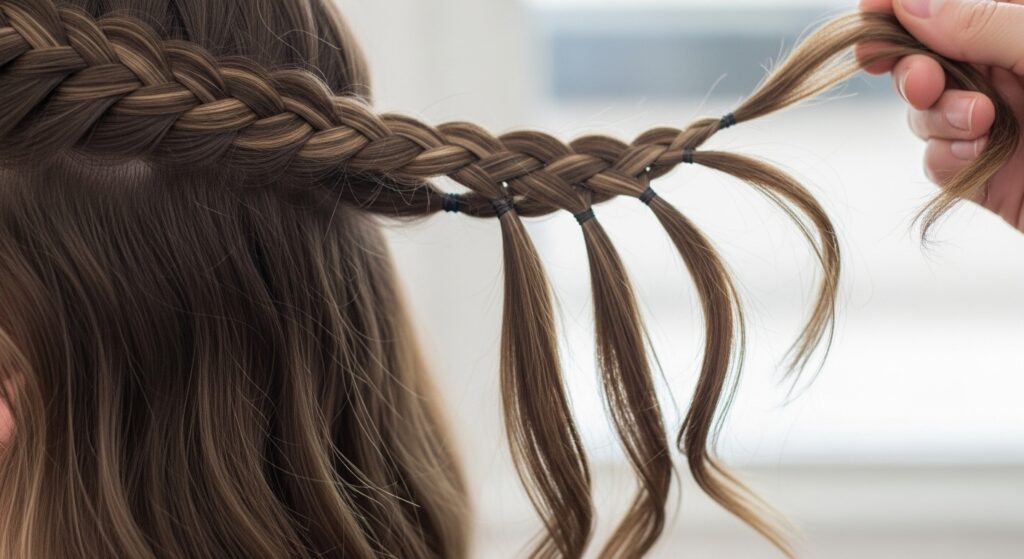
Step 5: Finishing the Braid
Once you can’t pick up more hair from the top, you’ll have three strands left. Simply finish this small tail with a regular three-strand braid all the way to the ends. Secure it tightly with a clear elastic.
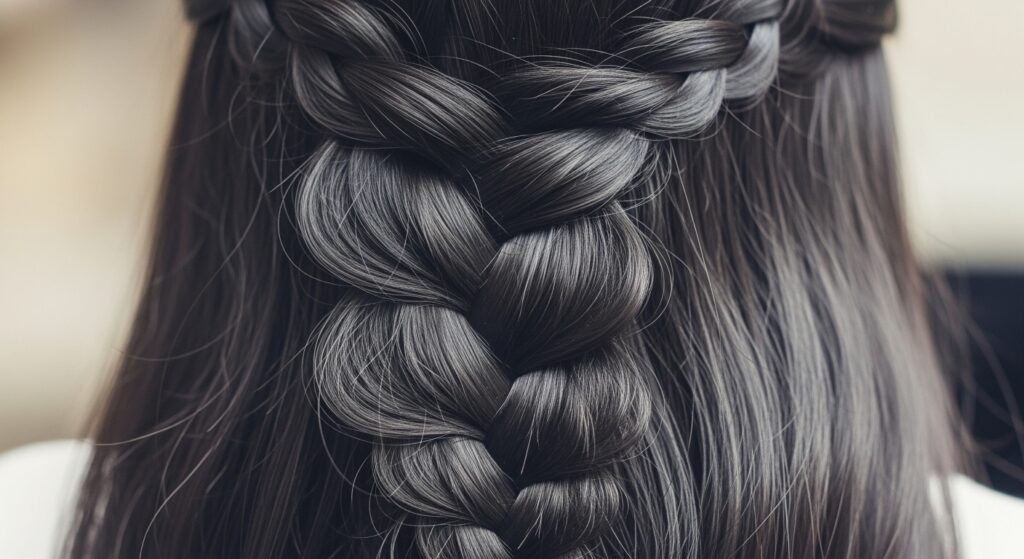
Now, you have a beautiful waterfall braid along the side of your head and a small, regular braid as a tail. Gently tug on the edges of the cascade braid to loosen it and make it look fuller and softer.
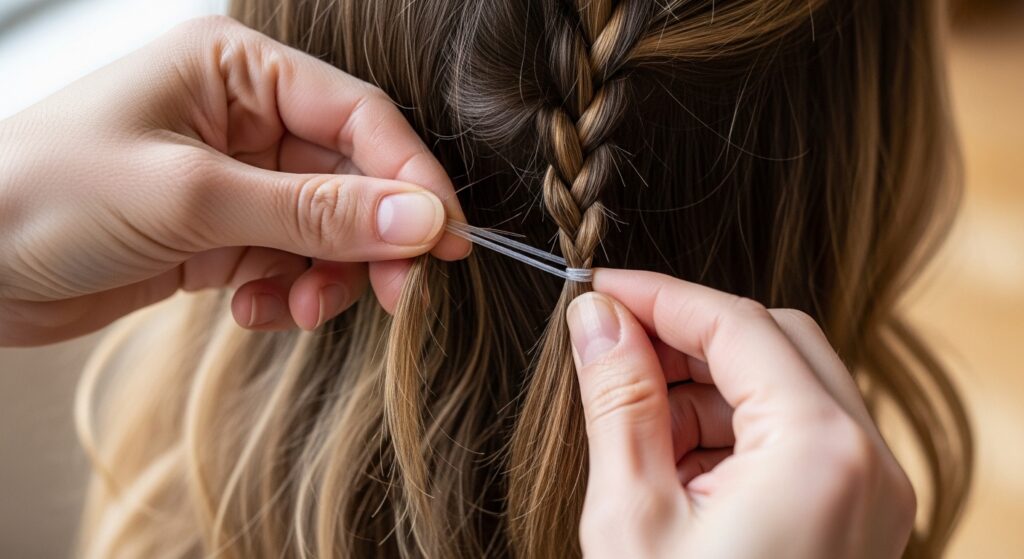
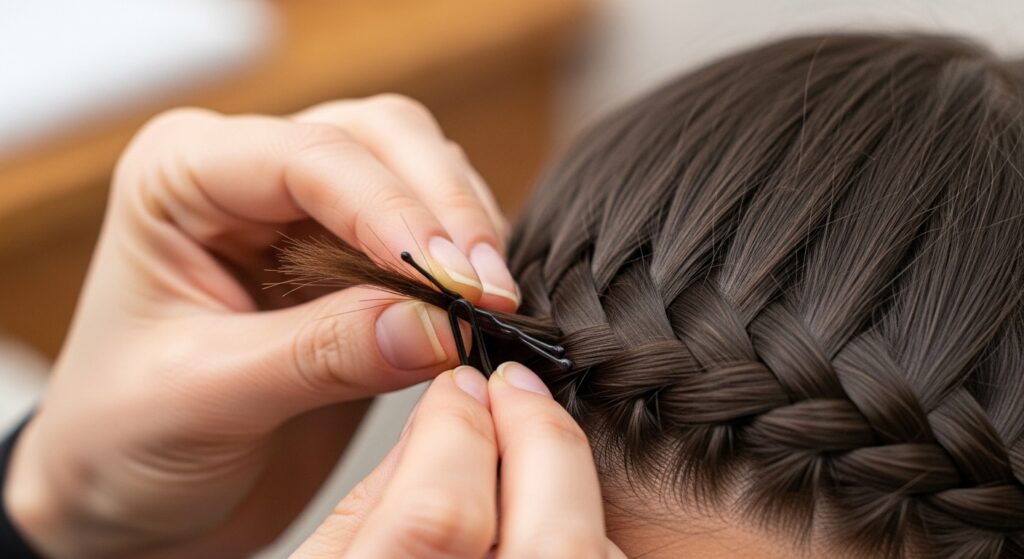
Step 6: The Art of Disguising the Tail
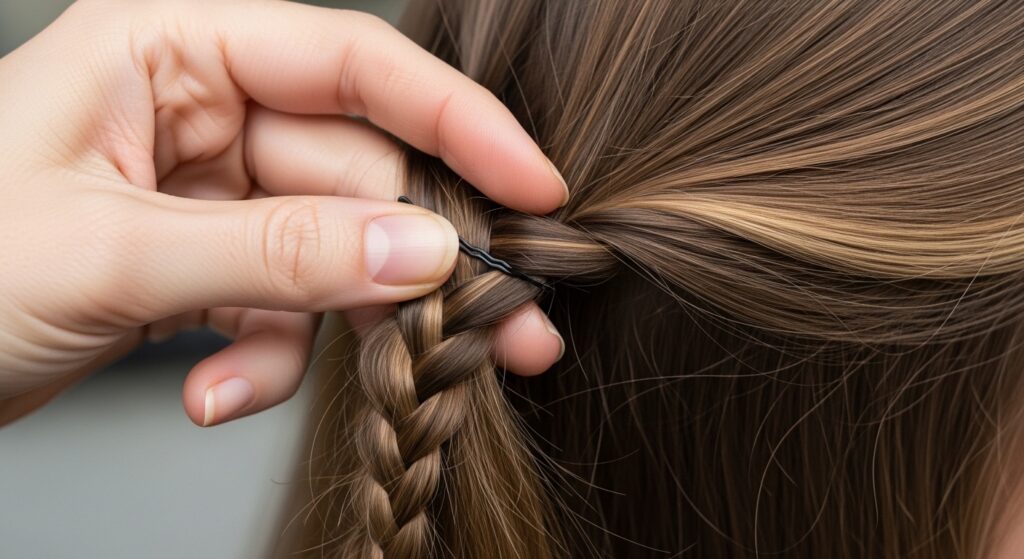
This part is easy. Take that small braided tail and tuck it underneath the cascading section of your hair. Use a bobby pin or two that matches your hair color to pin it securely underneath, hiding the elastic.
Once it’s pinned, let your loose hair fall naturally. The tail should be completely invisible, leaving only the illusion of strands magically cascading down from the braid into your flowing locks.
Pro Tip: Making It Look Effortlessly Full
Don’t skip this step! After you’ve pinned the tail, go back to the braid itself. Gently pull apart the loops of the braid, little by little. This is called “pancaking” and it instantly makes the braid look wider, softer, and more romantic.
Focus on the sections that sit on top of your head. The more you loosen, the more boho and lived-in it looks. This is what takes it from “just a braid” to a true work of art.
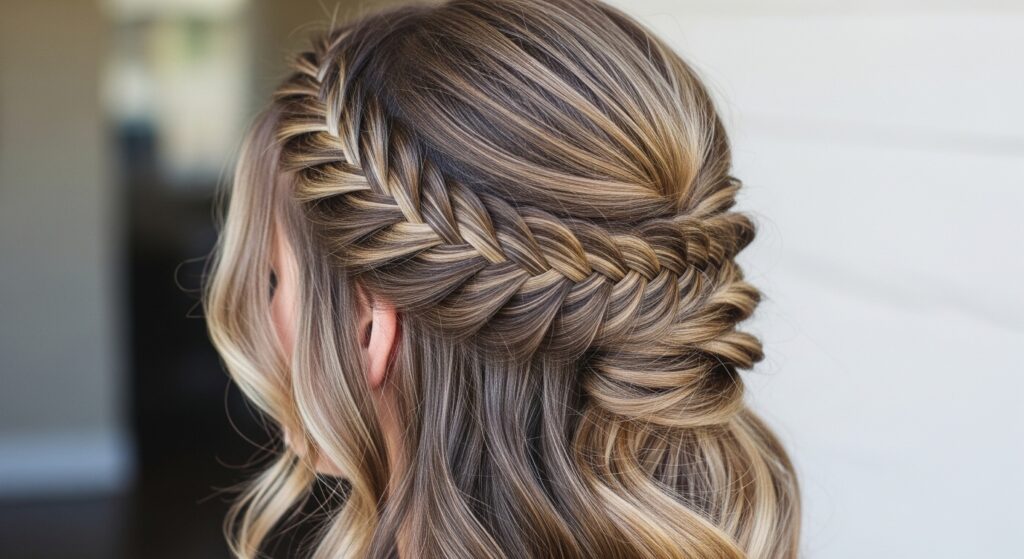
Switching Up the Placement: A Crown Cascade
Why stop at the side? This technique is so versatile. Start your first section at one temple and braid across your forehead toward the other temple. You’ll create a beautiful, ethereal headband effect.
It’s perfect for keeping hair out of your face while looking incredibly elegant. This placement feels very romantic and is a gorgeous alternative to the classic side braid, giving off major romantic goth hairstyles vibes when done on darker hair.
For Shorter Hair: The Asymmetrical Lob Twist
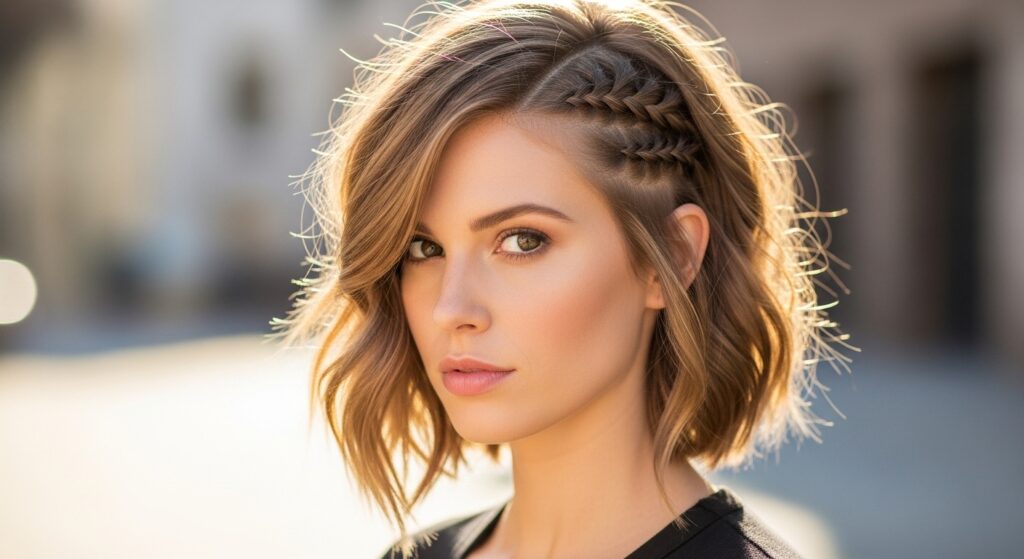
Have a chic asymmetrical lob or a vampire haircut? You can still rock this! Create a smaller, tighter cascade braid just along the hairline on the longer side. It will act as a beautiful accent.
Since you have less length, you might only get 2-3 “drops” before you finish, but the effect is just as striking. It adds a detailed, artistic touch to your bold cut, blending trends like the glitchy glam hair aesthetic with classic braiding.
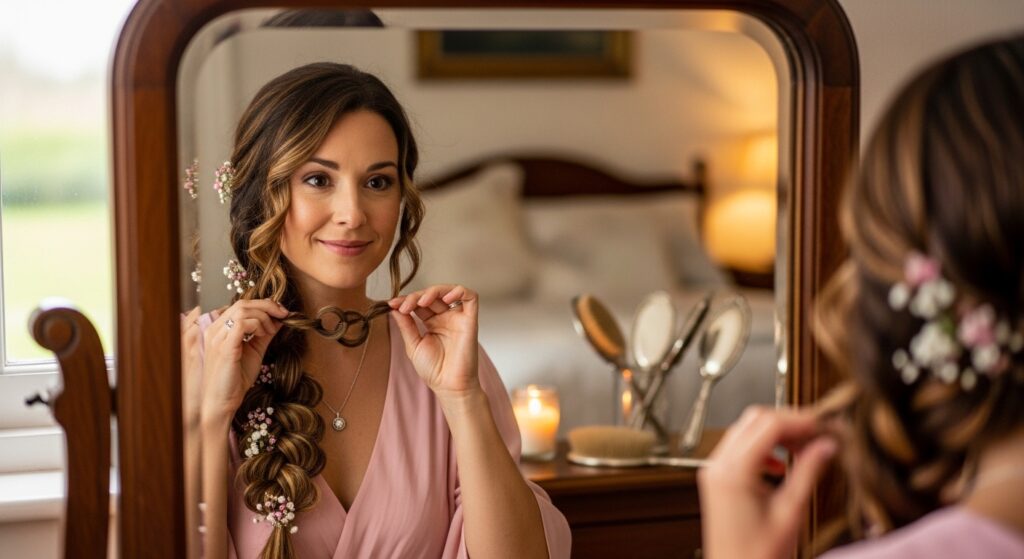
Adding Accessories for a Special Touch
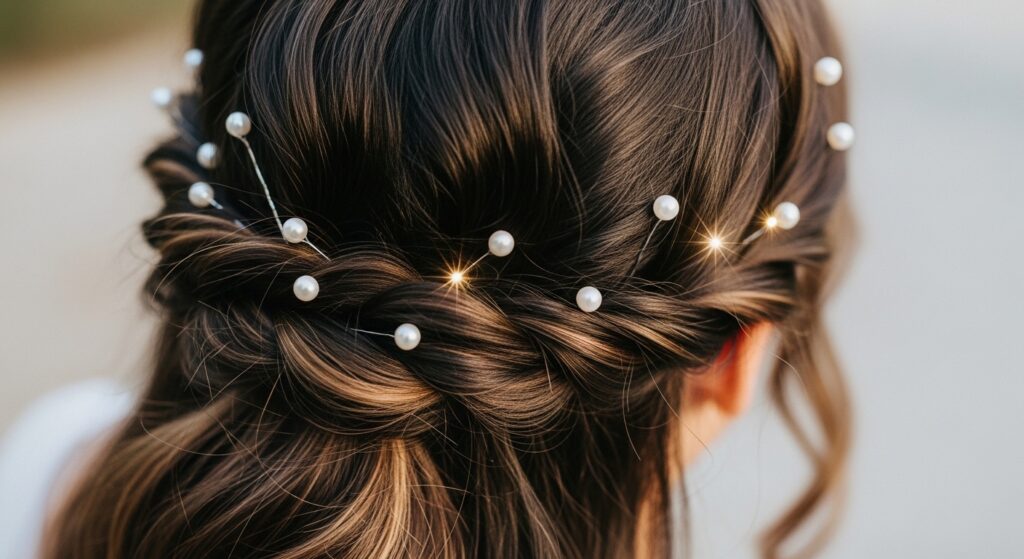
For a wedding or a party, add some sparkle. Weave a string of tiny pearls or thread a ribbon through the braid as you go. Or, after you’re done, slide in a few delicate, sparkly pins.
This instantly elevates the look to pure “quiet luxury bob” territory—even if you don’t have a bob! The key is to choose accessories that enhance, not overwhelm, the natural flow of the braid.
The Perfect Match: Hime Cut Framing
If you have a hime cut, this braid is a dream come true. Use those long, front framing pieces to create your cascade braid. You can braid them back, letting the shorter layers and the blunt back section create a cool, textured contrast.
It’s a fantastic way to style those dramatic pieces and really highlight the unique structure of your cut. This combo is definitely one of the most inventive 2026 hairstyles we’re trying early.
Day-to-Night Transformation in Minutes
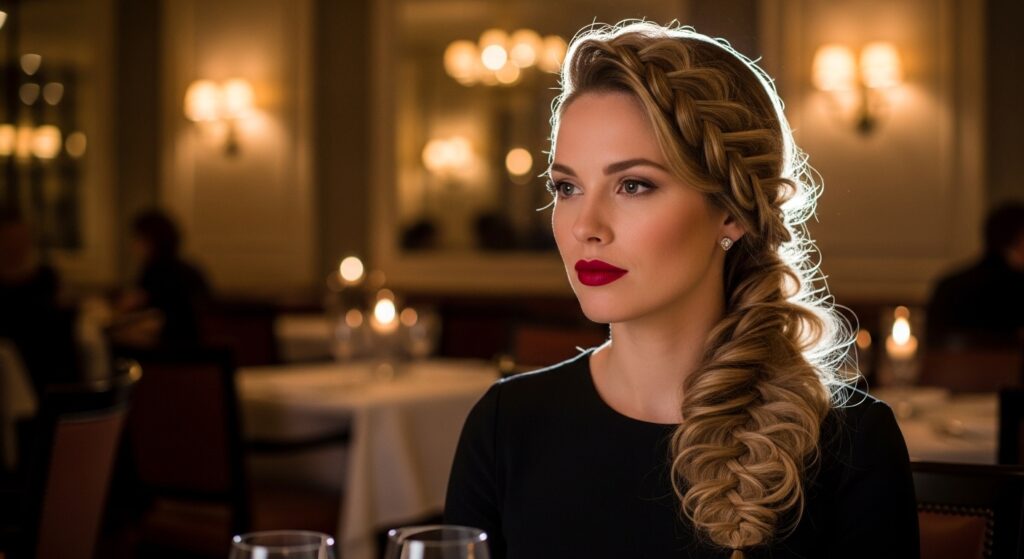
Wore your cascade braid all day? Take it to dinner in two minutes. Carefully remove the pins and the tail braid. Spritz a bit of shine spray on your loose hair and on the cascade section.
Pull out a few face-framing tendrils for a soft effect. Add a bold lipstick, and boom—your effortless day look is now a polished, romantic night look. It’s the ultimate versatile style.
Troubleshooting: If Your Braid Feels Loose
If sections feel like they’re slipping or the braid isn’t lying flat, don’t panic. As you braid, make sure you’re pulling the strands snugly toward your head. Tension is important.
If it’s already done and loose, you can use bobby pins vertically underneath the braid to tack it to your scalp discreetly. No one will see them, and it will hold everything perfectly in place.
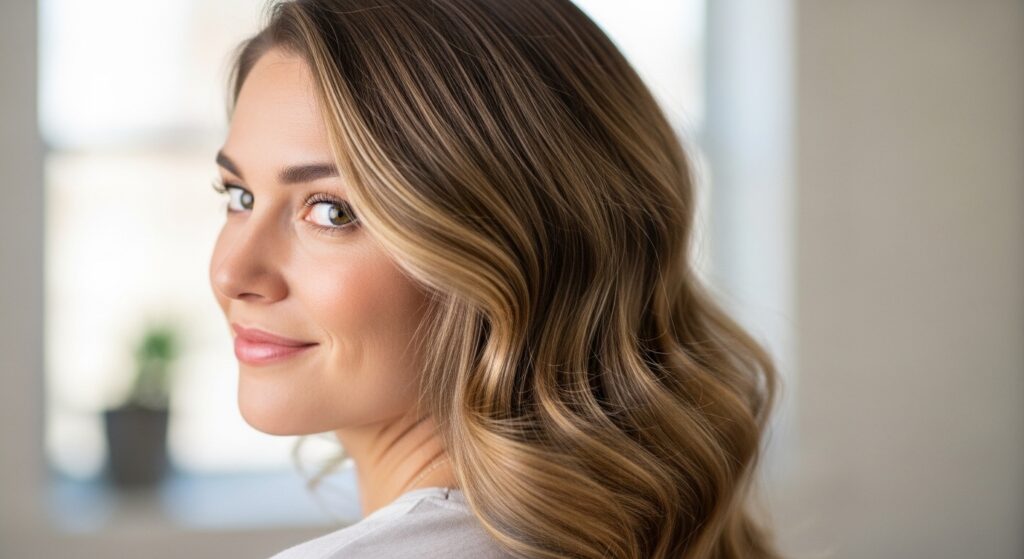
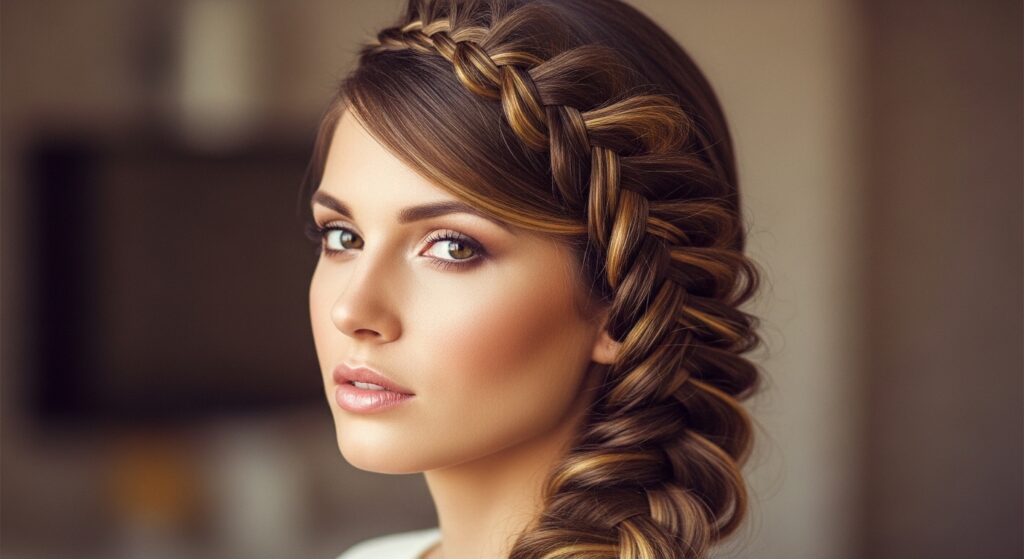
Pairing with Waves for Maximum Drama
For the ultimate waterfall effect, start with loose waves. Use a curling wand to create big, flowing waves in your hair before you braid. When you create the cascade, the dropped pieces will be beautifully wavy.
This adds incredible depth and movement, making the entire style look richer and more dynamic. It’s pure romance and a total head-turner.
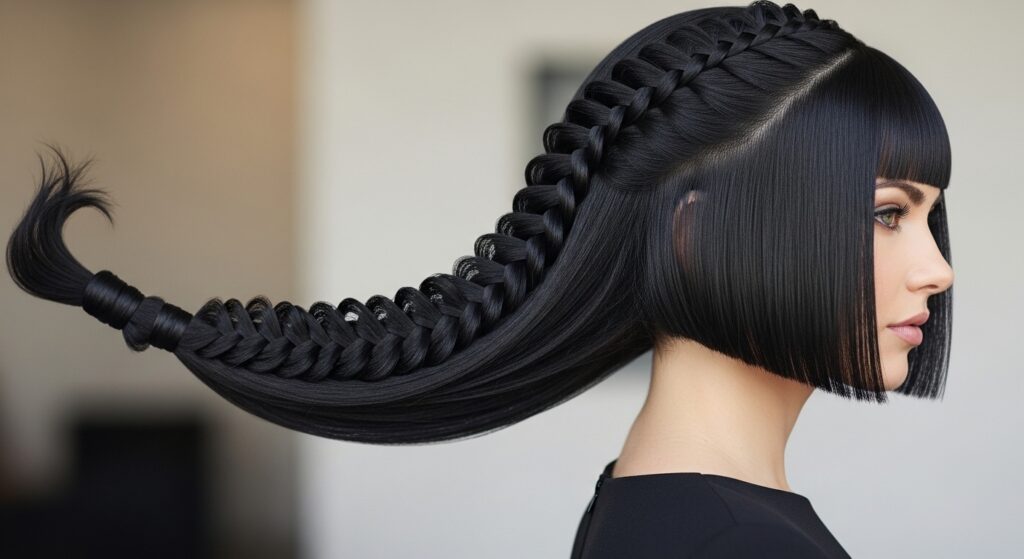
The “Old Money Hair” Version
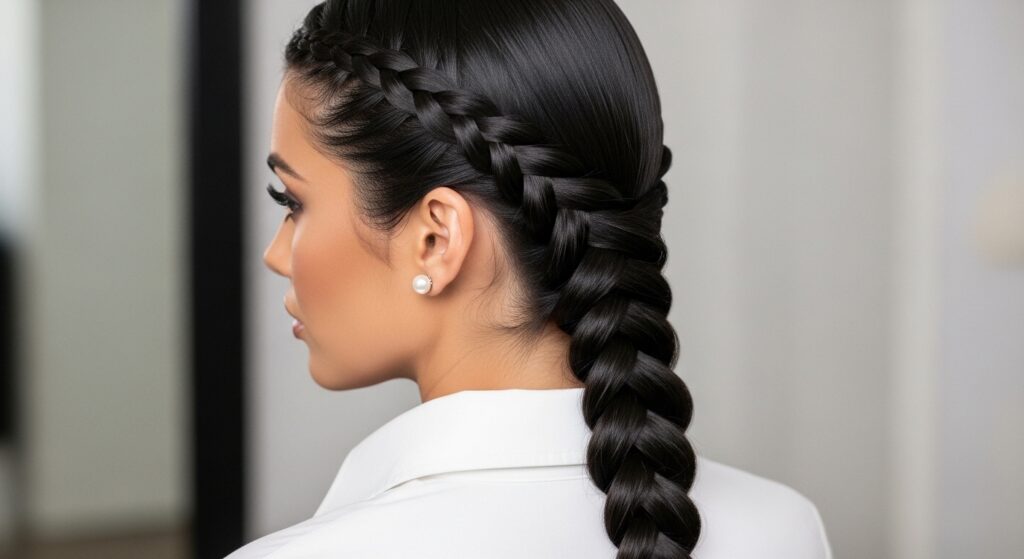
For that coveted old money hair aesthetic, opt for sleekness. Start with poker-straight, silky hair. Execute the braid very neatly and cleanly, without much pancaking.
The result is a refined, architectural detail in your hair that looks expensive and intentional. It’s less boho, more equestrian chic, and utterly sophisticated.
Making it Last: The Final Hold
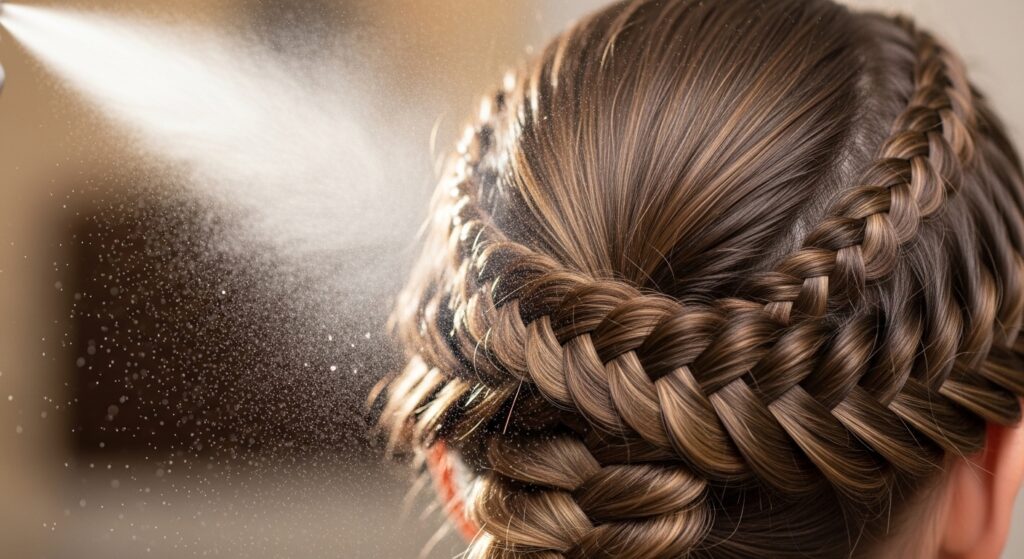
To lock in your masterpiece, hold a can of light-hold hairspray about 10 inches away. Give it one or two quick sprays over the entire braided section. Avoid heavy sprays that make hair look crunchy.
Focus on the roots of the braid and the picked-out sections. This will help fight frizz and keep those cascading pieces in place all day or night without sacrificing movement.
Why This Braid is More Than Just a Trend
While it fits right in with 2026 hairstyles focusing on texture and romance, this braid is a true classic. It’s a technique that has been loved for decades because it’s flattering, feminine, and functional.
It works on almost every hair type and length with a little adaptation. Mastering it means you always have a beautiful, reliable style in your back pocket that looks like you spent an hour, not ten minutes.
Your Challenge: Try It This Week!
I challenge you to try this once this week. Maybe on a night you’re just cooking at home, so there’s no pressure. Practice is everything. The first time might feel fiddly, but by the third, your fingers will fly.
It’s a skill that pays off forever. Once you get it, you’ll find yourself reaching for it all the time. It’s that good. Tag me if you post it—I love to see your creations!
More Braid Inspiration to Explore
Loving the braid life? There’s so much more to try. A Dutch braid gives a gorgeous 3D effect perfect for workouts. A fishtail braid feels beachy and cool. A simple three-strand braid twisted into a low bun is timeless elegance.
Each braid has its own personality. Playing with them is how you find your signature style. It’s all about having fun and expressing yourself through your hair.
And just like that, you’ve got a hairstyle that’s pure magic. It’s the kind of look that makes people stop and ask, “How did you do that?”—and you can just smile, knowing it’s your little secret. Remember, the best part about hair is that it grows back, so there’s zero risk in trying something new and playing with different looks.
I hope this guide gives you the confidence to create your own waterfall of braids. It’s all about that soft, flowing feeling and owning your unique beauty. Now go look in the mirror and see your gorgeous self with a brand-new, stunning detail.
Save this post to Pinterest so you always have the steps handy! Did you try the cascade braid? Tell me in the comments below—what’s your go-to braid when you want to feel extra beautiful?