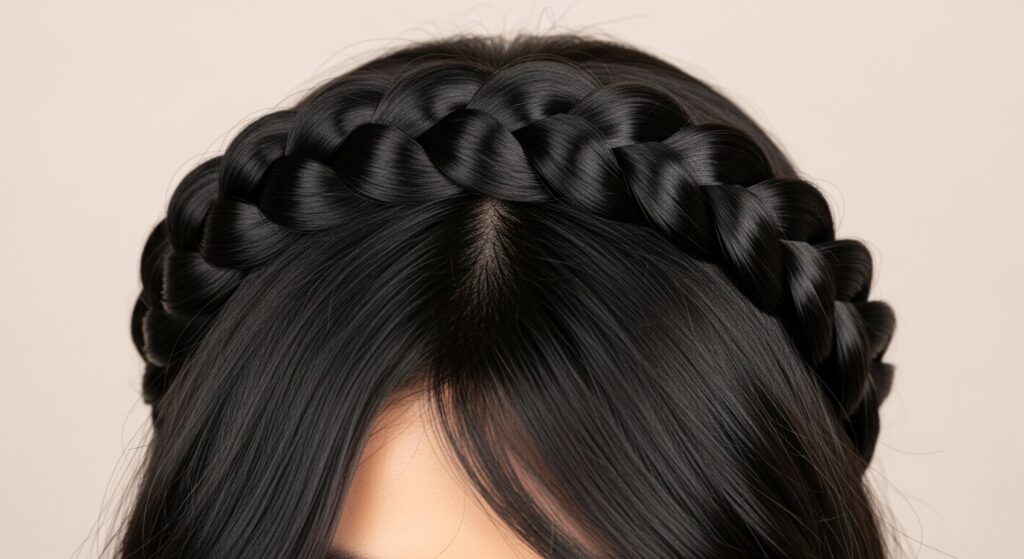
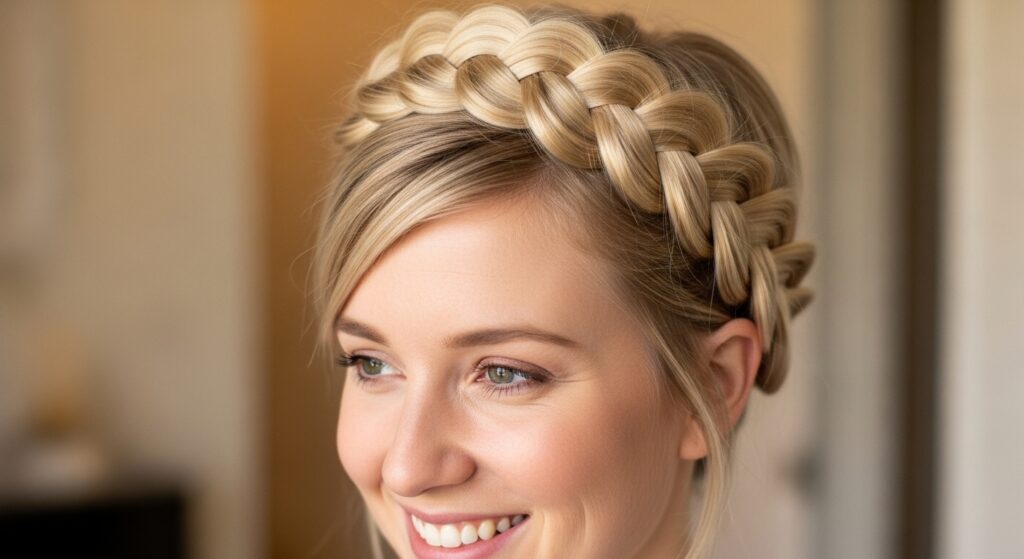
Rope 26 Thick Headband Braids Thickened with Backcombing Techniques
Okay, let’s be real. We’ve all seen those gorgeous, thick headband braids on Pinterest and thought, “My fine hair could never.” I used to think the exact same thing. I’d try to copy the style and end up with a sad, skinny little braid that looked nothing like the lush, romantic look I was going for.
But guess what? I found the secret. It’s all about a little strategic backcombing. And before you panic—this isn’t about 80s-level teasing. It’s a gentle, controlled technique that adds volume exactly where you need it, without the damage or the drama.
Today, I’m walking you through my step-by-step method for “Rope 26” Thick Headband Braids. It’s easier than it looks, works on all hair types, and gives you that instant “old money hair” vibe. Let’s ditch the hair envy and create some serious thickness.
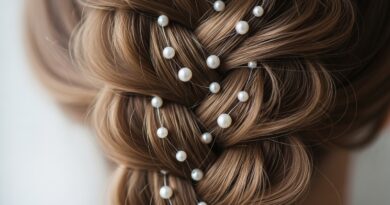
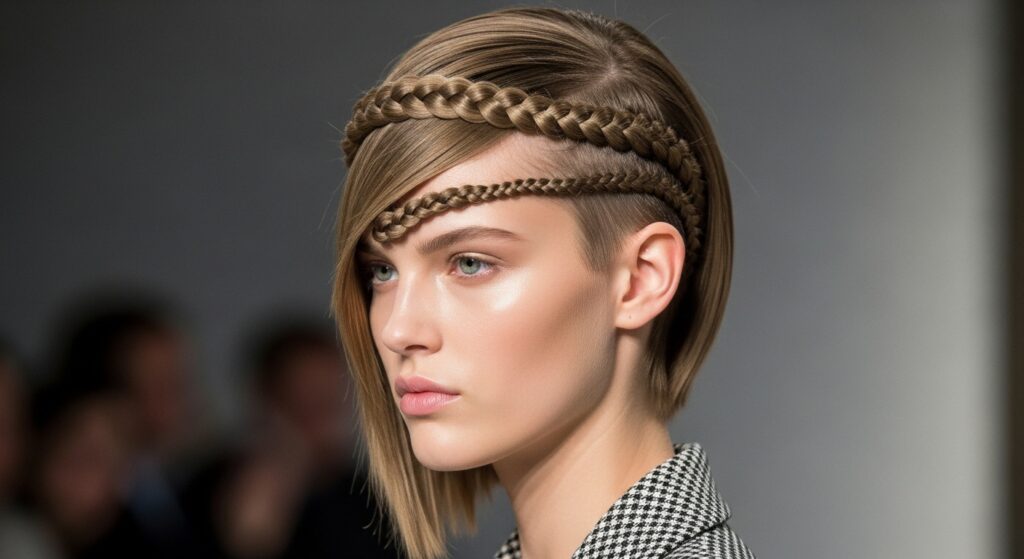
What Are “Rope 26” Headband Braids?
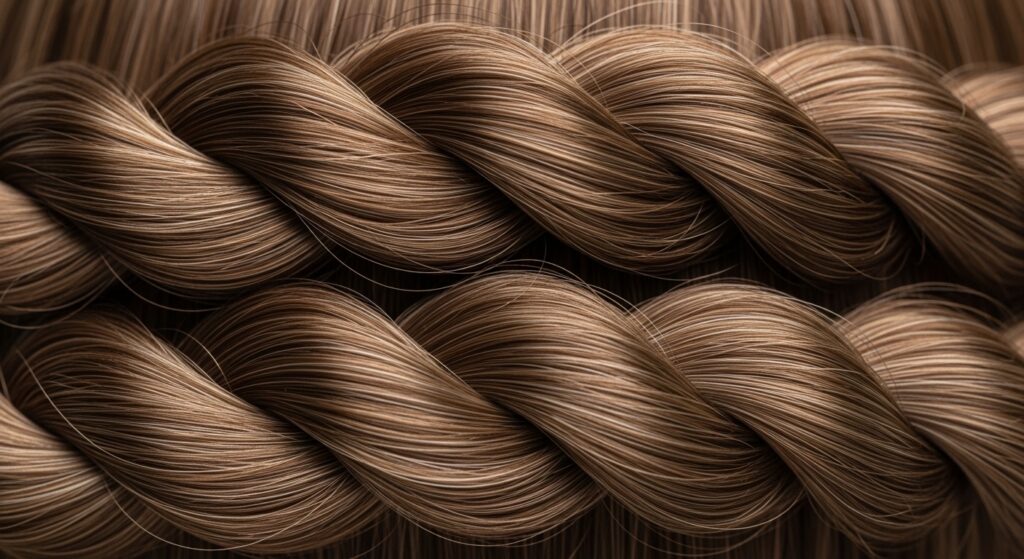
You might be wondering about the name. “Rope” refers to the type of braid—a simple, elegant two-strand twist that looks like a piece of rope. The “26” is my little nod to the fresh, modern feel of 2026 hairstyles trends we’re starting to see.
It’s a look that blends classic technique with a contemporary, thick-and-luxurious finish. Think of it as the cousin to the quiet luxury bob—it’s polished, intentional, and looks incredibly expensive, but it’s surprisingly easy to DIY.
Why Backcombing is Your New Best Friend
Forget everything you think you know about backcombing. We’re not going for big hair. We’re going for smart hair. This technique is about creating a hidden foundation of volume that your braid wraps around.
It’s the difference between braiding over a flat surface and braiding over a soft, padded one. The backcombing stays completely hidden underneath the top layer of your hair, so all anyone sees is impossibly thick, smooth braids.
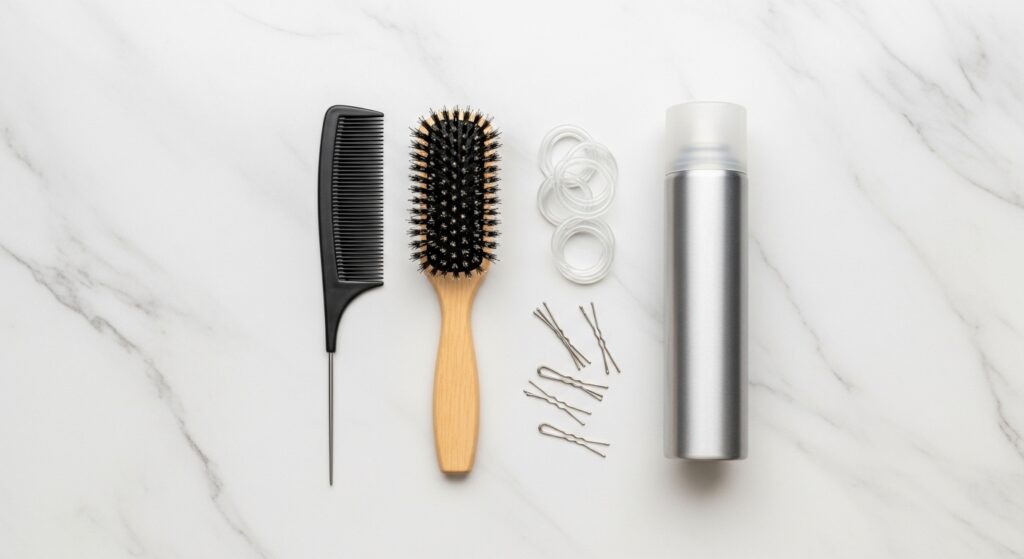
Tools You’ll Need to Get Started
Gathering the right tools makes this process so much smoother. You don’t need anything fancy, just a few basics.
- A fine-tooth comb for precise backcombing
- A paddle brush for smoothing the top layer
- Strong, clear elastic bands that match your hair color
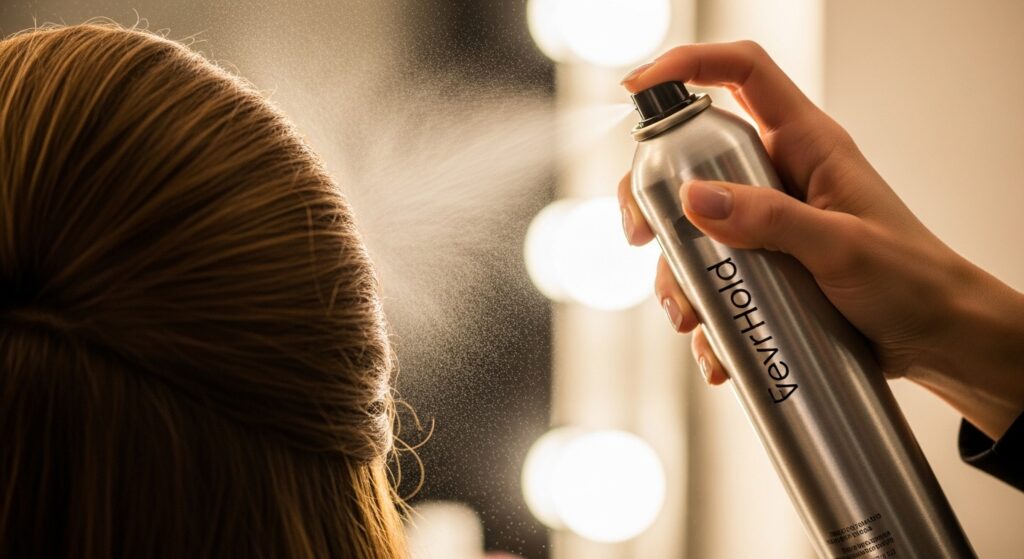
- A light-hold hairspray or texture spray
- A few bobby pins for securing the ends
Step 1: Start with Day-Old Hair
Freshly washed hair can be too slippery. For the best grip and hold, start with hair that’s one or two days old. If you need to, just hit your roots with a little dry shampoo.
This gives your hair some natural texture and helps the backcombing hold its shape better. It also makes the final style last longer throughout your day.

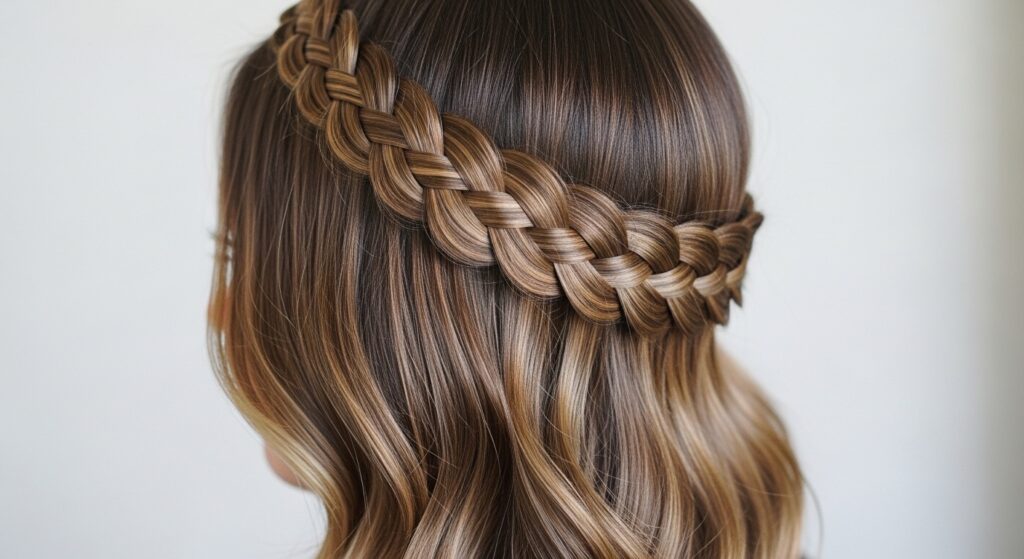
Step 2: Create Your Headband Section
Use the end of your comb to draw a diagonal part from about an inch behind your ear up to the crown of your head. Do this on both sides. The section should be about 2-3 inches thick.
Clip the rest of your hair out of the way. This section you’re working with will become your headband braid. The thickness of this section is key to the final look.

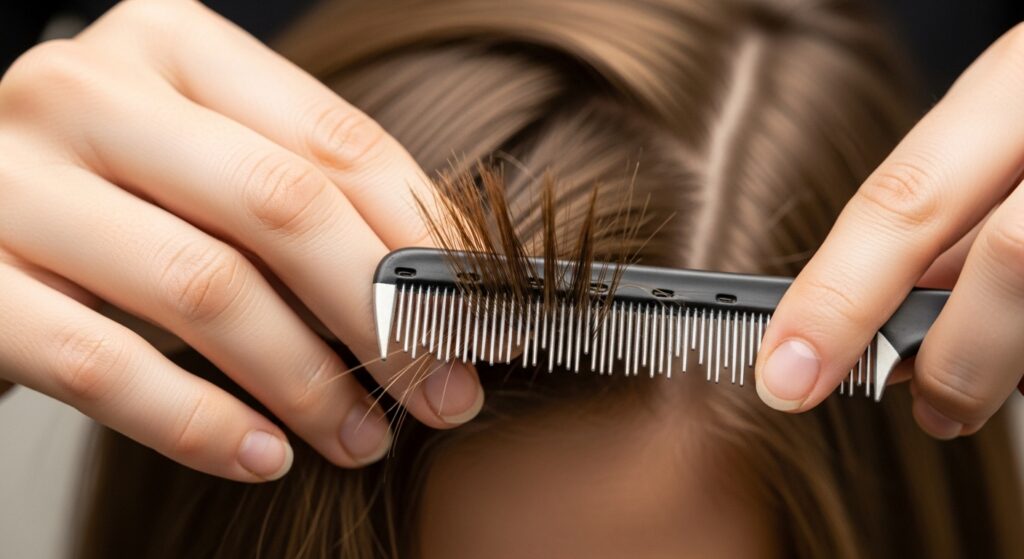
Step 3: The Gentle Backcombing Technique
Take a small, horizontal subsection of hair from the underside of your headband section. Hold it straight up. Using your fine-tooth comb, gently make 3-4 small strokes downward toward your scalp.
You should feel a slight resistance and see the section puff up. This is creating your hidden volume pillow. Be gentle—you can always add more, but you can’t easily remove it.
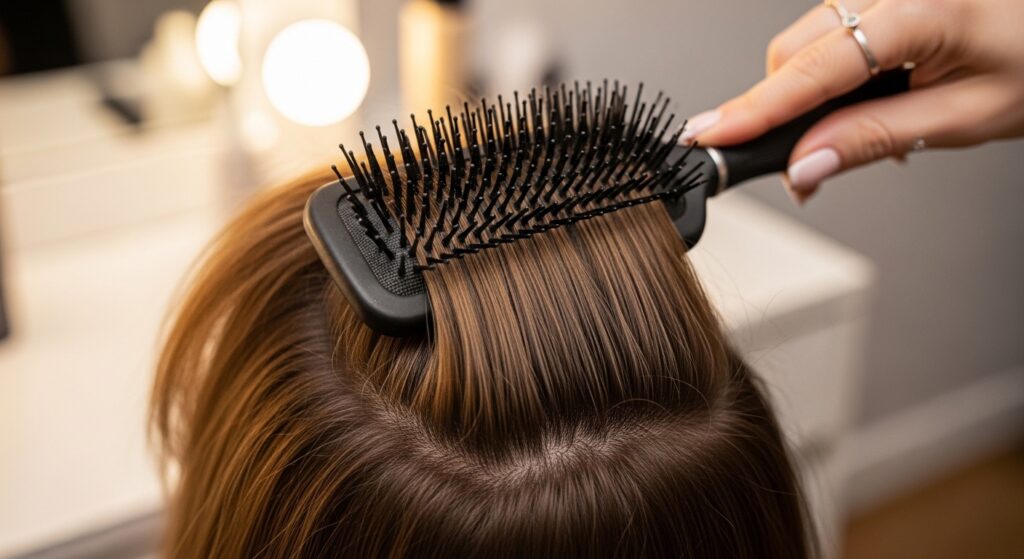
Step 4: Smooth the Top Layer
This is the magic step. Once that underneath section is gently backcombed, let it fall. Now, take the top layer of hair from your headband section and smooth it directly over the teased section.
Use your paddle brush to gently brush the top layer only, creating a perfectly smooth surface. All the volume is now hidden underneath, like a secret.
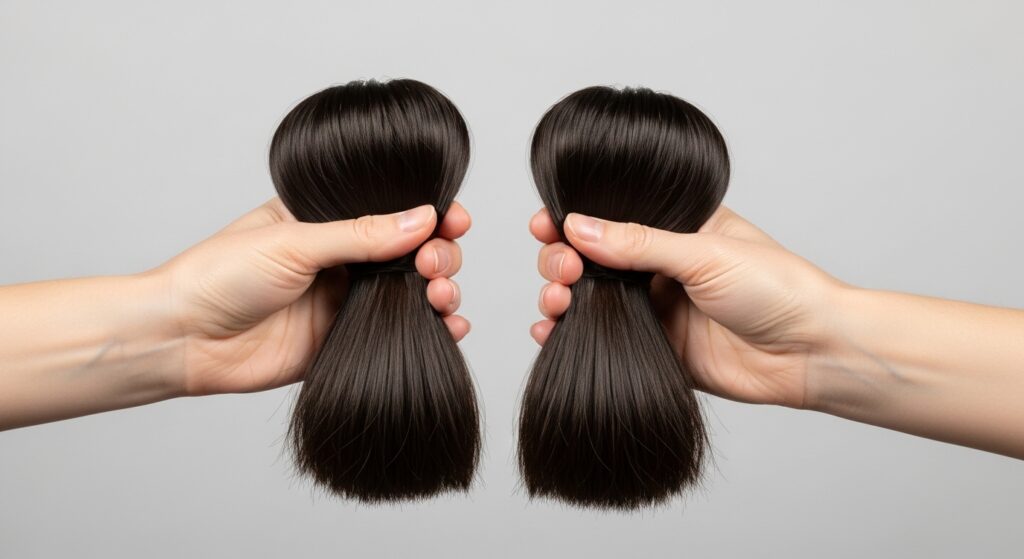
Step 5: Split Into Two Equal Sections
Now, divide that entire smoothed-out headband section into two equal parts. Make sure the division is clean. I like to hold one section in each hand.
You’ll already feel how much thicker and more substantial these two sections are compared to if you hadn’t backcombed. That’s exactly what we want!
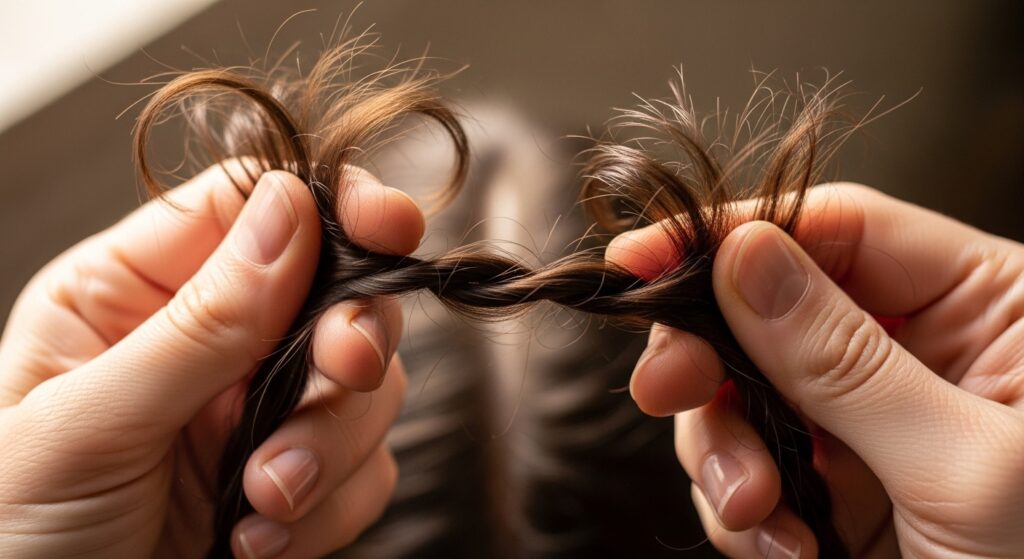
Step 6: Begin the Rope Twist
Take the right section and twist it tightly clockwise. Do the same with the left section—also twist it clockwise. They should both be twisted in the same direction.
Keep a firm hold on the ends as you twist. The twists should feel secure from root to tip. This pre-twisting is what creates the distinct “rope” look.
Step 7: Twist the Sections Together
Now, cross the right section over the left section. Then, continue wrapping them around each other, but here’s the key: twist them together in the *opposite* direction (counter-clockwise).
Twisting the pre-twisted sections in the opposite direction locks the braid together and prevents it from unraveling. It also makes the braid look even fuller.
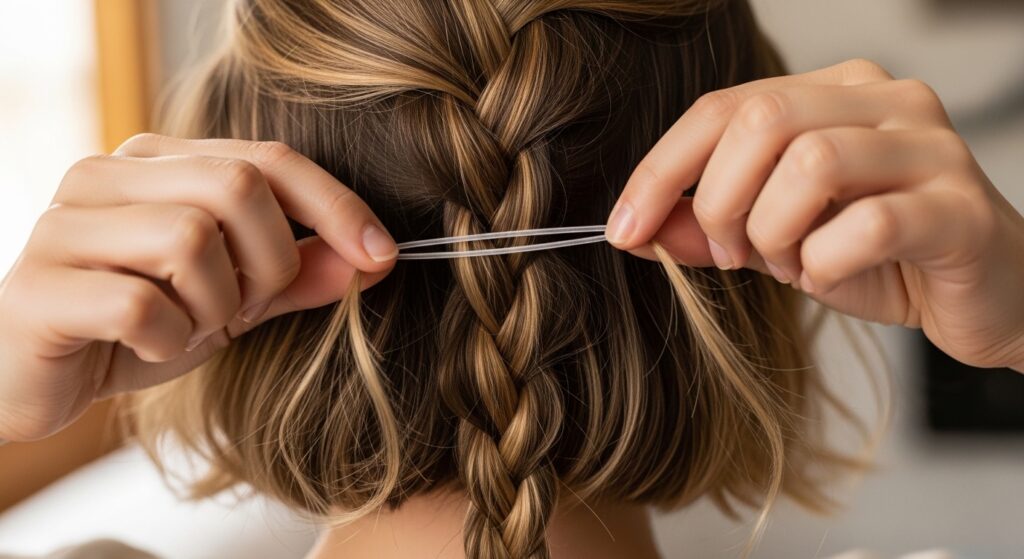
Step 8: Secure the End of the Braid
Once you’ve twisted all the way to the ends, secure the braid with a clear elastic band. Make sure it’s tight so the braid doesn’t come loose.
Give the braid a very gentle tug along its length to loosen it just a tiny bit. This helps it look softer and even thicker, less like a tight cord.
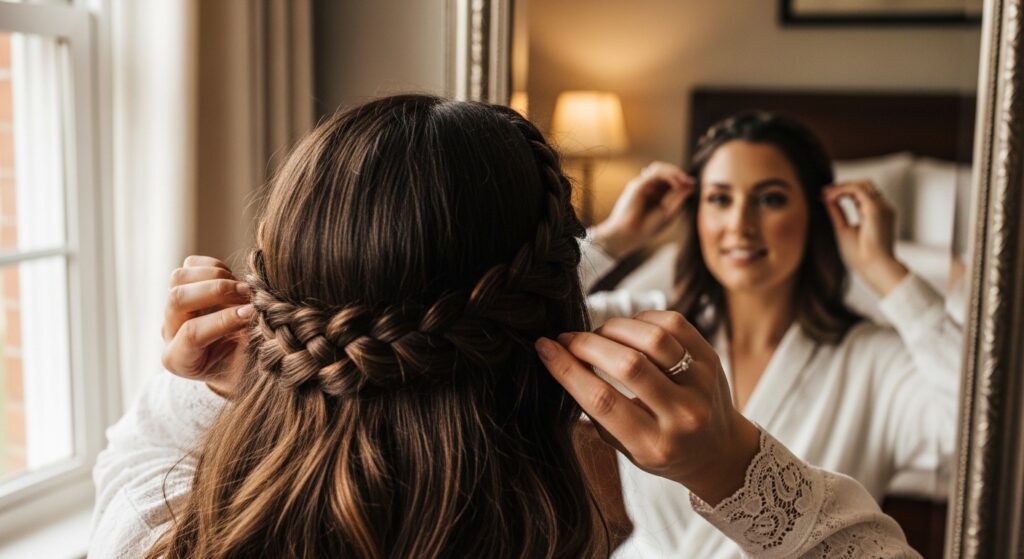
Step 9: Position and Pin the Braid
Drape the braid across your head like a headband. Play with the placement—it can sit right at your hairline or slightly back for a different feel.
Once you’re happy with the position, use a few bobby pins to secure it underneath. Push the pins through the braid and into the hair underneath, hiding them completely.
Step 10: Style the Rest of Your Hair
Let down the rest of your hair. You can leave it down in loose waves, which is my favorite for a romantic look. Or, you can tie it into a low bun or ponytail for a more polished vibe.
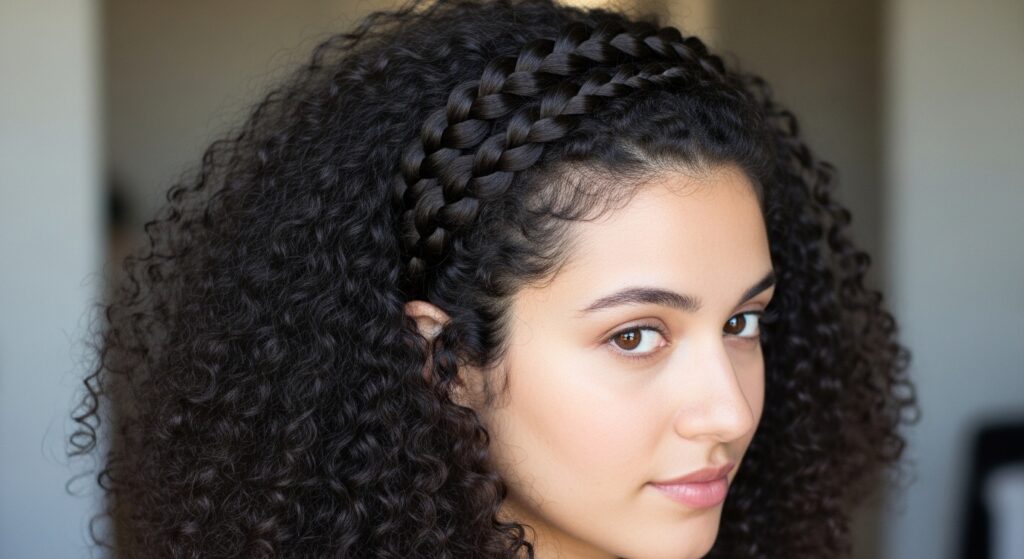
The headband braid acts as a beautiful accessory all on its own. It pairs perfectly with straight hair, giving a cool glitchy glam hair contrast, or with curls.
Making it Last All Day Long
To lock your hard work in place, a light mist of hairspray all over is your final step. Focus a little on the roots under the braid and where you pinned it.
Carry a few extra bobby pins and a spare clear elastic in your bag, just in case. But honestly, once this style is set, it’s surprisingly durable for a day out or even a workday.
Adapting the Look for Fine Hair
If you have very fine hair, don’t be afraid to take a slightly wider section for your headband. You can also be a bit more generous with the backcombing, just remember to keep it gentle.
Another tip is to use a texturizing spray before you start. It gives your hair more grit and hold, making every step of the process easier and longer-lasting.
Adapting the Look for Thick Hair
If you’re blessed with naturally thick hair, this technique will make your braids look absolutely epic. You might not need to backcomb as much, but doing it a little will still help control the shape.
Make sure your elastic is super strong. You might also need an extra bobby pin or two to secure the braid, as it has more weight to it.
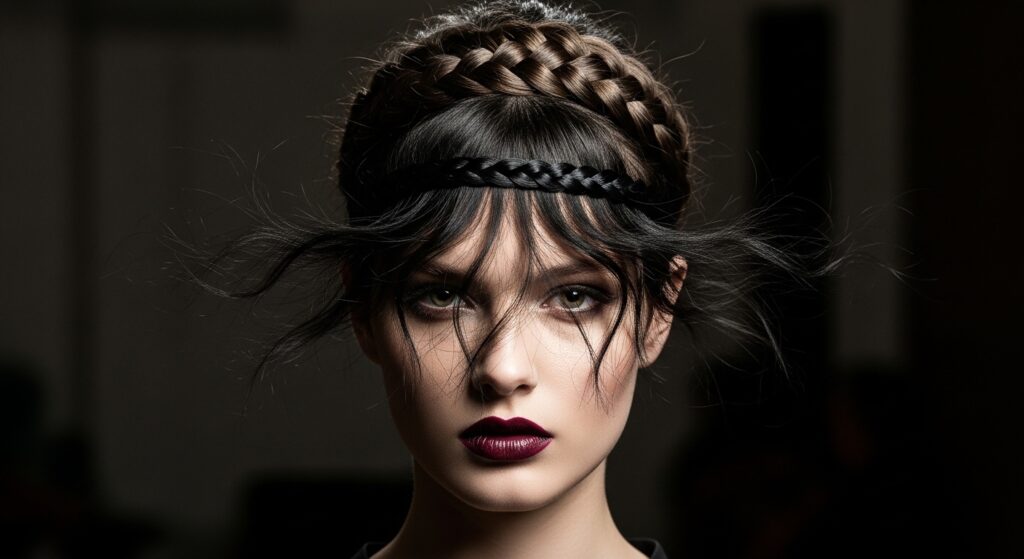
Adding a Romantic Goth Vibe
This style can easily edge into romantic goth hairstyles territory. Make your braid extra thick and dramatic. After styling, pull out a few face-framing tendrils.
Pair it with deep, dark hair color or add a few temporary dark streaks. Keep your makeup soft but with a dark lip or smoky eye. It’s a perfect mix of elegant and edgy.
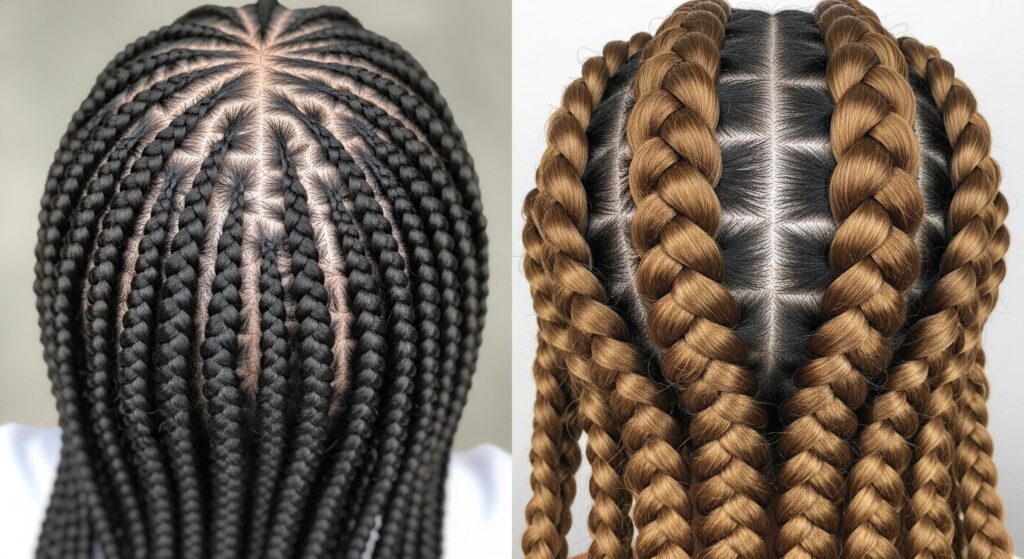
Pairing with Other Trendy Cuts
Imagine this braid with a sharp asymmetrical lob—so chic! It also looks amazing with the dramatic fringe of a hime cut, or the textured layers of a vampire haircut.
It’s a versatile accessory that can complement almost any cut. It adds a feminine touch to sharper styles and enhances the romance of already-soft ones.
Common Mistakes to Avoid
The biggest mistake is backcombing the top layer you plan to smooth. Always only tease the very bottom subsection. Another error is twisting the two sections in the wrong direction.
Remember: twist each section clockwise first, then twist them together counter-clockwise. Also, avoid pulling the braid too tight when you position it; a little softness is more flattering.

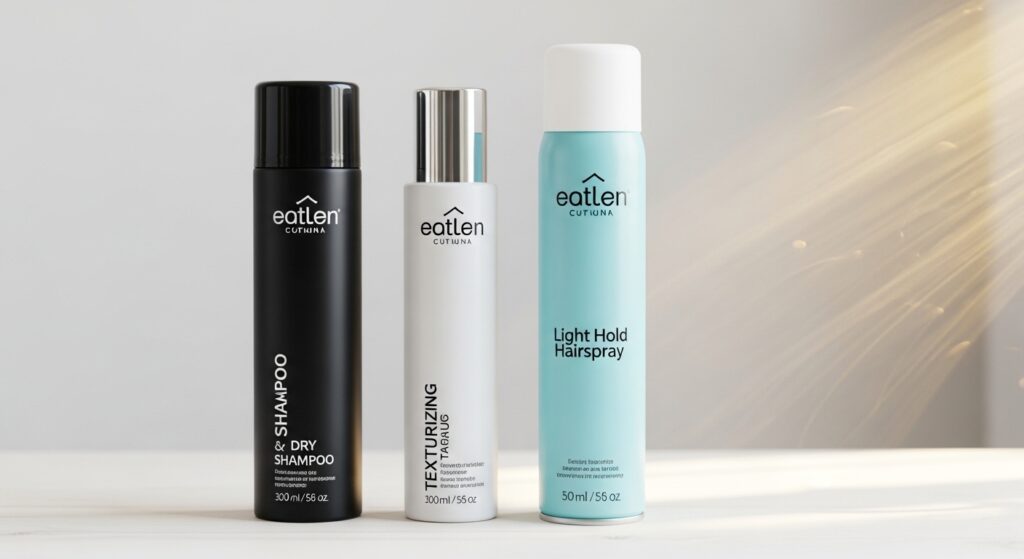
My Favorite Products for This Style
I keep it simple. A good dry shampoo for base texture, like Batiste. A light-hold hairspray that doesn’t make hair crunchy, like Moroccanoil Luminous Hairspray.
For extra grip on slippery hair, a light texture spray like Oribe Dry Texturizing Spray on the roots before you start can work wonders.
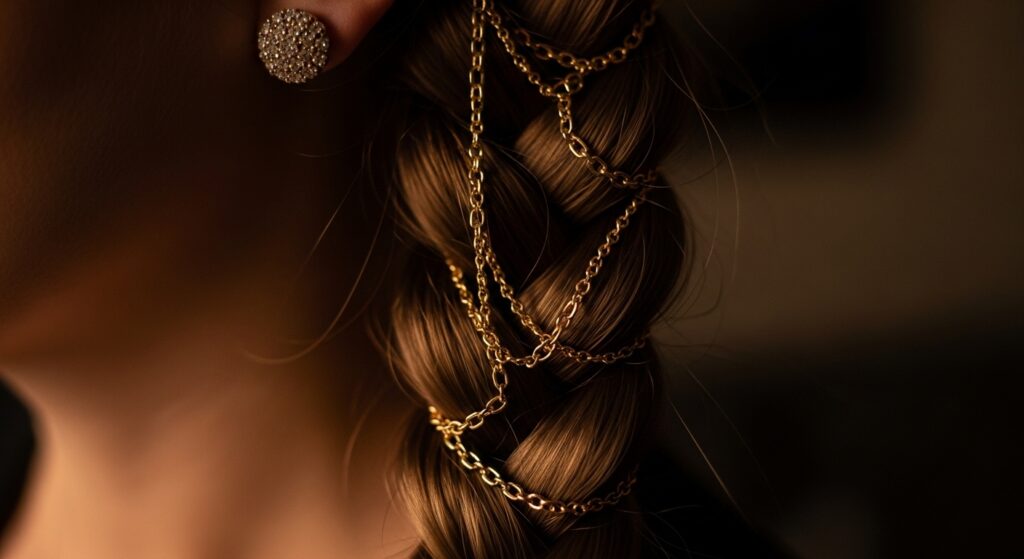
From Day to Night: Dressing It Up
This style transitions beautifully. For evening, gently pull out a few more tiny pieces around your face. You can also weave a delicate chain or ribbon into the braid.
Swap the clear elastic for a pretty, embellished one. Add some shine spray for a touch of glamour. It takes two minutes but completely changes the feel.
Answering Your Top Questions
Does this damage hair? Not if done gently! We’re not ripping or aggressive teasing. Can I do it on short hair? Yes, if it’s long enough to tuck behind your ear.
How do I take it out? Carefully remove pins and the elastic. Use your fingers or a wide-tooth comb to gently detangle from the ends up. Never brush through backcombing from the top down.

Why This Style Feels So “Now”
It hits all the right notes for what’s trending: it’s tactile, a little nostalgic, but feels fresh. It has that “undone” luxury feel we’re seeing everywhere, from old money hair to quiet luxury fashion.
It’s a statement that doesn’t shout. It shows you know a little secret technique, which is always cool. Plus, it’s incredibly photogenic from every angle.
And there you have it—your guide to never having thin, sad headband braids again. This little backcombing trick honestly changed my hair game. It’s one of those techniques that feels like a professional secret, but it’s so simple once you try it.
The best part is how versatile it is. You can wear it running errands for a touch of that quiet luxury vibe, or dress it up for a night out with a more romantic goth feel. It works with your natural texture and makes you feel put-together in minutes.
I’d love to see your creations! Did the backcombing make a huge difference for you? What’s your favorite way to wear this braid? Let me know in the comments below!
Save this post to Pinterest so you can always find these steps when you’re ready to create your thick, gorgeous rope braids. Tag me in your photos—I love seeing your styles!