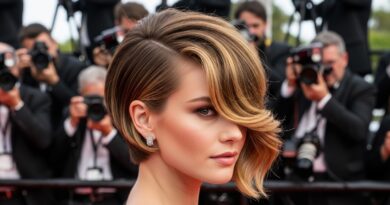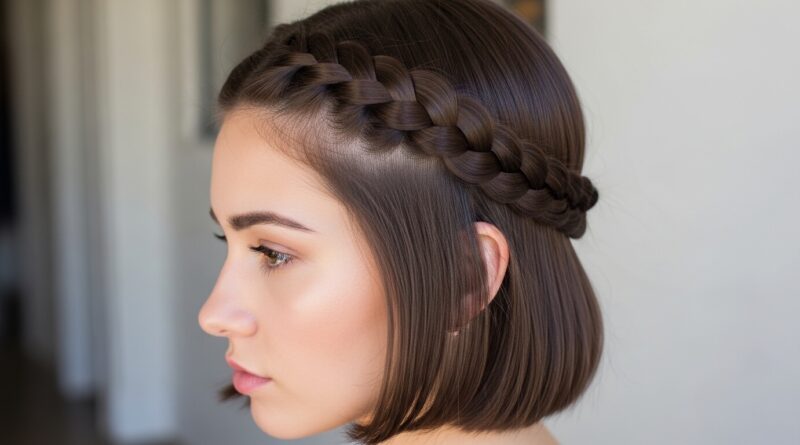
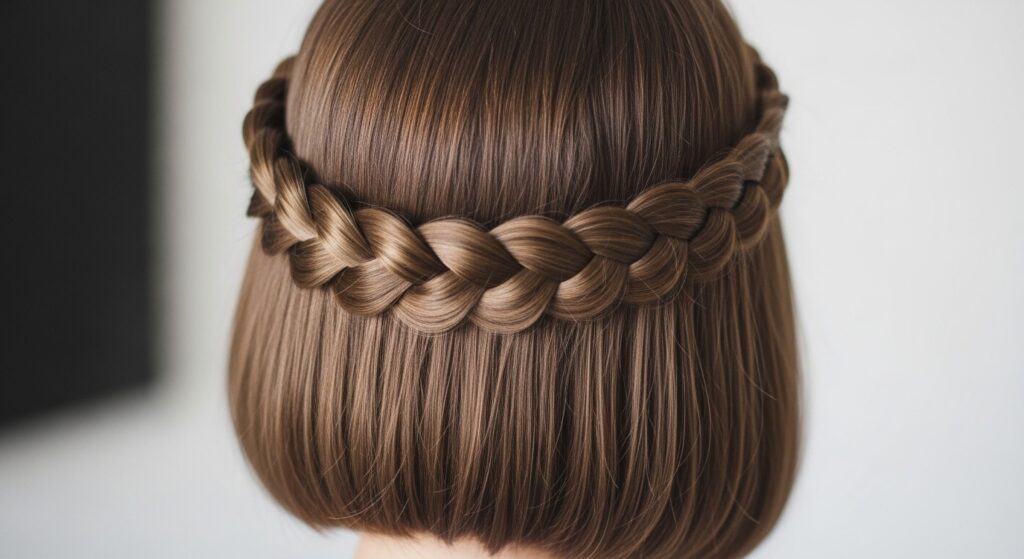
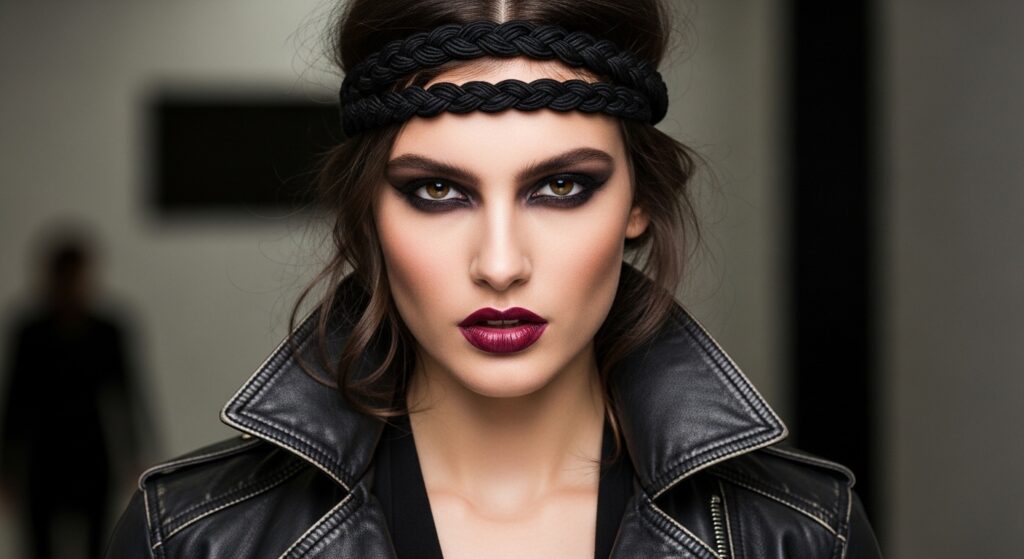
Rope Braid Headband Mastered for Boho Chic Vibes
Okay, let’s be real. We’ve all scrolled through endless feeds of perfect, intricate braids and thought, “I could never.” But what if I told you there’s one gorgeous, boho-chic style that looks way harder than it actually is? I’m talking about the rope braid headband.
This hairstyle is my secret weapon for looking put-together in under five minutes. It’s the perfect blend of effort and effortless, giving you those romantic, festival-ready vibes without any of the stress.
Whether your hair is long, short, thick, or fine, this technique can work for you. I’m going to walk you through it, step-by-simple-step. By the end of this, you’ll have a new go-to style that feels fresh and totally you.
Why the Rope Braid is a Total Game-Changer
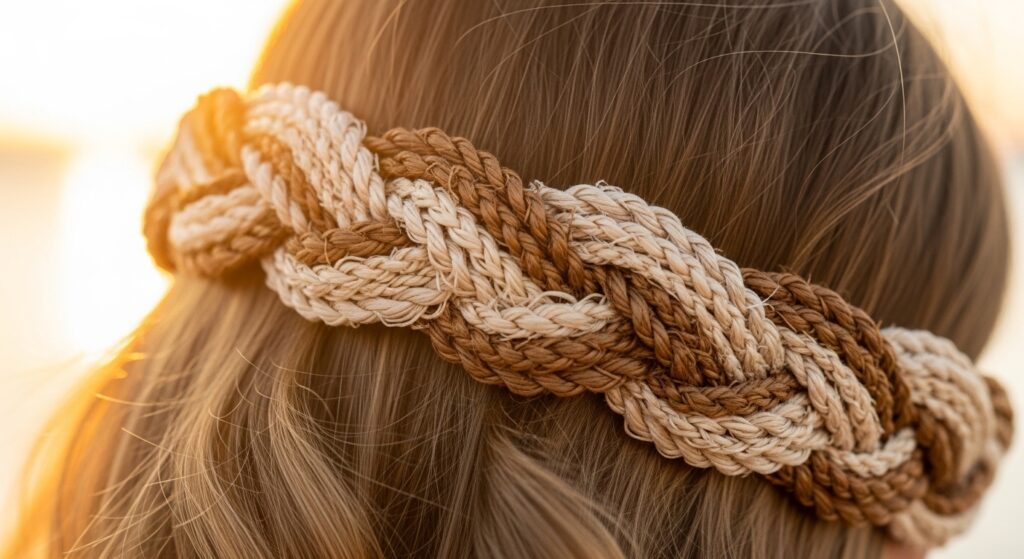
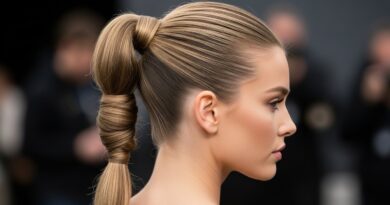
First, let’s talk about why this specific braid is so special. Unlike a regular three-strand braid, a rope braid (or twist braid) is created with just two sections. You simply twist them around each other.
The result is a beautiful, rounded, cord-like detail that looks incredibly elegant. When placed as a headband, it instantly elevates your look from simple to styled. It’s a detail that whispers “I tried” without screaming it.
This technique is a foundational skill. Once you master it, you can add it to so many other styles, from 2026 hairstyles predictions to romantic goth hairstyles. It’s all about building your toolkit.
What You’ll Need to Get Started
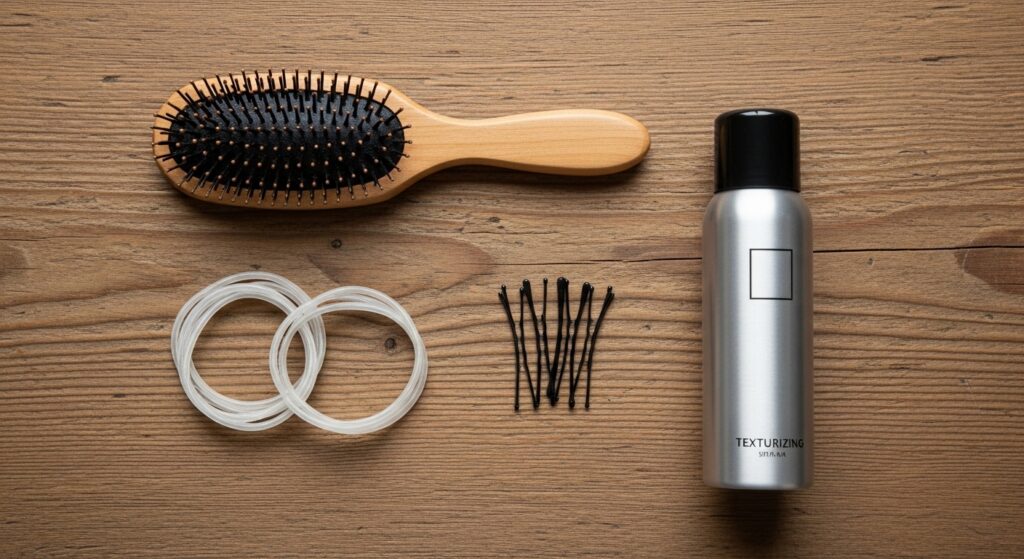
You don’t need a salon’s worth of products. Honestly, you can do this with almost nothing. But having a few key items makes it easier and helps the style last.
- A fine-tooth comb or brush to section cleanly.
- Two small, clear elastic bands (they’ll be hidden).
- A few bobby pins that match your hair color.
- Texturizing spray or dry shampoo (a game-changer for grip!).
That’s truly it. The beauty of this look is in its simplicity. We’re going for that lived-in, beautiful mess vibe, not a stiff, overdone updo.
Step 1: Prep Your Hair for Perfect Texture
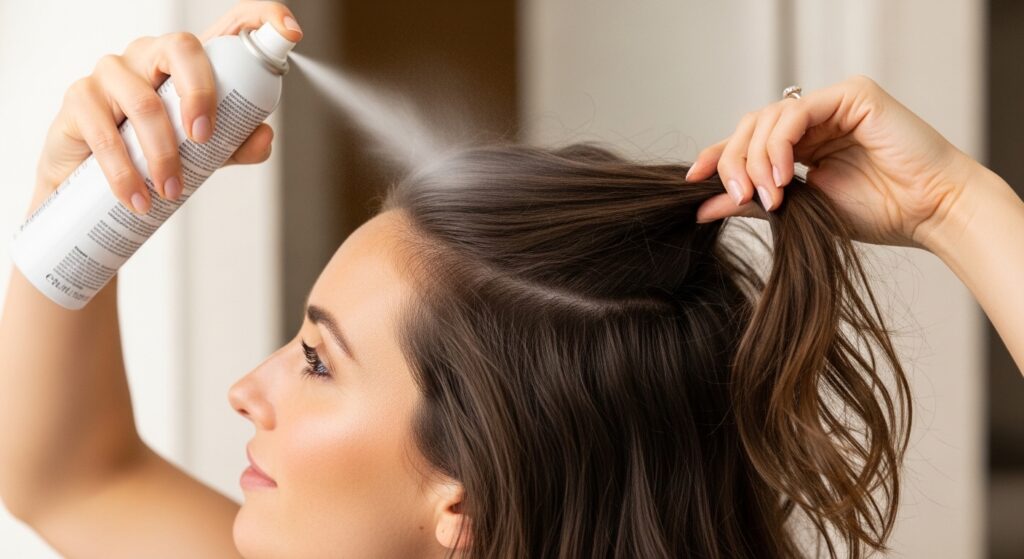
Start with hair that isn’t freshly washed. Day-old hair has more natural grip and texture. If your hair is super clean and slippery, spray some dry shampoo or texturizing spray at your roots and through the mid-lengths.
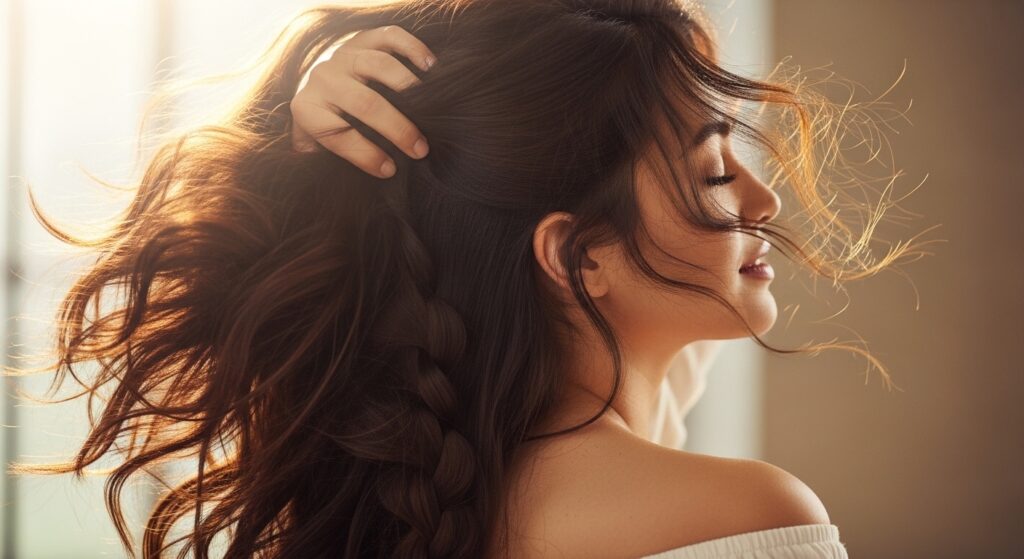
You can leave your hair down in its natural state—whether it’s straight, wavy, or curly. The braid will look amazing against any texture. For a modern twist, you could even pair it with an asymmetrical lob.
Don’t brush it too smooth. We want a little bit of that undone, organic feel. A quick tousle with your fingers is often the best prep.
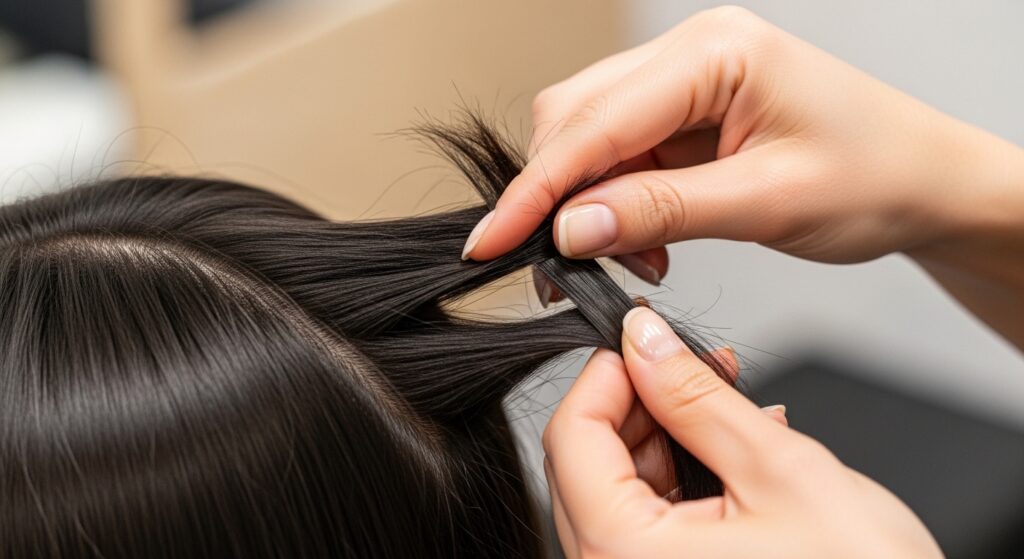
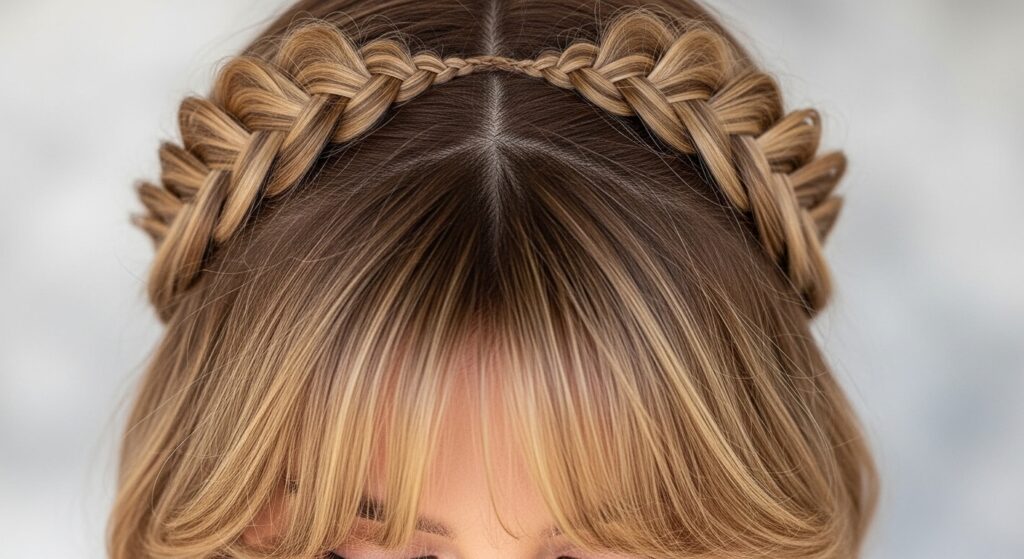
Step 2: Section Your “Headband” Piece
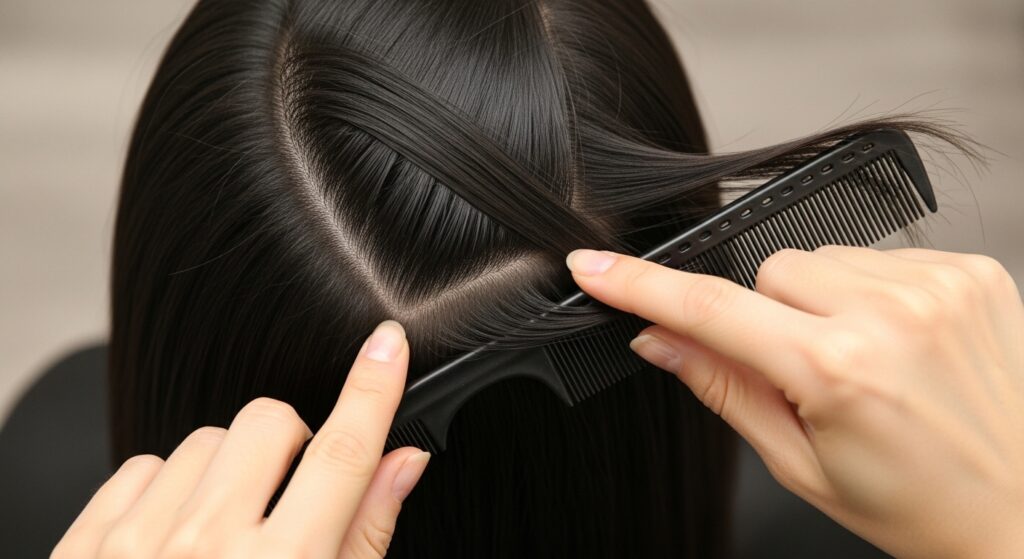
This is the most important step for placement. Using the end of a comb, create a deep side part. Then, from the side with more hair, take a diagonal section starting at your temple and going back towards the crown.
The section should be about 1-2 inches thick. Don’t worry about it being perfect. A slightly imperfect section adds to the boho charm. Secure the rest of your hair out of the way with a clip so it doesn’t get mixed in.
This diagonal line is what creates that flattering, face-framing effect. It’s a trick used in everything from old money hair styles to the vampire haircut—it’s all about the angle.
Step 3: Split Your Section into Two
Now, take that diagonal section and divide it neatly into two equal parts. Use your fingers or the comb to smooth each part, making sure there are no tangles.
Hold one strand in each hand. For the best grip, hold them between your thumbs and index fingers. Make sure the strands are taut but not pulled painfully tight from your scalp.
Getting these two sections even is key for a uniform braid. Think of it like the first step to that sleek quiet luxury bob precision, but we’re about to mess it up beautifully.
Step 4: The Simple Twist Motion
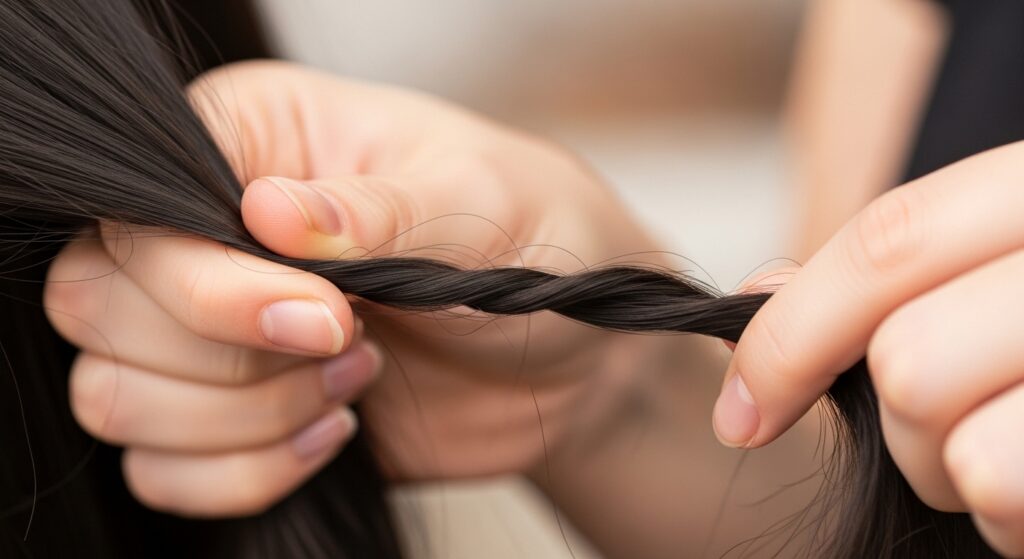
Here’s the magic. Take the strand in your right hand. Twist this single strand clockwise (to the right). Do this for two or three full rotations. You’ll see it start to coil on itself.
Now, do the same with the strand in your left hand. Also twist this single strand clockwise. It’s the same direction for both sides. This pre-twisting is what gives the rope braid its distinct, defined look.
Feel that texture building? This is where the braid starts to get its body. It’s a simple move that makes all the difference.
Step 5: Cross and Combine the Strands
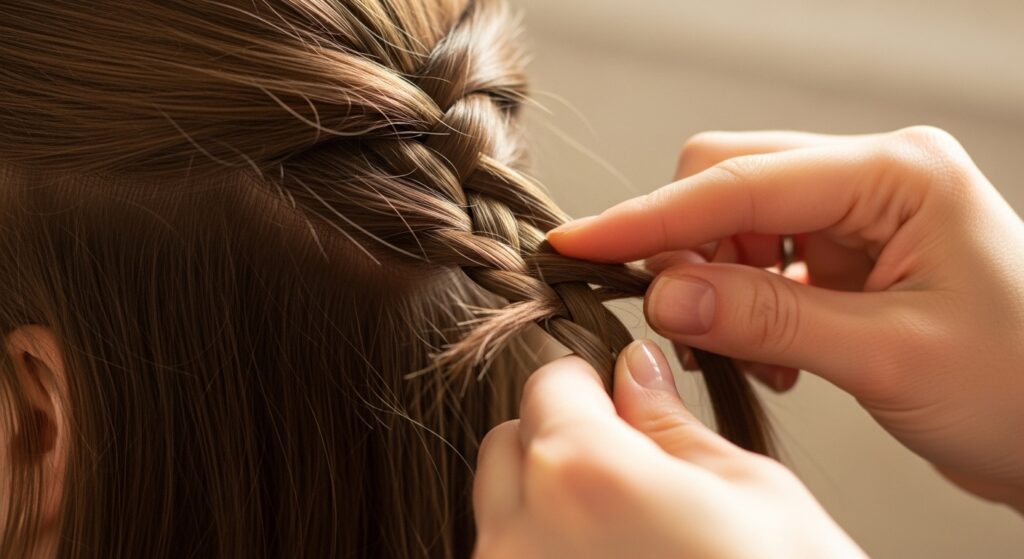
Now that both strands are individually twisted, you’ll bring them together. Take the strand in your right hand (the one you just twisted) and cross it over the strand in your left hand.
After you cross them, switch your grip. The strand that was in your right hand is now in your left, and vice versa. This is the only “braiding” motion you need to remember: cross right over left.
It might feel awkward at first, but after two crosses, you’ll have the rhythm. This is the core of the entire style.
Step 6: Repeat the Twist and Cross Pattern
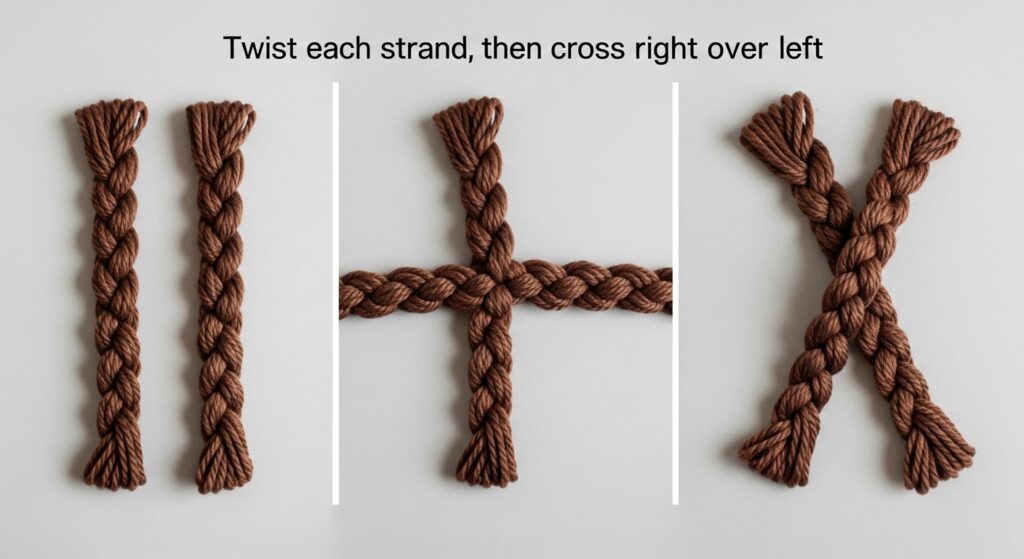
Continue the pattern. After each cross, stop. Now, before you cross again, you must re-twist each individual strand clockwise again.
So the pattern is: 1) Twist right strand. 2) Twist left strand. 3) Cross right strand over left. Switch hands. Repeat.
Keep the tension consistent. As you work, the beautiful, rounded rope braid will begin to form. Guide it along the diagonal path towards your opposite ear.
Step 7: Securing the End of Your Braid
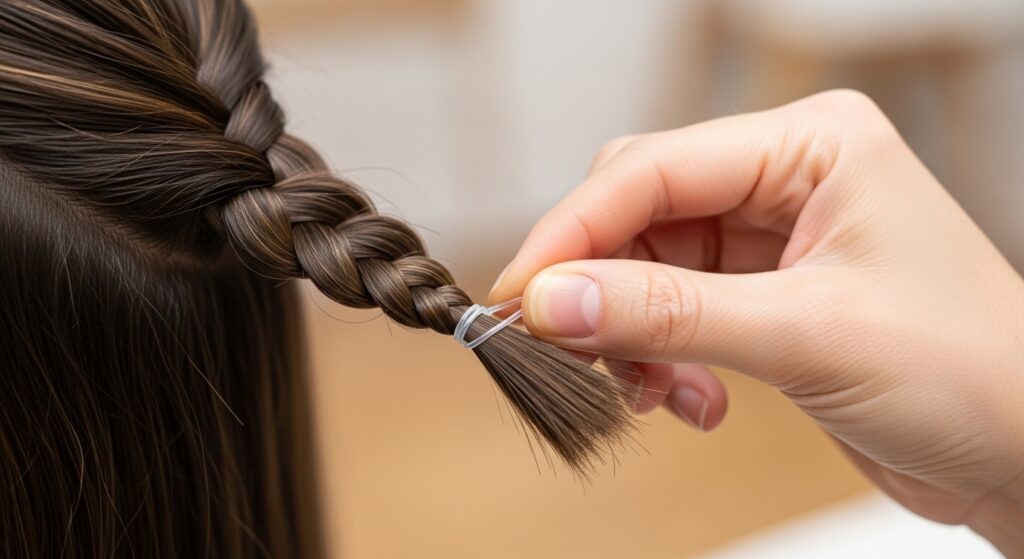
Once you’ve braided all the way to the ends of the hair in your section, it’s time to secure it. Take one of your small, clear elastics and wrap it around the end of the braid.
Make sure it’s tight enough that the braid won’t unravel, but don’t worry about it being perfect. We’re going to hide this elastic in the next step.
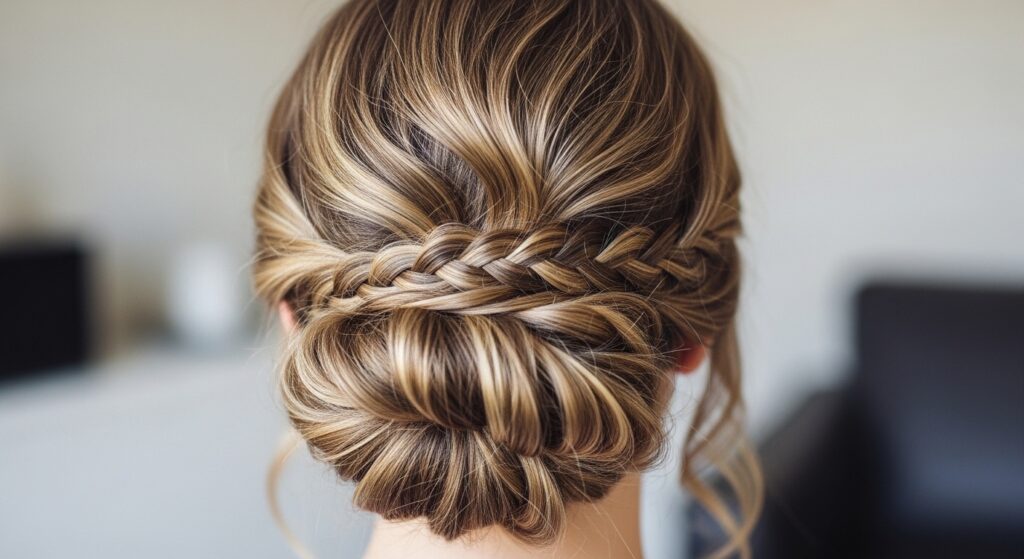
Give the braid a gentle tug along its length to loosen it slightly. This “pancaking” step makes it look fuller and more romantic.
Step 8: Positioning & Pinning the Headband
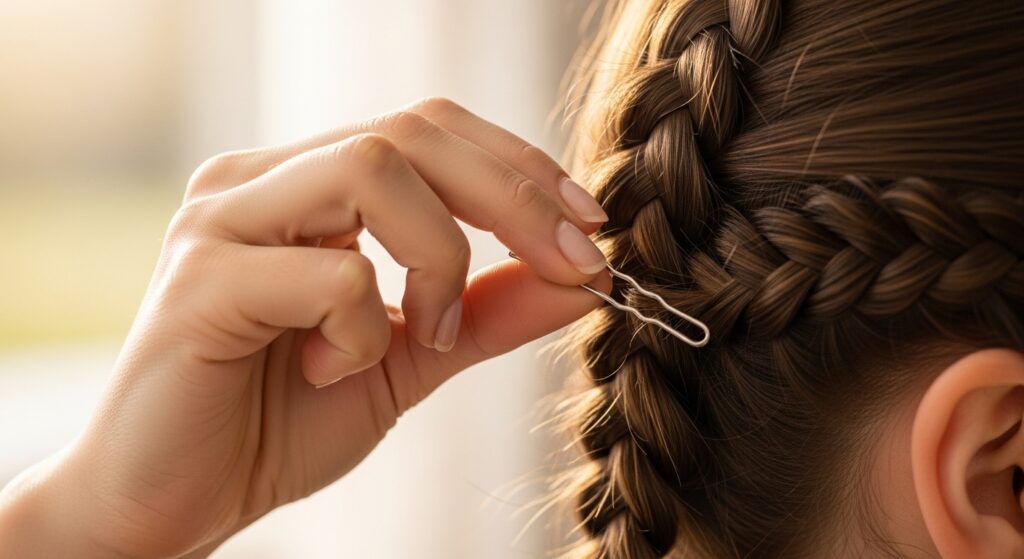
Now, drape the braid across your head like a headband. Bring the tail end towards the back of your head, just behind your opposite ear.
This is where the bobby pins come in. Slide a pin into the elastic at the end of the braid, then push the pin into the hair underneath, aiming upwards to grab the hair at your roots. Use 2-3 pins for security.
The goal is to hide the pins and the elastic completely under the bulk of the braid. No one should see your hardware!
Step 9: Tousle and Style the Rest of Your Hair
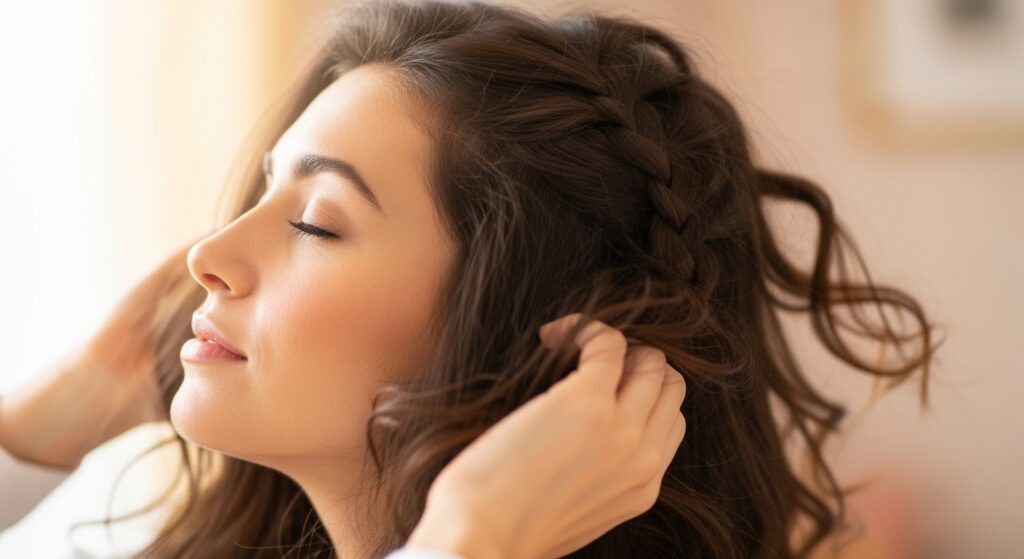
Release the rest of your hair. Now, look at the overall picture. Gently tug on a few face-framing pieces around the braid to soften the look.
Shake your head a bit and run your fingers through your lengths. We want the braid to look like it’s effortlessly nestled into your hair, not sitting on top of a stiff helmet.
This tousled finish is what gives you those true boho chic vibes. It’s the opposite of a rigid, geometric style like the hime cut—it’s all softness and flow.
Step 10: Lock It All in Place
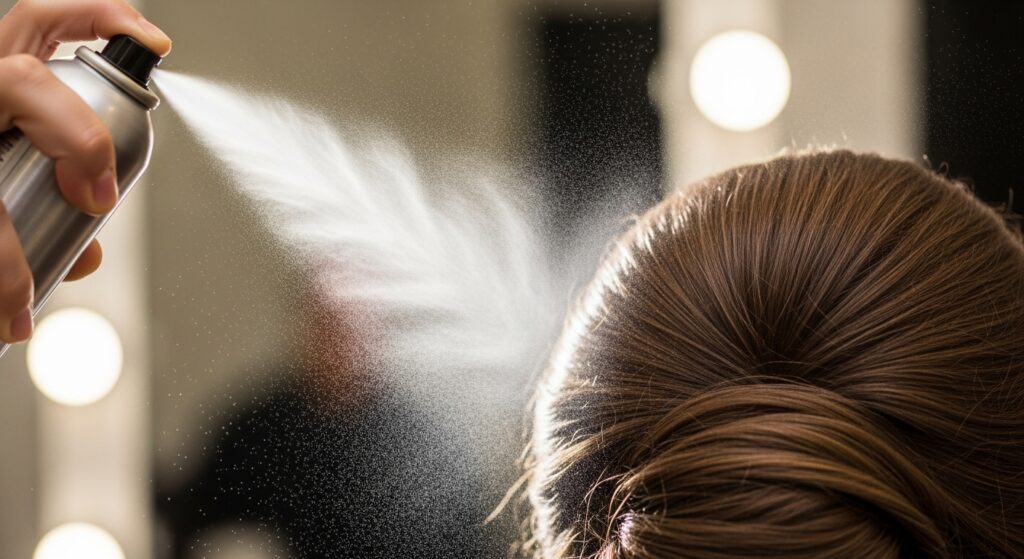
To make your hard work last all day or night, a light hold hairspray is your best friend. Hold the can about 10 inches away and give a gentle, all-over mist.
Pay special attention to the pinned area and the roots around the braid. You can also use a spoolie brush to smooth any baby hairs around your part if you want a sleeker look.
Choose a flexible hold formula. We want the style to move with you, not feel crunchy or stiff. The goal is lasting, touchable texture.
Adapting the Braid for Short Hair
Short hair friends, you can absolutely do this! The technique is exactly the same. Your section just might be a bit smaller.
When you get to the end, you might have a shorter tail. Simply pin it directly where it ends, behind your ear. It will look adorable and intentional, adding a detail to a quiet luxury bob or a playful asymmetrical lob.
The key is using more, smaller bobby pins to secure the shorter length. No one is left out of this style.
Making it Last: Day 2 & 3 Hair Magic
This style actually gets better on day two or three. The natural oils in your hair provide even more grip and a perfectly lived-in texture.
If the braid gets a little fuzzy, lightly dampen your fingertips with water or a bit of leave-in conditioner and smooth them down the length of the braid.
You can also sleep with the braid in! Just wrap your hair in a loose silk scarf or use a silk pillowcase. Wake up, refresh the base, and you’re good to go.
Adding Accessories for Extra Glam
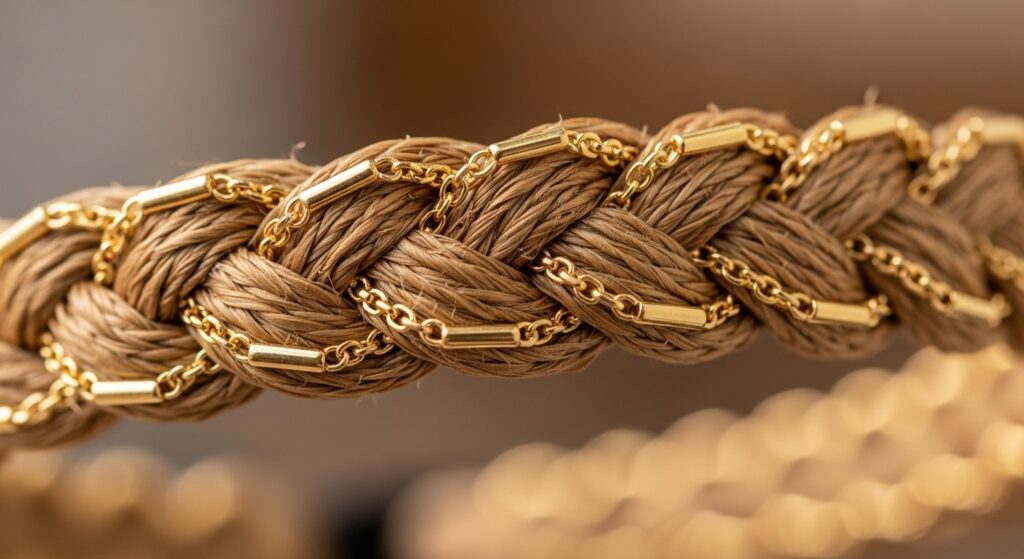
Want to dress it up? Weave a delicate ribbon or a pretty hair chain through the braid before you pin it. This takes the style from daytime casual to evening-ready in seconds.
For a glitchy glam hair moment, use a few colored hair clips or cuffs along the braid. Or, for a darker aesthetic that nods to romantic goth hairstyles, try a black velvet ribbon.
Accessories let you personalize the look endlessly. They’re the fastest way to make a classic technique feel new and on-trend.
Common Mistakes and How to Fix Them
The biggest mistake is making the braid too tight. It can look severe and give you a headache. The fix is easy: gently pull on the outer loops of the braid to loosen it after pinning.
Another issue is a lumpy, uneven braid. This usually means you forgot to re-twist the individual strands before each cross. Just undo it a few steps and restart the pattern.
If your braid won’t stay pinned, you’re not anchoring the bobby pin into the rooted hair underneath. Pin horizontally, then slide it upwards to grab that anchor.
From Boho to Edgy: Styling Variations
This braid isn’t just for boho vibes. Pair a tightly twisted, sleek rope braid with a minimalist outfit for an old money hair aesthetic of understated elegance.
Or, create two smaller rope braid headbands, one on each side, for a look that feels fresh and futuristic, perfect for 2026 hairstyles mood boards.
Combine it with deep waves and a dark lip for a twist on vampire haircut romance. One technique, a million different moods.
Pairing with Other Hair Trends
Think of your rope braid as an accessory. It plays incredibly well with other cuts and colors. It looks stunning with curtain bangs or long layers.
Imagine it with money-piece highlights or blended balayage. The braid will catch the light and show off the dimension in your color.
It’s the perfect add-on to make a simple haircut, like a blunt cut or that ever-popular asymmetrical lob, look styled and special with zero extra effort.
Your Quick-Reference Cheat Sheet
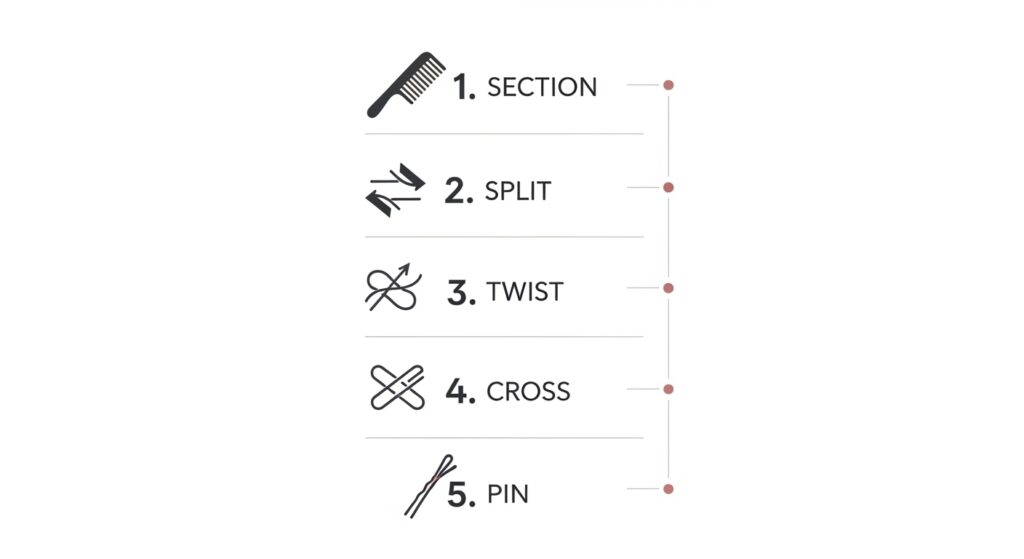
- Create a diagonal section from temple to crown.
- Split it into two equal strands.
- Twist each strand clockwise, individually.
- Cross the right strand over the left. Switch hands.
- Repeat Twist & Cross to the end. Secure and pin.
Bookmark this list. Print it and stick it on your mirror if you need to! After three tries, your hands will remember the motion and you won’t need to think about it at all.
How This Style Saves You Time
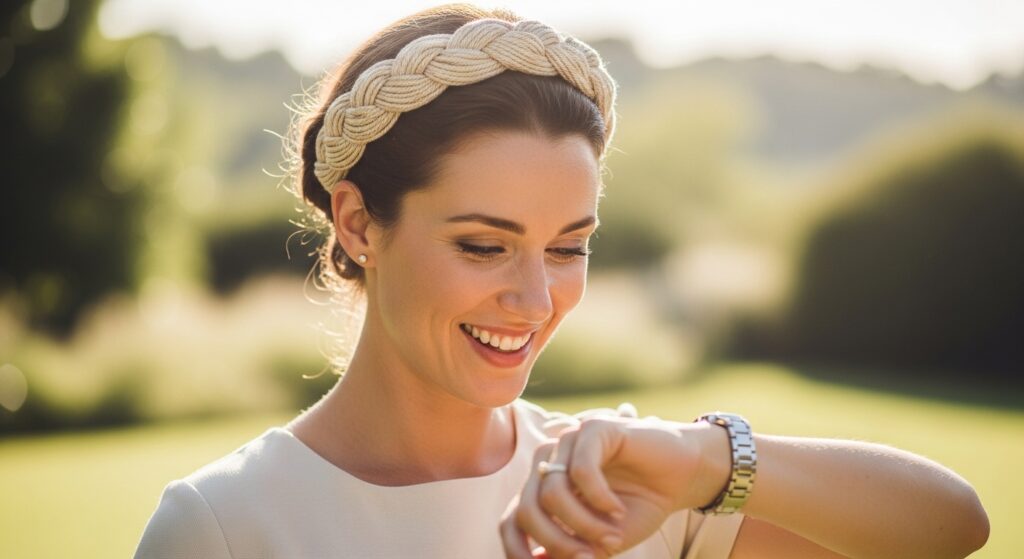
In a world of complicated 2026 hairstyles tutorials, this is a five-minute miracle. It hides unwashed roots, adds instant style to a basic ponytail or bun, and makes you look like you spent serious time on your appearance.
It’s the ultimate “I’m running late but need to look good” solution. It works for the office, a weekend market, a date, or a wedding. The versatility is unmatched.
Mastering one solid, beautiful technique like this is more valuable than knowing ten mediocre ones. This is a workhorse style you’ll return to for years.
Sharing Your Success & Tagging Us

I truly want to see you rock this look! When you try it, take a selfie. Celebrate your win, even if the first try isn’t perfect. It’s all about practice.
Share it on your stories or feed. Tag me @HaileyAndTeam so I can see your beautiful creation and share it with our community. Your version might inspire someone else to give it a go.
We’re all in this together, figuring out what makes us feel confident and chic. Your take on the style is unique and worth sharing.
Final Pep Talk: You’ve Got This
If you feel fumble-fingered at first, that’s completely normal. Every single hairstylist started where you are right now. The beauty of hair is that it grows back, and you can always brush it out and start over.
Be patient with yourself. Follow the steps slowly. Don’t aim for Instagram perfection on try number one. Aim for “Hey, I kinda did it!” That’s a huge win.
This skill is now in your back pocket. A little bit of technique can unlock so much daily confidence. That’s what this is really all about.
And just like that, you’ve added a seriously gorgeous hairstyle to your repertoire. The rope braid headband is one of those looks that feels special every time you wear it, yet it’s so simple once you know the trick.
Remember, the best hairstyles are the ones that make you feel like the most authentic, beautiful version of yourself