Shattered Tips: Fragmented End Texture
Imagine a manicure that doesn’t just sit prettily on your fingertips but tells a story of controlled chaos, of beauty in breakage, of art in asymmetry. Welcome to the world of fragmented end texture, a trend that has shattered the predictable smoothness of traditional nail art to create something breathtakingly raw and modern. Known colloquially as “shattered tips,” this technique moves beyond flat color and simple glitter, introducing a tactile, dimensional landscape on the nail’s free edge.
Deconstructing the Trend: What is Fragmented End Texture?
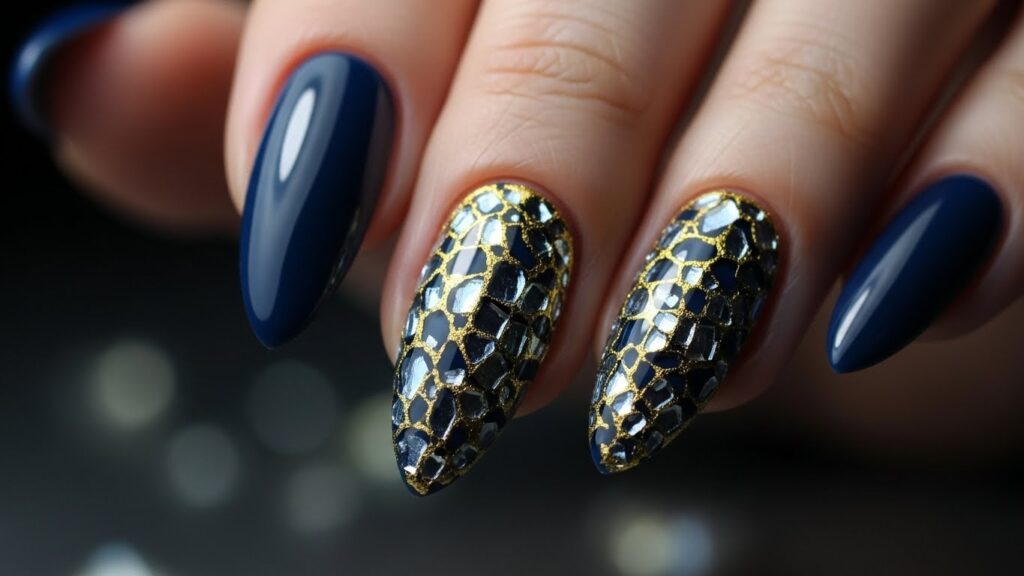
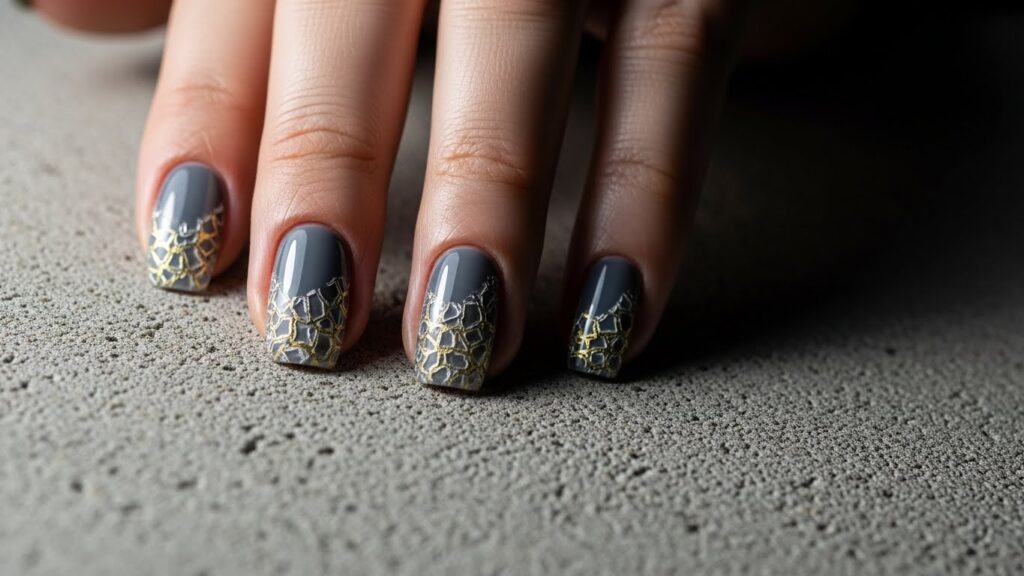
At its core, fragmented end texture is a nail art technique that creates a 3D, fractured, or crumbled effect specifically at the tips of the nails. Unlike a full-nail texture, it strategically places this visual disruption on the free edge, often contrasting with a smoother, solid-color base on the nail bed. The “fragments” can be made from various materials: chunky glitters, iridescent flakies, crushed shells, textured gels, or even hand-placed acrylic shards.
The magic lies in the juxtaposition. The soft, polished skin of the nail bed meets a crescendo of complex, rugged texture at the tip. This creates a powerful visual anchor, drawing the eye to the ends of the fingers and adding an unexpected, avant-garde element to any look. It’s a trend born from the intersection of high fashion, abstract art, and the ever-evolving desire for unique self-expression through beauty.
Why Shattered Tips Are Dominating the Nail Scene
The rise of fragmented textures isn’t accidental. It taps into several broader shifts in beauty and fashion. First, there’s the overwhelming desire for tactile experiences and visual depth. In a digital world, texture provides a sensory connection that flat images cannot. Running your fingers over a shattered tip is an experience in itself.
Secondly, it aligns perfectly with the “undone beauty” or “raw aesthetic” movement. This philosophy celebrates imperfections, asymmetry, and a look that appears artistically deconstructed rather than painstakingly perfect. Shattered tips look creative, intentional, and effortlessly cool. They signal a wearer who is confident, artistic, and unafraid to challenge conventional standards of polish and finish.
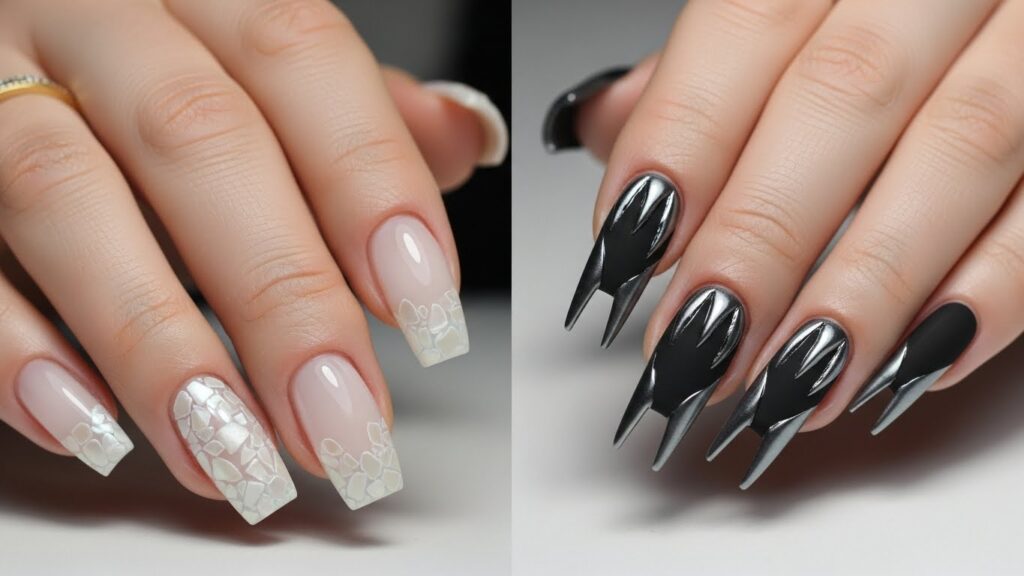
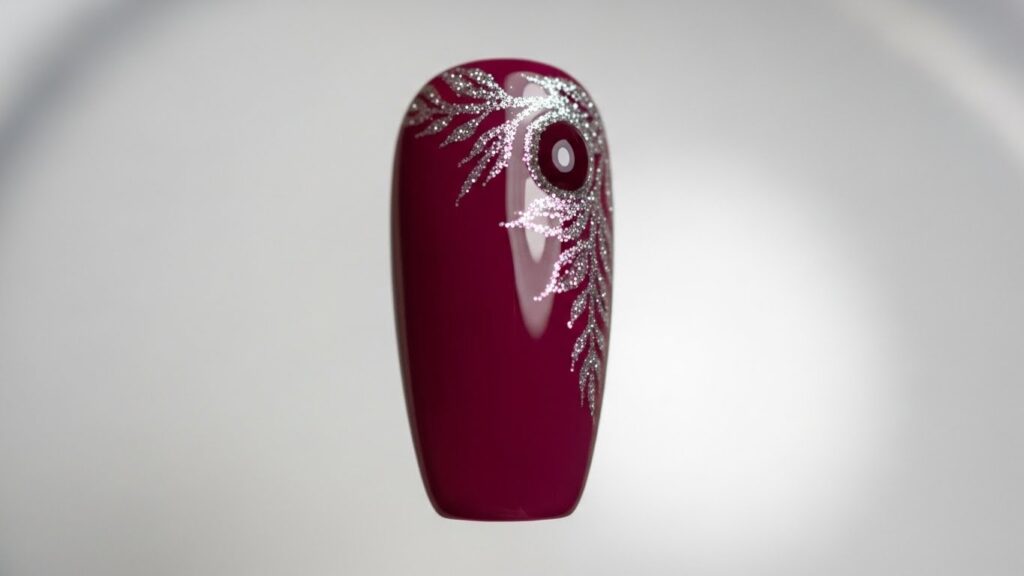
Finally, from a practical standpoint, it’s a brilliant way to make a statement without covering the entire nail in busy art. The color on the nail bed can remain chic and simple—a nude, a bold crimson, a sleek black—while the textured tip provides all the drama. It’s versatile, working for both subtle, ethereal designs and bold, grunge-inspired statements.
The Artist’s Toolkit: Materials for Creating Your Shattered Masterpiece
To embark on your fragmented nail journey, you’ll need to gather some key supplies. The chosen materials will define the final look’s intensity and style.
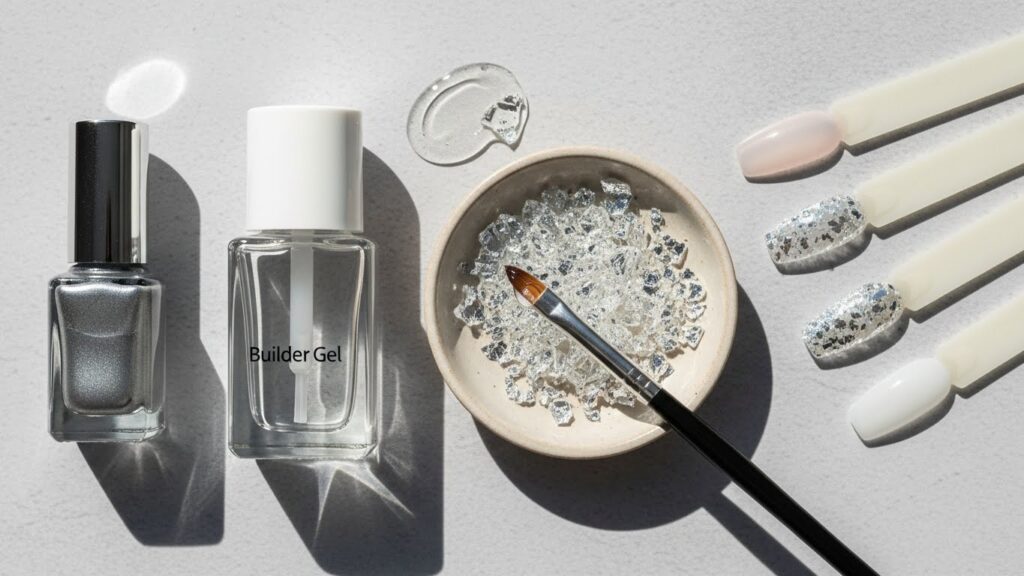
Base Essentials: A reliable base coat and your chosen color polish or gel for the nail bed. Creams, mattes, and shimmers all work wonderfully as a canvas. You’ll also need a high-quality top coat or a builder gel. A thicker gel is often preferred as it can better encapsulate and hold larger texture pieces.
Fragmentation Elements (The Star of the Show):
Chunky Glitters & Flakies: Irregular, large-piece glitters are a beginner-friendly option. Iridescent or holographic flakies create a shattered glass or ice effect.
Crushed Shells & Mica Powders: For a more organic, abalone-like texture and shimmer.
Acrylic Shards: For the boldest look, you can create tiny, thin shards from colored acrylic powder or purchase pre-made pieces.
Textured Gels: Certain gels dry with a sandy, crumbled, or crackled finish specifically designed for this effect.
Tools: A dotting tool or tweezers for precise placement, a small silicone tool or brush for patting down texture, and a lamp if you’re using gel products.
A Step-by-Step Guide to Achieving Fragmented Tips at Home
Ready to create? Follow this detailed guide to get salon-worthy shattered tips in your own space. We’ll outline the method using a gel system for its durability and working time.
Step 1: Prep and Base. Start with clean, shaped, and buffed nails. Apply a thin base coat and cure if using gel. Then, apply your chosen color to the entire nail. For a classic look, apply two coats for opacity. Cure thoroughly.
Step 2: Define the Fragmentation Zone. Decide how far up the nail you want the texture to go—just the very tip, the last third, or a diagonal line? You can mentally note this or lightly mark it with a pencil if needed.
Step 3: Apply the Adhesive Layer. Apply a medium-thick layer of clear builder gel or a thick top coat only to the zone you’ve defined for texture. Do not cure yet. This layer is what will trap your fragments.
Step 4: Create the Shatter. This is the creative part. Working quickly before the gel self-levels, use your tool to place or sprinkle your chosen texture material onto the wet gel. For a controlled look, place pieces individually. For a more random, dense effect, sprinkle generously. Gently pat the pieces down so they embed but aren’t completely submerged.
Step 5: Cure and Seal. Once you’re happy with the arrangement, cure the nail under your lamp for the full recommended time. The texture will now be hard and secure. Finally, apply a generous layer of top coat over the entire nail, carefully floating the brush to glide over the texture without dragging. This step is crucial to seal the fragments, prevent snagging, and add a high-gloss finish that enhances depth. Cure again.
Pro Tips and Creative Variations to Explore
Mastered the basics? Elevate your shattered tips with these professional insights and creative twists.
Pro Tip 1: The Gradient Shatter. Instead of an abrupt line, fade your texture. Apply your adhesive layer and place larger fragments at the very tip, gradually using smaller pieces as you move up the nail, creating an ombre effect into texture.
Pro Tip 2: Color Coordination & Contrast. Match your fragments to your base for a tonal, sophisticated look (e.g., navy base with navy-and-silver glitter). Or, go for high contrast for maximum impact (e.g., pastel pink base with jet-black shards).
Creative Variation: The “Negative Space” Shatter. Leave part of the nail bed bare or with a sheer wash of color. Apply the fragmented texture only along the tip and sidewalls, creating a modern, architectural frame.
Creative Variation: Mixed Media. Combine different textures! Start with a layer of crushed shell, then add a few strategic acrylic shards on top. The interplay of different shapes and reflects will be mesmerizing.
Maintenance Note: While a good top coat seals everything in, be mindful that extreme 3D textures can wear down faster. You can refresh the top coat every few days to maintain shine and integrity.
Beyond the Nail: The Cultural Fracture of Beauty Standards
The fragmented end texture trend is more than a passing fad; it’s a microcosm of a larger cultural shift. It represents a break from the long-held standard of flawlessly smooth, uniform beauty. Just as cracked glaze in kintsugi pottery highlights and beautifies breakage with gold, shattered tips celebrate intentional imperfection.
This trend empowers individuals to wear their artistry on their sleeves—or rather, on their fingertips. It challenges the notion that manicures must be pristine and polite. Instead, they can be expressive, bold, and a little rebellious. In embracing texture, fragmentation, and asymmetry, we embrace a more inclusive and interesting definition of what is beautiful—one that values character and creativity over impossible perfection.
So, the next time you look at your nails, consider leaving the perfectly smooth finish behind. Pick up your tools, gather your most intriguing glitters and gels, and embrace the beautiful break. Create a fracture, a shatter, a textured moment that is uniquely yours. The era of fragmented beauty is here, and it’s stunningly imperfect.