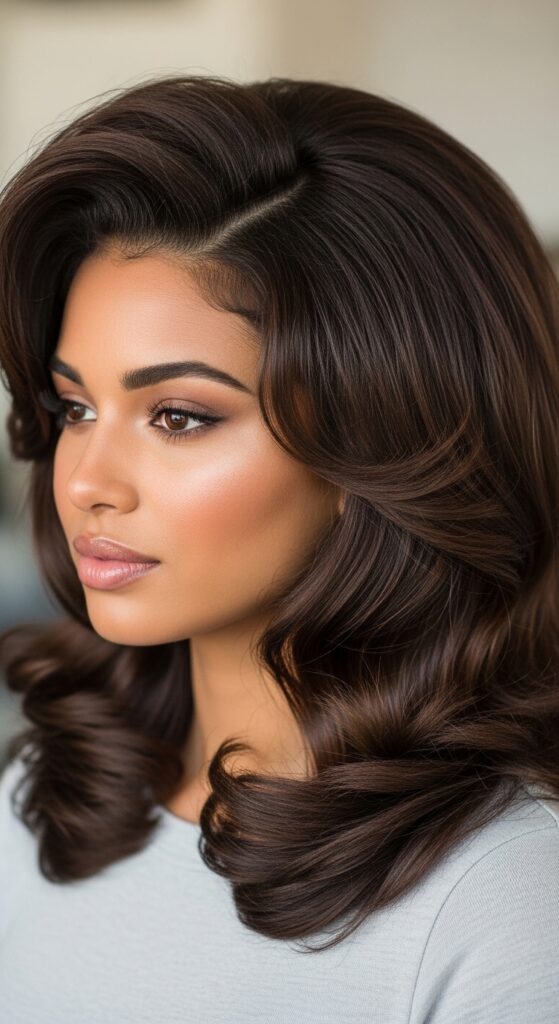
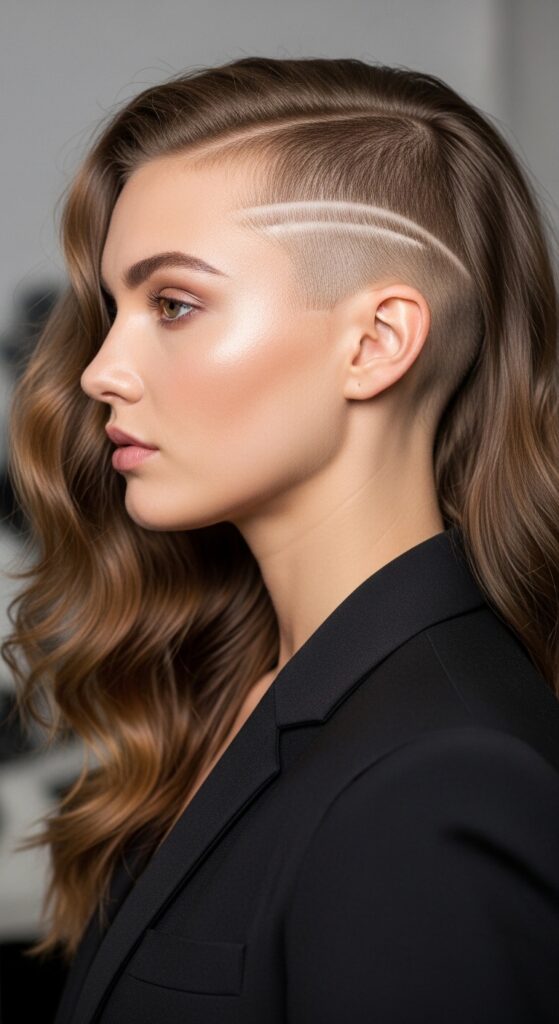
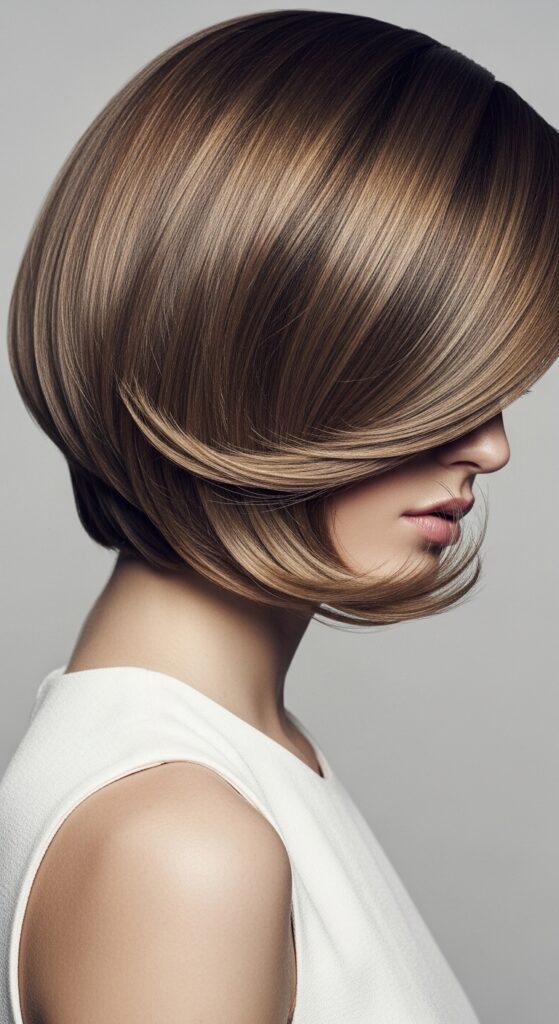
Side 14 Deep Sweep Waves Parted Low for Drama
Okay, let’s talk about a hairstyle that makes you feel like you just walked off a movie set. The Side 14 Deep Sweep Waves Parted Low for Drama. It sounds intense, but trust me, it’s one of those looks that’s easier than it seems and works for almost any hair type or length.
I’ve been seeing this vibe everywhere—it’s got that “old money hair” polish but with a seriously romantic, almost cinematic edge. It’s perfect when you want to feel put-together but not fussy, elegant but with a bit of a story.
Whether you’re prepping for a big date night, a wedding, or just want to turn your Tuesday grocery run into a personal fashion moment, this is your style. I’m breaking down everything, from the exact parting trick to the products that make it last all night. Let’s get into it.
What Is The “Side 14” Part, Anyway?
First, the name. “Side 14” isn’t some secret code. It simply means creating your deep side part 14 centimeters from the center of your hairline. This specific distance is the sweet spot.
It’s deep enough to create major drama and volume at the crown, but not so extreme that it feels unbalanced or like a costume. It frames your face beautifully and sets the entire shape for the waves to follow.
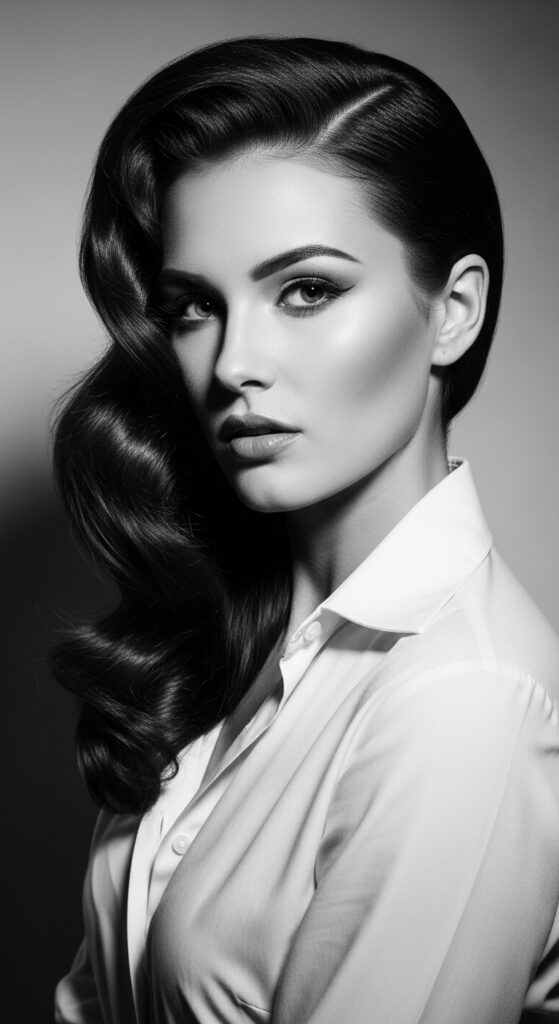
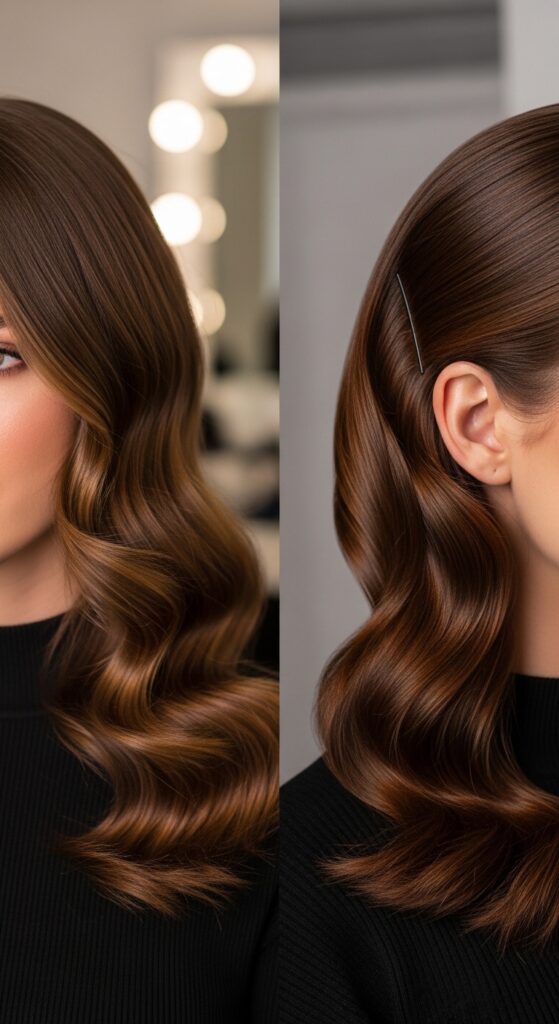
Why This Low-Parted Wave Is So Timeless
This look transcends trends. While we’re all loving the glitchy glam hair and vampire haircut of the moment, this style is a classic. It has roots in Old Hollywood glamour but feels completely fresh today.
It’s that perfect blend of “quiet luxury bob” sophistication and “romantic goth hairstyles” allure. It’s versatile enough for a boardroom (toned down) or a black-tie event (amped up), making it a technique worth mastering.
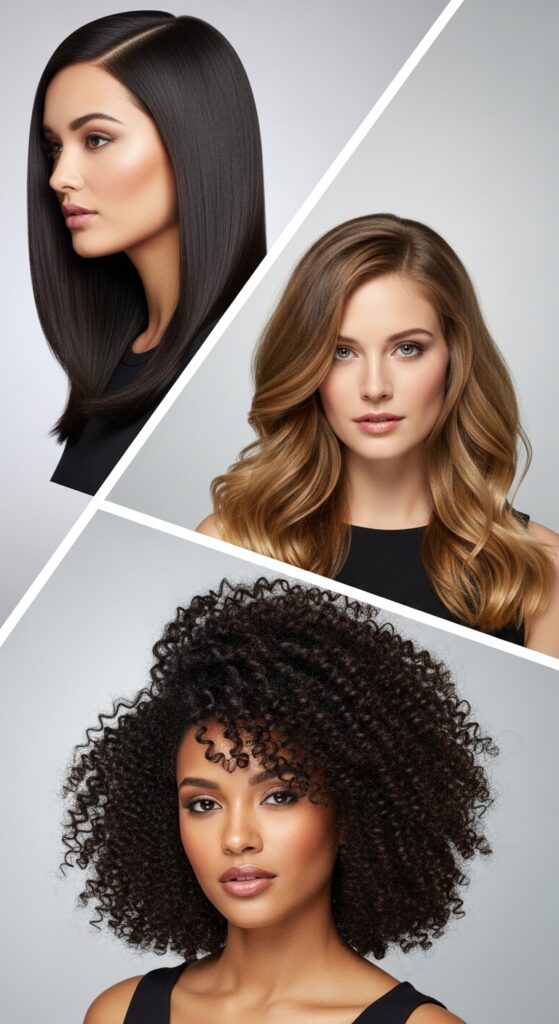
Hair Length & Type: Who Can Rock This?
Good news: this isn’t just for one hair type. Whether your hair is fine and straight or thick and curly, you can adapt this style. The length does matter a bit for the full effect.
- Shoulder-Length to Long Hair: Ideal. You get the full, sweeping wave effect.
- Asymmetrical Lob or Bob: Amazing. The deep part plays up the angular cut beautifully.
- Shorter Cuts (like a Hime cut): You can still do a deep side part and soft waves for a chic, modern twist.
Tools You Absolutely Need
You don’t need a salon full of tools, but a few key items are non-negotiable for this look. Here’s my must-have list.
- A Tail Comb: For that precise, clean 14cm part. Don’t just use your fingers.
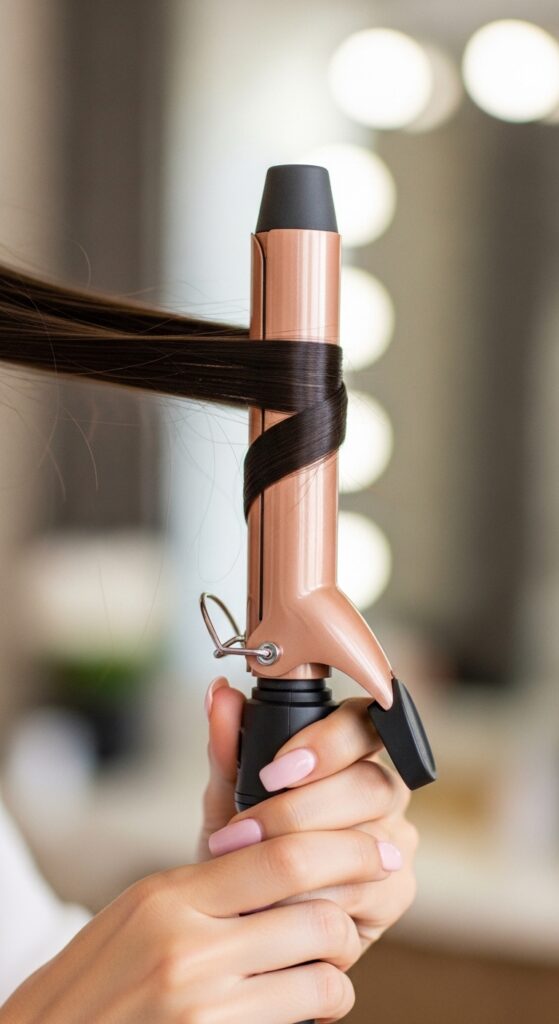
- 1.25 Inch Curling Iron or Wand: This barrel size creates soft, wearable waves, not tight curls.
- Strong Hold Hairspray: A flexible-hold formula is best. You want movement, not helmet head.
- Heat Protectant & Texture Spray: To shield your hair and add grit for hold.
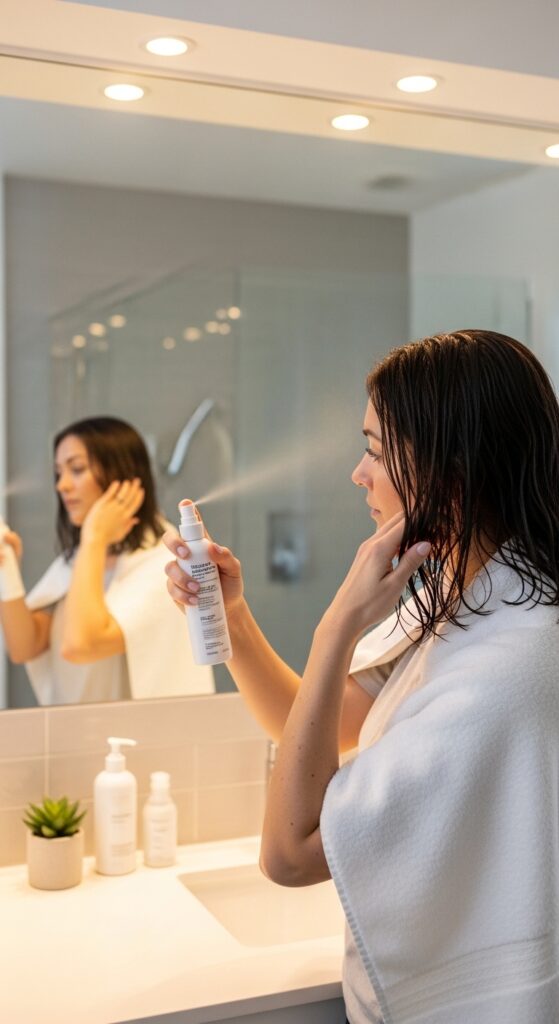
Step 1: The Perfect Wash & Prep
Start with second-day hair if you can. The natural oils give you better grip and texture. If you must wash, use a volumizing shampoo and conditioner at the roots and mid-lengths only.
After towel-drying, apply a heat protectant spray all over. Then, work a mousse or light volumizing foam at your roots. Blow-dry your hair completely, directing the airflow at the roots on the side opposite your part for maximum lift.
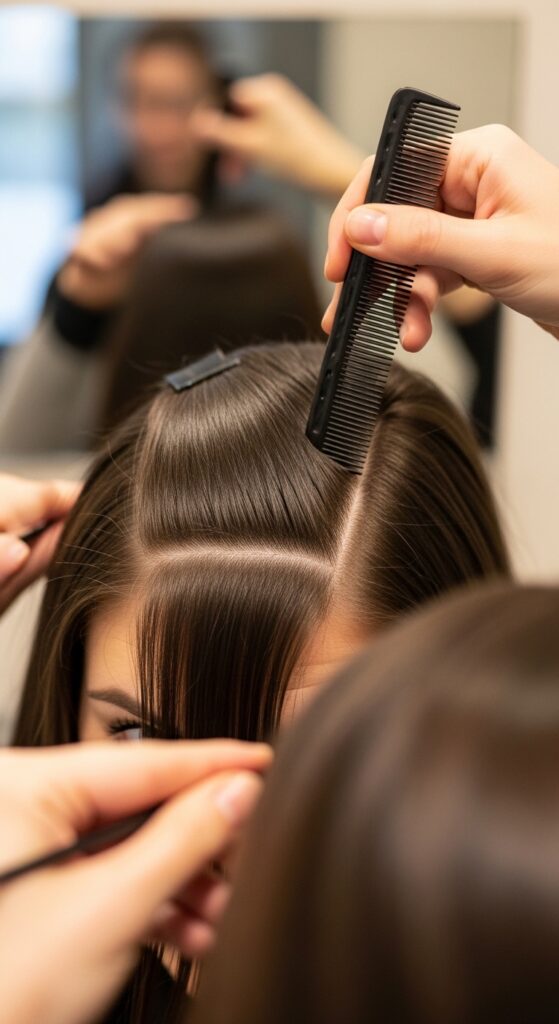
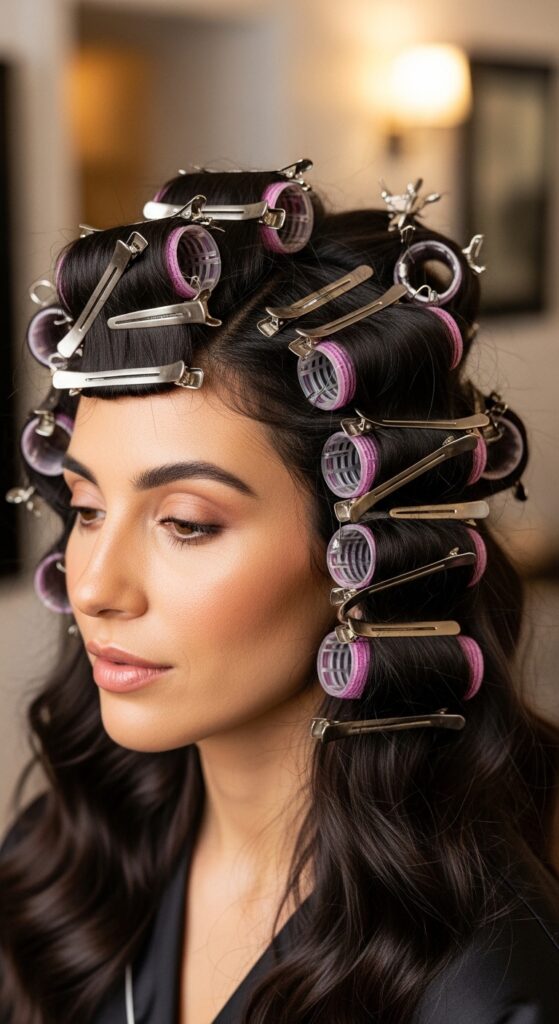
Step 2: Mapping Out Your “14” Part
This is the foundation. Take your tail comb and place the point at the very center of your hairline (where a middle part would start). Measure 14 centimeters over to one side.
Using the tail of the comb, drag a perfectly straight line from that point back to the crown of your head. Secure the smaller side of your hair with a clip so it’s out of the way. You should already see the dramatic shape starting.
Step 3: Root Lift for That Drama
The drama comes from height. On the larger side of your part (where most of your hair is), take a section at the crown. Lightly backcomb the very roots for hidden volume, or use a volumizing spray and blast with hot air from a blow dryer, then let it cool.
You can also use small velcro rollers at the crown for five minutes while you do your makeup. This lift is what makes the style feel expensive and intentional.
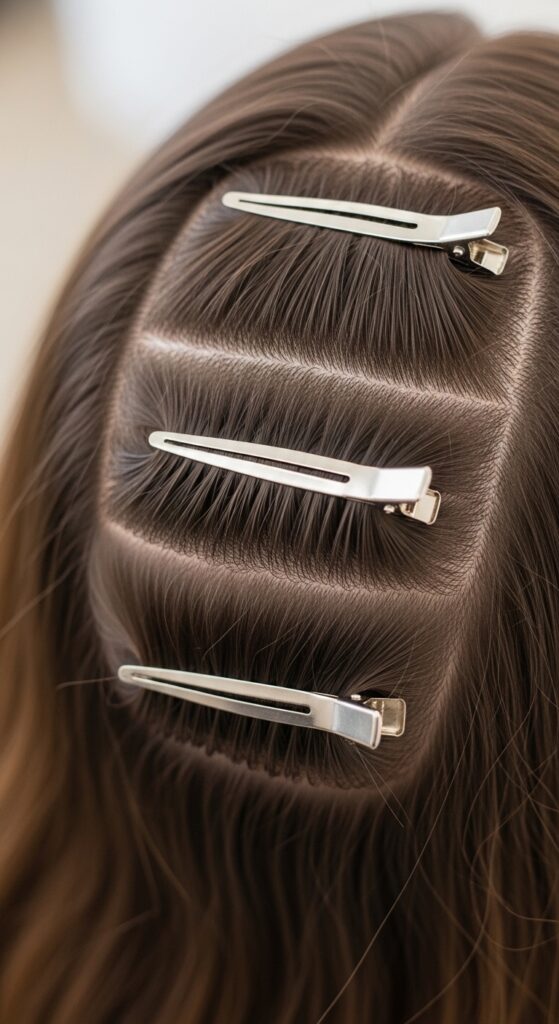
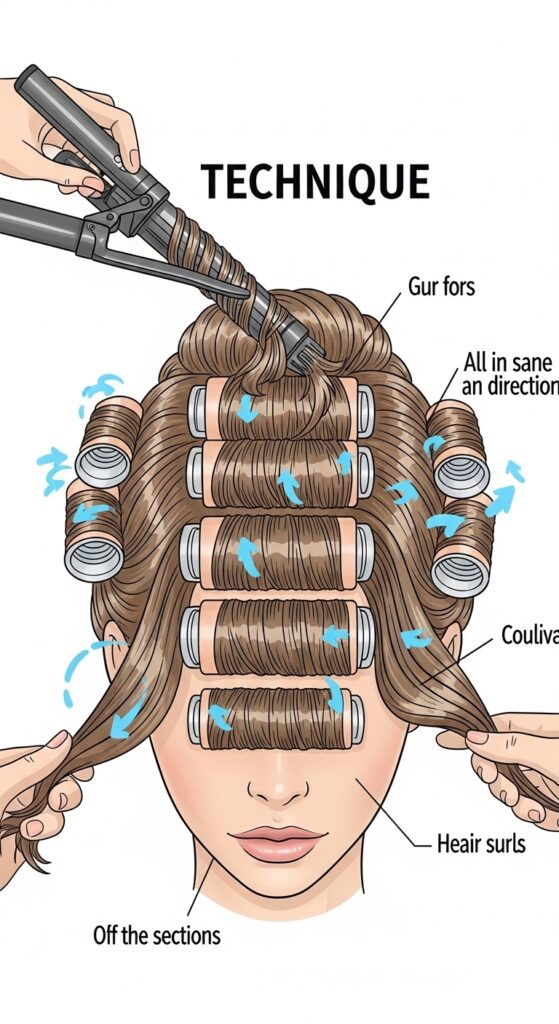
Step 4: Sectioning for Flawless Waves
Don’t just grab random sections. For smooth, uniform waves, clip your hair into three horizontal sections: bottom, middle, and top (crown). Start with the bottom section.
Within each section, take vertical subsections about two inches wide. This method ensures every piece gets heat and creates a seamless, cascading wave pattern instead of chaotic curls.
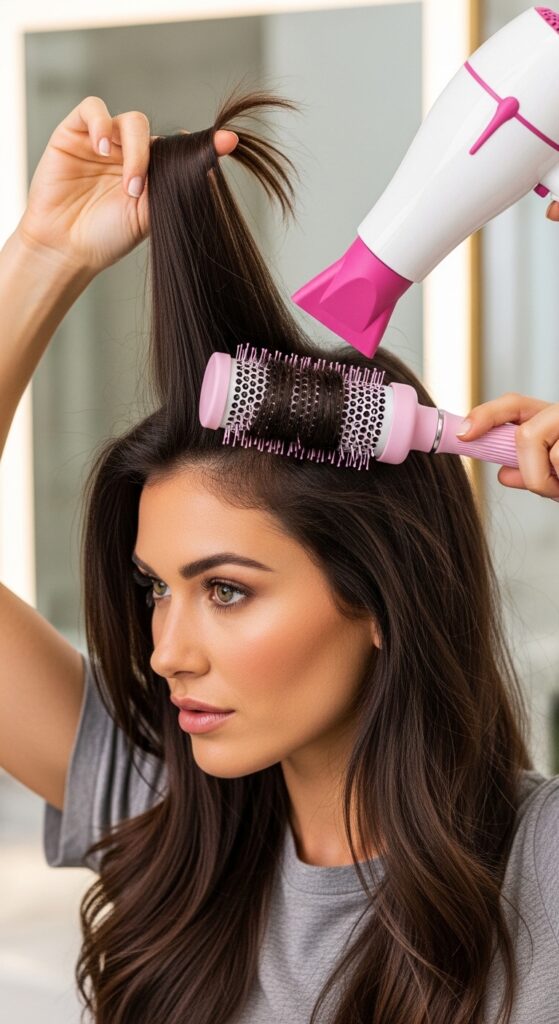
Step 5: The Curling Technique (It’s Not What You Think)
This is key for a soft wave, not a ringlet. Take your first vertical subsection. Wrap the hair around the curling wand away from your face. Hold for 8-10 seconds only.
Instead of pulling the wand out roughly, gently unwind the hair and immediately run your fingers through the curl to break it up. Let it cool. The goal is S-waves, not tight O’s.
Step 6: Direction & Pattern Matters
Consistency is everything. For the most natural, sweeping effect, curl every single section away from your face. Yes, all of them.
This uniform direction is what creates that cohesive, deep sweep of hair. It makes the style look polished and red-carpet ready, unlike alternating directions which gives a more tousled, beachy look.
Step 7: Cooling & Setting the Shape
As you finish each curled section, don’t touch it too much. Let the waves cool completely before you brush or style them. You can pin the warm curls in large loops against your head with clips to set them as they cool.
This cooling step is what locks the wave pattern in place for all-day wear. Rushing this means your waves will fall out faster.
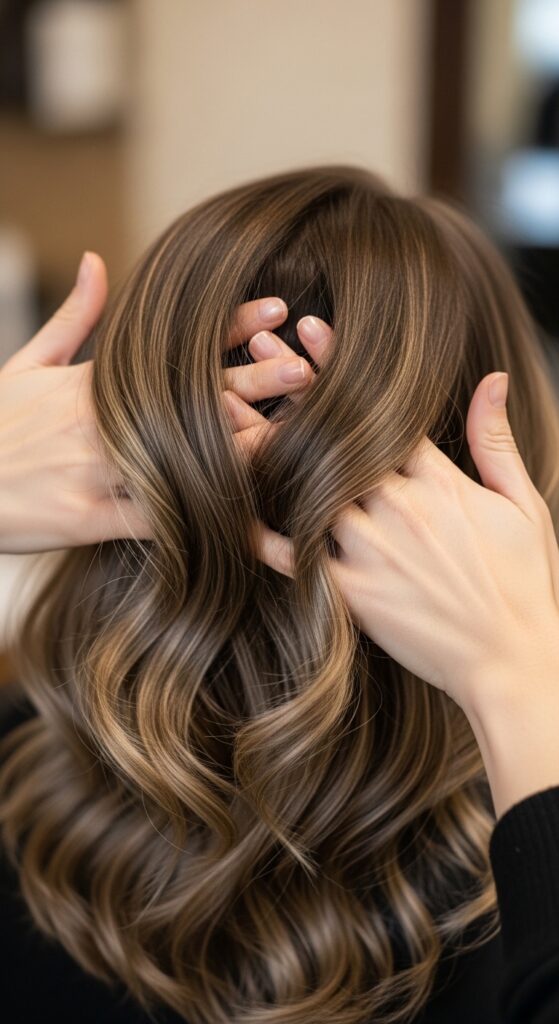
Step 8: The Art of the “Break-Up”
Once all your hair is cool, take down all the clips. Now, use your fingers only. Gently rake through all the waves, separating them and breaking up any uniform curl patterns.
Avoid using a brush at this stage—it can make the waves look frizzy or too loose. You want soft, lived-in waves, not perfect curls. This adds the “romantic” and effortless feel.
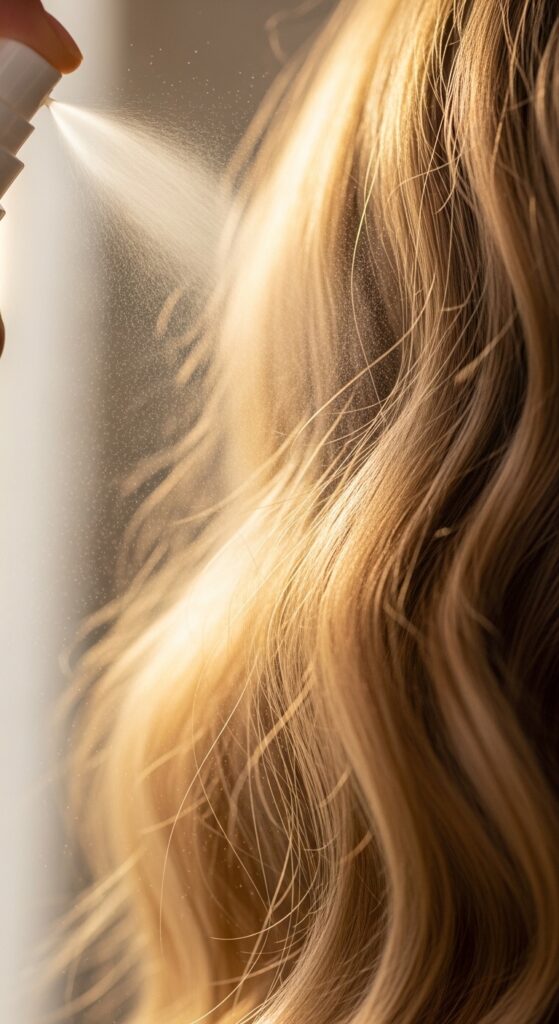
Step 9: Final Touch with Texture Spray
Lightly mist a texturizing or sea salt spray over your waves, focusing on the mid-lengths and ends. This gives separation, a bit of grit, and helps fight humidity.
It also blends any pieces that might still look too “curly” into the overall wave pattern. Scrunch the hair very lightly with your hands after spraying.
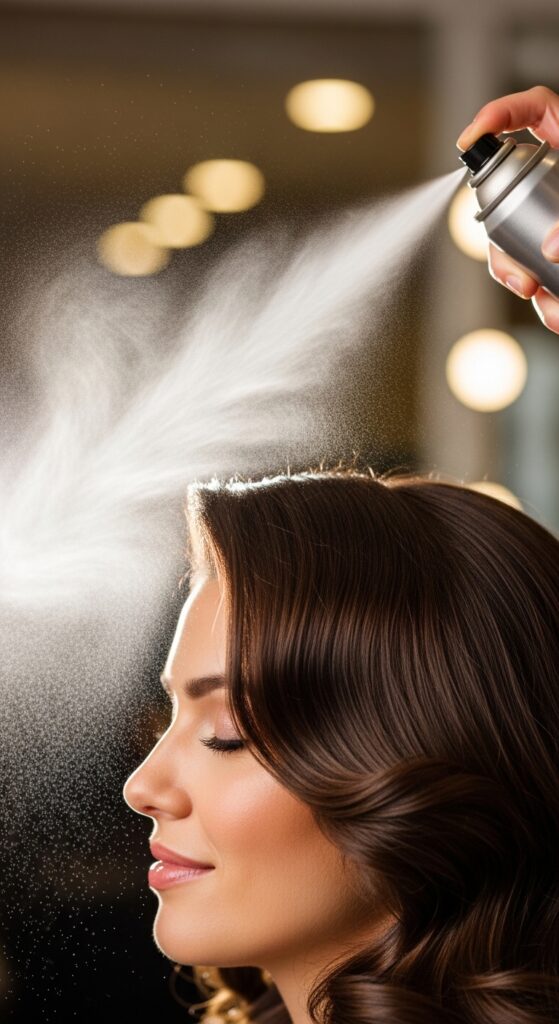
Step 10: The Hold Without The Stiffness
Hold your can of flexible-hold hairspray about 10 inches away from your head. Give a light, all-over mist. Let it settle for a second.
Then, for extra hold on the crown volume and the deep part, lift the hair slightly and spray just at the roots underneath. This keeps the style in place while letting the waves move.
Styling the “Other” Side
The smaller side of the part needs love too. You have a few options here, and it depends on your hair length and the event.
- Tuck It Behind Your Ear: Classic and clean.
- Let a Few Pieces Frame Your Face: Softens the look.
- Use a Shine Serum: On this side only, for a sleek, polished contrast to the voluminous waves.
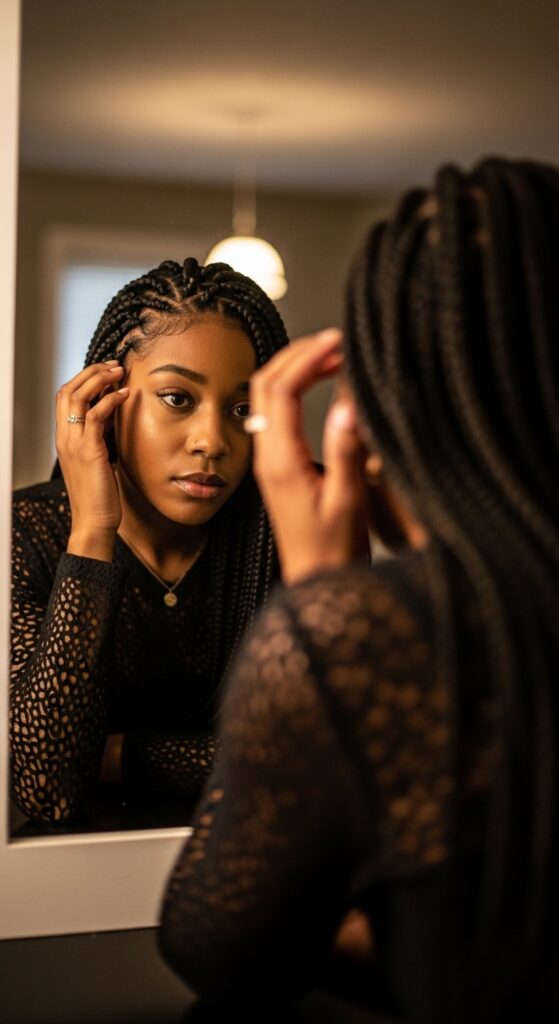
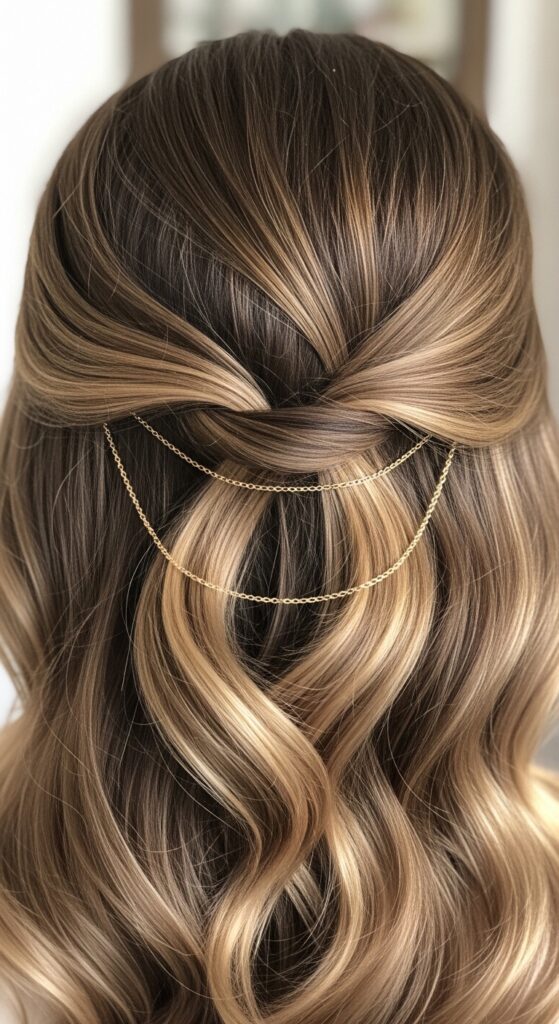
Accessorizing This Look
This hairstyle is a statement on its own, but a little sparkle never hurt. The key is to keep accessories minimal and elegant to match that “quiet luxury” vibe.
A simple, delicate chain hair clip on the smaller side, or a single sparkling bobby pin to secure the part, is gorgeous. For a “romantic goth” twist, try a dark velvet ribbon or a delicate silver cuff.
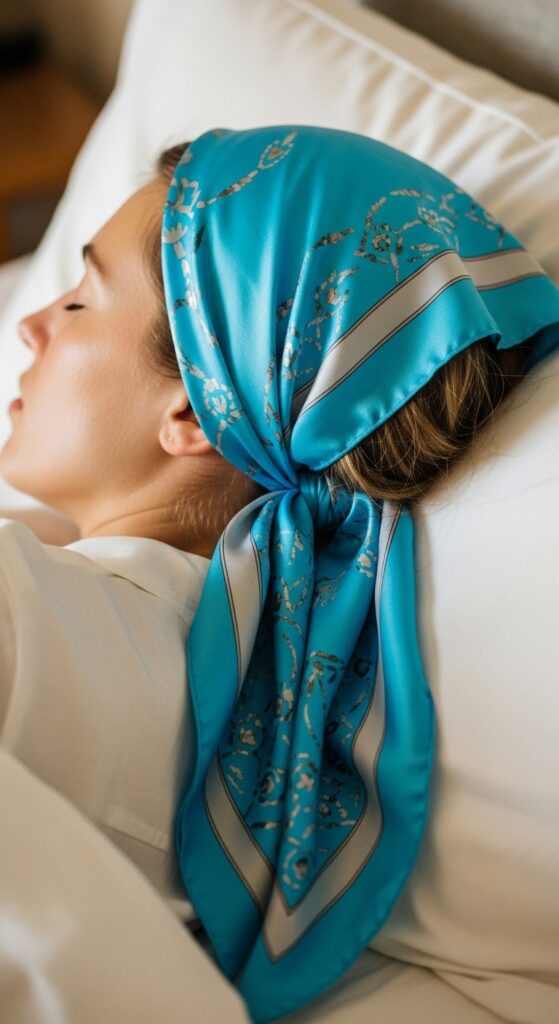
Day 2 Refresh: Making It Last
You worked hard on this style—make it last! Sleep with your hair in a loose, high ponytail or a silk scarf. In the morning, shake it out.
Spritz a mix of dry shampoo and water at the roots for volume, and use a curling wand to touch up any waves that have fallen, focusing on the front sections. A quick pass with the iron will revive the shape in minutes.
Common Mistakes & How to Avoid Them
Even pros make mistakes. Here are the big ones I see and how to fix them fast.
- Part is Crooked: Use the tail comb and measure twice. A crooked part ruins the balance.
- Waves Are Too Tight: Use a larger barrel iron and hold for less time. Always break up the curls.
- Lack of Volume: Don’t skip the root lift step! It’s essential for the drama.
Adapting For an Asymmetrical Lob
If you have a chic asymmetrical lob, this style is a dream. Follow all the same steps. The deep part will emphasize the angular cut of your lob beautifully.
You may need to curl the shorter back pieces with a smaller wand to integrate them into the wave pattern. The result is a very modern, architectural take on the classic wave.
From Day to Night: Amp It Up
This style transitions perfectly. For day, keep it soft and brushed out. For night, you have options to really lean into the drama.
Add a deeper side part by moving it another centimeter over. Use a shine spray for a glossier, wetter look. Or, pin back the smaller side completely with a stunning embellished clip for serious old Hollywood vibes.
Why This Fits 2026 Hairstyle Trends
Looking ahead to 2026 hairstyles, we’re seeing a move towards intentional, personality-driven hair. This look fits right in. It’s not chaotic “glitchy glam hair,” but it has that same high-drama intention.
It combines the polish of “old money hair” with the sensual feel of “romantic goth hairstyles.” It’s a style with a point of view, which is exactly where hair trends are headed.
Your Final Confidence Check
Before you walk out the door, do your final check. Look at your hair from the front, sides, and back. Is the volume balanced? Are the waves soft and blended?
Remember, this style is meant to feel a bit dramatic and luxurious. Own it. Stand up straight, toss your hair just a little, and get ready for the compliments. You’ve earned them.
And there you have it—your complete guide to mastering one of the most elegant, head-turning styles out there. It might take one or two tries to get the part and the wave rhythm just right, but once you do, it’ll become a go-to in your beauty arsenal for years to come.
Remember, the best hairstyles are the ones that make you feel like the most confident version of yourself. This one, with its beautiful balance of polish and passion, definitely does that.
Save this post to Pinterest so you always have the steps handy! And tell me in the comments—what’s your go-to dramatic hairstyle for a big night out? Can’t wait to hear your favorites.
XOXO, Hailey & Team