Teasing Hair Correctly: How to Backcomb Without Damage
We’ve all seen it—the iconic, gravity-defying volume of a 60s beehive, the rock-and-roll texture of a modern punk style, or the subtle, face-framing lift of a red-carpet updo. At the heart of these legendary looks lies a technique both revered and feared: teasing, or as it’s more commonly known, backcombing. For decades, it has been the beauty world’s ultimate double-edged sword. It promises unparalleled volume and hold but often at a terrifying cost: tangles, breakage, and a painful detangling process that can leave you swearing off the practice for good.
But what if we told you that the problem was never the technique itself, but how it was executed? The truth is, when done correctly, teasing doesn’t have to be a destructive act. It can be a precise, gentle method for building body and texture without sacrificing the health of your hair. This guide is your roadmap to mastering that art. We’re diving deep into the world of damage-free backcombing, debunking old myths, and replacing them with professional secrets that deliver stunning volume you can feel good about. Get ready to unlock the full potential of your hair, the safe way.
Why Traditional Backcombing Gets a Bad Rap
To understand how to tease hair correctly, it’s crucial to first understand what goes wrong with the traditional method. Many of us learned to backcomb by grabbing a section of hair, holding it straight up, and vigorously rubbing a comb from the mid-shaft down to the roots. This aggressive, haphazard approach is where the damage occurs.
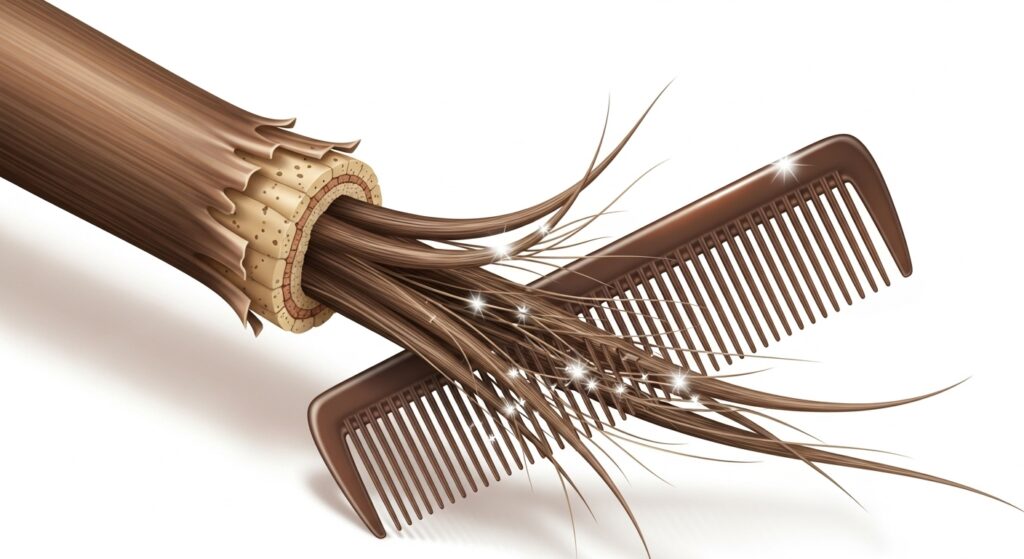
The hair shaft is protected by a layer of cuticles, which resemble shingles on a roof. When you comb *against* the natural direction of these cuticles with excessive force, you’re essentially lifting and scraping them. This weakens the hair’s structural integrity, leading to split ends, breakage, and a frayed, frizzy appearance. The resulting tangles are not just knots; they are a web of damaged, interlocked cuticles that resist being smoothed back down. Forcing a brush through this mess only compounds the problem, snapping the weakened strands and causing significant hair loss over time. It’s a cycle of creation and destruction that has rightfully made many wary of the technique.
The Golden Rules for Damage-Free Teasing
Before you even pick up a comb, you need to internalize the core principles of safe backcombing. This isn’t about brute force; it’s about strategy and finesse.
Preparation is Non-Negotiable: Never, ever tease bone-dry, freshly washed hair. Hair is at its most vulnerable when it’s clean and dry, as it lacks the natural oils that provide slip and protection. The ideal canvas is hair that is one or two days old, or hair that has been prepped with a texturizing or volumizing product.
Product is Your Best Friend: Using the right products creates a protective barrier on the hair shaft, adds grit for the tease to hold onto, and makes the detangling process infinitely easier. A light-hold hairspray, texturizing spray, or volumizing mousse applied before you start is essential.
Direction is Everything: The goal is not to create a bird’s nest. It’s to create a delicate latticework of hair that supports itself. This requires working in controlled, vertical sections rather than horizontal chunks.
Tool Mastery: Ditch the fine-toothed comb for teasing. The right tool makes all the difference in distributing pressure and minimizing stress on the hair.
Your Toolkit: Choosing the Right Products and Tools
Gathering the right arsenal is half the battle won. Using subpar tools is a direct ticket to Damage City.
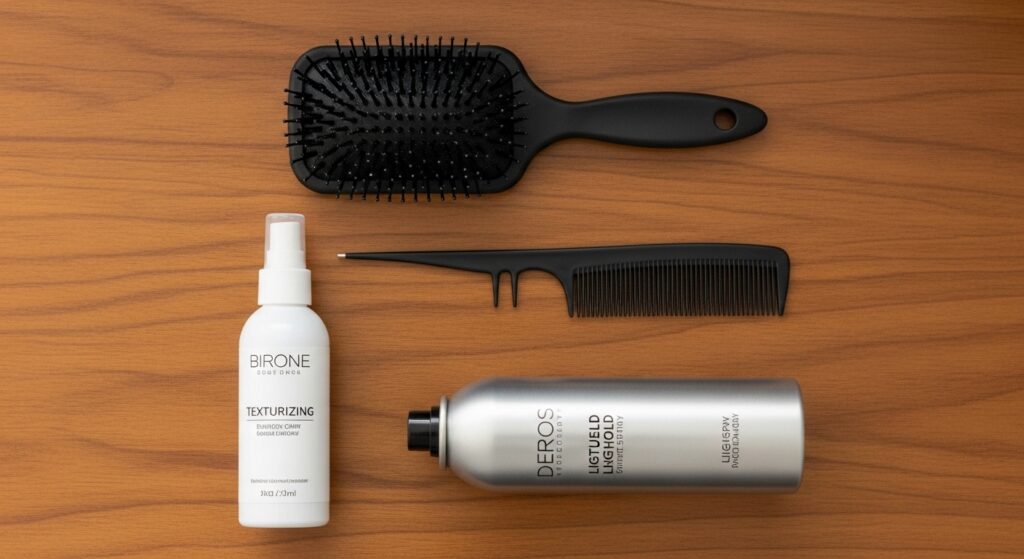
The Teasing Comb: The star of the show should be a rat-tail comb with a mix of wide and fine teeth. The fine teeth are for the actual teasing, while the wide teeth help section the hair without causing static or breakage. The long, pointed tail is perfect for creating clean, precise parts. Avoid combs with sharp, rough seams on the teeth.
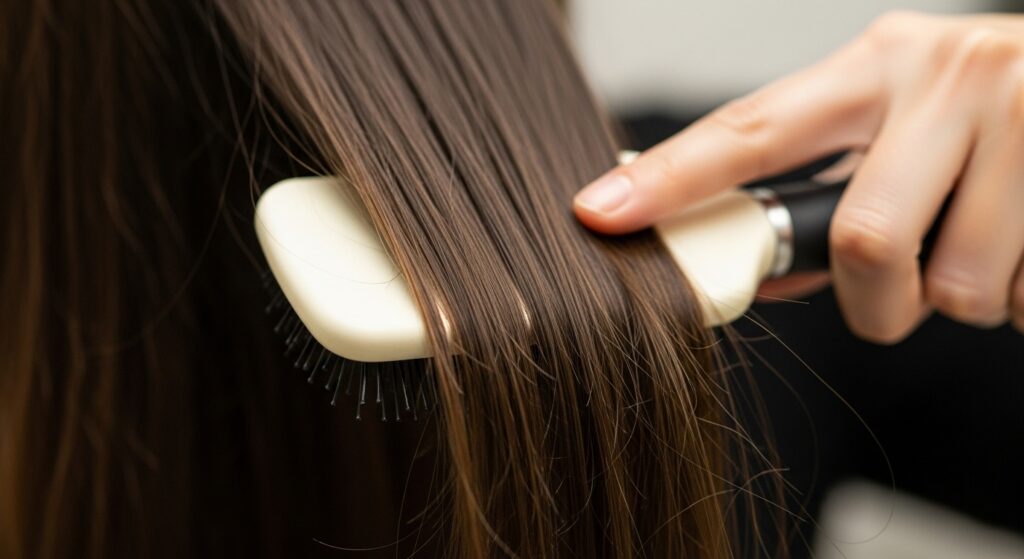
The Detangling Brush: For taking the tease out, a high-quality brush is critical. A paddle brush with flexible, ball-tipped bristles and a cushioned base is ideal. The ball tips glide through knots without snagging, and the cushioning adapts to the shape of your head, providing even pressure. A trusted boar bristle brush is also excellent for gently smoothing the surface after detangling.
Product Powerhouses:
Texturizing Spray: This is arguably the most important product. It adds a slight grit and tackiness that gives the hair something to “grip” onto, meaning you need less physical teasing to achieve the same hold.
Light-Hold Hairspray: Used *before* teasing, a light-hold formula provides structure without making the hair stiff or impossible to brush out later. Avoid heavy, super-hold formulas at this stage.
Dry Shampoo: A fantastic alternative for adding texture and absorbing oils on second-day hair, creating the perfect base for backcombing.
Heat Protectant: If you style with hot tools before or after teasing, a heat protectant is mandatory to shield your hair from thermal damage.
The Step-by-Step Technique for Flawless, Safe Backcombing
Now for the main event. Follow these steps meticulously for volume that lasts all day and brushes out without a trace.
Step 1: Prep and Protect. Start with day-old hair or spray dry hair with a texturizing spray from roots to mid-lengths. If using hairspray, mist it lightly onto the sections you plan to tease. This is your foundation.
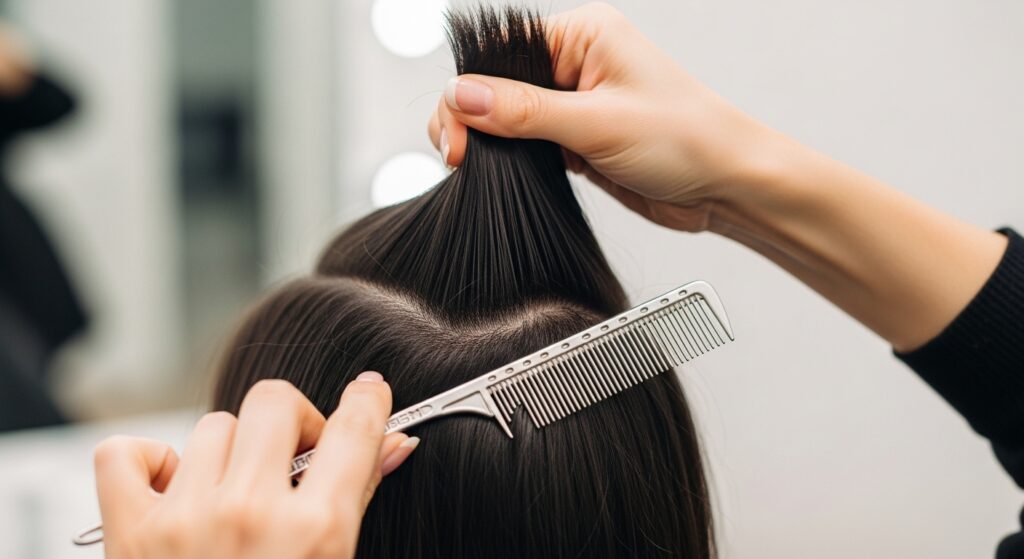
Step 2: Section with Purpose. Using the tail of your rat-tail comb, isolate a top section of hair (about the area you want to have volume) and clip the rest away. From this top section, take a horizontal, one-inch-thick layer. This is your first working section. Smooth the top layer of hair and clip it up and out of the way—you will be teasing the under-layers first.
Step 3: The Gentle Tease. Hold the one-inch section straight up and away from your head. Tension is key. With your rat-tail comb, place the teeth about two to three inches from your scalp. Now, using short, gentle, *pressing* strokes (not aggressive yanking motions), push the comb down *towards* your scalp about an inch. You should feel a slight resistance as the hair gently tangles around itself.
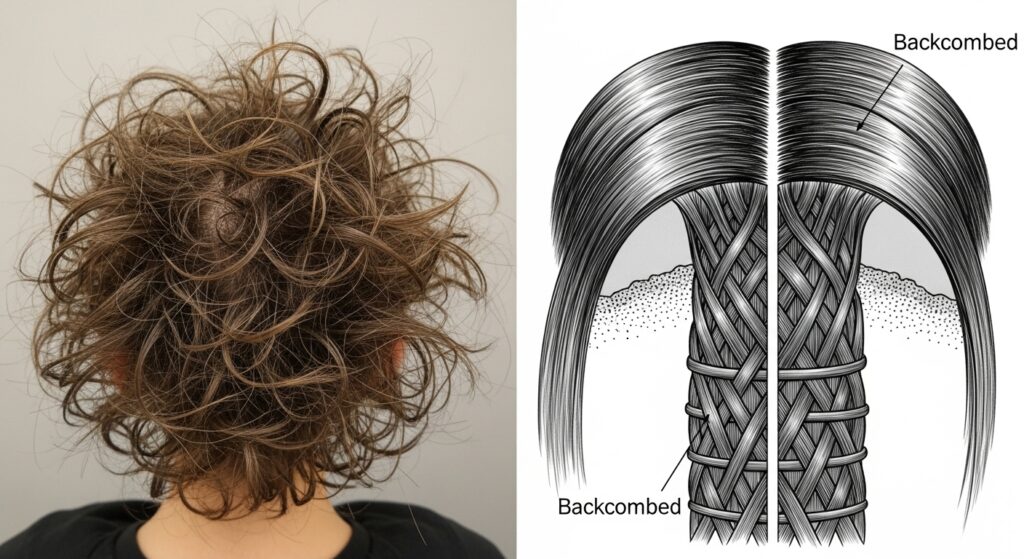
Step 4: Build the Structure. Release the section. You’ll see a small bump of volume at the root. Now, move your comb up another inch and repeat the same gentle, pressing stroke downward. Continue this process, working your way up the section until you are teasing just the final inch at the roots. This layered approach builds a stable, internal structure.
Step 5: Repeat and Layer. Release another thin, one-inch section from your clipped-up hair. Repeat the teasing process on this new section, working directly behind or below the first teased section. This layering effect is what creates incredible, lasting volume. Continue until all the under-layers in your top section are teased.
Step 6: Smooth the Surface. This is the magic step. Gently unclip the top, smooth layer of hair. Using a paddle brush or a wide-tooth comb, *lightly* brush *only* the very surface of this top layer, smoothing it over the teased foundation beneath. Do not drag the brush through the teased under-layers. You can pin this top layer lightly in place if needed.
Step 7: Final Lock. Hold a light-hold hairspray about 10 inches away and mist the entire style, focusing on the roots beneath the smooth top layer. For extra hold, you can also spray a little directly onto the teased sections before smoothing the top layer over them.
How to Gently Remove Teasing Without Breakage
How you take the style out is just as important as how you put it in. The “rip and tear” method is forbidden here.
Start by applying a lightweight detangling spray or a small amount of hair oil *only* to the mid-lengths and ends of your hair. This provides crucial slip. Using your paddle brush, start detangling from the very *ends* of your hair. Work in small sections, gently brushing out any knots at the tips. Once the ends are smooth, move the brush up a few inches and repeat, working your way slowly and methodically *up* to the roots. This gradual process ensures you aren’t forcing a large knot down the length of the hair shaft, which is a primary cause of breakage. Be patient—it should take a few minutes. Once all tangles are out, you can proceed with your regular washing or styling routine.
Common Backcombing Mistakes to Avoid at All Costs
Steer clear of these pitfalls to keep your hair healthy and your volume impeccable.
Teasing the Entire Length: You only need to tease from the mid-shaft to the root. Teasing the ends will destroy them, creating a frizzy, frayed mess.
Using a Dirty Brush or Comb: Old product buildup on your tools creates friction and snagging. Clean your brushes regularly.
Backcombing Wet Hair: Hair is incredibly elastic and vulnerable when wet. Teasing it in this state stretches it beyond its limits and can cause permanent damage.
Over-Teasing One Section: More is not always better. Repeatedly combing the same tiny spot creates an impossible knot. It’s better to have multiple, lightly teased layers supporting each other.
Brushing Out Roughly: As emphasized, always detangle from the ends up. Starting at the roots is a recipe for disaster.
Conclusion: Volume and Health Can Coexist
Teasing your hair doesn’t have to be a choice between dramatic style and hair health. By abandoning the aggressive, outdated techniques and embracing this methodical, gentle approach, you can achieve the breathtaking volume you desire while keeping your strands strong, smooth, and intact. It’s a shift in mindset—from seeing backcombing as a act of force to viewing it as an art of strategic building. Armed with the right knowledge, tools, and a little patience, you can confidently add this classic technique to your styling repertoire. So go ahead, lift, volume, and conquer—your hair will thank you for it.