The Sock Bun: Volume Without Teasing
Let’s be honest: we all crave that gorgeous, voluminous hair that looks like it belongs on a movie set. But the traditional methods to get there—backcombing, aggressive teasing, and high-heat styling—often leave our hair feeling brittle, looking frayed, and crying out for help. What if we told you there’s a legendary, almost magical technique that gives you breathtaking volume, beautiful waves, and a chic updo, all without a single tug of a teasing comb? Enter the humble, ingenious sock bun.
This isn’t a new gimmick; it’s a time-tested hack that hairstylists and savvy beauty lovers have relied on for decades. It’s the ultimate heatless, damage-free method to create the illusion of thick, abundant hair. Whether you have fine, thin strands or thick hair that needs a bit of oomph, the sock bun is a game-changer. In this guide, we’ll walk you through everything you need to know to master this technique and finally achieve the volume of your dreams—the healthy way.
Why the Sock Bun is a Volume Miracle Worker
At its core, the sock bun is a form of heatless styling. The principle is simple: you use a donut-shaped form (in this case, crafted from a sock) as a base to wrap your hair around. This creates an instantly lifted, full bun. But the real magic happens when you take it down. By wrapping your hair smoothly around the form and allowing it to set (often overnight), you train your hair to hold a lifted root and a cascading wave pattern from mid-lengths to ends.
Unlike teasing, which roughs up the hair cuticle to create friction and hold, the sock bun relies on tension and setting. This means zero physical damage to your hair shafts. You’re not breaking strands with a comb; you’re gently encouraging them into a new shape. The result is volume that looks polished and healthy, not frizzy and damaged. It’s a protective style that doubles as a styling tool, making it a perfect choice for anyone on a hair health journey.
Gathering Your Tools: It’s Simpler Than You Think
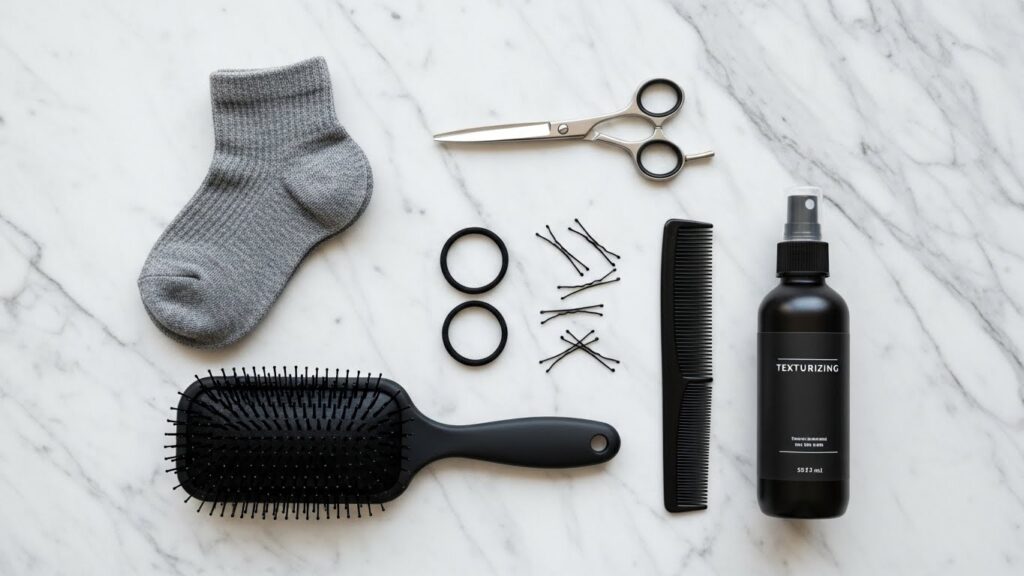
One of the best things about this technique is its accessibility. You likely have everything you need already at home. Here’s your essential toolkit:
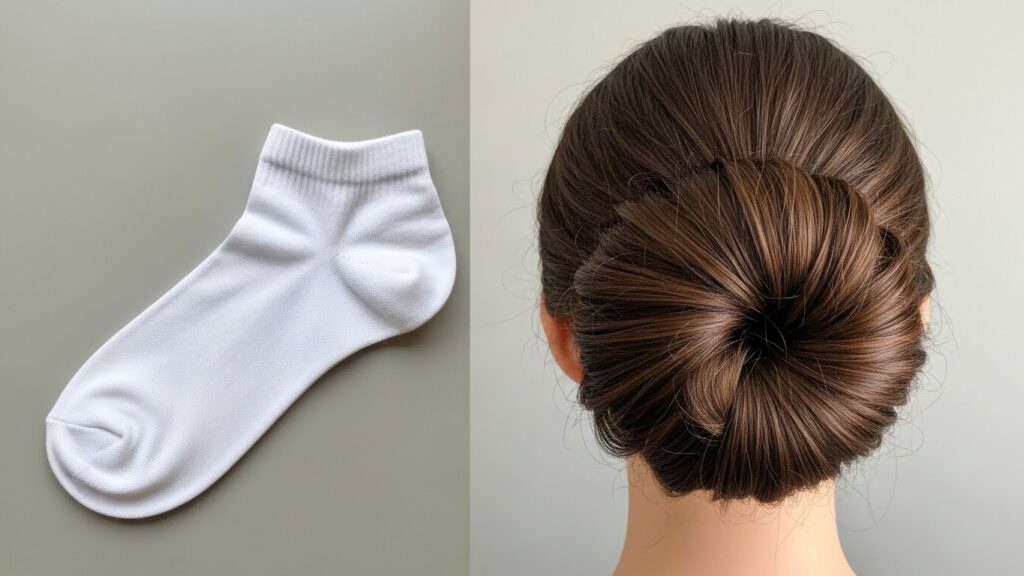
1. The Sock: A clean, ankle-length sock is ideal. Cotton or a cotton blend works best. The color doesn’t matter much, but choose one that somewhat matches your hair color if you’re worried about it peeking through thin hair.
2. Scissors: To create the “donut.”
3. A Brush and Comb: A brush for smoothing and a tail comb for clean partings.
4. Hair Ties: At least two: one to make a ponytail and one to secure the sock.
5. Styling Products (Optional): A light-hold mousse or texturizing spray on damp hair can enhance wave definition. A bit of hairspray or serum on dry hair can help with flyaways before you start.
6. Bobby Pins: Essential for securing the ends and hiding any evidence.
Step-by-Step: Crafting Your Sock Bun and Voluminous Waves
Now for the main event. Follow these steps carefully for a flawless, voluminous result.
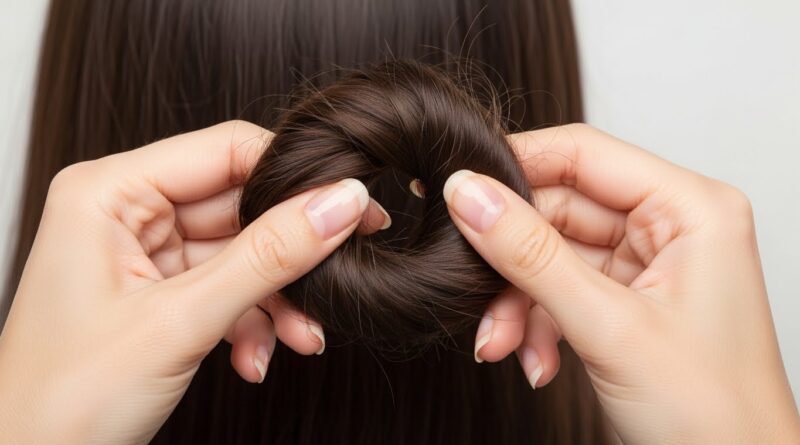
Step 1: Create the Sock Donut. Take your clean sock and start rolling it from the toes end towards the cuff. Keep rolling until you have a continuous, doughnut-like ring. Tuck the remaining cuff into the center of the roll to secure it. You now have your styling tool!
Step 2: Prep Your Hair. For the best wave results, start with damp, towel-dried hair or second-day hair with a bit of texture spray. If your hair is slippery, a light mousse can provide grip. Brush through to eliminate any tangles.
Step 3: Secure the Ponytail. Decide where you want your volume. For maximum lift, gather your hair into a high ponytail at the crown of your head. For a more relaxed, lower volume, opt for a ponytail at the nape of your neck. Use a hair tie to secure it firmly. For even more root volume, gently pull on the hair just above the tie to loosen it slightly from your scalp.
Step 4: Place the Sock Donut. Slide the sock donut over the ponytail, pushing it all the way down to the base, right against your head. Your ponytail should now be sticking up through the center of the donut.
Step 5: Wrap and Distribute. This is the key step. Separate your ponytail so it evenly surrounds the sock donut. Then, starting at the ends, begin wrapping the hair around the sock, covering it completely. As you wrap, the sock will roll naturally down the base of your ponytail. Keep the hair smooth and even as you go.
Step 6: Secure the Bun. Once all your hair is wrapped and the sock is covered, you’ll have a perfect, full bun. Use a second hair tie to secure the bun around the circumference. Tuck any loose ends under the bun and pin them securely with bobby pins. For a polished look, use the tail comb to gently smooth any baby hairs around your face.
Step 7: The Setting Period. For an updo, you’re done! For voluminous waves, you need to let it set. Leave the bun in for several hours, ideally overnight. Sleep on a satin pillowcase to prevent friction if leaving it in overnight.
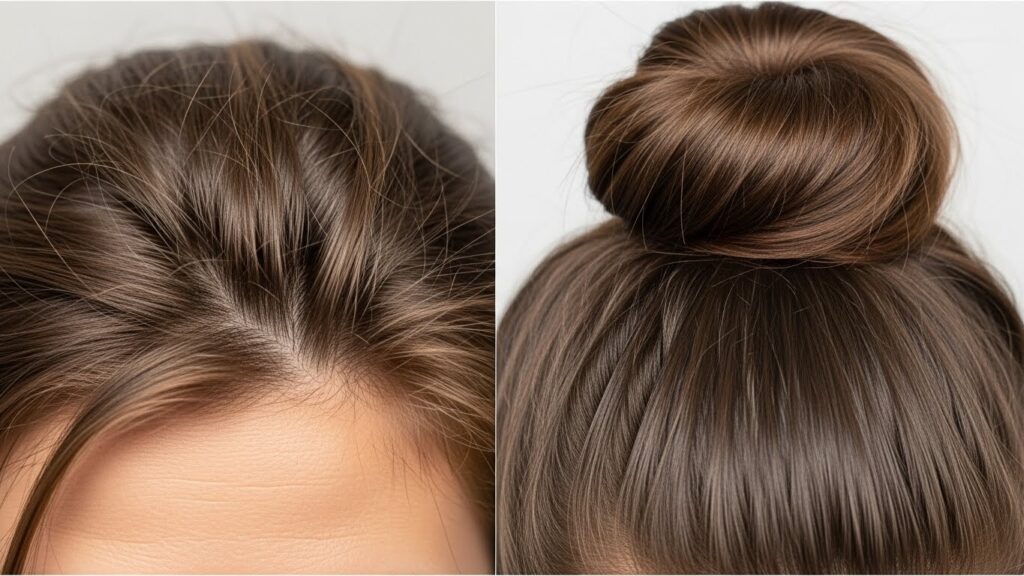
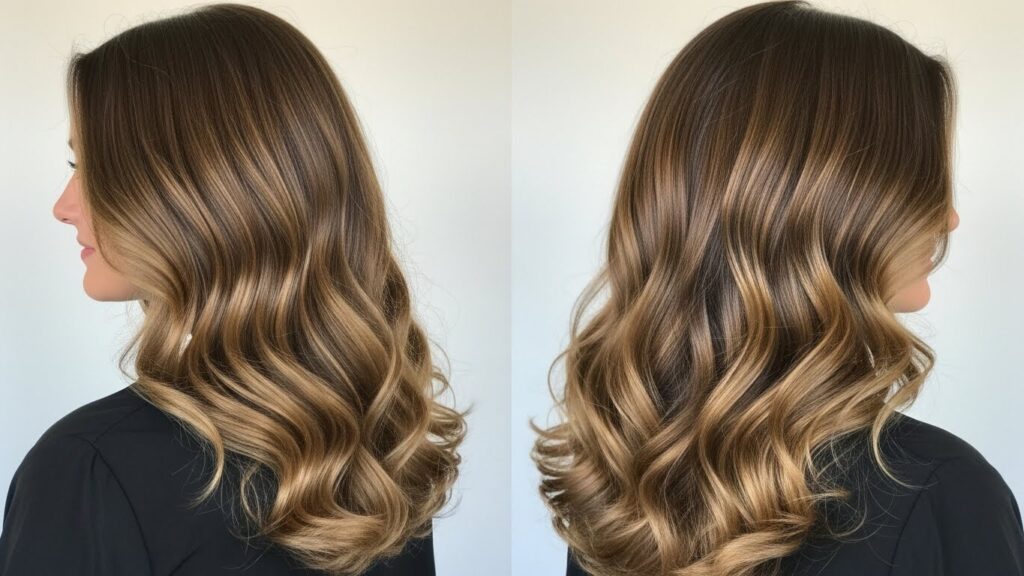
Step 8: The Grand Reveal. Gently remove the hair ties and carefully slide the sock bun out. Do not brush! Simply use your fingers to tousle the waves starting from the ends, working upward. You’ll see incredible volume at the roots and beautiful, uniform waves. Finish with a light mist of flexible-hold hairspray to set the look.
Pro Tips for Next-Level Sock Bun Success
To truly master this technique and adapt it to your unique hair, keep these expert tips in mind:
For Fine or Thin Hair: Use a smaller, thinner sock (like a child’s sock or a knee-high) to create a donut that’s proportional. Backcombing the ponytail very lightly before placing the donut can add extra grip and fullness, but be gentle. You can also try the method on dry hair with texturizing spray for more hold.
For Thick or Long Hair: A standard ankle sock works perfectly. Ensure your hair is evenly distributed around the donut to avoid a lopsided bun. You may need extra bobby pins to secure all the ends.
Maximizing Root Volume: The height of your ponytail is crucial. The higher the ponytail, the more dramatic the root lift. When you take the bun down, flip your head over and gently massage the roots with your fingertips for even more lift.
Wave Variation: For tighter waves, start with damp hair and use a smaller sock donut. For looser, beachy waves, use a larger donut on dry or second-day hair.
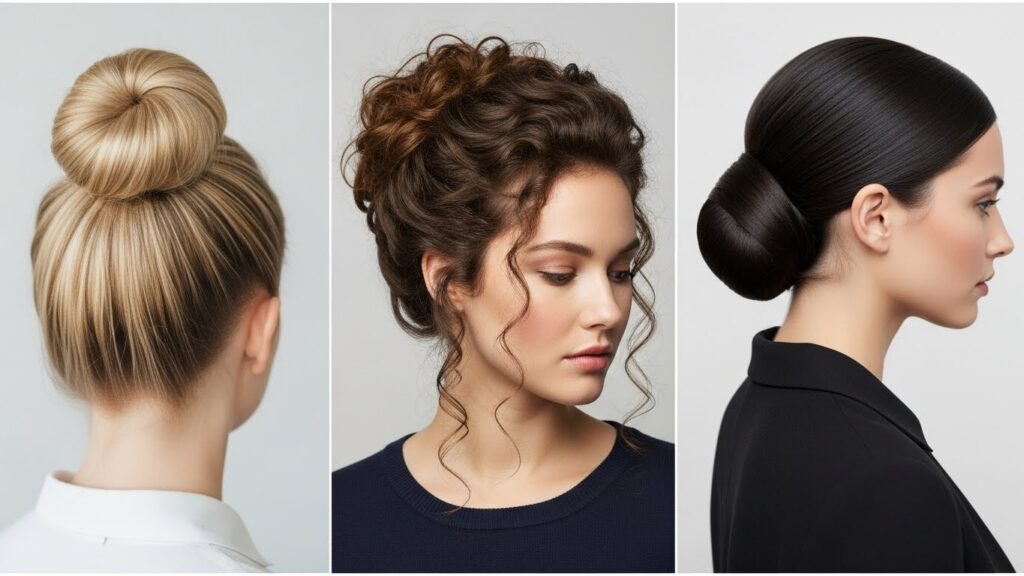
Beyond the Bun: Other Uses for Your Sock Donut
Your new sock donut tool isn’t a one-trick pony. Once you’ve mastered the classic, try these variations:
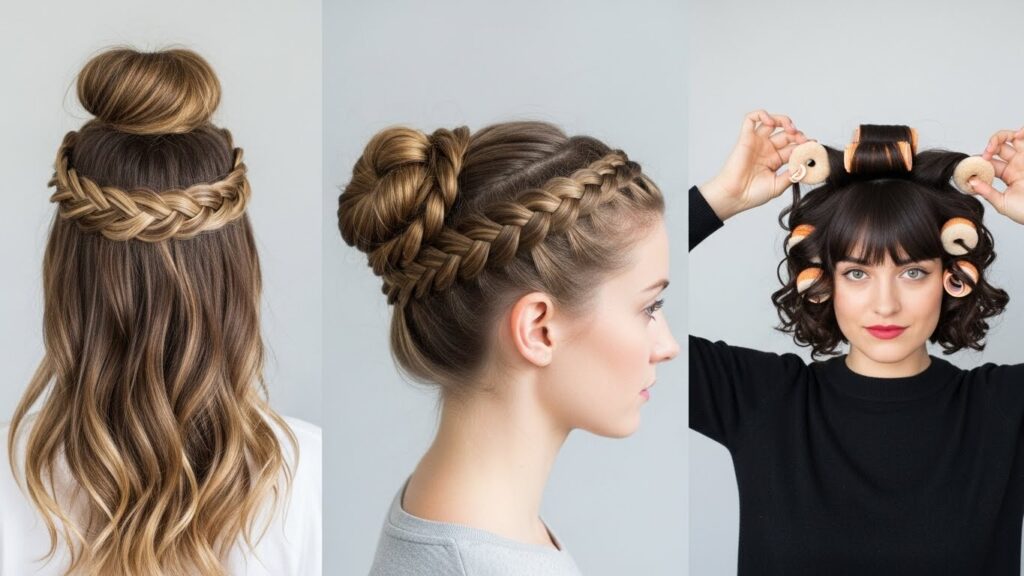
The Half-Up Crown: Create a half-up ponytail high on the back of your crown, place the donut, and wrap only the half-up section for a regal, voluminous half-up style.
Braided Sock Bun: Braid your ponytail before wrapping it around the donut for a beautiful, textured, and intricate-looking bun.
No-Heat Curls for Short Hair: If you have shorter hair that won’t fit in a ponytail, you can create small sections, wrap them around individual, smaller sock rings, and pin them flat against your head overnight for gorgeous, voluminous curls.
Embrace the Volume, Ditch the Damage
The sock bun is more than just a clever beauty hack; it’s a testament to the power of gentle, intelligent styling. In a world of high-heat tools and aggressive techniques, it offers a sanctuary for your hair’s health while delivering stunning, red-carpet-worthy results. It proves that you don’t have to sacrifice the integrity of your hair for the sake of style.
So, raid your sock drawer, grab a spare, and give it a try. With a little practice, you’ll unlock a world of volume, beautiful waves, and elegant updos—all from an item that probably cost you just a few dollars. Your hair will look fuller, feel healthier, and thank you for the break from the teasing comb and the flat iron. Here’s to big, beautiful hair, achieved the smart way.