Toddler-Approved Mom Braids Hacks for Daily Sanity
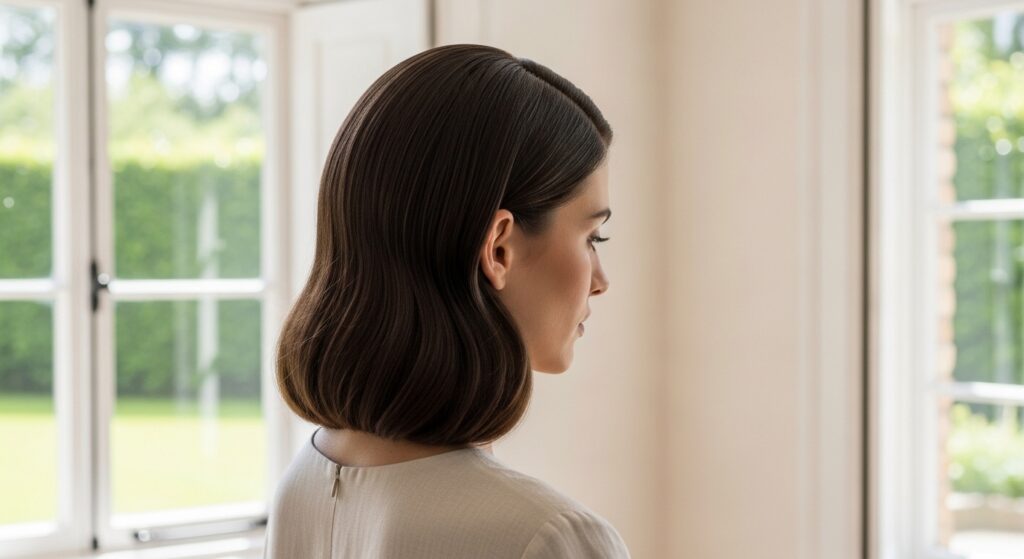
Let’s be real for a second. The morning routine with a toddler is less “quiet luxury” and more “glitchy glam” in the most chaotic way possible. You’re trying to look halfway put-together while someone is using your leg as a climbing gym. I get it. The dream of a perfect asymmetrical lob or an intricate hime cut fades fast when you have approximately 90 seconds to do your own hair.
That’s where these mom braids come in. They’re not about achieving 2026 hairstyles before anyone else. They’re about sanity. They’re quick, they keep the hair out of both your face and grabby little hands, and honestly, they can make you feel like you’ve got your life together.
This is your no-judgment zone for simple, toddler-approved braiding hacks. We’re talking real life, messy buns, and tricks that actually work when you’re operating on half-sleep. Let’s reclaim those few minutes for yourself.
The “One-Minute” Messy Mom Bun
This is my daily uniform. It’s faster than making a cup of coffee. The goal isn’t perfection; it’s “I tried” with maximum efficiency. The secret is in the texture.
If your hair is freshly washed and slippery, a spritz of texturizing spray or even a dab of hand cream rubbed on your palms and smoothed over the lengths makes all the difference. It gives your hair something to grip.
- Pull hair into a low ponytail at your nape.
- Twist the ponytail until it coils around itself.
- Wrap it into a bun and secure with a thick, coiled hair tie. Don’t worry about loose pieces.
- Gently pull a few soft pieces out around your face. This is the “I meant to do that” part.
The Side-Swept Rope Braid
This braid looks fancier than it is. It’s just two sections twisted around each other, but it holds like a champion and keeps all the hair contained on one side, away from sticky fingers. It’s a great way to add a touch of that romantic goth hairstyles vibe without any effort.
Start by brushing all your hair to one side. Split it into two even sections. Twist both sections clockwise, then twist them around each other counter-clockwise. The pre-twisting is what gives it that neat, rope-like look.
Secure the end with a clear elastic. For extra hold and a polished feel, you can gently tug on the outer loops of the braid to make it look fuller and more intentional.
The “No-Tug” Milkmaid Braids

Regular pigtail braids get pulled. A single braid gets climbed on. The milkmaid style takes the braids and tucks them up and out of the way. It’s surprisingly comfortable and gives you a sweet, practical look.
Create two simple braids, one on each side. Make them looser than you think. A tight braid will give you a headache by naptime. Pull them gently to loosen and create a softer look.
Take the right braid, bring it across the top of your head, and secure it with bobby pins where it naturally rests. Do the same with the left braid, tucking the end under the first braid. No fancy crossing needed, just lay them flat and pin.
The Invisible Pony Hack
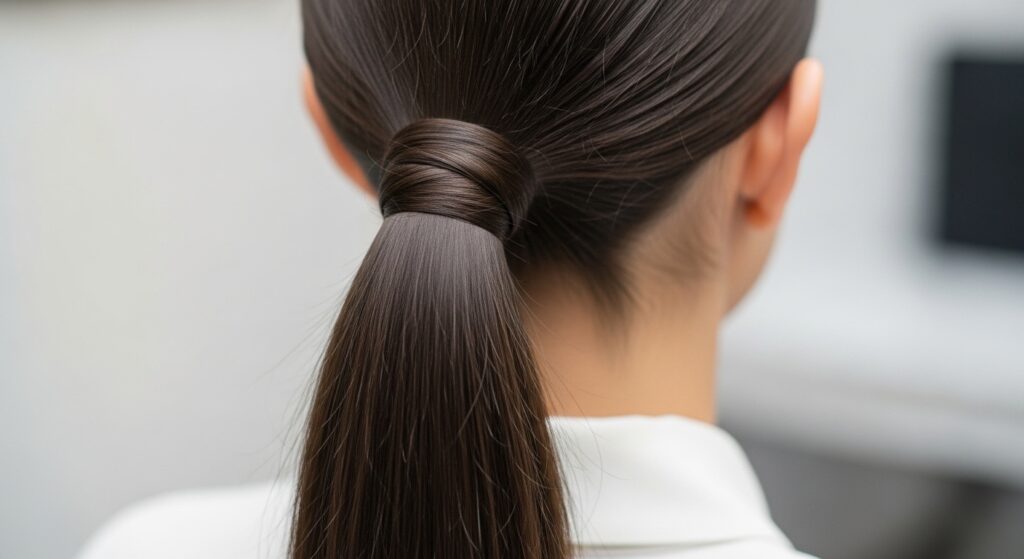
A ponytail is the ultimate mom hack, but the basic hair tie can look a bit… basic. This 10-second trick elevates it instantly. It gives off major old money hair energy—that polished, “I just threw this together” look we all secretly want.
After securing your ponytail, take a small, one-inch section of hair from underneath it. Wrap this section tightly around the base of the ponytail, covering the hair tie completely.
Tuck the end of this wrapping piece into the hair tie itself, or use a small bobby pin to secure it underneath the ponytail. It looks chic and prevents little fingers from easily pulling the tie out.
The Half-Up Top Knot
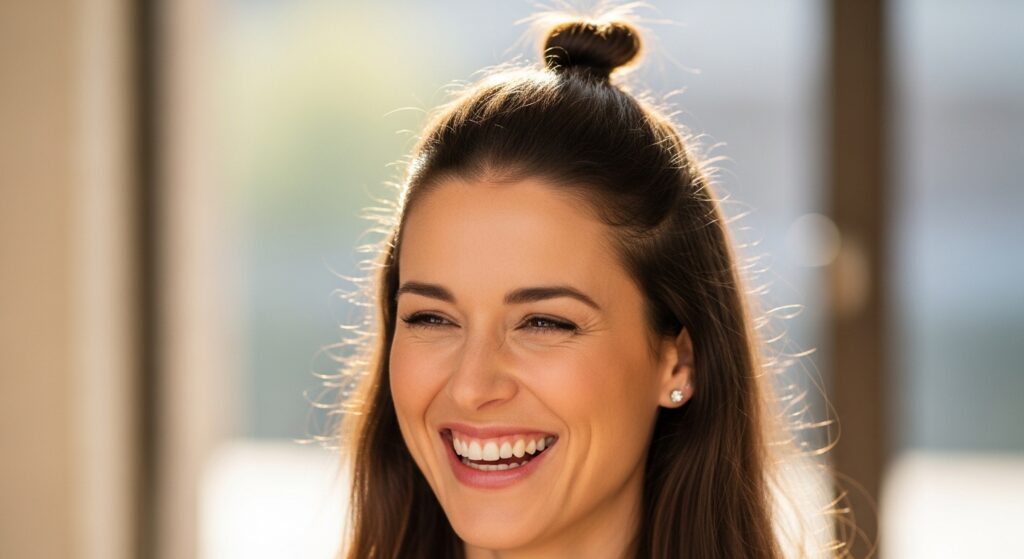
When you want to feel like your hair is “down” but need it completely off your face, this is the winner. It lifts your features and contains the most troublesome pieces. Think of it as the baby sister to the dramatic vampire haircut top knots—way more practical for the playground.
Gather only the hair from your temples and crown. Pull it up as if you’re making a tiny, high ponytail right on the top of your head. Twist it once and wrap it into a small bun.
Secure it with a small hair tie or a few bobby pins. Let the rest of your hair flow freely. This style keeps hair away from food, paint, and anything else your toddler decides to share.
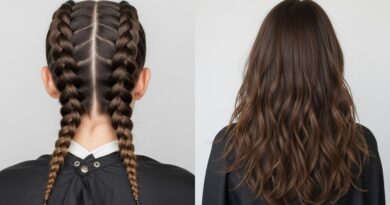
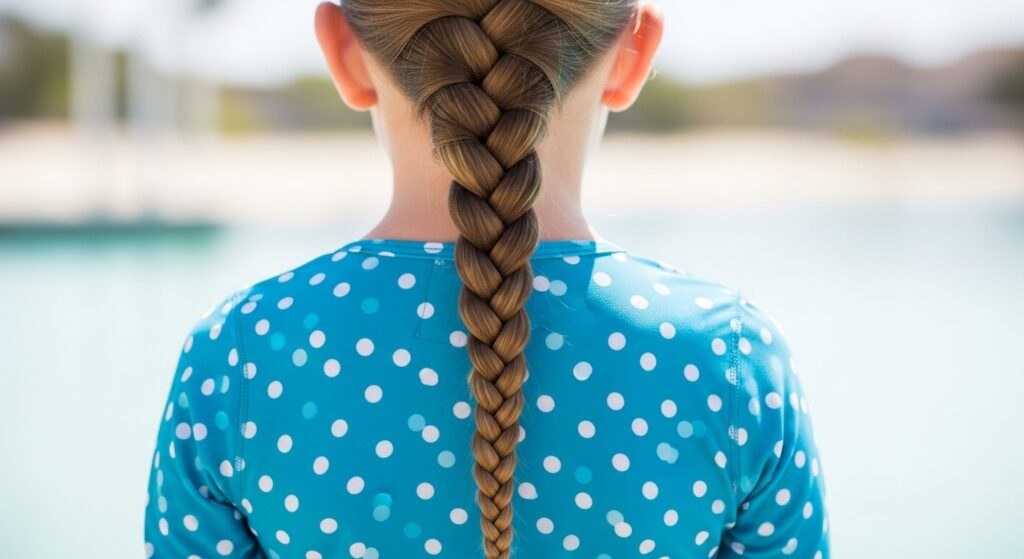
The Low-Impact French Braid
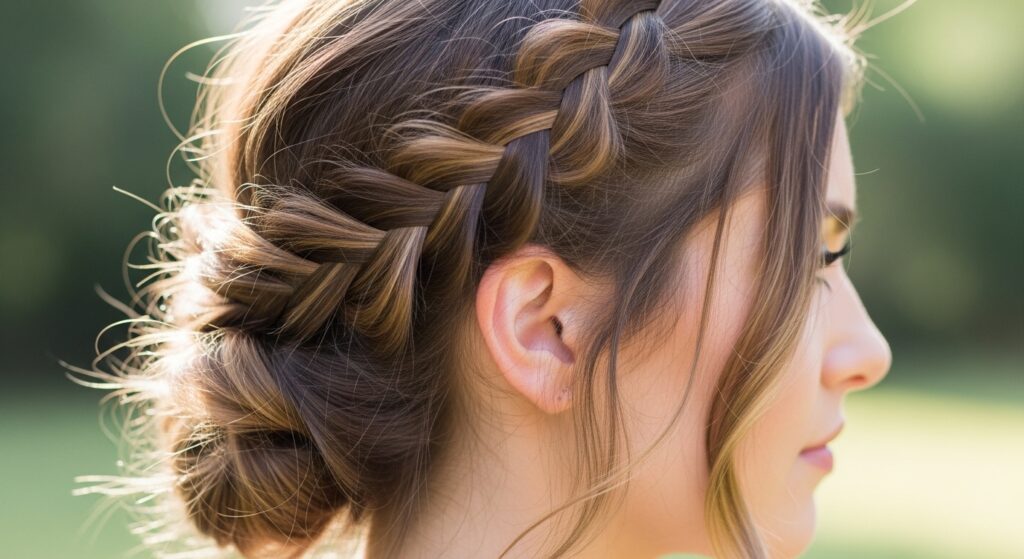
The word “French braid” can sound intimidating when you’re tired. Let’s reframe it: it’s just adding hair to a regular braid. This version starts at the side, so you don’t have to fight with the back of your head where you can’t see.
Start with a small section of hair by your temple. Divide it into three and begin a simple braid. After one or two crosses, start adding in small pieces of hair from the front only.
Continue braiding straight back along your hairline, adding hair only from the top section. Once you run out of hair to add, braid the rest normally and secure. It’s elegant, holds all day, and minimizes flyaways.
The Sleep-In Waves Trick

This is a hack for future you. On a day when you have a tiny bit of extra energy at night, do a simple style that gives you a free pass the next morning. It’s the ultimate in mom-level glitchy glam hair—beautifully undone texture without any heat.
Before bed, while your hair is slightly damp (or mist it with water), braid it into one or two loose braids. The looser the braid, the softer the wave. Use a silk scrunchie to prevent creases.
Sleep on it. In the morning, unravel the braids and run your fingers through the waves. Scrunch them gently. You’ll have perfect, heat-free texture that looks like you spent time, when you really just slept.
The Headband as a Savior

Never underestimate the power of a good headband. It’s a braid without the braiding. In two seconds, it pulls everything back, adds a pop of color or pattern, and looks incredibly intentional. It’s a key accessory for that quiet luxury bob aesthetic if you have shorter hair.
Choose a wide, fabric-covered headband for comfort and grip. Slip it on over your hair, then use your fingers to gently pull out a few pieces around your temples and ears to soften the look.
For second or third-day hair, it’s a lifesaver. It also helps absorb a bit of oil at the roots. Keep a few in your diaper bag for instant emergency hair fixes.
The “No-Braid” Twist Back
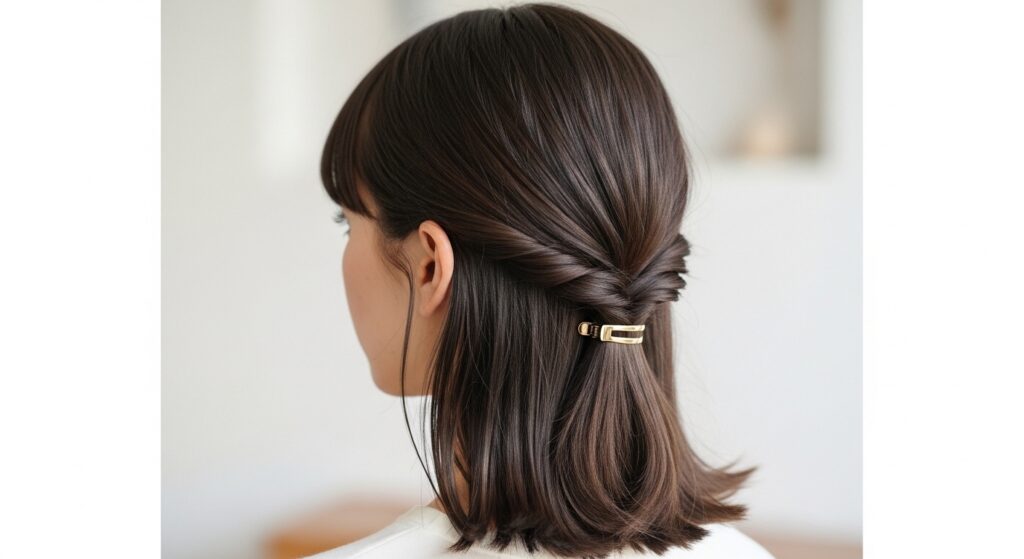
If braiding feels like too much coordination before coffee, this twist-back is for you. It uses the same principle as a French braid to clear your face but is much harder to mess up. It gives a clean, polished line.
Take a section of hair from each temple. Twist each section backwards, away from your face. As you twist, gently pull the sections to add a little tension.
Bring the two twisted sections together at the back of your head, about halfway down. Secure them together with one strong clip or a small hair tie. Let the rest of your hair hang free. Done.
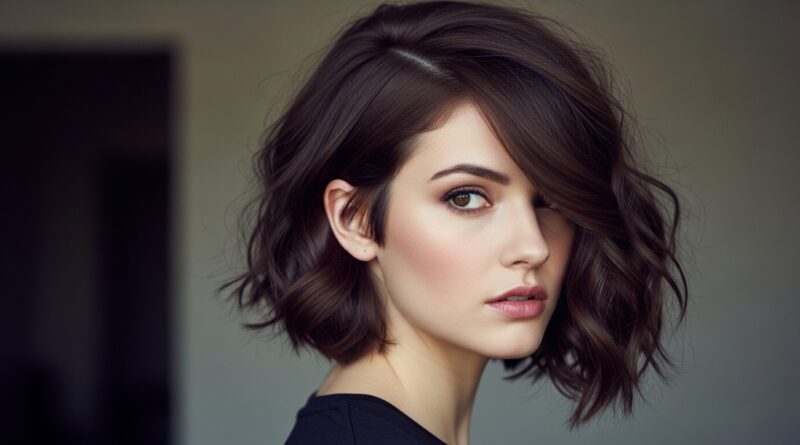
The Tucked-Under Bob Illusion
Have longer hair but crave the chic, clean feel of a quiet luxury bob? This hack gives you the look without the chop. It’s perfect for hot days or when you just want your hair off your neck completely.
Pull your hair into a low ponytail at the nape of your neck, but on your last loop of the hair tie, don’t pull the ends all the way through. You’ll create a small, tucked loop.
Fan out the loop to hide the hair tie, then use bobby pins to secure the tucked ends underneath the loop. From the front and sides, it looks like you have a beautiful, blunt bob.
The Quick-Release Pony for Naptime
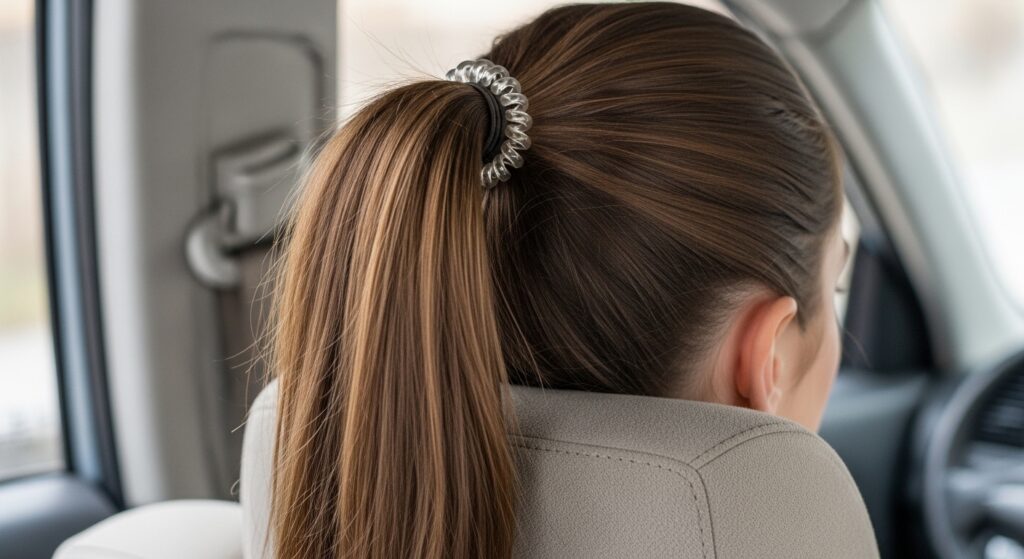
We’ve all been trapped by a high ponytail when we finally get to lean our head back. This is about choosing the right tools for comfort. The goal is a style that holds during play but releases tension for those precious quiet moments.
Use a spiral or coiled hair tie (the telephone cord kind). They provide hold without the tight, damaging pressure of a standard elastic. Make your ponytail a bit looser than usual.
Position it at the crown of your head, not too tight at the base. This allows you to rest your head without a painful knot pressing into your skull. It’s a tiny change with a huge comfort payoff.
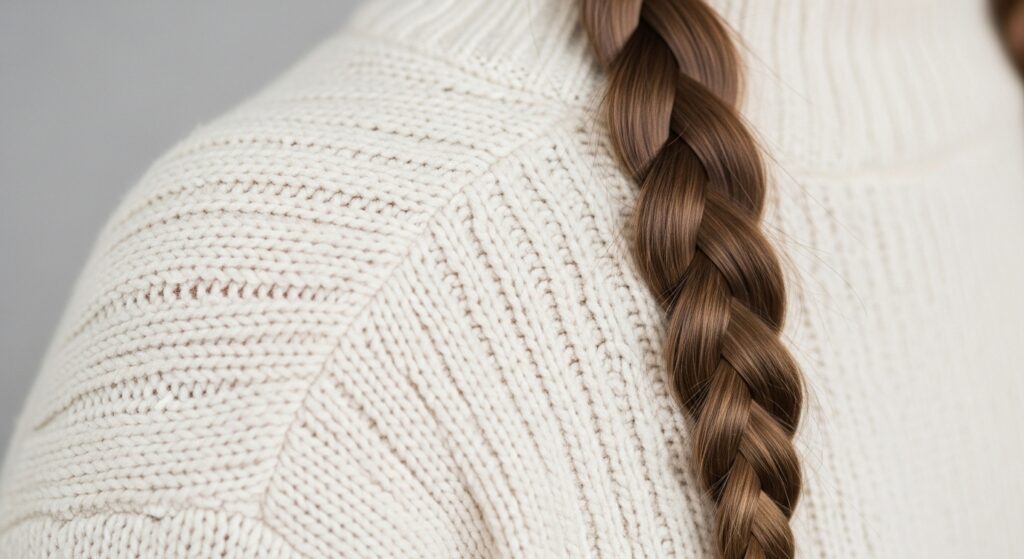
The “Hair Contained” Sleep Braid
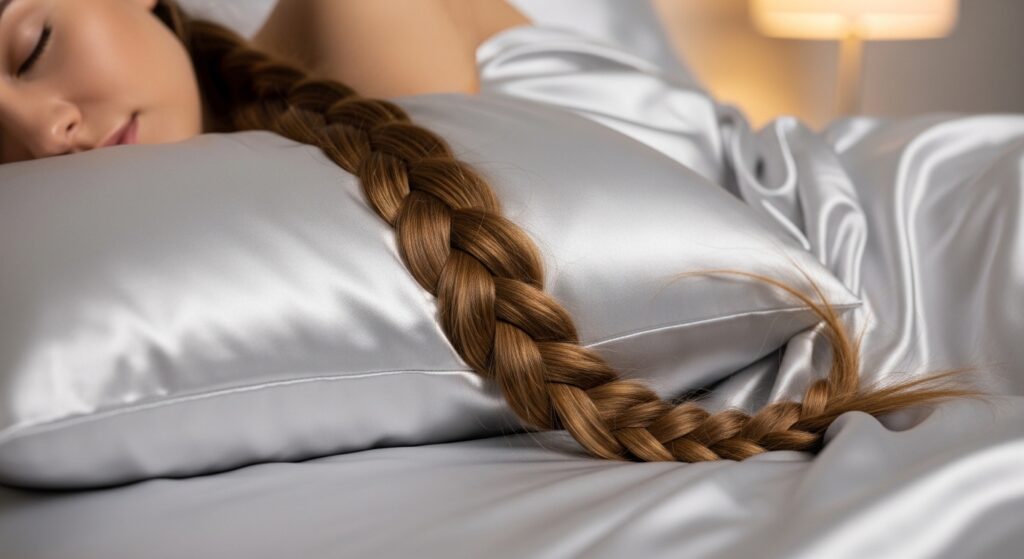
This isn’t just for you; it’s for your hair’s health. Sleeping with hair down leads to massive tangles, which leads to tears (yours) during morning brushing. A sleep braid prevents damage and gives you a head start on next-day waves.
Always braid it loose. A tight braid can cause stress on your hairline and be uncomfortable. A single, side braid is often easiest for sleeping.
Use a silk or satin scrunchie. It won’t crease your hair and reduces friction. This simple habit saves so much time and frustration in the morning detangling session.
The Clip-and-Go Chunky Clip Style
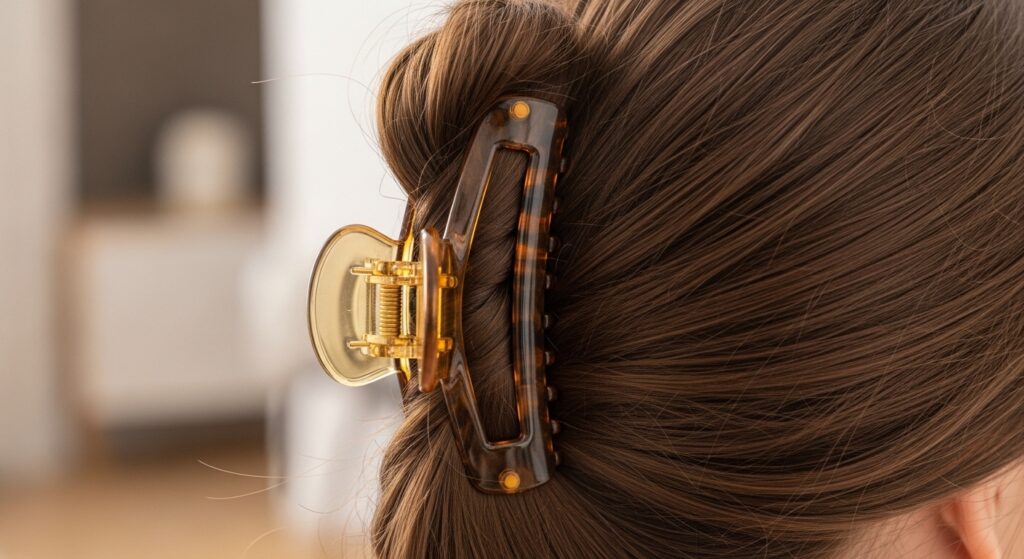
The claw clip is back and better than ever. It’s the fastest updo tool in our arsenal. The modern, large clips are strong enough to hold a lot of hair and instantly make you look like you know about 2026 hairstyles.
Gather your hair as if for a low ponytail. Twist the length of your hair once or twice. Fold the twisted hair up towards the crown, creating a loose, folded bundle.
Secure the entire bundle with a large claw clip, pushing it in from the side and snapping it shut. Pull out a few face-framing pieces. It’s secure, stylish, and takes literal seconds.
The Water-Friendly Pool Braid
Water play means tangles. This braid is designed to survive the splash zone with minimal repair needed later. It’s all about starting with sopping wet hair and braiding tightly.
Apply a leave-in conditioner or a detangling spray to wet hair. This provides slip and protection from chlorine or salt water. Comb it through thoroughly.
Braid it tightly, all the way to the ends, and secure with a tight elastic. You can even braid it into a bun if you want it completely off your neck. When it dries, you’ll have defined waves and no monster knots.
The “Dress It Up” Ribbon Braid
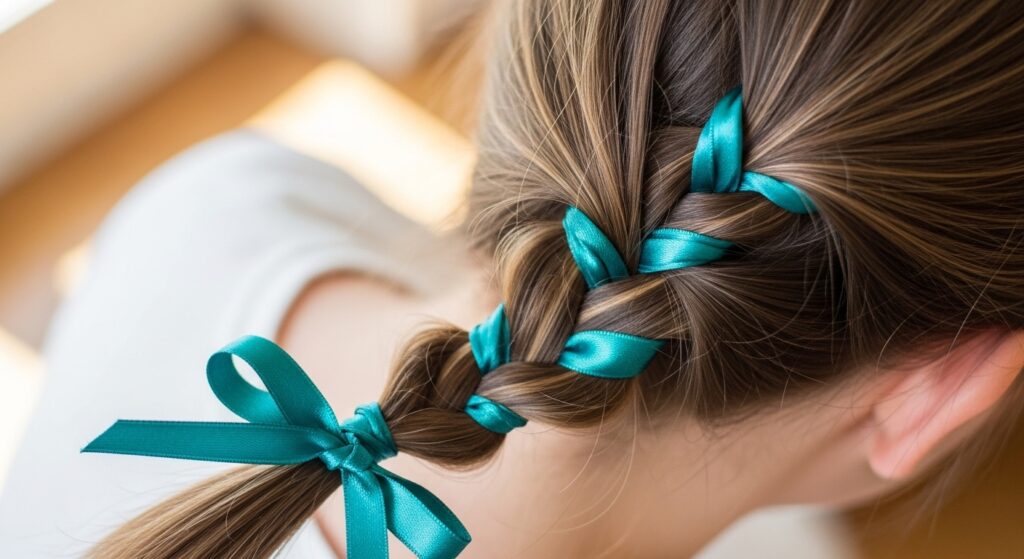
Got a birthday party or video call where you want to look extra? Add a ribbon. It transforms any basic braid into something special and taps right into the romantic goth hairstyles or cottagecore trend, depending on your ribbon choice.
Choose a long, thin ribbon. Start your braid (a simple three-strand or a ponytail braid works great), and incorporate the ribbon as one of the three strands.
Braid all the way down. Tie the end of the braid with the ribbon ends into a pretty bow. It’s a joyful, playful touch that makes you feel put-together instantly.
The Face-Framing Piece Strategy
This is a cut tip, not a styling tip, but it makes every single hack here look better. Ask your stylist for true, shorter face-framing layers. These are the pieces that make a messy bun look “styled” and a ponytail look polished.
These pieces should be cut to fall between your chin and collarbone. They frame your face, soften your features, and are the secret to that “I woke up like this” vibe.
No matter how you wear your hair—up, down, braided—these pieces automatically fall out and do their job. They’re the ultimate cheat code for looking like you tried.
The Dry Shampoo & Go Method
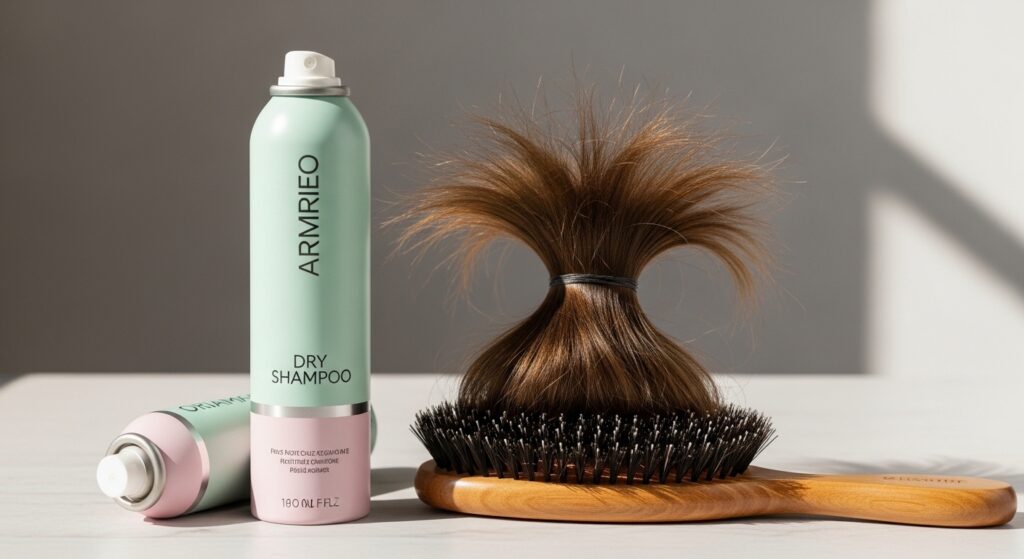
Dry shampoo isn’t just for absorbing oil; it’s your texture best friend. It gives “grip” to clean, slippery hair, making every braid and updo easier to create and longer lasting. It’s the foundation for glitchy glam hair texture.
Shake the can well. Spray it at the roots in short bursts, focusing on your crown and part. Don’t spray it on the lengths if you’re braiding—you just want that root lift.
Let it sit for a minute, then massage it in with your fingers or brush through. You’ll instantly have more volume and texture to work with, making your styles hold beautifully.
The Asymmetrical Side Part Switch
Changing your part is the fastest, zero-effort way to change your entire look and add volume. It feels fashion-forward, like you’re channeling an asymmetrical lob’s attitude, even if your hair is in a simple ponytail.
Use the end of a comb or your finger to create a deep side part. Go much further over than you normally would. The contrast creates automatic lift at the crown.
Style your hair as usual—ponytail, braid, down. The deep part will make it look fresher and more styled. It takes five seconds but has a huge impact.
The “Hair Jewelry” Minute
Accessorize your hack! A few well-placed pins can make a simple twist look like a salon style. It’s that old money hair trick—understated, elegant details that speak volumes.
After doing a simple style like the “No-Braid Twist Back” or a half-up knot, add 2-3 small, decorative hair pins. Place them where the twists meet, or use them to secure a stray piece in a pretty way