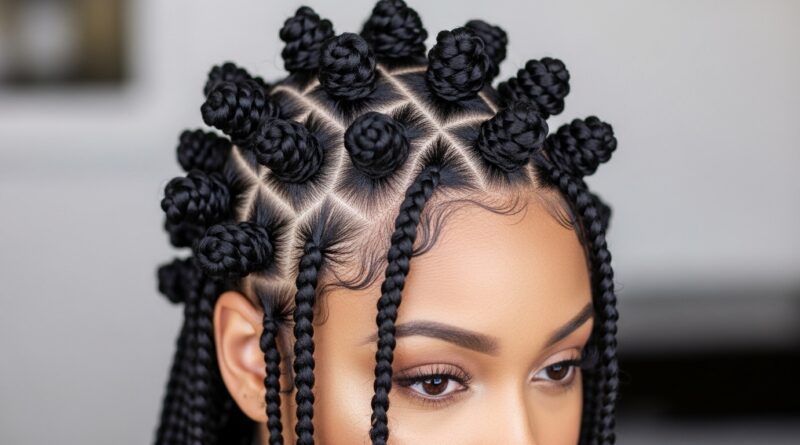
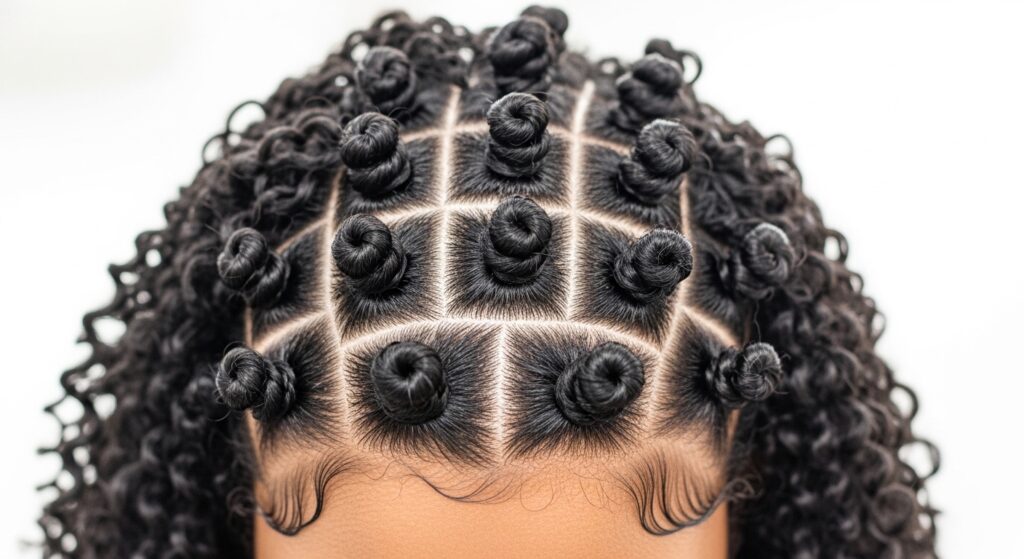
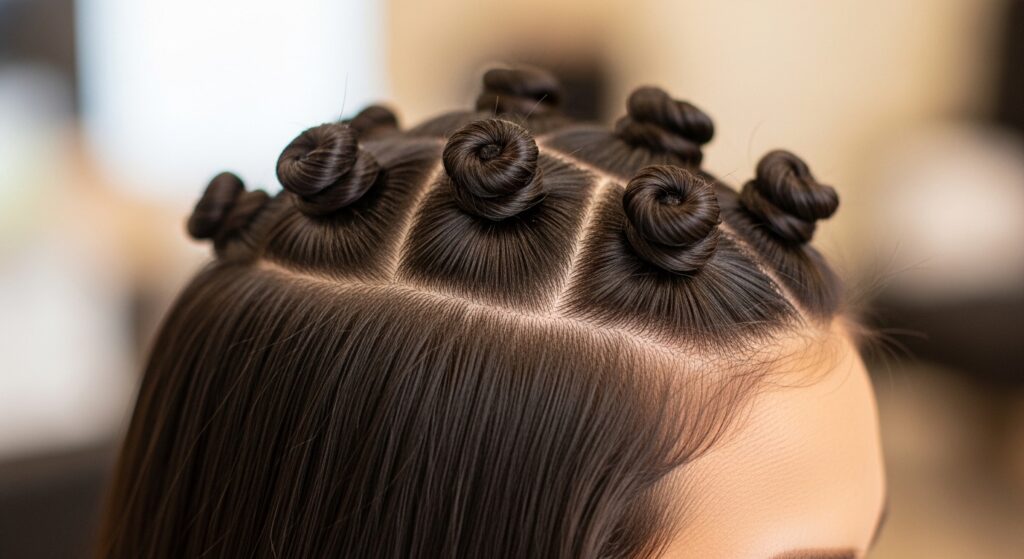
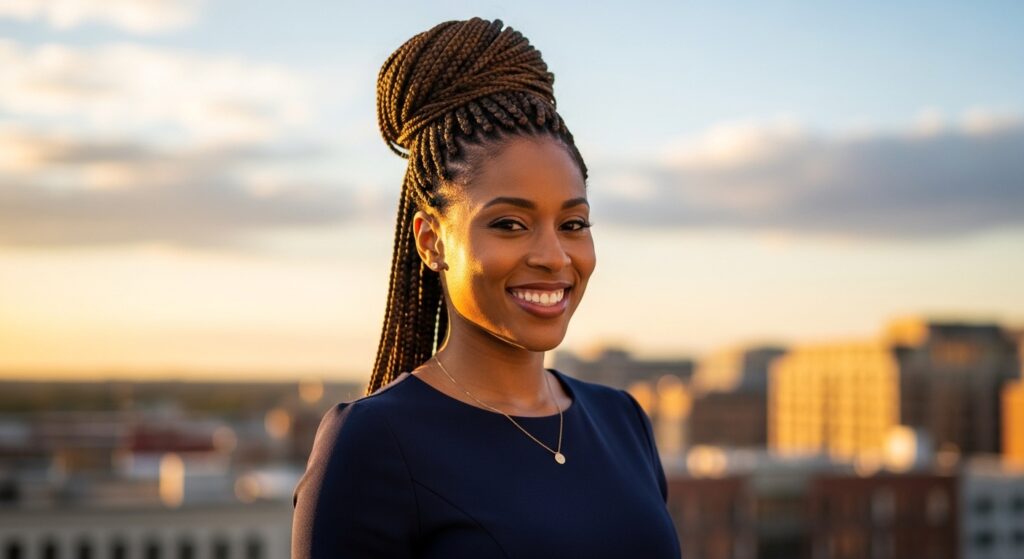
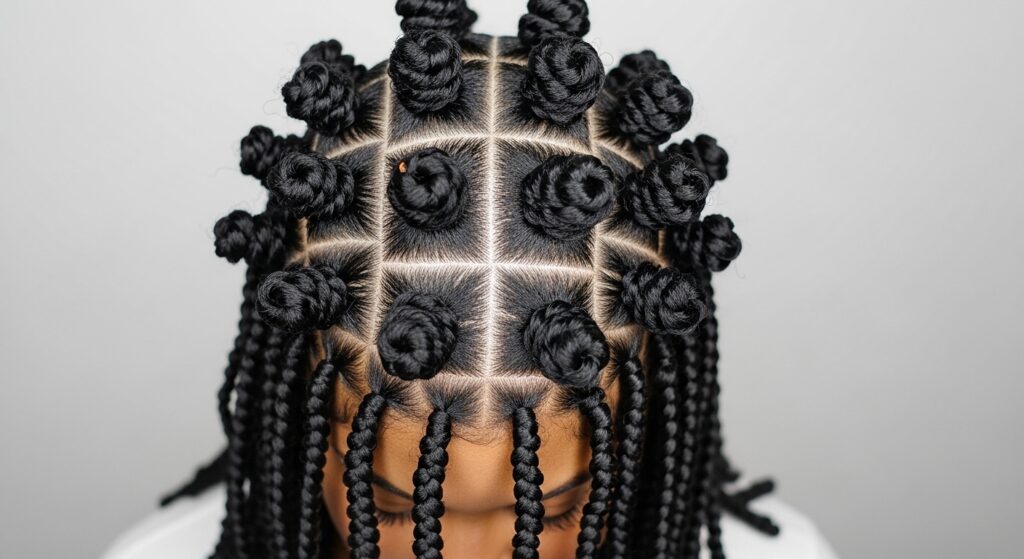
Twist 17 Mini Space Bun Rows Lining Heads Playfully Cute
Okay, let’s be real. We’ve all scrolled through endless feeds of 2026 hairstyles and felt a little overwhelmed. The trends are amazing, but sometimes you just want something playful, easy, and undeniably cute that works right now. That’s exactly why I’m obsessed with this look.
It’s called the mini space bun rows, and it’s the perfect mix of nostalgic and fresh. Think of it as taking those tiny, playful buns we all loved and giving them a chic, structured upgrade by lining them up in neat little rows.
It’s not as complicated as it looks, I promise. Whether your hair is natural, braided, or twisted, this style is a fantastic way to protect your ends while looking absolutely adorable. It works for a casual day out, a festival, or just when you want your hair to be fun and out of your face.
Let’s break down everything you need to create this head-turning style. I’ll walk you through the prep, the step-by-step process, and how to make it last all day. Get ready to turn some heads!
Why This Hairstyle is Everywhere Right Now
This style is popping up everywhere for good reason. It perfectly bridges the gap between protective styling and high-fashion flair. It takes the concept of space buns—a forever favorite—and adds a modern, geometric twist.
It’s incredibly versatile. You can make it sleek and polished for a touch of that old money hair polish, or keep it messy and whimsical for a more relaxed vibe. It works on all hair lengths and textures, which is a huge win.
- Protective & Practical: Keps your ends tucked away, minimizing breakage.
- Endless Creativity: Change the size, number, or pattern of your bun rows.
- Major Style Impact: It looks intricate but is surprisingly simple to achieve.
Gathering Your Tools: A Simple Checklist
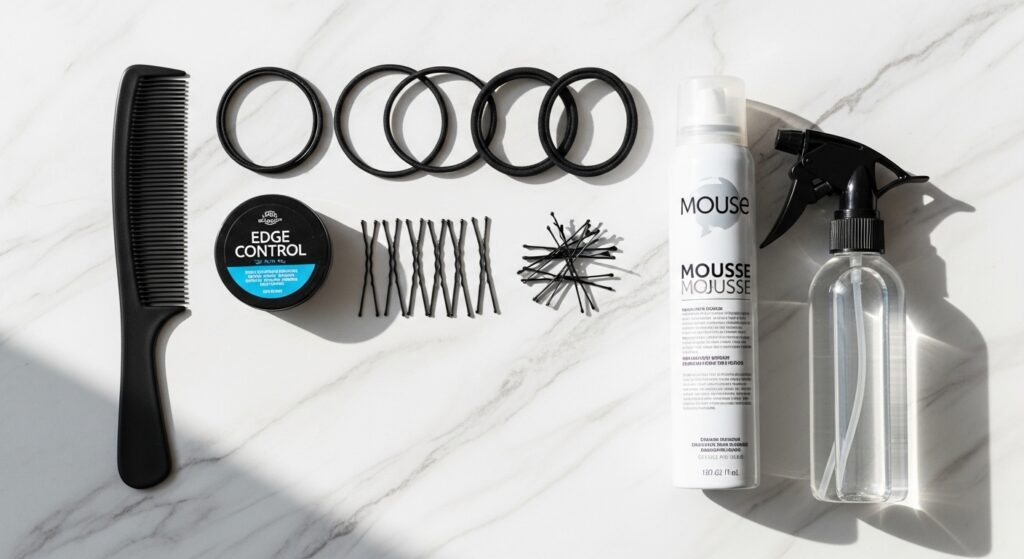
You don’t need a salon’s worth of products to nail this look. A few key items will set you up for success. Having everything within reach before you start is the secret to a stress-free styling session.
Here’s your quick shopping list. Most of this is probably already in your bathroom cabinet!
- Rat-Tail Comb: For creating clean, straight parts.
- Small, Coated Hair Elastics: They’re gentle and won’t snag.
- Bobby Pins (Matte Finish): To secure your buns flat and discreetly.
- Styling Mousse or Gel: For hold and smoothness, especially around your edges.
- Lightweight Hair Oil or Serum: To add shine and fight frizz.
Step 1: Start with the Perfect Base

Great hair starts with great prep. This step is non-negotiable if you want your style to last and look healthy. We’re aiming for hair that’s clean, moisturized, and completely tangle-free.
Wash and condition your hair as usual. While it’s damp, apply your favorite leave-in conditioner. If your hair is naturally straight or slippery, a light mousse can add grip. For curly or coily textures, a twisting cream will define your sections beautifully.
Gently detangle from ends to roots. The goal is smooth, manageable sections that will behave when you start parting. Let your hair air-dry partially or blow-dry on a cool setting until it’s just slightly damp to the touch.
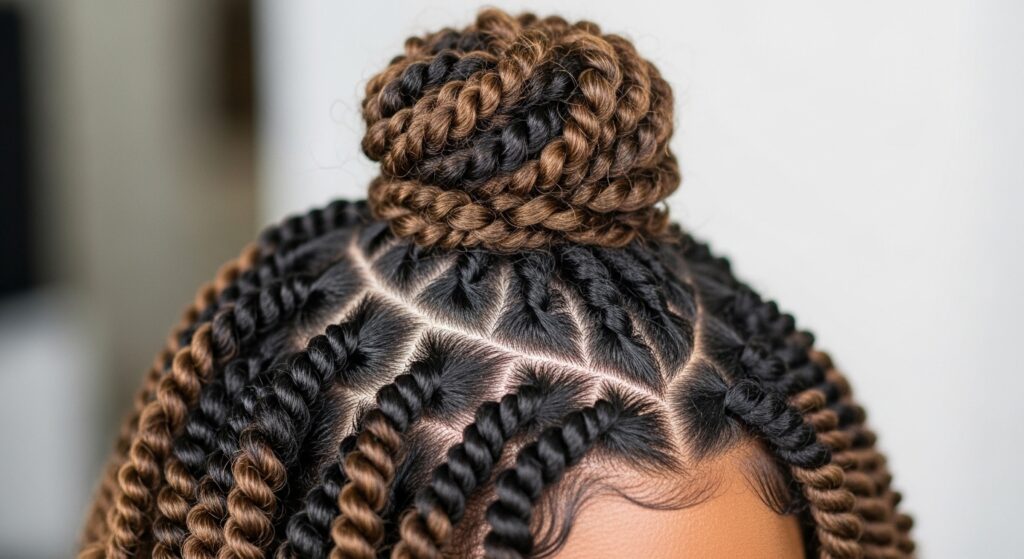
Step 2: Mapping Out Your Bun Rows
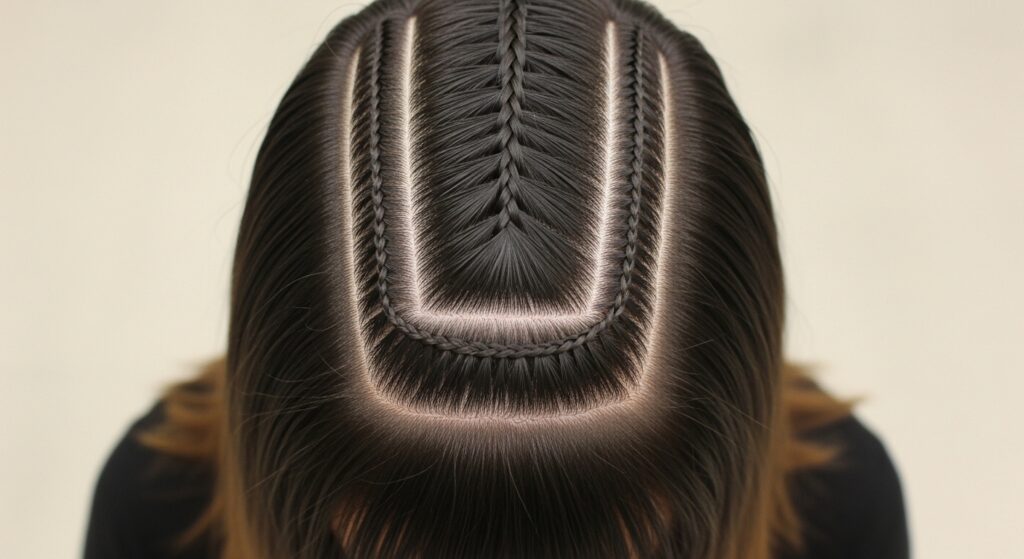
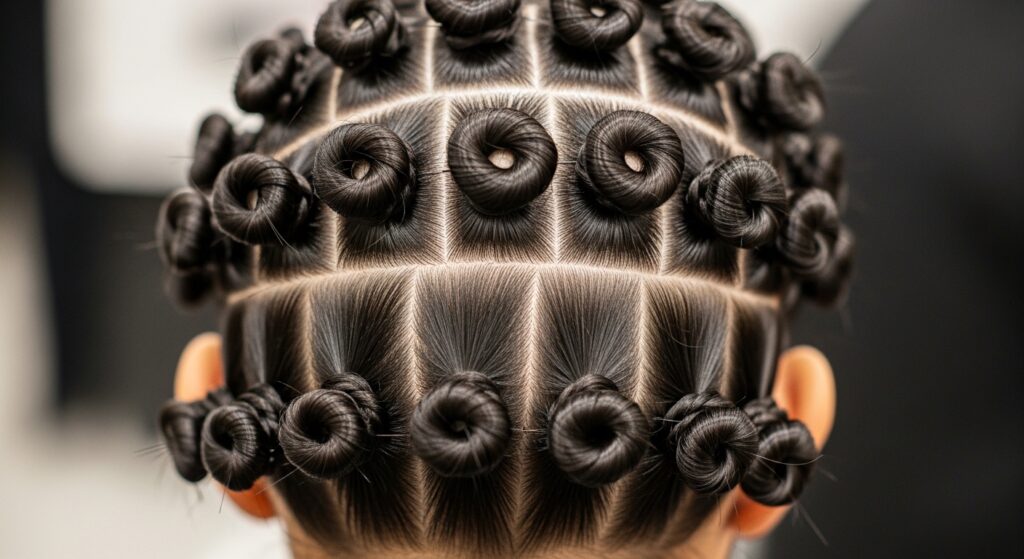
This is where the magic happens! Don’t just start grabbing sections. Planning your rows ensures they look even and intentional. I like to start with three horizontal rows for a classic look.
Use the handle of your rat-tail comb to draw a straight part from ear to ear over the crown of your head. This is your top row. Then, create a second part parallel to it, about two inches below. The remaining hair at the bottom is your third row.
Secure the middle and bottom rows with loose clips so they’re out of the way. We’ll always work from the front of the head back, one row at a time. This keeps everything organized.
Step 3: Creating Your First Section & Twist
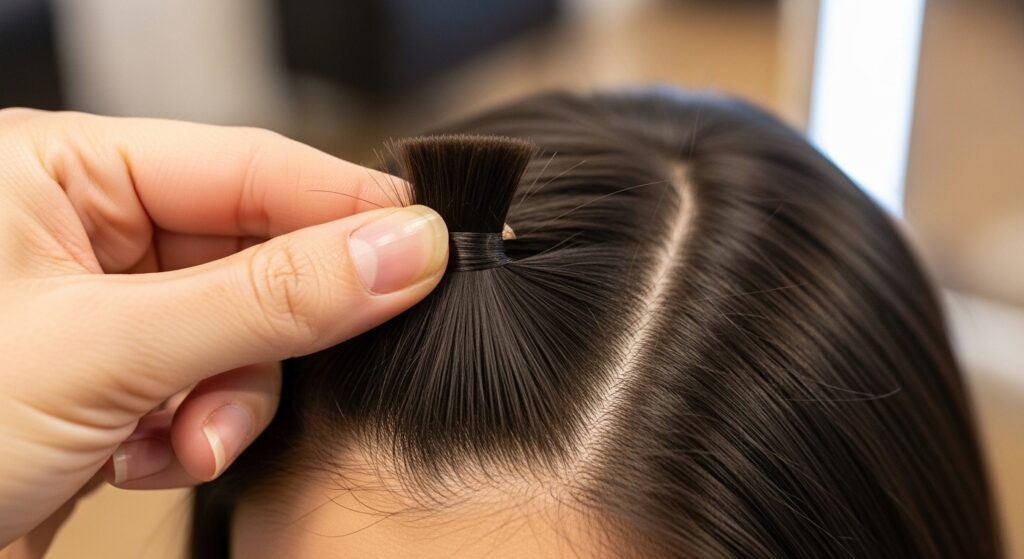
Now for the fun part! Within your top row, start at the very front, near your temple. Take a small, square-shaped section—about an inch wide. The smaller the section, the daintier and more precise your buns will look.
Apply a tiny bit of edge control or gel to this section for sleekness. Then, begin twisting the strand tightly. You can do a simple two-strand twist or, for more texture, a flat twist against your scalp for an inch before continuing.
Twist all the way down to the ends of the hair. The key is consistency in tension. Try to keep the twist tight and even from root to tip so your final bun is smooth.
Step 4: Forming the Mini Space Bun
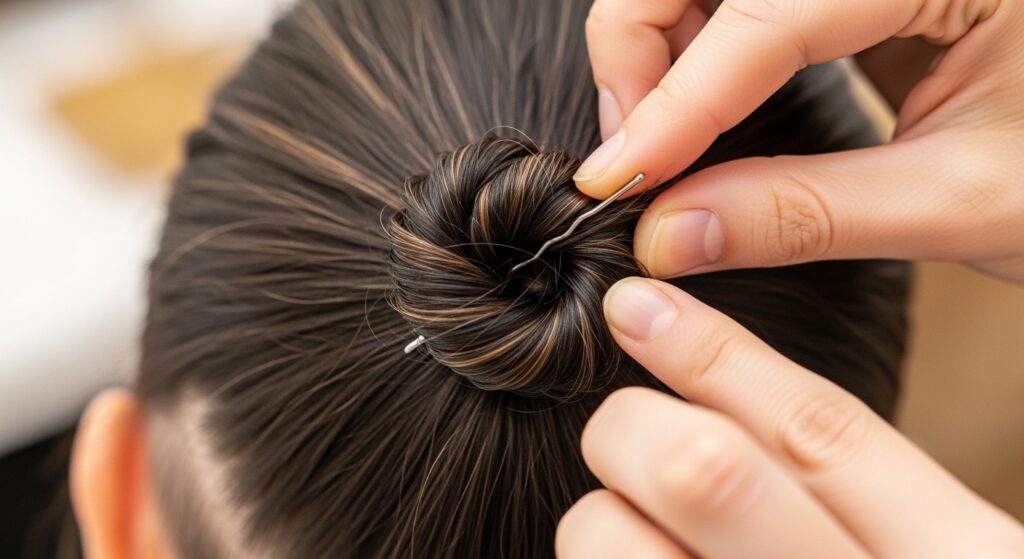
You’ve got your twist! Now, coil that twisted rope of hair around its base to form a small bun. Don’t just wrap it loosely; keep the coil tight and flat against your head.
While holding the bun in place with one hand, use the other to grab a bobby pin. Slide it through the center of the bun and into your hair underneath, catching the elastic if you used one. Use a second pin in an “X” formation for maximum security.
Gently adjust the bun, tucking in any stray ends. You want it to look like a little, perfect knot. Repeat this process for the next section in the same row, leaving a small, even gap between each bun.
Step 5: Completing Your First Row
Continue creating, twisting, and coiling sections all the way across your first row. Consistency is your best friend here. Try to make each section the same size and each bun the same tightness for that polished, intentional look.
As you move across your head, you might need to adjust the angle slightly. The buns should follow the curve of your head, sitting flat. If a bun feels loose, don’t hesitate to add an extra bobby pin.
Once the top row is done, give it a light mist with a flexible-hold hairspray. This will set the twists and tame any baby hairs. Then, unclip your second row and let’s move on!
Step 6: Working Through the Second & Third Rows
The process is exactly the same for the remaining rows! Unclip your second row. Start at the same side you began on for the top row to keep a consistent pattern. Take your first section, twist, coil, and pin.
A little pro tip: try to stagger the buns in the second row so they sit in the “gaps” of the row above. This creates a beautiful, interlocking pattern and covers more scalp for a fuller effect.
Repeat for the third and final row at the nape of your neck. For this bottom row, you can make the buns slightly larger if you have more hair, or keep them mini for uniformity. The choice is yours!
How to Customize for Your Hair Type
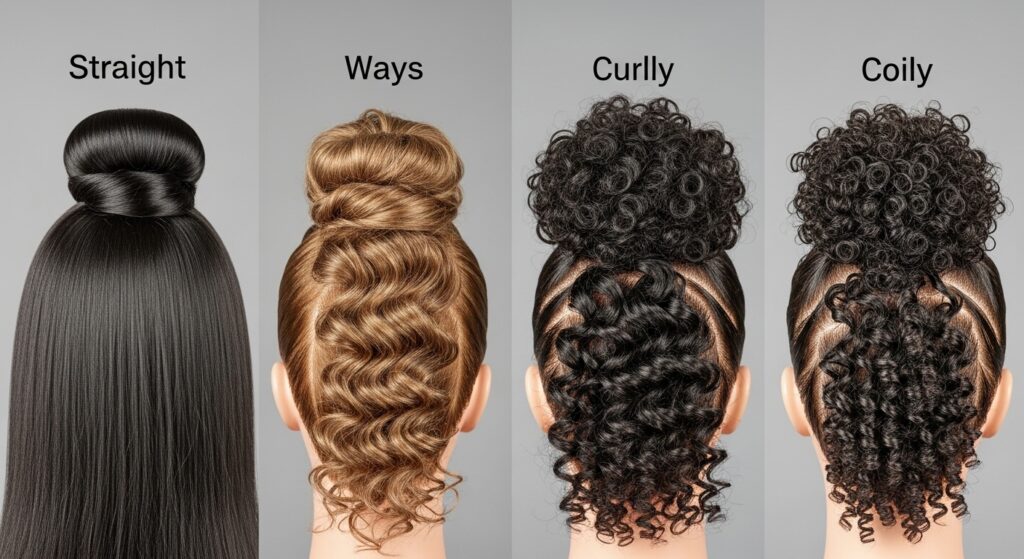
This style truly is for everyone. The technique adjusts slightly based on your natural texture, but the outcome is always stunning. The key is working with your hair’s natural state.
For straight or fine hair, use a texturizing spray before you start to add grip. Your twists might need an extra pin to hold. For curly and coily hair, your twists will have amazing natural hold and volume. Use a defining cream and don’t over-manipulate.
If you have shorter layers or an asymmetrical lob, don’t worry! Just make smaller sections where your hair is shorter. The variation in bun size can look incredibly cool and modern, like a glitchy glam hair moment.
Adding Accessories for Extra Sparkle
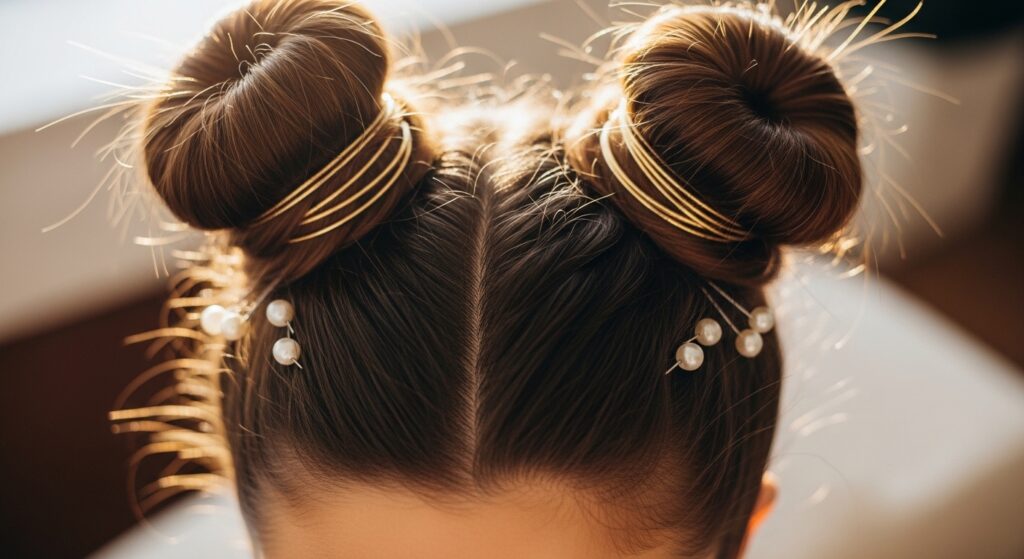
Want to take your style to the next level? Accessories are the easiest way. Since the style is so structured, a little bling goes a long way and won’t look overwhelming.
Slide tiny hair cuffs or rings onto your twists before coiling them into buns. Or, after you’re done, tuck in delicate pins. Think small stars, pearls, or even tiny faux flowers for a romantic touch.
- Mini Hair Rings: Stack a few on one twist for edgy flair.
- Pearl Bobby Pins: Replace your plain pins with pretty ones.
- Threaded Ribbon: Weave a thin ribbon through the bases of your buns.
Making It Last: All-Day Hold Secrets
You’ve put in the work, so let’s make it last! A few simple tricks will keep your style fresh from morning to night. It’s all about strategic product use and a little nighttime care.
After styling, use a light-hold hairspray all over. For edges or flyaways, a tiny bit of gel on a toothbrush can slick them down without buildup. If you’re active, a satin headband can protect the front rows.
At night, loosely tie a satin or silk scarf over your head. This minimizes friction. In the morning, you might just need to tighten a pin or two and refresh with a light spray.
From Day to Night: Quick Style Transformation
This style is a chameleon. For day, it’s playful and cool with a t-shirt and jeans. But for night, you can easily amp up the drama without redoing a thing.
Define your edges sharply and add a glossy sheen with a bit of hair oil just on the twists and buns. Swap out your simple pins for more dramatic accessories—think metallic cuffs or crystal bobby pins.
Pair it with a bold lip or a smoky eye. The neatness of the hair provides the perfect balance to romantic goth hairstyles-inspired makeup, giving you that cool, vampire haircut vibe without cutting a single strand.
What to Do If Your Hair Is Slippery or Fine
If your hair is very silky or fine, you might worry about the twists unraveling. I get it! The solution is all about adding texture and grip at the very beginning.
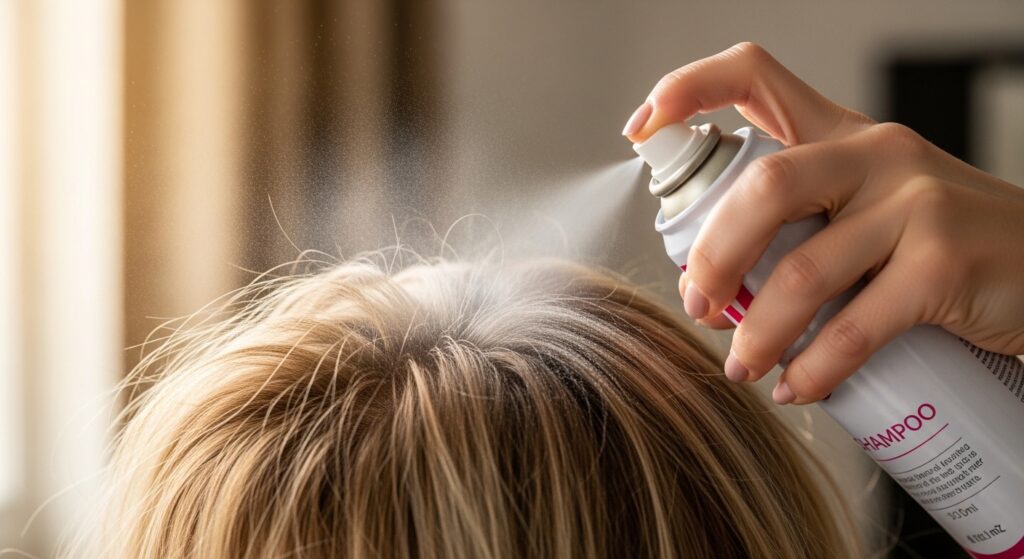
Start on day-old hair, or use a dry shampoo at your roots to add some grit. Before twisting, lightly mist each small section with a texturizing spray or a sea salt spray. This gives the hair something to “hold onto.”
When you coil your bun, use an extra bobby pin or two. You can also try a smaller elastic band at the base of the twist before coiling. The goal is to create anchor points.
Adapting the Look for Natural Hair
For my naturals, this style is a dream protective style. It looks beautiful on stretched or shrunken hair. The key is to start with well-moisturized, defined twists or braids from a previous style.
If you’re starting fresh, apply a generous amount of twisting cream to each section before you twist. Your natural texture will give the buns amazing body and fullness. Don’t be afraid to make the buns a little bigger to showcase your volume.
This is also a gorgeous way to show off a twist-out. The rows will look beautifully patterned and full. It’s a functional and fabulous way to wear your hair.
The “Hime Cut” Inspired Variation
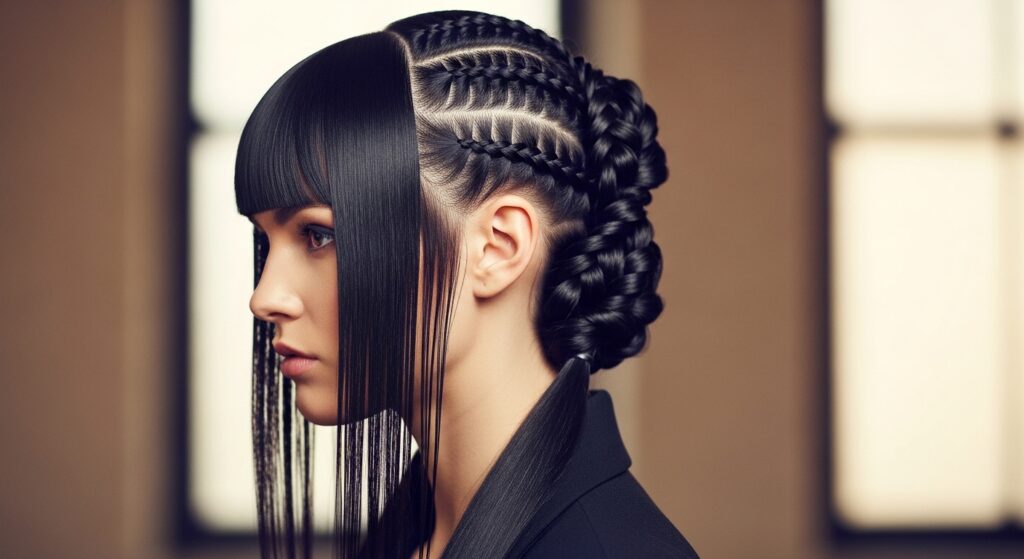
Love the dramatic feel of a hime cut but not ready to chop? This style can mimic that vibe! The structured rows give you that graphic, geometric feel associated with the look.
If you have face-framing layers or a fringe, leave them out! Style your bun rows as directed on the crown and back of your head, but let your front pieces flow freely. You can blunt-cut them for a more dramatic effect.
Alternatively, twist those front sections back and incorporate them into the first row of buns, creating a sleek, pulled-back effect that highlights your features just like a true hime style would.
Mixing Textures: Braids and Twists Combo
Who says you have to choose? For an incredible textural contrast, mix braids and twists in your rows. This adds a whole new level of visual interest and is perfect if you get bored doing the same thing all over.
Maybe your top row is all neat two-strand twists. Then, your second row could be tiny box braids. Or, alternate within the same row! The coiling process is exactly the same for both.
This mix is a major trend for a reason. It looks intricate, artistic, and shows off your styling skills. It’s a guaranteed conversation starter.
The “Quiet Luxury” Polished Version
For a dose of quiet luxury bob energy—but in bun form—focus on extreme polish. The goal is sleek, seamless, and impeccably neat. This version is all about precision.
Use a strong-hold edge gel and a fine-tooth comb to make every part razor-sharp. Ensure every twist is perfectly uniform and every bun is coiled in the exact same direction. Keep accessories minimal or non-existent.
Pair this with clean, minimalist makeup and neutral-toned clothing. The hairstyle becomes a statement of refined, understated elegance. It’s powerful in its perfection.
Adding Color Pop for a “Glitchy Glam” Effect
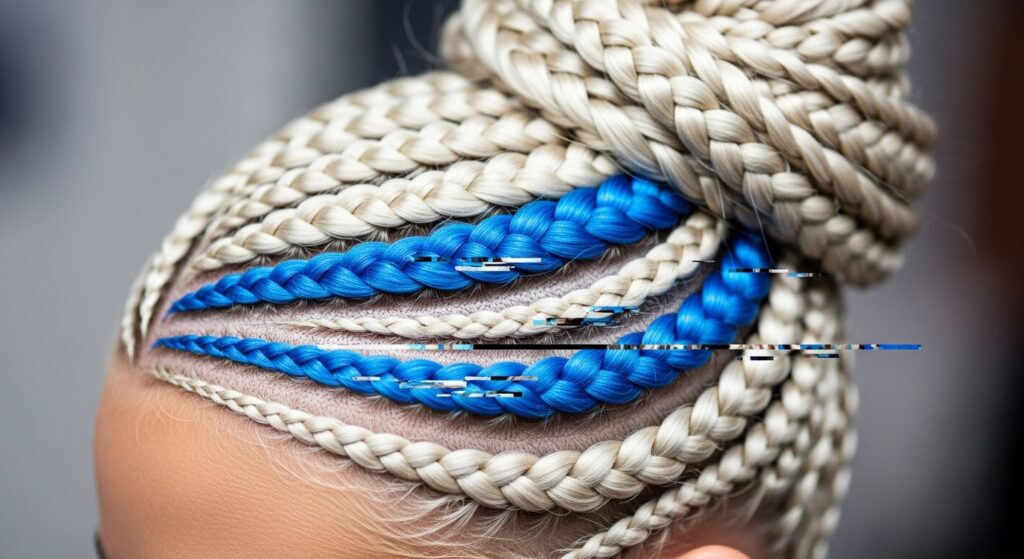
Embrace the glitchy glam hair trend with strategic color. You don’t need a full head of color to make a major impact. The rowed structure is perfect for playing with bold hues.
Use temporary hair color spray, chalk, or clip-in extensions on just one row of buns. Imagine jet-black hair with the middle row in neon pink, or blonde hair with the bottom row in silver.
The contrast between the structured style and the unexpected color pop creates that digital, “glitch” effect. It’s fun, fearless, and totally temporary—perfect for a weekend or concert.
Solving Common Problems: Fixing Gaps & Flyaways
See a little gap or some frizz? No panic needed. This is normal, especially as the day goes on. Your fix-it kit is simple: a travel-sized edge control, a toothbrush, and more bobby pins.
For small gaps between buns, gently loosen the pin on each side and nudge the bun over to close the space. Re-pin securely. For flyaways, a tiny bit of gel on a spoolie or toothbrush tames them instantly.
If a whole twist comes loose, don’t redo the whole row. Simply re-twist that one section, coil it,