Upcycle 22 Old Weave Pieces into Fun Hair Accessories Creatively
Hey friend! Let’s be real for a second. We all have that bag or box tucked away in the closet, full of old weave pieces we swore we’d reuse. They’re too good to toss, but just sitting there. Sound familiar? I was staring at my own collection the other day, feeling that classic mix of guilt and “what if.”
Then it hit me. Instead of waiting for the perfect hair day, why not turn them into something totally new? We’re talking fun, unique hair accessories that are about to become your new signature. This is the ultimate creative upcycle.
It’s easier than you think, I promise. No fancy skills needed. Just your old bundles, a few basic supplies, and a little bit of playtime. Let’s transform that stash into something beautiful and give those forgotten pieces a gorgeous second life. Ready to get crafty?
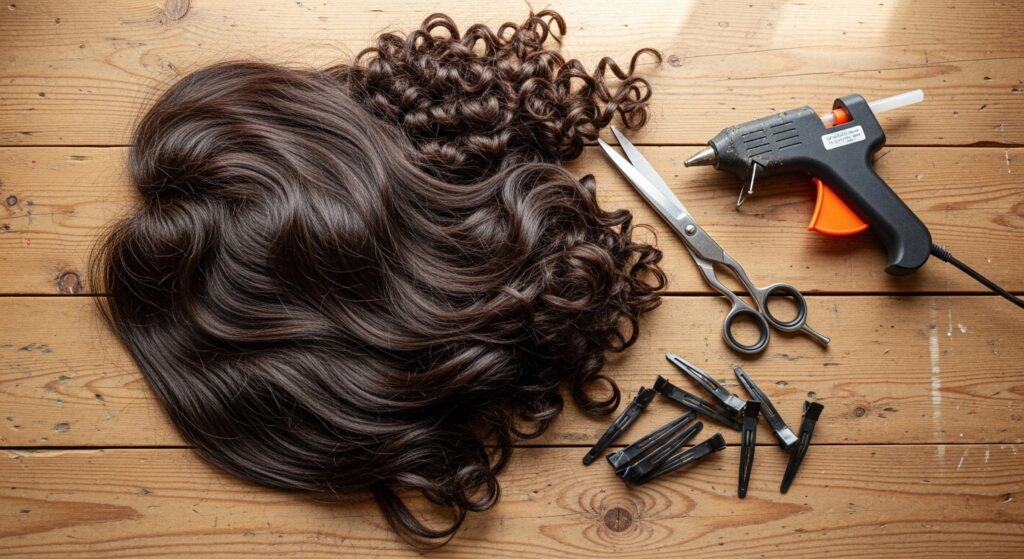
Gather Your Old Weave Stash & Basic Tools
First things first, let’s dig out that stash! Pull every piece you have—curly, straight, colored, or classic. Variety is your best friend here. Now, for tools, you don’t need a craft store haul.
Here’s the simple list to get started:
- Sharp fabric scissors
- A strong glue gun and glue sticks
- Plain hair clips, headbands, and ponytail holders
- Needle and thread (optional, but handy)
Clear a space at your kitchen table, put on some good music, and let’s sort. Group pieces by texture and color. Seeing them all laid out will spark your first ideas instantly.
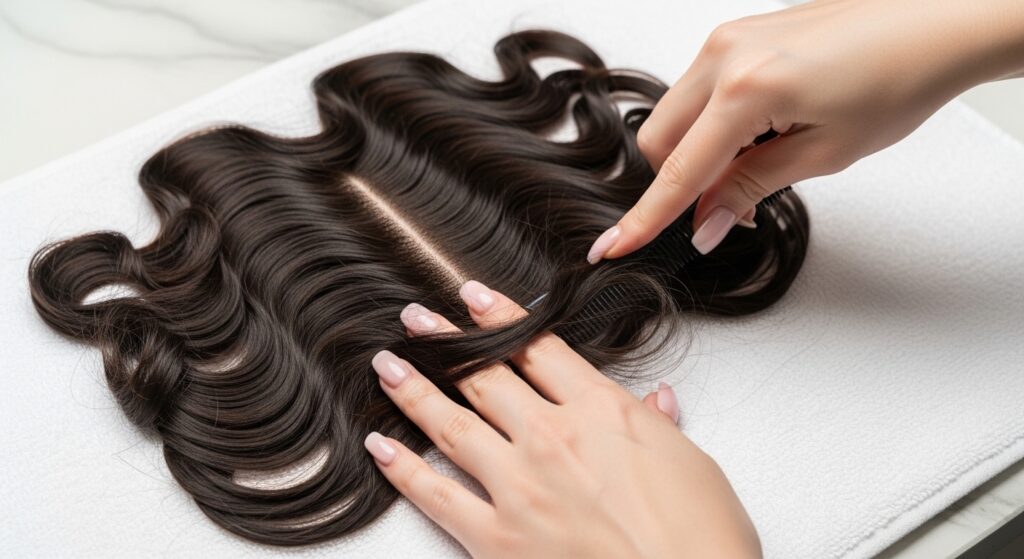
Clean & Prep Your Weave Pieces
Old weave can get a bit dusty or tangled. We want a fresh start. Give each piece a gentle wash in lukewarm water with a bit of mild shampoo. Rinse thoroughly and let them air-dry completely on a towel.
Once dry, carefully detangle with your fingers or a wide-tooth comb. For curly pieces, you can spritz with a leave-in conditioner to redefine the curls. This step makes the hair behave and look its best for its new life as an accessory.
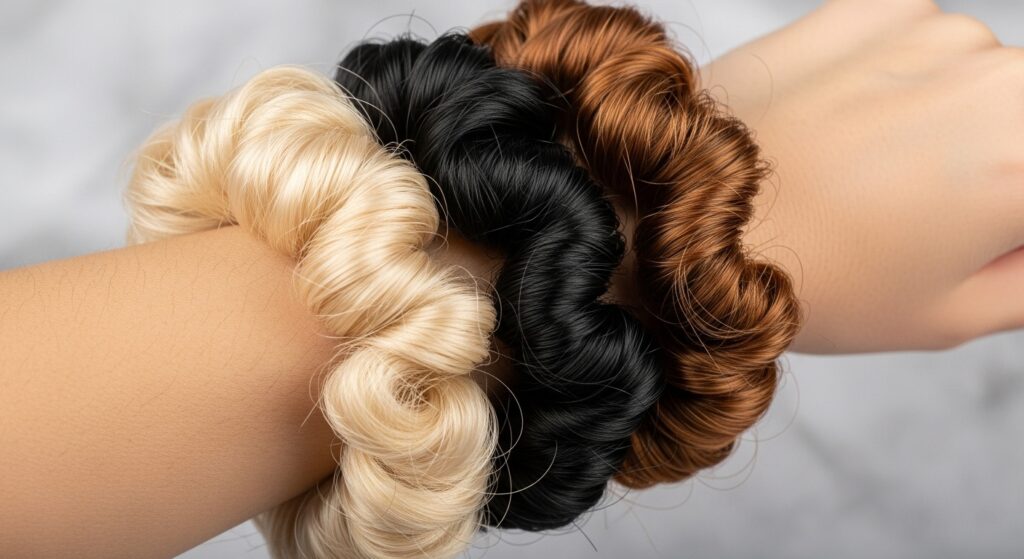
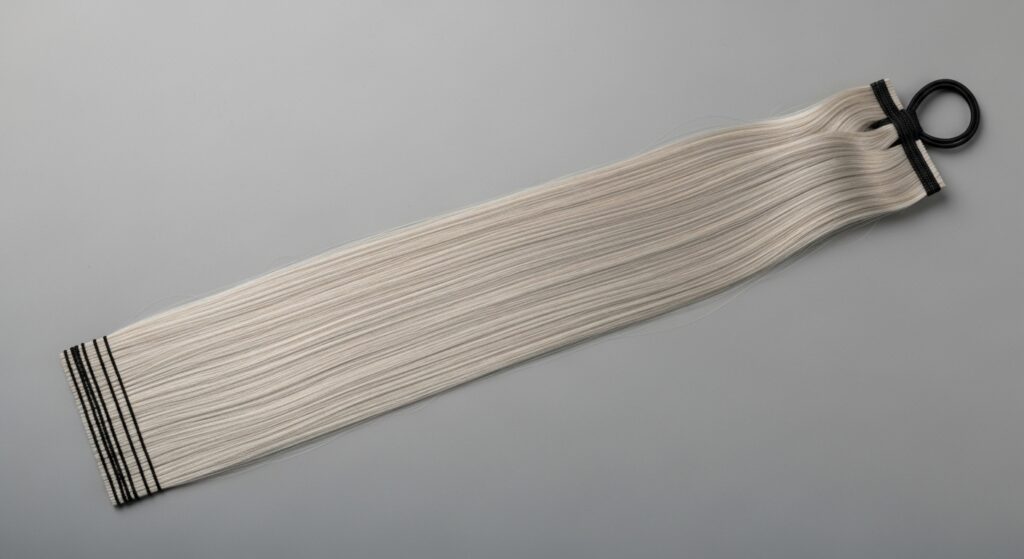
Create Simple & Chic Scrunchies
Scrunchies are the perfect beginner project. They’re super forgiving and always in style. Take a ponytail holder and measure a strip of weave long enough to wrap around it completely with a little overlap.
Fold the strip in half lengthwise, encasing the elastic inside, and glue the long edge shut. Then, neatly glue the two short ends together. That’s it! You now have a luxe, textured scrunchie. Make a bunch in different colors for a full set.
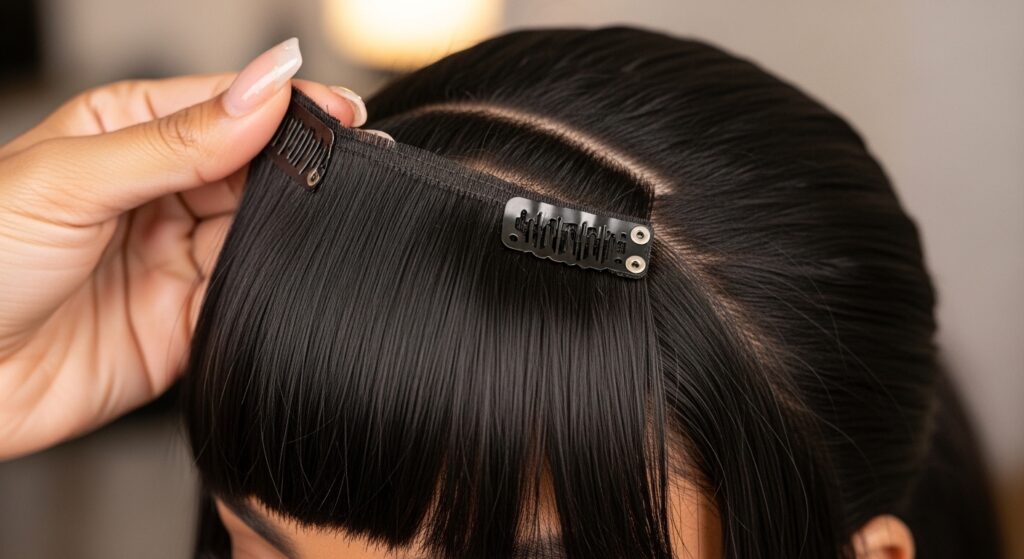
Make Glamorous Clip-In Bangs
Want to try 2026 hairstyles like the hime cut or a fringe without the commitment? This is your chance. Cut a section of straight weave into a bang shape, slightly wider than your forehead.
Take a small, clear plastic hair clip and glue the top of the weft securely to the clip’s flat side. Trim to your desired length and style. You can create a blunt bang, a wispy one, or even side-swept pieces for an asymmetrical lob vibe.
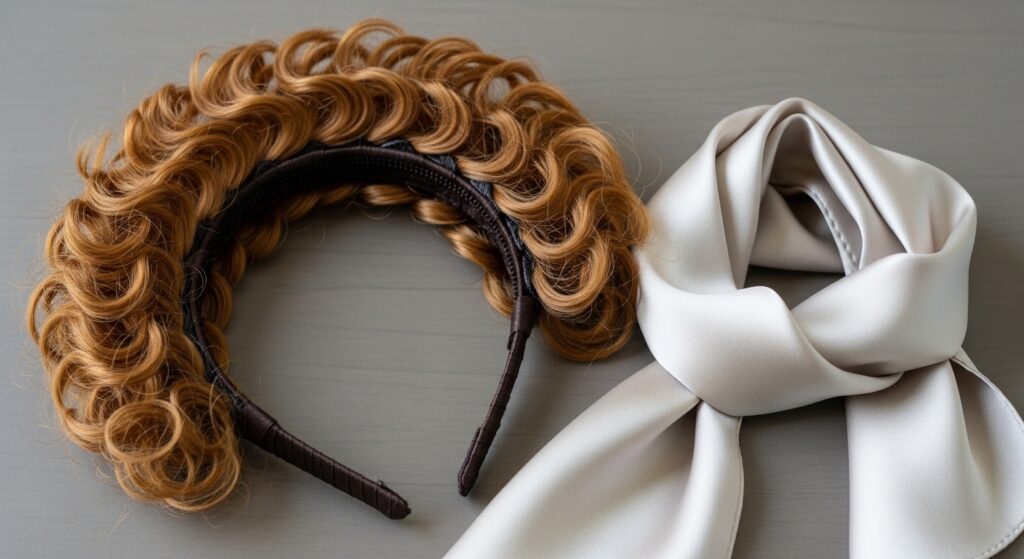
Design Textured Headband Wraps
This is my favorite for a boho, old money hair feel. Take a thin, flexible fabric headband. Cut several short pieces of curly or wavy weave. Fold each small piece into a little loop.
Glue these loops all along the top of the headband, clustering them close together. It creates a beautiful, textured crown that looks intricate but is simple to make. Perfect with a quiet luxury bob.
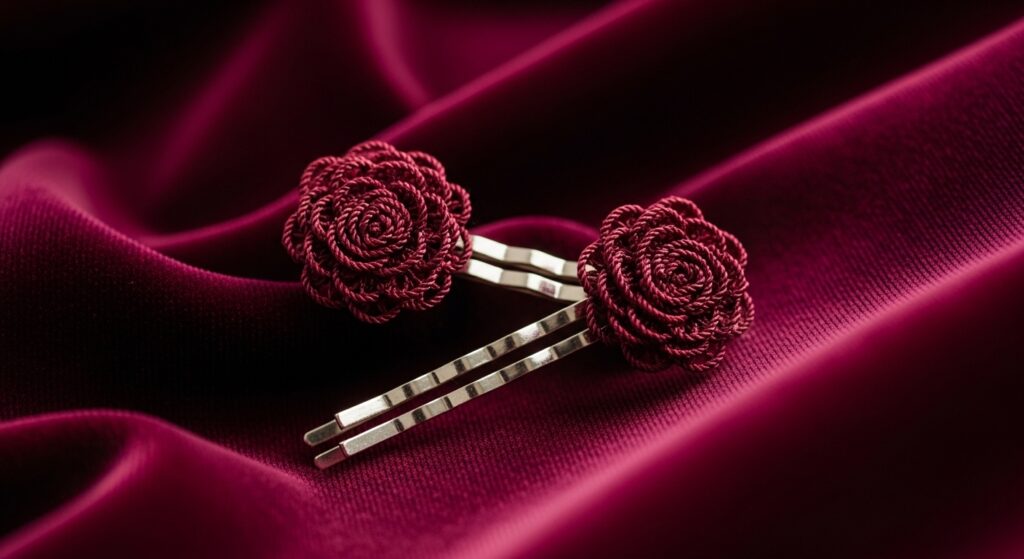
Craft Romantic Goth Hair Pins
Lean into the romantic goth hairstyles trend with dark, dramatic accents. Use jet black or deep burgundy weave. Create small, tight rolls or rosettes by coiling a strand and securing the end with glue or a stitch.
Glue these rosettes onto the ends of bobby pins or small French barrettes. Wear them to pin back sections of hair for a soft, Victorian-inspired look. They add instant mystery.
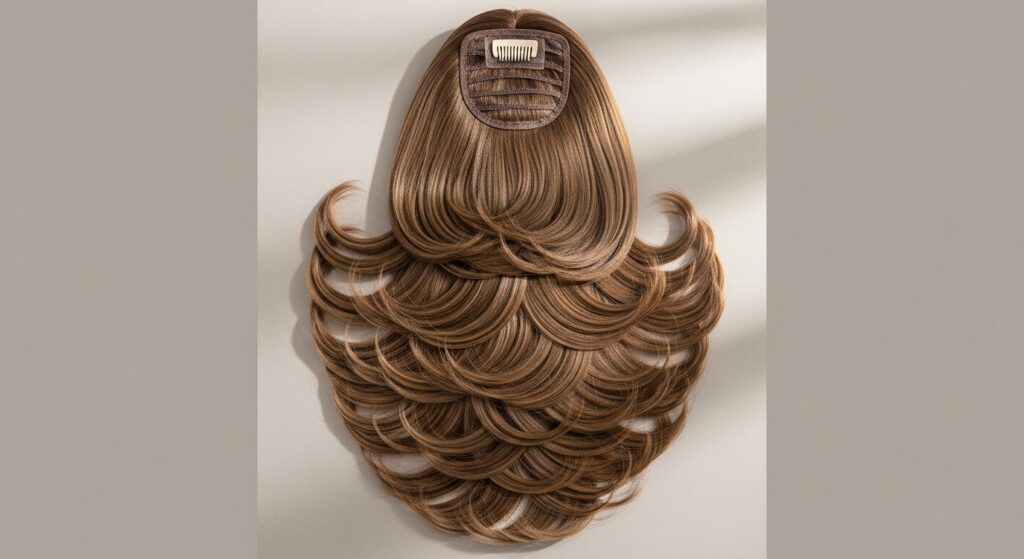
Build a Dramatic Hair Comb
For a statement piece, grab a wide-tooth decorative comb. Use a full, curly weft to create volume. Gather the weft at the top and start fanning and folding it to create a cascading shape.
Secure this shape with thread at the base, then glue the entire base firmly onto the teeth of the comb. This makes a stunning accessory for up-dos, giving major vintage glamour or glitchy glam hair energy.

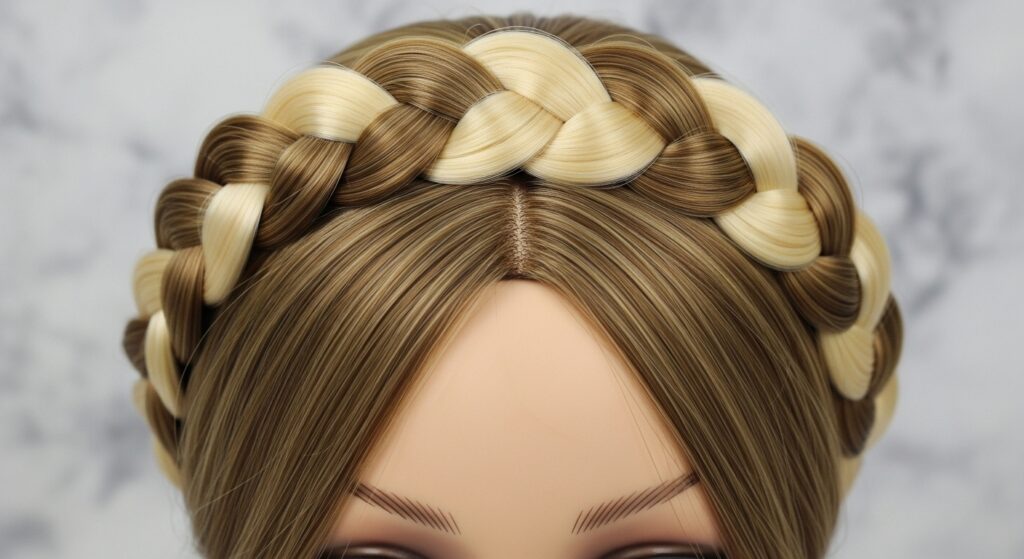
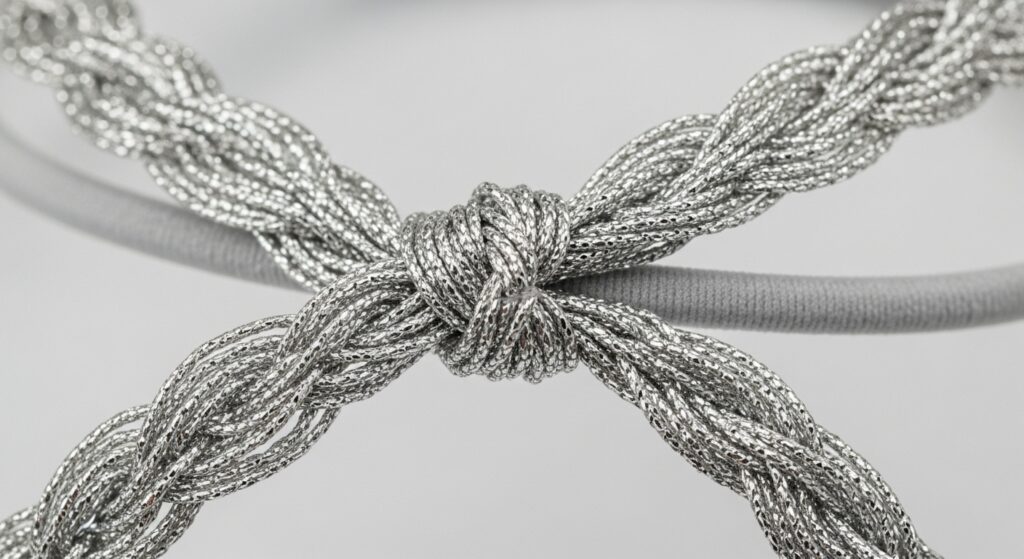
Weave a Boho Braided Crown
Channel festival vibes or a soft romantic look. Braid three long, thin strips of wavy or straight weave. Make the braids nice and long. Take a plain, elastic headband as your base.
Wrap and weave your braids around the headband, gluing them in place as you go. You can leave the ends loose for a carefree feel. It’s a gorgeous, bohemian touch for any summer look.
Assemble a Playful Ponytail Wrap
Elevate a basic ponytail or bun in seconds. Cut a long, thin strip of weave. Attach a small clear elastic loop to one end (this will hook onto your ponytail holder).
Wrap the strip around your base ponytail, securing the other end with a discreet dot of glue or a small pin. Choose a color that contrasts with your hair for a fun pop, or match it for seamless volume.
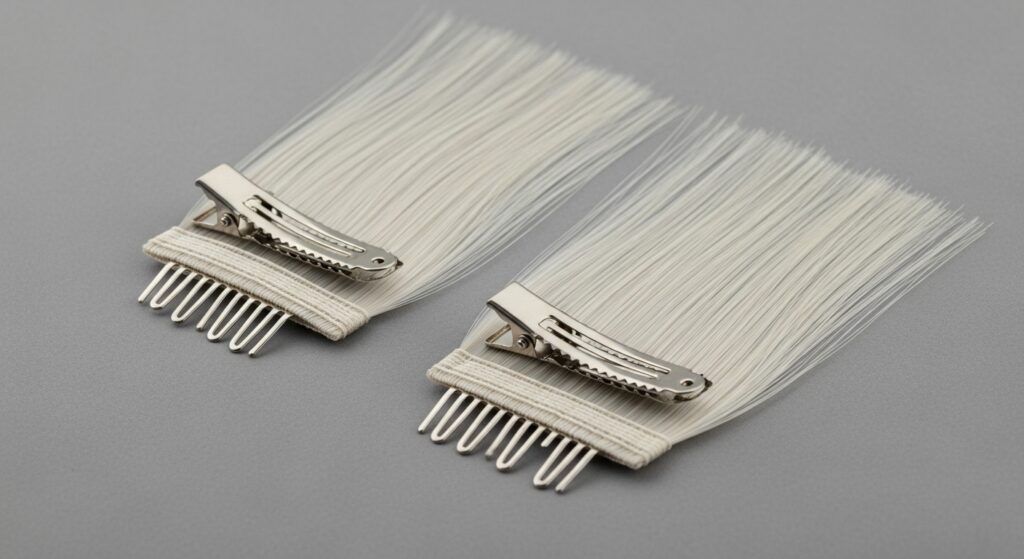
Fashion Mini Clips for Face-Framing
These are so versatile for 2026 hairstyles. Cut small, face-framing shaped pieces from a straight weft—think short layers or long curtain bangs. Attach them to small snap clips.
Use them to add temporary layers around your face, experiment with the vampire haircut, or just add subtle highlights of color. Clip one or two on either side for an instant refresh.
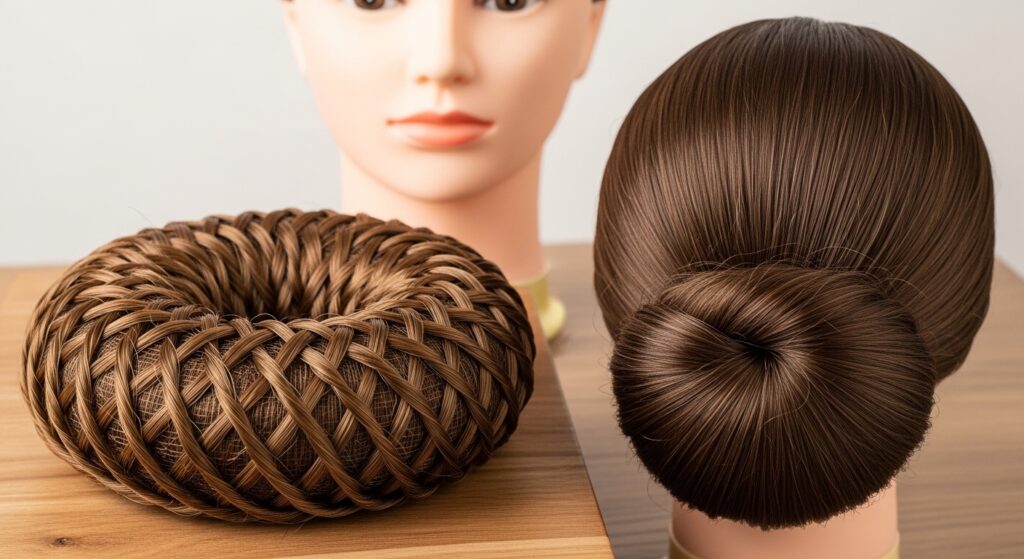
Construct a Voluminous Bun Donut
Don’t buy a bun form—make a custom one! Take a sock or nylon, stuff it with your leftover weave clippings (the short bits you’ve trimmed off), and shape it into a donut. Sew or glue the opening shut.
Then, take a longer weft and wrap it around the entire donut, gluing the end to secure. Now you have a bun maker that perfectly matches your hair color and texture for the sleekest updo.
Knot a Casual-Chic Scrunchie
For a different look, try a knotted scrunchie. Make a basic scrunchie as before, but before gluing the ends together, tie a loose, pretty knot in the middle of the fabric strip.
Then attach the ends to the elastic. The knot adds a cool, modern detail. This style works amazingly with sleek, straight hair for that quiet luxury aesthetic we all love.
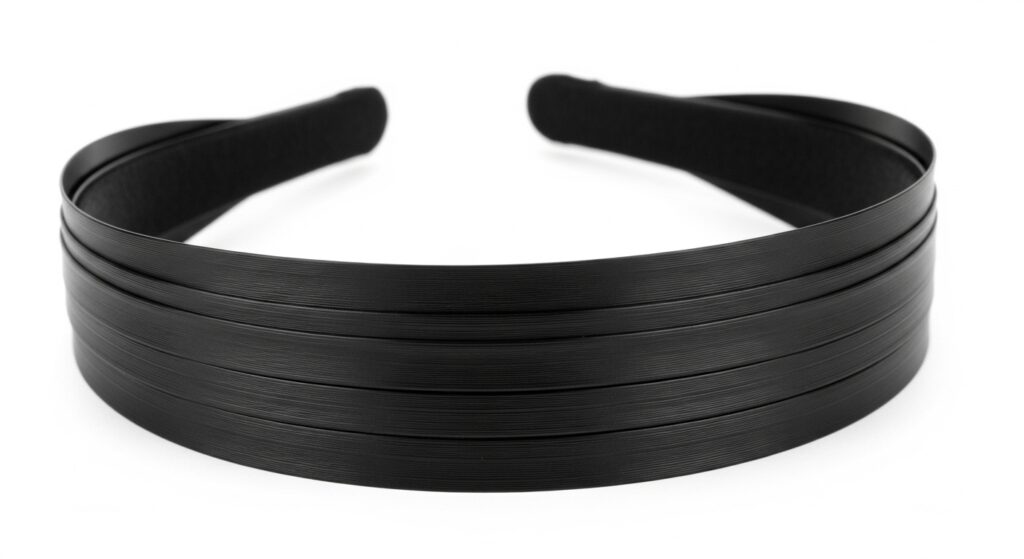
Embellish a Basic Headband
Take a simple plastic or metal headband. Cut a long, continuous weft. Starting at one end, glue the weft along the entire length of the headband, wrapping it smoothly.
For extra flair, add a small bow or coil at one side where you finish. This turns a dollar-store find into a custom, high-end looking accessory that complements your exact hair color.
Design Asymmetrical Clip-In Pieces
Play with the asymmetrical lob trend without cutting. Create a longer, tapered side piece from a weft. Attach it to a strong clip, making sure one end is longer than the other.
Clip it underneath your top layer of hair at the side. It gives the illusion of a dramatic, angled cut. This is a great way to test drive bold shapes like the hime cut or a sharp asymmetrical line.
Create Whimsical Hair Tinsel
Hair tinsel is back! Cut very thin, long strands from a shiny or platinum weave. Take a clear, tiny hair elastic and knot one end of a few strands to it.
You can then braid these strands into your own hair or tie the elastic around a small section. It catches the light beautifully for a subtle, glitchy glam hair effect that’s perfect for parties.
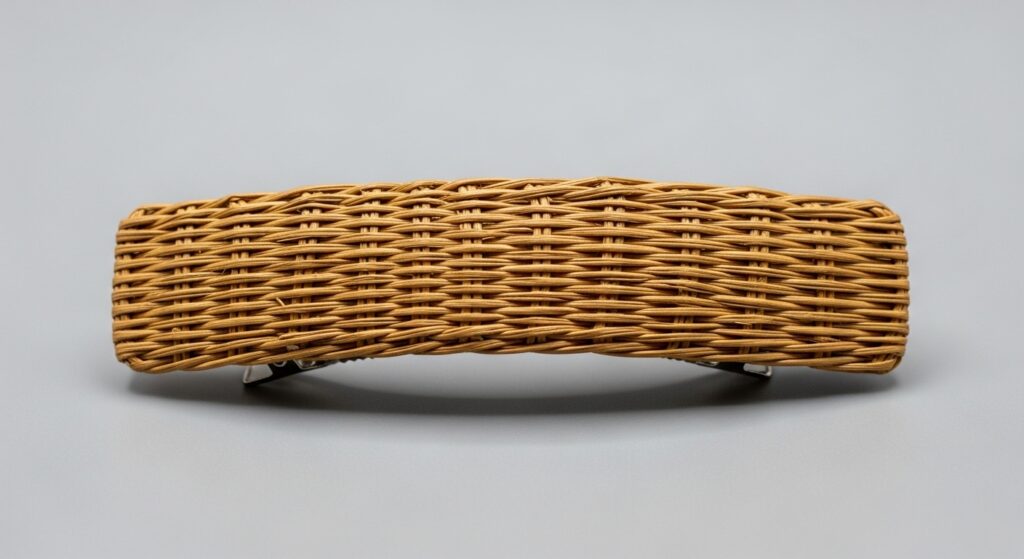
Build a Decorative Barrette Base
Large barrettes are huge right now. Get a plain, large-claw clip or flat barrette. Create a “base” of weave by gluing a weft directly onto the visible top surface of the clip.
Once that’s secure, you can build on it—add smaller curls, braids, or beads. This creates a statement piece that holds a lot of hair while looking like a work of art.
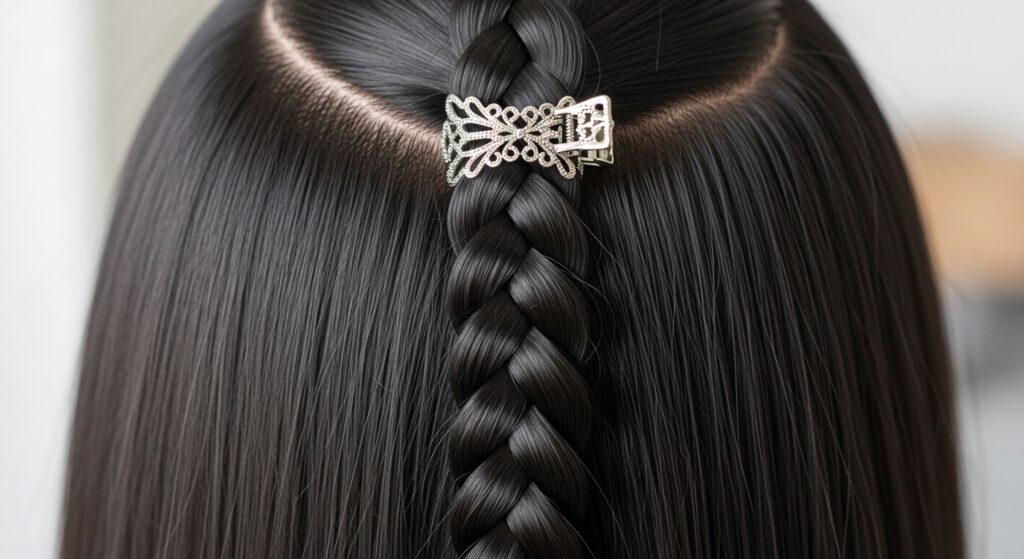
Make a Quick Braid Extension
Got a leftover straight piece? Braid it tightly. Attach a small, strong clip to the top of the braid. You now have an instant braid extension.
Clip it underneath your hair at the back to add length and detail to your braid, or clip it over a section for a visible accent. It’s the easiest way to get complex-looking braids in minutes.
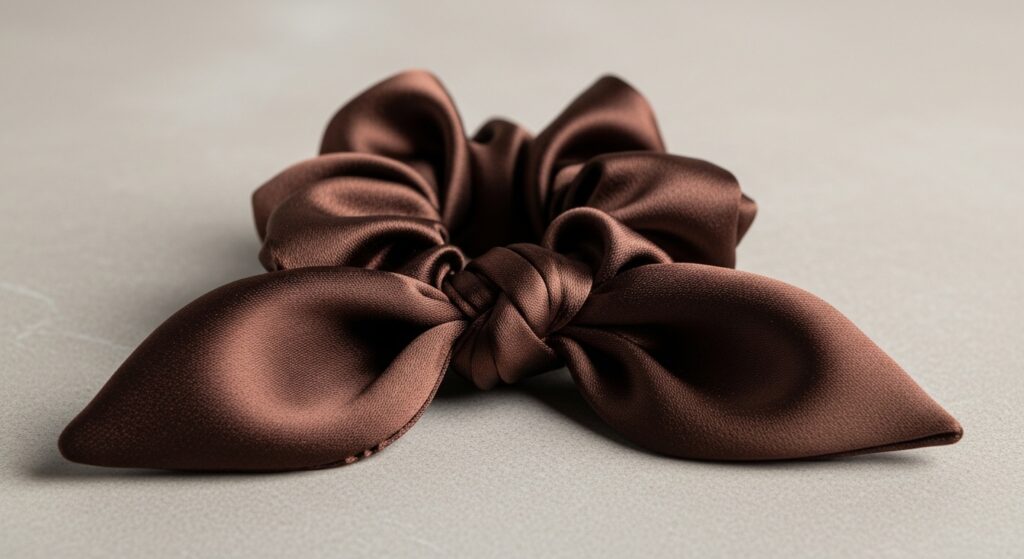
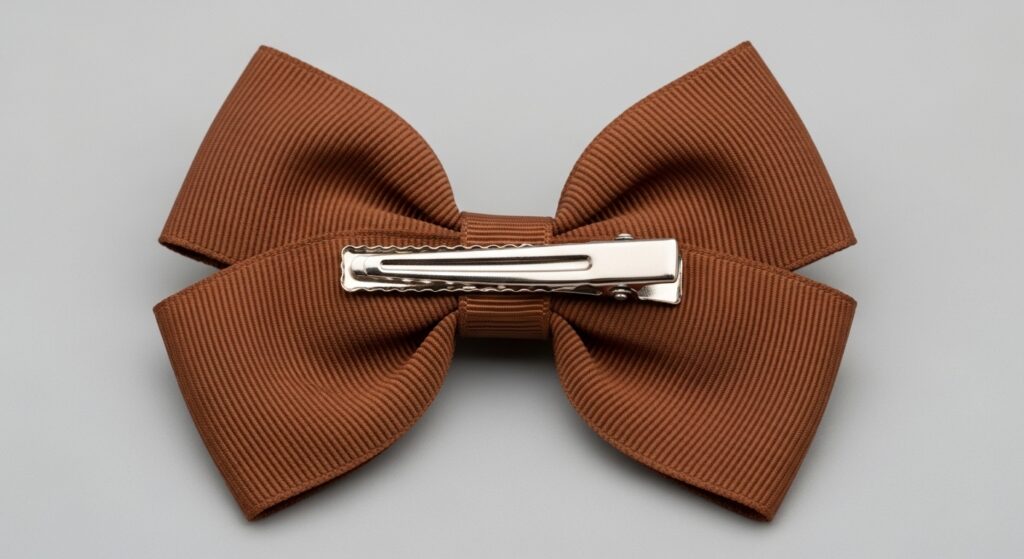
Fold a Modern Hair Bow
Bows are forever cute. Cut a rectangular piece of weave. Fold it into a classic bow shape, pinching the center. Use a thin strip of weave or thread to tie and secure the center.
Glue the back of the bow directly to a bobby pin or clip. Position it at the back of your head for a sweet surprise, or at the side for a playful touch. It instantly leans into the coquette trend.
Craft a Layered Ponytail Piece
For unbelievable ponytail volume, create a layered piece. Take a weft and trim it so it’s longer in the center and shorter on the sides, like a waterfall.
Attach this entire weft to a strong, long clip. When you put your hair in a ponytail, clip this piece underneath at the base. It adds tons of fullness and a perfect, blended shape.
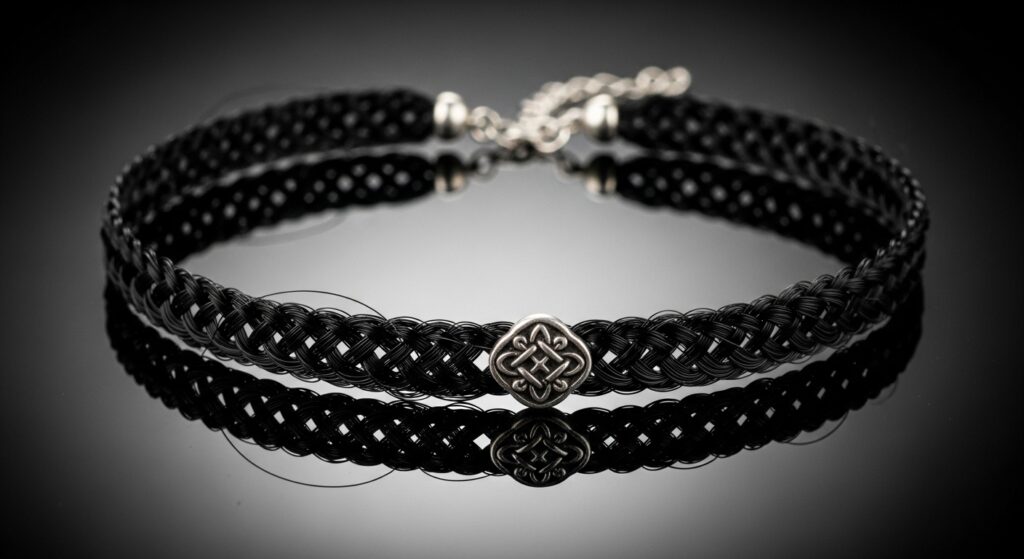
Design a Gothic Choker Necklace
Think outside the hair box! Use a long, straight piece of deep black weave. Braid or twist it, then attach the ends to a jewelry clasp. You can add a small pendant in the center.
This makes a stunning, textured choker that perfectly matches a romantic goth hairstyle. It ties your whole look together in the most creative way.
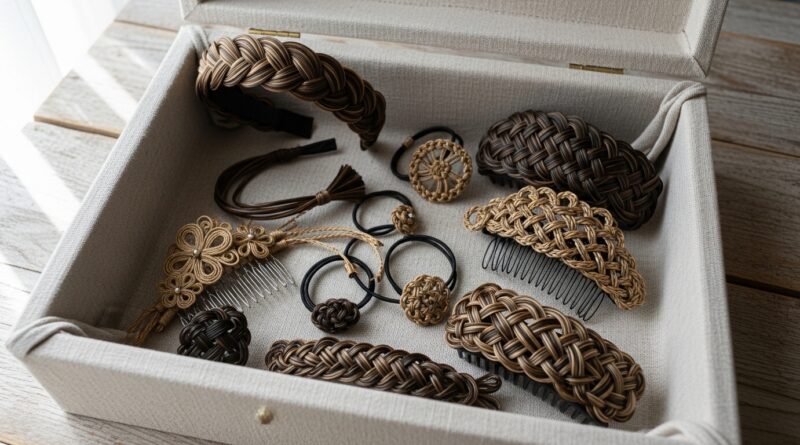
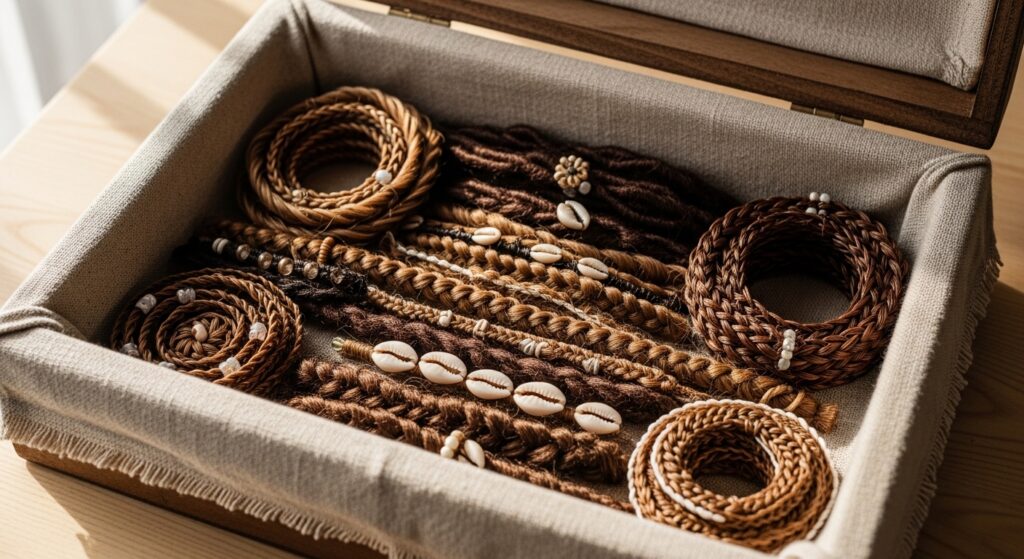
Put Together a Full Updo Kit
Now, store your creations beautifully. Find a pretty box or bag. Place your new scrunchies, clips, combs, and wraps inside in an organized way.
Having a dedicated “upcycle kit” makes getting ready so fun. You’ll reach for these unique pieces every day because they tell a story and add a personal touch no store-bought item can.
Style & Rock Your New Accessories
The fun part is wearing them! Don’t save these for a special occasion. Add a textured scrunchie to your low bun for the grocery store. Clip in those bangs for a coffee date.
Mix and match. Pair a dramatic comb with simple mini clips. Your accessories should feel like an extension of your personal style—whether that’s old money hair simplicity or full glitchy glam drama. Have fun with it!
And just like that, your closet clutter has become a treasure chest of possibilities. I’m so proud of you for diving in and creating something beautiful from what you already had. That’s the best kind of win, isn’t it?
Each piece you made carries that good, creative energy. They’re not just accessories; they’re reminders that a little imagination can refresh your whole style without spending a dime. I hope you feel as inspired as I do.
Now I’d love to hear from you! Which idea are you trying first? Did you come up with a genius twist of your own? Tell me everything in the comments below! And if this post sparked some creative joy, do me a huge favor and Save this post to Pinterest so your friends can upcycle their stash too. Happy crafting, beautiful!