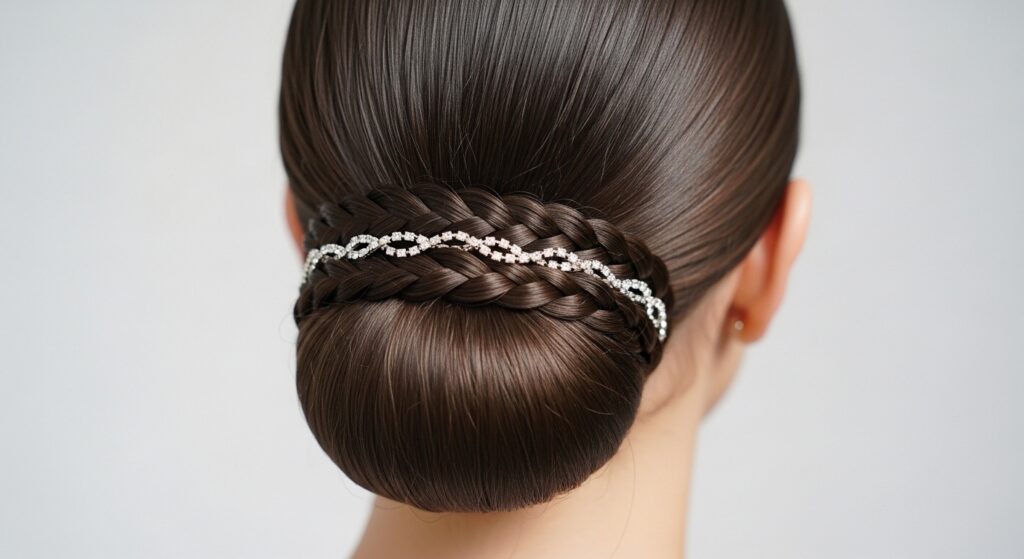
Updos 21 Crystal Bead Chains Draping Delicately Over Braids
Okay, let’s be real. We’ve all seen those stunning red carpet looks where a hairstyle isn’t just a hairstyle—it’s a piece of art. You know the ones I mean, where delicate chains and crystals seem to float in the hair. It feels like a fantasy, something reserved for celebrities with a glam squad.
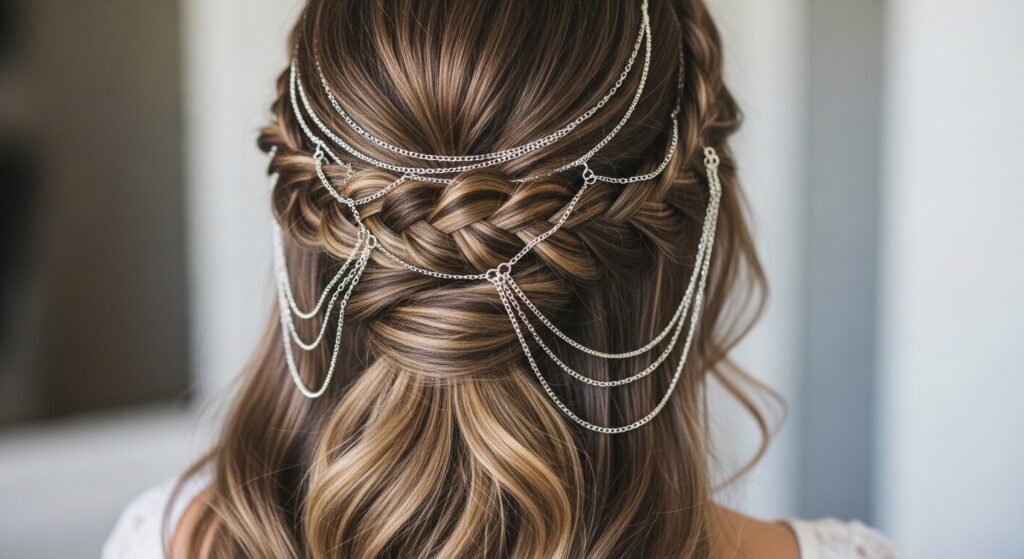
But what if I told you that look is totally within reach for your next big night out or even a dressed-up brunch? I’m talking about the gorgeous trend of draping crystal bead chains over braids. It’s the ultimate blend of boho romance and glitchy glam hair.
It looks intricate, but the secret is that it’s surprisingly simple to DIY. This post is your complete, step-by-step guide to getting that ethereal, head-turning look at home. I’ll walk you through everything from the braid base to securing those chains so they stay put all night.
Get ready to level up your updo game. This is one of those 2026 hairstyles you can start wearing right now.
Why This Crystal & Braid Combo Is Everywhere
This trend is popping up everywhere because it hits that perfect sweet spot. It’s romantic and detailed but doesn’t feel overly fussy. It takes the timeless appeal of braids—think old money hair vibes—and adds a modern, magical twist.
It’s a fantastic way to incorporate jewelry into your look in a fresh way. Instead of just earrings and a necklace, your hair becomes part of the accessory statement. It works for so many aesthetics, from soft and romantic to something with a hint of romantic goth hairstyles.
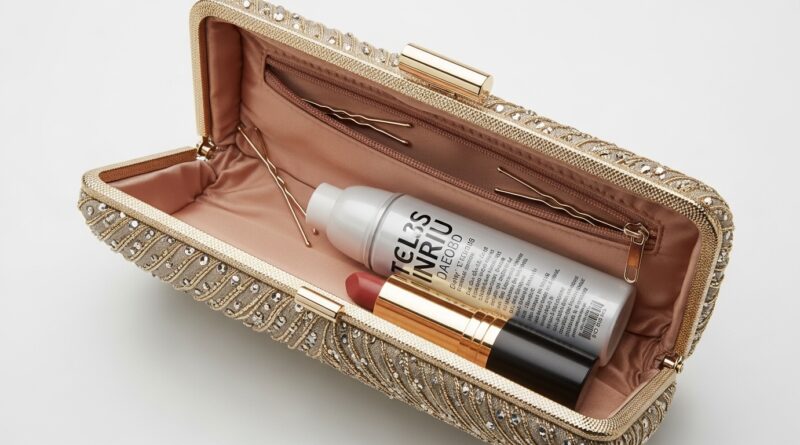
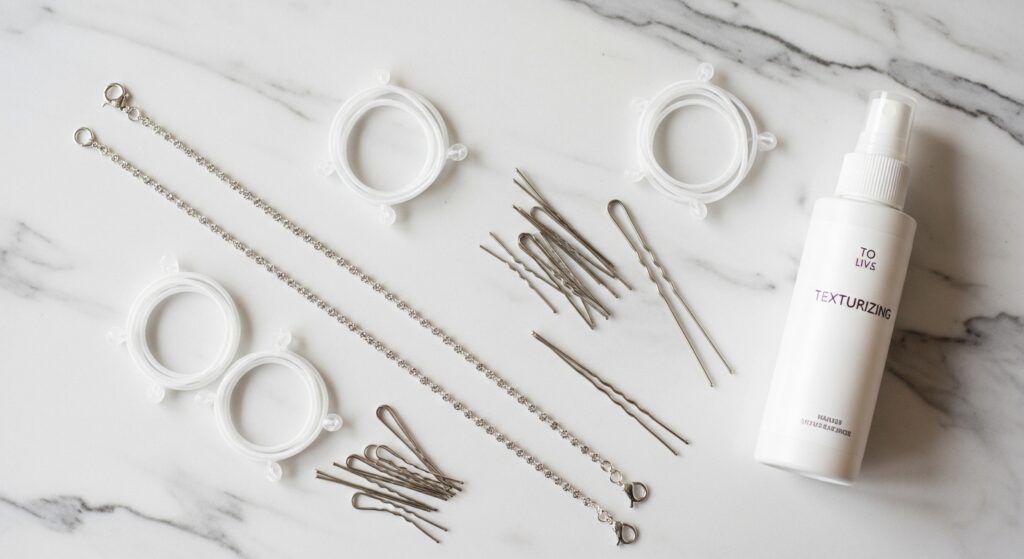
Gathering Your Tools: A Simple Shopping List
You don’t need much! The key is having the right pieces so the process is smooth. Here’s exactly what to grab before you start.
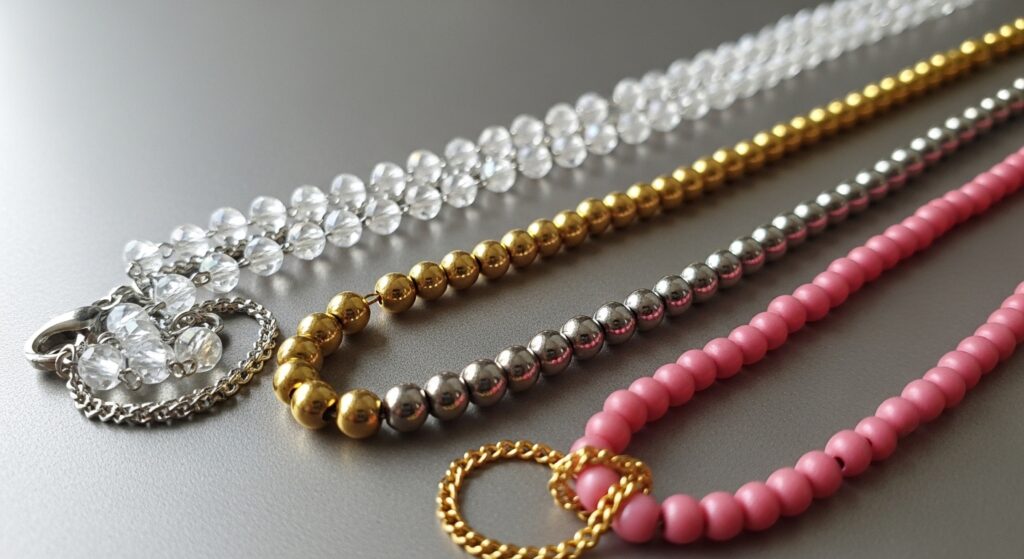
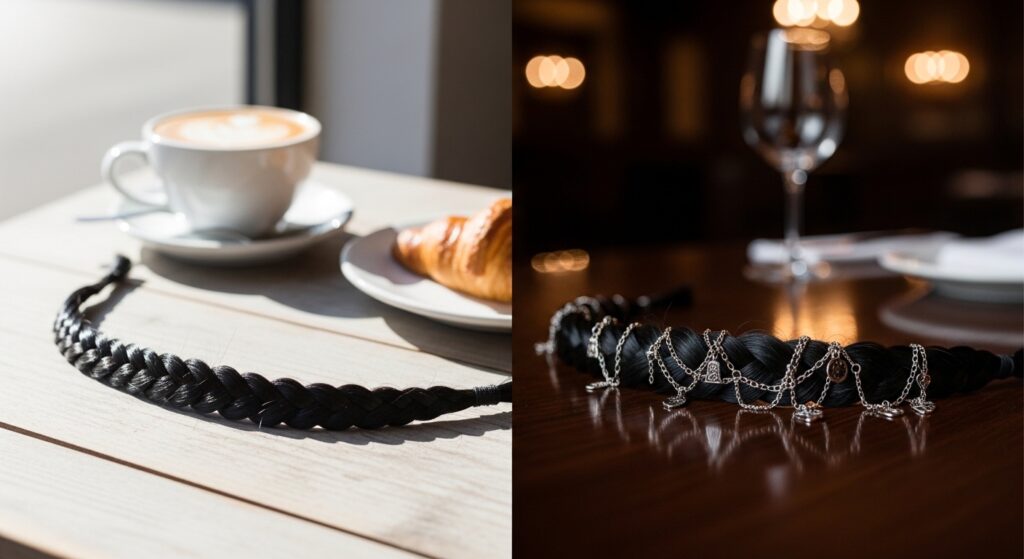
- Crystal Bead Chains: Look for delicate, lightweight ones on Etsy or a craft store. Get a few with different bead sizes.
- Clear Elastic Bands & Bobby Pins: The clear elastics are for securing braid ends. Bobby pins in your hair color are essential.
- Fine-Tip Hairpin or Crochet Hook: This is your secret weapon for tucking chain ends neatly.
- Basic Styling Products: A texturizing spray, hairspray, and maybe a shine serum.
The Best Braid Bases to Start With
Not all braids are created equal for this look. You want a braid with texture and dimension, something for the chains to grip onto and drape over. Simpler is often better as a foundation.
A classic three-strand braid works, but for more visual interest, go for a Dutch braid (braided under) or a fishtail. These braids have beautiful, pronounced ridges that the chains can nestle into perfectly, creating that effortless draped effect.
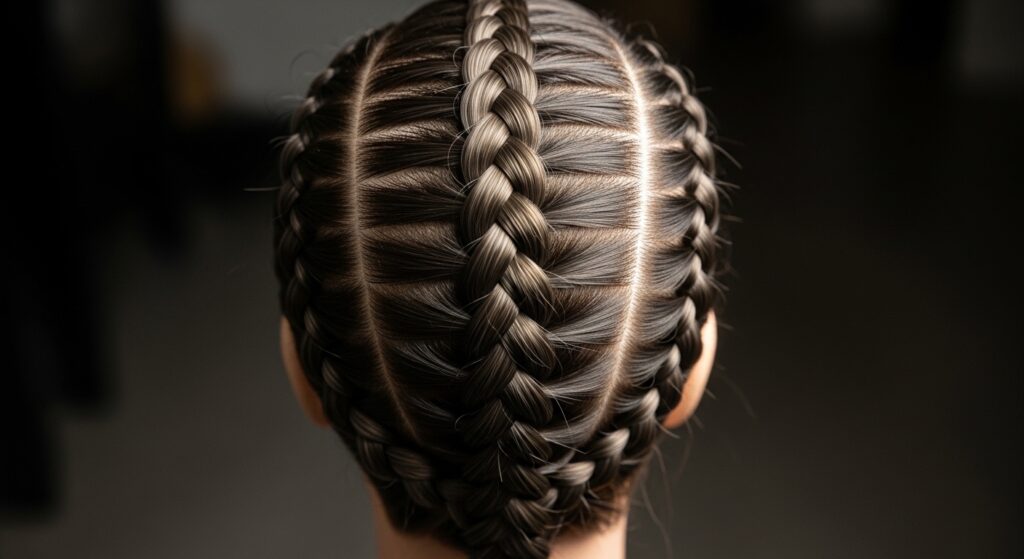
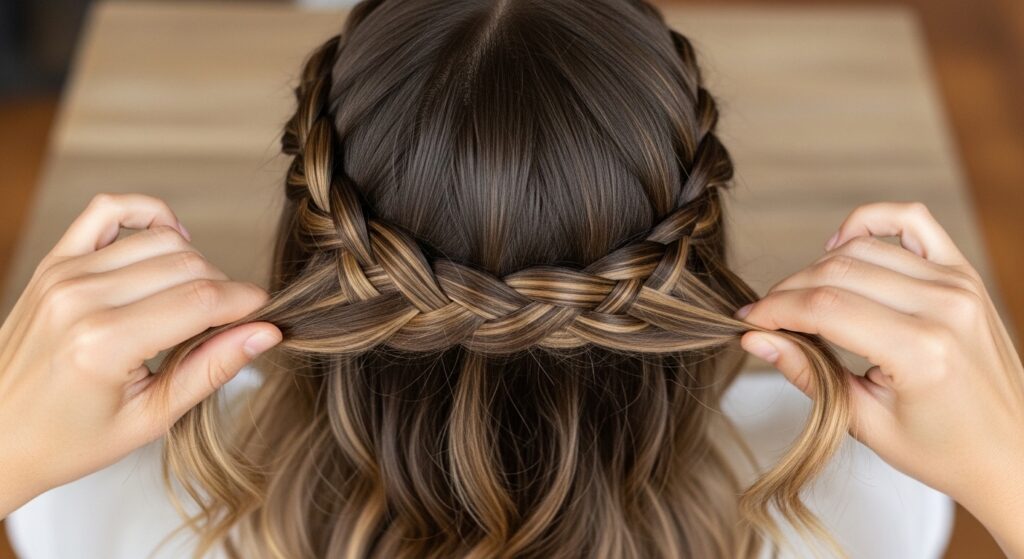
Step 1: Creating the Perfect Textured Braid
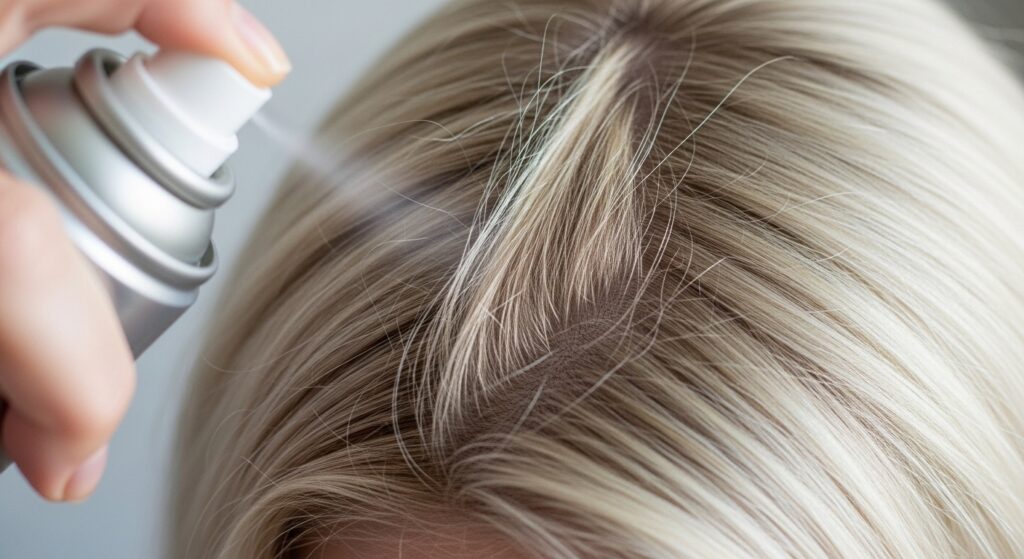
Start with day-old hair or spray dry strands with a texturizing spray. This gives the chains something to hold onto. Don’t make your braid too tight or too sleek.
- Braid your hair as you normally would, but keep a gentle, consistent tension.
- When you reach the end, secure it with a clear elastic band.
- Gently pull on the outer loops of the braid to loosen it and create that fuller, softer look. This also creates more space for the chains.
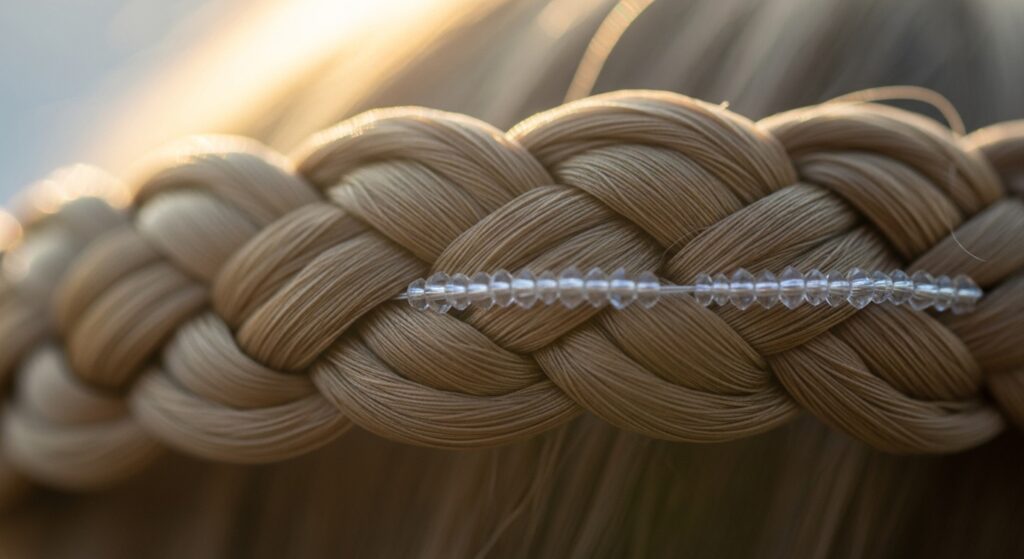
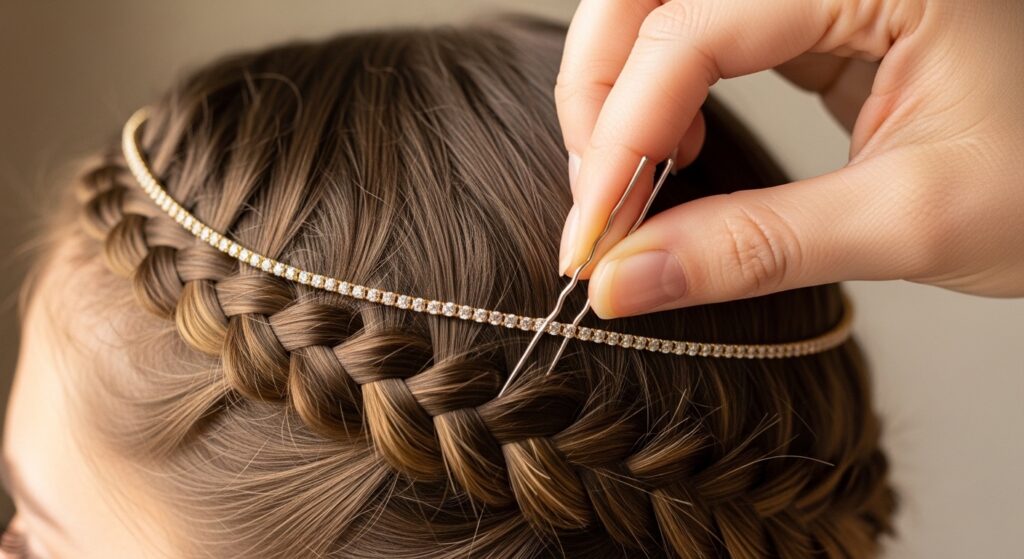
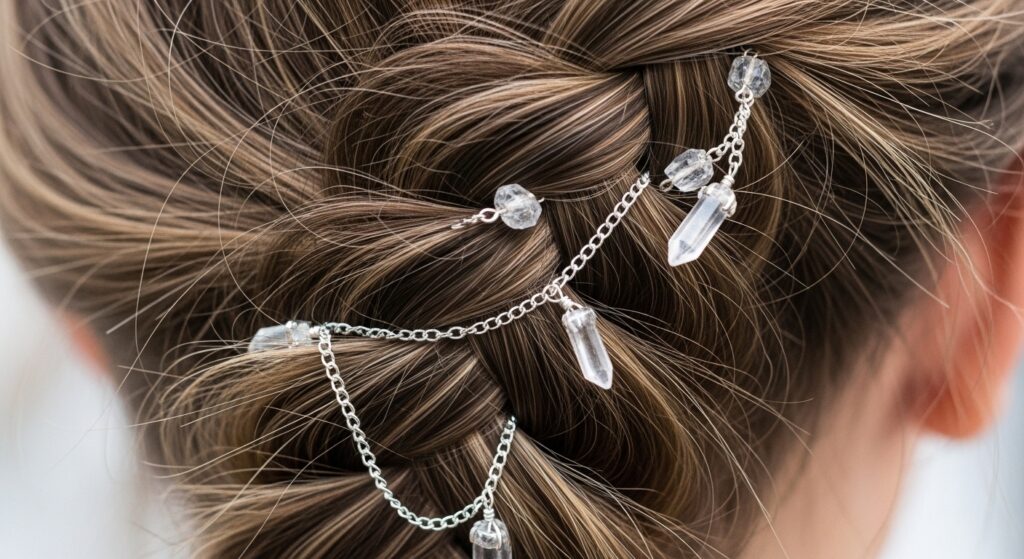
Step 2: Strategically Placing Your First Chain
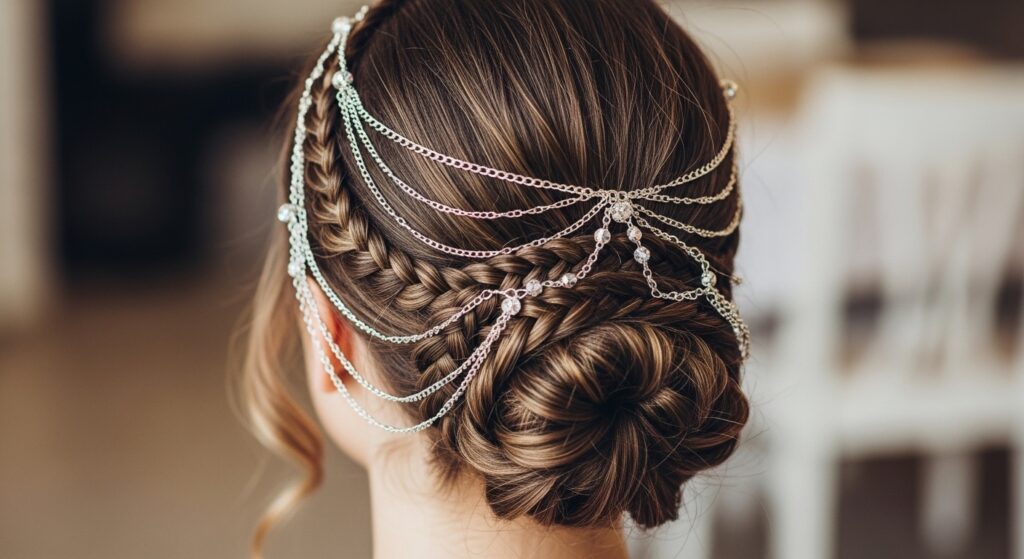
Now for the fun part. Take your first chain. Don’t just lay it on top. You want it to look like it grew there.
Starting near the top of the braid, use a bobby pin to secure one end of the chain underneath the braid, hiding the pin. Then, gently drape the chain over the braid, following its natural curve. Use another discreet pin at the bottom to secure the other end.
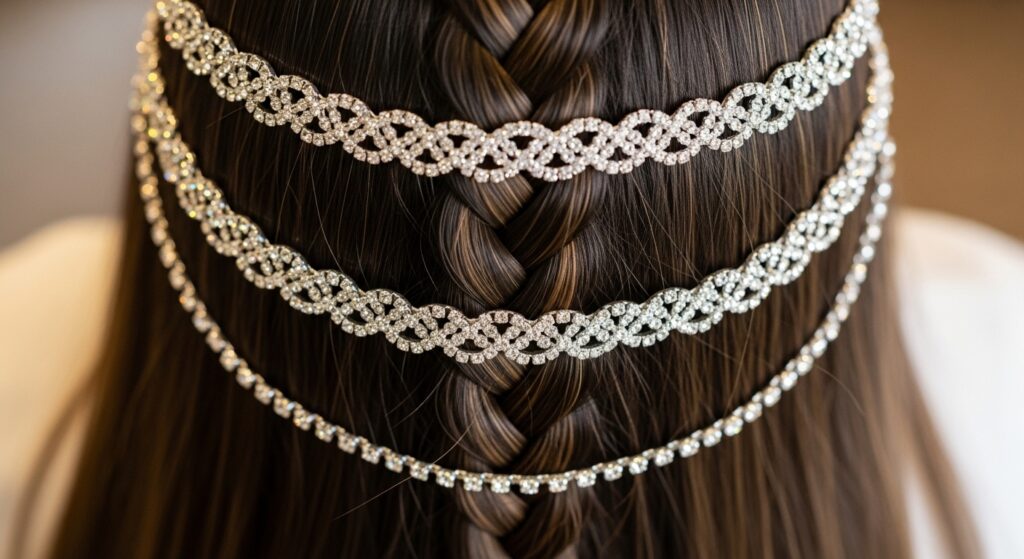
Step 3: Building Dimension with Multiple Chains
One chain is pretty, but two or three is magical. This is where you build that “draping” effect. Add your next chain slightly offset from the first.
Maybe let the second one dip lower in the center or cross over the first one gently. There’s no wrong way. Just play with the placement until it feels balanced. Use different chain lengths or bead styles for more interest.
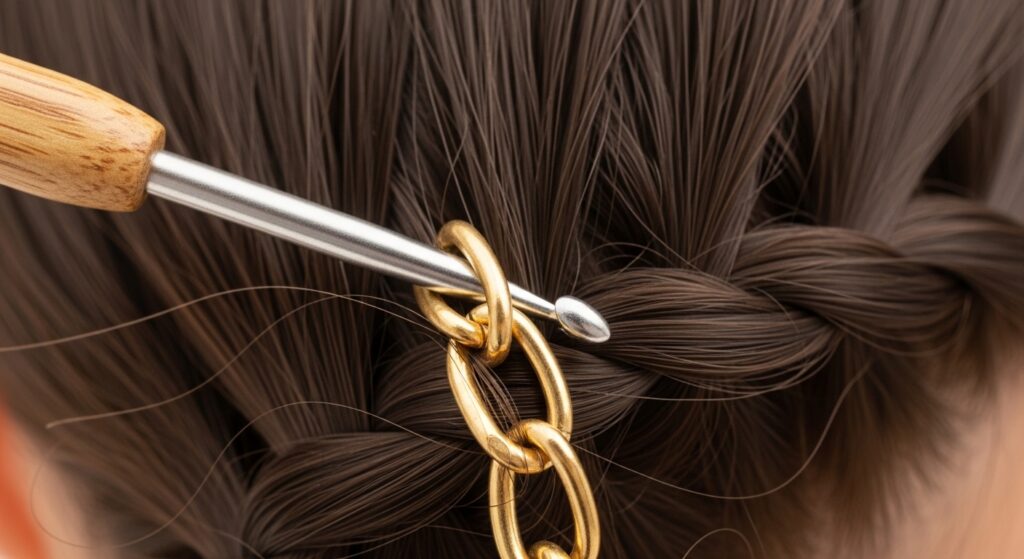
Step 4: The Secret to Securing Everything Invisibly
This step is crucial for all-night wear. After you love the placement, it’s time to lock it down. Take your fine-tip hairpin or crochet hook.
Gently lift a small section of the braid and tuck the end link of the chain underneath, then let the hair cover it. You can also use it to hook a chain link onto a piece of hair within the braid. Finish with a light mist of flexible-hold hairspray.
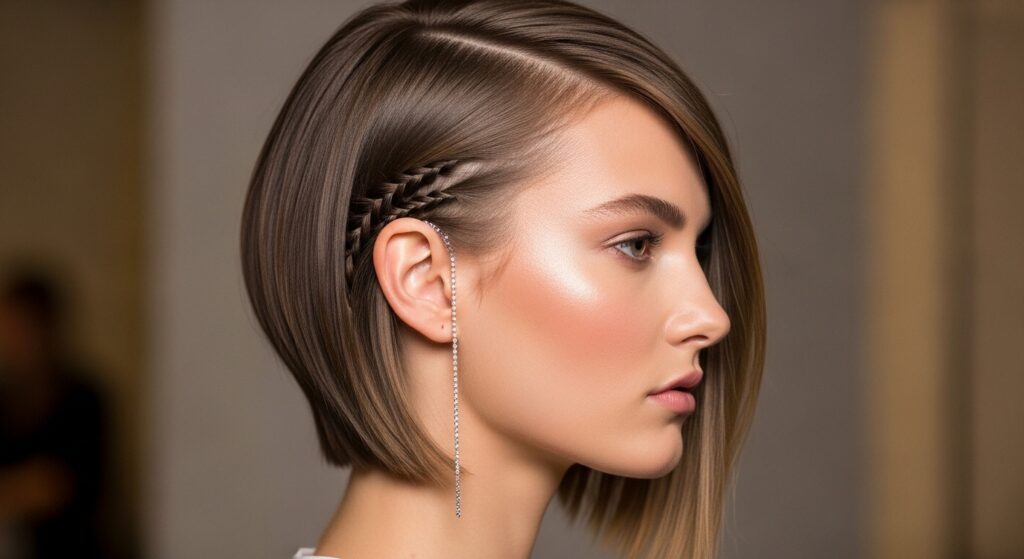
Adapting the Look for Short Hair: Asymmetrical Lob & Bobs
Have a chic asymmetrical lob or a quiet luxury bob? You can still do this! Create a small, accent braid along your hairline or at the nape of your neck.
Drape a single, shorter chain over just that braided section. It becomes a stunning, subtle detail. This is a gorgeous way to add a touch of glitchy glam hair to a polished short cut.
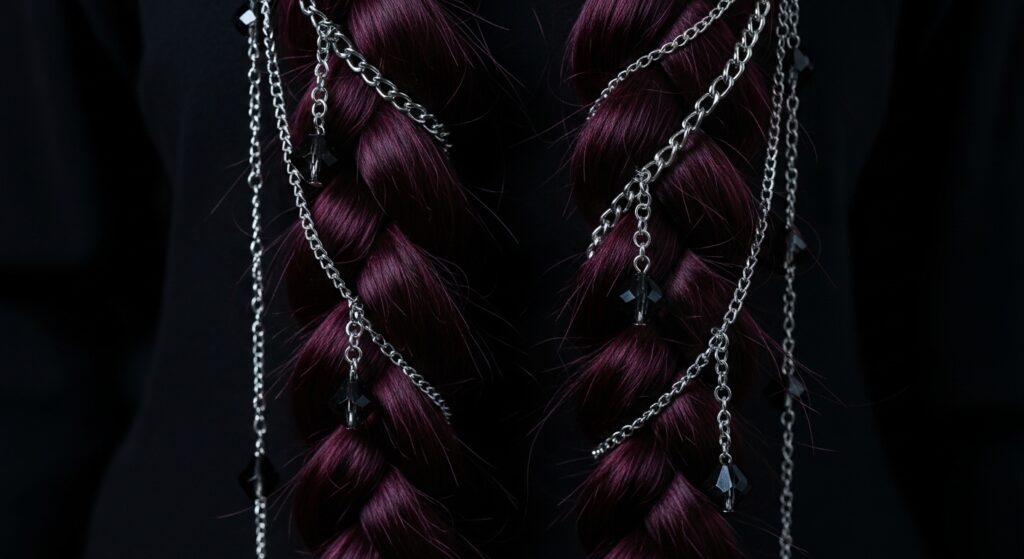
Channeling Romantic Goth & Vampire Vibes
Lean into the romantic goth hairstyles or vampire haircut aesthetic by choosing darker chains. Look for ones with black crystals, dark pearls, or silver chains with onyx beads.
Pair the chains with two deep, dark braids or a braided crown. The contrast between the dark hair and the sparkling, moody jewels is absolutely breathtaking and perfectly mysterious.
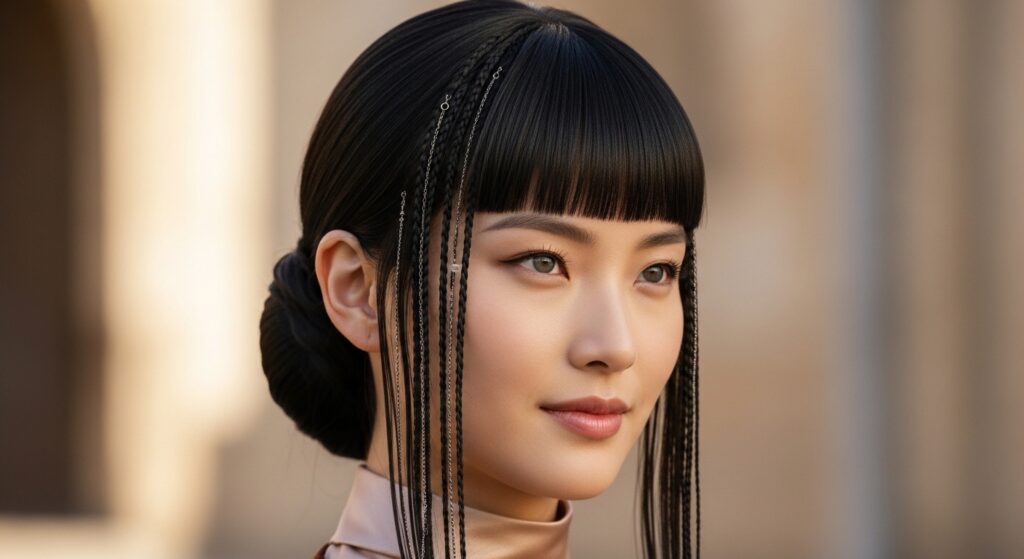
Adding a Hime Cut Flair to Your Updo
The hime cut, with its dramatic face-framing pieces, is a great candidate. Style the long front sections into two smaller, delicate braids.
Drape your crystal chains specifically over these front braids before incorporating them into the main updo. This draws beautiful attention to your unique cut and frames your face with sparkle.
Creating a “Glitchy Glam” Texture Effect
Glitchy glam hair is all about intentional, artful imperfection. To get this vibe, don’t make your braids perfect. Let some pieces flyaway.
Then, drape the chains in a less structured way. Let one chain hang loosely, or thread it through the braid in a broken, irregular pattern. It should feel cool and deliberately “undone.”
Elevating a Simple Low Bun in Minutes
This is the quickest upgrade for a classic. Pull your hair into a low, textured bun. Before you twist the final loop, pull out a small section of hair and braid it.
Wrap that braid around the base of the bun. Then, simply drape one or two chains over the braid-wrapped bun base. Instant old money hair elegance with a modern twist.
The Half-Up, Half-Down Crystal Moment
Not ready for a full updo? A half-up style is your best friend. Create a half-up crown or just pull back the top section and braid it.
Drape your chains over this half-up braid, letting the ends blend into your loose hair below. It’s effortless, beautiful, and perfect for daytime-to-evening.
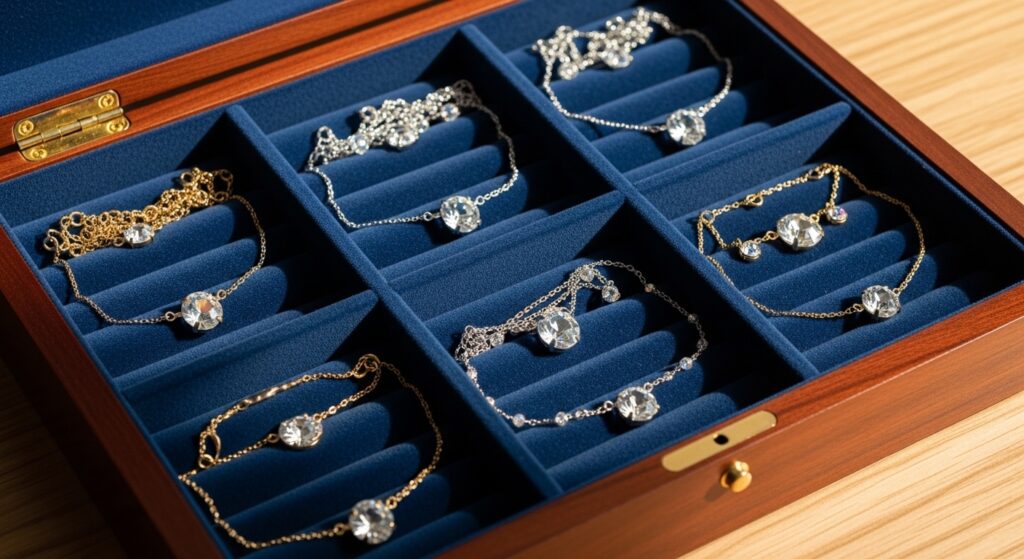
Choosing Your Chains: Bead Size & Color Matters
The chain details change the whole feel. Small, clear crystals or pearls feel ethereal and classic. Larger, colored beads make more of a bold statement.
- For a Wedding/Bridal: Tiny, clear Swarovski crystals or freshwater pearls.
- For a Party: Mixed metallic beads or chains with a pop of color.
- For Everyday Magic: Simple, ultra-thin chains with almost-invisible beads.
What to Do If Your Hair is Super Silky & Slippery
Fine or silky hair can make chains slide. The fix is all in prep. Use a strong-hold texturizing spray on dry hair before braiding.
You can also lightly backcomb the section where the braid will sit for extra grip. When securing the chains, use more bobby pins in an “X” formation and really tuck those ends in deep with your hairpin.
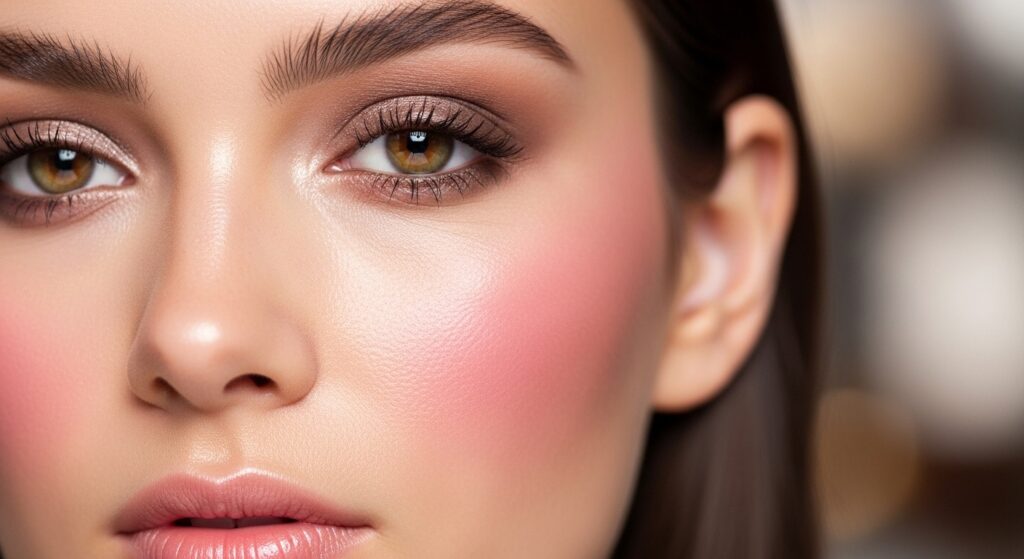
Matching Your Makeup to the Crystal Draped Look
Keep your makeup balanced. Since the hair is detailed, I recommend focusing on one feature. A glowing, fresh skin base is perfect.
Then, choose either a soft romantic eye with shimmer or a bold lip—not both. This keeps you from looking overdone. A soft pink blush and highlight will complement the crystals beautifully.
How to Make This Hairstyle Last All Night Long
Nobody wants a chain falling off at dinner. After everything is pinned, do the “head shake test.” Gently shake your head from side to side.
If anything feels loose, reinforce it. Carry a few extra bobby pins and a tiny travel hairspray for touch-ups. Securing the chains under the braid, not just on top, is the real key to longevity.

Taking It From Day to Night Effortlessly
This is the best part. Wear your braid plain for daytime errands or work. Then, when it’s time for dinner or drinks, simply add your chains.
It takes less than five minutes to transform the entire look. Keep your chains in a small pouch in your purse. This quick change is what makes this one of my favorite 2026 hairstyles—it’s so adaptable.
Inspiring Variations: Beyond the Single Braid
Don’t stop at one braid! Try this on twin braids, a braided headband, or a complex updo with multiple braided elements. Each braid is a new canvas.
You can connect chains between two braids or create a web-like effect over a braided bun. Look at vintage jewelry and red carpet photos for incredible, outside-the-box inspiration.
Your Questions Answered: The FAQ Quick-Fire Round
Let’s tackle the common questions fast. Can I sleep in it? No, remove the chains before bed to avoid tangles.
Can I reuse the chains? Absolutely! Gently untangle and store them flat. What if a chain breaks? Keep a few spare jump rings and needle-nose pliers for quick repairs.
My Final Pep Talk: You Can Totally Do This
I know it looks high-fashion, but I promise it’s just a braid plus jewelry. Your first try might not be perfect, and that’s okay. It gets easier every time.
The goal isn’t perfection; it’s creating something beautiful and unique that makes you feel amazing. That’s the real magic of playing with hair accessories. So grab a chain and just start playing.And there you have it—your complete guide to turning a simple braid into a crystal-draped masterpiece. This look truly is one of those special styles that feels luxurious but is built on a foundation of simple techniques we all know.
I love how it takes the everyday and makes it feel extraordinary. Whether you’re adapting it for your vampire haircut or adding a quiet luxury bob twist, it’s all about expressing your personal style with a little extra sparkle.
Did you try it? I want to see your creations! Tag me on Instagram or save this post to Pinterest to keep this guide handy for your next event. What bead color are you most excited to try? Tell me in the comments below!