Viral TikTok Braids Tried Easily This Weekend Fast
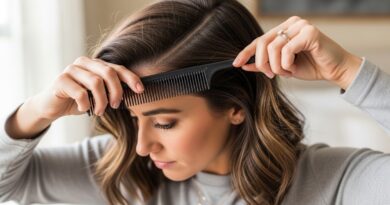
Okay, I saw the braids all over my feed too. You know the ones. They look impossibly intricate, like you need a professional and three hours to spare. I was scrolling, feeling that mix of inspiration and “I could never.”
But here’s the secret I figured out: most of those viral TikTok braids are built on one or two simple techniques. Once you know the base, you can fly through them.
This weekend, I challenge you to try one. I broke down the absolute easiest, fastest styles that give you that wow-factor without the salon price tag. Let’s get into it.
Your Pre-Braid Checklist: Gather Your Tools
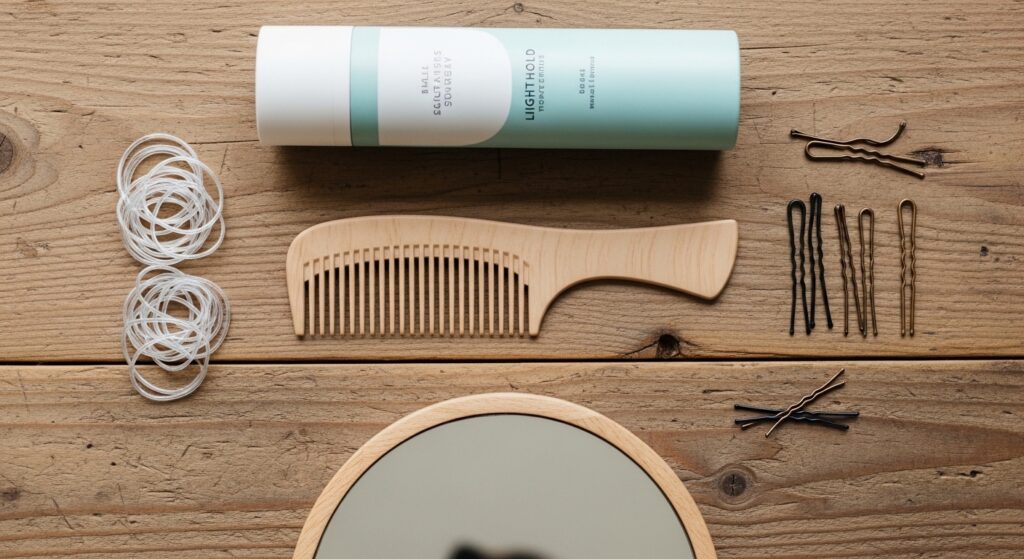
Before we start, let’s get your toolkit ready. You don’t need much, but having these within reach makes everything smoother. Trust me, scrambling for a pin with your hair half-done is the worst.
Here’s what you need:
- A wide-tooth comb for detangling
- Small, clear hair elastics
- A handful of bobby pins (matte ones blend best)
- Light-hold texturizing spray or mousse
- A couple of small hair clips to section hair
Start With Day-Old Hair For Grip
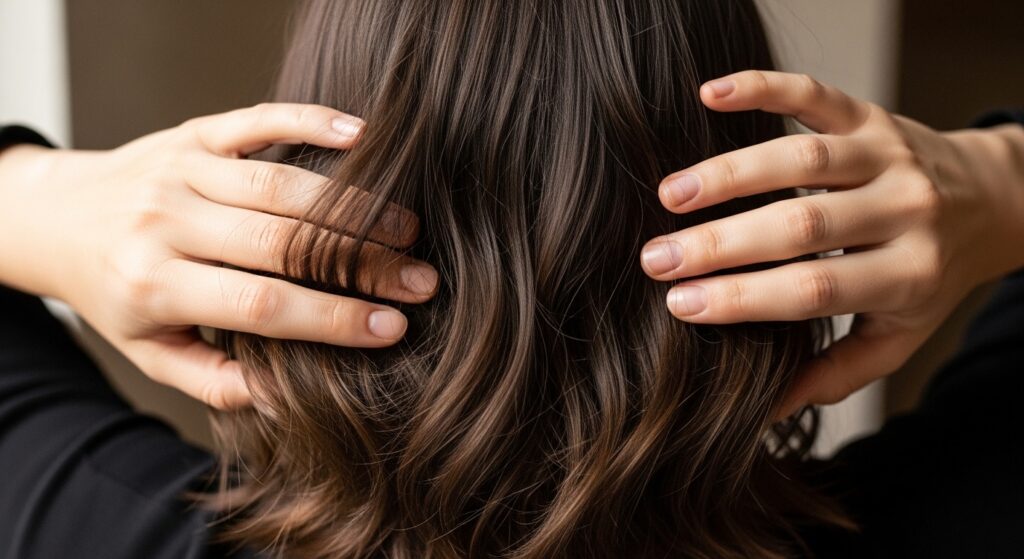
This is the golden rule for easy braiding. Freshly washed hair can be too slippery. Day-old hair has just enough natural oil and texture to hold the style better.
If you must wash, spray a texturizing spray at your roots and through the lengths. A little grit is your friend. It makes the braid look fuller and helps it stay put all day long.
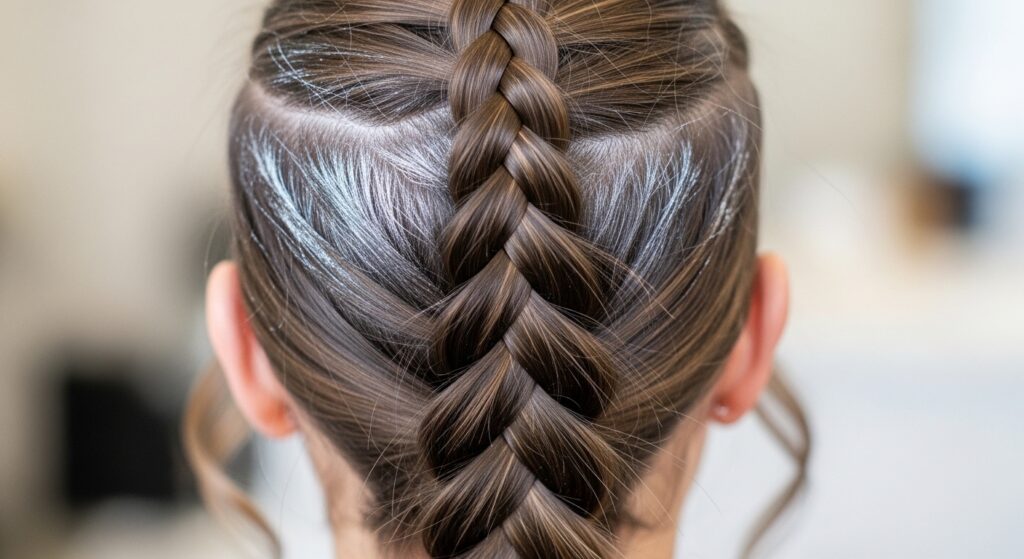
The Foundation: Mastering The Basic Three-Strand
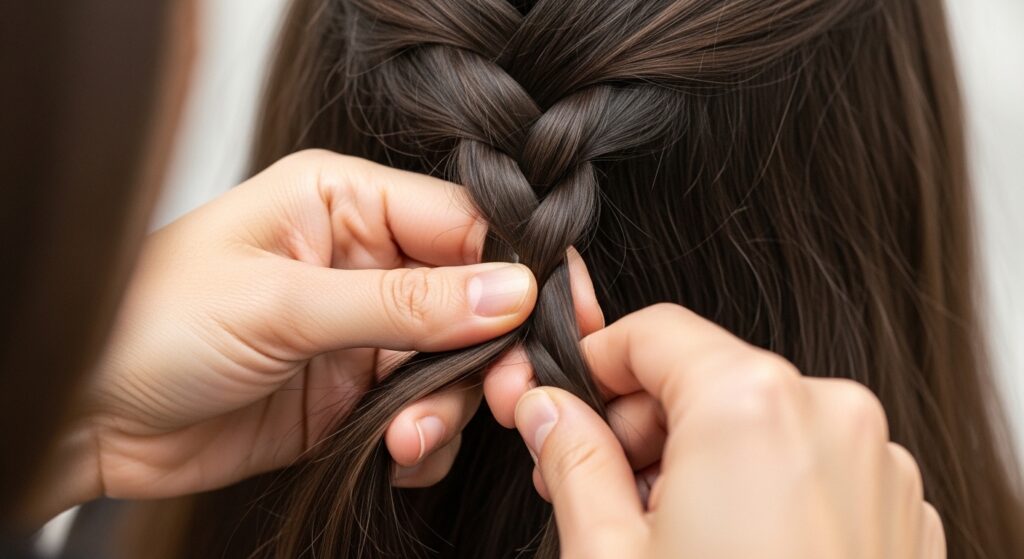
Everything here starts with this. If you can do a basic braid, you can do all of these styles. Let’s just quickly lock in the method.
Divide hair into three equal sections. Cross the right section over the middle (it becomes the new middle). Then, cross the left section over the new middle. Keep alternating, pulling gently to tighten as you go. That’s it! Practice this a few times to get the rhythm.
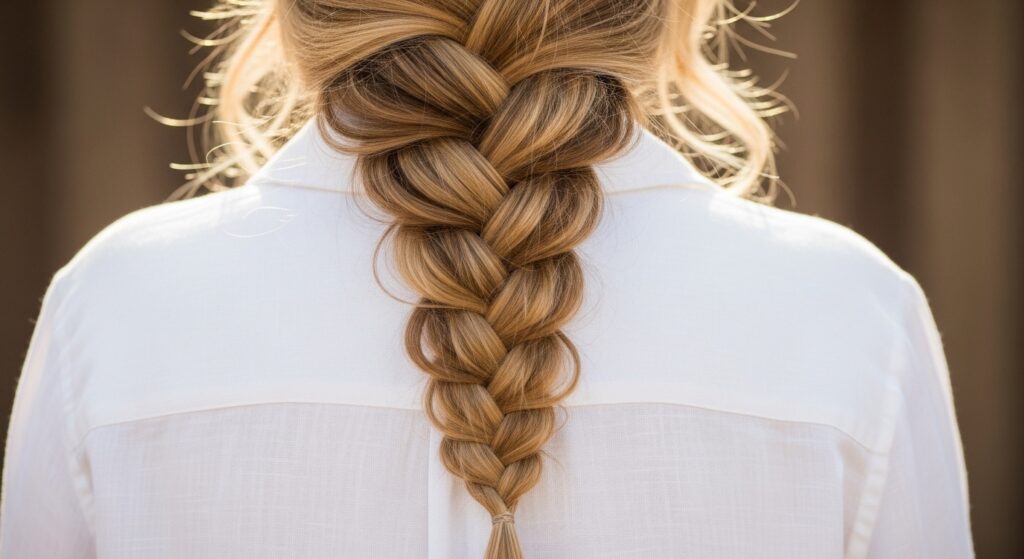
The “Old Money Hair” Twist: The Rope Braid
This braid screams quiet luxury and is deceptively simple. It gives that sleek, polished look you see in all the old money hair aesthetics. It’s perfect for a weekend farmer’s market or a nice brunch.
Split a section into two parts. Twist both sections clockwise. Then, twist them around each other counter-clockwise. The key is keeping the initial twists tight. Secure the end. It looks intricate but takes two minutes.
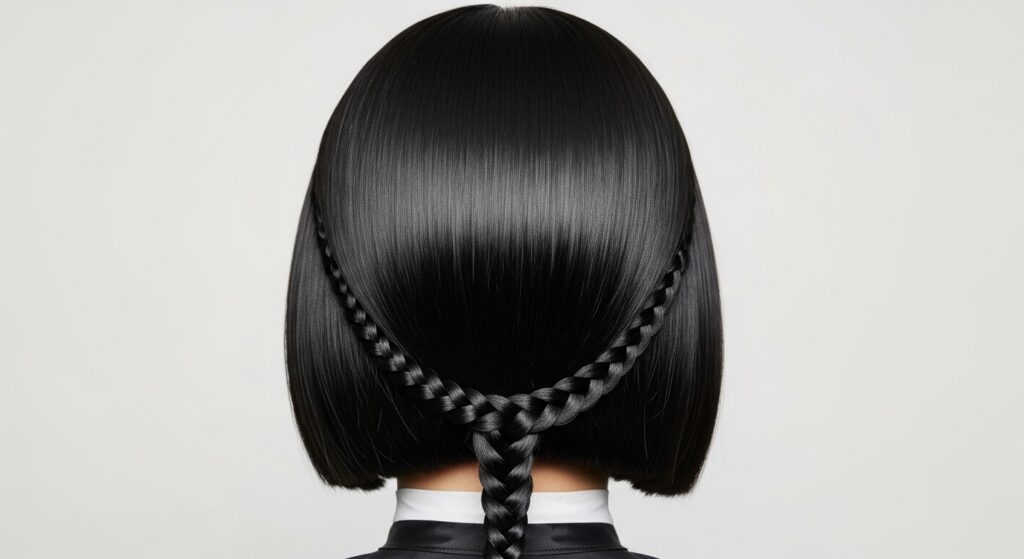
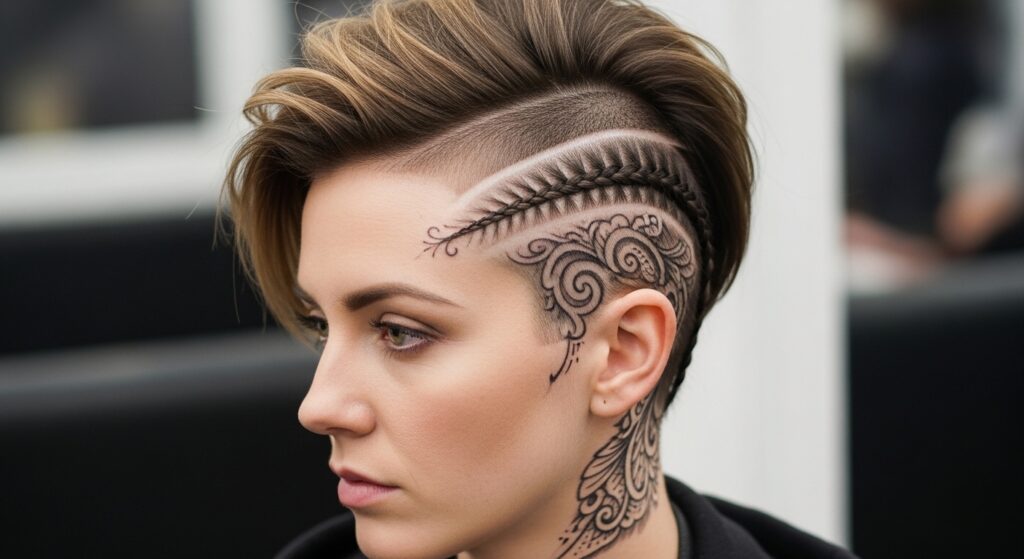
The Viral “Vampire Cut” Accent Braid
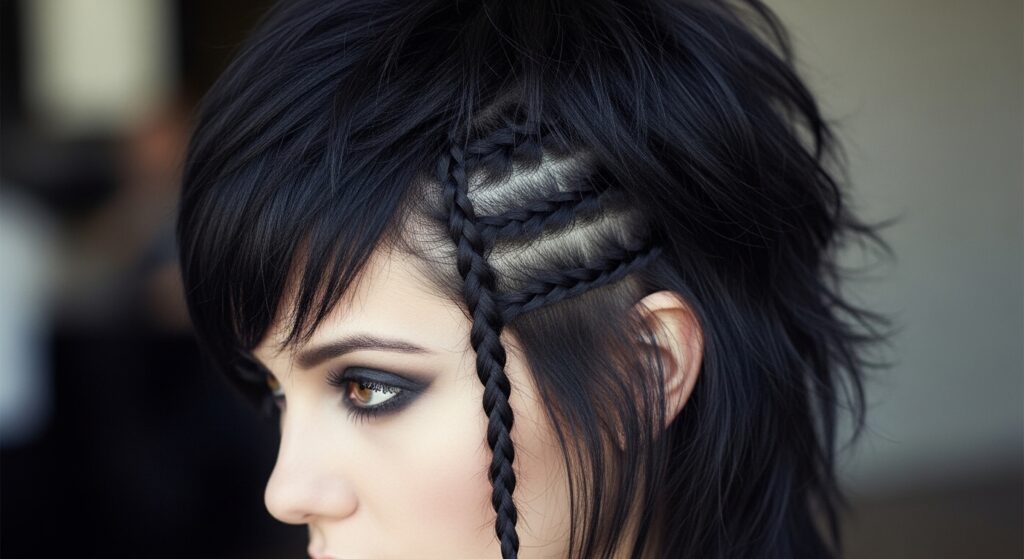
This is for all my romantic goth hairstyles lovers. If you have a shag or a vampire haircut, this accent is perfect. It adds a detailed, ethereal touch without changing your whole look.
Take a small section of hair near your temple. Do a simple three-strand or rope braid. Braid it loosely for a softer feel. Pin it back just behind your ear with a bobby pin, or let it hang with the rest of your hair. Instant mood.
Fast Boho Vibes: The Pull-Through Braid
This looks like a gorgeous, thick fishtail braid but is way easier. It’s my go-to for a boho, festival-inspired look that’s actually comfortable to sleep on if you want second-day waves.
- Put your hair in a high ponytail and secure with an elastic.
- Add a second elastic a few inches down.
- Split the hair above the second elastic and pull the ponytail through the hole.
- Repeat down the length, adding elastics and pulling through.
Face-Framing Braid For An Asymmetrical Lob
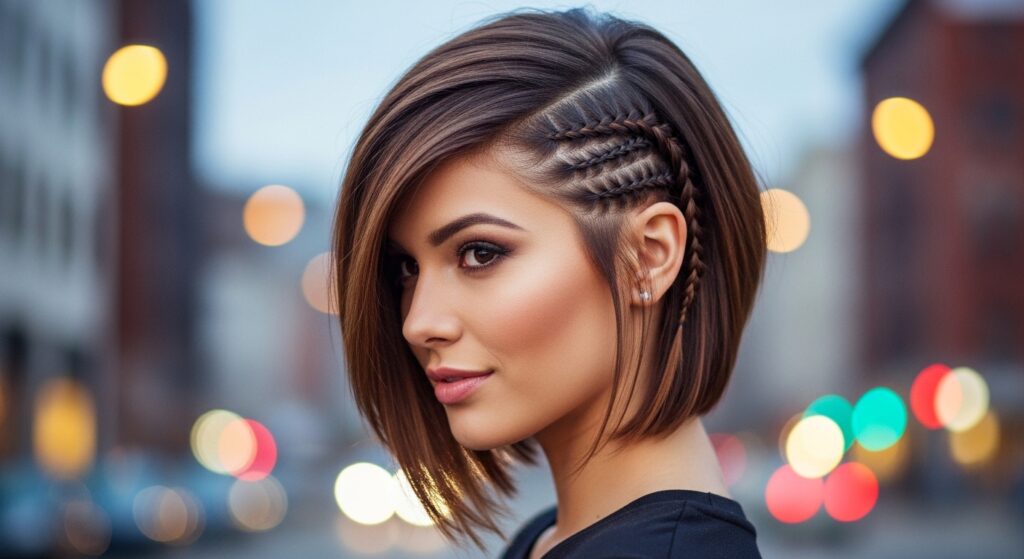
If you have a chic asymmetrical lob or a hime cut, this style highlights your cut perfectly. It keeps hair out of your face while showing off your amazing shape.
On the heavier side of your lob, take a section from the front. Braid it loosely along your hairline, following the angle of your cut. Secure it behind your ear with a hidden pin. It adds a little detail that makes your haircut pop.
The “Glitchy Glam Hair” Piecey Braid
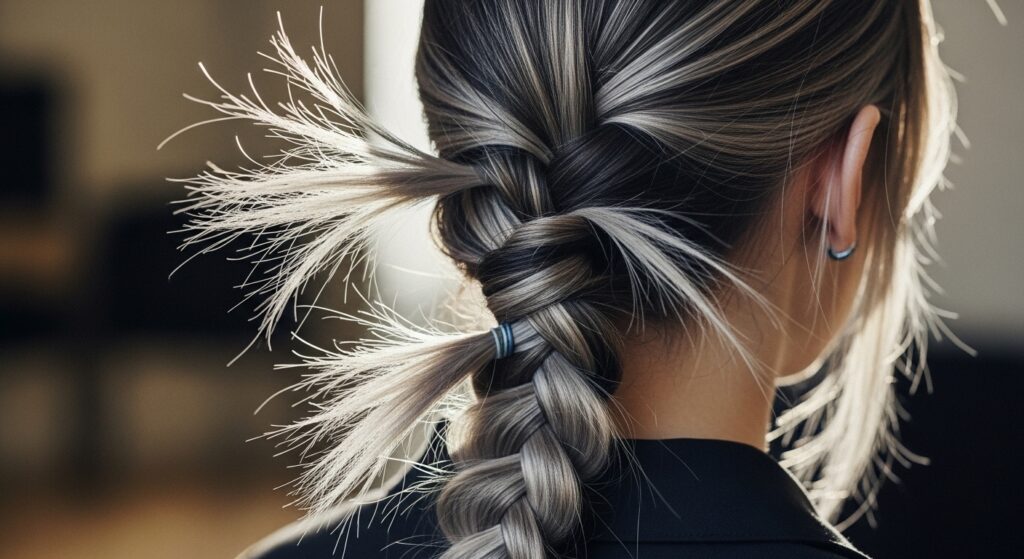
Glitchy glam hair is all about intentional imperfection. This isn’t a neat braid. After you finish any braid, gently pull at the outer loops to make it wider and messier.
Pull out tiny wispy strands around your face and neck. The goal is “I did this in a cool, effortless way,” not “I spent an hour perfecting it.” A little hairspray on your fingers tames the wisps just enough.
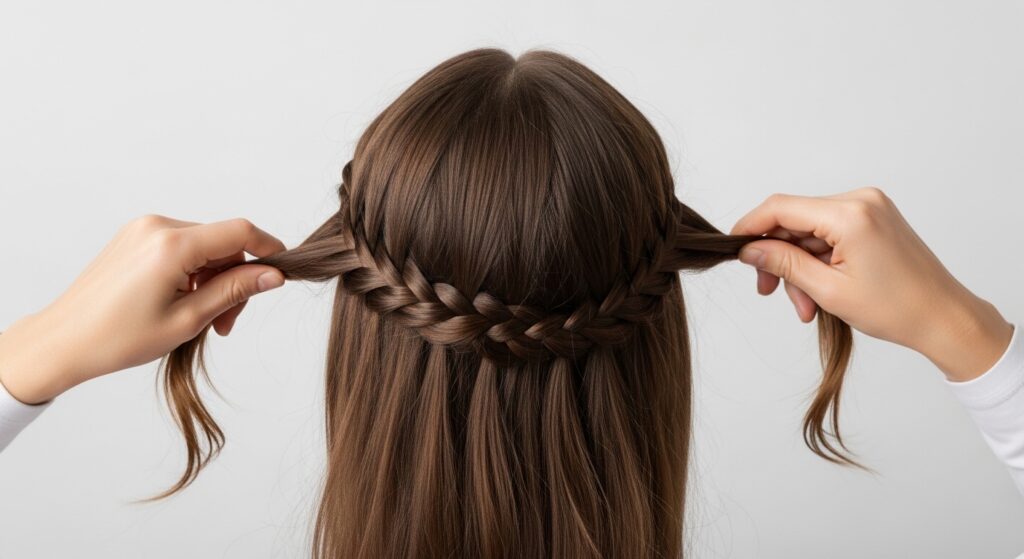
Half-Up Crown Braid In 5 Minutes
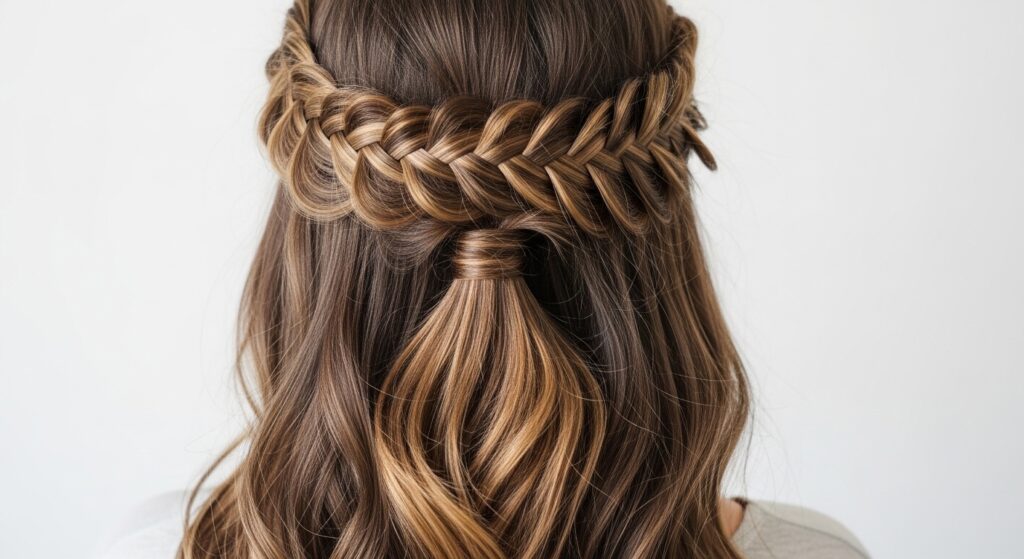
This sounds fancy but is one of the fastest up-dos ever. It gives you that romantic, crown-like effect without needing to braid all your hair.
Take two sections of hair from above each temple. Braid each into a simple three-strand braid. Pull them to the back of your head, cross them over each other, and pin. Let the rest of your hair flow down. So pretty, so easy.
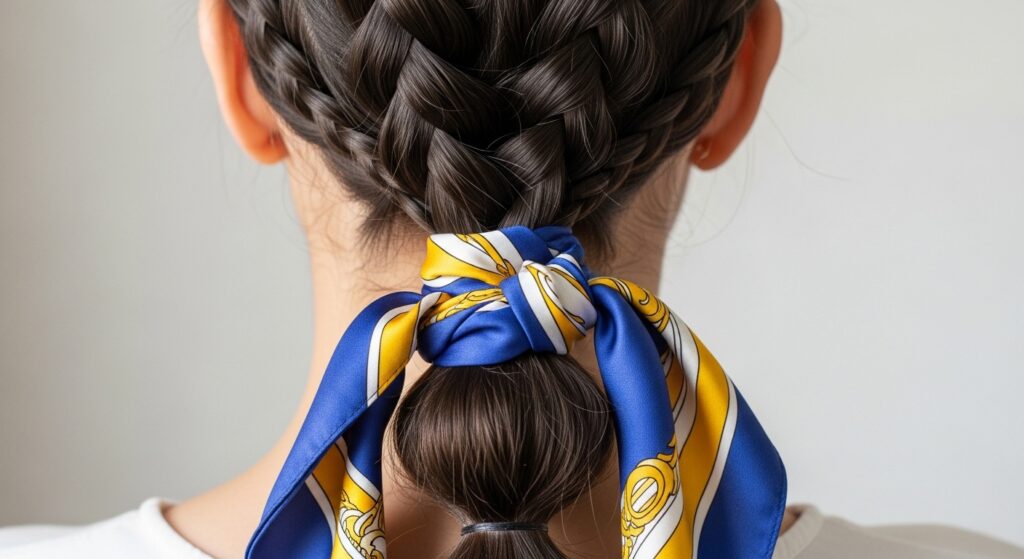
Add A Scarf For Instant “2026 Hairstyles” Flair
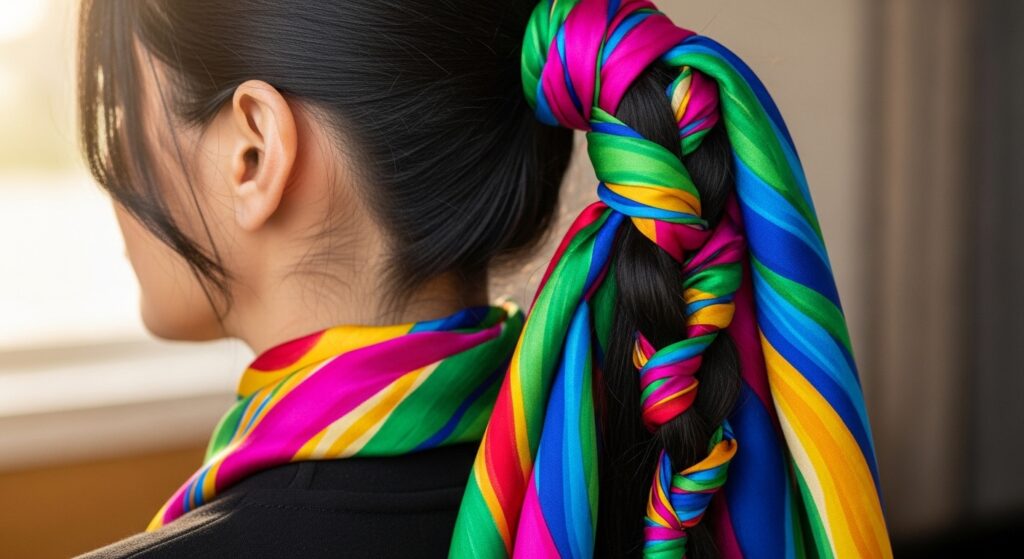
Want to tap into those 2026 hairstyles trends now? Add a scarf. It’s the ultimate cheat code. It hides messy braid starts and adds a major style element.
Fold a long, thin scarf into a strand. When you start your braid at the crown, treat the scarf as one of the three sections. Braid it right in. You can also tie it around the base of a ponytail before you braid. Instant editorial look.
Double Braids That Don’t Look Kindergarten
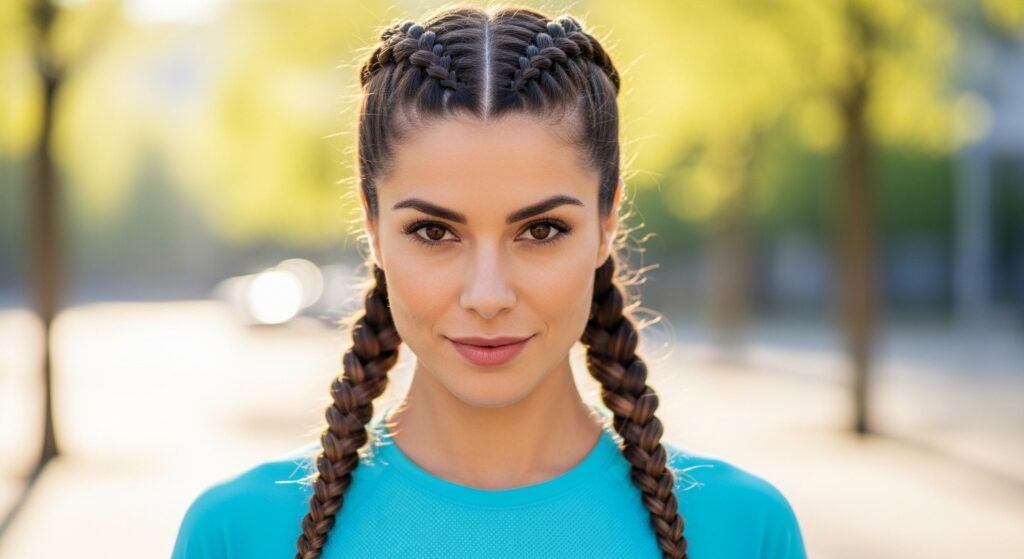
Double braids are back in a big, cool way. The trick is in the details to keep them feeling grown-up. Start with a deep side part, or add a scarf as we just talked about.
Braid them loosely, and definitely pull them apart gently to widen them. Keep the ends sleek in a small ponytail or wrap them with a small section of hair. It’s athletic, chic, and perfect for running errands in style.
The Sleek Low Braid For “Quiet Luxury Bob”
If you have a quiet luxury bob, this style is your best friend for slightly grown-out days or when you want a change. It works on chin-length or longer bobs.
Apply a smoothing cream or serum to damp hair and blow-dry straight. Gather all hair at the nape. Braid it tightly in a simple three-strand. Use a clear elastic and a tiny dab of gel on flyaways. It’s the definition of polished.
Braided Headband For Bad Hair Days
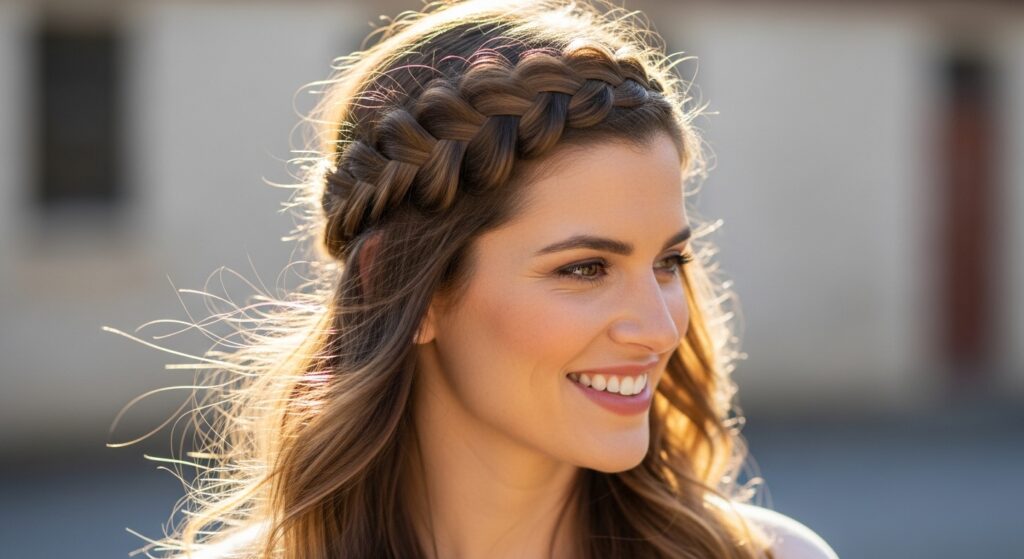
This is my ultimate save when I haven’t washed my hair but need to look put together. It takes two minutes and hides oily roots beautifully.
Take a section of hair from one temple. Braid it loosely across your hairline, like a headband. Pin it securely behind your opposite ear. Fluff your remaining hair over the braid’s start to hide it. Day saved.
Sleep In Braids For Perfect Morning Waves

This is the ultimate two-for-one. Style your hair *while* you sleep. Braid your hair loosely into two or three sections before bed. The looser the braid, the softer the wave.
In the morning, undo the braids and run your fingers through. Spritz with a little sea salt spray for texture. You get beautiful, heatless waves and a cute braided style all night. It’s the best hack.
Accessorize Your Braid In Seconds
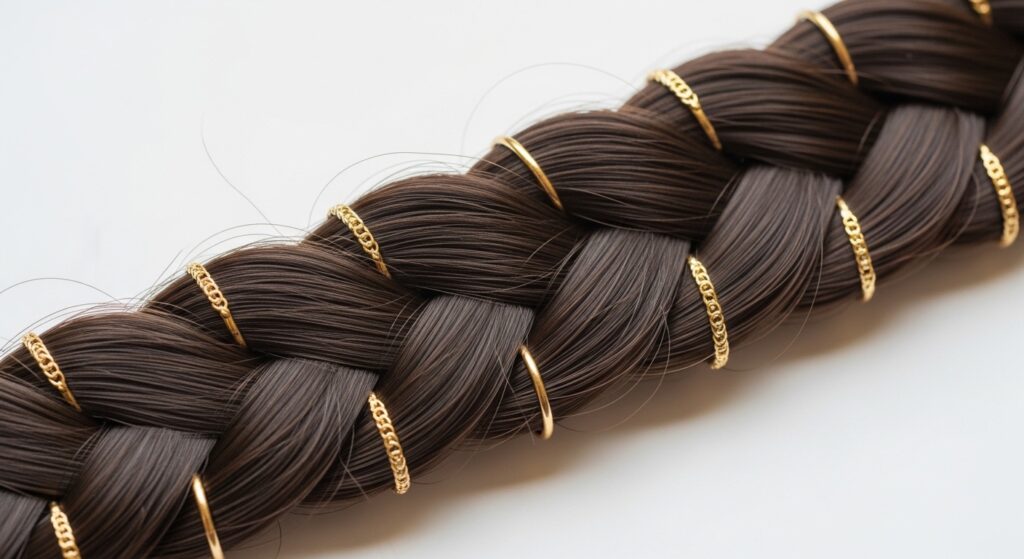
Little accessories make your braid look deliberate and trendy. You don’t need much. I love tiny gold hair rings or even small, pearl-ended pins.
After braiding, simply slide a few rings onto different sections. Or, criss-cross two bobby pins with pretty ends near the base of your braid. It feels special with almost zero extra effort.
Fix A Sloppy Braid Fast
Your braid looks lumpy or uneven? Don’t redo it. Gently pull at the outer loops of the braid to widen it. This hides mistakes and makes the braid look fuller and more romantic.
If the top is messy, pull out a few face-framing pieces. You can also twist the hair at the crown before you start braiding for a smoother base. Always have bobby pins handy to secure any loose spots.
Braids For Super Short Hair
Short hair friends, you can play too. The key is micro-braids or accent braids. If you have an undercut, a single braid along the shaved line is so cool.
On a pixie, take a tiny section near the front. Braid it as far as it goes and secure with a tiny clear elastic. Let it stick out or pin it back. It’s a fun, edgy detail that shows off your cut.
Make Thin Hair Look Thicker
Braiding can actually make thin hair look way thicker. The trick is texture. Before braiding, use a volumizing powder or dry shampoo at your roots. Tease the crown hair slightly.
When you braid, keep it a little looser. After securing the end, pull the braid apart gently. This pancaking method makes the braid look twice as thick. It really works.
The Quick Gym-To-Go Braid
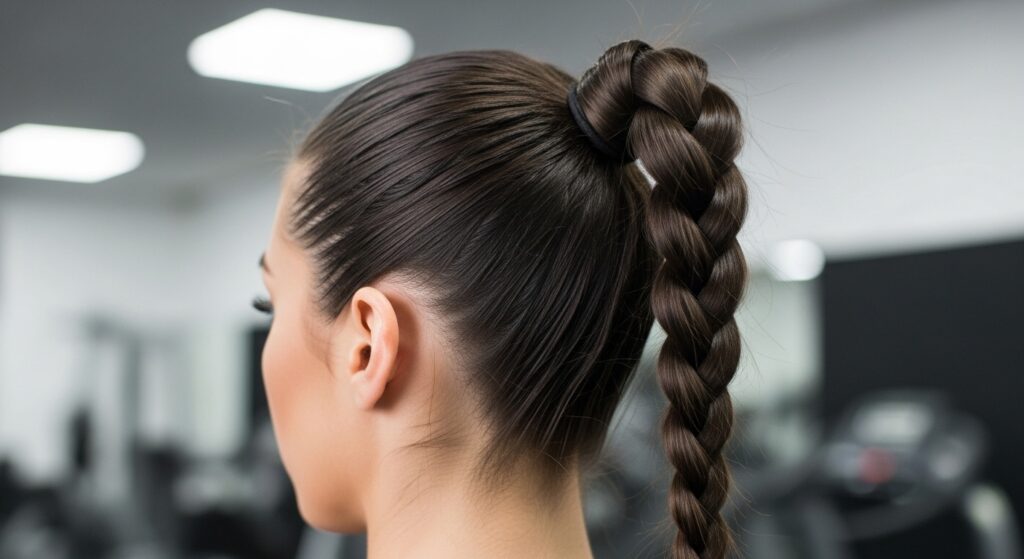
For working out, you need a braid that stays. A high, tight ponytail braid is the answer. Brush all hair into a high ponytail and secure tightly with a strong elastic.
Braid the ponytail tightly and secure the end. Wrap a tiny piece of hair around the base elastic and pin it for a polished finish. It won’t budge during your workout and still looks cute after.
Practice Makes Progress, Not Perfection

Your first try might not be Pinterest-perfect. That’s okay. Mine weren’t either. The goal is to find one or two styles that feel good and doable for you.
Practice while watching TV. The muscle memory will build faster than you think. Before long, you’ll be able to do these without even looking. Seriously, it just takes a few tries.
Your Weekend Challenge: Pick One!
So, which one will you try this weekend? Scroll back and pick just one. Maybe the rope braid for that old money hair vibe, or the piecey braid for some glitchy glam hair energy.
Set aside 15 minutes. Grab your tools. Put on a good playlist. Just try it. I promise it’s easier than it looks on your For You page. And you’ll have a new skill for life.
See? I told you it was possible. Braids don’t have to be this intimidating, time-consuming thing. They can be your quickest trick for looking like you put in way more effort than you did.
The real win is finding what feels like “you.” Maybe it’s a sleek braid with your bob, or a messy one with your shag. Once you have that go-to, it changes your whole bad-hair-day game.
I’d love to hear how it went! Which braid did you try? Did you have a “heck yes, I did it!” moment? Tell me everything in the comments below.
Save this post to Pinterest so you can find it next time you need a quick style idea. Pin your favorite braid and tag me—I love seeing your versions!