Wave 12 Under-Braid Ponytails Hidden for Surprise Reveal Moments
Okay, let’s be real. We’ve all been there. You’re at a wedding, a party, or just out for a fancy dinner, and you want a hairstyle that feels special. But you also don’t want to spend hours in front of the mirror or have it fall flat by the end of the night.
What if I told you there’s a trick that gives you two stunning looks in one? A style that starts sleek and polished, then transforms into a cascade of gorgeous, effortless waves with one simple pull? It’s the ultimate surprise reveal moment, and it’s easier than you think.
I’m talking about under-braid ponytails. You braid them, hide them, and forget about them until you’re ready for that wow factor. It’s perfect for when you want your look to evolve throughout the day or night. Let me show you exactly how to get this magical, two-in-one hairstyle.
What Are Wave 12 Under-Braid Ponytails?
This technique is my secret weapon for events. You create two simple braids on either side of your head, but instead of leaving them out, you tuck and pin them underneath your main ponytail. They stay completely hidden and protected.
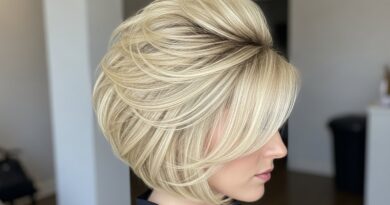
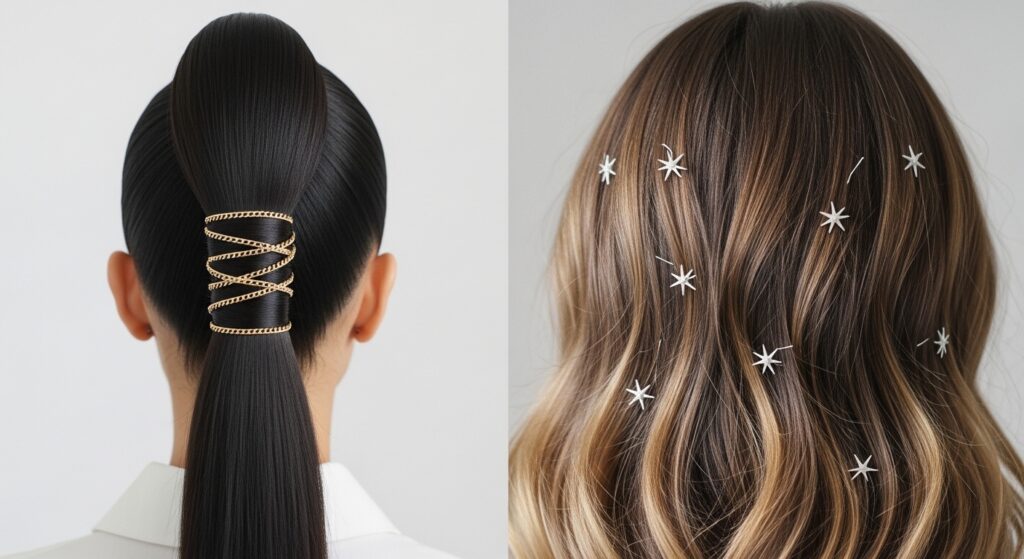
The “Wave 12” part? That’s the magic number. It refers to creating a soft, beachy wave pattern that looks incredible when you finally let those braids down. The texture from the braids gives you perfect, romantic waves without any heat. It’s a foolproof way to add major drama to your look on demand.
Why This Style is a Total Game-Changer
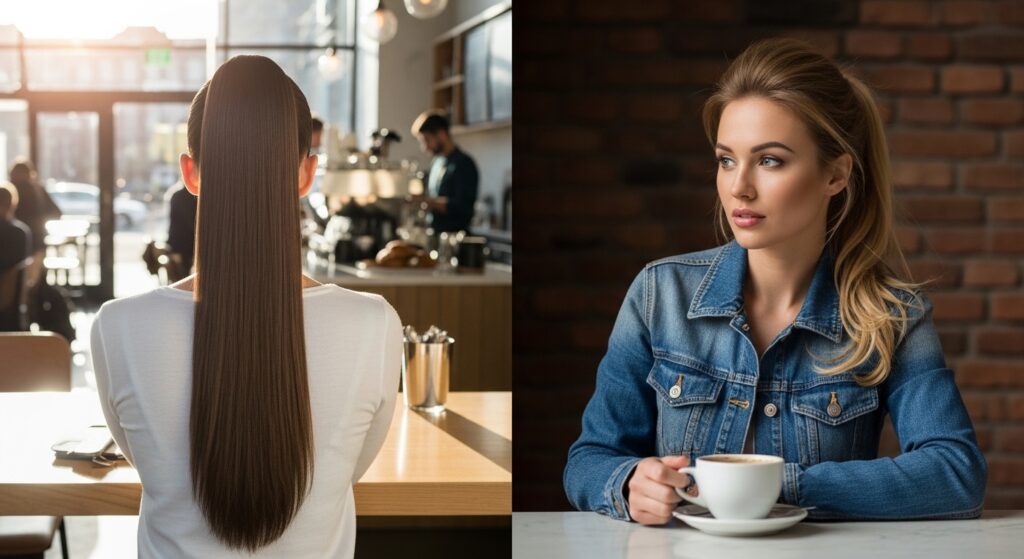
The beauty of this style is in its transformation. You start with a look that’s all about quiet luxury—sleek, polished, and put-together. It has that chic, old money hair vibe that’s so in right now.
Then, when you’re ready for a change, you get that incredible reveal. Suddenly, you have voluminous, textured waves that feel romantic and full of life. It’s like having a hairstylist in your back pocket, ready for your second act. It works for so many aesthetics, from classic to romantic goth hairstyles.
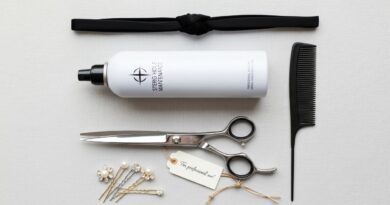
Tools You’ll Need to Get Started

You don’t need much! Gather these basics before you start. Having everything within reach makes the process smooth and stress-free.
- Paddle Brush: For smoothing your hair into that sleek ponytail.
- Strong, Snag-Free Hair Ties: One for the main ponytail, and two smaller ones for the braids.
- Bobby Pins (Lots!): Matched to your hair color for seamless hiding.
- Texturizing Spray or Mousse: This is key for creating hold and beautiful wave definition.
- Shine Serum or Oil: A drop to tame flyaways and add polish to the initial sleek look.
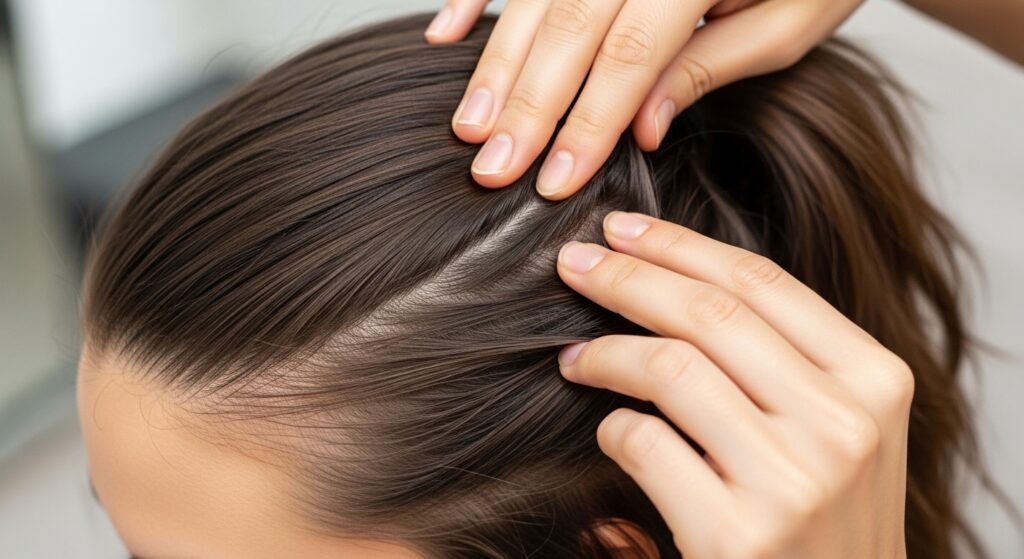
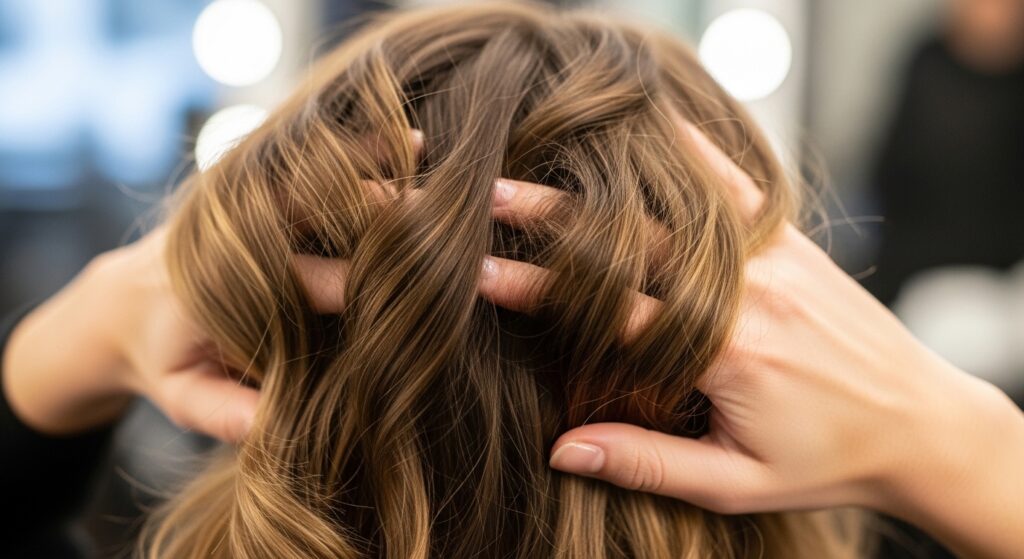
Step 1: Prep Your Hair for Success

Great hair starts with great prep. I always do this on day-old hair for the best grip, but you can use dry shampoo on fresh hair. Start with slightly damp or dry hair and apply a texturizing product from mid-lengths to ends.
This gives your hair some grit and hold, which will help the braids stay put and create more defined waves later. If your hair is very silky, this step is non-negotiable. Blow-dry or let it air dry completely before you begin styling.
Step 2: Create Your Sleek Base Ponytail
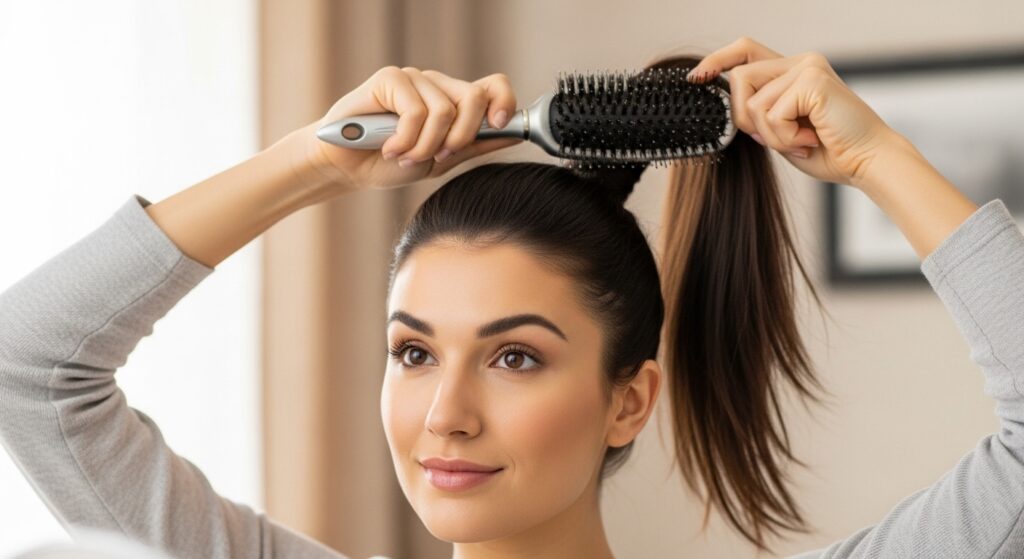
This is your foundation. Brush all of your hair back to your desired height. A high ponytail at the crown gives the most dramatic reveal, but a low one works beautifully too.
Secure it tightly with a strong hair tie. For extra sleekness, take a tiny section of hair from underneath the ponytail and wrap it around the base to conceal the hair tie, pinning it in place. This gives you that clean, quiet luxury bob ponytail effect.
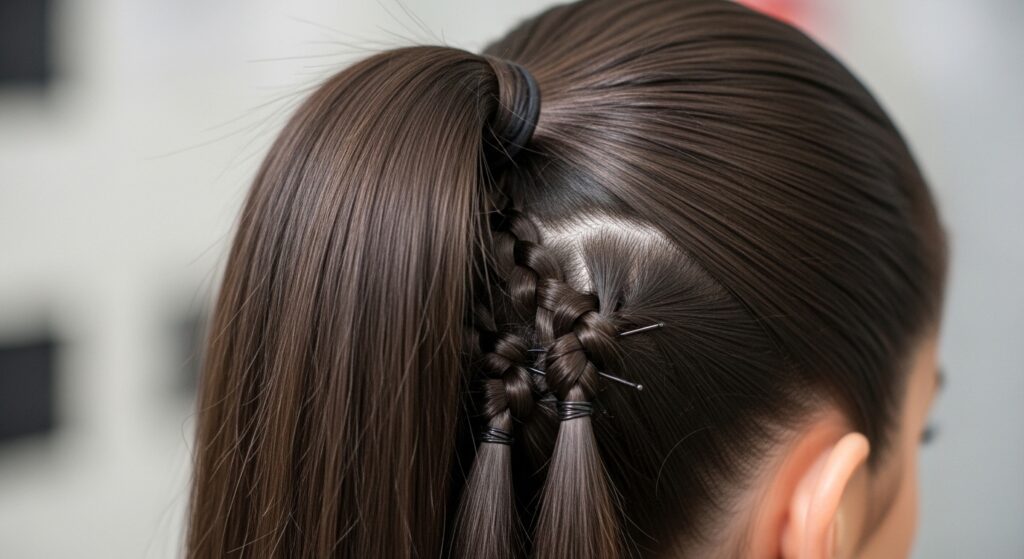
Step 3: Section Out Your Hidden Braids
Now, for the secret part! Leave your ponytail as is. On one side of your head, near your temple, pick up a diagonal section of hair. It should be about two inches wide.
This section comes from the hair that’s *not* in your ponytail—the loose hair below it. Do the same on the other side. These two sections will become your hidden braids. Clip the rest of the loose hair out of the way for now.
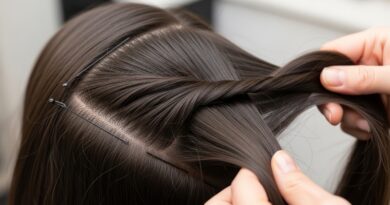
Step 4: Braid Each Section Securely
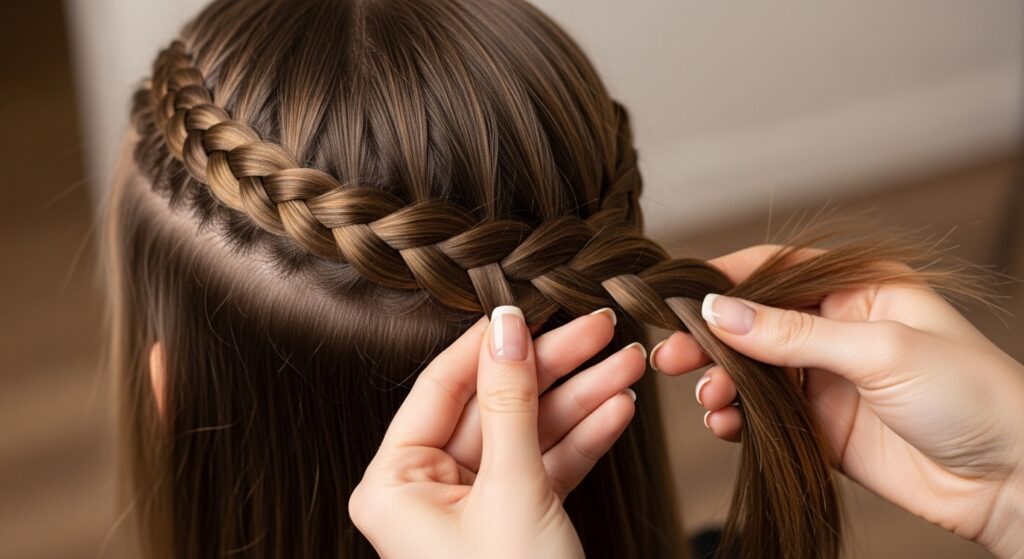
Take one of the sections and divide it into three equal parts. Braid it all the way down to the ends in a standard three-strand braid. Keep it neat, but don’t pull it painfully tight.
The goal is a secure, smooth braid. When you reach the end, secure it with a small, clear elastic. Repeat the exact same process on the other side. You should now have two braids hanging down near your ears.
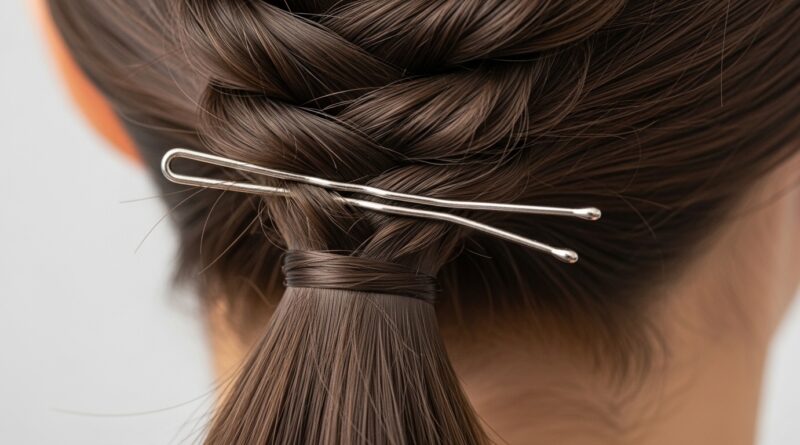
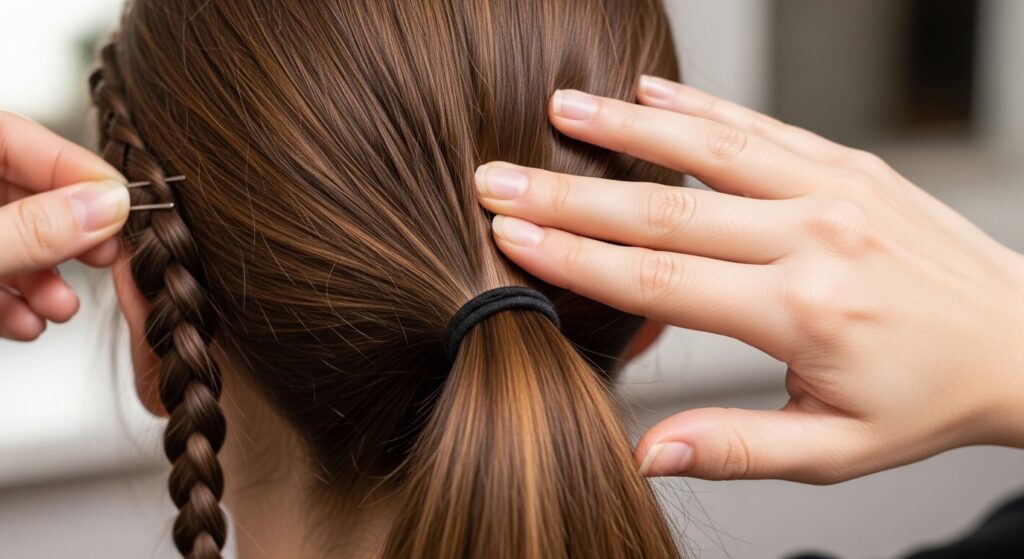
Step 5: The Art of Hiding & Pinning
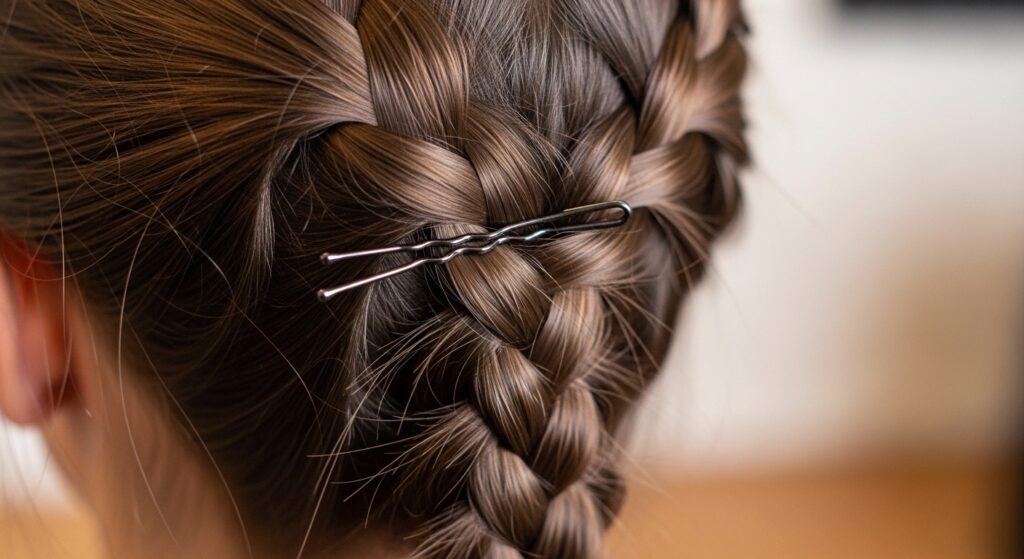
This is where the magic happens. Take one braid and lift it up towards the base of your ponytail. Gently twist the braid slightly so it lies flat against your head.
Use several bobby pins in a criss-cross pattern to anchor the entire length of the braid underneath the ponytail. The pins should go through the braid and into the hair at the base of your ponytail. Tuck the tail end of the braid under, too. Repeat with the second braid on the opposite side.
Step 6: Style the Remaining Loose Hair
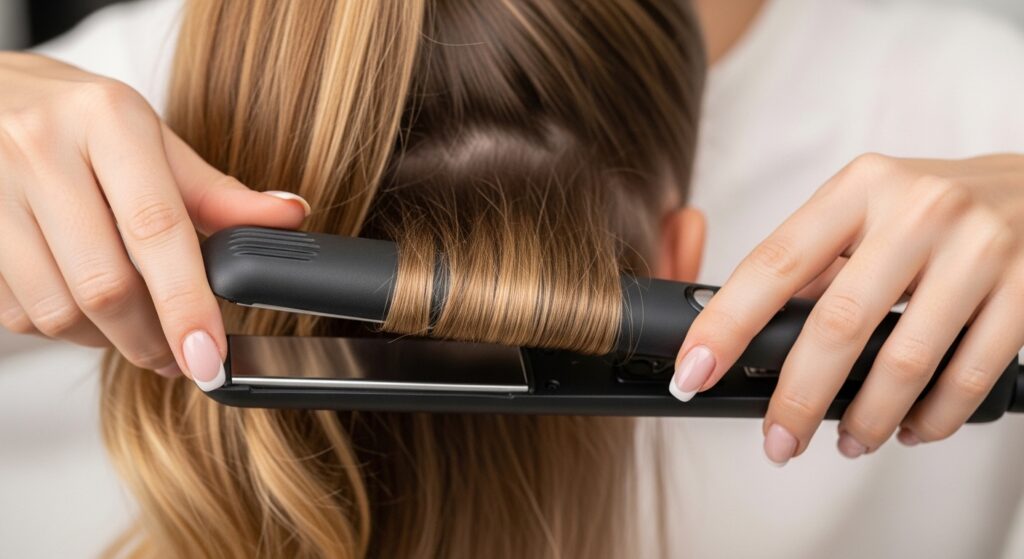
Now, let down the rest of the hair you clipped away. This is the hair that falls below your ponytail. You can leave it straight for a chic look, or add soft bends with a flat iron for movement.
This loose hair is what will blend with your waves later. A little shine serum here will make the sleek look impeccable. Check your pins from the front and side—if you see any bumps, smooth and re-pin.
Step 7: Perfecting Your “First Look” Style
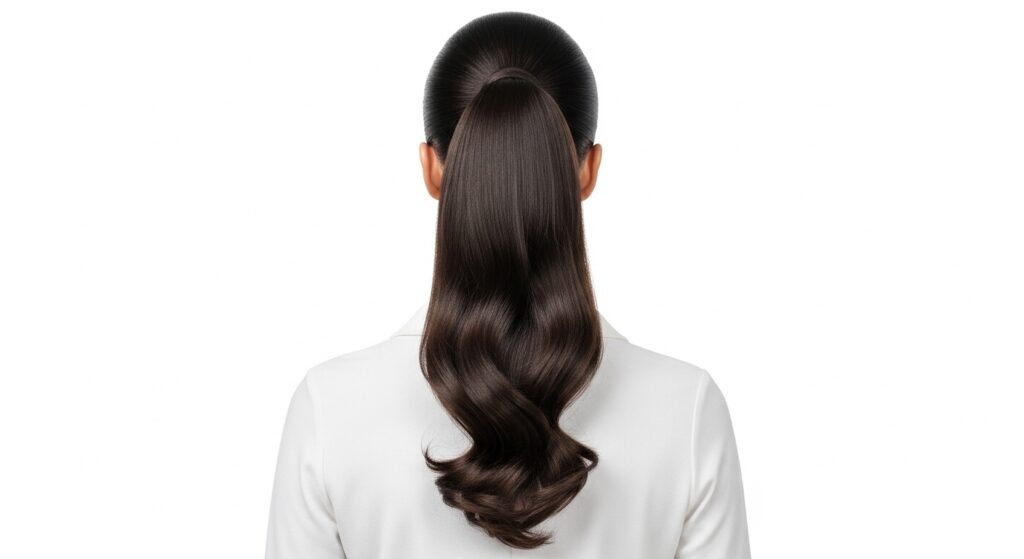
Your first look is complete! From every angle, it should look like a beautiful, intentional ponytail with soft, loose hair below. There should be no hint of the braids waiting underneath.
This look is so versatile. It pairs perfectly with a blazer for that old money hair aesthetic or with a sleek top for a minimalist vibe. It’s a style that says you’ve got it all together. And little do they know, you’ve got a secret waiting.
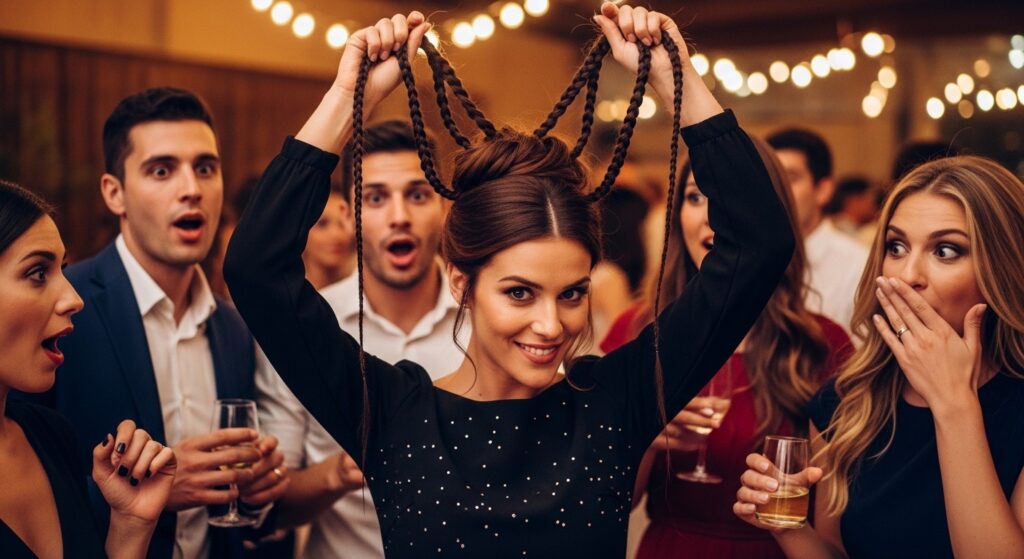
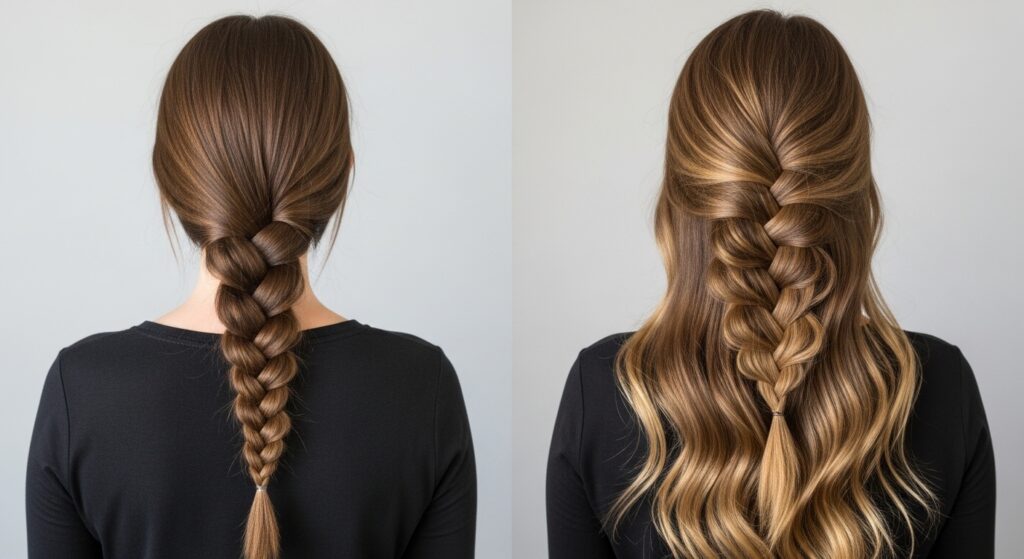
The Big Reveal: How to Drop Your Waves

When you’re ready for the transformation, find a mirror. Reach back to the base of your ponytail and feel for the bobby pins. Gently pull them out, one by one. You’ll feel the braids start to release.
Once all the pins are out, gently pull the braids completely free. Don’t yank! Slowly unravel the braids with your fingers. You’ll see those gorgeous, crimped wave patterns start to appear. This is the fun part!
Step 8: Shake Out & Style Your Waves
Now, let your hair down completely. Remove the hair tie from your main ponytail. Use your fingers to gently shake everything out at the roots for volume. Don’t use a brush—it will make the waves frizzy.
Run your fingers through the waves to separate them and soften the braid pattern. You want a lived-in, effortless wave. Spritz a little more texturizing spray on your hands and scrunch the ends for extra definition.
Pro Tips for Maximum Wave Definition
Want more defined waves? Braid your sections when they are slightly damp with product and let them dry completely before hiding them. The longer the braids set, the stronger the wave.
For looser, beachier waves, braid loosely and don’t let them set as long. You can even gently pull on the sides of each braid after braiding to plump it up, which creates a wider, softer wave pattern when released.
Making This Style Last All Night Long

To keep your sleek start flawless, use a light-hold hairspray all over before you head out. Carry a few extra bobby pins and a mini hairspray in your bag for touch-ups.
After the reveal, a spritz of flexible-hold spray will keep your waves looking fresh but not crunchy. If your hair tends to fall flat, those extra bobby pins can also be used to create a cute half-up style with your new waves later in the night.
Adapting the Style for Shorter Hair
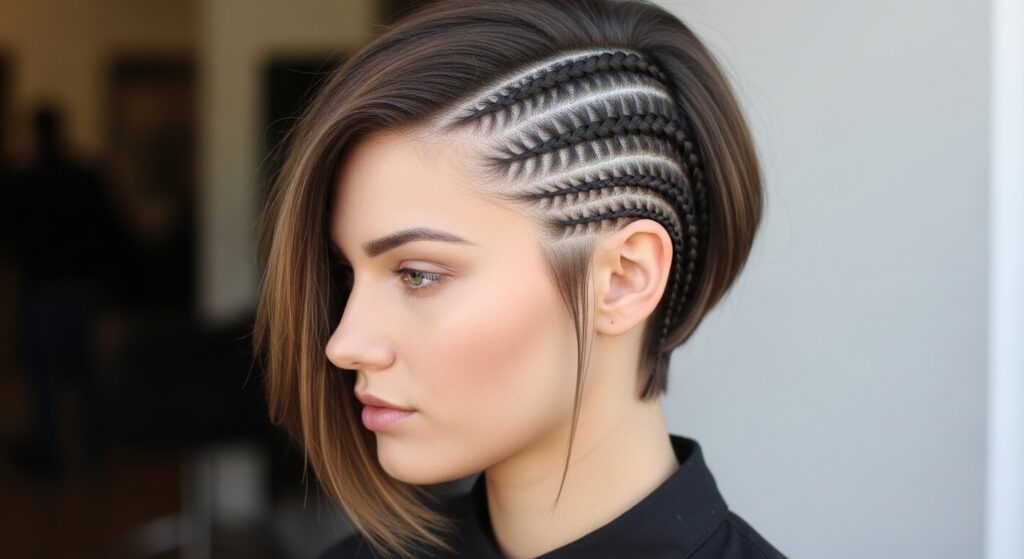
Got a bob or an asymmetrical lob? You can still do this! The technique just changes slightly. Create smaller, thinner braids closer to your nape. You’ll hide them right at the base of your neck.
Your reveal will be more about adding texture and volume at the ends rather than long waves. It’s a fantastic way to add a surprise element to a classic quiet luxury bob or even a bold vampire haircut.
Color Play: Making Your Waves Pop
If you have highlights, balayage, or any dimensional color, this style is for you. The wave pattern will catch the light on different color tones, creating incredible depth and movement.
It makes your color look expensive and multi-dimensional. For those experimenting with glitchy glam hair trends, imagine hidden braids with a pop of contrasting color—the reveal would be absolutely stunning.
From Day to Night: The Ultimate Transition
This is the perfect day-to-night hairstyle. Wear the sleek version to work, meetings, or daytime events. It’s professional and elegant.
Then, at dinner or drinks, excuse yourself to the restroom for 60 seconds and release your waves. You’ll walk back to the table with a whole new vibe that’s perfect for evening. It feels like a full style refresh in an instant.
Pairing with 2026 Hair Accessories
Accessorize both looks! For the sleek ponytail, try threading a delicate chain through it or using a sophisticated scarf as a hair tie. It’s a major 2026 hairstyles trend we’re seeing already.
After the reveal, add a few pretty pins or clips to your waves. Think celestial stars for a romantic goth touch or pearl pins for a classic feel. Accessories elevate the transformation even more.
Common Mistakes and How to Fix Them
Mistake: Visible bumps from braids. Fix: Braid thinner sections and pin them flatter. Use more, smaller pins.
Mistake: Braids slipping out. Fix: Use texturizing spray for grip and criss-cross your bobby pins.
Mistake: Waves looking frizzy. Fix: Use a tiny drop of serum on your palms and smooth over waves after shaking them out.
Inspiration from Other Trend Cuts
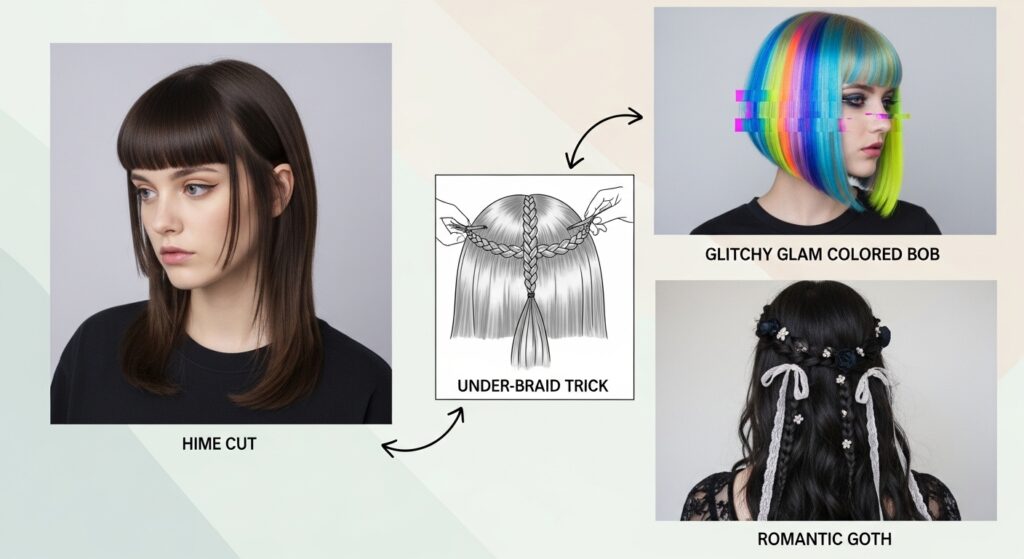
Think outside the box! This trick isn’t just for long hair. Imagine it with a hime cut—hide tiny braids under the long front sections. For glitchy glam hair, use contrasting colored extensions in your braids.
The vampire haircut with its sharp layers? Hidden braids could add unexpected texture. It’s all about adapting the core idea—hide, then reveal—to your personal cut and style.
Creating a Romantic Goth Vibe
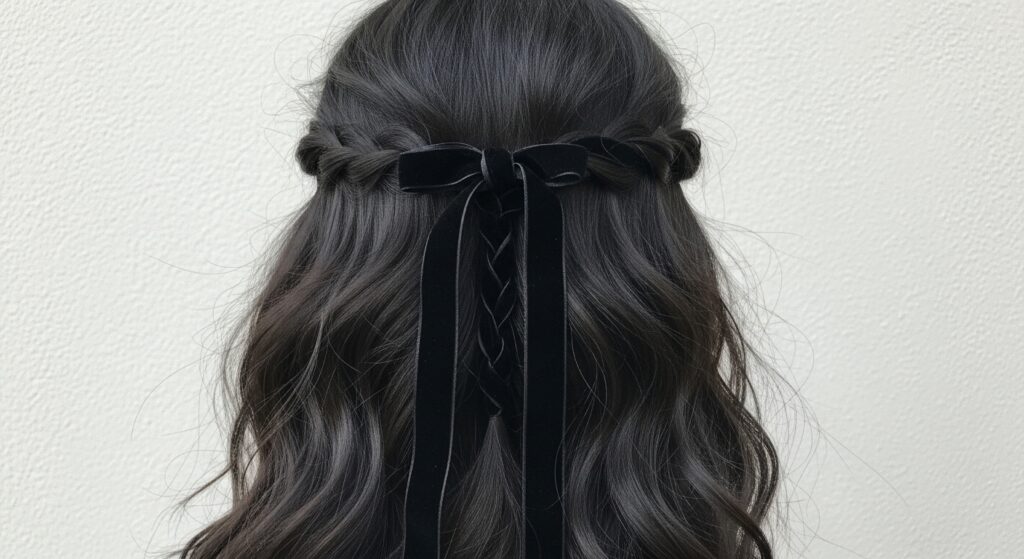
For a romantic goth hairstyles take, start with a deep side part on your sleek ponytail. Keep it super dark and polished. Use a black velvet ribbon as your hair tie.
When you release the waves, they’ll be deep and dramatic. Pull out a few strategic face-framing pieces. Add a few ornate, antique-looking hair pins to the waves. The contrast from severe sleek to soft, dark waves is pure magic.
Why This Fits the Quiet Luxury Trend
Quiet luxury is about quality, subtlety, and effortlessness. This style nails it. The initial look is impeccably groomed and simple—no loud colors or obvious styling.
The value is in the hidden detail and the functional transformation. It’s intelligent, practical, and luxurious in its cleverness. It’s not shouting for attention; it’s promising a beautiful experience, which is the heart of true luxury.
Your Go-To Guide for Special Occasions
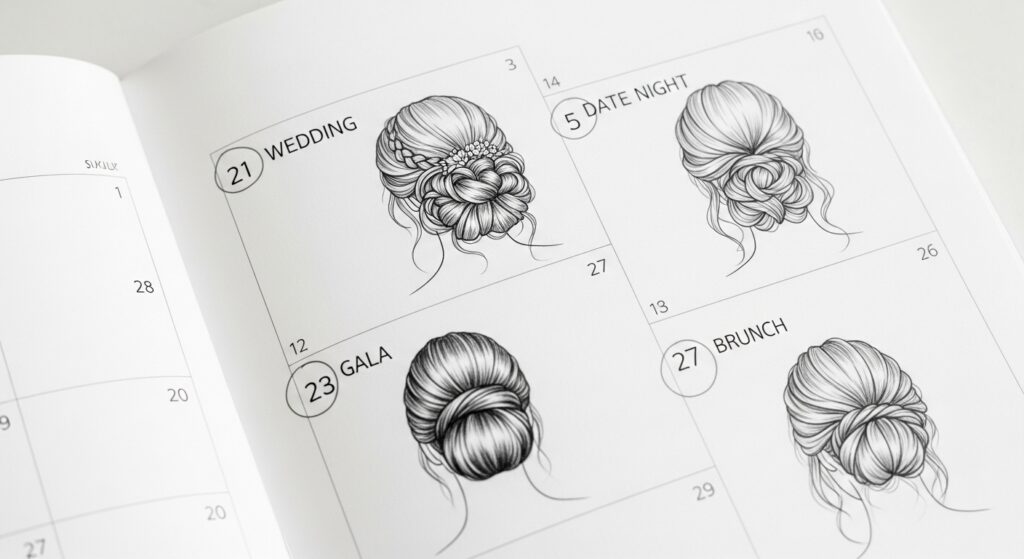
Bookmark this for your next event. It’s perfect for weddings (as a guest or bridesmaid), galas, anniversary dinners, or even a special date night. It gives you two distinct looks without needing to fully restyle.
Practice it once or twice before the big day so you feel confident. You’ll save so much time getting ready because you’ve essentially pre-styled your second look hours in advance.
Final Thoughts on Your Secret Style
And that’s it! Your guide to having the most fun, transformative hairstyle in your arsenal. I love techniques like this—they’re smart, they’re beautiful, and they make you feel like you’ve got a fantastic secret.
It’s a reminder that style can be playful and practical at the same time. Whether you’re embracing 2026 hairstyles</strong