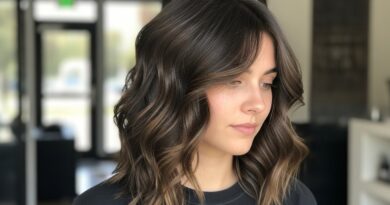
18 Blow-Dry Techniques for Curly Hair That Minimize Frizz
For those with curly hair, the battle against frizz can feel never-ending. Humidity, dryness, and even the wrong towel can turn your beautiful curls into a fuzzy halo. While many curly girls and guys opt for air-drying, mastering the blow-dryer can be a game-changer. It offers control, volume, and, when done correctly, significantly less frizz. The key lies in technique, not heat. This guide will walk you through 18 essential blow-dry techniques designed to work with your curls, not against them, for smooth, defined, and utterly gorgeous results.

Pre-Dry Prep: The Foundation of Frizz-Free Curls
Your blow-dry success is determined before you even turn on the dryer. Proper preparation sets the stage for smooth, defined curls that last.
1. The Hydration Hero: Start with a moisturizing shampoo and conditioner. Look for formulas with ingredients like shea butter, coconut oil, or glycerin. In the shower, use cool water for your final rinse to help seal the hair cuticle.
2. Detangle with Care: Never, ever brush dry curls. While your hair is sopping wet and full of conditioner, use a wide-tooth comb or your fingers to gently detangle from the ends up to the roots. This prevents breakage that can later appear as frizz.
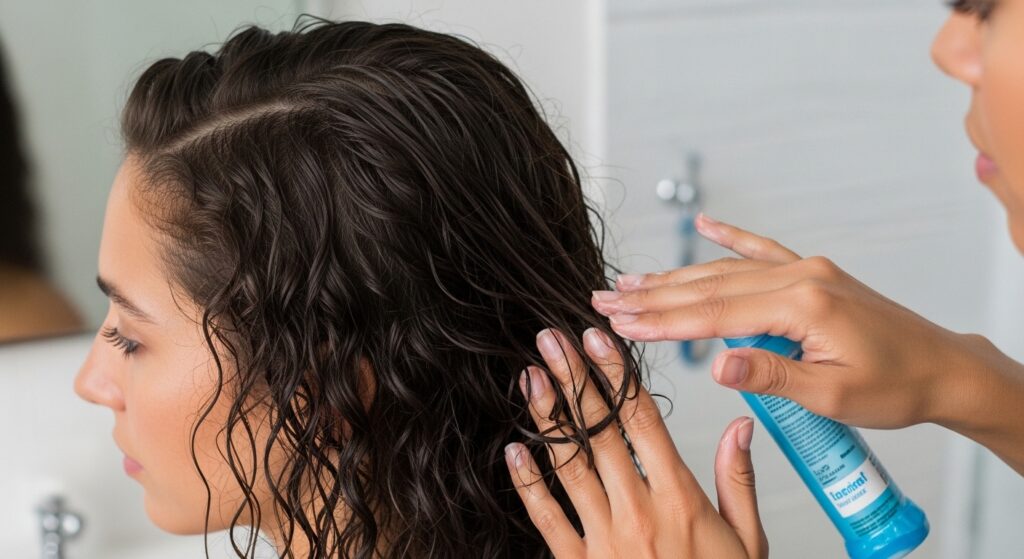
3. The Leave-In Lifeline: After gently squeezing out excess water with a microfiber towel (never a terry cloth towel!), apply a generous amount of leave-in conditioner. This provides a moisture base layer and a protective barrier.
4. Styling Product Strategy: Follow up with a curl-defining cream or mousse. For extra frizz-fighting power, apply a heat protectant spray or serum. This is non-negotiable—it shields your hair from heat damage, which is a primary cause of frizz.
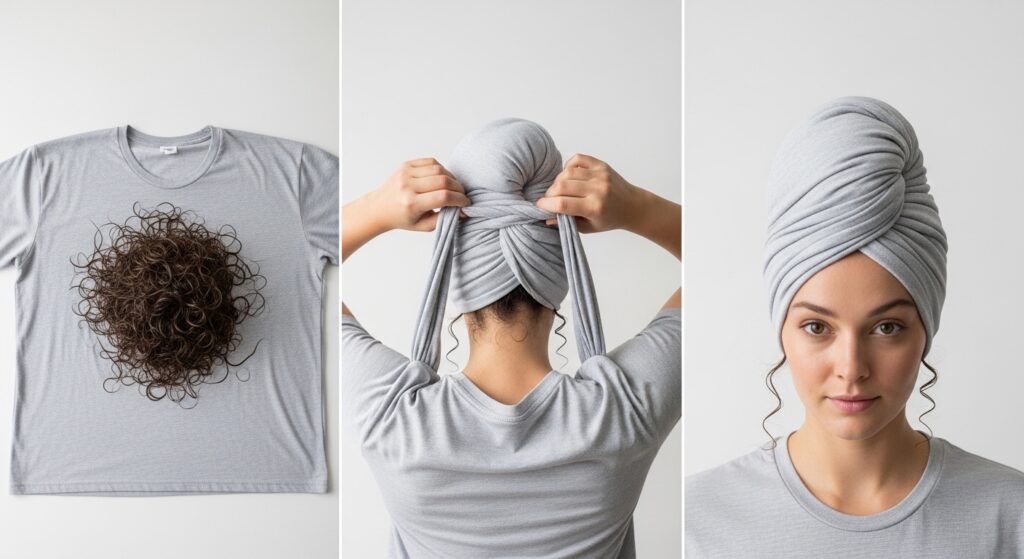
The Towel & Plop Method
5. Microfiber or Cotton T-Shirt Only: Ditch the regular bath towel. Its rough texture roughs up the hair cuticle, creating instant frizz. Instead, use a soft microfiber towel or an old cotton t-shirt to gently scrunch out water.
6. The Plopping Prelude: Before drying, try “plopping.” Lay your t-shirt or microfiber towel flat, flip your head over, and place your hair in the center. Wrap the fabric around your head to create a loose turban. Leave it on for 10-20 minutes. This soaks up excess moisture while allowing your curls to set in their natural pattern with minimal disturbance.
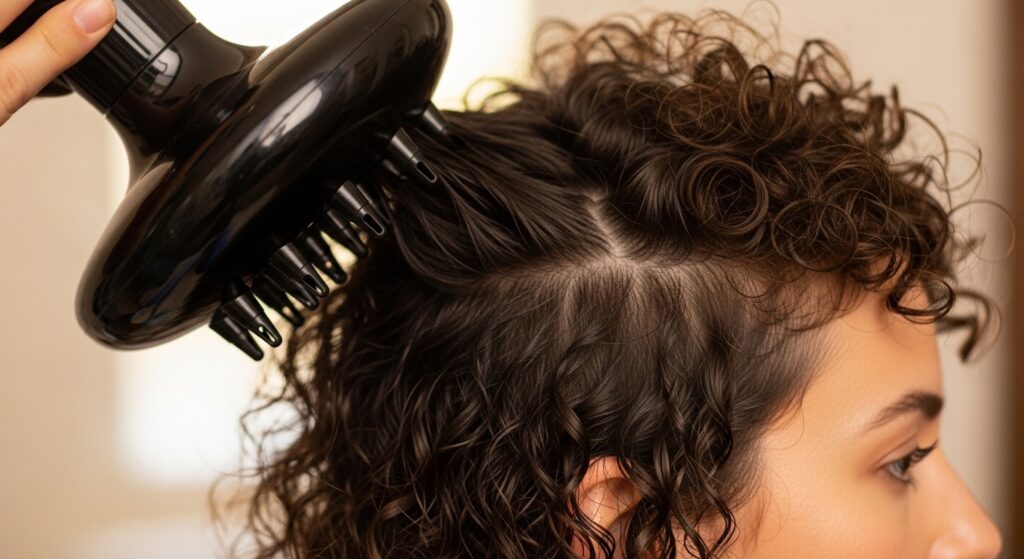
Diffuser Mastery: Your #1 Frizz-Fighting Tool
A diffuser is non-negotiable for curly hair. It disperses airflow over a wider area, drying curls gently without blowing them apart.
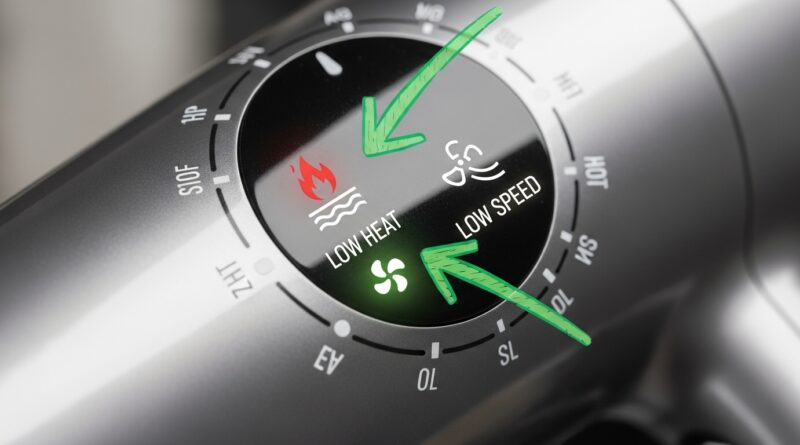
7. The Pixie Diffuse (Low & Slow): This is the gold standard. Set your dryer to low heat and low or medium speed. Turn your head upside down. Take a section of hair, place it in the diffuser bowl, and gently lift it to your scalp. Hold it there for 30-60 seconds, then move to the next section. Never move the diffuser around vigorously.
8. Hover Diffusing: For extra delicate curls or to set your cast, don’t touch your hair with the diffuser at all. Simply hover the diffuser around your head, allowing the warm air to circulate. This takes longer but maximizes definition.
9. Cold Shot Seal: Once your hair is about 90% dry, hit the cold shot button. Blast each section with cool air for 10-15 seconds. This helps to lock in the style and seal the cuticle shut, which is the ultimate frizz-blocker.
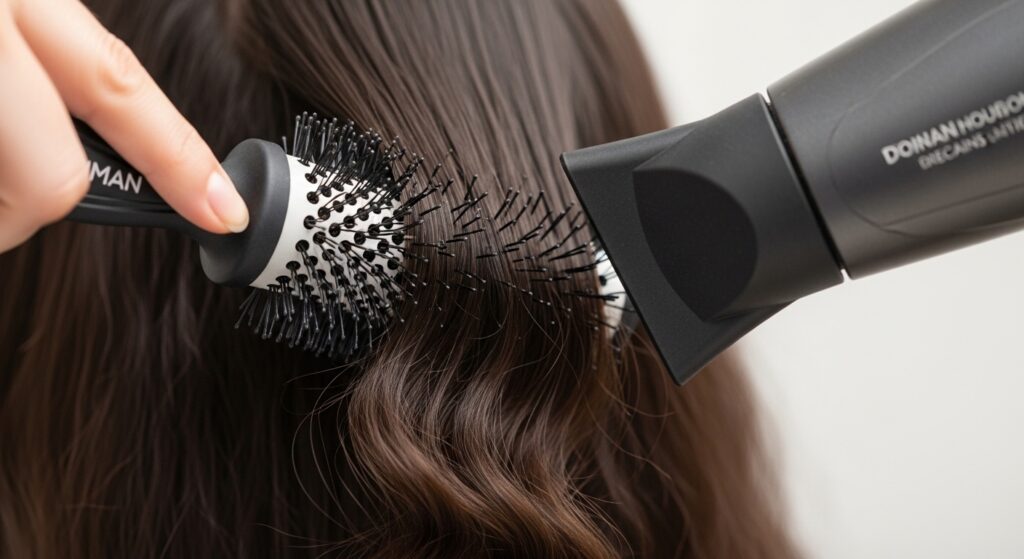
Techniques with a Concentrator Nozzle
If you’re seeking a smoother, more stretched look, a concentrator nozzle can be used with precision.
10. Tension Blow-Drying: Use a Denman brush or a wide-tooth comb. Take a small section, place the brush under the hair, and point the nozzle down the hair shaft, following the brush. The tension from pulling the brush and the directed airflow smooths the cuticle.
11. The “Bands” Method: Apply a small amount of smoothing serum to a section. Using your fingers, twist the section into a rope. Use the concentrator nozzle to blow-dry the twisted section from root to tip. This creates a smooth, defined wave with minimal frizz.
12. Always Follow the Direction: Never blow-dry against the direction of hair growth or randomly swirl the dryer. Always point the nozzle downward, from roots to ends. This encourages the cuticle to lie flat.
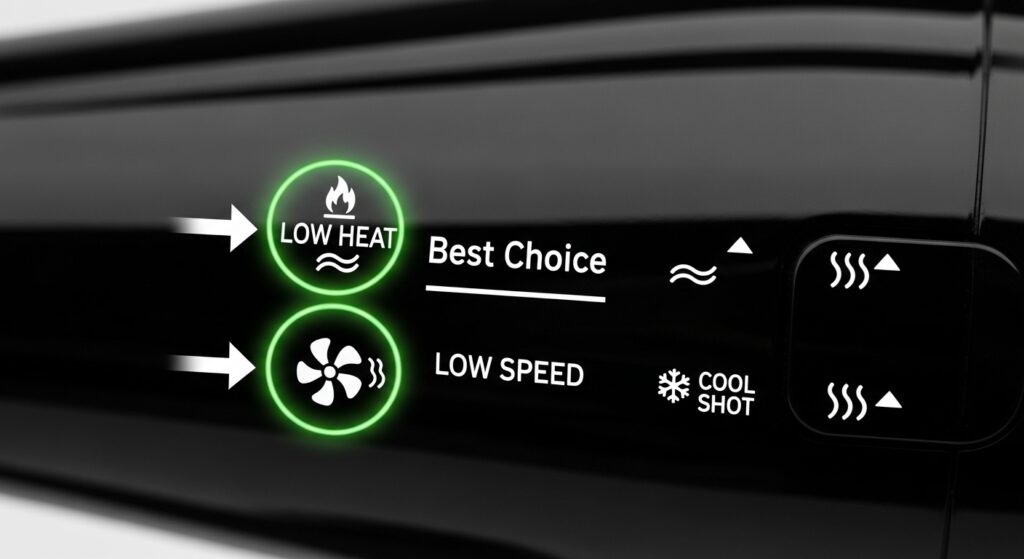
Heat & Airflow Settings: The Control Panel
Your dryer’s settings are your dial for frizz control.
13. Low and Slow Wins the Race: High heat and high speed are the arch-enemies of curly hair. They cause rapid moisture loss, leading to dryness and frizz. Always start with the lowest effective settings.
14. The Progressive Dry: Begin on medium heat and low speed to remove bulk moisture. As hair becomes damp (not wet), switch to low heat. For the final dry, use the cool setting.
15. Maintain Distance: Keep the dryer (and diffuser) at least 6 inches away from your hair. Closer proximity is too intense and can scorch the hair, causing damage and frizz.
Sectioning & Handling: Be Gentle
How you handle your hair during the drying process is crucial.
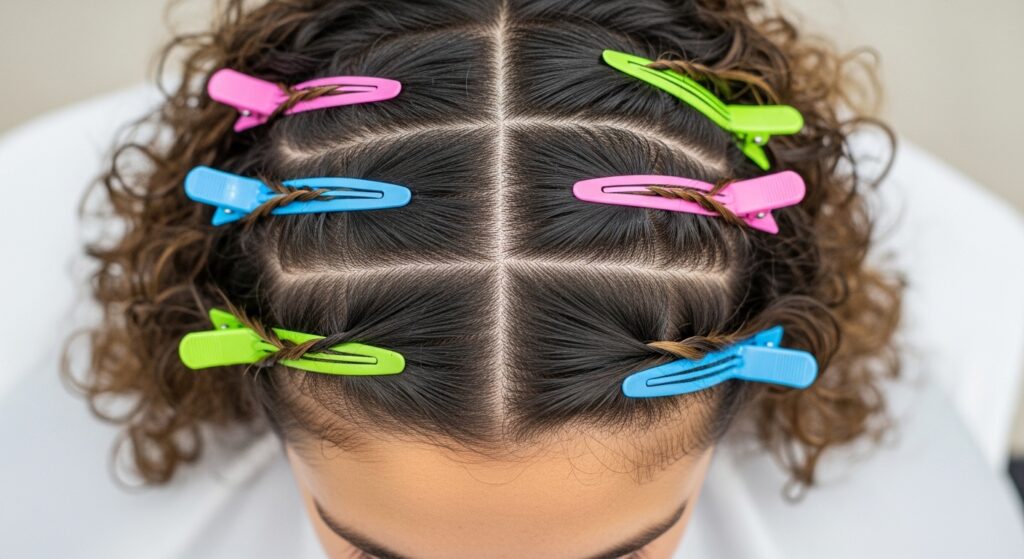
16. Strategic Sectioning: Clip your hair up into 4-6 sections. Work on one section at a time, leaving the others clipped away. This ensures you dry each part thoroughly without having to over-manipulate the rest of your hair.
17. Hands-Off Policy: Once you’ve applied product and started drying, stop touching your curls! Constantly scrunching or raking your fingers through drying hair breaks up the curl clumps and creates frizz. Let the dryer and the products do their work.
18. The Final SOTC (Scrunch Out the Crunch): If you used a strong-hold gel or mousse, a cast will form. Once your hair is completely, 100% cool and dry, take a small amount of hair oil or serum on your palms, rub them together, and gently scrunch your curls upwards to break the cast. This leaves curls soft, defined, and frizz-free.
Conclusion: Embrace the Power of Technique
Transforming your curly hair from frizzy to fabulous with a blow-dryer is entirely possible. It requires patience, the right tools, and a commitment to gentle, heat-conscious techniques. Remember, the goal is to enhance your natural curl pattern, not obliterate it with heat. By incorporating these 18 techniques—from the essential pre-wash prep to the final cool shot and scrunch—you equip yourself with a full arsenal against frizz. Your curls will thank you with bounce, definition, and a smooth, radiant shine that lasts for days. Happy drying!