22 Updo Hairstyles Messy Buns Chignons Formal Events Red Carpet Glam
Okay, let’s be real. You have an event coming up. Maybe it’s a wedding, a fancy dinner, or you just want to feel incredible on a random Tuesday. You want a hairstyle that looks polished but not fussy, elegant but still like you. I get it. That’s why I live for a good updo.
Messy buns and chignons are the secret weapons for looking put-together with minimal effort. They work for everything from a casual day out to full-on red carpet glam. The best part? You don’t need to be a pro.
I’ve pulled together 22 of my favorite looks, from simple styles you can do in five minutes to show-stopping looks perfect for your next big night. Think of this as your ultimate guide to looking effortlessly chic, fast. Let’s find your next signature style.
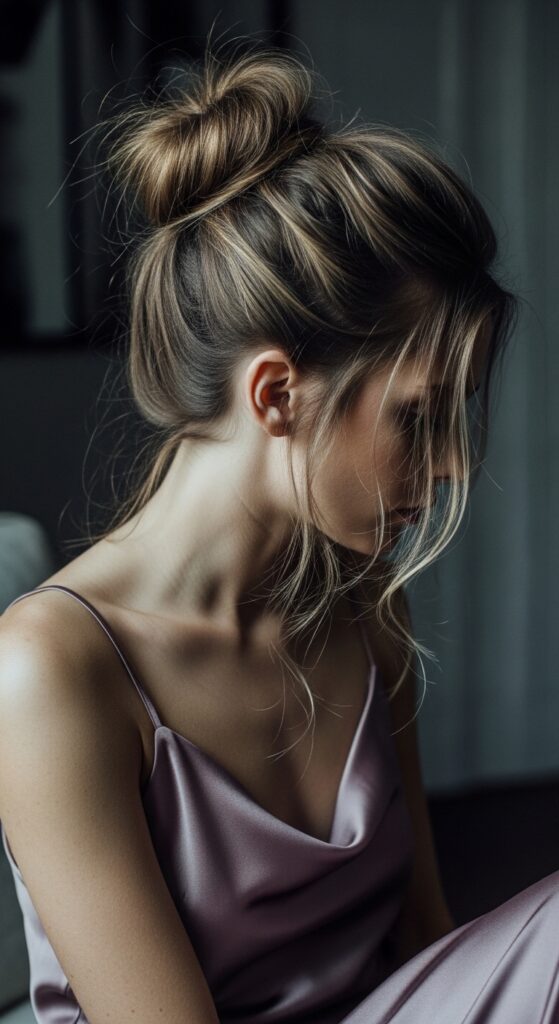
The Effortless Messy Bun
This is the queen of quick hairstyles. The goal isn’t perfection; it’s that “I just threw this together and look amazing” vibe. It works with day-old hair for better texture.
Start with a low or high ponytail, but don’t pull it all the way through on the last loop of the hair tie. Pull the loop apart and gently tug sections to create volume. The key steps are:
- Tease the crown slightly before gathering your hair.
- Use your fingers, not a brush, for a softer look.
- Secure with bobby pins that match your hair color.
- Pull out a few wispy pieces around your face and neck.
The Classic Low Chignon
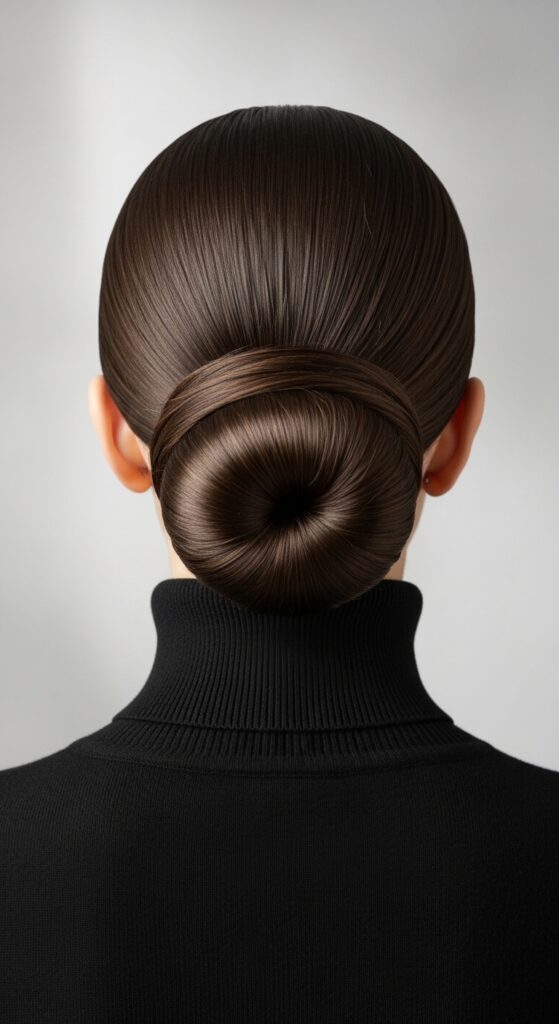
This is timeless elegance. It whispers quiet luxury hair and works for any formal event, from the office to the opera. It looks complicated but is surprisingly simple.
Create a low ponytail and twist it tightly. Wrap the twist around the base to form a bun and secure the ends with pins. For a polished finish, smooth down any flyaways with a bit of serum or hairspray on a toothbrush.
The Textured Ballerina Bun
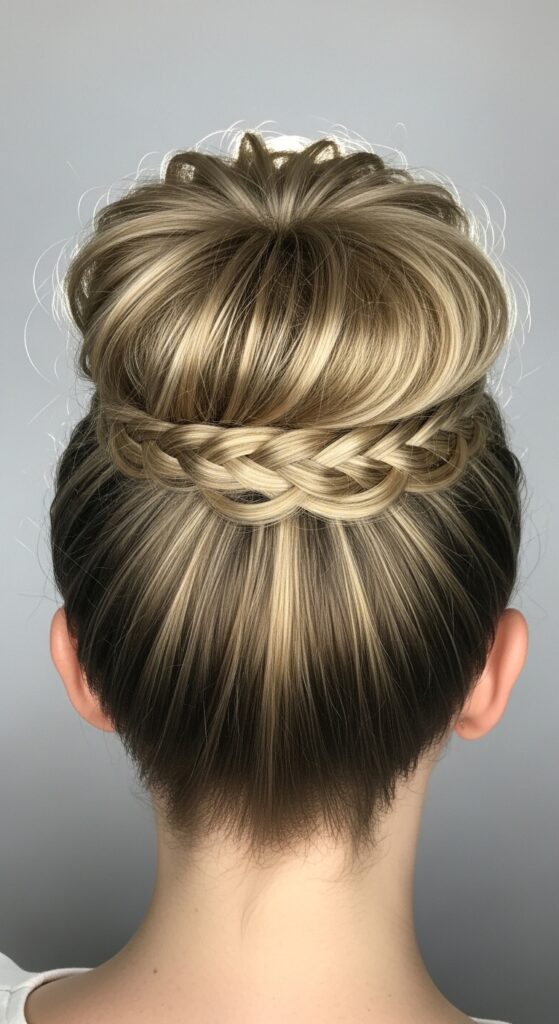
This high-drama style is perfect when you want to feel like a prima ballerina. It lifts your features and adds instant sophistication. It’s a top pick for 2026 hairstyles with a classic twist.
Tease your hair at the crown for height before gathering into a high ponytail. Braid the ponytail loosely, then wrap it around the base into a bun. Pin every inch! Pull out tiny face-framing pieces for softness.
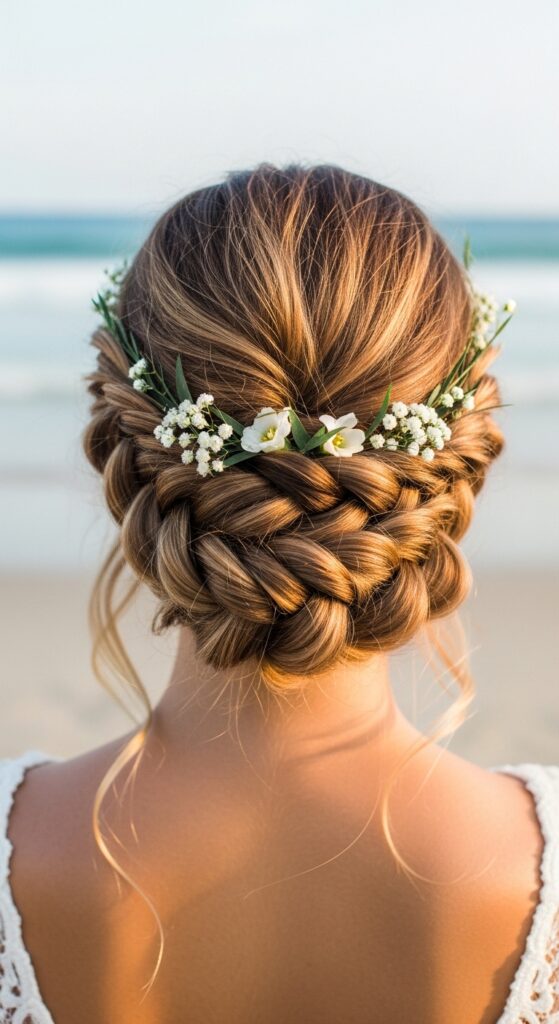
The Braided Crown Updo
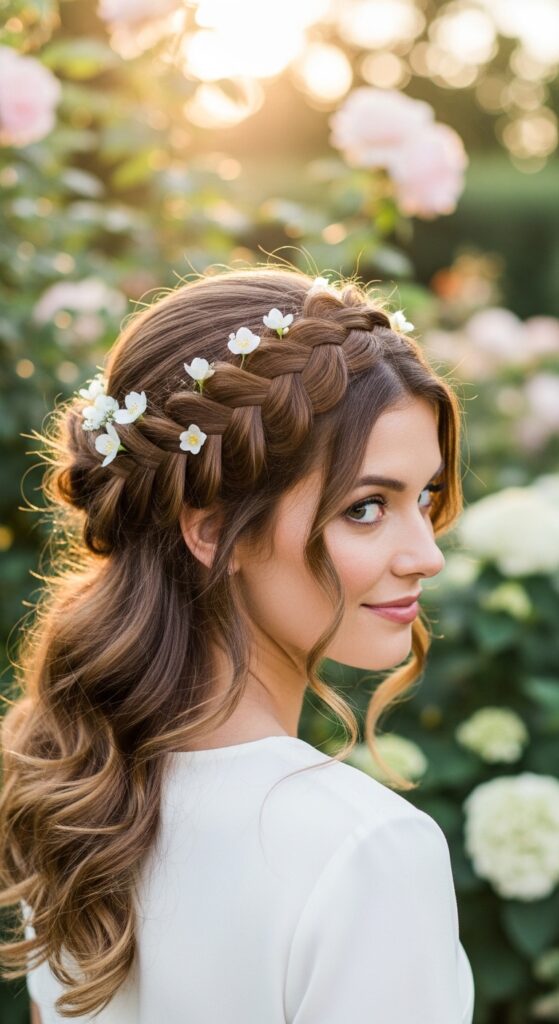
This is the ultimate romantic hairstyle. It frames your face beautifully and keeps hair completely off your neck. It’s perfect for outdoor weddings or any event where you want a fairy-tale touch.
Part your hair down the middle. Create two Dutch braids (braiding under, not over) starting at your temples, going back to meet at the nape. Pin the ends together and tuck them under. Fluff the braids for a fuller look.
The Modern Twisted Updo
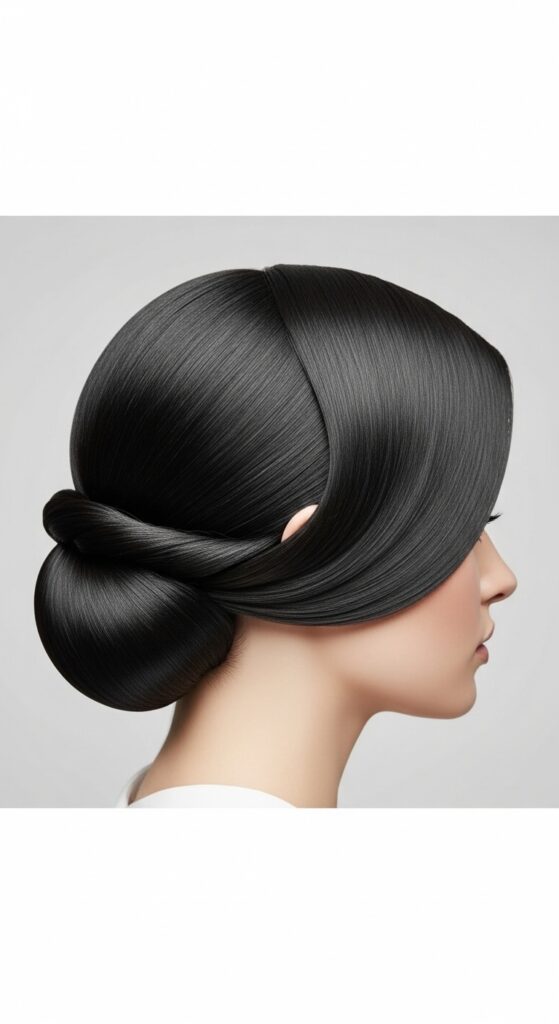
Sleek, modern, and incredibly chic. This style uses clean lines and a single dramatic twist for impact. It pairs perfectly with statement earrings and a minimalist outfit.
Create a deep side part. On the heavier side, take a section from the front and begin a simple twist, adding in hair as you go back toward your ear. Gather all hair into a low bun and incorporate the twist. Secure tightly.
The “Undone” French Twist
The French twist is back, but forget the stiff, retro version. The modern take is soft, undone, and incredibly sexy. It has that old money hair feel but with a relaxed edge.
Gather hair at the nape as if for a low ponytail. Twist upwards toward the crown, letting pieces escape naturally. When you reach the top, fold the ends under and pin horizontally. Don’t over-smooth it.
The Bubble Ponytail Updo
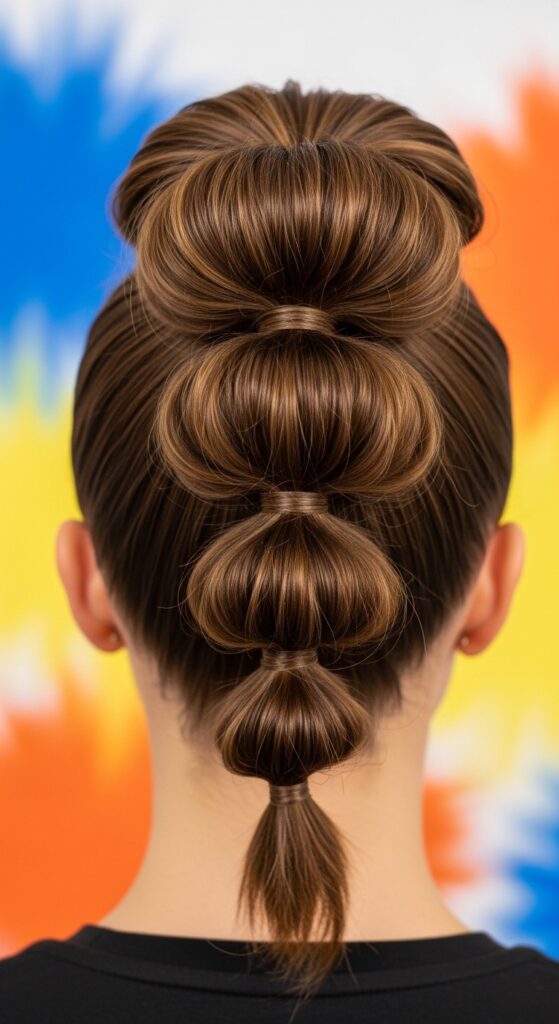
Playful, trendy, and full of volume! This style is a fun twist on the classic ponytail and works great on medium to long hair. It’s a conversation starter and feels very fresh.
Create a high ponytail. Place hair ties every few inches down the length. Gently pull apart each section between the ties to create “bubbles.” Take the end and tuck it under the last bubble, pinning to secure.
The Gothic Romantic Chignon
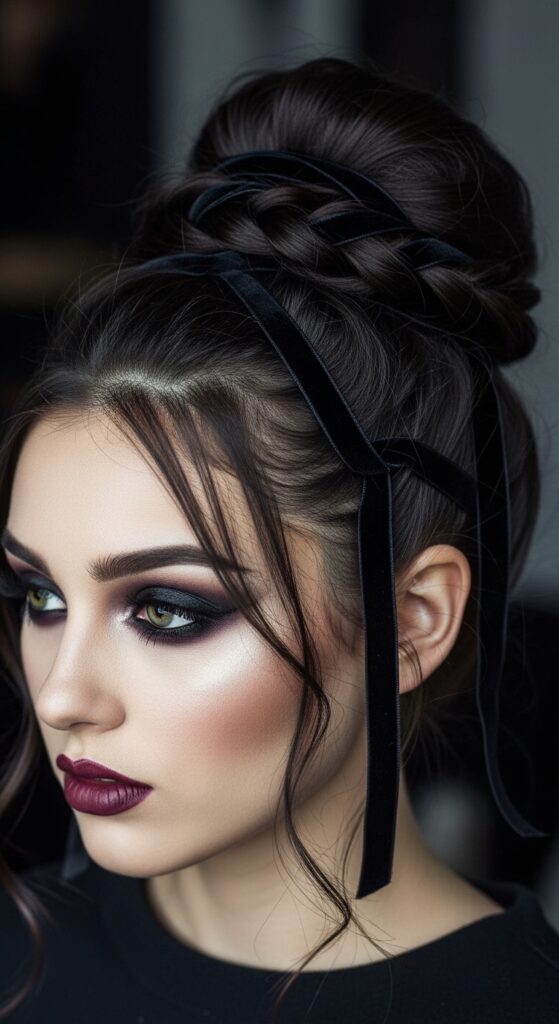
Channel your inner romantic with a dark, elegant twist. This style mixes delicate details with a moody vibe. Think velvet ribbons, lace, or delicate chains woven into the hair.
Create a loose, low chignon. Before pinning it completely, weave a length of ribbon or a thin chain through the twists. Leave the ends to drape or tie into a small bow. Perfect for a vampire haircut aesthetic.
The Sleek Asymmetrical Bun
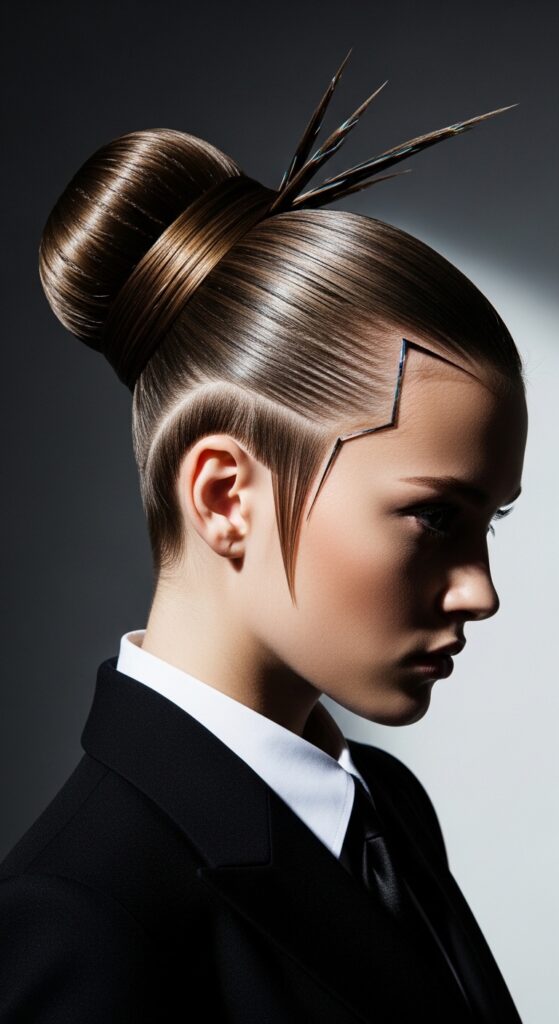
For the fashion-forward, this look is all about architectural shape. It plays with asymmetry in a bold, beautiful way. It complements an asymmetrical lob cut perfectly as it grows out.
Part your hair deeply. Gather all hair to one side, low near your neck. Twist into a tight, compact bun. Use strong-hold gel on a brush to slick down any baby hairs for a ultra-clean finish.
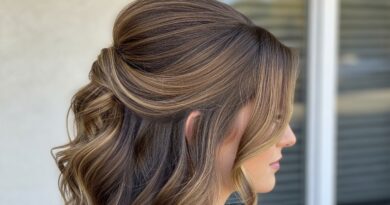
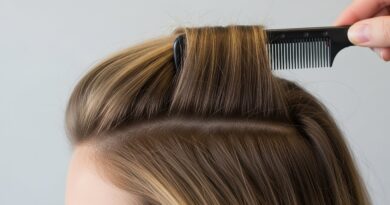
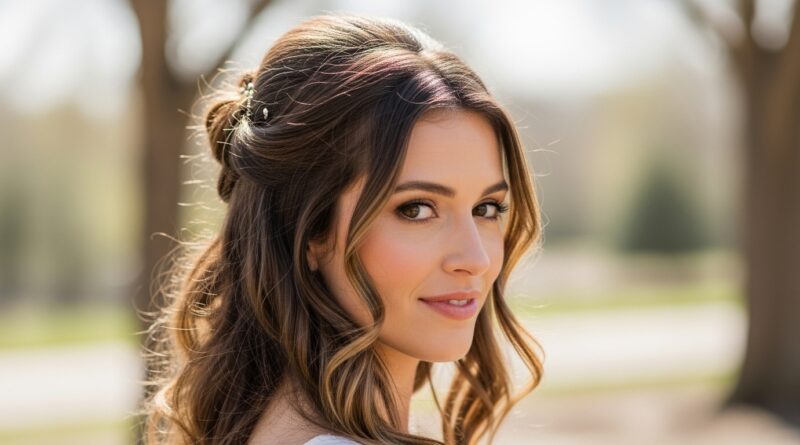
The Half-Up Twisted Crown
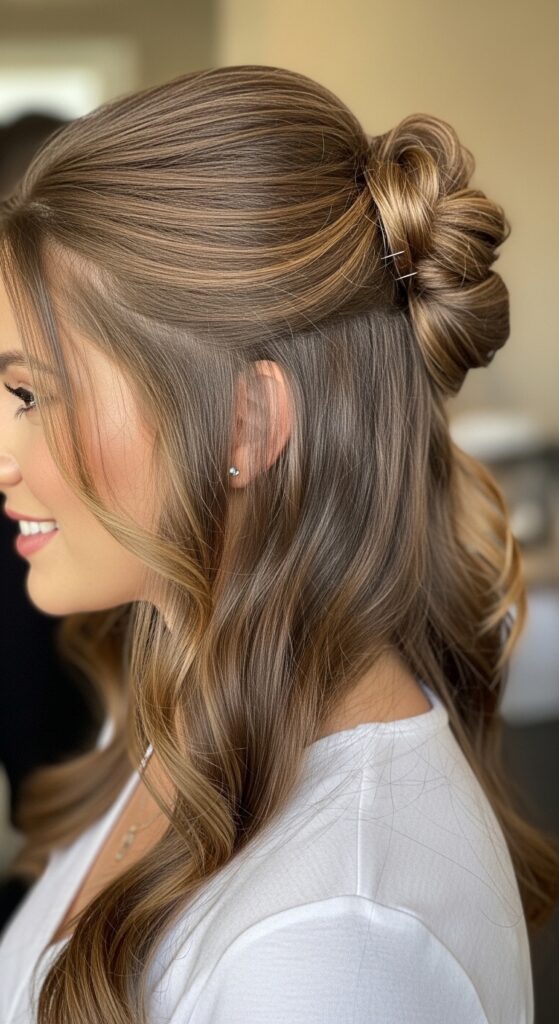
Not ready for a full updo? This half-up style gives you the elegance of an updo while letting your hair flow. It’s incredibly versatile and takes just minutes.
Take two sections from the front, one from each side. Twist them back and cross them over each other at the back of your head, pinning as you go. It creates a beautiful, lifted effect at the crown.
The Voluminous Gibson Tuck
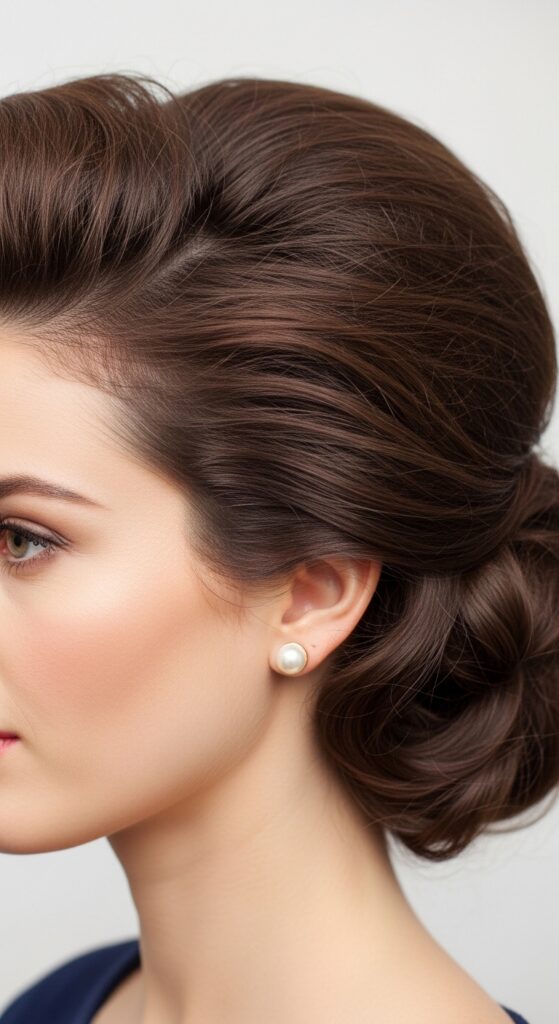
This vintage style is making a huge comeback. It creates incredible volume at the crown and looks beautifully romantic. It’s a true old money hair classic that feels new again.
Create light teasing at the crown. Gather hair low, but instead of twisting, fold the ends under and upward, tucking them into the base of your hair at the nape. Pin generously to hold the “tuck” in place.
The Rope Braid Updo
Rope braids (twists) have a beautiful, intricate texture. Using them to build an updo looks far more complex than it is. The result is boho-chic and perfectly messy.
Split hair into two sections. Twist each one tightly into a rope braid. Wrap the two ropes around each other, then coil them into a bun at the nape. Secure with pins. Pull it apart gently for fullness.
The Hime Cut-Inspired Updo
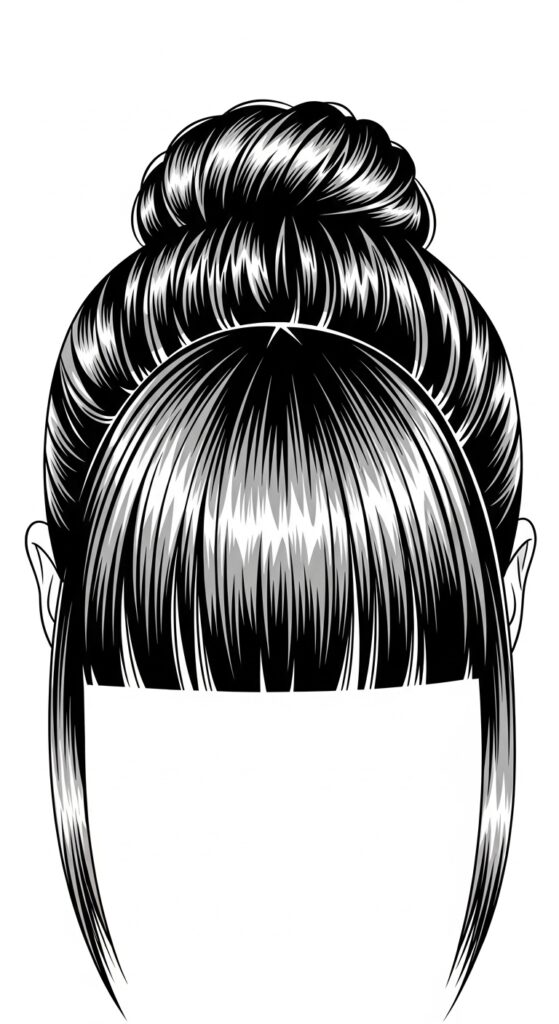
If you have a hime cut or just love blunt bangs and pieces, this style is for you. It highlights those graphic lines while keeping the rest chic and contained.
Style your blunt fringe and face-framing pieces straight and smooth. Gather the rest of your hair into a very sleek, low knot or bun at the nape. The contrast is stunning and modern.
The Tousled Updo with Scarf
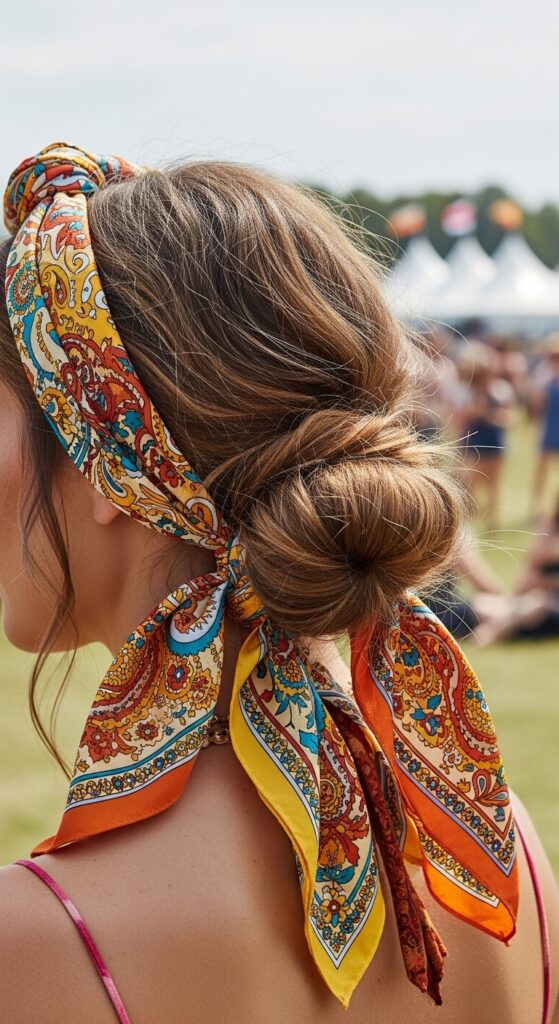
Add a pop of color and pattern with your favorite scarf. This is the easiest way to elevate a simple bun and make it look intentional and stylish. It hides messy pins, too!
Create a loose, low bun. Take a long, rectangular silk scarf and tie it around the base of the bun, letting the ends flow down. You can also braid the scarf into a ponytail before making the bun.
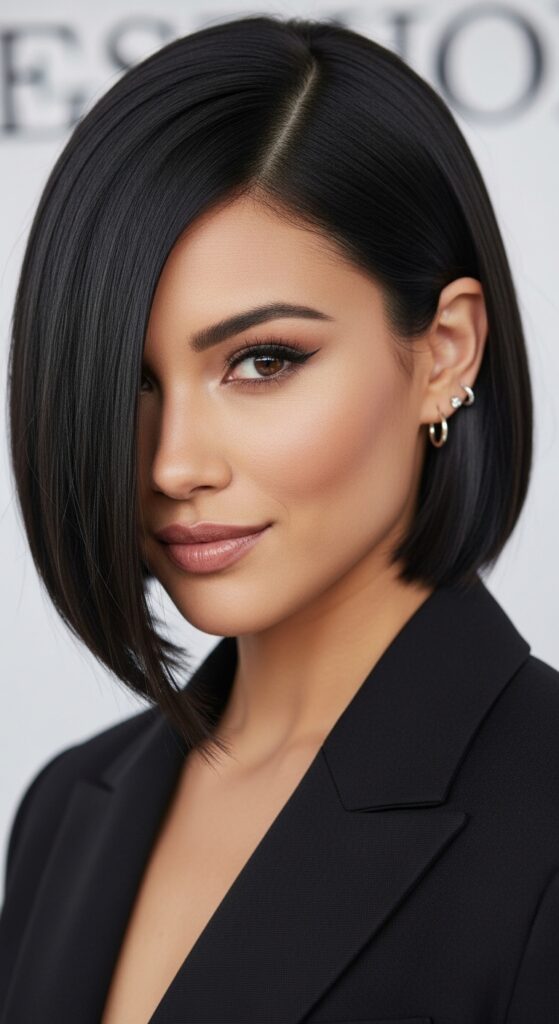
The Elegant Knotted Bun
This technique is genius for shorter hair or a quiet luxury bob that’s just long enough to put up. A simple knot looks elegant and holds surprisingly well with pins.
Gather hair into a low ponytail. Tie the length into a single overhand knot (like the start of tying your shoes). Tuck the ends under and pin the knot securely to your head. Spritz to hold.
The Faux Bob Updo
Want to try a short style without the chop? This updo trick is magical. It gives you the sleek look of a bob or asymmetrical lob for a night, then you can go back to long hair tomorrow.
Create a low ponytail. Fold the length under and pin it up and under the base of the ponytail, at the nape. The ends should be tucked completely out of sight. Smooth the top hair over the pins.
The Red Carpet Waves Updo
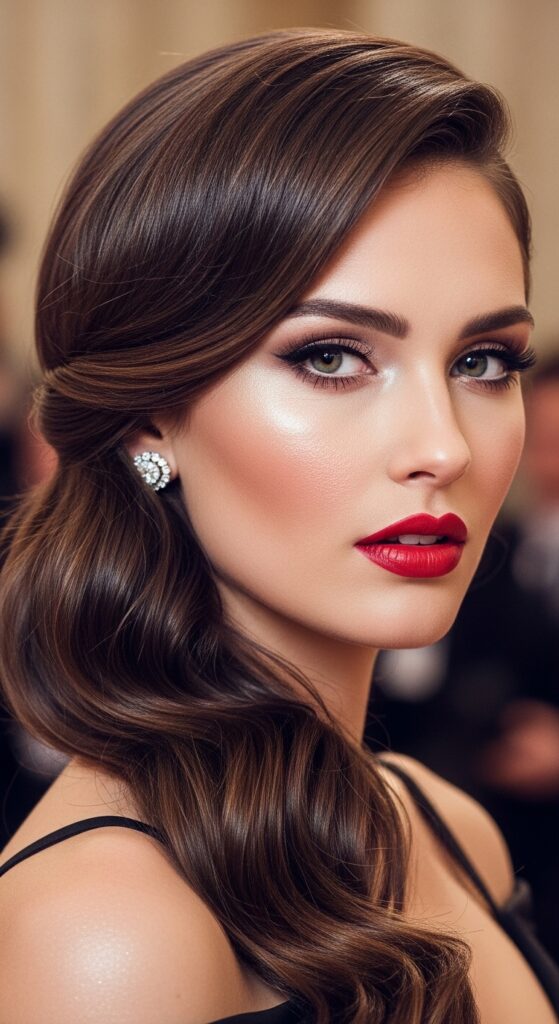
This is pure Hollywood glamour. It’s soft, sexy, and designed to catch the light (and the cameras). It works with any hair length and is a forever favorite for a reason.
Curl all your hair with a large-barrel iron. Sweep hair to one side, loosely twisting and pinning just at the back and below the ear. Let the waves cascade over your shoulder. Hairspray!
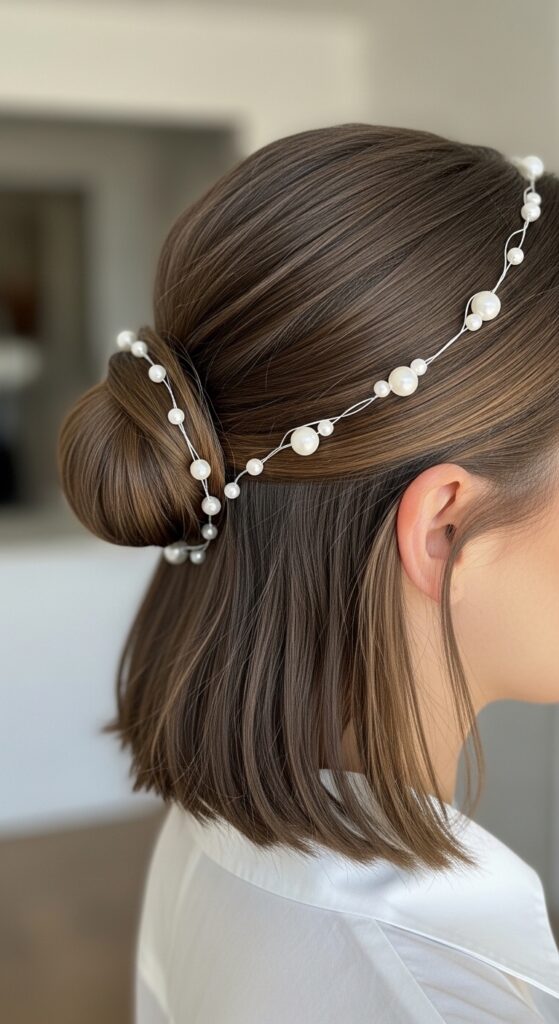
The Minimalist Pin-Up
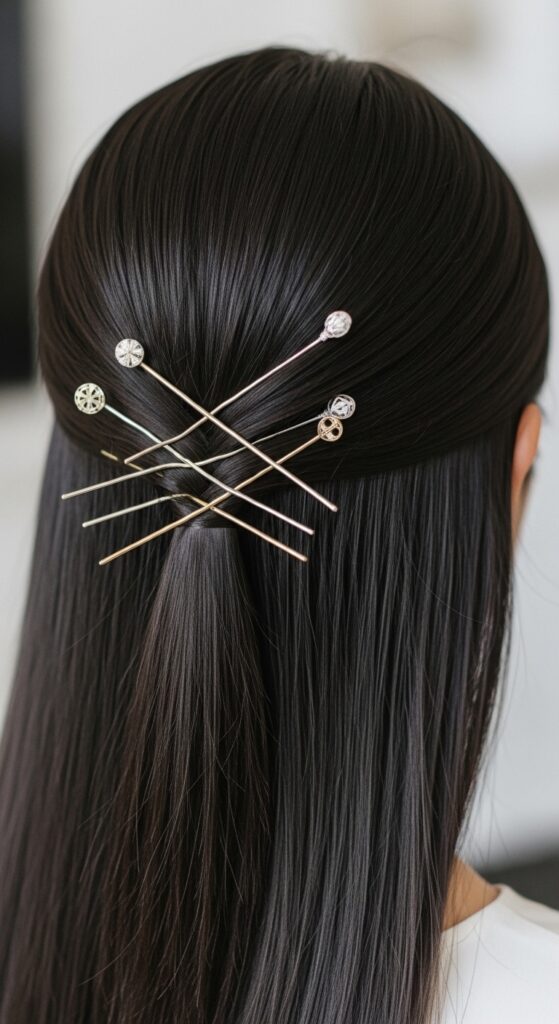
Sometimes, less is more. This style uses beautiful hair pins as the star of the show. It’s an artful, modern way to secure your updo and let the accessories shine.
Pull hair into a low, loose twist or bun. Instead of hiding pins, use 3-5 decorative gold or pearl-tipped pins in a deliberate pattern to hold the style. It should look effortless and cool.
The Waterfall Braid into Bun

This combines two beautiful elements for a truly ethereal look. The waterfall braid adds a detail that feels special, while the bun keeps everything secure and elegant.
Create a waterfall braid along your hairline, ending just above your ear. Gather all hair, including the braid tail, into a low chignon. The braid will beautifully frame one side of your face.
The Punk-Inspired Messy Updo
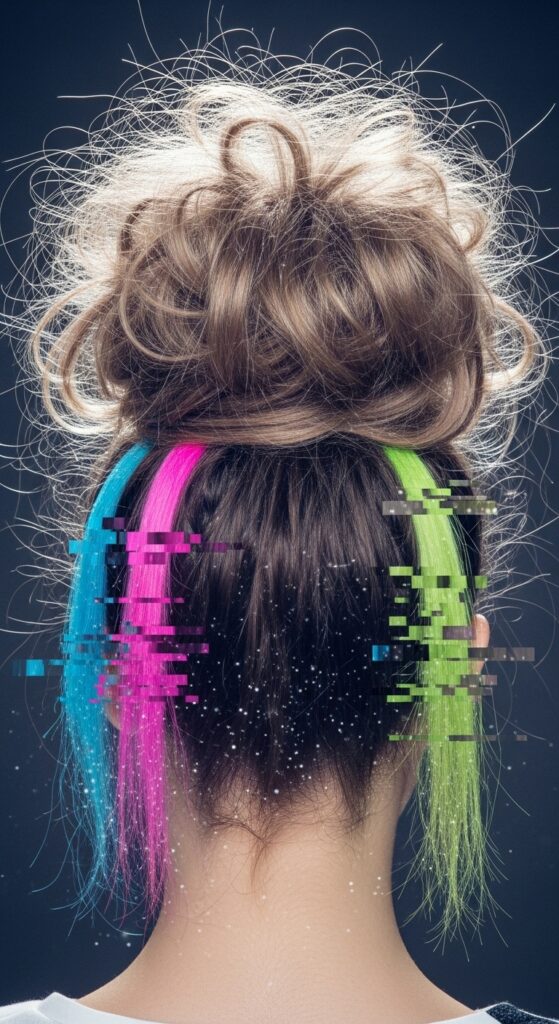
Break the rules! This updo is all about controlled chaos and personal expression. It’s perfect for a concert, an edgy party, or whenever you want to make a statement.
Tease hair heavily for maximum volume. Gather into a very high, very loose bun. Pull out tons of pieces. Use texturizing spray liberally. Consider adding a temporary color spray or glitter to sections.
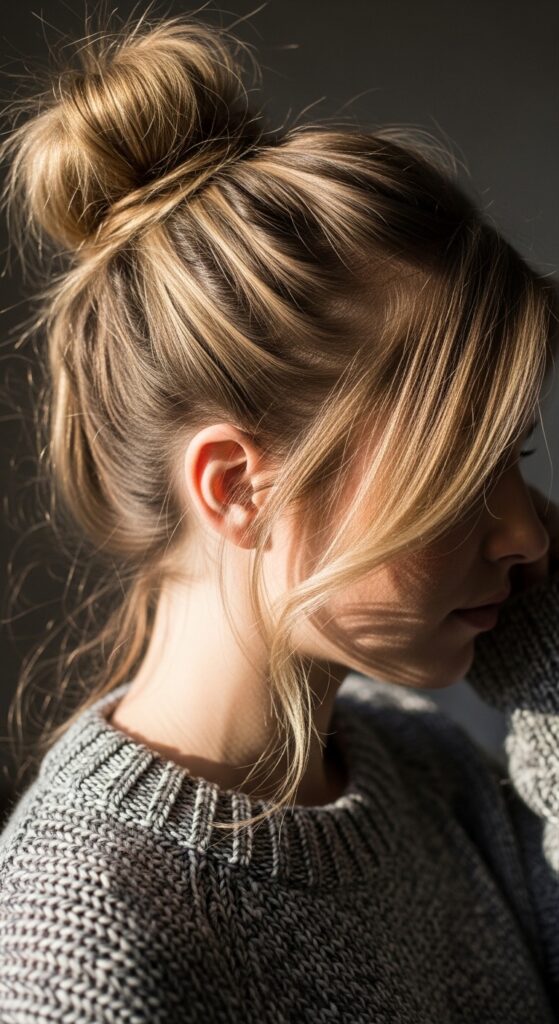
The Sophisticated Top Knot
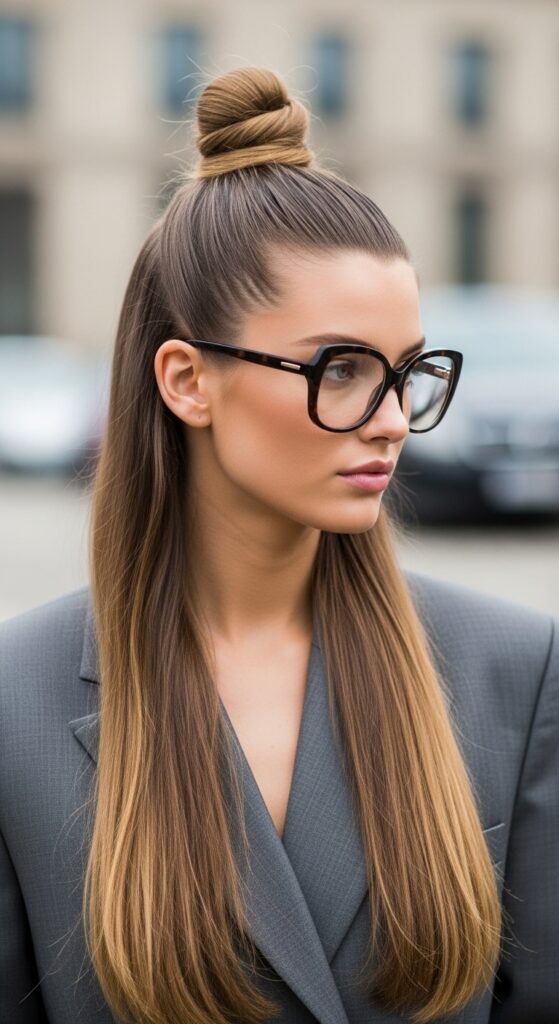
The top knot is a classic for a reason. When done sleek and high, it exudes confidence and style. It’s the ultimate “I mean business” hairstyle that’s also comfortable.
Brush hair into a high ponytail. Twist tightly and wrap around the base, securing flat against the head. Use a bristle brush and gel to smooth every flyaway for that ultra-polished finish.
The Twisted Headband Effect
This clever style gives you the look of a hair accessory without needing one. It’s sweet, preppy, and keeps hair neatly off your face in the most graceful way.
Take a front section from each temple. Twist each back, meeting in the middle at the back of your head. Pin them there, then gather all hair, including the twists, into a simple low bun.
And there you have it! Twenty-two ways to twist, tie, and transform your hair into something special. The beauty of updos is that they can be as simple or as intricate as you want them to be.
My best advice? Practice the one or two that speak to you on a lazy Sunday afternoon. That way, when you’re getting ready for your big moment, you’ll feel cool, confident, and completely put-together.
Did you find your next go-to look? I’d love to hear which one you’re trying first! Tell me in the comments below. And if you found this helpful, save this post to Pinterest so you’ll always have this guide right at your fingertips for your next event.