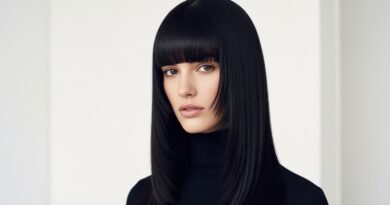
23 Donut Bun Hairstyles Perfect Circle Volume Prom Bridesmaid Formal Events
Okay, let’s be real. We’ve all been there. You have a big event—a wedding, a formal gala, a fancy date night—and you need a hairstyle that looks like you tried, but not too hard. Something elegant, put-together, and guaranteed to last all night. Enter the donut bun.
It’s the secret weapon for instant, perfect-circle volume. No fancy skills required, just a simple foam donut and a few bobby pins. It’s the ultimate hack for looking polished in minutes.
Whether you’re a bride, a bridesmaid, or just want to feel extra special, this classic style is having a major moment. I’ve rounded up 23 stunning ways to wear it, from sleek and modern to soft and romantic. Get ready to find your new go-to updo.
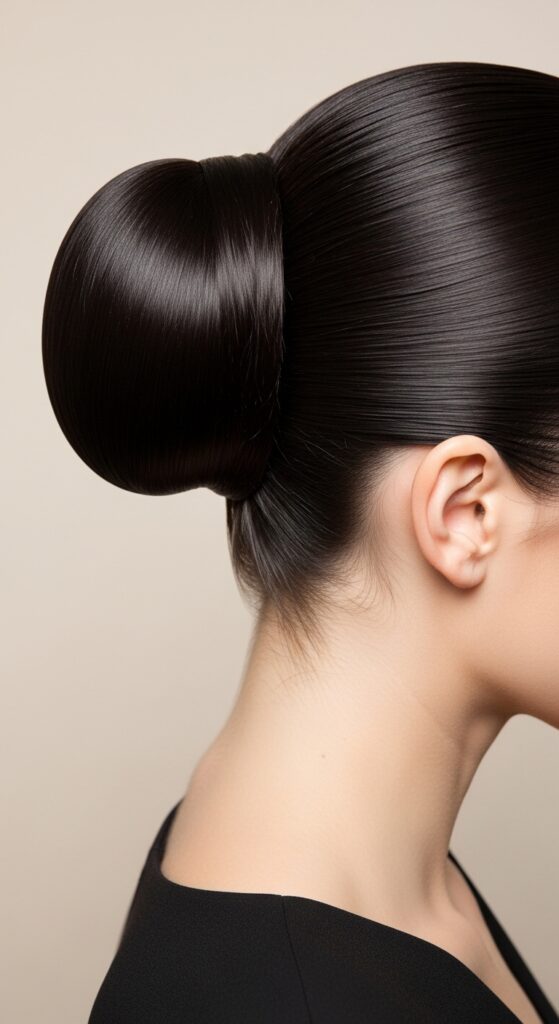
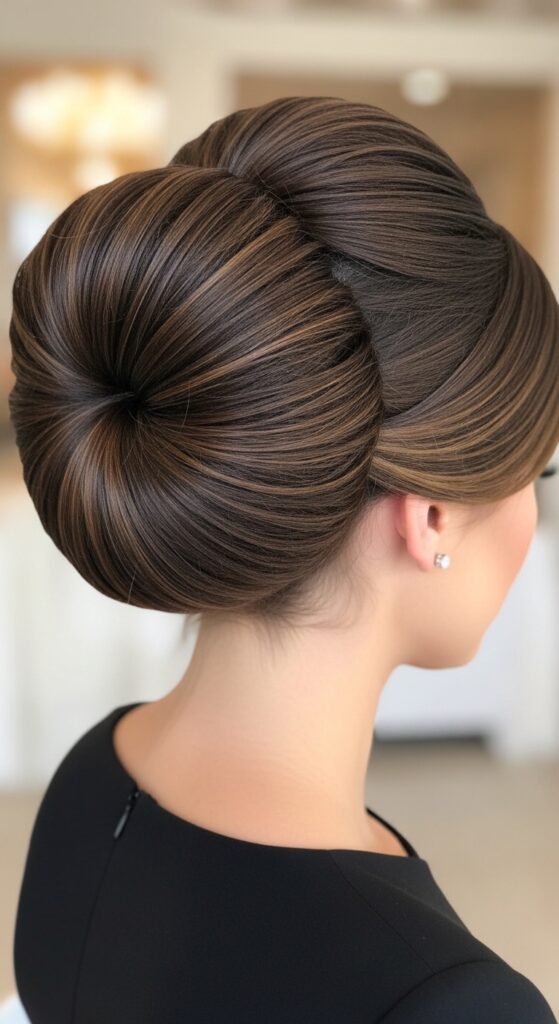
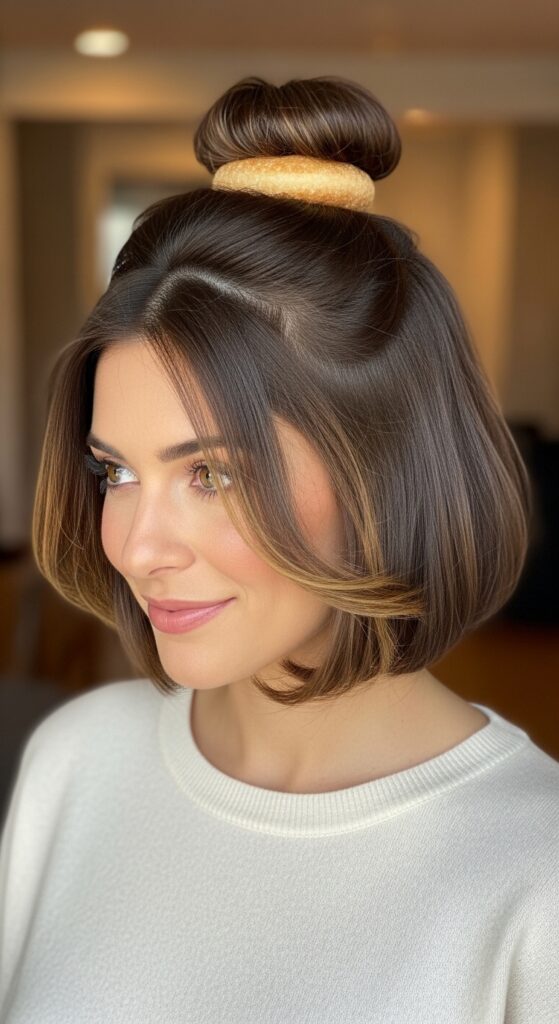
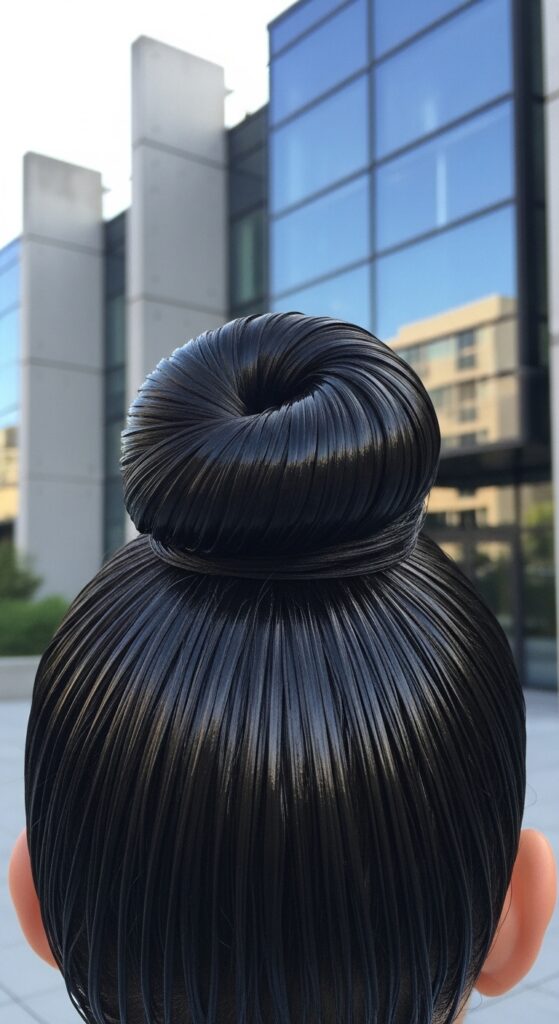
The Classic Smooth Donut Bun
This is your foundation. A perfectly smooth, high bun that screams polished elegance. It works for any hair type and is the base for so many variations.
Start with a high ponytail. Slide the donut over the tail and spread your hair evenly around it. Then, simply wrap the ends under and pin everything securely. A light-hold hairspray and a shine serum are your best friends here for that flawless finish.
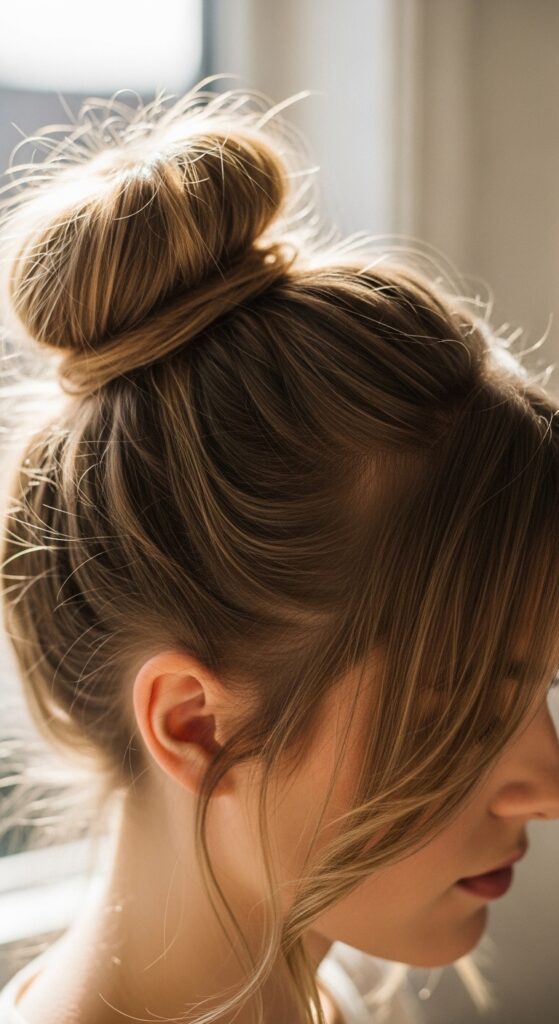
The Messy Textured Donut Bun
For a more relaxed, “I woke up like this” vibe, the messy bun is your friend. This style is perfect for balancing a formal dress with a touch of cool-girl ease.
Follow the steps for the classic bun, but don’t make your ponytail too tight. After securing the bun, gently pull out small sections around your face and nape. Use your fingers to loosen the bun itself for soft, romantic volume.
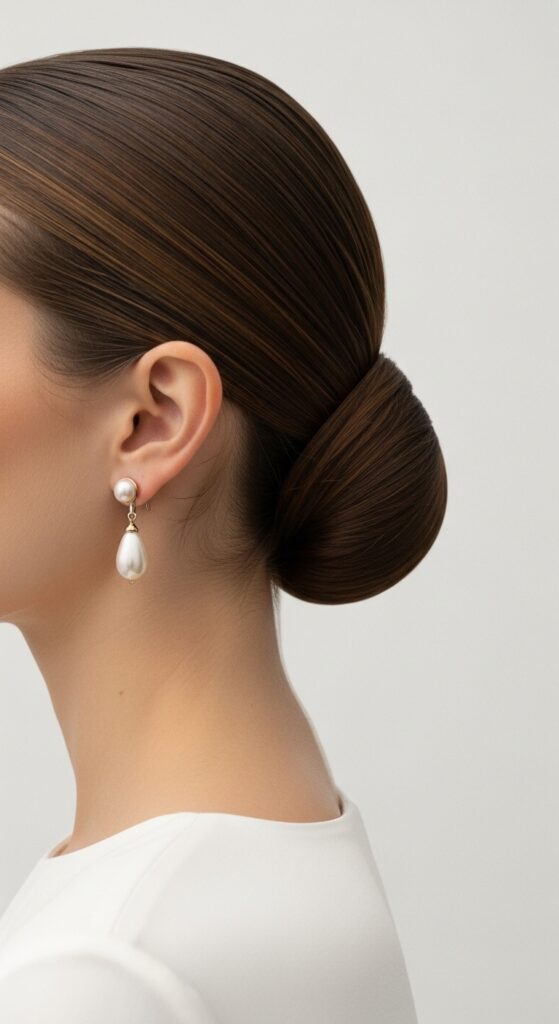
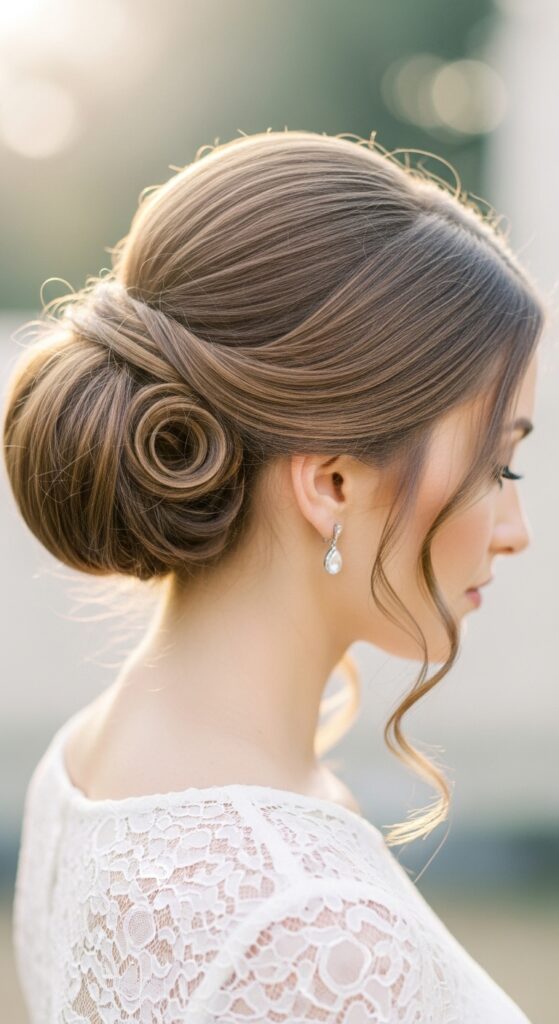
The Low Donut Bun for Quiet Luxury
This is the epitome of old money hair and quiet luxury. A low, sleek donut bun at the nape of your neck is incredibly sophisticated and timeless.
It pairs beautifully with statement earrings and a simple silk dress. The key is tension: make sure the hair leading into the bun is smooth, but not so tight it gives you a headache. This is a top contender for 2026 hairstyles leaning into refined elegance.
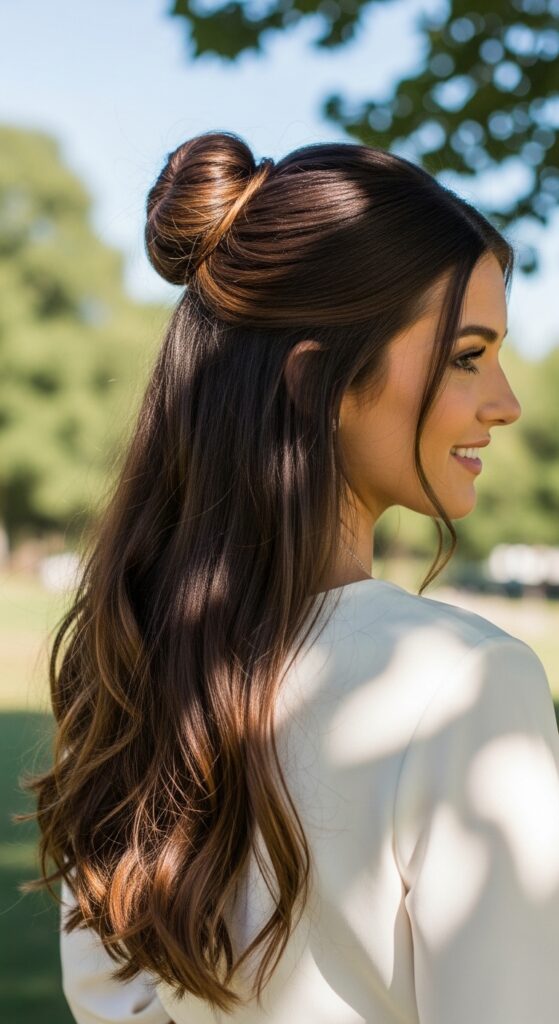
The Half-Up Donut Bun Crown
Want volume but love your waves down? This half-up style gives you the best of both worlds. It creates a beautiful, voluminous crown that looks intricate but is so simple.
Just create a half-up ponytail on the crown of your head, use a small hair donut, and wrap the hair around it. Secure and fluff. It instantly elevates your everyday look for a dinner out or a garden party.
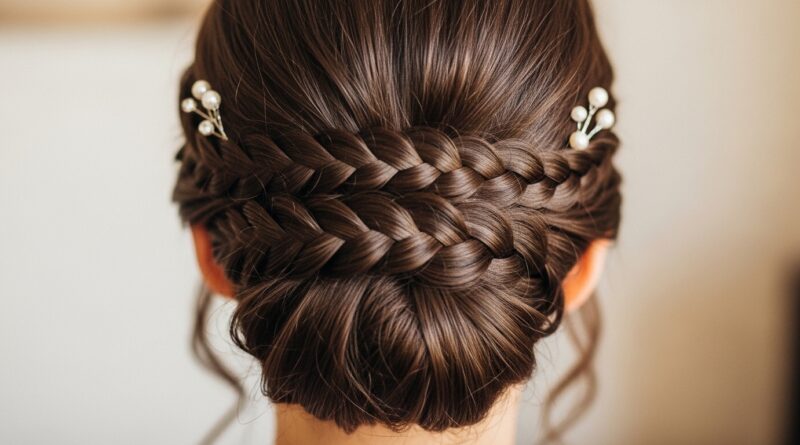
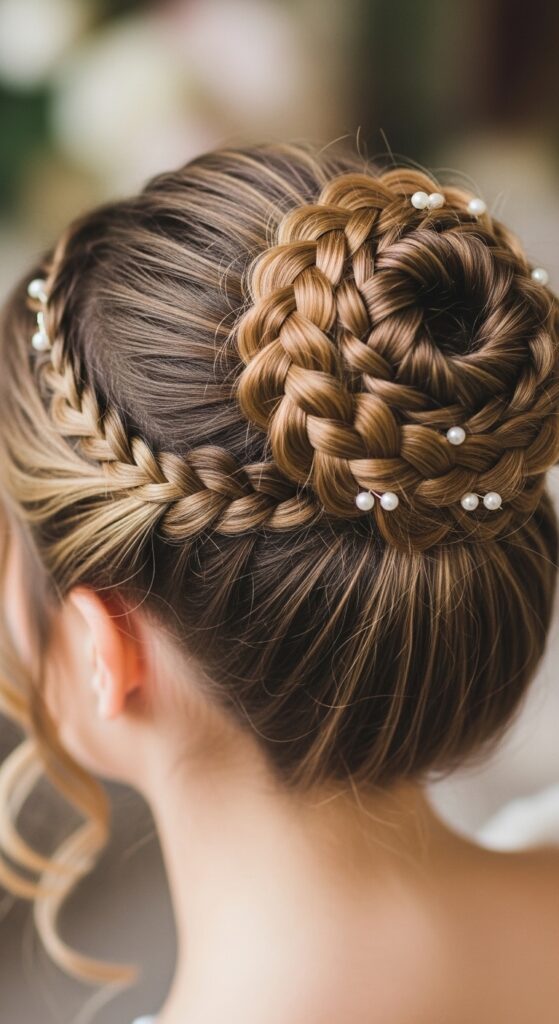
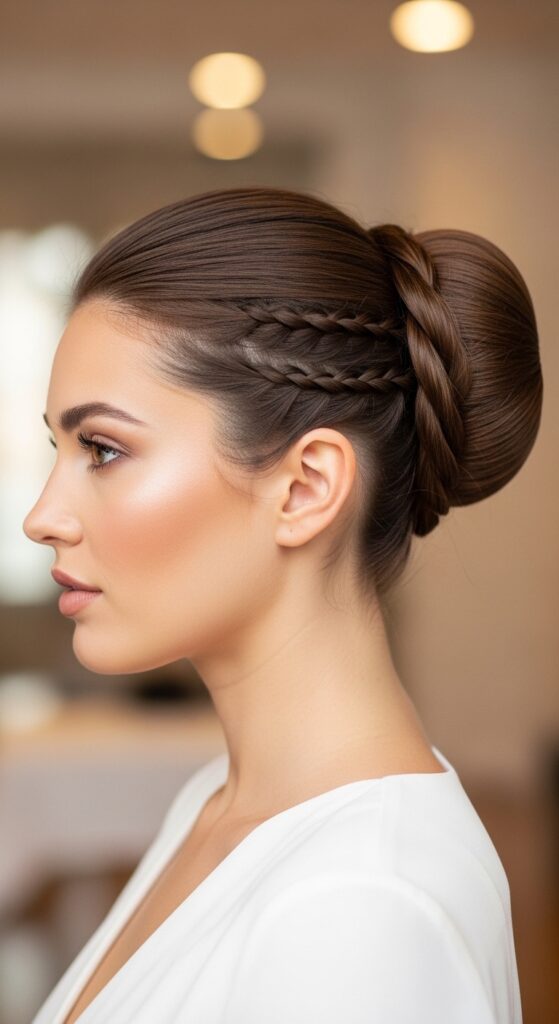
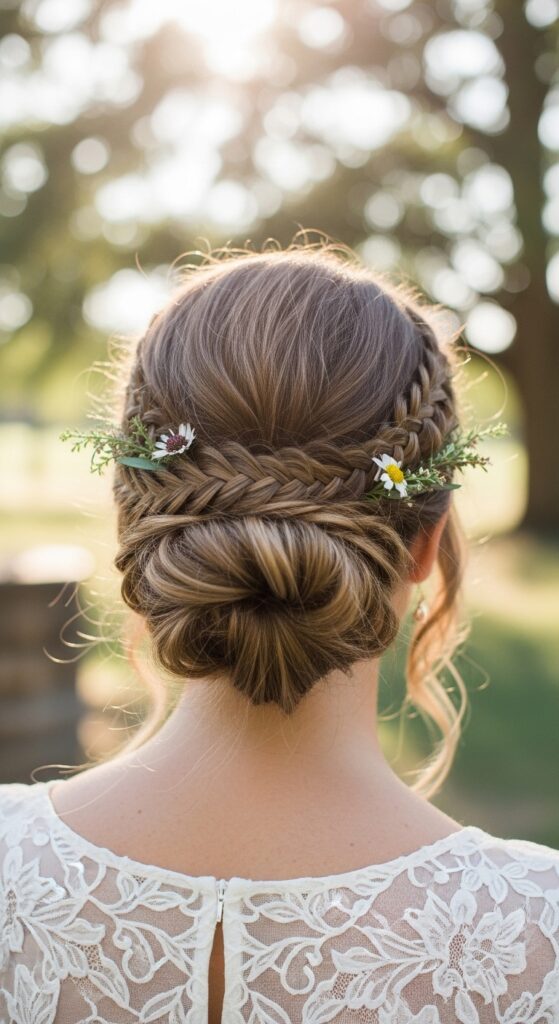
The Braided Donut Bun
Add a detailed twist to your bun by incorporating a braid. This is perfect for adding a touch of boho romance or intricate detail to your formal look.
- Option 1: Create a braid in your ponytail before wrapping it around the donut.
- Option 2: Make a Dutch braid along your hairline that feeds into the ponytail.
- Option 3: Braid a small section and wrap it around the base of the finished bun to hide the donut.
Donut Bun with Twisted Sides
This adds beautiful detail and keeps every strand in place. It’s a graceful look that frames the face beautifully and feels very red-carpet ready.
Instead of a simple ponytail, twist small sections from the front of your hair on each side as you gather it back. Secure the twists into your ponytail before making the bun. It looks custom and keeps those pesky baby hairs elegant.
The Side-Swept Donut Bun
A chic, asymmetrical take on the classic. A side-swept bun feels glamorous and is incredibly flattering. It works with both sleek and textured finishes.
Create a deep side part and gather your hair into a low ponytail on the heavier side. Place your donut and form the bun. Let a few tendrils fall on the lighter side for a soft, romantic touch.
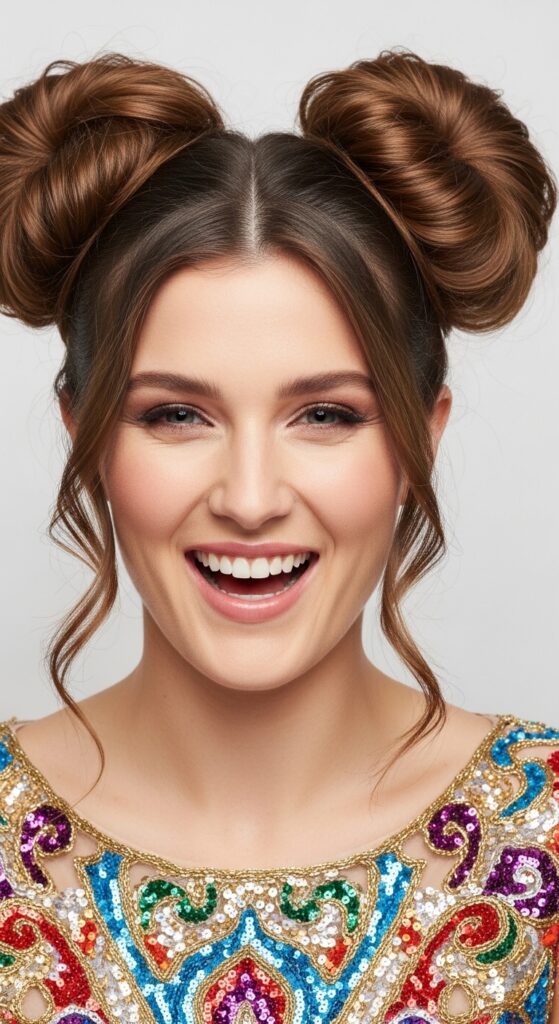
Double Donut Buns (Space Buns!)
Yes, donut buns can be playful! Double buns, or space buns, are a fun and trendy option for a creative bridesmaid or a less traditional formal event. They bring major volume and personality.
Part your hair down the middle. Create two high ponytails, use two small donuts, and form symmetrical buns. Keep them sleek for a modern look, or pull them out for a more textured, fun vibe.
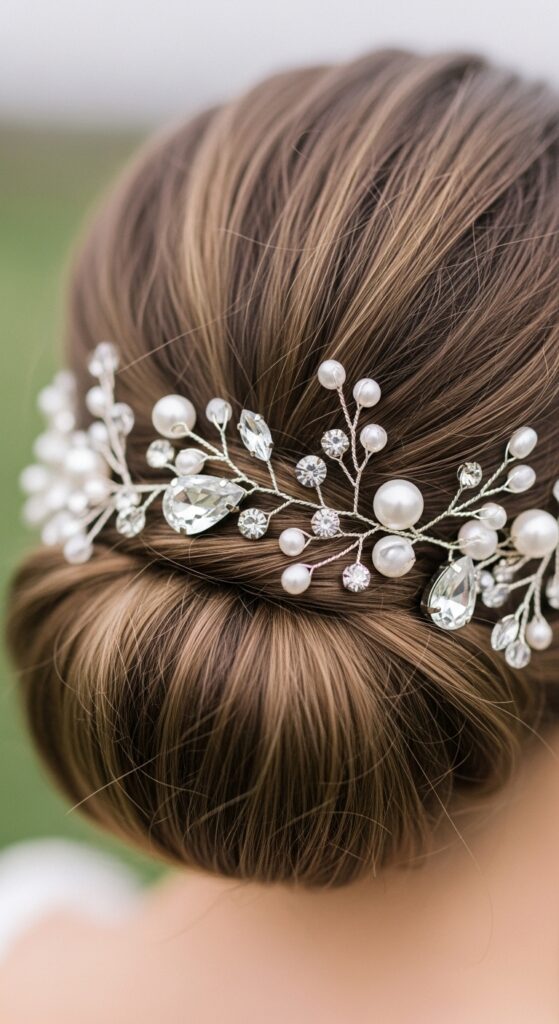
The Donut Bun with a Hair Vine
This is a dream for brides and bridesmaids. A delicate hair vine or jeweled pins can transform a simple bun into a fairy-tale masterpiece. It’s the easiest way to add a “wow” factor.
Create your chosen bun first. Then, gently weave a flexible hair vine around the base or over the top. Use bobby pins to secure the ends discreetly. For a more romantic goth feel, try a vine with dark pearls or black leaves.
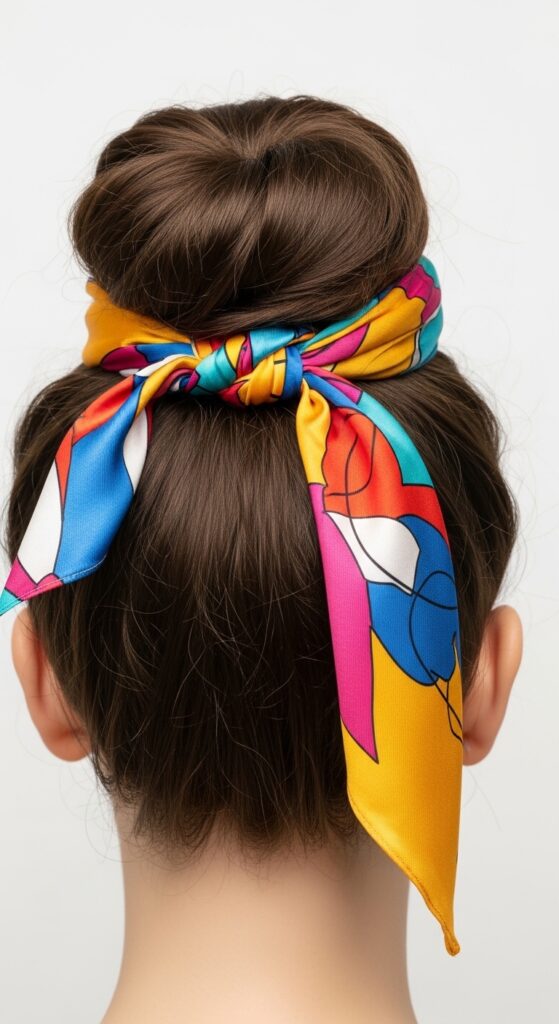
Accessorize with a Scrunchie or Scarf
Don’t hide the donut—decorate it! Using a luxe silk scrunchie or a patterned scarf as your ponytail holder before making the bun adds a huge pop of color and texture.
Simply use the accessory to secure your ponytail. When you wrap your hair around the donut, let the fabric peek out for a modern, chic touch. It’s a great nod to glitchy glam hair trends.
Donut Bun for Short Hair & Bobs
Think you can’t do a bun with a bob or an asymmetrical lob? Think again! With a small donut and a few well-placed pins, you can create a gorgeous, voluminous mini bun.
You’ll likely have shorter pieces that fall out—that’s the goal! Use them as face-framing layers. This style is chic, modern, and perfect for showing off a stunning neckline.
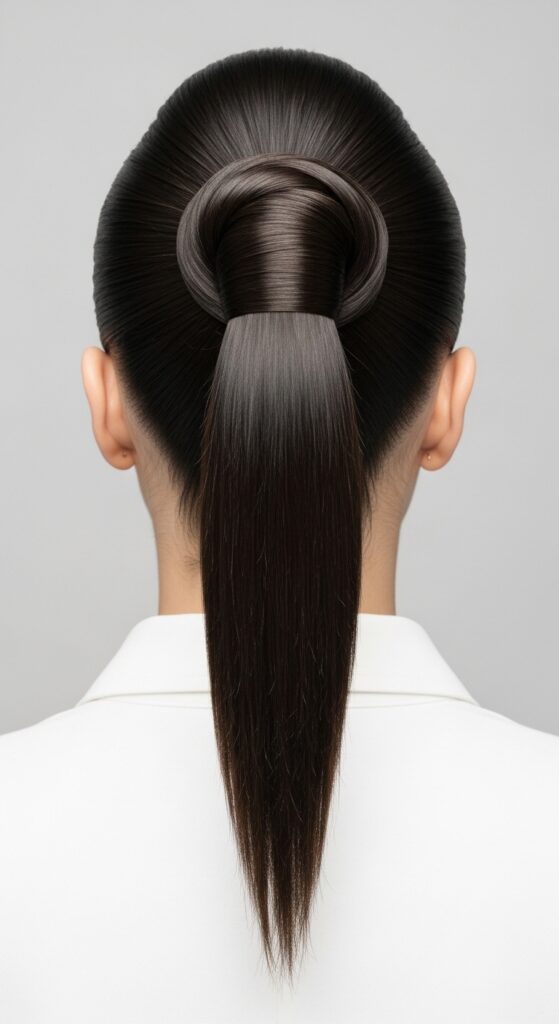
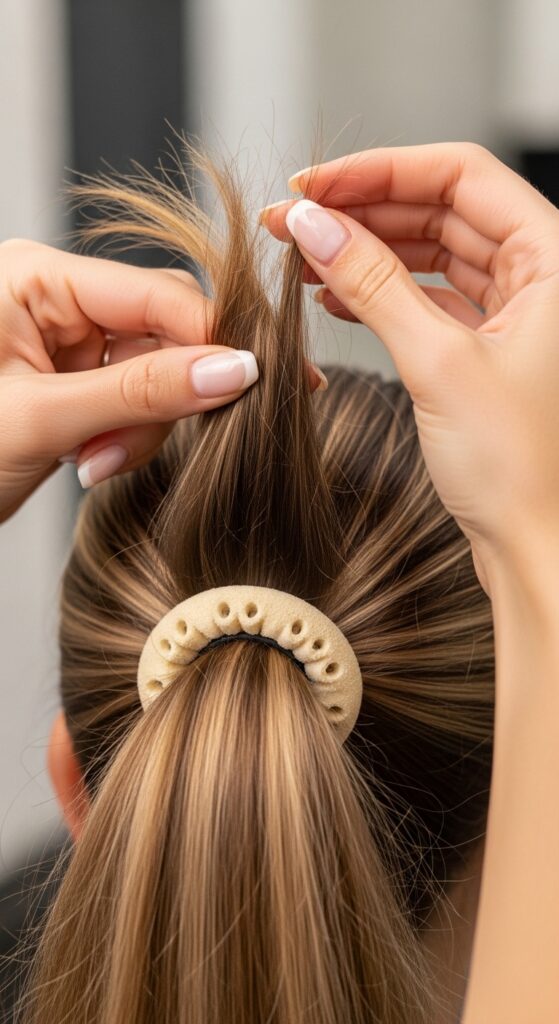
The Wrapped Ponytail Base Bun
For ultimate polish, hide your ponytail holder. Before you place the donut, take a small section of hair from the ponytail and wrap it around the elastic. Secure it with a pin underneath.
Then, proceed with the donut bun as usual. This extra step gives a seamless, high-end look that’s perfect for the most formal events. It looks like you hired a professional.
Donut Bun with Curled Tendrils
Soft, face-framing tendrils are the secret to a romantic, soft look. They balance the structure of the bun and add a touch of vintage glamour.
After your bun is secure, use a small curling iron to curl a few pieces around your face and at the nape of your neck. Gently brush them out with your fingers for a soft, blended wave.
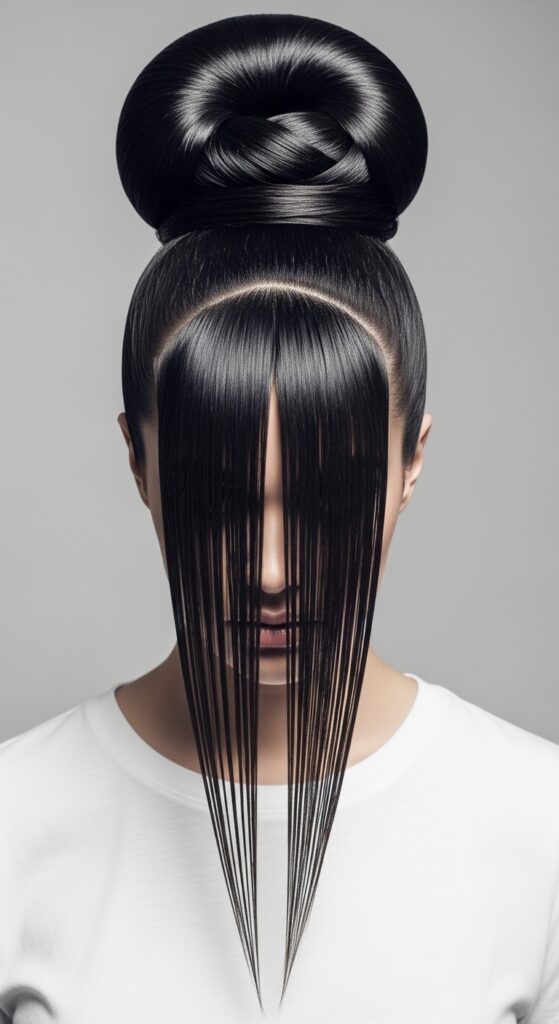
The “Hime” Inspired Donut Bun
Take inspiration from the iconic hime cut and its structured front pieces. Create a high, smooth donut bun, but leave out two distinct, long front sections.
You can wear these straight and sharp for a dramatic look, or curl them softly for a more blended romance. It’s a unique, eye-catching style that plays with geometry.
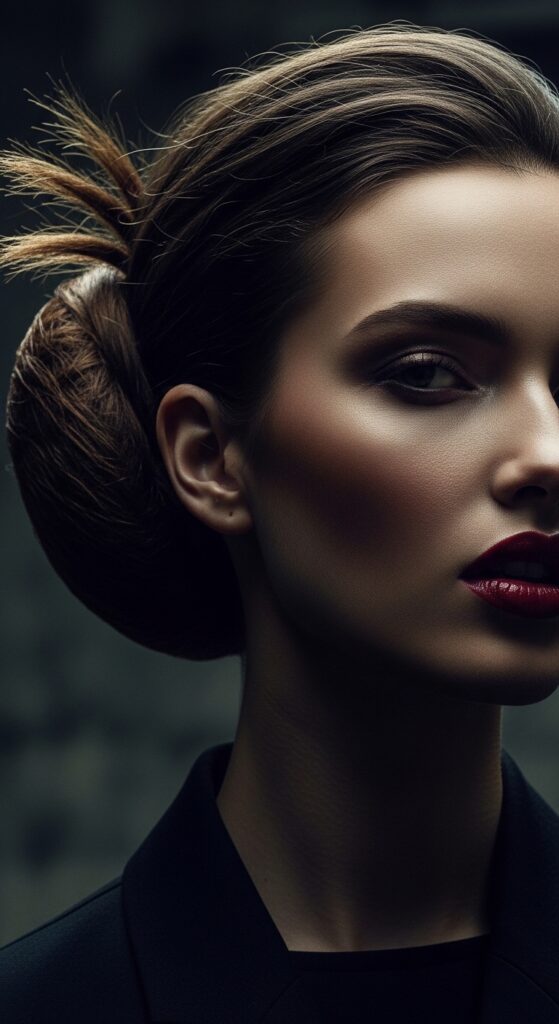
Donut Bun for a Vampire Aesthetic
Pair your bun with dark romantic elements for a vampire haircut vibe. Think deep side parts, sharp contour, and rich, dark hair color.
Opt for a low, slightly messy bun with lots of texture. Pull out a few long, piecey strands. Accessorize with dark metal hair clips or a black satin ribbon for that perfect romantic goth formal look.
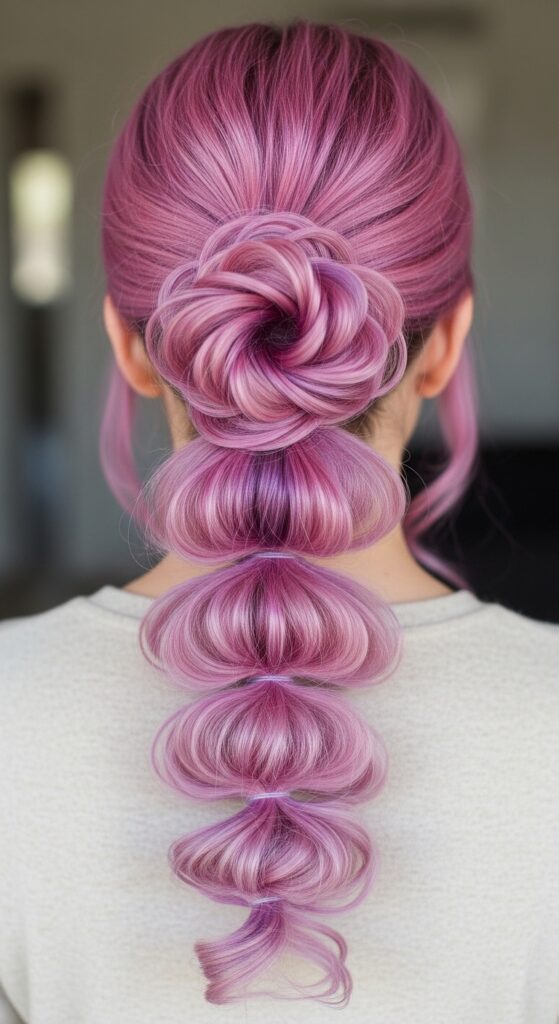
The Bubble Ponytail into a Bun
This is a two-in-one style that’s full of fun volume. First, create a bubble ponytail by placing elastics down the length of your ponytail and puffing out the sections between them.
Then, use the final section to create a donut bun at the end. It’s a playful, modern updo that’s sure to get compliments and works amazing on thick hair.
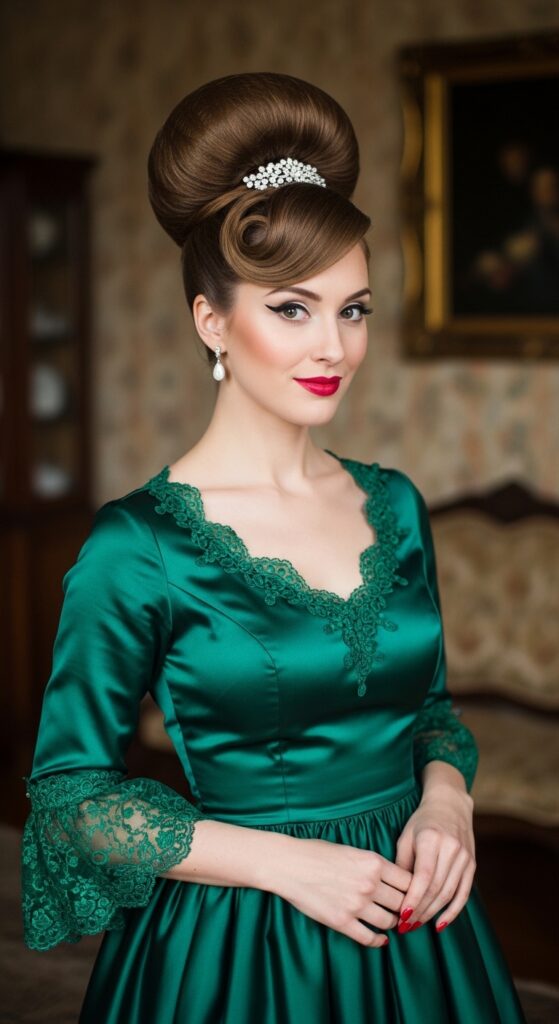
Donut Bun with a Poof or Tease
Channel some retro glamour by adding height at the crown. Before gathering your hair, tease the hair at the crown of your head lightly.
Smooth the top layer over the tease to create a soft poof or bouffant. Then, gather your hair into your chosen bun style. This adds major drama and balances the volume of the bun itself.
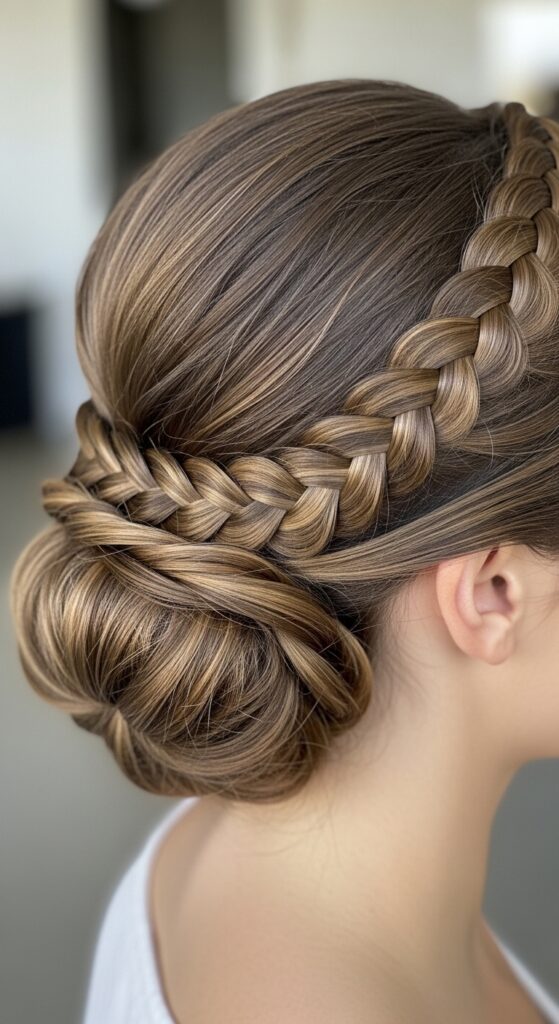
The Dutch Braid Headband Bun
This style combines two gorgeous elements. Create a Dutch braid (an inside-out braid) starting at one temple, going across your hairline like a headband, and ending at the opposite ear.
Gather all your hair, including the braid’s end, into a low ponytail and make your donut bun. It’s an intricate-looking style that’s actually broken down into simple steps.
Donut Bun on Wet-Look Hair
For a super modern, editorial feel, try the wet-look slick. Use a strong-hold gel or pomade to slick your hair back into an incredibly sleek ponytail before making your bun.
Ensure every hair is smoothed, including baby hairs. The result is a high-shine, severe bun that pairs perfectly with minimalist fashion and bold makeup. It’s a power look.
The Fishtail Donut Bun
Incorporate a fishtail braid for a boho-chic texture. A fishtail braid looks complicated but is easy once you get the rhythm.
Fishtail your ponytail before wrapping it around the donut, or create a fishtail braid that wraps around the base of a finished bun. The unique texture is beautiful and eye-catching.
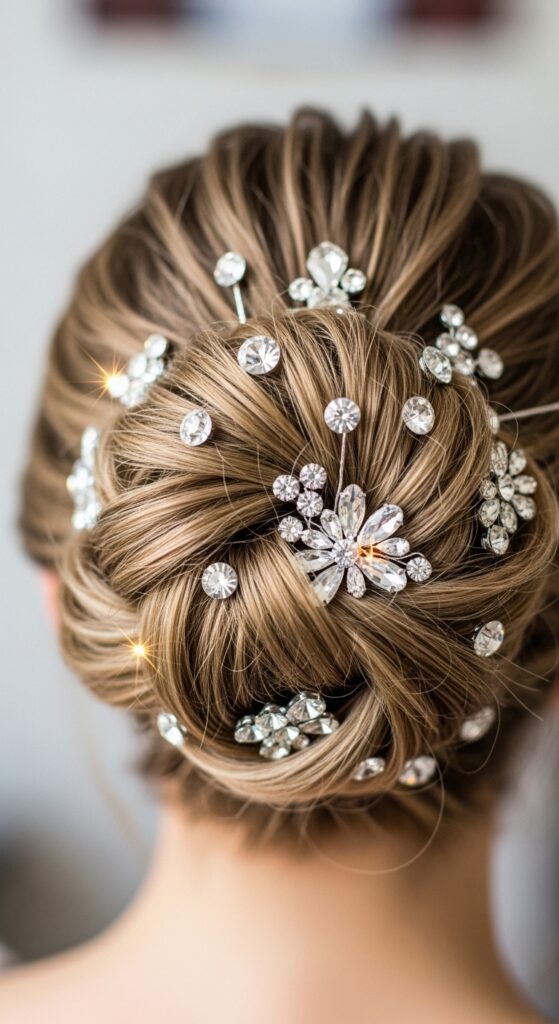
Donut Bun with Hair Jewelry Pins
Go beyond the vine. Individual hair pins—think stars, moons, pearls, or diamonds—can create a custom constellation in your bun.
Place them in a clustered pattern or scatter them randomly for a sparkly effect. This is a great way to match your jewelry and add personal flair. Perfect for New Year’s Eve or a gala.
For Fine Hair: The Volume-Boosting Trick
If you have fine hair, don’t skip the donut bun! The trick is to backcomb or tease the hair in your ponytail before you place the donut over it.
This creates a ton of grip and base volume. Then, gently smooth the top layer over the teased section and wrap it around the donut. You’ll get a full, lasting bun that won’t slip.
The Perfect Donut Bun Tool Kit
Having the right tools makes all the difference. Here’s what you need in your kit:
- Foam Donuts: Get a few sizes—small for half-up styles or short hair, large for major volume.
- Bobby Pins: The criss-cross, strong-hold kind are best. Match them to your hair color.
- Elastics: Use seamless, snag-free ones to avoid breakage.
- Hairspray: A light-hold for texture, a strong-hold for sleekness.
- Tail Comb & Brush: For smoothing and precise parting.
And there you have it! From the classic sleek bun to styles with braids, twists, and all the accessories, the humble donut bun is truly the most versatile tool in your hairstyling kit. It’s a lifesaver for busy mornings and a showstopper for your biggest nights.
I hope this list gave you tons of inspiration and showed you just how creative you can get. The best part? Every single one of these looks is achievable at home, no fancy salon appointment needed.
Save this post to Pinterest so you always have this guide handy for your next event! Which style are you most excited to try? Tell me in the comments below—I love hearing from you!
XOXO, Hailey & Team