24 Boho Knots Hairstyles Messy Textured Updos Romantic Festival Wedding Looks
Okay, let’s be real. We’ve all scrolled through endless festival or wedding hair galleries and felt a mix of awe and “I could never do that.” The intricate braids, the perfect curls… it feels like a full-time job. But what if I told you the secret isn’t perfection? It’s the boho knot.
This is your ultimate guide to messy, textured updos that look romantic, intentional, and totally doable. We’re talking 24 looks, from five-minute miracles to stunning wedding-day styles.
I’ve broken everything down into simple, scannable sections. Whether you’re prepping for a festival, a beach wedding, or just want that effortless “I woke up like this” vibe, you’ll find your next favorite look right here. Let’s get into it.
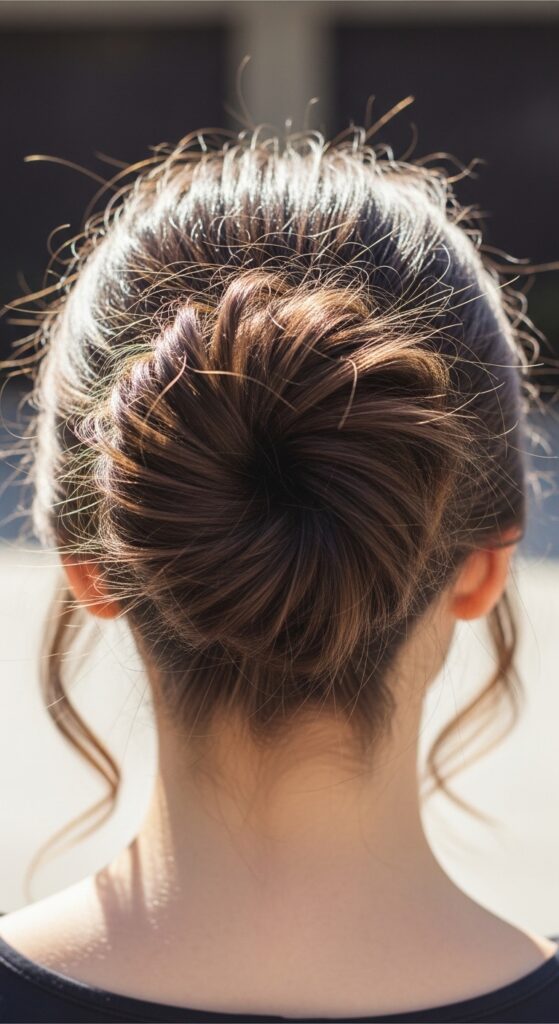
1. The Classic Messy Top Knot
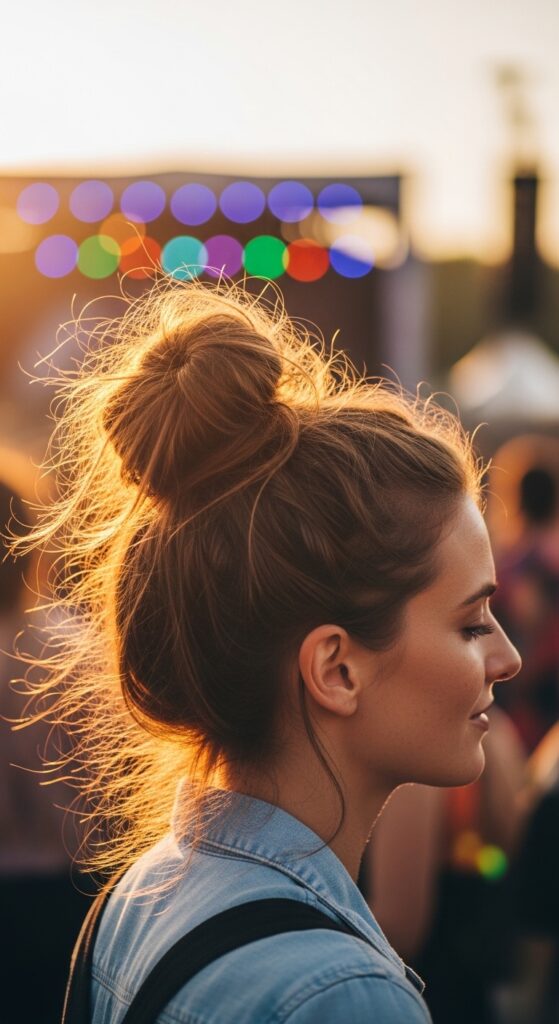
This is the foundation. It’s not about a slick, tight bun. It’s about volume and movement. The goal is to look like you threw your hair up without a mirror and somehow it looks amazing.
Start with second or third-day hair for grip. Pull your hair into a high ponytail, but don’t pull it all the way through on the last loop. Tug at the sides to create fullness and pull out a few face-framing pieces.
- Tease the crown lightly before gathering your hair.
- Use a texturizing spray, not hairspray, for a flexible hold.
- Wrap a small section of hair around the base to hide the elastic.
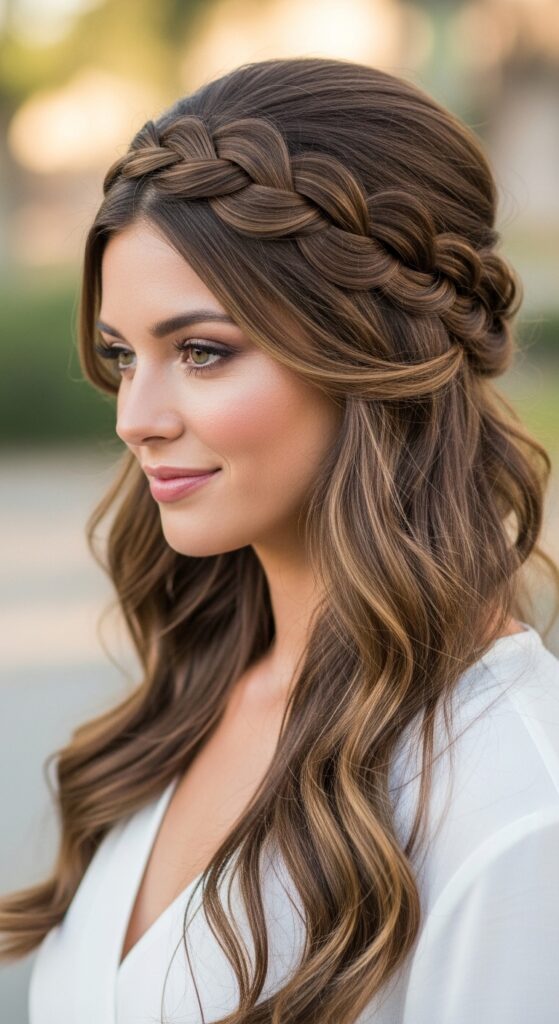
2. The Half-Up Boho Crown
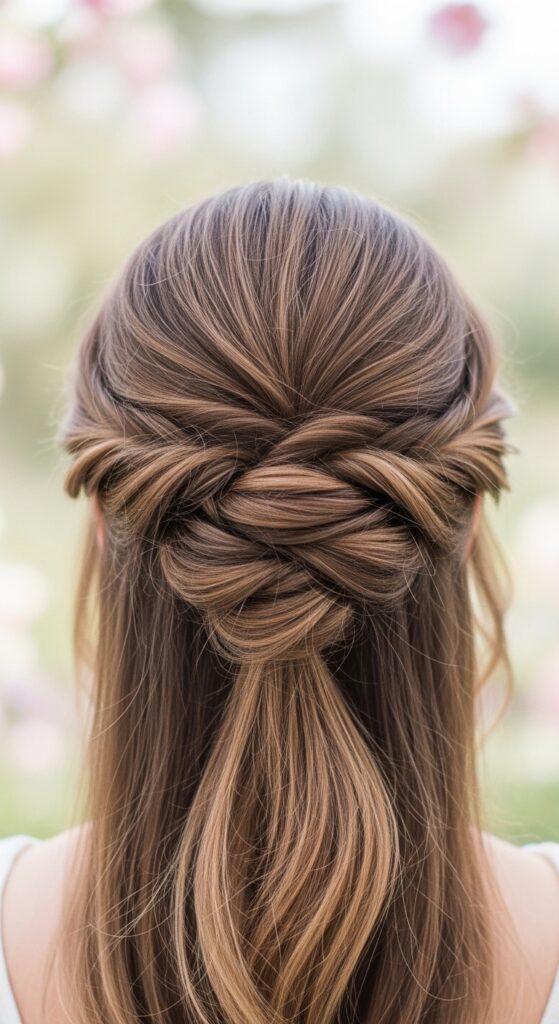
This look gives you the elegance of an updo with the freedom of leaving your hair down. It’s perfect for keeping hair off your face while showing off your length and texture. It pairs beautifully with 2026 hairstyles leaning into soft, romantic details.
Take a deep section from your temples back. Twist each side loosely, then cross them and pin them at the back of your head. Don’t pin them flat—create a little lift for a crown effect.
- Twist sections away from your face.
- Cross and pin with bobby pins that match your hair color.
- Gently pull on the twists to make them fuller.
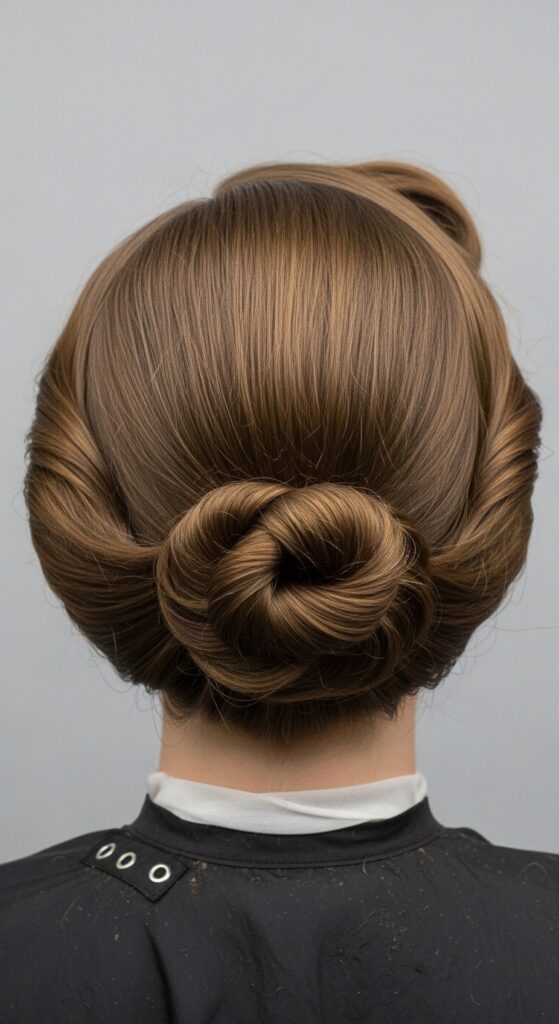
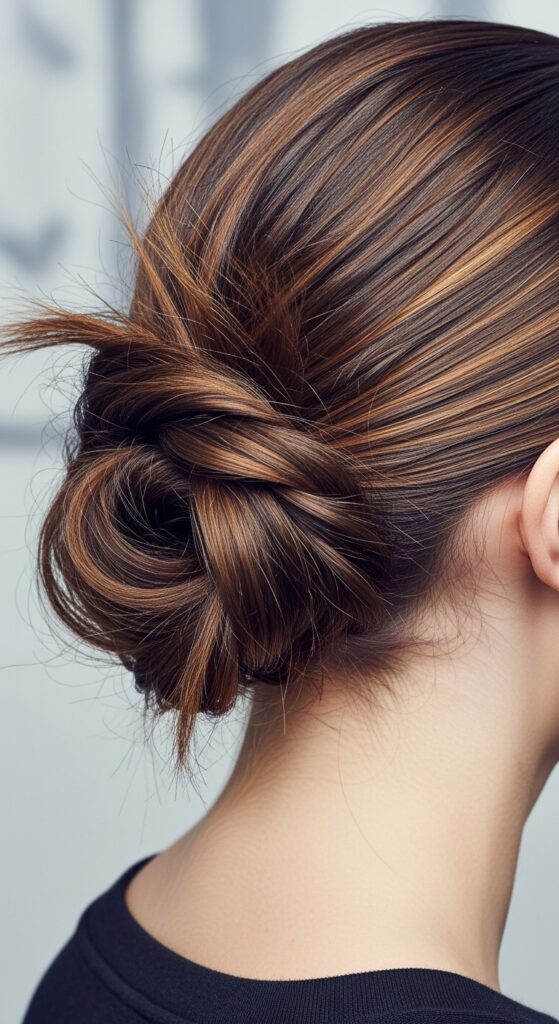
3. The Twisted Low Bun
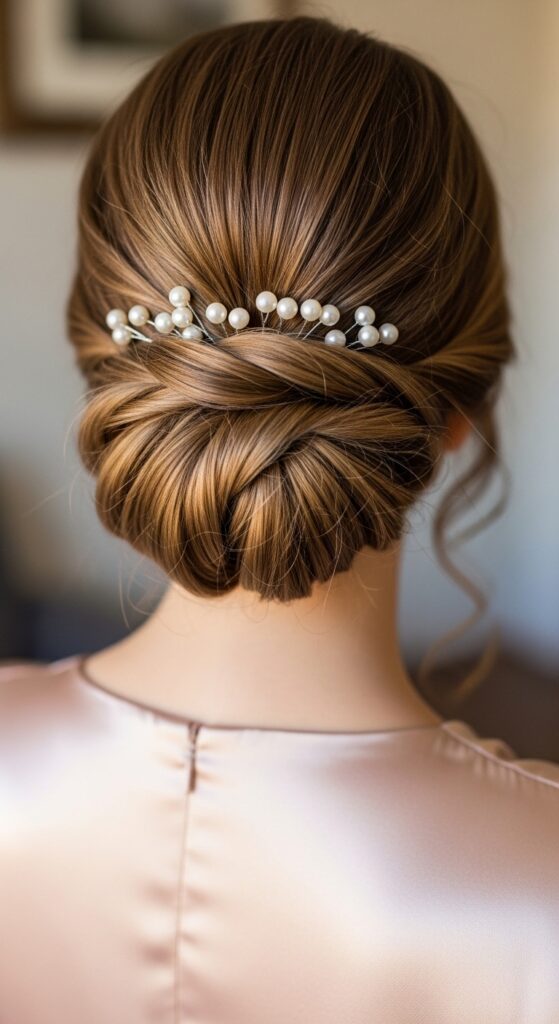
Think of this as the quiet luxury bob of updos. It’s understated, elegant, and incredibly chic. This is a go-to for garden parties, rehearsal dinners, or as a polished everyday look.
Gather your hair at the nape of your neck as if for a low ponytail. Twist the length until it coils around itself. Secure with an elastic, then pin the coil flat against your head, tucking the ends under.
- Keep the twist loose for a softer feel.
- Mist with a shine spray for a healthy glow.
- Perfect for showcasing beautiful earrings.
4. The Braided Boho Knot
Add a little extra detail by incorporating a simple braid. This style bridges the gap between a basic knot and a more intricate updo. It looks complex but takes only a minute longer.
Create a loose side braid (a simple three-strand is fine) on one side of your head. Gather all your hair, including the braid, into a low or mid-height bun. Wrap the tail of the braid around the bun’s base and pin it.
- Pull gently on the braid edges to make it wider and messier.
- Let some pieces escape the braid for a lived-in look.
- This works on both straight and curly hair.
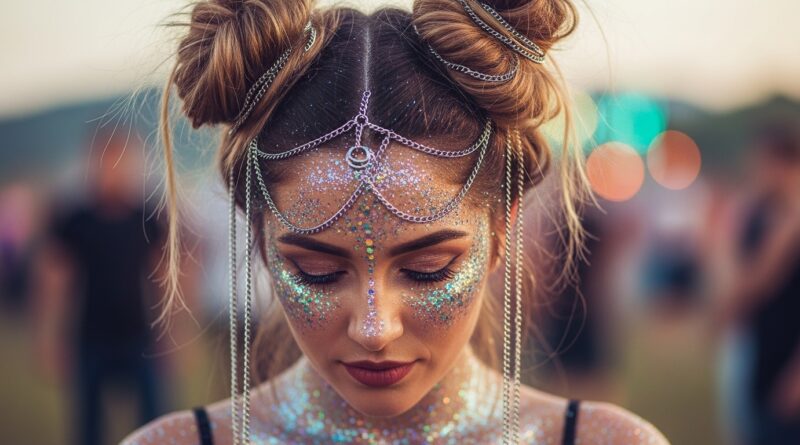
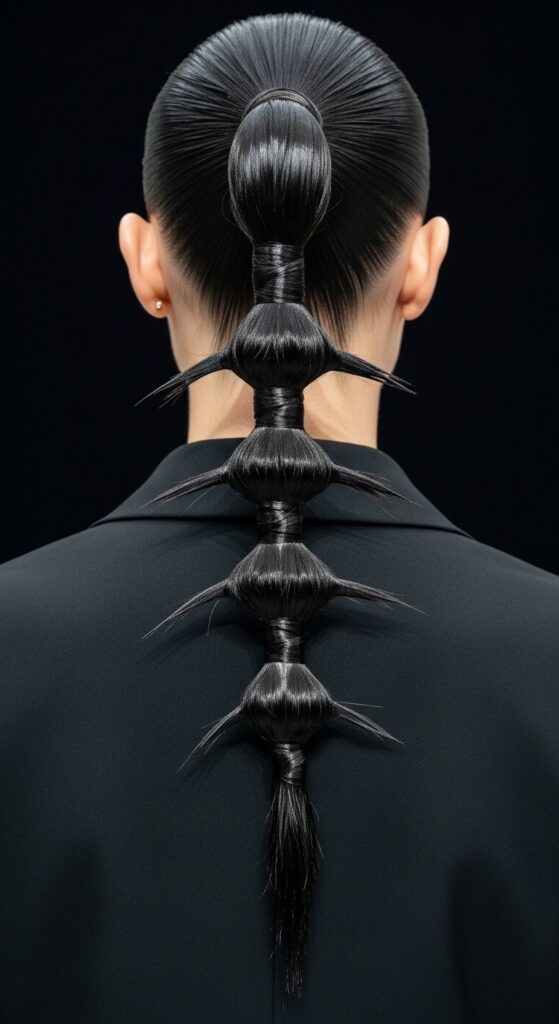
5. The Festival Goddess Double Knots
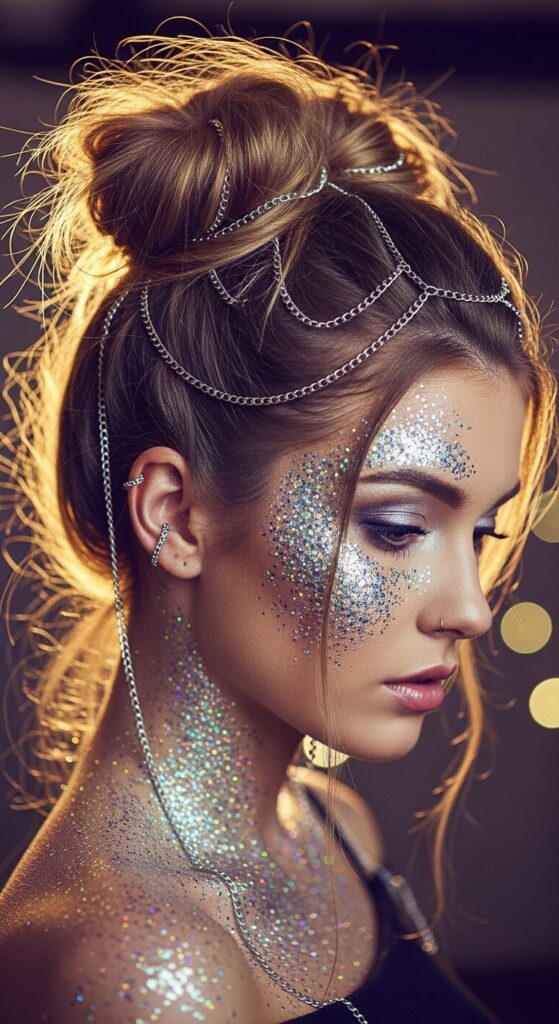
Space buns get a boho upgrade. Instead of tight buns, we’re creating two textured, knotted orbs. This is playful, youthful, and holds up amazingly in crowd chaos.
Part your hair down the middle. On each side, gather the hair into a high ponytail. Twist and knot the length before wrapping it into a bun. The key is imperfection—let pieces stick out.
- Use colored elastics or wrap embroidery thread around the base.
- Add temporary hair color or glitter to the pieces around your face.
- This is a great base for adding hair accessories.
6. The Textured Mermaid Knot
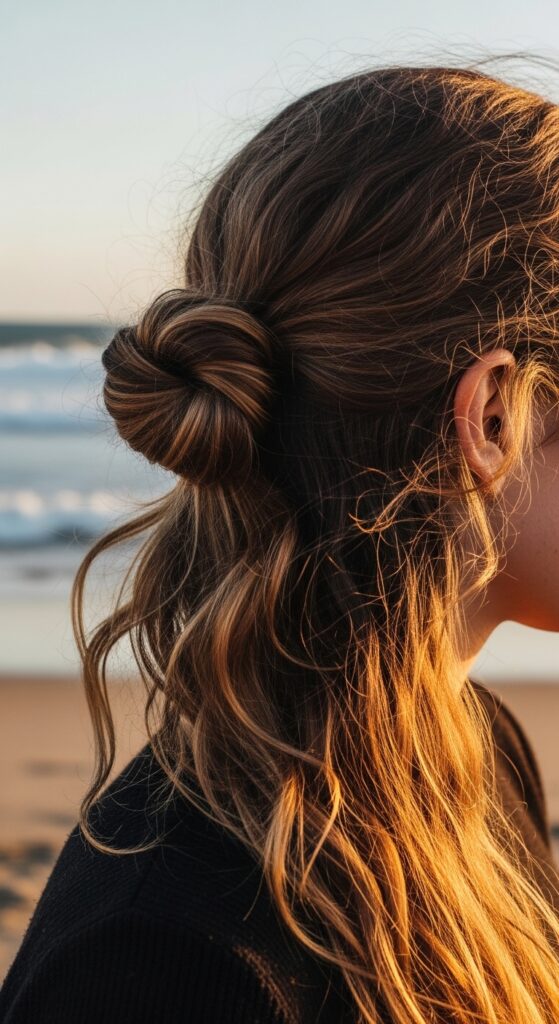
For my long-haired friends, this is a dream. It gives the illusion of an updo while letting your beautiful length shine. It’s effortlessly sexy and perfect for a beach wedding or a day by the water.
Take all your hair to one side. Tie it into a loose, low knot, only going through the first loop. Pull the knot gently to enlarge it, and let the ends flow freely with the rest of your hair.
- Spray salt spray on damp hair before air-drying for perfect texture.
- The knot should sit just below your shoulder.
- Pull face-framing layers out after you tie it.
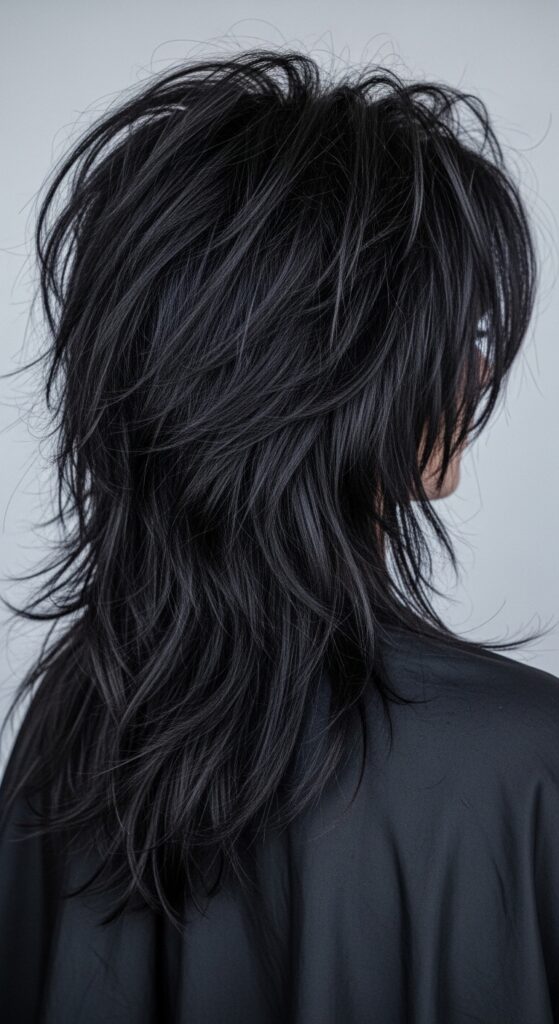
7. The Romantic Goth Twist
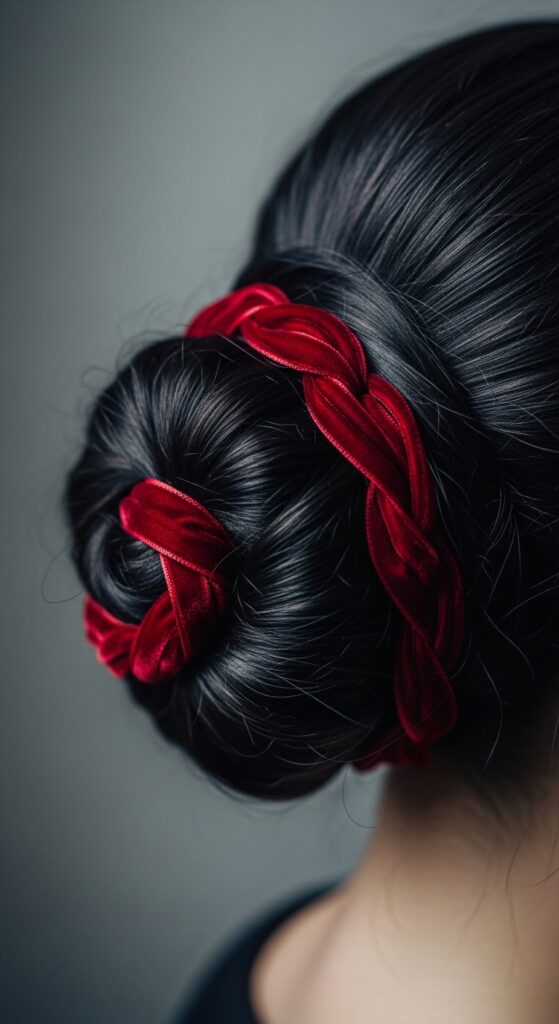
Boho meets drama. This look takes the softness of a knot and adds an edge, perfect for blending into romantic goth hairstyles. It’s all about deep side parts, texture, and a touch of dark romance.
Create a deep side part. Gather hair loosely at the nape, but instead of a clean bun, create a few intentional knots within the ponytail before coiling it. Leave tendrils out around your face and neck.
- Use a black satin ribbon as your hair tie or weave it in.
- Keep the texture matte, not shiny.
- Pair with a dark lip for a full vibe.
8. The Asymmetrical Lob Knot
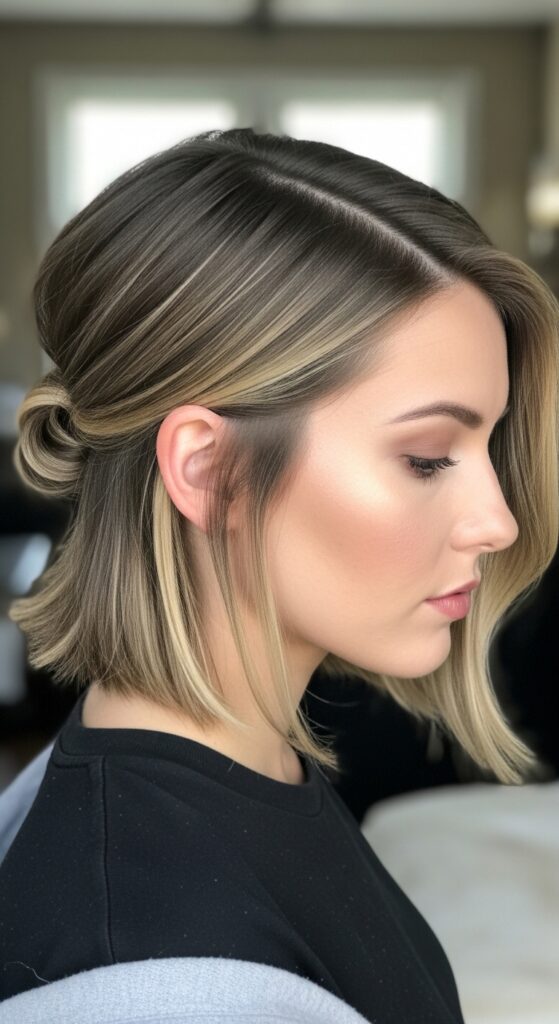
Short hair friends, you’re in! If you have an asymmetrical lob or a angled bob, you can still play. This style adds interest and keeps hair out of your face while highlighting your cut’s cool shape.
On the longer side of your lob, take a section from the front. Twist it back and secure it in a tiny, flat knot just above or behind your ear. Pin it neatly. Leave the rest of your hair down and textured.
- Use a strong-hold texturizing paste on short pieces.
- This look celebrates the precision of your cut.
- It’s a great way to transition a lob as it grows out.
9. The Hime Cut Accent Knot
The hime cut is striking on its own. But for a change, try tying just the long, face-framing sections. It creates a beautiful, layered look that’s both traditional and modern.
Isolate the two long front sections of your hime cut. Bring them to the back of your head, just below the crown. Tie them together in a simple knot or small braid, and pin them flat. Let your blunt bob and bangs remain untouched.
- This keeps those long pieces off your face gracefully.
- Add a small, elegant hairpin to the knot.
- It shows off the unique architecture of the hime cut.
10. The “Glitchy Glam” Knot
Enter glitchy glam hair. This trend is about intentional disruption. Think a sleek base with a knotted section that looks almost digital. It’s high-fashion and surprisingly easy to mimic.
Create a very sleek, high ponytail. Divide the tail into two sections. Twist them around each other tightly, then push the twist up to create a compact, knotted “glitch” in the middle of the ponytail. Secure with a clear elastic.
- Use a strong gel on your ponytail base for maximum sleekness.
- The contrast between slick and textured is key.
- Finish with a high-shine hairspray.
11. The Vintage-Inspired Rolled Knot
This takes the boho knot into vintage territory. It’s more polished than our messy looks but still has that knotted, textured heart. It screams old money hair in the best way—timeless and put-together.
Brush your hair smoothly into a low ponytail. Instead of tying it, twist the length and roll it upwards, tucking it under to create a soft roll. Pin it securely. The base of the roll will have a knotted appearance.
- Use a boar bristle brush for a smooth, glossy finish.
- Secure with U-pins for a stronger hold.
- Keep face-framing pieces soft, not rigid.
12. The Wedding Day Rope Twist Updo

This is your “I do” hairstyle. It uses the simple technique of rope twisting (twisting two sections together) to build a stunning, secure updo that lasts all day and night. It’s romantic and structured yet soft.
Section your hair. Create rope twists from the front, bringing them back to a central point. Instead of pinning each one flat, gently knot or tuck the ends of one twist into another. Build from the bottom up.
- Practice this once before the big day.
- Have your stylist incorporate a hairpiece or fresh flowers.
- This style works with veils attached under the knot.
13. The Messy Figure-Eight Bun
This sounds fancy but is just two loose buns connected. It creates a beautiful, unique shape from behind that’s perfect for photos. It’s a great way to add volume if you have fine or medium-length hair.
Create two loose side-by-side buns at the back of your head—one slightly higher than the other. Don’t tuck the ends in; let them flow into each other. Pin generously, then pull the buns apart slightly to connect them.
- Tease your hair before starting for extra grip and volume.
- Use a texturizing powder at the roots.
- This style looks amazing from every angle.
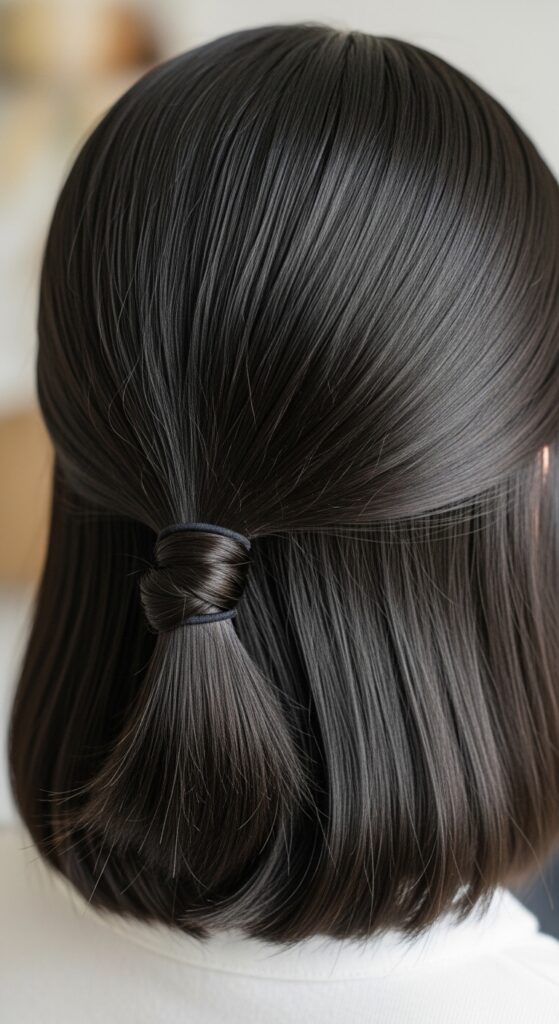
14. The Knotted Headband Effect
No actual headband needed. This style uses your own hair to create a beautiful, bohemian headband that keeps hair off your face. It’s functional, flattering, and works on almost every hair type.
Take a front section from each side, about an inch back from your hairline. Tie them together in a single knot at the top of your head. Pull gently to tighten, then pin the ends under the hair on the opposite sides.
- Make the sections thick enough to be visible.
- Pull the knot flat against your head for comfort.
- Let the rest of your hair flow freely down.
15. The Vampire Cut Tuck
The vampire haircut is all about dramatic, sharp layers. To style it, sometimes you just want to contain the longest front pieces. A simple, loose knot at the back does the trick while maintaining the cut’s fierce attitude.
Gather the longest, face-framing layers (the “vampire” points). Bring them to the back, just above the nape. Tie them in a single, loose knot and pin the ends under. Let the shorter, choppy layers around your face do their thing.
- Use a matte pomade to define the shorter layers.
- The knot should be small and subtle, not a focal point.
- This is a great “second-day” style for this cut.
16. The Bubble Ponytail Knot
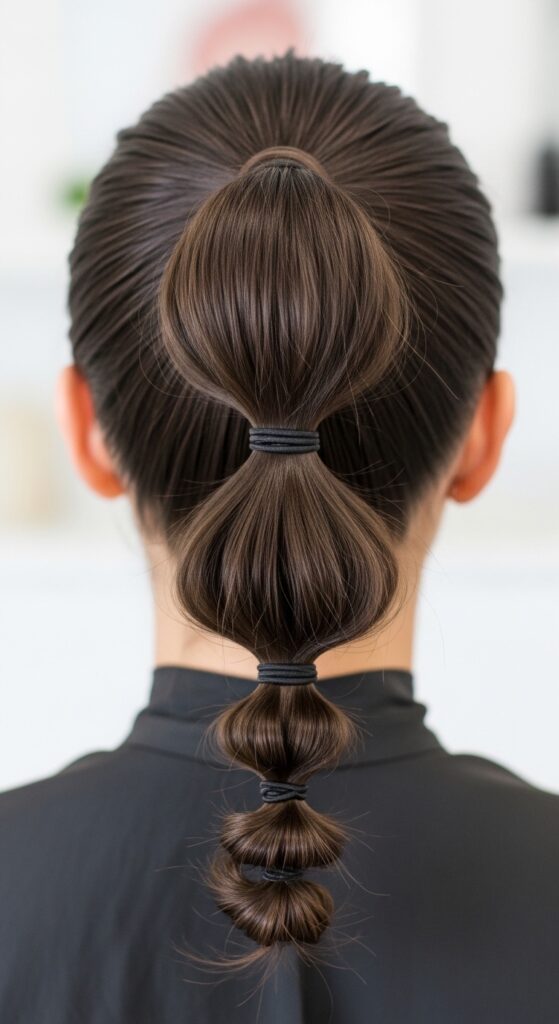
Combine two major trends! The playful bubble ponytail gets a sophisticated finish with a knotted bun. It adds height, interest, and keeps all your hair securely in place for dancing.
Create a high ponytail. Place elastics every few inches down the length. Gently pull on each section between elastics to create full “bubbles.” On the last section, twist the hair into a small, messy knot and pin it.
- Use elastics that match your hair color for a seamless look.
- Pancake each bubble by pulling it sideways for more volume.
- This style is surprisingly comfortable and secure.
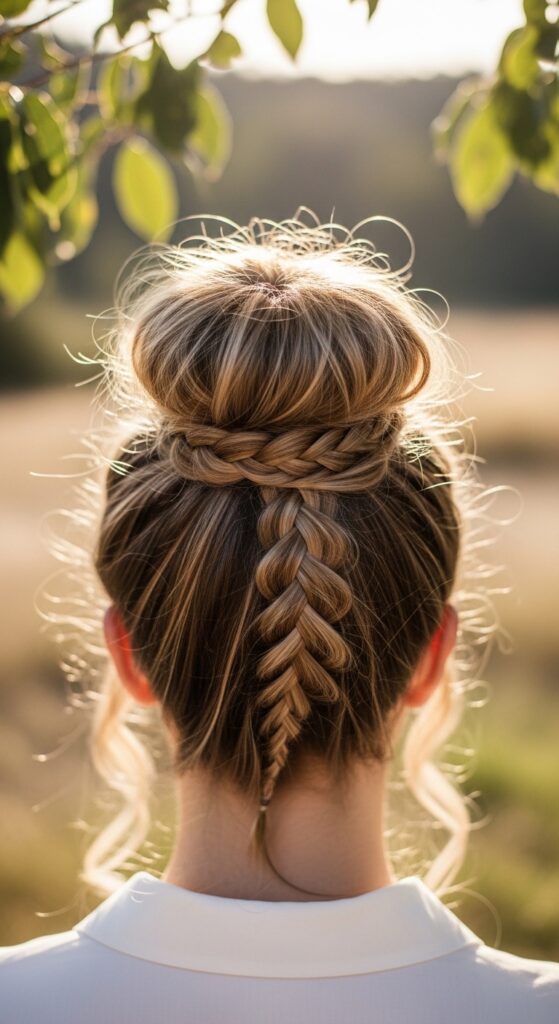
17. The Dutch Braid into Knotted Bun
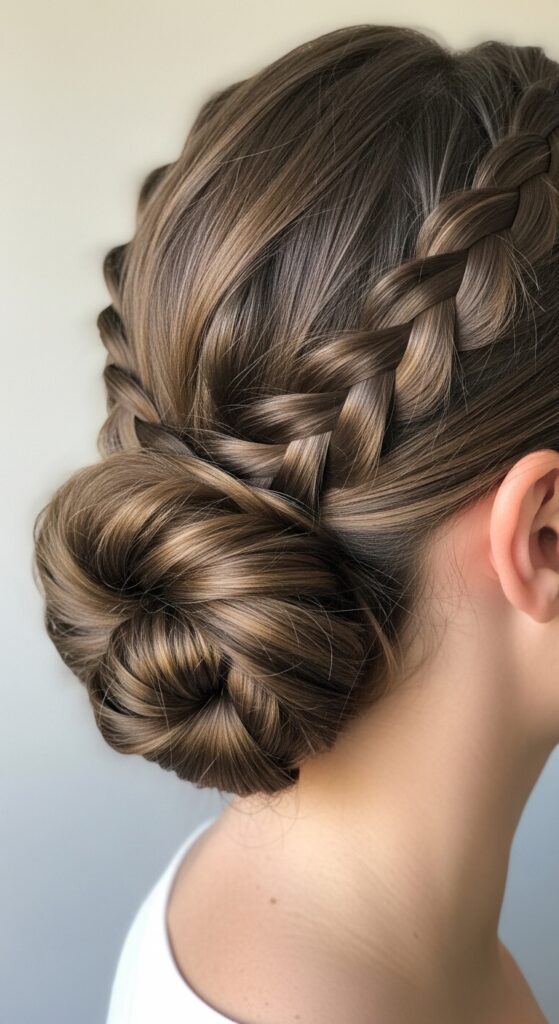
This style gives you the detail of a braid without the commitment of a full head. The braid acts as a beautiful lead-in to a simple, knotted bun. It’s elegant and keeps hair completely off your neck.
Start a Dutch braid (braiding under) at your temple, adding hair until you reach your ear. Then, gather all your hair, including the braid, into a low ponytail. Create a knot with the ponytail and pin it into a bun.
- Keep the braid loose and pull on the edges for width.
- Let a few pieces escape the braid near your face.
- This is a perfect hot-weather style.
18. The Tousled Gibson Tuck Variation
The Gibson tuck is vintage glam. Our boho version is all about looseness. Instead of a smooth roll, you create a soft, knotted tuck that looks effortlessly cool. It has that old money hair ease but feels modern.
Brush your hair back loosely. At the nape, gather it as if to make a ponytail, but only pull the hair halfway through the elastic on the last loop, creating a loop. Tuck the ends of the loop under and pin them loosely.
- The loop should be large and soft, not tight.
- Pull hair out at the crown for height.
- This works best on hair at least collarbone-length.
19. The Side-Swept Knotted Chignon
This is a major night-out look. It’s sleek, sexy, and incredibly flattering. By sweeping everything to one side, you create a long, elegant line along your neck and shoulder. The knot adds the required texture.
Brush all your hair to one side. Twist the length tightly, then coil it into a knot close to your head, just behind your ear. Pin it thoroughly, using the knot itself to anchor the style. Tuck ends under.
- Use a smoothing serum before brushing to control flyaways.
- Sp