24 Easy Heatless Hairstyles You Can Actually Pull Off Every Single Morning
Okay, let’s be real. My relationship with my hair straightener is… complicated. I love the look, but my hair does not love the heat. And hitting snooze five times means I have exactly 4.5 minutes to look put-together.
If you’re nodding along, you’re in the right place. I spent weeks trying every heatless hack I could find, and my hair has never been happier or healthier.
This isn’t about complicated braids you need a YouTube degree for. This is your new morning playbook: 24 genuinely easy, no-heat styles you can actually do. We’re talking major texture, sleek bobs, and trendy looks—all while you sleep or in the time it takes your coffee to brew.
Let’s ditch the damage and embrace the ease. Your best hair days start right here, right now.
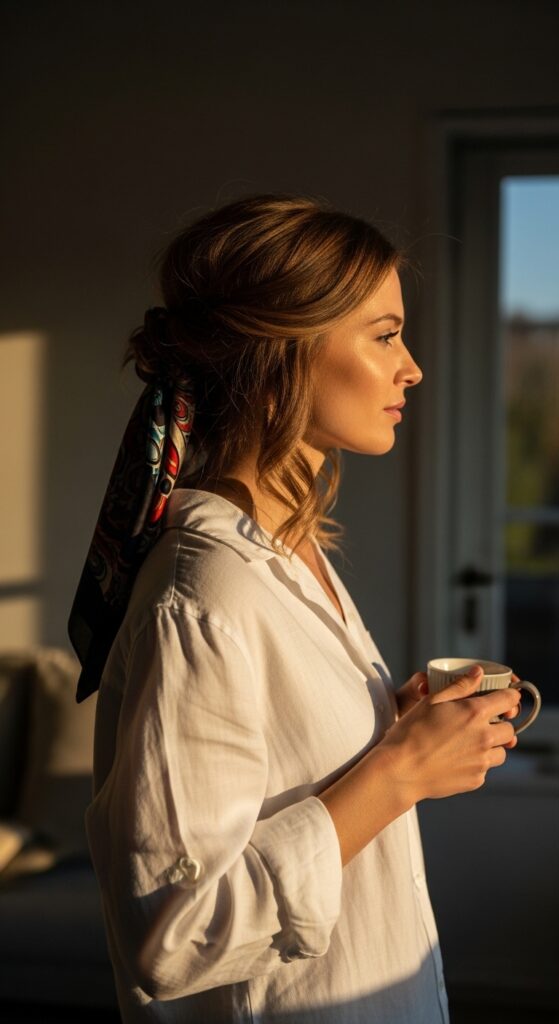
The Classic Silk Scarf Wrap
This is the ultimate in quiet luxury hair. It protects your strands while you sleep and gives you gorgeous, smooth waves with zero effort. It’s perfect for all hair lengths and adds a touch of that old money hair elegance to your morning routine.
All you need is a large, smooth silk or satin scarf. The technique is simple:
- Lay the scarf flat and fold it diagonally into a wide band.
- Place the center at your nape, tie the ends at your crown, and twist the length into a rope.
- Wrap the twisted rope around your head and tie the ends securely at your forehead. Sleep on it! In the morning, gently unravel for soft, uniform waves.
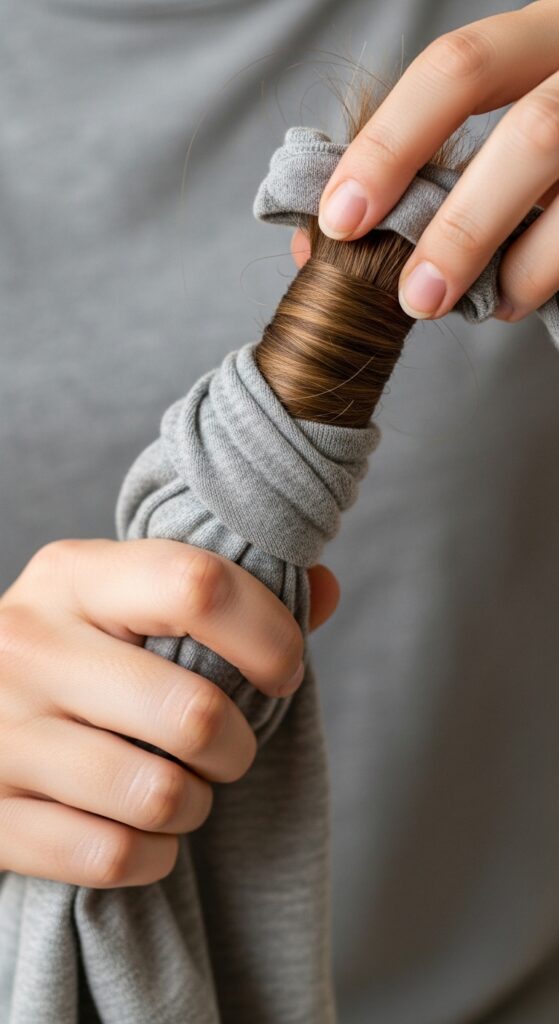
The Effortless T-Shirt Waves
No fancy tools needed—just an old, soft cotton t-shirt. This method creates beautiful, beachy waves that look like you spent an hour with a curling wand. It’s my go-to for second-day hair that needs a refresh.
It works best on medium to long hair. Here’s the quick process:
- Lay the shirt flat and cut straight across just below the armpits to make a long tube.
- With damp hair, divide it into two sections. Twist each section tightly from roots to ends.
- Wrap each twist around the center of the t-shirt “rope,” then tie the ends of the shirt together. Leave it for a few hours or overnight.
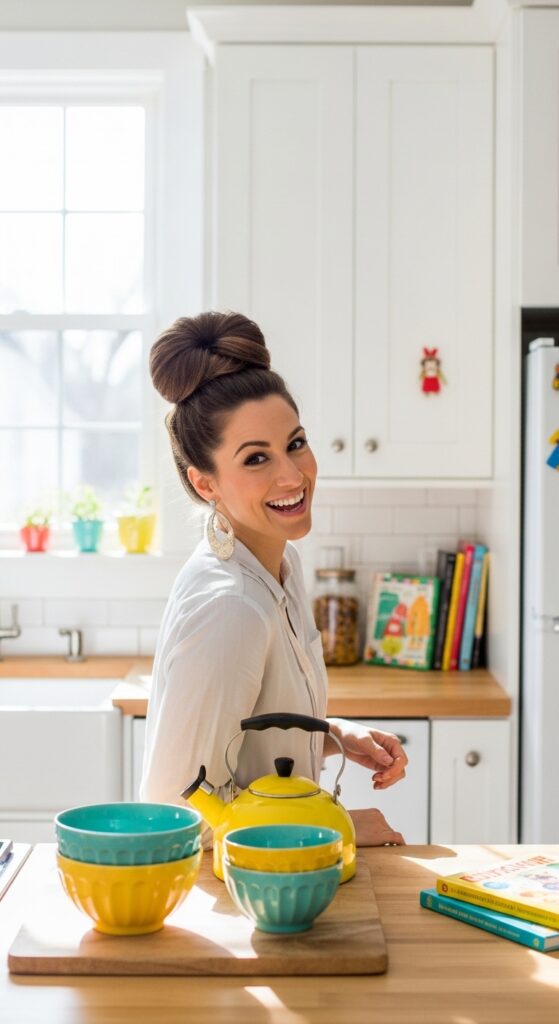
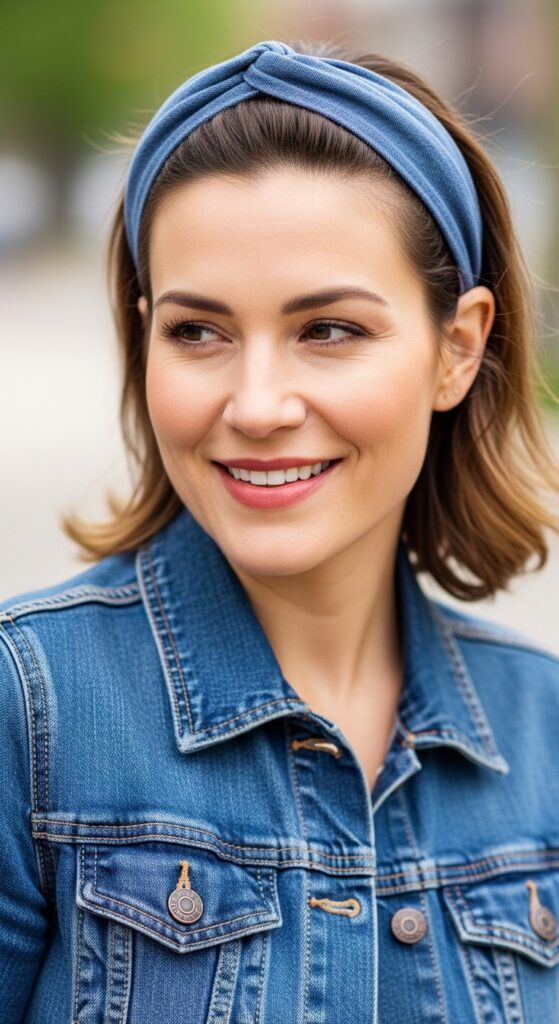
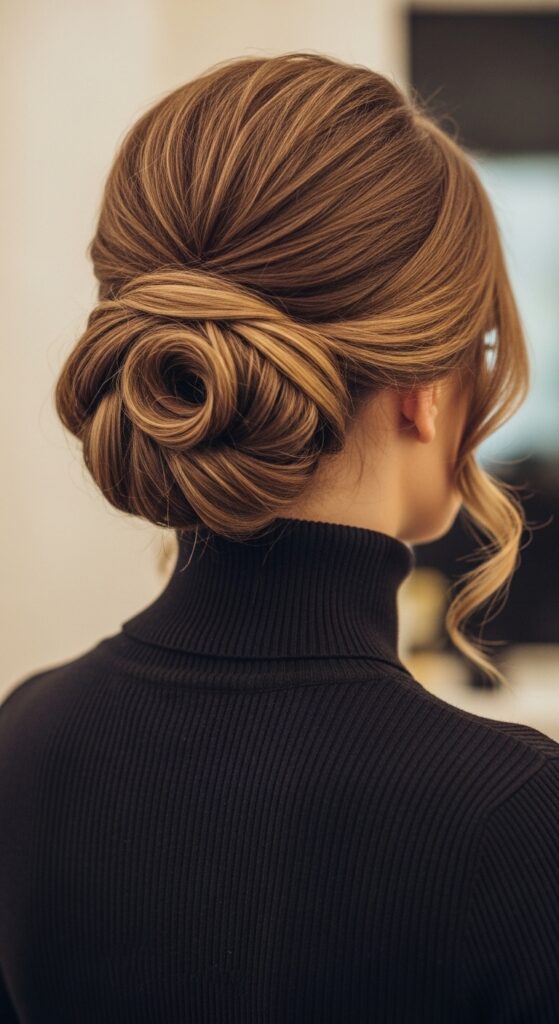
The Sleek Low Twisted Bun
For a polished look that takes 60 seconds, this is it. It works beautifully on a quiet luxury bob or longer hair, giving you that “I have my life together” vibe. It’s perfect for Zoom calls or running errands in style.
Start with brushed hair, preferably day-old for better grip. Gather all your hair at the nape of your neck as if making a low ponytail, but don’t use a band yet. Twist the length tightly until it begins to coil on itself.
Wrap the twist into a bun and secure it with a coil-free hair tie. Gently pull a few face-framing pieces loose for softness. For extra hold and flyaway control, a tiny bit of styling cream on your palms before twisting works wonders.

The Voluminous Sock Roll
Remember the sock curls from your grandma? They’re back and better than ever. This is the secret to achieving major, bouncy volume and curl without any heat. It’s a perfect base for many 2026 hairstyles that play with big shape.
You’ll need a clean sock (ankle socks work great) rolled into a donut. With dry or damp hair, pull it into a high ponytail. Feed the tail through the sock roll, then slowly spread the hair around it to cover the sock completely.
Now, roll the sock down toward your head, tucking all the hair under as you go. Once at the base, secure the roll with bobby pins. Leave it for as long as you can—the longer, the bouncier the result!
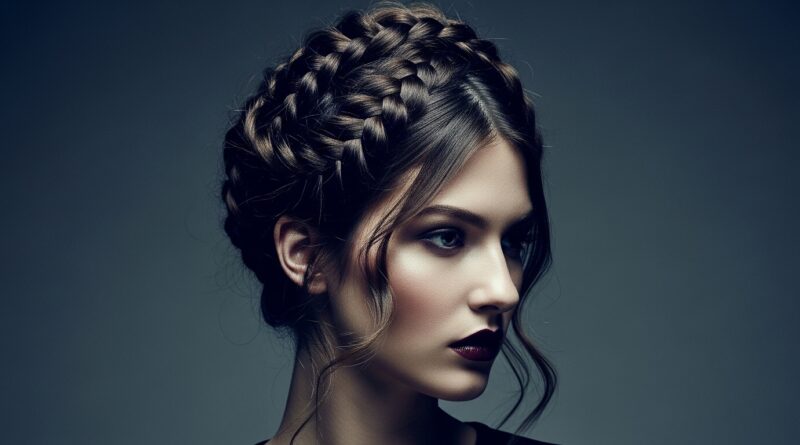
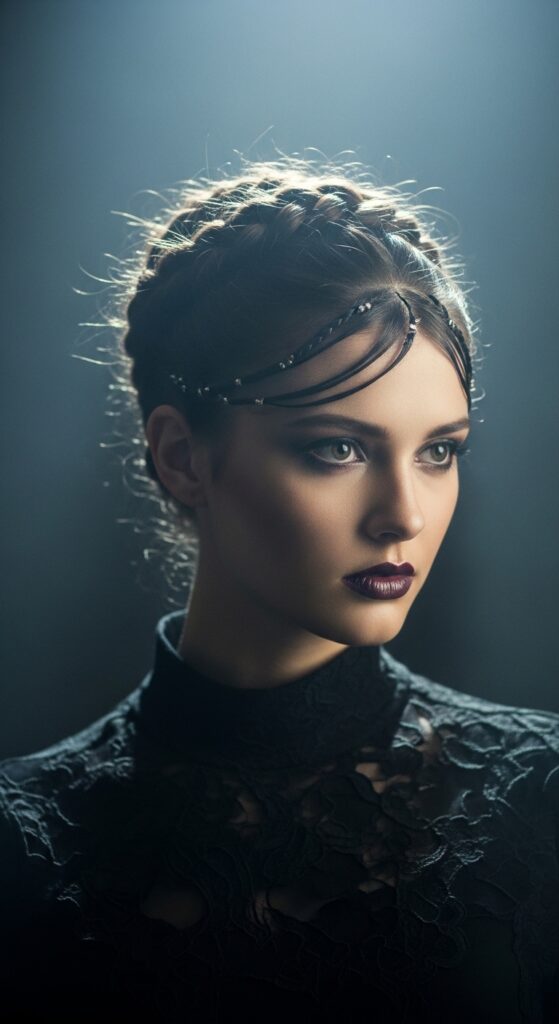
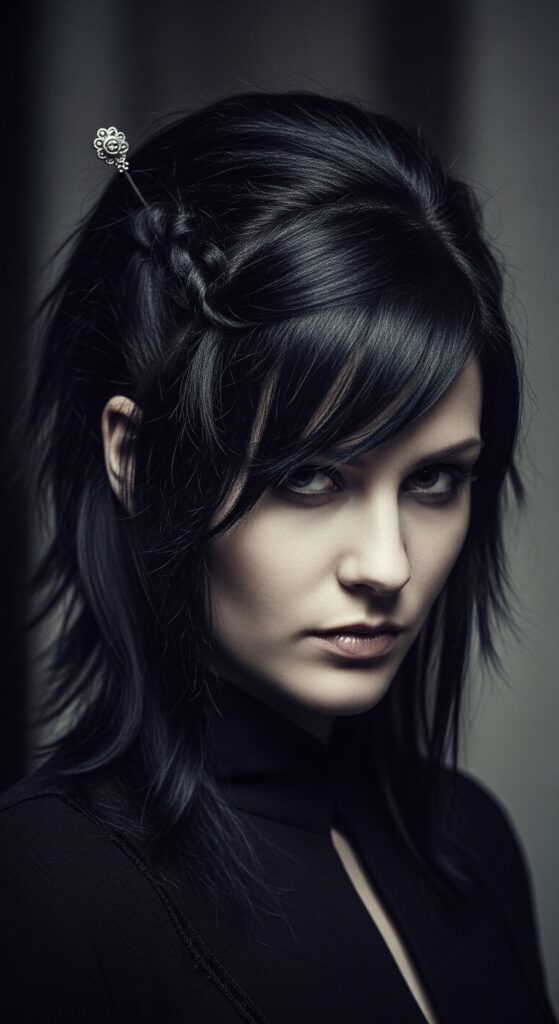
The Romantic Goth Braided Crown
This style mixes delicate and dark for a stunning romantic goth hairstyles look. It’s easier than it appears and keeps hair completely off your face. It works on all hair lengths, especially with some texturizing spray for grip.
Part your hair down the middle. Take a small section at the front on one side and begin a simple three-strand braid, adding in small pieces from the top as you go back toward your ear. Secure the end with a small clear elastic.
Repeat on the other side. Take the first braid, drape it across the crown of your head, and pin it securely. Do the same with the second braid, overlapping the ends of the first. Tuck and pin all the ends underneath for a seamless crown.
The Modern Asymmetrical Lob Twist
If you have an asymmetrical lob or a sharp bob, this style highlights your cut perfectly. It adds instant interest and looks incredibly chic. It’s a great way to style a fresh cut while it’s growing out.
On the longer side of your lob, take a section from the front. Twist it back away from your face, keeping it fairly tight. As you twist toward the back of your head, gently pull on the outer edges of the twist to loosen it and create a fuller, softer look.
Secure the end of the twist with a bobby pin where your hair ends, near the back of your jawline. Let the rest of your hair fall naturally. The contrast between the sleek twist and the loose hair is so modern.
The Hime Cut Half-Up Puff
The hime cut is all about dramatic, face-framing layers. This simple half-up style celebrates that. It gives a playful, slightly retro feel that’s perfect for adding personality to your look without any heat.
Gather the top section of your hair, including those signature hime cut front pieces, as if you’re making a half-up ponytail at the crown of your head. Instead of pulling the hair all the way through the hair tie on the last loop, leave it as a small puff or loop.
Gently tease the base of the puff with your fingers for a little more volume. You can leave the ends out for a messy look or tuck them under for a neater finish. Let the remaining layers and back hair flow freely.
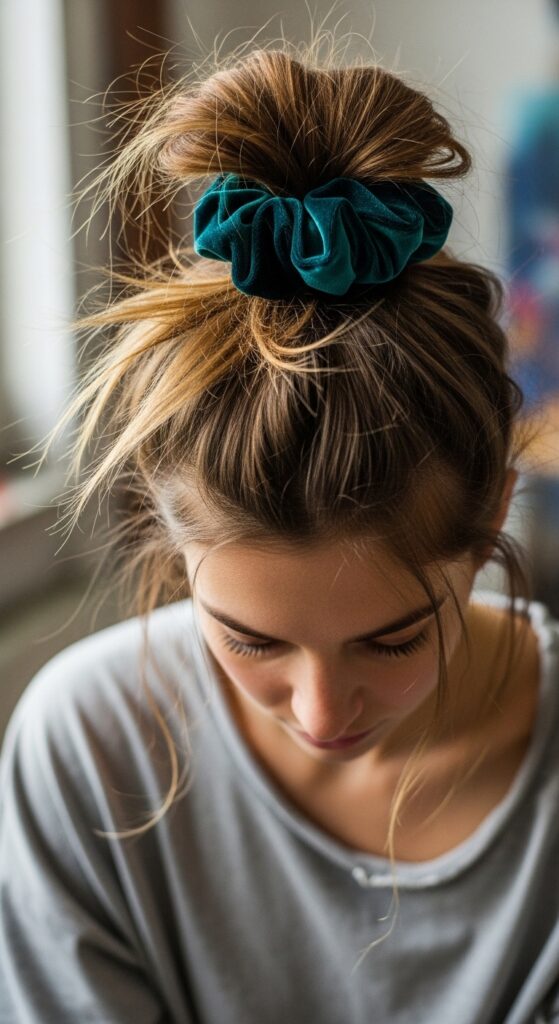
The Glitchy Glam Scrunchie Knot
For that intentionally imperfect glitchy glam hair vibe, this messy knot is a winner. It looks like you threw your hair up in seconds (because you did) but in the coolest way possible. Texture is your friend here.
Flip your head over and gather all your hair at the crown. Twist the hair once, then loop it into a loose knot. Don’t pull it tight—you want to see the shape of the knot. Use a large, claw-clip or a thick scrunchie to hold the base of the knot.
Let shorter pieces and ends fall out randomly. The key is nonchalance. Pull out a few strands around your face and at the nape of your neck to complete the effortlessly undone look.
The Vampire Haircut Texture Twist
The vampire haircut is all about sharp, piece-y texture. This style enhances that with a simple twisted accent. It’s dark, romantic, and keeps hair out of your eyes—ideal for a day when you want to channel a mysterious vibe.
On one side of your part, take a section of hair from the front. Split it into two pieces. Twist them around each other two or three times, then pull gently on the outer edges of the twist to make it wider and more textured.
Secure the twist back just behind your ear with a couple of crossed bobby pins. Repeat on the other side if you want symmetry, or leave it asymmetrical for more edge. Let the rest of your shaggy layers do their thing.
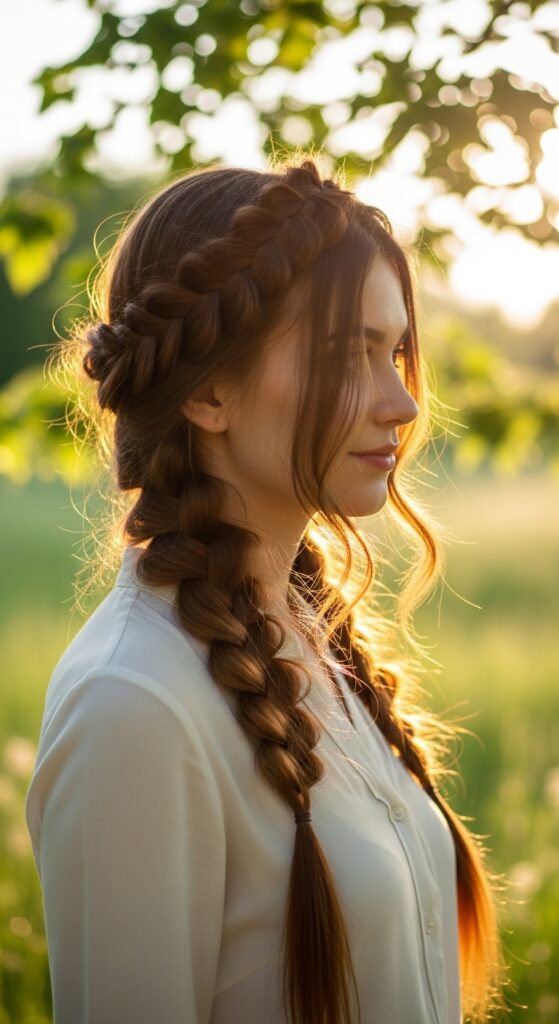
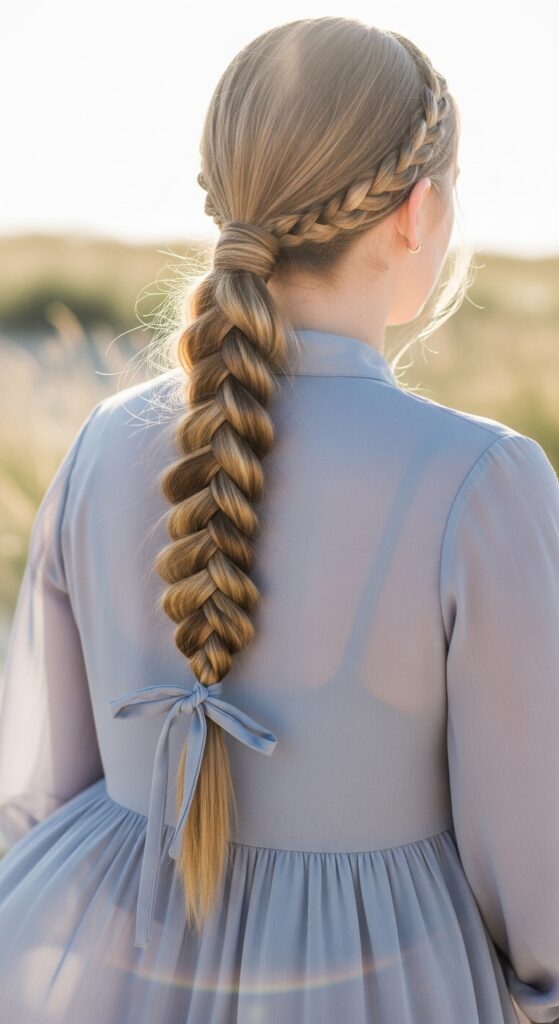
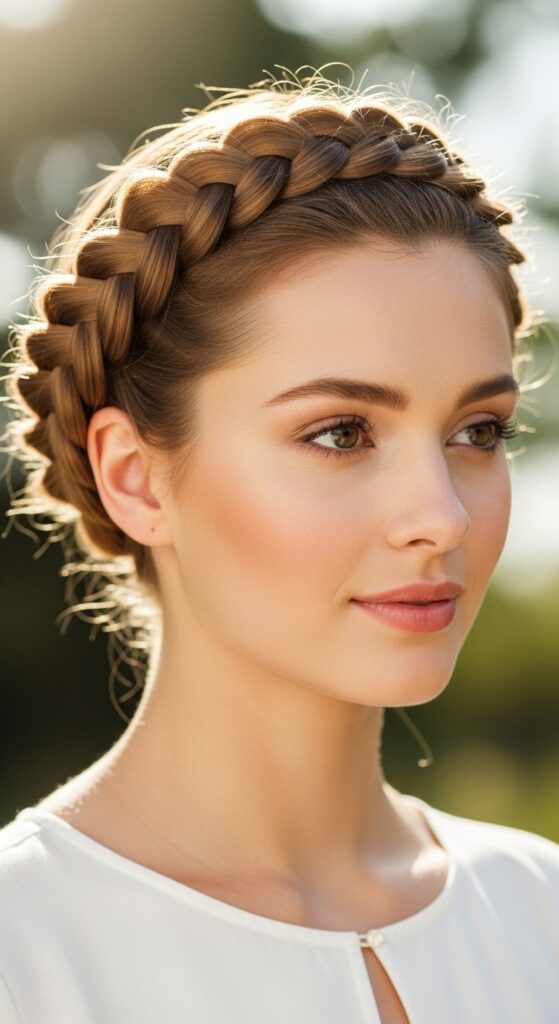
The Milkmaid Braids for Long Hair
This timeless style feels fresh again. It distributes the weight of long hair beautifully and looks both sweet and strong. It’s a fantastic protective style that can last for days with minimal touch-ups.
Part your hair down the middle. Braid each side into a simple three-strand braid, from the top of your head all the way to the ends. Secure with elastics. Take the first braid, pull it across the top of your head just above your forehead, and pin it securely.
Take the second braid and do the same, placing it just behind the first to create a double crown effect. Tuck the ends of the braids under and pin them well. Fluff the braids slightly for a softer, fuller look.
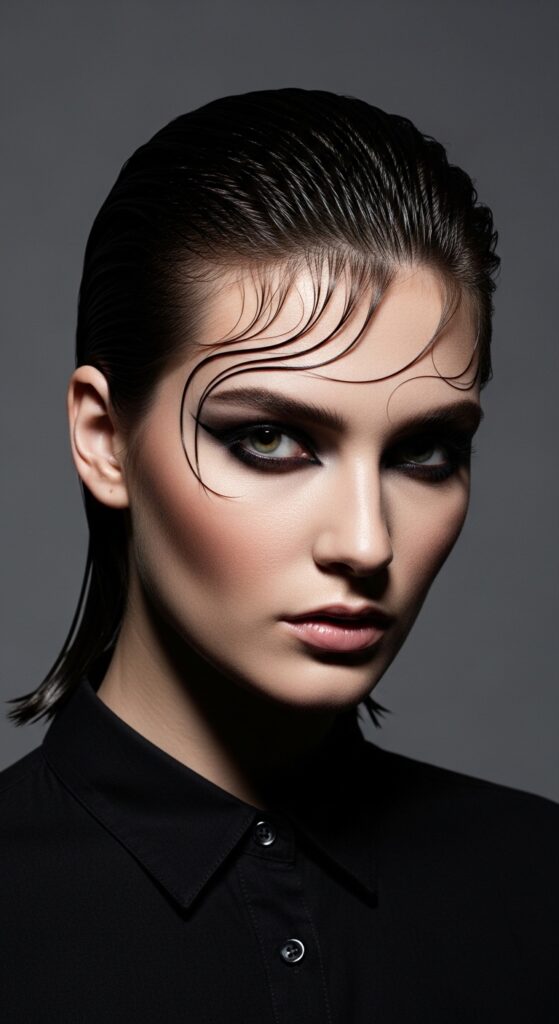
The Slicked-Back Wet Look (Without Gel)
This powerful look usually requires heavy product, but you can fake it heatlessly. It’s sleek, severe, and perfect for showing off your features. It works on everything from a pixie to waist-length hair.
Start with damp (not soaking) hair. Apply a strong-hold, non-sticky mousse from roots to ends. Use a fine-tooth comb to comb all your hair straight back from your hairline, ensuring no bumps.
If you have long hair, pull it into a low, tight ponytail or bun at the nape. For shorter hair, simply comb it back and let it air dry. As it dries, the mousse will hold the shape without the crunchy feel of gel, giving a polished finish.
The Heatless Overnight Headband Curls
This method gives you consistent, bouncy curls that last. Using a soft, foam headband is gentler on your hair than rollers. You’ll wake up with perfect curls ready to go—no touch-up needed.
You’ll need a long, foam hair-curl headband. Place it on your head like a crown. Take a small section of damp hair, wrap it around the headband, and tuck the end under. Continue around your entire head, working in small sections.
Once all hair is wrapped, you can sleep on it comfortably. In the morning, carefully unwrap each section. Separate the curls gently with your fingers and flip your head over to shake them out for maximum volume.

The Boho Rope Braid Ponytail
Elevate a basic ponytail in under two minutes. The rope braid detail adds texture and a boho-chic element. It’s perfect for dirty hair days when you still want to look like you tried.
Pull your hair into a mid-height or low ponytail and secure it. Divide the tail into two equal sections. Twist each section clockwise, then wrap them around each other counter-clockwise. This counter-twisting technique keeps the braid tight and neat.
Continue until you reach the ends, then secure with another elastic. Gently pull on the edges of the braid to fatten it up and make it look more effortless. This adds instant interest to a simple style.
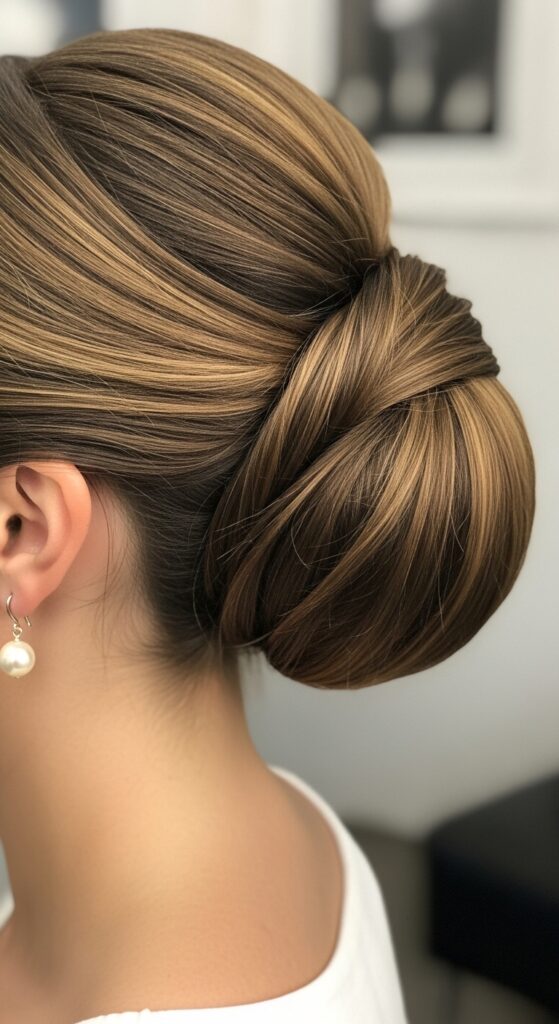
The French Twist for Medium Hair
This classic updo seems tricky but is totally achievable on medium-length hair with a little practice. It’s the epitome of quiet luxury and old money hair elegance, perfect for dinners or a day at the office.
Brush all your hair to one side at the nape of your neck. Hold it with one hand. With the other, twist the length upward toward the crown of your head, keeping the twist tight against your head.
When you reach the top, tuck the ends of your hair into the twist at the crown. Secure the entire twist with 4-5 bobby pins, criss-crossing them for hold. Smooth any flyaways with a bit of serum on your fingertips.
The Space Buns (Not Just for Festivals)
Space buns are fun, but done neatly, they can be a cool, everyday style. They keep hair completely off your face and neck and work on almost every hair length and texture. It’s a playful take on 2026 hairstyles.
Part your hair down the middle. Make two high ponytails, one on each side. Twist each ponytail tightly and wrap it around its base to form a bun. Secure with bobby pins and a second elastic if needed.
Don’t worry about making them perfect. Pull out a few baby hairs around your face and at the nape for a softer look. For a smoother finish, brush your hair into the ponytails first. For a messier look, use just your fingers.
The Faux Blunt Cut with Braids
Want the look of a fresh, blunt cut? This trick uses simple braids to create a temporary, convincing blunt line at the ends of your hair. It’s a fun way to test a look before you commit to the chop.
Part your hair down the middle. On each side, create a tight, simple three-strand braid from about ear-level down to the ends. Make sure the braid is very smooth and tight. Secure the end with a small, clear elastic.
Now, gently fold the braid under itself, tucking the elastic up and hiding it behind the unbraided hair. Pin it in place from underneath. The braid creates a solid, weighted “end” that mimics a perfect blunt cut when you look in the mirror.
The Twisted Headband Accent
This is less of a hairstyle and more of a hair accessory hack. It instantly polishes any look, holds back flyaways, and adds a touch of personality. Use a scarf, a pre-made twist, or even your own hair.
Take a section of hair from the front, about an inch wide, on one side. Twist it tightly back toward your ear. Continue twisting and pulling in small sections from the front as you go across your head, like a French twist but lying flat.
Once you reach the other side, tuck the end behind your ear and pin it. Alternatively, use a cute fabric headband or scarf and simply place it over your hair after twisting the front section for a mixed-material look.
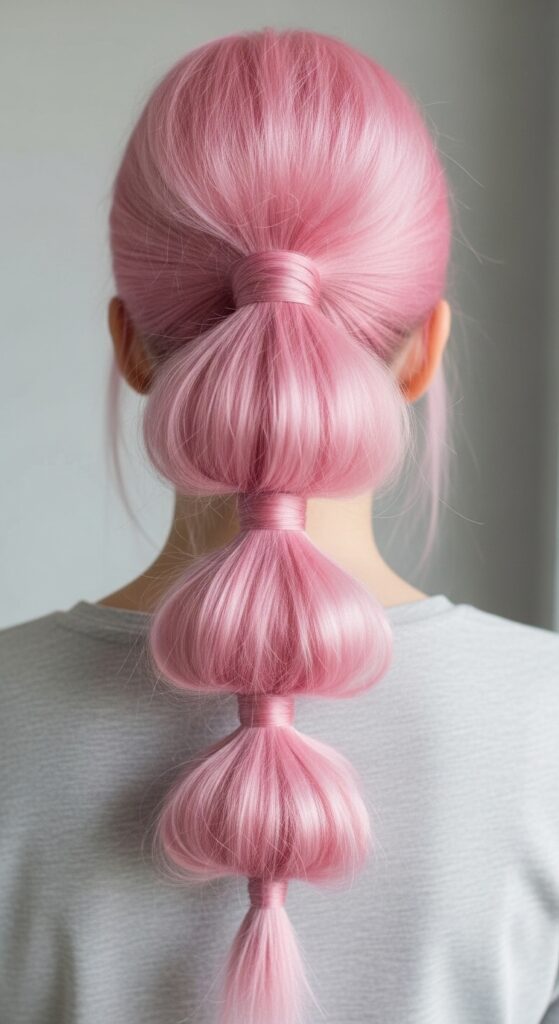
The Bubble Ponytail
This nostalgic style is surprisingly chic and modern. It adds incredible visual interest and volume to a basic ponytail. The best part? It takes two minutes and requires zero skill.
Pull your hair into a high, mid, or low ponytail and secure it tightly with an elastic. Move down about 3-4 inches and place another elastic. Gently puff out the section of hair between the two elastics to create a “bubble.”
Continue adding elastics down the length of the tail, puffing out each section. Space them evenly or unevenly for different effects. For a final touch, you can gently tug each bubble to make it rounder and fuller.
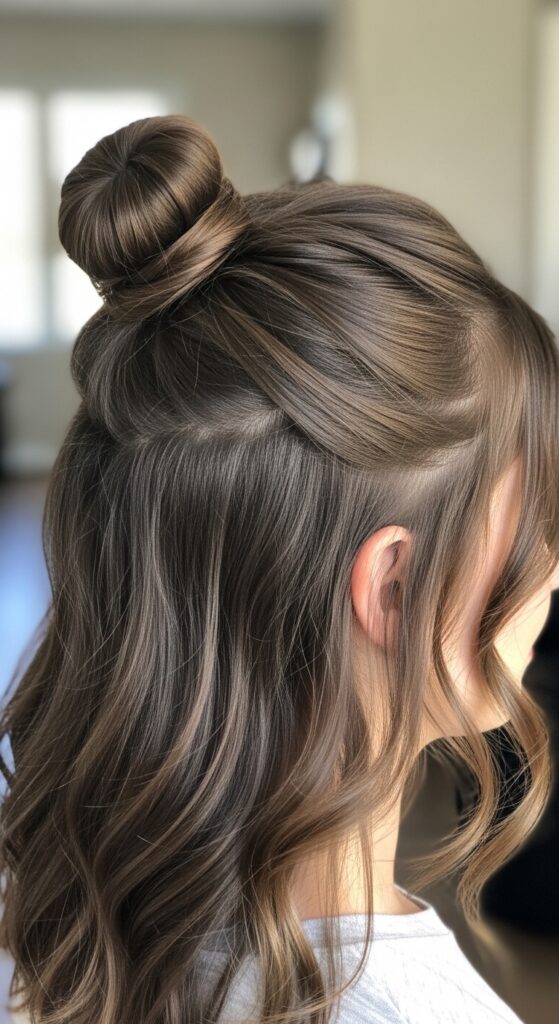
The Half-Up Twisted Bun
This style gives you the best of both worlds: hair down with an elegant updo detail. It’s perfect for medium to long hair and keeps those face-framing pieces where you want them. It feels very glitchy glam in its imperfect perfection.
Gather the top half of your hair as if for a half-up style. Instead of making a ponytail, twist the section once or twice at the back of your crown. Then, coil the twist into a small, messy bun and secure it with bobby pins.
Don’t make it too tight or neat. Pull out a few pieces from the bun and around your face to soften it. Let the bottom half of your hair flow freely. It’s a simple upgrade from a basic half-up look.
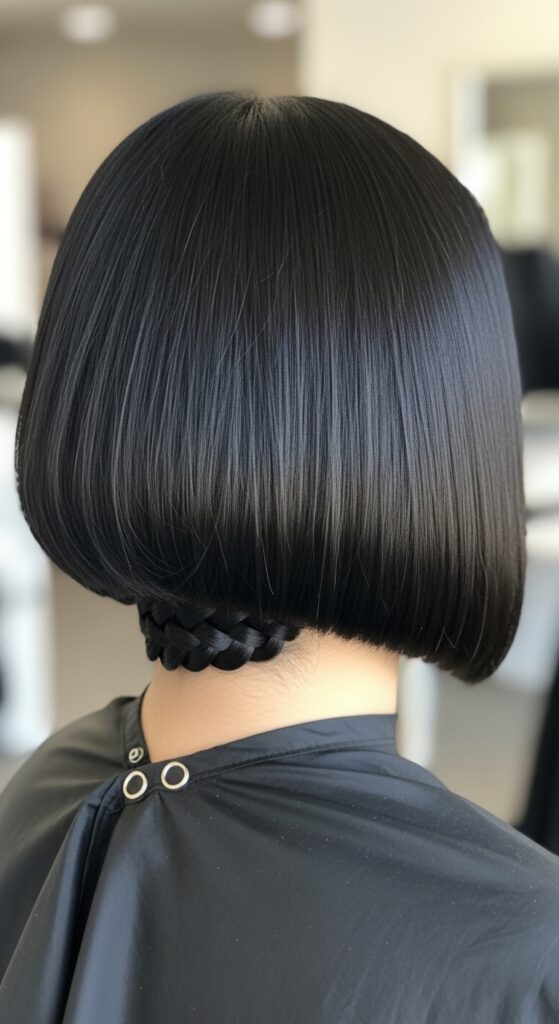
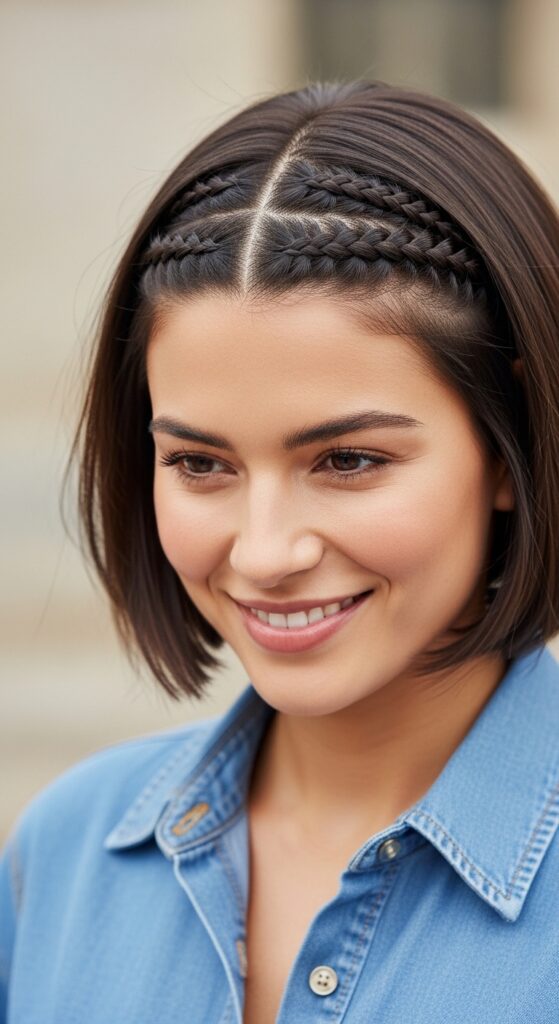
The Braided Hair Band for Short Hair
If you have a bob, pixie, or growing-out layers, this style adds a feminine touch. It uses a tiny braid as a functional and decorative headband, keeping shorter pieces in place beautifully.
On one side of your part, take a small section of hair from the front. Braid it into a simple, tight three-strand braid all the way to the end. Secure with a tiny elastic. Do the same on the other side.
Take the first braid and pull it across your forehead to the opposite side, just behind your hairline. Pin it discreetly. Take the second braid and pull it just behind the first, pinning it on the other side. Tuck the ends under.
The Gibson Tuck Variation
A softer, easier version of the classic Gibson tuck. It creates beautiful volume at the back of the head and looks intricate but is simple to do. It’s a gorgeous style for a quiet luxury aesthetic.
Brush all your hair back. Gather it at the nape of your neck as if for a low ponytail, but don’t pull it all the way through the hair tie on the final loop. You should have a loose loop of hair.
Split the loop open horizontally. Tuck the remaining tail of hair up and through the split, then pull it down to nestle the ends inside the tuck. Adjust the loop for size and secure everything with bobby pins hidden underneath. Gently pull at the sides to create soft volume.
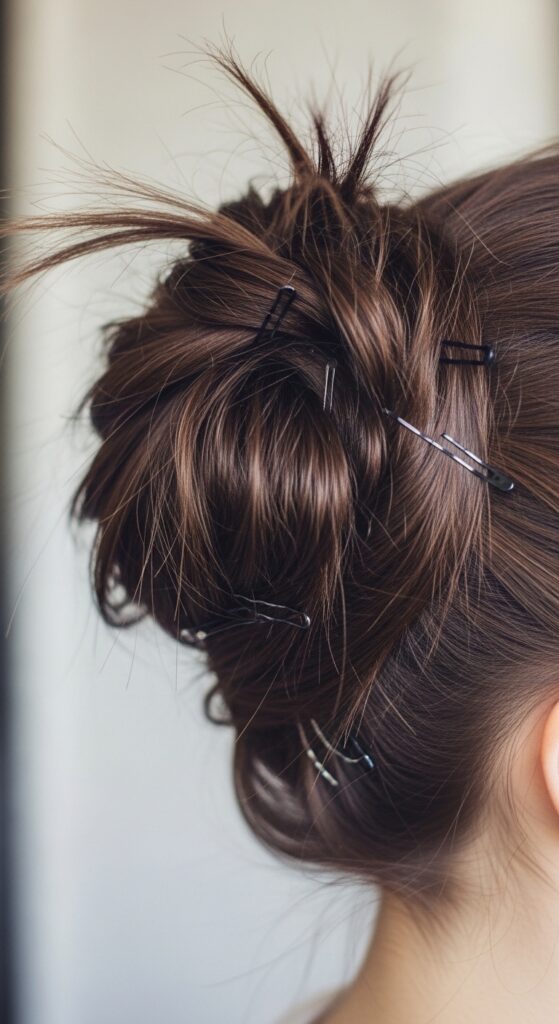
The Messy Pin Curl Updo
This is my secret for looking like I have amazing, natural curl texture when I really don’t. Using just bobby pins, you can create a beautifully messy, textured updo that holds all day. It’s perfect for dirty hair.
Start with second or third-day hair for grip. Pull your hair into a very loose, low ponytail but don’t pull the tail all the way through—leave the end as a loop. Twist the loop slightly and start pinning sections of it randomly to the base of your head with bobby pins.
Let pieces stick out intentionally. Pull out lots of face-framing pieces and wispy bits at the nape. The goal is a “I just pinned this up beautifully” mess. Hairspray lightly to hold the texture.
The Crown Rope Braid
This single braid wraps around like a crown but uses the easier rope braid technique. It’s less bulky than a traditional braid crown and looks incredibly elegant. It works on all hair lengths, especially when you have some layers to blend.
Part your hair deeply to one side. On the heavier side, take a front section and split it into two pieces. Twist each piece clockwise, then wrap them around each other counter-clockwise to form a rope braid.
As you braid, add in small pieces from the front hairline, working your way around your head. Continue until you run out of hair to add, then finish the braid and pin the end underneath the starting point. Tuck any short layers in as you go.
The Low, Loose Braided Bun
This is the ultimate lazy-day style that still looks intentional. By braiding the ponytail first, you get a bun with gorgeous texture and detail. It’s also more secure than a regular bun, so it lasts through busy days.
Pull your hair into a low, loose ponytail at the nape of your neck. Braid the ponytail into a simple three-strand braid and secure the end with an elastic. Wrap the braid around the base of the ponytail to form a bun.
Secure the bun with bobby pins, tucking the elastic end underneath. Don’t pull it tight—let it be a little loose and soft. Gently pull on the edges of the braid to loosen it and make the bun look fuller and more romantic.
And there you have it—24 ways to give your hair a break without sacrificing an ounce of style. The best part? Your hair gets to recover, and you get to hit snooze a little longer. It’s a total win-win.
My challenge to you? Pick just one new style to try this week. Maybe start with the Silk Scarf Wrap tonight, or the T-Shirt Waves on your next wash day. Once you see how good your hair feels and how much time you save, you might just become a heatless convert like me.
Remember, great style doesn’t have to be complicated. It’s about working with what you have and having a little fun with it. Your hair will thank you, I promise.
Save this post to Pinterest to keep all these ideas handy for your next rushed morning! Which style are you most excited to try? Tell me in the comments below—I read every single one.