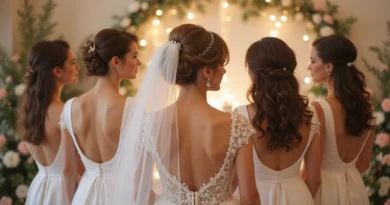
24 Goddess Braids Hairstyles Large Chunky Bohemian Protective Longevity Secrets
Okay, let’s be real. You’ve seen those stunning, large goddess braids all over your feed and thought, “I want that.” But then the practical questions hit: Will they look good on me? How long do they last? And how do I keep them from looking frizzy after week two?
You’re in the right place. I’m breaking down everything, from choosing your perfect style to the longevity secrets that actually work. We’re talking about that gorgeous, chunky, bohemian look that feels both protective and powerfully stylish.
This is your complete guide to getting the goddess braids of your dreams and keeping them flawless. Let’s dive in and get you that head-turning, low-maintenance hair you’ve been craving.
1. What Are Goddess Braids, Really?
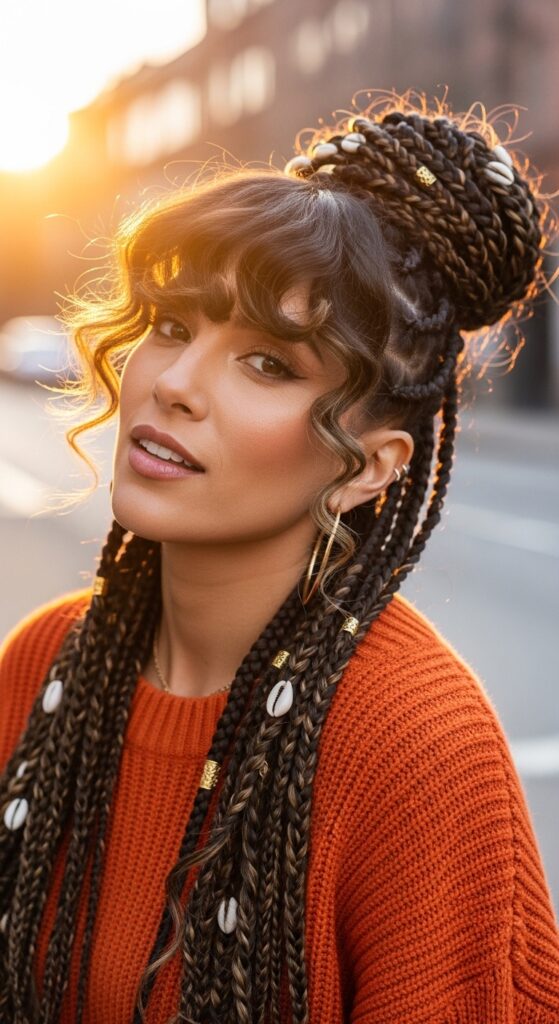
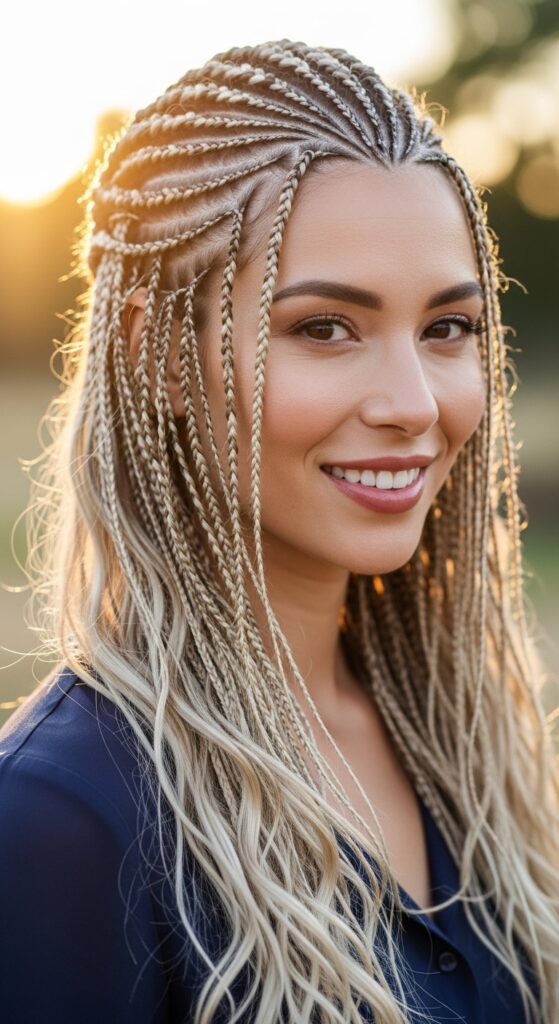
Think of goddess braids as the elevated cousin of classic box braids. They incorporate curly or wavy hair extensions, creating a softer, more romantic, and textured look. The “goddess” part comes from that effortless, ethereal vibe.
Unlike smaller braids, the large, chunky style we’re focusing on is bold and makes a statement. It’s a protective style that lets your natural hair rest while you rock a stunning, bohemian masterpiece.
2. Why Go Chunky & Large in 2026?
While micro braids have their place, the trend is shifting toward bold, statement-making pieces. Large, chunky braids are the ultimate in “quiet luxury” hair—they look expensive and elegant without trying too hard.
They’re also incredibly practical. They take less time to install than smaller braids and put less tension on your scalp. For 2026 hairstyles, expect to see this beautiful, bold size everywhere.
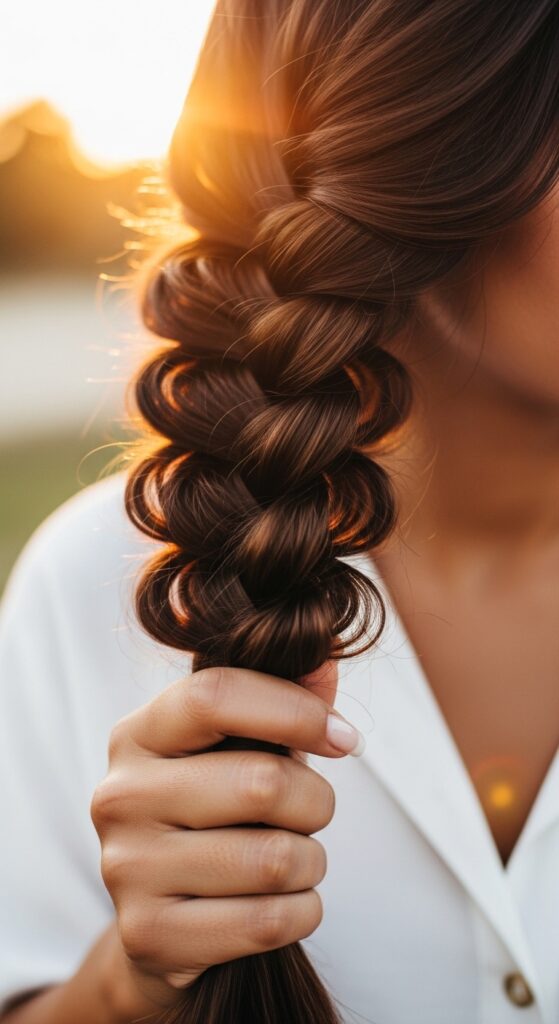
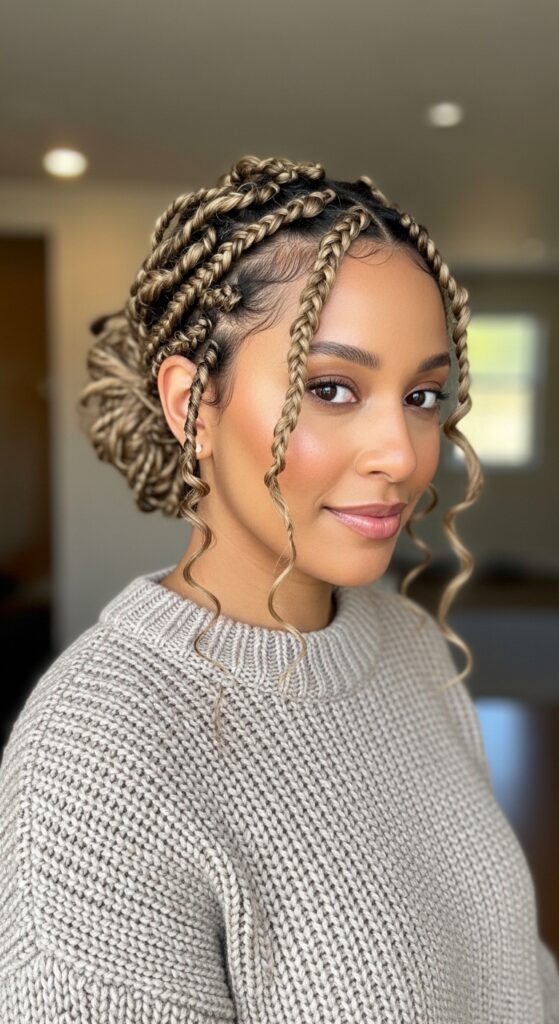
3. The Bohemian Texture Secret
The bohemian feel comes from the mix of textures. It’s not just straight braiding hair. The magic is in adding curly or wavy extensions to create that soft, undone, romantic look.
I recommend using pre-curled braiding hair or curling the ends yourself with boiling water. This texture adds volume and movement, making the style feel alive and dynamic, not stiff or heavy.
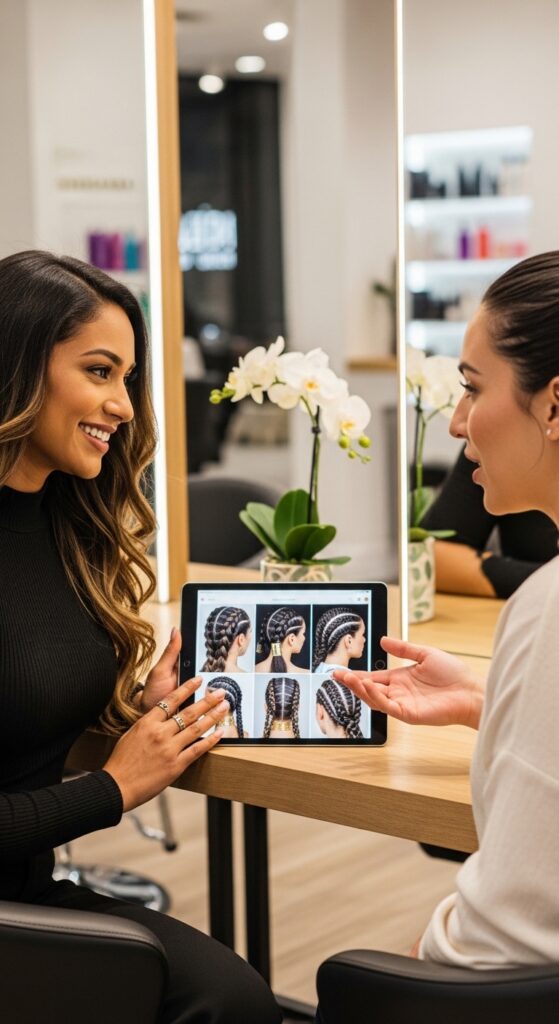
4. Consultation: Your Blueprint for Success
Never skip the consultation with your braider. This chat is everything. Bring clear photos of the exact size, length, and texture you want. Discuss your hair’s health and density.
- Show inspiration pics for “large chunky” styles.
- Mention if you want a side part, middle part, or no part.
- Talk about your daily routine so they can tailor the weight.
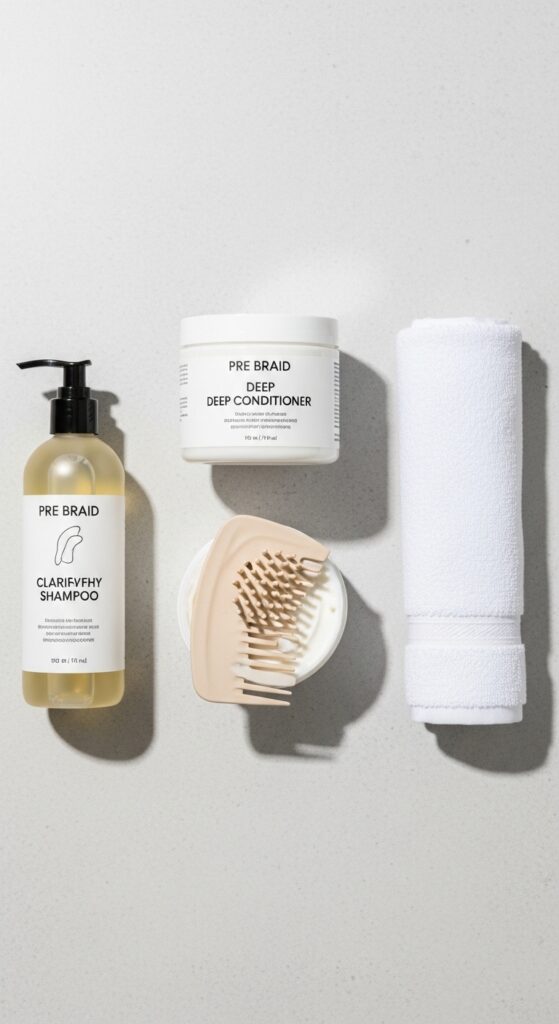
5. Pre-Braid Hair Care Is Non-Negotiable
Your braids will only be as healthy as the hair underneath. In the week before your appointment, give your natural hair some serious love. This ensures longevity and prevents damage.
- Clarify your scalp to remove any product buildup.
- Do a deep conditioning treatment for strength and moisture.
- Stretch or blow-dry your hair so it’s easier to braid from root to tip.
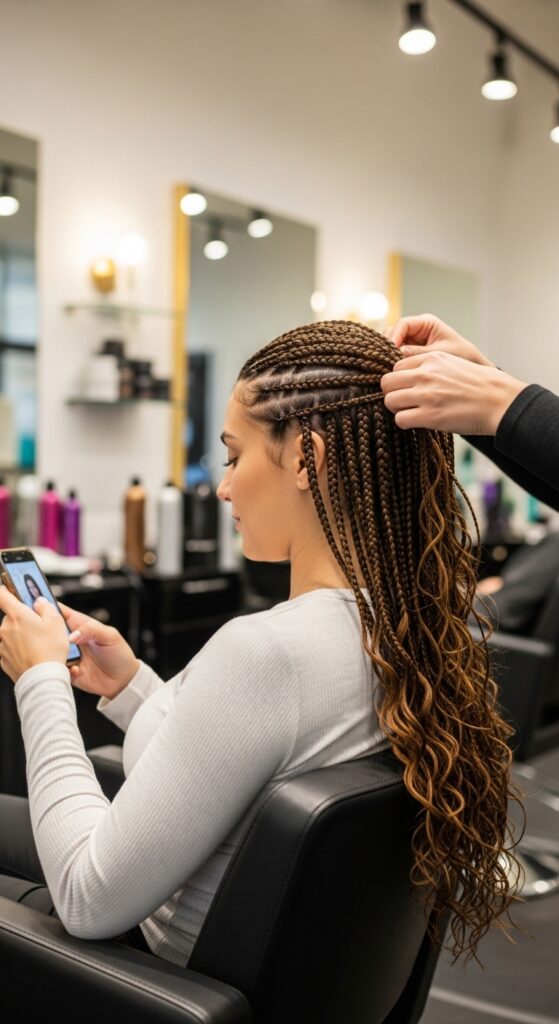
6. The Installation: What to Expect
Installation for large braids can take anywhere from 4 to 8 hours, depending on thickness and length. It’s a marathon, not a sprint! Come prepared with snacks, water, and a fully charged phone or tablet.
Communicate with your braider. If the tension feels too tight, speak up immediately. Proper installation should feel secure, not painful. This is key for scalp health.
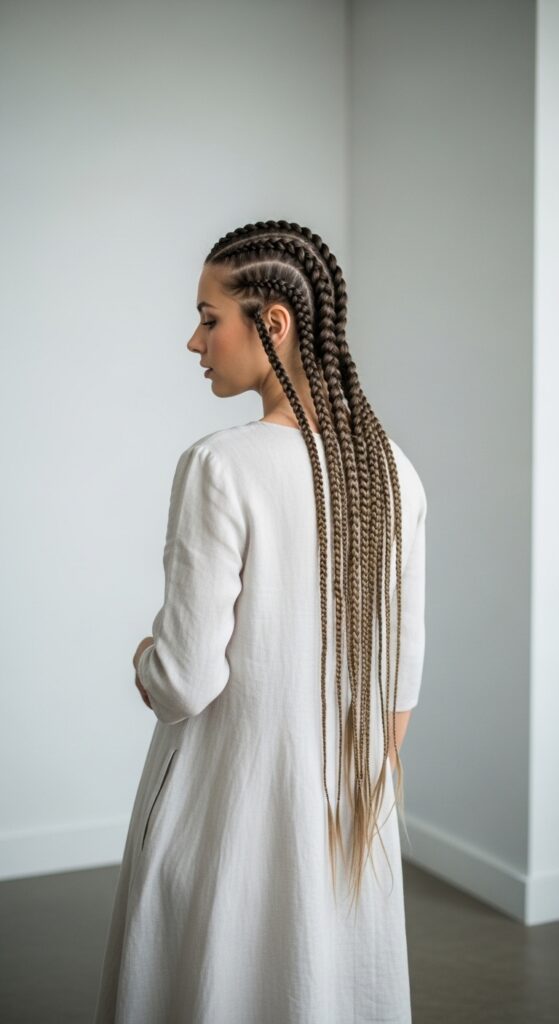
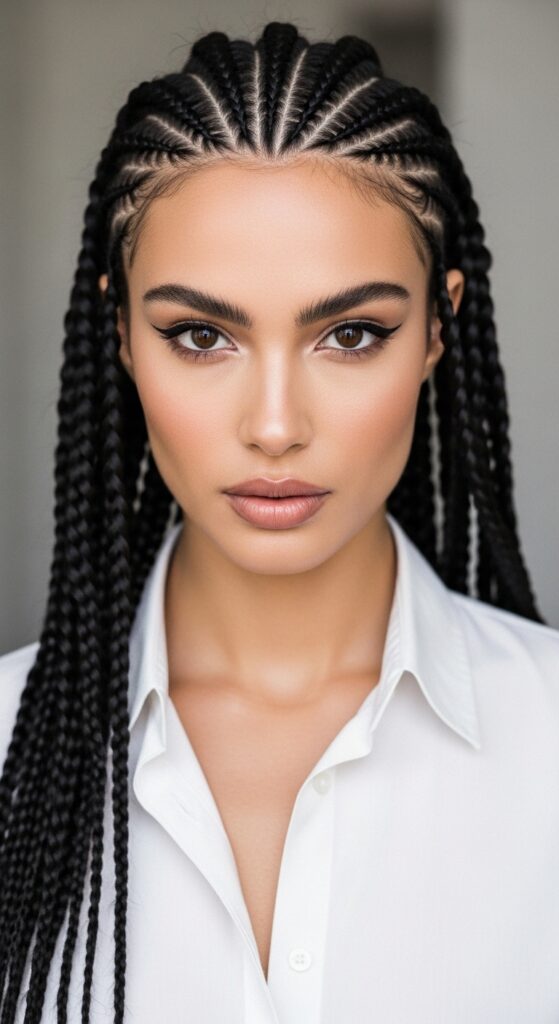
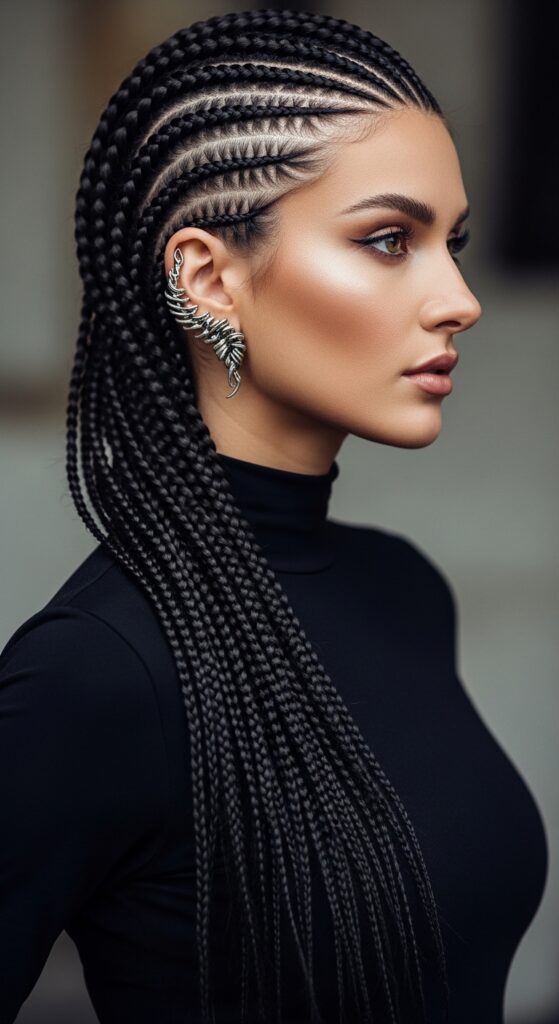
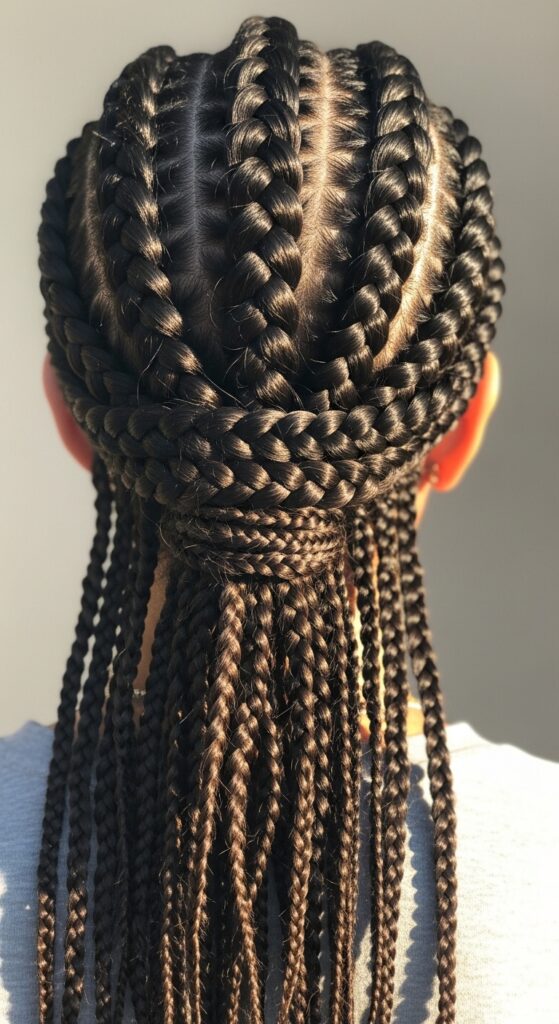
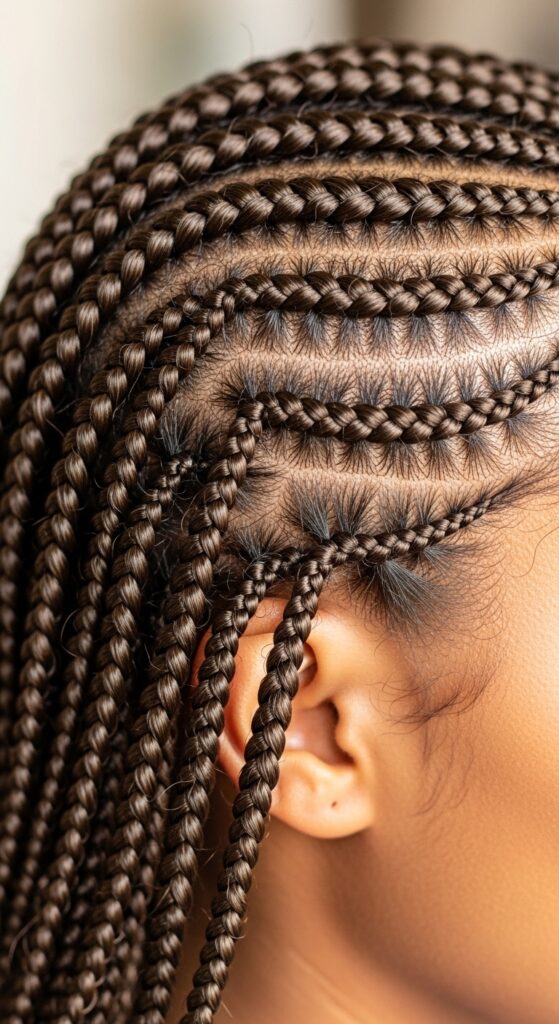
7. The Classic Center-Part Goddess
This is the ultimate timeless look. A clean center part with large, uniform braids falling on either side. It’s symmetrical, balanced, and gives off major “old money hair” vibes—polished and powerful.
It works for any face shape and is incredibly versatile for styling. You can wear it down, in a half-up style, or in a majestic low ponytail.
8. Side-Swept & Asymmetrical Drama
For a more modern, edgy feel, ask for a deep side part. Sweep all your braids over one shoulder. This creates incredible asymmetry and movement, similar to the popular asymmetrical lob cut but in braid form.
It’s a stunning red-carpet look that feels both romantic and bold. This style beautifully frames your face and highlights your neck and collarbone.
9. The Half-Up, Half-Down Crown
This is my go-to style for days when I want to feel regal but keep hair off my face. Simply gather the front sections of your braids and secure them at the crown or back of your head.
You can use a cute scarf, a sturdy hair clip, or even braid the gathered section for extra detail. It’s an instant upgrade that takes two minutes.
10. High Ponytail Power
Nothing says confidence like a high ponytail of chunky goddess braids. It gives major superhero energy and shows off the beautiful length and texture. Use a strong, snag-free hair tie and wrap a small braid around the base to hide it.
This style keeps you cool and is perfect for workouts or hot summer days while keeping all the beauty of your braids intact.

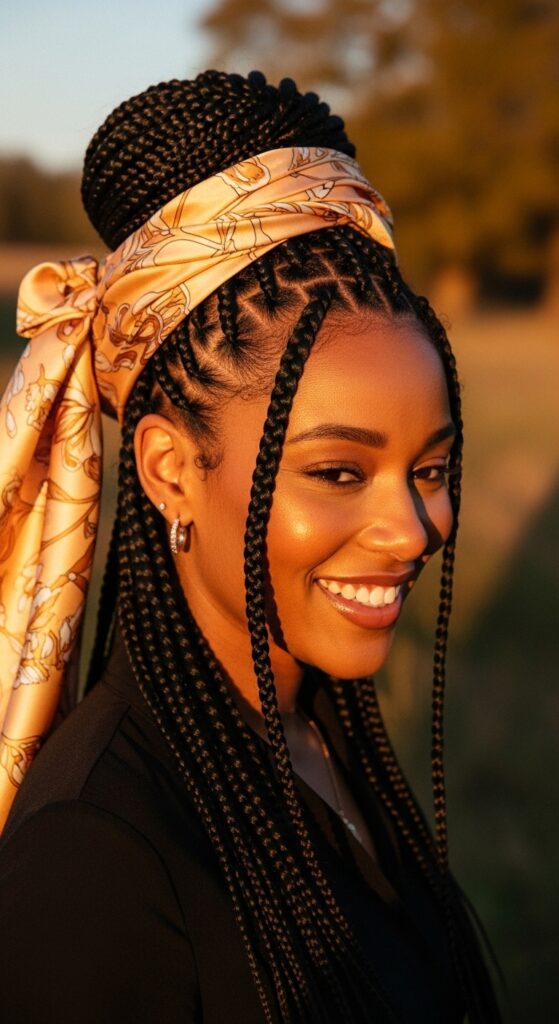
11. The Low, Bohemian Bun
For an elegant dinner or a busy day, a low bun is your best friend. Gather your braids low at your nape and twist them into a loose, textured bun. Don’t make it perfect—let some pieces and curls frame your face.
This look pairs perfectly with the “quiet luxury bob” aesthetic—understated, chic, and incredibly put-together with zero effort.
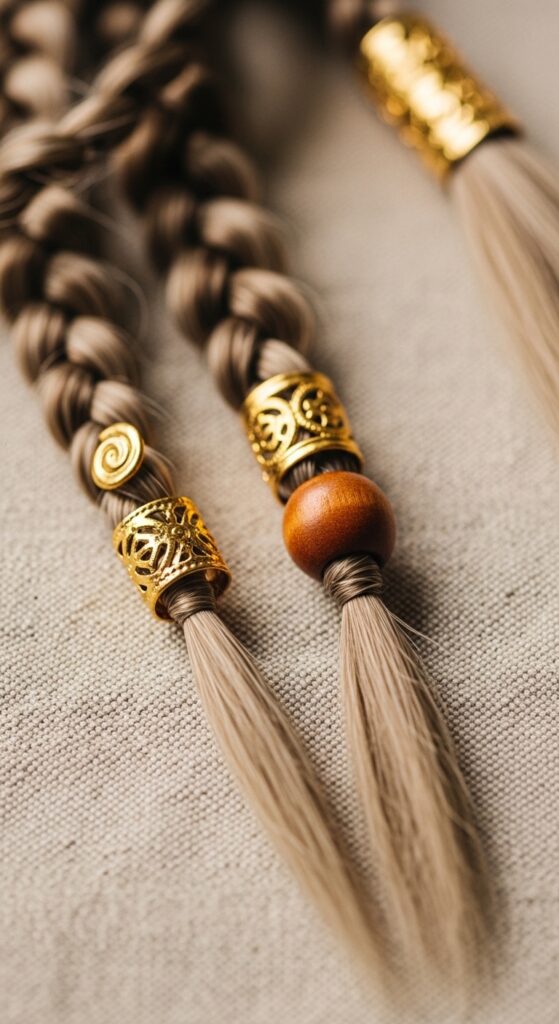
12. Adding Beads & Cuffs for Personality
Accessorize! This is where you can inject your personal style. Adding a few wooden beads, gold cuffs, or even colorful threads can transform your look. It’s a nod to romantic goth hairstyles when you use darker, metallic accessories.
Just don’t overdo it. A few well-placed pieces on the ends of random braids create interest without becoming noisy or heavy.
13. The “Hime Cut” Influence with Bangs
Love the dramatic, straight-across bangs of the hime cut? You can mimic that vibe! Ask your braider to leave out your front baby hairs or a section of hair to style as curly or blunt bangs.
This frames your face beautifully and adds a touch of edgy, modern flair to the traditional braided look. It’s a perfect fusion of styles.
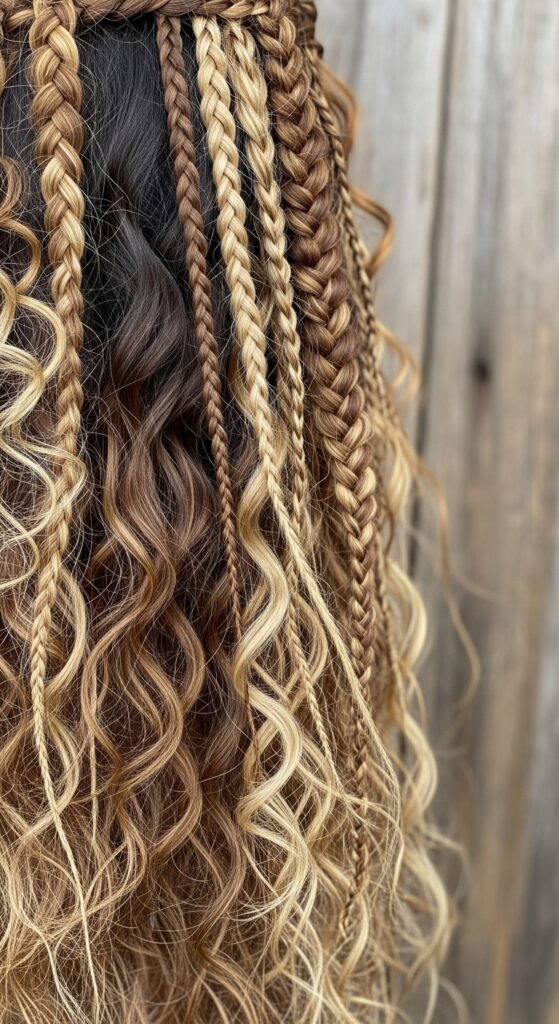
14. Mixing Braid Sizes for Dimension
For a truly custom look, mix 2-3 different braid sizes. Have a few extra-large braids around the perimeter and slightly smaller ones in the back. This creates incredible visual depth and texture.
It prevents the style from looking too uniform and adds an artistic, “glitchy glam hair” element—intentionally imperfect and cool.
15. Nighttime Routine for Longevity
Your nighttime routine is the #1 secret to making these braids last 6-8 weeks. Never sleep on them loose! Always protect them to prevent frizz and tangling.
- Gently gather braids into a loose, high ponytail or pineapple.
- Wrap your head in a silk or satin scarf, or use a satin pillowcase.
- This reduces friction and keeps your style fresh.

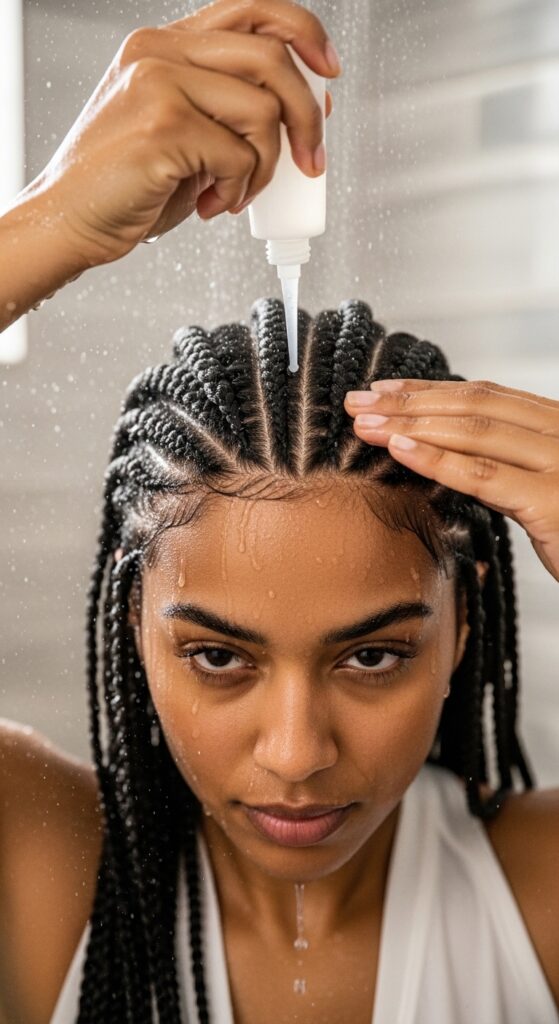
16. Washing Your Braids Correctly
Yes, you must wash your scalp! Every 2-3 weeks, dilute a clarifying shampoo with water in an applicator bottle. Gently apply it directly to your scalp and massage with the pads of your fingers.
Rinse thoroughly, letting the water flow down the braids. Follow with a light, watery conditioner on the braids only, then let them air dry completely. This prevents itchiness and buildup.
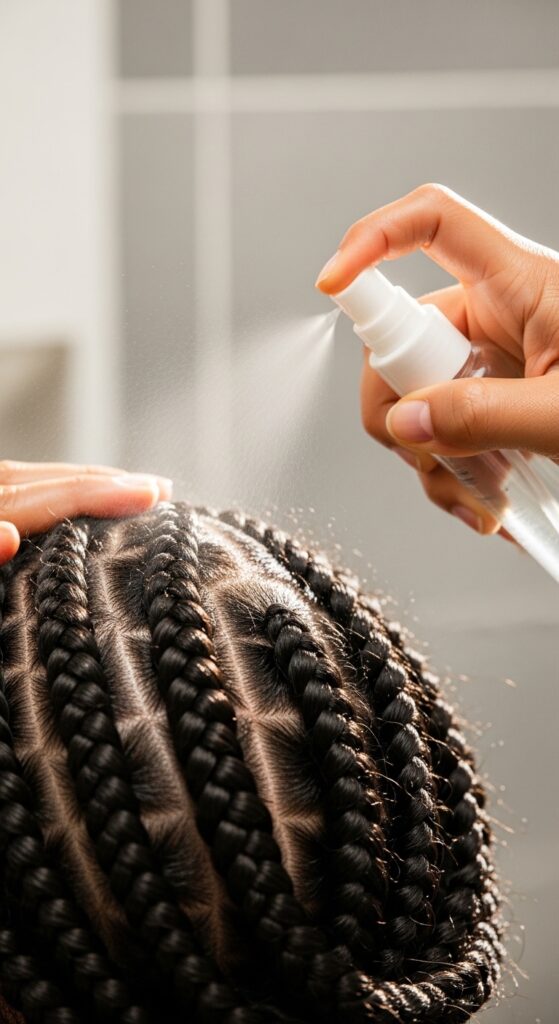
17. Moisturizing Your Scalp & Hair
Keep your scalp happy and your natural hair moisturized underneath. Use a lightweight, oil-based moisturizer or a dedicated braid spray. Focus on your scalp and the parts where your natural hair is exposed.
Avoid heavy products that cause buildup. A little goes a long way. Hydrated hair underneath means less breakage when you finally take the braids down.
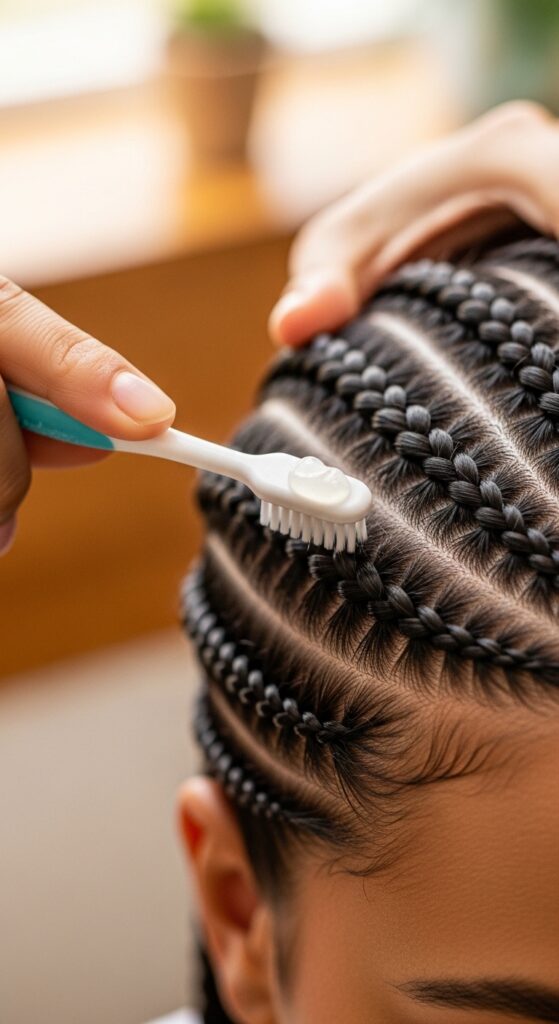
18. Taming Flyaways & Frizz
A little frizz is normal and adds to the bohemian look. But for wild flyaways, use a tiny bit of edge control or a light-hold gel on a toothbrush. Smooth down only the baby hairs around your hairline.
For frizz on the braids themselves, a light oil sheen spray or a dab of hair serum on your hands, smoothed down the length, can work wonders without making them greasy.
19. Knowing When It’s Time to Take Them Down
Even the best braids have an expiration date. Listen to your hair. If you see significant new growth (more than an inch), feel persistent itching or odor you can’t wash away, or notice thinning at the roots, it’s time.
Keeping them in too long can lead to matting and breakage. The goal is protective style, not hidden damage. 6-8 weeks is usually the sweet spot.
20. The Take-Down Process: Be Patient!
Do not rush this. Set aside a full evening or afternoon. Get your favorite detangling conditioner, a wide-tooth comb, and sharp scissors for cutting the extension thread. Work in small sections.
- Cut the extension thread at the tip and unravel gently.
- Once the extension is out, drench your natural hair in conditioner.
- Detangle from ends to roots with your fingers first, then the comb.
21. Post-Braid Care & Recovery
Your hair has been in a protective style, but it still needs TLC. After taking them down, give your hair a thorough, gentle wash and a protein-rich deep conditioner. This helps restore any lost strength.
Let your hair and scalp breathe for at least a week or two before installing another protective style. This is the key to long-term hair health and growth.
22. Goddess Braids for Fine Hair? Yes!
If you have fine or low-density hair, you can still rock this style. The secret is in the size and the base. Ask your braider to make the braids a bit smaller than “jumbo” to add fullness without overloading your strands.
They can also use a technique that doesn’t add too much extension hair per braid, reducing weight and tension on your delicate natural hair.
23. Styling with Hats & Headbands
Goddess braids are the perfect base for accessories. A wide-brimmed hat gives instant vacation vibes. A fabric headband or scarf can add a pop of color and keep your hair off your face.
Even with a style this bold, you can play with the “vampire haircut” aesthetic by adding a dark, lacy headpiece or a dramatic wide headband for a touch of gothic romance.

24. Your Confidence Is the Best Accessory
Finally, remember that the best thing you can wear with this style is your confidence. Goddess braids are powerful, beautiful, and a testament to taking time for self-care and expression.
Walk tall, own your look, and know that you’re rocking one of the most timeless and stunning protective styles out there. You look incredible.And there you have it—your full roadmap to gorgeous, long-lasting goddess braids. From choosing the right style to keeping them fresh for weeks, it’s all about smart prep and simple, consistent care.
This style is more than just a hairstyle; it’s a feeling of strength, beauty, and effortless cool. I hope this guide gives you the confidence to go for the look you love and keep it looking amazing.
Did you find your next style in this list? Save this post to Pinterest to keep all these ideas and tips handy! And tell me in the comments—which look are you dreaming of trying first? Can’t wait to hear from you!
Xoxo, Hailey & Team