24 Vacation Hairstyles Beach Waves Braids Updos Travel Friendly Heatless Styling
Okay, let’s be real. Packing for a trip is stressful enough without trying to cram your entire styling arsenal into a tiny TSA-approved bag. I’ve been there, wrestling with a curling iron in a hotel bathroom that has one dim lightbulb. No more!
This list is your vacation hair savior. We’re talking 24 easy, travel-friendly styles that look incredible without the fuss. Think heatless waves, braids that stay put, and updos that go from beach to dinner in two minutes flat.
Whether you’re chasing the 2026 hairstyles trend or just want something that works, I’ve got you. Every look here is tested, practical, and designed to let you actually enjoy your holiday. Let’s dive in and make your vacation hair the easiest part of your trip.
1. The Classic Heatless Beach Wave
This is my ultimate go-to. It gives you that perfect, lived-in wave without any heat damage. It’s the definition of effortless, “I woke up like this” hair that works for any destination.
All you need is a hair tie and maybe some texturizing spray. Do this on damp hair before bed, and wake up with gorgeous waves.
- Part damp hair down the middle. Twist each section away from your face.
- Coil each twist into a bun at the top of your head and secure with a soft scrunchie.
- Sleep on it! Unravel in the morning, shake out, and spritz for texture.
2. The Effortless Low Messy Bun
When it’s hot and you just need your hair off your neck, this is the answer. It’s polished enough for a nice dinner but looks relaxed and cool.
The key is to not make it perfect. Pull your hair into a low ponytail, but only loop the hair tie once on the second pass.
- Gather hair at your nape. Use a comb to gently pull out a few face-framing pieces.
- Create a ponytail and secure loosely. Don’t pull the last loop of the tie all the way through.
- Gently tug at the bun to loosen and create volume. Hairspray any flyaways.
3. The Simple French Braid
A French braid is a vacation workhorse. It keeps hair contained all day, looks beautiful, and actually gets better as it gets a little messy. It’s a true classic for a reason.
Start with a bit of texture. Braid along the crown of your head, or do two for a sportier look. No need to be perfect.
- Take a top section of hair and split it into three.
- Begin a normal braid, adding in small sections from the sides as you go.
- Continue to the ends of your hair and secure with a clear elastic.
4. The Half-Up Twisted Pony
This style gives you the best of both worlds: hair out of your face but still down. It adds instant polish and takes about 60 seconds. It’s my secret for looking put-together fast.
It works on any hair type. For finer hair, backcomb the crown slightly before twisting for extra volume.
- Take two small sections of hair from above your temples.
- Twist each section back and towards the center of your head.
- Secure them together with a small, cute clip or clear elastic at the back of your crown.

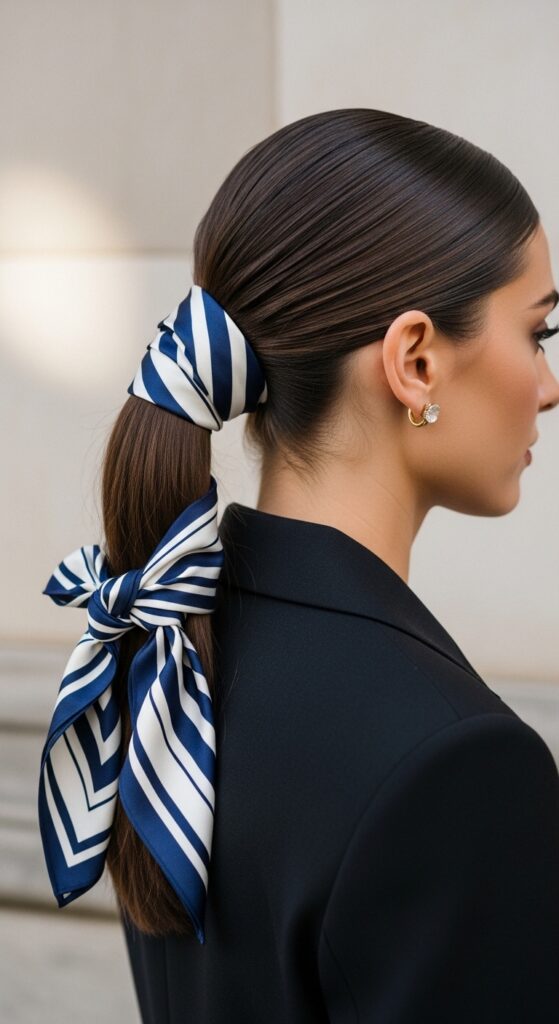
5. The Silk Scarf Ponytail
Elevate a basic ponytail instantly with a silk scarf. It adds a pop of color and a touch of that old money hair aesthetic—think timeless and chic. It protects your hair from friction, too.
Use a long, thin scarf. You can wrap it around the base of the ponytail or braid it into your hair for a more detailed look.
- Fold a long scarf into a thin band. Tie your hair into a mid or low ponytail.
- Wrap the scarf around the hair tie, knotting it securely underneath.
- You can leave the ends long or tie them into a small bow.
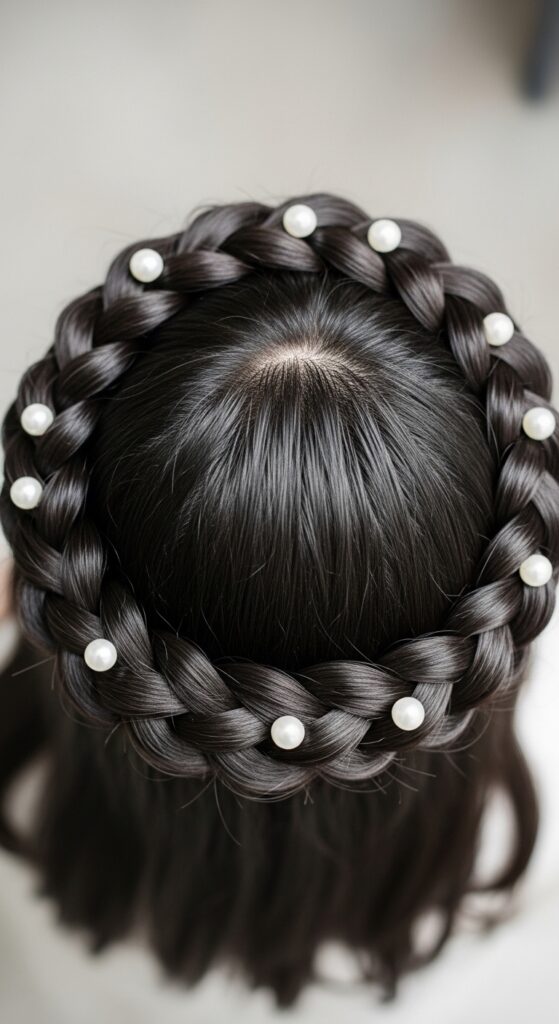
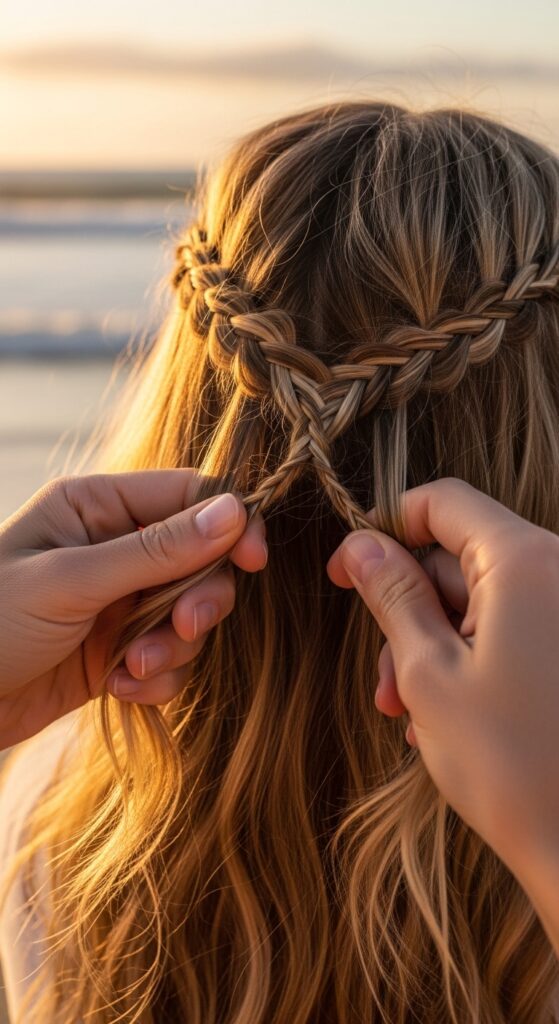
6. The Rope Braid Crown
This is a gorgeous, boho updo that’s surprisingly simple. It looks intricate but is just two rope braids pinned in place. It’s perfect for a fancy dinner or a day of exploring in the heat.
Rope braids are easier than they look. Just twist two sections of hair around each other.
- Part hair down the middle. On one side, split a section into two.
- Twist each strand clockwise, then twist them around each other counter-clockwise.
- Braid to the end, secure, and repeat on the other side. Pin the braids across your crown.
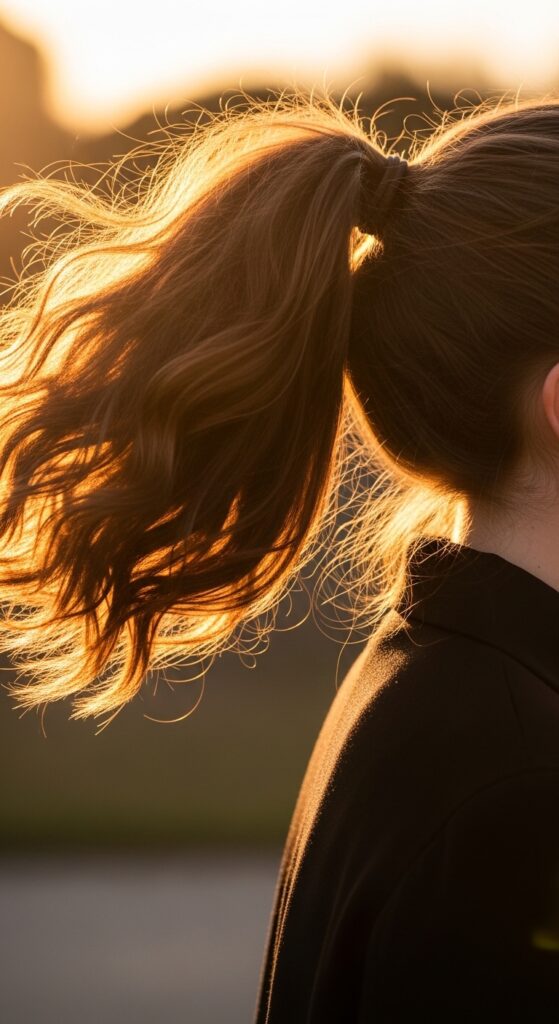
7. The Tousled Textured Ponytail
Move over, sleek pony. The textured, lived-in ponytail is where it’s at. It’s full, cool, and works with second or third-day hair perfectly. This is a major 2026 hairstyles vibe.
The goal is volume and piece-y texture. Teasing and texturizing spray are your best friends here.
- Lightly backcomb the hair at your crown for lift.
- Bend over and gather hair high on your head for maximum volume.
- Secure with a hair tie. Gently pull sections loose around your face and hairline.
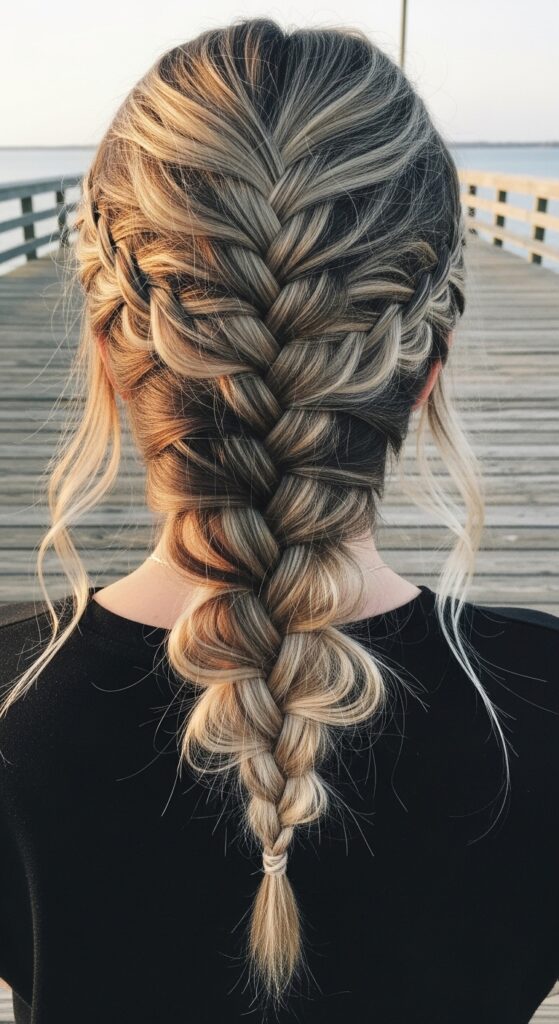
8. The Quick Fishtail Braid
A fishtail looks complicated but is just a matter of patience. It’s an elegant, beach-ready style that holds up against wind and humidity. Practice this once and you’ll have it for life.
Start with a slightly messy, textured base. The looser you braid, the easier it is and the better it looks.
- Divide hair into two equal sections.
- Take a small, thin piece from the outside of the left section and cross it over to the inside of the right.
- Repeat from the right side to the left. Continue to the end and secure.
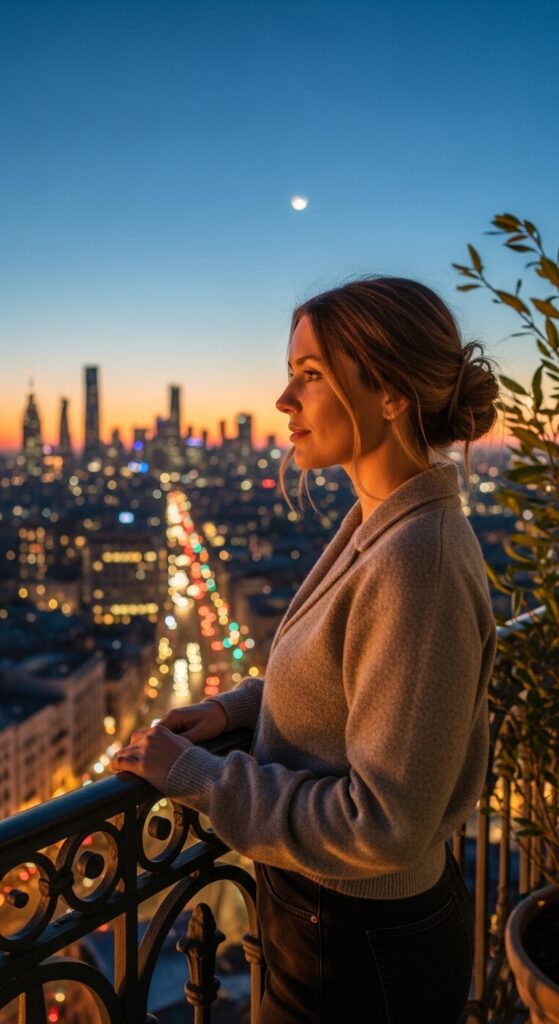
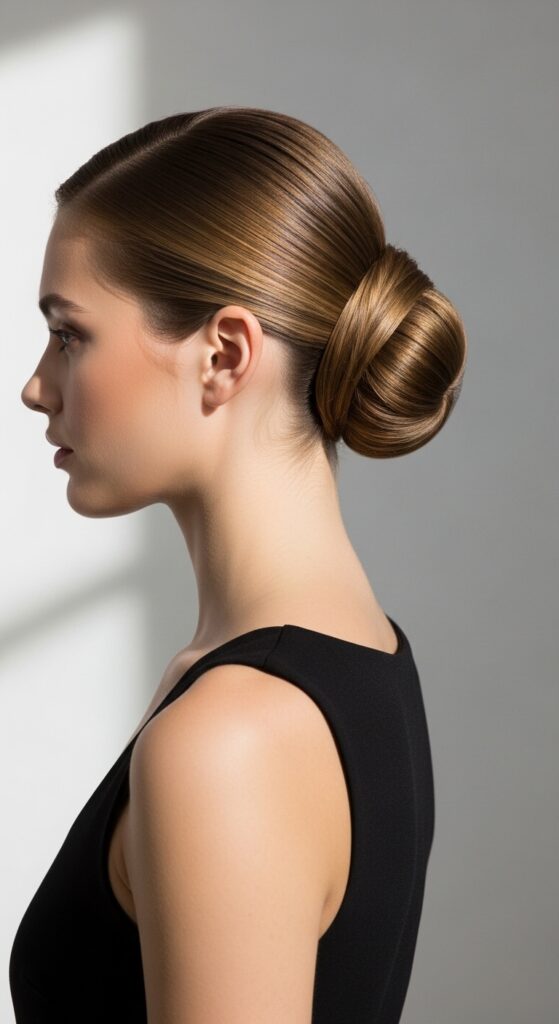
9. The Elegant Low Chignon
This is your instant upgrade hairstyle. It screams quiet luxury bob energy, even if you have long hair. It’s sleek, sophisticated, and perfect for a fancy evening out.
Use a smoothing serum and a fine-tooth comb for this look. The neater the base, the better the final result.
- Create a low, tight ponytail and secure it firmly.
- Twist the ponytail and wrap it around the base to form a bun.
- Secure with bobby pins, tucking the end under. Spray to hold and smooth.
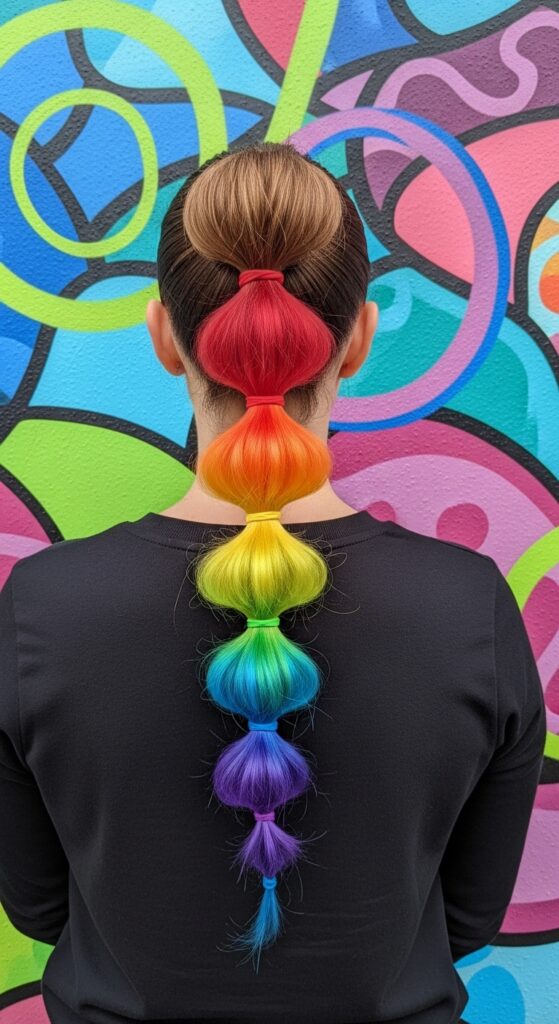
10. The Bubble Ponytail
Fun, playful, and totally travel-friendly. The bubble ponytail adds major style points with zero skill required. It’s a great way to dress up a basic pony for a day of sightseeing.
You just need extra hair ties. Space them evenly down the length of your ponytail and then “puff” out the sections between them.
- Make a high or mid ponytail. Secure with a hair tie.
- Place additional ties every few inches down the length of the tail.
- Gently tug on each section of hair between the ties to create the “bubbles.”
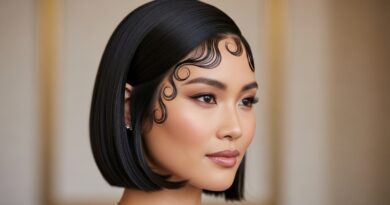
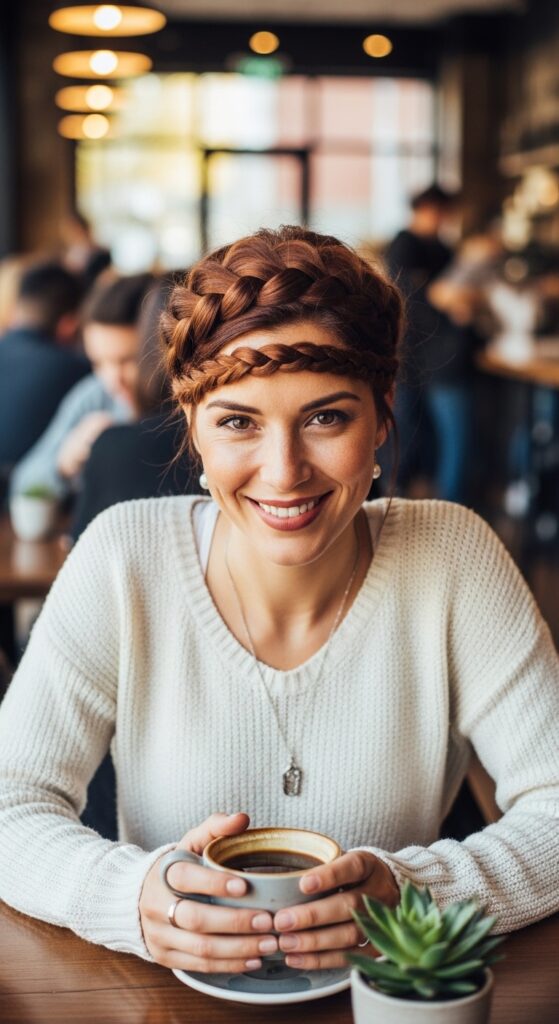
11. The Headband Braid
Keep hair off your face in the chicest way possible. This style uses a simple braid as a functional, pretty headband. It works with all hair lengths and textures.
You can do a regular three-strand braid or a Dutch braid for more dimension. Secure it behind your ear with bobby pins.
- Take a section of hair from one temple, near your hairline.
- Braid it loosely across your forehead, following your hairline.
- Once you reach the other side, pin the braid securely behind your ear.
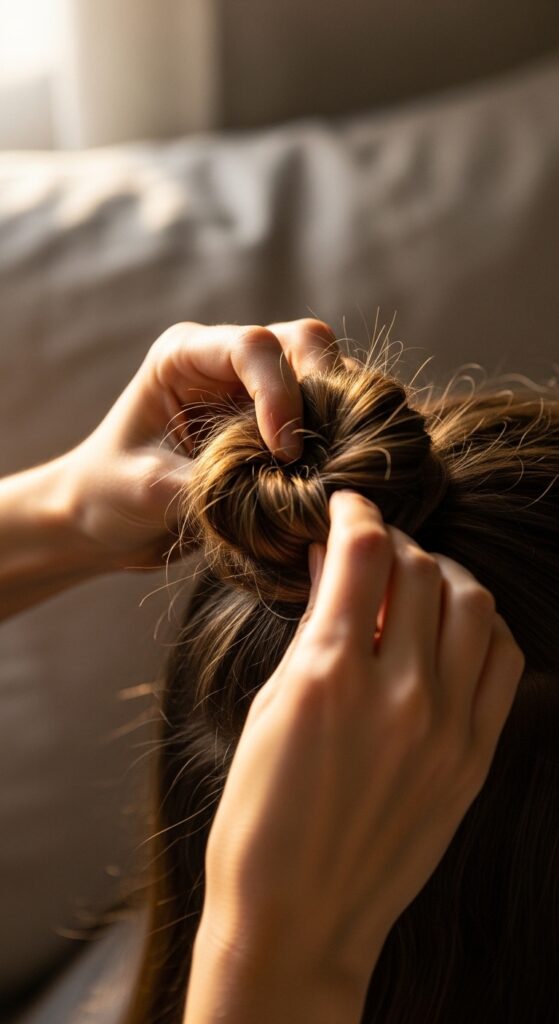
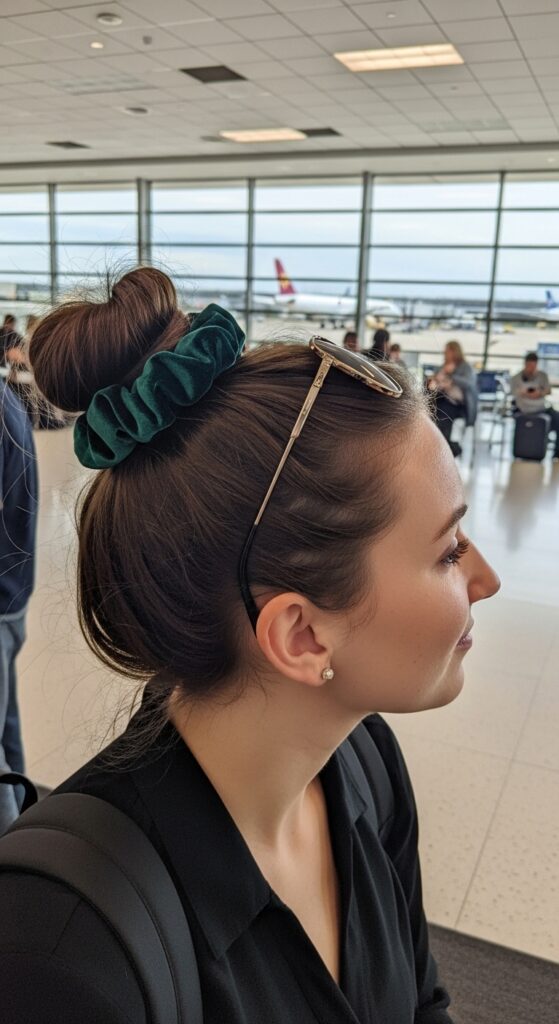
12. The Top Knot with Scrunchie
The ultimate easy updo. A top knot is perfect for beach days, long flights, or when you just need to get ready fast. Using a scrunchie adds a soft, retro touch and is gentler on your hair.
Don’t make it too tight or perfect. A little messiness is the goal for that cool-girl vibe.
- Flip head over and gather all hair into a high ponytail.
- Twist hair and wrap it around the base, forming a bun.
- Secure the bun with a large, fabric scrunchie. Pull out a few face-framing pieces.
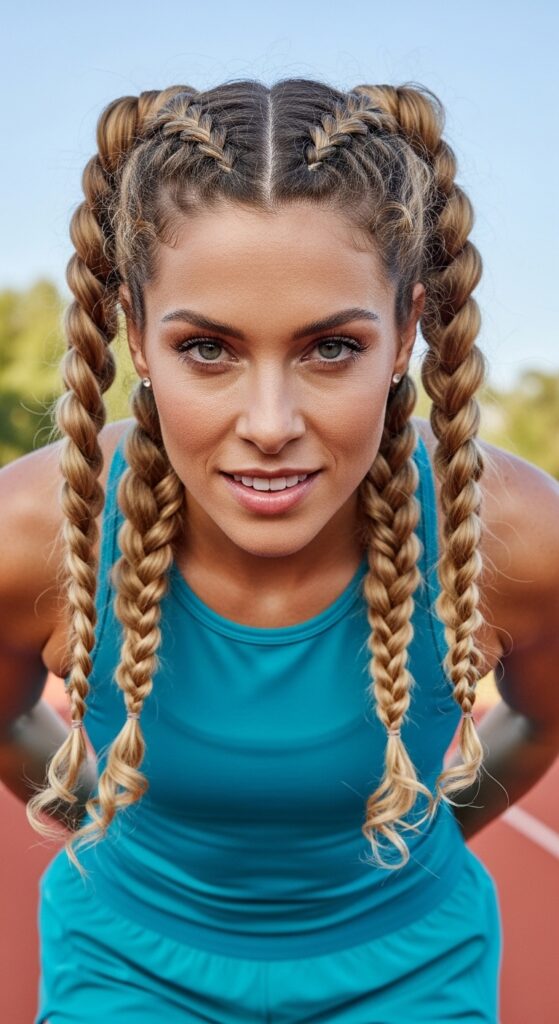
13. The Dutch Braid Pigtails
Not just for kids! Dutch braid pigtails are sporty, cute, and keep every strand in place. They give off a cool, 90s-inspired feel and are perfect for active vacation days.
Dutch braids are just inside-out French braids. They pop out from your head, creating great texture.
- Part hair down the middle. On one side, begin a Dutch braid at the temple.
- Add hair from underneath as you braid, working down towards your ear.
- Continue the braid to the ends. Repeat on the other side.
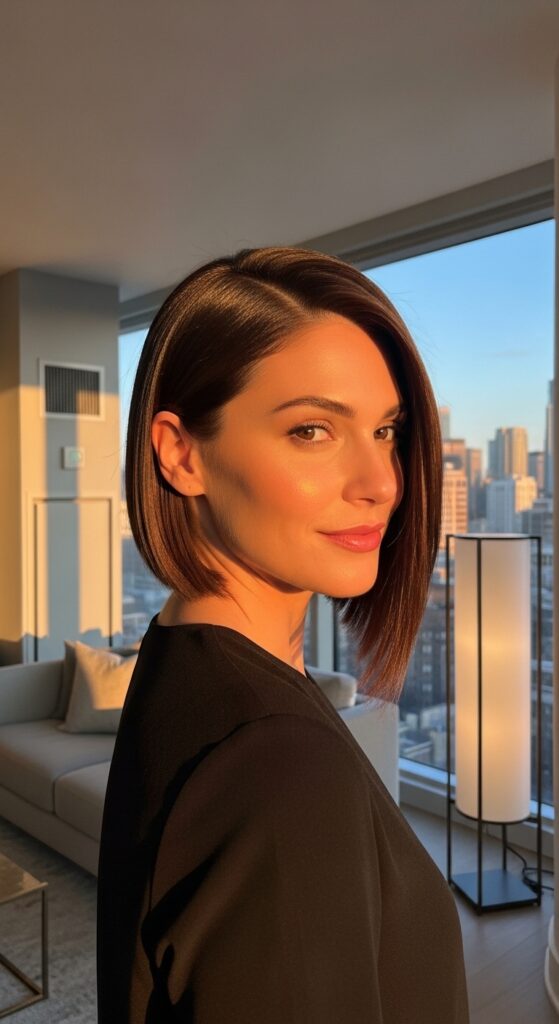
14. The Sleek Asymmetrical Lob
If you have a shorter cut, this is your power move. The asymmetrical lob is a sharp, modern cut that styles easily. A deep side part and a touch of shine serum create this look in seconds.
This cut is a star for 2026 hairstyles. It’s low-maintenance but always looks intentional and chic, embodying that quiet luxury bob feeling.
- Create a deep side part with a fine-tooth comb.
- Apply a smoothing serum or cream from mid-lengths to ends.
- Tuck the longer side behind your ear for a dramatic, asymmetrical line.
15. The Romantic Goth Twisted Updo
Channel a dark romantic vibe with this elegant updo. Think romantic goth hairstyles meets vacation ease. It uses twists and pins for an intricate look that’s actually simple to do.
It’s all about creating soft, twisted sections rather than tight braids. Leave some pieces loose for a soft, undone effect.
- Create two loose twists on either side of your head, starting at the temples.
- Pull the rest of your hair into a low, loose bun.
- Wrap the twisted sections around the base of the bun and pin in place.
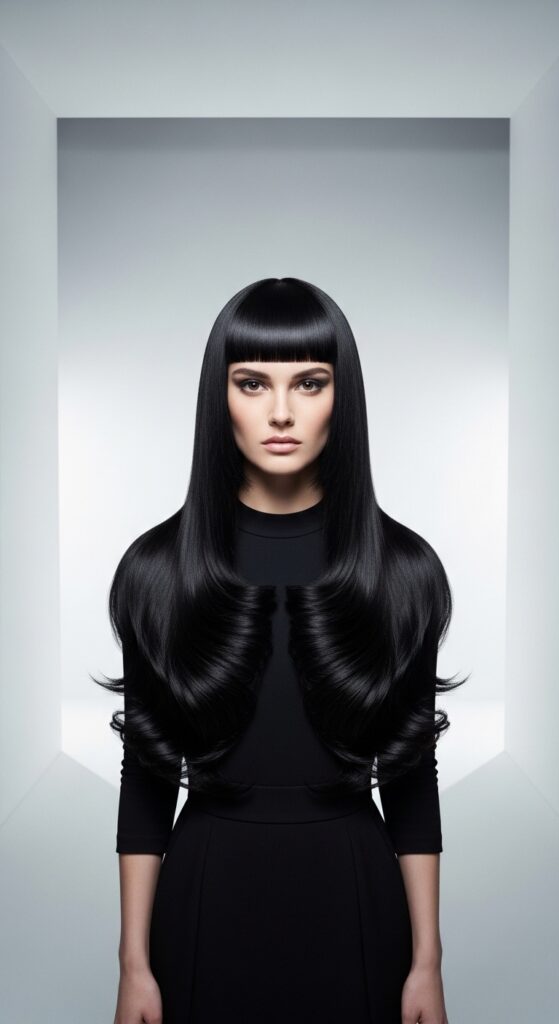
16. The Hime Cut with Air-Dry Texture
The hime cut is a bold, beautiful style with strong, straight-across bangs and long layers. On vacation, let it air-dry for amazing texture. It’s a statement look that requires minimal styling.
This cut is trending for a reason—it’s dramatic and unforgettable. Use a salt spray on damp hair to enhance your natural wave pattern.
- After washing, apply a texturizing spray or sea salt spray.
- Scrunch hair gently and let it air-dry completely.
- Use a flat iron on the bangs only to keep them sleek and defined.
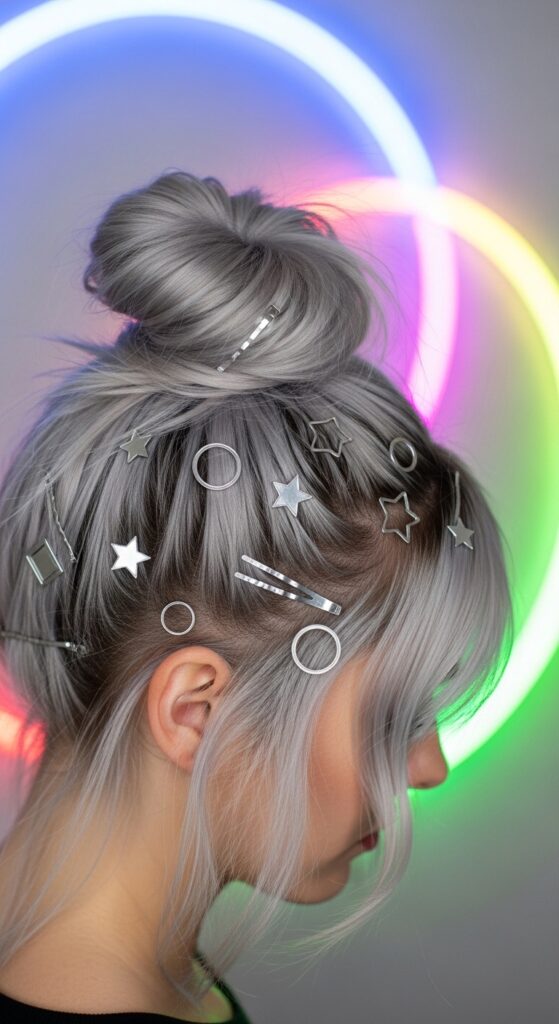
17. The Glitchy Glam Space Buns
For a fun, futuristic take on a classic, try glitchy glam hair with space buns. Add small, colored hair clips or cuffs in an asymmetrical way. It’s playful, trendy, and perfect for a festival or a night out.
The “glitch” is in the details—uneven placement, a few pieces left out, and cool accessories.
- Part hair down the middle and create two high pigtails.
- Wrap each into a bun and secure with pins.
- Pull out a few pieces deliberately. Add metallic or colored mini clips randomly around the buns.
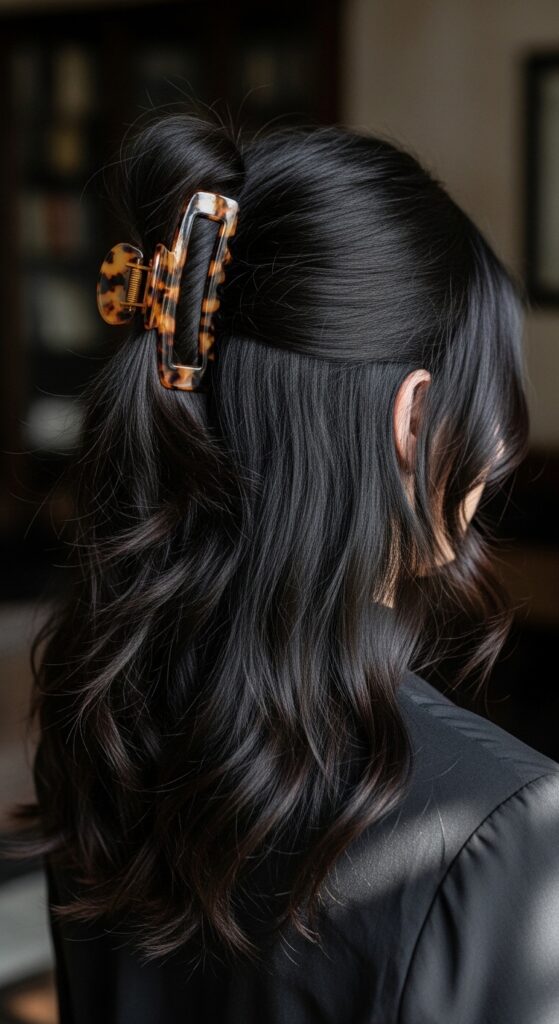
18. The Vampire Haircut with a Claw Clip
The vampire haircut—with its sharp layers and curtain bangs—is made for easy styling. Just throw it up in a claw clip for an instant, cool updo. The layers will beautifully frame your face.
This cut is all about movement and attitude. A claw clip captures the texture perfectly and looks effortlessly stylish.
- Let hair air-dry to show off its natural layered texture.
- Gather hair at the back of your crown, as if for a ponytail.
- Twist once and secure with a large, stylish claw clip, letting layers fall loose.
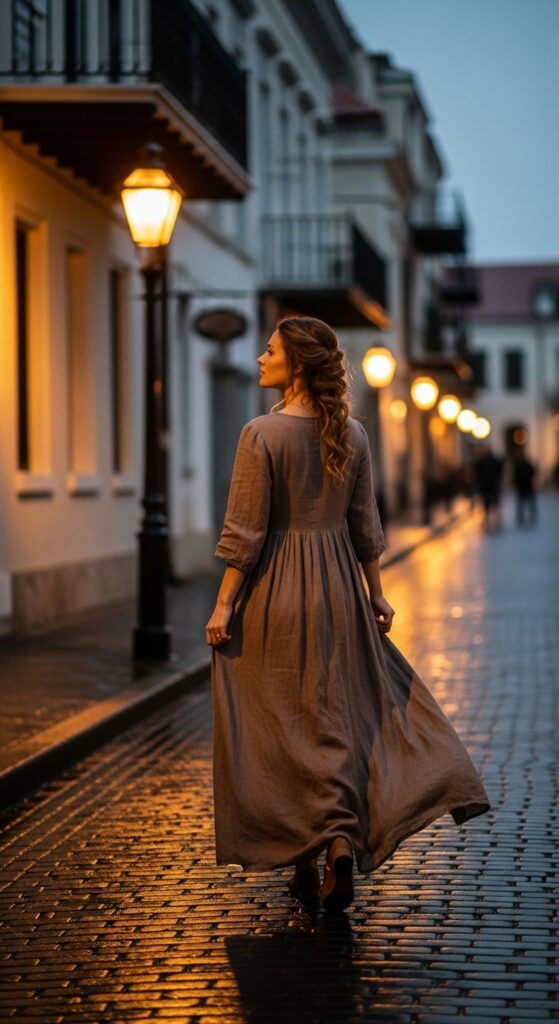
19. The Side-Swept Braid
Elegant and simple, a side-swept braid is incredibly versatile. It works on wet hair after a swim, on dry hair for dinner, or on second-day hair. It’s a one-braid wonder.
Sweep all your hair over one shoulder before you start braiding. A loose, slightly messy braid looks best.
- Gather all hair over one shoulder.
- Braid loosely, either a standard three-strand or a fishtail.
- Secure the end with a hair tie. Gently pull on the sides of the braid to loosen and widen it.
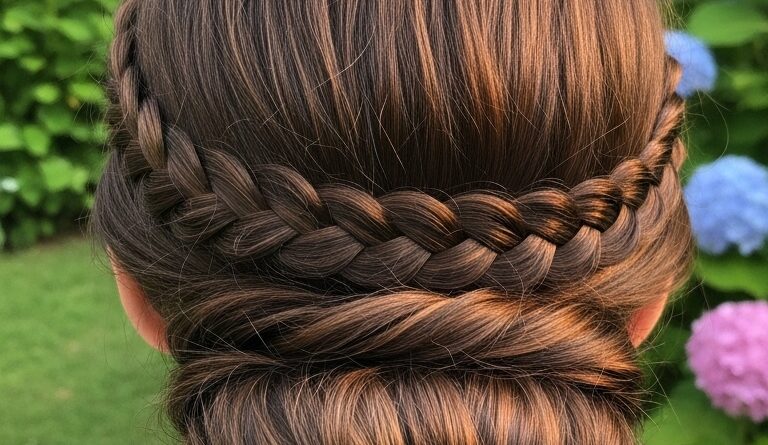
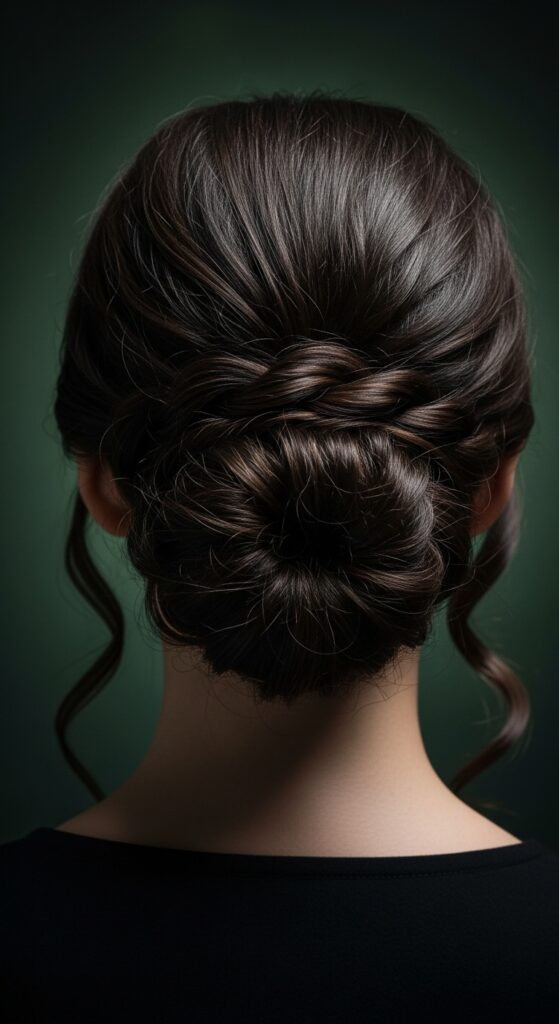
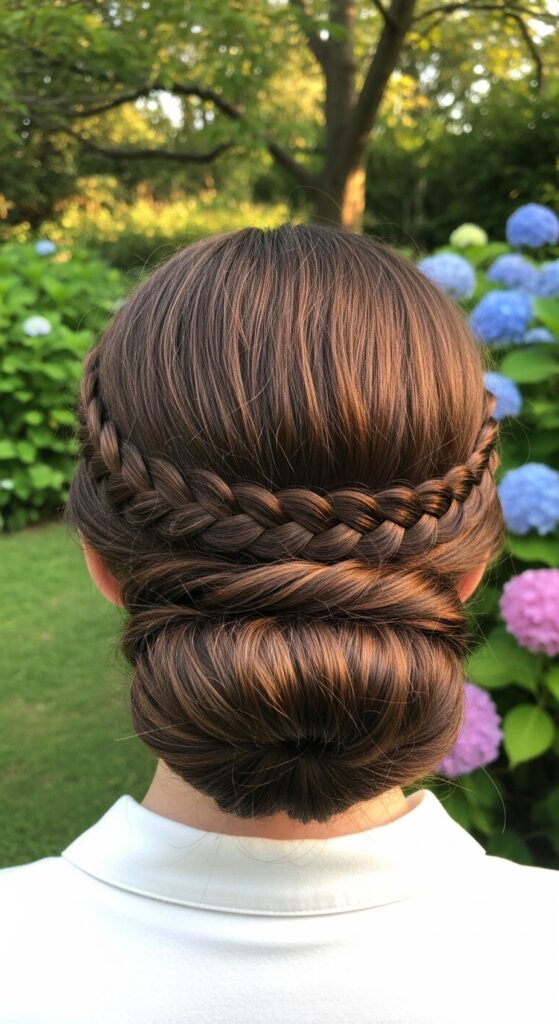
20. The Braided Headband into Low Bun
This combines two easy elements for a look that seems complex. The braided headband keeps hair off your face, and the low bun is sleek and tidy. It’s perfect for a hot day when you want to feel polished.
Start with the braided headband from section 11, but instead of leaving the rest down, gather it into a bun.
- Create a headband braid on one side and pin it behind the opposite ear.
- Gather the remaining hair, including the end of the braid, at your nape.
- Twist into a low chignon or bun and secure with pins.
21. The Twisted Bandana Updo
Use a bandana as both an accessory and a styling tool. This updo is secure, colorful, and protects your hair from the sun. It has a cool, retro vibe that’s perfect for a beach day.
Fold the bandana into a triangle and then into a long strip. It will act as a headband that also holds your hair.
- Place the bandana over your head like a headband, tying it at your nape.
- Gather all your hair, including the bandana ends, into a high ponytail.
- Twist the ponytail and wrap it around the base, using the bandana ties