30 Hairstyles for Plus Size Women with Thin Fine Hair That Suit Every Angle
Hey friend, I see you. You’ve got fine, thin hair, a beautiful full face, and about nineteen minutes to get ready before you walk out the door. And every “volume” tutorial online seems built for someone with three times your strands.
Here’s what I’ve learned after years of trial and error: fine hair isn’t the problem. The cut is. The right shape, the right part, and a little root lift change everything, from every angle, in every photo.
So I pulled together 30 hairstyles that actually work on plus size women with thin, fine hair. From the quiet luxury bob to the hime cut, the vampire haircut, and glitchy glam hair, these 2026 hairstyles are quick, real-life friendly, and flattering front, side, and back.
Grab your coffee. Let’s find your next look.
Why Fine, Thin Hair Is Secretly Low-Maintenance

Let’s start with the good news, because there’s a lot of it. Fine hair holds a style fast, takes shine beautifully, and air-dries in minutes. Thin strands are also the easiest hair on earth to build volume into, because a small amount of product goes a long way.
The real issue is weight. Heavy products, heavy layers, and heavy one-length cuts drag fine hair down and make it look thinner than it actually is.
- Light products beat strong ones
- Texture beats length
- Shape beats thickness
Flip those three rules and everything changes.
Rule One: Lift the Root, Not the Ends
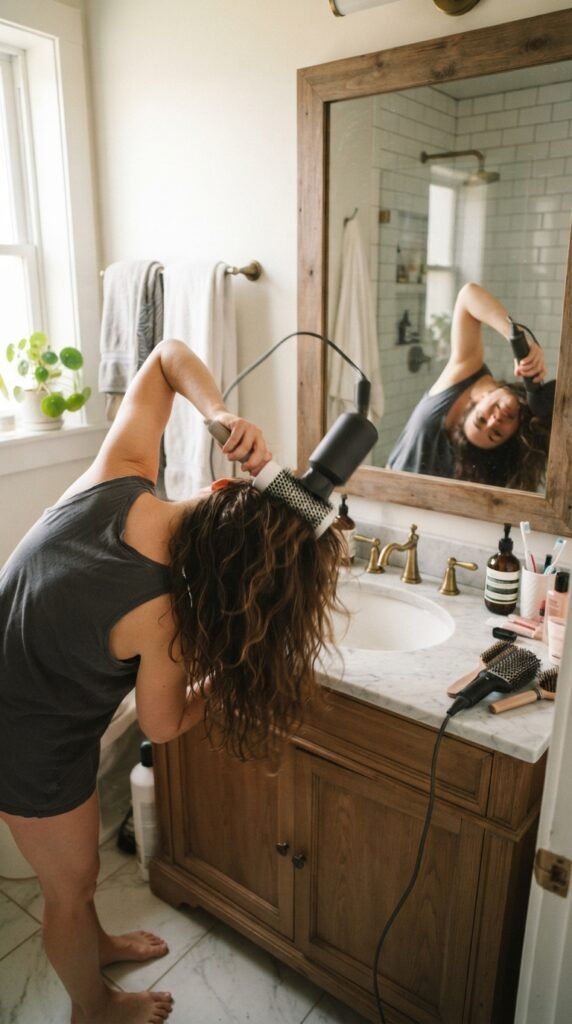
If you remember one thing from this whole post, make it this: volume for fine hair happens at the root, not the ends.
Most of us over-curl our ends and wonder why the top still looks flat. Instead, blast your roots with warm air in the opposite direction of your part, about ten seconds per side, then flip back and set with cool air.
- Rough-dry to 80 percent first
- Lift with fingers, not a brush, at the root
- Finish with cool air to lock it in
That’s it. Ten seconds, real lift.
The Quiet Luxury Bob
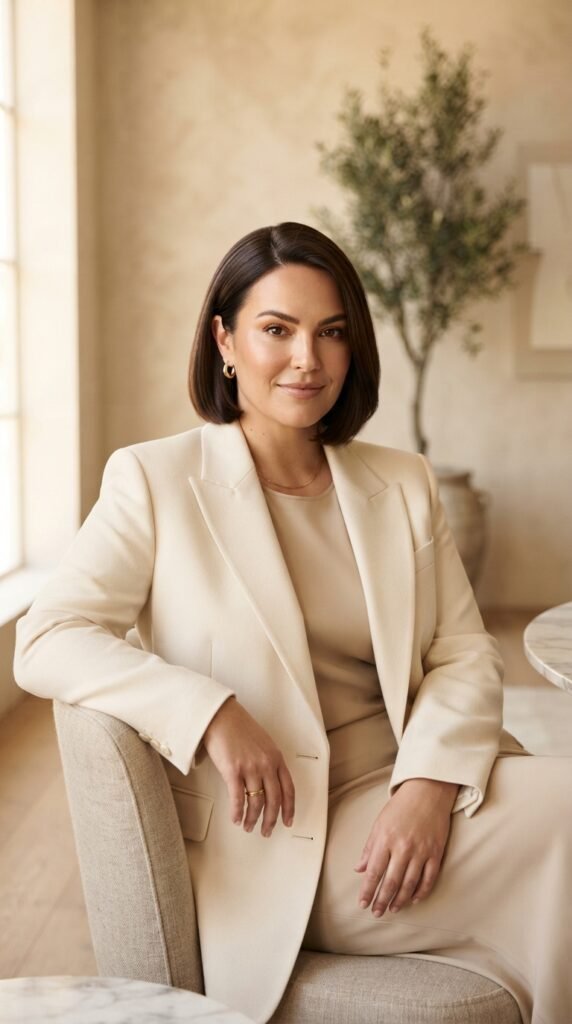
The quiet luxury bob is the quiet luxury bob for a reason. It’s a smooth, chin-to-jaw-length cut with a clean shape and almost no visible layering. On fine hair it reads expensive because there’s nothing choppy to break up the strand.
Ask your stylist for a soft blunt line with a tiny bit of texture at the ends so it doesn’t sit flat. Keep it slightly longer in front than the back.
- Best on oval and heart face shapes
- Style with a round brush and light serum
- Part slightly off center for lift
This is the “I have my life together” haircut of 2026.
The Asymmetrical Lob
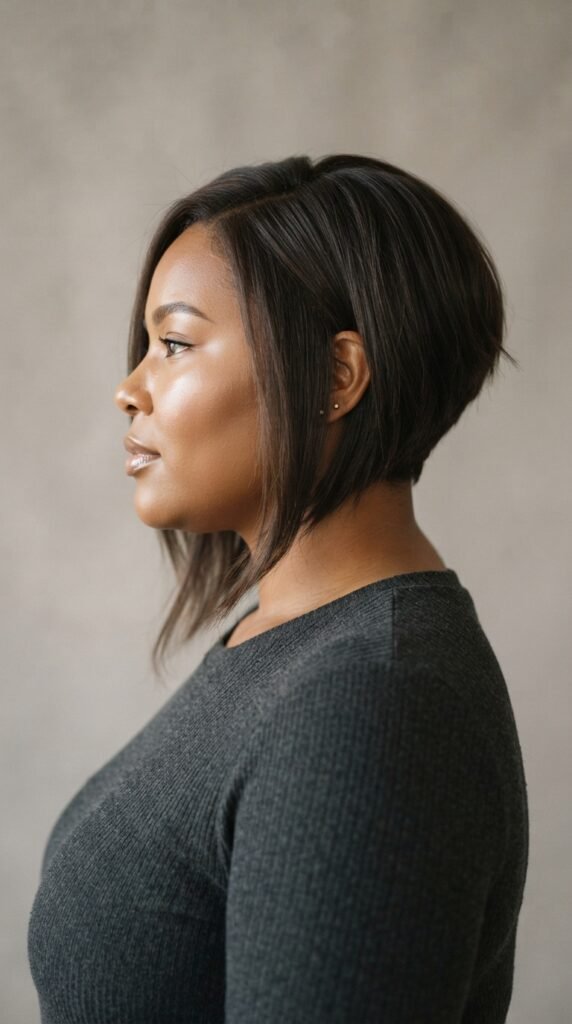
If you want instant angles, this is your cut. The asymmetrical lob is longer in front and shorter in back, which creates a diagonal line that slims the jaw and lifts the eye.
It also solves a very specific fine-hair problem: one-length lobs can hang heavy and flat. The asymmetry removes weight exactly where you don’t want it.
- Ask for a subtle angle, not a dramatic one
- Keep the front pieces grazing your collarbone
- Style with a side part for maximum lift
Bonus: it grows out beautifully, so you get months of good hair.
The Blunt Collarbone Cut

Blunt ends get a bad reputation, but on fine hair they’re magic. A blunt line makes the ends look fuller because every strand stops at the same place.
Ask for collarbone length with no thinning shears anywhere near it. Thinning shears are the number one reason fine hair looks stringy after a salon visit.
- Say “no thinning” out loud at the consult
- Add a deep side part for volume
- Use a tiny amount of light oil on the ends only
Simple, strong, and it photographs beautifully from the back.
The A-Line Angled Bob
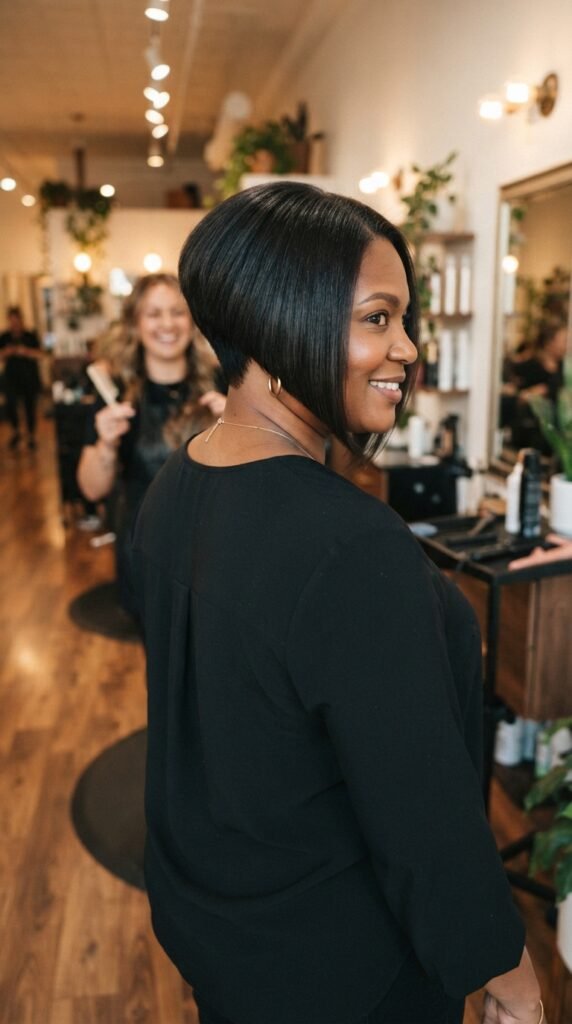
The A-line bob is the asymmetrical lob’s shorter sister, and it’s a powerhouse for round and square faces. Short at the nape, longer in front, it creates a sharp line that frames the face instead of hiding it.
It’s also one of the easiest cuts to style on fine hair. A quick blow-dry with a paddle brush and you’re done.
- Keep the front at chin or jaw length
- Ask for a soft beveled edge, not a hard chop
- Use a vent brush for speed
Great for anyone who wants polish without a lot of time.
The Hime Cut
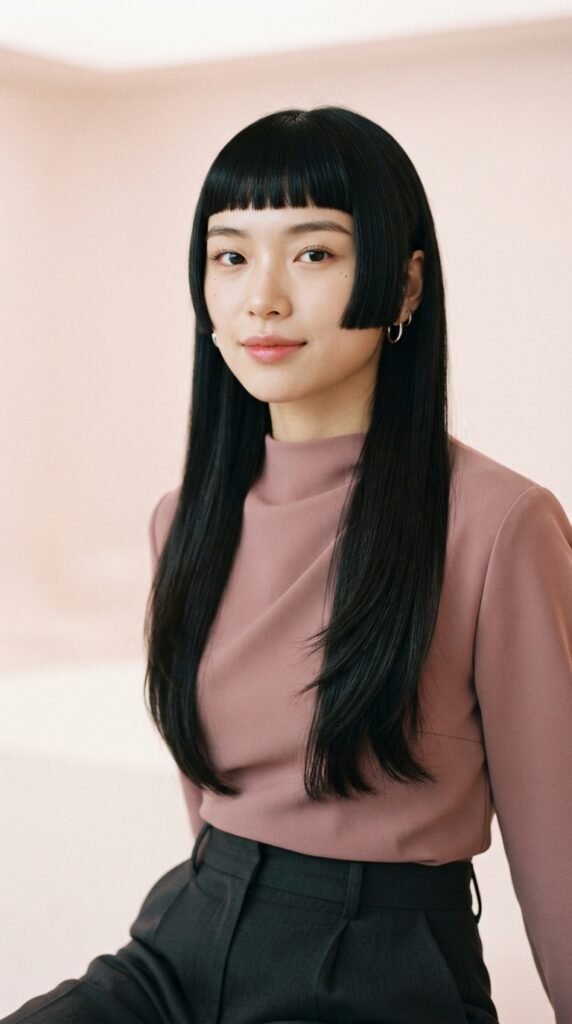
The hime cut is having a serious moment, and fine hair was basically made for it. It’s blunt cheekbone-length side pieces with the rest of the hair kept long and straight behind.
Because the side pieces are blunt, they look thicker than they are. And the long back keeps things simple and low-maintenance.
- Side pieces should hit at cheekbone or jaw
- Keep the line blunt, no layers
- Flat iron the front pieces for shine
It’s dramatic, modern, and surprisingly easy to pull off.
The Vampire Haircut
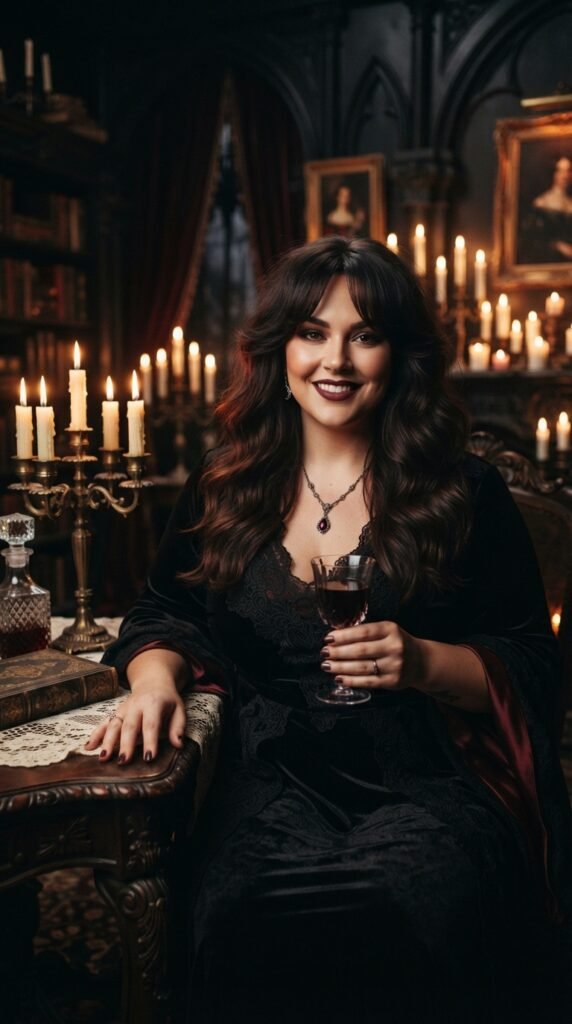
The vampire haircut is basically long hair with sharp face-framing layers and a soft, curtain-style fringe. Think romantic and slightly moody, like you just stepped out of a very stylish old house.
On fine hair, the trick is keeping the layers long and blended. Short choppy layers will make thin ends look thinner.
- Ask for long, blended face-framing only
- Use a texturizing spray at the mid-lengths
- Style the fringe with a small round brush
It gives you movement and edge without any extra bulk.
Old Money Hair: The Bouncy Blowout
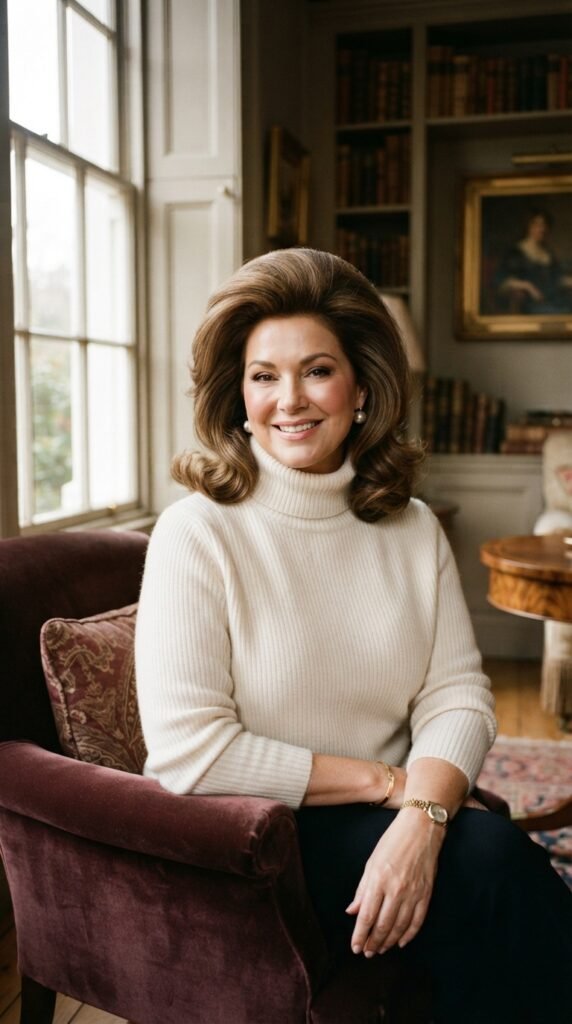
Old money hair is less a cut and more a finish. It’s a smooth, bouncy blowout with a deep side part, rounded ends, and a little height at the crown.
The secret for fine hair is volume powder at the root before you blow-dry, not after. It gives the brush something to grab onto.
- Set with velcro rollers for five minutes
- Brush everything away from the face
- Finish with a light flexible spray
This look works at every length and it never goes out of style.
Romantic Goth Hairstyles
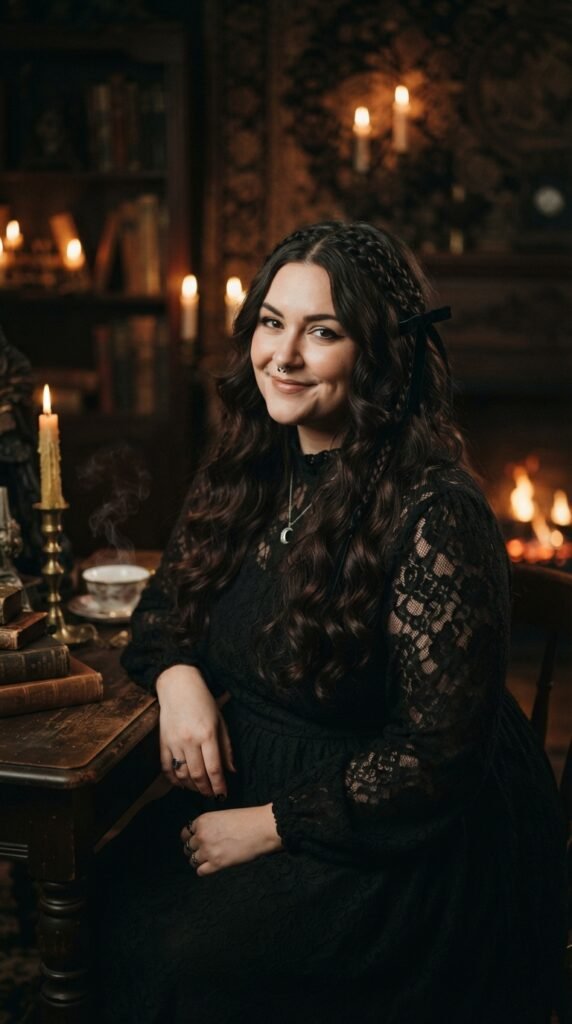
Romantic goth hairstyles are one of my favorite 2026 trends because they’re built on texture, not thickness. Soft waves, small braids, ribbons, and face-framing pieces all add visual volume without adding weight.
The key is keeping the texture loose. Tight crimps make fine hair look sparse; loose waves make it look fuller.
- Wrap small sections around a one-inch wand
- Add two tiny braids at the temples
- Pull one face-framing piece out front
Romantic, a little dark, very photogenic.
Glitchy Glam Hair
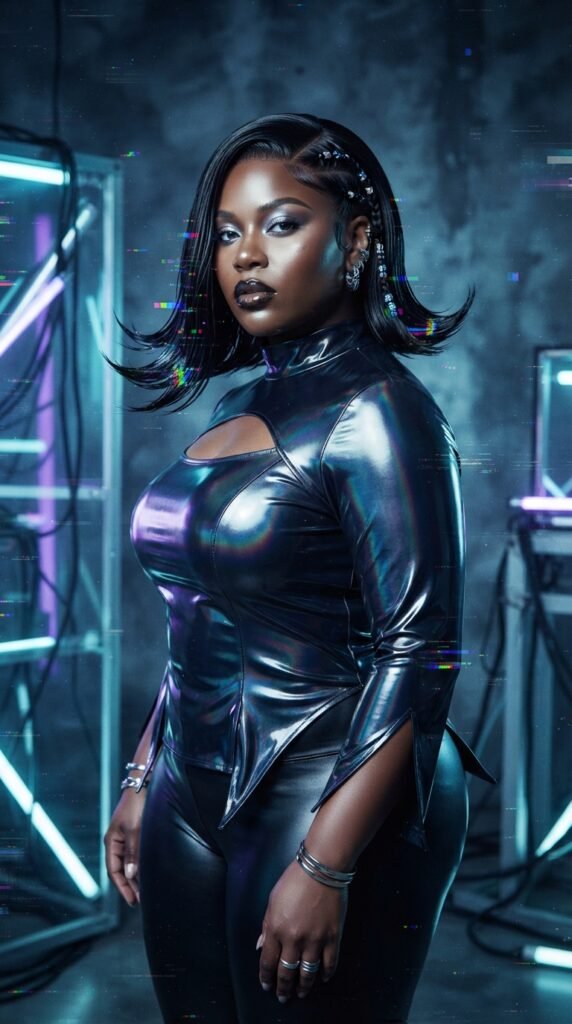
Glitchy glam hair is the fun one. It’s sleek on top, then deliberately sharp and flipped at the ends, like your hair got a little glitchy on purpose. Tiny braids and metallic clips make it feel styled, not messy.
For fine hair, the wet-look finish is your best friend. It makes strands look thicker because the light reflects in one clean sheet.
- Use gel on the top section only
- Flip the ends with a flat iron
- Add one small clip or braid as a focal point
It’s a great going-out look that takes eight minutes.
The Layered Pixie
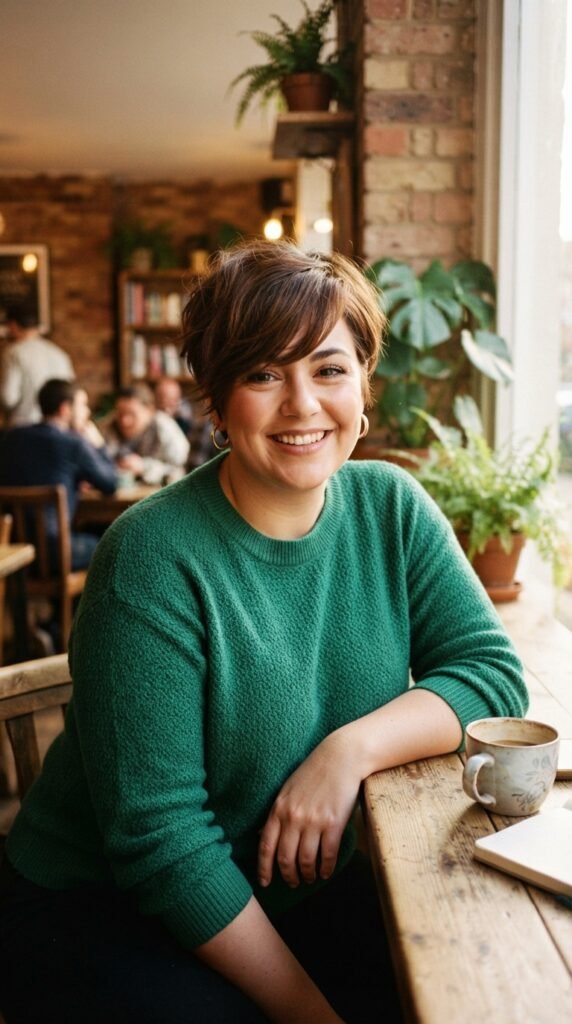
A layered pixie is the boldest way to make fine hair look instantly thicker, because you’re removing all the weight that was flattening it. Every strand gets lifted.
Ask for a longer pixie with soft, piecey layers on top and a bit of length at the sides so it still frames your face.
- Keep a soft fringe to balance a round face
- Use a matte paste for texture
- Refresh with water and a diffuser in the morning
It’s brave, and it’s almost always worth it.
The Bixie Cut
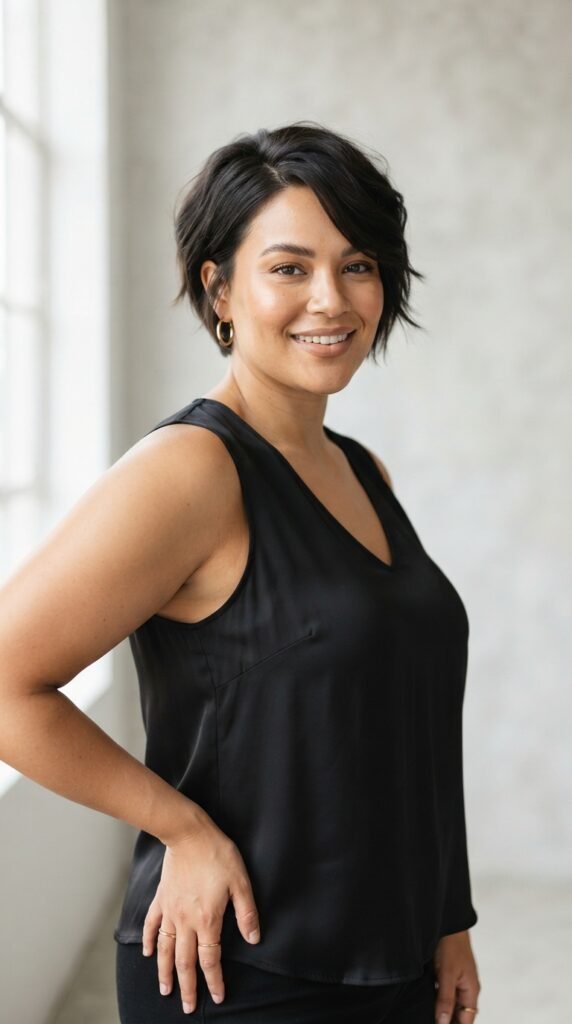
Can’t decide between a bob and a pixie? The bixie is your answer. It’s a bob’s length with a pixie’s layers, and it’s one of the most flattering 2026 hairstyles for fine hair.
It gives you volume at the crown, a clean line at the nape, and enough length around the face to tuck or leave loose.
- Ask for longer layers on top
- Keep the sides slightly longer than a pixie
- Tuck one side behind the ear for shape
Low effort, high payoff.
The Soft Shag
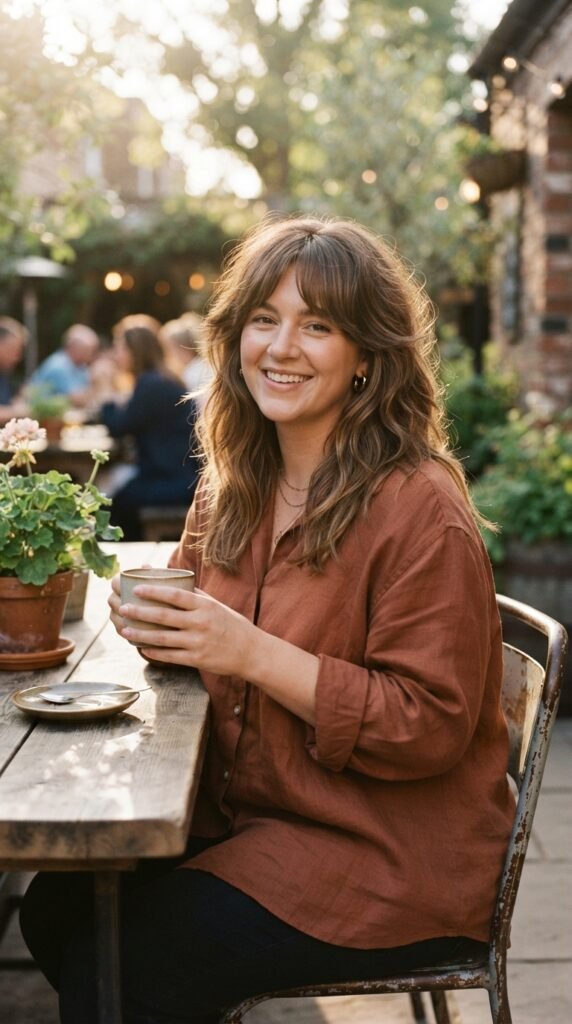
The shag is back, but softer than the seventies version. A soft shag adds long layers throughout so the hair moves instead of hanging flat.
The trick on fine hair is spacing the layers out. Too many layers and thin ends get stringy fast.
- Ask for long layers, spaced apart
- Pair with a curtain fringe, not a full bang
- Scrunch in a light texturizer and let it air-dry
It’s the “I woke up like this” cut that actually works.
The Rounded Curly Bob
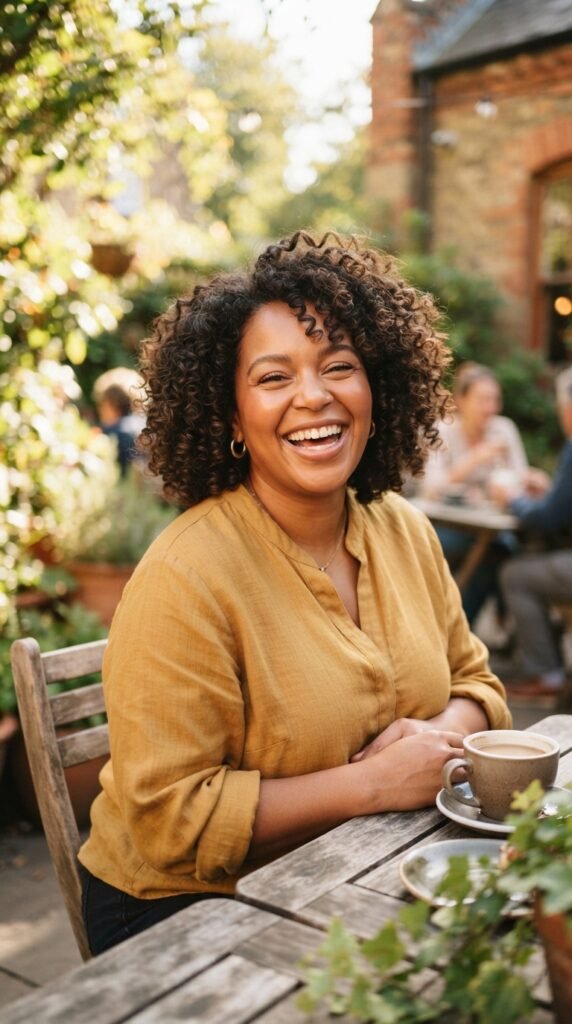
If you have natural texture, a rounded curly bob is the ultimate volume hack. Cutting to one rounded shape lets the curls stack and build on each other instead of falling flat.
Find a stylist who cuts curly hair dry. It makes a huge difference on fine curls.
- Keep the shape rounded, not layered thin
- Diffuse upside down for root lift
- Use a lightweight gel, not a heavy cream
This one gives you body and bounce for days.
Curtain Bangs on Thin Hair

Curtain bangs are the safest bangs for fine hair. Because they’re parted in the middle and swept to the sides, they add face-framing volume without covering your whole forehead.
Ask for them to start at cheekbone length and taper into your layers, so they blend instead of sitting like a block.
- Keep the shortest point at cheek level
- Style with a round brush or velcro roller
- Trim every six weeks, no exceptions
They soften a round face beautifully and photograph well from every angle.
Long Layers with Invisible Ends
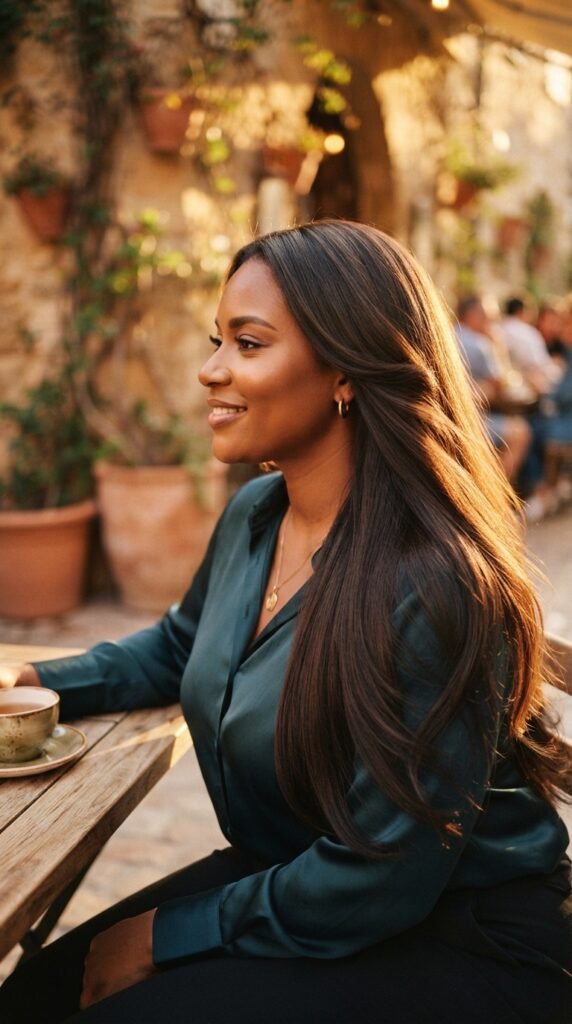
If you love long hair, this is how to keep it without looking flat. Invisible layers are blended so finely that you can’t see where they start, but they still remove weight so the hair moves.
Tell your stylist you want movement without visible steps. Bring a photo. It’s a specific ask.
- Keep the longest layer past your collarbone
- Add a few short pieces in front only
- Use a light oil on the ends daily
Full-looking length without the heaviness.
Face-Framing Layers That Slim and Lift

Face-framing layers are the most underrated tool for plus size women. They draw the eye inward and downward, which makes the face look longer and the hair look fuller at the same time.
Start them at the cheekbone, not the chin. Starting too low puts all the volume at your jaw, which is the opposite of what you want.
- Ask for layers that graduate downward
- Blend them into the rest of the hair
- Style with a round brush directed forward
Instant lift, instant polish.
The Textured Top Knot

A top knot on fine hair works best when it’s textured, not slicked. The messier texture creates the illusion of volume, and the height draws the eye upward, which lengthens your whole silhouette.
Add a little powder at the root, tease gently, then pin loosely.
- Place the knot high on the crown
- Pull two soft pieces out at the front
- Leave the back slightly loose at the nape
Five minutes, done, and it looks intentional.
Half-Up, Half-Down with Height
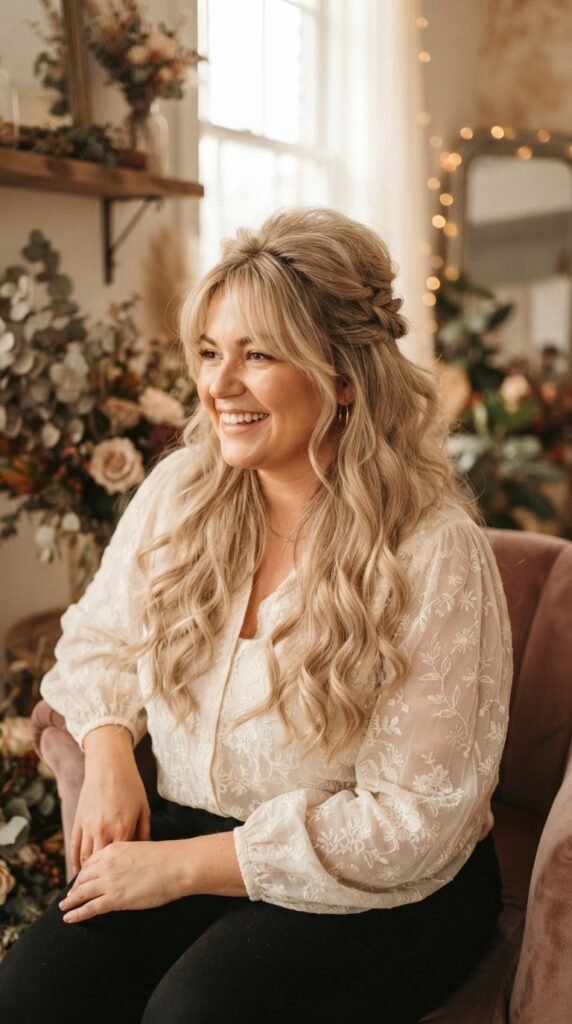
This is my go-to when I want to look put together with zero effort. The top section gets teased and pinned, which adds height, while the rest stays down for softness.
On fine hair, tease the crown section before you pin it. Skip this and it will fall flat by lunch.
- Tease the crown with a fine tooth comb
- Pin with bobby pins crossed in an X
- Curl the loose ends away from the face
Great for weddings, dinners, and photos.
The Sleek Low Chignon
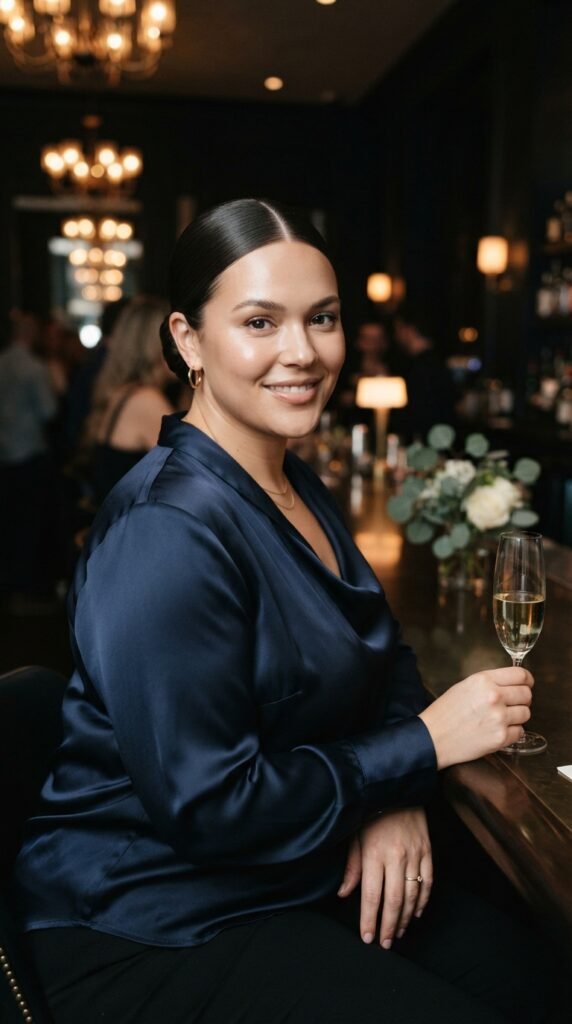
Sometimes the smartest move with fine hair is to stop fighting and go sleek. A low chignon looks expensive, hides thin ends, and takes about four minutes once you get the hang of it.
Use a gel or strong hold cream on the front and a light touch on the back.
- Part in the middle or slightly off center
- Twist into a low loop and pin
- Smooth flyaways with a tiny bit of hairspray on a brush
Classic, clean, and perfect with a statement earring.
The Messy Bun with Tendrils
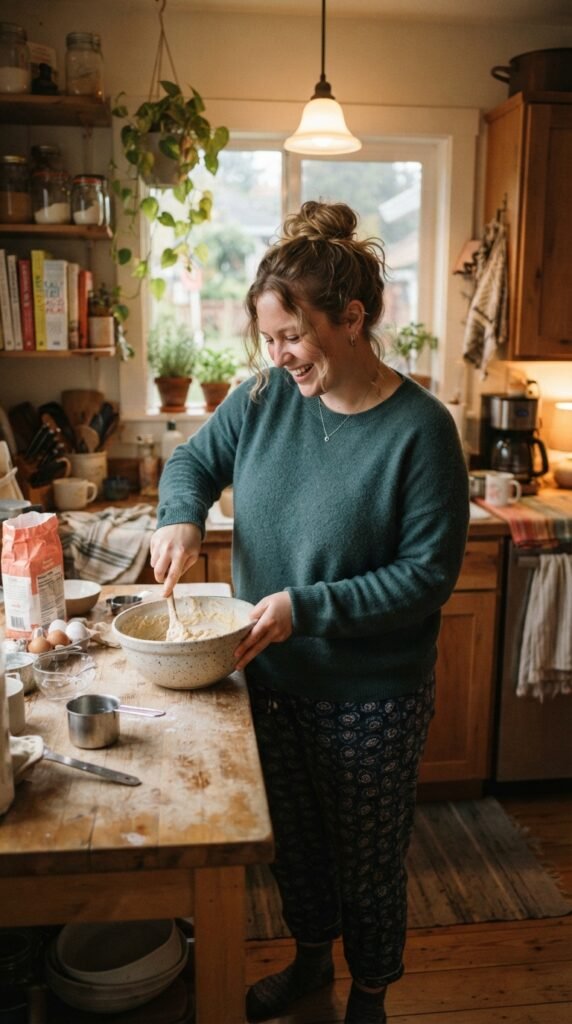
The messy bun is a classic for a reason. On fine hair, the trick is adding texture first and pulling out two or three tendrils at the front to soften your face.
Those face pieces do a lot of work. They frame your cheeks and make the style look styled rather than thrown together.
- Add dry shampoo before you bun
- Pull out pieces at the temple and cheek
- Curl the tendrils slightly with a small iron
Easy, forgiving, and it looks great in a mirror selfie.
The Claw Clip Updo
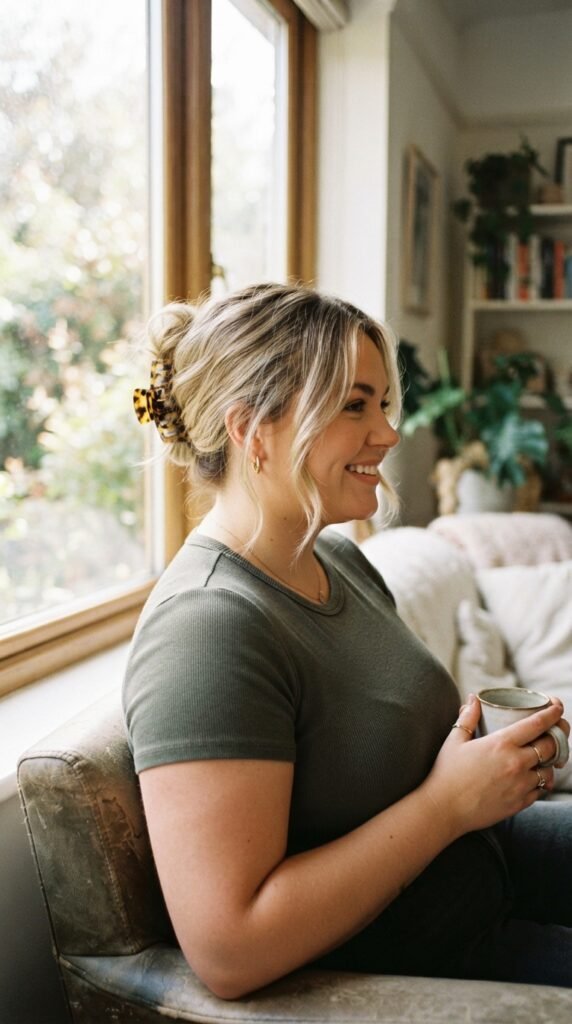
The claw clip is quietly one of the best tools for thin hair. It holds an updo without crushing volume, and the right clip adds a little visual weight that makes hair look fuller.
Choose a clip that’s matte or tortoiseshell rather than shiny plastic. It reads more intentional.
- Gather hair at the mid-crown
- Twist upward and clip
- Loosen the front for height
Thirty seconds, and it looks styled.
The Wrapped Ponytail
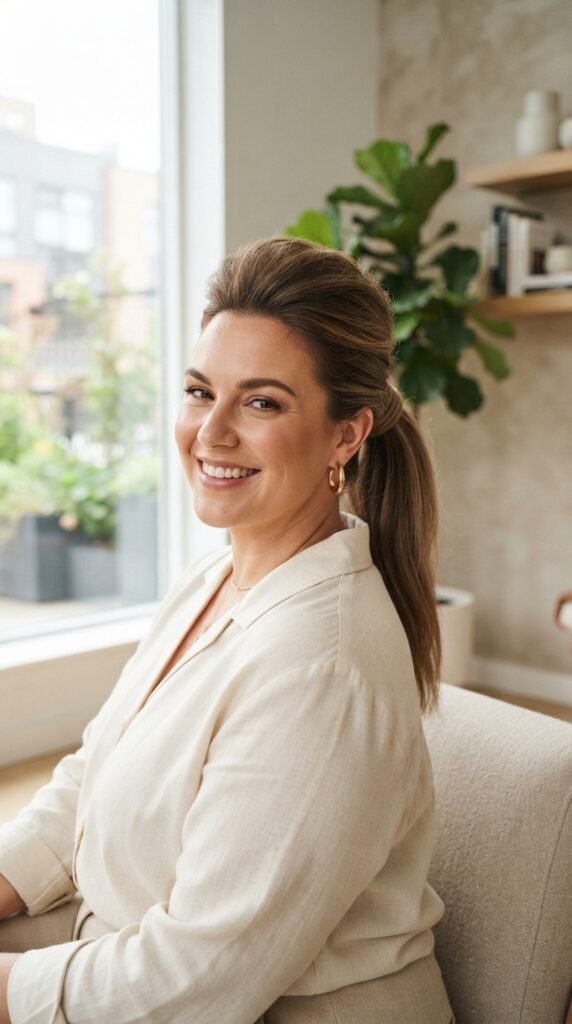
Wrapping a small section of hair around the ponytail base instantly hides thin ends and makes the whole style look more finished. It’s a small detail with a big payoff.
Tease the crown before you pull back so the top doesn’t look slicked down, which can make fine hair look thinner.
- Tease crown, then smooth back
- Secure with a clear elastic
- Wrap and pin a small section over the base
Clean, modern, and camera-ready.
Three Braids That Love Fine Hair
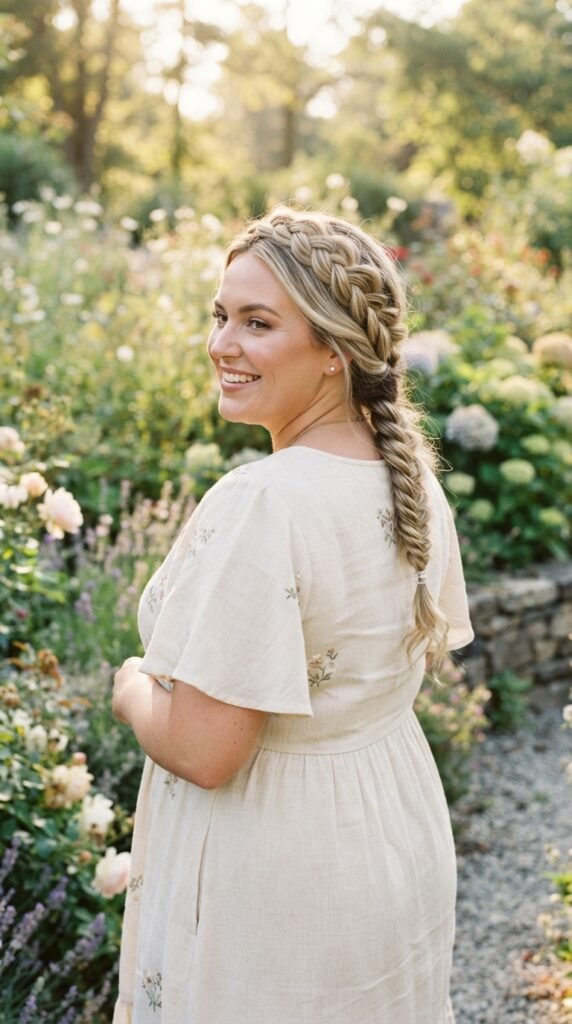
Braids add texture, and texture is volume for fine hair. Here are three that work beautifully without making hair look thin.
- Crown braid: wraps around the head and gives the illusion of a thicker crown
- Side fishtail: pull the pieces wide apart after braiding to fatten it up
- Dutch pigtails: the raised braid sits on top of the hair, so it reads full
Add dry shampoo before you braid, and always tug the braid wider once you finish. It’s the difference between thin and full.
The Headband Halo
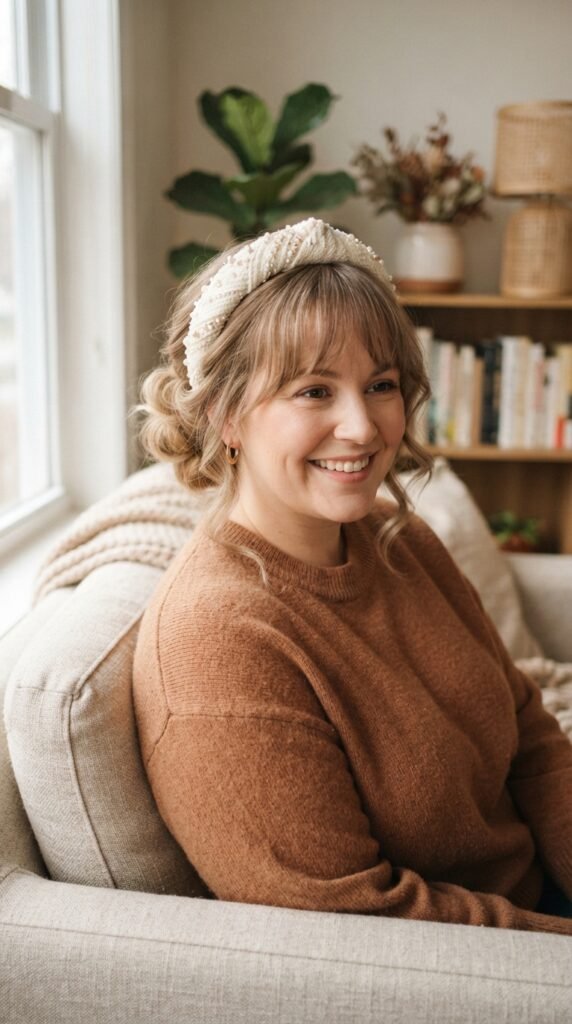
A padded headband is the fastest volume trick that exists. It pushes hair up at the root, adds height instantly, and hides any flatness at the crown.
Choose a wide, slightly padded band rather than a thin metal one. Thin bands flatten fine hair instead of lifting it.
- Place the band about an inch behind the hairline
- Push hair forward slightly for lift
- Pull two soft pieces out in front
Ten seconds and your hair looks twice as full.
Beach Waves with Texture Spray

Waves create width, and width is what makes fine hair look fuller. A loose, brushed-out beach wave gives you movement without any crunch.
Spray a texturizing mist through damp hair, scrunch, and let it air-dry. Then run your fingers through, never a brush.
- Spray mid-lengths, skip the roots
- Twist small sections around your finger
- Finish with a light flexible hold spray
Effortless texture that lasts all day.
The Side Part with Root Lift
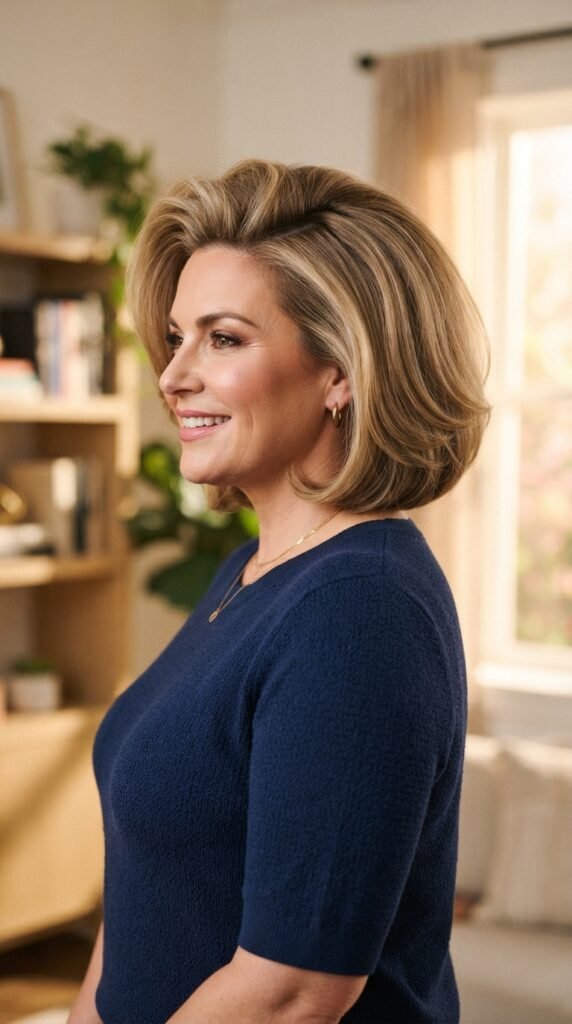
Never underestimate the side part. Switching your part from middle to side changes how hair falls, and it can add instant height on one side.
Blast the roots at the part line with warm air in the opposite direction, then flip back. Hold with cool air.
- Part on the side where hair falls naturally
- Lift roots on the heavy side
- Set with a light holding spray
Same hair, twice the volume, zero extra minutes.
The Tucked-Ear Middle Part
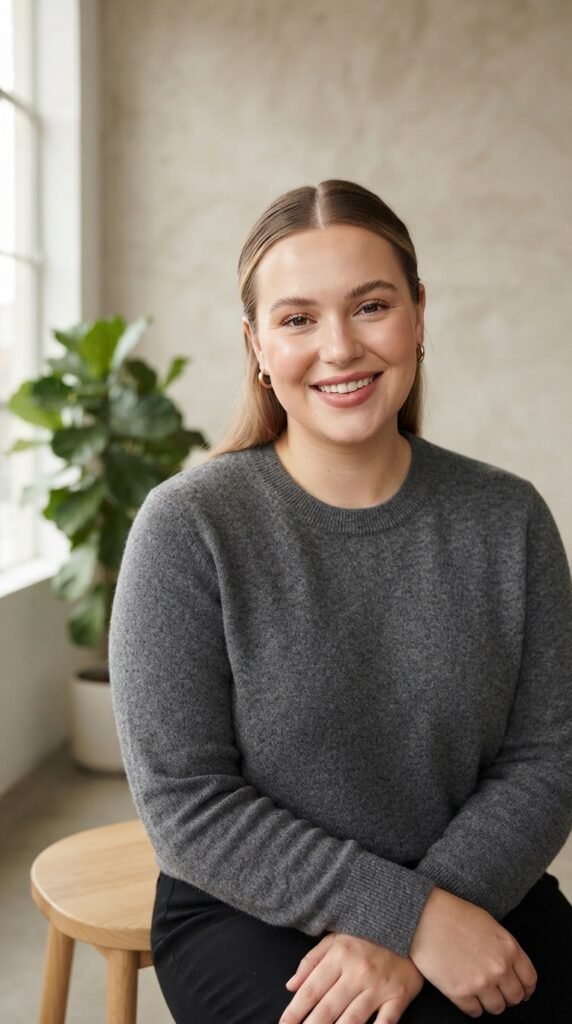
This is the quietest hairstyle on the list and one of my favorites. A middle part with both sides tucked behind the ears gives you a clean, open face and looks incredibly modern.
The key is volume at the crown. Tuck the ears, but keep the top lifted so it doesn’t look flat.
- Use a little powder at the root
- Tuck just behind the ear, not flat to the head
- Let a tiny piece fall forward for softness
Simple, and it suits almost every face shape.
The Wet-Look Slick Back
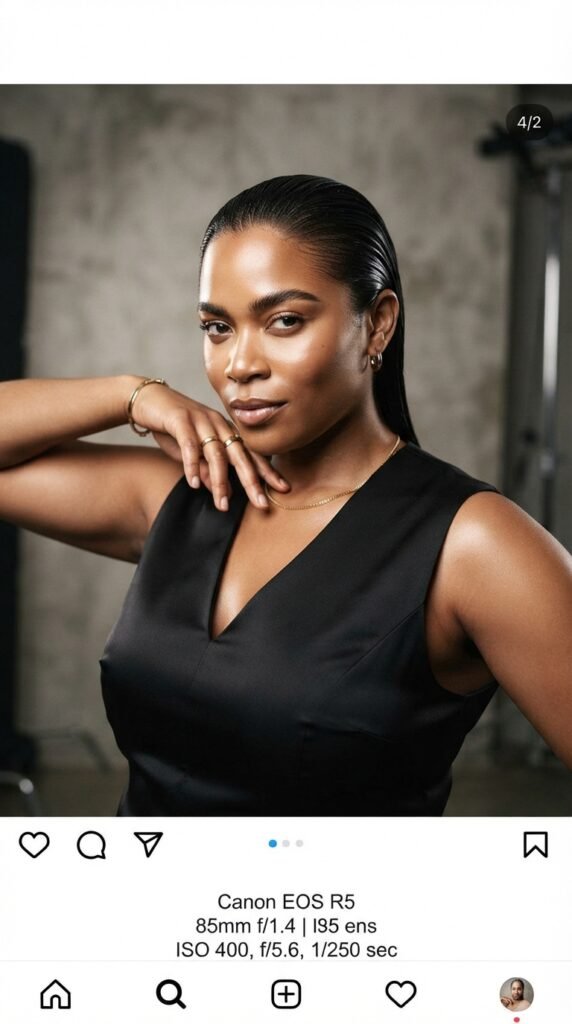
The slick back is the boldest way to own fine hair. Instead of hiding thin strands, it celebrates them with shine and a sharp, sculpted shape.
Use a flexible gel, comb everything back, and finish with a shine serum for that wet, polished look.
- Comb from the hairline straight back
- Smooth edges with a toothbrush and gel
- Pin the ends into a low twist
It’s editorial, confident, and looks incredible with bold earrings.
Products That Fake Volume Without the Crunch
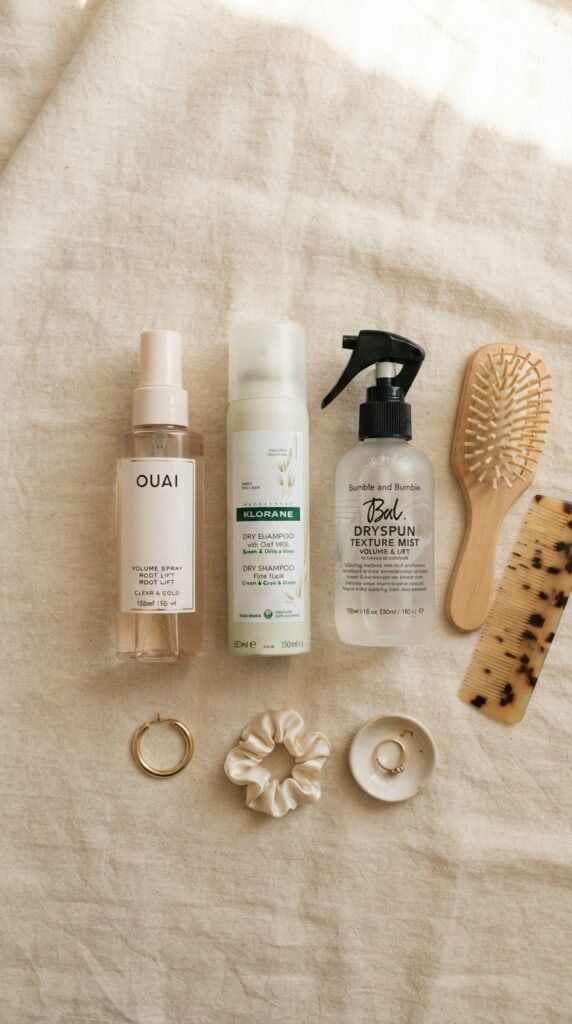
You don’t need a cabinet full of products. You need four, and you need to use them in the right order.
- Root lift spray: on damp roots before blow-drying
- Dry shampoo: on clean hair, not just dirty hair
- Texture spray: mid-lengths only, never the root
- Light hair oil: ends only, half a pump
Anything labeled “heavy,” “repair,” or “nourishing” will weigh fine hair down. Save those for the ends if you use them at all.
How to Talk to Your Stylist
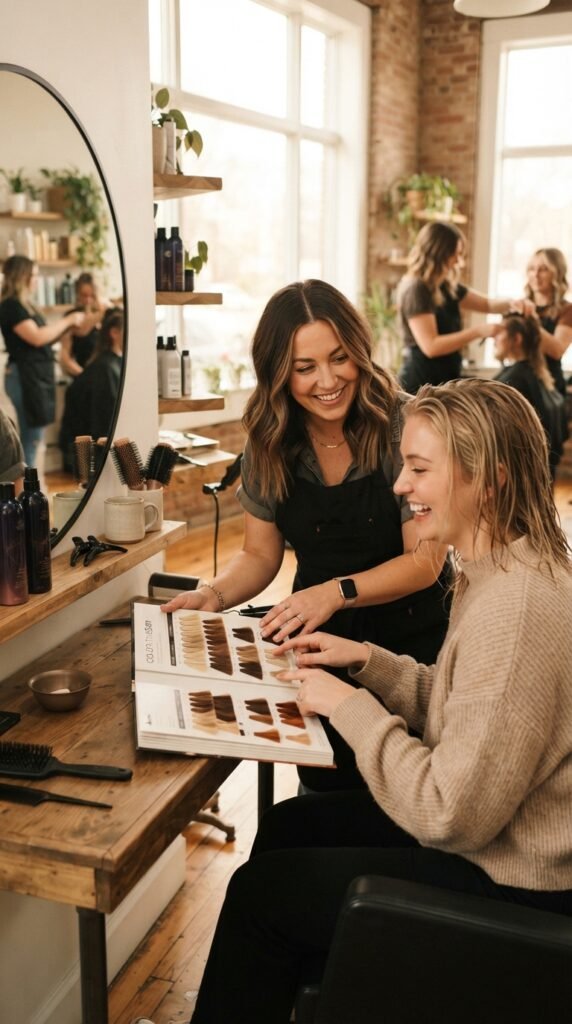
The consult matters more than the cut. Walk in with three specific asks and you’ll leave with hair you actually love.
- Say “no thinning shears” out loud
- Ask for blunt ends and invisible layers
- Show one photo of what you do want and one of what you don’t
Also mention your styling time. If you have five minutes in the morning, your stylist should know that before they pick up the scissors.
Your Five-Minute Morning Routine
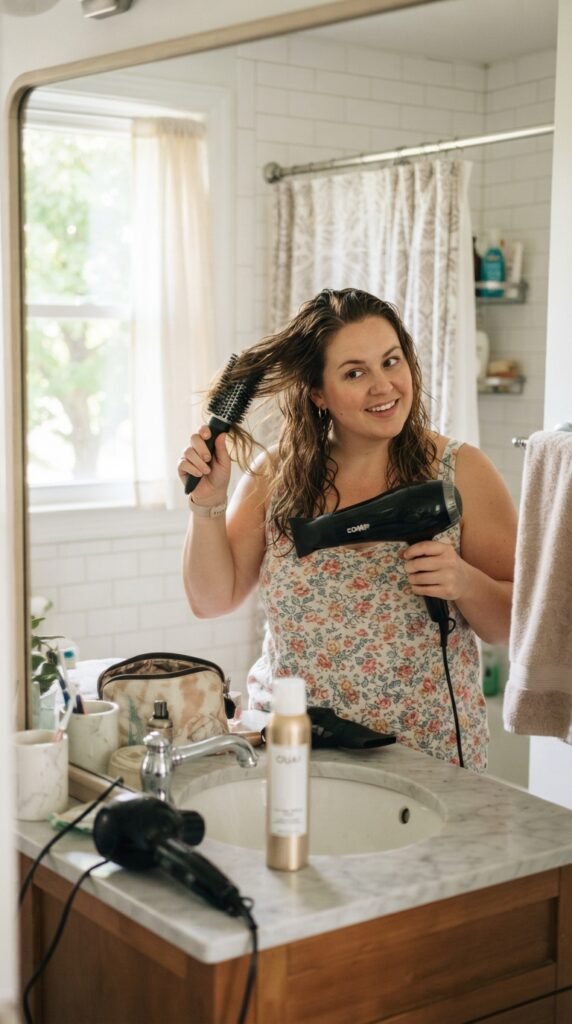
Fine hair doesn’t need a long routine. It needs a fast one, done consistently.
- Spray roots with a light volume mist
- Blast upside down for sixty seconds
- Flip back and set with cool air
- Add texturizer to the mid-lengths
- Pull one face piece forward and go
That’s it. No round brush marathon, no eleven-step routine. Fine hair responds fast when you work with it instead of against it.
Before You Go, Friend
Here’s what I want you to take from all thirty of these: your hair was never the problem. Fine, thin hair is just specific, and once you know its rules, it becomes the easiest hair you’ll ever style.
Pick one look from this list and try it this week. Start with the asymmetrical lob or the quiet luxury bob if you’re ready for a cut, or the headband halo if you want a win today. Either way, you’ll see the difference immediately.
And remember: every angle is a good angle when the shape is right.
Save this post to Pinterest so you have it ready at your next salon appointment, and drop a comment telling me which of these 30 hairstyles you’re trying first. I read every single one, and I love knowing what’s working for you.