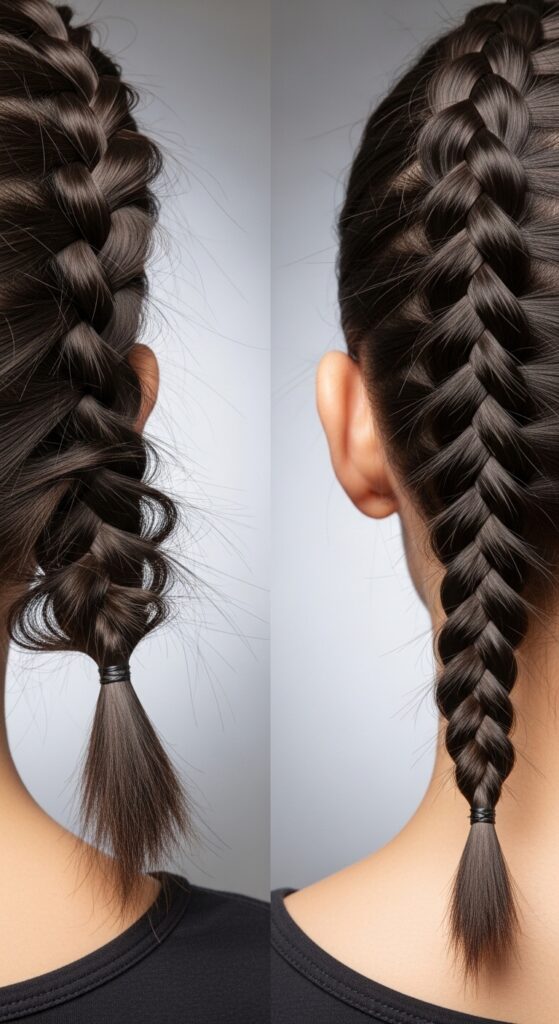
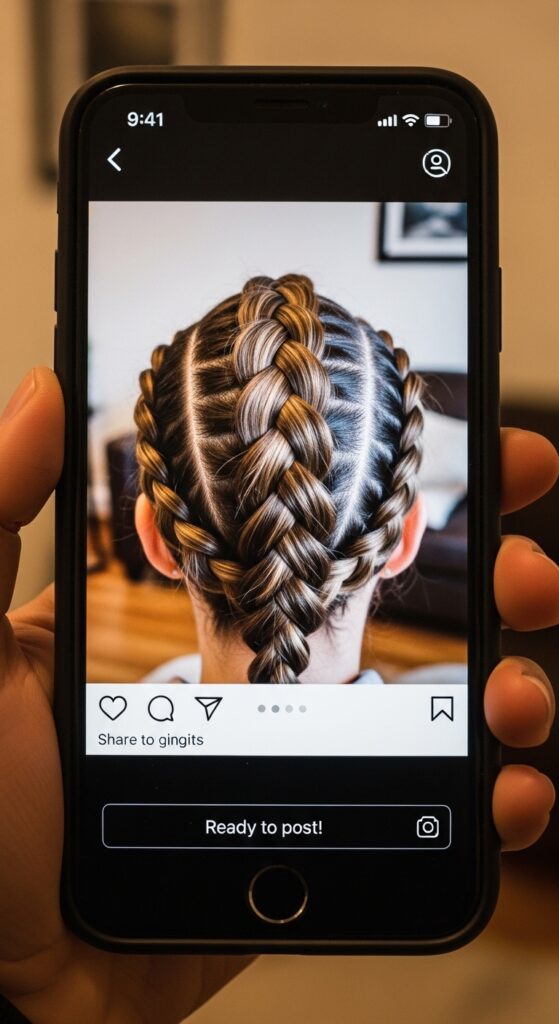
4-Strand Braid Tutorial: More Impressive Than It Looks
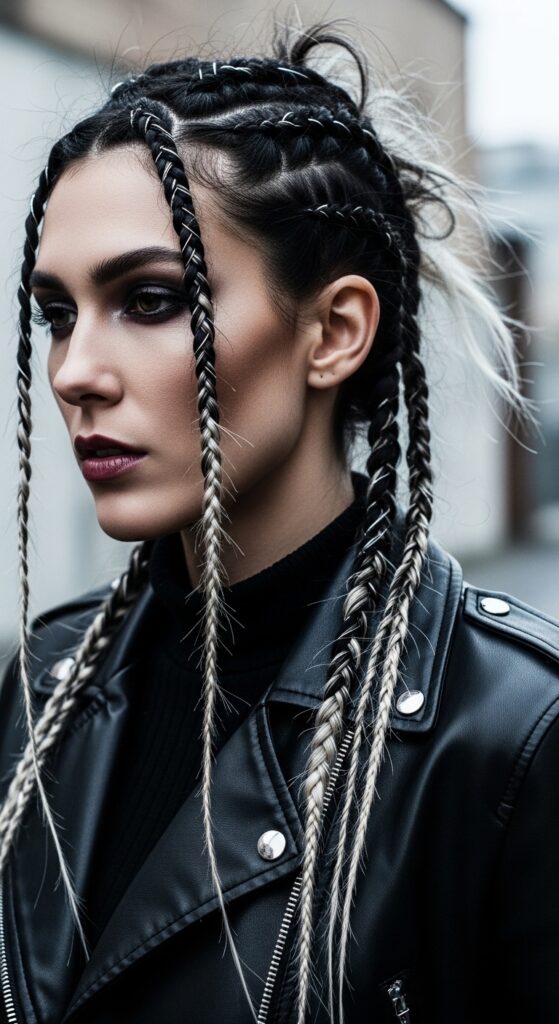
Okay, let’s be real. We’ve all scrolled through endless feeds of 2026 hairstyles and romantic goth hairstyles that look amazing but seem impossible to do yourself. I get it. Sometimes you just want a hairstyle that looks like you put in serious effort, without the actual hours of struggle.
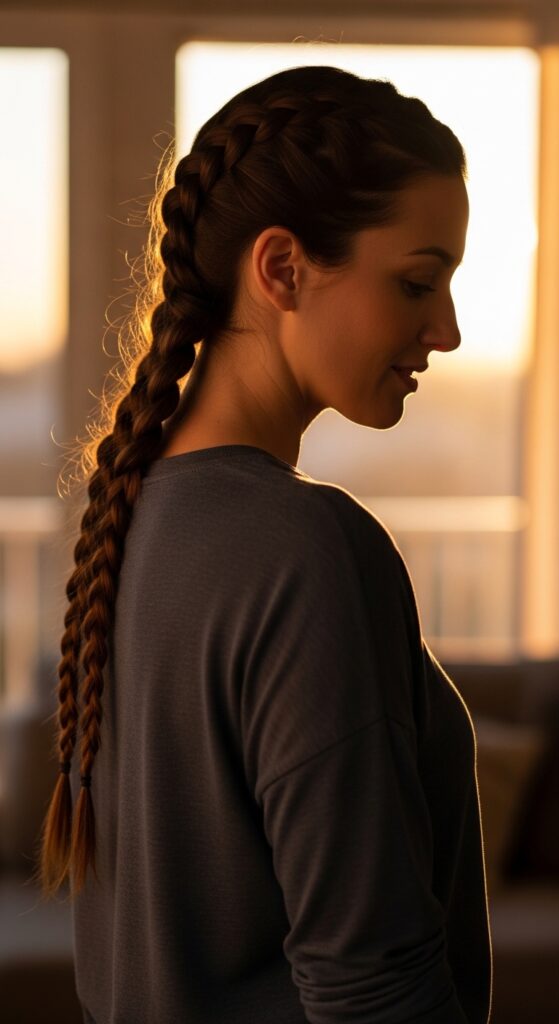
That’s where the 4-strand braid comes in. It sounds fancy and looks incredibly intricate—like something straight out of an old money hair tutorial. But I promise you, it’s one of those secrets that’s more impressive than it looks.
Once you get the simple pattern down, it’s just as easy as a regular braid. This guide will walk you through it, step-by-step, with no confusing jargon. Let’s turn that hair envy into a reality you can actually do.
Why a 4-Strand Braid is Your New Secret Weapon
Think of this as your upgrade from the basic three-strand. It instantly adds a touch of intricate, crafted beauty to your look. It’s perfect for when a regular braid feels too casual, but a full updo is too much.
This style works for so many aesthetics. It can be polished and elegant for a quiet luxury vibe, or woven with leather cords for a touch of glitchy glam hair edge. The versatility is its superpower.
What You’ll Need to Get Started

You don’t need special tools. This is all about technique. Gather what you already have.
- A brush or comb to detangle.
- A spray bottle with water or light hold spray. Slightly damp hair is easier to control.
- A few hair elastics that match your hair color.
- A small clip to section hair (optional, but helpful).
- A bit of patience for your first try!
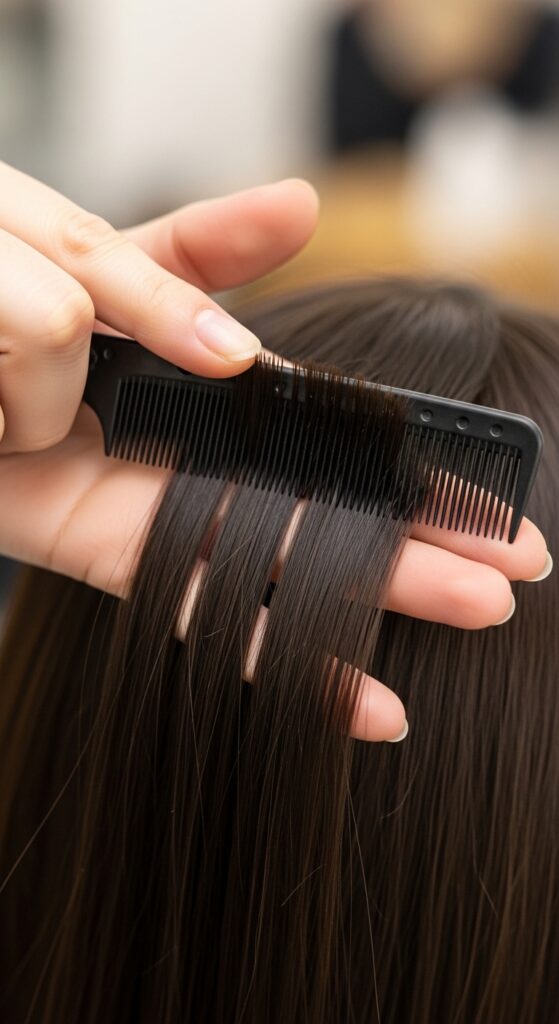
Step 1: Prep Your Hair Perfectly
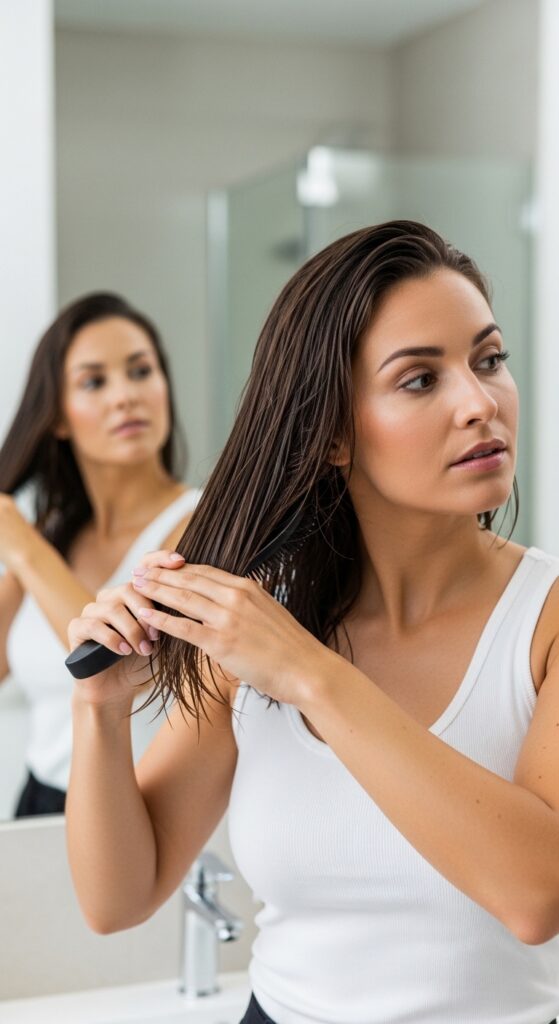
Great hair starts with great prep. Begin with dry or slightly damp hair. I like to mist mine with a texturizing spray for a bit of grip.
Brush through thoroughly to remove all knots. If your hair is very silky, a light texturizing spray or dry shampoo will give the strands something to hold onto. Smooth, detangled hair is non-negotiable for clean braiding.
Step 2: Section Your Hair Into Four
This is the most important step for success. Gather all the hair you want to braid into a ponytail at the back of your head. Secure it loosely with an elastic for now.
Divide that ponytail into four equal sections. Make sure they are as even as possible. Visualize them as strands 1, 2, 3, and 4, from left to right. Clarity here makes the next steps flow.
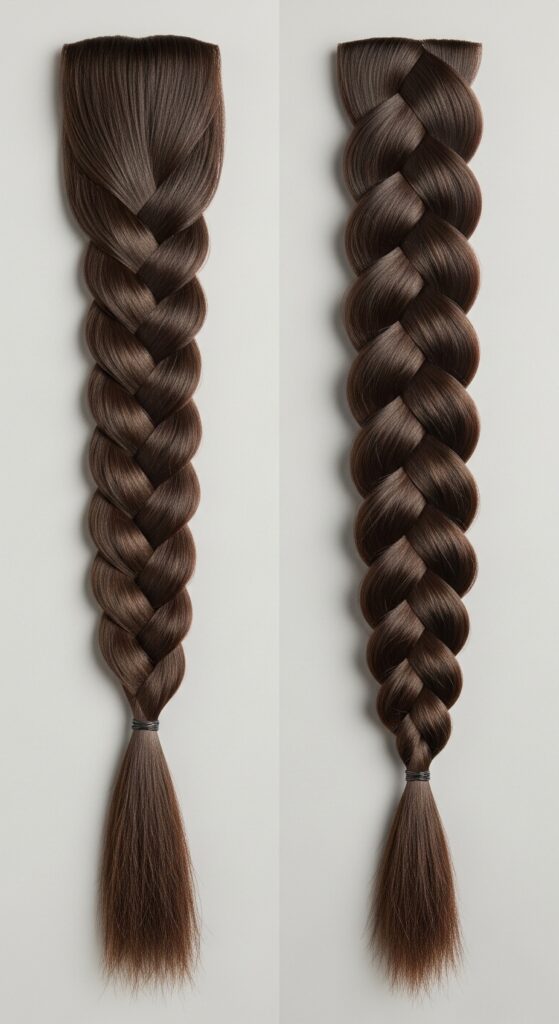
Step 3: The Core Movement Pattern
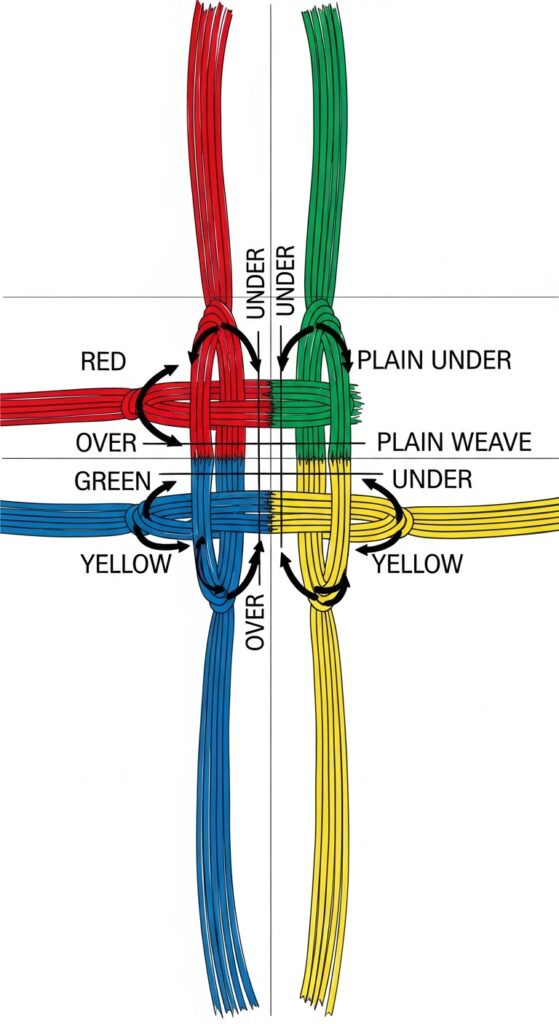
Here’s the simple pattern you’ll repeat. Don’t overthink it. Hold the four sections in your left hand. With your right hand, you’ll always work with the outer strands.
Take the far right strand (4) and cross it over the strand next to it (3), so they swap places. Then, take the far left strand (1) and cross it under the strand next to it (2), so they swap. That’s the core move: right over, left under.
Step 4: Repeat and Find Your Rhythm
After your first “right over, left under,” you’ll have a new arrangement of four strands. Pause and identify them again from left to right.
Now, just repeat the exact same thing. Always take the new far-right strand and cross it over its neighbor. Then, take the new far-left strand and cross it under its neighbor. Keep your tension firm and even.
Step 5: How to Keep Consistent Tension
Tension is what makes your braid look neat, not lumpy. As you cross each strand, pull it snugly against the others. Not so tight that it strains, but firm enough to hold the weave together.
Think of it like knitting or weaving. Consistent, even pressure is key. If a section feels loose, gently tighten it from the sides before you continue braiding down.
Step 6: Troubleshooting Loose or Uneven Sections
It’s okay if it gets messy! If one section feels too thick or the braid looks uneven, don’t panic. Simply loosen your grip slightly on all four strands.
Use your fingers to gently adjust and smooth the problem area from above, then re-tighten evenly. Sometimes you need to backtrack one or two moves to fix it. It’s part of the process.
Step 7: Securing Your Finished Braid
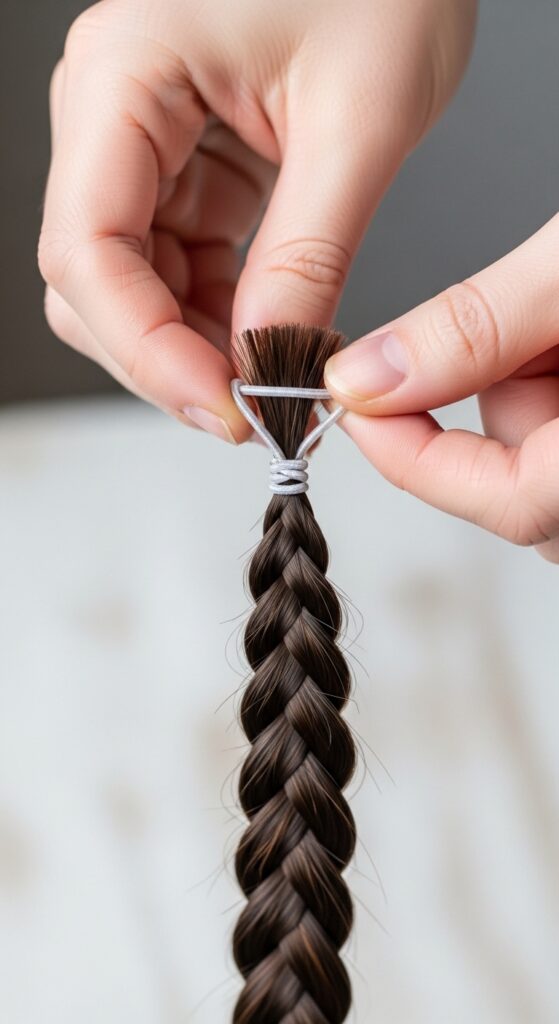
When you’ve braided as far down as you can, gather all four sections together. Wrap a small elastic tightly around the end to secure it.
For a seamless look, you can take a tiny piece of hair from the tail and wrap it around the elastic, securing it with a bobby pin underneath. This hides the elastic for a polished finish.
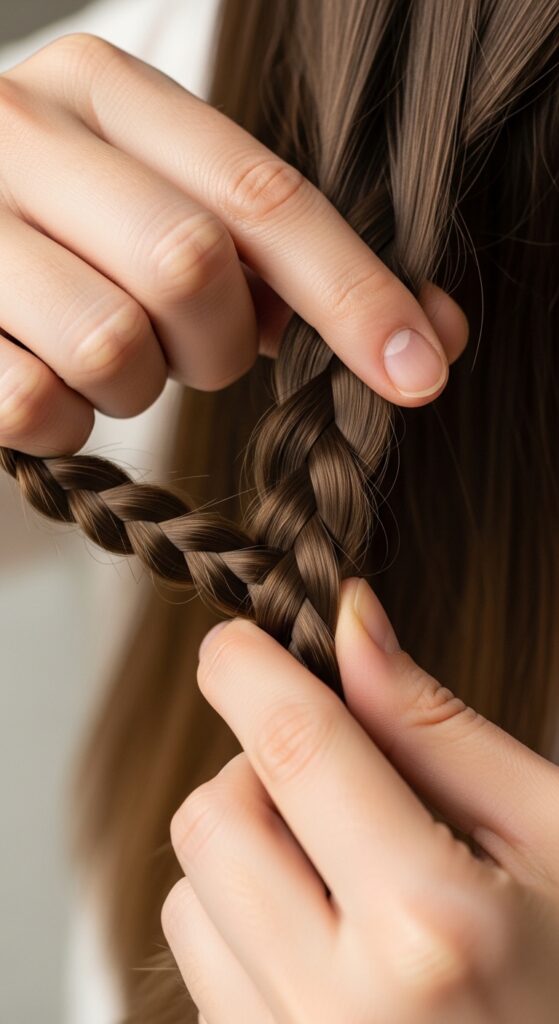
Step 8: Making It Look Fuller & Thicker
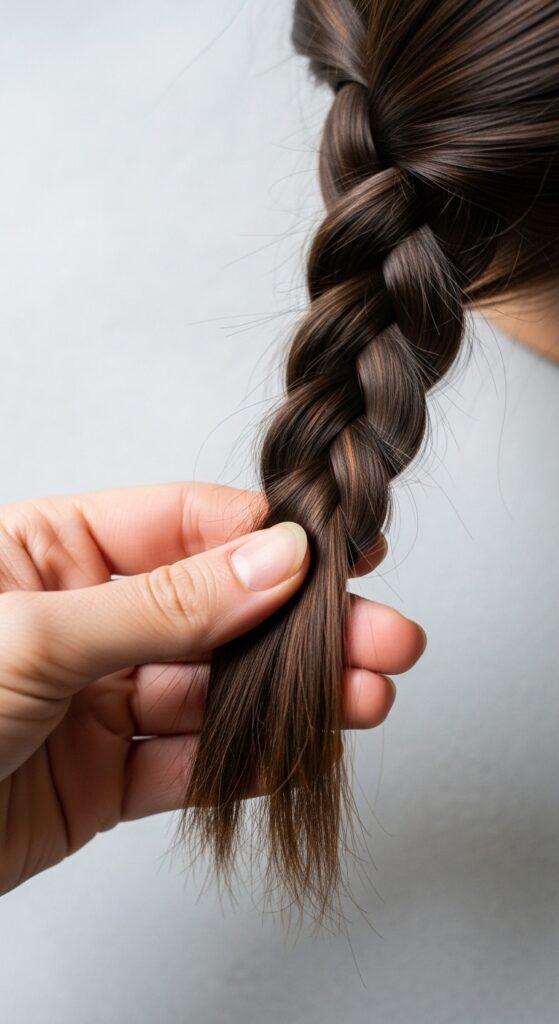
This is the magic step! Once your braid is secured, gently tug on the outer “loops” of the braid horizontally. Pull them outwards to flatten and widen the braid.
This “pancaking” technique adds volume and makes the braid look even more intricate and substantial. It’s the perfect trick for fine hair.
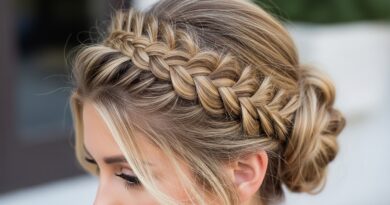
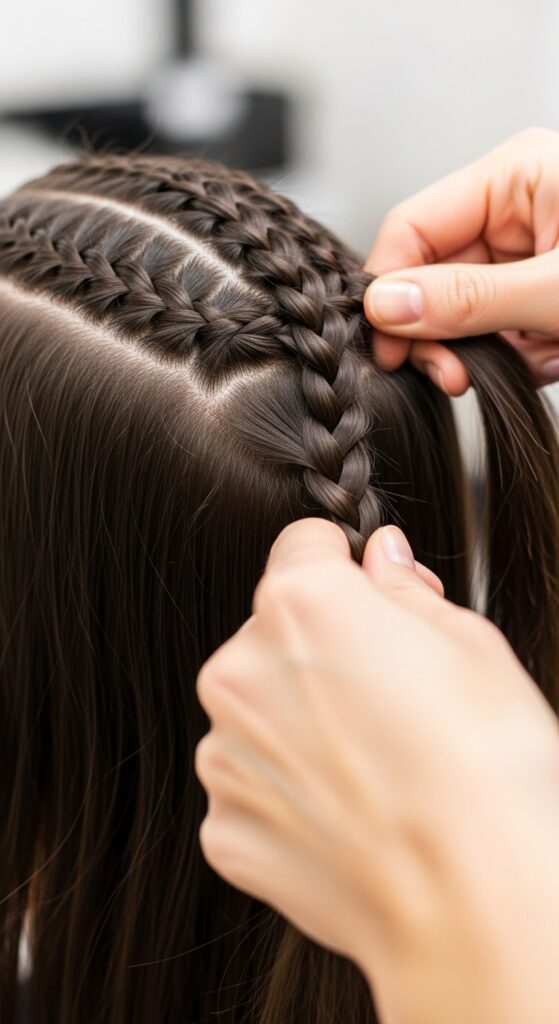
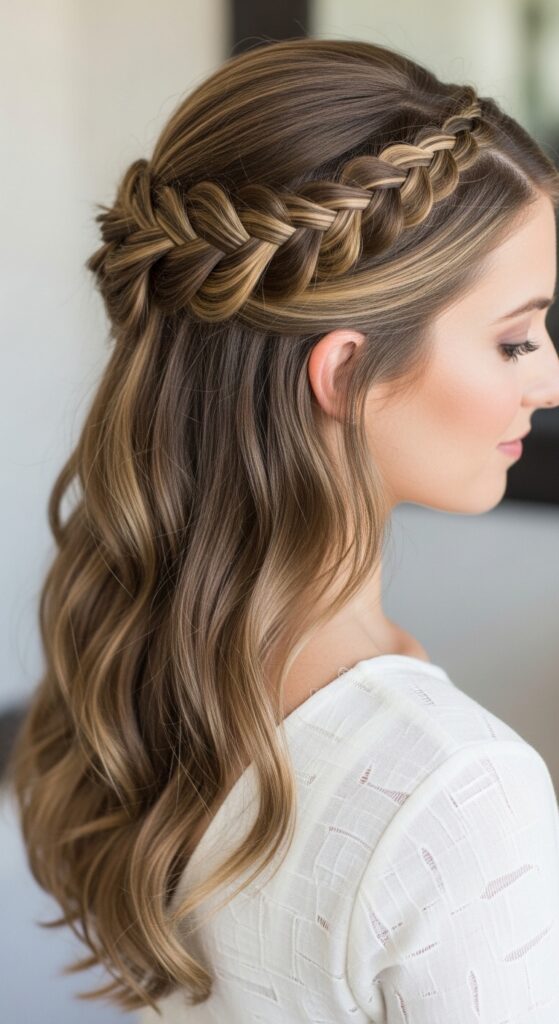
Styling Idea: The 4-Strand Braid Crown
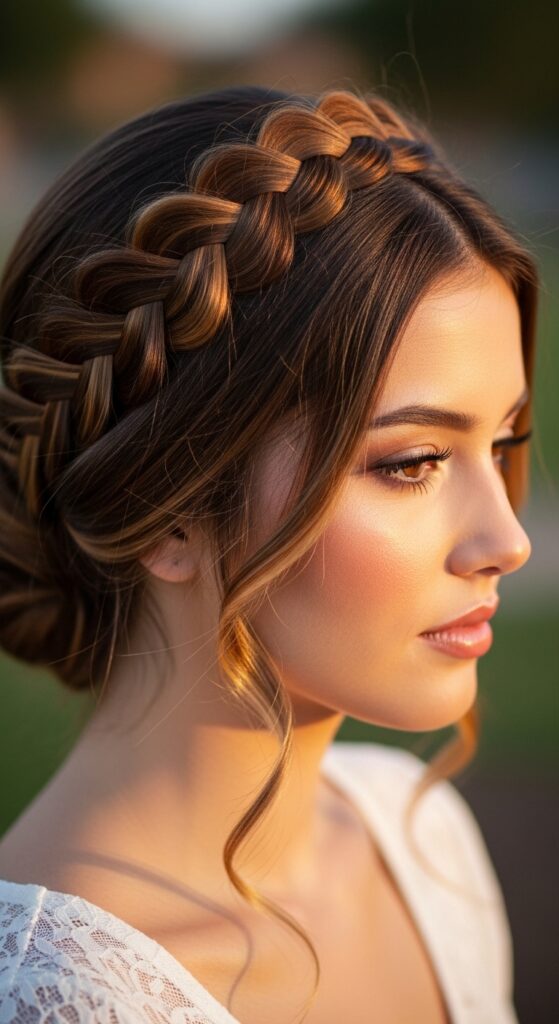
Take your new skill to the next level. Create a deep side part and braid a 4-strand along your hairline, starting above one ear.
Braid it back and continue wrapping it around your head like a crown, pinning it in place with bobby pins as you go. This is a stunning alternative to a headband and feels very old money hair elegant.
Styling Idea: Half-Up Romantic Style
This is perfect for adding detail to a simple look. Take a section of hair from your temples and crown for a half-up style.
Braid this section into a 4-strand braid and secure it at the back of your head. Let the rest of your hair flow down. It’s a gorgeous blend of intricate and effortless, ideal for romantic goth hairstyles or a soft everyday look.
Pairing It with 2026 Hair Trends
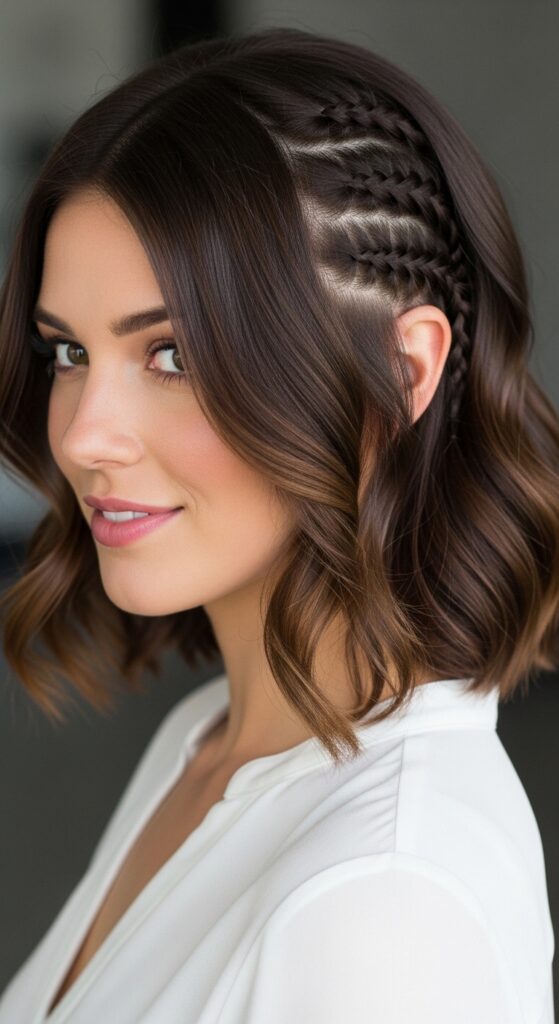
This braid isn’t just for long hair. It’s amazing for accenting modern cuts. Try a tiny, tight 4-strand along the shaved side of a vampire haircut.
Or, weave a single braid into the front of a sharp hime cut. It also looks stunning as a detail against the clean lines of an asymmetrical lob, proving classic techniques always have a place in new trends.
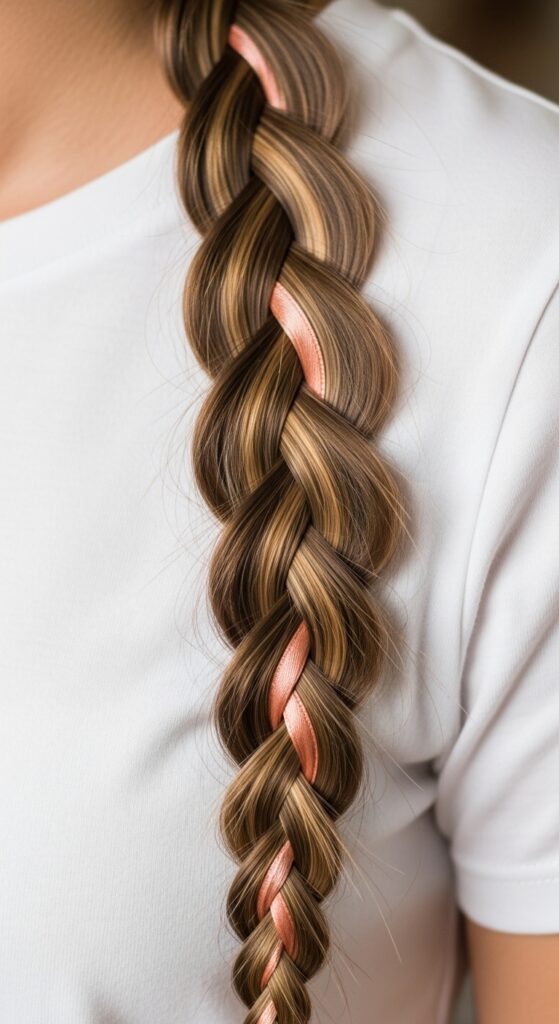
Adding Ribbons or Accessories
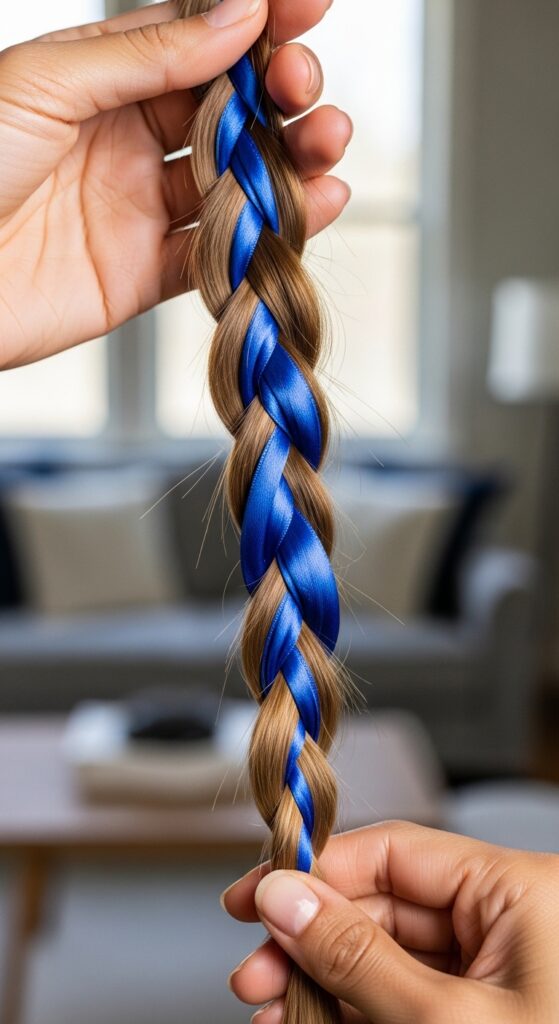
For a special touch, incorporate a ribbon. Treat a thin ribbon as one of your four strands. Simply braid it in as you go.
This adds a beautiful pop of color and texture. It’s a very quiet luxury and custom-looking detail. You can use leather strips for a darker, glitchy glam hair aesthetic instead.
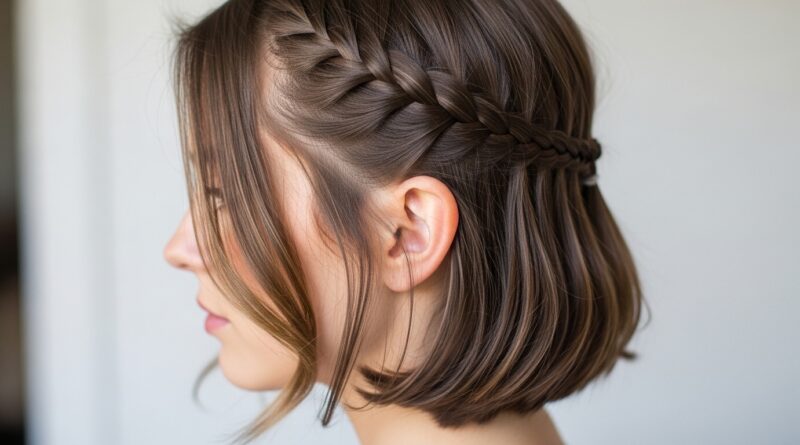
Adapting It for Shorter Hair
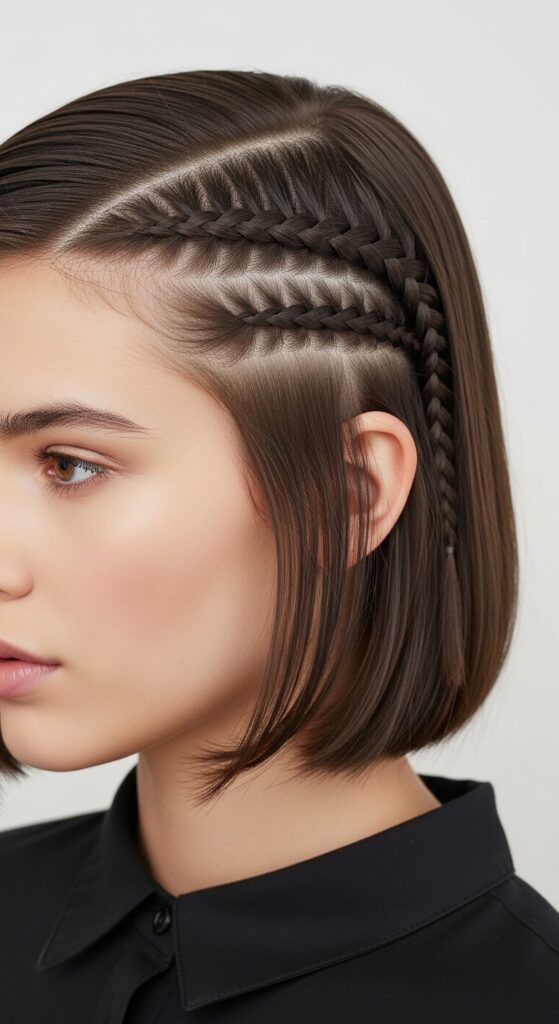
Don’t have waist-length locks? No problem. This braid works on shorter hair as an accent. On a quiet luxury bob, create a small section near your part.
Braid it back just above your ear and secure it. It’s a subtle, artful detail that shows off your skill. The key is to work with smaller, neater sections and keep the braid tight.
Creating a Glitchy Glam Vibe
For a glitchy glam hair twist, embrace imperfection. Braid two 4-strands on either side of your head, but keep them a little loose and textured.
Before securing, gently pull them apart to create a distressed, woven effect. Add in some holographic threads or tiny silver chains as you braid for that digital-age feel.
Mastering the Rope Braid Alternative
Once you’ve mastered the flat braid, try this variation. Instead of over-and-under, twist the outer strands around each other.
Take the far right strand and wrap it under and over the two middle strands to the far left side. It creates a beautiful, rounded, rope-like effect that’s perfect for a more structured look.
Common Mistakes and How to Avoid Them
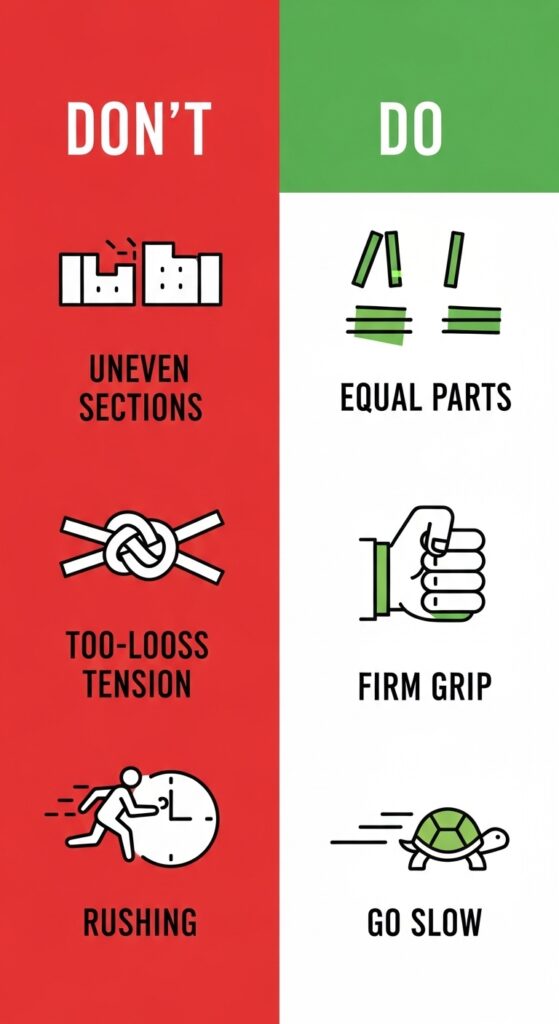
The biggest mistake is uneven sections. Take time at the start. Another is letting the strands slip, causing a loose braid. Maintain that steady tension.
Finally, don’t rush. Speed comes with practice. Go slowly, say the moves out loud (“right over, left under”) if you need to. Muscle memory will kick in.
Practice Drills Before You Start
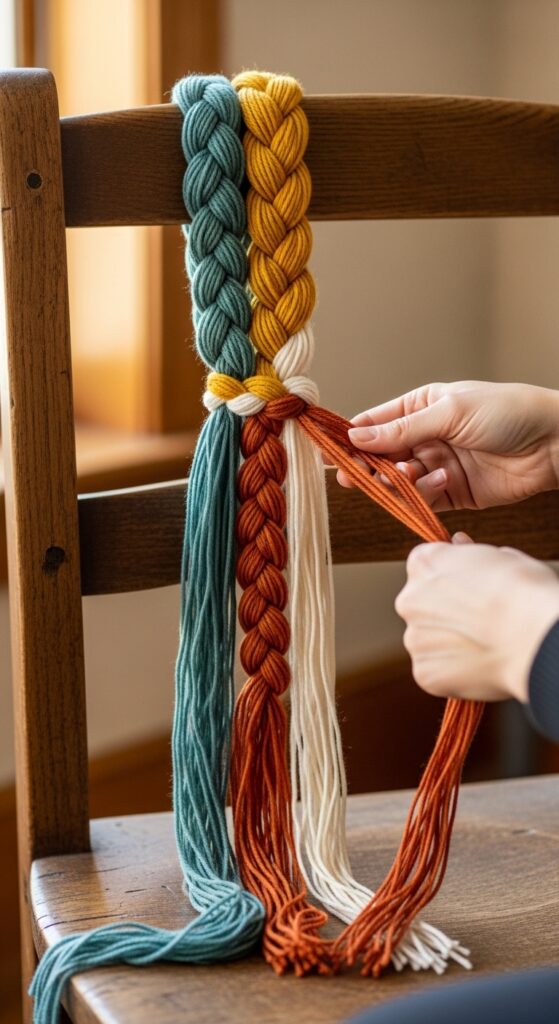
If you’re a visual learner, practice on something else first. Tie four pieces of thick yarn or ribbon to a chair.
Practice the pattern with those. The larger scale helps your brain understand the movement without the challenge of managing your own hair. It’s a game-changer for beginners.
Products That Actually Help

While you don’t need much, the right products help. A texturizing spray adds grip. A light-hold styling cream smooths flyaways.
A tiny drop of serum on your palms, smoothed over the finished braid, adds shine and tames any last wisps. Less is more—you don’t want sticky or crunchy hair.
How to Make It Last All Day
To ensure longevity, start with second-day hair or use dry shampoo for extra hold. After braiding and pancaking, mist lightly with a flexible-hold hairspray.
Carry a few extra elastics and bobby pins in your bag. If one section slips out, you can often tuck it back in and pin it discreetly without redoing the whole braid.
Sharing Your Success Online
You did it! Now show it off. The back of your head is the trickiest to photograph. Use a hand mirror in front of a big mirror, or ask a friend to help.
Good natural light is your best friend. Use the hashtags for the trends you’re channeling, like #2026hairstyles or #quietluxuryhair. You’ll inspire others!
Your Next Braiding Challenge
Mastered the four-strand? Amazing. Your next challenge is the five-strand braid. It follows a similar logical pattern, just with one more strand to manage.
It looks unbelievably complex, but you’ve already learned the core skills. Building on techniques is how you build a whole repertoire of impressive, salon-worthy styles at home.
See? I told you it was more impressive than it looks. The best part about learning a technique like this is that it’s yours forever. You can adapt it, play with it, and make it fit any mood or trend that comes your way.
It’s that one little skill that makes people say, “Wow, how did you do that?” And you can just smile and say it’s easy—because now, for you, it really is.
Save this post to Pinterest so you can always find the steps when you need them! And tell me in the comments—what’s the next hairstyle you’re dying to learn? I’m always looking for new tutorials to break down for us.