20 Hairstyles for Holiday Photos That Look Flattering From Every Camera Angle
Every December I make the same mistake. I spend forty minutes on my hair, take one photo, and immediately want to delete it. The angle is off. The flash hits the wrong spot. My part looks weird from above.
Here’s the truth: a great holiday photo hairstyle isn’t about being fancy. It’s about structure. Hair with volume where you need it, a clean part, and enough grip to survive hugs, wind, and your aunt’s overhead camera.
So I rounded up 20 hairstyles that look flattering from basically every angle. You’ll find 2026 hairstyles like the quiet luxury bob, old money hair, the vampire haircut, romantic goth hairstyles, and glitchy glam hair.
Let’s get your hair camera-ready.
1. The Quiet Luxury Bob
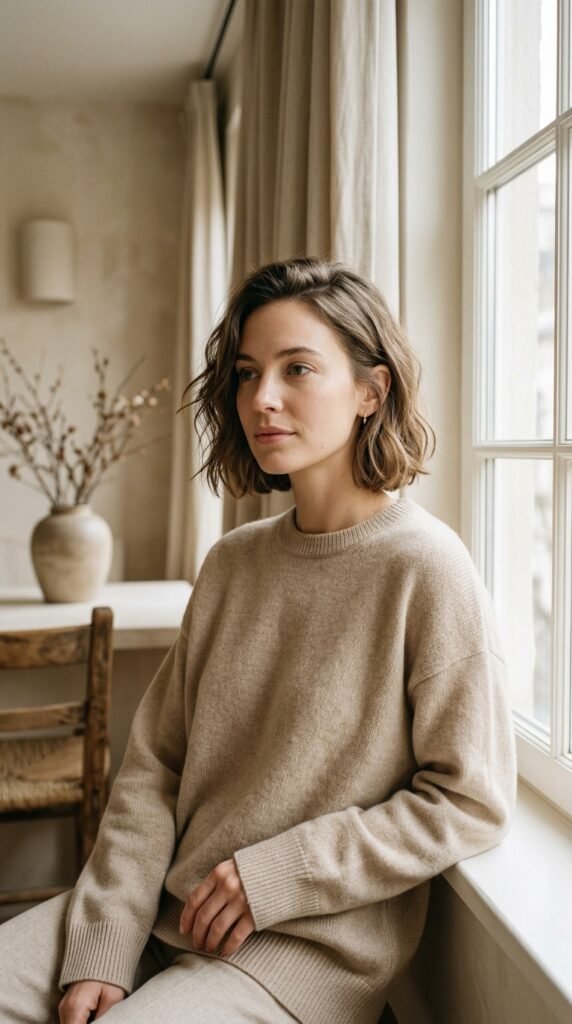
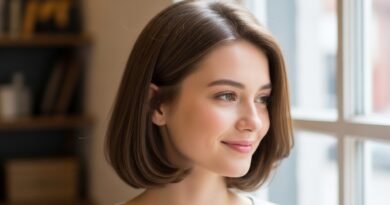
The quiet luxury bob is still the most photogenic haircut I’ve recommended all year. It hits at the jaw or collarbone, one length, with a soft bend. Nothing sharp, nothing trend-chasing. From above, it frames your face. From the side, it shows off your jawline. From below, it still looks intentional.
Ask your stylist for:
- A blunt or slightly rounded line at the jaw or collarbone
- Minimal layers, just enough for movement
- A gloss or shine treatment
At home, blow-dry with a round brush and finish with one drop of oil. Skip heavy spray. This look wants softness, not stiffness.
2. Old Money Hair
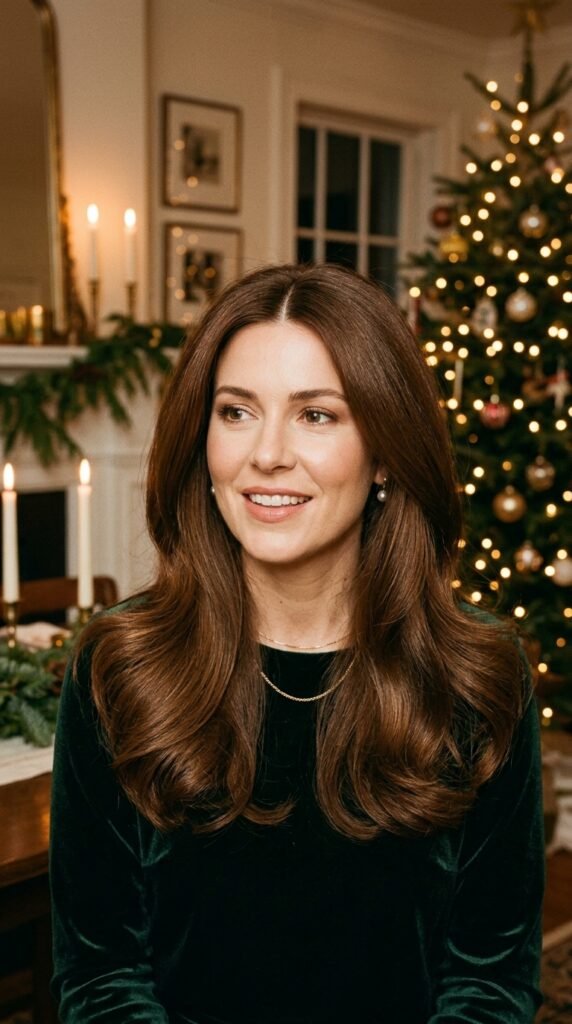
Old money hair is less about the cut and more about the finish. Glossy, healthy, expensive-looking. The kind of hair that seems like you have a standing weekly appointment.
The formula:
- Middle part, clean and precise
- Big, smooth volume at the crown
- Ends curled away from your face
- Shine you can actually see in a photo
This works on long hair, shoulder length, or a shoulder-grazing lob. Tame flyaways without flattening everything. Heat protectant, round brush blowout, one pump of lightweight oil through the ends only.
It photographs beautifully in warm indoor lighting, which is exactly what holiday photos are.
3. The Asymmetrical Lob
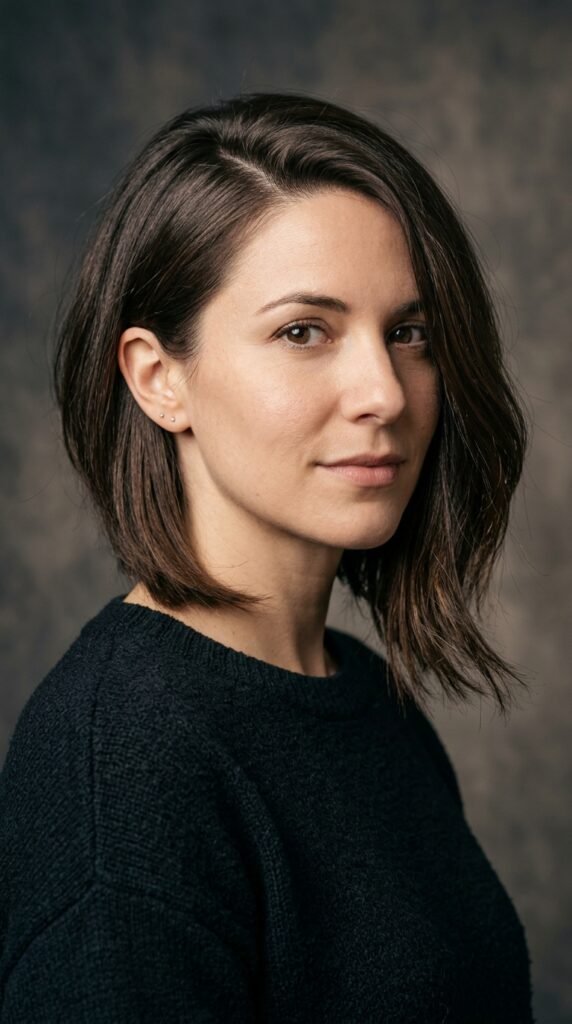
An asymmetrical lob is my favorite trick for anyone who isn’t in love with their facial symmetry. Longer on one side, shorter on the other, and suddenly every angle has something interesting going on.
Why it works for photos:
- The angled line draws attention to your cheekbones
- One side tucks behind the ear for a clean jawline
- The longer side gives you something to play with
Ask for a collarbone-length cut with a subtle A-line and a soft, not harsh, angle. Style with a deep side part and tuck the short side behind your ear. This is one of those 2026 hairstyles that looks styled when you’ve done almost nothing.
4. The Hime Cut
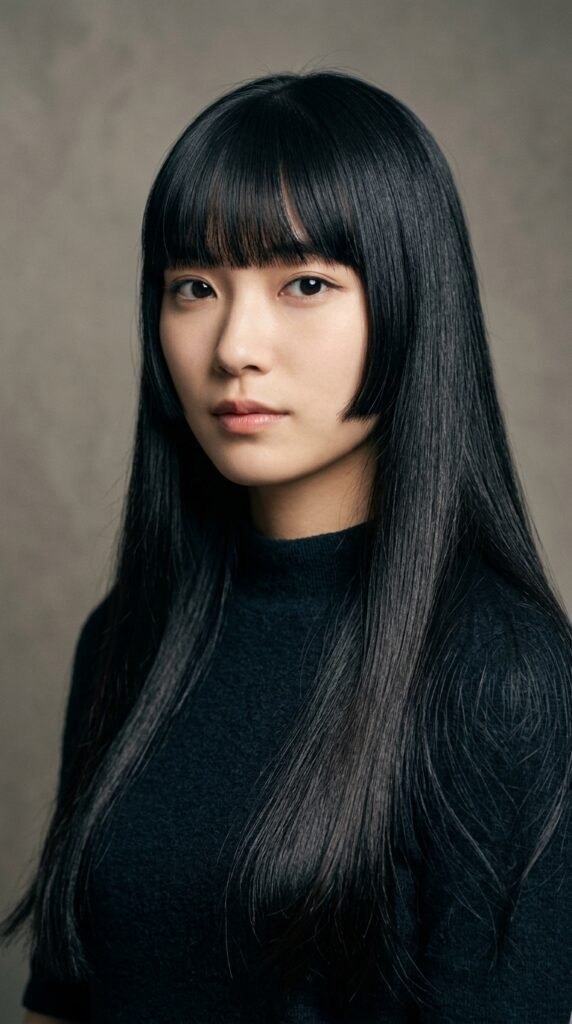
The hime cut went mainstream this year and I’m not mad about it. It’s a Japanese style with blunt cheek-length side pieces, straight bangs, and long hair in back. Sounds dramatic. Reads elegant.
For photos, it’s actually genius. The blunt side pieces frame your face like built-in contouring, so even a straight-on shot has shape. From the side, you get clean, sharp lines.
How to wear it:
- Keep the side pieces crisp with a flat iron
- Leave the back smooth, not curled
- Tuck one side behind your ear for variety
It’s bold, but it’s one of the most flattering face-framing cuts out there.
5. Romantic Goth Hairstyles
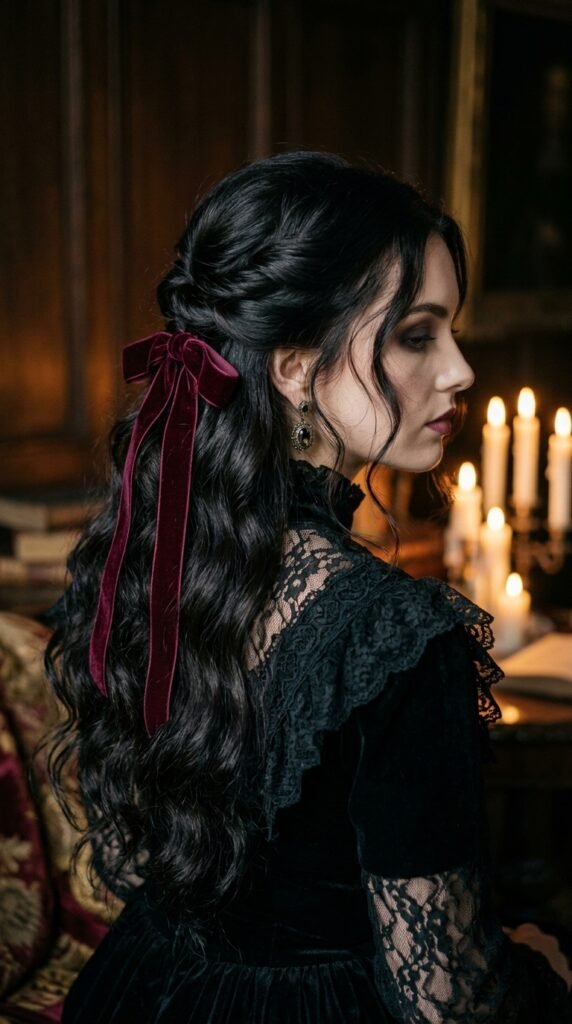
Romantic goth hairstyles are soft, moody, and made for candlelight. Think dark ribbons, loose waves, half-up styles with velvet, and a little drama. Not horror. Romance.
Photo-friendly moves:
- Loose, brushed-out waves instead of tight curls
- A black or deep burgundy ribbon woven into a half-up
- Two small face-framing pieces pulled out
- A little setting powder at the roots so nothing looks greasy under flash
Keep the texture soft and touchable. The goal is windswept and mysterious, not stiff. Bonus: this looks incredible in black-and-white or warm-filtered photos.
6. Glitchy Glam Hair
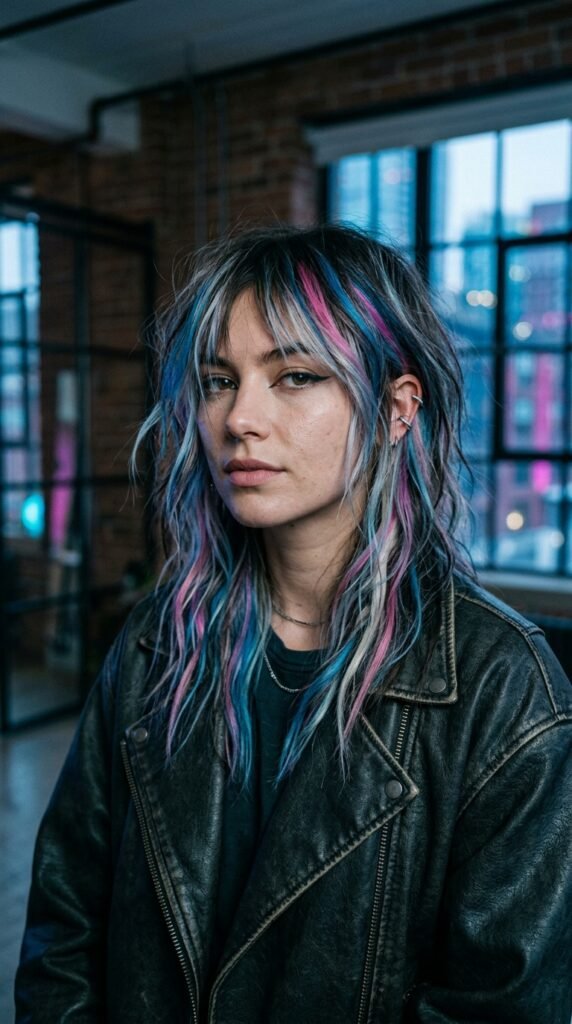
Glitchy glam hair is the fun one. A little undone, a little dramatic. Chunky highlights, uneven texture, visible styling, like the photo caught you mid-motion.
To make it camera-ready:
- Add texture with salt spray or a texturizing cream
- Use a one-inch wand and leave the ends straight
- Flip your part slightly off-center
- Let a few pieces fall across your forehead
The trick is contrast. If the texture is messy, keep your makeup clean and your outfit simple. From above it looks cool. From the side it looks intentional.
7. The Vampire Haircut
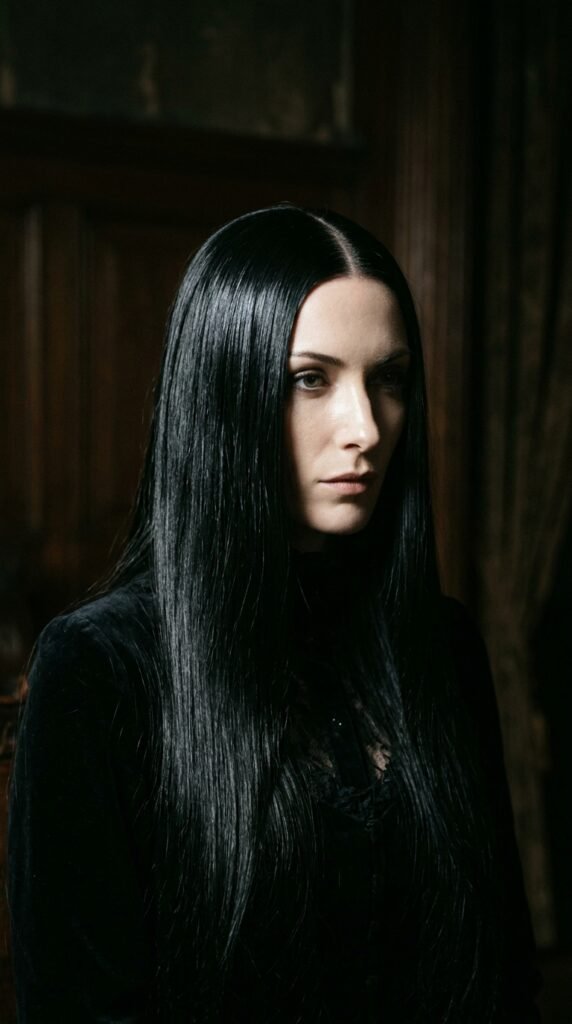
The vampire haircut is exactly what it sounds like: long, sleek, dark, dramatic, with a center part and maybe soft face-framing pieces. Very “I might be immortal, but I have great hair.”
Why it photographs so well:
- Sleek hair reflects light, which makes photos look sharper
- A center part flatters almost every face shape from the front
- Long lines elongate your neck and jaw
Style it with a straightener or a blowout, then a shine serum for gloss. If your hair is fine, add clip-in extensions for weight and drama. Pair with a deep red lip. Trust me.
8. Face-Framing Money Pieces
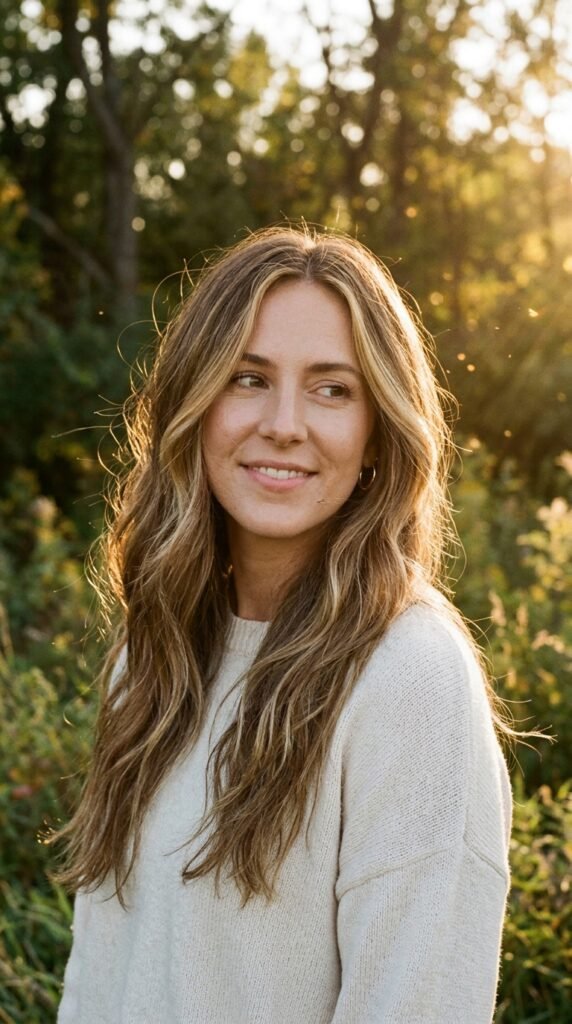
Money pieces are those two lighter, brighter sections right at the front of your hair. They’re the fastest way to look lit-from-within in a photo, because they catch light around your face.
How to make them work for holiday photos:
- Keep them soft and blended, not stripey
- Ask for a tone one or two shades lighter than your base
- Style them forward and slightly curved
If you don’t want to commit to bleach, use a temporary color wax on a small section. From above, they brighten your whole face. From the front, they frame your eyes.
9. The Textured Curly Shag
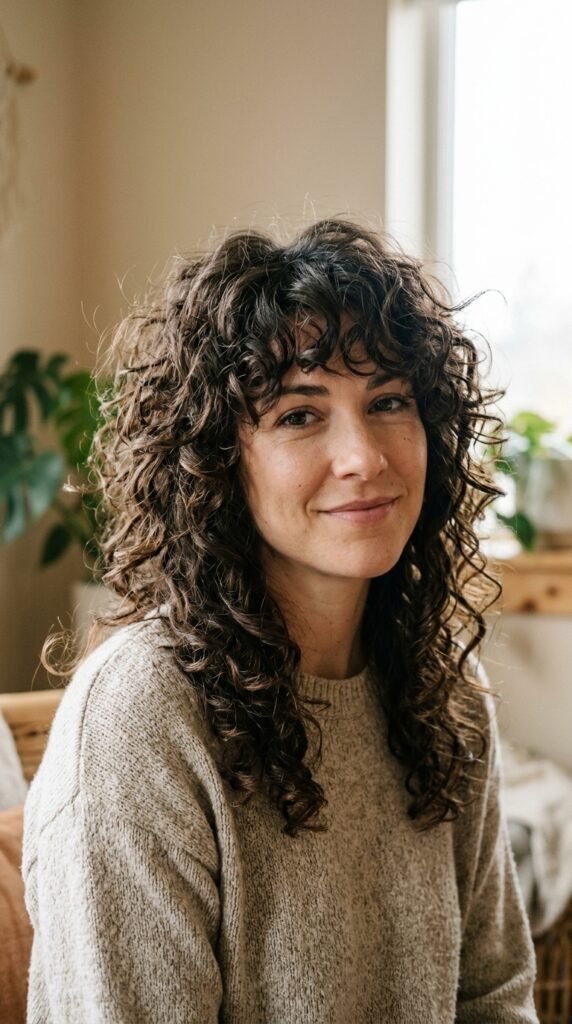
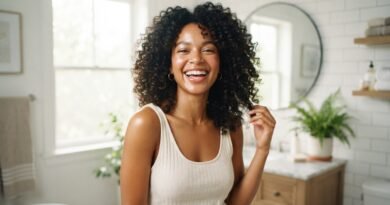
If you have curls, the textured shag is your best friend right now. It’s layered, a little wild, and it moves. Which means it looks good from literally every angle people photograph you at.
Styling tips:
- Start on soaking wet hair with a leave-in and a gel
- Scrunch, don’t rake
- Diffuse upside down, then flip and finish the front
- Don’t touch it while it dries
At the party, refresh with water and a light cream instead of dry shampoo. Dry shampoo on curls equals dull. Bonus: volume at the crown is the single best thing you can have for overhead photos.
10. The Slicked-Back Wet Look
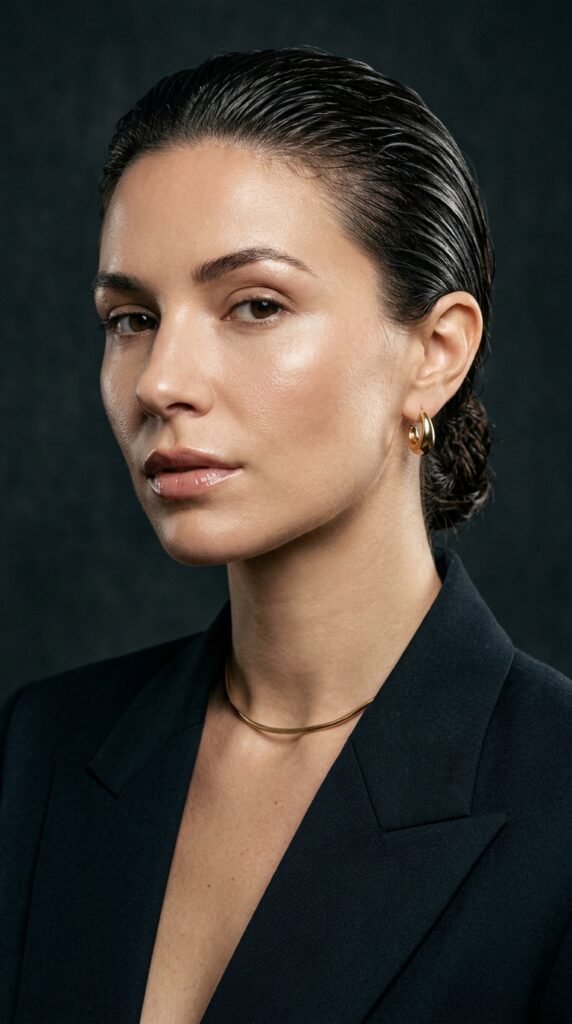
The slicked-back wet look is the most underrated holiday hairstyle. It takes eight minutes, looks expensive, and photographs like a dream because it has shine and clean lines.
Here’s the routine:
- Apply a strong-hold gel or pomade through damp hair
- Brush it back with a fine-tooth comb
- Smooth flyaways with a toothbrush and spray
- Pin the sides if your hair is thick
Add a middle part for elegance or a low bun for a formal event. Because there’s no frizz and no stray pieces, this is the one style that truly looks good from every angle, including the terrible ones.
11. The Sleek Low Bun
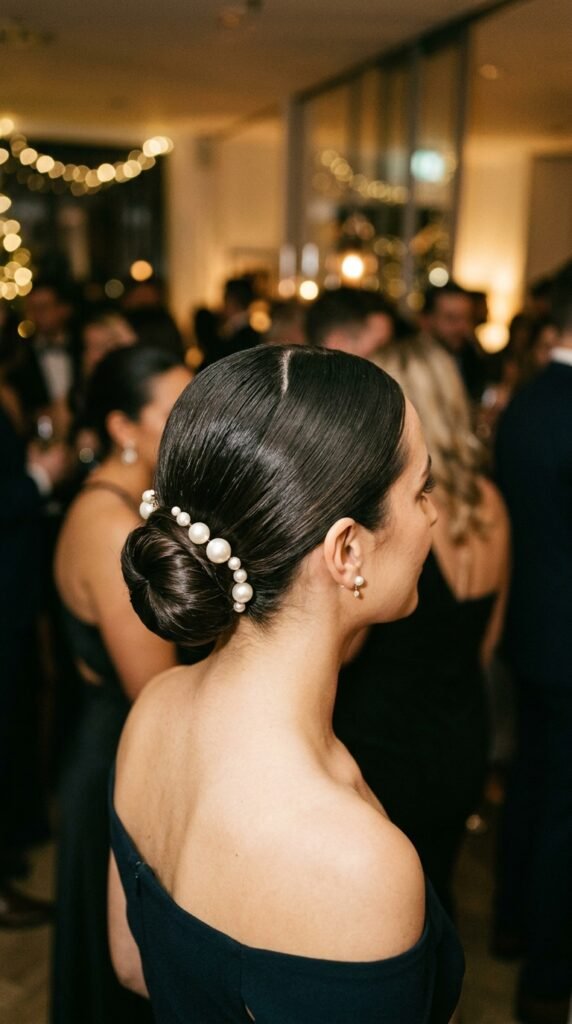
The sleek low bun is a classic for a reason. It’s formal enough for a party, but also forgiving. If your hair isn’t cooperating, you can hide a lot in a low bun.
Make it photo-proof:
- Pull hair back with a center or side part
- Use gel or edge control to smooth the front
- Wrap the ponytail into a bun and pin it flat
- Pull out two small pieces at the ears
Add a silky ribbon or a pearl pin for holiday flair. The low bun keeps your neck and shoulders visible, which flatters straps, turtlenecks, and off-the-shoulder dresses alike.
12. Hollywood Waves
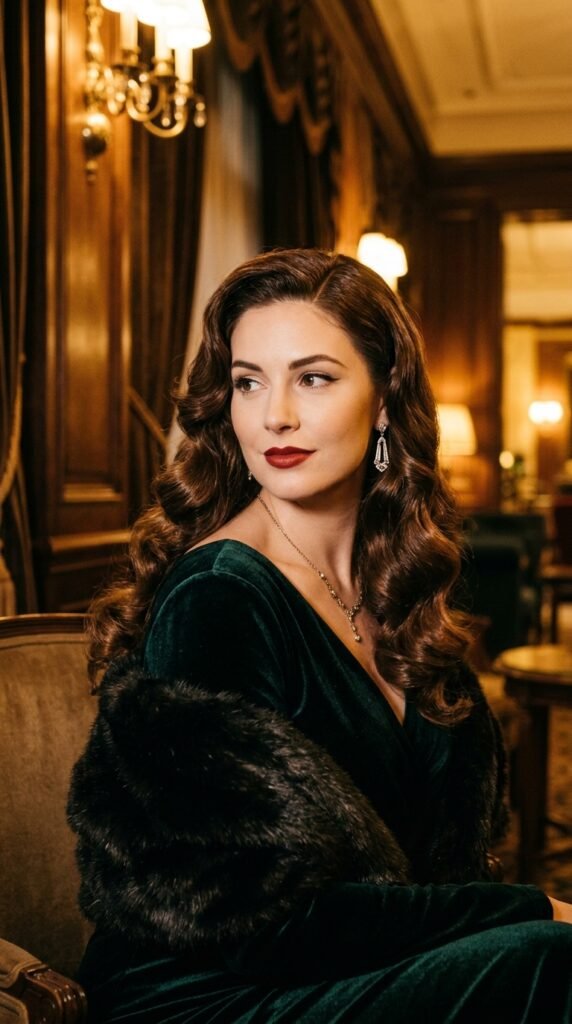
Hollywood waves never go out of style, and they’re basically made for holiday photos. Big, smooth, glossy waves that look like you walked off a red carpet, but they’re easier than they look.
Quick version:
- Blow-dry with a round brush for volume
- Section hair into three or four parts
- Curl everything in the same direction with a 1.5-inch barrel
- Brush the curls out to merge them into waves
- Set with a light-hold spray
Pin one side back with a sparkly clip for a fresh take. The key is shine and smoothness. Waves that are too crunchy won’t photograph as well.
13. The 90s Bouncy Blowout Bob
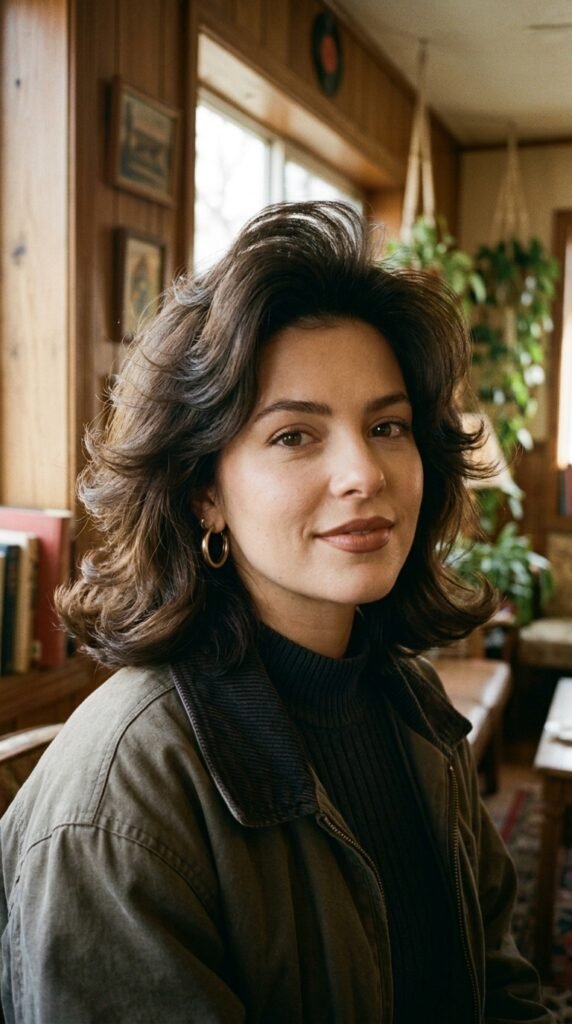
Short hair can absolutely be glamorous. A bouncy blowout bob, chin or shoulder length, curled under or flipped out, is exactly the kind of look that reads charming in photos.
How to get it:
- Blow-dry with a round brush, curling the ends as you go
- Use velcro rollers at the crown for lift
- Finish with a light hold spray
Flip the ends out on one side for a cheeky retro feel, or curl them under for something softer. This is one of those 2026 hairstyles that feels fresh but still familiar. From above, the bounce gives you volume. From the side, you get a cute, rounded shape.
14. Butterfly Layers
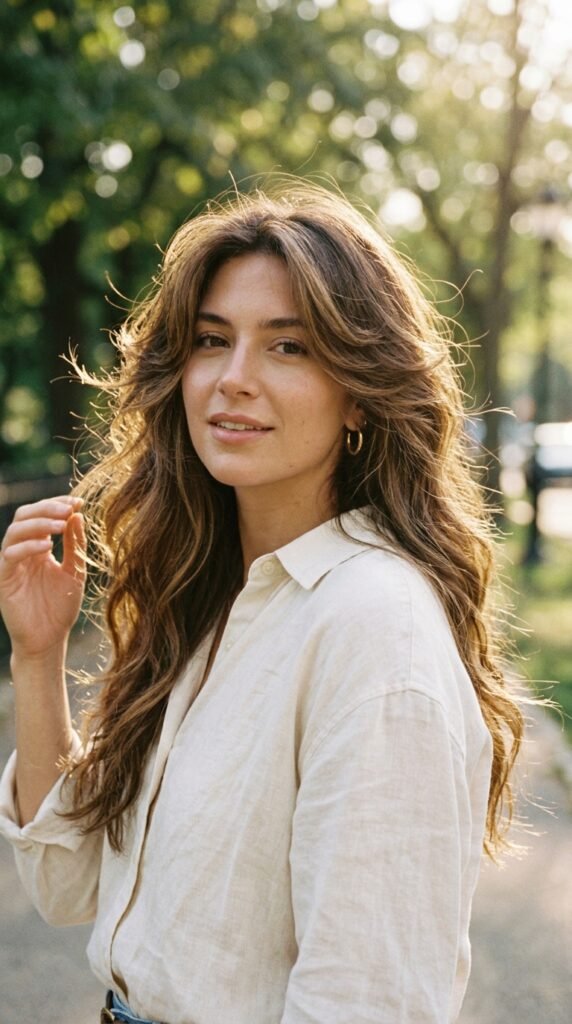
Butterfly layers are all about volume around the face and long, flowing lengths. They look great in motion, which is perfect for candid holiday photos.
What to ask for:
- Shorter layers around the cheeks and jaw
- Longer layers through the mid-lengths
- Face-framing pieces that blend
Style with a large round brush, curling the top layers away from your face and leaving everything else smooth. Because the shape is round and full, this cut is very forgiving from overhead angles. A huge win when someone taller is holding the camera.
15. Curtain Bangs with Long Layers
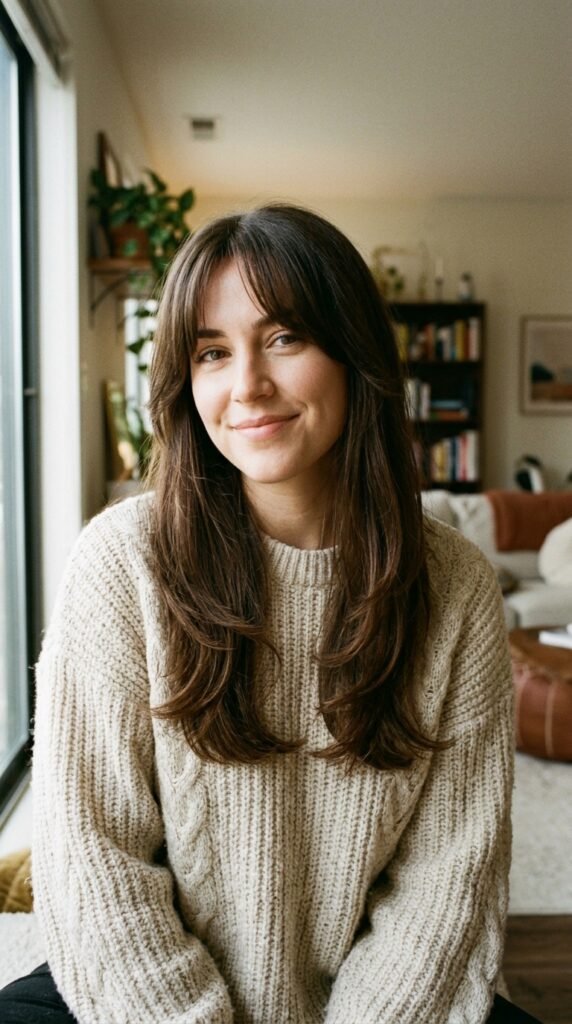
Curtain bangs are still everywhere, and for good reason: they soften your face without hiding it. Paired with long layers, they give you movement and a flattering frame from the front.
To style:
- Blow-dry bangs to one side, then the other, to create the split
- Use a round brush to curve them outward
- Add a little texture spray at the roots
If your bangs are growing out, this is the moment to embrace them. Slightly longer curtain bangs look even better than fresh ones. Bonus: they hide forehead shine in flash photos, which is a small miracle.
16. Half-Up, Half-Down with a Claw Clip
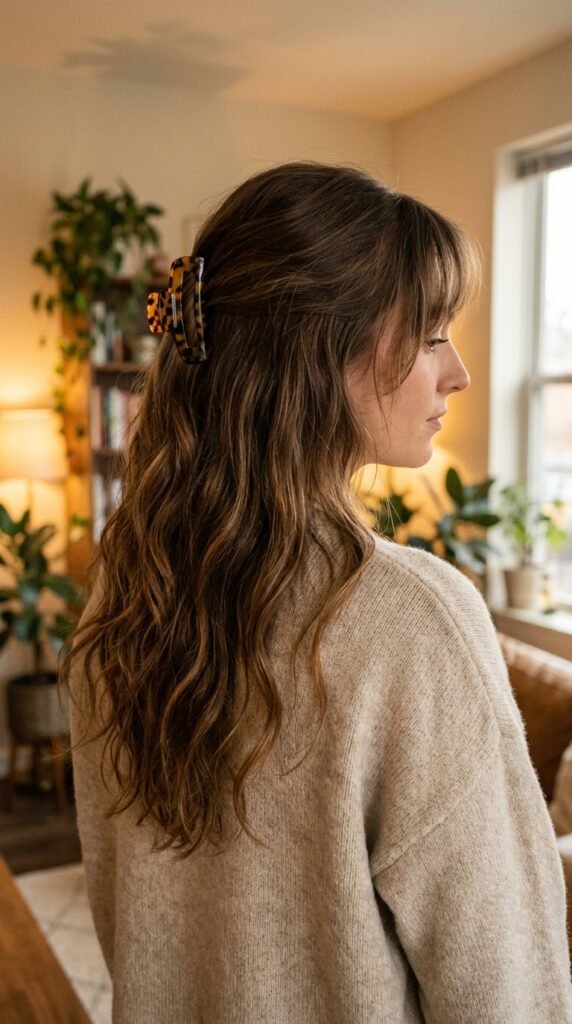
The claw clip is not lazy. It’s strategic. A half-up, half-down style with a clip gives you volume at the crown and hair down around your shoulders, which is flattering from every angle.
Do it in three steps:
- Take a section from each side of your part
- Pull it back loosely and twist once
- Clip it at the back of your head, not too low
Pull out a few face-framing pieces and spray lightly. Choose a tortoiseshell, pearl, or velvet clip for holiday. It reads intentional and expensive, even though it took ninety seconds.
17. The Braided Crown Half-Up
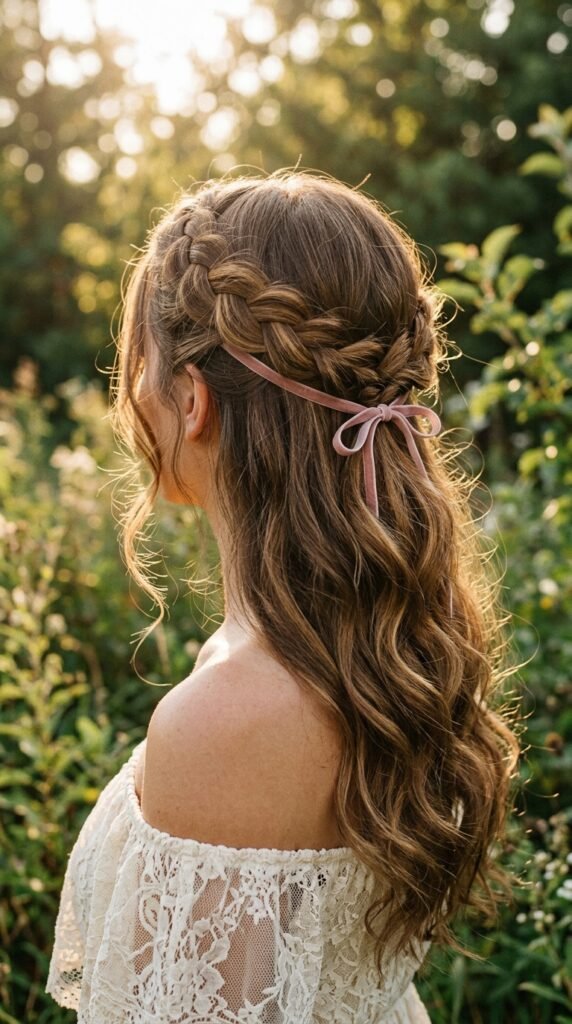
A braided crown sounds fancy, but a simple two-strand twist or a loose three-strand braid across the back of your head is enough. It adds texture and keeps hair off your face.
Steps:
- Part your hair down the middle
- Take a section from each side
- Braid or twist them toward the back
- Pin or clip them together
Leave the rest of your hair down and wavy. This style is great for photos because it adds interest at the side and back, not just the front. So when someone catches you mid-laugh and slightly turned, your hair still looks planned.
18. The Voluminous Curly Afro
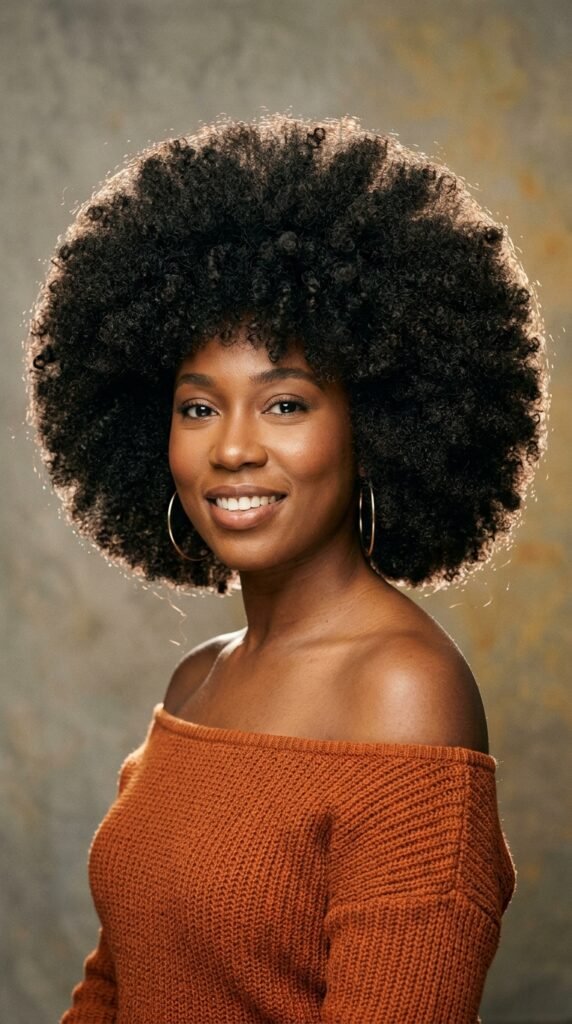
An afro with height and shape is stunning in photos. The trick is definition at the edges and volume everywhere else.
For picture day:
- Refresh with water and a leave-in cream
- Use a pick to lift the roots
- Shape the silhouette with your hands
- Define the front edge with gel and a soft brush
Keep your hands out of it once it’s set. Volume at the crown is what makes overhead angles work. With a rounded shape, you get a beautiful halo in photos no matter where the camera is.
19. The Sleek Ponytail with a Wrapped Base
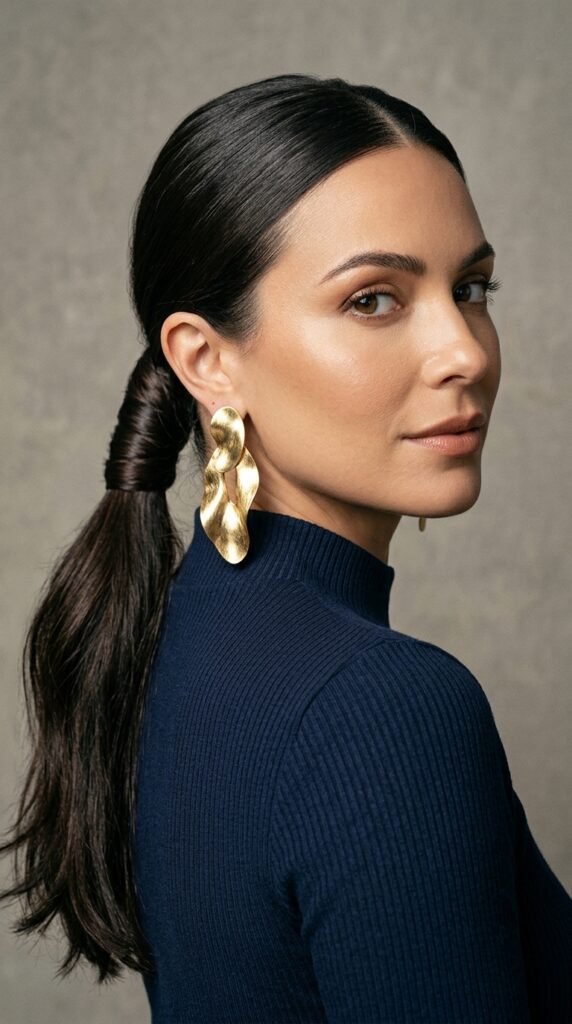
A sleek mid or high ponytail with the base wrapped in your own hair is one of the cleanest looks you can wear for photos. It’s polished, it lifts your features, and it never fights the camera.
To get it right:
- Brush hair back with gel or a smoothing cream
- Secure with a strong elastic
- Take a small strand and wrap it around the base
- Pin the end underneath
Add a middle part for a modern feel, or keep it slicked straight back for something sharper. Pair with statement earrings. The style keeps your neck and jawline totally visible.
20. The Soft Blunt Fringe
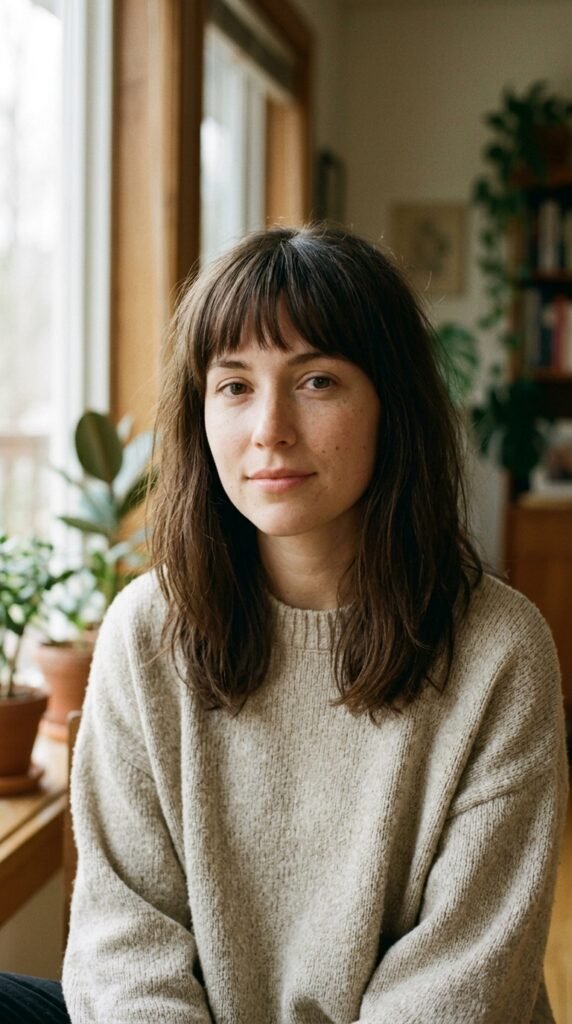
Bangs are a commitment, but a soft blunt fringe is worth it. It’s a straight-across fringe with slightly rounded edges. Not too heavy, not too wispy.
Why it works in photos:
- It frames your eyes immediately
- It adds a clean horizontal line that balances longer faces
- It looks intentional even with the rest of your hair air-dried
Ask for a fringe that sits just above your brows with a little softness at the corners. If you’re nervous, try clip-in bangs first. They photograph surprisingly well.
21. How to Make Any Hairstyle Camera-Angle Proof
Here are the fixes that solve almost every bad angle:
- Overhead camera? Add volume at the crown with root spray and a quick backcomb.
- Side angle? Make sure your part is clean and your face-framing pieces are styled forward.
- Low angle? Keep hair off your shoulders so your neck looks long.
- Flash photos? Skip heavy oil near the roots and use setting powder instead.
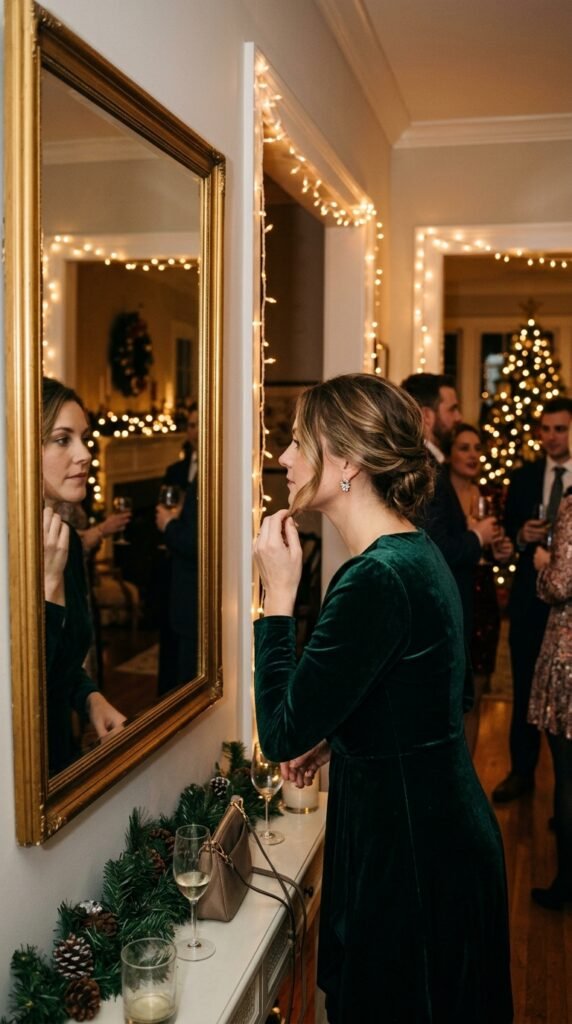
One more thing: practice your pose in a mirror at the height the camera will be. Ten seconds of practice beats thirty minutes of styling.
22. The 10-Minute Holiday Photo Prep Checklist
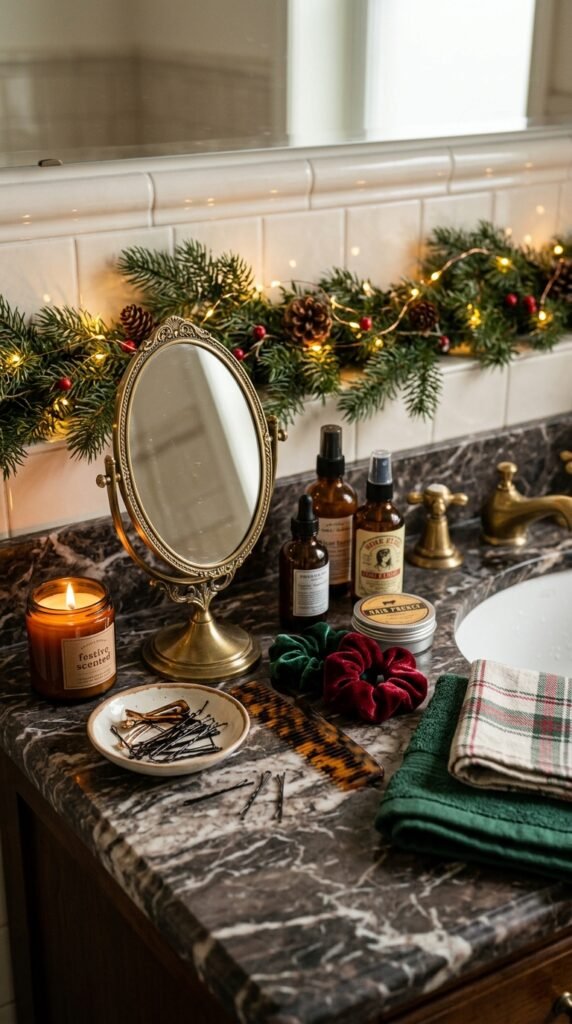
Run through this before anyone pulls out a phone:
- Spray root lift or dry shampoo at the crown
- Smooth the top layer with a light oil
- Fix your part with a comb
- Tame flyaways with a toothbrush and spray
- Check the back with two mirrors
- Grab one extra pin or clip, just in case
Also, toss a tiny hair oil or a comb in your bag. Holiday parties get humid and crowded, and a thirty-second touch-up saves the group photo.
A Warm Send-Off Before the Camera Comes Out
Here’s what I want you to remember: you don’t need the fanciest hairstyle in the room. You need one that holds its shape when the camera moves. Volume at the crown, a clean part, and a little grip go further than any trend.
Pick two or three styles from this list and practice them before the party. That way, getting ready feels calm instead of chaotic, and you actually like the photos you get tagged in.
Save this post to Pinterest so it’s ready the next time you’re getting ready for a holiday party. And tell me in the comments which hairstyle you’re trying first. I read every single one.