From Cap to Camera: Graduation Hairstyles for Women That Survive the Whole Day
Graduation day is the longest day of your year — the early-morning getting ready, the ceremony, the cap toss, the photos, the family lunch, the evening celebrations — and your hair has to survive all of it. It has to sit under a graduation cap for hours, stay neat under a heavy gown and a stole, and still look good in the photos you will keep for the rest of your life. That is a lot to ask of a hairstyle, and it is why most graduation hair advice misses the point: it shows you pretty styles, but it does not tell you which ones actually survive the cap.
This guide does. Inside you will find 40 graduation hairstyles for women — from low buns and braids to Hollywood waves and vintage finger waves — each one judged on the things that actually matter on the day: how long it takes, what it costs, whether the cap will crush it, and how it photographs. Eight short guides cover the details that make the difference, from styles that work under a cap to weather-proofing an outdoor ceremony, so you can walk into graduation day knowing your hair is the one thing you do not have to worry about.
Hairstyles That Actually Work Under a Graduation Cap
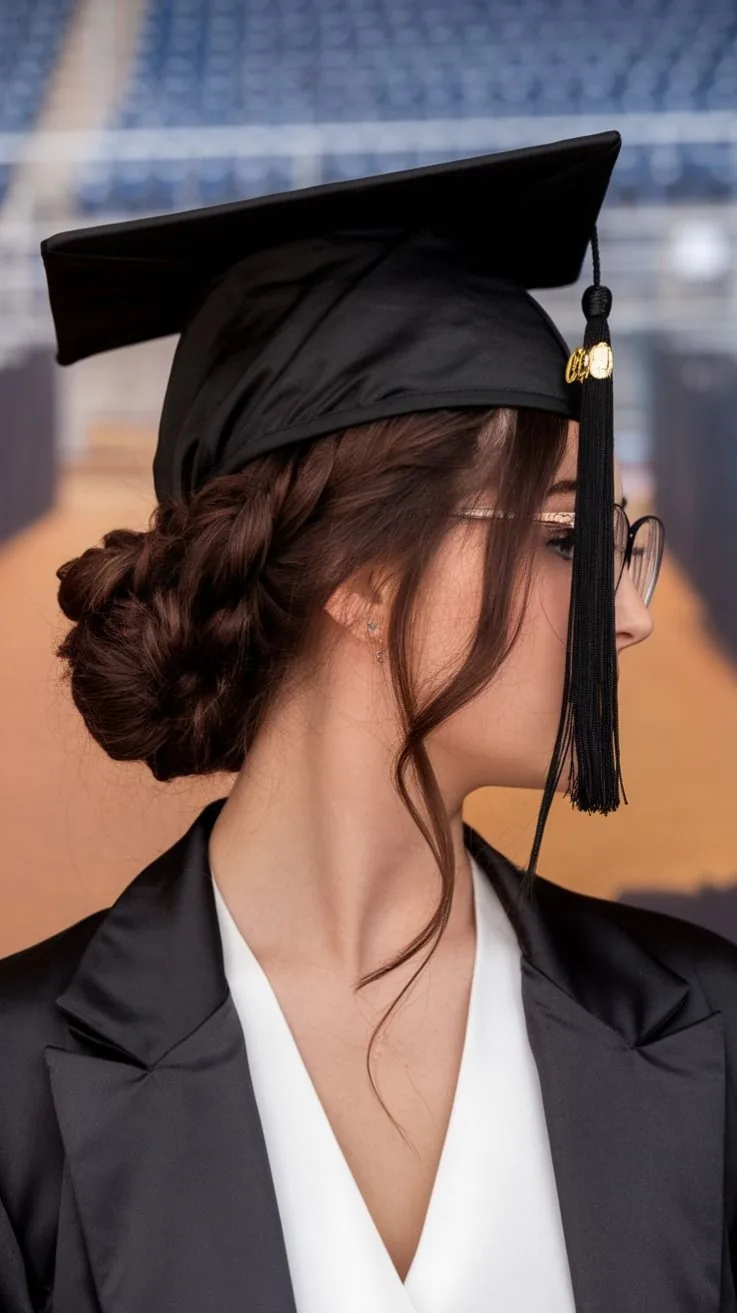
The first rule of graduation hair is simple: the cap wins. A graduation cap sits flat on the crown, presses down whatever is underneath it, and leaves a crease in anything with height on top — so the styles that survive are the ones built low. Low buns, low ponytails, low chignons and braids that start at the nape all sit below the cap line, which means the cap rests on your head instead of on your hairstyle. Anything piled high on the crown, from a top knot to a tall bouffant, will either tilt the cap or be flattened by it, and neither looks good in photos.
The practical test is to try your style on with the cap before the day. Put the cap on, wear it for ten minutes, take it off and look in the mirror — if your hair still looks like a hairstyle instead of a dent, you have a winner. Styles with a bit of grip — a light texture spray, a few bobby pins, a braid that holds its own shape — recover far better than perfectly smooth styles, which show every crease. And remember the cap is not optional, so choose a style that treats it as a partner, not an enemy.
Heat-Free Graduation Hairstyles for a Long Day
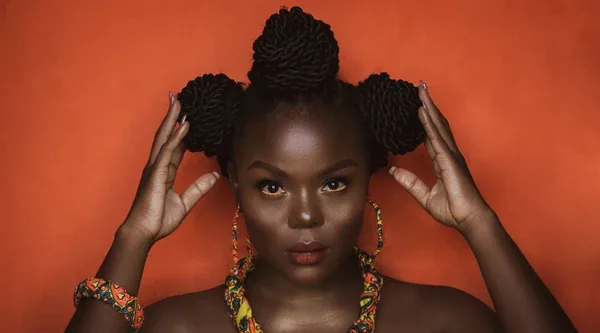
Graduation day is long — the ceremony, the photos, the family lunch, the evening celebrations — and heat-styled hair rarely survives all of it. Curls made with a hot iron at 8 in the morning can be limp waves by noon, especially in humidity, which is why heat-free styles are the quiet heroes of graduation day. Braids, twists, buns and overnight waves are built from the hair’s own texture and tension, so they hold their shape for hours instead of dropping out as the day warms up.
The easiest heat-free wins are the ones you set the night before: damp hair in two loose braids wakes up as soft waves, a low twisted bun slept in overnight gives you a relaxed bend, and a braid crown needs nothing more than your fingers and a few pins. The trade-off is control — heat-free styles are softer and less polished than a salon blowout — but on a day when your hair has to last twelve hours, a style that stays put beats a style that looks perfect for twenty minutes and then gives up.
Graduation Photos That Actually Look Good: Hair Tips
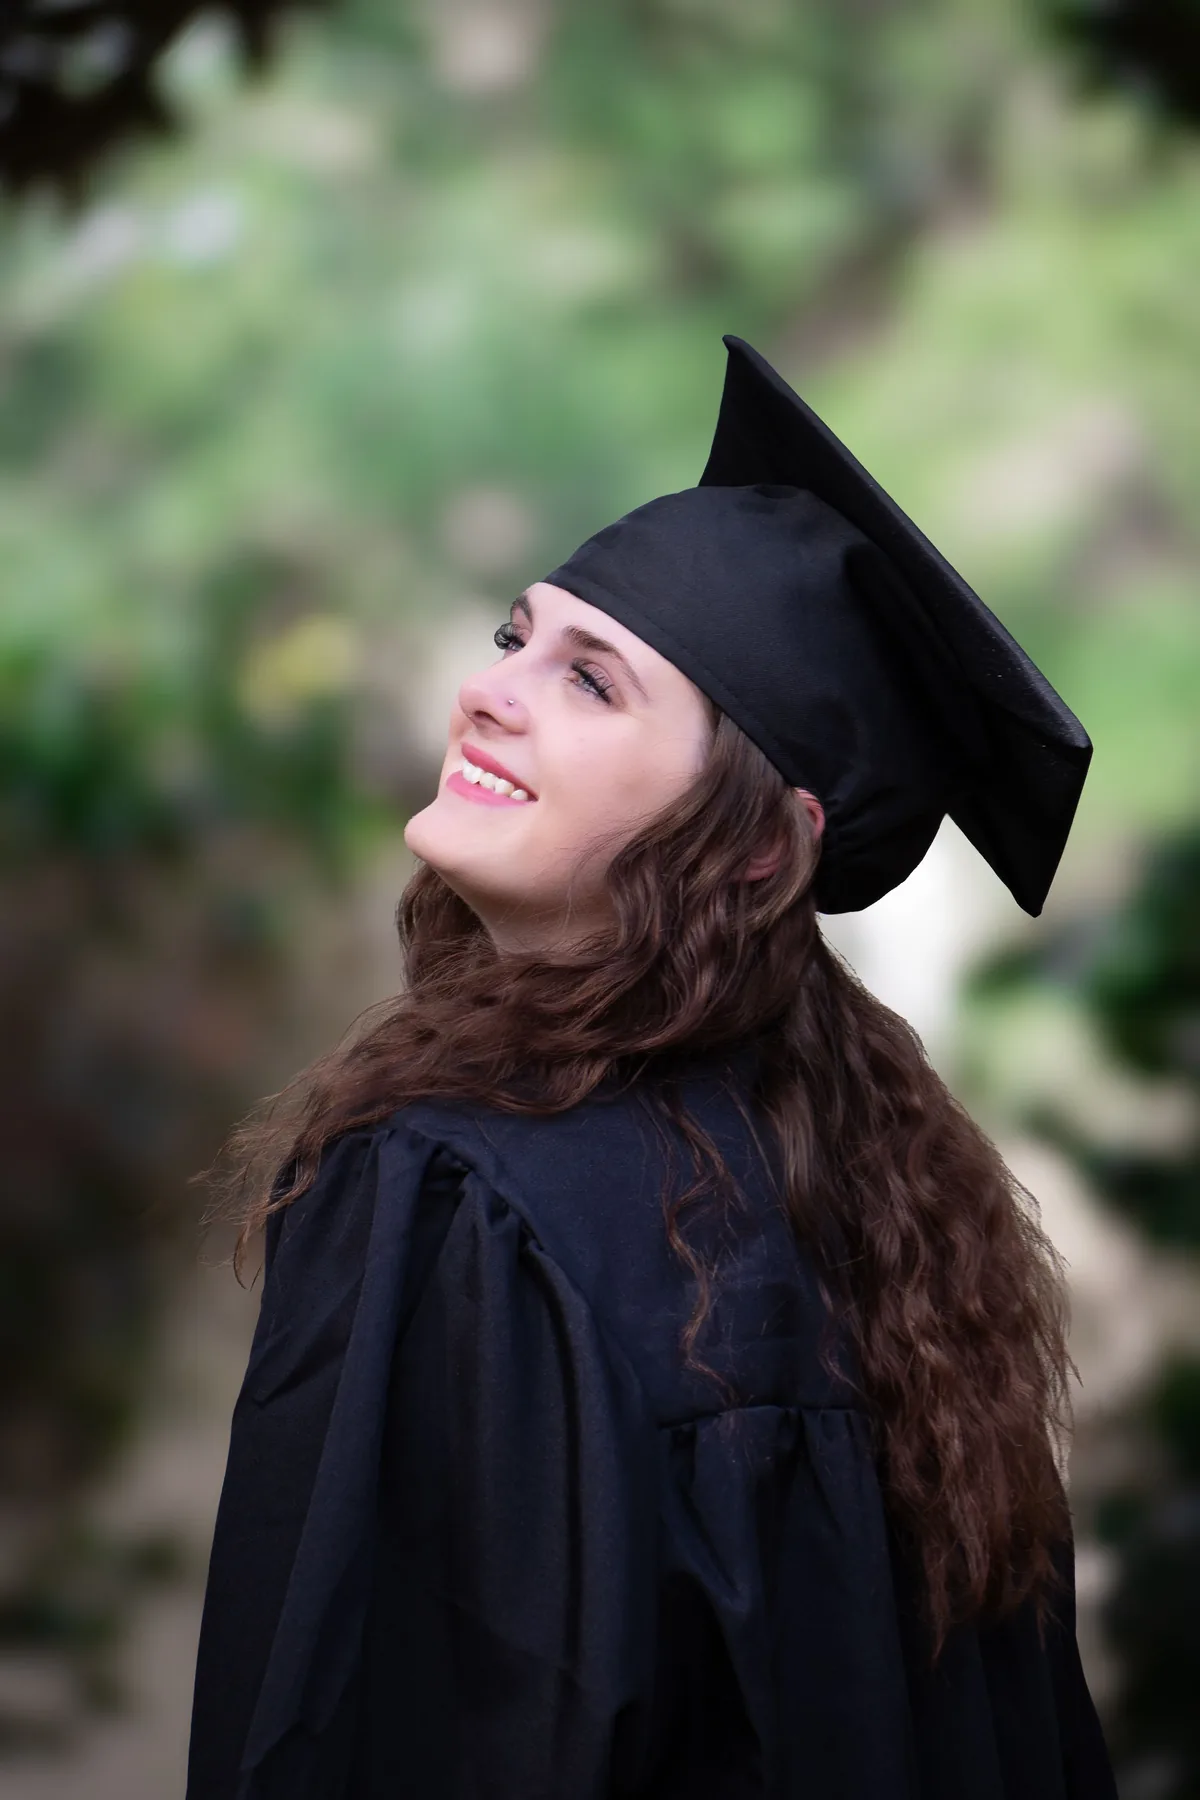
Graduation photos are the real reason most women stress about their hair, because the pictures will outlive the day by decades. The camera flattens hair more than the mirror does, so styles that look dramatic in person can look thin or shapeless in a photo, while styles with a little texture and movement photograph beautifully. The rule of thumb: if you can see the shape of your hairstyle from the front in a mirror, the camera will see it too — a side braid, a low bun with soft pieces around the face, and soft waves all read clearly in a photo.
Two things matter more than the style itself. First, shine: hair that catches the light looks healthy on camera, so a light shine spray or a smoothing serum on the ends makes a visible difference. Second, the cap moment: ask someone to check your hair right before the official photo, because the cap leaves a band across the front that a quick finger-comb can fix. And take one test photo with your phone before the ceremony, in the light you will actually be photographed in — it is the cheapest insurance on graduation day.
Matching Your Hair to Your Gown, Stole and Hood
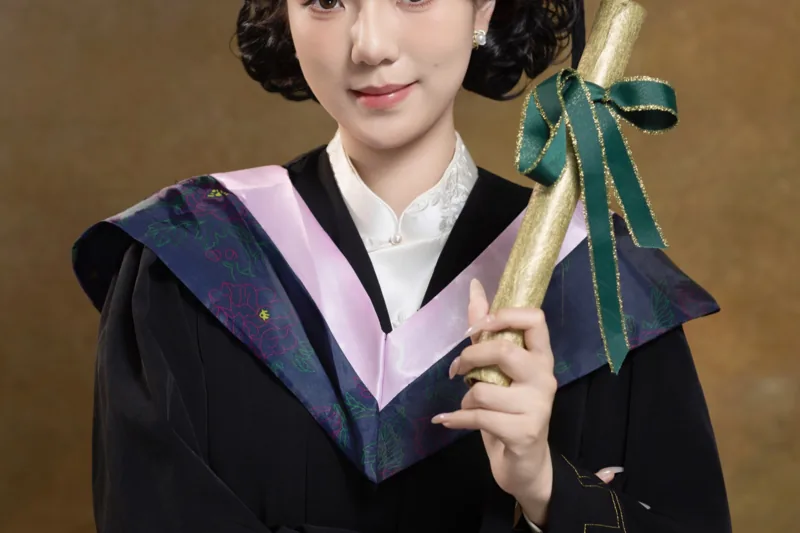
A graduation gown changes the rules for hair, because it adds a heavy black robe, a coloured stole and a hood that all sit on your shoulders and neck. Long loose hair gets trapped under the hood, catches on the stole and disappears into the robe, which is why most graduates end up pushing it forward or tucking it — and that fiddling is exactly what ruins a style. Hair worn up, to the side, or in a low style that sits below the shoulders works with the gown instead of fighting it, and it keeps the stole and hood visible, which is the whole point of the regalia.
The colour of your stole matters too. A bright stole next to bright hair can clash in photos, so a simple, polished style in a neutral finish photographs better than an elaborate one competing with the colours. If your hood is heavy, avoid a style that adds bulk at the nape — a low chignon or a sleek low ponytail sits neatly underneath it. The goal is a look where the gown, the stole and the hair each get their moment, instead of all three arguing in the same photograph.
1. The Low Sleek Bun
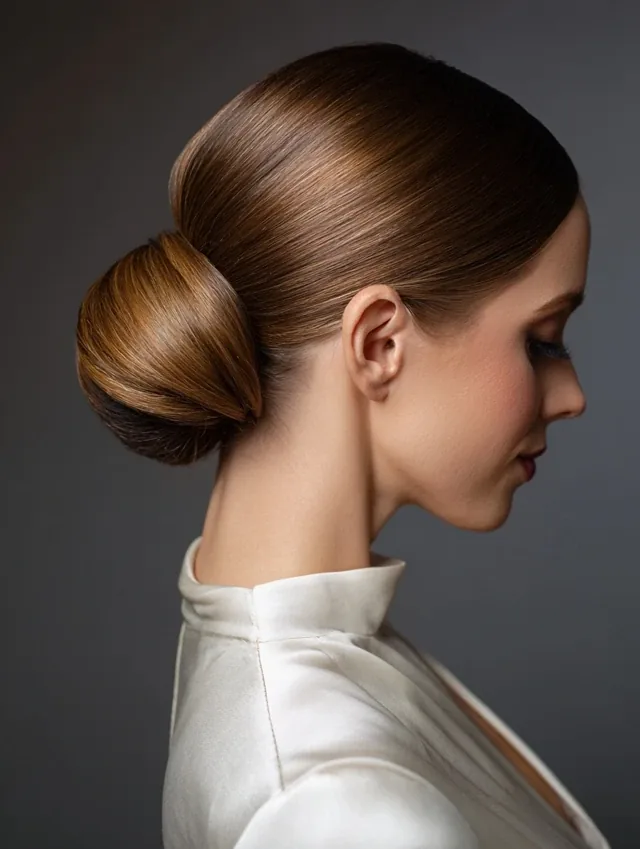
Verdict: the single safest graduation hairstyle there is. The low sleek bun sits at the nape, below the cap line, which means your cap sits flat, your hood sits flat, and nothing about your hair fights the gown. It reads as polished and deliberate in every photo — the kind of style that looks like you planned it, even if you did it in ten minutes with a brush and an elastic.
Time and cost: about ten minutes, no salon needed, just a brush, a hair tie, a few bobby pins and a little shine serum. Cap-friendly notes: it survives the cap completely — the cap rests above it, and when you take the cap off for photos the bun is exactly where you left it. It photographs beautifully from the front and the side, and it lasts through a long ceremony without a single touch-up.
2. Soft Hollywood Waves
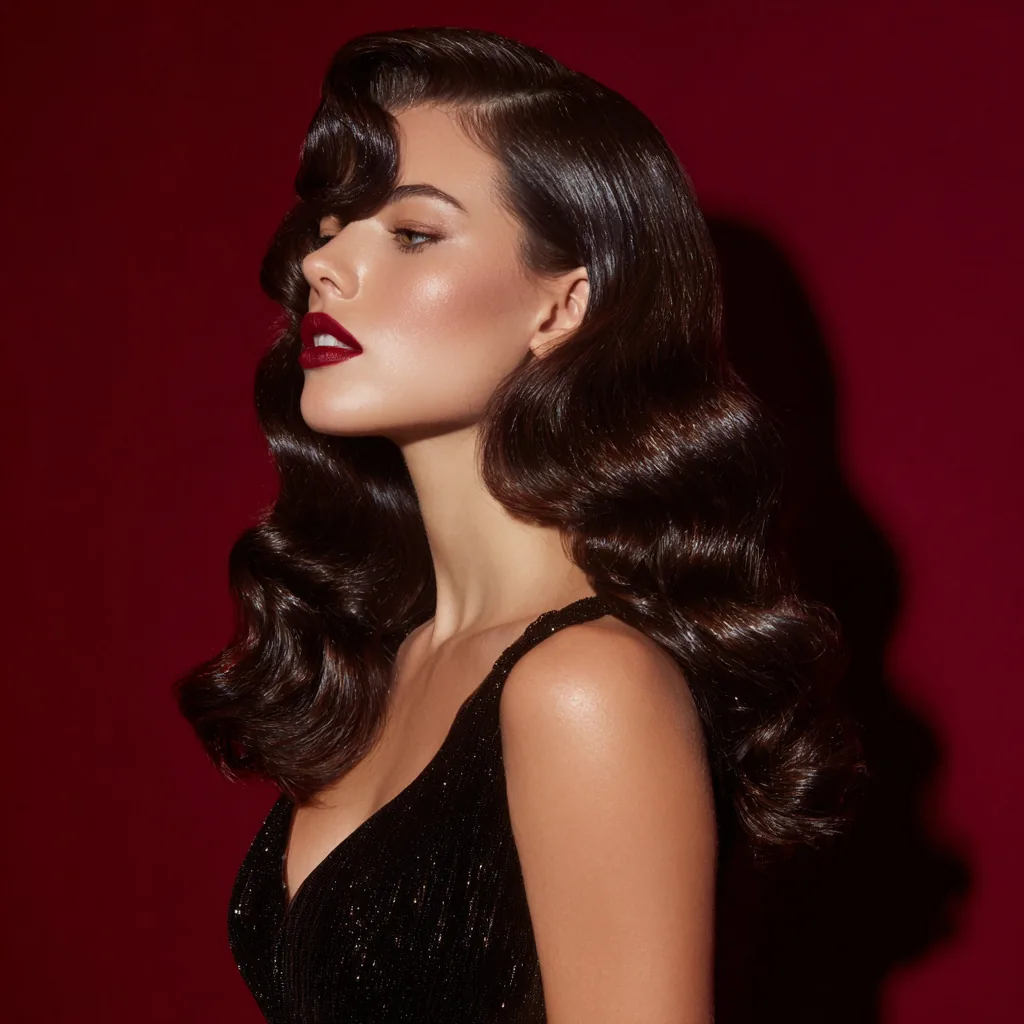
Verdict: the most photogenic style on this list, if you can keep it alive. Soft Hollywood waves — big, glossy, uniform curls brushed out into a smooth wave — catch the light in every photo and look spectacular with a gown. The risk is longevity: waves made with a hot iron can drop out over a long, warm ceremony, so this is a style that rewards good preparation.
Time and cost: 30 to 45 minutes with a large-barrel curling iron, plus a strong-hold hairspray; a salon blowout version costs more but lasts longer. Cap-friendly notes: the cap will press a band across the crown, so wear your waves parted to the side and keep the front pieces loose enough to finger-comb back into shape after the cap comes off. It photographs wonderfully, but carry a small brush and a travel hairspray for the photo session.
3. The Classic Low Chignon
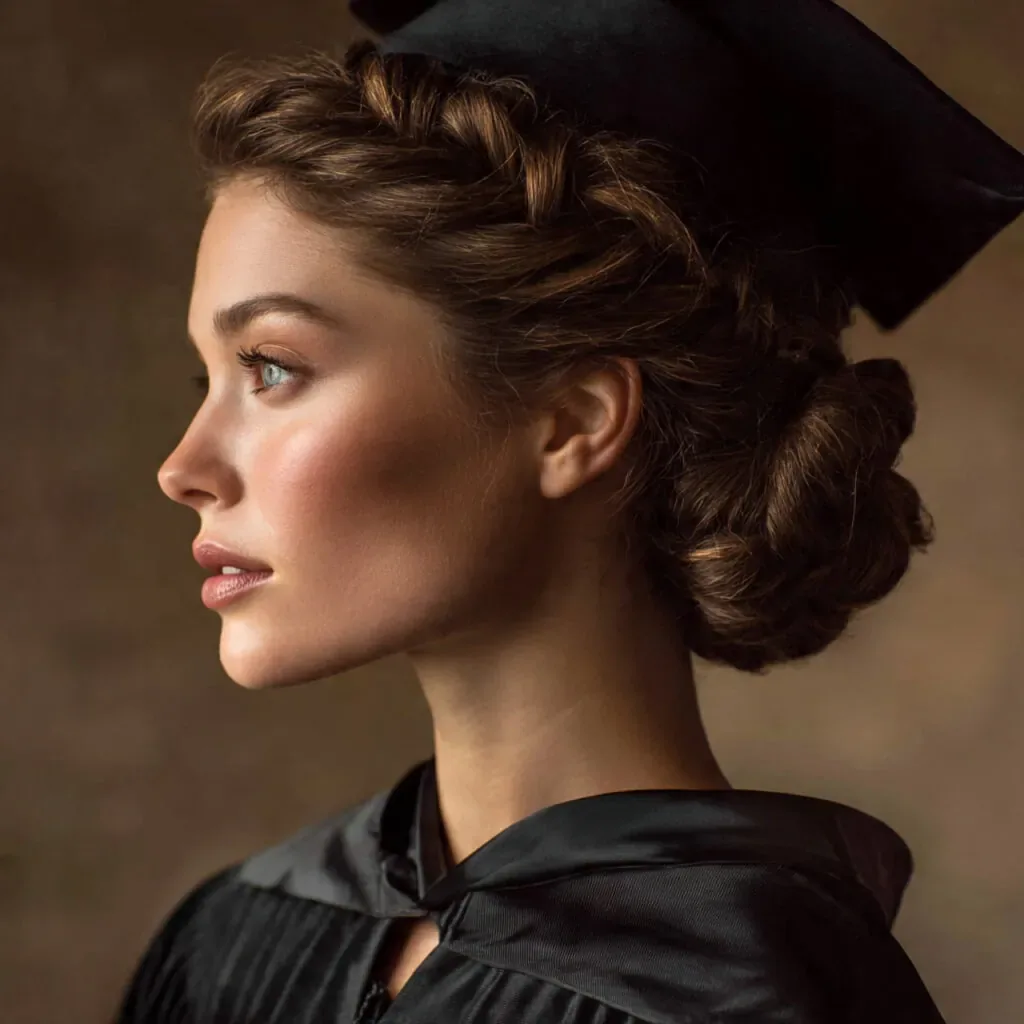
Verdict: timeless, elegant, and built for a gown. The low chignon — a soft, twisted knot at the nape — is the updo that graduation ceremonies were designed around: it sits below the cap, below the hood, and it looks as good at the evening dinner as it did at the morning ceremony. If you want one style that cannot go wrong, this is it.
Time and cost: 10 to 15 minutes at home with pins and a little texturising spray, or a quick salon updo. Cap-friendly notes: the chignon is completely clear of the cap, so there is no crease and no flattening. It photographs beautifully from every angle, especially from the side where the twist shows, and it survives hours of sitting, standing and hugging relatives without loosening.
4. Half-Up Twisted Crown
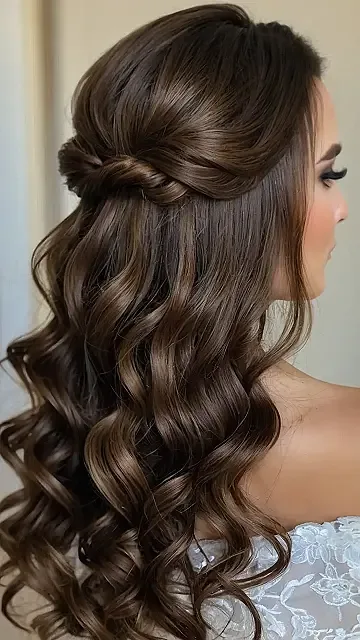
Verdict: the best of both worlds for women who cannot decide between up and down. The half-up twisted crown pulls the front sections back into a soft twist that frames the face, while the rest of the hair falls loose — so you get the polish of an updo and the softness of wearing your hair down. It suits nearly every face shape and every hair length from a lob down.
Time and cost: about 10 minutes, no heat required, just two twists and a few pins. Cap-friendly notes: the twist sits low enough that the cap does not crush it, and the loose length underneath hides any cap crease at the back. It photographs beautifully because the twist gives the camera something to see from the front. The only watch-out: the loose hair can frizz in humidity, so a little anti-frizz serum on the ends is worth it.
5. The Polished Low Ponytail
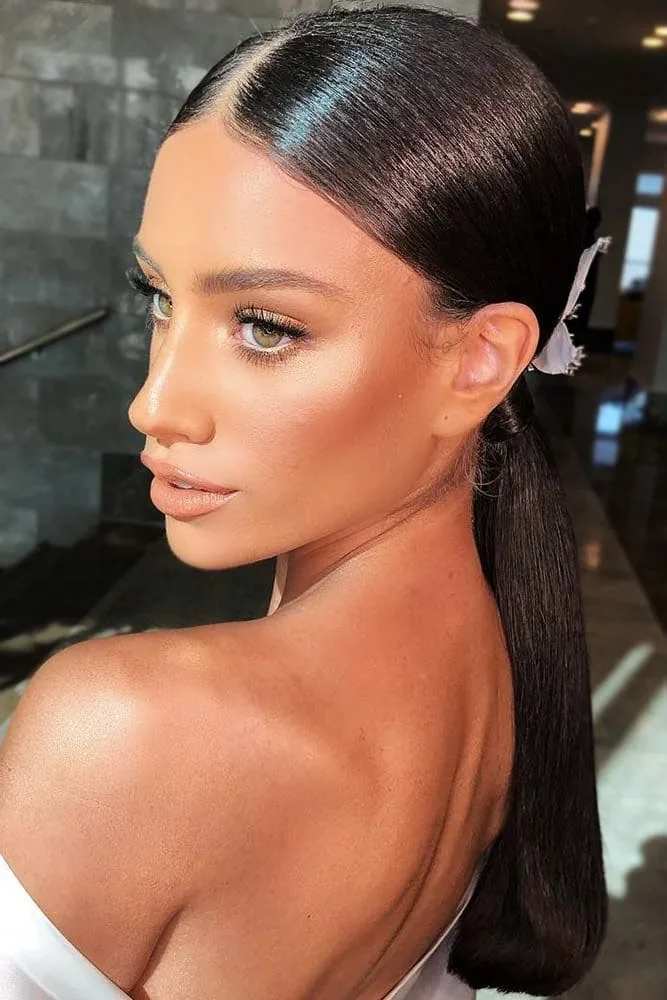
Verdict: underrated, and the easiest way to look expensive on graduation day. A polished low ponytail — smooth on top, tied low at the nape, with a strand wrapped around the elastic — looks like a salon style and takes minutes. It is the style for women who want to look put together without an elaborate updo, and it works on straight, wavy and lightly curled hair alike.
Time and cost: five minutes and almost no products — a brush, an elastic and a touch of serum. Cap-friendly notes: the ponytail sits well below the cap, so the cap never touches it, and the smooth top actually helps the cap sit evenly. It photographs cleanly from the front and survives a whole ceremony without moving. The trick is the wrapped strand: it hides the elastic and turns a school-day ponytail into a graduation look.
6. Loose Curls With a Side Part
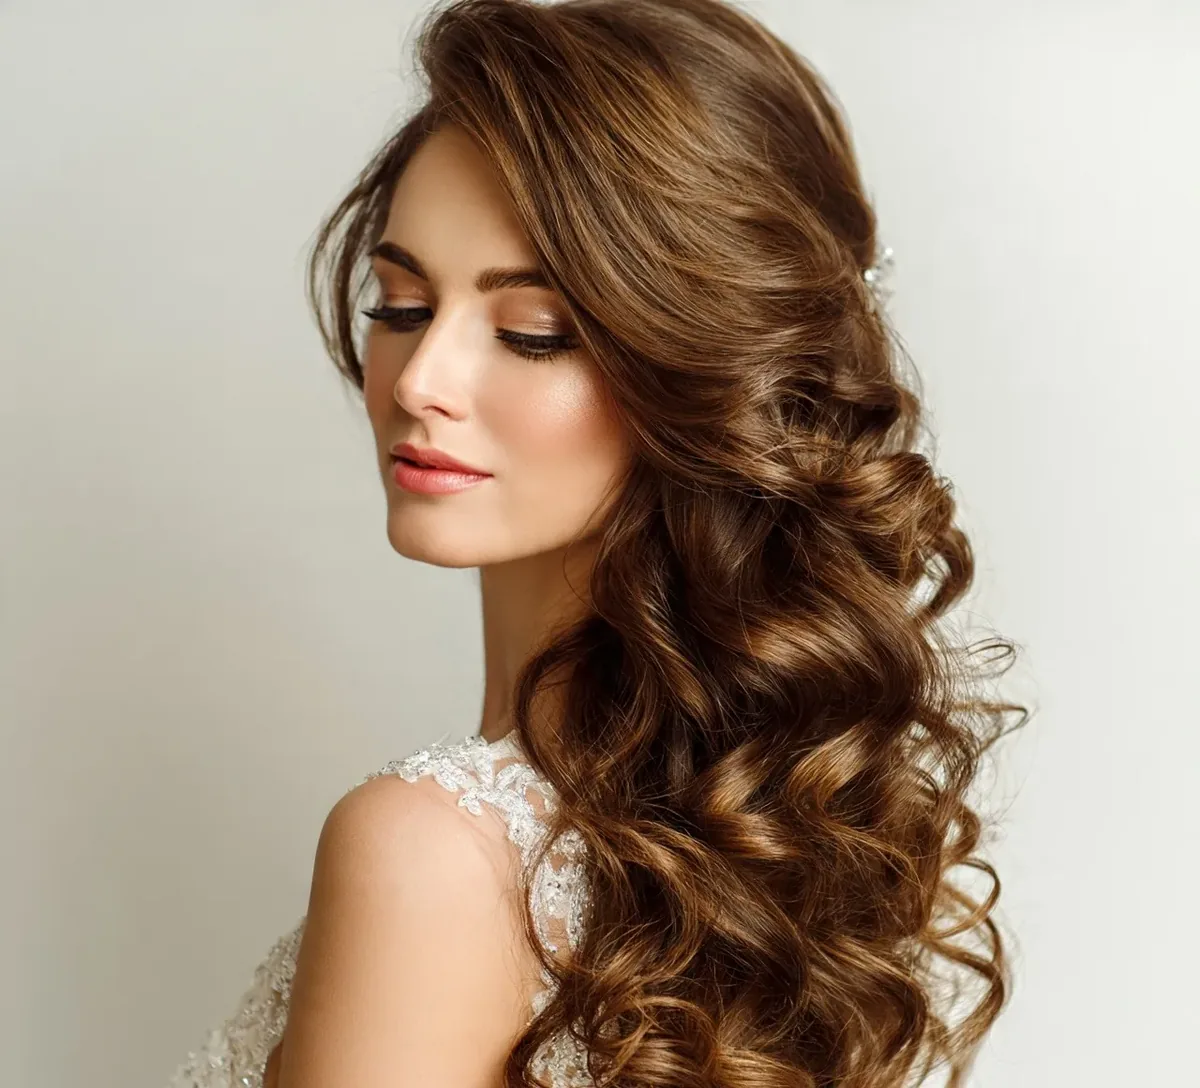
Verdict: relaxed, romantic, and very forgiving. Loose curls with a deep side part give you volume on one side and a soft sweep across the forehead, which flatters almost every face shape and softens the formality of the gown. The side part also helps with the cap — the hair falls naturally to one side instead of being pressed flat in the middle.
Time and cost: 20 to 30 minutes with a curling wand or hot rollers, plus a light-hold spray. Cap-friendly notes: the curls below the shoulders are untouched by the cap, and the side part means the cap crease falls where the hair already parts, so it blends in. It photographs beautifully, especially in outdoor light, but the curls will loosen over a long day — use a strong-hold spray and avoid touching them between photos.
7. The Braided Crown
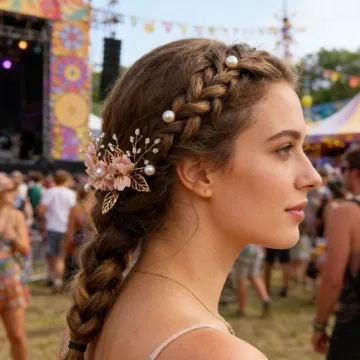
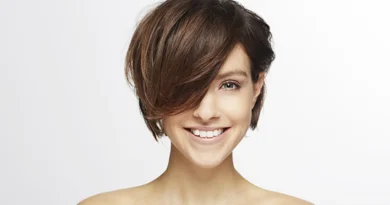
Verdict: the most secure style on this list — it simply does not move. A braided crown circles the head like a halo, holds its shape through hours of ceremony, photos and hugging, and looks intricate without needing a salon. It is also the style that photographs best from the side and the back, where the braid’s pattern shows up beautifully against the gown.
Time and cost: 10 to 15 minutes once you have practised it, no heat and no salon. Cap-friendly notes: the braid sits low around the head, so the cap rests on top of it without crushing it — in fact, the braid can help anchor the cap. It survives wind, humidity and a long ceremony better than almost any other style here. The only caution: keep the braid a little loose at the front, or the cap can press it into a visible band.
8. The High Voluminous Ponytail
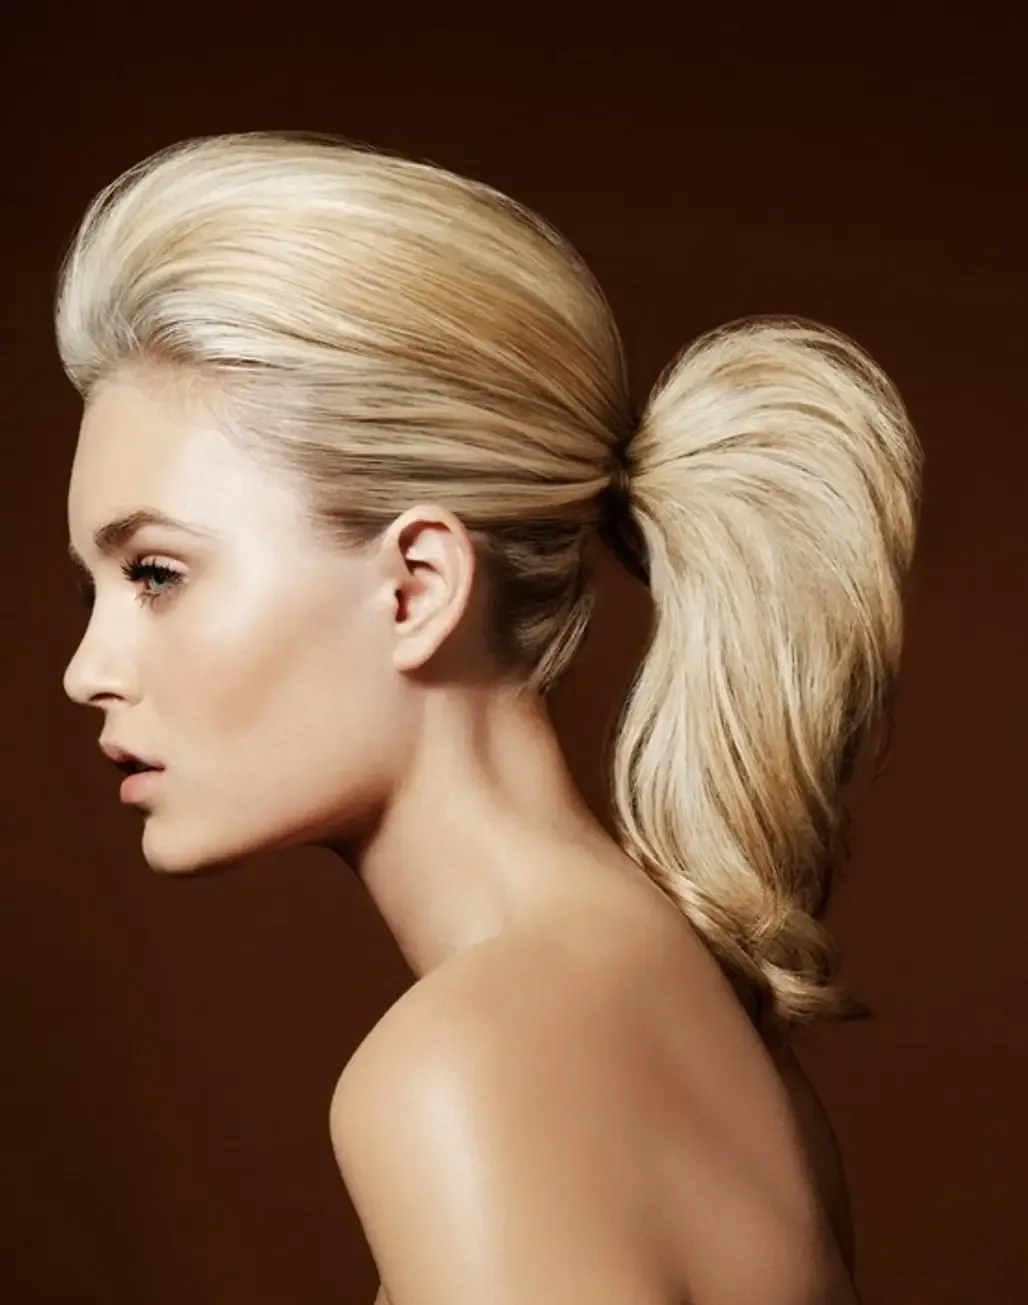
Verdict: bold, energetic, and a statement — but think twice before the cap goes on. A high voluminous ponytail lifts everything up and back, gives you instant height and drama, and looks fantastic in photos taken after the ceremony. The problem is the cap: a high ponytail sits exactly where the cap needs to sit, so the cap will either tilt, crush the base, or slide off.
Time and cost: 10 minutes with a brush, an elastic and some backcombing at the crown, or a salon blowout. Cap-friendly notes: this is the one style here that fights the cap — if you love it, wear it for the photos after the ceremony, not during it. A compromise is a mid-height ponytail, which keeps some of the lift while sitting low enough for the cap. It photographs with real drama, and it lasts well once it is up, because the tension holds the shape.
9. The French Twist
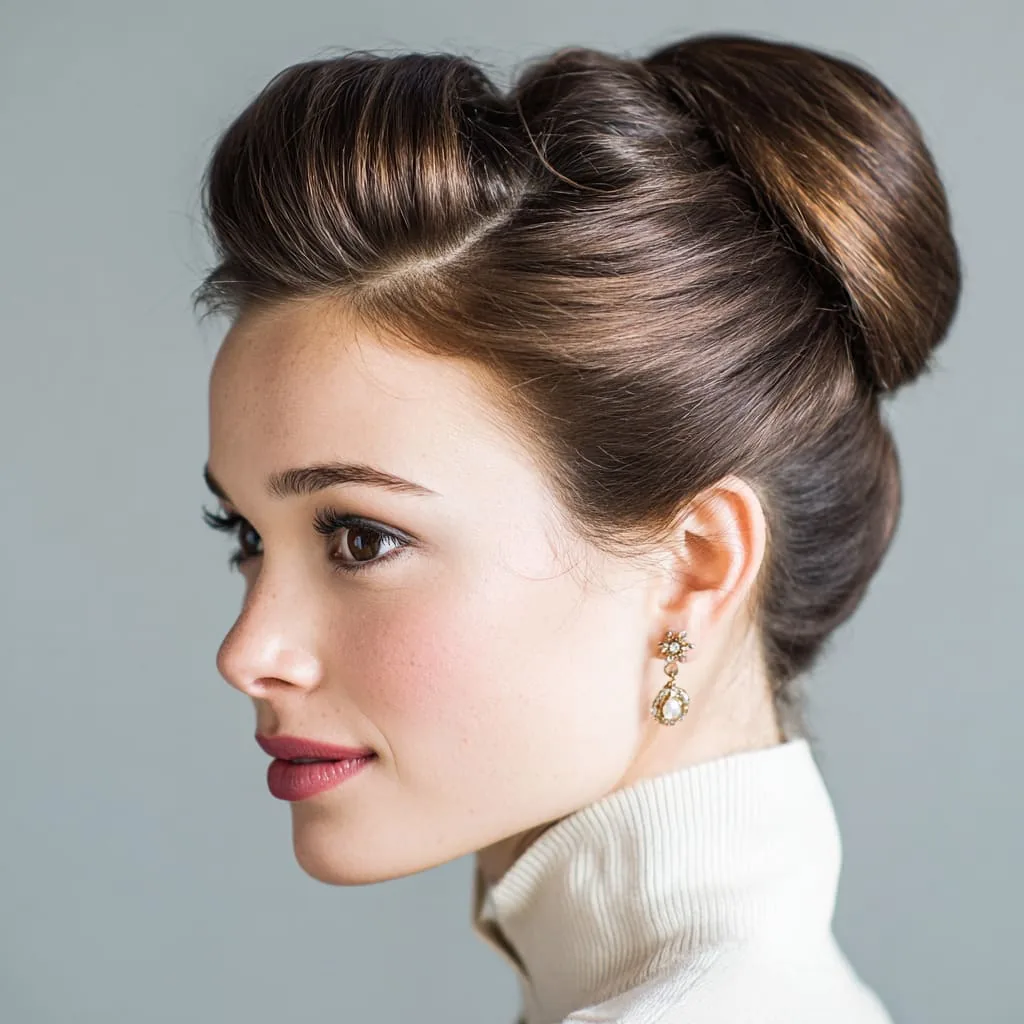
Verdict: the most classic formal updo there is, and it earns its reputation. The French twist sweeps the hair up and tucks it into a vertical roll at the back of the head — elegant, sculpted, and completely at home with a graduation gown. It suits medium to long hair and looks especially good with a stole, because the bare neck lets the regalia show.
Time and cost: 15 to 20 minutes with pins and a strong-hold spray, or a salon updo for a special occasion. Cap-friendly notes: the twist is vertical and sits at the back, so the cap sits above it without flattening it — but the top of the twist can brush the cap’s underside, so keep the roll a little lower than you think. It photographs beautifully from the side and the back, and it holds through a long ceremony if you pin it well.
10. Romantic Loose Updo
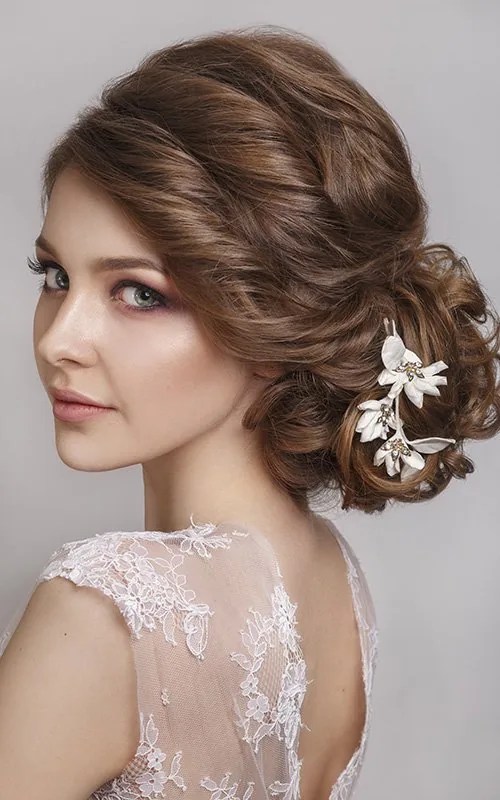
Verdict: soft, pretty, and the best choice if you hate the feeling of a tight updo. A romantic loose updo gathers the hair into a soft, slightly undone shape at the back, with a few face-framing pieces left loose — it looks effortless, even though it takes a little work. It suits wavy and curly hair particularly well, because the texture does the styling for you.
Time and cost: 15 to 20 minutes with pins, a curling wand for the loose pieces, and a light-hold spray. Cap-friendly notes: keep the bulk low and the loose pieces in front of your ears, not under the cap band, or they will be pressed flat. It photographs beautifully in soft light, and the loose pieces give the camera something gentle to catch. The trade-off: it is the least secure of the updos here, so carry extra pins and check it before the photo session.
11. The Bubble Ponytail
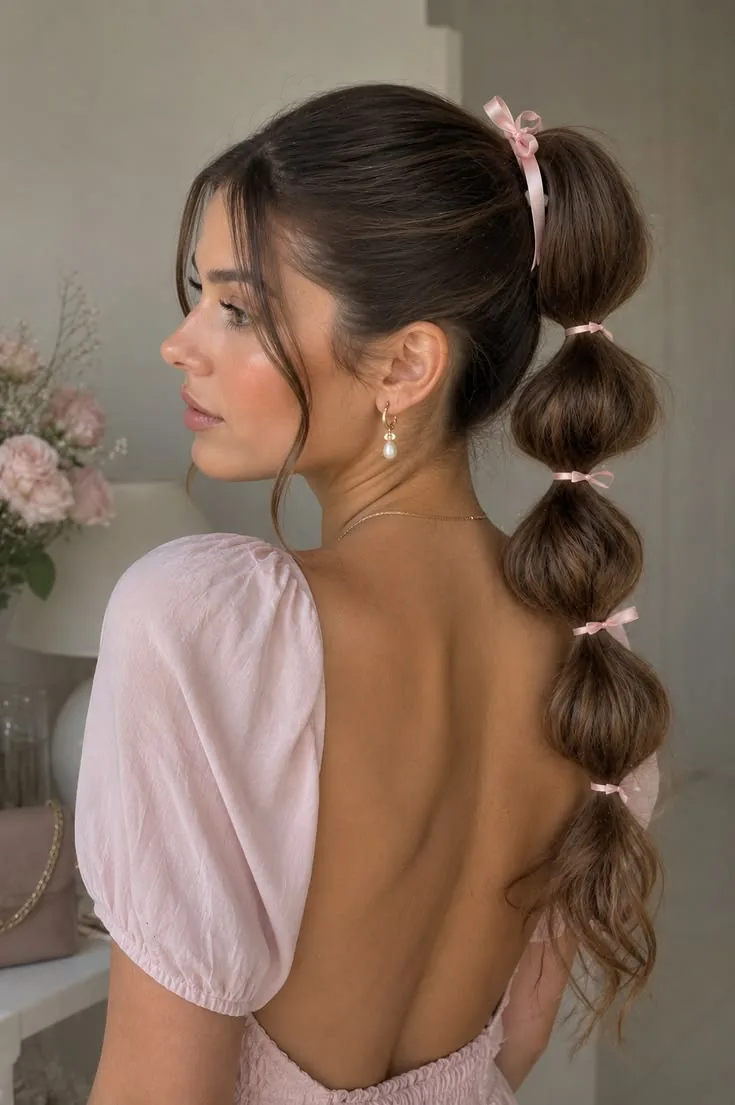
Verdict: fun, modern, and surprisingly practical. The bubble ponytail — a ponytail divided into puffed sections with elastics — adds volume and personality without needing length or heat, and it stands out in a crowd of low buns. It is the style for graduates who want something a little different but still want their hair to survive the day.
Time and cost: 10 to 15 minutes, just elastics and a little texturising spray. Cap-friendly notes: wear it low or mid-height so the cap clears the first bubble, and keep the bubbles below the shoulders so the cap band does not flatten them. It photographs with real character — the bubbles read clearly on camera — and it lasts through the ceremony because each section is anchored separately.
12. Sleek Straight Hair With a Centre Part
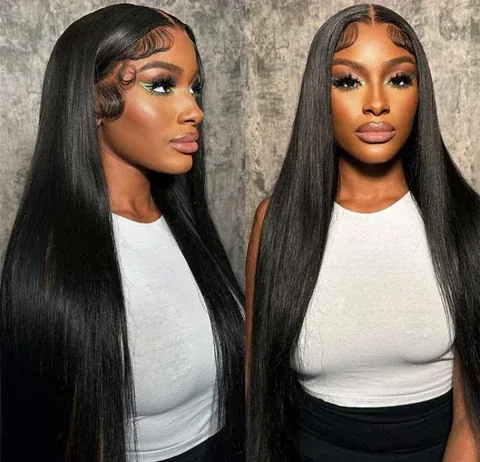
Verdict: minimal, modern, and striking — if your hair is healthy enough to carry it. Sleek straight hair with a centre part is the simplest look on this list, and that is the point: a smooth, shining fall of hair frames the face symmetrically and looks immaculate in photos. It demands good condition and a good straightener, because straight hair shows every split end.
Time and cost: 20 to 30 minutes with a straightener and a heat protectant, plus a shine serum. Cap-friendly notes: the cap will press a band across the crown, so part the hair slightly off-centre after the cap comes off and finger-comb the front to hide the crease. It photographs beautifully in good light, but it is the style most affected by humidity — a smoothing serum is essential if the ceremony is outdoors.
13. The Textured Low Bun
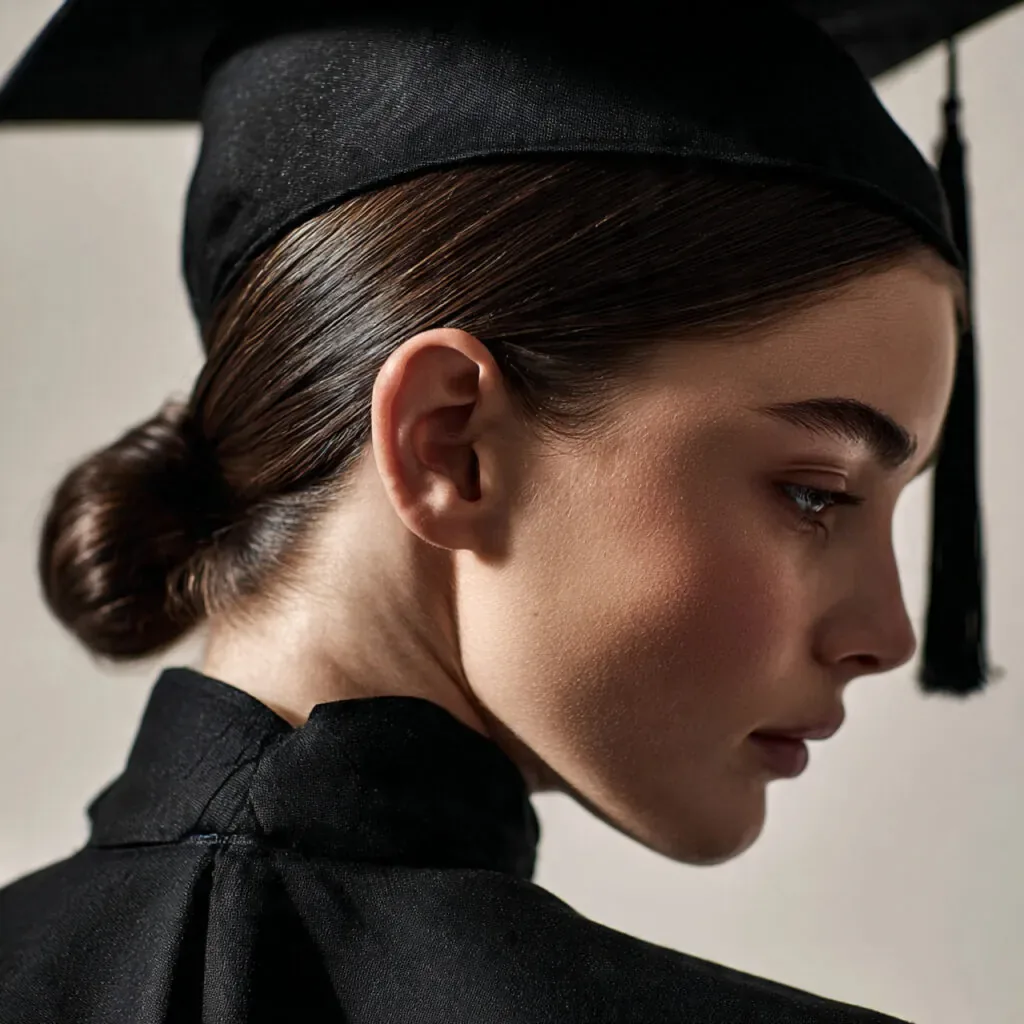
Verdict: the low bun for women who find the sleek version too severe. A textured low bun adds softness — a little backcombing, a few pulled-out pieces, a slightly undone finish — so the style looks relaxed and lived-in instead of boardroom-strict. It is the same practical shape as the sleek bun, with a gentler personality.
Time and cost: about 10 minutes with texturising spray and pins, no heat needed. Cap-friendly notes: the texture actually helps here — a cap crease blends into a textured bun instead of showing up as a dent, which is why this is the smarter choice if you know you will be taking the cap on and off. It photographs beautifully from the front, where the soft pieces frame the face, and it survives the whole ceremony without a touch-up.
14. Side-Swept Curls
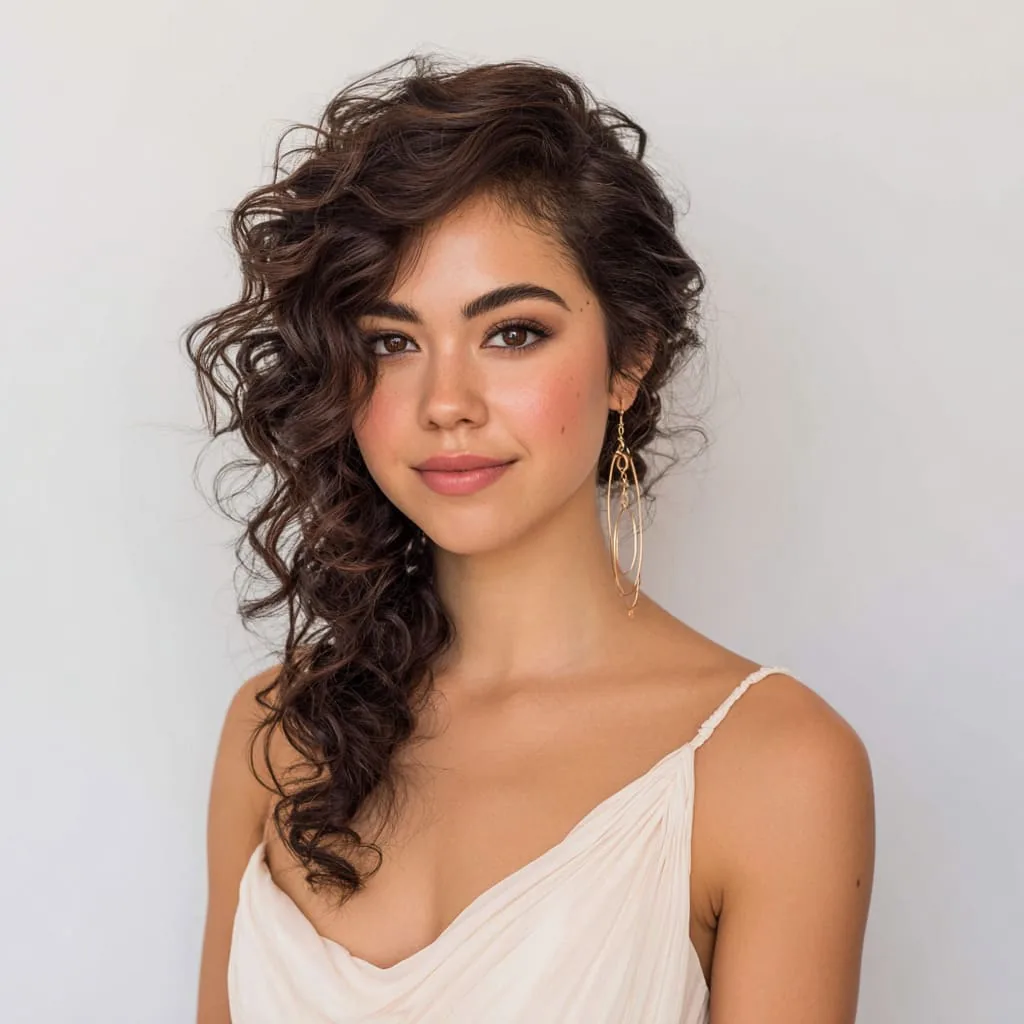
Verdict: old-Hollywood glamour without the effort of a full set. Side-swept curls gather all the volume to one side, which photographs beautifully and keeps the hair off the gown’s stole on the other side. The sweep across the forehead softens the face, and the curls falling over one shoulder give the camera a clear, elegant shape to capture.
Time and cost: 25 to 35 minutes with a curling iron, plus pins to hold the sweep and a strong-hold spray. Cap-friendly notes: sweep the curls to the side opposite your cap’s tilt, and keep the pinned side flat so the cap sits evenly. The curls below the shoulder are untouched by the cap. It photographs wonderfully, especially in profile, but it is a one-side style — check both sides in the mirror before the photos.
15. The Fishtail Braid
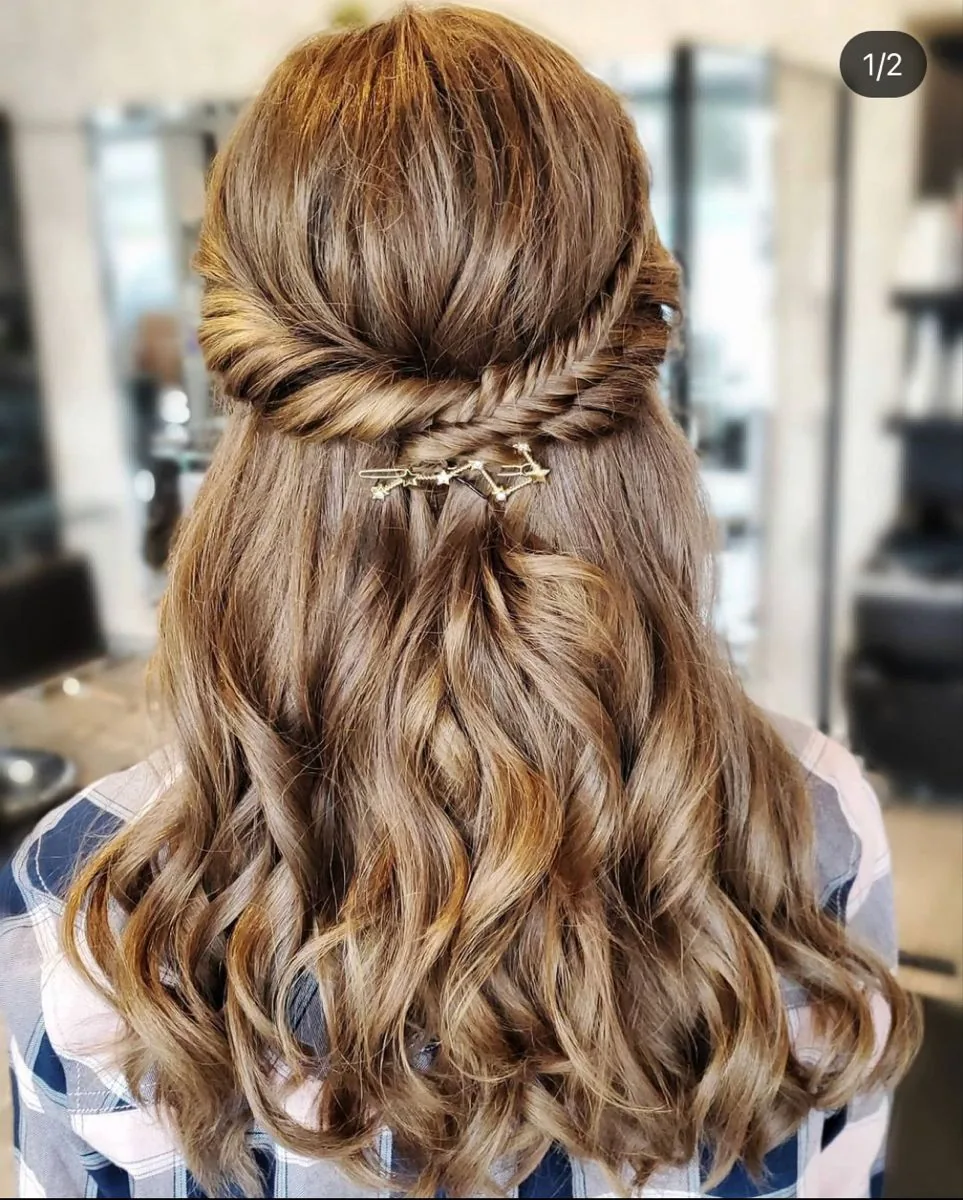
Verdict: intricate-looking, easy to do, and one of the longest-lasting styles on this list. A fishtail braid — two sections woven into a fine, herringbone pattern — looks like it took a salon visit, but it is just a simple over-under motion repeated down the length. It holds its shape for hours, which is exactly what a long graduation day needs.
Time and cost: 10 to 15 minutes, no heat, no salon, just patience for the weaving. Cap-friendly notes: wear it over one shoulder or down the back — either way the cap never touches the braid, and the braid’s texture hides any cap crease at the crown. It photographs beautifully, especially from the side, and it survives wind and humidity far better than loose curls. The only watch-out: a fishtail needs length, so it suits medium to long hair best.
16. The Curly Afro Puff
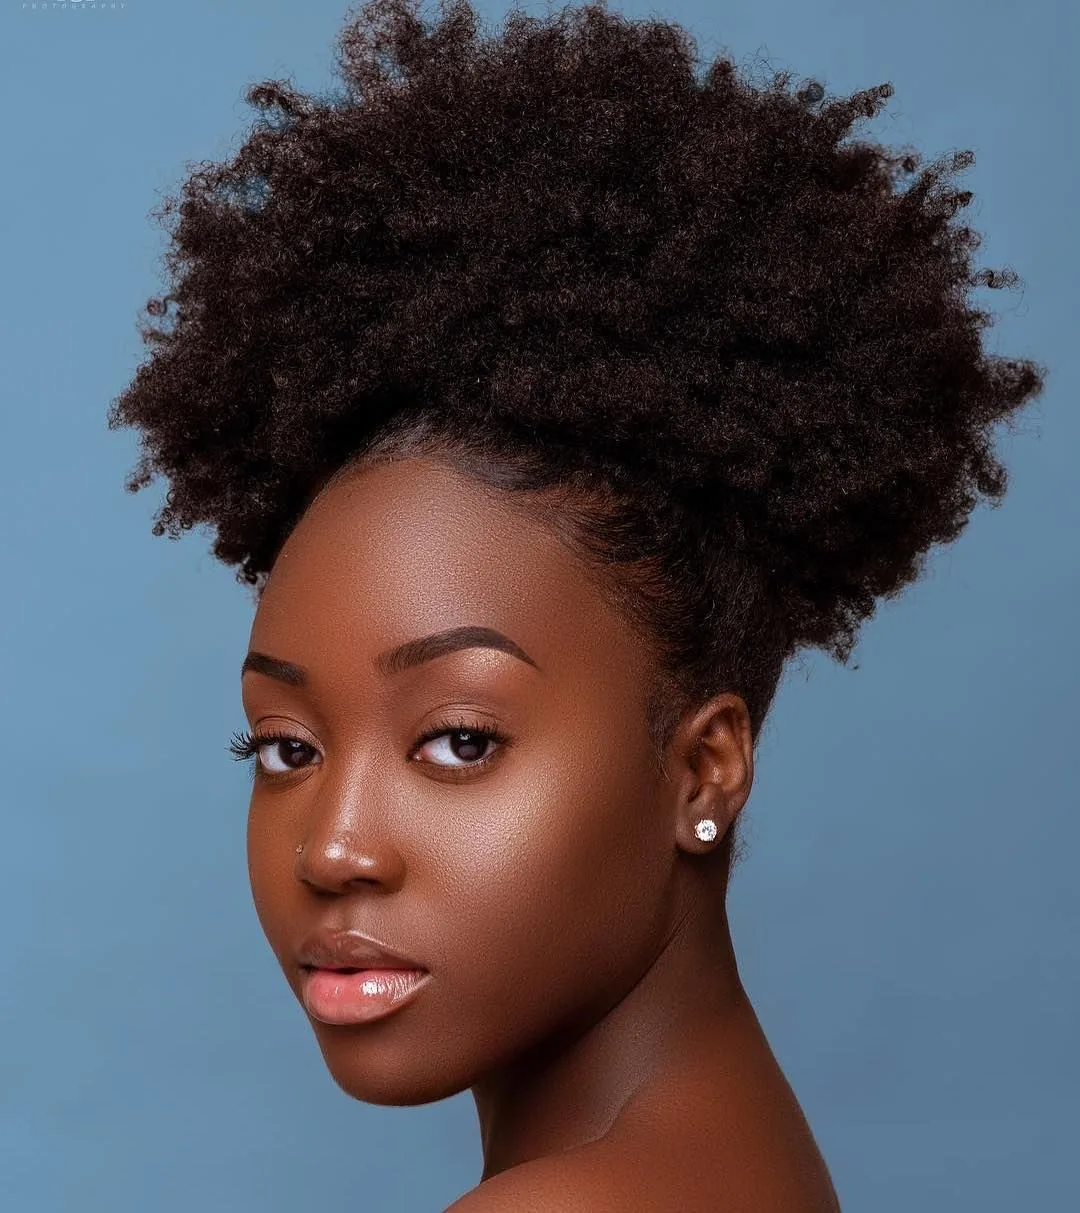
Verdict: joyful, proud, and perfectly suited to graduation day. A curly afro puff gathers natural curls into a full, rounded shape that celebrates the hair’s own texture — no heat, no straightening, no fighting the curl. It photographs with real presence, because the volume and shape read clearly from every angle, and it looks just as good under a cap as without one.
Time and cost: five minutes with a little curl cream and a hair tie — one of the cheapest styles here. Cap-friendly notes: the puff sits high enough that the cap rests on the hair rather than crushing a style, and the curls spring back the moment the cap comes off. It lasts through the whole ceremony without a touch-up, because the shape is the hair’s natural state. A little edge control around the hairline keeps the front neat for photos.
17. The Vintage Finger Wave Bob
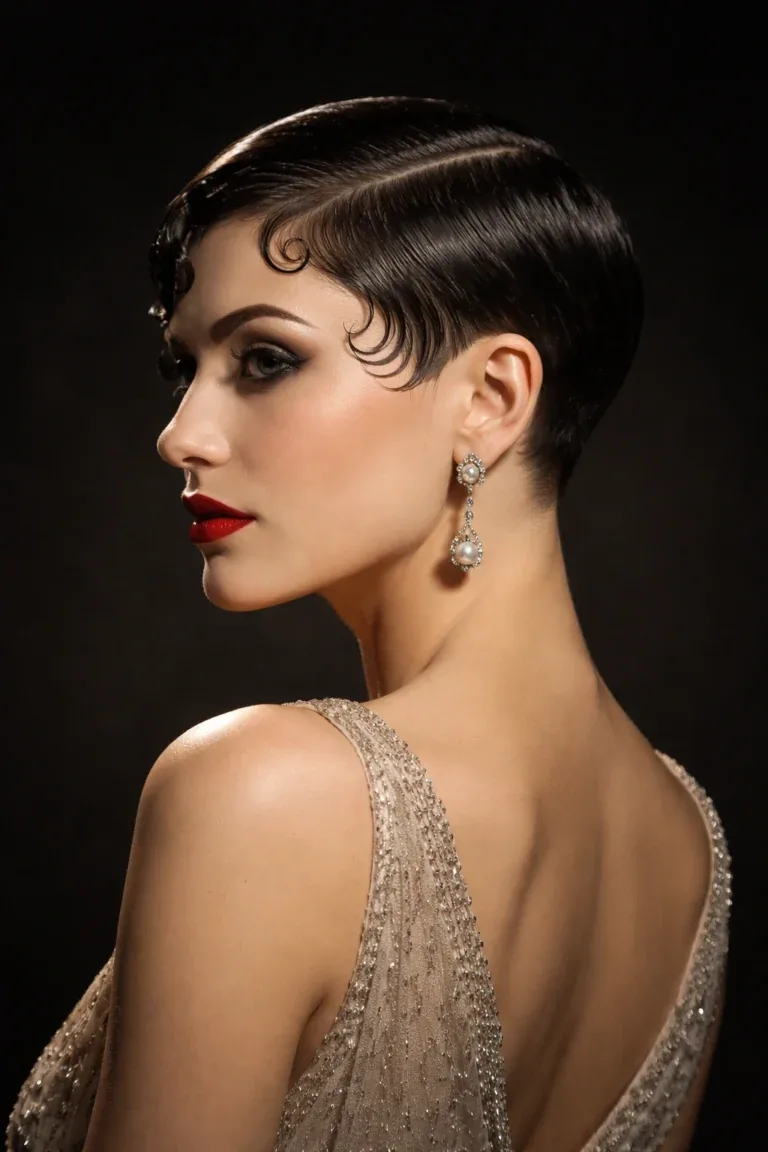
Verdict: the most distinctive style on this list, and a showstopper in photos. Vintage finger waves — sculpted S-shaped waves pressed close to the head — give a bob a 1920s elegance that no other style matches. It is a bold choice, and it needs confidence, but in graduation photos it looks like a portrait from another era.
Time and cost: 30 to 45 minutes with setting gel and clips, or a salon set — this is not a rushed-morning style. Cap-friendly notes: the waves are pressed flat to the head, so the cap sits neatly on top without crushing anything, and the shape springs back when the cap comes off. It photographs beautifully in black and white as well as colour. The trade-off: it is the least forgiving style here if the weather turns humid, so save it for an indoor ceremony or a dry day.
18. The Messy Low Bun With Face-Framing Pieces
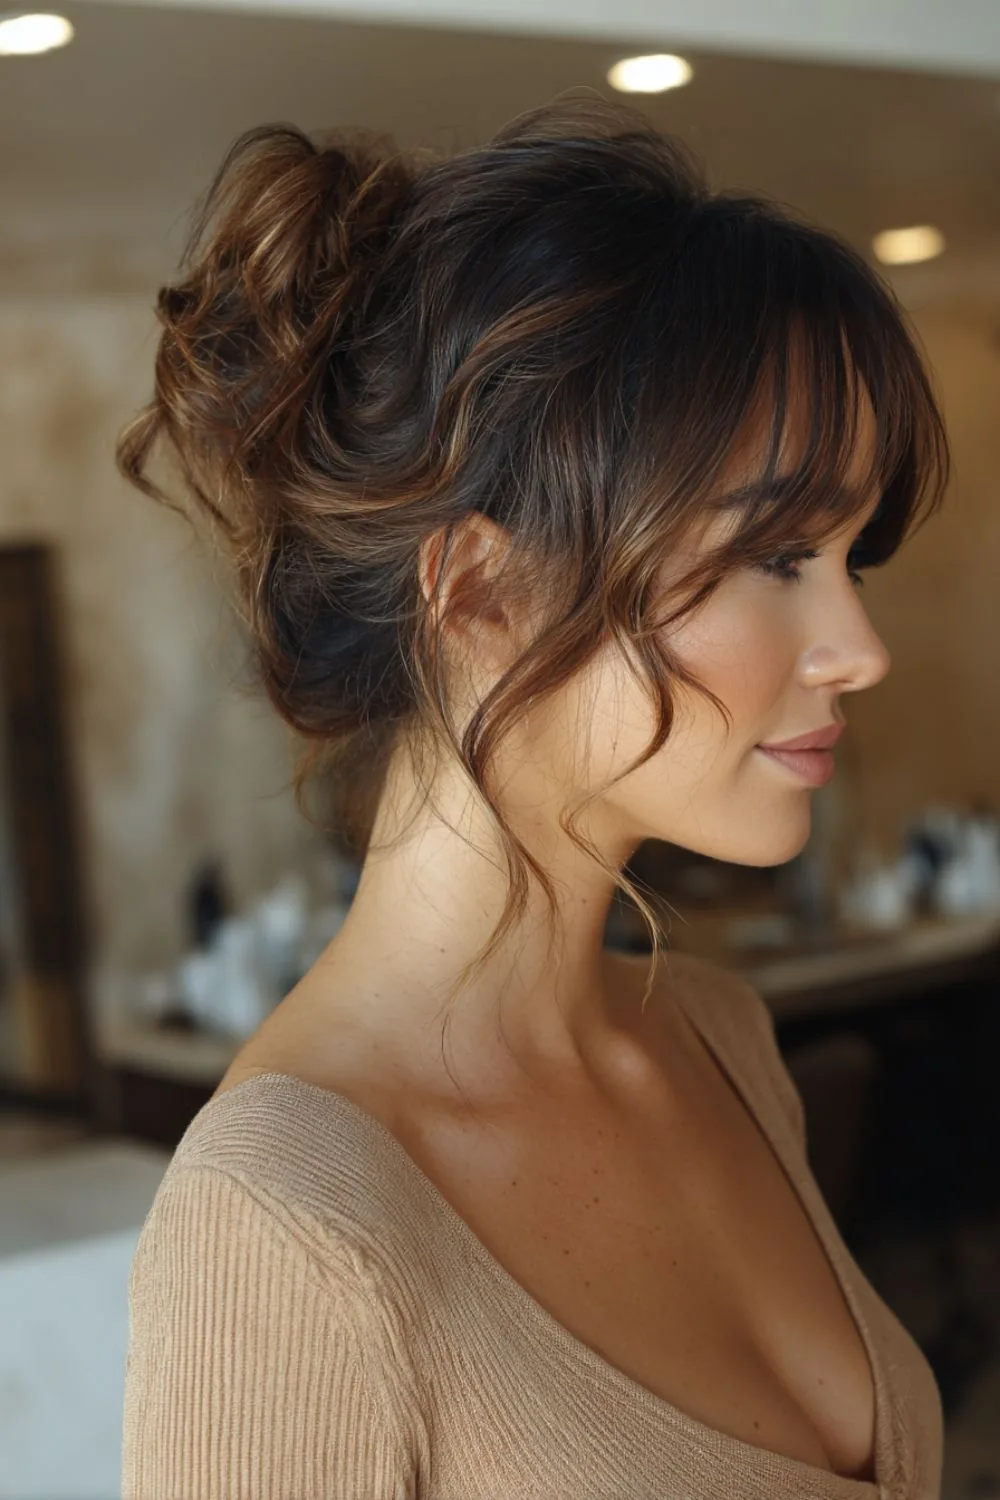
Verdict: the everyday favourite that also happens to be perfect for graduation. A messy low bun with a few soft pieces pulled loose around the face is relaxed, flattering and forgiving — it looks intentional without looking stiff, and it suits every face shape because the loose pieces soften the hairline. It is the style most graduates actually wear, and for good reason.
Time and cost: five minutes, no heat, just an elastic and a few pins. Cap-friendly notes: the loose pieces are the only risk — keep them in front of your ears, not under the cap band, and they will stay soft after the cap comes off. The bun itself is completely clear of the cap. It photographs beautifully from the front, and it survives the ceremony, the photos and the family lunch without a single check.
19. The Dutch Braid Crown
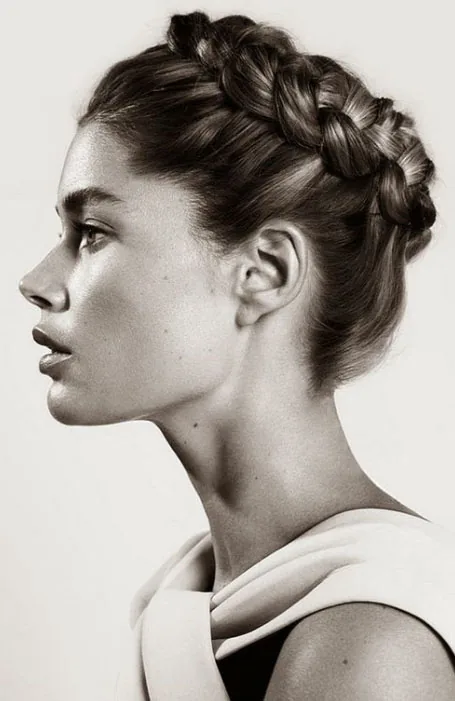
Verdict: the braided crown’s bolder sister, and even more secure. A Dutch braid crown — the braid woven outward so it sits on top of the hair instead of inside it — creates a raised, visible braid that frames the face like a headband. It holds through wind, hugging and hours of ceremony, and it looks intricate enough to draw compliments all day.
Time and cost: 15 to 20 minutes once you have the technique, no heat and no salon. Cap-friendly notes: the raised braid actually helps the cap sit evenly, because the cap rests on the braid instead of sliding on smooth hair. It survives the whole day without loosening, and it photographs beautifully from the front and the side. Keep the braid slightly loose at the temples so the cap band does not press it into a line.
20. The Glossy Blowout
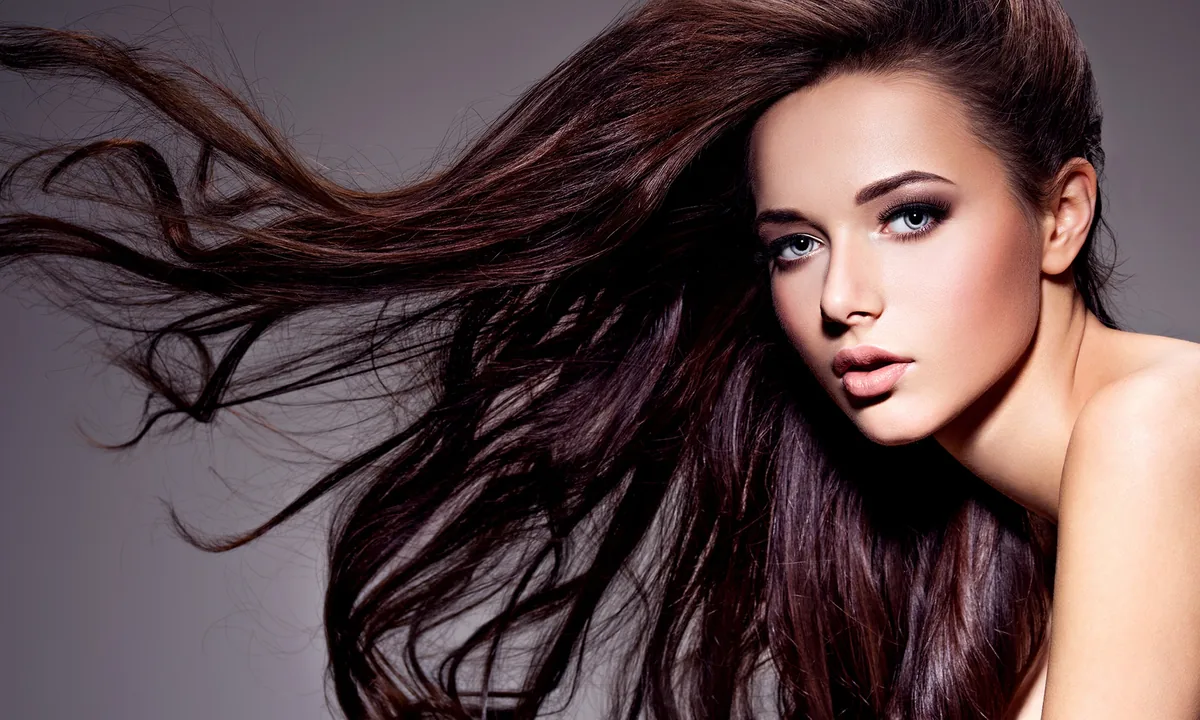
Verdict: the salon-fresh look that makes graduation morning feel like an occasion. A glossy blowout — smooth, bouncy, shining hair with movement at the ends — is the style that looks best in the first hour of the day and needs the most help to survive the rest of it. Book it if you love the feeling of freshly styled hair, and plan for a little maintenance.
Time and cost: 30 to 45 minutes at home with a round brush and a dryer, or a salon blowout. Cap-friendly notes: the cap will flatten the crown, so ask for extra volume at the roots and keep the front sections loose enough to finger-comb back into shape. It photographs beautifully in the first photos, especially outdoors, but the volume drops over a long ceremony — a travel-size dry shampoo and a quick root lift before the photo session will bring it back.
21. The Side Braid
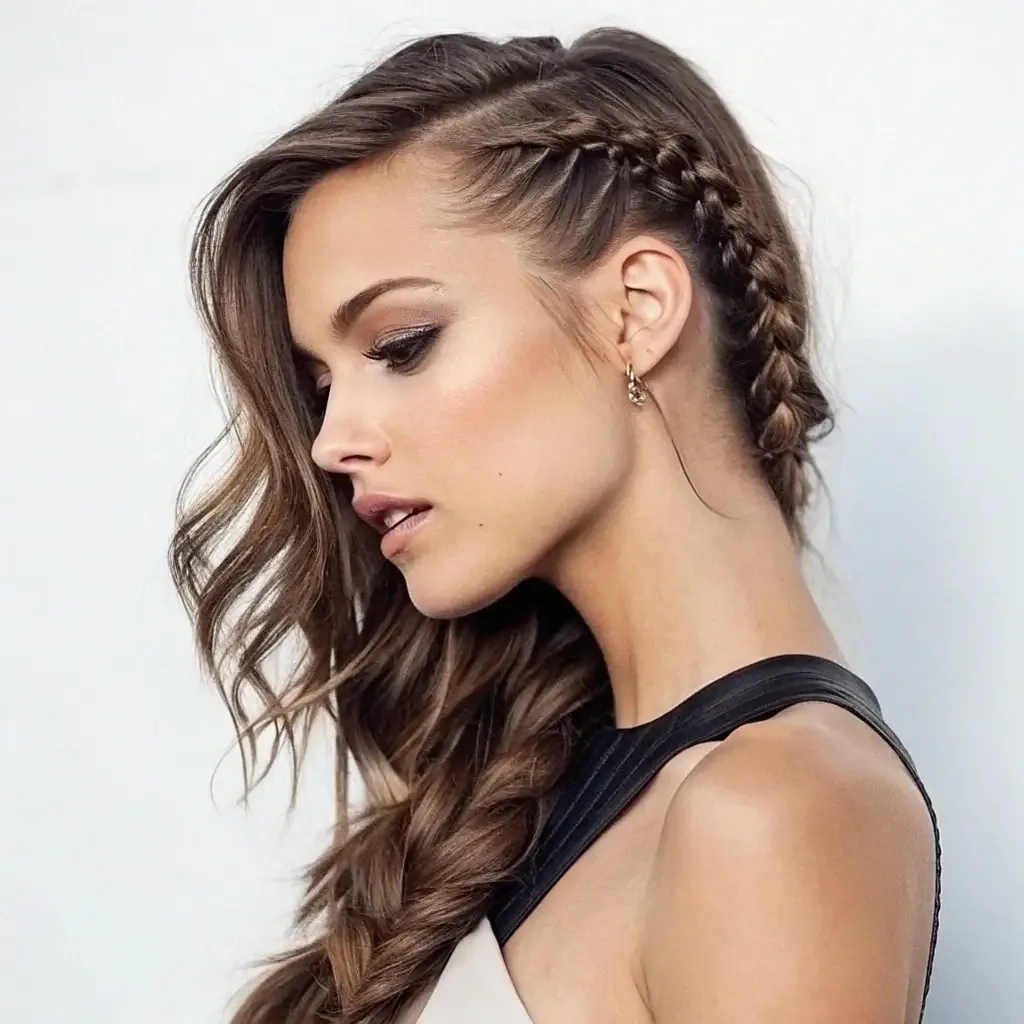
Verdict: simple, pretty, and the easiest braid to do on yourself. A side braid gathers the hair over one shoulder, keeps it off the gown and out of the way, and looks soft and romantic in photos. It is the braid for women who want the security of a braid without the effort of a crown or a fishtail.
Time and cost: five minutes, no heat, no products beyond an elastic. Cap-friendly notes: the braid sits over the shoulder, far from the cap, so the cap never touches it — and a side braid actually hides a cap crease at the crown, because the hair is swept to one side. It photographs beautifully from the braid side, and it lasts through the whole ceremony. The only watch-out: keep the braid loose at the front, or it can pull at the hairline over a long day.
22. The Low Twisted Knot
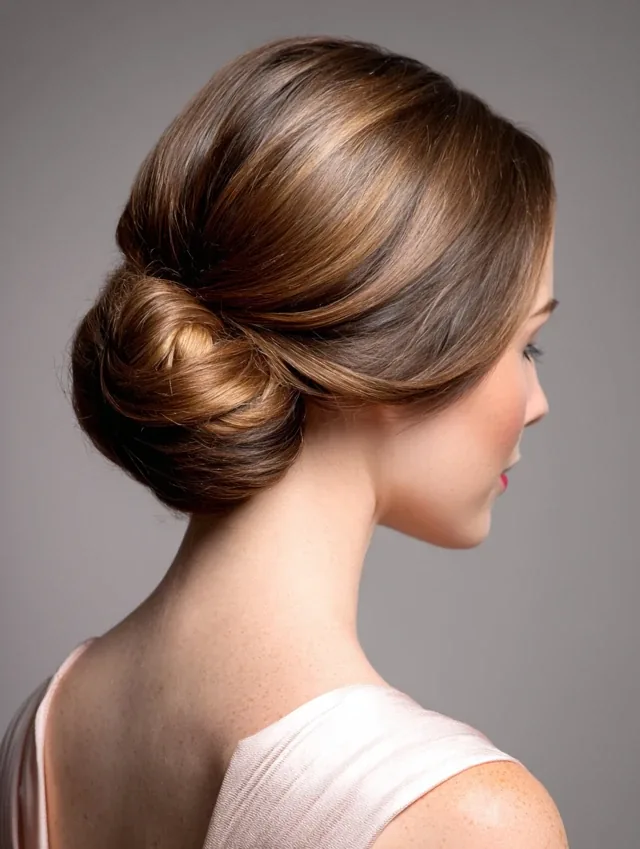
Verdict: the chignon’s modern cousin, and just as reliable. A low twisted knot takes two twisted sections and coils them into a soft knot at the nape — it looks sculpted and deliberate, but it is really just two twists and a few pins. It suits straight and wavy hair best, and it looks especially good with a stole, because the bare neck lets the regalia show.
Time and cost: about 10 minutes, no heat, just pins and a little texturising spray. Cap-friendly notes: the knot sits at the nape, completely clear of the cap, so there is no crease and no flattening. It photographs beautifully from the side, where the twist shows, and it survives hours of ceremony without loosening — the twist structure holds itself together.
23. Bouncy Blow-Dried Curls
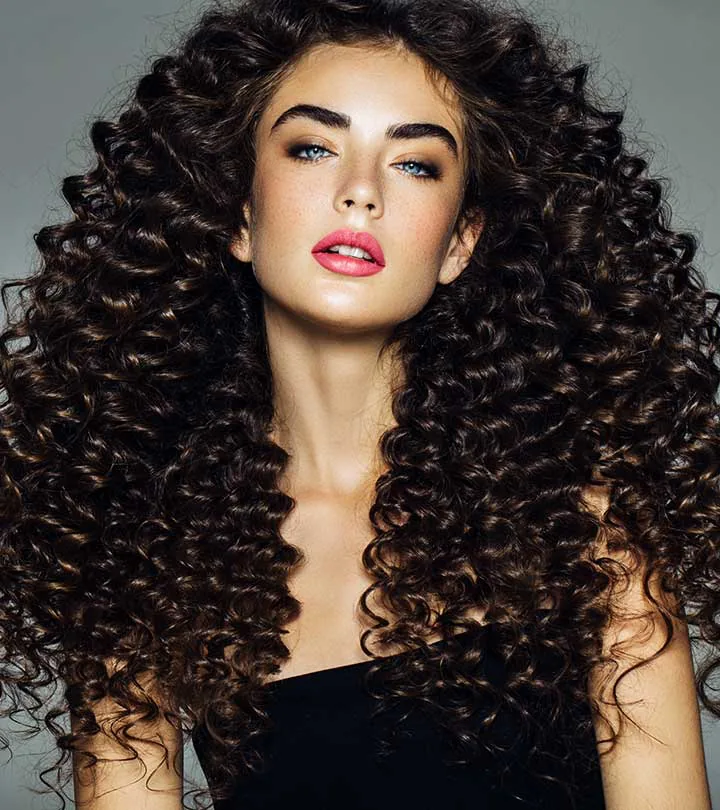
Verdict: the most joyful volume on this list. Bouncy blow-dried curls — big, soft, springy curls with movement at the ends — give you the energy of a celebration and look fantastic in photos, especially outdoors. The catch is the same as any curl: gravity and humidity will loosen them over a long day, so this is a style that needs a little planning.
Time and cost: 30 to 40 minutes with a round brush or hot rollers, plus a strong-hold spray; a salon set lasts longest. Cap-friendly notes: the cap will press the crown flat, so ask for extra lift at the roots and keep the front curls loose enough to reshape with your fingers after the cap comes off. It photographs with real life and movement, but carry a travel hairspray and check the curls before the photo session.
24. The Half-Up Claw Clip Twist
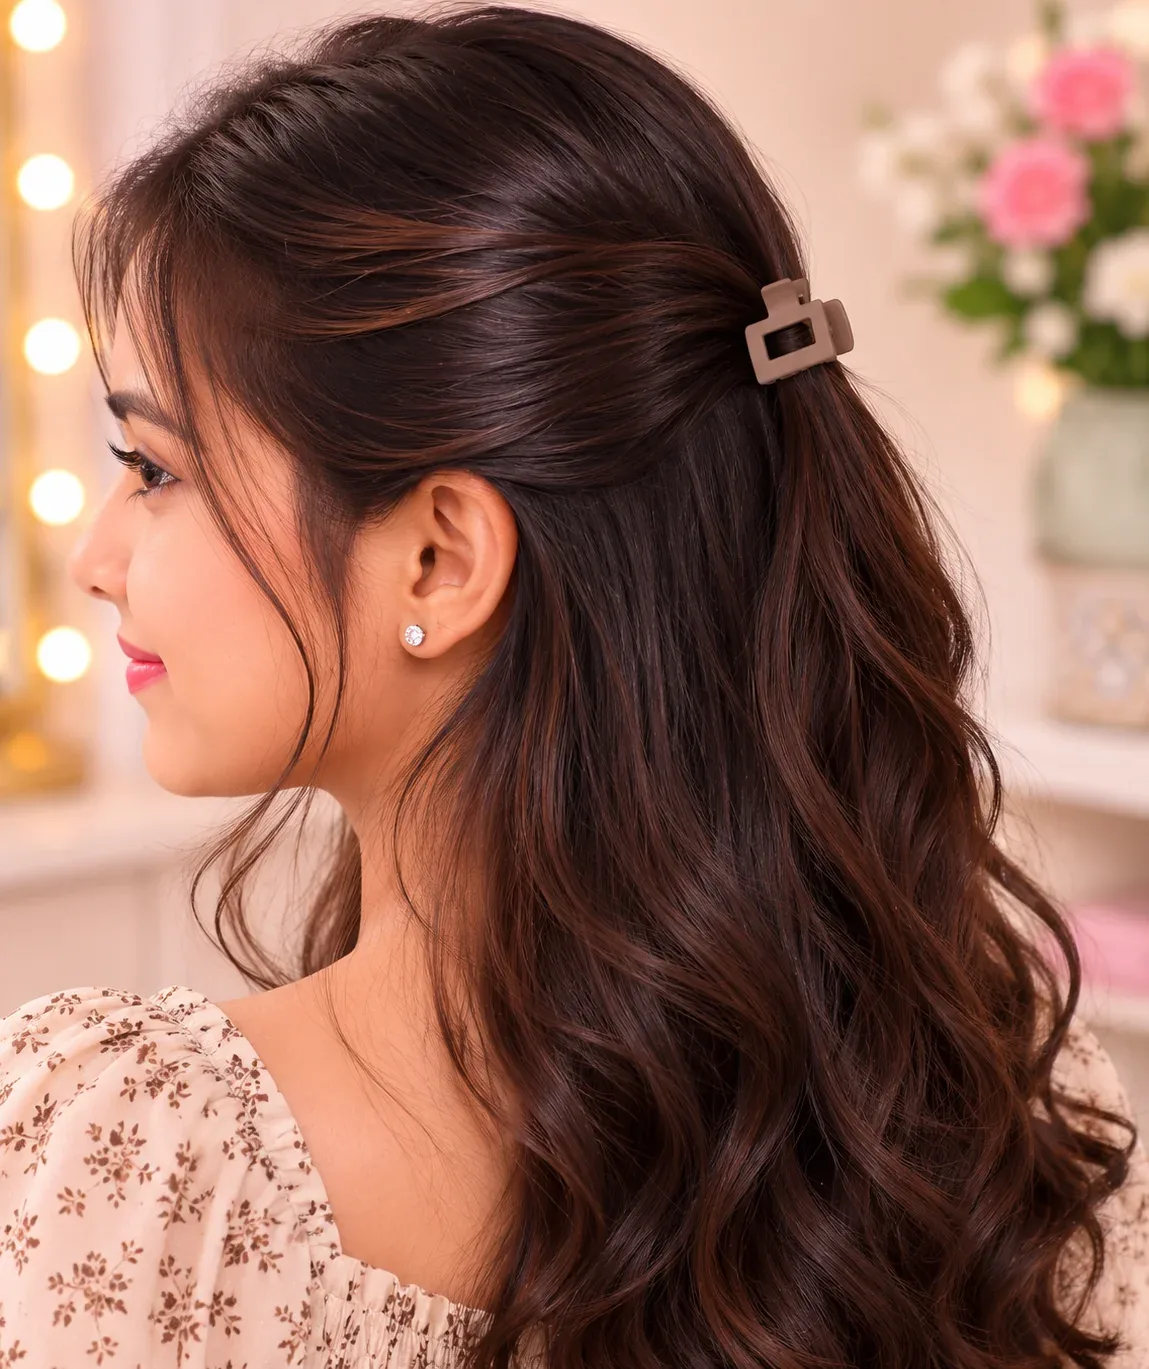
Verdict: the easiest style on this list, and the one most likely to survive a long day. A half-up claw clip twist takes the front sections, twists them back and clips them in place — two minutes, no pins, no heat, and the clip holds the twist through the whole ceremony. It is the style for graduates who want to look put together with the least possible effort.
Time and cost: two minutes and one claw clip — the cheapest style here. Cap-friendly notes: the twist sits low enough that the cap does not crush it, and the clip anchors the style so the cap cannot slide it around. It photographs well from the front, where the twist frames the face, and it lasts all day because the clip does the holding. The only caution: choose a clip that matches your hair colour, or it will show in photos.
25. The Elegant Top Knot
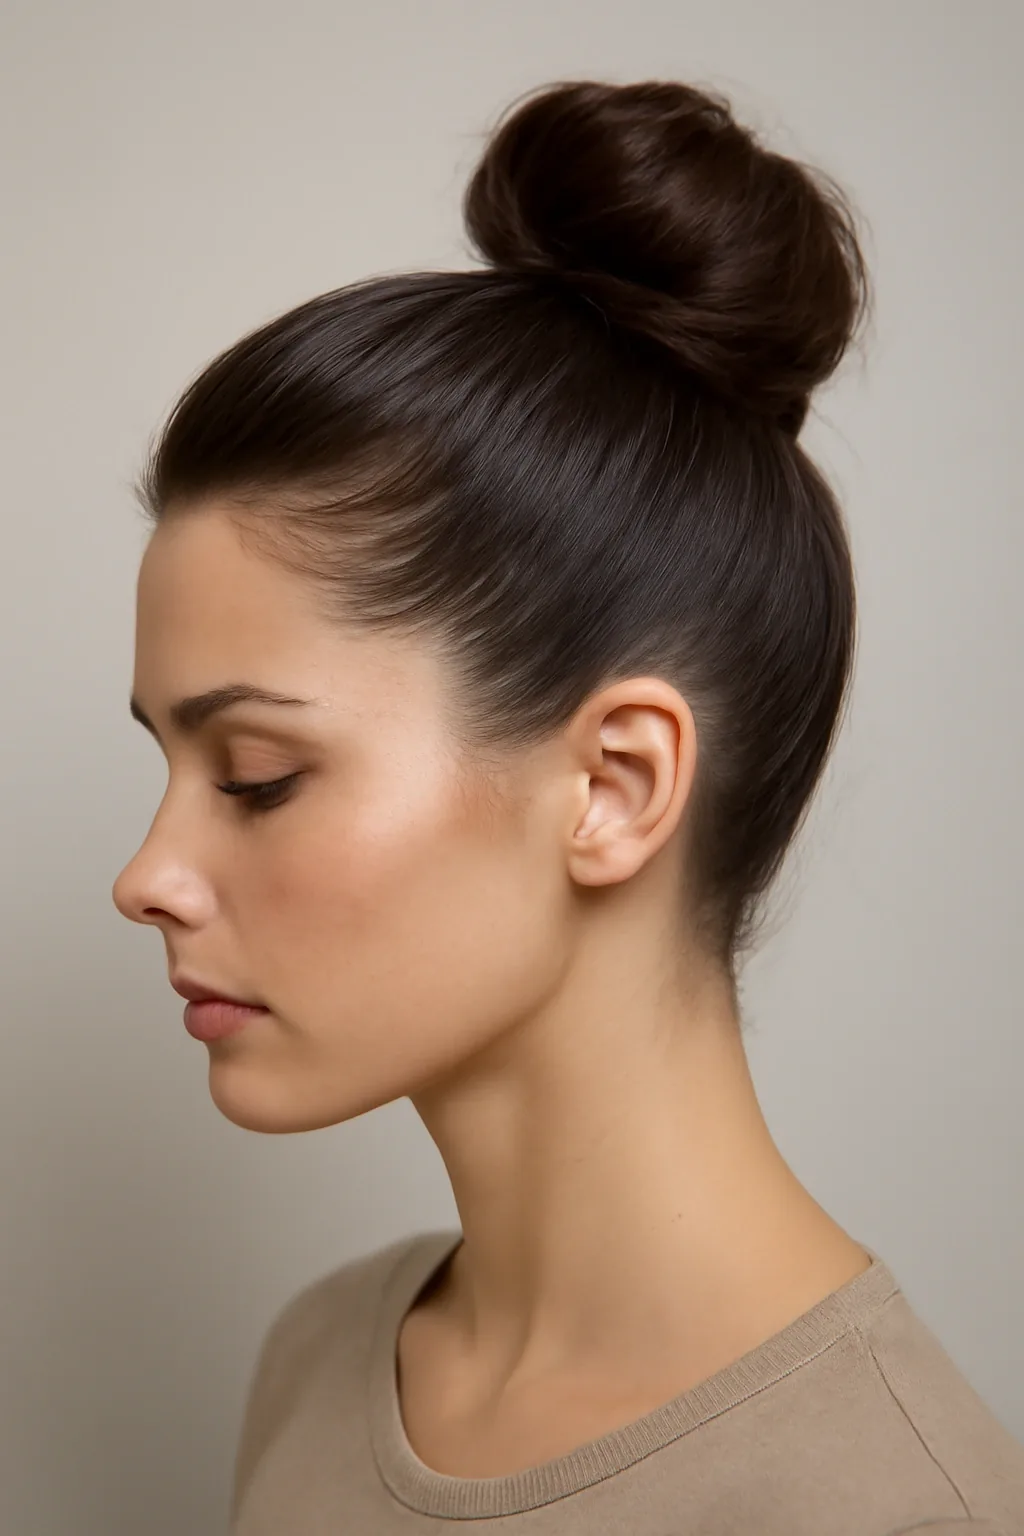
Verdict: beautiful after the ceremony, risky during it. An elegant top knot pulls everything up into a smooth, sculpted knot on the crown — it lengthens the neck, shows off the face, and looks wonderful in evening photos. But the knot sits exactly where the graduation cap needs to go, which makes it a poor choice for the ceremony itself.
Time and cost: 10 minutes with a brush, an elastic and pins, or a salon finish. Cap-friendly notes: this is a post-ceremony style — wear a low bun for the ceremony, then twist the hair up into a top knot for the evening celebrations and the dinner photos. It photographs beautifully once the cap is off, and it lasts well because the knot is anchored tightly. Do not try to wear it under the cap: the cap will tilt, the knot will flatten, and neither will look good.
26. The Wavy Lob
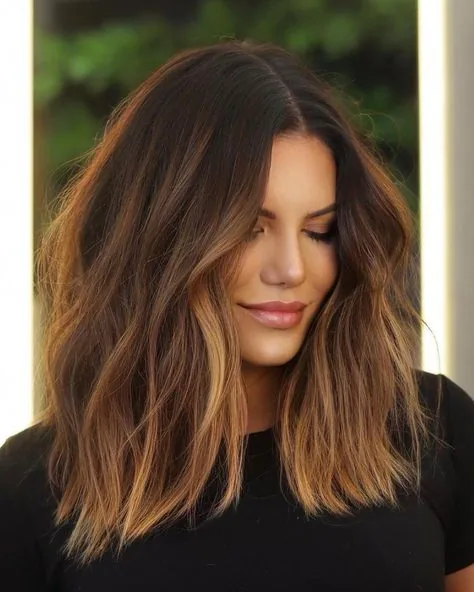
Verdict: the most versatile length for graduation day. A wavy lob — a long bob that falls between the chin and the shoulders, with soft waves through the mid-lengths — is long enough to feel feminine and short enough to stay light under a gown. The waves give the style movement, which photographs beautifully, and the length means the cap barely touches the hair at all.
Time and cost: 15 to 20 minutes with a curling wand or a texturising spray on damp hair, or a salon cut. Cap-friendly notes: the cap only presses the crown, and the waves below the shoulders are completely untouched — a quick finger-comb at the roots after the cap comes off is all the fixing you need. It photographs beautifully from the front and the side, and it survives the ceremony because the waves are the hair’s own texture, not a heat-set shape that drops out.
27. The Milkmaid Braids
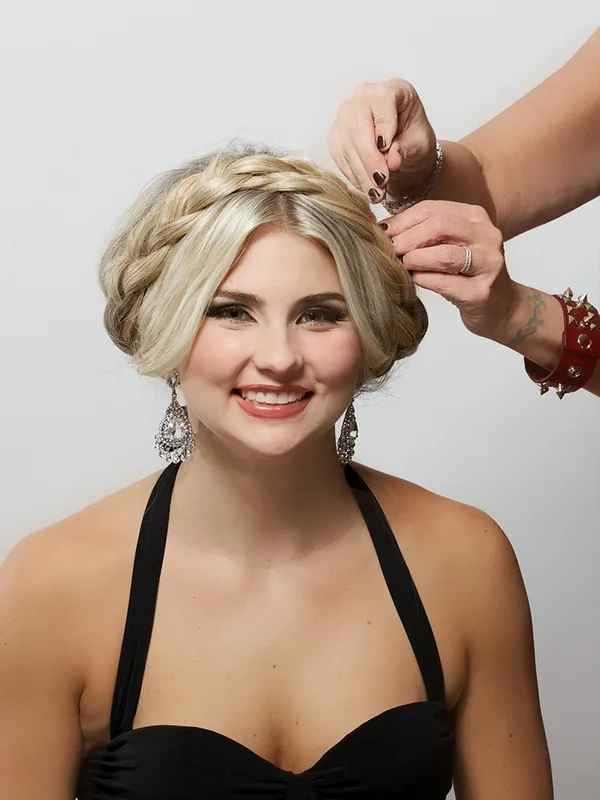
Verdict: sweet, romantic, and one of the most secure styles here. Milkmaid braids — two braids wrapped across the top of the head — look like a flower crown made of hair, and they hold through wind, hugging and hours of ceremony without a single pin slipping. They suit medium to long hair and look especially good with a simple gown, because the braids add all the detail the outfit needs.
Time and cost: 15 minutes, no heat, just two braids and a few pins. Cap-friendly notes: the braids sit across the crown, so the cap rests on top of them — and because they are braided, the cap cannot flatten them. They survive the whole day without loosening, and they photograph beautifully from the front, where the braid frames the face like a headband. Keep the braids slightly loose so the cap band does not press them into a line.
28. The Sock Bun
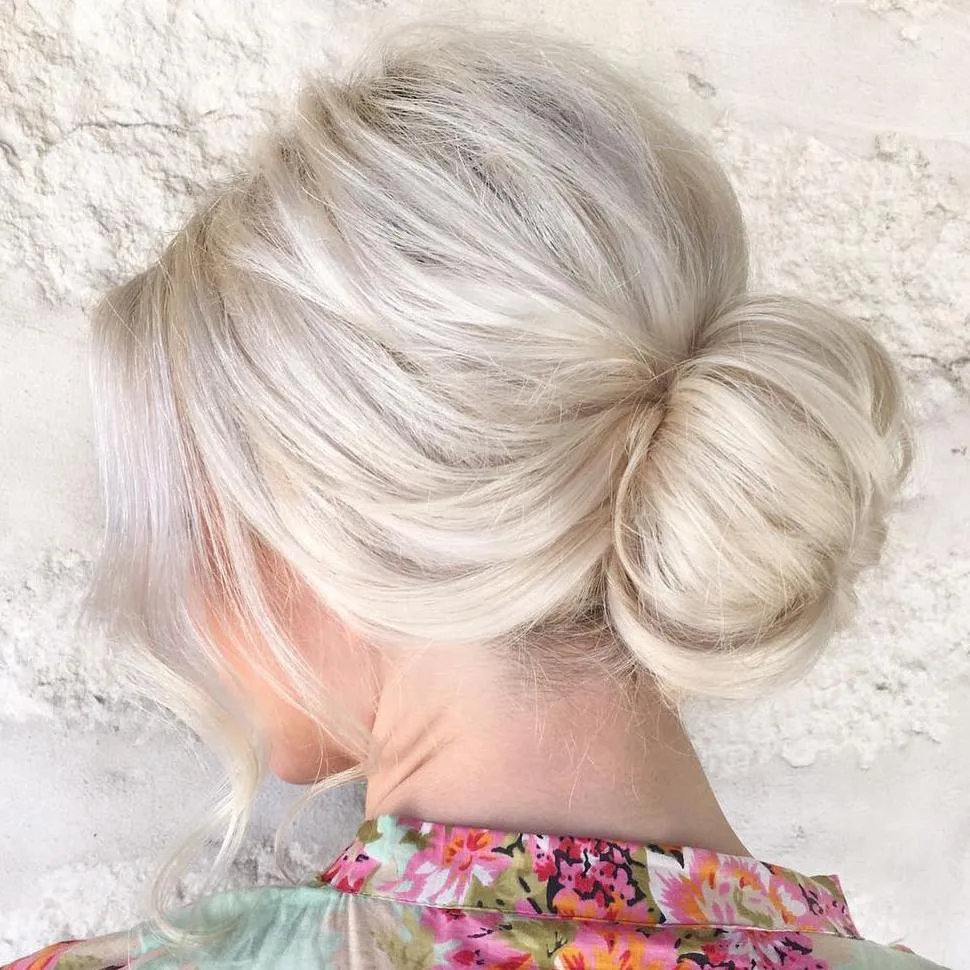
Verdict: the fullest, roundest bun you can make at home, and it looks like a salon did it. A sock bun — hair wrapped around a donut form — gives you a perfectly round, smooth bun with real volume, which photographs beautifully from the back and the side. It is the bun for graduates who want their updo to look deliberate and polished.
Time and cost: 10 minutes and a hair donut, no heat and no salon. Cap-friendly notes: wear it low at the nape and the cap never touches it; wear it high and the cap will tilt. It survives the whole ceremony without moving, because the donut anchors the shape, and it photographs with a clean, sculpted silhouette. The only watch-out: a high sock bun under a cap is the most common graduation hair mistake — keep it low.
29. Old Hollywood Glamour Waves
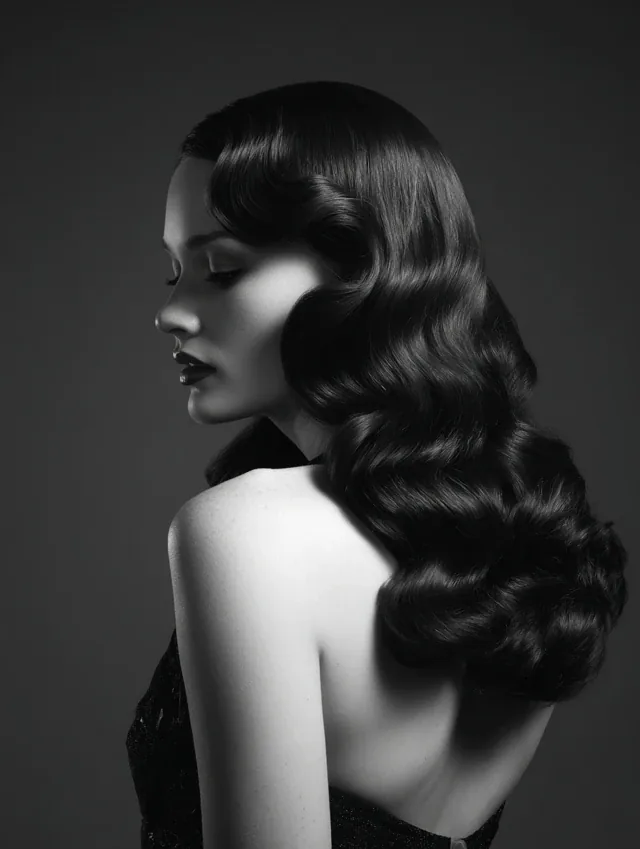
Verdict: the most glamorous style on this list, full stop. Old Hollywood waves — deep, sculpted, glossy waves that fall in a single direction — turn a graduation into a red-carpet moment, and they photograph like nothing else. The trade-off is time and fragility: this is a set style, and it needs setting lotion, clips and patience to get right.
Time and cost: 45 minutes to an hour with a curling iron and setting clips, or a salon set. Cap-friendly notes: the waves are sculpted close to the head, so the cap sits neatly on top — but the front wave can be pressed flat by the cap band, so keep the wave starting below the cap line. It photographs spectacularly, especially in black and white, but it is the style most likely to need a touch-up before the photo session. Carry a comb and a little shine spray.
30. The Ribbon-Tied Low Ponytail
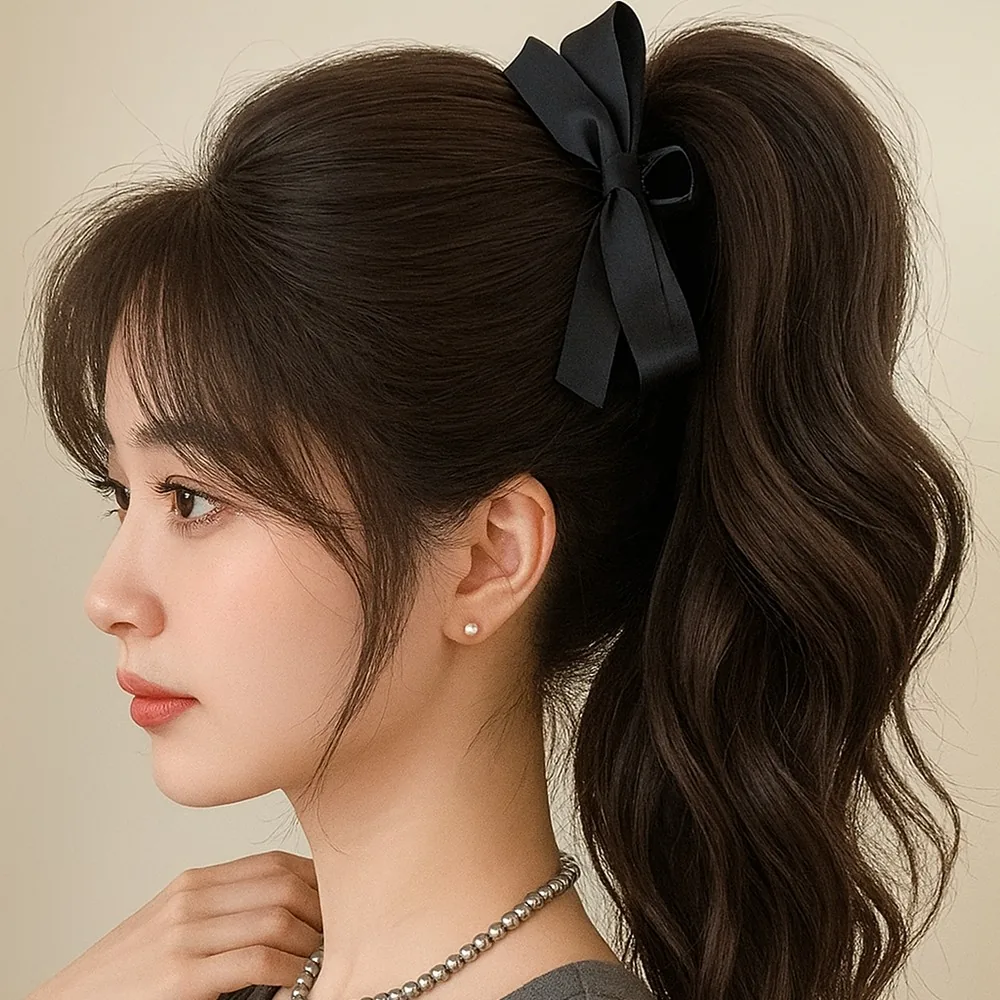
Verdict: a small detail that makes a simple style feel like an occasion. A ribbon-tied low ponytail is just a polished low ponytail with a ribbon — in your school colour, or black, or white — tied around the base, and that one detail turns a weekday style into a graduation look. It is simple, cheap, and it photographs beautifully because the ribbon gives the camera a focal point.
Time and cost: five minutes, plus a ribbon — the cheapest style here. Cap-friendly notes: the ponytail sits low, well below the cap, so the cap never touches it, and the ribbon stays put through the whole ceremony. It photographs beautifully from the back, where the ribbon shows, and it lasts all day without a touch-up. The only caution: choose a ribbon that matches your gown or stole, or it will clash in the official photos.
31. The Curly Half-Up Style
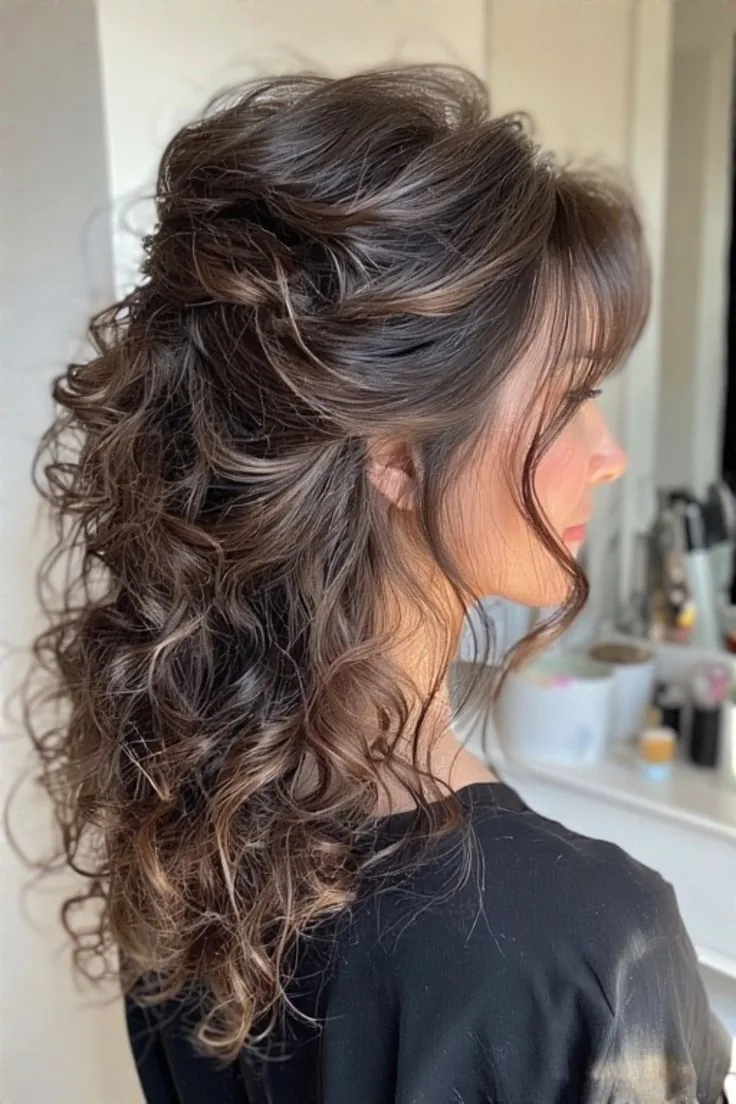
Verdict: the best way to wear natural curls to graduation. A curly half-up style pulls the front curls back and pins them, while the rest of the curls fall loose — so you get the curls you love, with the front kept neat and out of your face for the cap and the photos. It works on every curl pattern, from loose waves to tight coils.
Time and cost: 10 minutes with curl cream and a few pins, no heat needed. Cap-friendly notes: the pinned front sections sit flat under the cap, which actually helps the cap stay put, and the loose curls underneath spring back the moment the cap comes off. It photographs beautifully, because the curls give the camera texture and volume. The only watch-out: use a little curl cream on the ends before the ceremony, or humidity can turn the loose curls frizzy by the photo session.
32. The Sleek Middle-Part Low Bun
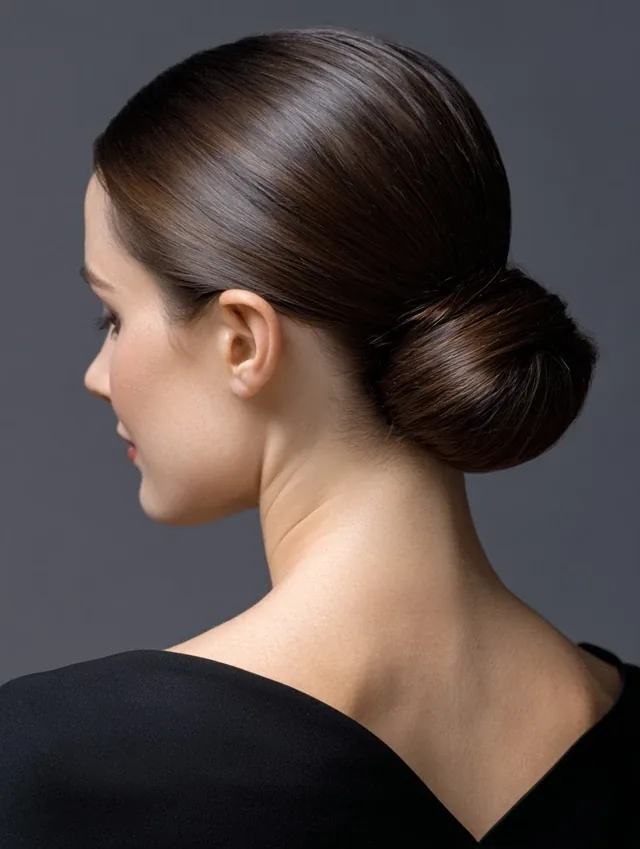
Verdict: the most modern, editorial version of the low bun. A sleek middle-part low bun — a centre part, smooth sides, and a tight low bun — looks like a fashion-week style, and it suits the formality of a graduation gown perfectly. It is the bun for graduates who want to look polished and a little bit fashion-forward at the same time.
Time and cost: 10 to 15 minutes with a brush, a smoothing serum and pins. Cap-friendly notes: the centre part is the only risk — the cap band can press a line across the part, so after the cap comes off, finger-comb the front and re-part the hair slightly off-centre. The bun itself is completely clear of the cap. It photographs beautifully from the front, where the symmetry reads cleanly, and it survives the whole ceremony without moving.
33. The Boho Braided Updo
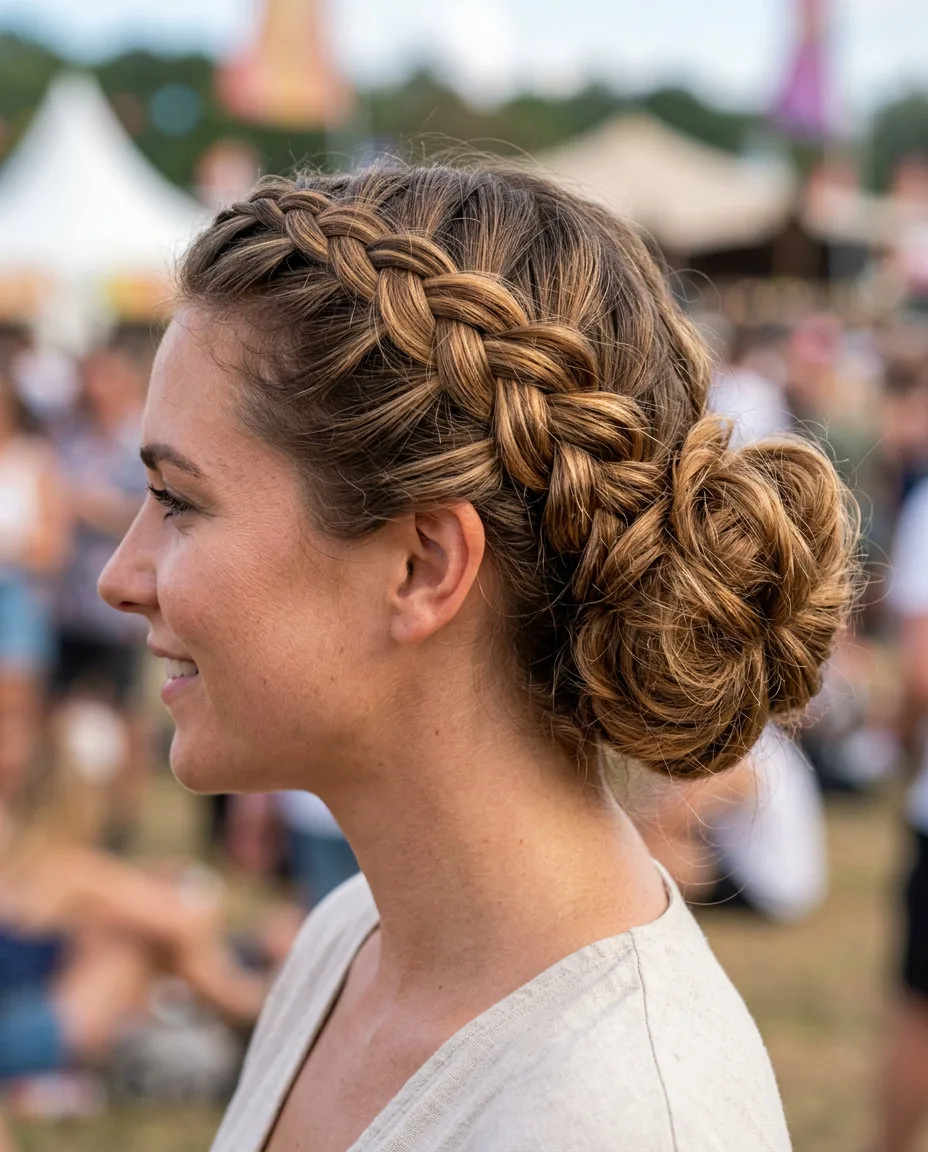
Verdict: relaxed, textured, and full of personality. A boho braided updo mixes loose braids, twists and a soft bun into a style that looks like it happened naturally — even though it takes a little work. It suits wavy and curly hair best, because the texture does the styling, and it looks especially good with a simple gown, because the hair provides all the detail.
Time and cost: 20 to 25 minutes with pins and texturising spray, no heat needed. Cap-friendly notes: keep the bulk low and the braids loose, and the cap will sit on top without crushing anything — the texture hides any crease. It photographs beautifully in outdoor light, where the braids and twists catch the sun, and it survives the ceremony well because the braids anchor the shape. Carry a few extra pins, because the loose pieces can slip over a long day.
34. The Soft Pixie With Volume
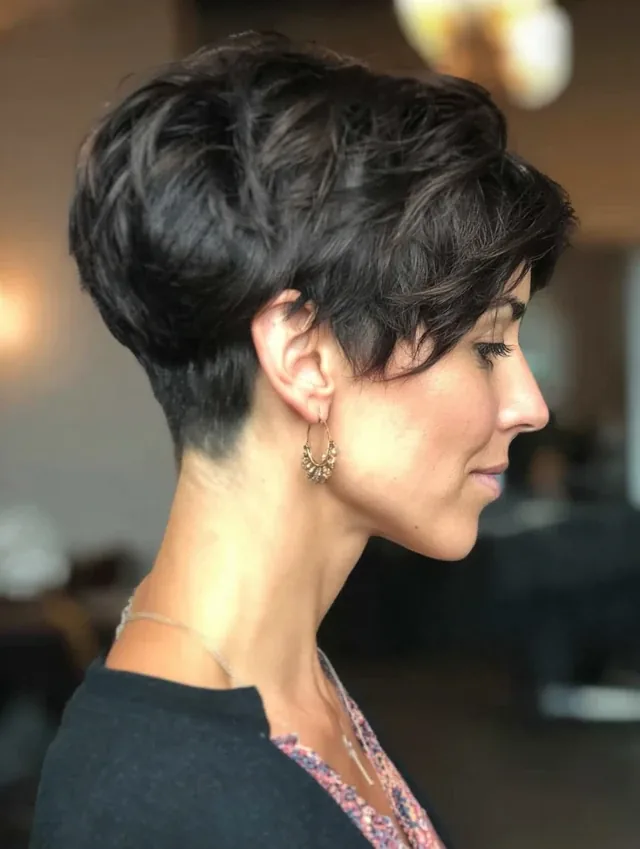
Verdict: the best short-hair choice for graduation, and proof that short hair needs no apology. A soft pixie with volume — textured on top, a little lift at the crown, soft pieces around the ears — frames the face beautifully and looks striking with a gown, because the bare neck lets the stole and hood show. It is the style for graduates who already love their short hair and want to wear it with confidence.
Time and cost: five minutes with a little styling cream or wax, no heat needed. Cap-friendly notes: this is where short hair wins — the cap sits directly on the pixie, and when it comes off, a quick finger-ruffle restores the volume in seconds. There is no long hair to crease, no bun to crush, and no style to lose. It photographs beautifully from the front, and it survives the whole day without a single touch-up.
35. The Layered Blowout
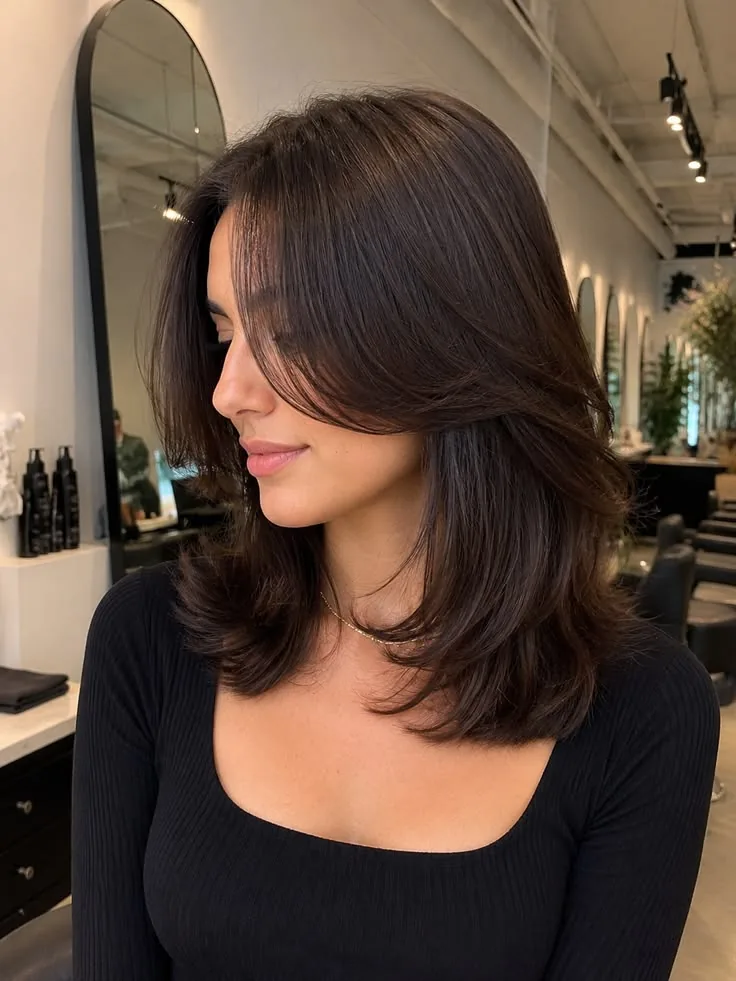
Verdict: the most flattering blowout for graduation, because the layers do the work. A layered blowout — long layers cut to move, blow-dried smooth with bounce at the ends — gives you volume, shine and shape in one style, and it suits almost every face shape because the layers frame the face. It is the blowout for women who want their hair to look like it was done by a professional, even if they did it themselves.
Time and cost: 30 to 40 minutes with a round brush and a dryer, or a salon blowout. Cap-friendly notes: the cap will flatten the crown, so ask for extra lift at the roots and keep the front layers loose enough to finger-comb back into shape. It photographs beautifully in the first photos, especially outdoors, but the volume drops over a long ceremony — a travel-size dry shampoo at the roots before the photo session brings it back.
36. The Rope Braid Ponytail
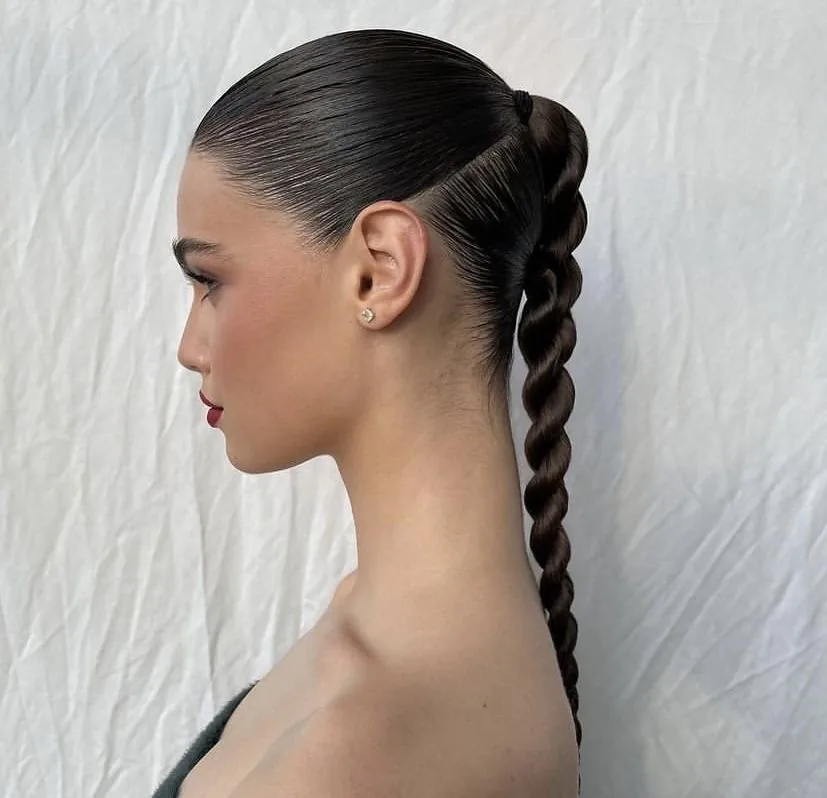
Verdict: the fastest braid that looks like it took skill. A rope braid ponytail — two sections twisted around each other into a rope — takes two minutes to make, holds its shape all day, and looks intricate enough to draw compliments. It is the ponytail for graduates who want something more interesting than a plain tail but do not have time for a fishtail.
Time and cost: five minutes, no heat, just an elastic and a little texturising spray. Cap-friendly notes: wear it low or over one shoulder and the cap never touches it — the rope’s texture hides any crease at the crown. It photographs beautifully from the side, where the rope pattern shows, and it survives wind, humidity and a long ceremony better than any loose style. The only watch-out: a rope braid needs to be twisted tightly, or it can unravel by the evening.
37. The Scarf-Tied Low Bun
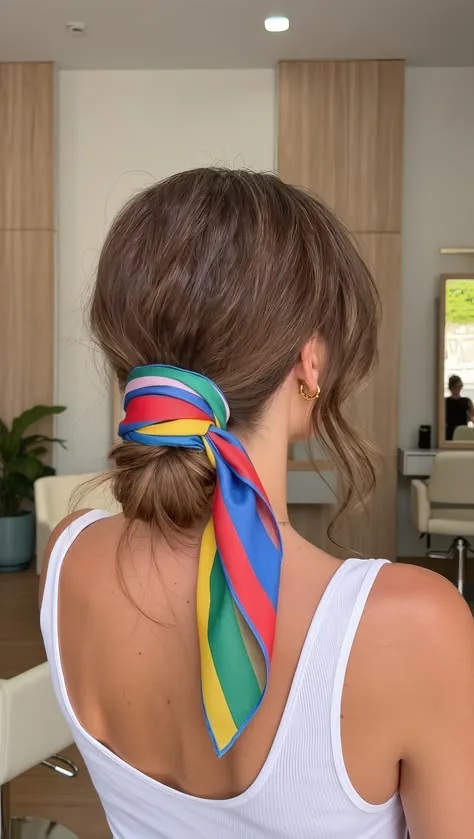
Verdict: the most personal style on this list, and a lovely way to add colour. A scarf-tied low bun wraps a silk scarf around a low bun — in your school colour, a pattern you love, or a colour that matches your stole — and that one detail turns a simple bun into a signature look. It is simple, cheap, and it photographs beautifully because the scarf gives the camera a pop of colour.
Time and cost: 10 minutes, plus a silk scarf — the cheapest way to make a bun feel special. Cap-friendly notes: the bun sits low, well below the cap, so the cap never touches it, and the scarf stays put through the whole ceremony. It photographs beautifully from the back, where the scarf shows, and it lasts all day without a touch-up. The only caution: tie the scarf securely, or it can slip during the ceremony — a bobby pin through the knot holds it in place.
38. The Romantic Side Chignon
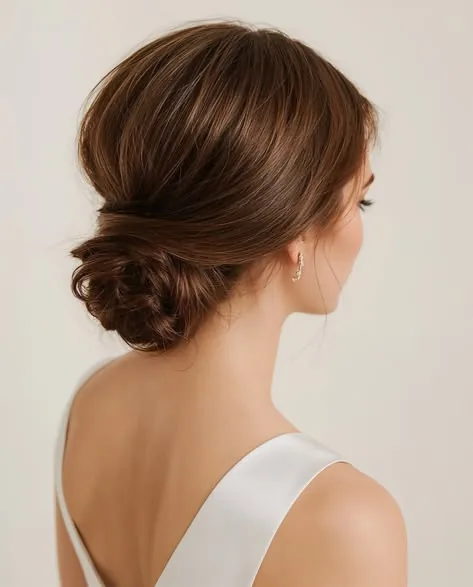
Verdict: the chignon for women who want a little romance with their elegance. A romantic side chignon gathers the hair into a soft knot at one side of the nape, with a few loose pieces around the face — it looks like a wedding updo, but it is perfectly at home at a graduation. The side placement gives the camera a clear, elegant shape, and the loose pieces soften the formality of the gown.
Time and cost: 15 minutes with pins and a little texturising spray, or a quick salon updo. Cap-friendly notes: the knot sits at the side of the nape, completely clear of the cap, so there is no crease and no flattening. It photographs beautifully from the knot side, so sit or stand with that side toward the camera for the official photo. It survives the ceremony well, but carry a few extra pins — the loose pieces can slip over a long day.
39. The Voluminous Curly Updo
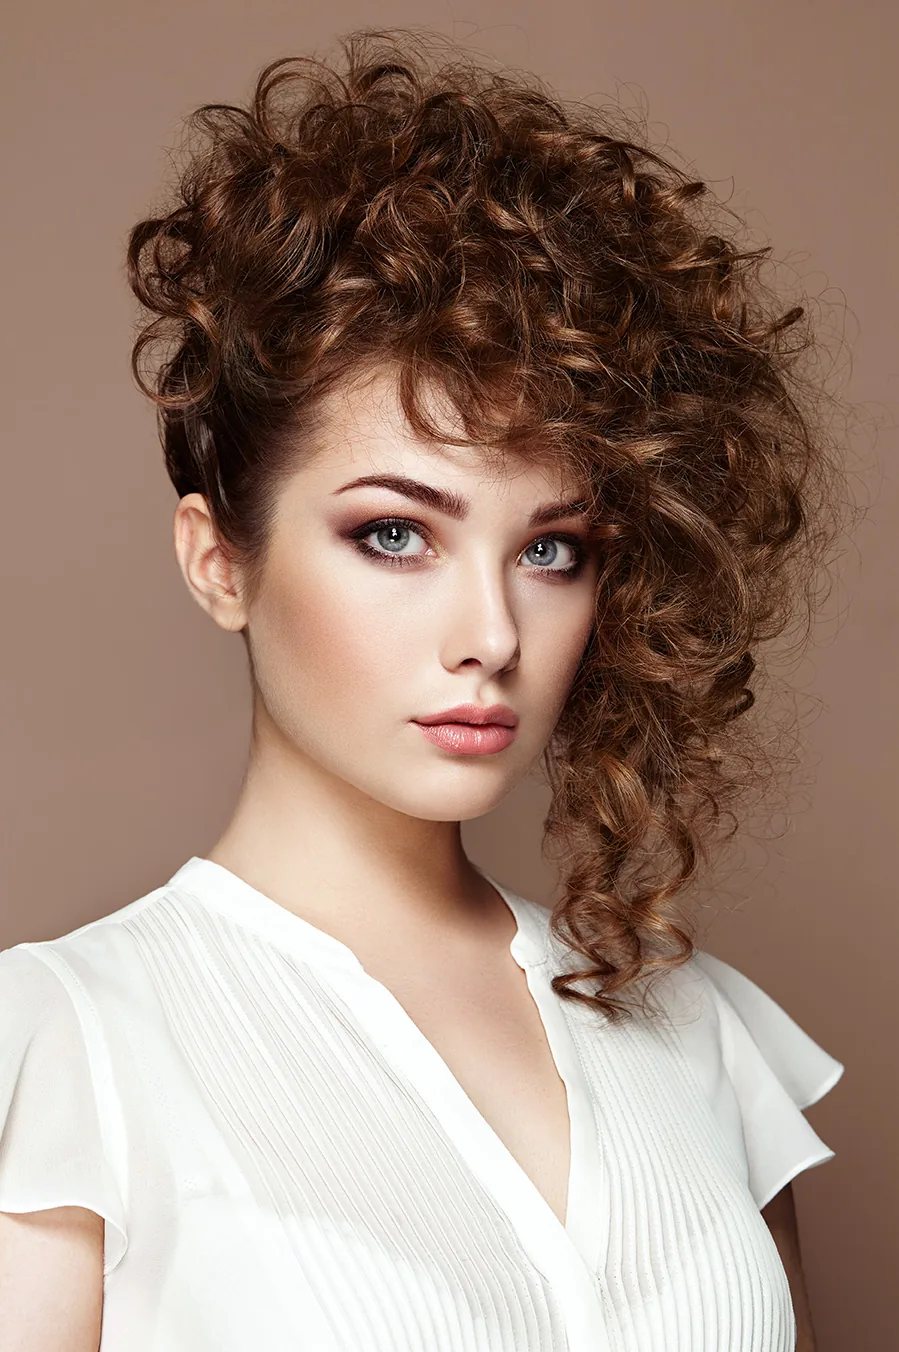
Verdict: the most dramatic updo for curly hair, and the one that photographs with the most presence. A voluminous curly updo gathers the curls up into a full, textured shape at the crown or the back, letting the curls themselves be the decoration — no extra accessories needed. It suits every curl pattern, and it looks especially good with a gown, because the volume balances the robe’s bulk.
Time and cost: 20 minutes with pins and curl cream, no heat needed. Cap-friendly notes: keep the bulk low at the nape if you want the cap to sit flat, or wear the volume high and accept that the cap will rest on the curls — either way, the curls spring back the moment the cap comes off. It photographs beautifully from every angle, and it survives the ceremony because the curls hold their own shape. A little curl cream on the ends keeps the frizz down for the photos.
40. The Effortless Air-Dried Waves
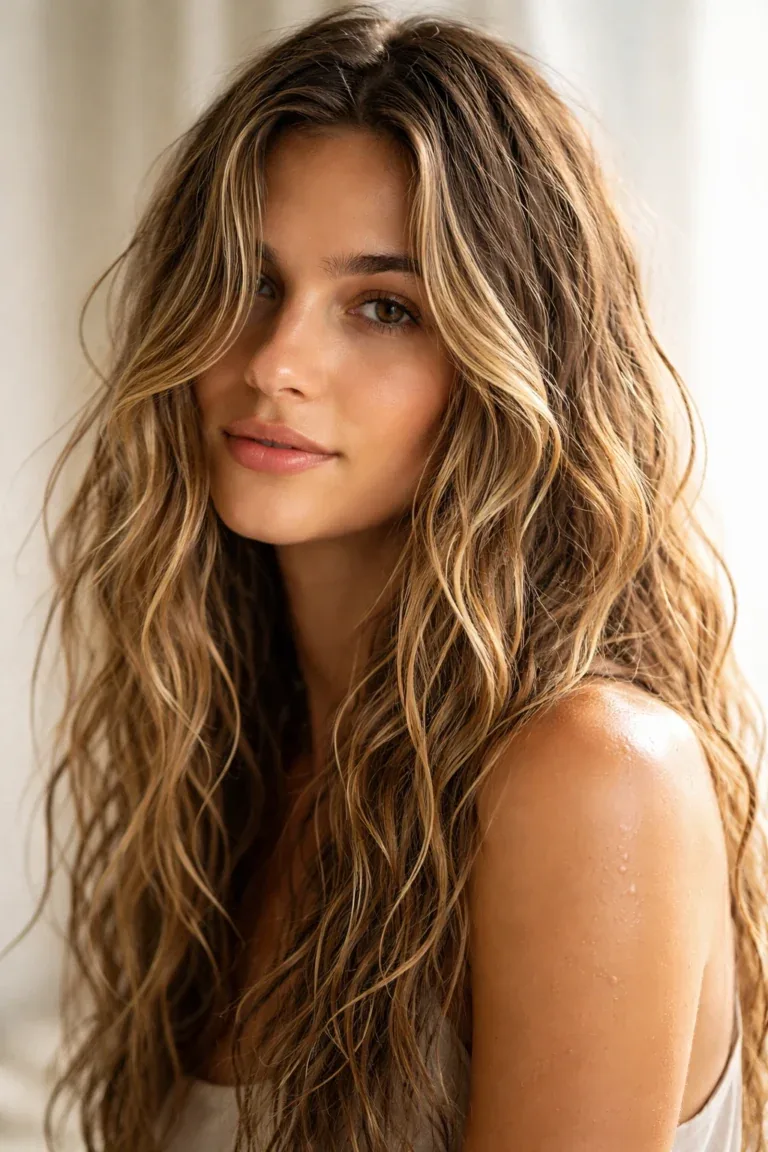
Verdict: the most honest style on this list — your hair, as it is, at its best. Effortless air-dried waves are just your natural texture, enhanced with a little salt spray or curl cream and left to dry on its own. It is the style for graduates who do not want to fight their hair on a day that is already stressful enough, and it looks beautiful precisely because it is not trying too hard.
Time and cost: five minutes and a little product — the cheapest style here. Cap-friendly notes: the cap presses the crown, but air-dried waves are so soft that a quick scrunch after the cap comes off restores them in seconds. It photographs beautifully in natural light, especially outdoors, and it survives the ceremony because there is no heat-set shape to lose. The only watch-out: if your hair dries flat, add a little texturising spray at the roots for volume before the photos.
Quick Fixes Between the Ceremony and Photos
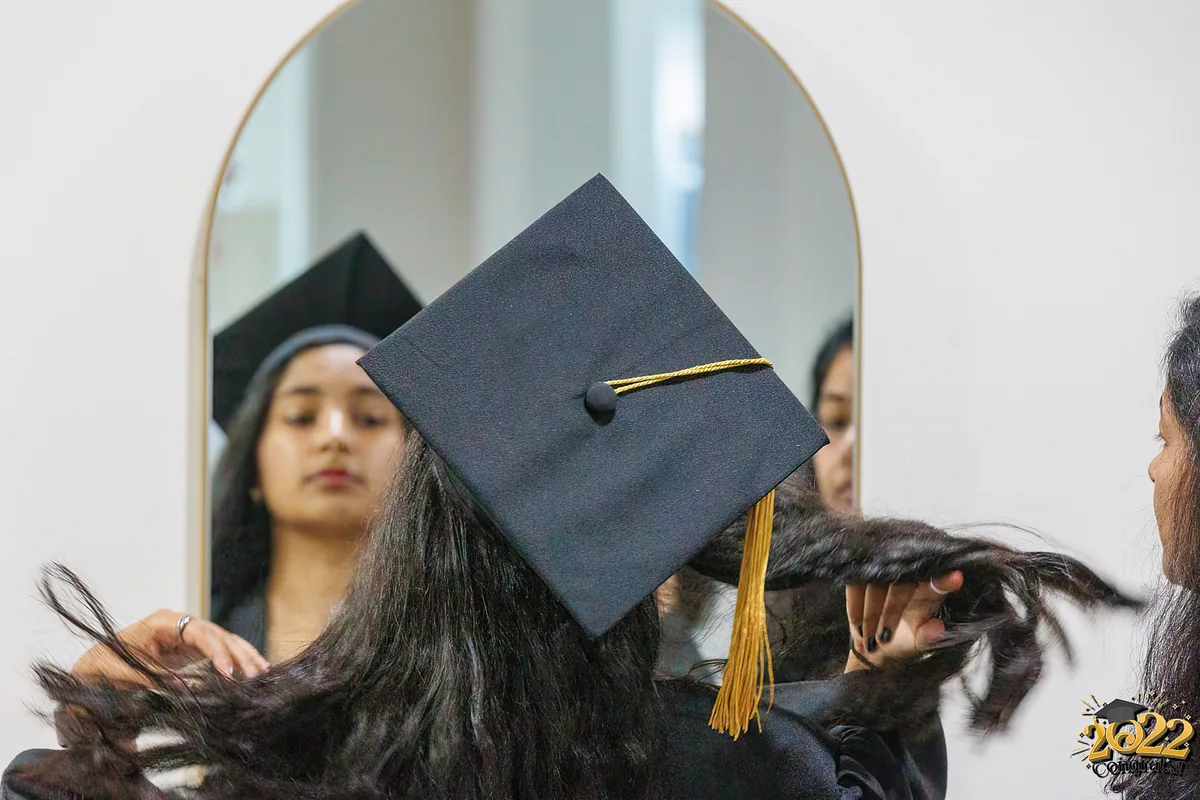
The gap between the ceremony and the photos is the most important ten minutes of graduation hair, because it is your one chance to fix what the cap did. Start with the crown: finger-comb the front to lift the cap band, then flip your head upside down for a second to restore volume at the roots. If you wore your hair down, scrunch the ends with a little texturising spray to bring the waves back. If you wore it up, check the pins — one loose pin can undo an updo in the photos.
Pack a tiny kit and keep it in your bag: a few bobby pins, a small brush, a travel-size hairspray, a little dry shampoo, and a mirror. The dry shampoo is the secret weapon — a quick spray at the roots lifts the cap flattening in seconds. And do the fixes in natural light if you can, because indoor mirrors lie about how hair looks outdoors. Ten minutes of fixing now saves a lifetime of looking at a flat photo.
Graduation Hairstyles by Hair Length
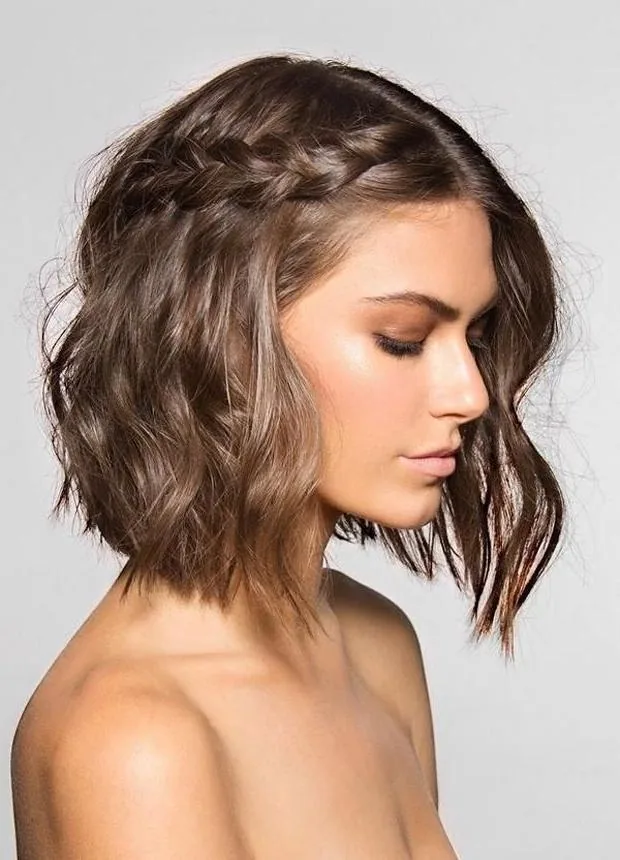
Short hair has the easiest graduation day. A pixie or a bob needs almost no preparation, survives the cap completely, and springs back the moment the cap comes off — a quick finger-ruffle is the whole touch-up. The only decision is whether to add a little volume at the crown with a texturising spray, because short hair can look flat under a cap if it is very fine. Otherwise, short hair is the lowest-stress choice on this list.
Medium hair — a lob or shoulder-length cut — is the most versatile length, because it can go up or down. A low bun, a half-up twist or soft waves all work, and the cap only touches the crown. Long hair has the most options but the most work: braids, chignons, ponytails and loose curls all look beautiful, but long hair is also the most likely to be flattened by the cap, caught under the hood, or frizzed by humidity. The rule for every length is the same — choose a style that works with the cap and the gown, not against them, and the length will take care of itself.
Weather-Proofing Your Hair for Outdoor Ceremonies
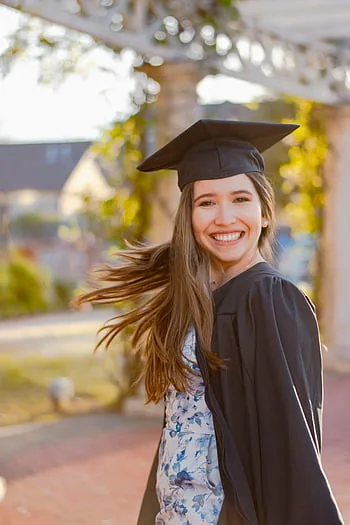
Outdoor graduation ceremonies are where good hairstyles go to die — wind, humidity, sun and sweat all attack the style at once, and the photos are taken in the middle of it. The styles that survive outdoors are the anchored ones: braids, buns, twists and updos, which hold their shape because they are pinned or woven into place. Loose curls and blowouts are the most vulnerable — wind tangles them, humidity drops them, and the sun fades the shine within an hour.
The practical defences are simple. An anti-humidity spray before you leave the house, a strong-hold hairspray as a final step, and a style with enough pins to survive a gust of wind. If rain is forecast, wear your hair up — a wet updo still looks like a style, while wet loose hair just looks wet. And check the forecast the night before, not the morning of: if the wind is going to be strong, choose a braid or a bun over loose waves, and you will thank yourself in the photos.
DIY vs Salon for Graduation Day
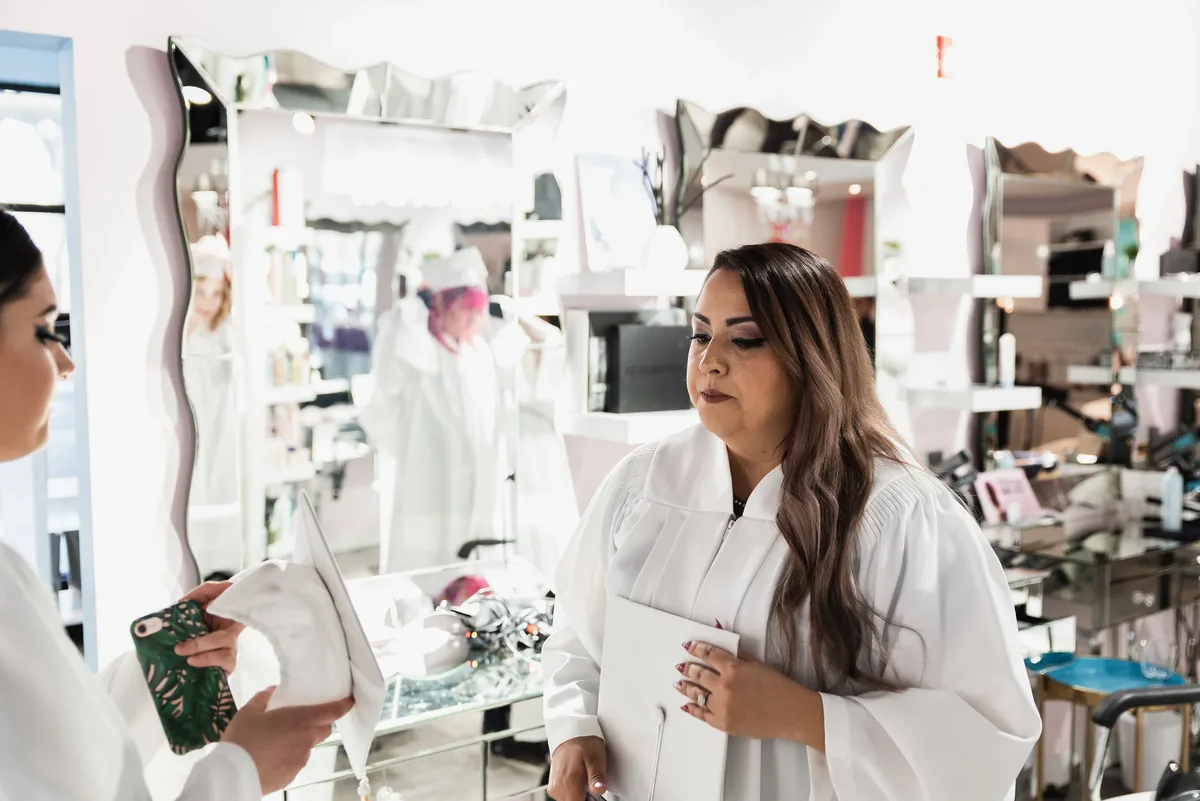
The honest answer is that most graduation hairstyles are better done yourself — and the ones that are not are worth booking early. Low buns, ponytails, braids, half-up twists and claw-clip styles are all easy at home, cost nothing, and you can practise them the week before until they take five minutes. A salon visit for a simple low bun is money spent on something you could do better yourself, because nobody knows your hair like you do.
The styles worth a salon are the ones that need a second pair of hands or a skill you do not have: a French twist, an old Hollywood wave set, a glossy blowout, or an intricate braided updo. If you book a salon, book it for the morning of the ceremony and bring a photo of the exact style — not a vague description. And whatever you choose, do a trial run a week before: try the style, wear the cap with it, take a photo, and see how it holds for a few hours. The trial run is the difference between a style you love and a style you regret.
What is the best hairstyle for graduation under a cap?
A low bun, low chignon, low ponytail or a braid are the best graduation hairstyles under a cap, because they sit below the cap line and the cap never touches them. Styles with height on the crown, like top knots and tall bouffants, will be flattened or will tilt the cap, so avoid them for the ceremony itself.
How do I keep my graduation hairstyle from going flat under the cap?
Choose a low style, add a little texturising spray or dry shampoo at the roots before the cap goes on, and do a quick fix after the cap comes off — finger-comb the crown, flip your head upside down for a second, and add a spritz of dry shampoo. Textured styles hide cap creases far better than perfectly smooth ones.
Should I wash my hair the day of graduation?
It is better to wash your hair the night before graduation, not the morning of. Day-old hair has more grip and holds a style longer, while freshly washed hair is slippery and can slide out of pins and braids. If your hair gets oily quickly, use a little dry shampoo at the roots on the morning instead of a full wash.
How long does a graduation hairstyle last?
A braided or pinned-up graduation hairstyle can last 10 to 12 hours without a touch-up, while heat-styled curls and blowouts usually start to drop after 4 to 6 hours, especially in humidity. For a full day of ceremony, photos and celebrations, an updo or a braid is the longest-lasting choice.
Can I do my graduation hairstyle myself?
Yes, most graduation hairstyles are easy to do yourself — low buns, low ponytails, braids, half-up twists and claw-clip styles all take 5 to 15 minutes with no salon visit. The styles worth booking a salon for are French twists, old Hollywood wave sets, glossy blowouts and intricate braided updos, which need a second pair of hands or a skill you may not have.
What hairstyle photographs best at graduation?
Styles with a clear shape photograph best at graduation — a low bun, a side braid, a braided crown or soft waves all read clearly on camera. The camera flattens hair, so styles with texture and movement photograph better than perfectly smooth ones, and a little shine spray on the ends makes a visible difference in photos.
How do I stop my graduation hair from frizzing outdoors?
Use an anti-frizz serum on the ends before you leave, finish with an anti-humidity hairspray, and choose an anchored style like a braid or a bun instead of loose curls. Carry a small bottle of serum in your bag for a quick touch-up before the photo session, and avoid touching your hair between photos, which creates more frizz.
Should I wear my hair up or down for graduation?
Hair worn up is the safer choice for graduation, because it survives the cap, the hood and the stole, and it lasts through a long ceremony without a touch-up. Hair worn down looks softer in photos but needs more maintenance — if you wear it down, choose soft waves or loose curls and carry a brush and hairspray for the photo session.
When should I book a salon appointment for graduation?
Book your salon appointment at least two to three weeks before graduation, because graduation season is one of the busiest times for salons. Book the appointment for the morning of the ceremony, bring a photo of the exact style you want, and do a trial run a week before so you know the style works with your cap.
What should I do if my hair falls flat before photos?
Flip your head upside down and shake the roots, add a quick spray of dry shampoo at the crown, and finger-comb the front to lift the cap band. If you wore your hair down, scrunch the ends with a little texturising spray to bring the waves back, and take one test photo with your phone before the official photos start.
Conclusion
Graduation day asks more of your hair than almost any other day — it has to survive a cap, a gown, a long ceremony and a photo session, and still look like you. The styles that do that best are not the most elaborate ones. They are the low buns, the braids, the chignons and the half-up twists that sit below the cap line, hold their shape for twelve hours, and photograph with a clear, confident shape. A good graduation hairstyle is not the one that looks best in the mirror at 8 in the morning. It is the one that still looks good in the last photo of the day.
So choose a style that works with the cap instead of against it, practise it once with the cap on, and pack a tiny kit of pins, dry shampoo and hairspray for the gap between the ceremony and the photos. The rest of the day will take care of itself — and so will your hair. Congratulations, graduate.