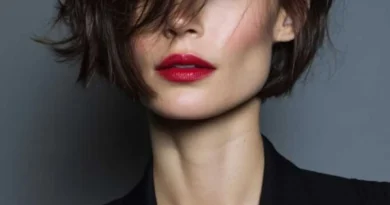
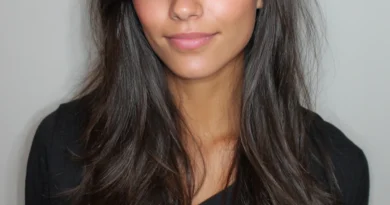
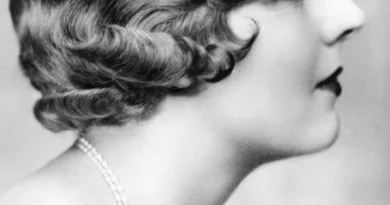
The 90s Blowout Is Back: Big, Bouncy Volume That Works on Every Hair Length
The 90s blowout is back, and it is not a nostalgia act. It is the big, bouncy, high-volume hairstyle that defined a decade of supermodels — hair blown out smooth with a round brush, full of lift at the roots, soft layers curving away from the face, and ends that flick out in a glossy finish. For years it was filed away as a period look, something that belonged on a runway in 1994. Then it started turning up everywhere again: on red carpets, on social media, in salons, and on women who were not even born in the 90s. The reason is simple. A 90s blowout makes hair look full, healthy and expensive, and it does it on almost every length and texture.
This guide gives you 38 90s blowout hairstyles for women — the classic supermodel blowout, curtain bangs, the blowout bob, feathered and flipped ends, versions for fine hair and thick hair, for curly hair and straight hair, for weddings and date nights and ordinary Tuesdays — plus eight short guides on the questions women actually ask: what a 90s blowout really is, which lengths and textures it suits, how it differs from a modern blowout, which tools and products you need, how to ask your stylist for it, the mistakes that kill the bounce, and how to make it last into the second and third day. Each style comes with an honest note on styling time, tools and who should think twice, so you can choose with confidence — and stop fighting your hair.
What Is a 90s Blowout — and Why Is It Back?
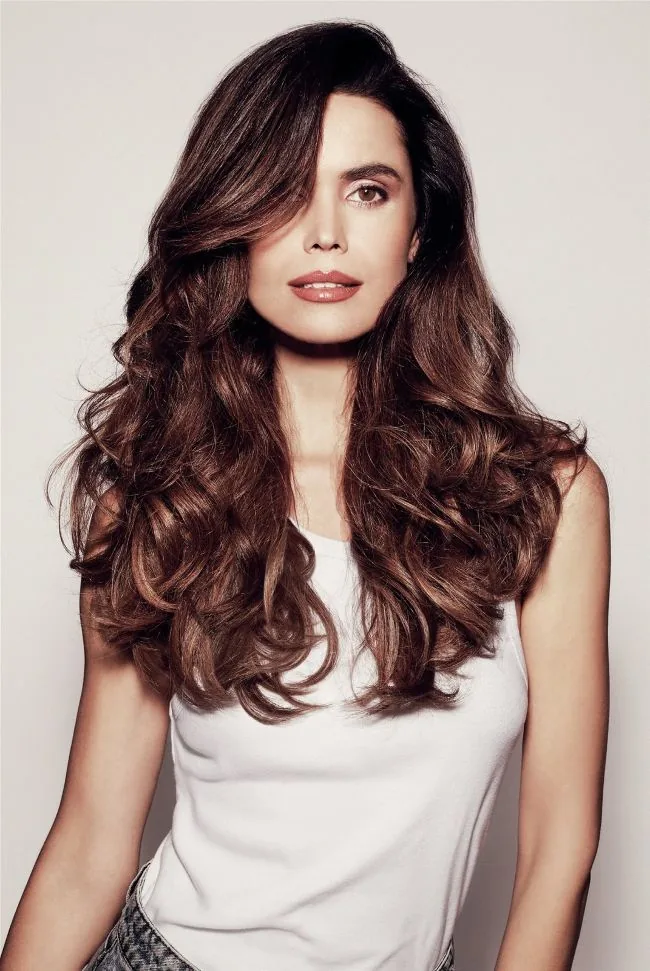
A 90s blowout is the big, bouncy, high-volume hairstyle that defined the decade: hair blown out smooth with a round brush, full of lift at the roots, soft curves through the lengths, and ends that flick out or curl under with a deliberate, glossy finish. It is the look of the supermodel era — hair that moves when you walk into a room, frames the face in soft layers, and looks expensive without a single visible curl. The volume is the point. A 90s blowout is not a sleek straight style and it is not beachy waves; it is hair with body, bounce and a polished shine.
So why is it back now? Partly it is nostalgia — the 90s are the decade fashion keeps returning to — but mostly it is because the blowout solves a real problem. It makes fine hair look full, it makes long hair look styled instead of just long, and it photographs beautifully, which matters more than ever in a world of front cameras and video calls. Quick verdict: the 90s blowout is not a costume. Done well, it is simply the most flattering version of a blow-dry, and the 38 styles in this guide show how it works on every length, texture and occasion.
The Signature Shape: Volume, Bounce and That Flick

Every 90s blowout shares the same signature shape, and once you can see it, you can ask for it by name. The roots have lift, but the lift sits through the crown and the sides rather than piled up on top. The mid-lengths are smooth and full, with long layers that curve away from the face. And the ends do the talking: they flick outward, curl under, or bounce in a soft C-shape that gives the whole style its movement. The silhouette is wide and soft, never flat and never spiky.
The bounce is what separates a real 90s blowout from a plain blow-dry. A regular blow-dry is smooth and tidy; a 90s blowout is smooth and alive, with hair that springs back when you shake it. The trick is in the drying: sections are rolled around a large round brush, dried with tension, and then left to cool in the curl before they are brushed out. That cooling step is the whole secret — it sets the shape, so the volume lasts for days instead of falling flat by lunchtime. If your blowout drops within an hour, the hair was almost certainly brushed out while it was still warm.
The Best Hair Lengths and Textures for a 90s Blowout
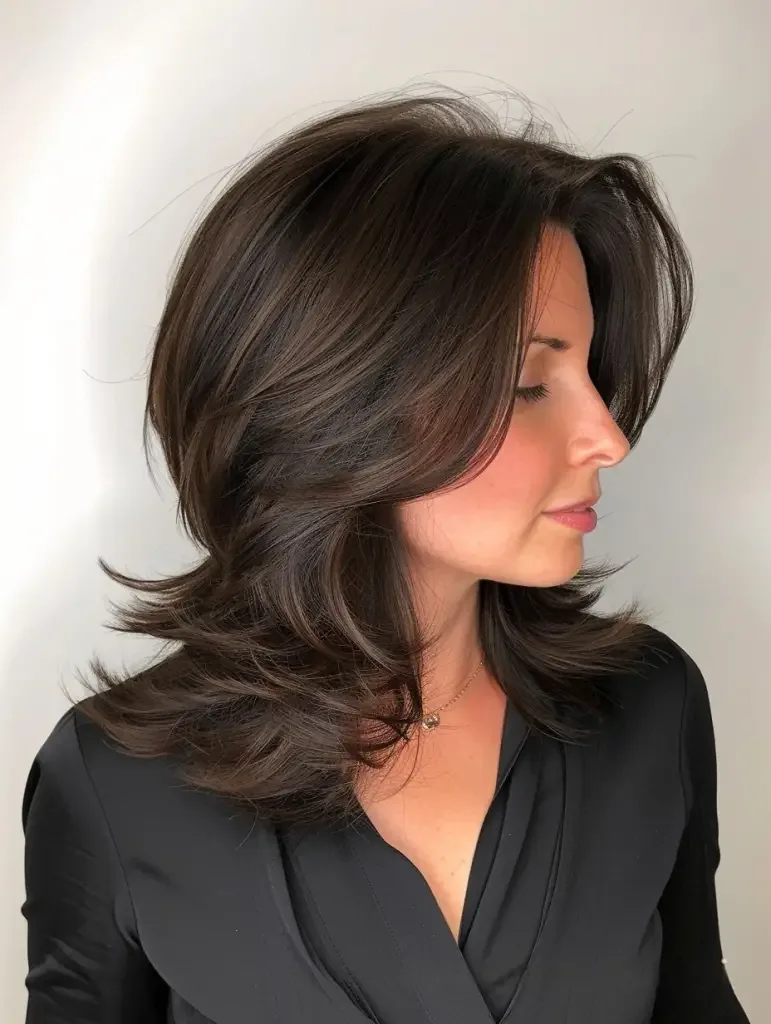
The sweet spot for a 90s blowout is shoulder length to long hair, because that length has enough weight to hold a flick at the ends and enough hair to build volume through the sides. A lob or a shoulder-length cut is the easiest starting point — it dries fast, the ends flick naturally, and the layers frame the face without any extra work. Long hair works beautifully too, as long as it has layers; one-length long hair is heavy, and heavy hair pulls volume out at the roots, so ask for long layers that start at the cheekbone. Short hair can absolutely have a 90s blowout as well — a chin-length bob with a round brush gives you the same bounce in miniature.
Texture matters less than most people think. Straight hair takes to a blowout easily and holds the smooth, glossy finish best. Wavy hair needs a little more smoothing at the roots but keeps the volume for longer. Curly hair needs to be stretched smooth first, but once it is, the bounce is the biggest on this list. The one texture that struggles is very fine, very slippery hair, because volume slides out of it — and that is fixed with mousse at the roots and a light hold spray, not with a different cut. Maintenance across all lengths is the same: the blowout lasts two to three days, and a dry shampoo at the roots on day two keeps it going.
90s Blowout vs Modern Blowout: What Is Different?
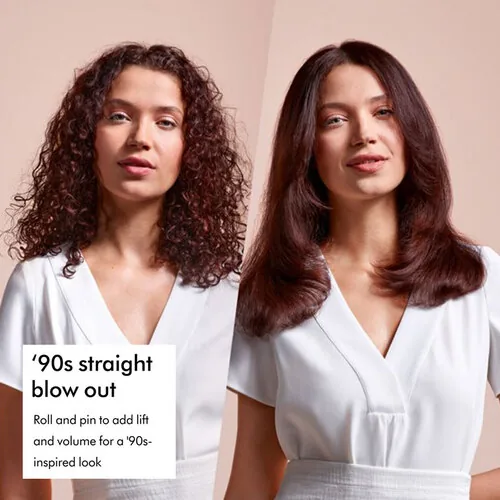
A modern blowout and a 90s blowout look similar from across the room, but they are built on different ideas. A modern blowout is usually sleeker, flatter at the roots, and finished with straight, polished ends — the goal is smoothness. A 90s blowout is rounder, fuller and more dramatic: the roots are lifted, the layers curve, and the ends flick. Where a modern blowout whispers, a 90s blowout walks in and says hello. Neither is better — they are different moods, and the 90s version is the one to choose when you want your hair to be the outfit.
Pros of the 90s blowout: maximum volume, a glamorous finish, and a style that lasts two to three days with very little touching up. Cons: it takes longer than a modern blowout — twenty to forty minutes at home, depending on length — and it needs heat, so a heat protectant is not optional. Who should pick the modern version instead: women who want a quiet, everyday polish, or anyone whose hair is so fine that big volume drops out within an hour. Cost and time: a salon 90s blowout usually costs a little more than a standard blow-dry because it takes longer, and it is worth every penny for a wedding, a party or a photoshoot.
1. The Classic 90s Supermodel Blowout
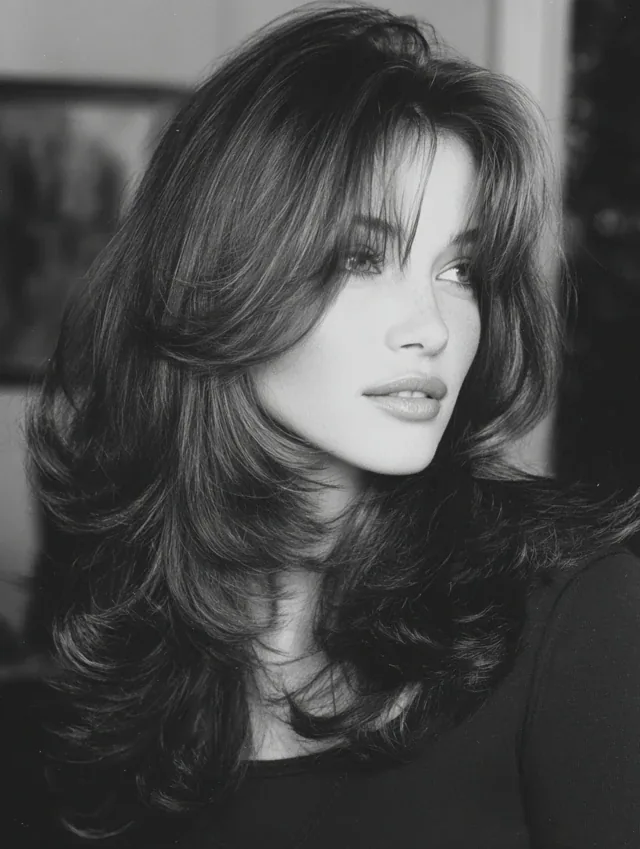
The classic 90s supermodel blowout is the one every other style on this list is measured against: long hair, blown out to glossy perfection, with huge volume at the roots, soft layers curving away from the face, and ends that flick out in a feathered finish. It is the hair of the era’s runways and magazine covers, and it still stops people in a room, because hair this full and this polished reads as confidence before you say a word. The secret is not length alone — it is the layers, cut long and blended, so the hair moves in one smooth, bouncy sheet instead of sitting in a heavy curtain.
Best for: long to very long hair, straight or wavy, and anyone who wants maximum impact. How to style: apply mousse at the roots, blow-dry in large sections with a big round brush, rolling each section away from the face, and let every section cool in the brush shape before you touch it. What to ask your stylist: long layers starting at the cheekbone, no short pieces at the front, and a cut that keeps the ends thick rather than thinned out. Styling time: thirty to forty minutes at home, or about forty-five at the salon. Tools needed: a large round brush, a blow-dryer with a nozzle, mousse and a light hold spray.
2. The Bouncy Blowout With Curtain Bangs
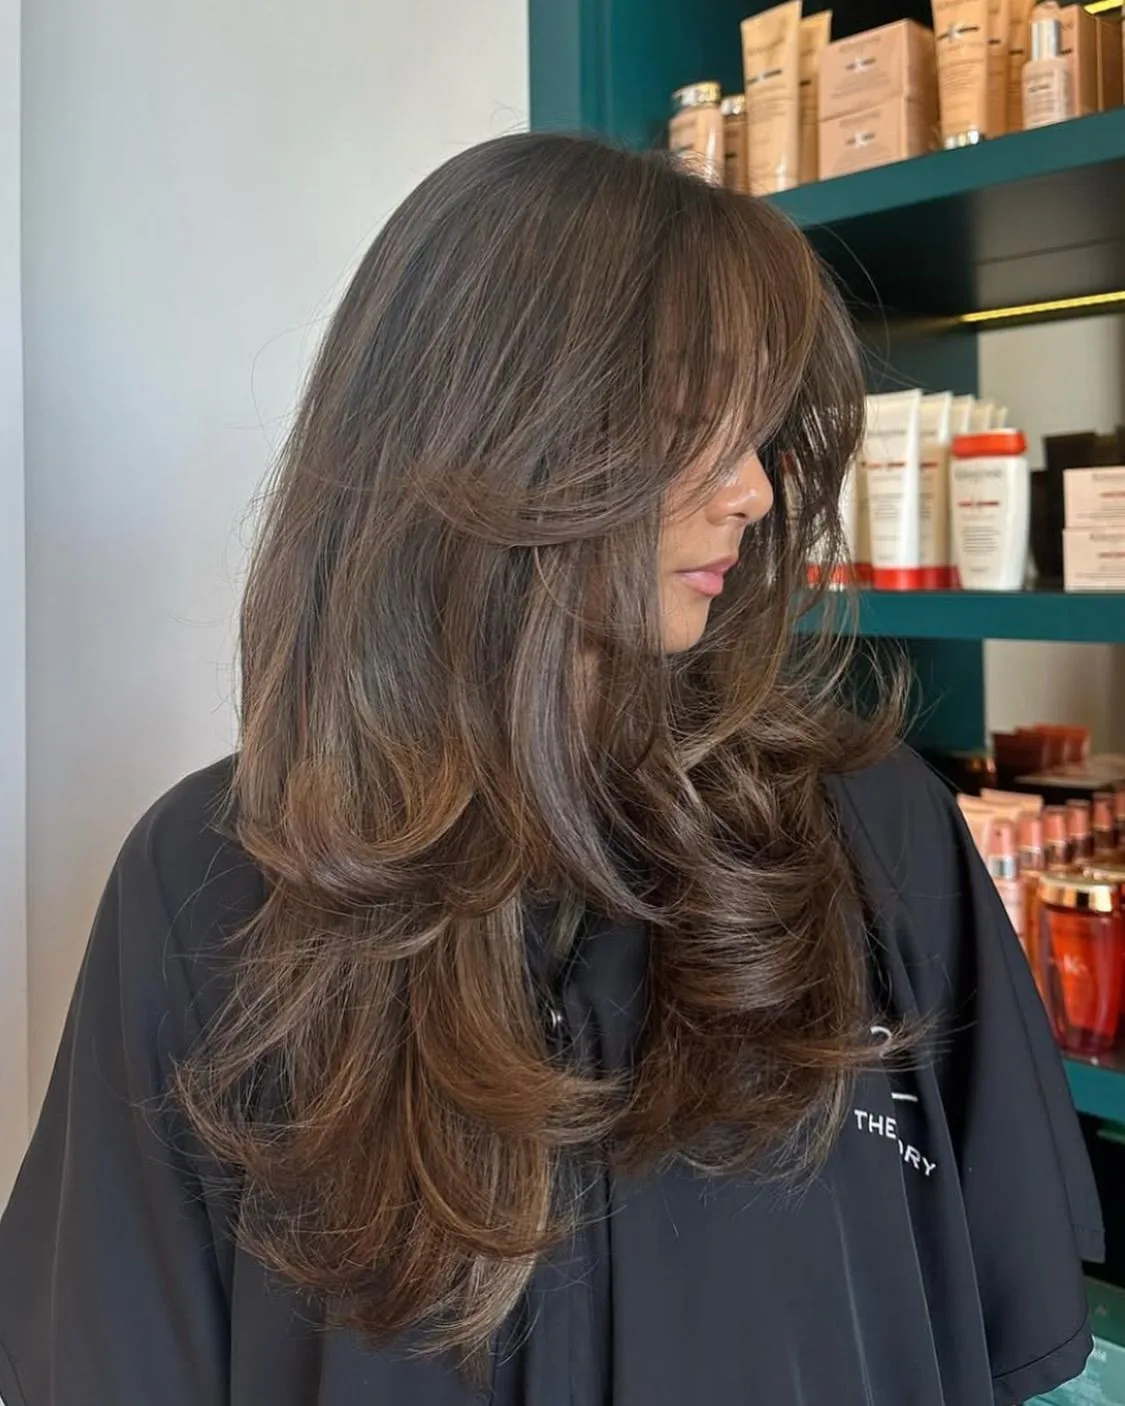
Curtain bangs and a 90s blowout were made for each other, because the bangs do at the front what the blowout does everywhere else: they add softness, movement and a frame around the face. The bangs part in the middle and sweep out to either side, blending straight into the face-framing layers, so there is no hard line anywhere in the cut — just one continuous, bouncy curve from the forehead to the ends. It is the most flattering version of the blowout for women who want their hair to soften their face as well as fill it out.
Best for: almost every face shape, and hair from shoulder length to long. How to style: blow-dry the bangs first, while they are still damp, rolling them forward and to the sides with a medium round brush so they curve outward. What to ask your stylist: curtain bangs that graze the cheekbone, not the eyebrow, so they blend into the layers. Styling time: twenty-five to thirty-five minutes. Tools needed: a medium round brush for the bangs, a large one for the lengths, and a little texture spray. Quick verdict: if you are only going to try one blowout from this list, try this one — the bangs make it look styled even on a rushed morning.
3. The Voluminous Blowout Bob
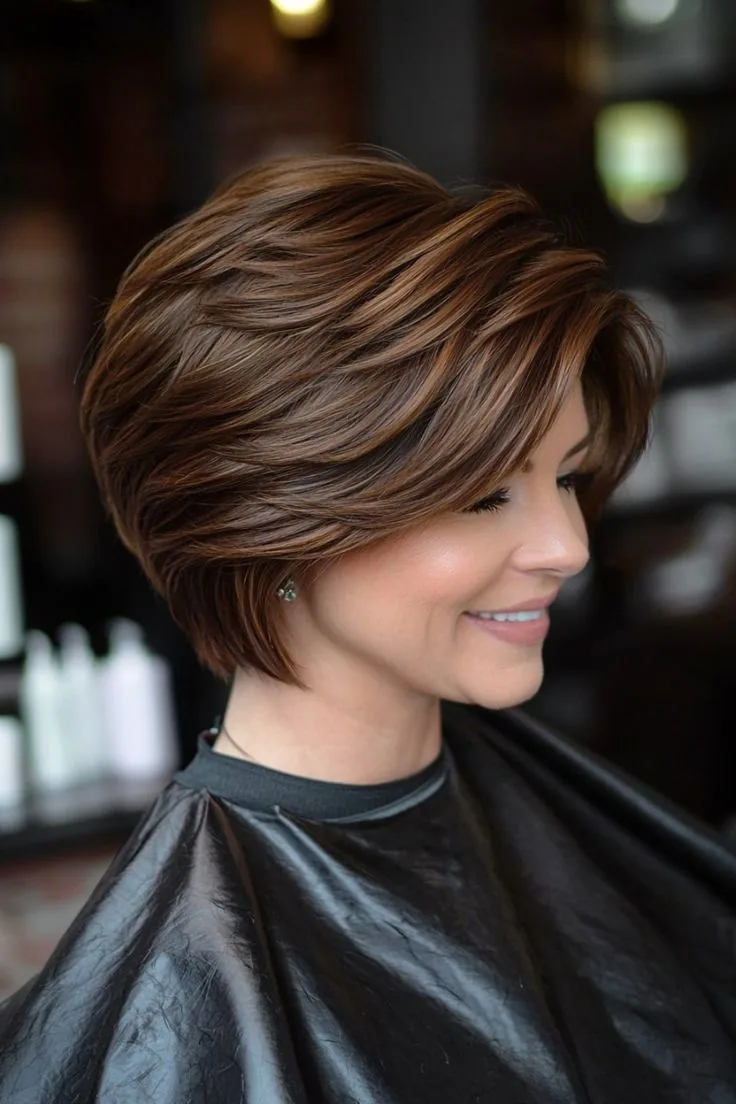
A voluminous blowout bob takes everything people love about the 90s blowout and packs it into a short cut: the same root lift, the same curved layers, the same flicked ends, but on hair that ends at the chin or the jaw. The result is a bob that looks twice as full as it is, with the ends kicking out and under in turns and the whole shape reading as round and bouncy rather than flat and neat. It is the blowout for women who love volume but do not want the drying time of long hair — or the weight of it.
Pros: dries in fifteen minutes, looks salon-fresh with very little effort, and makes fine hair look thick. Cons: the short back needs a trim every five weeks to hold its shape, and the volume can go flat in humidity. Common mistake: blow-drying a blowout bob straight down — always dry the sides outward and upward with the round brush, or the bob collapses into a plain straight cut. Maintenance: trims every five to six weeks, and a root-lifting spray on damp hair every wash. Who should avoid it: women who tie their hair back every day, because the back of this bob is too short for a ponytail.
4. The Long Layered 90s Blowout
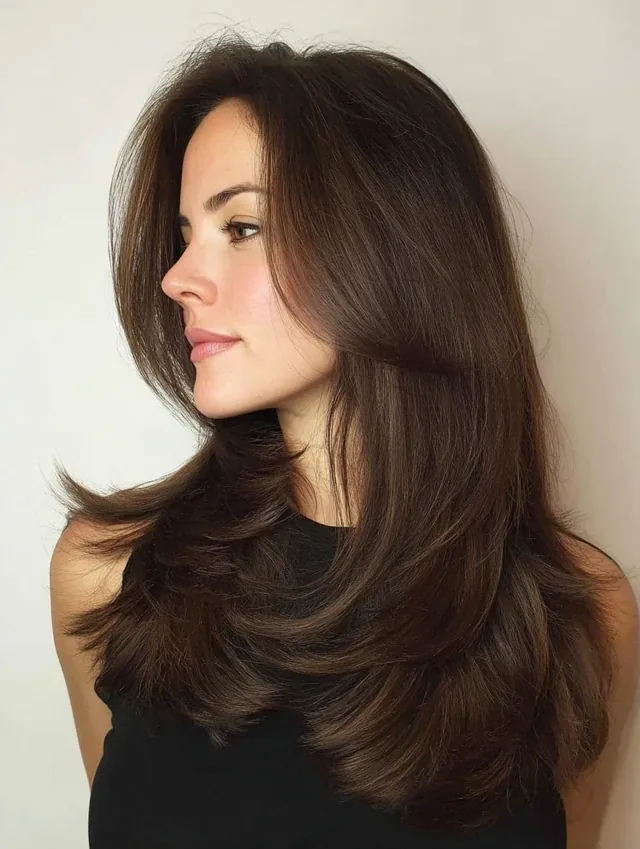
The long layered 90s blowout is the version for women who refuse to cut their length but still want the bounce. The layers are the whole trick: long, blended layers that start at the cheekbone and fall through the lengths, so the hair has somewhere to move instead of hanging in one heavy sheet. Blow-dried with a round brush, each layer curves away from the face at a slightly different height, and the overall effect is hair that looks thick, full and alive — the way long hair looks in a shampoo advert, because that is exactly how it was styled.
Best for: long hair of any texture, and anyone growing their hair out. How to style: work in four large sections, rolling each one away from the face on a large round brush, and pin each section up to cool while you dry the next. What to ask your stylist: layers that start at the cheekbone and the longest layer no shorter than the chest, so the length stays. Styling time: thirty-five to forty-five minutes at home. Tools needed: a large round brush, sectioning clips, mousse and a shine spray. Cost and time: a salon version takes about an hour, and it is the blowout most worth paying for, because the layers need a professional cut to fall correctly.
5. The Deep Side Part 90s Blowout
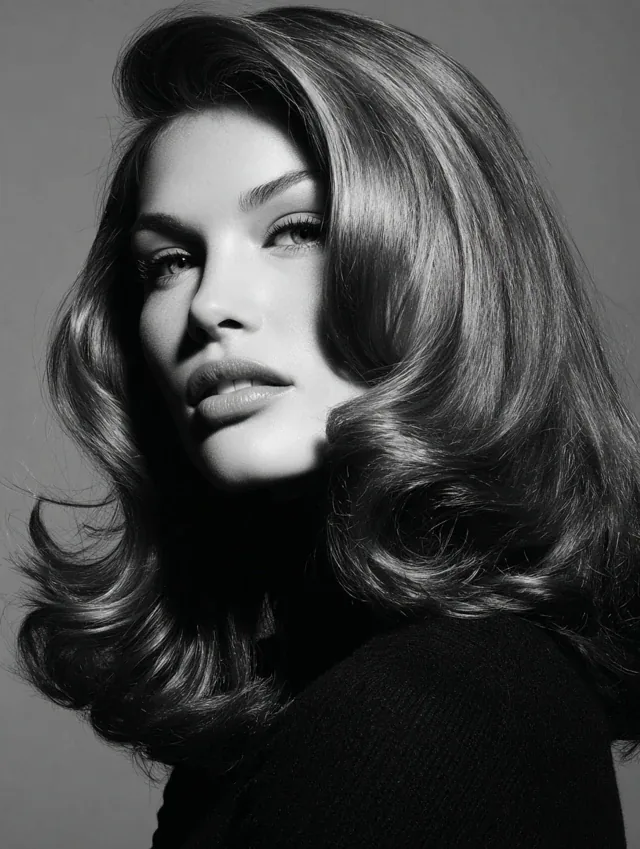
A deep side part turns a 90s blowout from pretty to dramatic, because the part changes where all the volume goes. Instead of falling evenly on both sides, the hair sweeps across the forehead in one big, glossy wave, and the heavier side holds most of the volume — a deep, side-swept shape that looks like old Hollywood with a 90s bounce. It is the blowout for a night out, a photoshoot, or any evening when you want your hair to do the talking, and it flatters almost every face shape because the diagonal sweep softens strong features.
Styling time: twenty-five to thirty minutes. How to style: part the hair deeply to one side while it is still wet, then blow-dry the heavy side first, rolling the front section across the forehead and away from the face. What to ask your stylist: layers that are slightly longer on the heavy side, so the sweep has weight. Tools needed: a large round brush, a tail comb for a clean part, and a strong-hold spray for the sweep. Common mistake: parting the hair after it is dry — a deep side part has to be set while the hair is wet, or it will fight you all day. Quick verdict: the most glamorous blowout on this list, and the easiest way to make a simple outfit look dressed up.
6. The Feathered 90s Blowout
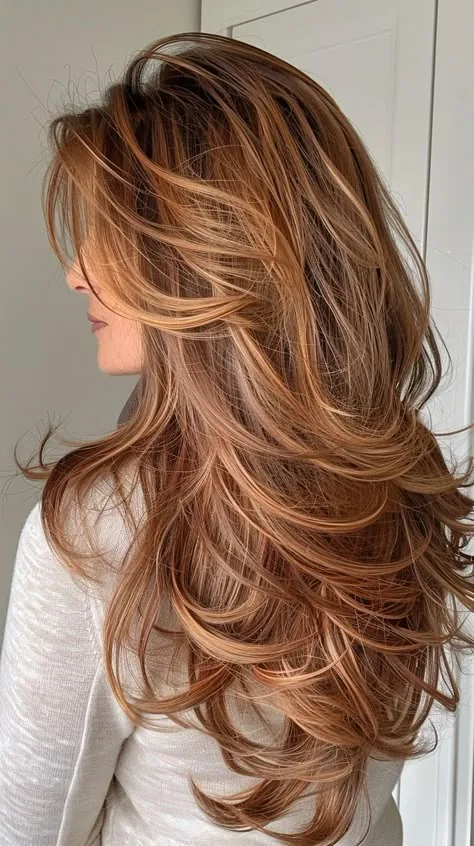
The feathered 90s blowout is the softest, most romantic version of the style, with layers that flick outward like feathers instead of curling under in a neat curve. The front pieces are the stars: they are cut in long, wispy layers that flick away from the face, and when they are blown out they create a frame that looks light and airy rather than heavy and polished. It is the blowout for women who love the 90s look but want it to feel a little less done — more like hair that moves in the wind than hair that just left the salon.
Best for: medium to long hair, straight or wavy, and anyone who loves a seventies feel. How to style: blow-dry the front layers outward with a round brush, flipping the ends away from the face instead of under, and finish with a light texture spray rather than a shine spray. What to ask your stylist: feathered layers at the front, with the shortest pieces at the cheekbone. Styling time: twenty to thirty minutes. Tools needed: a medium round brush and a texturising spray. Who should avoid it: very curly hair, where feathering can look frizzy rather than flicked. Maintenance: trims every seven to eight weeks to keep the feathered ends from splitting.
7. The Big Blowout for Fine Hair
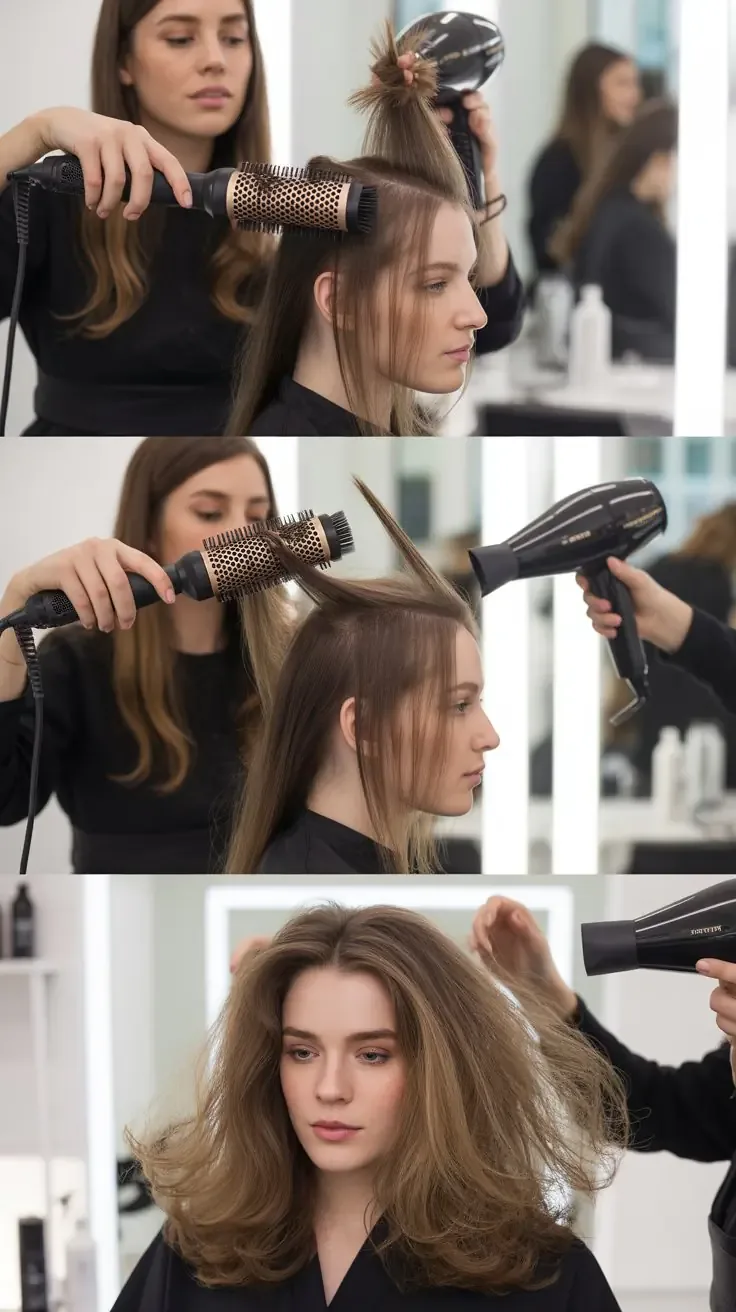
Fine hair and a 90s blowout are a better match than most people expect, because a blowout is one of the few styles that can make fine hair look genuinely full — as long as it is built the right way. The secret is to create the volume at the roots and keep the ends light: mousse and a root-lifting spray on damp hair, sections dried with a round brush and pinned up to cool, and no heavy creams or oils anywhere near the roots. The result is fine hair with real body, bounce that holds for a day or two, and ends that flick instead of falling flat.
Pros: makes fine hair look twice as thick, and the style holds better than most people expect once the roots are set. Cons: the volume drops faster than on thick hair, especially in humidity, so a light hold spray is essential. Common mistake: using too much product — a pea-sized amount of mousse is enough, and anything heavier will flatten the volume you just built. What to ask your stylist: long, blended layers rather than short, choppy ones, because too much layering can make fine hair look thin at the ends. Styling time: twenty to twenty-five minutes. Tools needed: a medium round brush, volumising mousse, root-lifting spray and dry shampoo for day two.
8. The 90s Blowout for Thick Hair
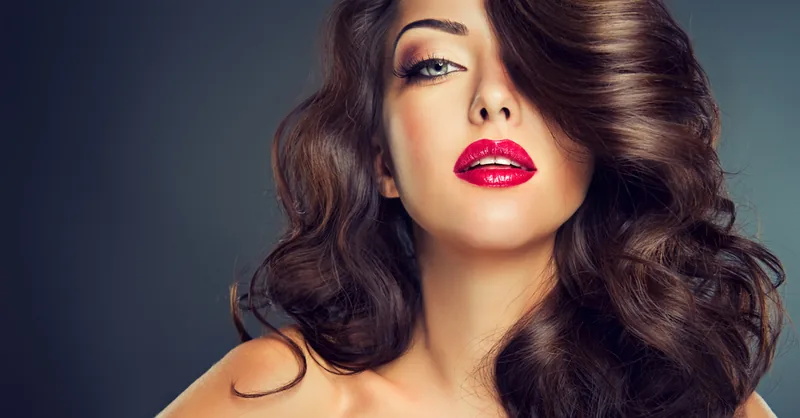
Thick hair is the natural home of the 90s blowout, because thick hair already has the body the style is trying to create — the job is to shape it, not to invent it. The challenge is the opposite of fine hair: thick hair is heavy, and heavy hair pulls volume out at the roots while it dries. The answer is to dry in small sections, use a round brush with real tension, and let every section cool in its curl before brushing it out. Done that way, thick hair holds a 90s blowout longer than any other hair type — two to three days, easily, with the bounce still there on the morning after.
Best for: thick, heavy hair of any length. How to style: rough-dry the hair to about eighty percent first, then work in small sections with a large round brush, drying each one fully before moving on. What to ask your stylist: thinning through the mid-lengths, not just layering — thinning removes weight, and weight is what pulls the volume out. Styling time: forty to fifty minutes at home, so this is the blowout most worth getting at the salon. Tools needed: a powerful blow-dryer, a large round brush, sectioning clips and a heat protectant. Maintenance: trims every eight weeks, with texturising at each visit to keep the weight down.
9. The Chin-Length 90s Blowout
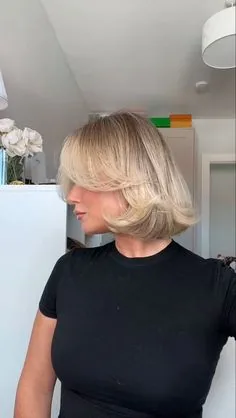
A chin-length 90s blowout is proof that you do not need long hair to get the look — you just need the right cut and a round brush. At chin length, the blowout is all about the ends: they curl under and flick out in turns, the sides hold their fullness at cheek level, and the whole shape reads as round, bouncy and deliberately styled. It is the shortest version of the blowout on this list, and it is also one of the most flattering, because the volume sits exactly where it frames the face.
Styling time: ten to fifteen minutes, the fastest blowout on this list. How to style: blow-dry with a medium round brush, rolling the ends under at the back and out at the front, and finish with a tiny amount of shine serum on the ends only. What to ask your stylist: a chin-length bob with soft, textured ends rather than a blunt edge, so the flick looks natural. Tools needed: a medium round brush and a light hold spray. Who should avoid it: women who want to tie their hair up, because the back is too short for a ponytail. Quick verdict: the blowout for women who want maximum style in minimum time — and the one that looks most like a salon visit when it was not.
10. The Shoulder-Length 90s Blowout
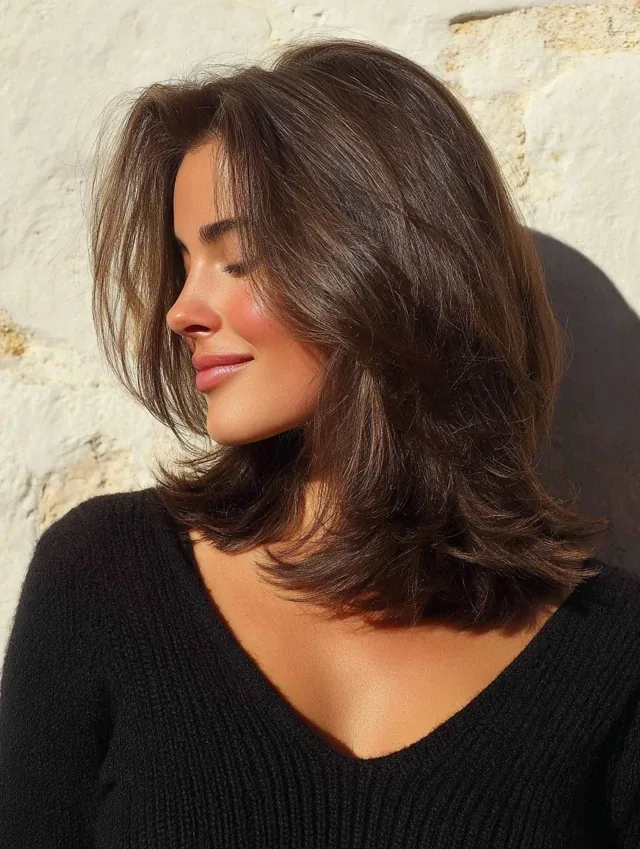
The shoulder-length 90s blowout is the sweet spot of the whole list: long enough to hold a real flick at the ends, short enough to dry in twenty minutes, and the easiest length to keep bouncy for two or three days. The hair ends right where the layers can do their best work — around the collarbone, where the curves frame the face and the shoulders — and the cut is long enough to tie back on a bad hair day, which a chin-length bob is not. It is the blowout most stylists recommend to women trying the style for the first time, because it is the most forgiving.
Best for: almost everyone, and especially women moving from long hair to shorter hair. How to style: blow-dry in three sections — the back first, then each side — rolling the ends under with a large round brush and letting them cool before brushing out. What to ask your stylist: layers that start at the cheekbone and end at the collarbone, with no short pieces at the crown. Styling time: twenty to twenty-five minutes. Tools needed: a large round brush, mousse and a light hold spray. Maintenance: trims every seven to eight weeks. Pros: the most versatile blowout, easy to grow out, and it works on straight, wavy and curly hair.
11. The Flipped-End 90s Blowout
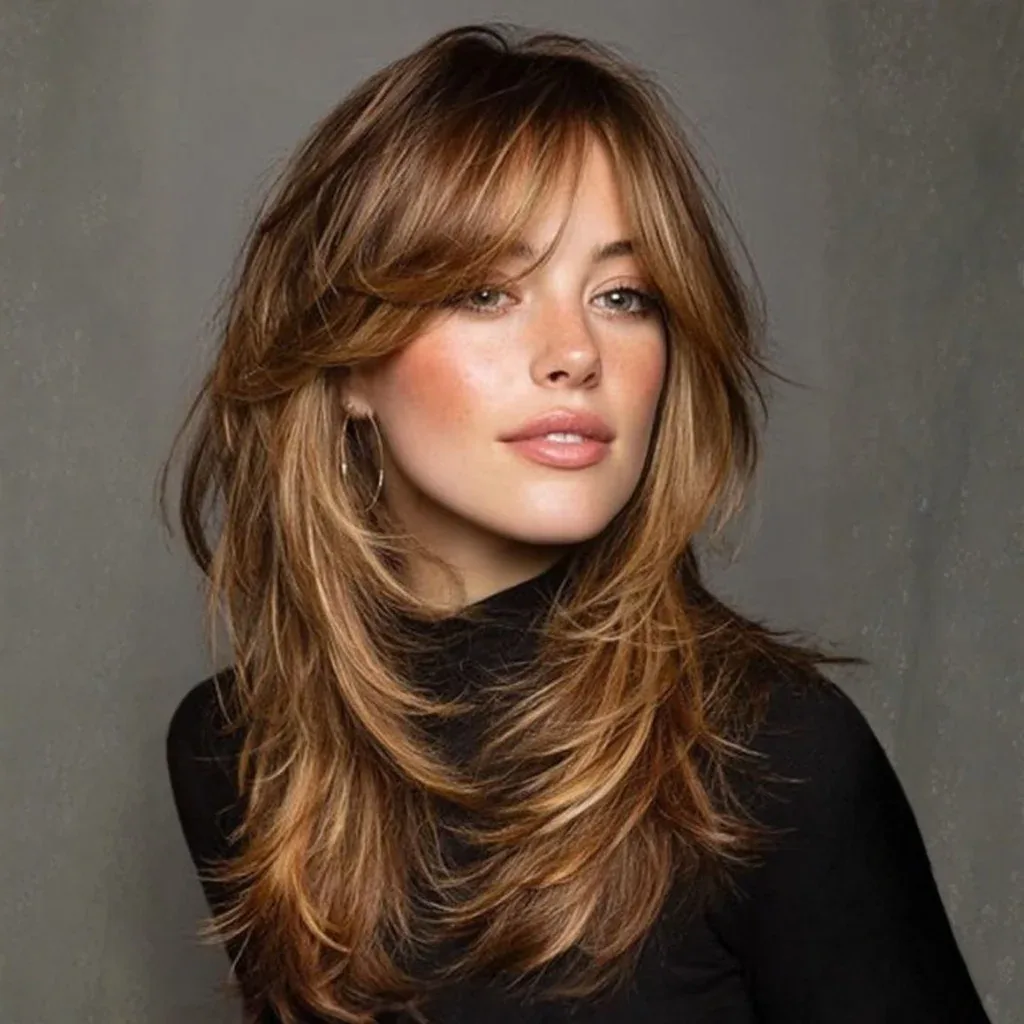
The flipped-end 90s blowout is the most recognisable version of the style, because the ends are the whole point: instead of curling under in a neat curve, they flick outward, away from the face, in a deliberate, playful flip. It is the look that defined the decade’s hair — the flick you can see from across a room — and it works because the flip adds width at the ends, so the hair looks wider and more alive than a straight blow-dry ever could. The front pieces flick outward too, framing the face in soft, feathery curves.
Best for: medium to long hair, straight or wavy. How to style: blow-dry each section with a round brush, rolling the brush outward at the ends instead of under, and let the section cool in that flipped shape before you brush it out. What to ask your stylist: layers that end at different lengths, so the flips fall at different heights and look natural rather than uniform. Styling time: twenty-five to thirty minutes. Tools needed: a large round brush, a blow-dryer with a nozzle, and a light hold spray — a strong hold spray will make the flips look stiff. Common mistake: flipping every single section the same way, which looks like a wig; leave a few ends curling under for balance.
12. The Face-Framing Layer 90s Blowout
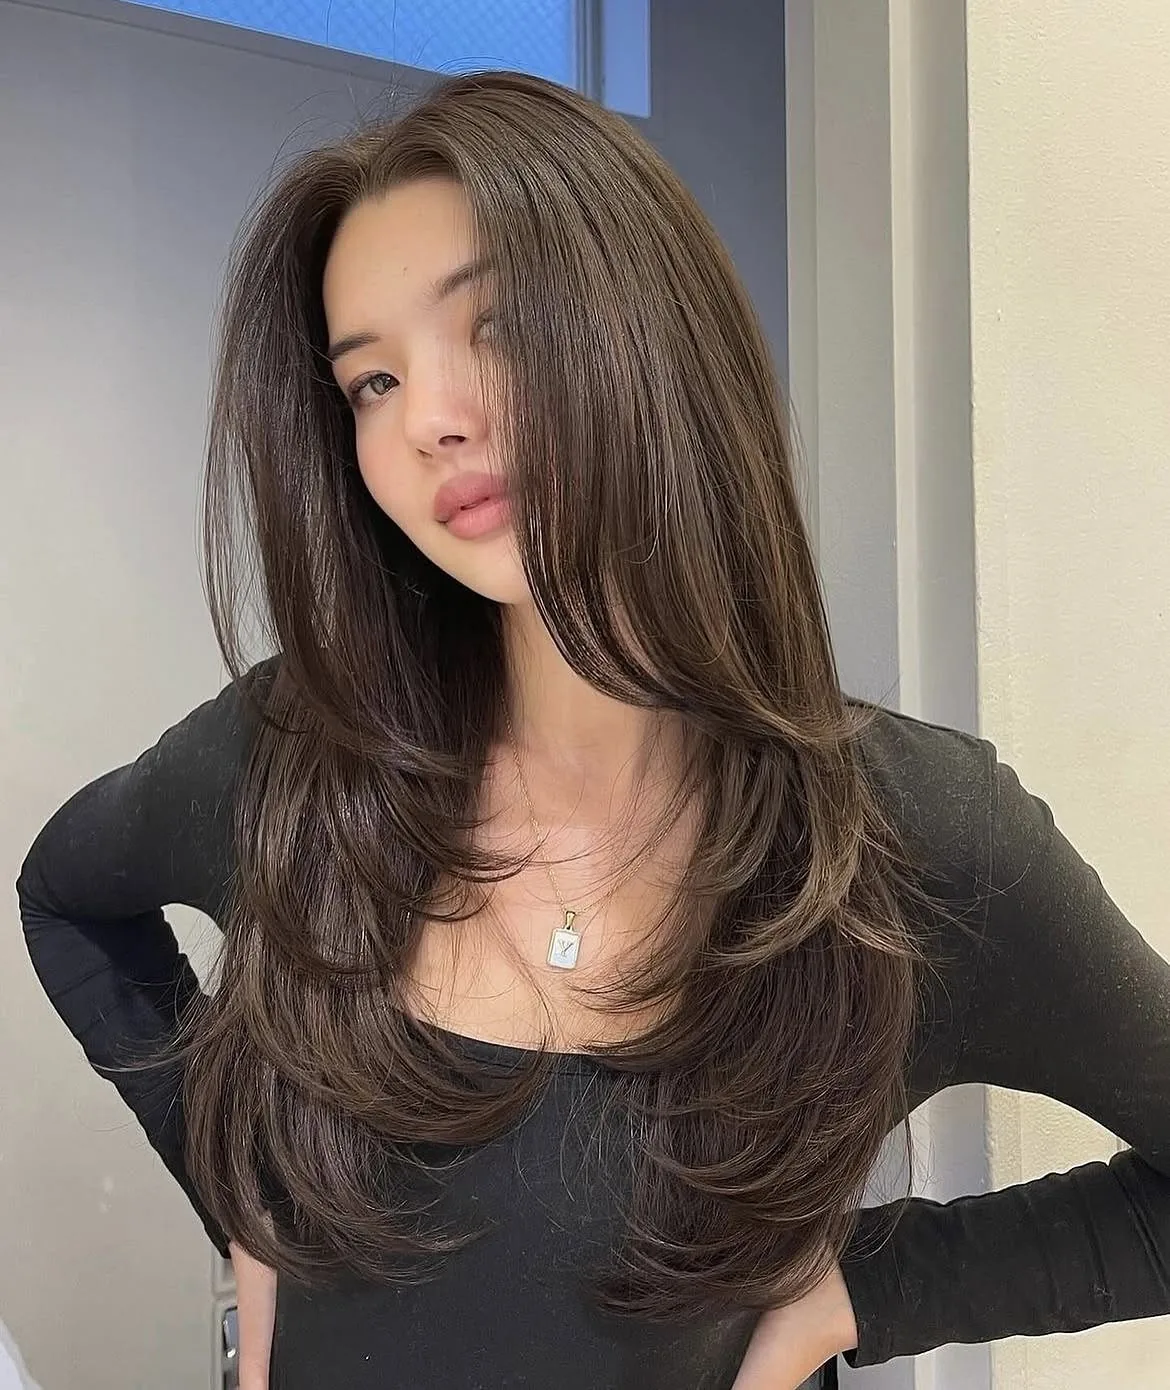
The face-framing layer 90s blowout puts all the attention at the front, where two long layers fall on either side of the face and curve away from it in soft, bouncy sweeps. Those front pieces are shorter than the rest of the hair — usually starting at the cheekbone and ending at the chin or the jaw — and when they are blown out they frame the face the way a picture frame frames a photograph. It is the blowout for women who want their hair to flatter their face first and everything else second, and it works on every face shape because the layers can be cut to suit the person wearing them.
Styling time: twenty to thirty minutes. How to style: dry the face-framing pieces first, rolling them away from the face on a medium round brush, then dry the back in large sections. What to ask your stylist: face-framing layers that start at the cheekbone, and tell them whether you want the layers to flick out or curl under — that one choice changes the whole look. Tools needed: a medium round brush for the front, a large one for the back, and a shine spray. Quick verdict: the most face-flattering blowout on this list, and the easiest to maintain, because the front layers grow out gracefully into the rest of the cut.
13. The Middle Part 90s Blowout
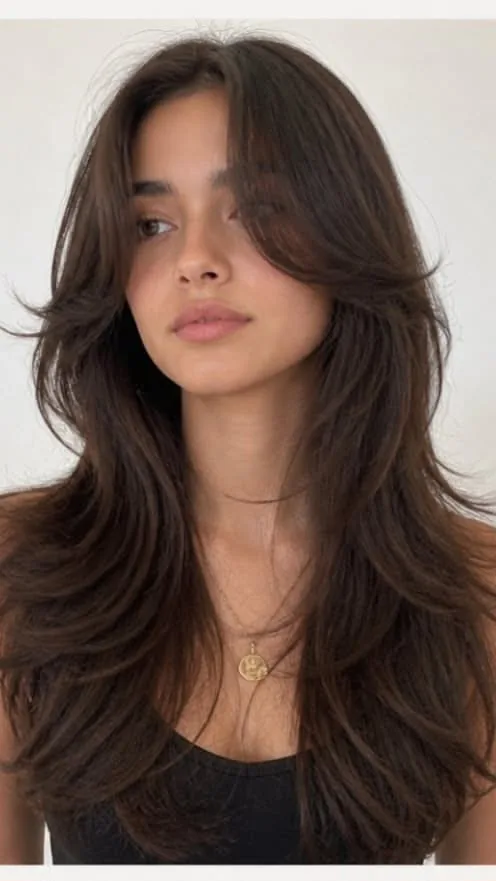
A middle part 90s blowout is the most symmetrical version of the style, and it is also the most modern-feeling: the hair parts exactly down the centre, falls in two equal, bouncy curtains, and the layers curve away from the face on both sides in a mirror image. It is the blowout for women who love balance and symmetry, and it looks especially good with curtain bangs, which soften the centre part and stop it from looking severe. The volume is the same as any other blowout — big at the roots, full through the sides — but the part gives it a clean, deliberate frame.
Pros: symmetrical, polished, and it photographs beautifully from the front. Cons: a centre part is the least forgiving parting, because it shows the face exactly as it is — it works best paired with curtain bangs or face-framing layers. Common mistake: wearing a middle part blowout with one-length hair and no layers, which can look flat and heavy; the layers are what give the centre part its movement. What to ask your stylist: curtain bangs or face-framing layers that start at the cheekbone. Styling time: twenty-five to thirty-five minutes. Tools needed: a large round brush, a tail comb for a straight part, and mousse at the roots.
14. The 90s Blowout for Naturally Curly Hair
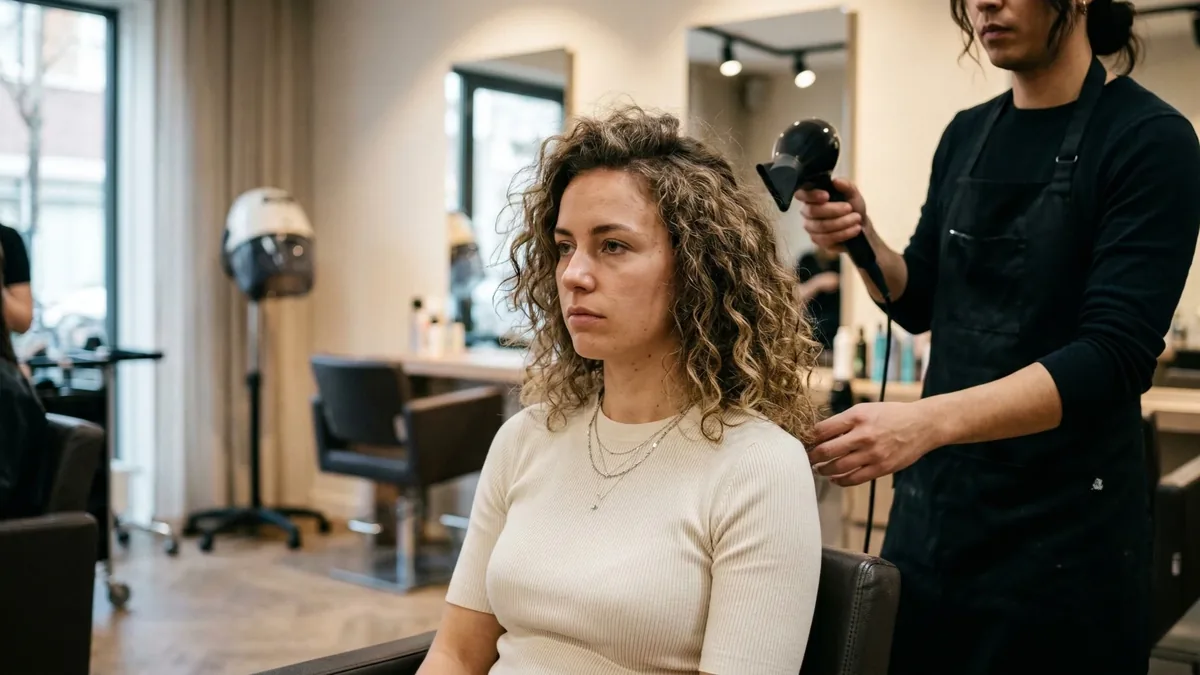
A 90s blowout on naturally curly hair is the most dramatic transformation on this list, because the starting point and the finish could not be more different: curls stretched smooth, blown out to glossy, bouncy volume, with the hair falling in big, soft curves instead of tight spirals. The result is the biggest, fullest blowout you can get, because curly hair has natural body that straight hair has to be talked into — once it is smoothed, the volume is enormous, and it holds for days. It is the blowout for curly-haired women who want to see their hair do something completely different for a night.
Best for: naturally curly or coily hair, medium to long. How to style: start with a smoothing cream and a heat protectant, blow-dry in small sections with a round brush and real tension, and stretch each section fully smooth before you move on. What to ask your stylist: a cut with long layers, because layers are what let the blowout fall in curves instead of a triangle. Styling time: forty-five to sixty minutes at home, so this one is worth a salon visit. Tools needed: a powerful blow-dryer, a large round brush, a smoothing cream and a strong heat protectant. Maintenance: the blowout lasts until your next wash, and a silk scarf at night keeps it smooth.
15. The 90s Blowout for Wavy Hair
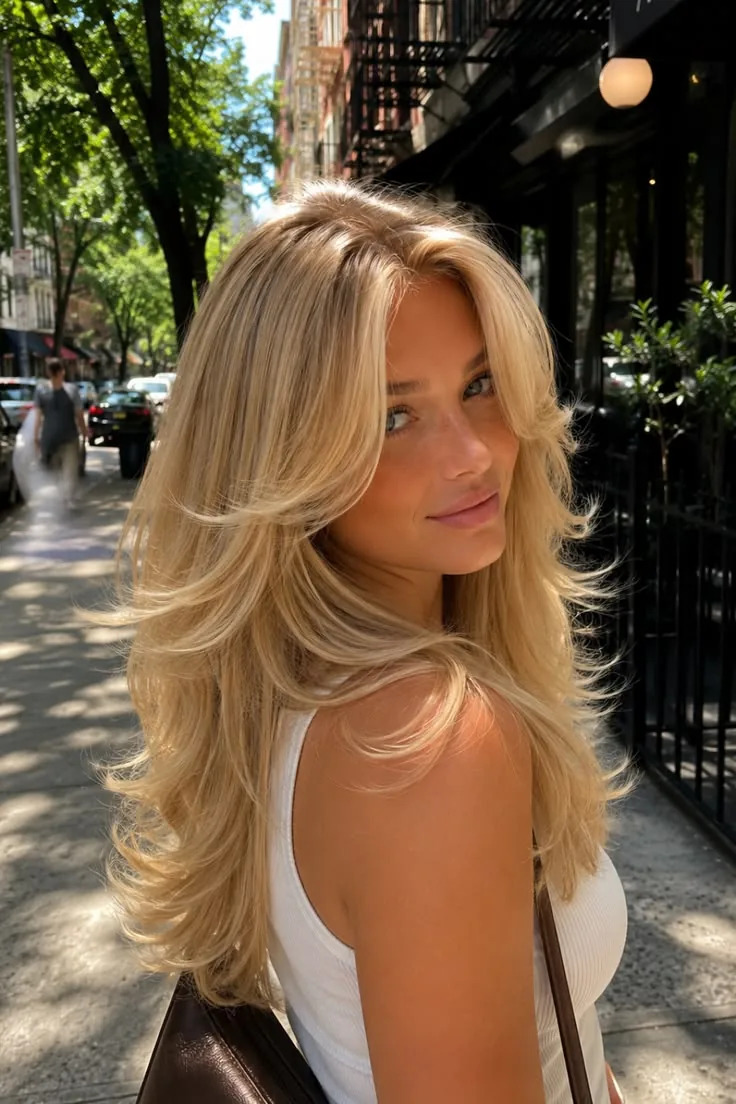
Wavy hair is the easiest texture for a 90s blowout, because the wave is already halfway there: the hair has natural movement, natural body, and a tendency to hold a curl, which is everything a blowout needs. The job is mostly to smooth the roots and shape the ends — blow-dry the top sections straight with a round brush to get rid of frizz, then let the natural wave do the rest through the lengths, with the ends flicked out or curled under to finish. The result is a blowout that looks effortless, because half of it is natural, and it keeps its bounce longer than a blowout on straight hair.
Styling time: twenty to thirty minutes. How to style: apply a smoothing cream to damp hair, blow-dry the roots smooth first, then roll the mid-lengths and ends on a large round brush. What to ask your stylist: long layers that follow your natural wave pattern, so the blowout falls the way your hair already wants to fall. Tools needed: a large round brush, a smoothing cream and a light hold spray. Pros: the volume lasts two to three days, and the second-day hair looks even better than the first. Who should avoid over-styling it: anyone with a strong natural wave — too much heat and too much brushing will fight the wave instead of working with it. Quick verdict: the lowest-effort blowout on this list, and one of the best-looking.
16. The 90s Blowout for Straight Hair
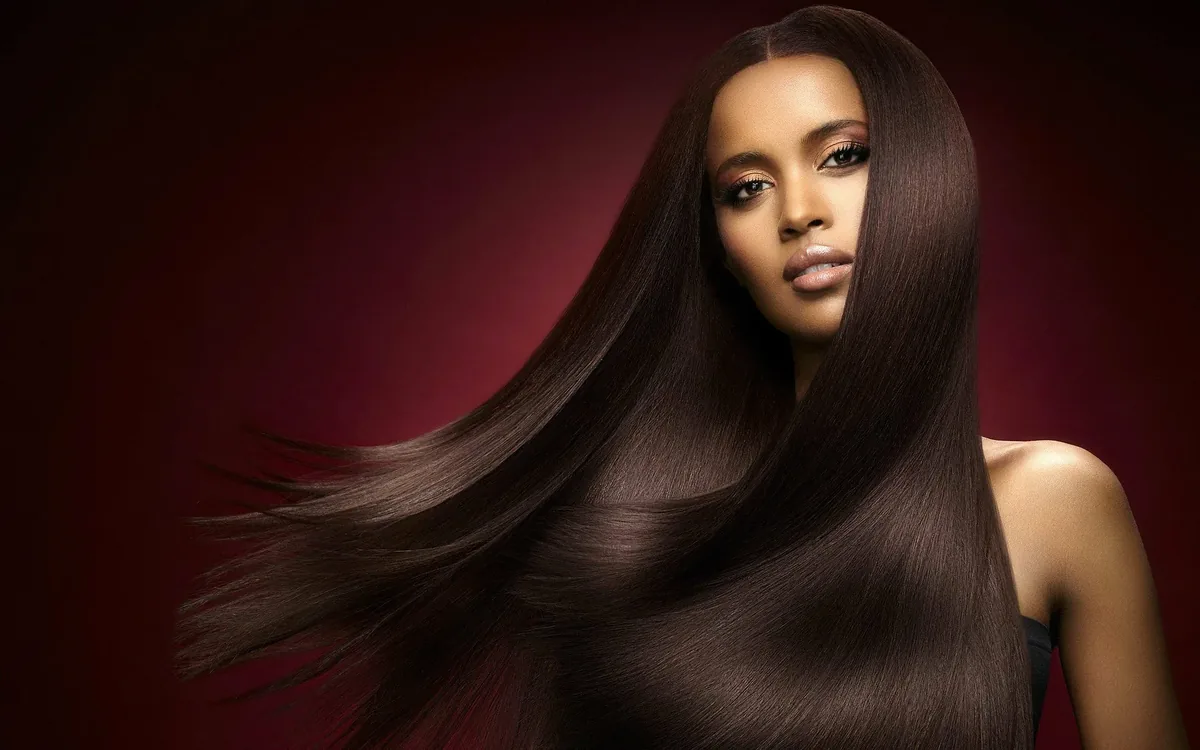
Straight hair takes to a 90s blowout beautifully, because the smooth, glossy finish the style is famous for is exactly what straight hair does best — but it needs help with the volume, because straight hair has no natural body to lean on. The trick is to build the volume in at the roots and set it while the hair cools: mousse on damp hair, sections dried with a round brush and pinned up to cool, and a light hold spray once the shape is set. Without the cooling step, a blowout on straight hair will fall flat within an hour, so that one step is not optional here — it is the whole style.
Best for: straight hair of any length, from a bob to long hair. How to style: dry the hair in sections, rolling each one up on a large round brush and pinning it in place to cool for five minutes before brushing out. What to ask your stylist: long layers that start at the cheekbone, because one-length straight hair has nothing to hold a curl. Styling time: twenty-five to forty minutes. Tools needed: a large round brush, sectioning clips, volumising mousse and a light hold spray. Common mistake: brushing the blowout out while it is still warm — that is the single biggest reason straight-hair blowouts go flat. Maintenance: dry shampoo at the roots on day two brings the volume back.
17. The Sleek Glossy 90s Blowout
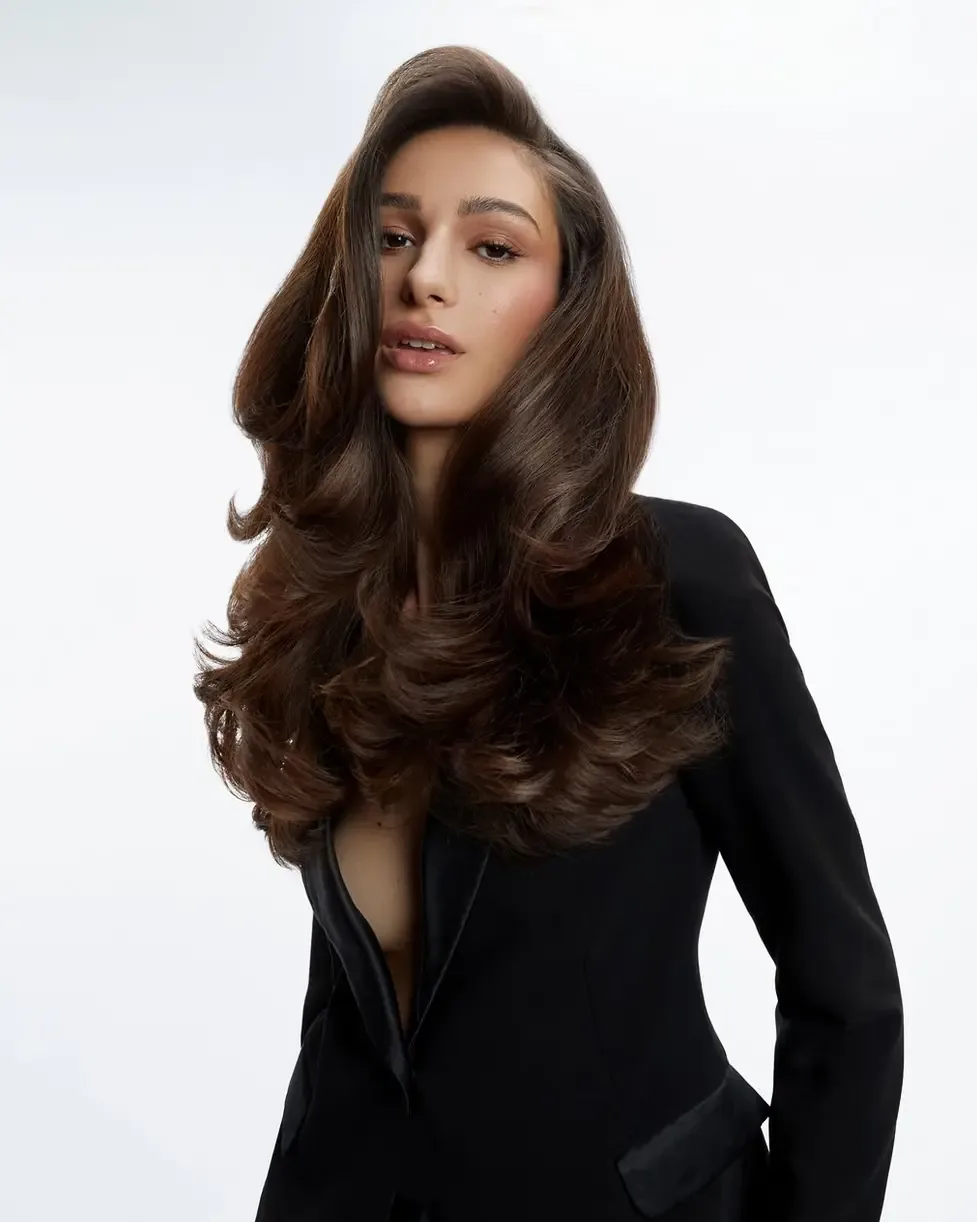
The sleek glossy 90s blowout is the polished, red-carpet cousin of the classic: the same big volume and the same curved layers, but finished so smooth and so shiny that the hair looks like glass. The ends curl under in a neat, uniform curve instead of flicking out, the surface is completely frizz-free, and the whole style catches the light when you move. It is the blowout for a wedding, a formal event, or any evening when you want to look expensive — and it is the one that photographs best, because the shine reads beautifully on camera.
Pros: the glossiest finish on this list, and it looks polished for two to three days. Cons: it takes the longest to achieve — forty to fifty minutes — and it needs the most product, including a shine serum and a smoothing cream. How to style: blow-dry each section with a round brush and a nozzle, keeping the dryer pointed down the hair shaft, then finish with a flat iron on the very ends only and a shine spray. What to ask your stylist: a cut with clean, blunt-ish ends, because split or wispy ends will not hold a glossy finish. Tools needed: a round brush, a blow-dryer with a nozzle, a shine serum and a flat iron for the ends. Who should avoid it: women who want a relaxed, undone look — this one is deliberately polished.
18. The Tousled Undone 90s Blowout
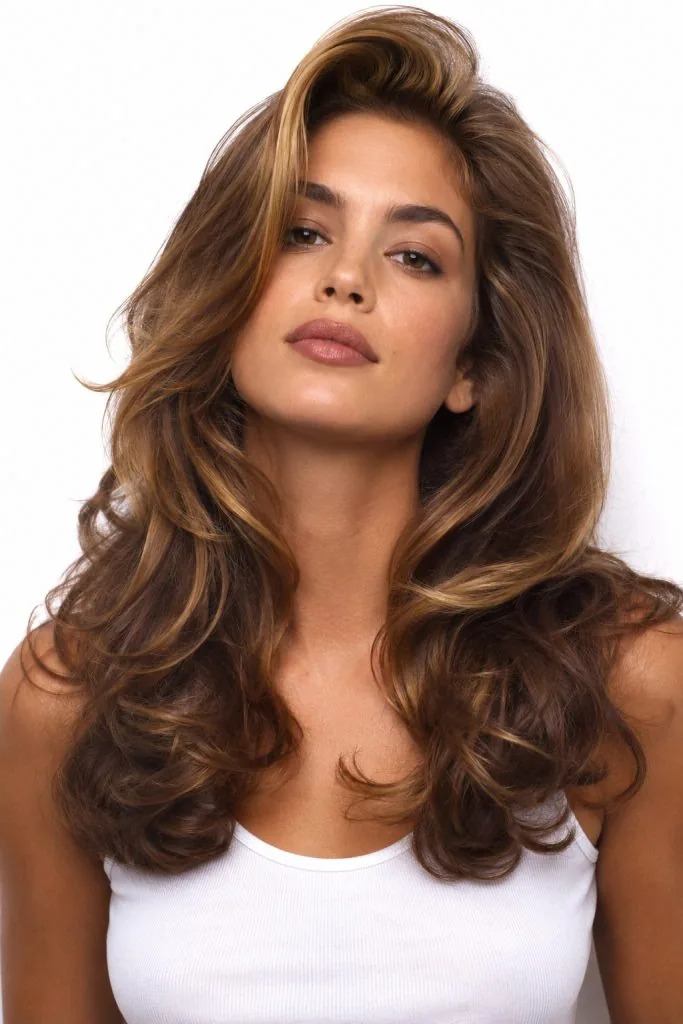
The tousled undone 90s blowout is the relaxed version of the style, for women who love the volume but not the polish: the same big, bouncy shape, but finished with texture instead of shine, and with the ends left to fall where they want instead of being curled into a perfect curve. It looks like a blowout the morning after — soft, lived-in, a little bit messy — and it is the version that works best for everyday wear, because it does not fall apart if you touch it, and it looks better the more you shake it out.
Styling time: fifteen to twenty minutes, the fastest full blowout on this list. How to style: blow-dry with a round brush as usual, then shake the hair out with your fingers, scrunch a little texture spray through the ends, and do not brush it — brushing is what makes a blowout look polished, and this one is meant to look undone. What to ask your stylist: textured, piecey ends rather than a clean cut, so the tousled finish looks deliberate. Tools needed: a round brush and a texture spray — no shine serum, no flat iron. Pros: low effort, hides bad hair days, and grows out with character. Who should avoid it: anyone who wants a formal, polished finish — this one is designed to look relaxed.
19. The Velcro Roller 90s Blowout
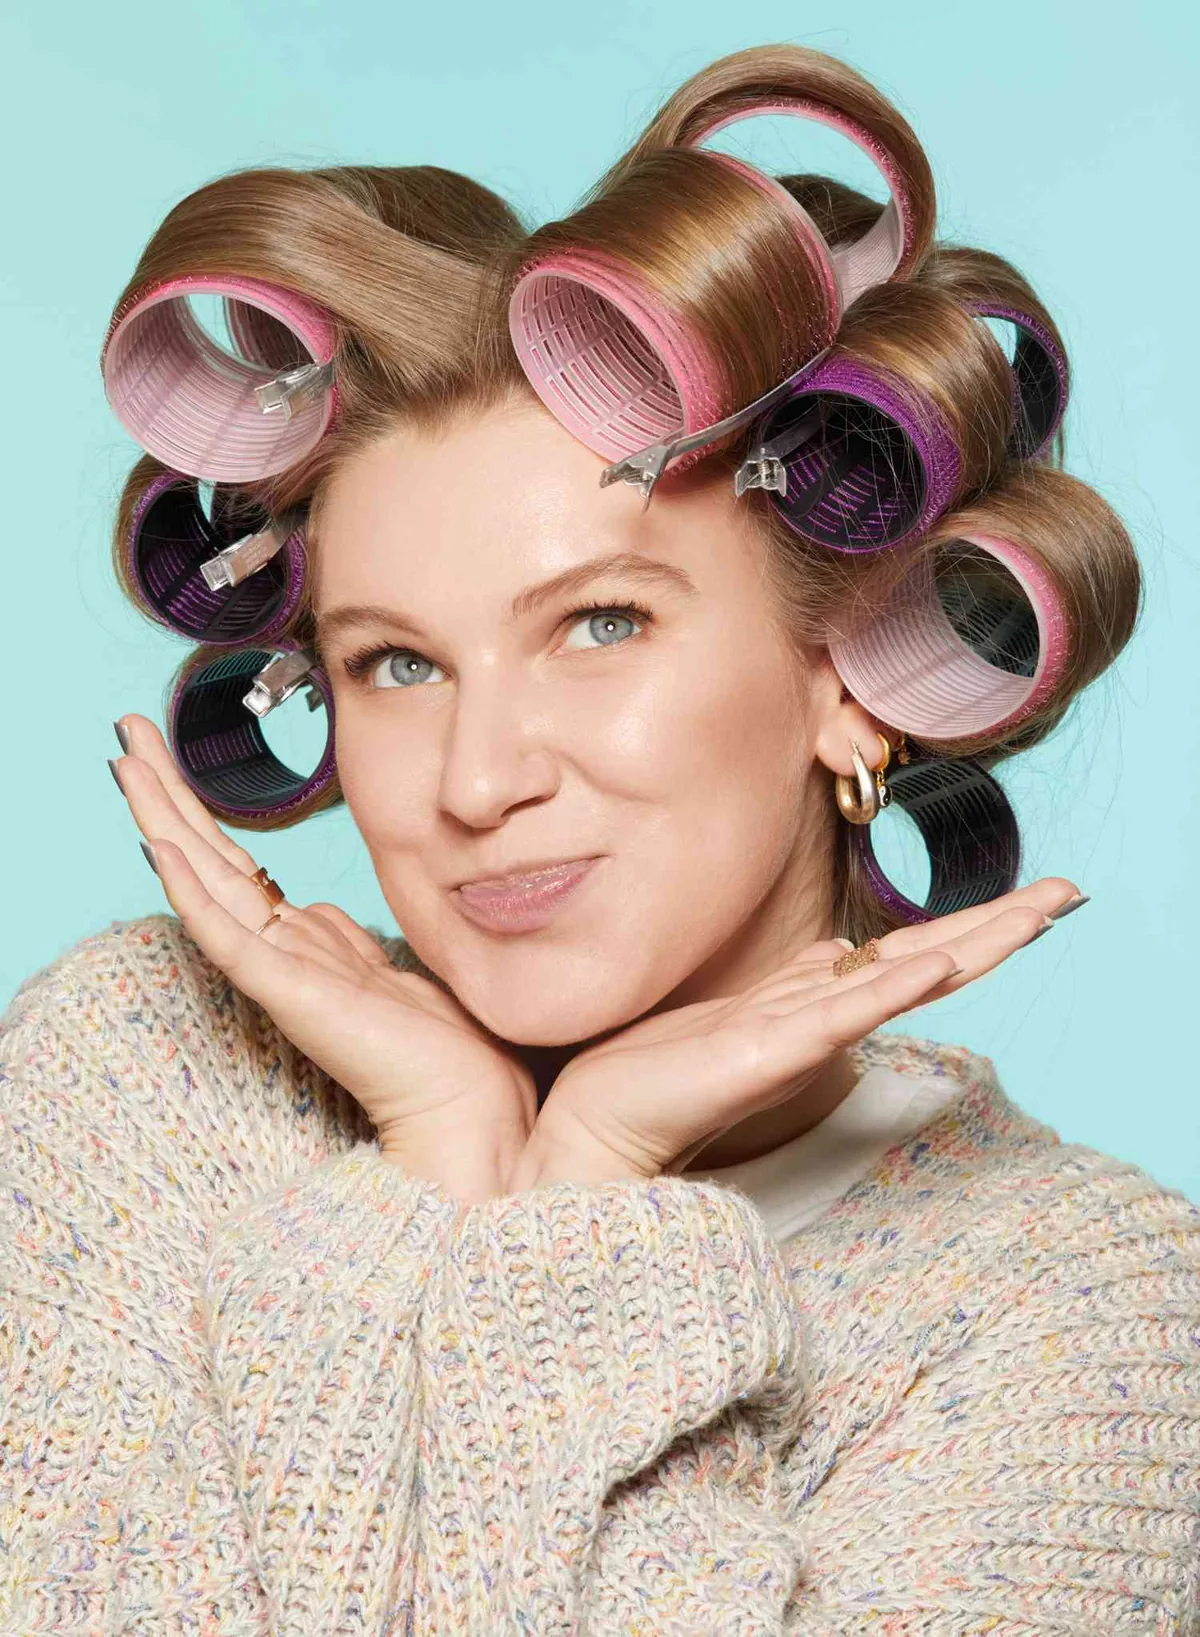
The velcro roller 90s blowout is the old-school way to get the look, and it is still the best way to get volume that lasts: the hair is blow-dried smooth first, then rolled up in large velcro rollers and left to cool completely, so the shape sets in the curl. When the rollers come out, the hair falls in big, bouncy waves with the volume built right into the roots — the kind of volume a round brush alone struggles to match. It takes longer than a brush-only blowout, but the result lasts longer too, and it is the method most salons still use for a reason.
Best for: medium to long hair, and anyone whose blowout usually falls flat. How to style: blow-dry the hair smooth, then roll large sections up in velcro rollers, starting at the front and working back, and leave them in for at least twenty minutes — or overnight, for maximum hold. What to ask your stylist: nothing, this is a styling method, not a cut, so it works with whatever haircut you already have. Styling time: twenty minutes of drying plus twenty minutes of setting time. Tools needed: a set of large velcro rollers, a blow-dryer, and a light hold spray. Quick verdict: the highest-volume blowout on this list, and the one most worth learning if your hair will not hold a curl.
20. The Round Brush Only 90s Blowout
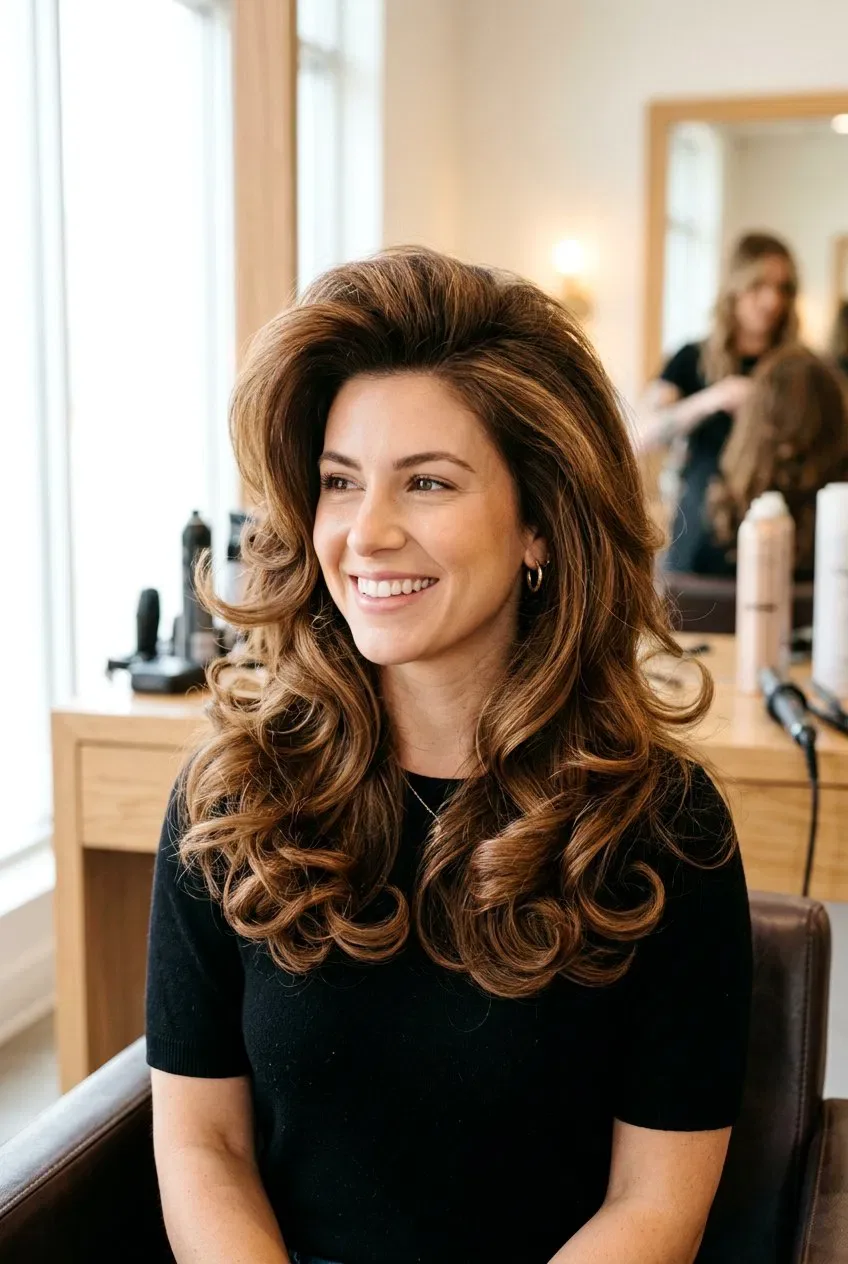
The round brush only 90s blowout is the everyday version of the style: no rollers, no hot tools, just a blow-dryer and a large round brush, and twenty minutes of your morning. It is the method most women actually use at home, because it needs the least equipment and the least planning — you wash your hair, you dry it in sections with the brush, and you are done. The volume is a little softer than a roller set, and it may not last into the third day, but for a one-day blowout it is more than enough, and it is the version you will actually do twice a week instead of once a month.
Styling time: twenty to twenty-five minutes. How to style: work in four sections, rolling each one around a large round brush and drying it with tension, then let each section cool for a minute before you brush it out — even one minute of cooling makes a real difference. What to ask your stylist: layers that start at the cheekbone, so the brush has something to shape. Tools needed: one large round brush and a blow-dryer with a nozzle — that is genuinely all you need, plus mousse and a heat protectant. Common mistake: using a brush that is too small, which creates tight curls instead of big, bouncy volume; the brush should be as large as your hair length allows. Pros: fast, simple, and the easiest blowout to learn.
21. The 90s Blowout for a Wedding
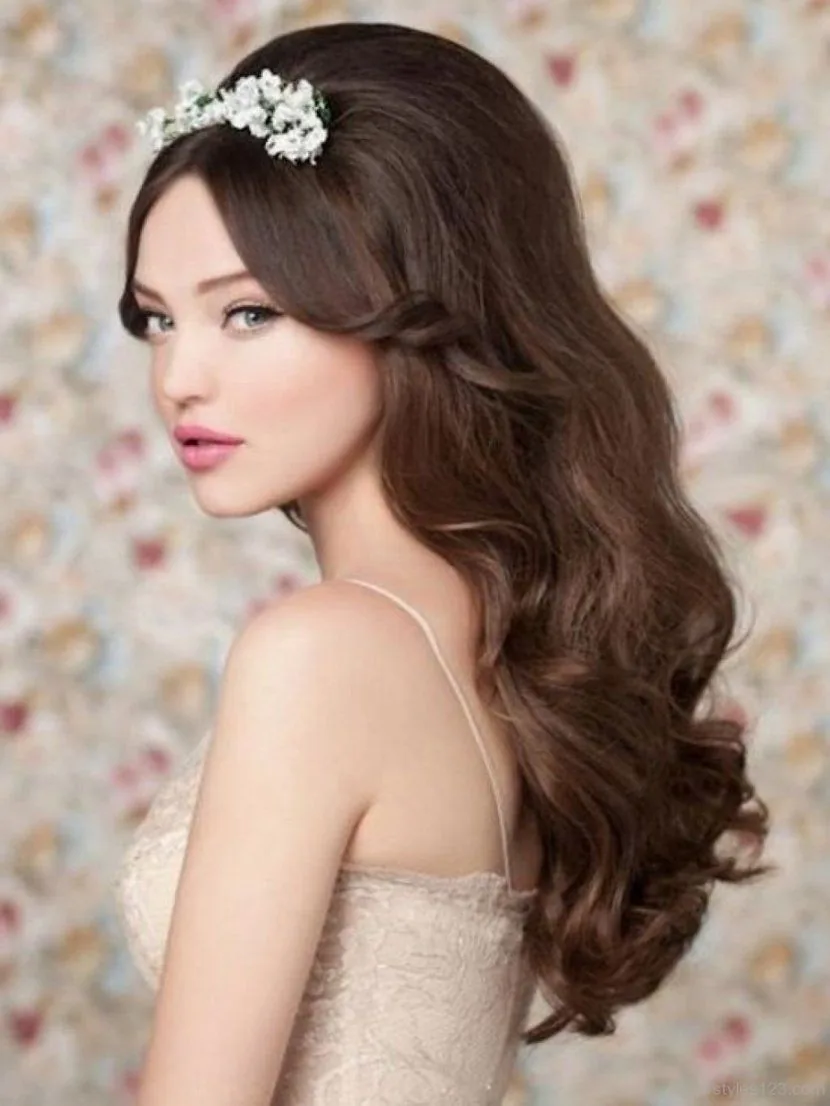
A 90s blowout for a wedding is the bridal style for women who want to look like themselves, only more so: hair down, full and bouncy, with soft layers framing the face and ends that flick in a polished finish. It photographs beautifully from every angle, it moves when you dance, and it does not need a single pin to hold it — which is more than you can say for most updos. A veil can sit just behind the hairline, and a hairpiece or a few fresh flowers can tuck into the side without disturbing the volume.
Best for: brides, bridesmaids and wedding guests with medium to long hair. How to style: this one is worth a salon trial — book a trial run a few weeks before the wedding, and bring photos of the exact volume and flick you want. What to ask your stylist: a blowout with extra hold, because wedding days are long, and a finish that will survive dancing, hugging and photographs. Styling time: forty-five minutes to an hour at the salon. Tools needed: a large round brush, velcro rollers for extra hold, and a strong-hold spray. Cost and time: a bridal blowout costs more than a standard one, but it is the style you will see in every photograph for the rest of your life. Common mistake: a tightly scraped-back style with no volume — a wedding blowout should be soft at the front and full at the sides.
22. The 90s Blowout for a Night Out
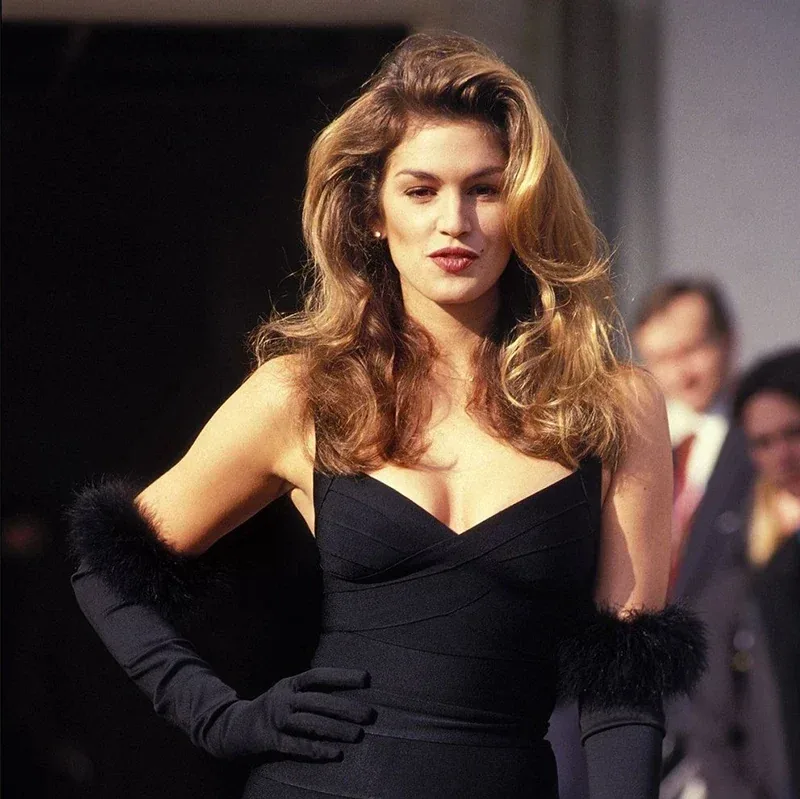
The 90s blowout for a night out is the most glamorous version of the style, turned up to full volume: bigger roots, bigger flicks, more shine, and a finish that is meant to be seen under lights. It is the blowout for a party, a dinner, a night of dancing — any evening when you want your hair to be part of the outfit. The secret is to go a little further than you would for the daytime: more mousse at the roots, larger sections on the brush, and a stronger hold spray, so the volume survives the whole evening instead of dropping after the first hour.
Styling time: thirty to forty minutes. How to style: blow-dry with a large round brush, pin the top sections up to cool for extra lift, and finish with a shine spray and a strong-hold hairspray. What to ask your stylist: a cut with long layers and a deep side part, which is the most dramatic parting for an evening blowout. Tools needed: a large round brush, velcro rollers for the crown, mousse and a strong-hold spray. Pros: maximum glamour, and it makes even a simple outfit look dressed up. Cons: it needs heat styling every time, and it will need washing out the next morning. Quick verdict: the blowout to choose when the evening matters — save the relaxed versions for the daytime.
23. The 90s Blowout for the Office
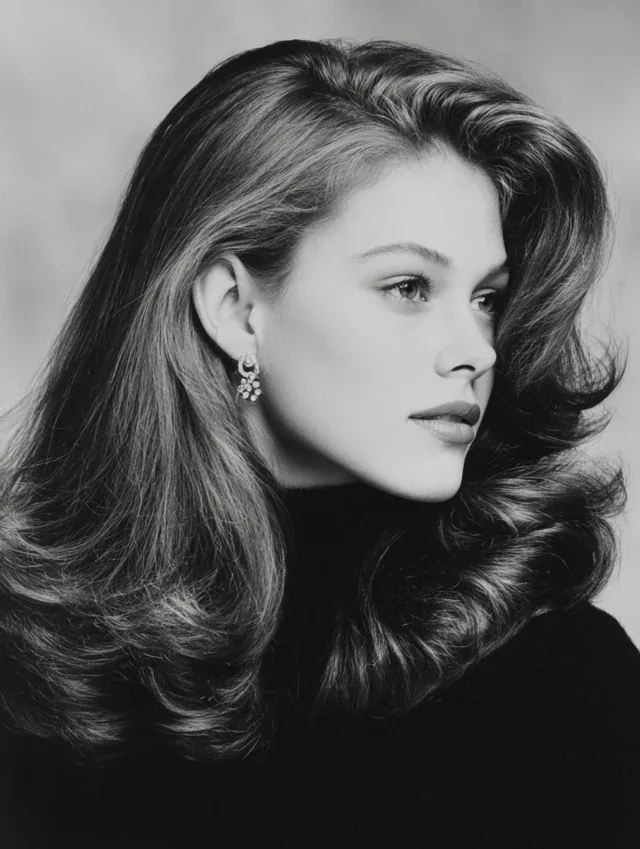
The 90s blowout for the office is the toned-down, professional version of the style: the same smooth volume and curved layers, but with the bounce kept under control, the ends curling under rather than flicking out, and the overall finish reading as polished rather than glamorous. It is the blowout for work, for meetings, for any day when you want to look put-together without looking like you are heading to a party — and it is one of the best work hairstyles there is, because it looks styled for two or three days, which means one Sunday-evening blow-dry can carry you through half the working week.
Best for: shoulder length to long hair, and anyone who wants a low-effort workweek. How to style: blow-dry with a large round brush, curling the ends under, and finish with a light hold spray rather than a strong one, so the style looks soft rather than set. What to ask your stylist: layers that start at the cheekbone and a cut that air-dries neatly, so the blowout is easy to refresh. Styling time: twenty to twenty-five minutes. Tools needed: a large round brush, mousse and a light hold spray. Maintenance: dry shampoo at the roots on day two and three keeps it looking fresh. Who should avoid the full-glamour version at work: anyone in a conservative office — keep the flick for the weekend.
24. The 90s Blowout for Date Night
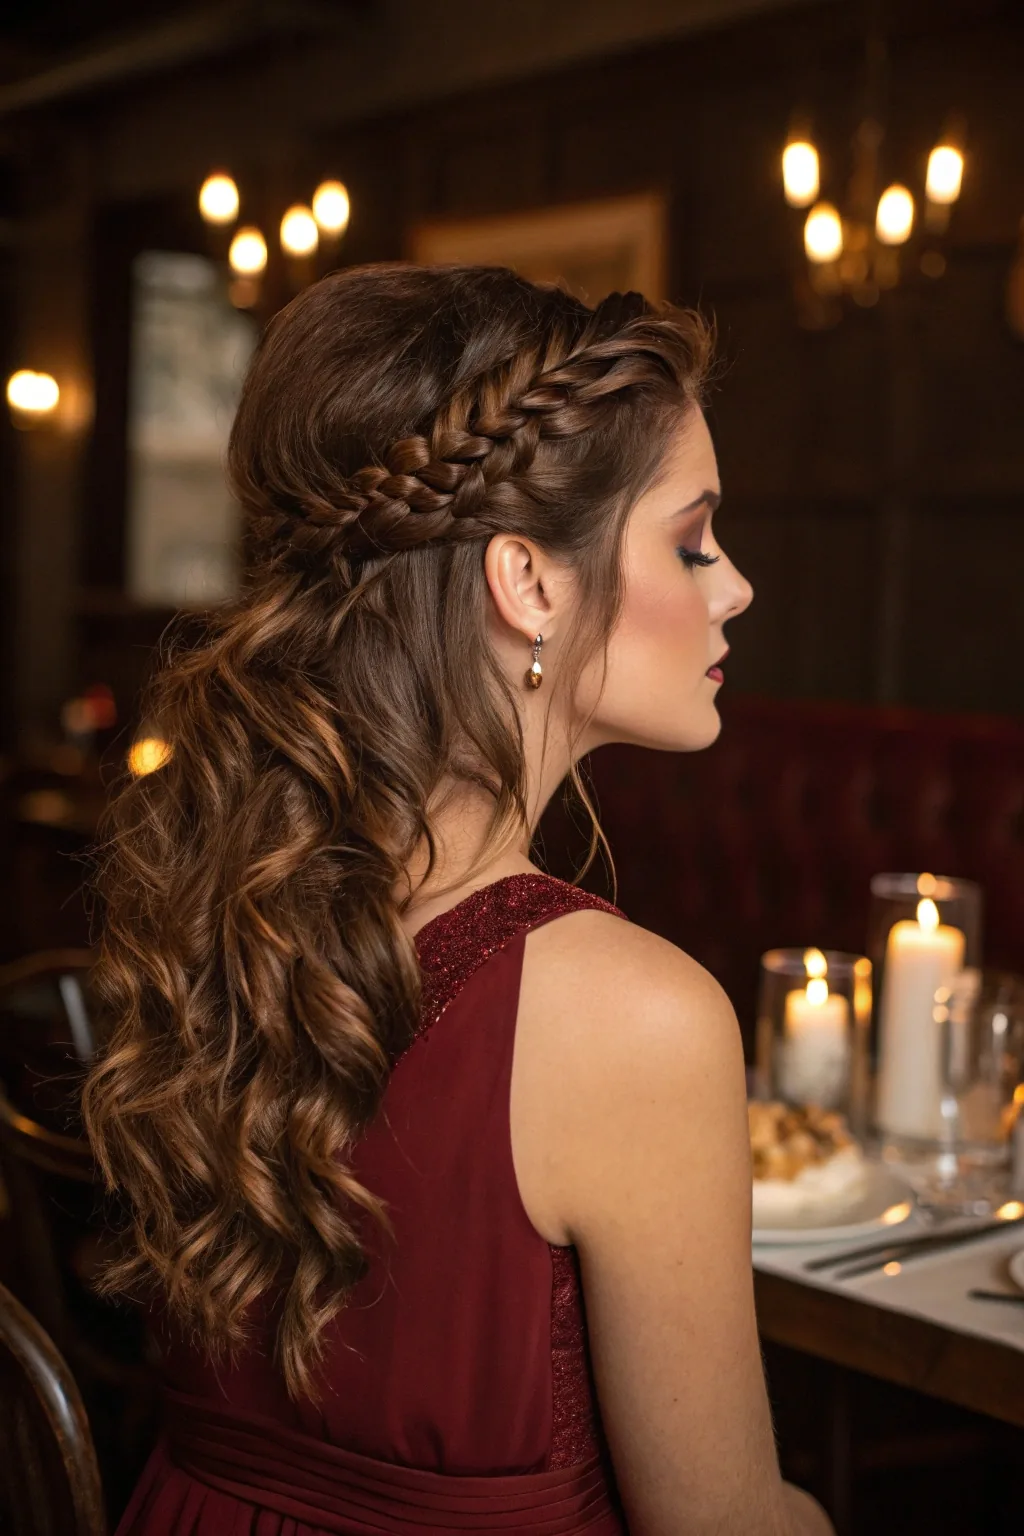
A 90s blowout for date night is the romantic version of the style: soft, touchable volume, layers that fall around the face in gentle curves, and a finish that looks like you spent twenty minutes on your hair, even if you spent forty. The volume is a little softer than a night-out blowout, the ends curl under rather than flicking out, and the whole look is designed to be admired up close — which is exactly where a date night blowout is seen. It is the style for an evening when you want to look beautiful without looking overdone.
Styling time: twenty-five to thirty minutes. How to style: blow-dry with a large round brush, rolling the front sections away from the face, and finish with a shine spray and a very light hold spray — the hair should move when you turn your head. What to ask your stylist: face-framing layers that start at the cheekbone, so the front of the blowout frames your face. Tools needed: a large round brush, mousse and a shine spray. Pros: romantic, flattering on almost every face shape, and it works on straight, wavy and curly hair with a round brush. Cons: the volume can drop in a humid restaurant, so a light hold spray is essential. Quick verdict: the blowout that makes a simple dress and a good blow-dry feel like a whole outfit.
25. The 90s Blowout for Women Over 40

A 90s blowout for women over 40 is the style at its most flattering, because volume is the most youth-giving thing hair can do: it lifts the face, softens the features, and makes the hair look full and healthy. The best version at this age is a shoulder-length blowout with soft layers and a side part — long enough to feel glamorous, short enough to dry quickly, and with the volume sitting at the sides, where it frames the face, rather than piled on top. A little root lift and a gloss finish complete the look, and the cut is forgiving if you skip a day of styling.
Styling time: twenty to twenty-five minutes with a round brush. How to style: blow-dry the layers outward with a large round brush, and finish with a shine spray — gloss is what makes this blowout look expensive at any age. What to ask your stylist: layers that start at the cheekbone and a side part, which is more flattering than a centre part at this length. Tools needed: a large round brush, mousse and a shine spray. Maintenance: trims every six to seven weeks, and a gloss every couple of months keeps coloured hair shiny. Pros: youthful without trying too hard, easy to style, and it works on straight, wavy and curly hair. Who should avoid a very short, very steep cut with this blowout: anyone whose hair is thinning at the crown — keep the length and the layers soft.
26. The 90s Blowout for Women Over 50
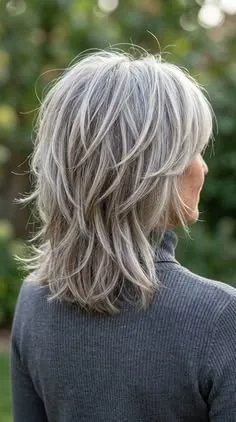
A 90s blowout for women over 50 is best worn with softness: a shoulder-length cut with layers, a side-swept front, and a little volume at the sides, blown out to a glossy, bouncy finish. The soft layers frame the face and soften both the forehead and the jaw, the side part adds a diagonal that breaks up straight lines, and the volume makes the hair look full and healthy — which is the single most flattering thing hair can do at any age. It is the blowout for women who have always loved big hair and have no intention of stopping now.
Styling time: twenty minutes with a round brush, and the cut is forgiving if you skip a day. How to style: blow-dry with a large round brush, rolling the ends under, and finish with a shine spray for gloss. What to ask your stylist: soft layers, a side part, and no short pieces at the crown — volume at the sides is the goal, not height on top. Tools needed: a large round brush, mousse and a shine spray. Maintenance: trims every six weeks, and a gloss treatment keeps grey-blended or coloured hair shiny. Pros: glamorous, easy to style, and it works on straight, wavy and curly hair. Cons: a very short, very steep cut can look harsh on mature skin — keep the angle gentle and the ends soft.
27. The 90s Blowout on a Lob
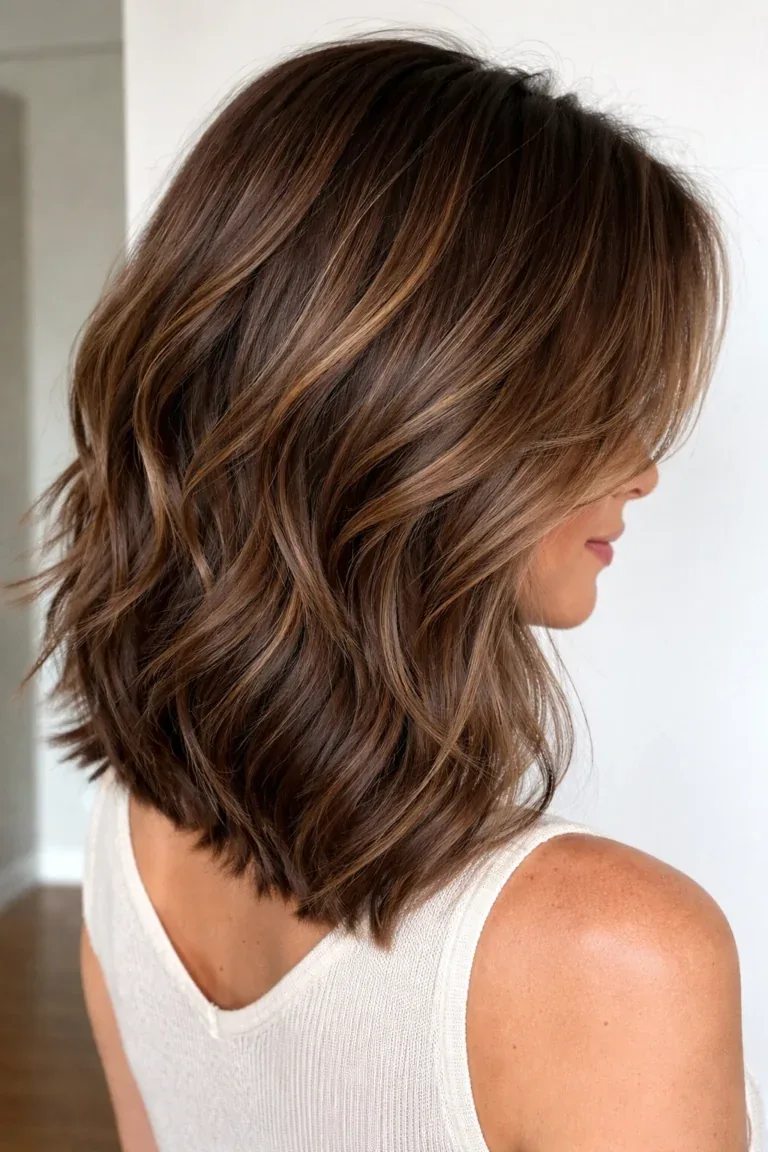
The 90s blowout on a lob is the most practical version of the style, because a lob — a long bob that ends around the collarbone — is the easiest length to blow out: it dries fast, the ends flick naturally, and the layers have just enough length to curve without weighing the style down. Blown out with a round brush, a lob becomes a bouncy, voluminous shape with the ends kicking out and under in turns, and the whole cut reads as a deliberate, styled look rather than a grown-out bob. It is the blowout for women who want the volume without the forty-minute drying time.
Best for: straight and wavy hair, and anyone moving from long hair to shorter hair. How to style: blow-dry in three sections with a large round brush, rolling the ends under at the back and out at the front, and let each section cool before brushing out. What to ask your stylist: textured ends and layers that start at the cheekbone, not at the crown — volume at the sides is the goal. Styling time: fifteen to twenty minutes. Tools needed: a large round brush, mousse and a light hold spray. Maintenance: trims every seven to eight weeks. Quick verdict: the blowout you will actually do twice a week, because it is fast enough to fit into a real morning.
28. The 90s Blowout for Blondes
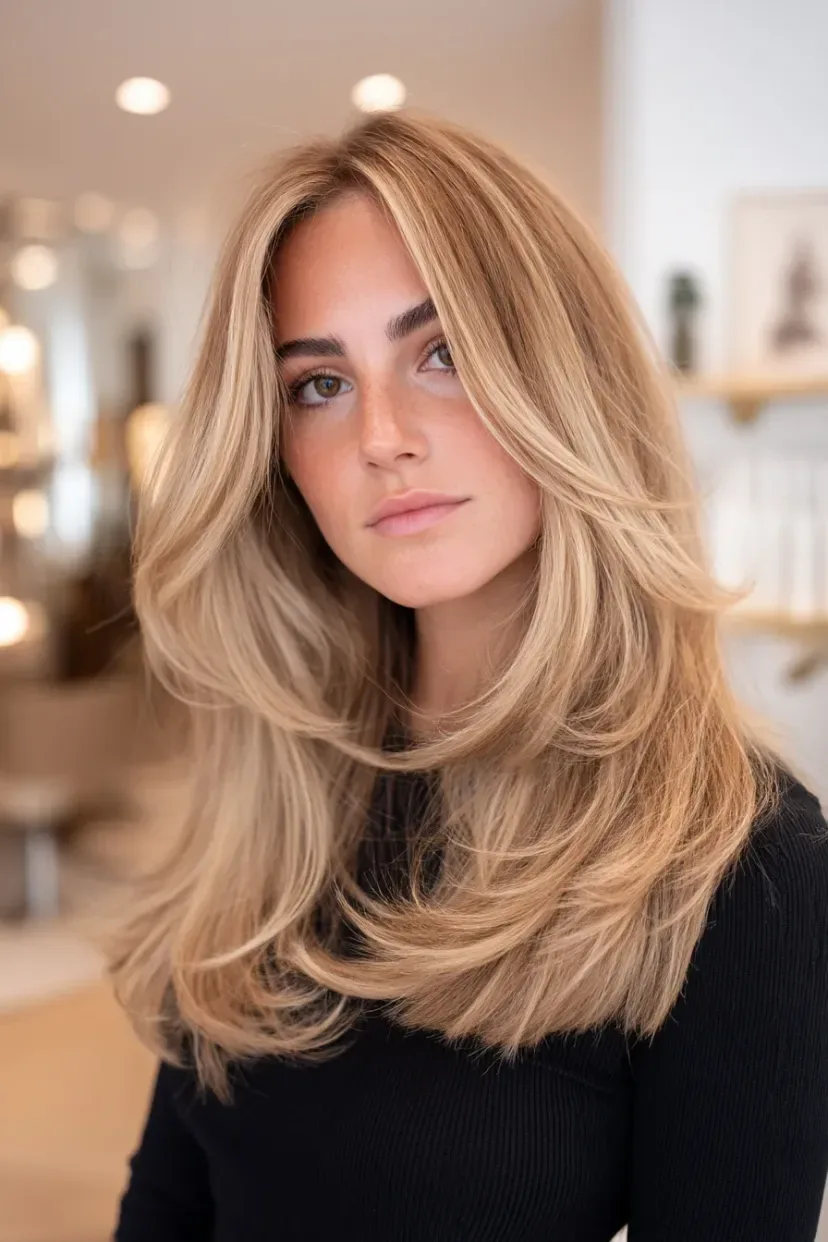
A 90s blowout on blonde hair is the most eye-catching version of the style, because blonde hair shows volume and movement better than any other colour: the light catches every curve, every flick and every layer, and the whole style looks brighter and more dimensional. Highlights help even more — a few lighter pieces through the lengths make the layers visible, so the blowout reads as full and textured rather than one flat sheet of colour. It is the blowout for blondes who want their hair to look as expensive as it is.
Best for: blonde hair of any shade, from platinum to honey, and especially highlighted hair. How to style: blow-dry with a large round brush as usual, and finish with a shine spray — blonde hair needs gloss to look its best, because it can look dull without it. What to ask your stylist: highlights placed through the mid-lengths, so the layers catch the light. Styling time: twenty-five to forty minutes, depending on length. Tools needed: a large round brush, mousse, a shine spray and a purple shampoo once a week to keep the blonde bright. Common mistake: overloading blonde hair with heavy products, which makes it look flat and dull — keep the products light. Maintenance: trims every seven to eight weeks, and a gloss or toner every six weeks.
29. The 90s Blowout for Brunettes
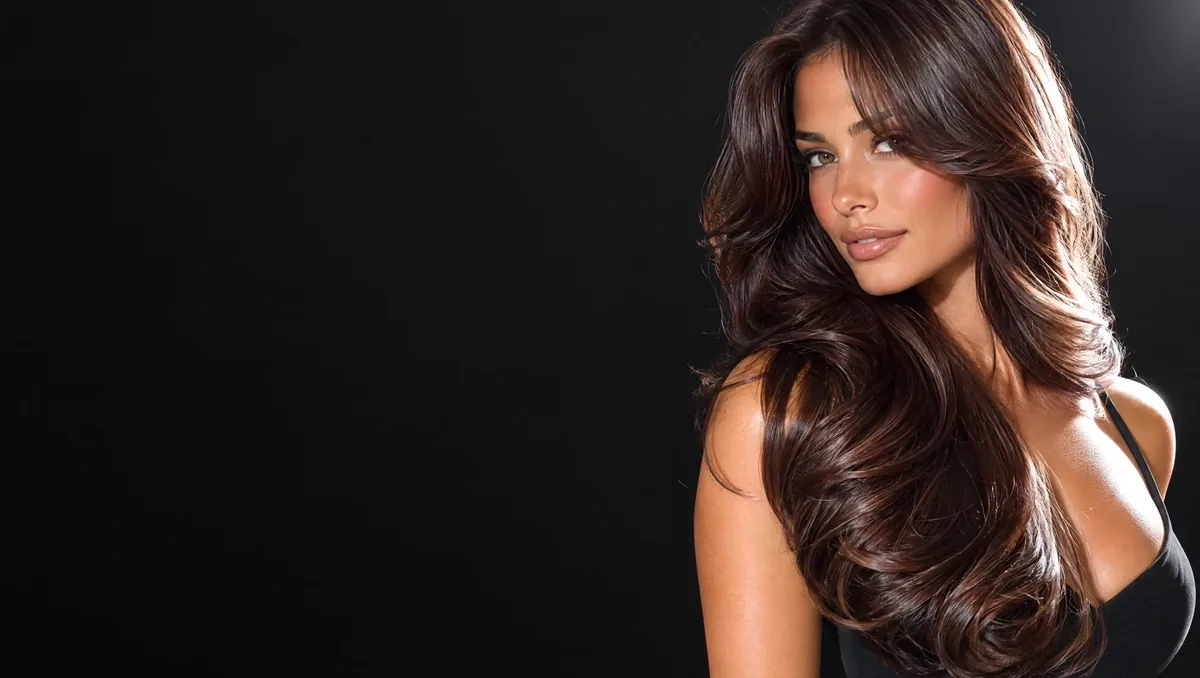
A 90s blowout on brunette hair is the glossiest version of the style, because dark hair shows shine better than any other colour: when it is blown out smooth, it reflects light like a mirror, and the curves and flicks of the blowout catch that light at every angle. The volume is the same as any other blowout — big at the roots, full through the sides — but on brunette hair the finish looks deeper, richer and more polished, and the whole style reads as expensive with very little extra effort. It is the blowout for brunettes who want their hair to look like a salon advert.
Best for: brunette hair of any shade, from dark brown to chestnut, and especially hair with a gloss treatment. How to style: blow-dry with a large round brush, keeping the dryer pointed down the hair shaft for maximum smoothness, and finish with a shine serum on the ends only. What to ask your stylist: a gloss treatment every few months, which makes brunette hair look dramatically shinier. Styling time: twenty-five to forty minutes, depending on length. Tools needed: a large round brush, a smoothing cream and a shine serum. Pros: the glossiest finish on this list, and it holds its shape for two to three days. Cons: dark hair shows frizz more than blonde hair, so a smoothing product is not optional. Quick verdict: the blowout that looks most like money.
30. The 90s Blowout With Soft Highlights
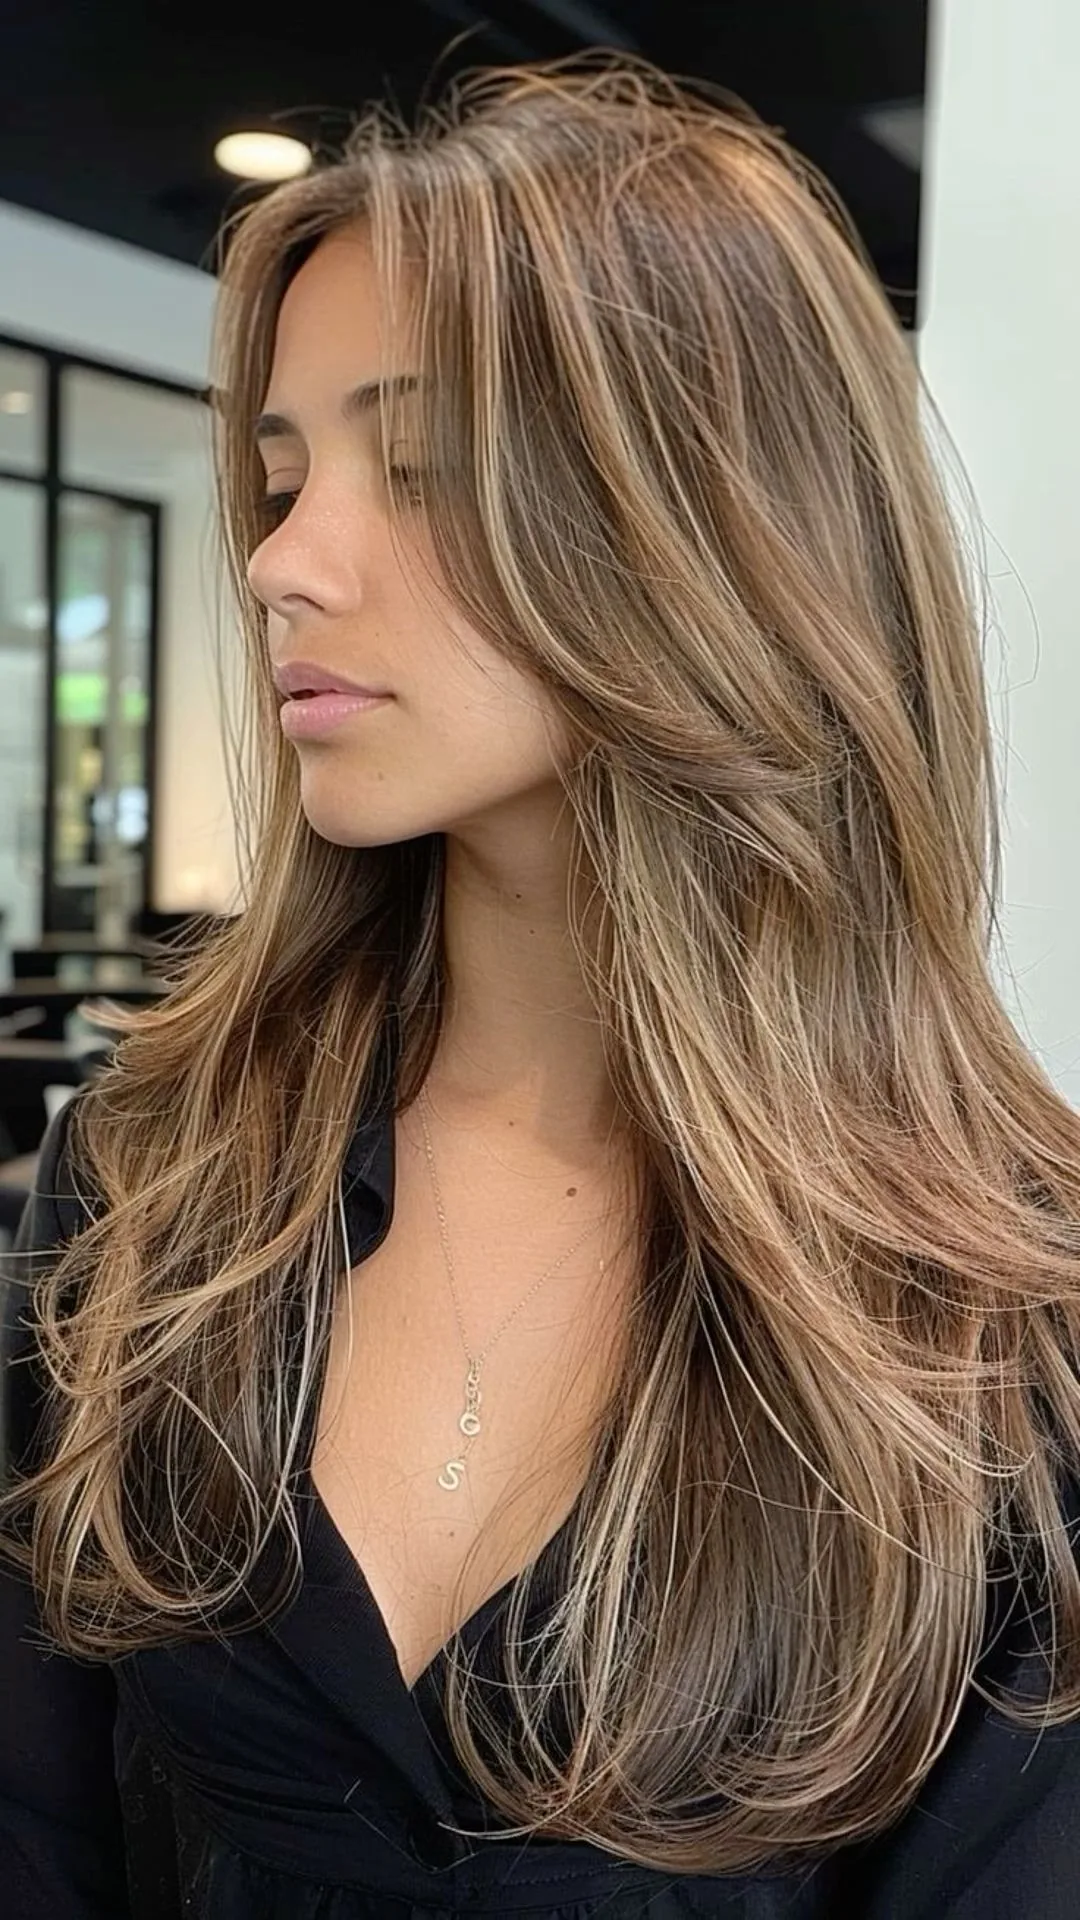
A 90s blowout with soft highlights is the version for women who want their blowout to look dimensional: the highlights are placed through the lengths and around the face, so when the hair is blown out, the light and dark pieces fall at different heights and the layers become visible. The effect is subtle — no harsh stripes, just a soft, sun-kissed blend that makes the blowout look fuller, more textured and more expensive than a single flat colour ever could. It is the blowout for women who are thinking about colour and want a reason to book it.
Styling time: twenty-five to forty minutes, depending on length. How to style: blow-dry as usual with a large round brush, and finish with a shine spray — the highlights need gloss to catch the light. What to ask your stylist: soft, blended highlights, balayage or face-framing pieces, placed through the mid-lengths rather than at the roots. Tools needed: a large round brush, mousse and a shine spray. Cost and time: highlights add an hour and a salon charge to the appointment, but they last eight to twelve weeks, so the cost per wear is low. Pros: makes the blowout look fuller and more dimensional. Cons: highlighted hair needs a colour-safe shampoo and a weekly mask, or the ends will dry out and the blowout will lose its shine.
31. The Hot Air Brush 90s Blowout
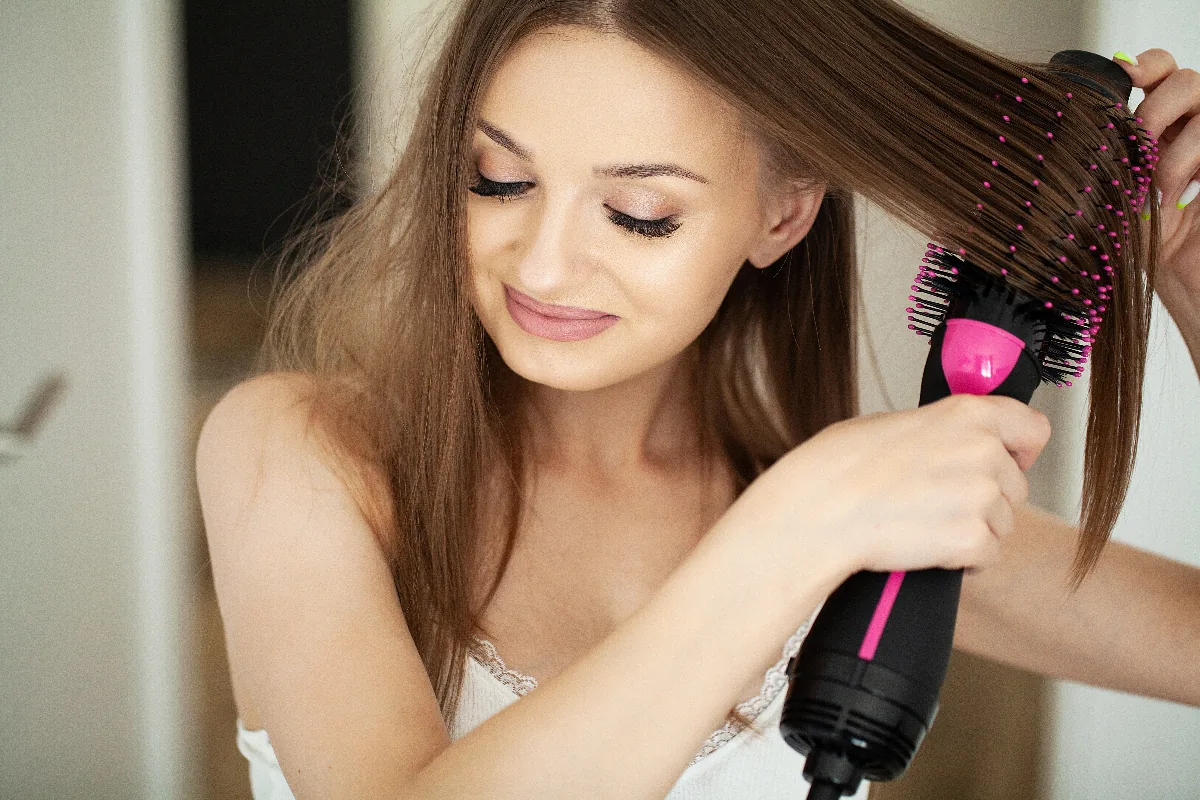
The hot air brush 90s blowout is the modern shortcut to the look: a single tool that dries and styles at the same time, so you can get a bouncy, voluminous blowout in fifteen minutes without juggling a dryer in one hand and a brush in the other. It is the blowout for women who have always struggled with a round brush, because the hot air brush does the work for you — you roll a section around the barrel, hold it for a few seconds, and the heat and the airflow set the shape together. The volume is a little softer than a traditional blow-dry, but for a daily blowout it is more than enough.
Best for: beginners, and anyone who finds a round brush and a dryer hard to coordinate. How to style: work on hair that is about eighty percent dry, roll large sections around the hot air brush, hold each one for ten seconds, and let it cool for a moment before you move on. What to ask your stylist: layers that start at the cheekbone, so the brush has something to shape. Styling time: fifteen to twenty minutes. Tools needed: one hot air brush — that is the whole kit, plus a heat protectant. Common mistake: using the hot air brush on soaking wet hair, which takes forever and fries the ends; always rough-dry first. Pros: fast, easy, and almost impossible to get wrong. Cons: the volume does not last as long as a traditional blow-dry, so save it for one-day wear.
32. The Second-Day Hair 90s Blowout
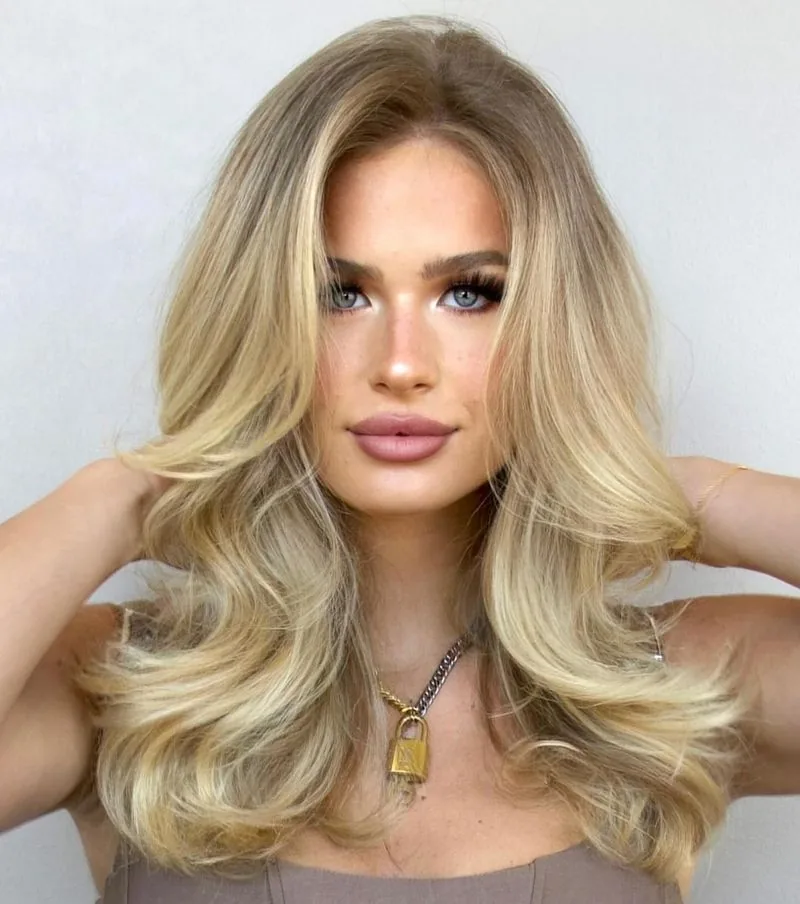
The second-day hair 90s blowout is not a blowout you do from scratch — it is a blowout you rescue, and it is the skill that makes the whole style worth learning. A 90s blowout is supposed to last two to three days, and on day two the roots are a little flat, the ends are a little sleepy, and the whole thing needs ten minutes of attention to look new again. The rescue is simple: dry shampoo at the roots, a quick blast of heat on the front sections with a round brush, and a shake-out with your fingers. Ten minutes, and the blowout is back.
Styling time: ten minutes, the fastest entry on this list. How to style: spray dry shampoo at the roots, massage it in and brush it out, then re-roll the front two sections on a round brush with a blast of hot air and let them cool. What to ask your stylist: nothing, this is a refresh technique, not a cut. Tools needed: dry shampoo, a round brush and a blow-dryer. Common mistake: re-wetting the whole head on day two — that undoes the blowout instead of refreshing it, and you will have to start from scratch. Pros: doubles the life of your blowout, and saves a wash day. Who should avoid over-refreshing: women with very fine hair, where too much dry shampoo can build up and flatten the roots — use it sparingly and brush it out properly.
33. The 90s Blowout for a Photoshoot
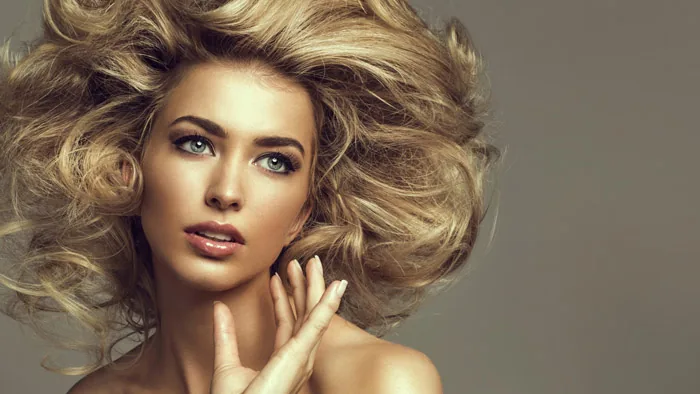
A 90s blowout for a photoshoot is the most camera-ready version of the style, because it is built to be seen through a lens: bigger volume than a daytime blowout, more shine, more defined flicks, and a finish that holds its shape under hot lights and long sessions. The secret is in the setting — the hair is blown out, rolled in velcro rollers, and left to cool completely, so the volume is locked in rather than brushed out. When the rollers come down, the hair falls in big, glossy waves that move when the model moves, which is exactly what a camera wants to see.
Best for: photoshoots, video, content creation and any day you will be photographed a lot. How to style: blow-dry with a large round brush, set the top sections in velcro rollers, leave them in for twenty minutes, then brush out gently with your fingers and finish with a shine spray. What to ask your stylist: a cut with long layers and a deep side part, which photographs better than a centre part. Styling time: forty-five minutes to an hour. Tools needed: a large round brush, velcro rollers, mousse, a shine spray and a strong-hold spray. Cost and time: a salon photoshoot blowout is worth booking, because the setting step takes practice. Quick verdict: the blowout that looks best on camera, and the one to choose when the photographs matter.
34. The 90s Blowout for a Party

The 90s blowout for a party is the fun version of the style: big, bouncy, a little bit extra, and designed to survive dancing, hugging and a long night. The volume is turned up — more mousse, larger sections on the brush, rollers at the crown for extra lift — and the finish is glossier than a daytime blowout, so the hair catches the light when you move. It is the blowout for a birthday, a celebration, a night out with friends — any party where your hair is part of the outfit, and where you want it to still look good in the photographs at two in the morning.
Styling time: thirty to forty minutes. How to style: blow-dry with a large round brush, pin the crown sections up to cool, and finish with a strong-hold spray and a shine spray. What to ask your stylist: long layers and a deep side part for maximum drama. Tools needed: a large round brush, velcro rollers, mousse and a strong-hold spray. Pros: maximum glamour, and it holds up all night if it is set properly. Cons: it needs a wash the next morning, because the hold spray and the volume do not survive a night of sleep. Common mistake: skipping the cooling step — if the hair is brushed out while it is still warm, the party volume will be gone before you leave the house. Quick verdict: the blowout for the nights you will remember.
35. The Humidity-Proof 90s Blowout
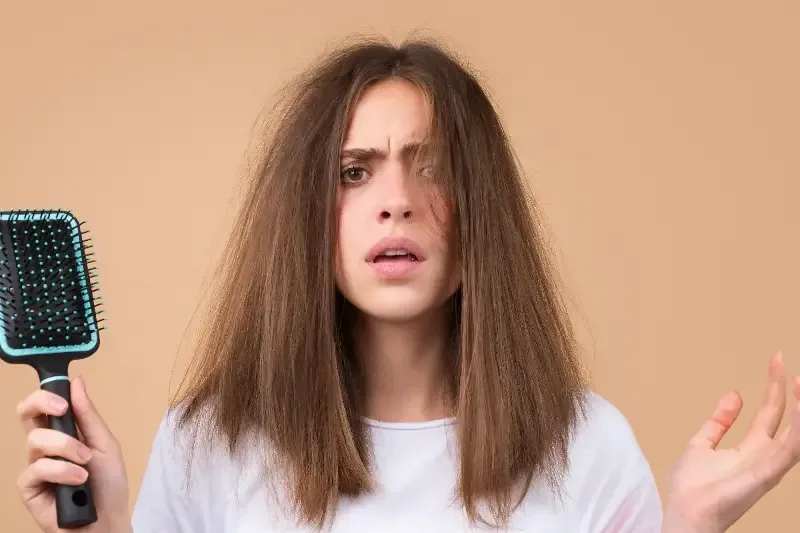
The humidity-proof 90s blowout is the version for women who live where the air is wet — or who have a holiday, a wedding or a summer evening in a humid place and still want the bounce. Humidity is the enemy of a blowout, because moisture in the air relaxes the hair back toward its natural texture, and the volume drops. The defence is a system, not a single product: an anti-humidity smoothing cream on damp hair, a cool shot from the dryer to seal each section, a light hold spray once the style is set, and — most importantly — no touching the hair once it is done, because hands add moisture and frizz.
Best for: humid climates, summer weddings, holidays and anyone whose hair frizzes at the first sign of rain. How to style: apply an anti-humidity cream before drying, blow-dry each section fully — damp hair frizzes, dry hair does not — and finish with a cool shot and a light hold spray. What to ask your stylist: a cut with long layers, because short, choppy layers frizz more easily. Styling time: thirty to forty minutes. Tools needed: an anti-humidity smoothing cream, a large round brush, a blow-dryer with a cool shot, and a light hold spray. Pros: the only blowout on this list that survives a humid day. Cons: it needs more product than a normal blowout, and it still will not last as long as it would in dry air — but it will last the evening, which is what matters.
36. The 90s Blowout With a Full Fringe
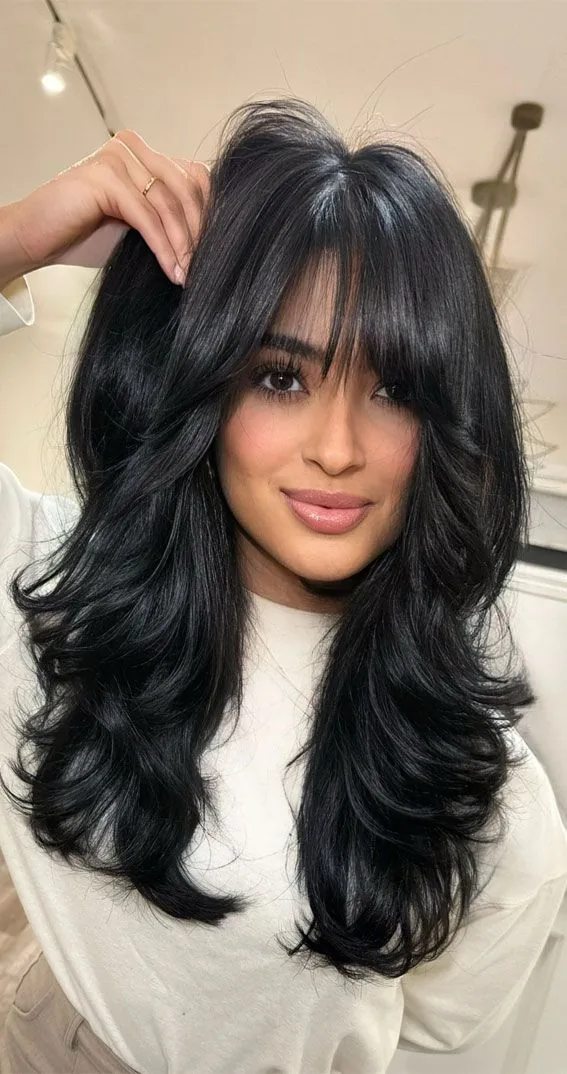
A 90s blowout with a full fringe is the boldest version of the style, because the fringe changes the whole shape of the cut: a straight-across fringe, blown out smooth and full, sits above a mass of bouncy, voluminous hair, and the contrast between the neat fringe and the big, wild lengths is what makes it striking. It is the blowout for women who love a fringe and love volume in equal measure, and it works best on thick hair, where the fringe has enough weight to sit properly instead of splitting apart.
Pros: striking, glamorous, and the fringe shortens the face, which flatters a long face shape. Cons: a full fringe needs a trim every four to five weeks, and it needs styling every morning — it will not behave on its own. How to style: blow-dry the fringe first, while it is still damp, rolling it under with a medium round brush, then blow-dry the lengths with a large round brush. What to ask your stylist: a fringe that ends at the eyebrows, cut soft and textured rather than blunt, so it blends into the blowout. Styling time: twenty-five to thirty-five minutes. Tools needed: a medium round brush for the fringe, a large one for the lengths, and a light hold spray. Who should avoid it: women with a strong cowlick at the front, where a full fringe has too little weight to hold it down.
37. The Side-Swept 90s Blowout
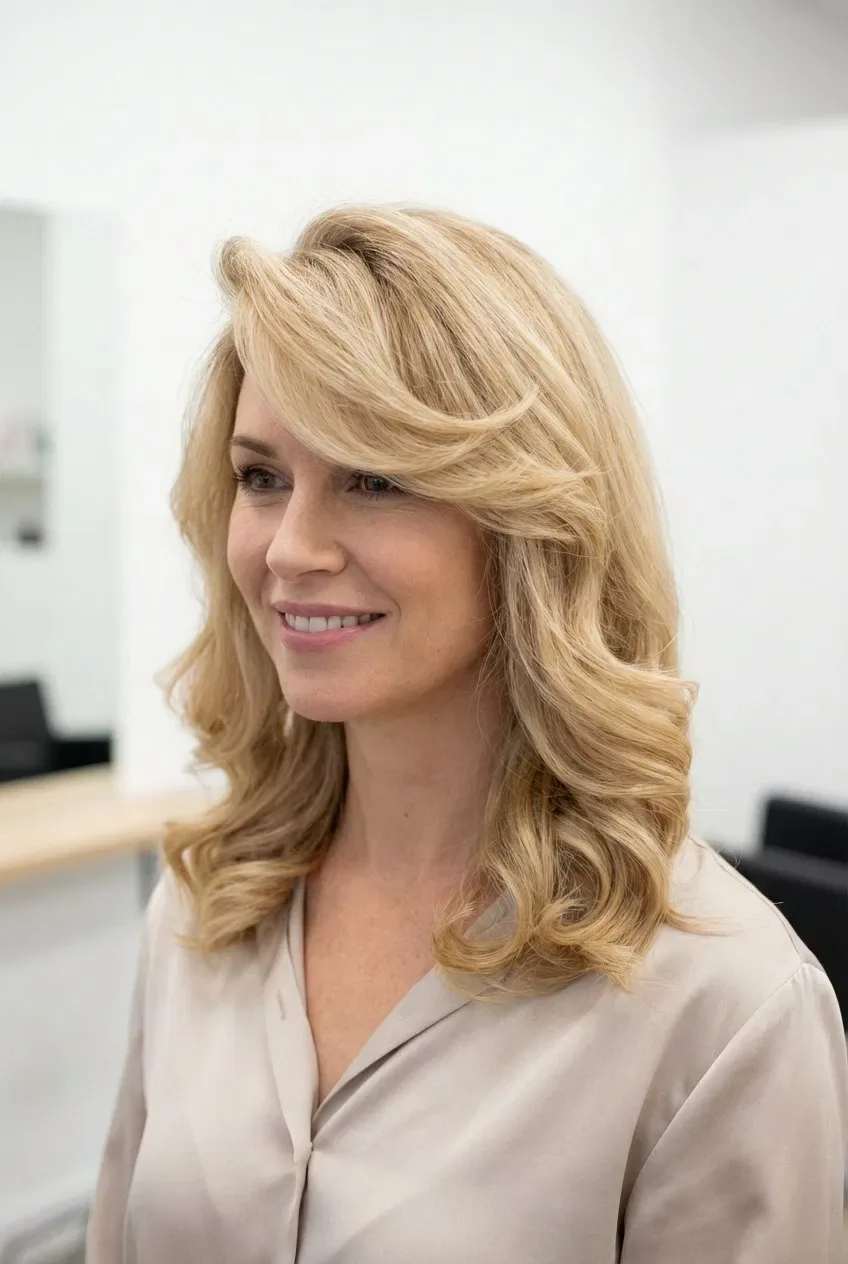
The side-swept 90s blowout is the softer cousin of the deep side part: the part sits just off-centre, the front sweeps gently across the forehead, and the volume falls evenly on both sides instead of piling up on one. It is the blowout for women who want a little drama without the full commitment of a deep part, and it is the most flattering blowout for a round or square face, because the diagonal sweep breaks up the symmetry of the face and the volume at the sides softens the jaw. It is also the easiest parting to maintain, because it is close to where most people’s hair naturally falls.
Styling time: twenty to thirty minutes. How to style: part the hair slightly off-centre while it is wet, blow-dry the front section across the forehead with a round brush, and let the rest fall naturally. What to ask your stylist: layers that are slightly longer on the side you sweep toward, so the sweep has weight. Tools needed: a large round brush, a tail comb and a light hold spray. Common mistake: sweeping the front too far across, which covers one eye and looks like a fringe — the sweep should end at the temple, not the cheekbone. Pros: flattering, easy to maintain, and it grows out gracefully. Quick verdict: the blowout for women who want a side part without the drama of a deep one.
38. The 10-Minute Low-Maintenance 90s Blowout
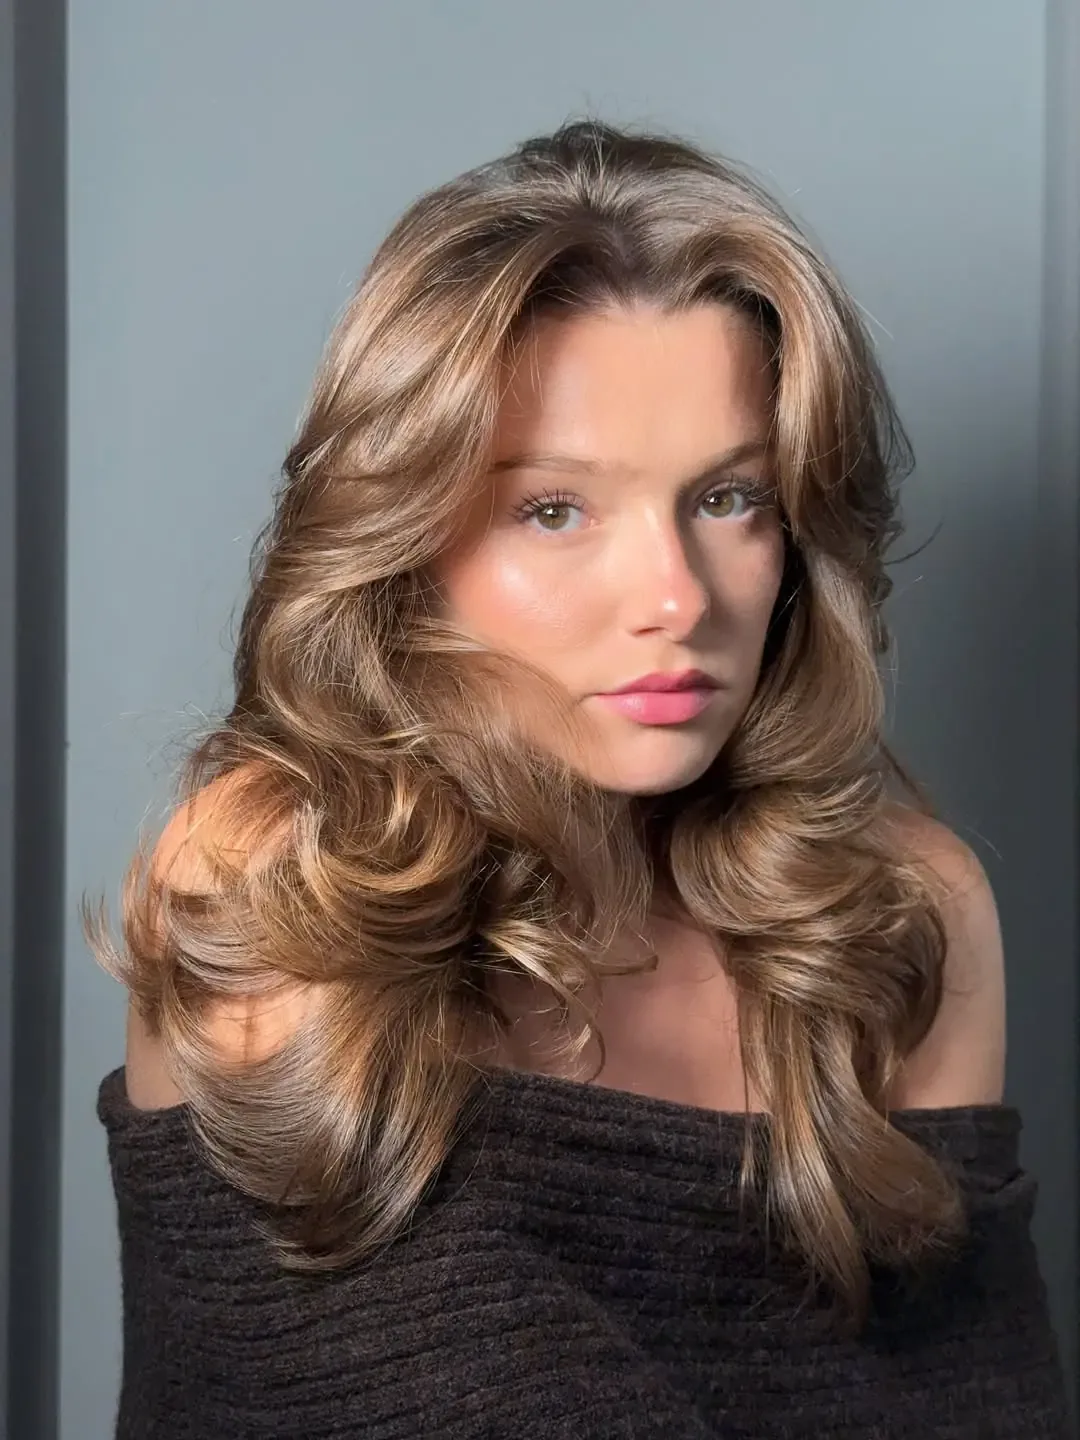
The 10-minute low-maintenance 90s blowout is the version for real mornings: the hair is washed, rough-dried, and then shaped in just three sections — the front, the crown and the back — with a large round brush, and the whole thing is done before the coffee is ready. It will not last three days, and it will not have the volume of a salon blowout, but it will have the shape: lift at the roots, a curve through the lengths, and ends that flick. For a weekday, that is enough — and it is the version that turns a 90s blowout from a special-occasion style into a habit.
Best for: busy mornings, and anyone who wants the look without the forty-minute commitment. How to style: rough-dry the hair to eighty percent, then blow-dry just the front section and the crown with a round brush, and let the back air-dry — nobody sees the back of your head on a Tuesday. What to ask your stylist: a cut with layers that start at the cheekbone and air-dry into shape, so the blowout is easy to refresh. Styling time: ten minutes, genuinely. Tools needed: one large round brush and a blow-dryer — plus mousse, if you have time for it. Pros: fast, realistic, and the easiest blowout to actually do twice a week. Cons: the volume lasts a day, not three, and it needs a refresh with dry shampoo the next morning. Quick verdict: the blowout you will keep, because it fits into a real life.
Tools and Products for a 90s Blowout at Home
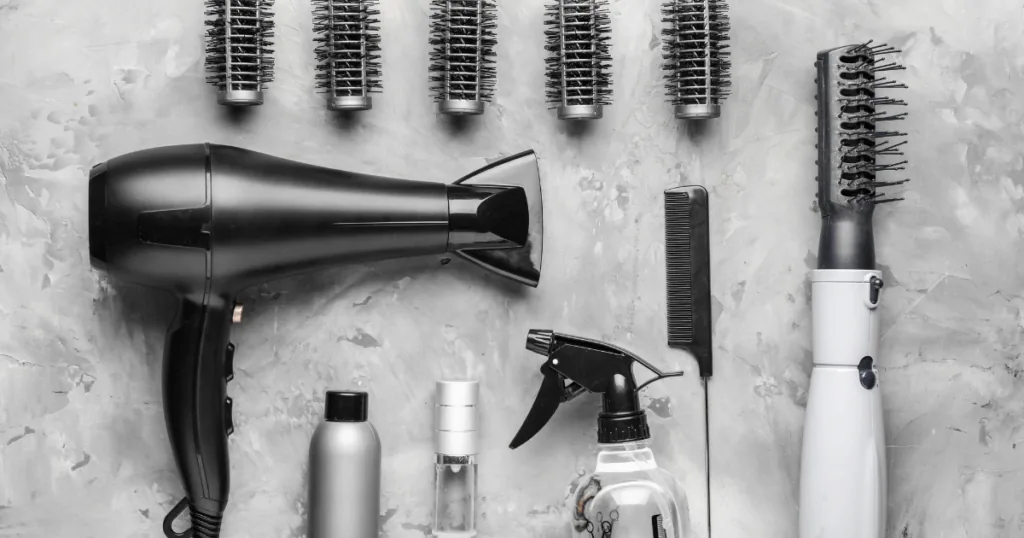
You do not need a salon full of equipment to do a 90s blowout at home — you need four things, and you probably already own two of them. A blow-dryer with a nozzle, because the nozzle focuses the air and smooths the hair instead of blowing it around. A large round brush, ceramic if you can, because it holds heat and sets the shape. A heat protectant, because a blowout is a heat style and unprotected hair will pay for it. And a volumising mousse, applied at the roots on damp hair, because mousse is what gives the volume somewhere to hold.
The products that make the biggest difference are the ones people skip. A root-lifting spray, applied at the sides and the crown before drying, adds lift that mousse alone cannot. Velcro rollers, used on the top sections while the rest of the hair dries, add volume that lasts into the second day. And a light hold spray, used once the style is set, keeps the shape without making the hair stiff. The common mistake is using too much of everything: a pea-sized amount of mousse, a light mist of spray, and a drop of serum on the ends only. Overloading the hair is the fastest way to flatten a blowout you just spent thirty minutes building.
How to Ask Your Stylist for a 90s Blowout
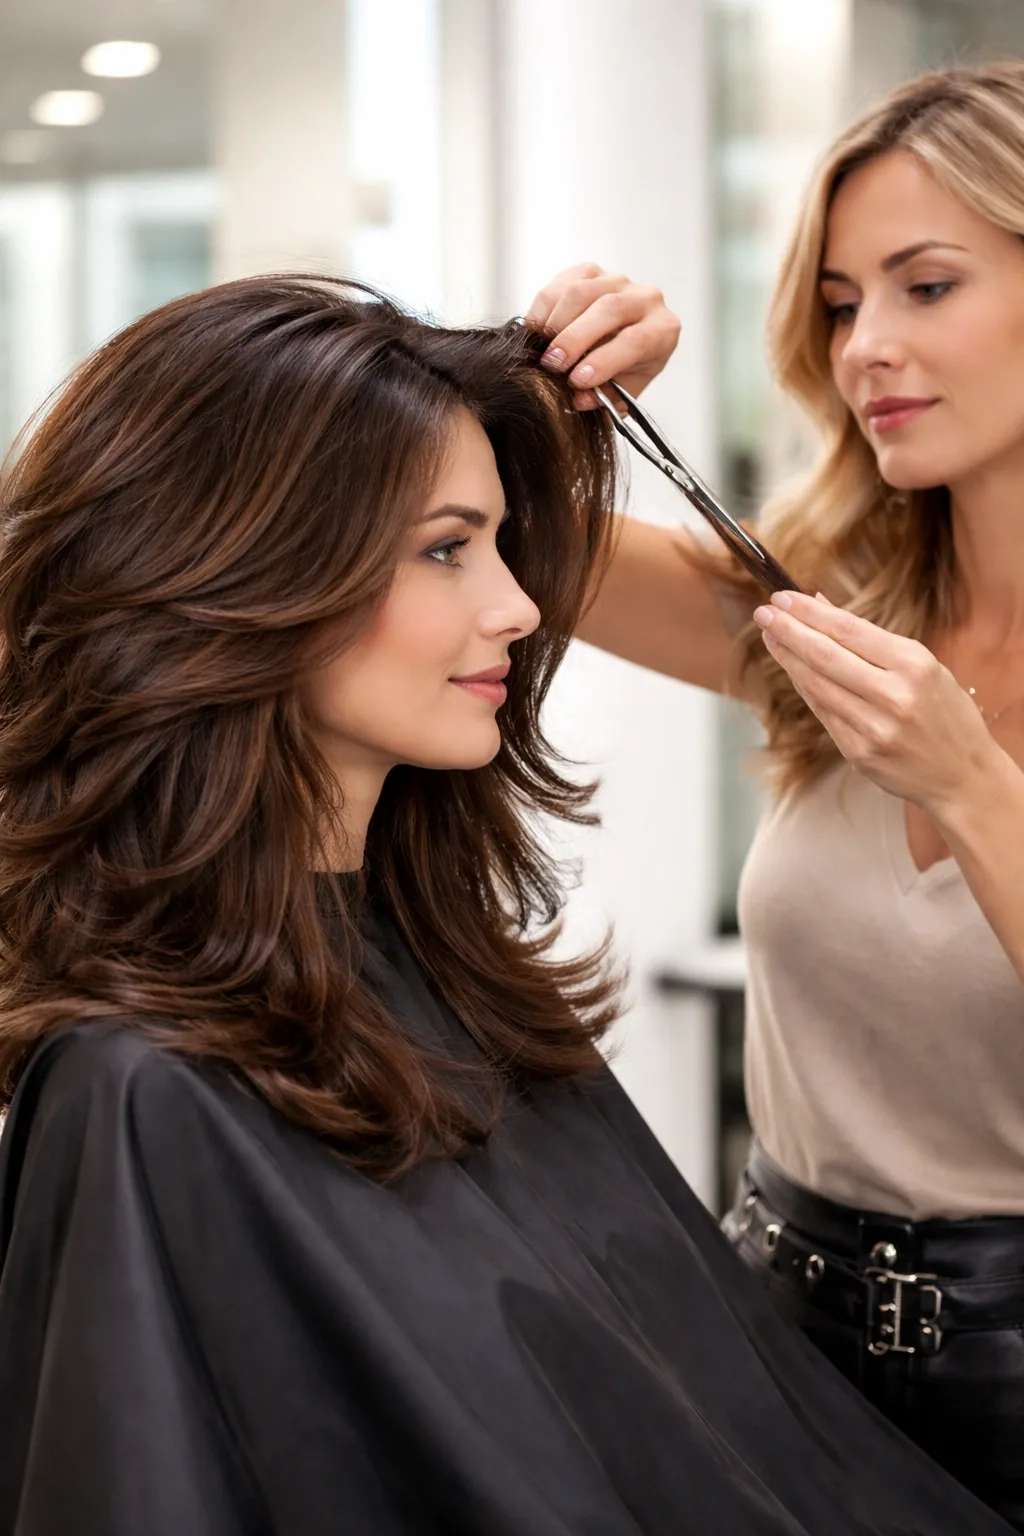
The words that cause 90s-blowout regret are vague ones. Saying just “give me a blowout” leaves the part, the layers and the finish entirely open, and one stylist’s blowout is another’s sleek straight style. Go in with two or three photos of the exact blowout you want — the volume, the flick, the part — and point at the exact things you like: where the part should sit, how long the front layers should be, and whether you want the ends to flick out or curl under. Then say what you do not want — “no flat roots” and “no straight ends” are as useful as any photo.
Ask three questions before the dryer comes out: where will you put my part, where will the layers start, and how long will this take? A good stylist will also ask about your morning routine, because a blowout that needs forty minutes will not suit a ten-minute person. If you are nervous, ask for the longer version first — you can always go shorter at your next visit, and a first cut that is too short around the face is the one regret that takes months to fix. And if you want to learn to do it yourself, say so: a good stylist will show you the brush technique while they work, and that ten-minute lesson is worth more than any tutorial.
Common Mistakes That Kill the Bounce
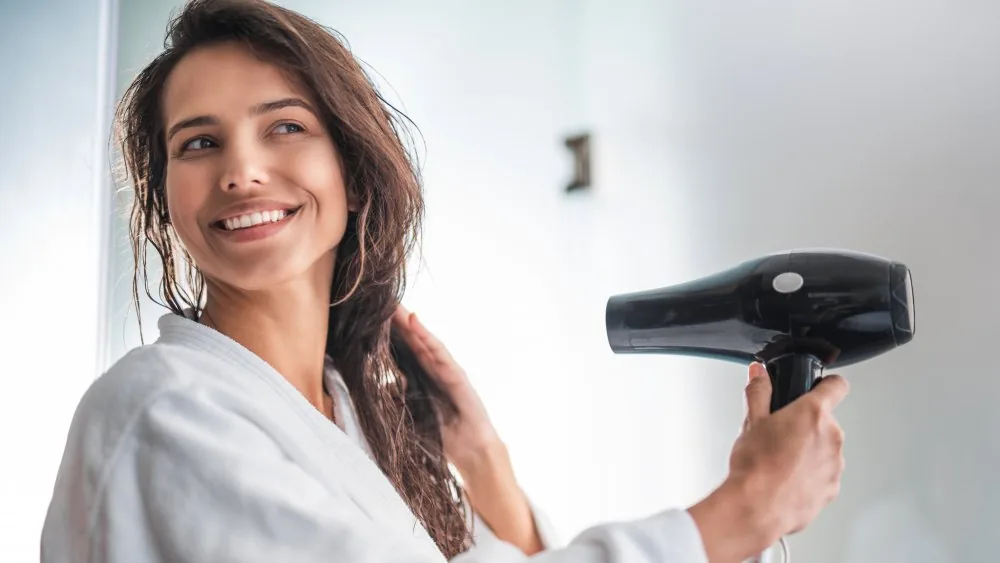
The most common mistake with a 90s blowout is also the most understandable: brushing the hair out while it is still warm. The shape of a blowout is set by cooling, not by drying — the hair has to cool in its curl before it is touched, or the volume falls out within the hour. The second mistake is the mirror image of the first: using too much product. A heavy cream, a big handful of mousse, or an oil applied at the roots will flatten the volume you just built, because weight is the enemy of bounce. Less product, applied in the right places, always beats more.
Three smaller mistakes are worth knowing too. Blow-drying the front straight down, instead of across the forehead, trains the hair to fall flat. Using a brush that is too small creates tight curls instead of big, bouncy volume — the brush should be as large as your hair length allows. And skipping the heat protectant, which does not affect the blowout today but damages the hair over time, so the blowout gets worse every month instead of better. None of these is a disaster — every one of them is fixed by the same three things: dry in sections, let each section cool before you touch it, and use less product than you think you need.
Making Your Blowout Last: Second and Third Day
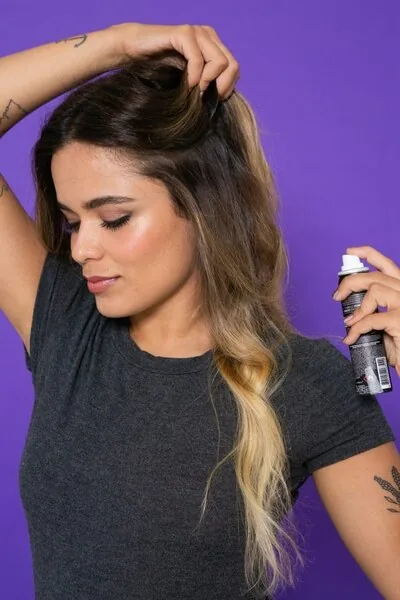
A 90s blowout is supposed to last two to three days, and the difference between a blowout that lasts and one that does not is almost entirely in what you do at night. Sleep on a silk or satin pillowcase, because cotton creates friction and frizz while you sleep. Tie the hair up loosely at the top of your head — a loose pineapple, not a tight ponytail — so the roots stay lifted and the ends do not get crushed. And in the morning, do not re-wet the hair: a little dry shampoo at the roots, a quick blast of heat on the front sections with a round brush, and a shake-out with your fingers is all it needs.
Long-term upkeep for a blowout-friendly cut is simple: trims every six to eight weeks to keep the layers and the ends in shape, a heat protectant every single time you use a hot tool, and a weekly deep-conditioning mask, because heat-styled hair dries out faster than air-dried hair. The routine between trims is the same as for any hair: a shampoo that suits your hair type, conditioner on the mid-lengths and ends, and no heavy oils at the roots. A 90s blowout does not need special products or special care — it just needs a good cut, a cool-down after drying, and a little respect at bedtime.
What is a 90s blowout?
A 90s blowout is a big, bouncy, high-volume hairstyle created by blow-drying the hair smooth with a large round brush, with lift at the roots, soft layers curving away from the face, and ends that flick out or curl under. It is the voluminous, glossy look of the supermodel era, and it is different from a modern blowout because it is rounder, fuller and more dramatic, with the volume as the main feature rather than just smoothness.
How long does a 90s blowout last?
A 90s blowout usually lasts two to three days. Thick and wavy hair holds it the longest, while fine hair may need a refresh on day two. To make it last, sleep on a silk pillowcase, tie the hair up loosely at night, and use dry shampoo at the roots on the second morning instead of re-washing. A quick blast of heat on the front sections with a round brush brings the bounce back in about five minutes.
Can I do a 90s blowout at home?
Yes — you can do a 90s blowout at home with a blow-dryer, a large round brush, a heat protectant and volumising mousse. Work in sections, roll each one around the brush, and let every section cool before you brush it out, because the shape sets as it cools. It takes twenty to forty minutes depending on your hair length. A hot air brush is the easiest tool for beginners, and velcro rollers add volume that lasts longer.
What hair length do you need for a 90s blowout?
The best length for a 90s blowout is shoulder length to long hair, because that length has enough weight to hold a flick at the ends and enough hair to build volume. A lob or shoulder-length cut is the easiest starting point. Short hair can have a 90s blowout too — a chin-length bob blown out with a round brush gives you the same bounce in miniature, and it dries in about fifteen minutes.
Does a 90s blowout work on fine hair?
Yes — a 90s blowout works on fine hair, and it is one of the best styles for making fine hair look full. Use mousse and a root-lifting spray on damp hair, dry in sections with a round brush, and pin each section up to cool before brushing it out. Keep products light, because heavy creams and oils will flatten the volume. The blowout may drop faster than on thick hair, especially in humidity, so a light hold spray is essential.
Does a 90s blowout work on curly hair?
Yes — a 90s blowout works on curly hair, and it gives the biggest, fullest result on this list, because curly hair already has natural body. The hair needs to be stretched smooth first, with a smoothing cream and a heat protectant, then blow-dried in small sections with a round brush and real tension. It takes forty-five to sixty minutes at home, so this is the version most worth getting at the salon, and it lasts until your next wash.
What is the difference between a 90s blowout and a regular blowout?
A regular or modern blowout is usually sleeker and flatter at the roots, with straight, polished ends — the goal is smoothness. A 90s blowout is rounder, fuller and more dramatic: the roots are lifted, the layers curve away from the face, and the ends flick out or curl under. Where a modern blowout whispers, a 90s blowout is the main event. It also takes longer — twenty to forty minutes at home — because the volume has to be built in section by section.
How do I keep a 90s blowout from falling flat?
Let every section cool in its curl before you brush it out, because the shape sets as it cools — brushing warm hair is the single biggest reason blowouts go flat. Use mousse at the roots on damp hair, a light hold spray once the style is set, and dry shampoo at the roots on day two. Avoid heavy creams and oils at the roots, and do not touch the hair too much once it is done, because hands add moisture and flatten the volume.
Is a 90s blowout bad for your hair?
A 90s blowout is not bad for your hair as long as you use a heat protectant every time and do not do it every single day. The heat from a blow-dryer and a round brush can dry the hair out over time, so use a weekly deep-conditioning mask, keep the dryer moving instead of holding it in one spot, and give your hair a break with heat-free days in between blowouts. A hot air brush on a lower heat setting is a gentler option for regular use.
How much does a 90s blowout cost at a salon?
A 90s blowout at a salon usually costs more than a standard blow-dry, because it takes longer — typically forty-five minutes to an hour, depending on your hair length and thickness. Prices vary by salon and city, and a bridal or photoshoot blowout costs more again. It is worth the price for a wedding, a party or a photoshoot, and for everyday wear, learning the round-brush technique at home saves the salon cost entirely.
Conclusion
The 90s blowout is back because it never really stopped working. It is the hairstyle that makes fine hair look full, long hair look styled instead of just long, and any face look softer and more polished — and it does it with nothing more exotic than a round brush, a blow-dryer and a little patience. A shoulder-length blowout with curtain bangs is the easiest place to start. A classic supermodel blowout, a blowout bob, or a feathered version with flipped ends will all do the same job in different ways. And if you are feeling bold, a deep side part blowout proves the point most clearly of all: big hair, worn with confidence, is a striking feature.
Start with the cooling step, not the drying — let every section cool in its curl before you brush it out, and the volume will last for days instead of an hour. Bring photos of the exact blowout you want to your stylist, say what you do not want as well as what you do, and ask for the longer version first if you are unsure. Your hair has been yours since the day you were born. It is time it started working with you — big, bouncy, and unapologetically 90s.