Cornrow Hairstyles for Women: From Classic Straight-Backs to Bold Statement Braids
Cornrows are one of the oldest braided styles in the world, and they have never really gone out of fashion — because few styles do so much at once. A set of cornrows protects your natural hair from daily manipulation, keeps it neatly tucked away for weeks, and still looks polished enough for work, weddings and nights out. The braids sit close to the scalp in neat rows, which means the style is as practical as it is beautiful: no daily heat, no morning battle with tangles, and a shape that holds from the first day to the last.
This guide brings together 36 cornrow hairstyles for women, from classic straight-backs and feed-in braids to goddess cornrows, beaded ends, buns and bold statement designs. Eight guides answer the questions that come up before, during and after the style: how cornrows compare with box braids, how to prep your hair, how to care for your scalp underneath, what works on short versus long hair, feed-in versus classic braiding, and how to take cornrows out without breakage. Every style comes with honest notes on install time, typical cost, maintenance and how long it lasts — so you can book your braider with confidence.
Cornrows vs Box Braids
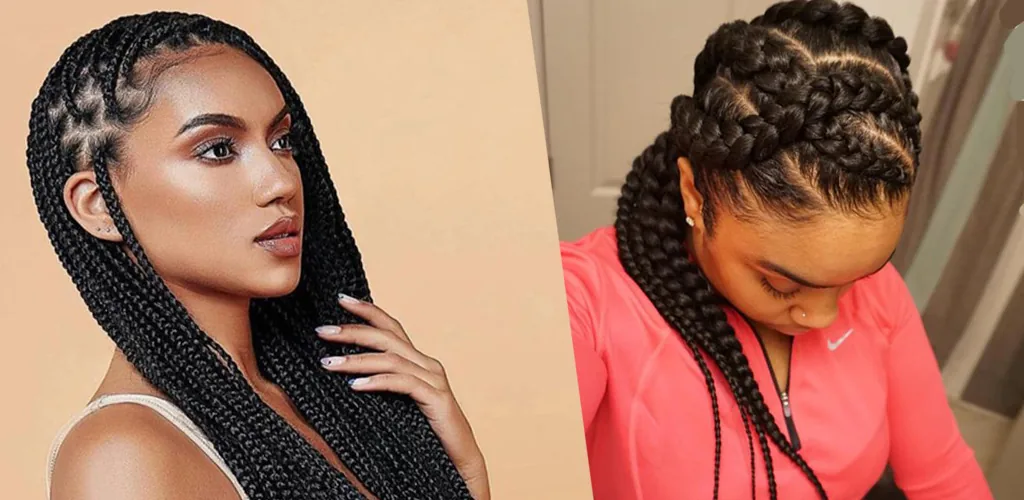
Cornrows and box braids are both protective styles, but they sit on the head in very different ways — and that difference decides which one suits your life. Cornrows are braided flat against the scalp in rows, so the finished style lies close to the head, feels light, and sits beautifully under hats, helmets, scarves and wigs. Box braids hang free from small square sections, which gives more movement and more styling options, but also more weight and more hair to manage. If you want a sleek, low-profile style that lasts through workouts and sleep without a bonnet battle, cornrows usually win.
Cornrows are typically faster and cheaper to install than box braids — a straightforward set takes one to three hours, while box braids often take four to eight — and they tend to last two to four weeks, a little less than box braids. The trade-off is variety: box braids can be worn in far more updos, while cornrows offer a more limited set of shapes once they are in. Many women alternate between the two, using cornrows when they want something neat and quick, and box braids when they want length and versatility. Either way, the same rules apply: do not let the braids pull too tight, and give your hair a rest between installs.
How to Prep Your Hair Before Cornrows
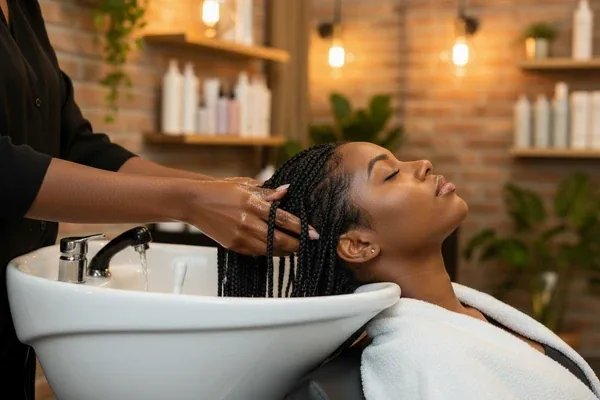
Good cornrows start the day before the appointment, not in the braider’s chair. Wash your hair with a clarifying shampoo to remove product build-up, then follow with a moisturising conditioner or a deep-conditioning mask, because once the braids are in, your hair will rely on the moisture you put in now. Detangle gently with a wide-tooth comb while the hair is damp and conditioned, working from the ends upward, and trim any split ends — braiding over damaged ends only hides the problem while it gets worse.
Arrive with your hair clean, detangled and stretched if possible — a light blow-dry on low heat or a few chunky twists overnight make the braider’s job faster and the parts neater. Bring the extensions, beads or cuffs you want to use, and tell your braider about any tender spots, thinning edges or a sensitive scalp before they start. Skip heavy oils on the scalp on the day itself, since slippery hair is harder to grip and the braids can loosen early. An hour of prep saves you days of discomfort and weeks of a style that does not sit right.
Scalp Care Under Cornrows
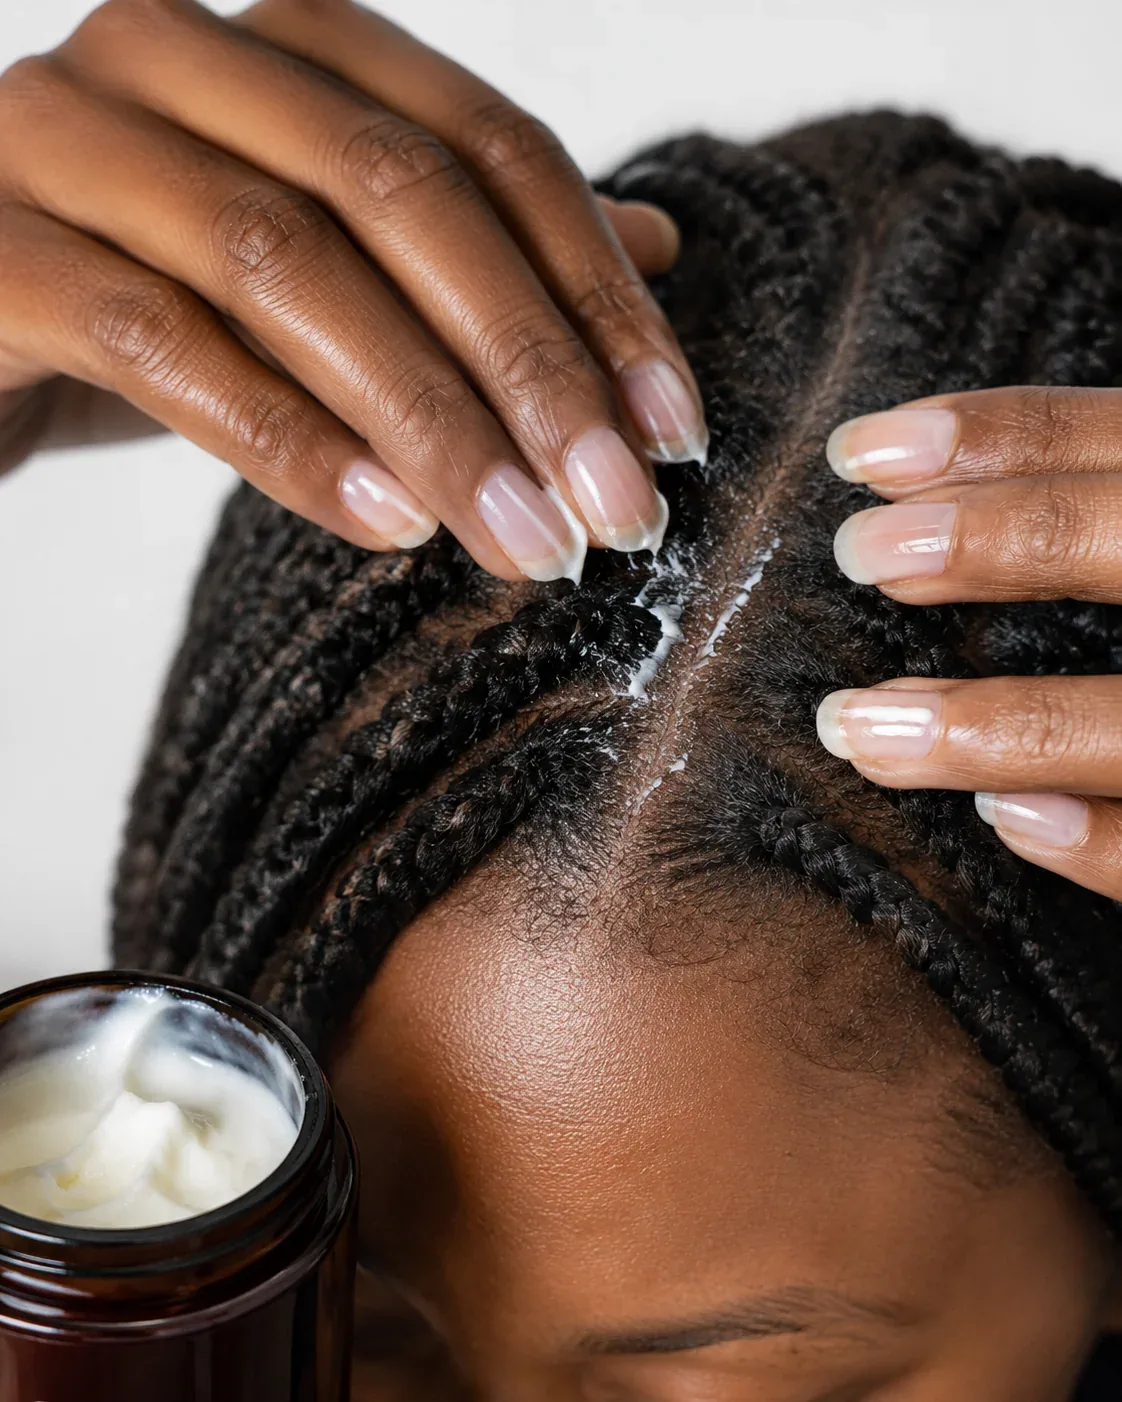
Your scalp is doing the work while your cornrows are in, and it needs care even though you cannot reach it the way you normally would. The golden rule is moisture without build-up: a light oil or a scalp spray applied along the parts every two or three days keeps the scalp comfortable and stops the itching that tempts you to scratch at the braids. A peppermint or tea-tree scalp oil feels cooling and fresh, but use a few drops, not a flood — heavy oil sitting on the scalp can clog pores and make the braids look greasy at the roots.
Clean the scalp gently once a week with a diluted shampoo or a scalp cleanser applied with a nozzle bottle or a cotton pad along the parts, then rinse carefully and dry the braids fully — damp braids left to sit can smell and can irritate the scalp. Sleep in a silk or satin bonnet or on a satin pillowcase to stop the edges frizzing and the braids rubbing. If you notice bumps, soreness or a braid that pulls when you move your head, that is your scalp asking for help: loosen that braid or take the style out rather than enduring pain that can damage your hairline.
Cornrows for Short Hair vs Long Hair
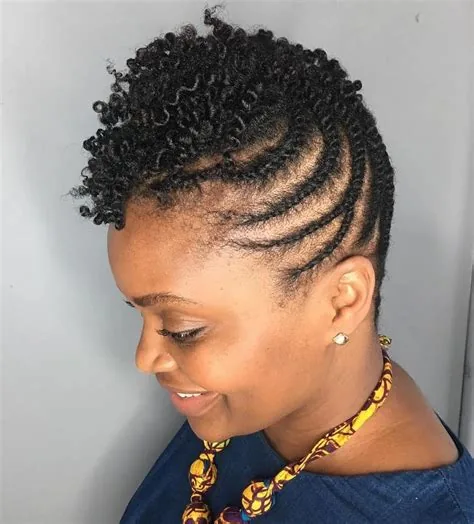
Cornrows are one of the few styles that genuinely work at almost any length, but the result looks different on short hair than on long hair — and knowing that helps you choose the right design. On short hair, cornrows create a neat, sculpted look: the braids lie close to the head, the parts are the star of the show, and styles like a cornrow crown, a side sweep or a small bun work beautifully. You need roughly two to three inches of hair for the braider to grip, and feed-in extensions can add length if you want it.
On long hair, cornrows can be left to hang, gathered into a ponytail or a bun, or combined with curly ends for extra movement — the length gives you far more styling options day to day. Long hair also takes longer to braid and costs more, especially with extensions, and the extra weight means the braids must be installed with care so they do not pull at the hairline. Whatever your length, tell your braider what you want the finished style to do: lie flat under a wig, hang free, or sweep up into an updo — the design should be built around that answer.
Styling Cornrows Up vs Down
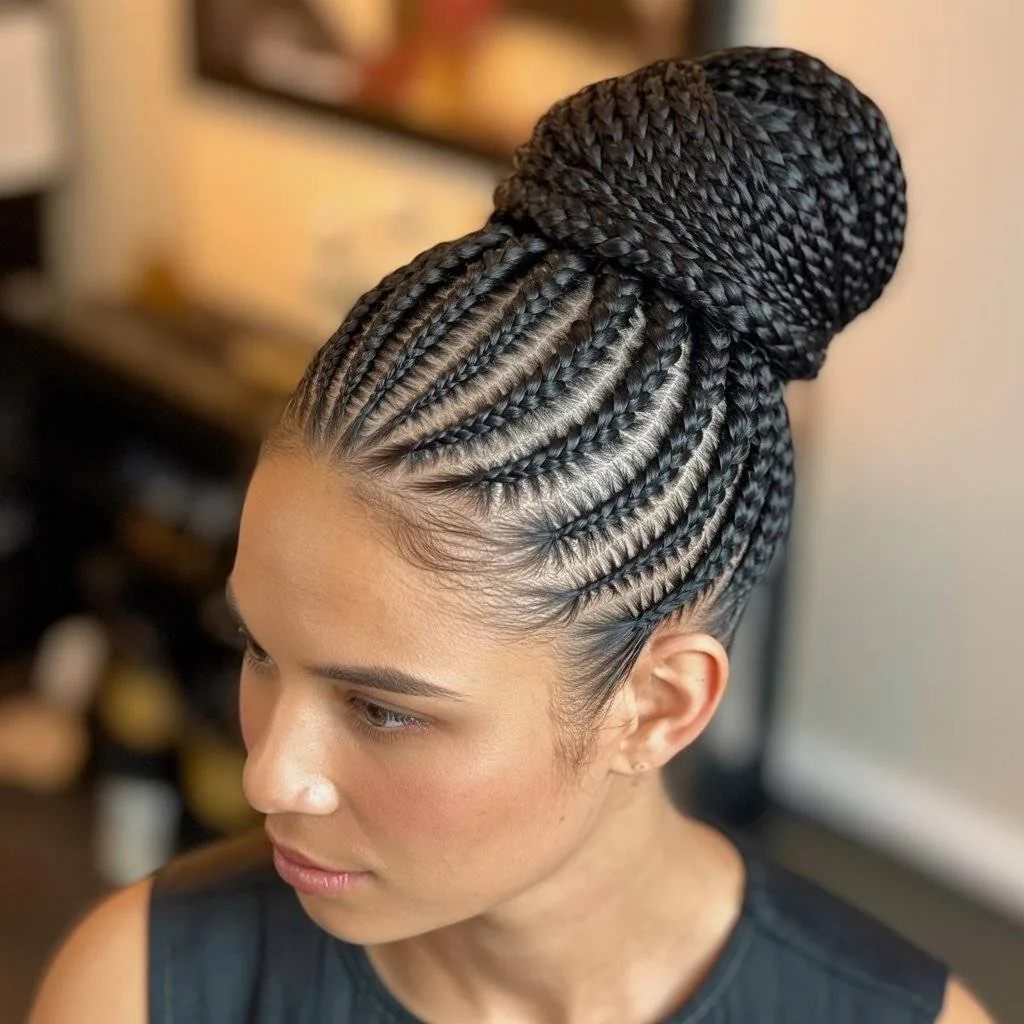
Cornrows are at their best when you treat them as two styles in one: worn down for a relaxed, everyday look, and swept up when you want something polished. Worn down, straight-back or side-parted cornrows frame the face and show off the neatness of the parts — this is the lowest-effort way to wear them, and the one that puts the least tension on your edges. Add beads or cuffs at the ends and the down style is finished in seconds, with no extra work in the morning.
Swept up, the same cornrows become a bun, a top knot, a high ponytail or space buns, and the style suddenly looks formal enough for a wedding or a job interview. The trick is to gather the braids gently — never yank them into a tight ponytail, and vary where you place the updo so the same braids are not pulled in the same direction every day. A little edge control smooths the hairline, and a silk scarf at night keeps the updo neat for the next day. If your braids feel tight when you pull them up, wear them down that day: comfort always beats a style.
Feed-In Cornrows vs Classic Cornrows
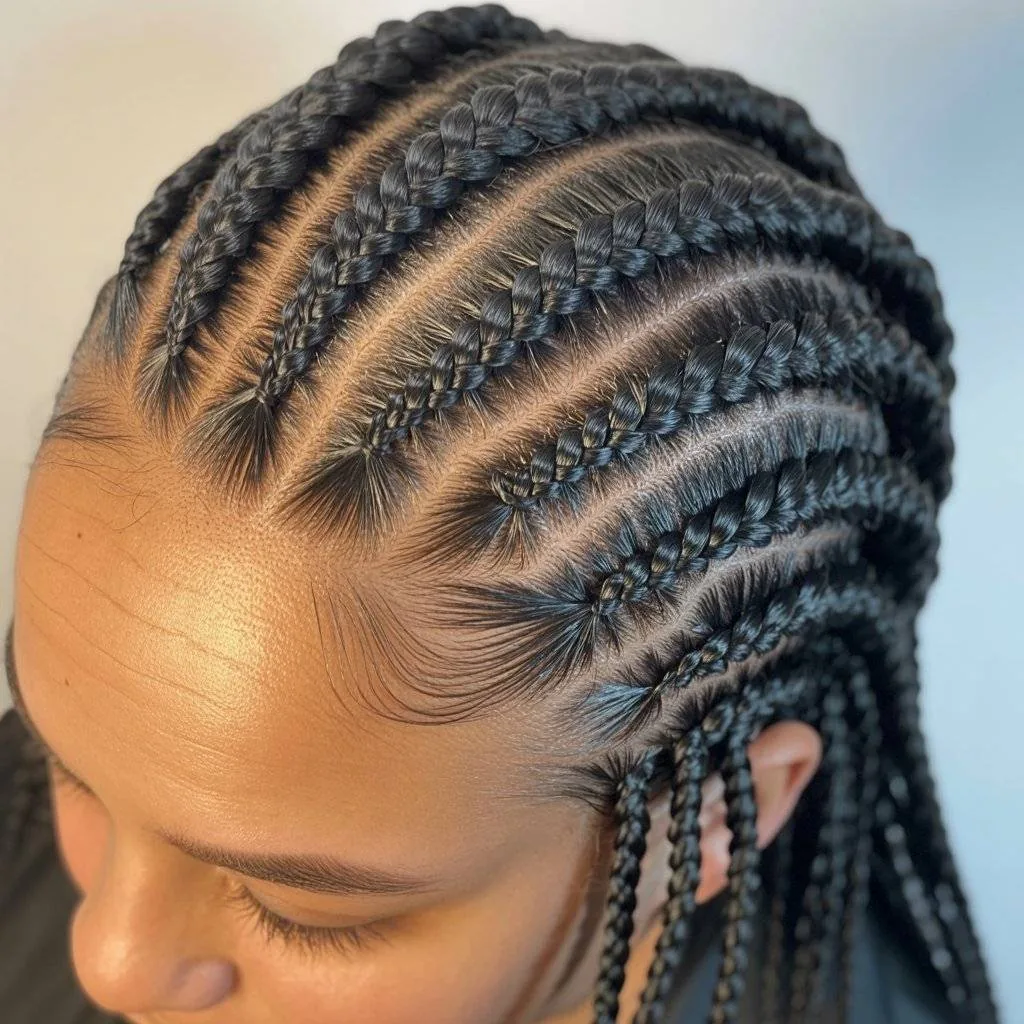
The difference between feed-in and classic cornrows is all in how the braid starts — and it changes how the finished style looks and feels. In a classic cornrow, the braider starts with your natural hair and adds extensions right at the front, which creates a small knot at the hairline. In a feed-in cornrow, small pieces of extension hair are gradually fed into the braid as it travels back, so the braid starts thin and grows thicker with no visible knot and no sudden bump at the front.
Feed-in cornrows look more natural, lie flatter at the hairline, and are usually gentler on your edges, which is why they have become the go-to for straight-backs and goddess cornrows. They take a little longer to install and cost a little more, because the technique is slower and more skilled. Classic cornrows are faster and cheaper, and they suit chunky, bold designs where the knot does not matter. If you have a sensitive hairline or you want the most natural-looking finish, ask for feed-in; if you want a quick, bold, budget-friendly set, classic cornrows will do the job beautifully.
How to Take Cornrows Out Safely
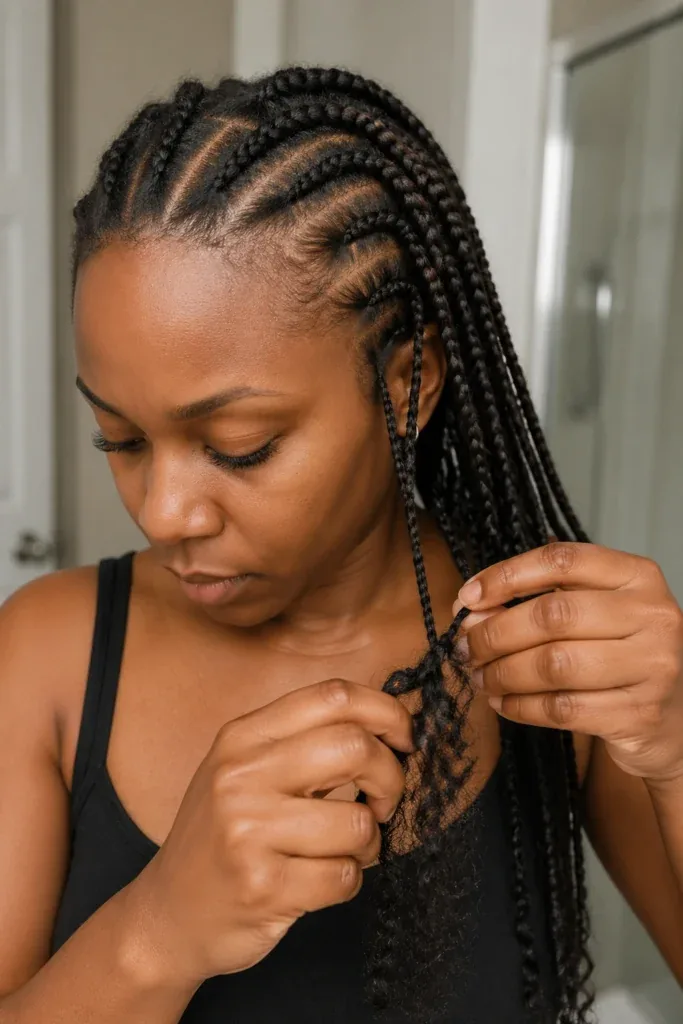
Taking cornrows out is where most braid damage actually happens — not during the install — so treat removal as carefully as you treated the braiding. Set aside an hour, sit somewhere comfortable, and work braid by braid: cut the extension hair well below your natural hair, then unravel the braid from the end upward with your fingers, never yanking or pulling. Keep a spray bottle of water mixed with conditioner nearby, and mist each section as you go — damp hair slips apart far more easily than dry hair.
Once a braid is out, detangle that section gently with your fingers before moving on, and drop the shed hair into a pile so you can see what is normal shedding versus breakage. When all the braids are out, wash with a moisturising shampoo, deep-condition for at least twenty minutes, and give your hair a few days of rest — loose twists or a simple puff — before the next install. Never take cornrows out in a rush the night before an event, and never rip through tangles with a fine comb. Your hair will thank you with far less breakage and far healthier regrowth.
Growing Your Hair With Cornrows
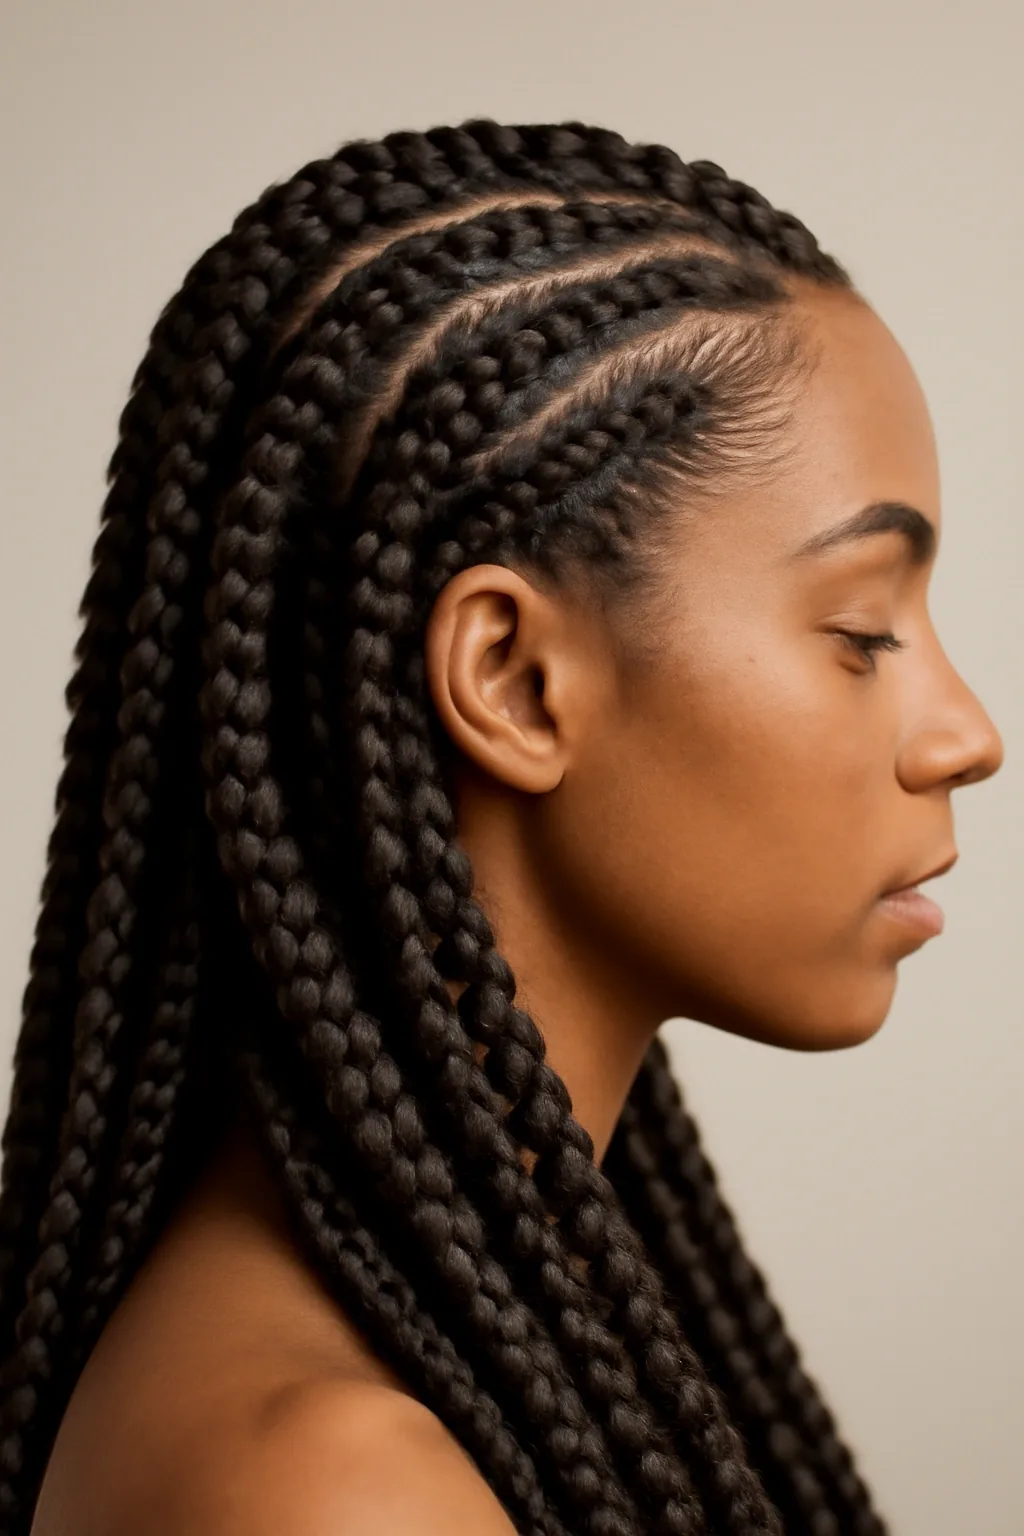
Cornrows are a favourite protective style for growing hair, and the reason is simple: hair that is braided and left alone is hair that is not being combed, brushed, heat-styled or pulled every day. Every time you manipulate your hair you risk breakage, and cornrows cut that manipulation down to almost nothing for two to four weeks at a time. The hair keeps growing at its normal rate — roughly half an inch a month — and far more of that growth stays on your head because the ends are tucked away and protected.
But cornrows only help growth if you treat them as a rest, not a set-and-forget style. Keep the scalp moisturised, wash gently once a week, do not keep the same set in for more than four weeks, and always leave at least a week between installs so your scalp and edges can recover. Styles that pull too tight will do the opposite of growing your hair — they cause traction alopecia at the hairline, which is slow to reverse. The women who grow the longest, healthiest hair with cornrows are the ones who are boring about the rules: gentle installs, regular moisture, timely removal, and real breaks in between.
1. Classic Straight-Back Cornrows
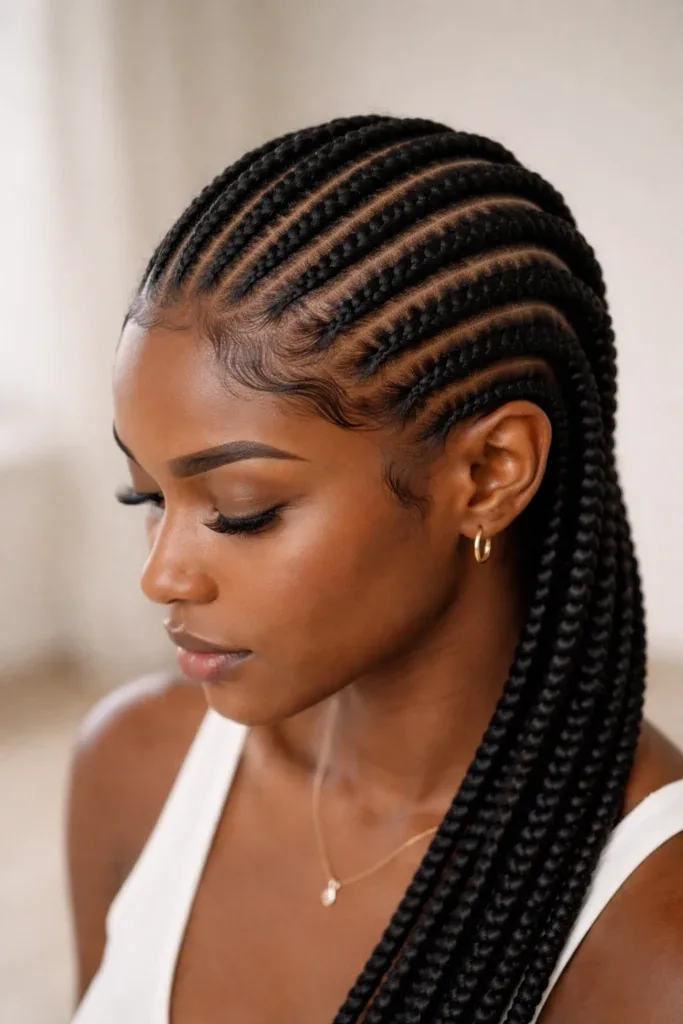
Classic straight-back cornrows are the original and still the most loved cornrow style: neat rows braided straight from the hairline to the nape, evenly spaced, lying flat and clean. The look is timeless because it is so simple — the beauty is in the precision of the parts and the smoothness of the braids, not in decoration. Straight-backs suit every face shape, work on short and long hair alike, and look just as good under a wig or a headwrap as they do on their own. They are the style to choose when you want cornrows to do their job quietly and beautifully.
Install takes about one to two hours without extensions, or two to three hours with added length, and typically costs $40–$90 depending on your city and braider. Maintenance is easy: moisturise the scalp every two or three days, tie the braids down with a silk scarf at night, and wash gently once a week. The style usually lasts two to four weeks, with the edges needing the most attention as new growth comes in. When the parts start to blur and the roots look fuzzy, it is time for a fresh set.
2. Feed-In Straight-Back Cornrows
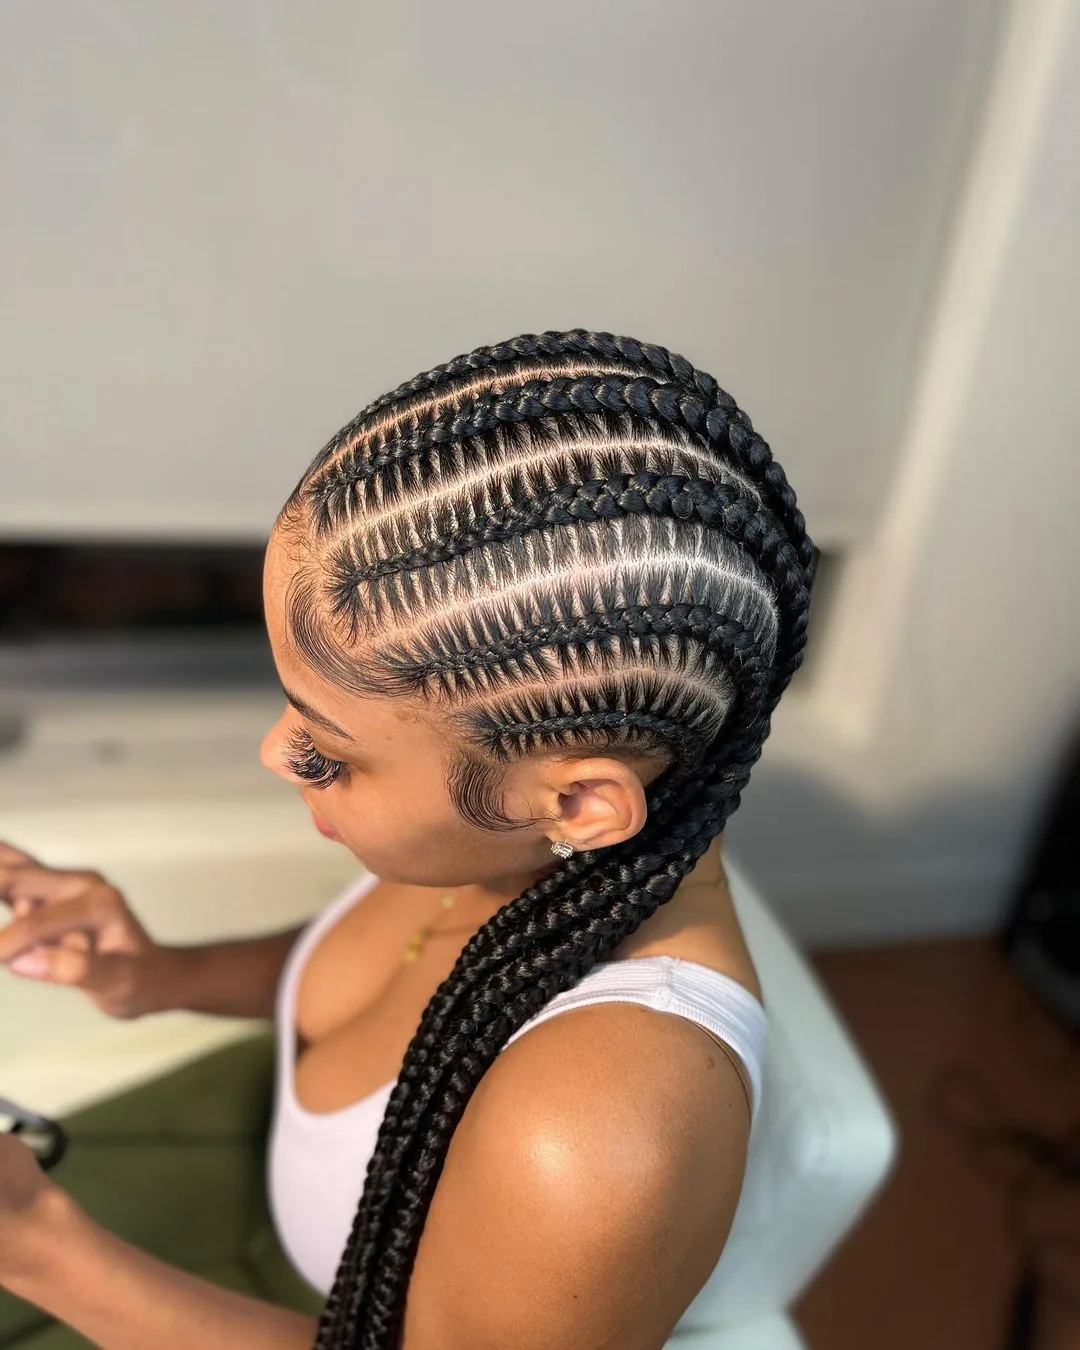
Feed-in straight-backs are the modern upgrade of the classic: the braids start thin at the hairline and gradually thicken as extension hair is fed in, so there is no knot or bump at the front and the finish looks as if the braids grew from your own scalp. The result is flatter, smoother and more natural-looking than a classic set, and noticeably kinder to your edges. This is the style celebrities and braiders reach for when the cornrows themselves are the finished look, not just a base for a wig.
Install takes about two to three hours and typically costs $70–$140, a little more than classic cornrows because the feed-in technique is slower and more skilled. Maintenance is the same as any cornrow set: oil the scalp lightly along the parts, protect the braids at night with a bonnet or scarf, and avoid heavy products that cause build-up. Expect the style to last three to four weeks, and to look its best in the first two. Feed-ins are the best choice if you have a sensitive hairline or want the most polished finish.
3. Cornrows With Curly Ends
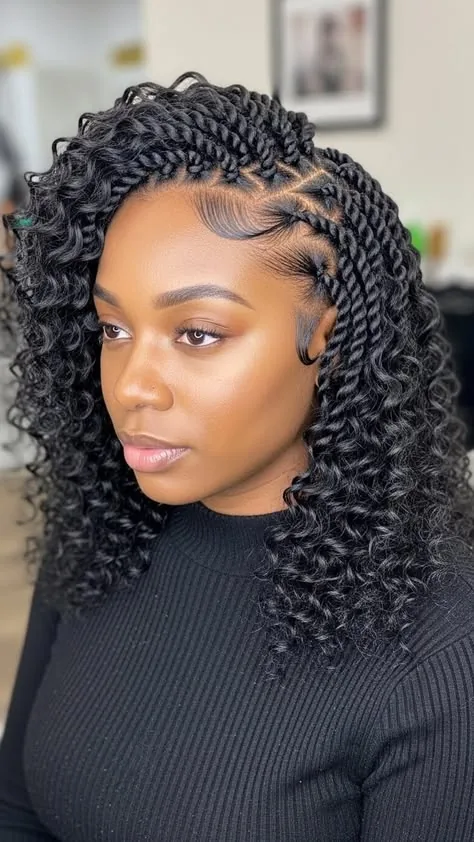
Cornrows with curly ends give you the best of both worlds: neat, sculpted braids at the front and soft, bouncy curls at the back. The braids usually stop at the nape or mid-length, and the remaining hair — your own or added curly extensions — is left loose in curls that move and catch the light. The contrast between the structured braids and the free curls is what makes this style so flattering: it softens the face, adds volume, and turns a protective style into a full hairstyle in its own right.
Install takes two to three hours and typically costs $80–$150, depending on the length and type of curly hair used. Maintenance means keeping the curls defined: a little curl cream or mousse, a satin bonnet at night, and a gentle shake-out in the morning rather than brushing. The curls will loosen over time, so the style looks fullest in the first ten days and lasts two to three weeks overall. Refresh the curls with a light mist of water and leave-in conditioner, and the style stays bouncy to the end.
4. Cornrow Bun
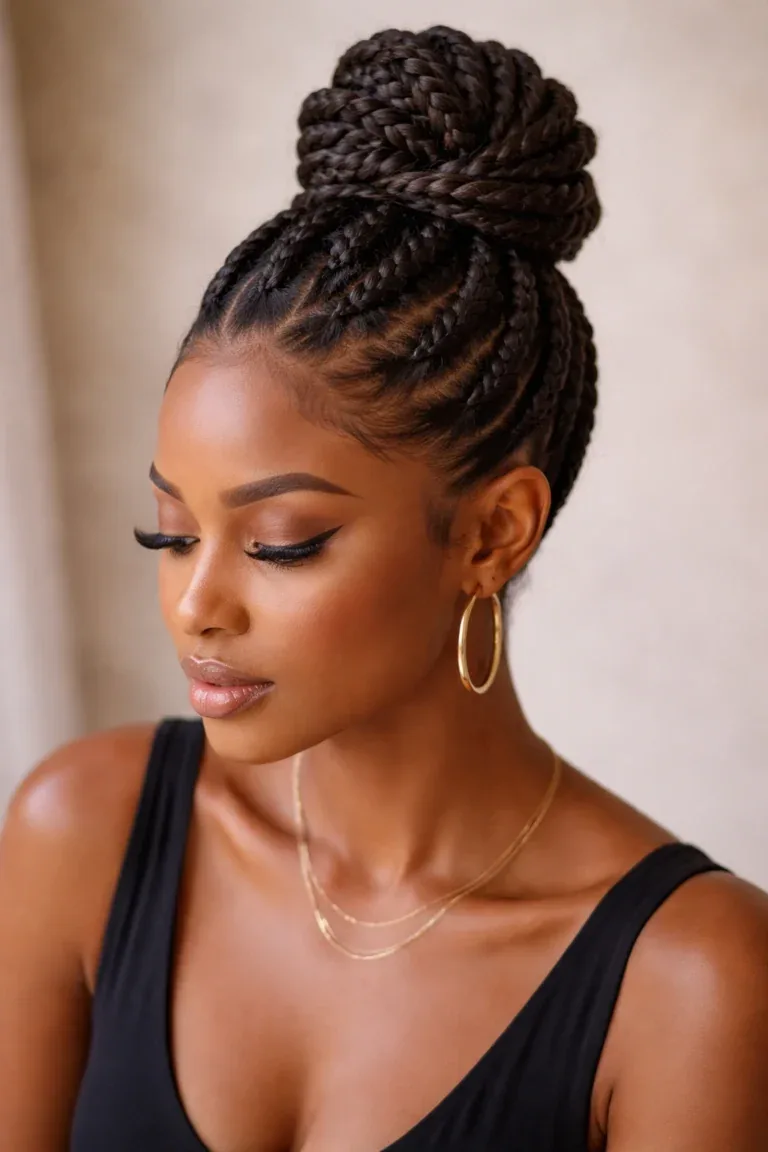
The cornrow bun takes neat braids and sweeps them into a low or high bun, turning a protective style into an updo that works for the office, a wedding or a night out. The braids are usually braided toward the crown or the nape and then coiled into a bun, sometimes with the ends wrapped around the base for a smooth finish. It is a wonderfully practical style: the hair is completely out of your face, it survives heat and humidity, and it looks deliberate and polished with almost no daily effort.
Install takes two to three hours and typically costs $70–$130. Maintenance is minimal — smooth the edges with a little edge control in the morning, tie the bun down with a scarf at night, and moisturise the scalp along the parts. The style lasts two to four weeks, and the bun itself can be repositioned or re-wrapped as the braids loosen. If the bun starts to feel heavy, switch to a lower placement for a few days to give your hairline a break.
5. Cornrows Into a High Ponytail
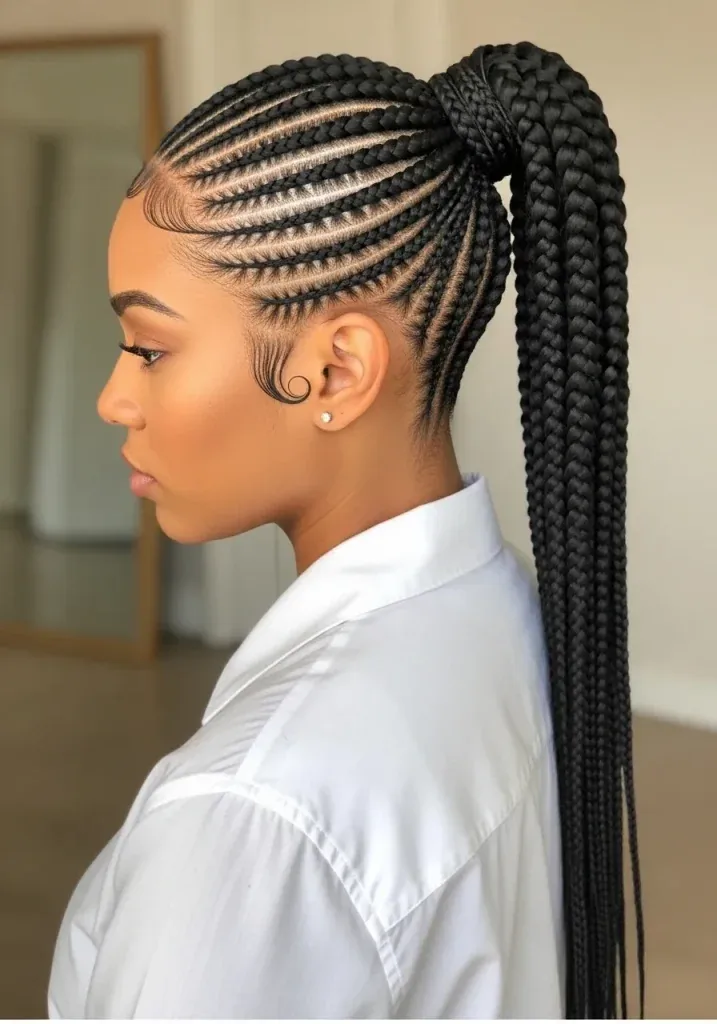
Cornrows into a high ponytail are pure energy: the braids sweep upward from the hairline and gather into a ponytail that sits high on the crown, long and swinging. It is a bold, confident look that shows off the neatness of the parts from every angle and gives instant lift to the face. The ponytail can be left long and straight, curled at the ends, or wrapped at the base with a braid for a seamless finish — each version changes the mood completely.
Install takes two to three hours and typically costs $70–$140 with extensions. Maintenance is about tension: do not pull the ponytail tighter each day to keep it high, and vary its position so the same braids are not stressed in the same direction. A silk scrunchie is gentler than a tight elastic, and a bonnet at night keeps the ponytail smooth. The style lasts two to four weeks, though the ponytail may start to sit lower as the braids grow out — when it does, wear it a little lower and enjoy the softer look.
6. Side-Swept Cornrows
Side-swept cornrows braid the hair diagonally across the head instead of straight back, so the braids sweep from one side to the other and fall over one shoulder. The diagonal lines are instantly more glamorous than straight rows — they add movement, asymmetry and a sense of occasion, and they flatter round and square faces by drawing the eye across rather than down. It is a lovely choice for events, photos and days when you want your cornrows to feel like a style rather than a base.
Install takes two to three hours and typically costs $70–$130. Maintenance follows the usual cornrow rules: moisturise the scalp, protect the braids at night, and keep the edges smooth with a light edge control. Because the braids run diagonally, they can loosen unevenly, so expect the style to look its sharpest for the first two weeks and last two to three weeks in total. A silk scarf tied across the sweep at night keeps the diagonal lines crisp for longer.
7. Zigzag Cornrows
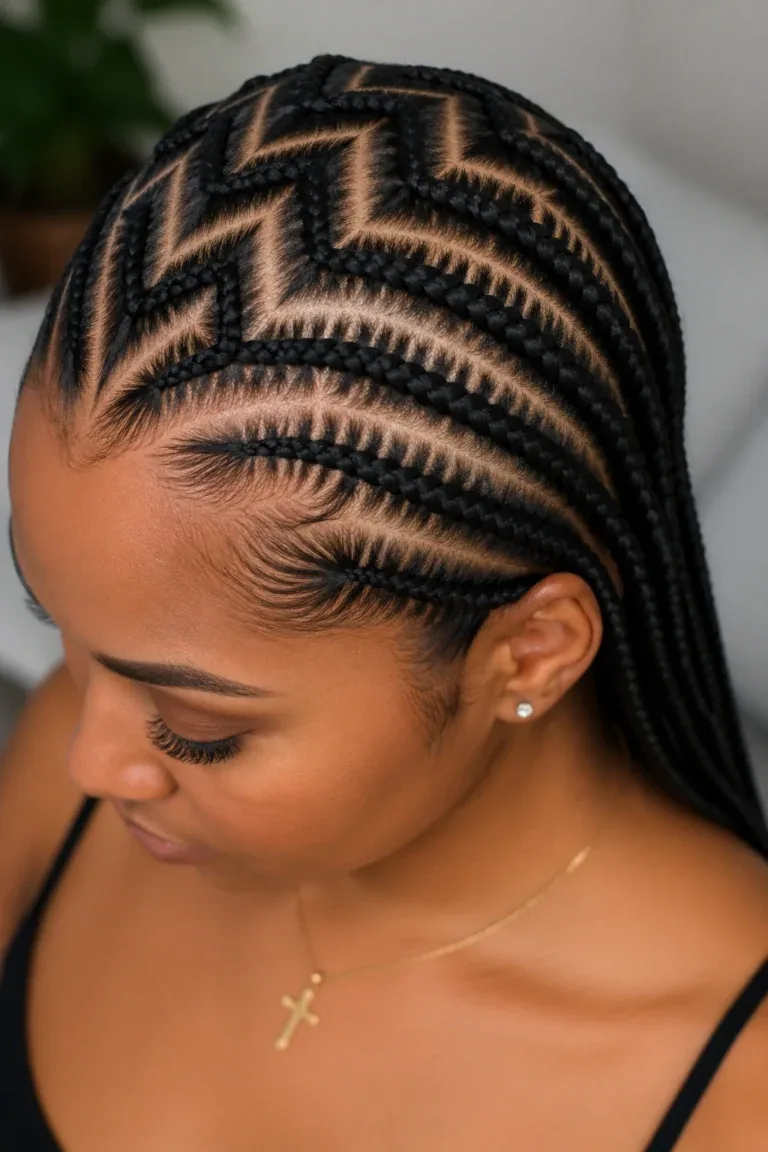
Zigzag cornrows turn the parts themselves into the design: instead of straight lines, the braids follow a zigzag path across the scalp, creating a graphic, eye-catching pattern that looks like art. The effect is playful and bold, and it photographs beautifully — the zigzag catches the light differently from every angle. This is the style to pick when you want your cornrows to be a statement, not just a protective style, and it works best with a skilled braider who can keep the zigzag even all the way across.
Install takes two to four hours and typically costs $80–$150, because the pattern is slower to braid than straight rows. Maintenance is standard: scalp oil along the parts, a satin bonnet at night, and gentle washing. The sharp zigzag lines blur as new growth comes in, so the style looks its best for the first ten days and lasts two to three weeks. Ask your braider to keep the zigzags the same size across the head — uneven zigzags are the one thing that can spoil this look.
8. Cornrows With Beads
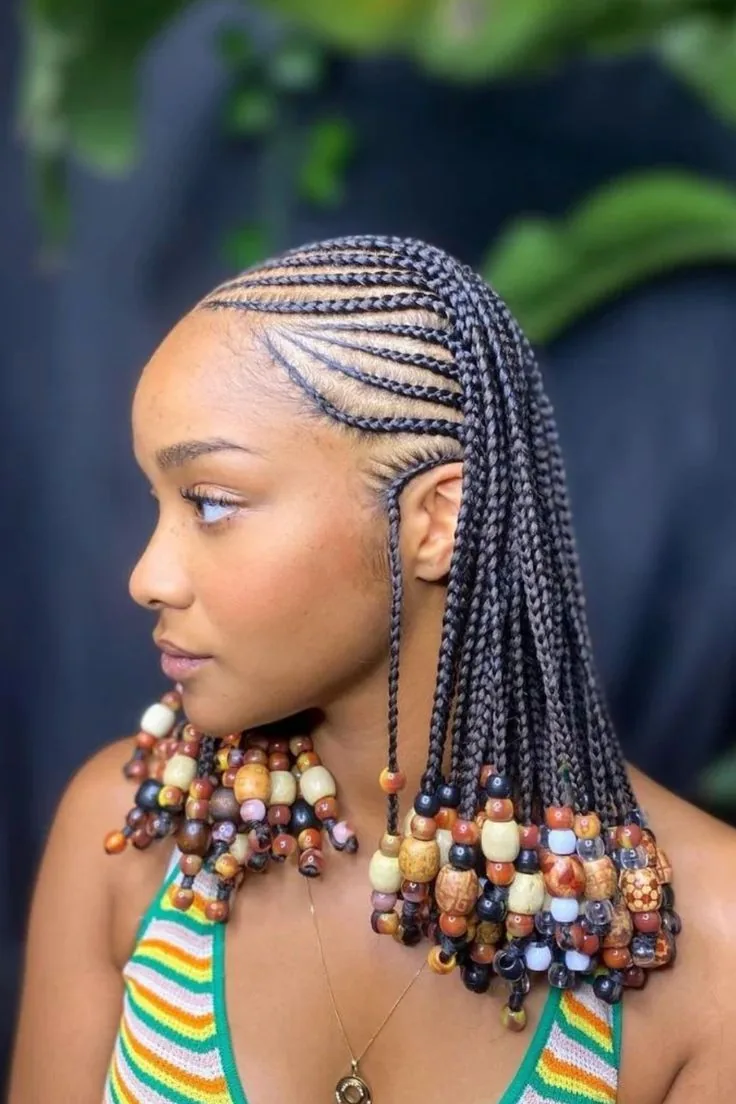
Cornrows with beads are joyful, colourful and endlessly personal: wooden, glass or metallic beads threaded onto the ends of the braids, sometimes mixed with cuffs and shells, turning a neat protective style into something that moves, clicks softly and catches the light. Beads suit every age and every occasion — a few gold beads for a subtle shimmer, or a full set of bright colours for a festival or holiday. They also protect the ends of the braids, keeping them from unravelling.
Install takes two to three hours plus bead time and typically costs $70–$140, with beads themselves costing a few dollars. Maintenance is easy, but beads add weight, so keep them light and do not overload fine hair; remove any bead that pulls or catches. Tie the beaded ends up at night so they do not tangle, and the style lasts two to four weeks. When you take the braids out, slide the beads off first and keep the ones you love — good beads last for many installs.
9. Cornrows With Cuffs and Rings
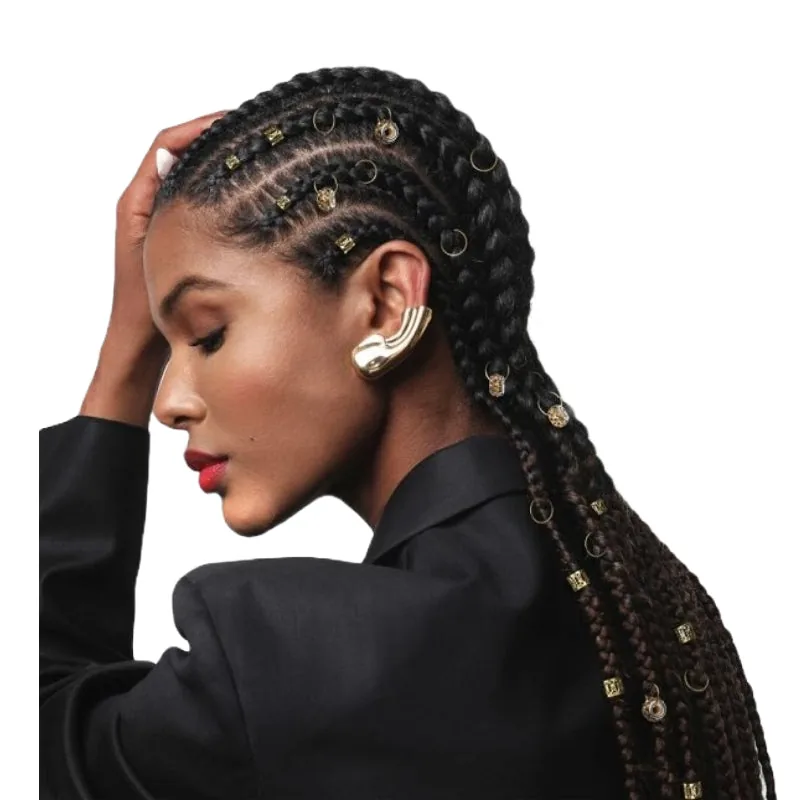
Gold cuffs and rings threaded along cornrows are the quickest way to make a simple set look expensive. A few metallic cuffs spaced along the braids catch the light with every turn of the head, and they work with any cornrow design — straight-backs, side sweeps, buns and ponytails all look more finished with a little metal. The look is subtle enough for work and striking enough for a night out, which is why cuffs have become a staple of modern cornrow styling.
Install adds only a few minutes to a normal set, and cuffs cost a few dollars a pack, so the total is usually $60–$130 depending on the braids themselves. Maintenance is simple: slide the cuffs off before washing if you can, or wash gently around them, and check that none has slipped and started pulling a single braid. The style lasts two to four weeks, and the cuffs can be reused on your next set. Keep the number of cuffs modest — three to six per style is plenty — so the braids stay light and comfortable.
10. Goddess Cornrows
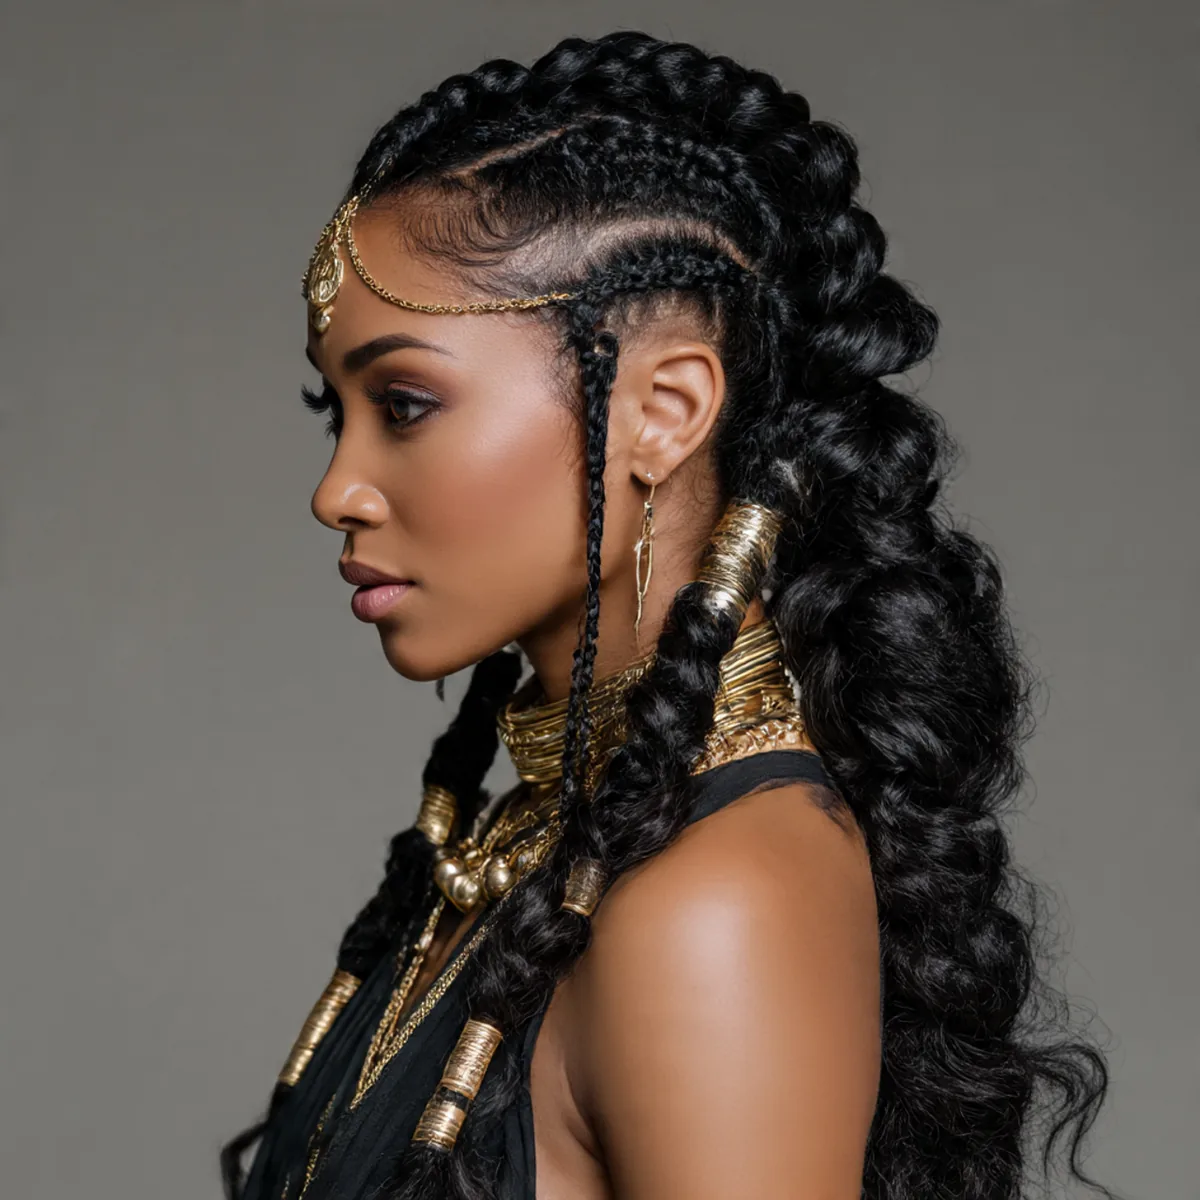
Goddess cornrows are the big, bold, regal version of the style: thick, chunky braids — usually four to six of them — braided with feed-in extensions so they lie flat at the front and grow full toward the back. The name fits: the style has presence, it frames the face like a crown, and it looks stunning on everyone from teenagers to grandmothers. Goddess cornrows are also one of the fastest cornrow styles to install, because fewer, thicker braids mean less time in the chair.
Install takes one and a half to two and a half hours and typically costs $60–$120. Maintenance is straightforward: moisturise the scalp, protect the braids at night, and smooth the edges in the morning. Because the braids are thick, they can feel heavy, so ask your braider not to pull too tight at the hairline. The style lasts two to three weeks — thick braids show new growth sooner than small ones — but those two weeks are gloriously low-effort, with a style that looks finished from the moment you leave the salon.
11. Jumbo Cornrows
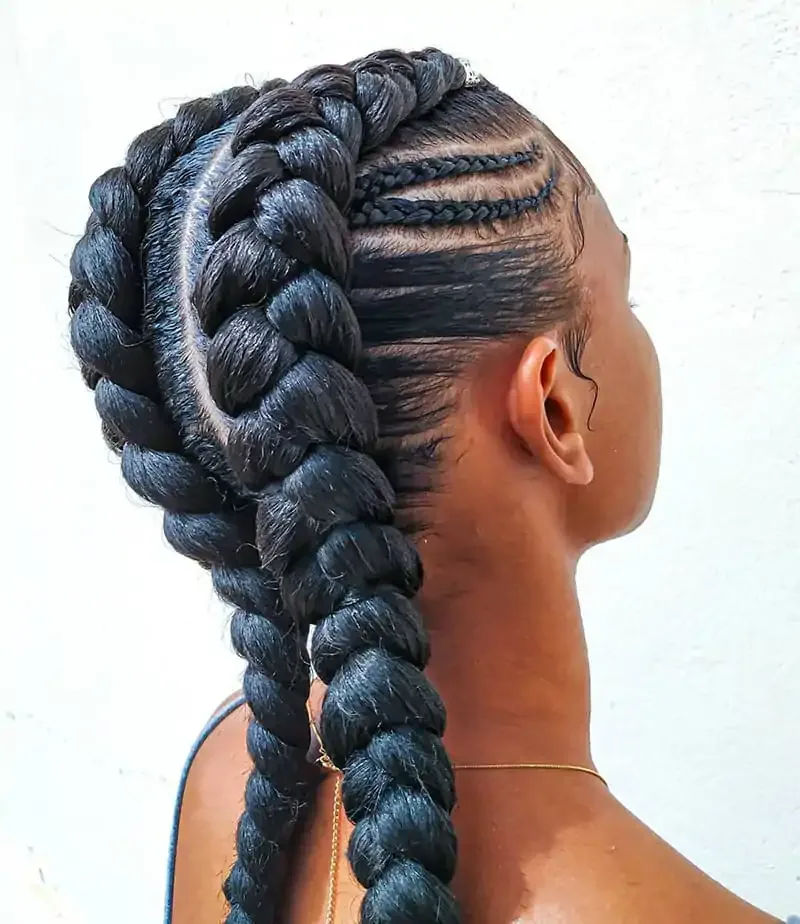
Jumbo cornrows use just a few very thick braids — sometimes only two or three — for a dramatic, sculptural look that is all about scale. The thick braids make a statement on their own, and the wide parts between them show off the scalp in clean, graphic lines. It is a fast, bold style that suits women who like their hair to be noticed, and it works beautifully with extensions in a contrasting colour or with the ends curled for extra drama.
Install is quick — often just one to two hours — and typically costs $50–$100, making jumbo cornrows one of the most affordable cornrow styles. Maintenance is easy, but thick braids are heavy, so avoid tight updos and give your edges a break by wearing the style down most days. The style lasts about two weeks, since wide parts show growth quickly, and the braids can loosen at the ends sooner than smaller ones. For a short, striking protective style between longer installs, jumbo cornrows are hard to beat.
12. Small Stitch Cornrows
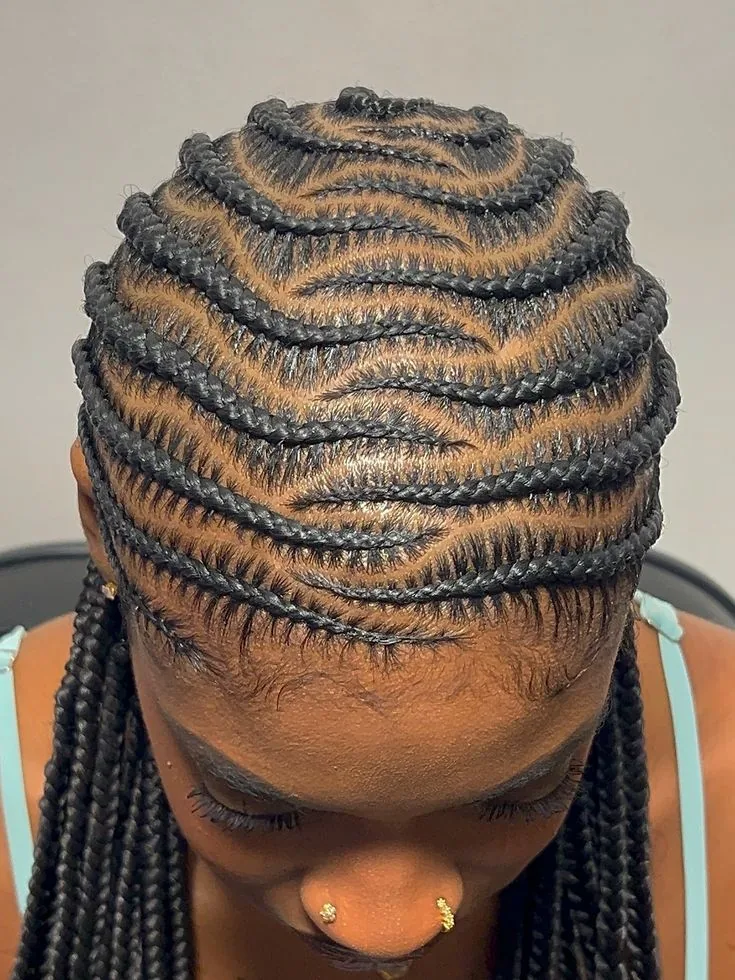
Small stitch cornrows are the precision end of cornrow styling: many fine braids, each one stitched close to the scalp with tiny, even stitches that look almost like embroidery. The finish is incredibly neat and detailed, and the style lasts longer than chunkier designs because the small braids hold their shape as the hair grows. Stitch braids are the choice when you want cornrows that look immaculate up close — for photos, for work, or simply because you love the craft of it.
Install takes three to five hours and typically costs $100–$180, because the fine stitching is slow, skilled work. Maintenance is gentle: oil the scalp lightly, avoid scratching at the tiny parts, and protect the style with a bonnet every night. The style can last three to four weeks, sometimes longer, but do not be tempted to stretch it — small braids left in too long can lock at the roots. Book a braider who specialises in stitch work, and the result is worth every minute in the chair.
13. Cornrows With a Middle Part
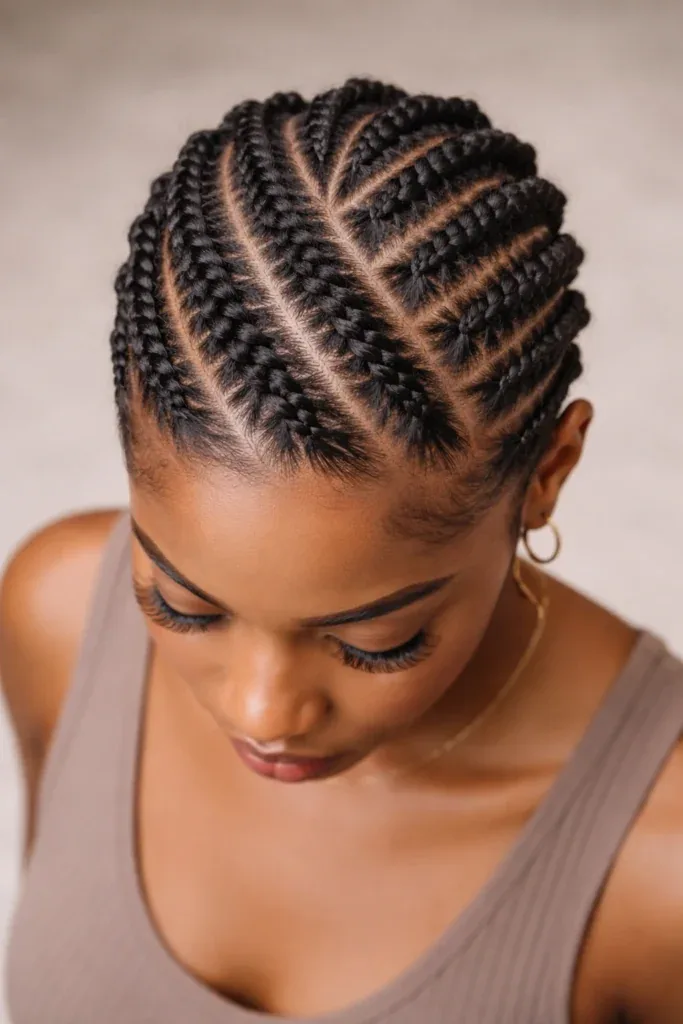
Cornrows with a middle part are symmetry at its best: the hair is divided down the centre and the braids mirror each other on each side, framing the face evenly and giving the style a clean, balanced look. The middle part suits oval and heart-shaped faces particularly well, and it is the most versatile cornrow layout — the same parting works for straight-backs, buns, ponytails and half-up styles. It is also the easiest design for a braider to keep even, which means a reliably neat result.
Install takes one and a half to three hours and typically costs $60–$130 depending on size and extensions. Maintenance is standard: scalp moisture along the parts, a silk scarf at night, and a little edge control to keep the centre line sharp. The style lasts two to four weeks, and the middle part tends to stay looking neat longer than a side part, since it does not get disturbed by how you sleep. If you like symmetry and a clean finish, this is the parting to ask for.
14. Cornrows With a Side Part
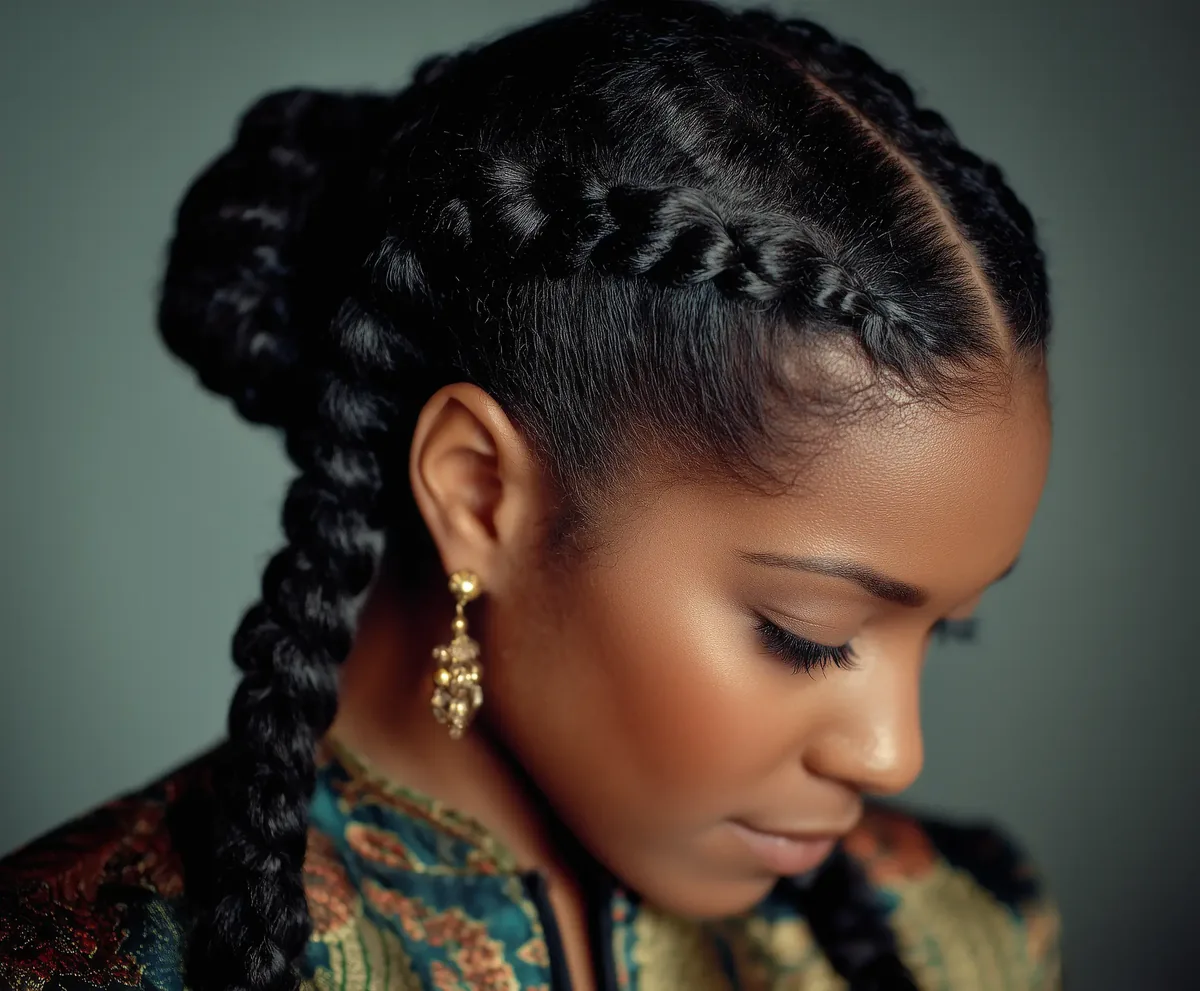
A side part changes the whole feeling of a cornrow set: instead of symmetrical rows, the braids sweep from a deep side part, giving the style movement, volume on one side and a soft, glamorous shape. Side-parted cornrows flatter round faces by adding asymmetry, and they suit women who normally wear a side part in their loose hair — the style feels like you, just braided. The sweep also gives you a natural place to tuck the braids behind one ear, which shows off earrings beautifully.
Install takes two to three hours and typically costs $60–$130. Maintenance is the same as any cornrow set, with one extra note: the side part can blur faster than a middle part if you sleep on the heavy side, so tie a scarf across it at night. The style lasts two to three weeks at its best. A side part is the easiest way to make a familiar cornrow design feel new again, and it pairs beautifully with beads or cuffs on the heavier side.
15. Lemonade Cornrows
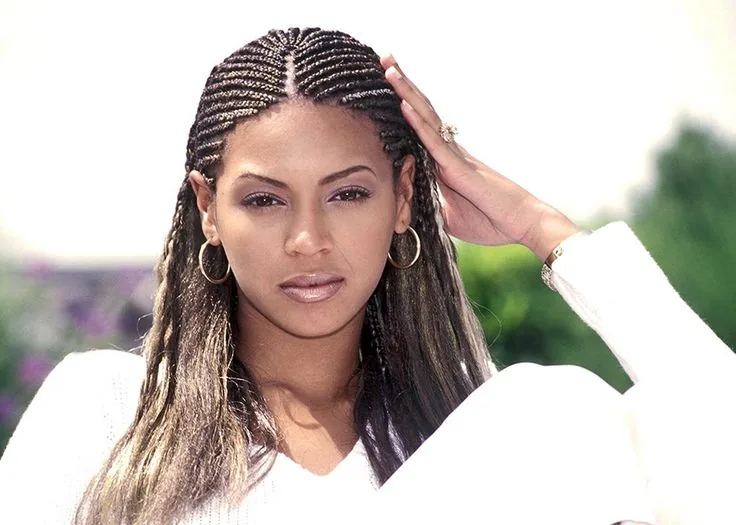
Lemonade cornrows — the side-swept, beaded style made famous by Beyoncé — are one of the most requested cornrow designs of the last decade, and it is easy to see why. The braids sweep from a deep side part across the head and fall over one shoulder, usually finished with beads or gold cuffs at the ends. The result is glamorous, feminine and instantly recognisable, with a diagonal line that flatters the face and photographs beautifully from every angle.
Install takes two to three hours and typically costs $80–$150, with beads or cuffs adding a little to the price. Maintenance means keeping the sweep in place: a silk scarf at night, light scalp oil, and gentle handling of the beaded ends. The style lasts two to three weeks, looking its sharpest in the first ten days before growth softens the side part. Ask your braider for a deep, clean side part and even braid sizes — those two details are what make lemonade braids look like lemonade braids.
16. Cornrows With Colour
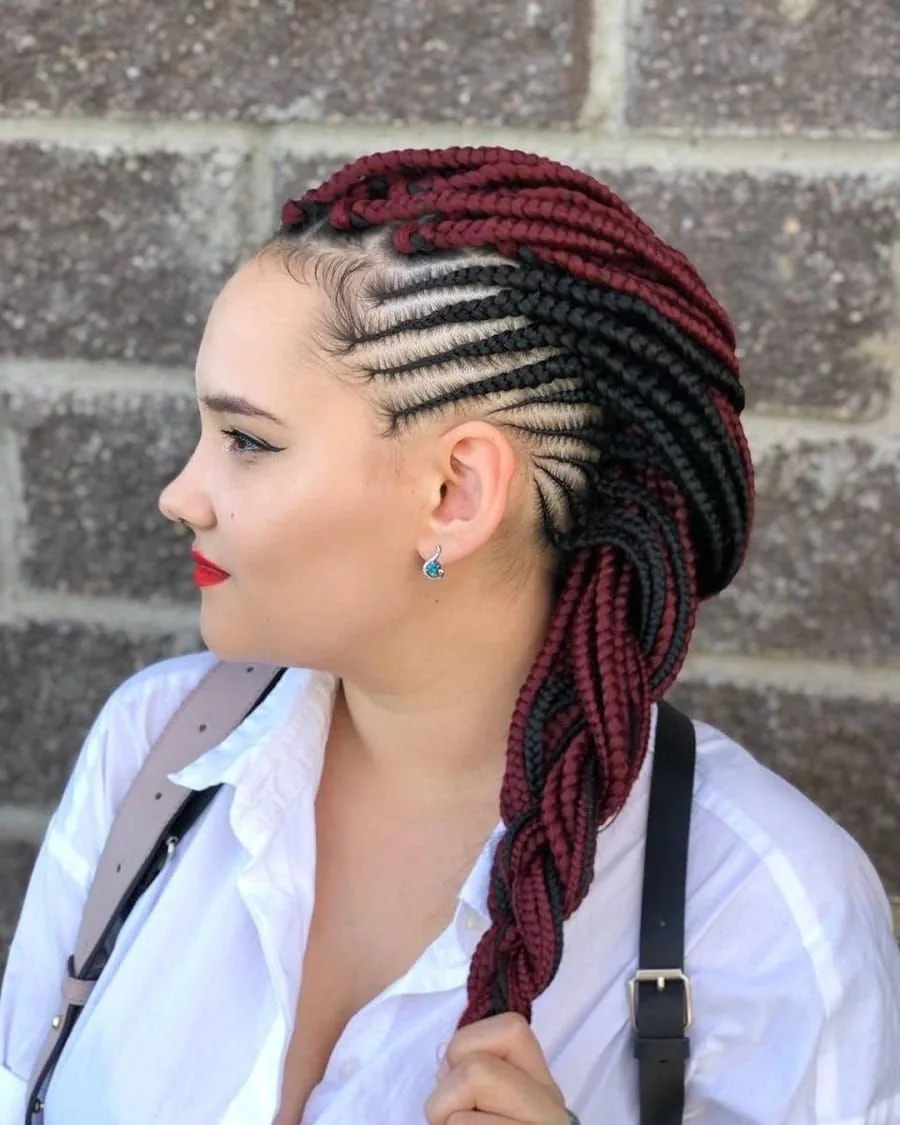
Cornrows with colour let you try a new shade without touching your natural hair with dye: the colour comes from the extensions, so you can wear burgundy, honey blonde, copper or even pastel braids for a few weeks and then go back to your natural colour. A few coloured braids mixed into a natural set give a subtle highlight effect, while a full head of coloured cornrows makes a bold fashion statement. It is the lowest-commitment way to experiment with colour.
Install takes two to three hours and typically costs $80–$160, depending on the extensions used. Maintenance is the same as any cornrow set, with one extra care point: coloured synthetic hair can feel drier, so keep your scalp moisturised and avoid heavy oils on the extensions themselves. The style lasts two to four weeks. If you are trying colour for the first time, start with a shade close to your natural colour — burgundy or honey — before going brighter, and you will know within a week whether bold colour is for you.
17. Two Cornrows (Double Braids)
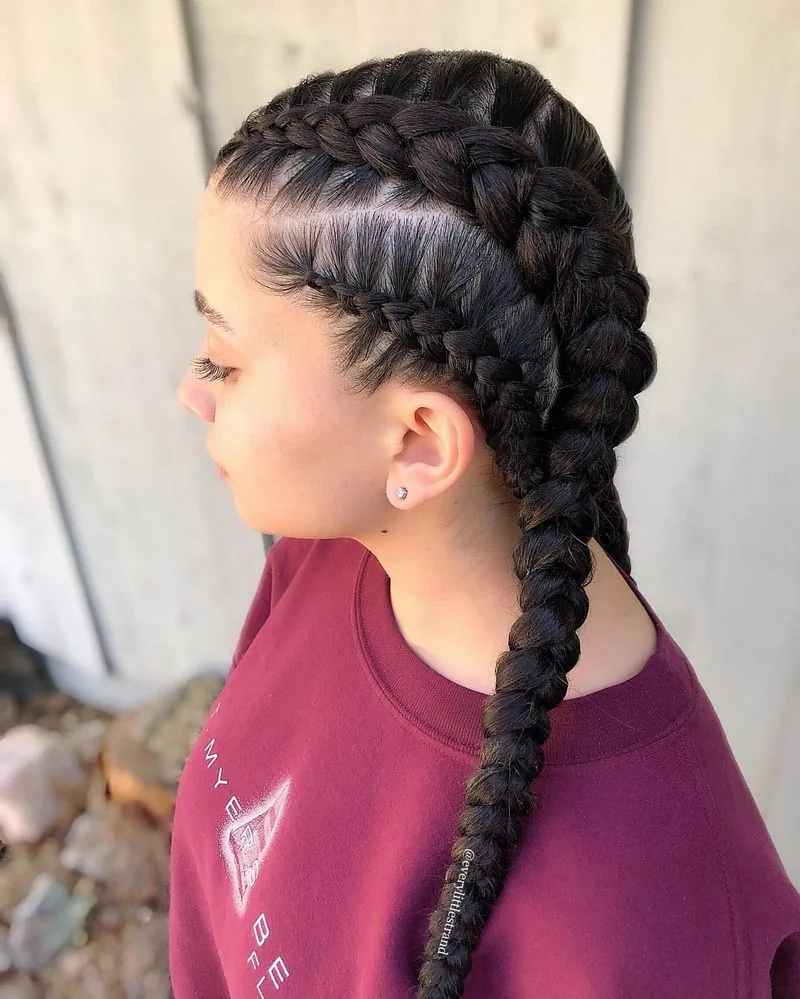
Two cornrows — the classic double braids — are the simplest cornrow style there is, and sometimes the simplest is exactly right. Two thick braids, one on each side of a centre part, running from the hairline to the nape: the look is sporty, youthful and effortlessly cool, and it is the style many women choose for the gym, for holidays, or for the week between bigger installs. It is also the easiest cornrow style to learn to do on yourself, which makes it a great first DIY braid.
Install takes 30 minutes to an hour and typically costs $30–$60 at a salon, or nothing if you braid them yourself. Maintenance is minimal: a little scalp oil, a bonnet at night, and the braids are done. The style lasts one to two weeks — two braids show growth quickly — but that is part of the charm: it is a quick, cheap, low-commitment style you can refresh often. For a weekend away, a workout week or a first attempt at braiding, two cornrows are the perfect starting point.
18. Four Cornrows
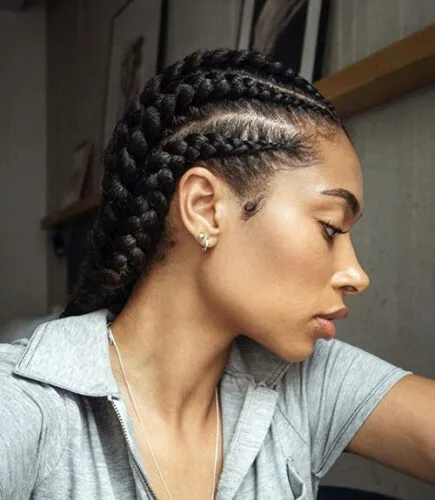
Four cornrows strike the perfect balance between simple and styled: two braids on each side of a centre part, thick enough to look deliberate and thin enough to last. The style is neat, symmetrical and versatile — wear the braids down, gather them into a low ponytail, or coil them into a bun, and the same set does three different jobs. Four cornrows are a favourite for women who want a protective style that is quick to install but still looks like a real hairstyle, not just a base.
Install takes one to two hours and typically costs $50–$90. Maintenance is easy: moisturise the scalp every couple of days, protect the braids at night, and smooth the edges in the morning. The style lasts two to three weeks, with the centre part staying neat longer than busier designs. Four cornrows are also a good choice if you are new to cornrows — the install is short, the price is kind, and you will know within a fortnight whether braided life suits you.
19. Six Cornrows
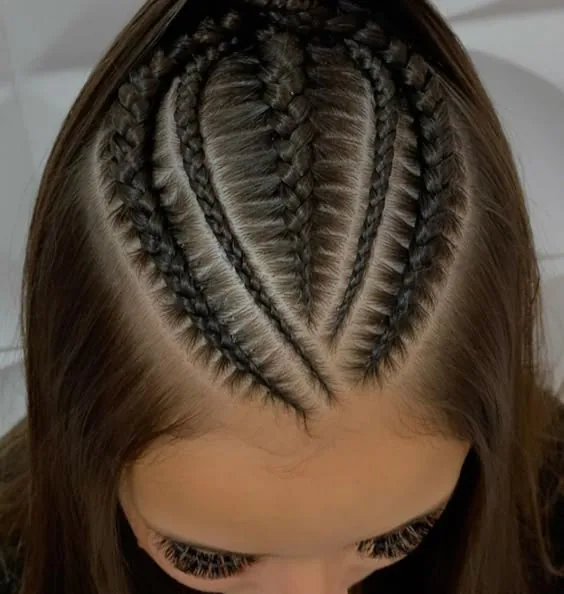
Six cornrows — three on each side of a centre part — are the sweet spot for many women: more detailed than four braids, but still quick enough to install in a single sitting without a long day in the chair. The medium-sized braids lie flat, look neat from every angle, and give you enough braids to style into a ponytail or a bun without the style feeling sparse. It is a reliable, everyday cornrow design that works for work, for the gym and for weekends alike.
Install takes one and a half to two and a half hours and typically costs $60–$110. Maintenance follows the standard routine: scalp oil along the parts, a satin bonnet at night, gentle weekly washing. The style lasts two to four weeks, and the medium braid size holds up well as the hair grows — the parts stay visible longer than with jumbo braids. Six cornrows are the set to choose when you want a classic look with just a little more detail.
20. Cornrow Mohawk
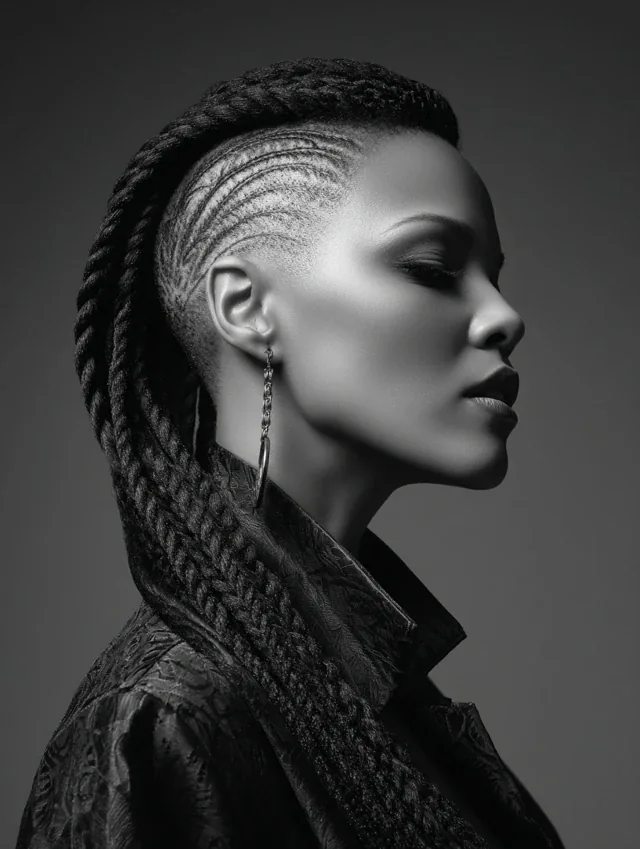
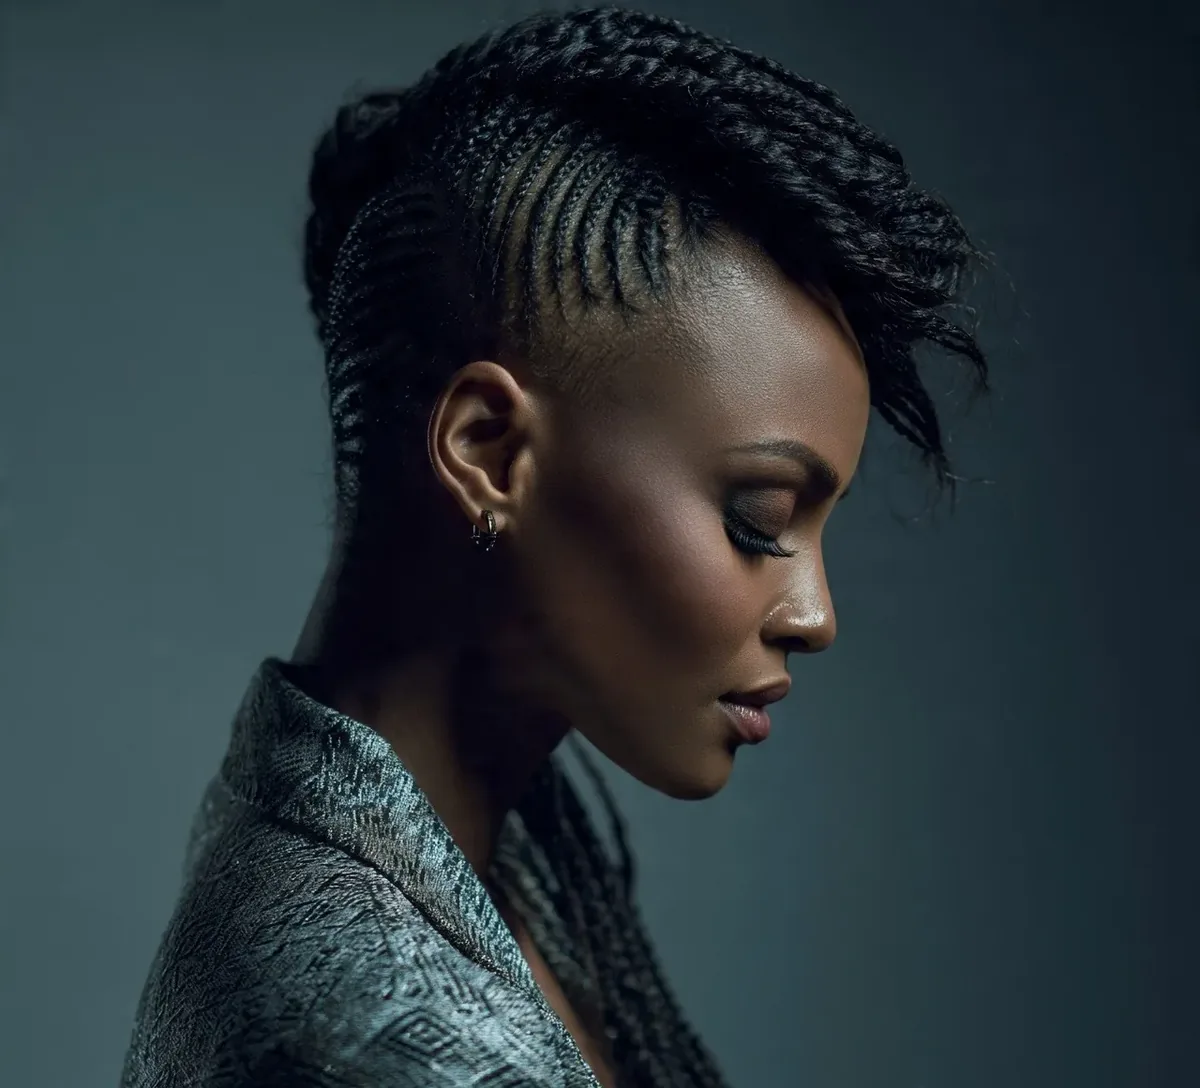
The cornrow mohawk is cornrows at their boldest: the sides are braided flat and tight, while the centre is left fuller — in braids, twists or curls that stand up along the middle of the head like a mohawk. The contrast between the sleek sides and the volume on top is dramatic, edgy and impossible to ignore. It is a statement style for parties, festivals and photoshoots, and for women who like their hair to say something before they do.
Install takes two to four hours and typically costs $90–$160, depending on how the centre is finished. Maintenance means keeping the sides smooth with edge control and the centre defined with a little mousse or curl cream. The style lasts two to three weeks, though the centre will need refreshing after the first week. Wear it for the occasion it was made for, and enjoy being the most memorable head of hair in the room.
21. Cornrows Into a Low Bun
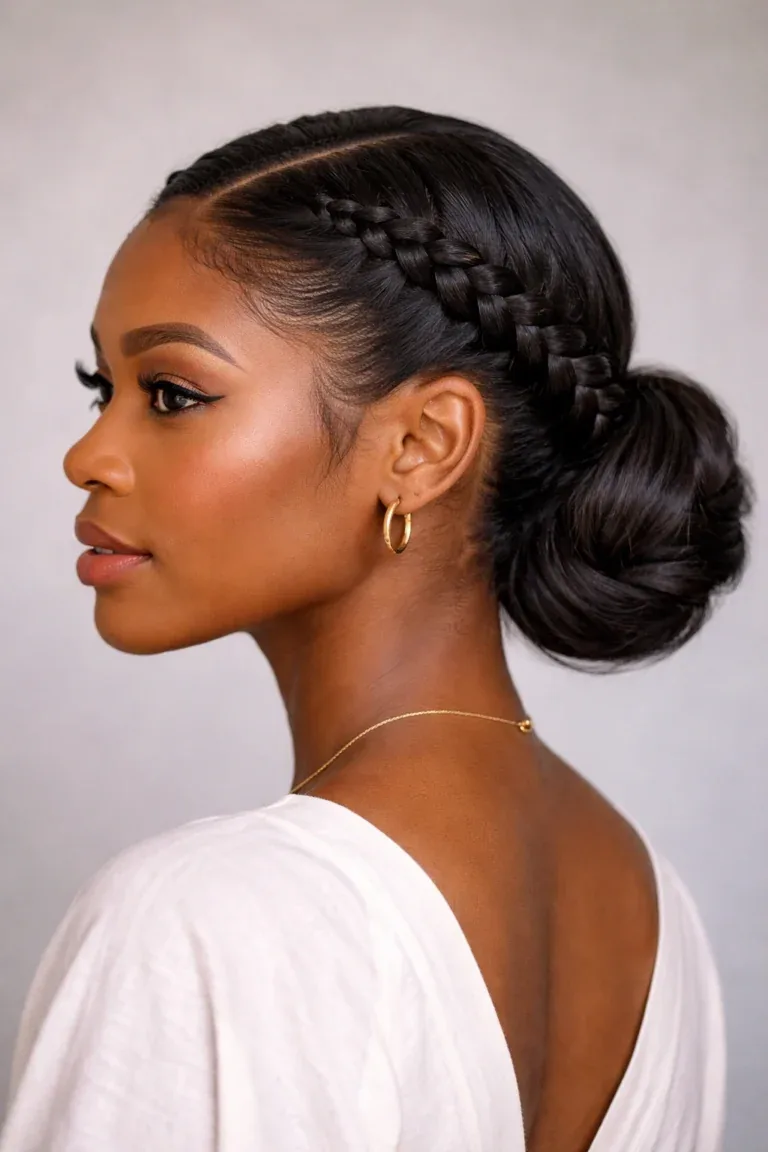
Cornrows into a low bun are quiet elegance: the braids travel back from the hairline and gather into a bun at the nape, low and neat, with nothing to fuss over. The style suits formal occasions, office days and hot weather equally well, and it shows off the neckline, the cheekbones and a good pair of earrings. A low bun is also one of the gentlest updos for cornrows, because the weight sits low and pulls very little at the hairline.
Install takes two to three hours and typically costs $70–$130. Maintenance is minimal: smooth the edges in the morning, tie the bun down with a scarf at night, and moisturise the scalp along the parts. The style lasts two to four weeks, and the bun can be re-wrapped as the braids loosen. If you want a cornrow style that is polished, comfortable and completely fuss-free, the low bun is the one to book.
22. Cornrows With a Curly Ponytail
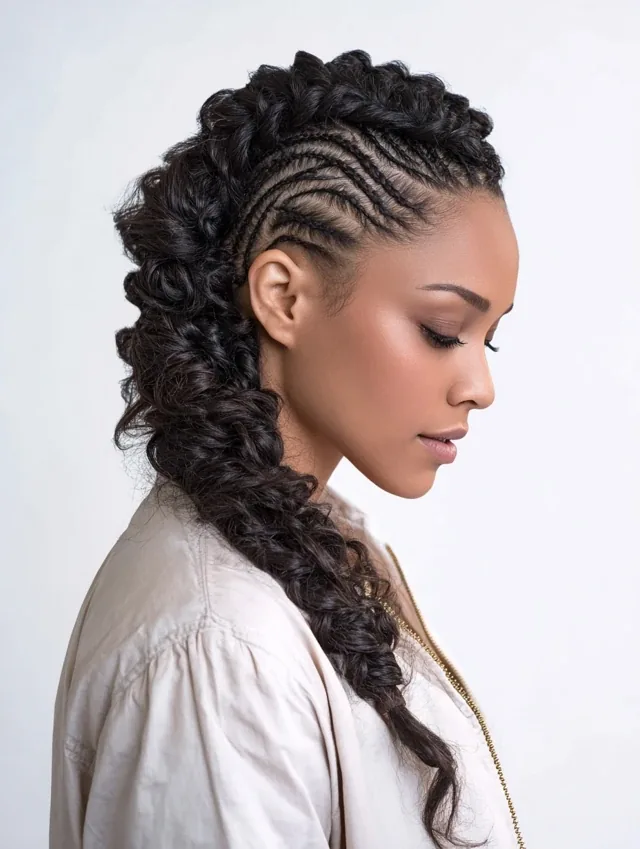
Cornrows with a curly ponytail combine sculpted braids at the front with a cloud of curls at the back: the braids sweep up into a ponytail, and the ponytail itself is full of bouncy curls that move when you do. The contrast is the whole point — structure in front, freedom at the back — and the result is playful, feminine and full of life. It is a wonderful style for parties and holidays, and it photographs beautifully.
Install takes two to three hours and typically costs $80–$150, depending on the curly extensions used. Maintenance means keeping the curls defined: a little curl cream, a satin bonnet at night, and a gentle shake in the morning rather than brushing. The curls loosen over the life of the style, so it looks fullest in the first week and lasts two to three weeks overall. A light mist of water and leave-in conditioner revives the curls between washes.
23. Cornrow Crown (Halo Cornrows)
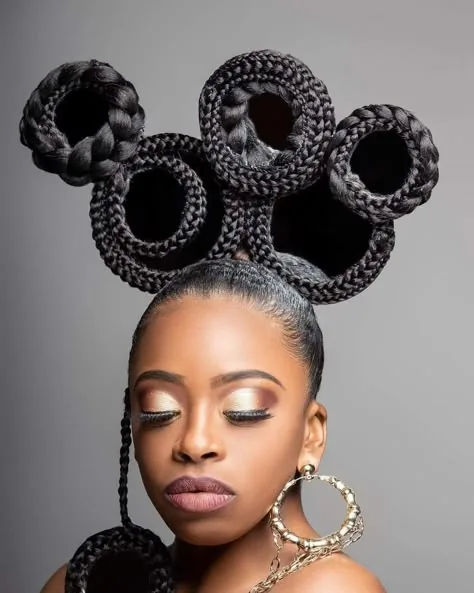
The cornrow crown — also called halo cornrows — braids the hair in a circle around the head, like a halo, so the braids frame the face from every side. The effect is soft, romantic and regal, and it is one of the most flattering cornrow designs for round and heart-shaped faces, because the circular lines draw the eye around rather than across. A crown is also a beautiful base for a wedding or a formal event, with flowers or pins tucked into the braids.
Install takes two to three hours and typically costs $80–$140, since the circular pattern needs a skilled braider. Maintenance is standard: scalp oil, a bonnet at night, gentle washing. The crown holds its shape well for two to three weeks, though the braids at the nape can loosen first. Ask your braider to keep the circle even and the braids the same size all the way around — symmetry is what makes a halo look like a halo.
24. Cornrows With a Deep Side Sweep
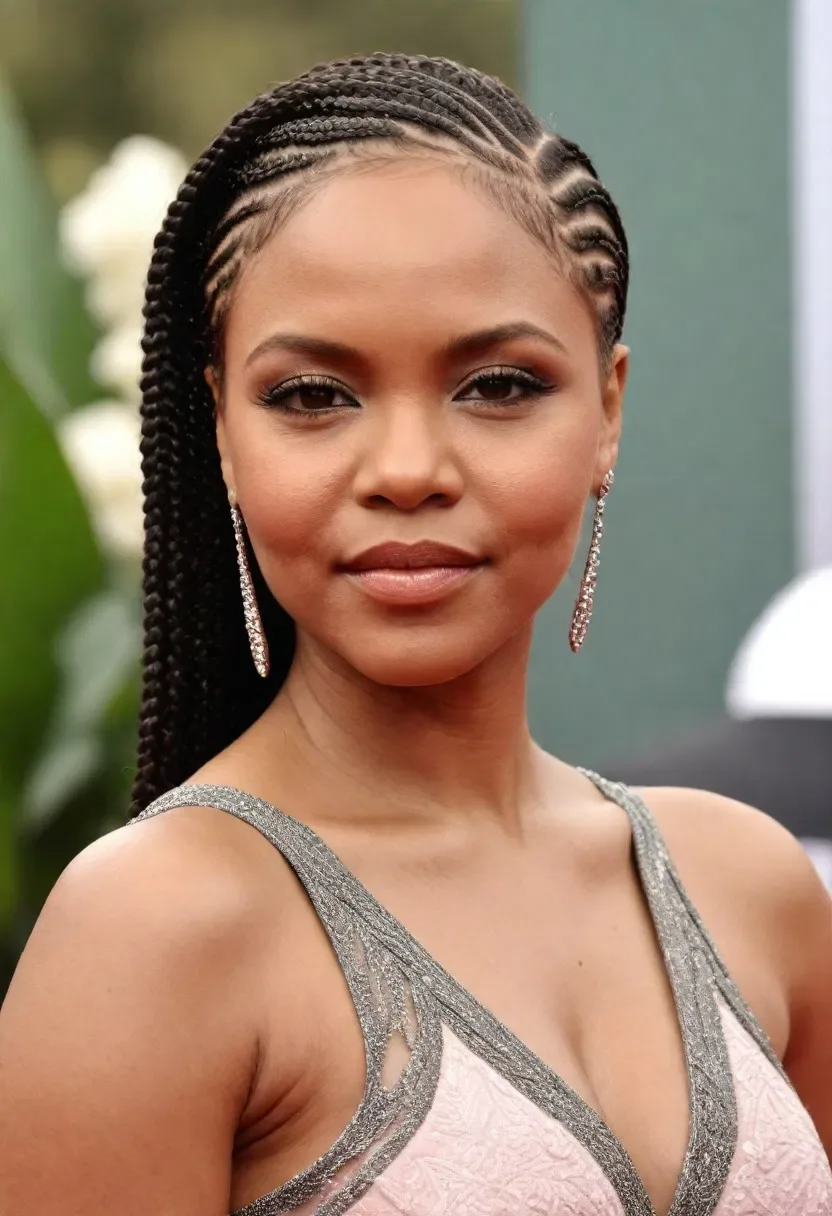
A deep side sweep takes the lemonade idea and makes it softer: the braids start from a deep side part and sweep across the forehead, falling to one side in a long, elegant line. The sweep gives the style instant glamour and a sense of movement, and it flatters the face by breaking up symmetry and adding volume where you want it. It is the cornrow version of old-Hollywood hair — dramatic, but still completely wearable every day.
Install takes two to three hours and typically costs $70–$140. Maintenance means protecting the sweep at night with a silk scarf tied across it, so the diagonal lines stay crisp. The style lasts two to three weeks, looking its best in the first ten days. Pair it with gold cuffs on the heavy side, or leave it plain and let the sweep do the talking.
25. Cornrows With Baby Hairs Styled
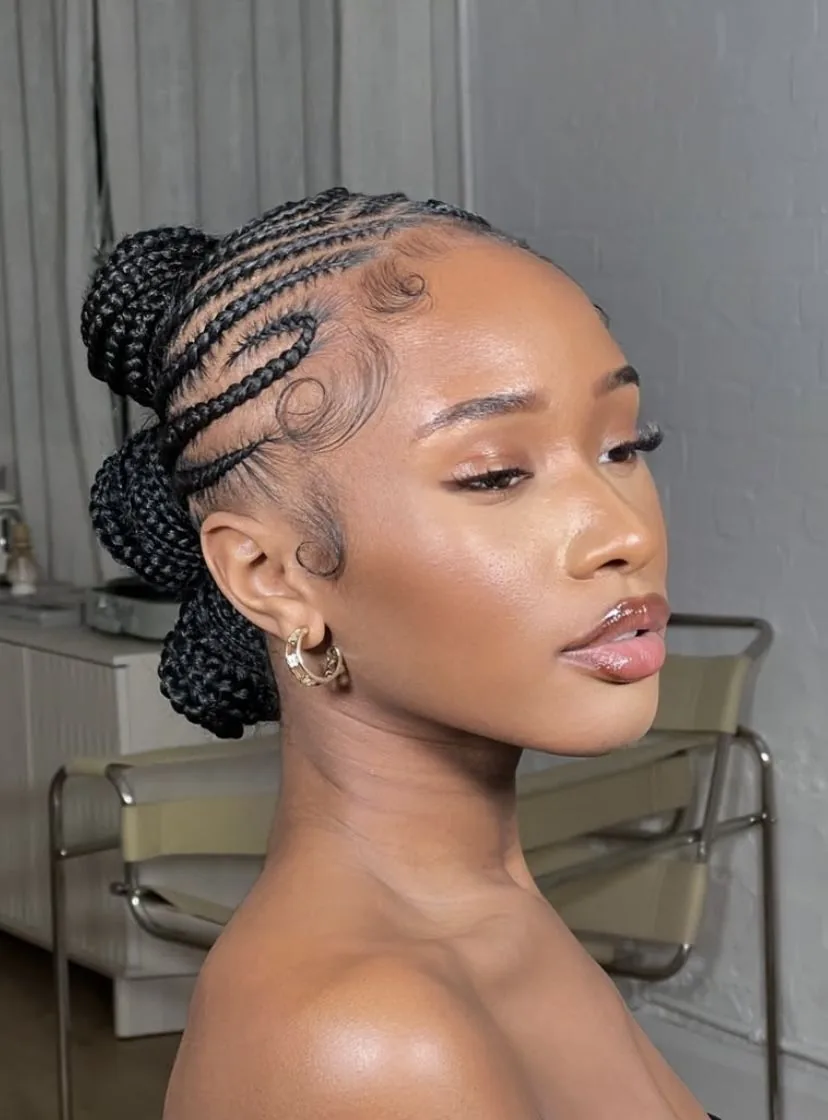
Styled baby hairs — the soft, swooping edges along the hairline — are the finishing touch that turns neat cornrows into a polished look. A little edge control and a soft brush shape the fine hairs at the forehead into gentle waves and curls, framing the face and softening the line where the braids begin. The effect is subtle but transformative: the same cornrows look sharper, more intentional and more finished with styled edges than without.
Styling baby hairs adds only a few minutes to your morning routine and costs nothing beyond a small tub of edge control. Maintenance means re-styling the edges each morning and washing the edge control out regularly so it does not build up on the scalp. The cornrows themselves last two to four weeks; the baby hairs are a daily ritual within that. Go gently — the hairs at the hairline are the finest and most fragile on your head, and heavy-handed brushing or too much product can damage them.
26. Cornrows for Short Natural Hair
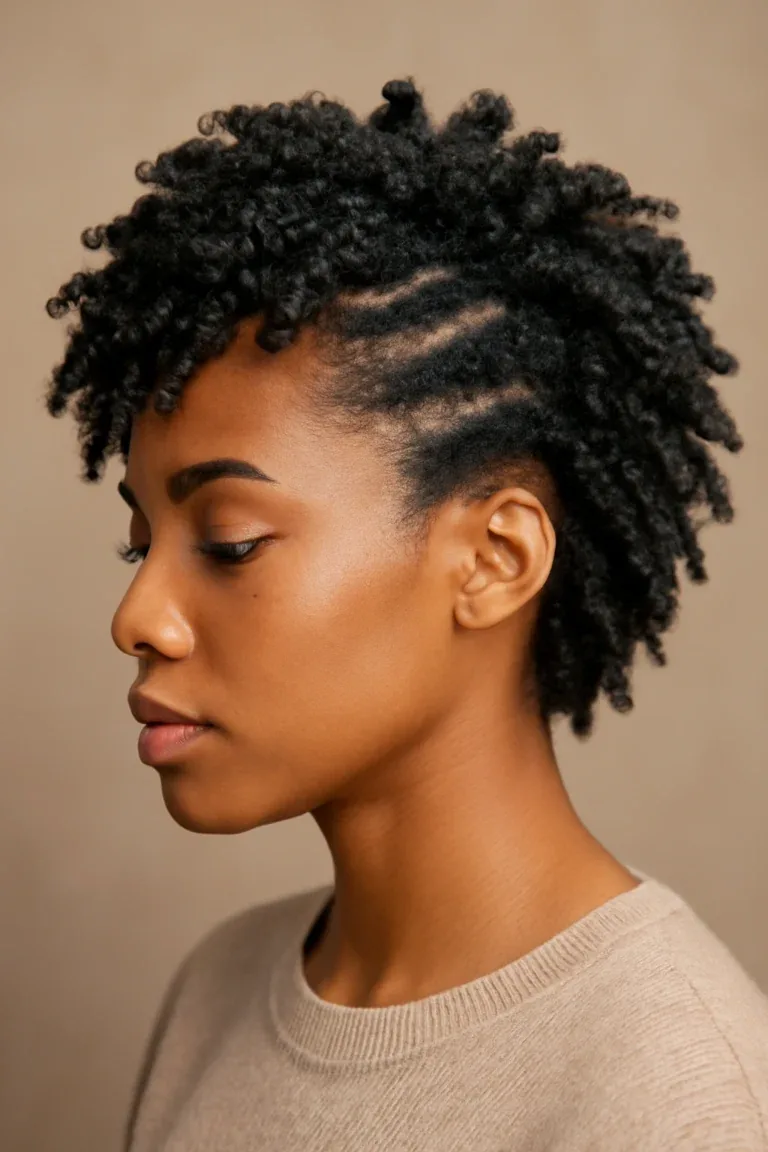
Cornrows on short natural hair are proof that you do not need length to wear braids beautifully: with just two to three inches of hair, a skilled braider can create neat, sculpted rows that lie close to the head and show off the shape of your head and the neatness of the parts. Short cornrows are fresh, easy and honest — there is nowhere for a sloppy part to hide — and they are a wonderful style for women growing out a cut or taking a break from longer installs.
Install takes one to two hours and typically costs $40–$80, making it one of the cheapest cornrow options. Maintenance is simple: scalp oil, a bonnet at night, and a little edge control in the morning. The style lasts one to three weeks, depending on how fast your hair grows and how small the braids are. Feed-in extensions can add length if you want it, but short cornrows worn as they are have a clean, confident beauty all their own.
27. Cornrows for Long Hair
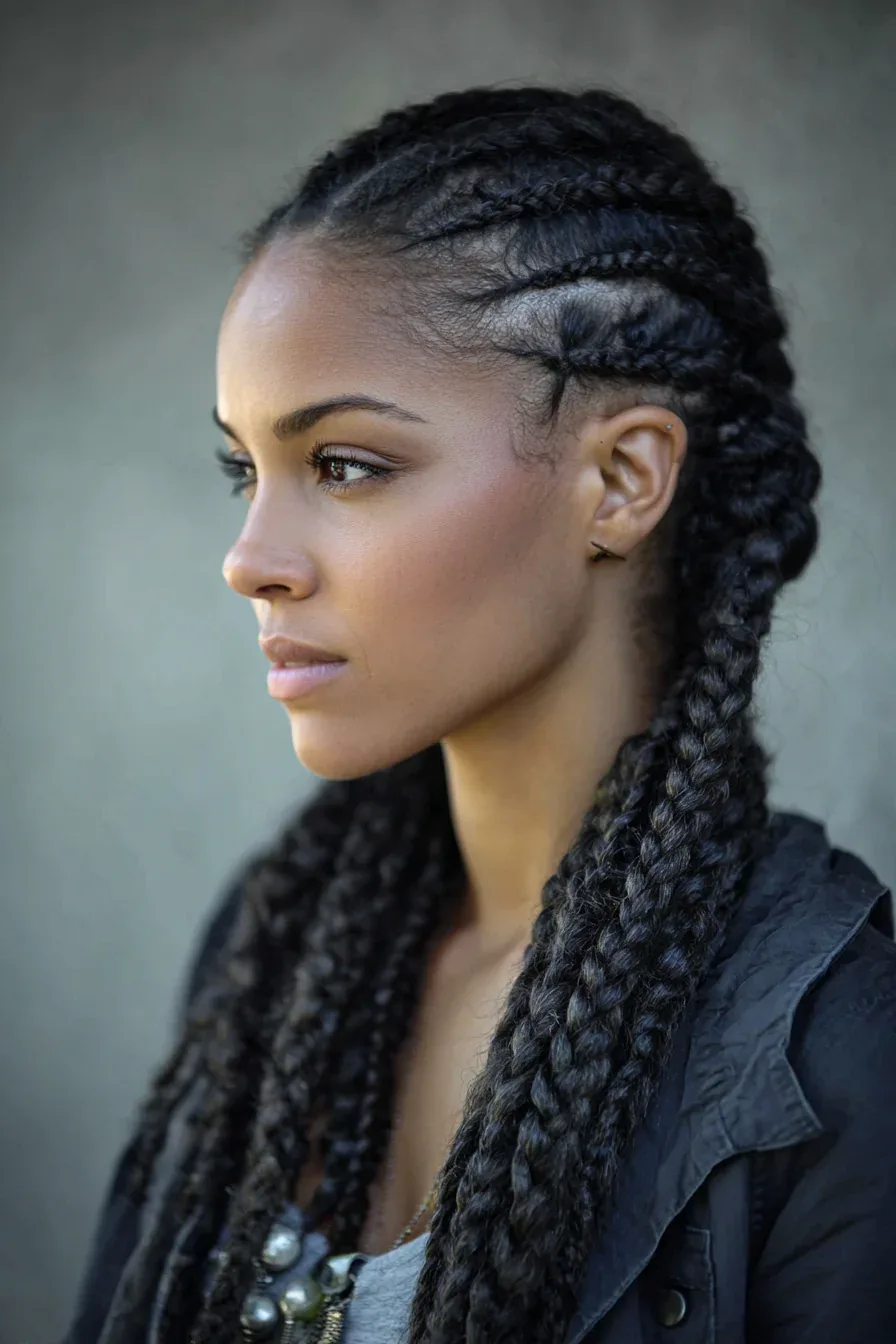
Long hair gives cornrows room to shine: the braids can run the full length of the head and keep going, falling past the shoulders in long, swinging rows, or be gathered into ponytails and buns that show off the length. Long cornrows are dramatic in the best way — the braids themselves become the hairstyle, moving when you move and catching the light along their length. They are also deeply practical, keeping long hair protected and tangle-free for weeks.
Install takes two to four hours and typically costs $80–$160, depending on length and whether extensions are added. Maintenance means protecting the long braids at night — a bonnet, or a loose braid of the braids — and moisturising the scalp along the parts. The style lasts two to four weeks. Long cornrows are heavier than short ones, so ask your braider to keep the tension gentle at the hairline, and enjoy the rare combination of a style that is both protective and show-stopping.
28. Cornrows With Extensions
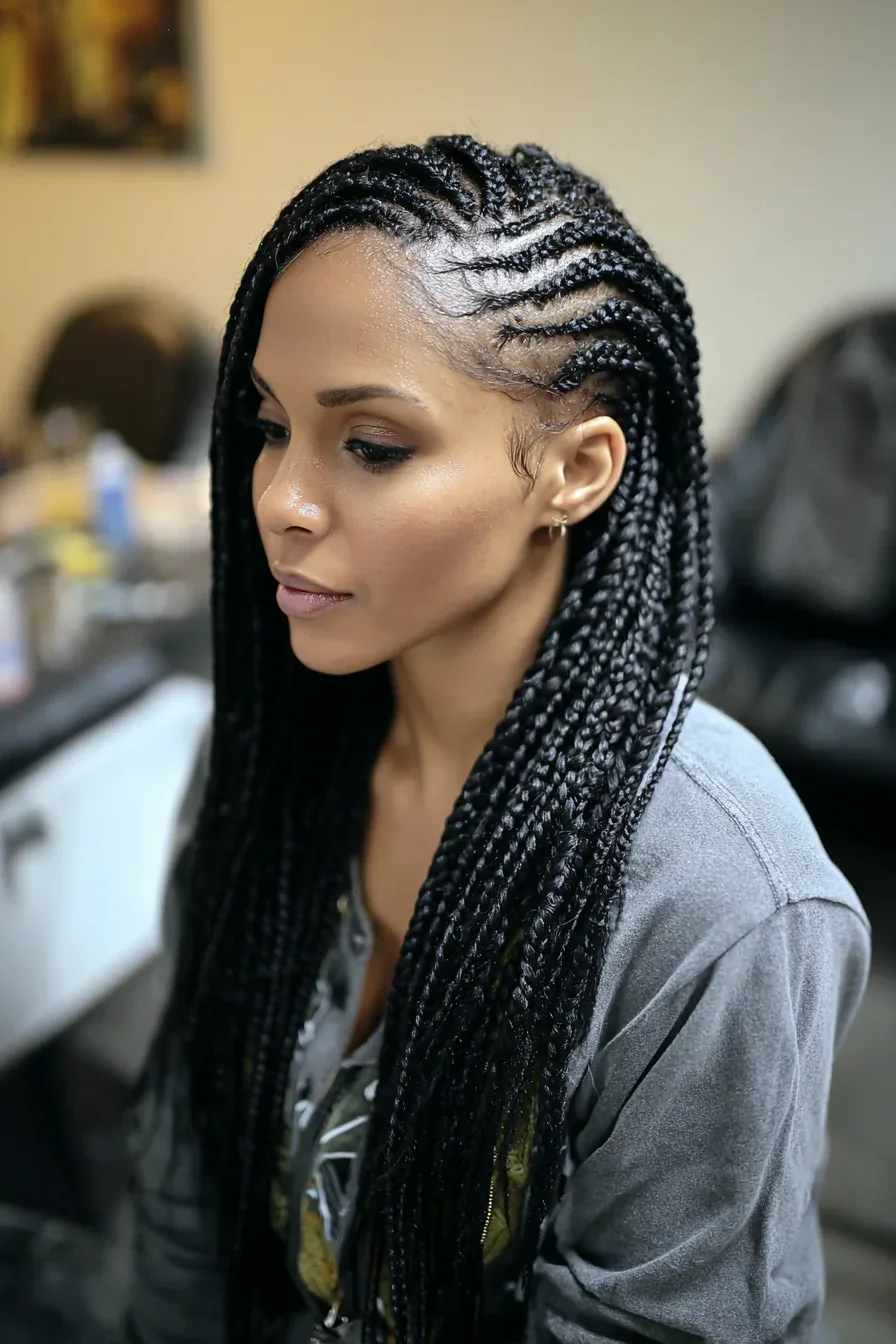
Adding extensions to cornrows opens up a whole new set of possibilities: extra length, extra thickness, and colours you would never dye your own hair. The extensions are braided in with your natural hair, so the finished braids look fuller and longer, and the style can be anything from waist-length straight-backs to a thick goddess set. Extensions are what turn a two-week protective style into a full fashion statement.
Install takes two to four hours and typically costs $80–$180, including the hair. Maintenance is the same as any cornrow set, with extra care for the extension ends — keep them from tangling at night with a bonnet, and trim any fraying ends. The style lasts two to four weeks. Choose good-quality extensions and tell your braider how much length you actually want: waist-length braids look stunning, but they are heavy, and your neck will feel the difference by the end of the first week.
29. Cornrows With a Half-Up Style
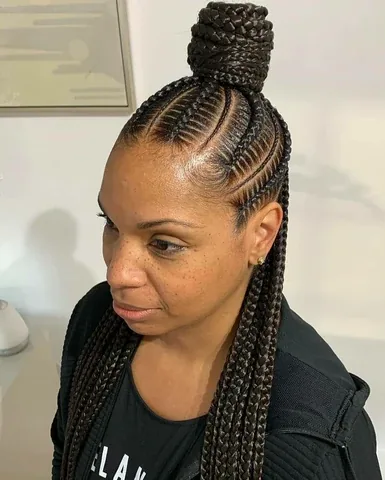
Half-up cornrows give you structure and freedom in one style: the top section is braided and gathered up, while the lower braids — or your loose curls — fall free at the back. The result is relaxed and romantic, with the neatness of cornrows at the front and movement at the back, and it suits almost every face shape. It is a lovely choice for days when you want your hair up and out of your face but still want length showing.
Install takes two to three hours and typically costs $70–$140. Maintenance means keeping the loose section defined — a little curl cream if the ends are curly — and protecting the whole style with a bonnet at night. The style lasts two to three weeks. The half-up placement can be changed day to day, which keeps the style feeling fresh and stops the same braids being pulled in the same direction every day.
30. Cornrows Into Space Buns
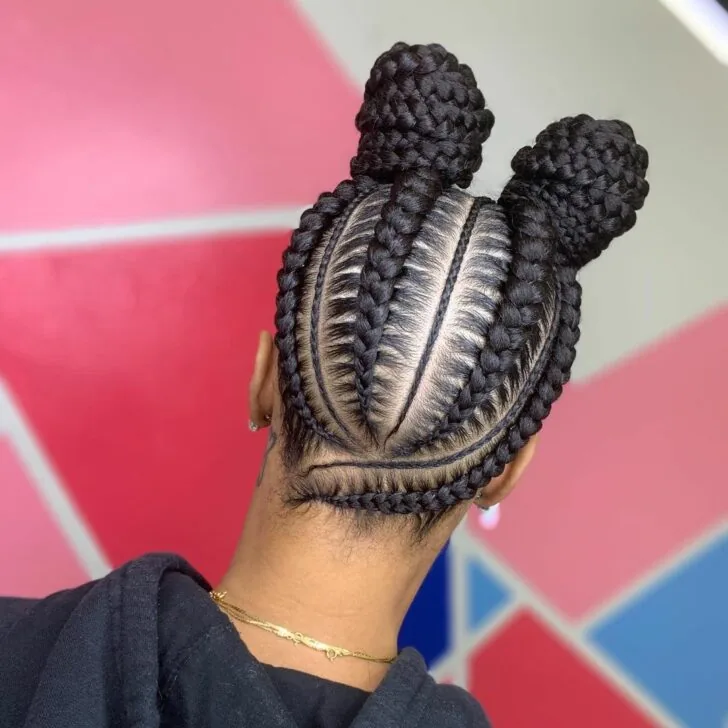
Cornrows into space buns are pure fun: the braids are divided into two sections and coiled into two buns, one on each side of the head, for a playful, youthful look that is made for festivals, holidays and days when you want your hair to make you smile. The style is surprisingly versatile — neat, symmetrical buns for a polished version, or looser, messier buns for a relaxed festival feel — and it keeps the hair completely out of the way.
Install takes two to three hours and typically costs $70–$130. Maintenance is easy: smooth the edges, tie the buns down at night, and moisturise the scalp. The style lasts two to three weeks, though the buns may need re-coiling as the braids loosen. Space buns put the braids under even tension on both sides, which is gentler on the hairline than a single tight bun — just keep the buns light and do not pull them too tight.
31. Cornrows With a Top Knot
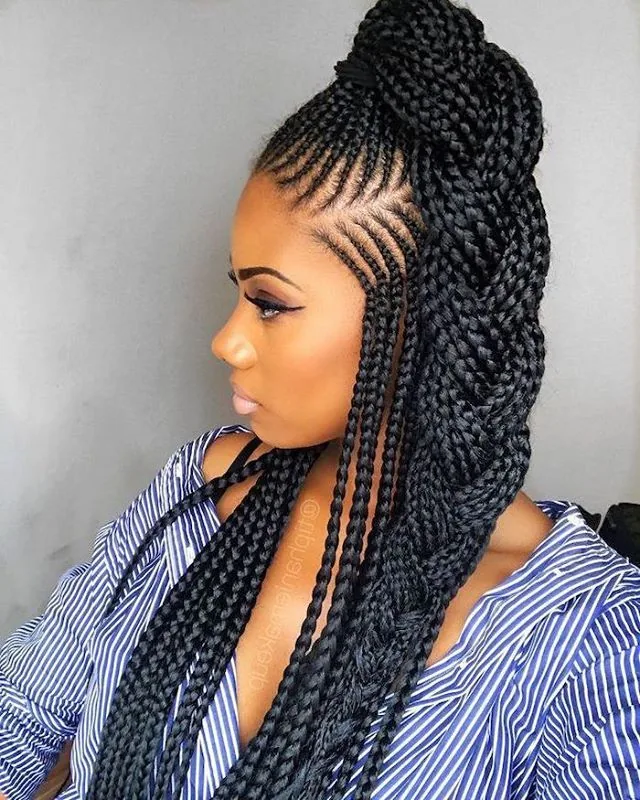
The cornrow top knot gathers every braid into a single knot on the crown, high and neat, for a look that is both striking and practical. The high placement lifts the face, shows off the neck and shoulders, and keeps the hair completely out of the way on hot days or during workouts. A top knot is the cornrow style for women who like their hair up, out of the way and looking deliberate — no stray pieces, no fuss, just a clean, sculptural finish.
Install takes two to three hours and typically costs $70–$130. Maintenance is about tension: a top knot pulls upward, so vary its position and wear the braids down on some days to rest your hairline. A silk scrunchie and a bonnet at night keep the knot smooth. The style lasts two to four weeks. If the knot feels heavy or tight, lower it slightly — a slightly lower knot is still a top knot, and your edges will thank you.
32. Fulani-Inspired Cornrows
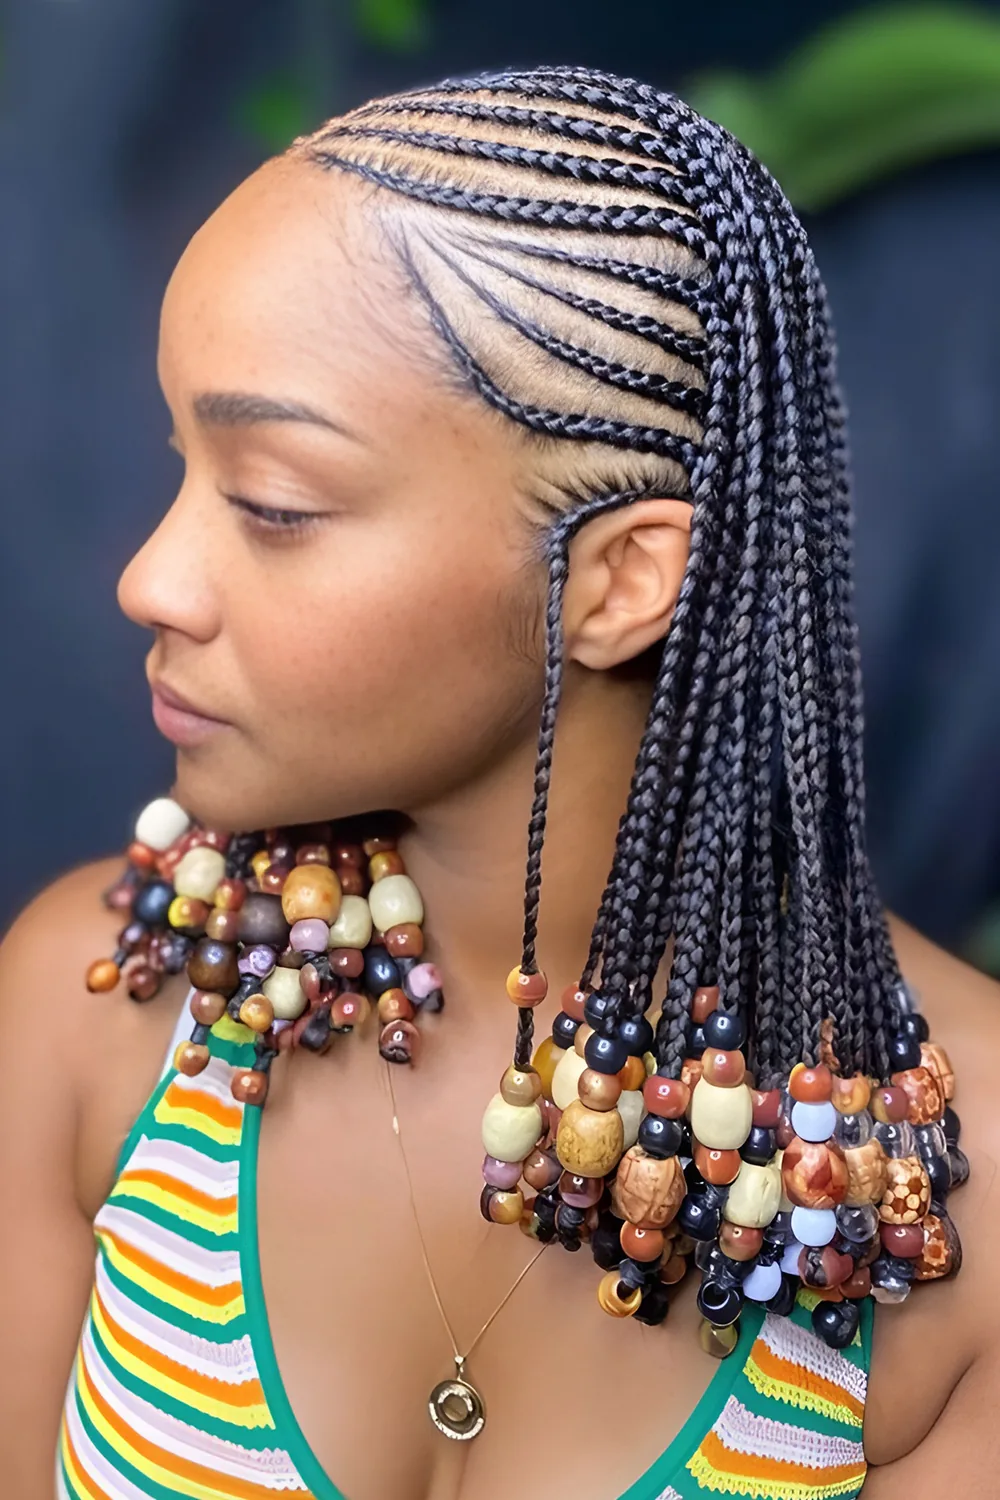
Fulani-inspired cornrows draw on the braiding traditions of the Fulani people of West Africa: a central braid running down the middle of the head, side braids sweeping toward the face, and beads, cowrie shells and cuffs as decoration. The style is rich with history and instantly recognisable — the central braid and the face-framing side pieces create a beautiful, symmetrical frame. Wearing it is a way of carrying a centuries-old tradition into a modern look.
Install takes two to four hours and typically costs $90–$170, depending on the beads and decoration. Maintenance follows the usual cornrow routine, with care for the beads — keep them light, and remove any that pull. The style lasts two to three weeks. When you wear Fulani-inspired cornrows, the details matter: even braid sizes, a clean centre braid and beads that mean something to you turn a beautiful style into a personal one.
33. Cornrows With a Fringe (Bangs)
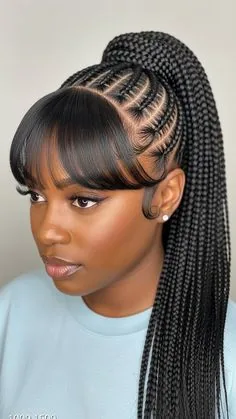
Cornrows with a fringe bring braiding right up to the forehead: short braids or a braided bang across the front, with the rest of the hair in longer cornrows behind. The fringe softens the face, suits high foreheads and long faces beautifully, and gives the style a youthful, fashion-forward edge. It is a clever design for women who want the neatness of cornrows with the softness of a fringe — two looks in one install.
Install takes two to three hours and typically costs $70–$140. Maintenance means keeping the short fringe braids neat — they loosen fastest, since they are the shortest braids in the set — and smoothing the edges each morning. The style lasts two to three weeks, with the fringe needing the most attention. A braided fringe is a bold choice, so ask your braider to show you the placement before they start, and enjoy a style that frames your face like nothing else.
34. Cornrows for the Gym and Active Days
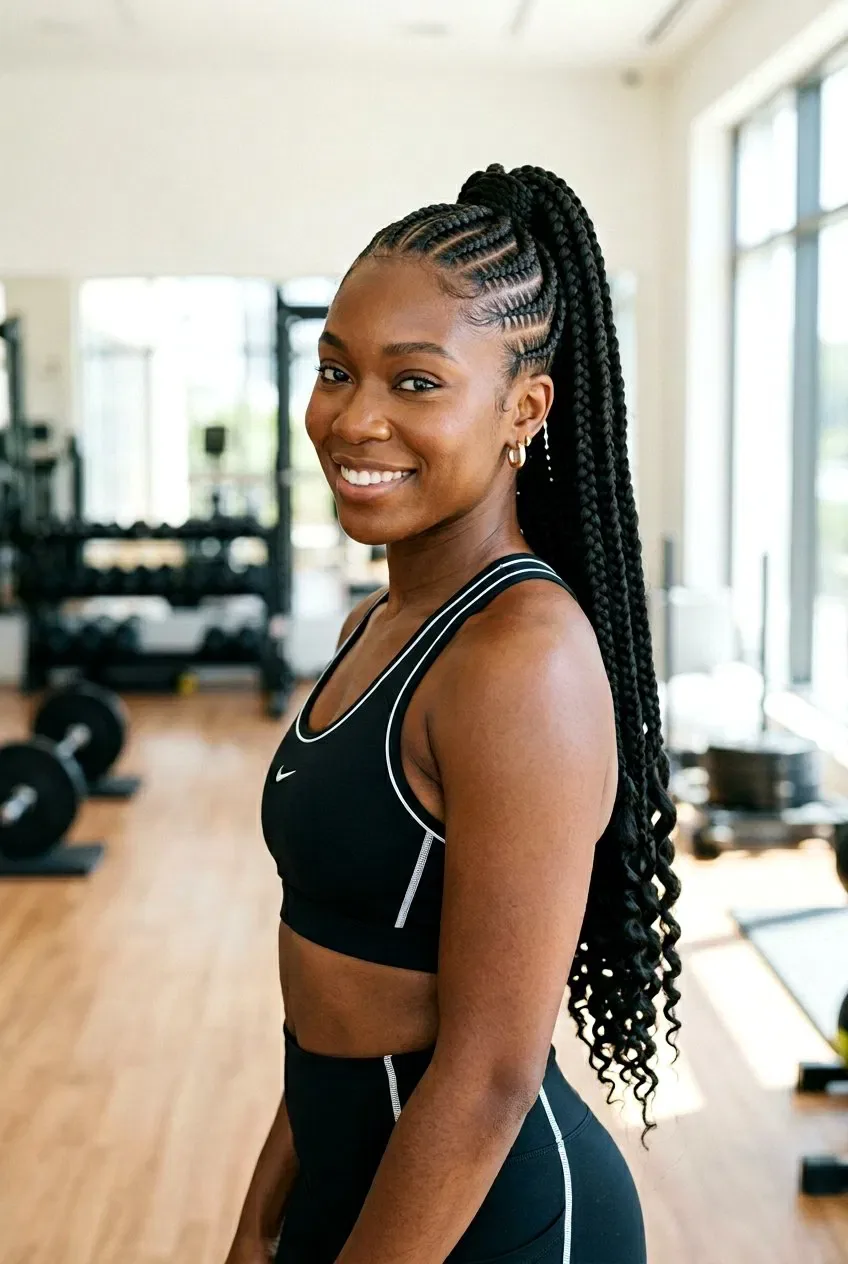
Cornrows are the gym’s best friend: braided flat against the scalp, they do not bounce into your face, they do not come loose mid-workout, and they survive sweat, swimming and long runs far better than loose hair. A simple straight-back or four-braid set is all you need — the braids stay put through every session, and a quick rinse and dry afterwards is all the maintenance they ask. For women who train most days, cornrows are the lowest-effort way to keep hair neat and protected.
Install takes one to two hours and typically costs $40–$90. Maintenance is about sweat: rinse the scalp with water after heavy sessions, use a light scalp cleanser once a week, and always dry the braids fully — damp braids left under a cap can smell and irritate the scalp. The style lasts two to three weeks with heavy training. Keep the braids a little looser than usual if you train hard, and your scalp will stay comfortable through every workout.
35. Cornrows for Weddings and Formal Events
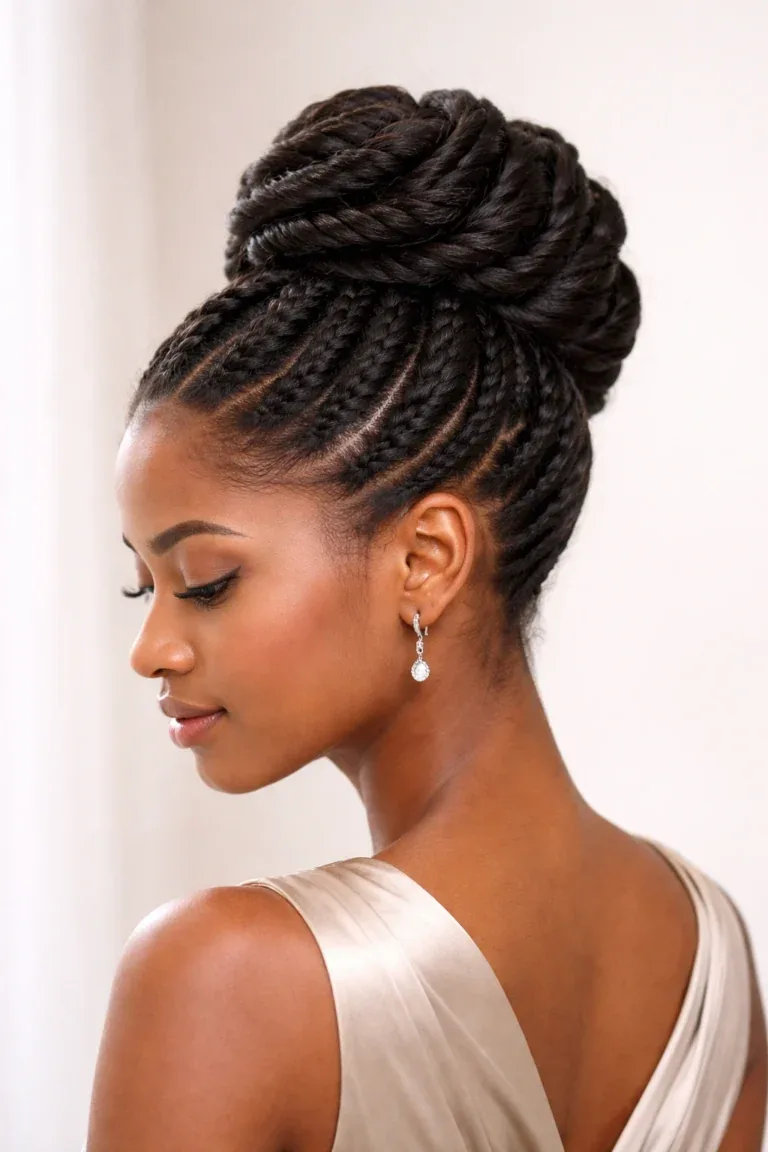
Cornrows for a wedding or a formal event are cornrows at their most elegant: the braids are designed as an updo — swept into a low bun, a crown or a sculpted side sweep — and finished with gold cuffs, pearls or fresh flowers. The style photographs beautifully, holds its shape through a whole day of dancing, and never needs a mid-event fix. Brides, bridesmaids and wedding guests all choose cornrow updos for the same reason: they look stunning and they stay stunning.
Install takes two to four hours and typically costs $100–$200 for an event design, including accessories. Maintenance on the day is almost nothing — a little edge control in the morning and the style is done. The style lasts two to three weeks, so book the install two or three days before the event for the freshest look. Tell your braider about the event, your dress and your accessories, so the design is built around the whole outfit, not just the hair.
36. Cornrows With a Scarf or Headwrap
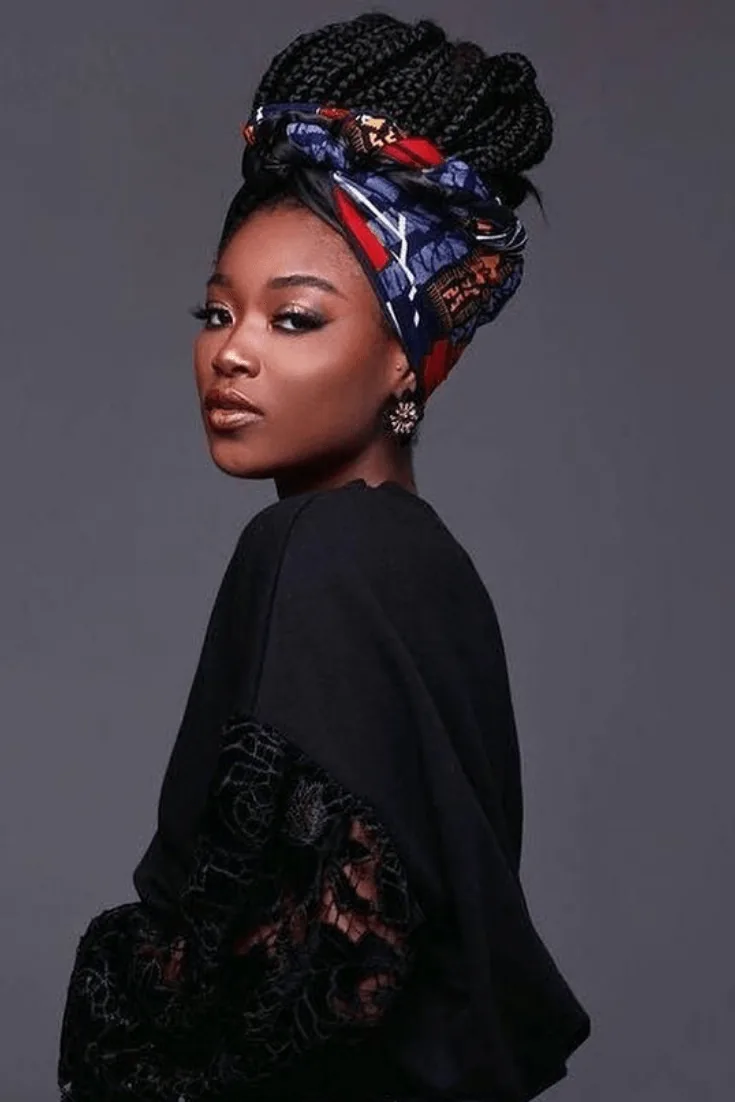
Cornrows with a scarf or headwrap are two styles in one: the neat braids underneath, and a beautiful wrap on top that changes the look completely. A silk scarf tied at the front, a bold African-print headwrap, or a simple satin wrap for sleeping — each one gives the same cornrows a different mood, and each one protects the braids from friction, dust and sun. Headwraps are also the perfect cover for the last few days of a set, when the roots are growing out and the style needs a little help.
Install takes one to three hours and typically costs $50–$130 for the braids, plus the cost of the wrap. Maintenance is the easiest on this list: the wrap does most of the protecting, so the braids stay neat longer — often three to four weeks. Choose a silk or satin lining for wraps you wear to sleep, and a cotton or printed wrap for daytime. A headwrap is not a way of hiding your cornrows; it is a way of styling them twice.
How long do cornrows last?
Cornrows usually last two to four weeks, depending on the size of the braids, how fast your hair grows, and how well you care for them. Small stitch cornrows can last three to four weeks, while jumbo or two-braid styles may only last one to two weeks. Take them out when the parts start to blur, the roots look fuzzy, or the braids feel loose — keeping them in longer risks tangling and breakage at the roots.
Do cornrows damage your hair?
Cornrows do not damage your hair when they are installed gently and removed carefully — in fact, as a protective style, they usually help hair grow by reducing daily manipulation. Damage happens when braids are installed too tight, kept in too long, or ripped out in a rush. If a braid hurts, if you see bumps along your hairline, or if you cannot move your eyebrows comfortably, the braids are too tight and should be loosened or removed.
How much do cornrows cost?
Cornrows typically cost $40–$90 for a simple set without extensions, $70–$150 for a medium set with extensions, and $100–$200 for detailed or event designs such as stitch cornrows or a wedding updo. Prices vary by city, braider experience and the hair used. A simple two-braid or four-braid set is the most affordable option, while small stitch braids and Fulani-inspired designs cost the most because they take the longest.
Can you wash your hair with cornrows in?
Yes, you can wash cornrows — and you should, about once a week. Use a diluted shampoo or a scalp cleanser applied along the parts with a nozzle bottle, massage gently with your fingertips, rinse carefully, and dry the braids fully afterwards. Do not pile the braids on top of your head while washing, and do not go to bed with damp braids, as trapped moisture can cause an odour and irritate your scalp.
Are cornrows a protective style?
Yes, cornrows are one of the classic protective styles: the hair is braided away, the ends are tucked in, and daily combing, brushing and heat styling are cut down to almost nothing for two to four weeks. That rest is what helps hair retain length. The protection only works if the braids are not too tight, the scalp is kept moisturised, and you give your hair a break of at least a week between installs.
How do I stop my cornrows from itching?
Itching is usually caused by a dry scalp or product build-up. Apply a light scalp oil or a scalp spray along the parts every two or three days, and wash gently once a week with a diluted shampoo. Do not scratch at the braids with your nails or a comb — pat the scalp instead, or use the back of a rattail comb to soothe it. If the itching is severe or comes with bumps or flaking, take the braids out and let your scalp recover.
Can I do cornrows on short hair?
Yes, you need roughly two to three inches of hair for a braider to grip and braid cornrows on short hair. Short cornrows look neat and sculpted, and they are a great style while you grow your hair out. If you want length, feed-in extensions can be added to short hair — just tell your braider how much length you want, and keep the extensions light so they do not pull at your edges.
What is the difference between feed-in and regular cornrows?
In regular cornrows, extensions are added at the front of the braid, which creates a small knot at the hairline. In feed-in cornrows, small pieces of extension hair are gradually fed into the braid as it travels back, so the braid starts thin and thickens naturally with no knot. Feed-ins look more natural, lie flatter and are gentler on your edges, but they take longer and cost a little more.
How do I take cornrows out without breaking my hair?
Work braid by braid: cut the extension hair well below your natural hair, unravel each braid from the end upward with your fingers, and mist the section with water and conditioner as you go. Detangle each section with your fingers before moving on, then wash with a moisturising shampoo and deep-condition for at least twenty minutes. Never rip braids out or pull through tangles with a fine comb — slow, damp removal is what prevents breakage.
Can I sleep with cornrows?
Yes, and you should protect them while you sleep. Wear a silk or satin bonnet, or sleep on a satin pillowcase, to stop the braids frizzing and the edges rubbing. If your cornrows are long, loosely braid them together or gather them in a low, loose ponytail before putting the bonnet on. Never sleep with wet cornrows, and tie a silk scarf across the hairline if you want the edges to stay smooth overnight.
Conclusion
Cornrows have lasted for thousands of years for a simple reason: they do more than any other single style. They protect your hair, they keep it neat for weeks, they cost less than most salon styles, and they can be anything from the quietest straight-backs to the boldest mohawk — all while looking like they were made for you. Whether you choose classic straight-backs for the gym, goddess cornrows for a holiday, or a beaded lemonade set for a special occasion, the same rules make the style work: a gentle install, a moisturised scalp, a bonnet at night, and removal that is slow and kind.
Start with a style that fits your life, not just your mood — a quick four-braid set if you are new to cornrows, a feed-in set if you want the most natural finish, a bun or a low ponytail if you need your hair out of the way. Bring photos to your braider, say what you do not want as well as what you do, and speak up the moment a braid feels too tight. Then go out and enjoy the easiest three weeks your hair will ever have: no morning battle, no heat, no fuss — just neat, beautiful braids that hold their shape from the first day to the last.