From Boardroom to Ballroom: Sleek Bun Hairstyles for Women That Stay Polished All Day
A sleek bun is the hairstyle equivalent of a perfectly tailored jacket: it makes everything else you are wearing look more deliberate. When the hair is brushed smooth, the part is clean and the bun sits exactly where you placed it, the whole look reads as calm, confident and put together — whether you are heading into a meeting, down the aisle or out for dinner. There is no frizz to fight, no strands falling in your face, and no wondering whether your hair still looks the way it did when you left the house. That is the quiet power of a sleek bun: it does its job and then it stays out of the way.
This guide gathers 41 sleek bun hairstyles for women, from the classic low bun at the nape to the high ballerina bun, the slicked-back centre-part bun, the twisted and braided bun, the chignon and the French twist bun — plus versions for short, fine, thick, curly and straight hair, and polished looks for work, weddings and formal evenings. Eight guides cover what makes a bun truly sleek, how placement changes the whole look, the tools and products that do the smoothing, how the style changes with length and texture, and the mistakes that turn sleek into stiff or flat. One honest note first: a sleek bun is not a wash-and-go style. It takes a brush, a little product and five to fifteen minutes — but once it is in, it holds for hours, and that trade is worth it.
What Makes a Bun Sleek — Smoothness, Shine and a Clean Line
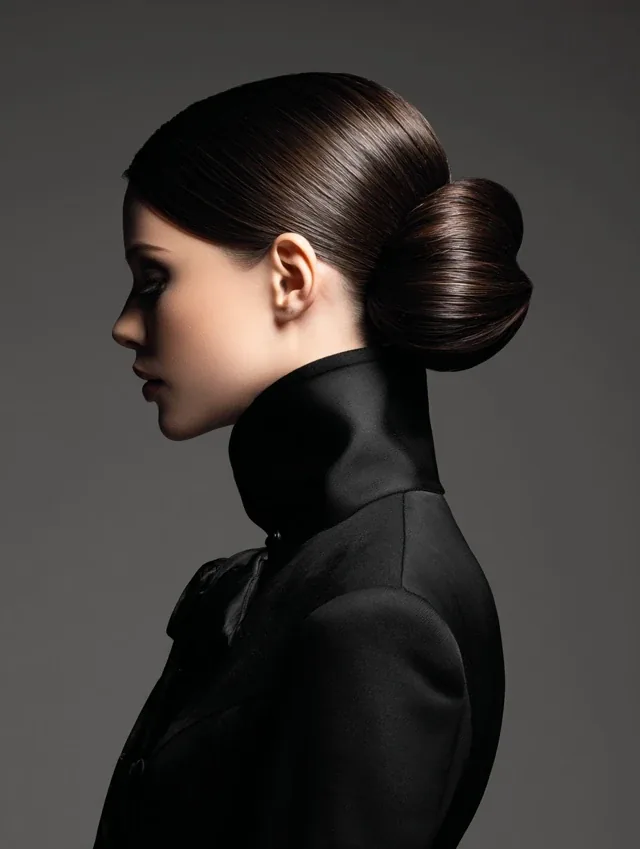
A sleek bun is defined by three things, and all three have to be present: smoothness, shine and a clean line. Smoothness means no flyaways, no bumps and no frizz — the hair lies flat from the hairline to the bun, with every strand going in the same direction. Shine comes from the hair being brushed flat and sealed with a little product, so light bounces off the surface instead of scattering through frizz. And the clean line is the part and the outline: a straight centre or side part, a smooth hairline, and a bun with a neat, even shape. If any one of the three is missing, the bun reads as tidy rather than sleek.
The good news is that sleekness is a technique, not a hair type. Straight hair gets there fastest, but wavy and curly hair can be just as sleek with the right prep — a blow-dry with a brush, or a smoothing cream worked through damp hair before it is gathered. The products matter less than the order: brush the hair smooth first, then apply a light gel or pomade to the surface, then brush again to distribute it. Too much product makes the hair look wet and heavy; too little lets the flyaways spring back within the hour. The bun that stays sleek all day is the one that was brushed twice and sealed once, not the one drowned in gel.
Bun Placement — Low, High and Top Knot, and What Each One Says
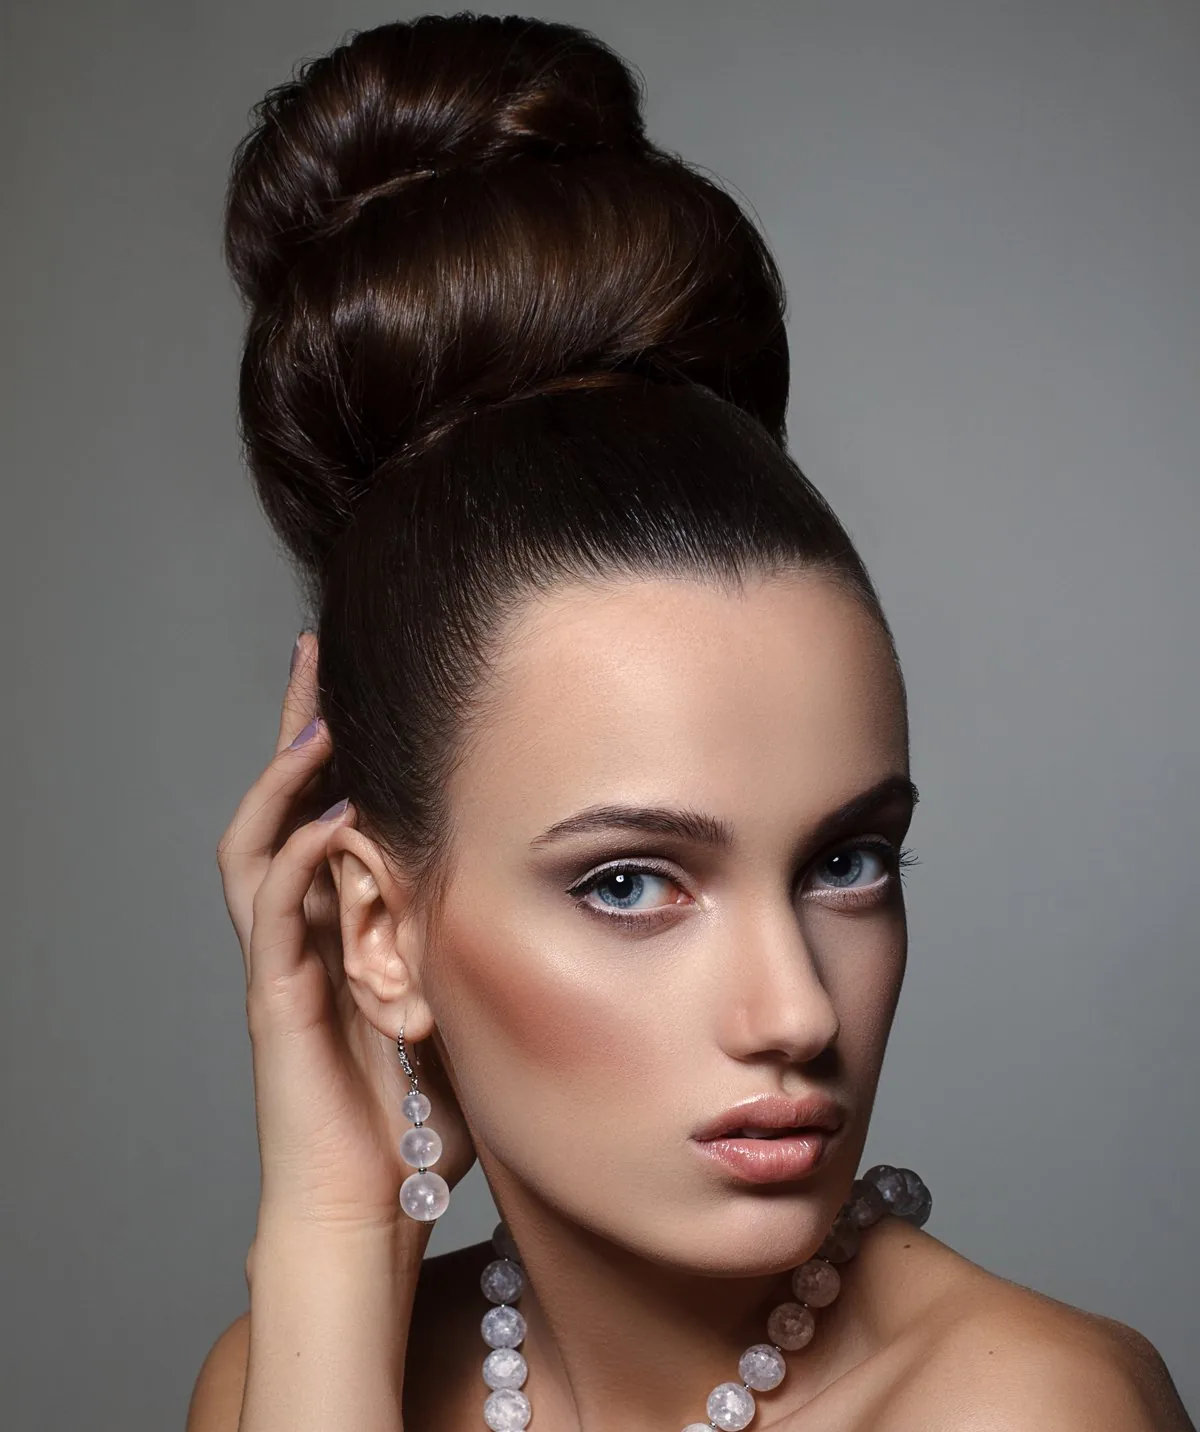
Where the bun sits changes the whole feeling of the style. A low bun at the nape is the calmest and most classic placement: it lengthens the neck, suits a collar or a high neckline, and reads as elegant and understated, which is why it is the default for weddings and formal events. A high bun at the crown is bolder and more dramatic: it lifts the face, adds height, and pairs beautifully with a bare neckline or a statement earring. A top knot, sitting right on top of the head, is the most modern of the three — sharp, graphic and a little bit fashion-forward.
Placement also changes what the bun does to your face. A low bun is the most forgiving, because it does not pull the features upward and it suits every face shape. A high bun lengthens a round face and suits oval and heart-shaped faces best, but it can make a long face look longer, so women with long faces usually do better with a low or mid-height bun. The practical rule is simple: low for formal and for long faces, high for drama and for round faces, top knot for a modern edge. Try all three in the mirror before a big event — the bun that looks right on your face is the one to wear, whatever the occasion.
Tools and Products for a Sleek Bun — The Kit That Does the Work
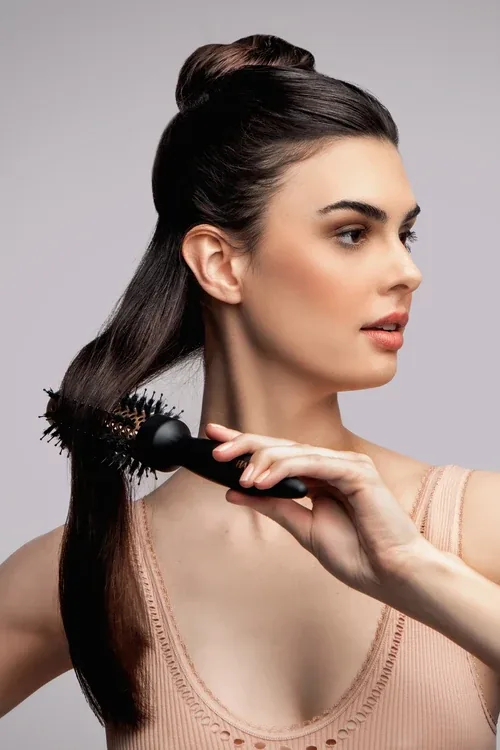
A sleek bun needs surprisingly few tools, but the right ones make the difference between smooth and nearly smooth. The essentials are a boar-bristle brush or a fine-tooth comb for smoothing, a strong hair tie that matches your hair colour, bobby pins in your hair colour, and a light-hold gel, pomade or edge control. A toothbrush — a clean one, kept for hair — is the secret weapon for smoothing the hairline and taming baby hairs without leaving a hard, shiny patch. A silk or satin scrunchie is worth having too, because it holds the bun without denting the hair the way a tight elastic does.
Product choice matters more than product quantity. A water-based gel gives a clean, flexible hold and washes out easily, which makes it the best everyday choice. A pomade gives more shine and a firmer finish, but it can look greasy if you use too much, so warm a pea-sized amount between your palms first. Edge control is for the hairline only — a tiny amount, smoothed with a toothbrush, keeps the edges neat for hours. And a light mist of hairspray, held at arm’s length, is the final seal: it locks the surface without making the bun stiff. Buy the brush first, the gel second, and the pins in bulk — you will always lose one.
Sleek Buns by Hair Length and Texture
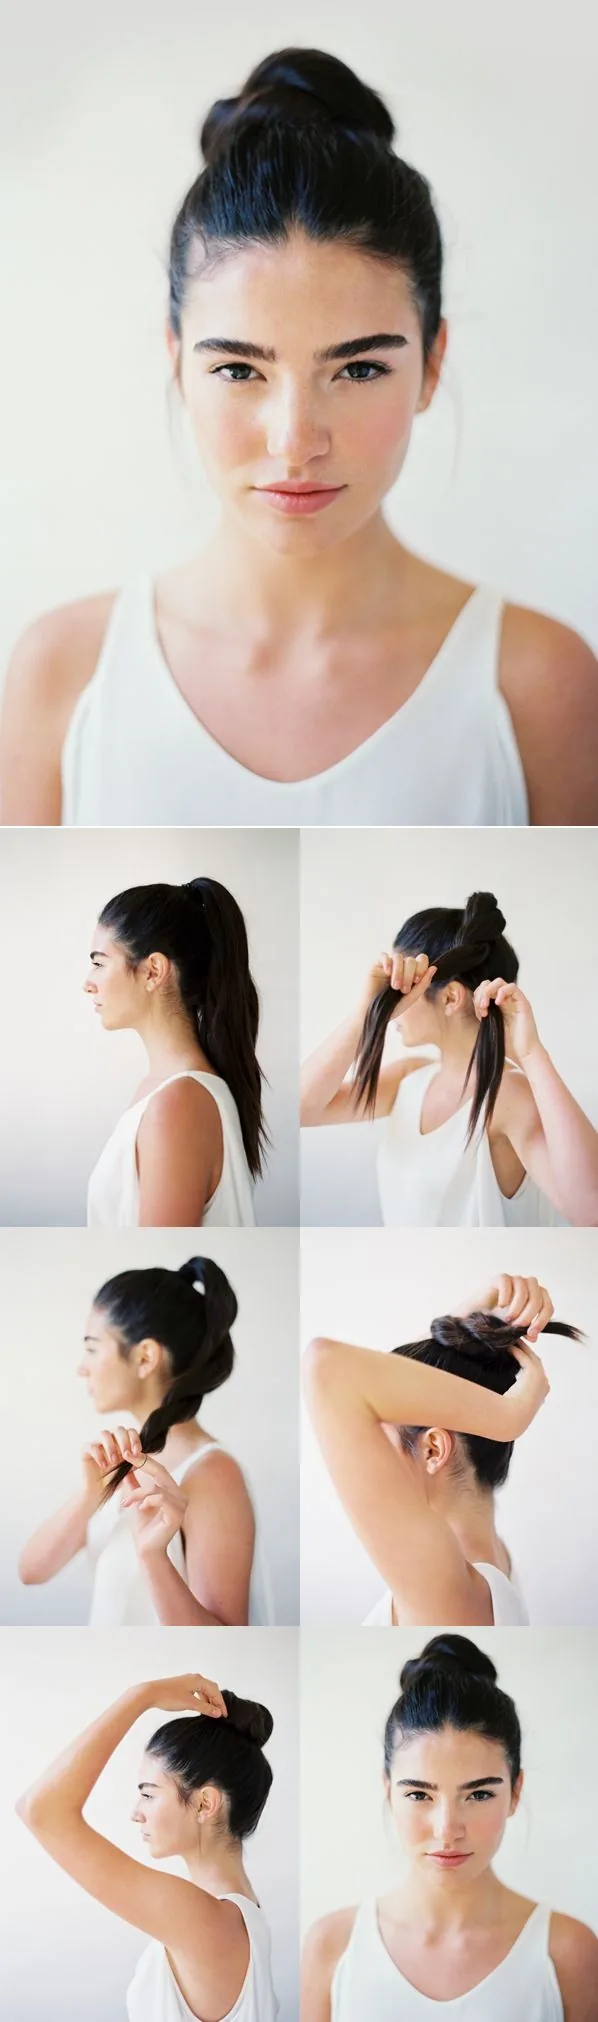
A sleek bun works at almost every length, but the technique changes with it. Short hair — chin length or a bob — needs a little help: gather it into a small bun and pin the loose ends underneath, or use a small donut form to give the bun volume it would not have on its own. Medium hair is the easiest length for a sleek bun, because there is enough hair to form a full bun and not so much that it pulls heavy. Long hair makes the fullest buns, but it also needs more pins and a stronger tie, because the weight of the bun can drag it down over the course of a day.
Texture changes the prep, not the result. Straight hair is the fastest to smooth — brush, gather, pin, done. Wavy hair needs a smoothing cream and a quick brush-through while damp, or a fast blow-dry, to stop the waves from pushing flyaways out at the hairline. Curly hair needs the most prep — a blow-dry with a brush, or a thorough smoothing with gel — but it also gives the most impressive result, because a sleek bun on curly hair shows off the contrast between the smooth surface and the bun itself. Fine hair should use light products only, because heavy gel flattens it; thick hair can take a stronger gel and more pins. Whatever your hair, the bun is possible — the prep is just different.
Sleek Buns for Work, Weddings and Formal Events
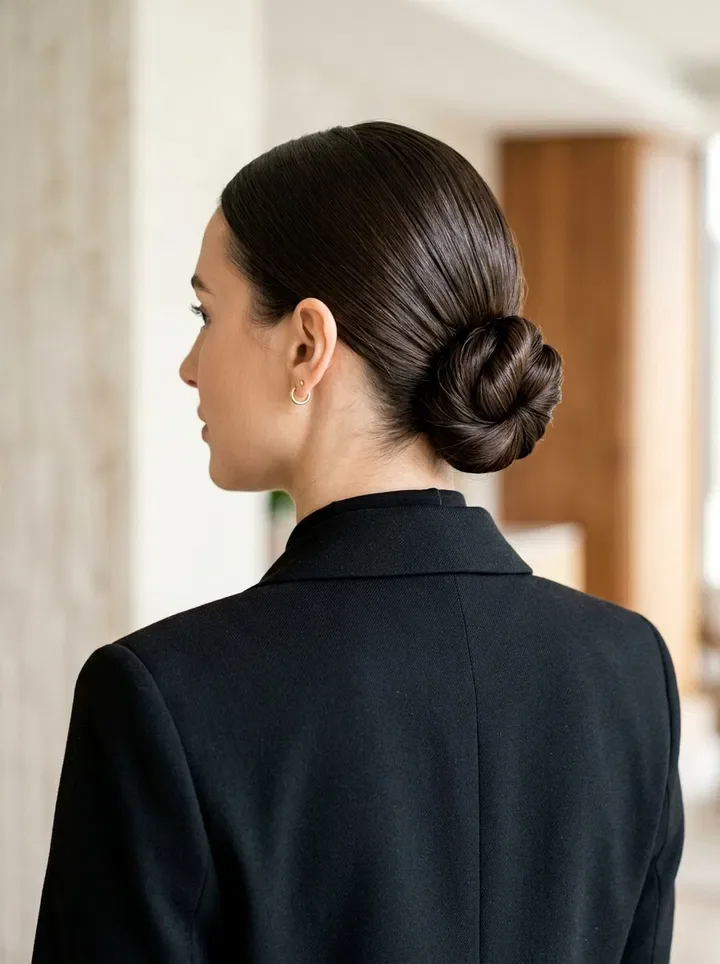
A sleek bun is the most professional updo there is, because it does two things a workplace values: it keeps the hair completely out of the face, and it looks deliberate. The office version is a low or mid-height bun, with a clean part, no loose strands, and no statement accessories — just the bun, smooth and neat, so the focus stays on you rather than on your hair. It suits a suit, a blouse, a video call and a long day at a desk, and it survives a commute, a meeting and a lunch without needing a touch-up. If your workplace is conservative, the low sleek bun is the safest updo you can wear.
For a wedding, the sleek bun becomes a frame for the face and a base for accessories: a low chignon with a veil, a high ballerina bun with a tiara or a hair vine, or a slicked-back bun with pearl pins for a modern bride. The rules change a little here — the bun can be bigger, the accessories can be bolder, and a few face-framing strands are welcome, because a wedding bun is allowed to be romantic as well as sleek. For a formal evening, the same logic applies: height and shine do the work, and one elegant accessory finishes the look. Whatever the occasion, do a trial run and wear the bun for a full day first, because a bun that has been tested will hold its line far better than one tried for the first time on the morning of the event.
How to Make a Sleek Bun Last All Day — Humidity, Gym and Long Hours
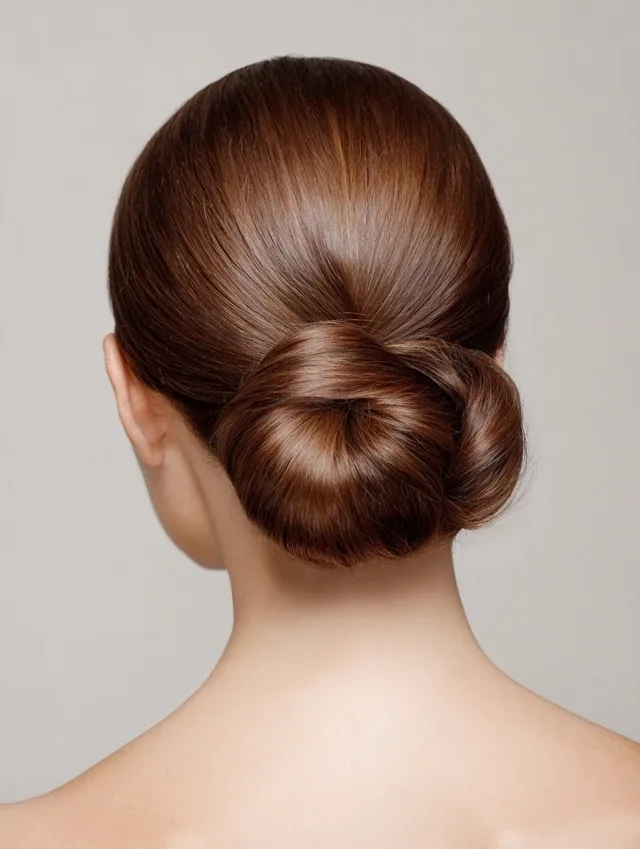
The difference between a bun that looks sleek at 9 a.m. and one that still looks sleek at 9 p.m. is the prep, not the hairspray. Start with hair that is clean but not freshly washed — second-day hair holds a sleek bun better than squeaky-clean hair, because it has a little natural grip. Brush the hair smooth while it is slightly damp, apply gel to the surface, brush again, and then secure the bun with a strong tie before pinning it. The pins do the real holding: push each bobby pin in against the direction of the bun, so it grips the hair underneath, and use more pins than you think you need — four to six for a low bun, six to eight for a high one.
Humidity is the enemy, and the defence is sealing the surface. A light pomade or a smoothing serum on the outer layer creates a barrier that keeps moisture out and flyaways down, and a final mist of hairspray adds a second layer. For the gym, the trick is the opposite: use a sweat-wicking headband while you work out, then smooth the hairline again afterwards with a little edge control — the bun itself will usually survive, because it is pinned in place. And if the bun starts to sag by the afternoon, the fix is quick: take out the pins, re-smooth the surface with a brush, and re-pin. Two minutes, and the bun is new again.
Preparing Your Hair for a Sleek Bun — Wash, Dry and Smooth
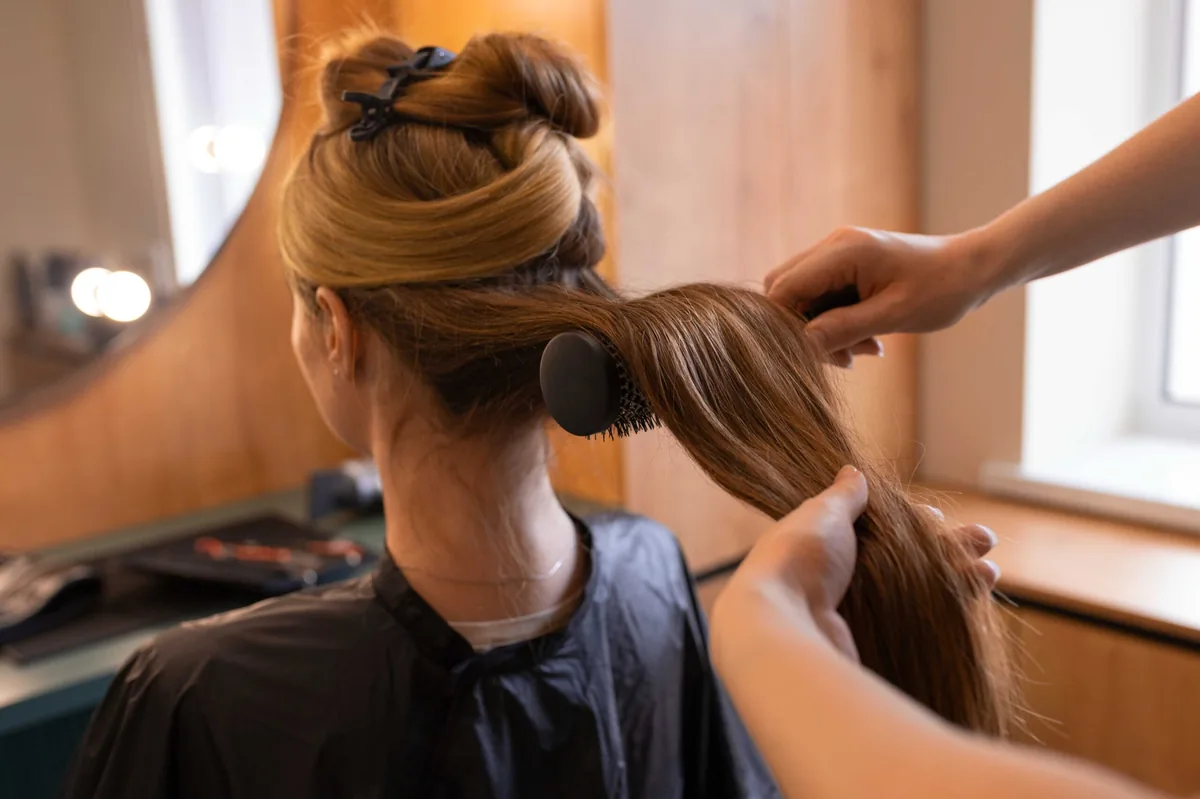
A sleek bun starts before the bun does. Wash the hair with a smoothing shampoo and conditioner, and detangle it gently while it is still damp — a wide-tooth comb, working from the ends upward, so you do not snap the strands. If your hair is wavy or curly, blow-dry it with a round brush or a paddle brush, pulling the hair smooth as you dry, because the bun will only be as smooth as the hair going into it. Straight hair can be air-dried, but a quick pass with a flat iron on the front sections makes the hairline noticeably sleeker, and it takes less than five minutes.
The second part of the prep is product, applied in the right order and in the right amount. Work a smoothing cream or a leave-in through damp hair first, then blow-dry, then apply gel or pomade to the surface once the hair is gathered — never before, because product applied to loose hair just makes it sticky. Brush the hair into the bun’s position before you tie it, checking the surface in the mirror from every angle, and smooth any bump with the flat of the brush rather than with your fingers, which leave dents. Prep is the unglamorous half of a sleek bun, and it is the half that decides whether the bun looks expensive or merely tidy.
Common Sleek Bun Mistakes and How to Fix Them
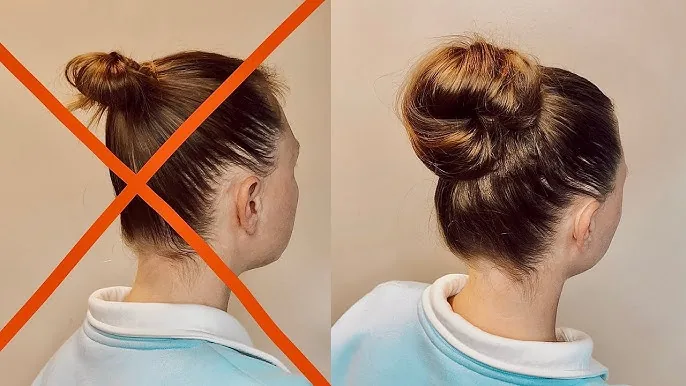
The most common sleek bun mistake is too much product. Gel piled on thick makes the hair look wet, heavy and crunchy, and it flakes by the afternoon — which is the opposite of sleek. The fix is to use less than you think you need: a pea-sized amount of gel or pomade, warmed between your palms and smoothed over the surface, then brushed through. If the hair already looks overloaded, the only real fix is to wash it and start again, because adding more product on top only makes it worse. Less product, brushed twice, beats more product every time.
The other mistakes are about the shape and the hold. A bun tied too tightly pulls at the hairline, causes headaches and can break the hair at the edges — gather the hair firmly, not fiercely, and never pull it back so hard that the skin at your temples pulls. A bun with a bump on top is usually a brushing problem: brush the hair into position before you tie it, and smooth the surface with the flat of the brush, not your fingers. Pins that show are a placement problem: push each pin in against the bun and tuck the ends underneath, choosing pins that match your hair colour. And a bun that sags by lunchtime needs more pins, not more gel — pins hold, gel only smooths.
1. The Classic Low Sleek Bun
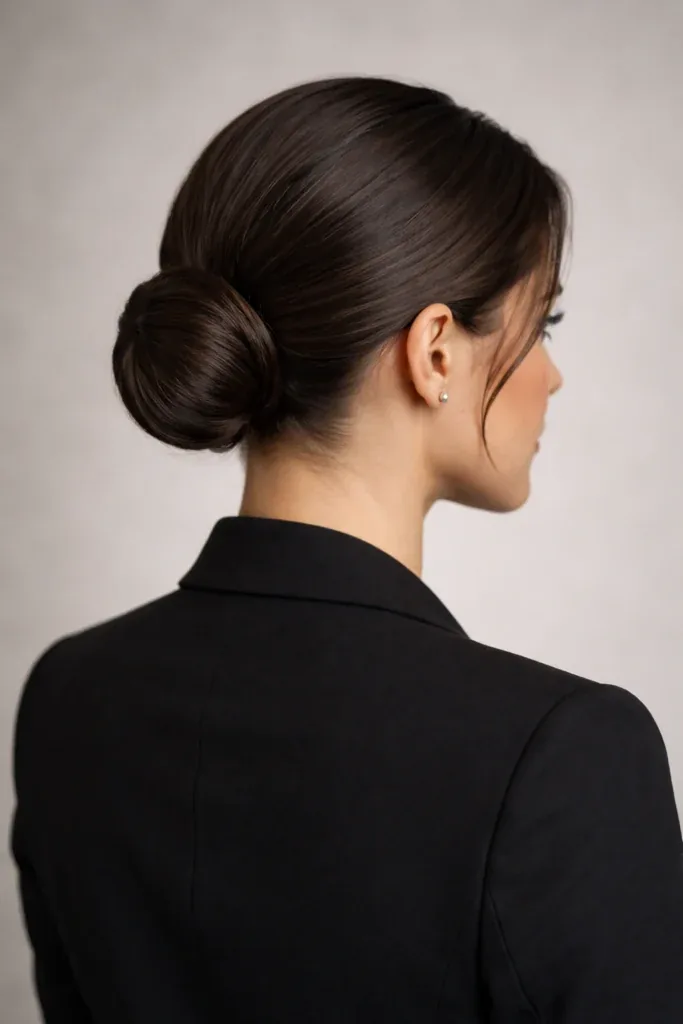
The classic low sleek bun is the bun every other bun is measured against: hair brushed smooth, gathered at the nape of the neck, and coiled into a neat, round bun that sits low and calm. There is nothing fussy about it — no part to fuss over, no accessories, no loose strands — just smooth hair and a clean silhouette. It lengthens the neck, shows off the jawline, and suits a collar, a high neckline or a bare shoulder equally well. It is the bun for a wedding, a job interview, a formal dinner or any day when you want to look like you have everything under control.
Best for: every face shape, and especially long and oval faces, because the low placement balances the length of the face. How to style it: brush the hair back smoothly, gather it at the nape, twist it into a coil and pin it in place, smoothing the surface with a little gel as you go. Time and cost: five to ten minutes, no salon visit needed, just a brush, a tie and a few bobby pins. Quick verdict: if you only learn one sleek bun, learn this one — it is the most versatile updo in this guide, and it never looks wrong.
2. The High Ballerina Bun
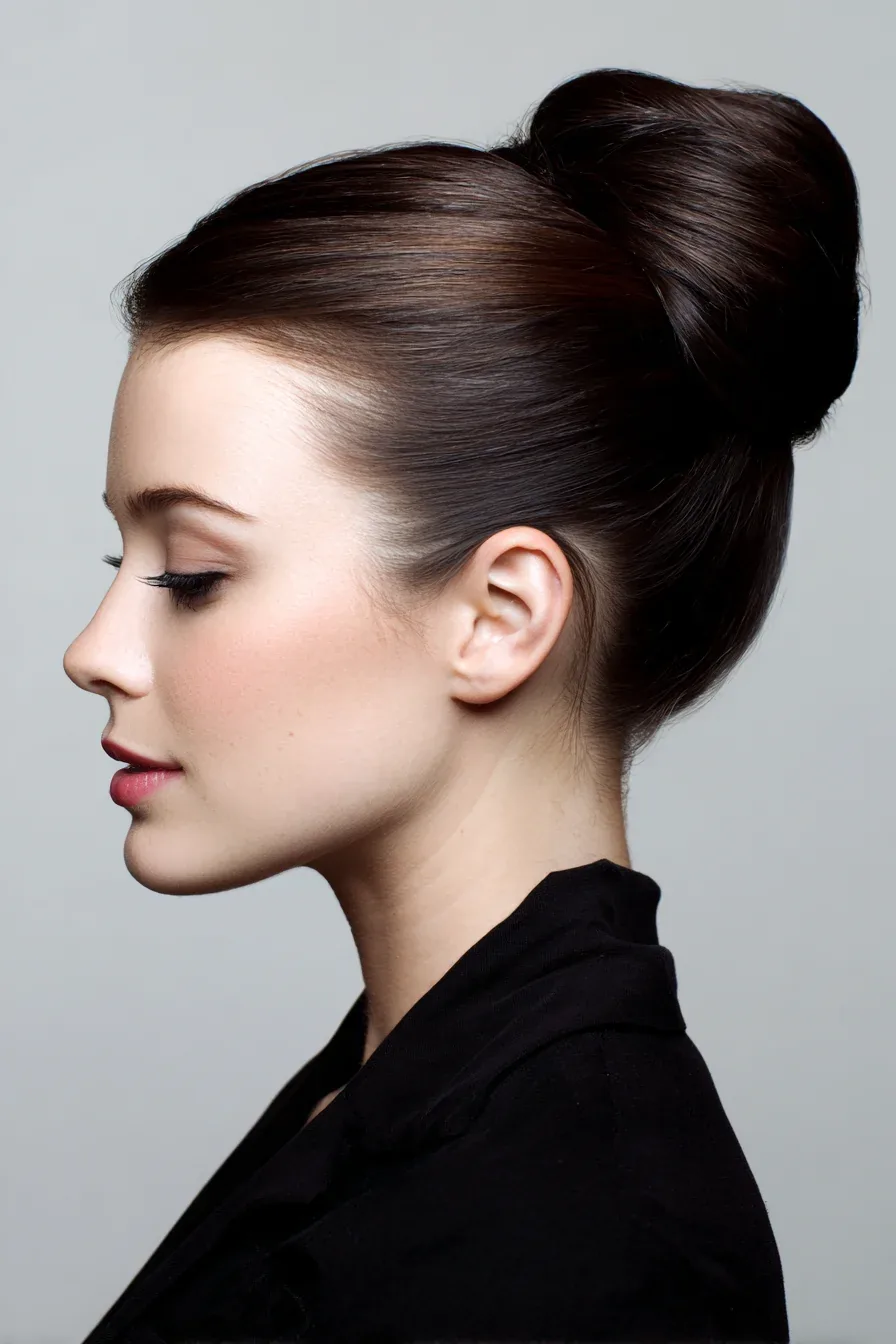
The high ballerina bun is the sleek bun at its most dramatic: hair pulled up to the crown and coiled into a tall, round bun that sits high on the head like a dancer’s. It lifts the whole face, lengthens the neck, and gives the silhouette a clean, vertical line that photographs beautifully. It is the bun for a ballet, a black-tie event, a photoshoot or any evening when you want your hair to be a statement rather than a background detail. The ballerina bun looks best when it is perfectly round and perfectly smooth, so it rewards a little extra care with the brush.
Who should try it: women with oval, round and heart-shaped faces, because the height lengthens the face. What to ask your stylist for: a high bun with a clean centre part and a donut form if your hair is fine, so the bun looks full rather than small. Common mistake: placing the bun too far back, which makes it look like a top knot that slipped — it should sit at the crown, where the head starts to curve. Maintenance: a few extra pins and a mist of hairspray, because a high bun has further to fall if it loosens. It takes ten minutes, and it looks like an hour’s work.
3. The Slicked-Back Low Bun with a Centre Part
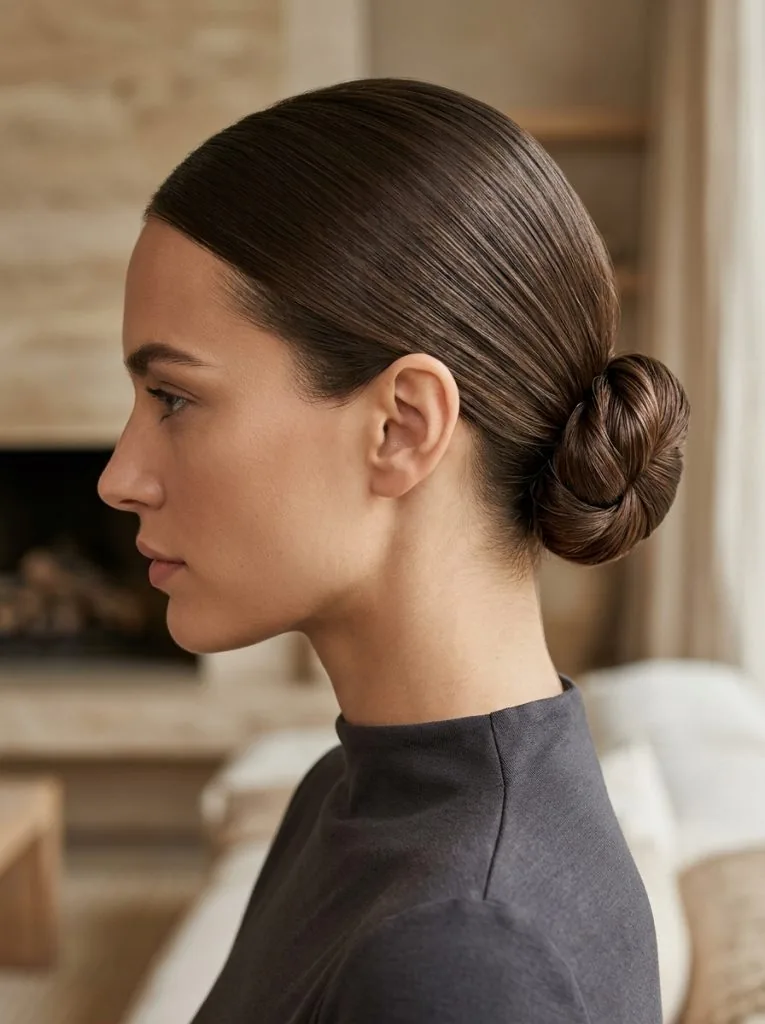
The slicked-back low bun with a centre part is the most fashion-forward version of the classic low bun: the hair is parted precisely down the middle, brushed flat on both sides, and gathered into a low bun at the nape. The centre part gives the style a symmetry and a sharpness that a partless bun does not have, and it frames the face in a way that suits strong features — a defined brow, a straight nose, a confident jaw. It is the bun you see on runways and red carpets, and it is also the bun that looks most at home in a boardroom.
Pros: razor-clean, modern, and it photographs beautifully from the front. Cons: the centre part is unforgiving — it shows every bump and every flyaway, so the brushing has to be exact. Best for: oval and heart-shaped faces, and for hair that is straight or blow-dried smooth. How to style it: part the hair with the tail of a comb while it is damp, brush each side flat, apply a little gel to the surface, and gather it low. Quick verdict: the sleekest bun in this guide, and the one that demands the most precision — worth it when you want to look sharp.
4. The Slicked-Back Low Bun with a Side Part
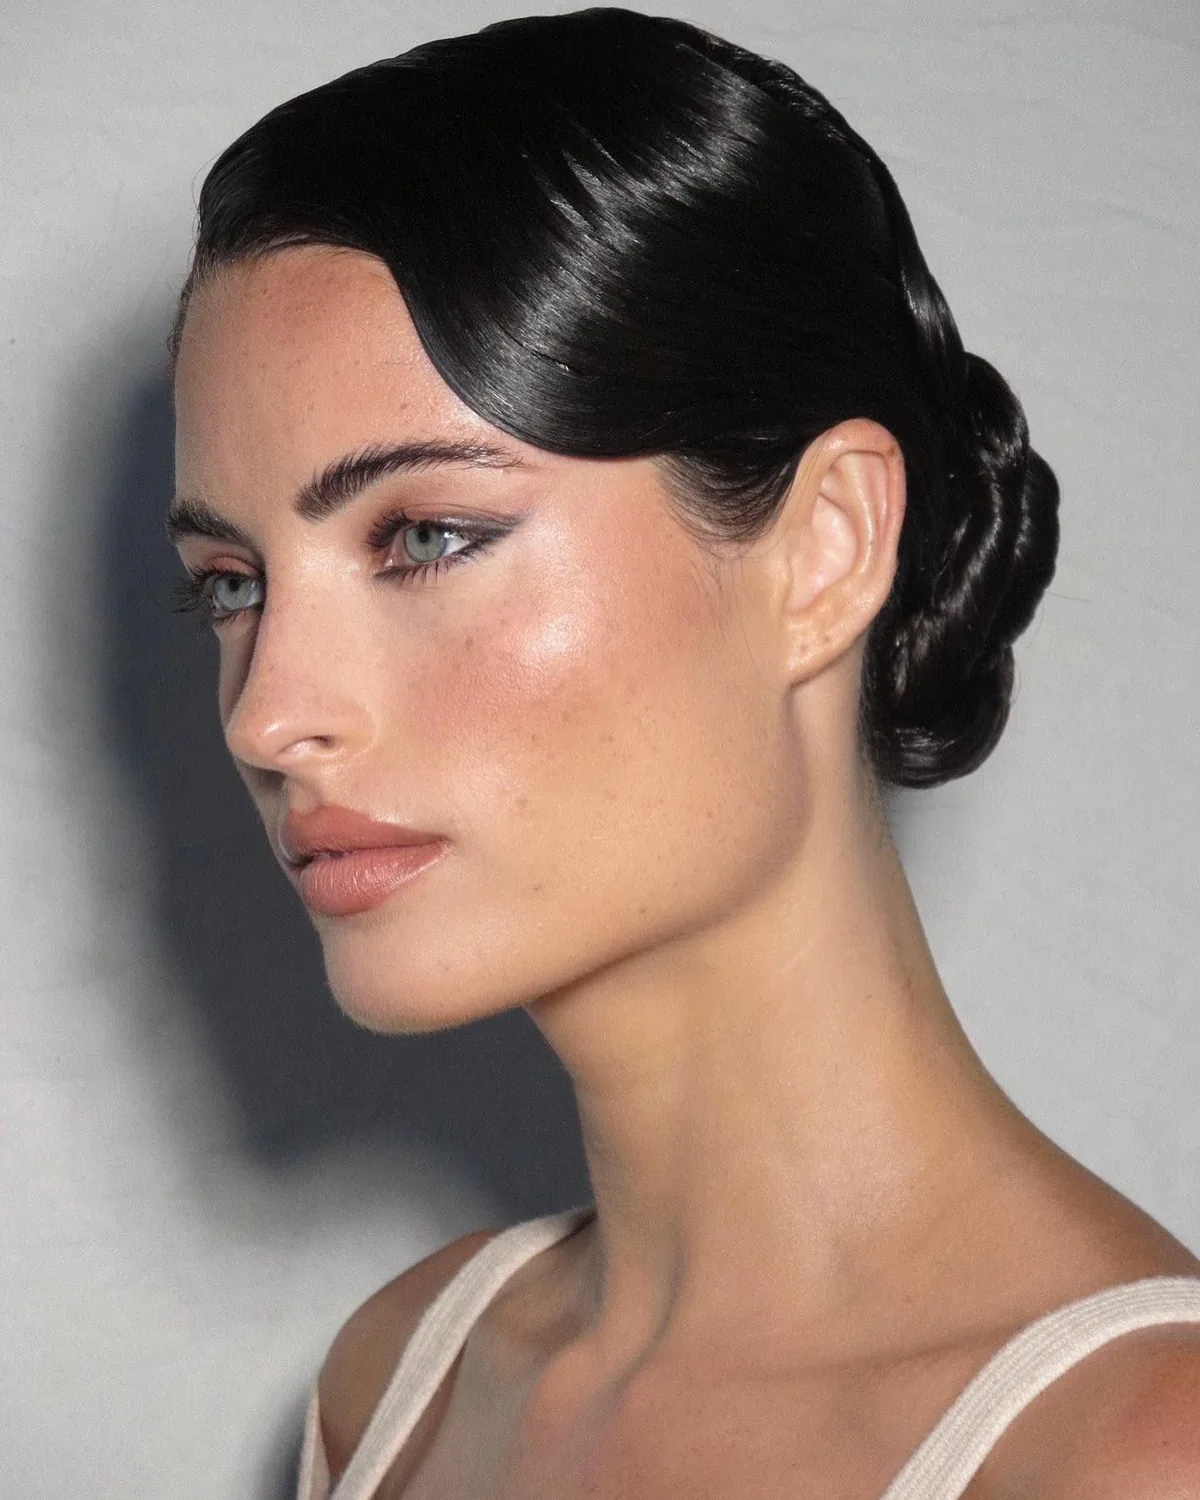
The slicked-back low bun with a side part is the centre-part bun’s softer sister: the hair is parted deeply on one side, swept across the forehead, and gathered into a low bun. The diagonal sweep gives the style a glamorous, almost old-Hollywood quality, and it adds volume on one side of the head, which flatters the face in a way a centre part does not. It is the bun for an evening dress, a dramatic neckline, or any occasion when you want the sleekness with a little more romance.
Best for: round and square faces, because the diagonal line breaks up the symmetry of the face and softens a strong jaw. Who should avoid it: nobody, really — but if your hair is very fine, the side sweep can look thin on the smaller side, so add a little volume there with a gentle backcomb. Time and cost: the same as the centre-part bun, about ten minutes, with no extra products. Maintenance: check the part in the mirror before you leave, because a side part can drift during the day — a bobby pin hidden behind the ear keeps it in place. A small change, a completely different mood.
5. The Low Bun with Face-Framing Strands
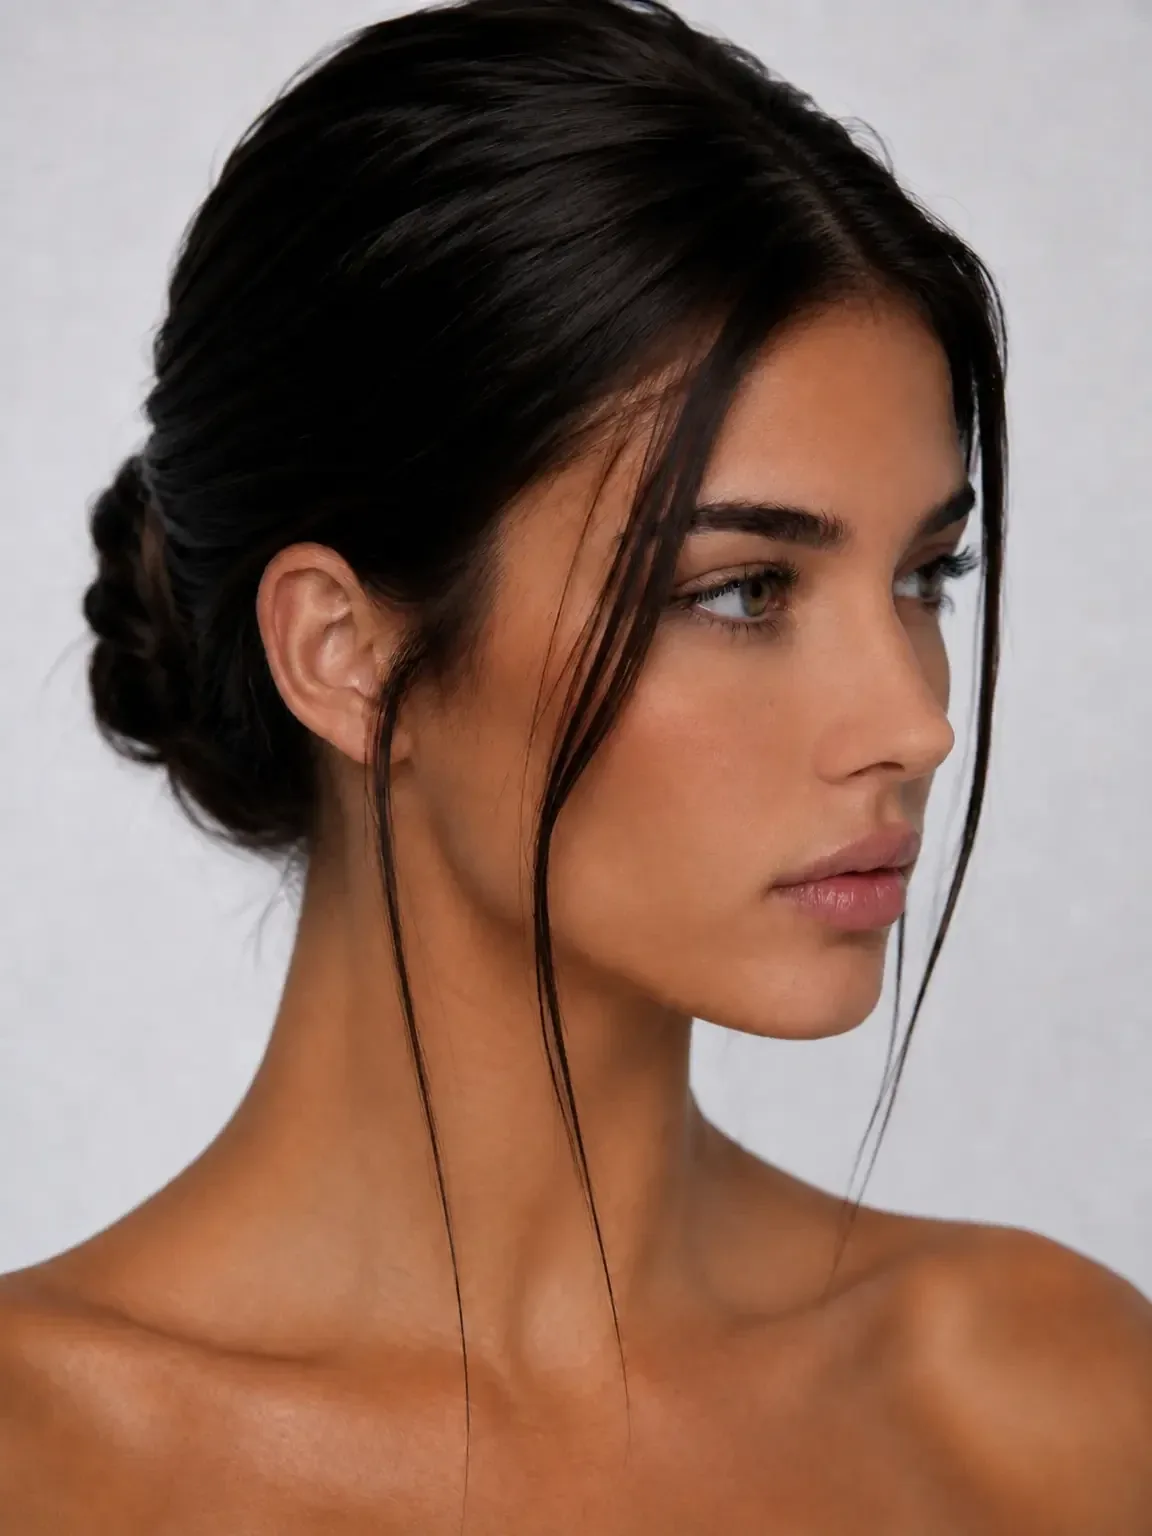
The low bun with face-framing strands is the sleek bun with a soft edge: the bun itself is smooth and polished, but two thin strands are left loose at the front to frame the face. The strands keep the style from looking severe, and they make it the best choice for women who find a fully slicked-back bun too harsh. The strands can be straight and sleek, gently waved, or curled for a romantic finish — and they are the detail that turns a formal bun into a wedding bun.
How to style it: pull out the two front strands before you gather the rest of the hair, and smooth them separately with a little pomade or a curling iron. Pros: softens the face, suits almost everyone, and photographs beautifully. Cons: the strands need attention during the day — they are the first thing to frizz in humidity, so carry a little edge control. Best for: round, square and heart-shaped faces, where the strands break up the width of the face. Quick verdict: the most forgiving sleek bun, and the one to choose if you are new to slicked-back styles.
6. The Sleek Top Knot
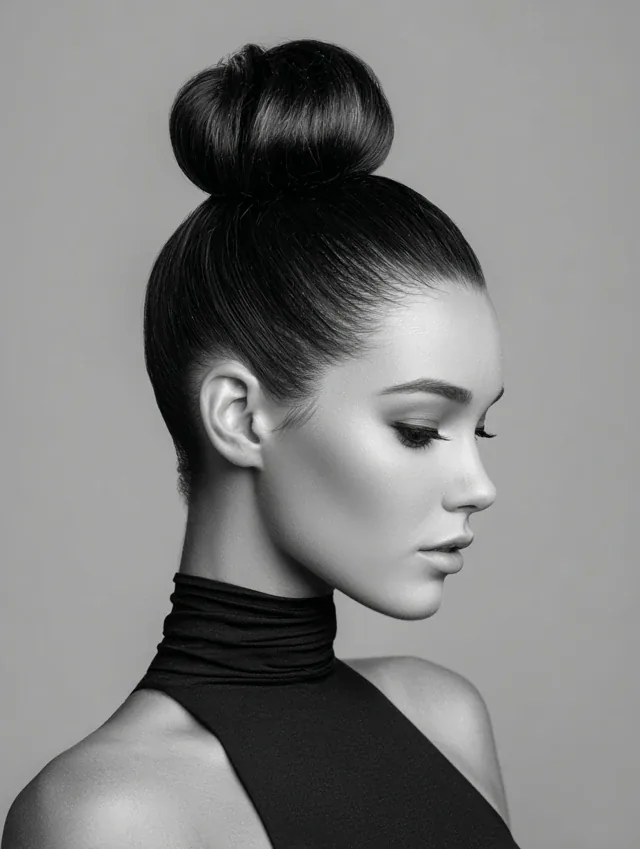
The sleek top knot is the most modern bun in this guide: hair pulled straight up and coiled into a neat knot right on top of the head, with the surface brushed perfectly smooth. It is sharp, graphic and a little bit fashion-forward, and it suits a minimalist outfit, a strong brow and a bold lip. Unlike the ballerina bun, which sits at the crown, the top knot sits higher and smaller, so it reads as a deliberate design choice rather than a classic updo. It is the bun for a gallery opening, a fashion event, or a day when you want to look like you know exactly what you are doing.
Best for: oval and round faces, and for women with strong features who can carry a bold silhouette. Common mistake: making the knot too big, which turns it into a ballerina bun, or too loose, which makes it look messy — a top knot should be compact and tight. How to style it: gather the hair at the very top of the head, twist it tightly, coil it and pin it, then smooth the surface with gel. Time: five to ten minutes. Who should avoid it: women with very long faces, because the height on top can make the face look longer still.
7. The Sleek Donut Bun
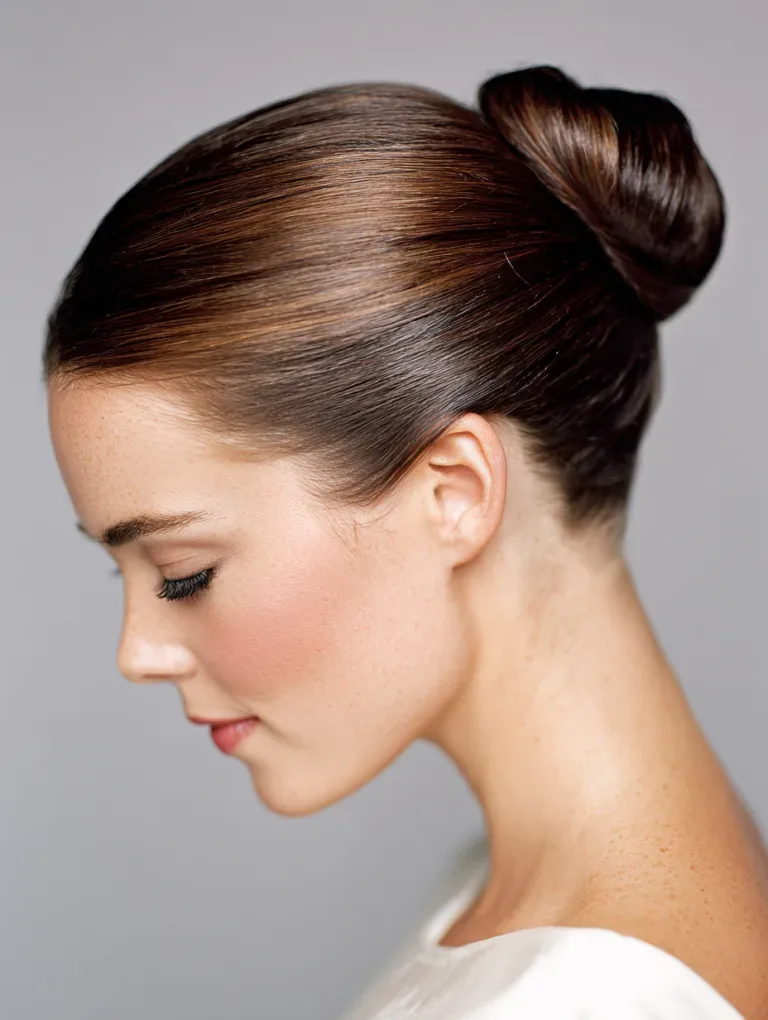
The sleek donut bun is the fullest bun in this guide, and it cheats a little — in the best way. A foam donut form is slipped over the ponytail, the hair is spread evenly over it, and the ends are tucked underneath, so the bun looks perfectly round, perfectly even and much fuller than the hair alone would allow. It is the bun for fine hair, for short hair, and for anyone who wants a big, polished bun without waiting years for their hair to grow. The result is so neat that it looks like it was sculpted rather than styled.
Pros: a perfect round shape every time, and real volume even on fine hair. Cons: the donut can feel heavy by the end of the day, and it needs to match your hair colour, or it will show through thin spots. Best for: fine and medium hair, and for formal occasions when the bun needs to look flawless. Cost: a donut form costs very little and lasts for years. How to style it: pull the ponytail through the donut, spread the hair over it, secure the ends with pins, and smooth the surface. Quick verdict: the easiest way to a big, perfect bun — no shame in the shortcut.
8. The Twisted Low Sleek Bun
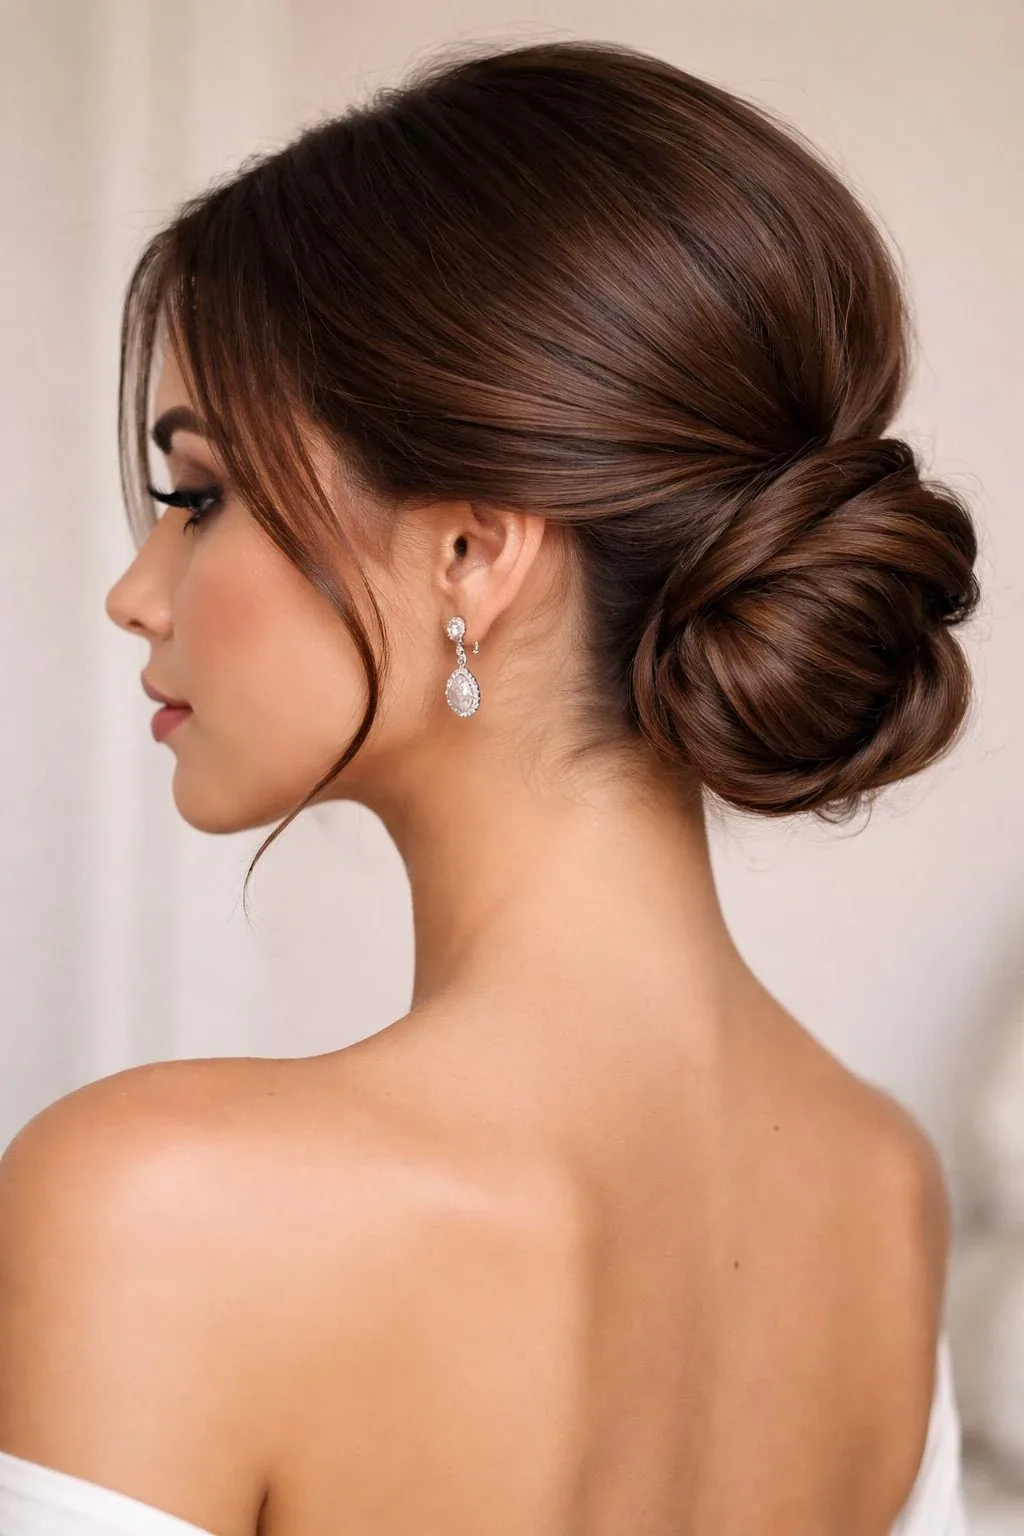
The twisted low sleek bun adds a detail to the classic low bun: the hair is divided into two sections, each twisted, and the twists are coiled together into a low bun. The twists give the bun a rope-like texture and a sense of movement, so it looks more interesting than a plain coil while staying just as smooth and polished. It is the bun for a wedding guest, a dinner party, or any occasion when you want the bun to have a little more craft to it, without losing the sleek finish.
Best for: medium and long hair, because the twists need length to show. How to style it: part the hair down the middle, twist each side toward the nape, cross the twists and coil them into a bun, pinning as you go. Maintenance: the twists hold their shape well, so this bun lasts longer than a plain coil — a good choice for a long day. Time and cost: ten to fifteen minutes, no salon visit needed. Common mistake: twisting too loosely, which makes the bun look messy rather than sleek — keep the twists tight and smooth. A small twist, a big difference.
9. The Sleek Braided Bun
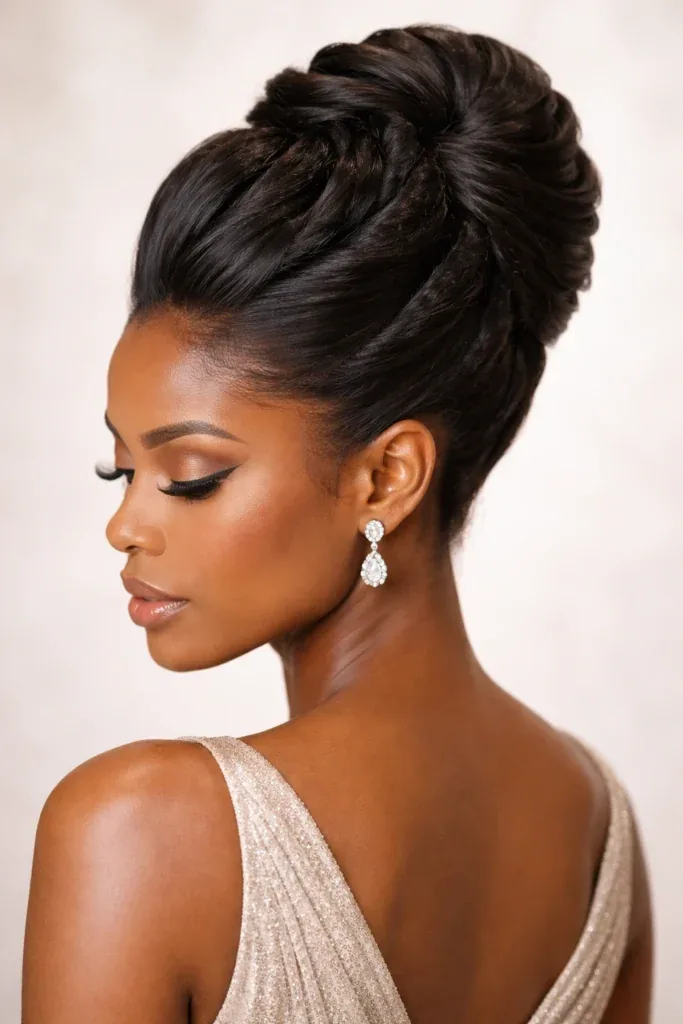
The sleek braided bun is the braided version of the classic: the hair is gathered into a ponytail, braided, and the braid is coiled into a bun. The braid gives the bun a woven texture and a sculptural quality, and it is the most secure bun in this guide — a braided bun does not loosen, sag or fall apart, because the braid itself holds the hair together. It is the bun for a long day, a long flight, a wedding that goes on until midnight, or any occasion when you need the bun to stay exactly where you put it.
Pros: the most secure bun here, and the braid adds texture without losing the sleek surface. Cons: it takes a little longer, and it needs enough length for a proper braid. Best for: long and thick hair, and for active days. How to style it: brush the hair smooth, gather it at the nape or the crown, braid it tightly, coil the braid and pin it. Maintenance: almost none — a braided bun refreshes with a quick smoothing of the surface. Quick verdict: if your bun always falls apart by the afternoon, braid it first. Problem solved.
10. The Sleek Chignon
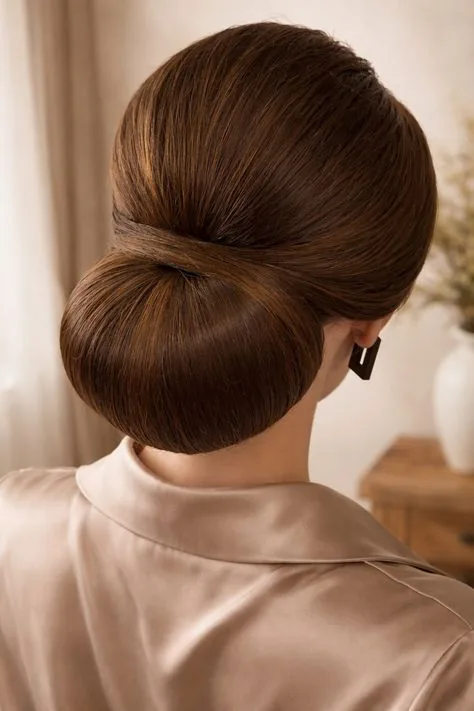
The sleek chignon is the French classic: a low, soft bun at the nape, coiled loosely rather than twisted tightly, with a smooth surface and a relaxed, elegant shape. It is less severe than the classic low bun and more refined than a casual bun — the chignon is the bun that French women have worn for a century, and it still looks effortless and expensive. It suits a silk blouse, a tailored jacket, a wedding dress or a quiet dinner, and it is the bun that whispers rather than shouts.
Best for: every face shape, and especially for women who want elegance without severity. What to ask your stylist for: a low chignon with a smooth surface and a soft, slightly loose coil, not a tight knot. How to style it: brush the hair back, gather it low, loop it into a soft roll and pin it, leaving the surface smooth. Time: ten minutes, and it looks better slightly soft than perfectly tight — the chignon is allowed a little ease. Common mistake: pulling it too tight, which turns it into a plain low bun and loses the chignon’s softness.
11. The Sleek French Twist Bun
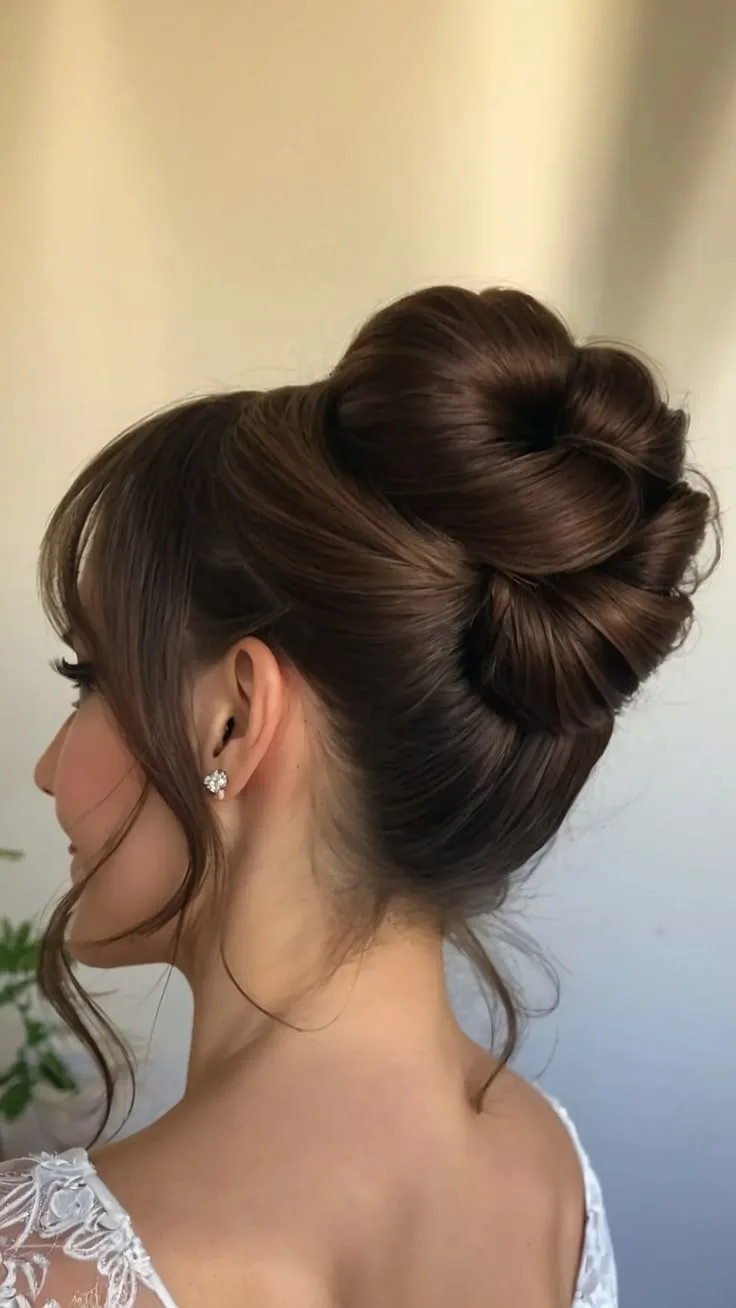
The sleek French twist bun is the most sophisticated bun in this guide: the hair is swept up, twisted vertically along the back of the head, and tucked into a tall, narrow roll. It is the updo of old Hollywood and Paris runways, and it still carries that glamour — long, vertical, elegant, and completely unmistakable. The French twist suits a long dress, a bare back, a formal event or a wedding, and it is the bun that makes the neck look longer and the whole silhouette look taller.
Best for: medium and long hair, and for oval and long faces, because the vertical line lengthens the face. How to style it: brush the hair to one side, twist it upward along the back of the head, tuck the ends in and pin the roll securely — this one takes practice, so try it a few times before the event. Maintenance: it needs more pins than a round bun, and a mist of hairspray to hold the vertical line. Time and cost: fifteen to twenty minutes at home, or a salon visit if you want it flawless. Quick verdict: the most elegant bun here, and the one worth practising.
12. The Sleek Bun with a Silk Scarf
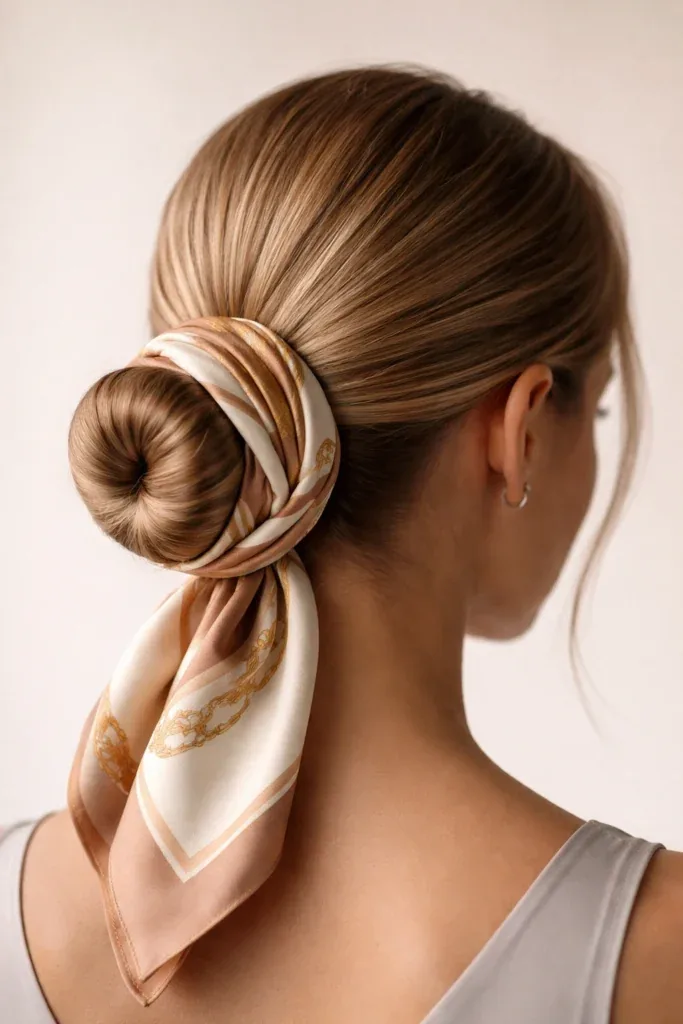
The sleek bun with a silk scarf is elegance with a practical streak: a silk or satin scarf is tied around the base of the bun, or wrapped around the hairline, adding colour and pattern while protecting the edges and keeping the bun in place. The scarf can be knotted at the front for a retro feel, at the side for something softer, or at the back for a clean, minimal look — and each version gives the same bun a completely different mood. It is the bun for a holiday, a garden party, or a day when you want your hair to have a little more personality.
Pros: adds colour without changing the hair, protects the hairline, and hides any flyaways at the edges. Cons: a scarf tied too tightly can flatten the bun or leave a dent in the hair. Best for: every face shape, and for second-day hair, when the scarf hides a multitude of sins. How to style it: make the bun first, then wrap the scarf around its base and knot it, or tie it across the hairline before gathering the hair. Cost: the price of a scarf. Quick verdict: the fastest way to make a simple bun look intentional — one accessory, a whole new style.
13. The Sleek Bridal Bun
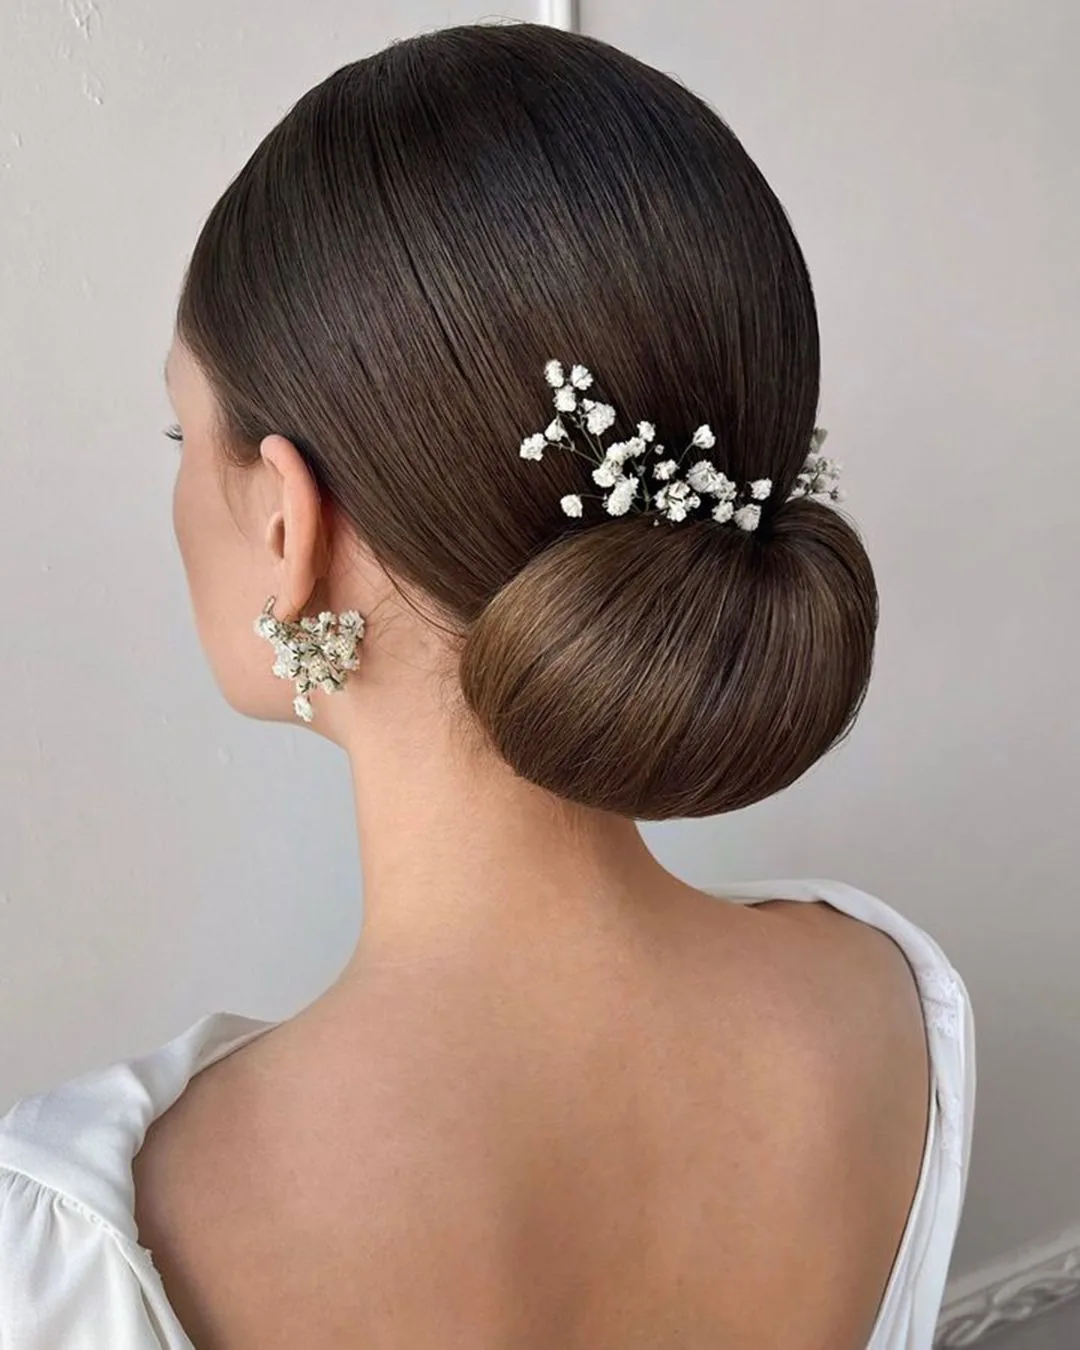
The sleek bridal bun is the wedding version of the low bun: smooth, polished and perfectly placed, so it frames the face for photographs and holds a veil, a tiara or a hair vine without slipping. It is usually a low chignon or a low sleek bun, with a clean part and a smooth surface, because a bridal bun needs to look flawless from every angle and last from the first photograph to the last dance. Brides often add a few face-framing strands, pearl pins, or a single fresh flower, so the bun is romantic as well as sleek.
Best for: brides who want a classic, timeless look rather than a trendy one. What to ask your stylist for: a low sleek bun with a trial run, so you can check how it photographs and how it feels after a full day. Maintenance: a trial run is essential, and the bun should be pinned with more pins than usual, because a wedding day is long. Time and cost: a salon bridal updo, so budget for a stylist and a trial. Common mistake: choosing a bun you have never worn before on the wedding day — wear it for a full day first. The bridal bun is the bun that has to be perfect, and the trial is how you get there.
14. The Sleek Office Bun
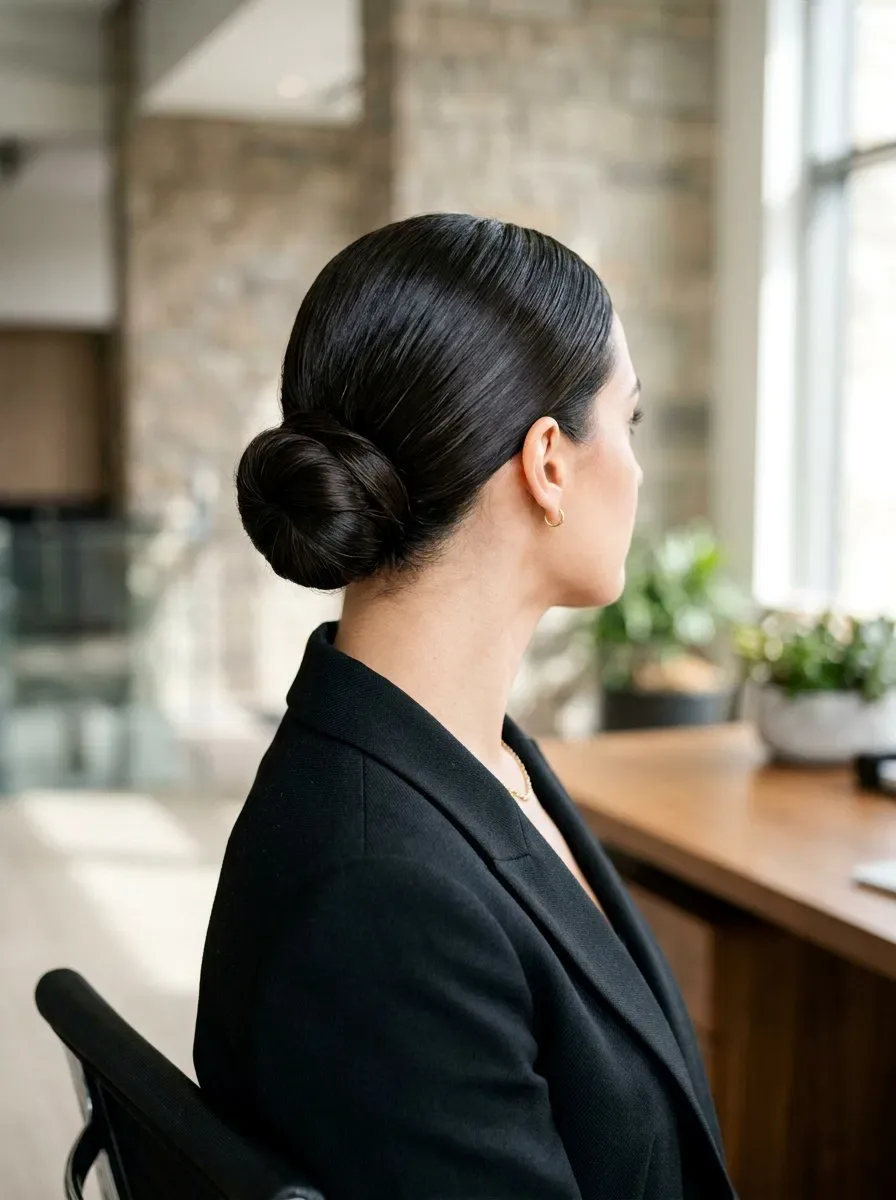
The sleek office bun is the workhorse of this guide: a low or mid-height bun, perfectly smooth, with no loose strands and no statement accessories. It is the bun that says you are here to work, and it does it without a word — the hair is out of the face, the silhouette is neat, and the style survives a commute, a video call and a long afternoon without needing a touch-up. It suits a suit, a blouse, a uniform or a smart dress, and it is the updo that works in the most conservative workplaces as well as the most creative ones.
Best for: every face shape and every hair length that can reach a bun. How to style it: brush the hair smooth, gather it low or at mid-height, coil it and pin it, then smooth the surface with a little gel. Time: five minutes once you know the routine — the office bun is a habit, not a project. Maintenance: keep a small brush and a few bobby pins in your desk drawer for a midday refresh. Quick verdict: the most useful bun in this guide. Learn it once, wear it every week.
15. The Sleek Formal Evening Bun
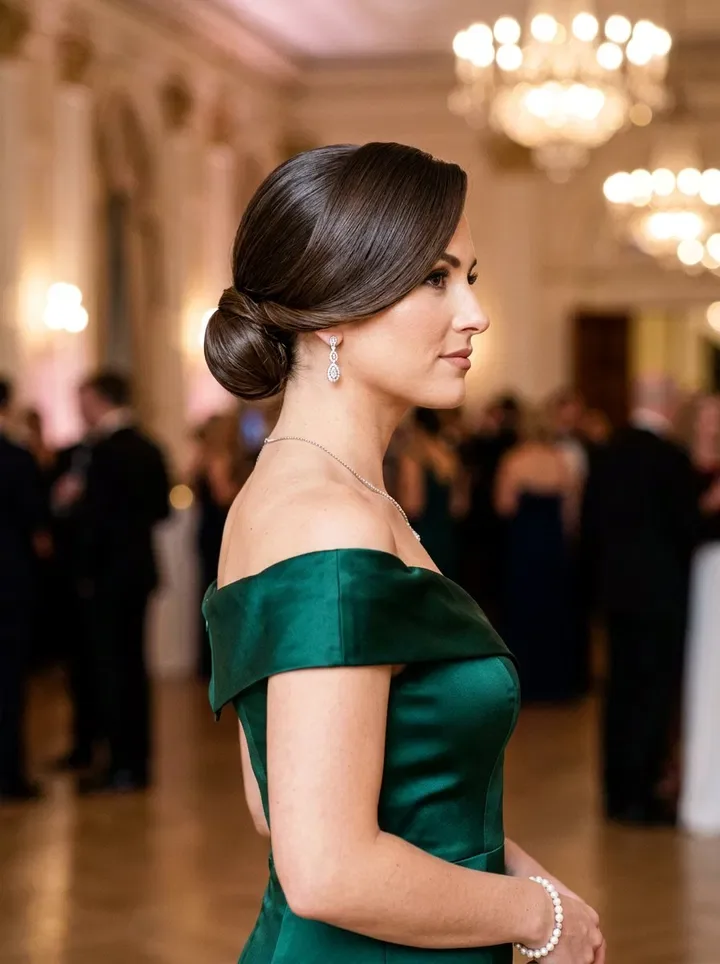
The sleek formal evening bun is the office bun dressed up: the same smooth surface and clean line, but with more height, more shine, and one elegant accessory — a pearl pin, a gold cuff, a crystal clip — to catch the light. It suits a long dress, a bare shoulder and a dramatic neckline, because the bun lifts the neck and lets the dress do the talking. It is the bun for a gala, a black-tie dinner, an awards night or a formal wedding, and it photographs beautifully, because the silhouette is so clean.
Best for: oval and heart-shaped faces, and for hair that can hold height. What to ask your stylist for: a high or mid-height bun with a smooth, shiny surface and one statement accessory. Pros: elegant, timeless, and it holds all evening. Cons: it needs a trial run if you have not worn a high bun before. Time and cost: ten to fifteen minutes at home, or a salon visit for a big event. Maintenance: extra pins and a mist of hairspray, because a formal bun has to survive dancing. The formal bun is the office bun after dark — same discipline, more sparkle.
16. The Sleek Bun with Pearl Pins
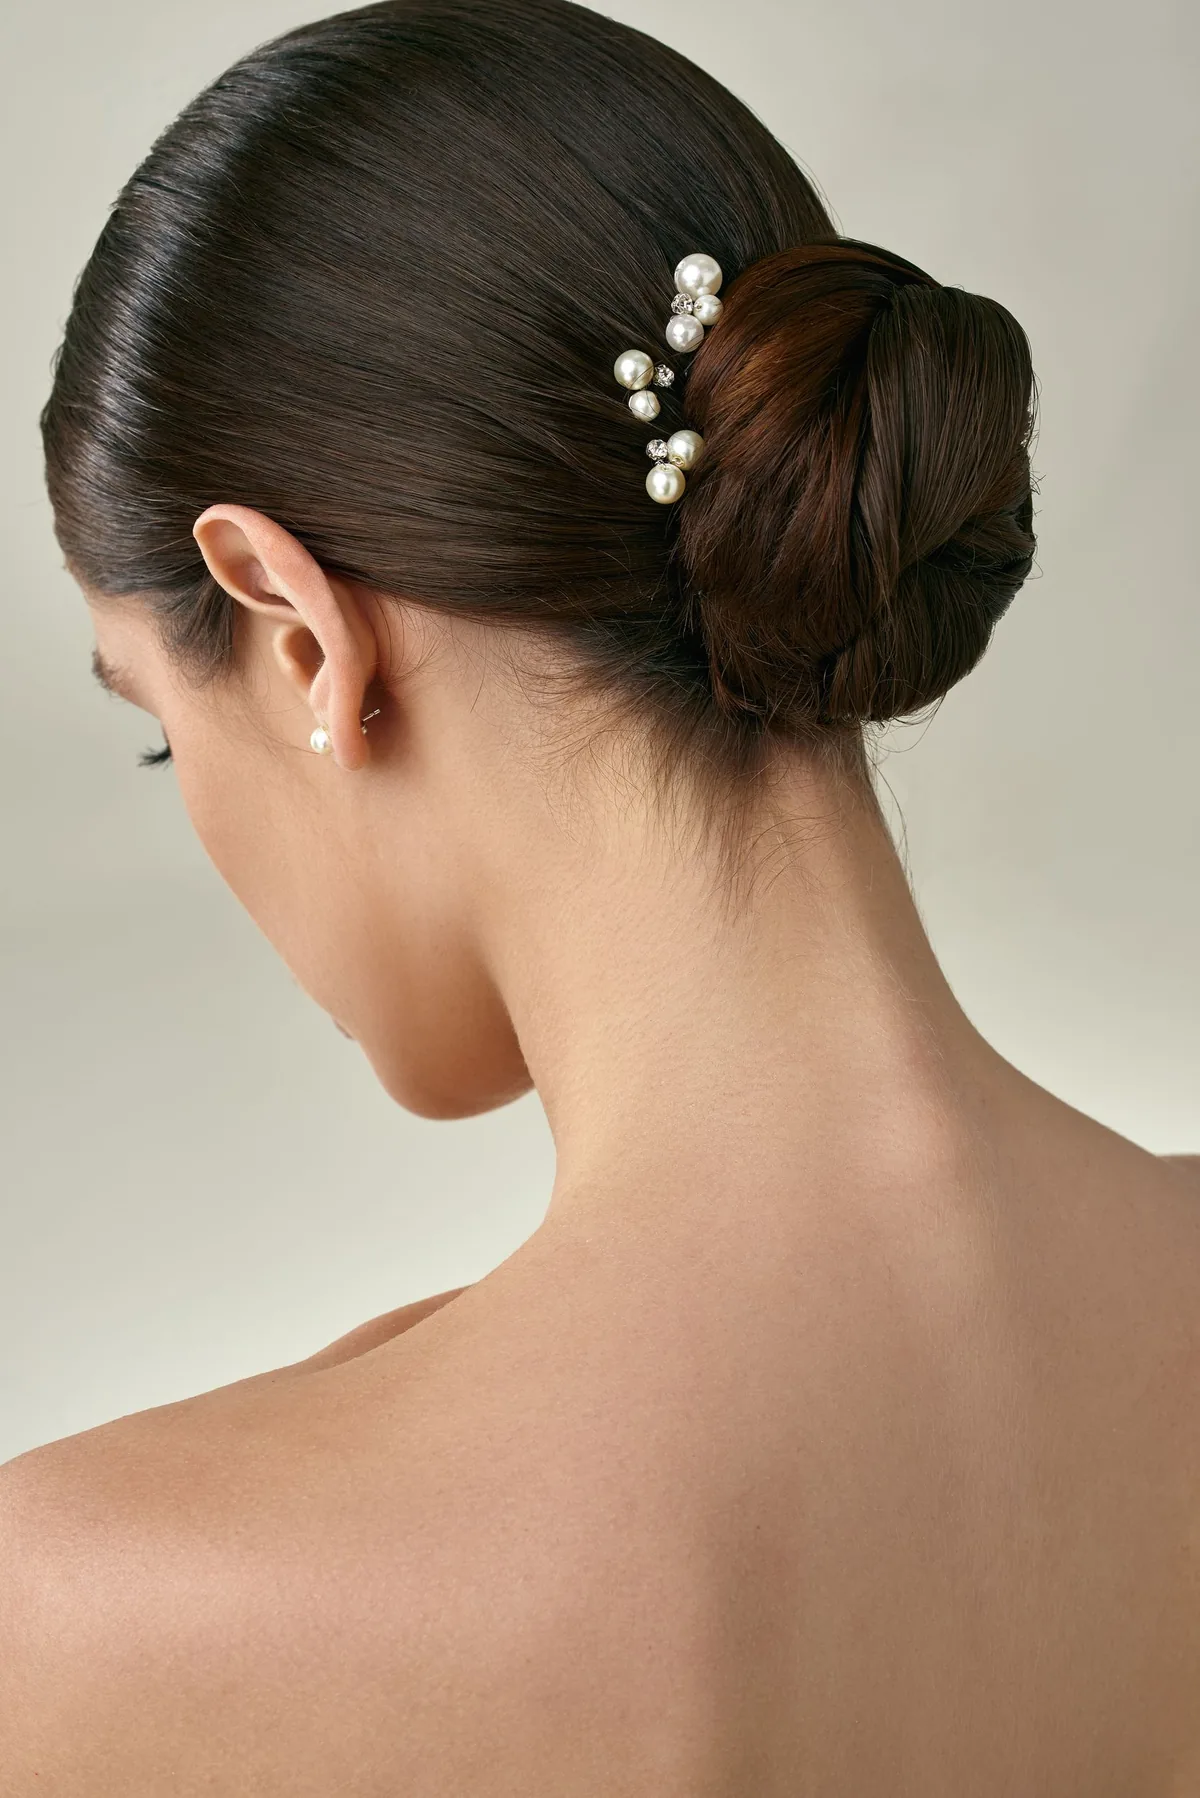
The sleek bun with pearl pins is the bun dressed up with the smallest possible change: a few pearl-headed pins pushed into the bun, catching the light every time the head moves. Pearls against smooth, dark or blonde hair are one of the most beautiful combinations in hairstyling — soft, classic and completely timeless — and a few pins are all it takes, because the pearls do the work. They suit a wedding, a party, a christening or any day when you want the bun to feel special without changing its shape.
Best for: every face shape, because the pins are an accent rather than a shape. How to style it: make the bun first, then push three to five pearl pins into the coil, spacing them evenly or clustering them on one side. Cost: a pack of pearl pins costs very little. Pros: instant elegance, no extra styling time. Cons: the pins can slip out if the bun is loose, so pin the bun firmly first. Quick verdict: the fastest way to turn a workday bun into a wedding bun — three pins, two minutes, done.
17. The Sleek Bun with Gold Accessories
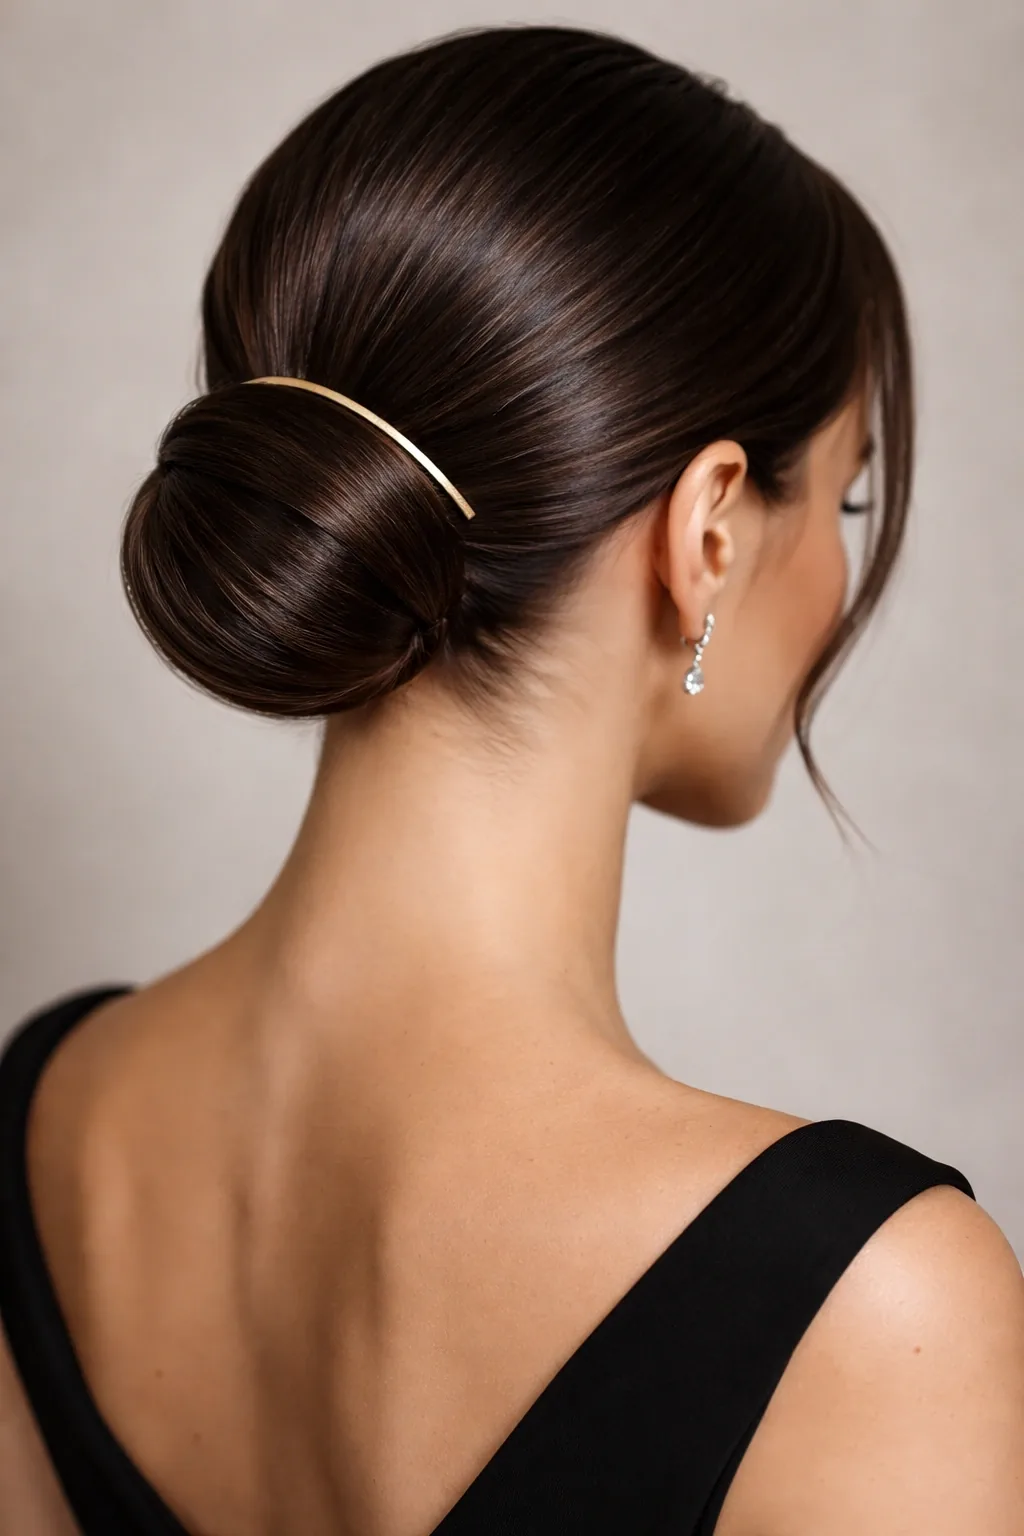
The sleek bun with gold accessories is the bun with a little warmth and a little shine: a gold hair cuff around the base of the bun, a gold pin through the coil, or a thin gold chain woven into the bun. Gold against smooth hair is striking — warm, regal and modern all at once — and it suits a party, a photoshoot, a festive dinner or any evening when you want the bun to feel like jewellery rather than just hair. A single gold accent is enough; the bun itself is the star, and the gold is the finishing touch.
Best for: every face shape, and for hair that is dark or warm-toned, where the gold shows up best. How to style it: make the bun, then slide a cuff over the base or push a gold pin through the coil. Maintenance: none — the accessories last for years. Cost: modest for gold-toned accessories, more for real gold. Common mistake: adding too many gold pieces at once, which turns elegant into busy — one accent, worn well, is the rule. Quick verdict: if pearls are classic, gold is confident. Choose the one that matches your mood.
18. The Sleek Bun with a Bow
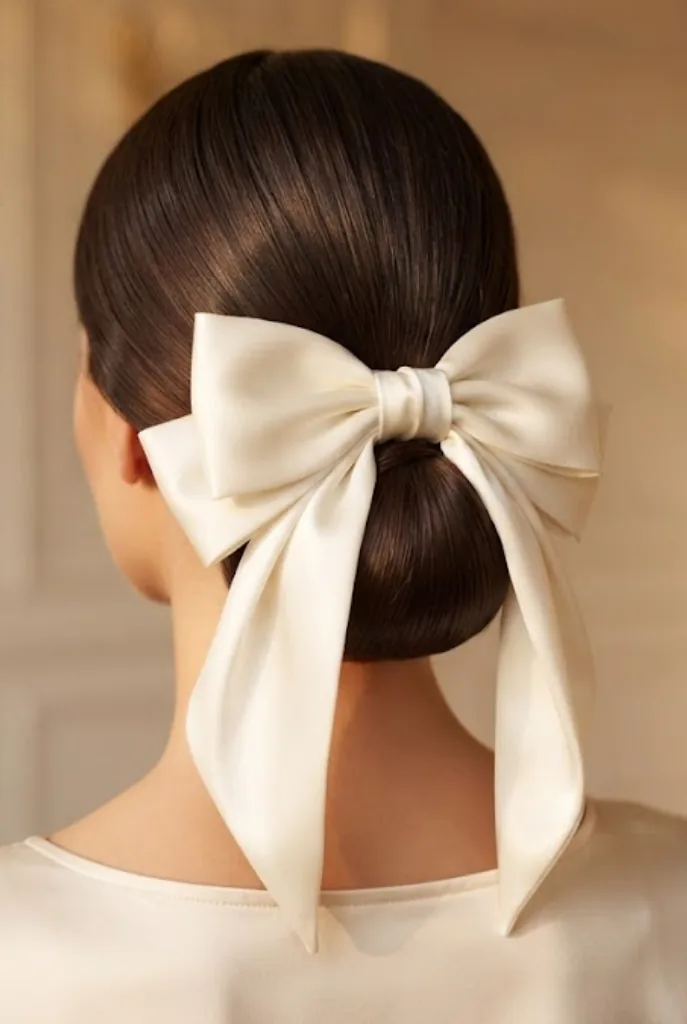
The sleek bun with a bow is the bun with a playful, romantic twist: a velvet or satin bow tied around the base of the bun, or a small bow pinned just above it. The bow softens the severity of a slicked-back bun and adds a touch of charm, which makes it the bun for a date, a party, a birthday or a holiday lunch. A black velvet bow is the classic choice — elegant and understated — while a coloured satin bow is bolder and more fun. The bow should be in proportion to the bun: a big bow on a small bun looks top-heavy, and a tiny bow on a big bun disappears.
Best for: oval and heart-shaped faces, and for women who like a romantic touch. How to style it: make the bun, then tie the bow around its base or clip it just above. Pros: softens a severe bun, adds personality, and takes seconds. Cons: a bow can slip during the day, so pin it in place. Time and cost: seconds, and the price of a bow. Who should avoid it: nobody, but keep the bow small at work — a big bow is a party accessory, not an office one. A bow is the bun’s way of smiling.
19. The Sleek Bun with Curtain Bangs
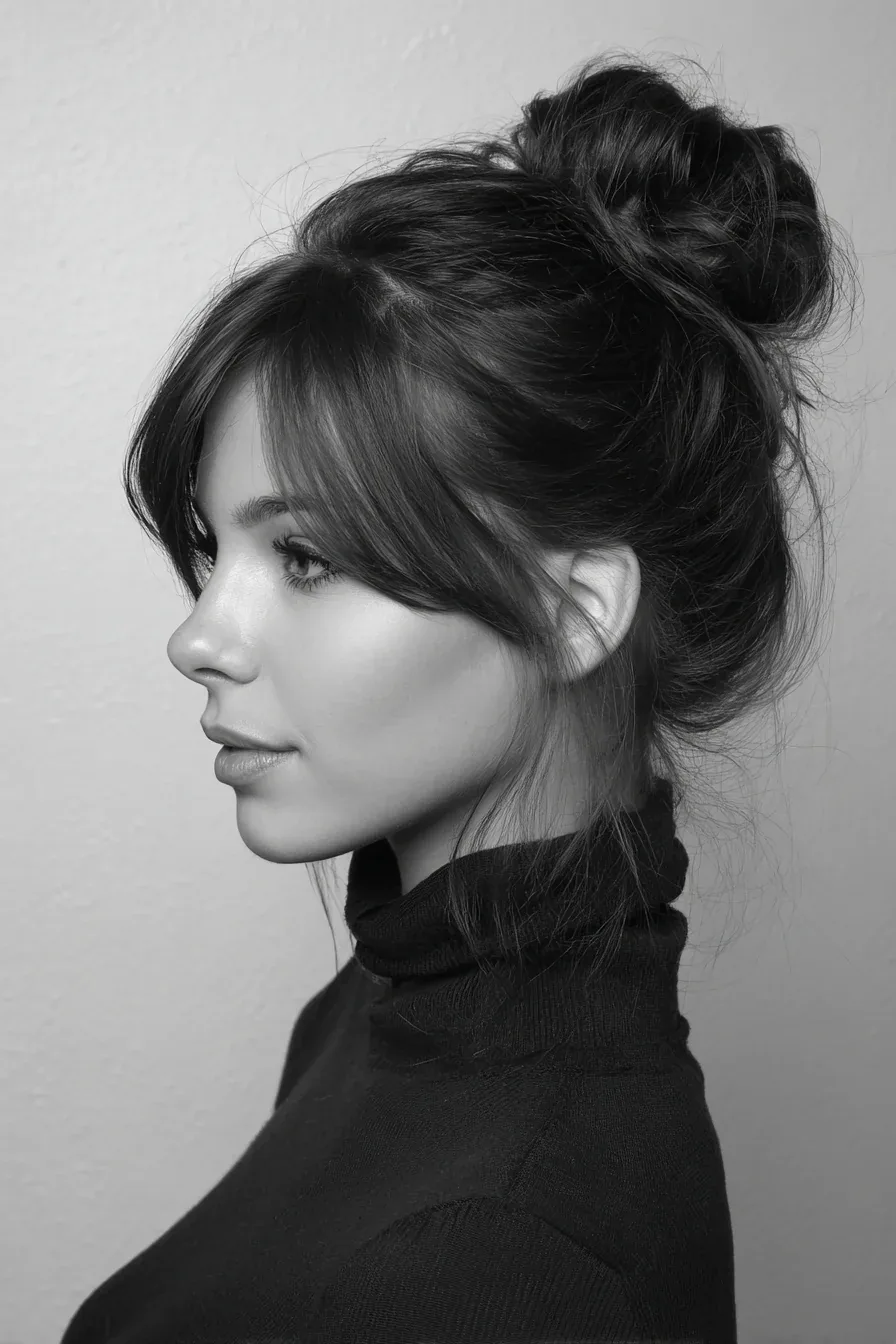
The sleek bun with curtain bangs is the bun for women who love a fringe but want the polish of an updo: the hair is parted down the middle, two curtain bangs fall softly on either side of the face, and the rest of the hair is gathered into a smooth, sleek bun. The bangs soften the forehead, frame the eyes, and keep the style from looking severe, while the bun keeps the rest of the hair neat and out of the way. It is the bun for a wedding, a date, or any day when you want to look polished and approachable at the same time.
Best for: oval, long and heart-shaped faces, because the bangs shorten the forehead and balance the length of the face. How to style it: part the hair down the middle, leave the front sections loose, gather the rest into a bun, then style the bangs with a round brush or a flat iron so they curve gently away from the face. Maintenance: the bangs need a quick touch-up during the day, because they are the first thing to lose their shape. Time: ten to fifteen minutes. Quick verdict: the most romantic sleek bun — polished at the back, soft at the front.
20. The Sleek Bun with Swoop Bangs
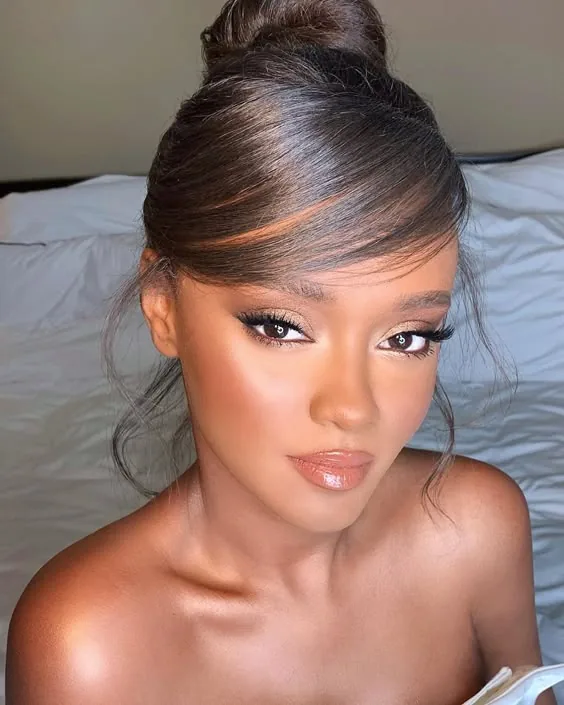
The sleek bun with swoop bangs is the curtain-bang bun’s bolder cousin: a deep side part, a long fringe swept across the forehead, and the rest of the hair gathered into a smooth bun. The swoop gives the style a dramatic diagonal line, and it suits strong features — a defined brow, a straight nose, a confident smile. It is the bun for an evening out, a photoshoot, or any occasion when you want the sleekness with a little more drama and a little more movement at the front.
Best for: round and square faces, because the diagonal sweep breaks up the symmetry and softens a strong jaw. How to style it: part the hair deeply on one side, sweep the fringe across the forehead and pin it behind the ear if needed, then gather the rest into a bun. Pros: dramatic, flattering, and it hides a wide forehead. Cons: the swoop needs pinning to stay in place, and it can fall into the eyes by the afternoon. Maintenance: a bobby pin and a little hairspray keep the swoop where it belongs. A small sweep, a big change.
21. The Sleek Bun for Short Hair
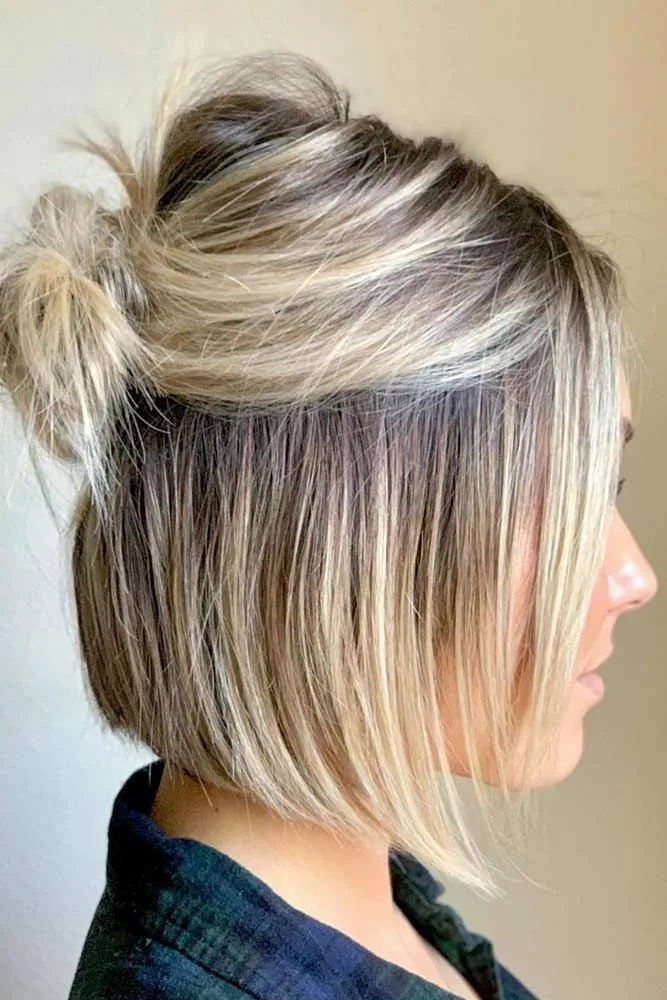
The sleek bun for short hair is proof that you do not need long hair to wear a bun: chin-length or bob-length hair can be gathered into a small, neat bun with a little help. The trick is to gather the hair at the nape, twist it into a small coil, and pin the loose ends underneath, using a small donut form if the bun needs more volume. The result is a compact, polished bun that looks deliberate rather than improvised, and it suits a bob, a lob or a growing-out pixie. It is the bun for women who cut their hair short and refuse to give up their updos.
Best for: every face shape, and especially for women with a bob or lob. Common mistake: trying to force all the hair into the bun, which creates bumps — instead, let the shortest pieces fall out and pin them, or smooth them with gel. How to style it: use a small donut form, gather the hair over it, and pin the ends underneath. Time and cost: ten minutes, plus a donut form that costs very little. Quick verdict: short hair can wear a sleek bun beautifully — it just needs a little help, and the help is cheap.
22. The Sleek Bun for Medium Hair
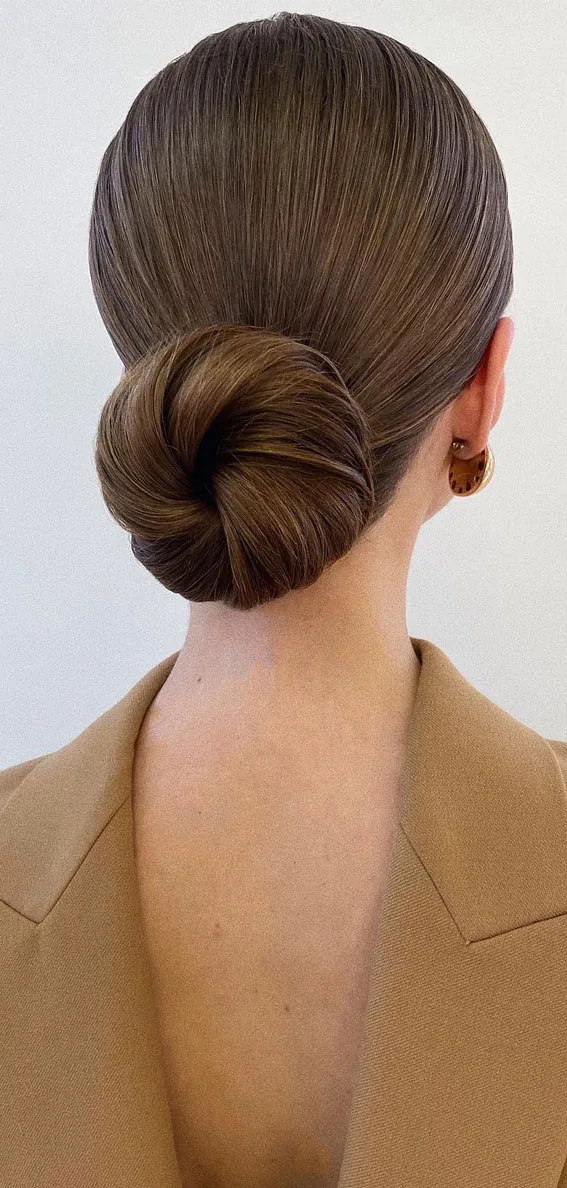
The sleek bun for medium hair is the easiest bun in this guide: shoulder-length hair has exactly enough length to form a full, round bun, and not so much that the bun pulls heavy or needs a dozen pins. It is the length that does everything — a low bun, a high bun, a twisted bun, a braided bun — and it does all of them well. A medium-length sleek bun is the everyday bun, the work bun, the wedding-guest bun and the dinner bun, all in one, because the length is versatile and the styling is quick.
Best for: every face shape, and for women who want a bun they can do in five minutes. How to style it: brush the hair smooth, gather it where you want the bun, twist and coil it, pin it, and smooth the surface. Maintenance: minimal — a medium bun holds its shape all day with four to six pins. Time and cost: five to ten minutes, no salon visit, no special tools beyond a brush and pins. Quick verdict: if your hair is medium length, the sleek bun is your easiest updo. It is the length the bun was made for.
23. The Sleek Bun for Long Hair
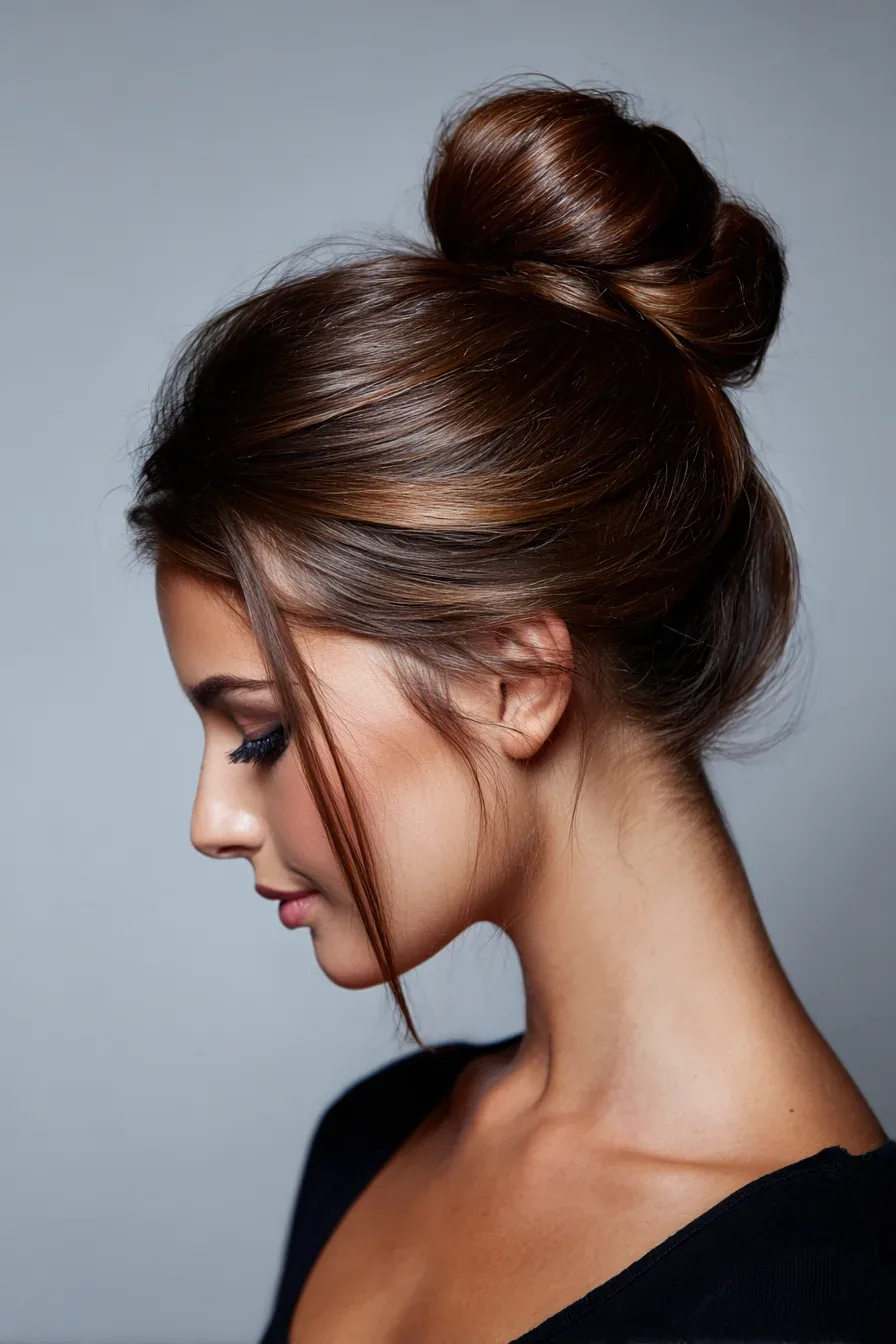
The sleek bun for long hair is the fullest bun in this guide: long hair makes a big, round, sculptural bun that has real presence, and it is the bun that gets the most compliments. The length gives the bun volume, weight and a beautiful, even coil, and it suits a formal event, a wedding or a photoshoot, where the bun needs to look substantial. The trade-off is weight: a long-hair bun is heavy, and it needs a strong tie and plenty of pins, or it will sag by the afternoon.
Best for: oval, round and heart-shaped faces, and for formal occasions. How to style it: gather the hair firmly, twist it into a long coil, wrap the coil around itself and pin it in several places — six to eight pins, pushed in against the bun. Common mistake: using too few pins, which lets the bun droop. Maintenance: check the bun at lunchtime and re-pin if it has slipped. Time: ten to fifteen minutes. Quick verdict: long hair makes the most impressive sleek bun, and the price is a few extra pins. Worth it.
24. The Sleek Bun for Thick Hair
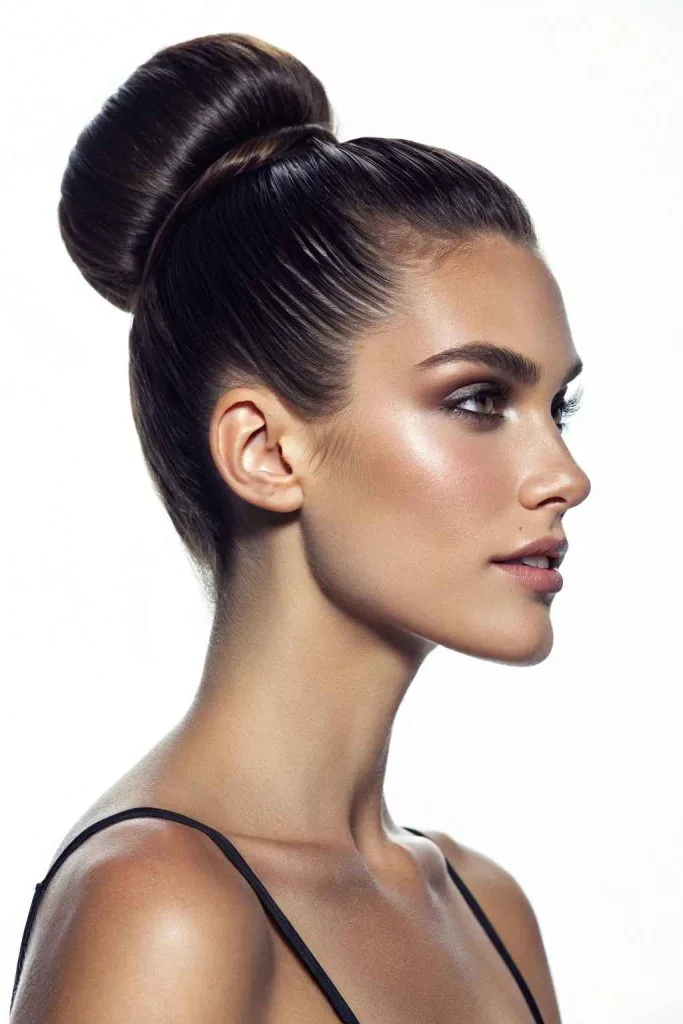
The sleek bun for thick hair is the bun in its fullest glory: thick hair makes a big, round bun with almost no effort, because the volume is already there. The bun holds its shape, it does not need a donut form, and it looks substantial from every angle. The challenge is not volume but weight and smoothness: thick hair is heavy, so the bun needs a strong tie and plenty of pins, and it needs thorough brushing, because thick hair hides bumps and flyaways more easily than fine hair does.
Best for: every face shape, and for women who want a bun with real presence. How to style it: brush the hair in sections to make sure it is smooth all the way through, gather it firmly, and use a strong, thick hair tie. Maintenance: use more pins than you think you need, and check the bun during the day, because thick hair can loosen a tie. Time: ten minutes. Cost: a strong tie and a pack of bobby pins. Quick verdict: thick hair was made for a sleek bun — the volume is free, and the only cost is a few extra pins.
25. The Sleek Bun for Fine Hair
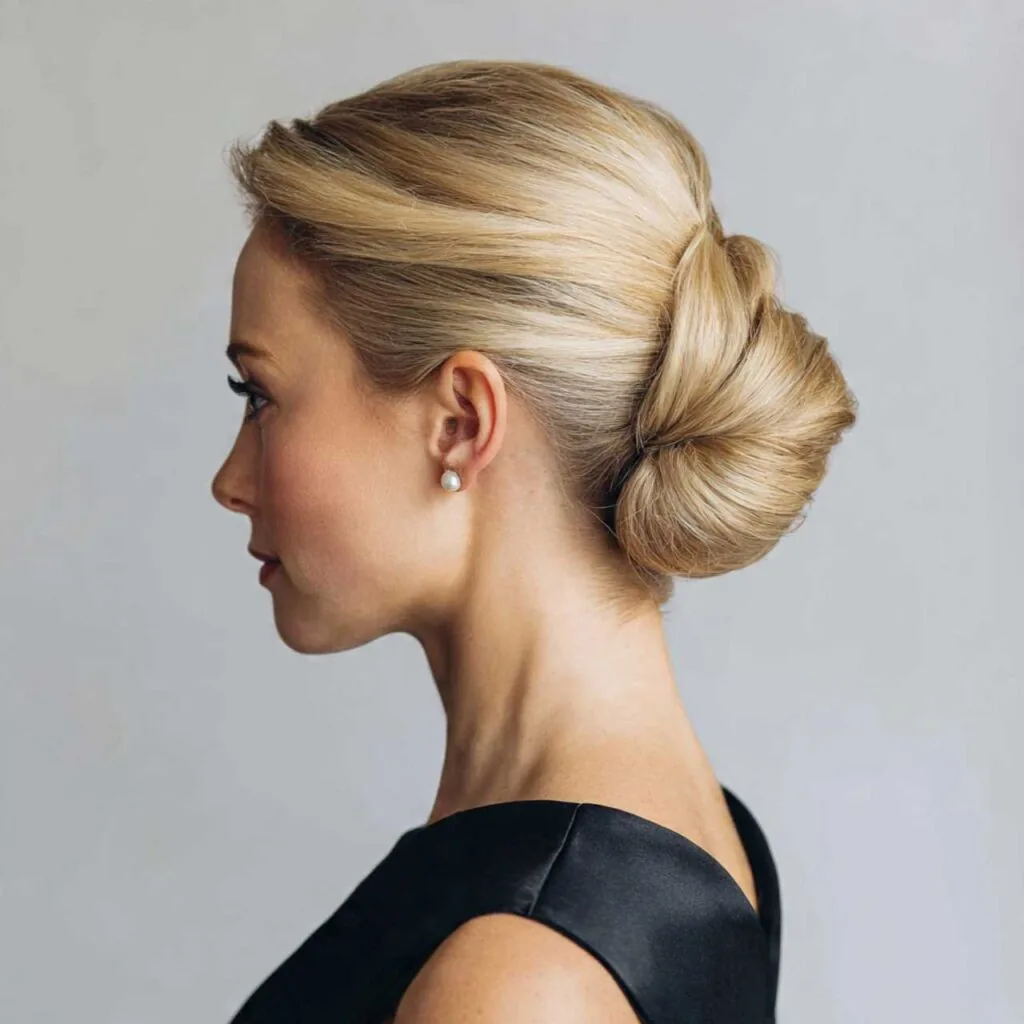
The sleek bun for fine hair is proof that a bun is not only for thick hair: with the right technique, fine hair makes a beautiful, neat bun with its own kind of elegance. The key is to work with the volume you have rather than chasing someone else’s: a smaller, tighter bun looks better on fine hair than a big, loose one, and a donut form gives the bun the fullness it would not have on its own. Light products are essential, because heavy gel flattens fine hair and makes the bun look limp.
Best for: oval and heart-shaped faces, and for women with fine or low-density hair. How to style it: use a donut form in your hair colour, gather the hair over it, and pin the ends underneath. Pros: a neat, polished bun with very little effort. Cons: the bun will be smaller than a thick-hair bun, and it needs a donut to look full. Maintenance: a light gel and a few pins are enough. Time and cost: ten minutes, plus a donut form. Quick verdict: fine hair can wear a sleek bun beautifully — in a smaller shape, with lighter products, and it will look lovely.
26. The Sleek Bun for Curly Hair
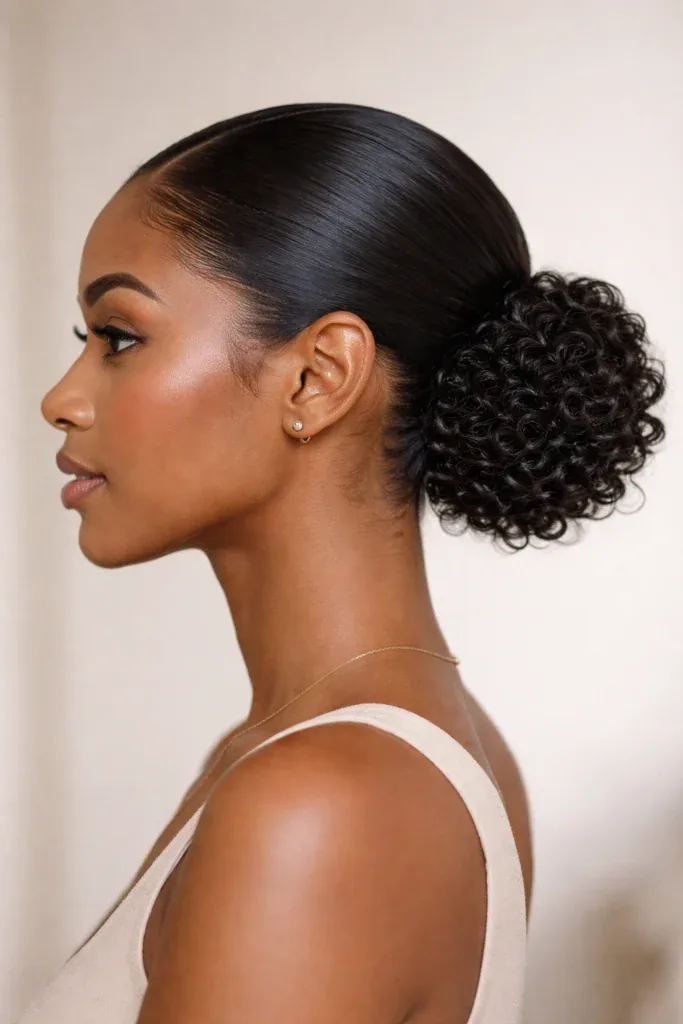
The sleek bun for curly hair is the most impressive transformation in this guide: curly hair, smoothed flat and gathered into a polished bun, shows off the contrast between the smooth surface and the bun itself. It takes the most prep — a blow-dry with a brush, or a thorough smoothing with gel — but the result is striking, because a sleek bun on curly hair proves that the smoothness is a choice, not a hair type. It is the bun for a formal event, a job interview, or any day when you want your curls to take a back seat to the silhouette.
Best for: every face shape, and for women with wavy or curly hair who want a polished updo. How to style it: blow-dry the hair smooth with a brush, or work gel through damp hair and brush it flat before gathering it. Common mistake: skipping the blow-dry, which leaves the hairline frizzy and the bun lumpy. Maintenance: a smoothing serum on the surface keeps the curls from springing back. Time: fifteen to twenty minutes with a blow-dry. Quick verdict: the most work, and the most impressive result — curly hair makes a sleek bun look like a decision.
27. The Sleek Bun for Straight Hair
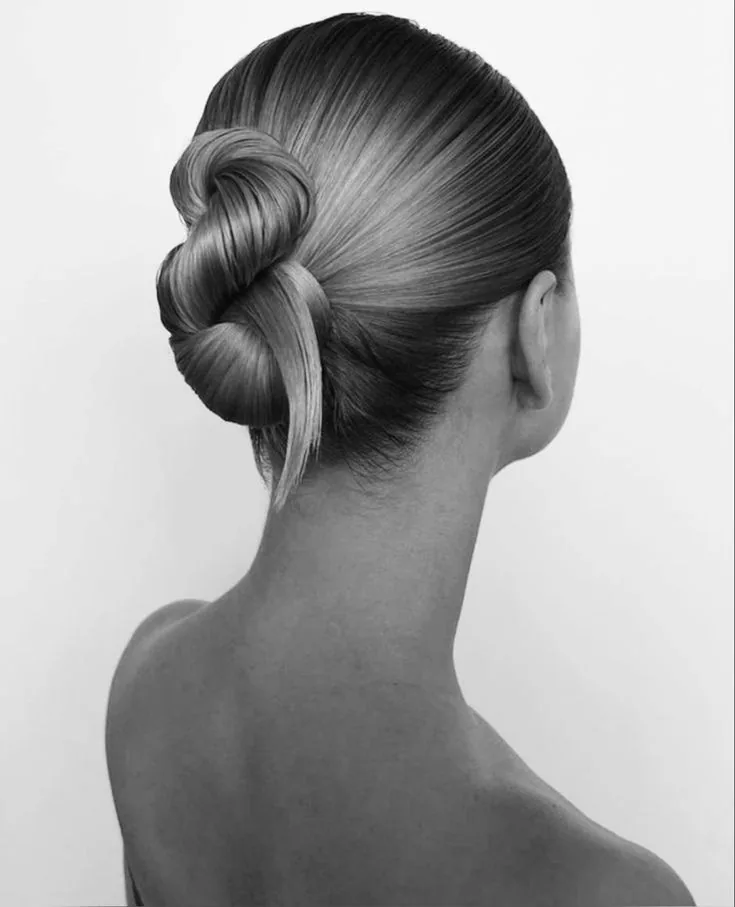
The sleek bun for straight hair is the fastest bun in this guide: straight hair is already smooth, so the bun needs almost no prep — brush, gather, coil, pin, done. It is the bun for a busy morning, a last-minute event, or any day when you have five minutes and need to look polished. Straight hair also gives the cleanest surface of any hair type, because there are no waves or curls to fight, so the bun looks razor-sharp with very little effort. The only trade-off is grip: straight hair is slippery, so the bun needs more pins than a curly bun would.
Best for: every face shape, and for women with straight or blow-dried hair. How to style it: brush the hair smooth, gather it, twist and coil it, and pin it with six pins rather than four, because straight hair slips. Pros: the fastest, smoothest bun here. Cons: the bun can loosen during the day, so check it at lunchtime. Maintenance: a little texture spray at the roots before gathering the hair gives it grip. Time and cost: five minutes, no salon visit. Quick verdict: the easiest sleek bun of all — straight hair and a bun were made for each other.
28. The Sleek Bun for Wavy Hair
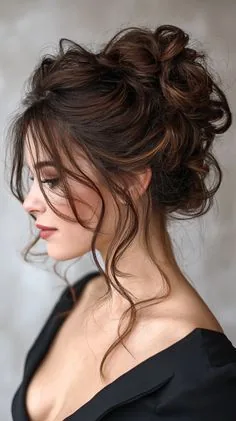
The sleek bun for wavy hair sits between the straight and curly versions: wavy hair is almost smooth already, but the waves push flyaways out at the hairline and make the surface less clean than straight hair. The fix is simple — a smoothing cream worked through damp hair, a quick brush-through, and a little gel on the surface once the hair is gathered. The result is a bun that is smooth where it matters and soft where it does not, with a gentle texture that straight hair cannot match.
Best for: oval and round faces, and for women with natural waves who want a polished updo without a full blow-dry. How to style it: apply smoothing cream to damp hair, brush it into the bun’s position, and smooth the surface with gel. Pros: quicker than the curly version, softer than the straight version. Cons: the waves can spring back in humidity, so seal the surface with hairspray. Maintenance: a morning smoothing of the hairline is usually enough. Time: ten minutes. Quick verdict: wavy hair makes a sleek bun with a little more character — smooth, but never stiff.
29. The Wet-Look Sleek Bun
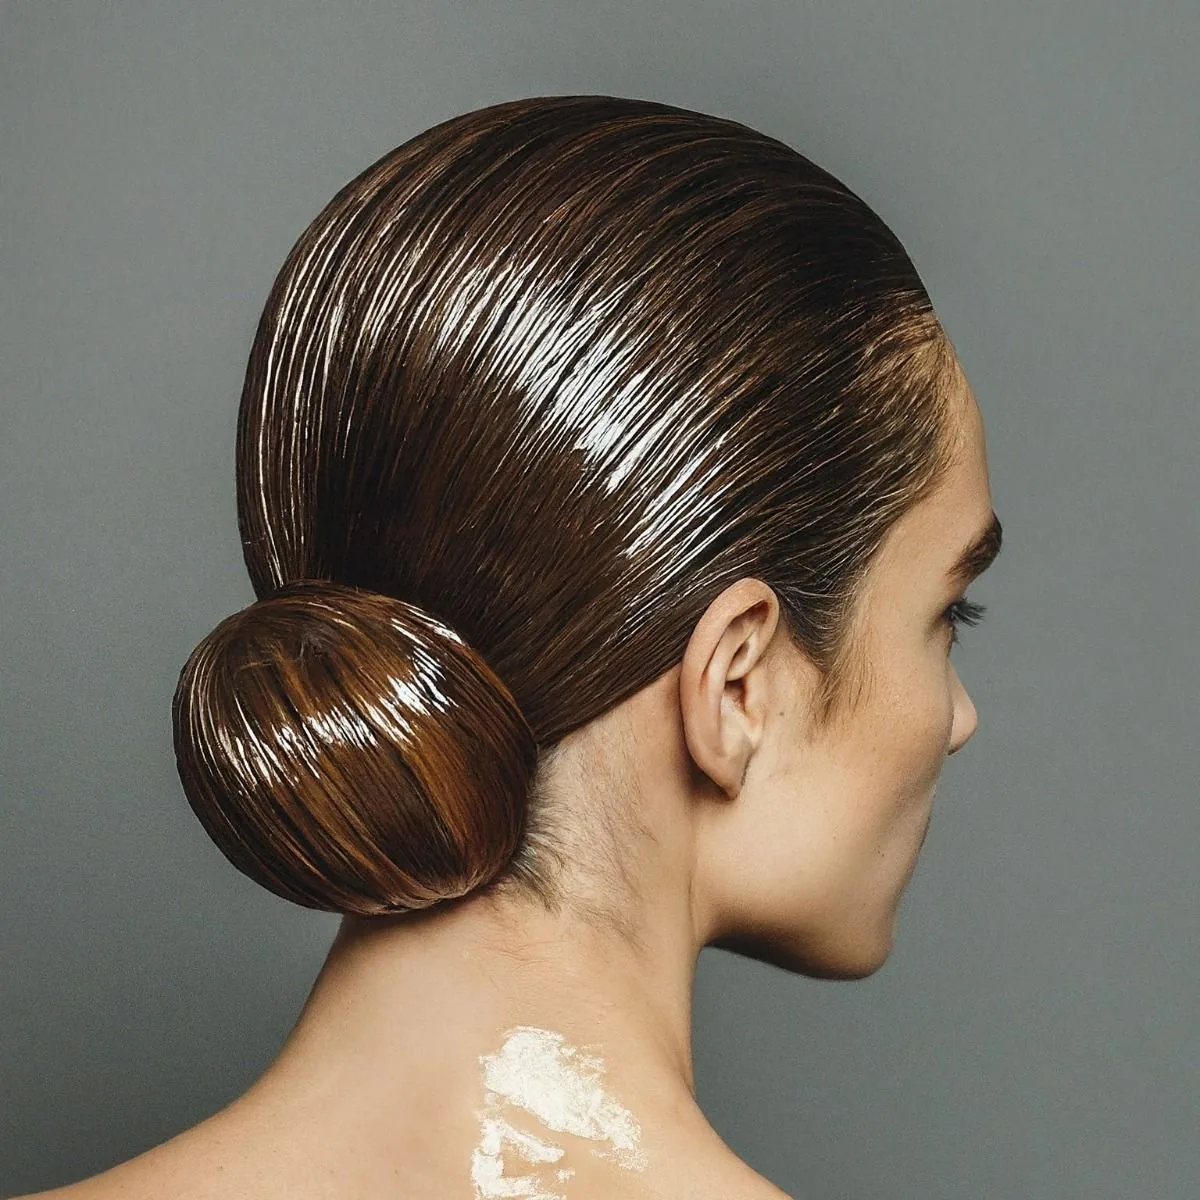
The wet-look sleek bun is the most fashion-forward bun in this guide: the hair is smoothed back with gel so it looks wet and glossy, like you have just stepped out of the water, and gathered into a low or high bun. The shine is the whole point — the surface catches the light, the hairline gleams, and the bun looks sculpted rather than styled. It is the bun for a photoshoot, a fashion event, a night out or any occasion when you want your hair to look like a statement rather than a hairstyle.
Best for: oval and heart-shaped faces, and for women with strong features who can carry a bold, glossy finish. How to style it: work gel through damp hair from the hairline back, brush it smooth, and gather it into a bun, adding more gel to the surface until it shines. Pros: dramatic, modern, and it photographs beautifully. Cons: the wet look needs a lot of product, and it can feel heavy — this is not an everyday bun. Maintenance: none during the day, because the gel holds it. Quick verdict: the boldest sleek bun here. Wear it when you want to be noticed.
30. The Sleek Bun with Laid Edges
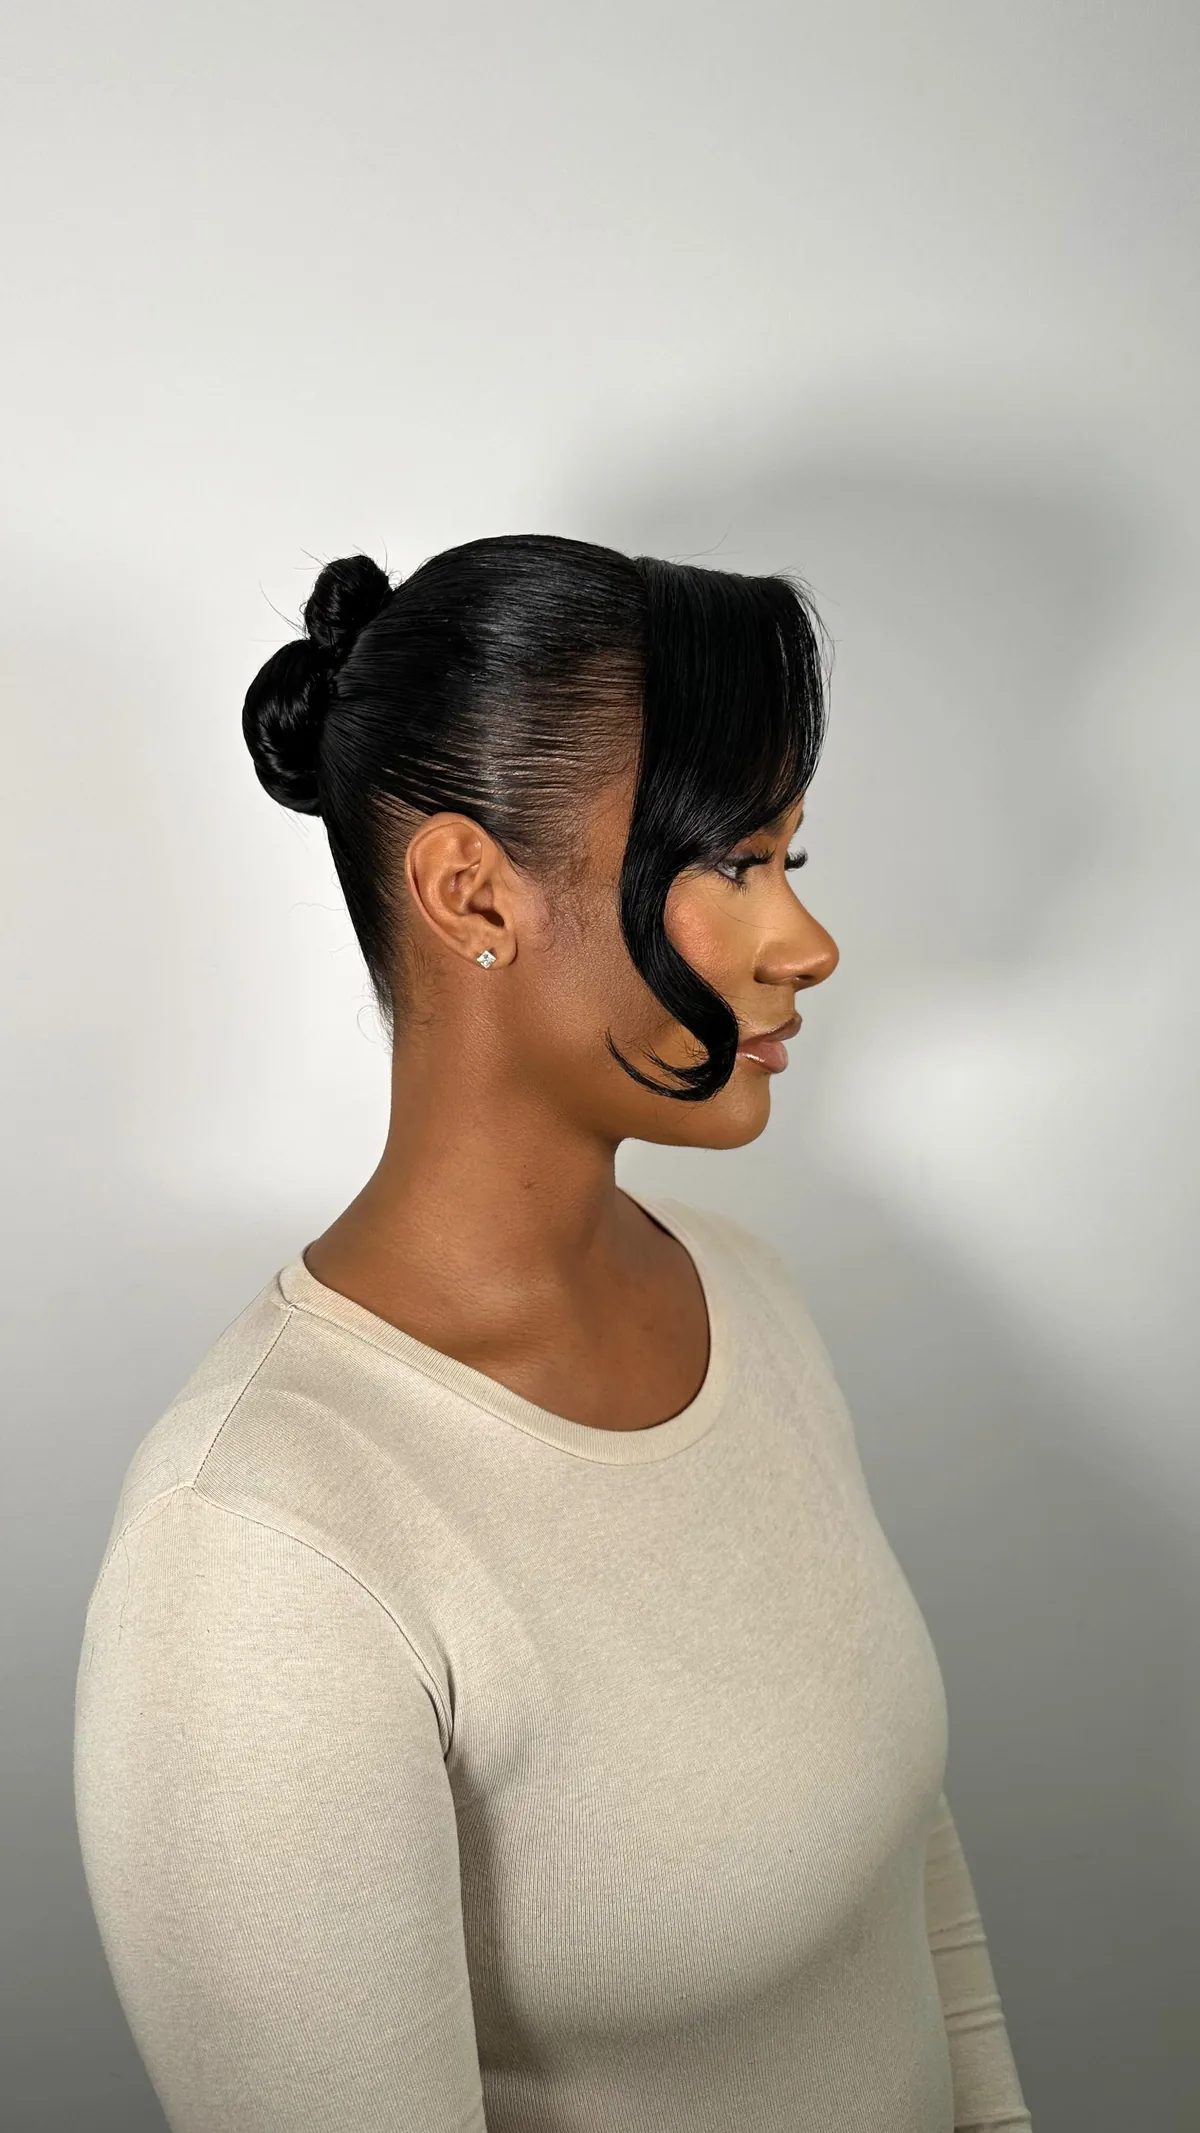
The sleek bun with laid edges is the bun where the hairline is the star: the baby hairs around the forehead and temples are smoothed into swoops and swirls with edge control, so the hairline looks sculpted and deliberate. Laid edges turn a simple bun into a work of art, and they are the detail that makes the bun look finished rather than merely tidy. They suit a party, a photoshoot, a night out or any day when you want your hairline to have as much attention as the bun itself.
Best for: every face shape, and for women with baby hairs or a textured hairline. How to style it: make the bun first, then apply a tiny amount of edge control to the baby hairs and shape them with a toothbrush or an edge brush. Pros: a sculpted, polished hairline that elevates the whole bun. Cons: laid edges take a few minutes to shape, and they can smudge in humidity. Maintenance: a little extra edge control in your bag for touch-ups. Time: five extra minutes on top of the bun. Quick verdict: the hairline is the frame — lay the edges, and the bun looks complete.
31. Sleek Double Buns
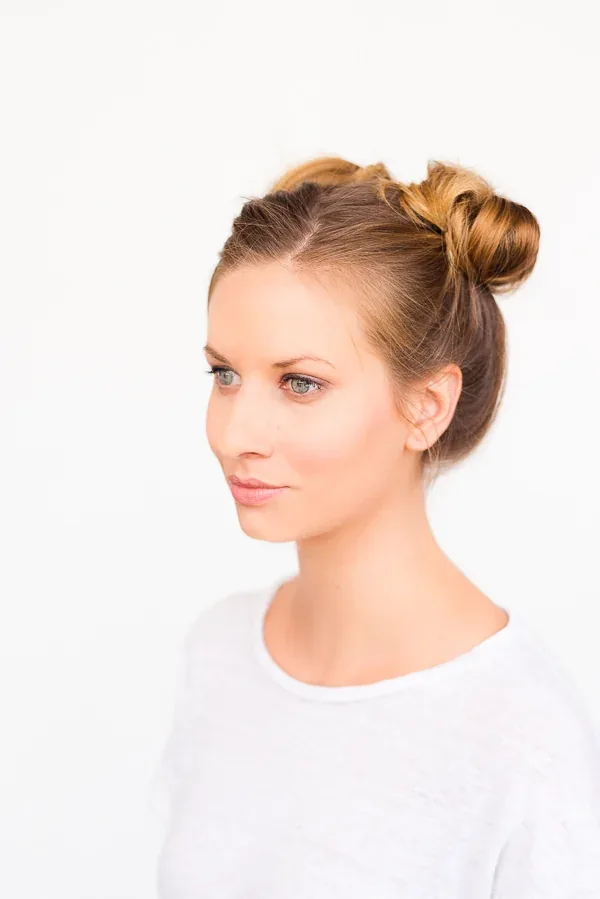
Sleek double buns — two small, smooth buns, one on each side of the head — are the playful side of the sleek bun: fun, youthful and full of personality, without ever looking messy when they are done well. The buns can sit high on the crown for a bold, festival look, or lower at the sides for something softer, and they work beautifully with a centre part. They suit a festival, a holiday, a party or any day when you want your hair to make people smile, and they are also practical, because two smaller buns are easier to secure than one big one on very thick hair.
Best for: oval, heart-shaped and round faces, and for younger women or anyone who wants a playful updo. How to style it: part the hair down the middle, gather each side into a bun, and make sure the buns are even — use a mirror to check from behind. Pros: fun, secure, and they last all day. Cons: evenness is everything — uneven buns look like a mistake. Maintenance: a few pins per bun and a smoothing of the surface. Time: fifteen minutes. Quick verdict: two buns, twice the fun — and a sleek finish keeps them grown-up, not childish.
32. The Sleek Bun with a Wrapped Base
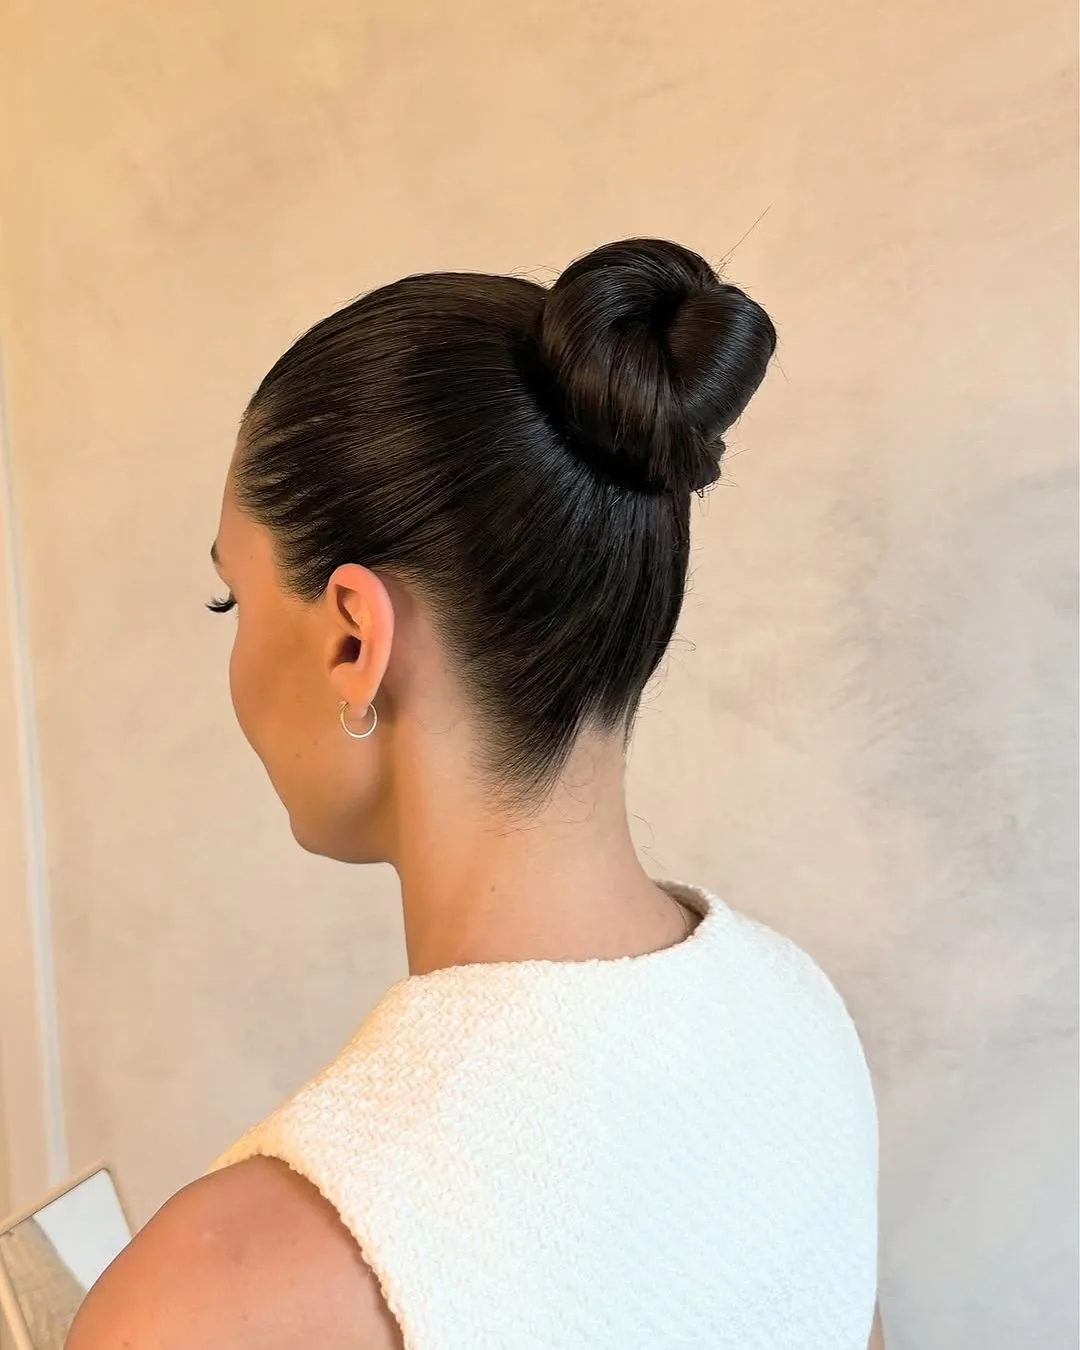
The sleek bun with a wrapped base is the bun with a hidden detail: a thin strand of hair is wrapped around the base of the bun, covering the hair tie completely, so the bun looks seamless and the tie disappears. It is a small change with a big effect — the bun looks more polished, more expensive and more finished, because there is no elastic in sight. It is the bun for a wedding, a formal event, or any occasion when the details matter, and it is also the bun that photographers love, because there is nothing to distract from the silhouette.
Best for: every face shape, and for medium and long hair, where the wrapping strand has enough length. How to style it: make the bun, leave out a thin strand, wrap it around the base and pin the end underneath. Pros: hides the tie, looks more polished, costs nothing. Cons: the wrap can unravel if it is not pinned well. Maintenance: one hidden pin is usually enough. Time: two extra minutes. Quick verdict: the cheapest upgrade in this guide — one strand, wrapped around the base, and the bun looks salon-made.
33. The Sleek Bun with a Braided Crown
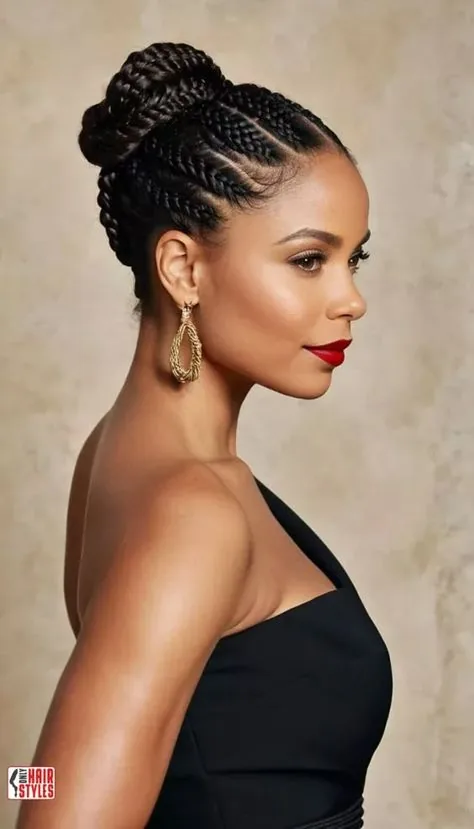
The sleek bun with a braided crown is the bun with a halo: a braid runs along the hairline like a crown, and the rest of the hair is gathered into a smooth bun at the back. The braid gives the style structure and detail at the front, and the bun gives it volume and polish at the back — a combination that looks deliberate, romantic and completely modern. It suits a wedding, a garden party, a formal dinner or any occasion when you want the bun to have a little more craft to it.
Best for: oval, round and heart-shaped faces, and for medium and long hair. How to style it: braid a section along the hairline first, then gather the rest of the hair into a bun, pinning the end of the braid into the bun. Maintenance: the braid holds its shape well, so this bun lasts all day. Time and cost: fifteen to twenty minutes at home, or a salon visit for a big event. Common mistake: making the braid too loose, which lets it sag — keep it snug against the head. A crown and a bun, in one style.
34. The Sleek Gym Bun
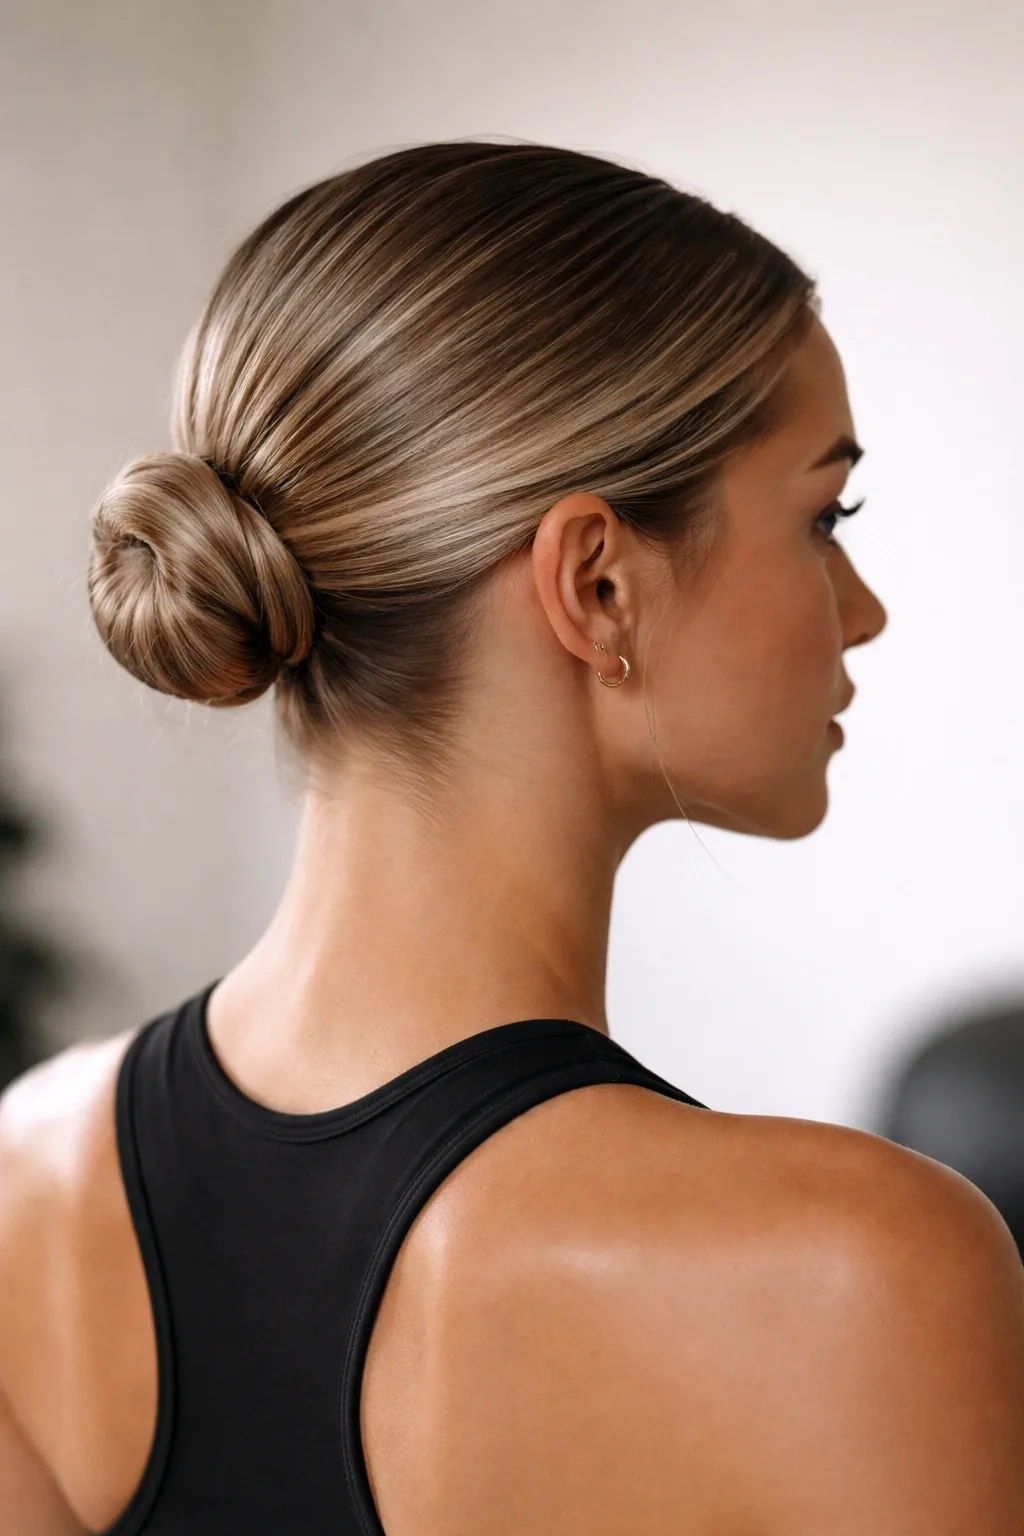
The sleek gym bun is the bun that works as hard as you do: hair brushed smooth, gathered high or low, and pinned so securely that it survives a run, a class, a swim or a full workout without loosening. It keeps the hair completely off the face and neck, which is exactly what you want when you are moving, and it looks polished enough to wear straight from the gym to lunch without redoing it. The gym bun is not a glamorous bun — it is a practical one — but it is the bun that proves sleek and strong can be the same thing.
Best for: every face shape, and for anyone who works out with their hair up. How to style it: gather the hair firmly, twist it tightly, coil it and pin it with more pins than usual, and use a sweat-wicking headband while you exercise. Pros: secure, practical, and it keeps the hair off the neck. Cons: a tight gym bun can pull at the hairline, so do not wear it tight every day. Maintenance: smooth the hairline again after the workout with a little edge control. Time: five minutes. Quick verdict: the hardest-working bun in this guide — built to stay put.
35. The Sleek Second-Day Bun
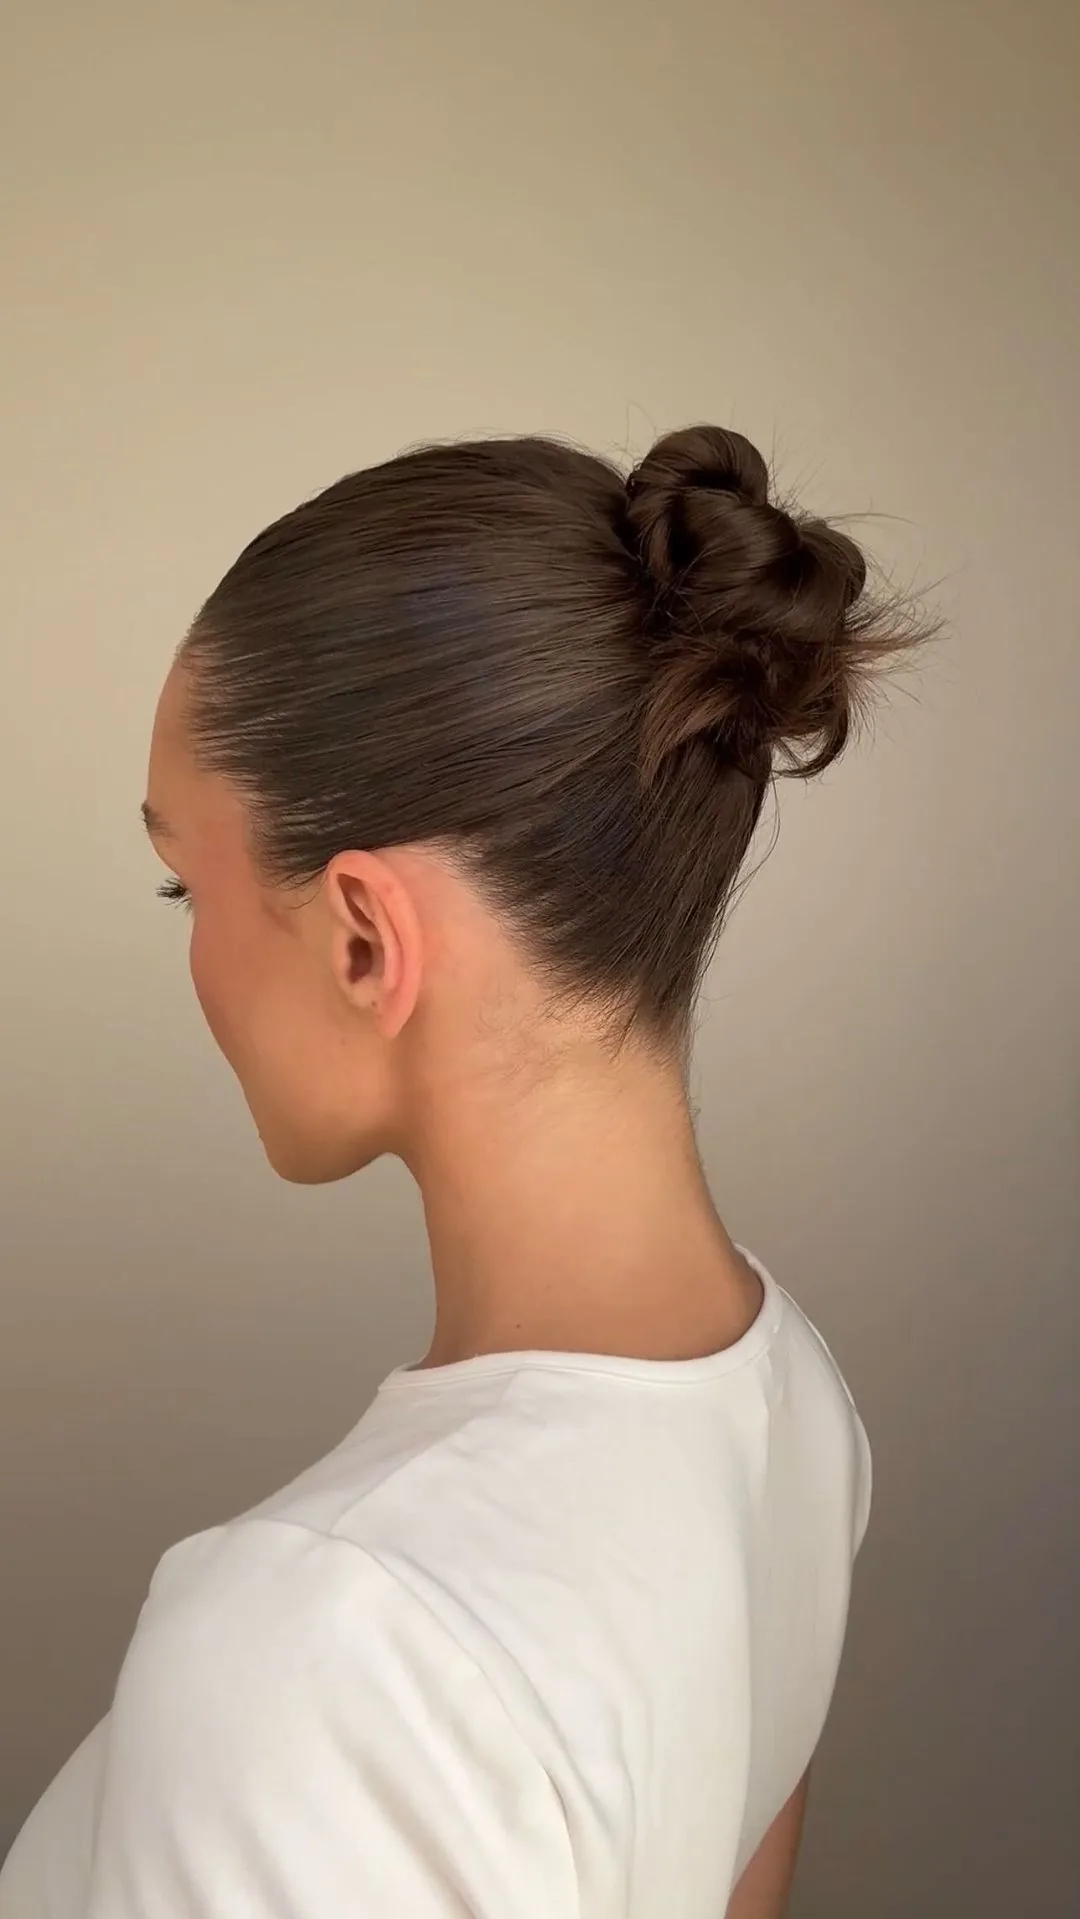
The sleek second-day bun is the bun that saves a bad hair day: hair that is a day past washing, a little flat at the roots and a little frizzy at the ends, gathered into a smooth, polished bun that hides all of it. Second-day hair is actually the best hair for a sleek bun, because it has natural grip and texture that freshly washed hair does not — the bun holds better, the pins grip better, and the style lasts longer. It is the bun for a busy morning, a surprise meeting, or any day when the hair is not cooperating and you need it to look like it is.
Best for: every face shape, and for anyone who washes their hair every two or three days. How to style it: brush the hair smooth, apply a little dry shampoo at the roots if needed, gather it into a bun and smooth the surface with gel. Pros: hides a bad hair day, holds better than a fresh-hair bun, and takes five minutes. Cons: none, really — second-day hair is a bun’s best friend. Maintenance: a quick smoothing of the hairline during the day. Time and cost: five minutes, no products beyond dry shampoo and gel. Quick verdict: the bun that turns a bad hair day into a good hair day.
36. The Sleek Bun with a Headband
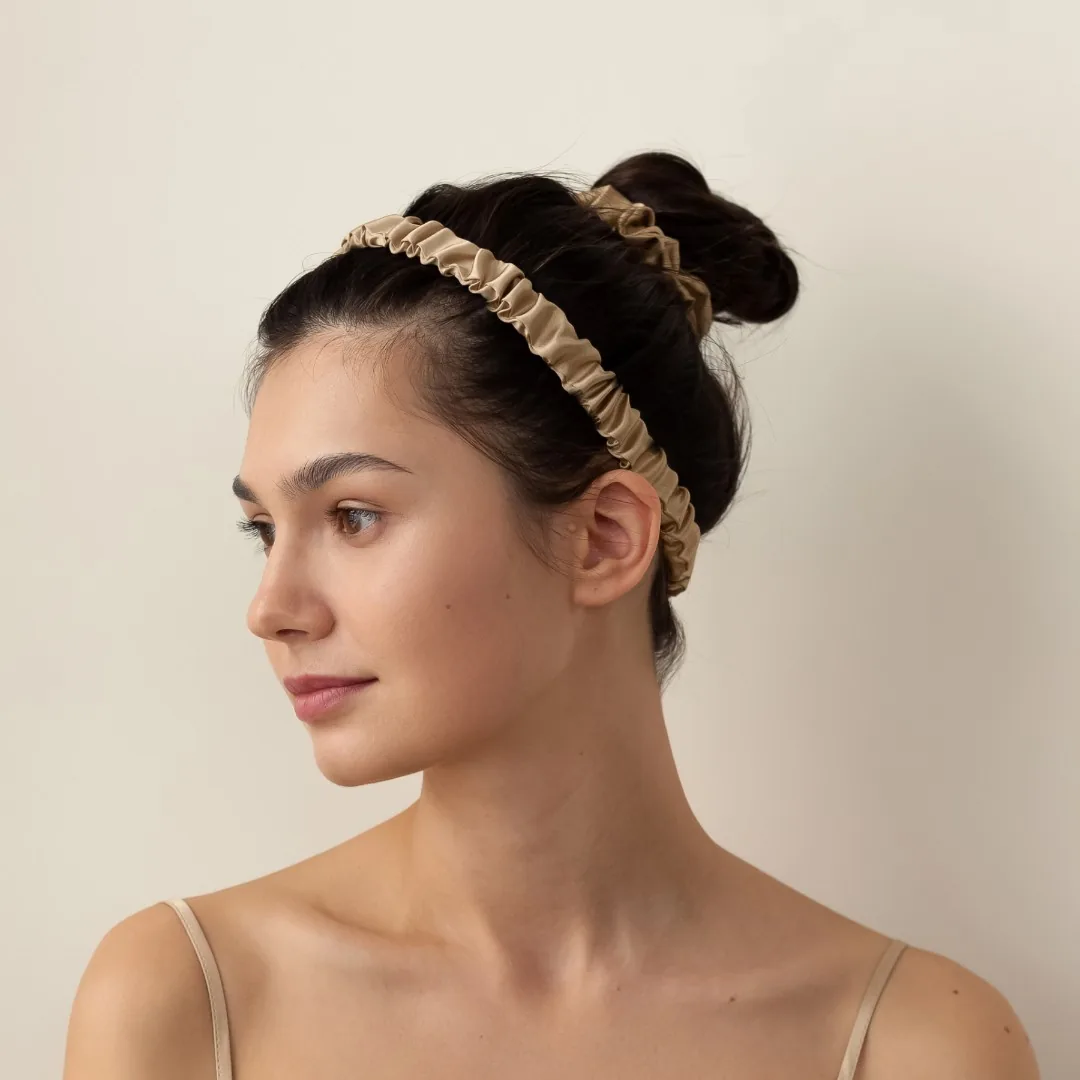
The sleek bun with a headband is the quickest transformation in this guide: one accessory, and the whole bun changes. A headband pushes the front of the hair back, shows off the face, and adds a line of colour or texture across the hair — and it works with every bun placement, from a low bun to a high ballerina bun. A thin, fabric headband is the everyday choice; a wide, padded one is the statement; and a beaded or velvet band turns the bun into evening hair in seconds. It is also the most practical bun accessory, because it keeps the hair out of your face on a windy day.
Best for: every face shape, and for women growing out a fringe, because the headband tidies the in-between lengths. How to style it: make the bun first, then slide the headband on and position it behind the hairline. Pros: instant change, no extra styling time, and it hides flyaways at the front. Cons: a tight headband worn every day can cause breakage along the hairline, so vary the position and choose a soft fabric. Time and cost: seconds, and the price of the band. Quick verdict: three headbands, three different buns — the cheapest variety in this guide.
37. The Sleek Bun with a Silk Scrunchie
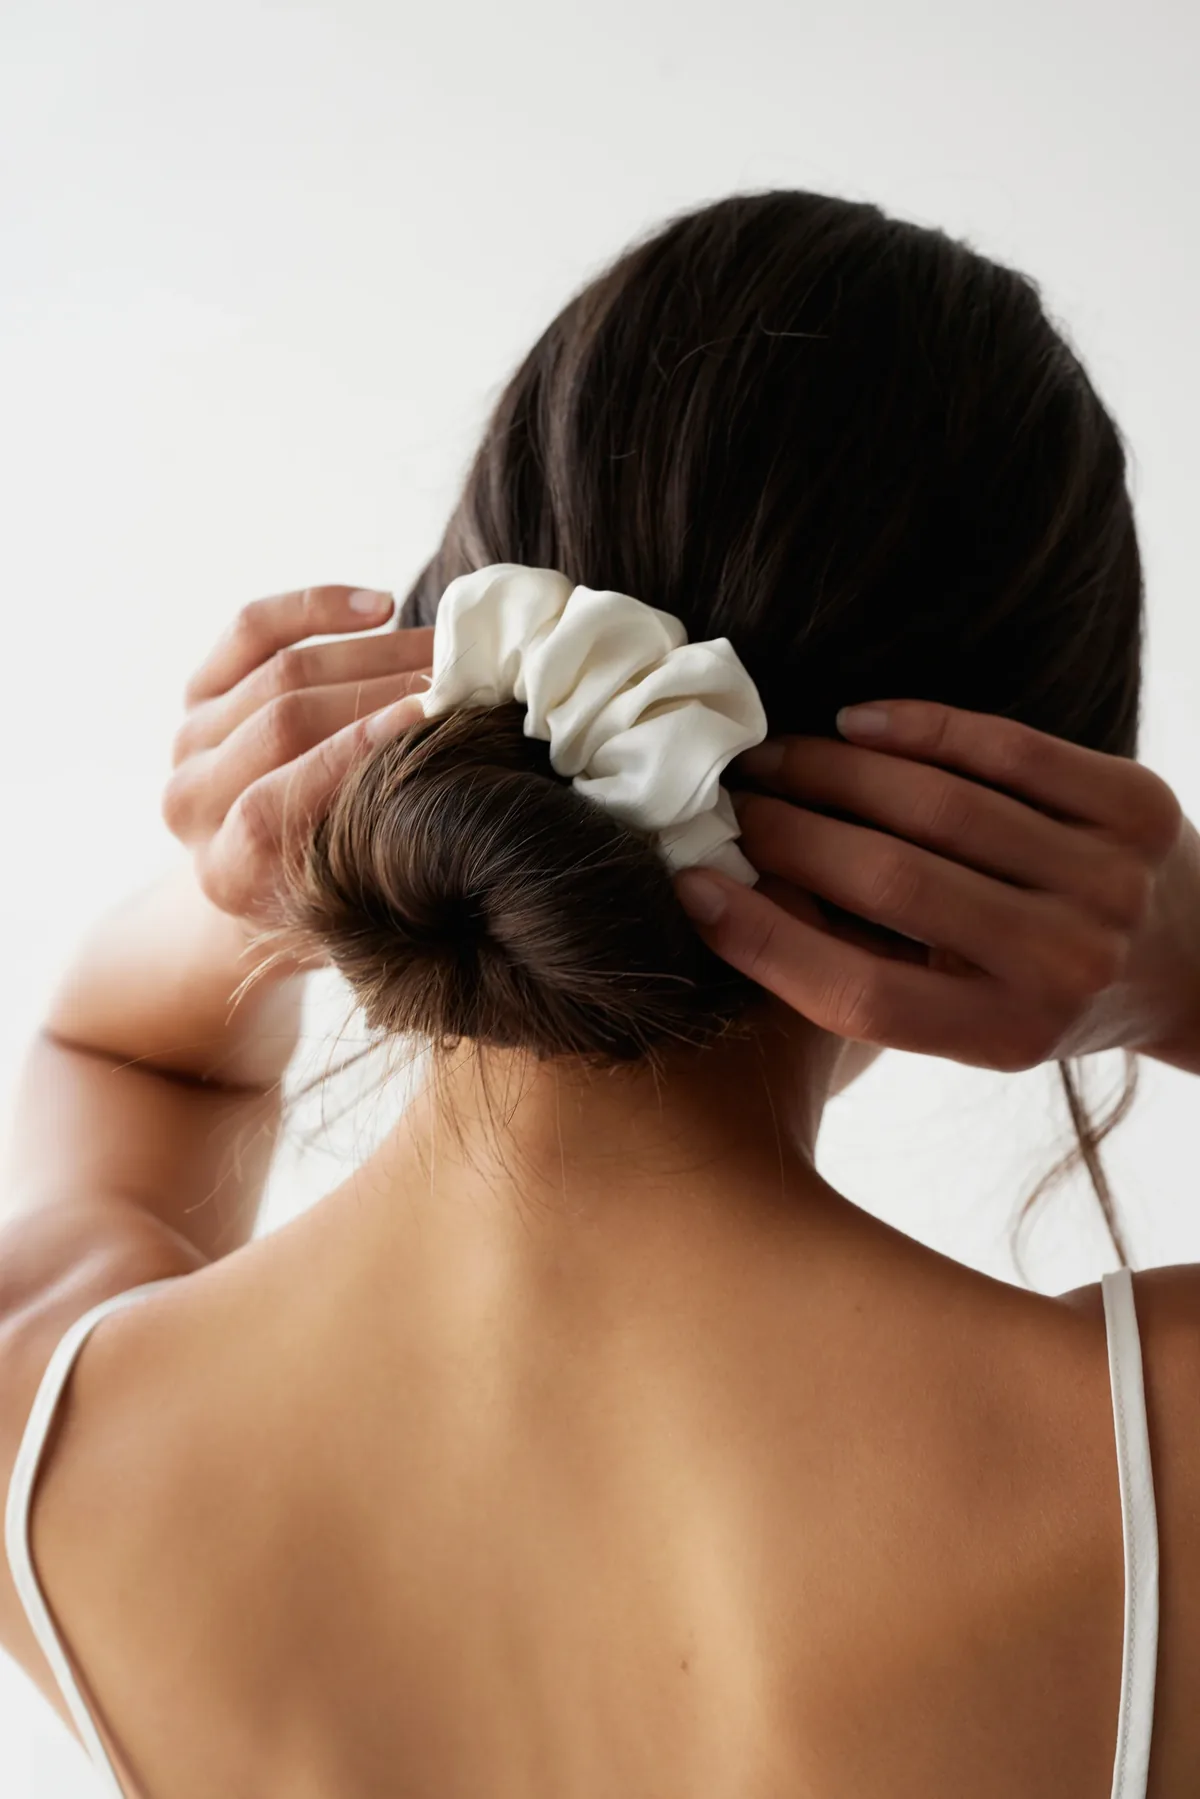
The sleek bun with a silk scrunchie is the bun that is kind to your hair: a silk or satin scrunchie holds the bun without denting the hair or snapping the strands the way a tight elastic does, and it adds a soft, luxurious detail at the base of the bun. A silk scrunchie in a colour that matches your hair looks almost invisible; one in a contrasting colour becomes an accessory in its own right. It is the bun for everyday wear, for sleeping in a bun, or for anyone whose hair breaks easily at the tie.
Best for: every face shape, and for fine or fragile hair that snaps under a tight elastic. How to style it: gather the hair with the scrunchie, twist and coil it, and pin it — the scrunchie does the holding, the pins do the shaping. Pros: no dents, no breakage, and the bun is comfortable all day. Cons: a silk scrunchie holds less tightly than an elastic, so the bun needs a few extra pins. Maintenance: none — the scrunchie is the maintenance. Time and cost: five minutes, and the price of a scrunchie. Quick verdict: the gentlest bun in this guide — kind to your hair, and it looks good doing it.
38. The Sleek Knotted Bun
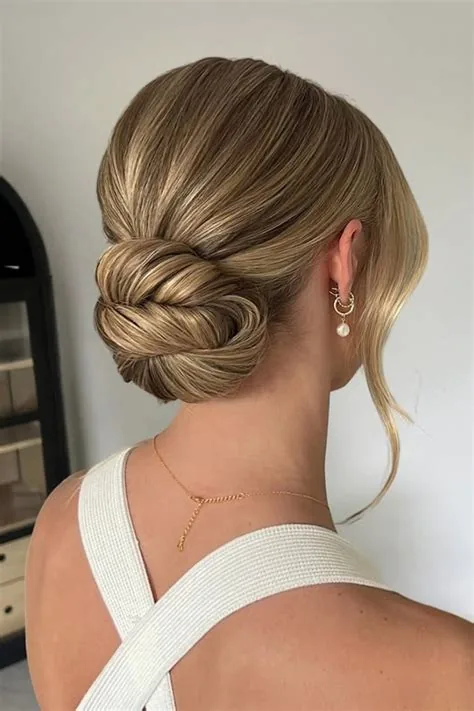
The sleek knotted bun is the bun with a twist — literally: the hair is divided into two sections, the sections are knotted together, and the knot is coiled into a bun. The knot gives the bun a sculptural, almost architectural quality, and it is the most secure bun in this guide after the braided bun, because the knot itself holds the hair together. It is the bun for a modern bride, a fashion event, or any occasion when you want the bun to look like it was designed rather than just styled.
Best for: medium and long hair, because the knot needs length to form. How to style it: divide the hair into two sections, tie them in a knot, then coil the knot into a bun and pin it. Pros: secure, sculptural, and it looks more complicated than it is. Cons: it takes a little practice to get the knot even. Maintenance: almost none — a knotted bun holds its shape all day. Time: ten to fifteen minutes. Quick verdict: the most architectural bun here — a knot, a coil, and a style that looks like it came from a salon.
39. The Sleek Bun for a Round Face
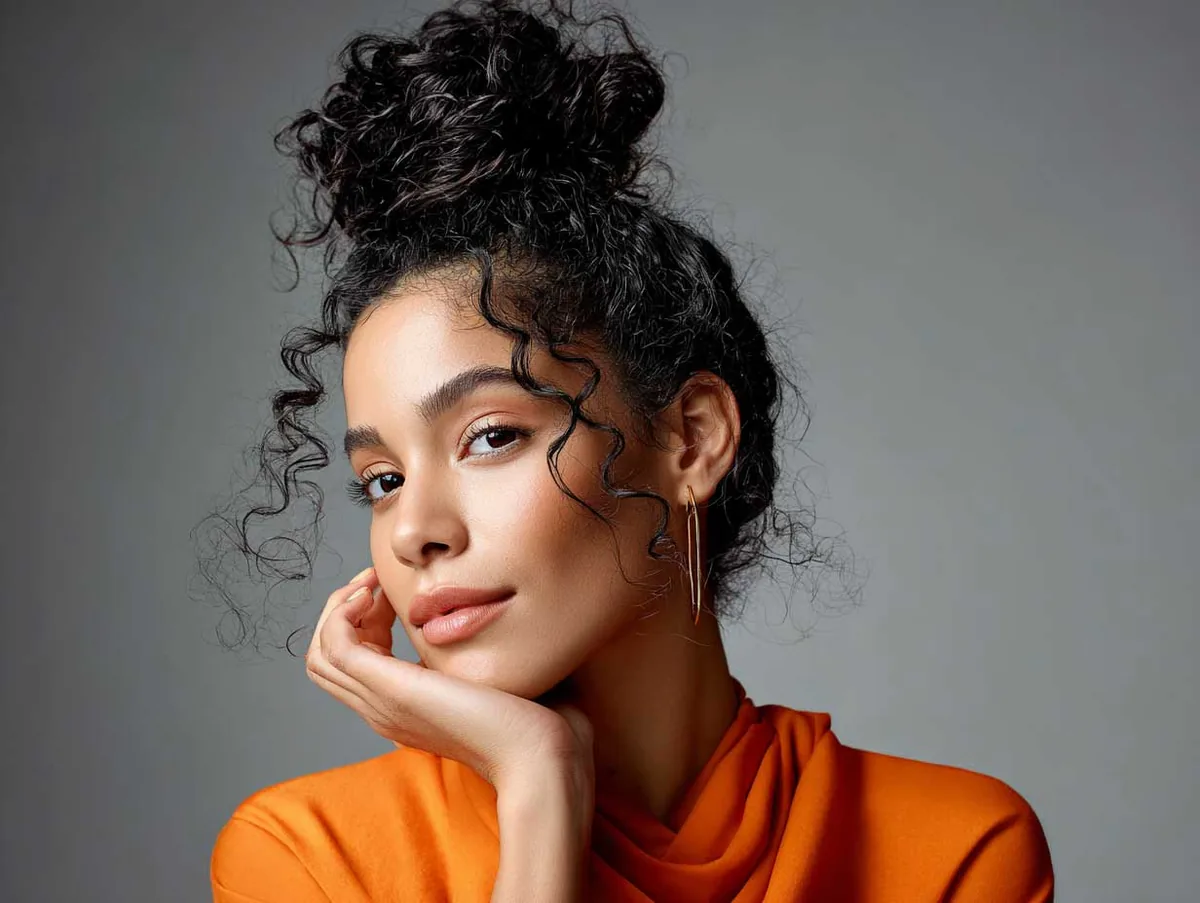
The sleek bun for a round face is all about placement: a high or mid-height bun, with a little height on top, lengthens the face and balances its width, while a low bun on a round face can make the face look wider than it is. The trick is height — a bun that sits at the crown, with the hair brushed smoothly upward, draws the eye up and makes the face look longer. A centre part works well here too, because it adds a vertical line down the middle of the face, and a few face-framing strands soften the cheeks without adding width.
Best for: round faces, obviously — and for anyone who wants their face to look longer. What to ask your stylist for: a high or mid-height bun with a clean centre part, not a low bun. Common mistake: a low, wide bun, which emphasises the width of the face. How to style it: brush the hair upward into a high bun, smooth the surface, and leave two thin strands at the front. Maintenance: the same as any sleek bun — a few pins and a smoothing of the surface. Quick verdict: on a round face, height is your friend. Put the bun up high, and let it do the lengthening.
40. The Sleek Bun for a Long Face
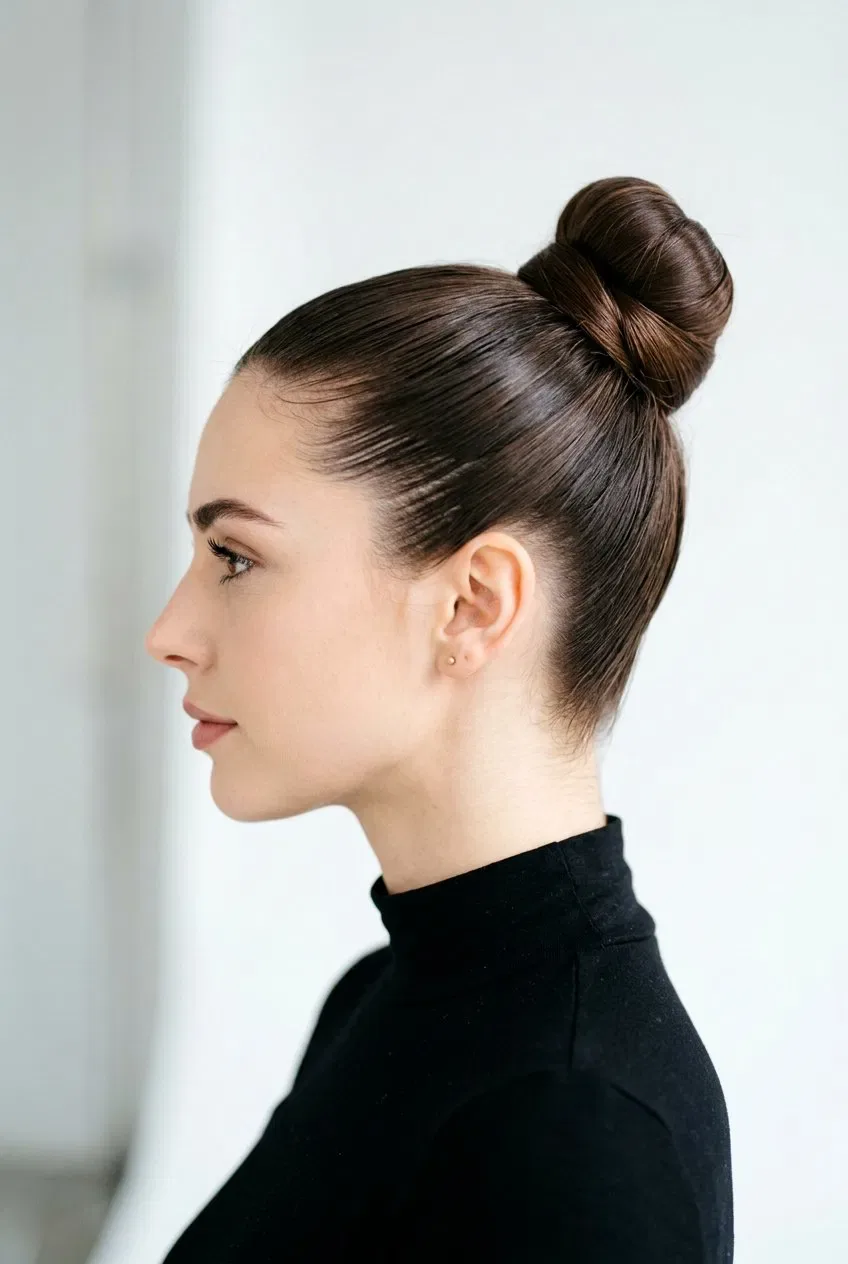
The sleek bun for a long face is the opposite of the round-face bun: a low bun, sitting at the nape, with width rather than height, so the face looks shorter and more balanced. A low bun adds fullness at the sides of the head, which widens the silhouette and counteracts the length of the face, while a high bun would only make the face look longer. A side part works well here, because the diagonal sweep breaks up the vertical line of the face, and a wider, softer bun suits a long face better than a small, tight one.
Best for: long and oval faces. What to ask your stylist for: a low, wide bun with a side part, not a high top knot. Common mistake: a high bun, which adds height where the face already has plenty. How to style it: gather the hair low at the nape, coil it into a wide, soft bun, and part the hair on the side. Maintenance: the same as any sleek bun. Time: five to ten minutes. Quick verdict: on a long face, low and wide beats high and tight. The bun should balance the face, not lengthen it further.
41. The Sleek Bun for a Night Out
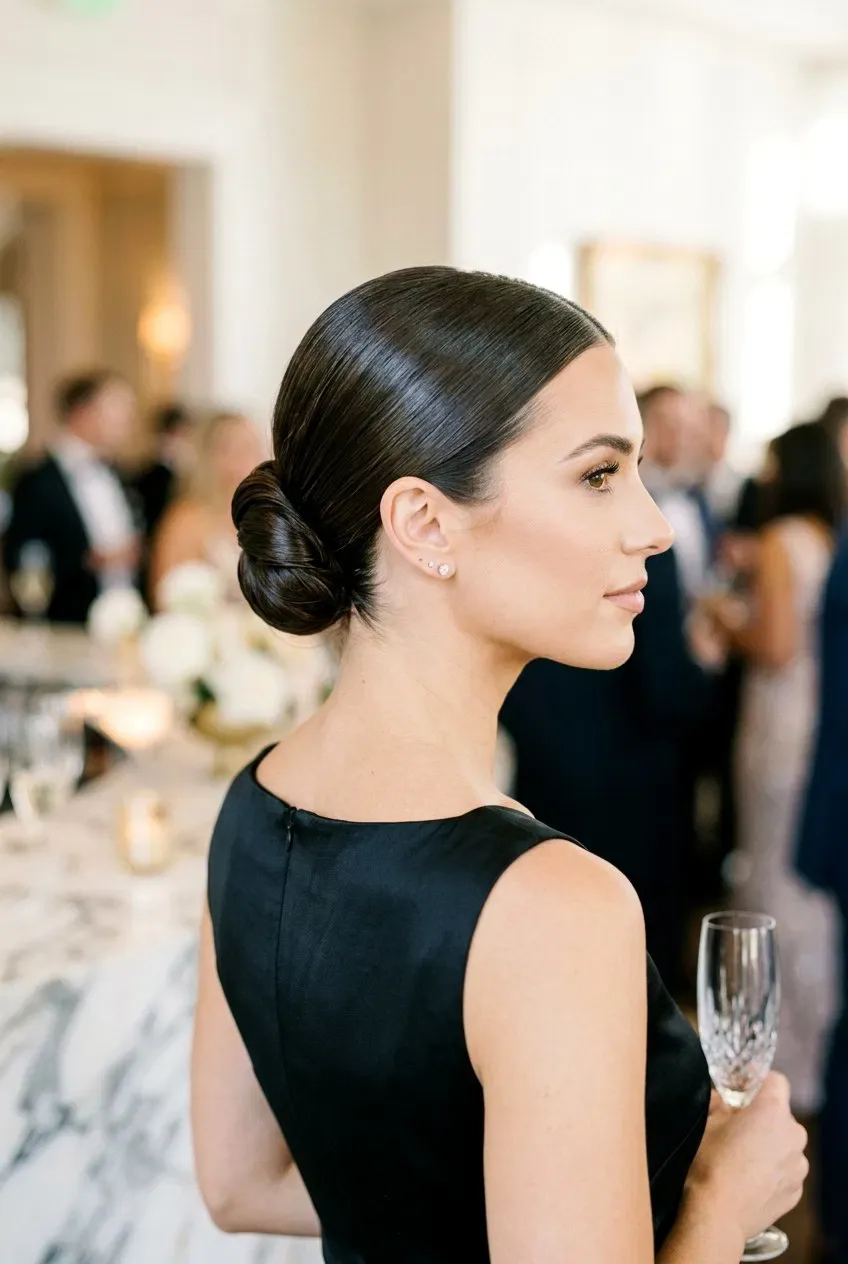
The sleek bun for a night out is the bun at its most glamorous: a high or mid-height bun, perfectly smooth and shiny, with a bold accessory — a crystal clip, a gold cuff, a velvet bow — and a face-framing strand or two to keep it from looking severe. It suits a cocktail dress, a night out with friends, a party or a date, and it is the bun that survives dancing, dinner and a long evening without needing a touch-up. The night-out bun is the day bun with the volume turned up: more shine, more height, and one accessory that catches the light.
Best for: every face shape, and for anyone who wants to look polished after dark. How to style it: make the bun a little higher and a little bigger than your daytime bun, add shine with a pomade, and finish with one statement accessory. Pros: glamorous, secure, and it holds all night. Cons: it needs more product and more pins than a daytime bun. Maintenance: a quick check in the mirror halfway through the evening is usually enough. Time and cost: fifteen minutes, plus an accessory. Quick verdict: the bun that goes out when you do — smooth, shiny, and ready for the night.
What is a sleek bun hairstyle?
A sleek bun hairstyle is an updo in which the hair is brushed smooth, with no flyaways or bumps, and gathered into a neat bun — usually low at the nape, high at the crown, or in a top knot. The hair is held flat against the head with gel, pomade or edge control, and the bun itself is coiled and pinned so it holds its shape. Sleek buns suit every face shape and work for work, weddings and formal events.
How do you make a bun sleek?
To make a bun sleek, brush the hair smooth while it is slightly damp, apply a small amount of gel or pomade to the surface, and brush again to distribute it. Gather the hair into the bun’s position, checking for bumps in the mirror, then twist, coil and pin it. Smooth the hairline with a toothbrush and a little edge control, and finish with a light mist of hairspray. The key is brushing twice and using less product than you think you need.
How do I keep my sleek bun from falling out?
To keep a sleek bun from falling out, use a strong hair tie, twist the hair tightly before coiling it, and pin the bun with four to eight bobby pins, pushing each pin in against the direction of the bun so it grips the hair underneath. A braided or knotted bun holds even better, because the braid or knot secures the hair before it is coiled. Check the bun at lunchtime and re-pin if it has slipped.
Can I do a sleek bun on short hair?
Yes, you can do a sleek bun on short hair — chin-length or bob-length hair can be gathered into a small bun, especially with a little help from a donut form. Gather the hair at the nape, twist it into a small coil, and pin the loose ends underneath. A small donut form in your hair colour gives the bun the fullness it would not have on its own, and the result looks deliberate rather than improvised.
How do I do a sleek bun on curly hair?
To do a sleek bun on curly hair, blow-dry the hair smooth with a brush first, or work gel through damp hair and brush it flat before gathering it. The blow-dry is the step that matters most, because the bun will only be as smooth as the hair going into it. Finish with a smoothing serum on the surface to stop the curls from springing back, and use a few extra pins, because curly hair is heavier when it is gathered.
What products do I need for a sleek bun?
For a sleek bun you need a boar-bristle brush or a fine-tooth comb, a strong hair tie, bobby pins in your hair colour, and a light-hold gel, pomade or edge control. A clean toothbrush is useful for smoothing the hairline, and a silk scrunchie is gentler on the hair than a tight elastic. A light mist of hairspray, held at arm’s length, is the final seal. Buy the brush first and the gel second — the tools do more of the work than the products.
How long does a sleek bun last?
A well-pinned sleek bun lasts all day — eight to twelve hours — if it is brushed smooth, sealed with gel or pomade, and pinned with enough bobby pins. A braided or knotted bun lasts even longer, because the braid or knot holds the hair together. Humidity is the main threat, so seal the surface with a pomade or a smoothing serum, and carry a few extra pins for a quick refresh in the afternoon.
Is a sleek bun bad for your hair?
A sleek bun is not bad for your hair if it is not pulled too tightly. A bun tied too tightly pulls at the hairline, causes headaches and can break the hair at the edges, especially if it is worn tight every day. Gather the hair firmly, not fiercely, vary the position of the bun, and give your hair a rest with a loose style on some days. A silk scrunchie is gentler than a tight elastic, and it leaves no dent in the hair.
What is the difference between a low bun and a chignon?
A low bun and a chignon are very similar, but a chignon is usually softer and looser — a low, relaxed coil at the nape, often with a slightly undone finish — while a low sleek bun is tighter, smoother and more polished. The chignon is the French classic, elegant and a little relaxed; the low sleek bun is the modern version, sharper and more precise. Both sit at the nape, and both suit formal occasions.
Can I wear a sleek bun to a wedding?
Yes, a sleek bun is one of the best wedding hairstyles — a low chignon or a low sleek bun with a clean part, a smooth surface and a few pearl pins or a hair vine looks timeless in photographs and holds a veil without slipping. Brides usually choose a low bun, because it frames the face and leaves room for a veil or a tiara. Do a trial run with your stylist first, and wear the bun for a full day before the wedding to check that it holds.
Conclusion
The sleek bun is not the easiest updo — it asks for a brush, a little product, and five to fifteen minutes of attention. But it gives back more than it asks for: a style that looks deliberate, a silhouette that flatters every face, and a bun that stays where you put it from morning to midnight. Behind the smoothness is a simple truth — a sleek bun is not about having the right hair type, it is about having the right technique. Brush twice, use less product than you think you need, pin more than you think you need, and the bun will do the rest.
Start with the bun that feels like you — the classic low bun, if you are not sure — and learn its routine: smooth, gather, coil, pin, and a quick check in the mirror. Wear it low for work, high for a night out, slicked back for a wedding, and braided when you need it to last all day. And when someone asks how your hair looks so polished, tell them the truth: you brushed it, you pinned it, and then you left it alone. A sleek bun is not magic. It is a brush, a few pins, and a little patience — worn with confidence.