Waterfall Braid Hairstyles for Women: Romantic Cascades, Half-Up Crowns and Wedding-Ready Braids
A waterfall braid is the prettiest trick in braiding: instead of pulling every strand through, you let one strand drop out of the braid at each step, so the hair falls like water through the plait. The result is a soft, romantic line across the head with loose strands cascading below it — a style that looks intricate and delicate, yet is really just a French braid with one small change. It is the braid for women who want something softer than a tight plait and more special than loose hair, and it works on straight, wavy and curly hair alike. A waterfall braid frames the face, shows off colour and layers, and turns ordinary hair into something that looks made for a photograph.
This guide gathers 44 waterfall braid hairstyles for women, from the classic half-up cascade and the double waterfall braid to waterfall crowns, wedding and prom braids, waterfall braids with curls, waves and flowers, and versions for short, medium and long hair. Eight guides cover how the braid actually works, how it differs from French, Dutch and fishtail braids, a step-by-step you can follow at home, which lengths and textures suit it best, how curls and colour change it, how to wear it for weddings and proms, and the mistakes that make it slip or fall flat. One honest note first: a waterfall braid is a soft, romantic style, not a tight gym braid — it holds best on hair with a little texture, a little grip, and a few well-placed pins.
How a Waterfall Braid Actually Works — The Dropped Strand
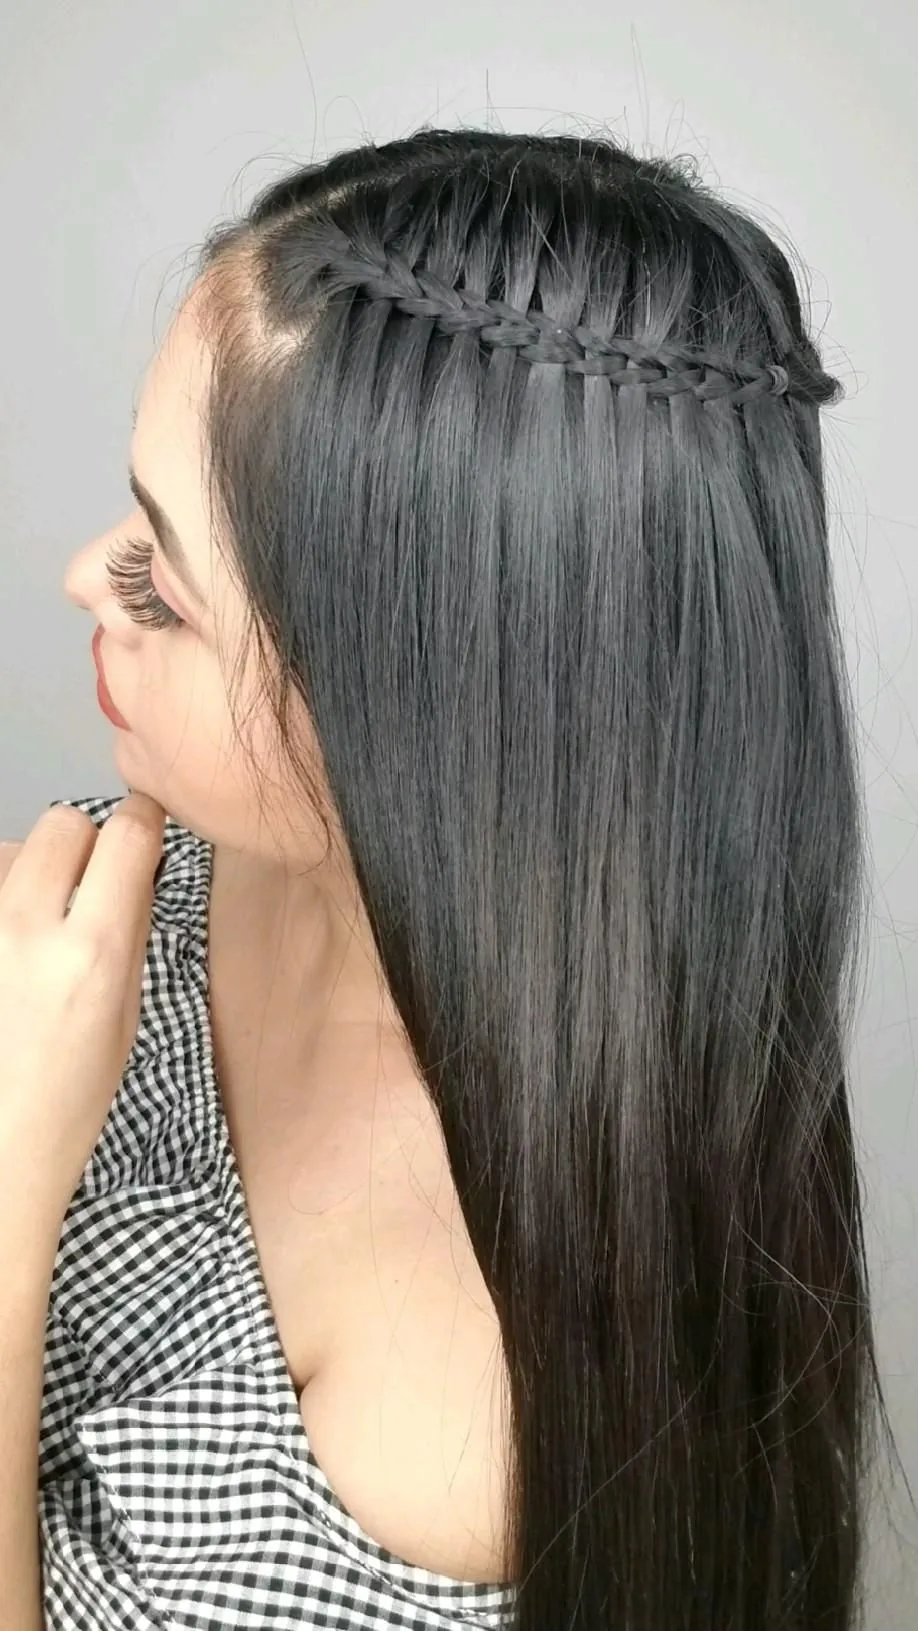
A waterfall braid starts exactly like a French braid: you take a small section at the front, split it into three strands, and cross them over each other. The difference comes at the second step. Each time you would normally pick up new hair and add it to the bottom strand, you drop that bottom strand instead and let it fall free, then pick up a fresh piece of hair from just behind it to take its place. That dropped strand is the waterfall — it hangs down through the braid, and the next dropped strand hangs beside it, so you end up with a row of loose strands falling from a single diagonal plait.
The braid itself usually travels across the back of the head from one side to the other, or from both sides to meet in the middle, and it is finished with a small elastic, a pin, or by blending it into the loose hair below. Because the dropped strands are never woven back in, the braid looks open and airy rather than tight, and the falling hair moves when you do. The key skill is keeping the tension even: too loose and the braid sags, too tight and the dropped strands pull and the braid looks like an ordinary French braid. Practice on the second day after a wash, when the hair has a little natural grip, and the braid will behave far better than on freshly washed, slippery hair.
Waterfall Braid vs French, Dutch and Fishtail Braids
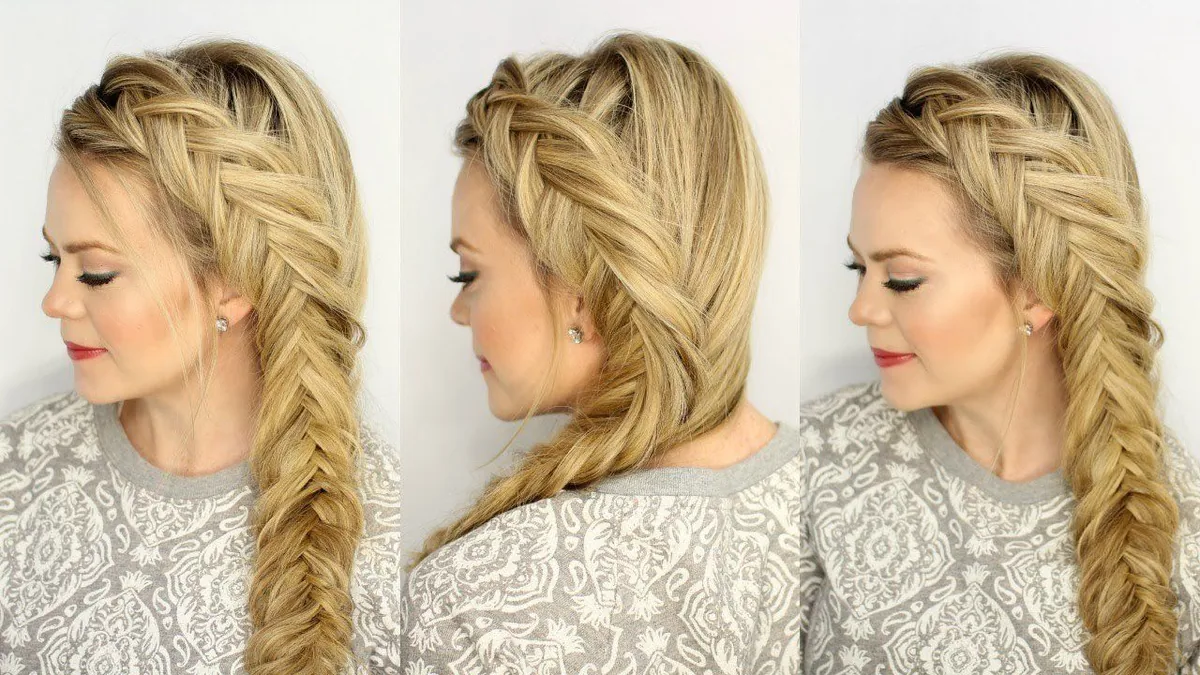
A French braid gathers all the hair into the plait, strand by strand, so nothing is left loose — it is a secure, practical braid that holds everything in place. A waterfall braid uses the same three-strand crossing, but it leaves a strand out at every step, so the finished style is half braid and half loose hair. That is the whole difference, and it changes everything about how the style looks and behaves: a French braid is tidy and sporty, a waterfall braid is romantic and decorative, and a waterfall braid will never hold as firmly as a French braid, because half the hair is deliberately left free.
A Dutch braid is a French braid in reverse — the strands cross under instead of over, so the braid sits on top of the hair like a raised cord — while a fishtail uses only two strands and makes a fine, herringbone pattern. A waterfall braid can be finished with either of those: a Dutch waterfall braid has a bolder, raised plait, and a waterfall braid with a fishtail finish has a finer, more detailed tail. The waterfall is the technique that creates the falling strands; French, Dutch and fishtail are the ways the plait itself is built. If you can French braid, you can waterfall braid — you only need to learn to let go of one strand at each step.
How to Do a Waterfall Braid Yourself — Step by Step
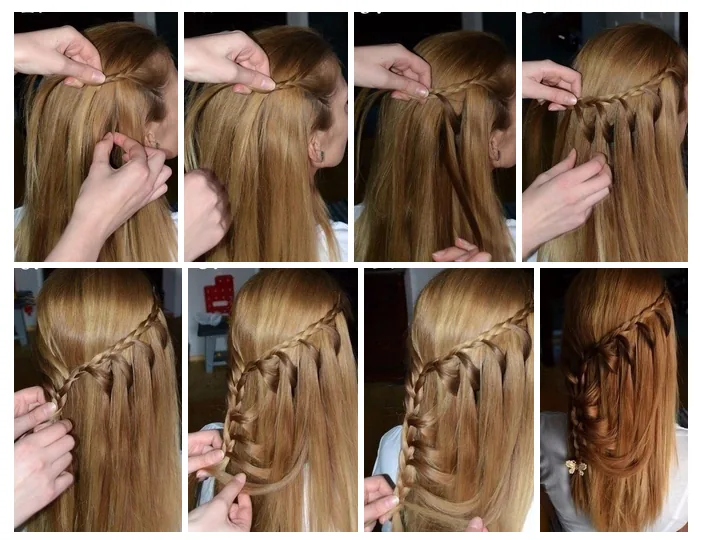
Start with brushed, slightly textured hair — a little dry shampoo or a light texturising spray on clean hair gives the grip you need. Take a section of hair at the front, near the temple, and split it into three strands. Cross the top strand over the middle, then the bottom strand over the middle, exactly as you would begin a French braid. Now take a small piece of hair from the top, add it to the top strand and cross it over; then, instead of adding hair to the bottom strand, drop the bottom strand and let it fall, and pick up a new small section from just behind where it fell to replace it. Repeat across the head, dropping and replacing, until you reach the other side.
Finish the braid by plaiting the remaining three strands for two or three more crosses without adding hair, then secure the end with a small clear elastic and tuck it under the loose hair, or pin it in place. Gently pull at the edges of the plait — a technique called pancaking — to make the braid look fuller and softer, but pull only the plait, not the dropped strands. Set the style with a light mist of flexible hairspray, and add two or three bobby pins along the braid, hidden under the hair, so it stays put for the evening. The first try will take fifteen minutes and look a little uneven; the third try will take five and look like a salon did it.
Waterfall Braids on Every Length and Hair Type
A waterfall braid needs enough length for the dropped strands to fall and be seen, so it shines on medium and long hair, where the cascade has room to show. On long hair the braid can travel all the way across the back of the head and the dropped strands fall for inches, which is the most dramatic version of the style. On medium hair — around shoulder length — the braid still works beautifully, especially as a half-up style, though the dropped strands are shorter and the effect is softer and neater. On short hair, a waterfall braid is possible from about chin length, but the braid stays close to the face and the cascade is short, so it reads more as a pretty detail than as a waterfall.
Hair type changes the braid more than length does. Straight hair shows the plait most clearly, because every crossing is visible, but it is also the slipperiest, so it needs texture spray and pins to hold. Wavy hair is the easiest of all: the natural wave gives grip, and the dropped strands fall in soft waves that look made for the style. Curly hair makes a gorgeous, full waterfall braid, though the plait can disappear into the curls unless it is pancaked open, and fine hair needs a little backcombing at the crown and a texturising spray so the braid does not look thin. Thick hair holds the braid best of all, because the weight of the dropped strands keeps the plait sitting flat against the head.
Waterfall Braids with Curls, Waves and Colour
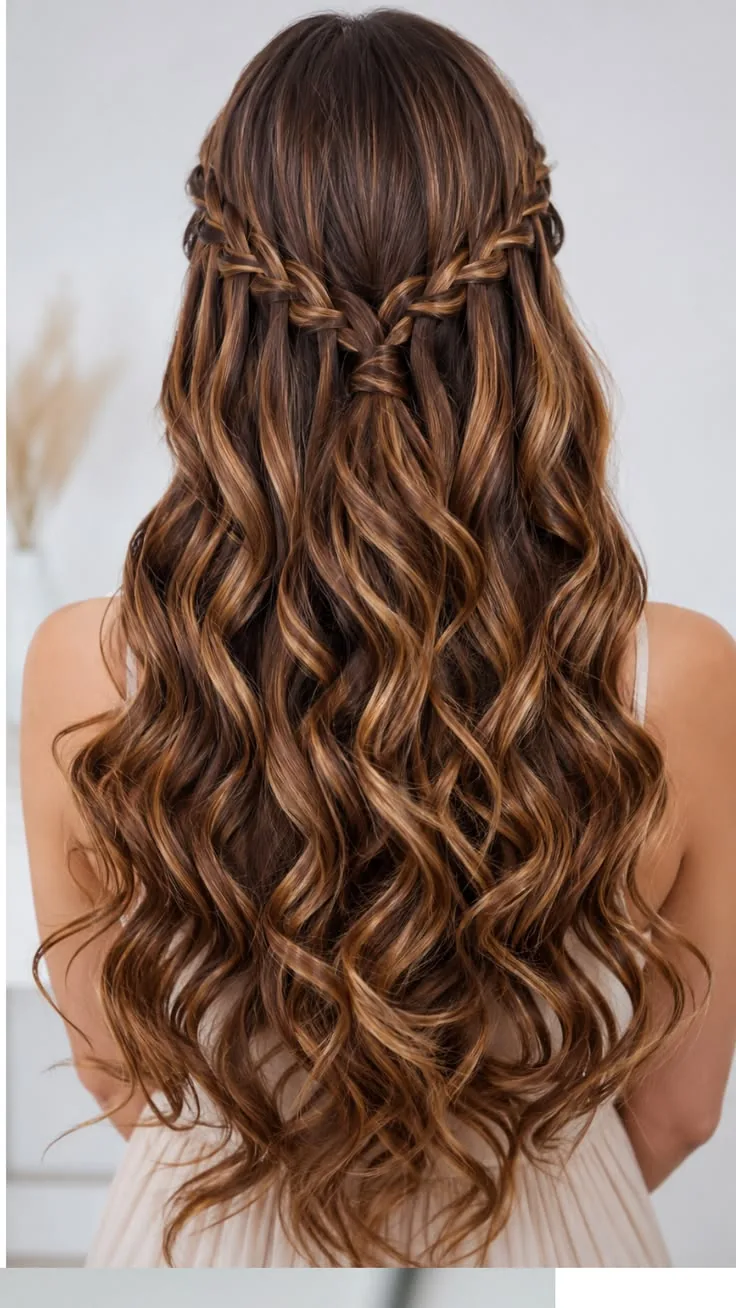
Curls are the waterfall braid’s best friend. When the dropped strands are curled, each one falls as a separate, defined curl, and the whole style looks like it was designed for a photograph — the braid gives the structure, the curls give the movement. The easiest way to get there is to braid first on mostly straight hair, then curl only the dropped strands and the ends with a curling wand, so the braid stays neat and the cascade stays bouncy. If your hair is naturally wavy, a few passes with a wand on the front sections is usually enough, and the back can be left as it is.
Colour changes a waterfall braid more than almost any other style, because the braid pulls strands from different layers of the hair and lays them side by side. Highlights and balayage show up beautifully in a waterfall braid: the lighter pieces catch the light along the plait and the darker pieces fall behind them, so the braid looks three-dimensional. On single-colour hair the braid can look flatter, so a few face-framing highlights or a balayage through the mid-lengths will make the whole style pop. If you are planning colour for a wedding or a prom, tell your colourist you want a waterfall braid — they will place the lightest pieces exactly where the braid will show them.
Waterfall Braids for Weddings, Proms and Formal Events
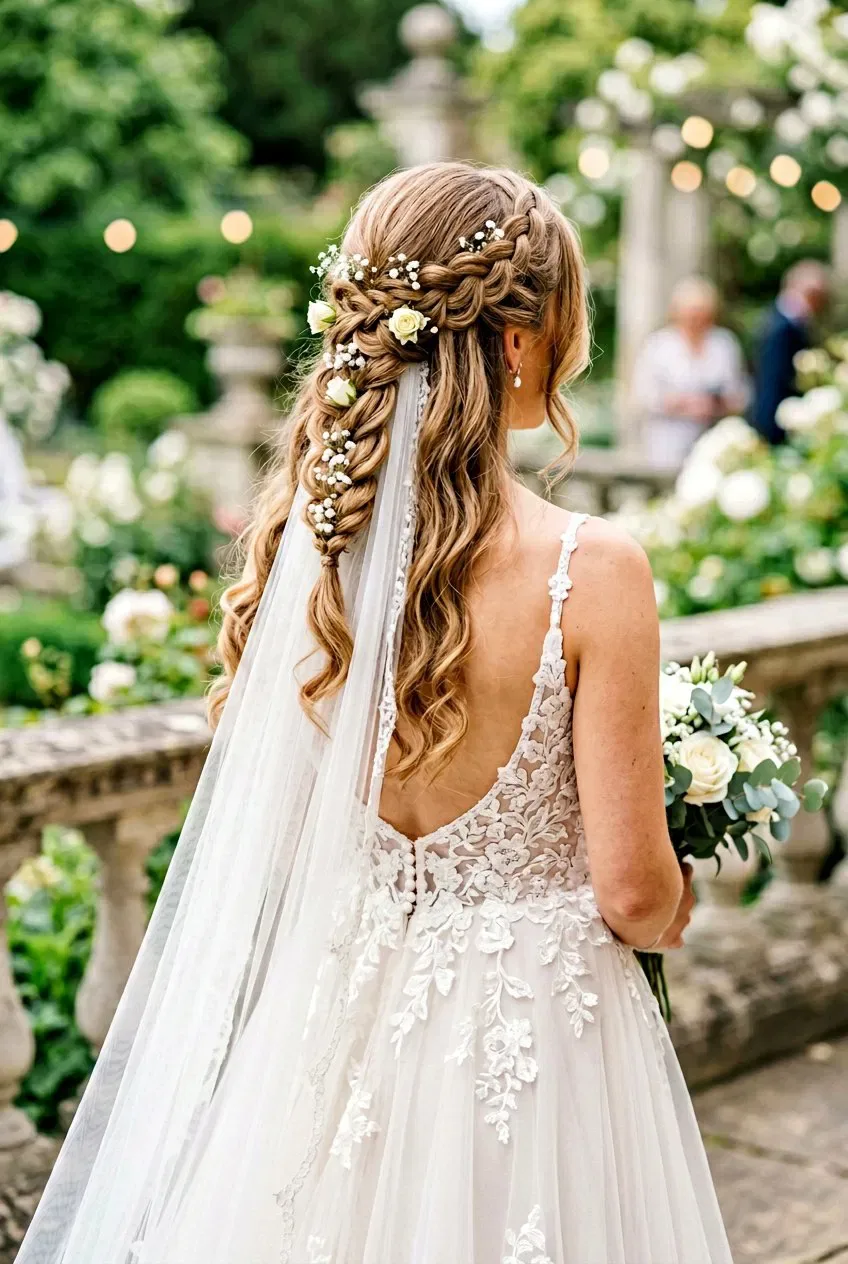
A waterfall braid is a natural wedding hairstyle, because it is romantic without being fussy, and it photographs from every angle: the braid across the back of the head, the curls falling below it, and the face fully open at the front. Brides usually wear it half-up, with the braid travelling from one side to the other and the rest of the hair curled, sometimes with a few fresh flowers or pearl pins tucked into the plait. It suits a garden wedding, a beach wedding and a classic church wedding equally well, and it works with a veil — the veil can be pinned just above or just below the braid, so the plait stays visible.
For a prom, the waterfall braid is the style that looks like you spent hours on it and took ten minutes: a double waterfall braid that meets in the middle, or a waterfall braid into a low bun, pairs beautifully with a long dress and a little sparkle. For any formal event, do a trial run first — wear the style for a full evening, with the pins and the accessories, to test how it holds — and have your stylist finish the braid a little tighter than you think you want it, because a waterfall braid loosens by about a quarter over the first hour. On the day, bring three spare bobby pins and a travel-size hairspray in your bag, and the style will survive the dancing.
Waterfall Braids with Accessories — Flowers, Pearls and Ribbons
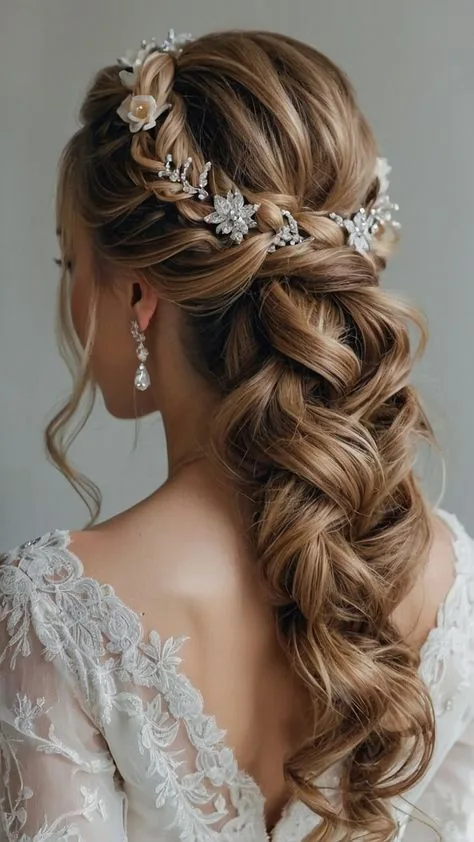
A waterfall braid is made for accessories, because the plait itself is a shelf: flowers, pins and ribbons can be tucked into it without sliding out, and the dropped strands frame them. Fresh flowers are the classic choice — small blooms like baby’s breath or tiny roses, tucked into the braid every few inches, with the stems hidden under the plait. Pearl pins are the elegant choice: three or four scattered along the braid catch the light and make the style look bridal, even on an ordinary day. A ribbon threaded through the braid, or tied at the end where the braid finishes, gives the style a soft, romantic finish that suits a garden party or a prom.
The rule with accessories is one idea at a time. Flowers plus pearls plus a ribbon is too much, and the braid disappears under the decoration — pick the one that matches the occasion and let the braid do the rest. Keep the accessories light: heavy clips and large flowers drag the plait down and make it sag, especially on fine hair. Pin each accessory into the braid itself, not into the loose hair below it, so it stays where you put it, and use a bobby pin the same colour as your hair to anchor it. If you are wearing a veil or a tiara, place it above the braid, not through it, so the two do not fight each other for the same space.
Common Waterfall Braid Mistakes and How to Fix Them
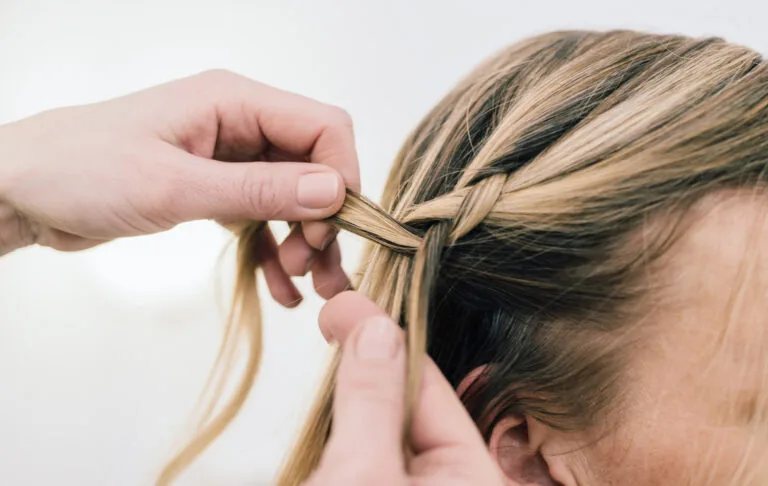
The most common waterfall braid mistake is starting on freshly washed, slippery hair. Clean hair has no grip, so the plait slides, the dropped strands pull out, and the braid falls apart within the hour. The fix is texture: second-day hair, a little dry shampoo at the roots, or a light texturising spray before you start. The second mistake is pulling the braid too tight, which flattens the dropped strands and makes the style look like an ordinary French braid — keep the tension gentle, and pancake the plait open afterwards instead of braiding it tight in the first place.
The other mistakes are about finishing and hold. Skipping the pins is the big one: a waterfall braid needs two or three bobby pins hidden along its length, because the dropped strands pull the plait downward and it will sag without them. Using too much hairspray too early stiffens the dropped strands and makes them look crunchy — spray lightly at the end, from a distance, and only on the braid itself. And the mistake that costs the most time is starting the braid too far back: begin at the temple, not at the ear, or the braid will sit too low and the cascade will fall over your shoulders instead of across your back. Start at the temple, keep it loose, pin it, and let the waterfall do the rest.
1. The Classic Half-Up Waterfall Braid
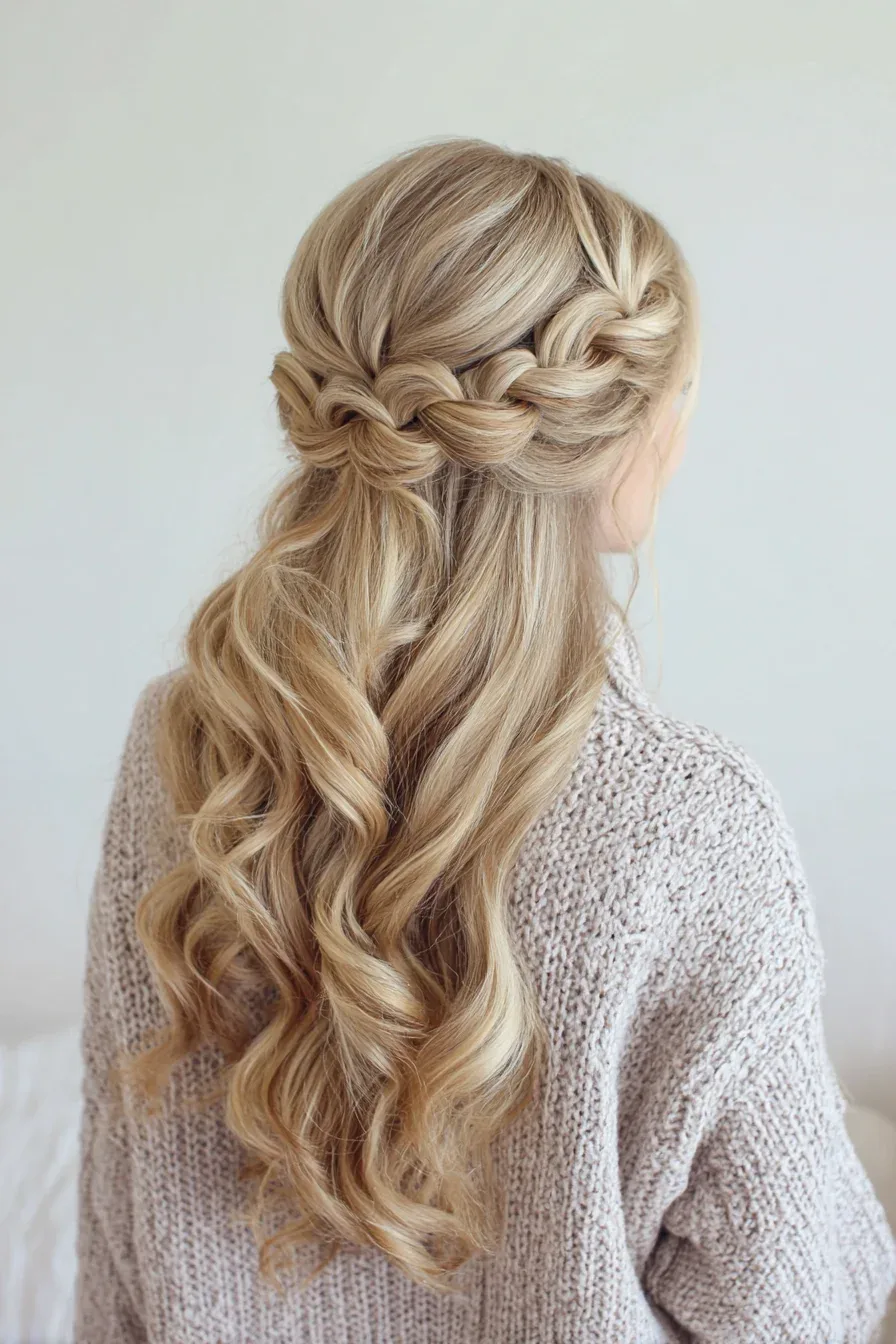
The classic half-up waterfall braid is the style that made the waterfall famous: a single braid travels across the back of the head from one side to the other, dropping strands as it goes, while the rest of the hair falls loose below it. It is the simplest waterfall braid and the most romantic, because the braid is the only structure and everything else is movement. The dropped strands fall in a neat row, the braid sits like a headband made of hair, and the face stays completely open. It suits almost everyone, and it is the waterfall braid to learn first, because every other version in this guide is a variation on it.
Best for: women with medium to long hair who want a romantic everyday style, and for anyone learning to waterfall braid. It suits oval, round and heart-shaped faces, and it is especially flattering with a side part, because the braid follows the part line. How to style: start the braid at one temple, travel across the back of the head, and pin the end under the loose hair on the far side. Curl the dropped strands and the ends lightly, and the style is done in under fifteen minutes once you have practised it twice.
Common mistake: starting the braid too low, near the ear, so the cascade falls over the shoulders instead of across the back. Start at the temple and keep the braid level. Quick verdict: if you only learn one waterfall braid, learn this one — it is pretty, practical, and it goes with everything from jeans to a wedding guest dress.
2. The Double Waterfall Braid
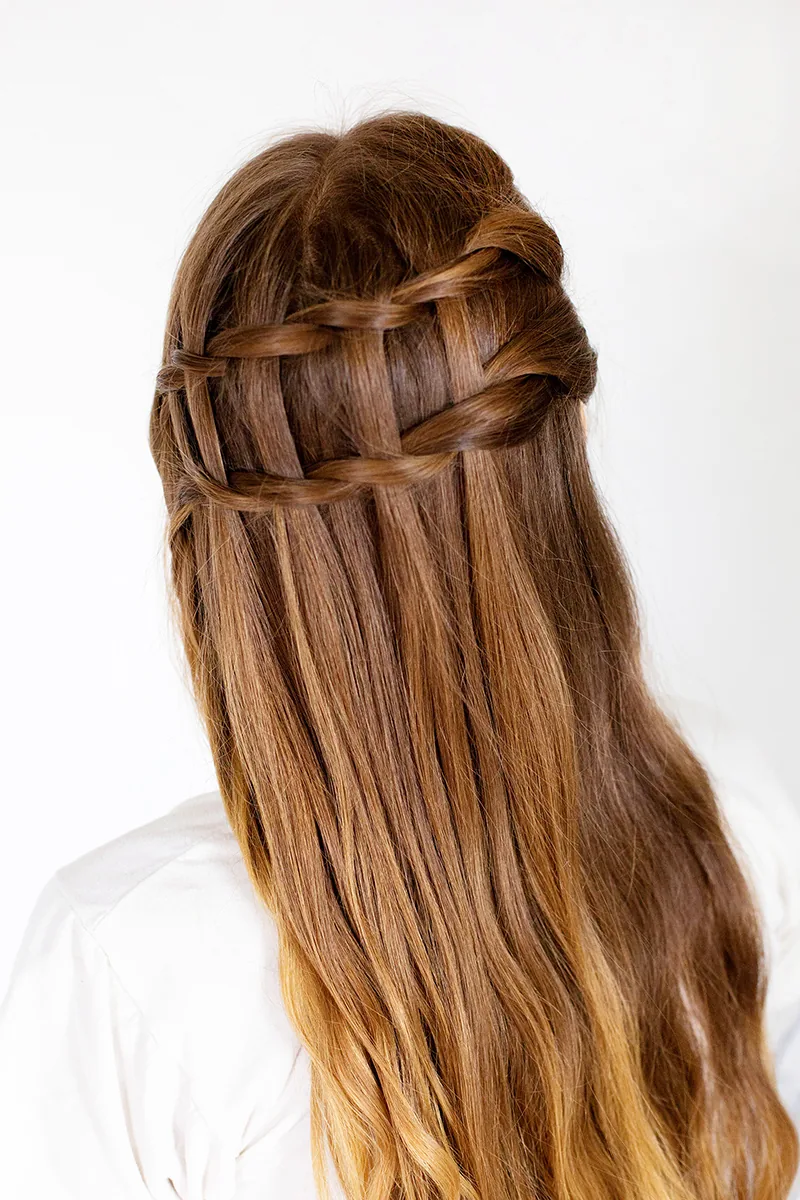
The double waterfall braid starts a braid on each side of the head and brings them together in the middle, where they meet and are pinned or tied. It is the most balanced waterfall braid, because the two plaits mirror each other, and it is the version that holds best, because each braid is shorter and lighter than a single braid travelling the whole way across. The dropped strands fall in two matching cascades, and the meeting point in the middle is the perfect place for a flower, a pearl pin, or a small bow.
Best for: weddings, proms and photographs, where symmetry matters, and for thick hair, where a single long braid gets heavy. How to style: part the hair in the middle, braid from each temple toward the centre, and secure the two ends together with a small elastic, then cover the elastic with a strand of hair or a decorative pin. Keep both braids at the same height, or the meeting point will sit crooked — a mirror check from behind is worth the extra minute.
Pros: holds longer than a single waterfall braid, looks symmetrical, and the meeting point hides the elastic beautifully. Cons: it takes a little longer, and matching the two sides takes practice. Quick verdict: the double waterfall is the occasion version of the classic — choose it when the photos matter.
3. The Waterfall Braid Crown
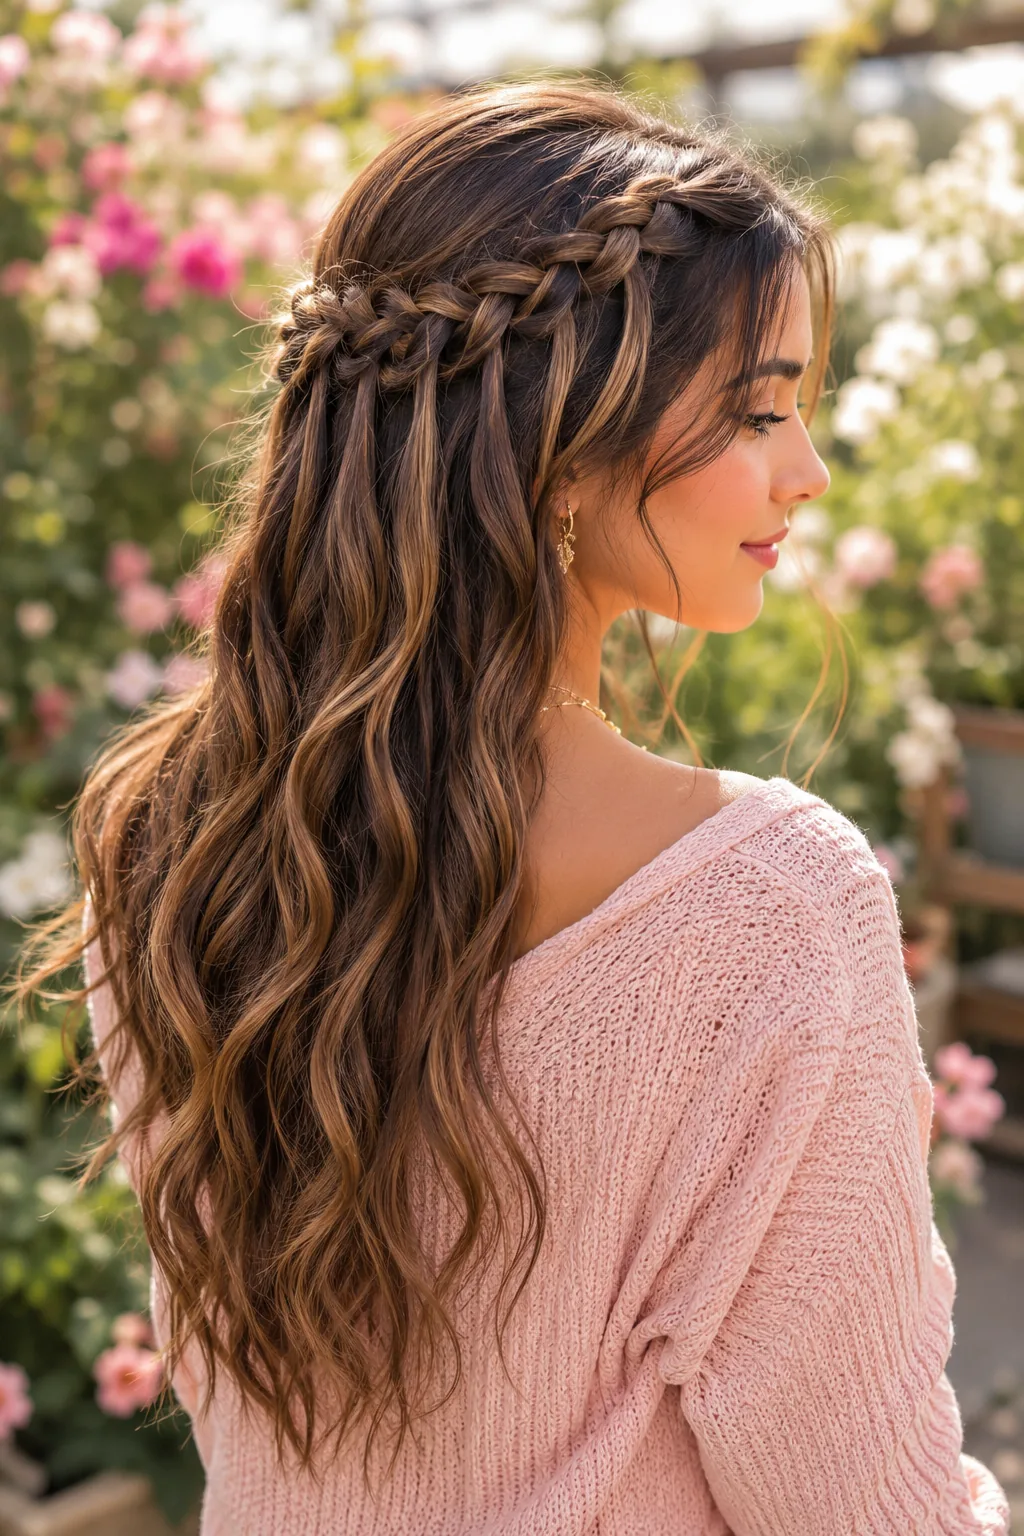
The waterfall braid crown — sometimes called a halo waterfall — wraps the braid all the way around the head, like a crown made of hair, with the dropped strands falling inside and outside the circle. It is the most regal waterfall braid, and the most striking from behind, because the plait forms a complete ring. It suits a bride, a bridesmaid, or any formal occasion, and it also works as a festival style, when the crown is left a little looser and messier for a boho feel.
Best for: long hair, because the braid needs length to travel all the way around, and for formal events where the hair should be up and out of the way while still looking soft. How to style: start behind one ear, braid around the back of the head and finish behind the other ear, pinning the end under the start. Pancake the plait gently so it looks full, and curl the dropped strands so they fall in soft waves inside the crown.
Who should avoid it: women with short or fine hair, because the braid will not reach all the way around and the crown will look thin. Maintenance: it needs five or six pins to hold the circle, and a trial run is essential — a crown that sags at the back is worse than no crown at all. Quick verdict: the crown is the waterfall braid at its most dramatic, and it is worth the effort for a day that matters.
4. The Side Waterfall Braid
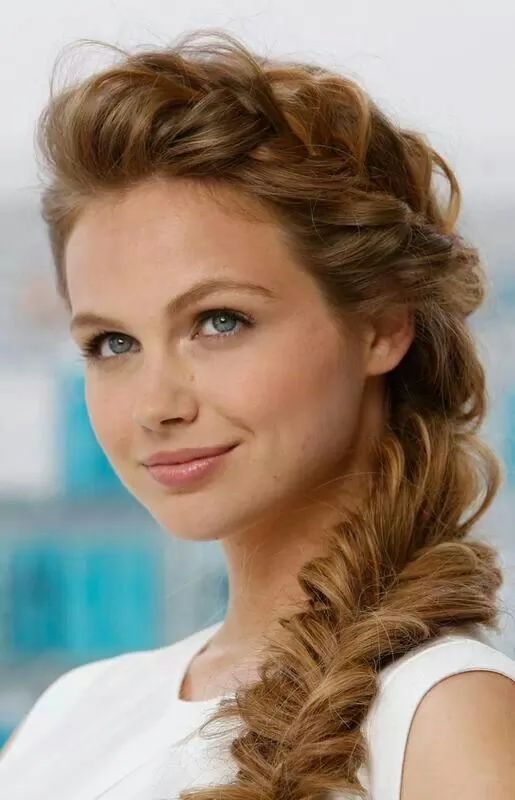
The side waterfall braid sweeps the braid to one side of the head, so the plait travels diagonally and the dropped strands fall over one shoulder. It is the most flattering waterfall braid for photographs, because the whole style is visible from the front, and it is the easiest to do on yourself, because you can see what you are doing in the mirror instead of braiding blind behind your head. The side sweep also shows off the face, the earrings and the neckline, which is why it is a favourite for date nights and evening events.
Best for: women who braid their own hair, and for anyone with a favourite side — the braid follows the part and falls where you want it to. How to style: part the hair deeply on one side, start the braid at the part, and travel diagonally down toward the opposite shoulder, dropping strands as you go. Finish the braid over the shoulder and secure it with a small elastic, then curl the dropped strands and the ends together so they blend into one soft fall of hair.
Time and cost: ten minutes at home, no salon needed, and a little texturising spray is the only product. Common mistake: making the diagonal too steep, so the braid slides down and the cascade disappears — keep the angle gentle, about forty-five degrees, and pin the braid at the nape so it stays put. Quick verdict: the side waterfall is the selfie-friendly waterfall, and the easiest one to wear well.
5. The Waterfall Braid with Loose Curls
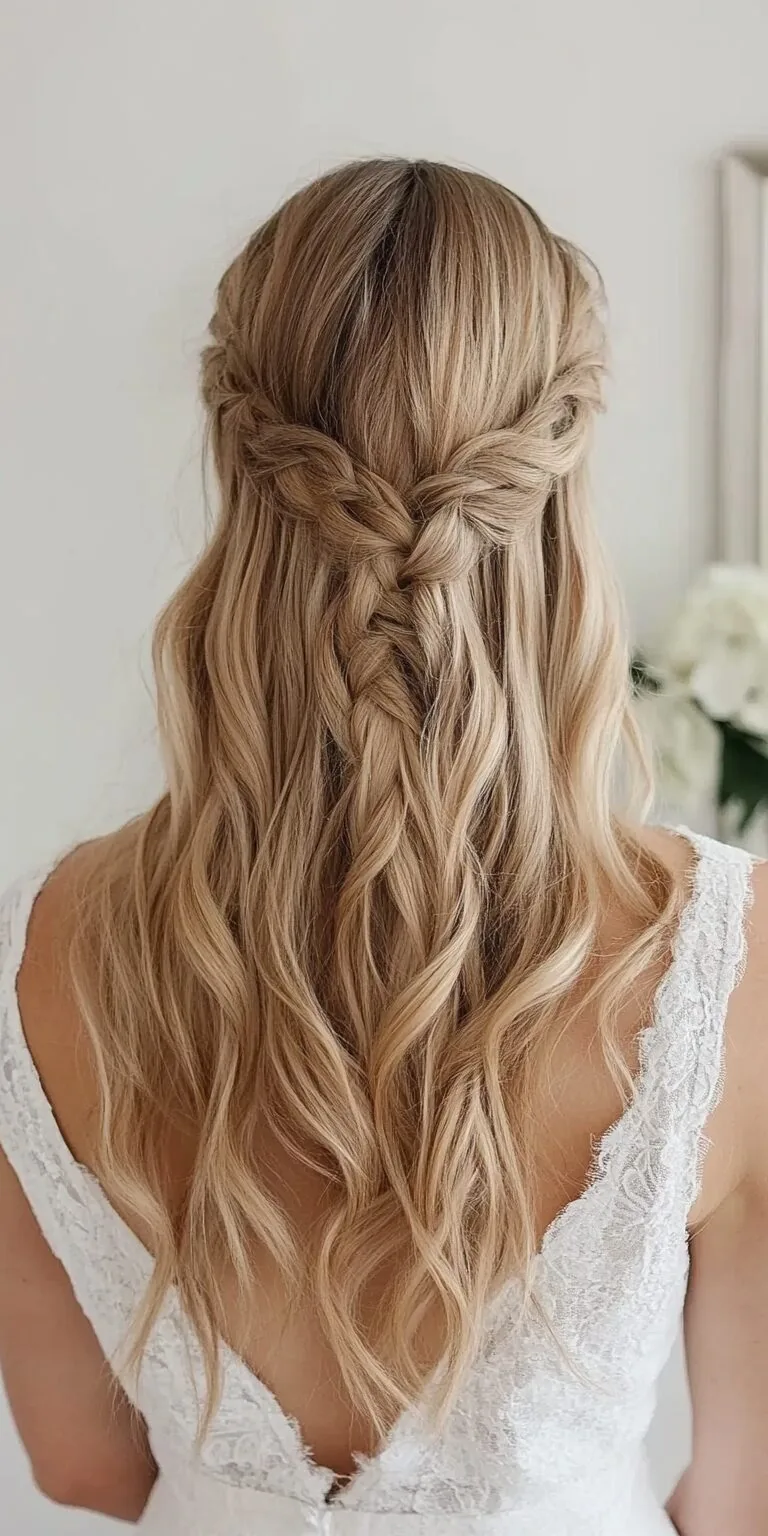
The waterfall braid with loose curls is the combination everyone pictures when they hear the words waterfall braid: a neat plait across the head, and below it a fall of soft, bouncy curls. The curls are what make the waterfall look like water — each dropped strand becomes a curl, and the curls move when you do, so the style never looks stiff. It is the most requested waterfall braid at salons, and the one that photographs best, because the contrast between the structured braid and the soft curls is so pretty.
Best for: weddings, proms, date nights and any occasion where the hair should look soft and romantic. How to style: braid first on mostly straight hair, then curl the dropped strands and the ends with a large-barrel curling wand, holding each curl for a few seconds and letting it cool in your hand before you let it fall. Brush the curls out gently with your fingers, not a brush, so they stay separate and bouncy instead of merging into one wave.
Pros: the curls hide any unevenness in the braid, and they make the style look fuller. Cons: curling takes an extra fifteen minutes, and the curls will drop in humidity unless you use a light-hold spray. Quick verdict: if you want the waterfall braid to look its absolute best, add the curls — they are the difference between a nice braid and a beautiful one.
6. The Waterfall Braid with Beach Waves
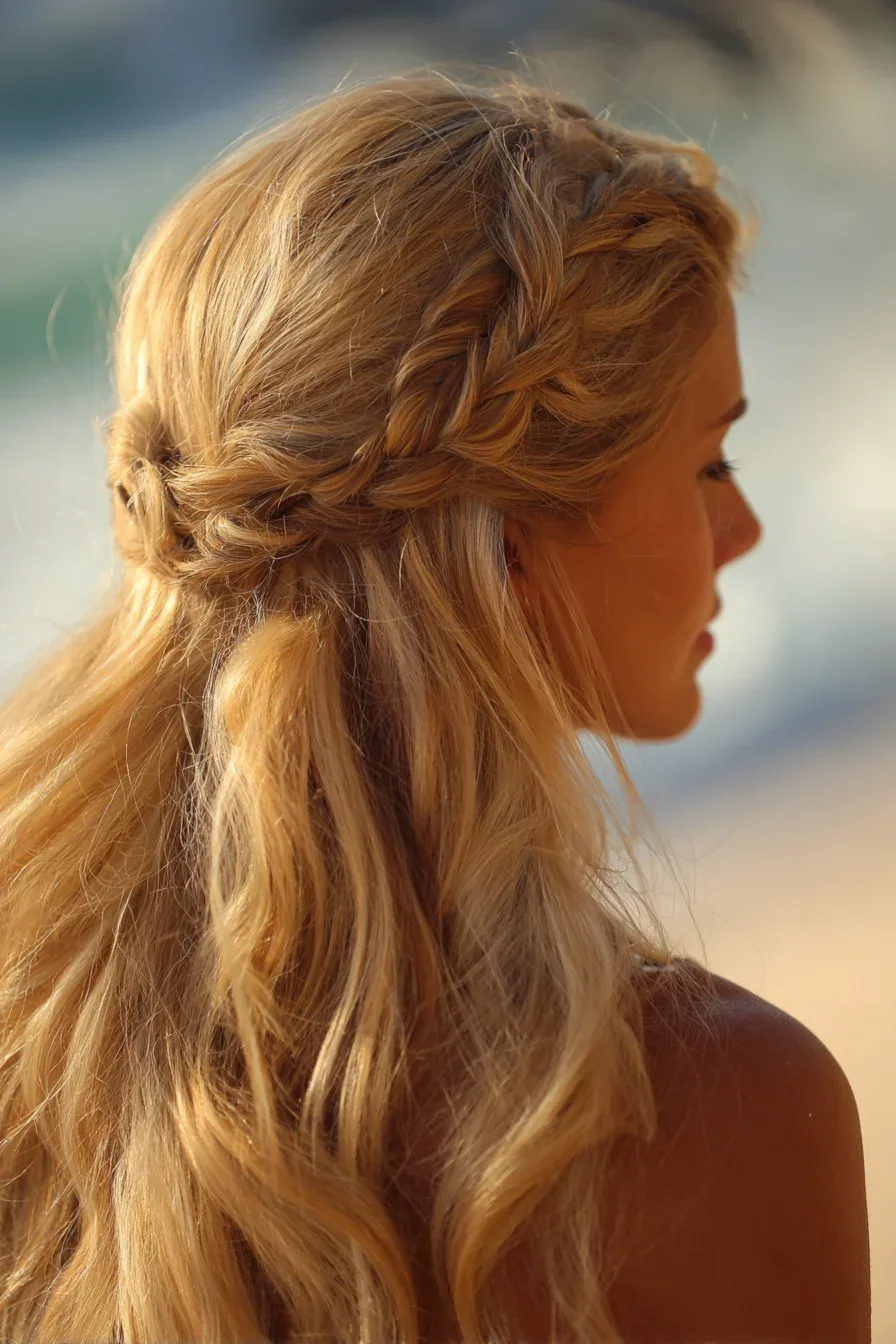
The waterfall braid with beach waves is the relaxed, summery version of the style: the braid is looser, the dropped strands are waved rather than curled, and the whole look is soft, tousled and a little undone. It suits a beach holiday, a summer wedding, a festival, or any day when you want to look pretty without looking polished. The waves give the waterfall a natural, sun-kissed feel, and the looser braid means the style holds up better in wind and humidity than a tight, curled version.
Best for: wavy hair, which needs almost no extra styling, and for summer, when tight curls would drop anyway. How to style: braid loosely, pancaking the plait open as you go, then wave the dropped strands with a flat iron — clamp, twist, and pull through in one smooth motion — or use a sea-salt spray and scrunch the hair while it dries. Finish with a light texturising spray rather than hairspray, so the waves stay soft and touchable.
Who should avoid it: women who want a very polished, formal look — beach waves are deliberately messy, and they will not read as formal. Maintenance: almost none, which is the point; the style looks better a little lived-in, so you can wear it all day and it only gets softer. Quick verdict: the beach-wave waterfall is the holiday version, and it is the easiest waterfall braid to live in.
7. The Waterfall Braid for Long Hair
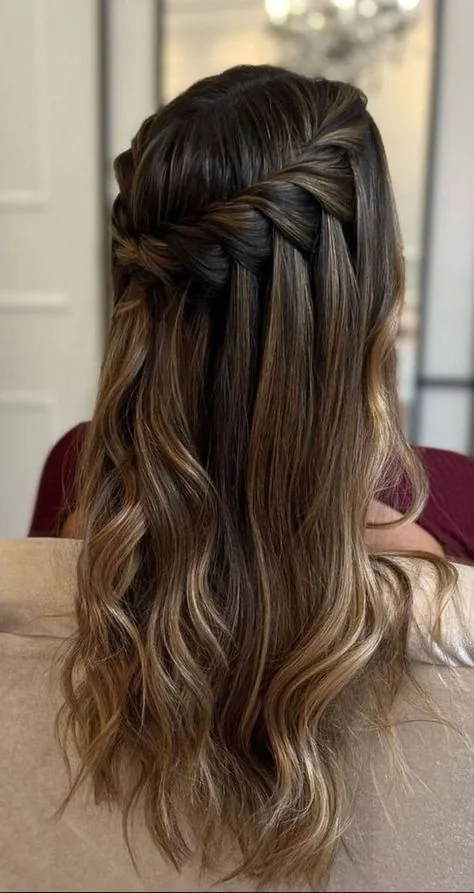
The waterfall braid for long hair is the waterfall at its most dramatic: the braid travels across the back of the head, and the dropped strands fall for inches, sometimes a foot, in a long, flowing cascade. Long hair gives the style its name, because the falling strands genuinely look like water, and it is the length that shows off the braid best in photographs, especially from behind. It is also the length where the braid holds best, because the weight of the falling hair keeps the plait sitting flat against the head instead of lifting away from it.
Best for: women with hair past the shoulders who want a statement style without an updo. How to style: use a single braid across the back, or a double braid that meets in the middle, and curl the dropped strands in large sections so they fall in long, even waves. A little shine spray on the ends will catch the light and make the cascade look even longer. Keep the braid itself neat, because on long hair any unevenness shows from a distance.
Time and cost: fifteen to twenty minutes at home, or a salon styling session before a big event. Common mistake: letting the dropped strands tangle in the braid as you work — keep them separated, and smooth each one with your fingers as you drop it. Quick verdict: long hair is where the waterfall braid earns its name, and if you have the length, this is the version to try first.
8. The Waterfall Braid for Medium Hair
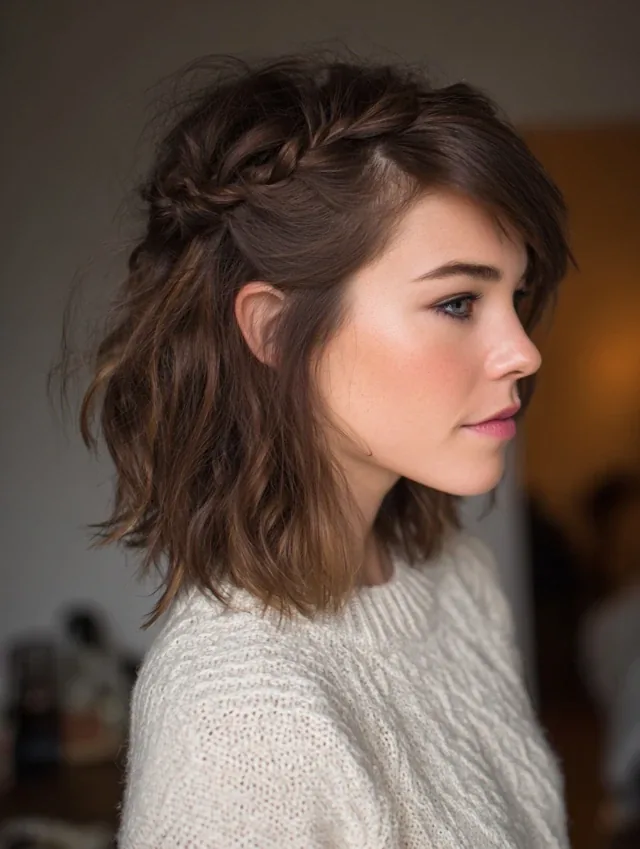
The waterfall braid for medium hair — around shoulder length — is the most wearable version of the style, because the braid is neat, the dropped strands are short enough to stay tidy, and the whole style holds its shape for hours. It does not have the drama of a long-hair waterfall, but it has something better for everyday wear: it looks finished, it stays put, and it works for the office as well as for an evening out. Medium hair is also the easiest length to braid yourself, because you can reach the back of your head without the hair getting in the way.
Best for: everyday wear, work, and women growing their hair out, who want a pretty style while the length catches up. How to style: a half-up waterfall braid works best at this length — start at one temple, travel across the back, and pin the end under the loose hair. Curl the dropped strands with a medium-barrel wand so they match the length of the rest of the hair, and the style will look balanced rather than top-heavy.
Pros: holds well, quick to do, and suits almost every face shape. Cons: the cascade is short, so the waterfall effect is subtler than on long hair. Quick verdict: medium hair is the sweet spot for a waterfall braid you can actually wear every day, not just for a photograph.
9. The Waterfall Braid for Short Hair
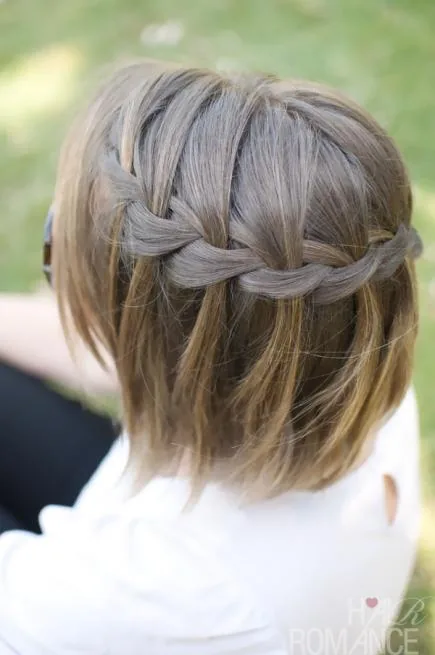
The waterfall braid for short hair works from about chin length, and it is a pretty detail rather than a full cascade: the braid travels a short distance, the dropped strands fall for an inch or two, and the effect is a delicate line of plait across the front or the side of the head. It suits a lob or a long bob beautifully, and it is the waterfall braid for women who love the look but do not have the length for the full version. It also works as a way to keep the front hair out of the face while the rest of the style stays loose.
Best for: lobs, long bobs, and women growing out a bob who want a pretty way to handle the front sections. How to style: braid along the front hairline, from the part toward the ear, dropping short strands as you go, and pin the end behind the ear. Keep the braid small — use thin sections — or it will overwhelm the short hair around it. A little texturising spray gives the grip the braid needs on short hair, which tends to slip out of plaits.
Who should avoid it: women with hair shorter than chin length, because the braid will not have enough to hold onto and the dropped strands will be too short to see. Maintenance: it needs a pin at the end and a light spray, and it will hold for a few hours rather than all day. Quick verdict: a short-hair waterfall is a lovely accent, not a full style — wear it as a detail, and it will look intentional and pretty.
10. The Waterfall Braid with Straight Hair
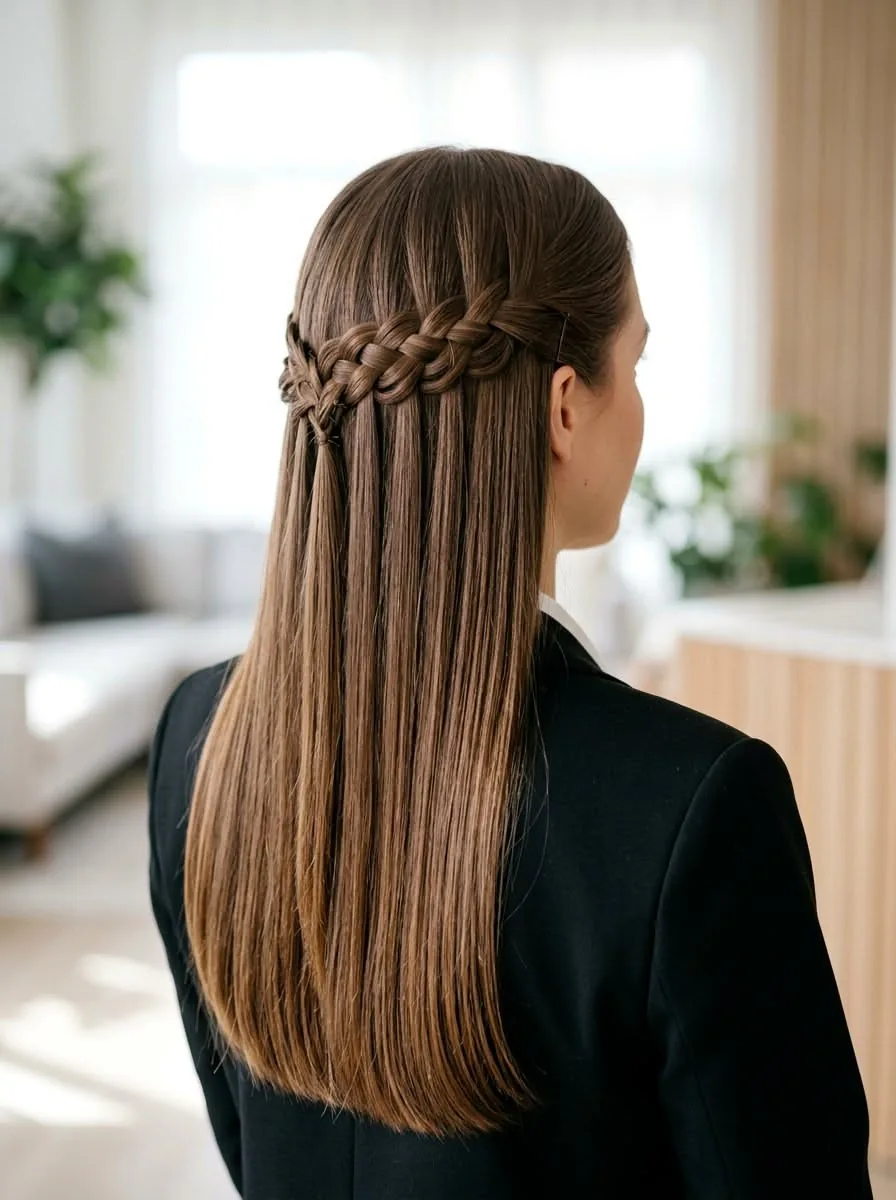
The waterfall braid with straight hair shows the plait more clearly than any other hair type, because every crossing is visible against the smooth, straight strands. It is the most graphic waterfall braid: the braid looks like a clean, neat line across the head, and the dropped strands fall in straight, silky ribbons. It suits a polished, elegant look, and it is the version that works best for work or a formal event, where the hair should look tidy rather than tousled. Straight hair also shows off colour beautifully in a waterfall braid, because the plait pulls strands from different layers side by side.
Best for: women with naturally straight hair who want a neat, defined braid. How to style: add texture first — a light texturising spray or a little dry shampoo at the roots — because straight hair is slippery and the braid will slide without grip. Braid a little tighter than you would on wavy hair, and pin the plait in two or three places. Leave the dropped strands straight, or add a very slight bend at the ends with a flat iron, so the style stays sleek.
Common mistake: skipping the texture step, which is why most straight-hair waterfall braids fall apart within the hour. The fix takes thirty seconds: spray, wait a moment, then braid. Quick verdict: straight hair makes the neatest waterfall braid, as long as you give it the grip it needs first.
11. The Waterfall Braid for Curly Hair
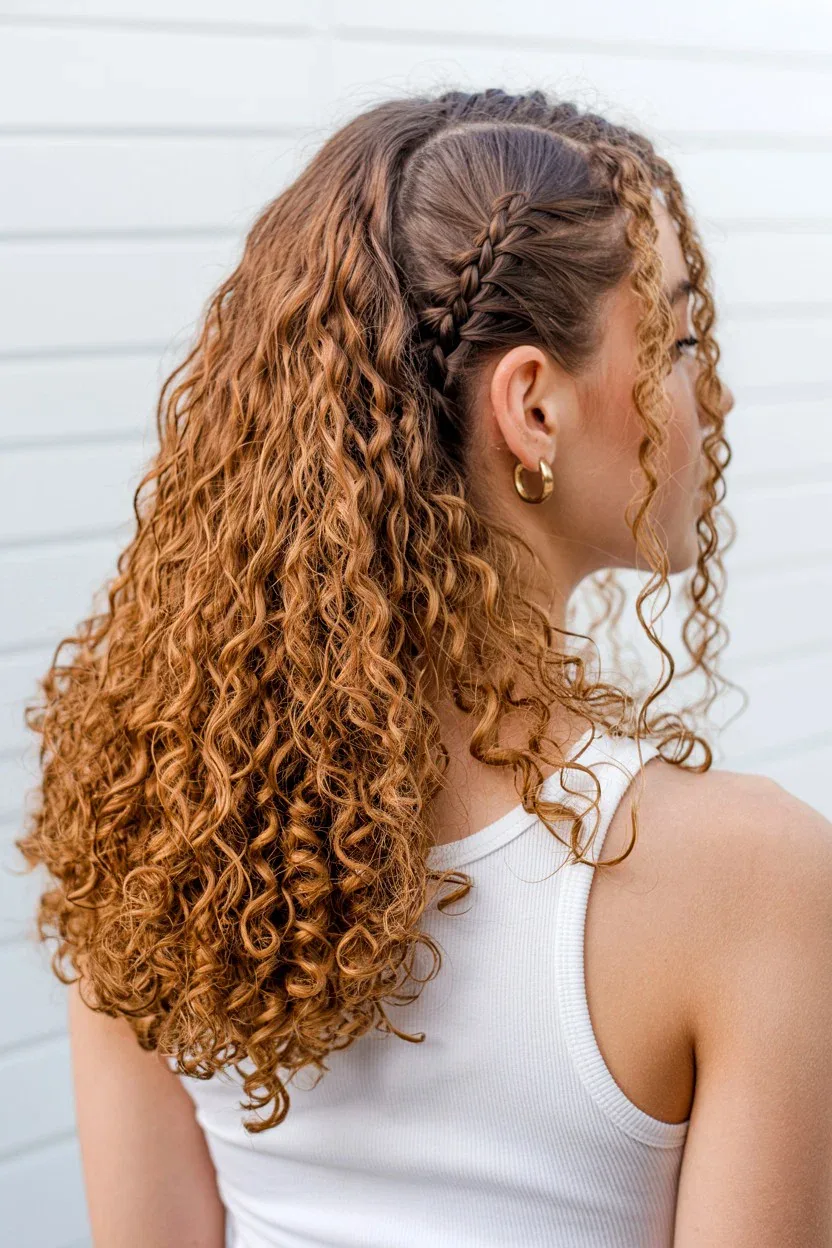
The waterfall braid for curly hair is the fullest, most romantic version of the style: the curls give the braid volume, the dropped strands fall as defined curls, and the whole look is soft, generous and completely natural. It is also the easiest waterfall braid to make look good, because the curls hide any unevenness in the plait and the texture gives the braid all the grip it needs. The challenge is the opposite of straight hair — the braid can disappear into the curls, so it needs to be pancaked open and made a little bigger than you think, or it will be invisible from more than a few feet away.
Best for: women with natural curls who want a style that works with their texture instead of fighting it. How to style: braid on dry, defined curls, using a curl cream to keep the frizz down, and take slightly larger sections than you would on straight hair so the plait is visible. Pancake the braid gently after you finish, pulling at the edges to widen it, and leave the dropped curls exactly as they are — they are already perfect.
Pros: great grip, great volume, and the curls do half the styling for you. Cons: the braid can look messy if the curls are not defined first, so a little curl cream goes a long way. Quick verdict: curly hair and waterfall braids were made for each other — the texture is the styling.
12. The Waterfall Braid for Wavy Hair
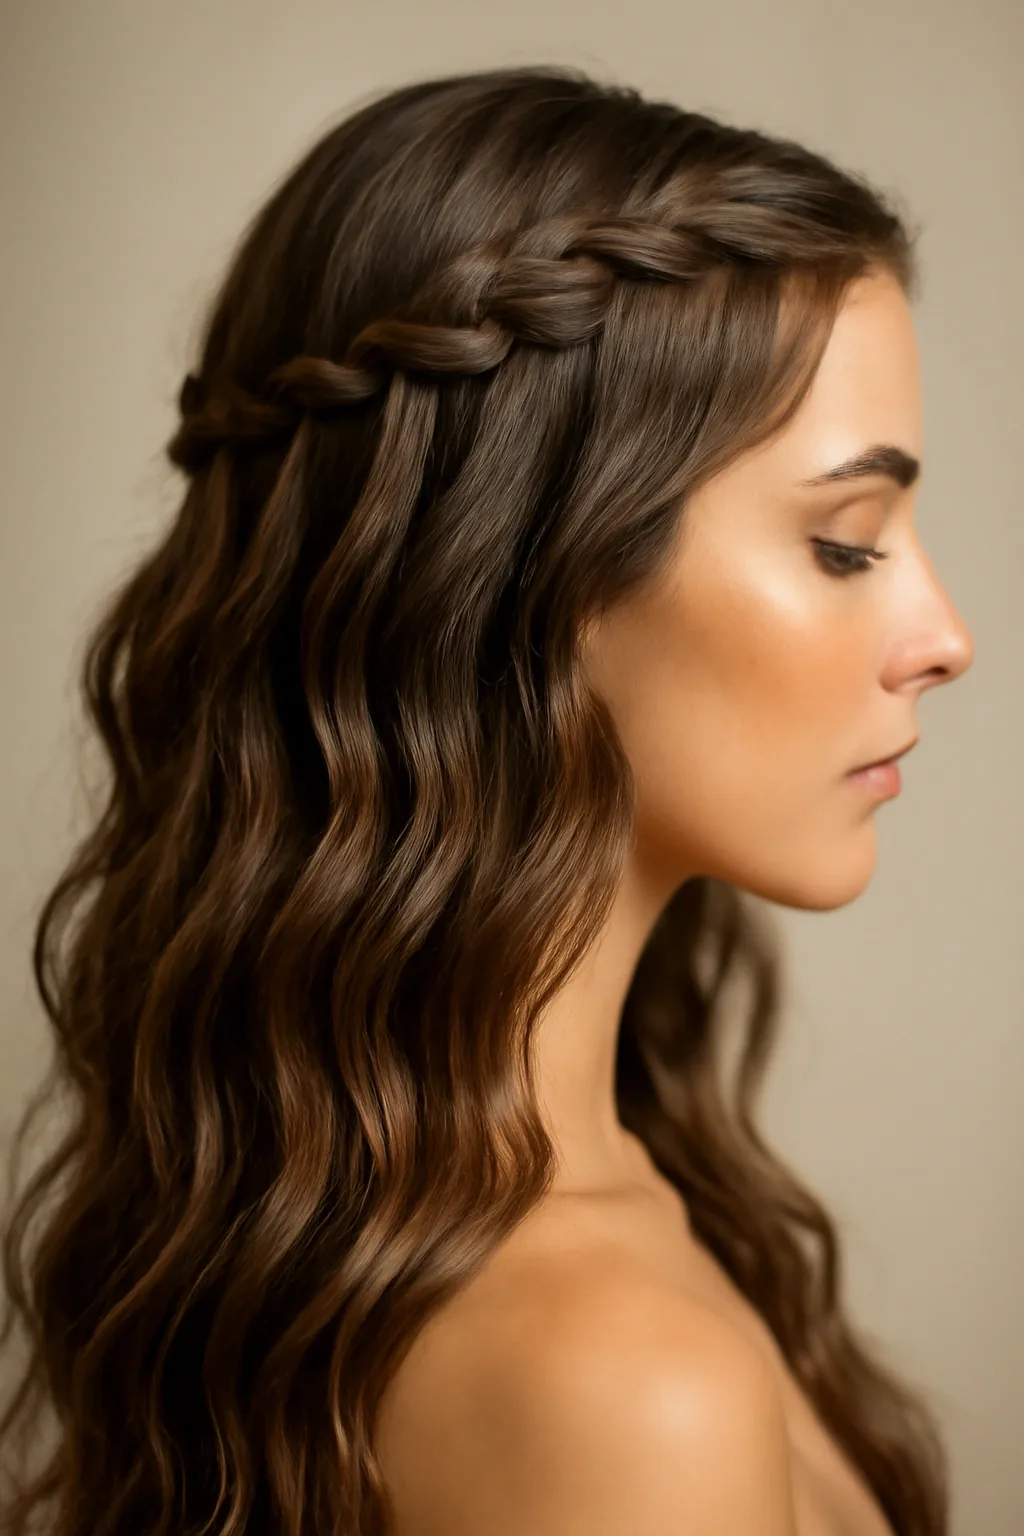
The waterfall braid for wavy hair is the easiest waterfall braid of all, because wavy hair has everything the style needs: natural grip, so the braid holds; natural movement, so the dropped strands fall in soft waves; and natural texture, so the plait looks full without any pancaking. It is the hair type that needs the least help, and the style that looks most effortless — a waterfall braid on wavy hair looks like it happened by itself, which is exactly the charm of it.
Best for: women with natural waves who want a quick, pretty style with almost no extra work. How to style: braid on dry hair, or on hair that has been left to air-dry with a little sea-salt spray, and let the waves do the rest. If the waves are uneven, a few passes with a wand on the front sections will even them out, but the back can usually be left alone. Pin the braid in two places and finish with a light spray.
Time and cost: under ten minutes at home, and no special products beyond a texturising spray if the hair is very soft. Common mistake: over-styling the waves, which makes the style look done-up instead of effortless — the whole point of wavy hair is that it already has the movement. Quick verdict: if your hair is wavy, the waterfall braid is your easiest pretty style, and you should wear it often.
13. The Waterfall Braid for Fine Hair
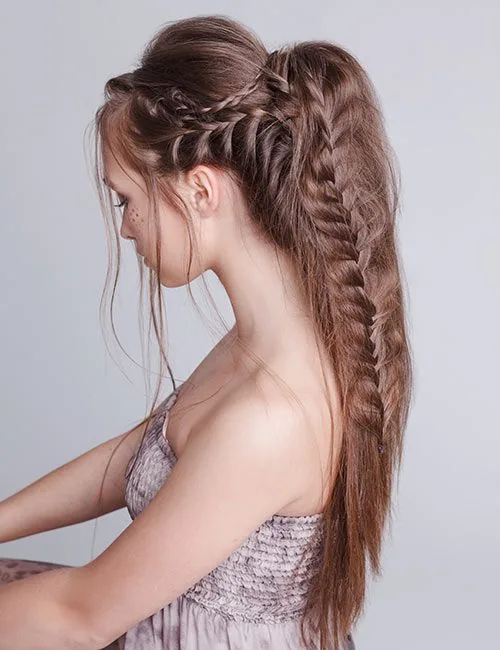
The waterfall braid for fine hair needs a little help, but it is absolutely possible — and when it works, it looks delicate and lovely, like a thin gold chain across the head. The challenge is volume: fine hair makes a thin plait, and the dropped strands are thin too, so the braid can look sparse if it is not handled well. The fix is preparation: a little backcombing at the crown, a texturising spray through the lengths, and a braid that is pancaked open afterwards, so the plait looks twice as full as it really is.
Best for: women with fine hair who want a romantic style without a heavy updo. How to style: backcomb the crown gently, spray the hair with a texturising spray, and braid with slightly larger sections than usual, so the plait has more to work with. After you finish, pull at the edges of the braid — gently, a millimetre at a time — to widen it, and pin it in place before it can slip. Curl the dropped strands, because curled fine hair looks fuller than straight fine hair.
Who should avoid it: nobody, but be honest about the result — a fine-hair waterfall will look delicate, not dramatic, and that is fine. Maintenance: it needs pins and a light spray, and it will hold for an evening rather than all day. Quick verdict: fine hair can wear a waterfall braid beautifully, as long as you build the volume in before you braid, not after.
14. The Waterfall Braid for Thick Hair
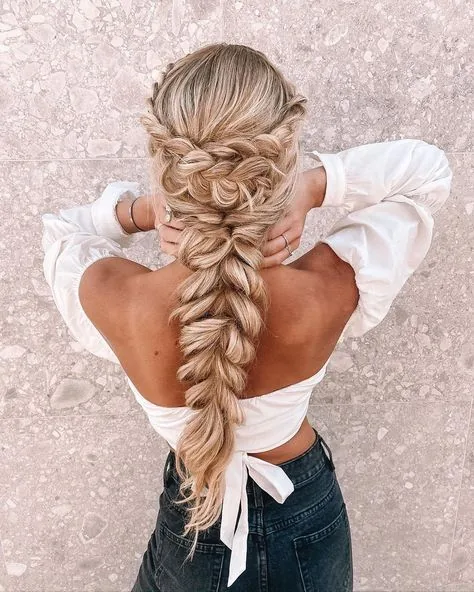
The waterfall braid for thick hair is the waterfall at its fullest: the plait is thick and visible, the dropped strands are generous, and the whole style has a presence that thinner hair cannot match. Thick hair also holds the braid best, because the weight of the falling strands keeps the plait sitting flat against the head, and the natural grip of thick hair means the braid rarely slips. It is the hair type that makes a waterfall braid look like a salon style even when you did it yourself in the bathroom mirror.
Best for: women with thick hair who want a style that shows off the volume instead of hiding it. How to style: take slightly larger sections than usual, because thick hair needs room in the plait, and braid a little looser than you think — a tight braid on thick hair will pull and give you a headache. A double waterfall braid works particularly well on thick hair, because each braid carries half the weight, and the meeting point in the middle balances the style.
Pros: great hold, great volume, and the braid looks expensive. Cons: the braid is heavy, so it needs three or four pins rather than two, and it takes a few minutes longer to braid. Quick verdict: thick hair is the waterfall braid’s natural home — if you have it, this style was made for you.
15. The Romantic Waterfall Braid for a Wedding
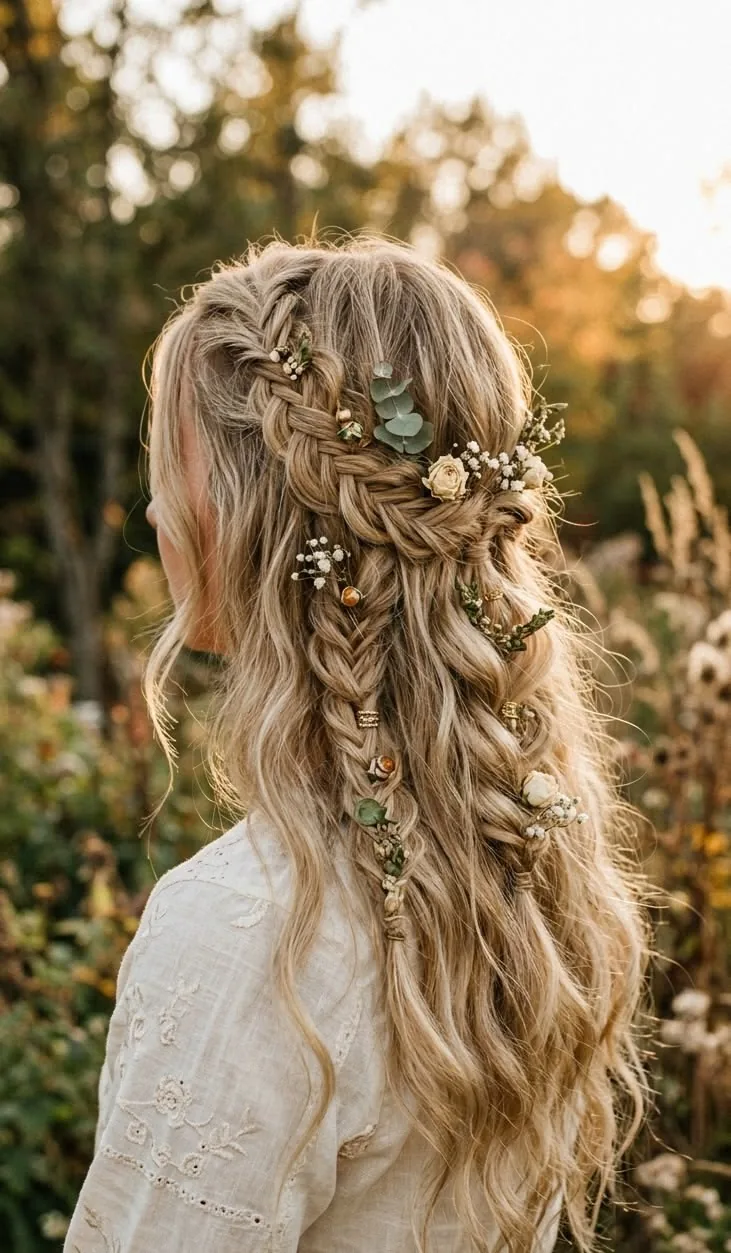
The romantic waterfall braid for a wedding is the bridal version of the classic half-up style, worn with soft curls, a few fresh flowers, and a veil pinned just above the braid. It is one of the most popular bridal hairstyles of recent years, because it is romantic without being fussy, it photographs from every angle, and it lets the bride wear her hair down while still looking like she has had it styled. The braid across the back of the head frames the veil, the curls fall below it, and the face stays open for the photographs.
Best for: brides with medium to long hair, and for garden, beach and outdoor weddings, where a soft, romantic style suits the setting. How to style: have your stylist braid a little tighter than usual, because a wedding-day braid loosens over the hours, and curl the dropped strands with a large-barrel wand so they hold. Add small flowers — baby’s breath or tiny roses — tucked into the braid, and pin the veil just above the plait so the braid stays visible in the photographs.
What to ask your stylist: for a trial run at least a month before the wedding, with the flowers and the veil, so you can see how the style holds for a full day. Cost: a salon bridal styling session, plus the flowers. Quick verdict: if you want to wear your hair down on your wedding day and still look styled, the waterfall braid is the answer.
16. The Waterfall Braid for Bridesmaids
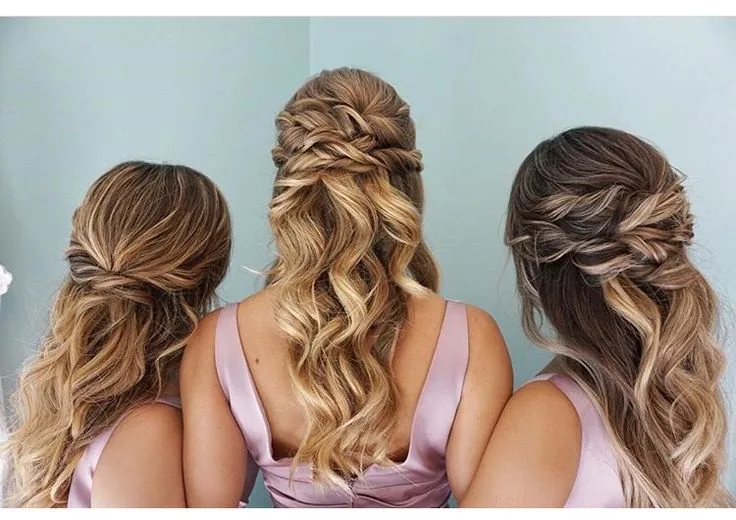
The waterfall braid for bridesmaids is the coordinated version of the bridal style: the same braid, worn a little smaller and softer, so the bridesmaids look like a matching set without outshining the bride. It works beautifully for a wedding party, because the style suits every hair length and colour, and each bridesmaid can wear it in a slightly different way — one with curls, one with waves, one with a flower — while still looking like part of the same group. It also photographs wonderfully, because the braids create a repeated line across the group photographs.
Best for: bridesmaid groups of three or more, where a matching style ties the party together. How to style: agree on one version — usually the classic half-up waterfall with soft curls — and let each bridesmaid add her own small detail, like a flower or a pearl pin in her own colour. Keep the braids the same size and at the same height, so the group looks coordinated rather than random.
Pros: suits every bridesmaid, photographs beautifully, and is comfortable to wear all day. Cons: if the bridesmaids have very different hair lengths, the braids will look different sizes, so agree on the version that suits the shortest hair in the group. Quick verdict: the waterfall braid is the bridesmaid style that makes the whole party look like they planned it — because they did.
17. The Waterfall Braid for Prom
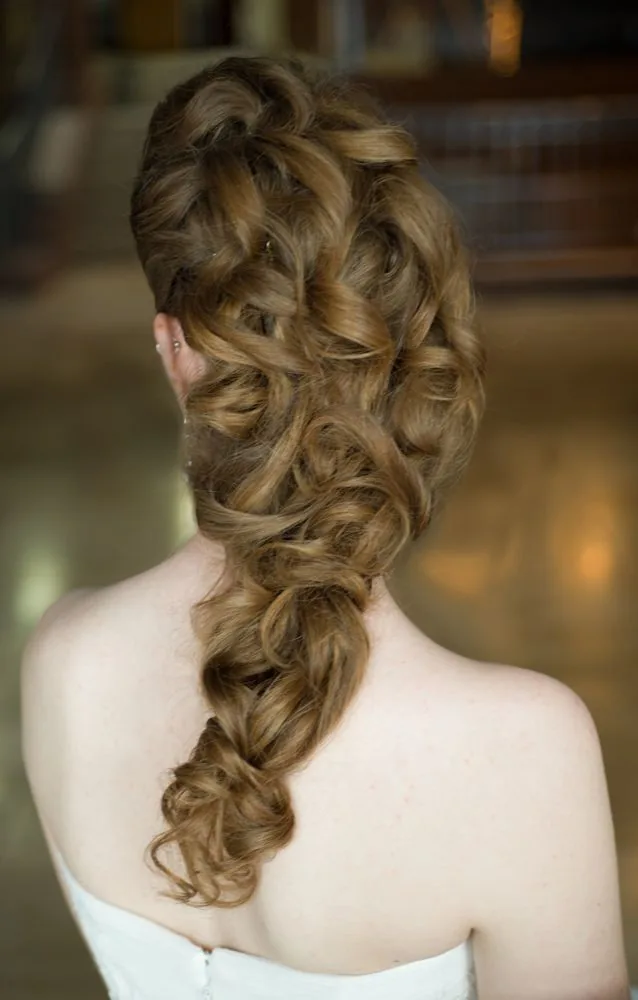
The waterfall braid for prom is the style that looks like you spent hours on it and took twenty minutes: a double waterfall braid that meets in the middle, or a waterfall braid into a low bun, with soft curls and a little sparkle. It suits a long prom dress perfectly, because the braid gives the hair structure while the curls keep it soft, and it photographs beautifully from the front and the back — which matters, because prom photographs are taken from every angle. It is also comfortable to wear all night, which a tight updo is not.
Best for: prom, homecoming and school formals, especially with a long dress and an open back, where the braid and the curls show. How to style: a double waterfall braid with curled dropped strands is the classic prom version, finished with a pearl pin or a small crystal clip at the meeting point. If the dress has a detailed back, wear the braid to one side instead, so the dress stays visible.
Time and cost: a salon styling session, or twenty minutes at home if you have practised the braid. Common mistake: choosing a style you have never tried before on prom night — practise it twice in the week before, or book a trial with your stylist. Quick verdict: the waterfall braid is the prom style that looks expensive, feels comfortable, and survives the dancing.
18. The Waterfall Braid for a Date Night
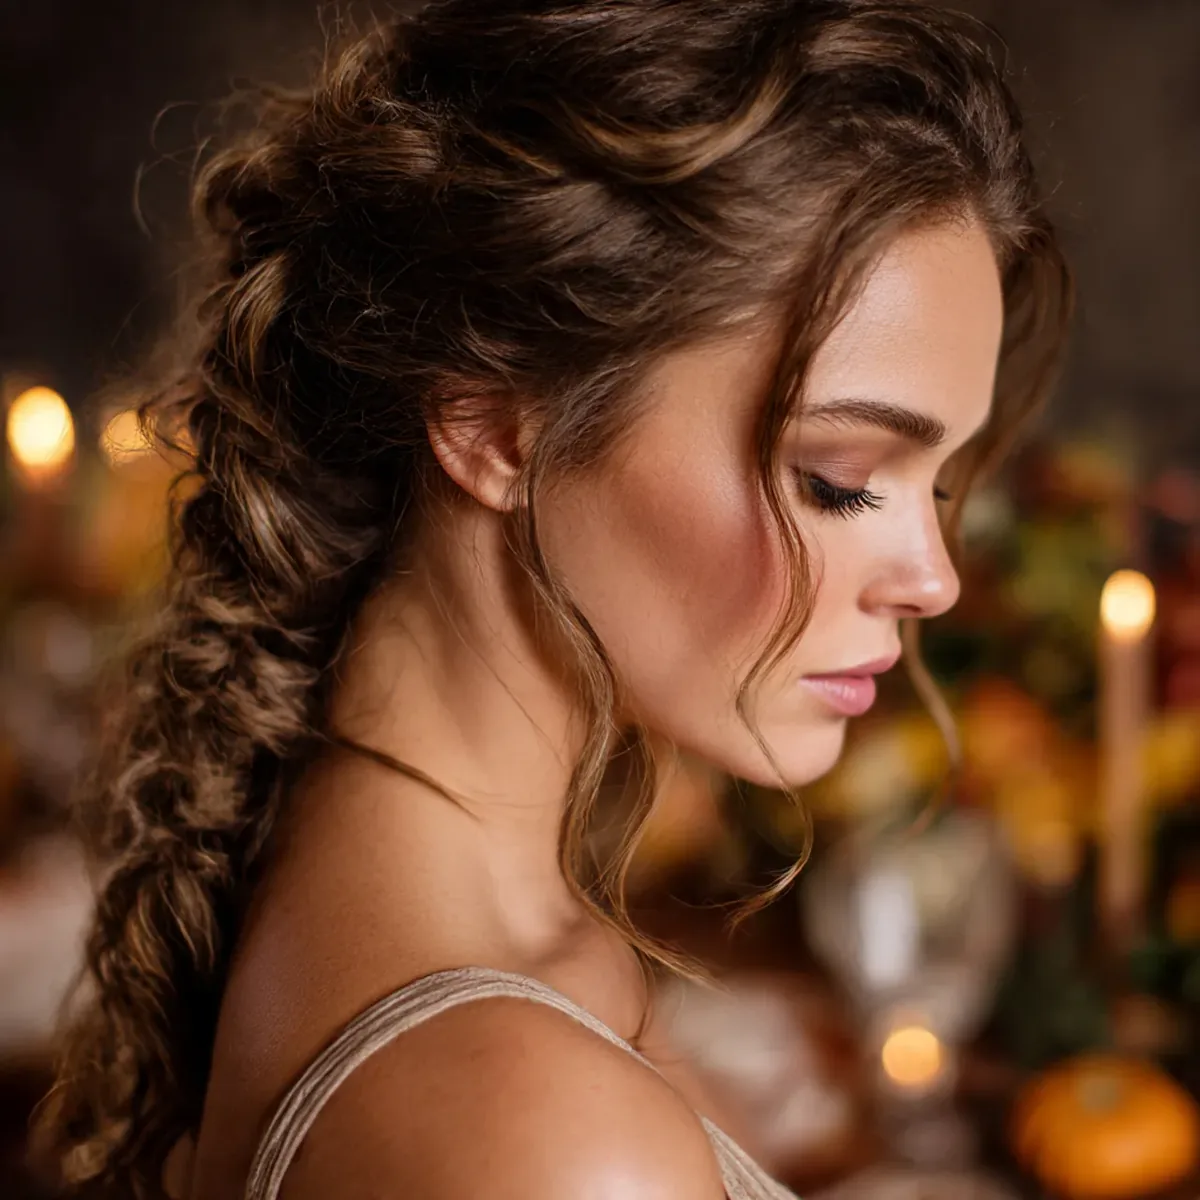
The waterfall braid for a date night is the soft, romantic version of the style: a side waterfall braid, with the dropped strands curled and the rest of the hair falling over one shoulder. It is pretty without being overdone, it shows off the face and the earrings, and it looks like you made an effort without looking like you spent an hour in front of the mirror. It is the waterfall braid for a dinner, a walk, or a night out — a style that says you cared, but not too much.
Best for: a first date or a special evening, when the hair should look soft and touchable rather than stiff. How to style: part the hair on one side, braid diagonally toward the opposite shoulder, and curl the dropped strands and the ends together so they fall as one soft wave over the shoulder. Add a single pearl pin at the end of the braid, or leave it plain — a date-night waterfall does not need much decoration.
Pros: quick, pretty, and it holds up through dinner and a walk. Cons: it will loosen over a long evening, so bring a spare pin in your bag. Quick verdict: the side waterfall is the date-night braid — romantic, easy, and it looks even better by candlelight.
19. The Waterfall Braid with a Low Ponytail
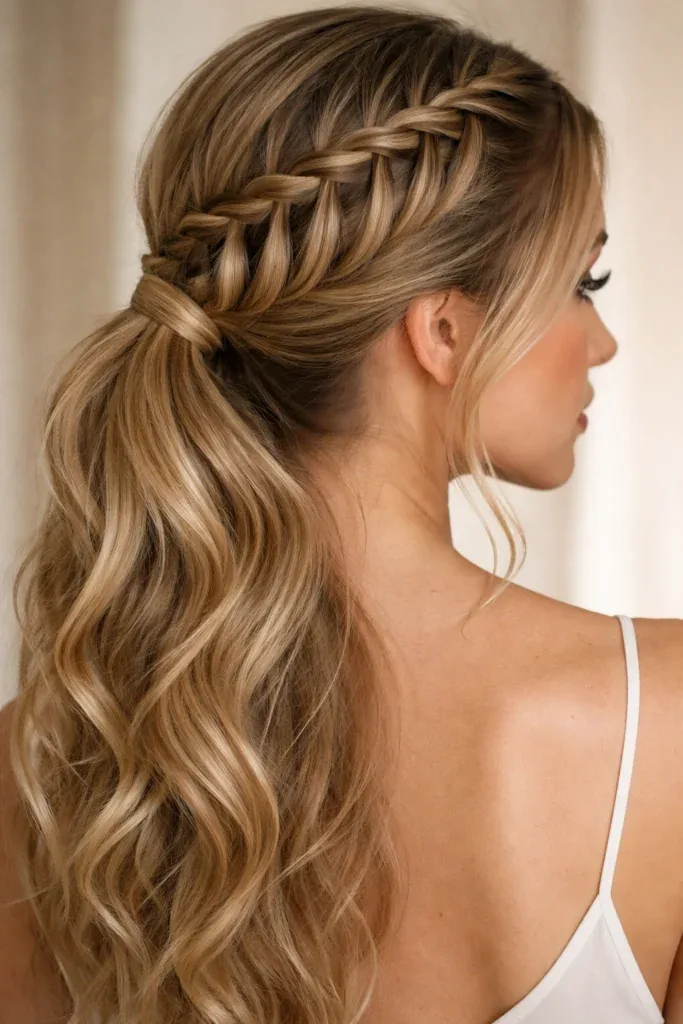
The waterfall braid with a low ponytail combines the romance of the waterfall with the practicality of a ponytail: the braid travels across the back of the head, dropping strands as it goes, and then the whole lot — braid, dropped strands and loose hair — is gathered into a low ponytail at the nape. It is the waterfall braid for women who love the look but want the hair out of the way, and it suits work, a smart dinner, or a day when the hair needs to stay tidy. The ponytail itself is soft and full, because the dropped strands add volume to it.
Best for: work, smart occasions, and women who like their hair tied back but not in a plain ponytail. How to style: braid the waterfall first, then gather everything into a low ponytail and secure it with a covered elastic. Wrap a small strand of hair around the elastic to hide it, and curl the ponytail lightly so it falls in soft waves. Pull a few face-framing strands loose at the front for softness.
Pros: practical, tidy, and the braid makes an ordinary ponytail look special. Cons: the waterfall effect is partly hidden once the hair is gathered, so the braid is more of a detail than the main event. Quick verdict: the low ponytail waterfall is the working version of the style — pretty, practical, and it stays put all day.
20. The Waterfall Braid into a High Ponytail
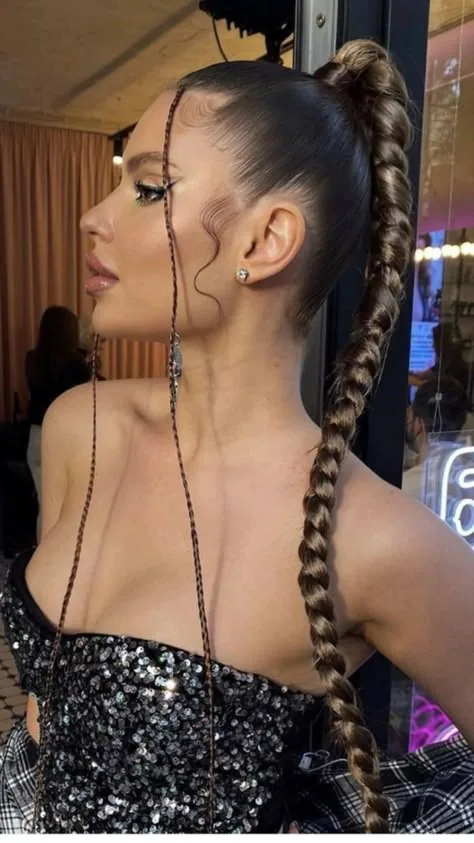
The waterfall braid into a high ponytail is the glamorous, high-energy version: the braid travels across the head and up into a high ponytail, so the plait is visible at the front and the ponytail falls long and full behind it. It is a bold, confident style, and it suits a night out, a party, or any occasion when the hair should look dramatic. The high ponytail also lifts the face, which makes the whole style look polished and awake — it is the waterfall braid with a lift.
Best for: long hair, parties and evenings, and women who love a high ponytail but want something more interesting than a plain one. How to style: braid the waterfall from the front toward the crown, gathering the dropped strands as you go, then collect all the hair into a high ponytail at the crown and secure it firmly. Curl the ponytail in large sections so it falls in bouncy waves, and wrap a strand around the elastic.
Who should avoid it: women with fine or short hair, because a high ponytail needs volume to look good, and a thin ponytail will look sparse. Maintenance: it needs a strong elastic and a couple of pins, and it will hold all evening. Quick verdict: the high ponytail waterfall is the party version — bold, bouncy, and impossible to ignore.
21. The Waterfall Braid with a Messy Bun
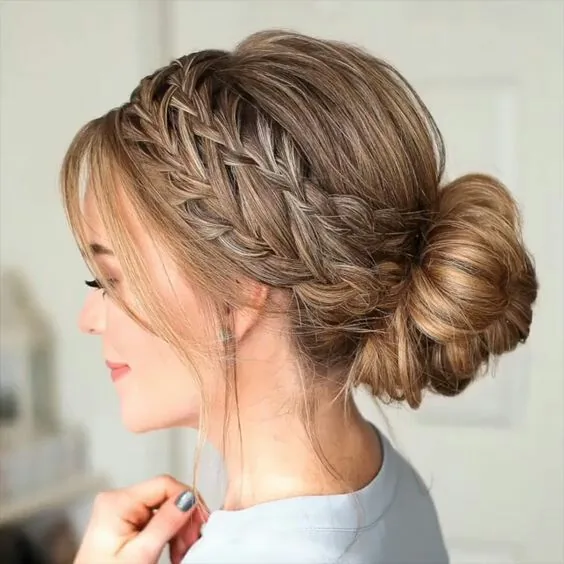
The waterfall braid with a messy bun is the casual, lived-in version of the style: the braid travels across the back of the head, and the rest of the hair is twisted into a loose, soft bun at the back or the side. It is the waterfall braid for a weekend, a brunch, or a day when you want to look pretty without looking done-up. The bun is deliberately imperfect — a few strands pulled loose, a soft, rounded shape — and the braid is what makes it look intentional rather than accidental.
Best for: medium to long hair, weekends, and women who love a bun but want it to look a little more special. How to style: braid the waterfall first, then gather the loose hair — including the dropped strands — into a low, loose bun and pin it in place, leaving a few strands out at the front. Pull the bun apart gently with your fingers so it looks soft and full, not tight and neat.
Pros: quick, comfortable, and it hides second-day hair beautifully. Cons: the waterfall is partly hidden by the bun, so the braid reads as a detail. Quick verdict: the messy-bun waterfall is the weekend version — easy, pretty, and it looks like you tried harder than you did.
22. The Waterfall Braid with a Low Bun
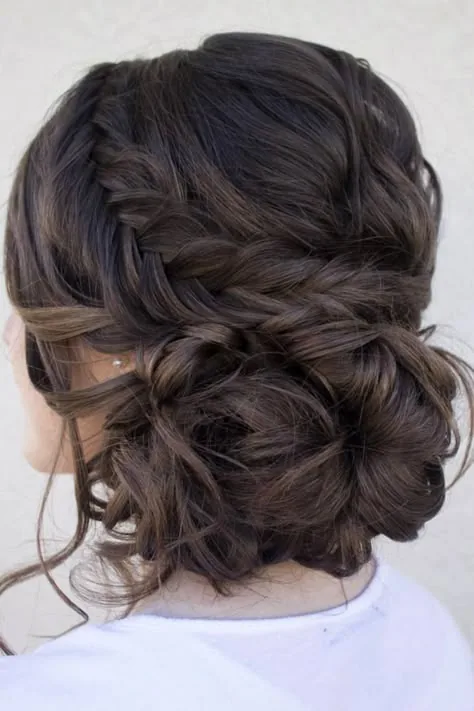
The waterfall braid with a low bun — sometimes called a waterfall chignon — is the most elegant version of the style: the braid travels across the back of the head, and the hair is gathered into a neat, low bun at the nape, with the dropped strands woven into the bun so it looks full and soft. It suits a wedding, a formal dinner, or any occasion when the hair should be up and polished, and it is the waterfall braid that works best with a long dress and a bare back, because the low bun leaves the neck and shoulders completely open.
Best for: weddings, formal events, and women who want an updo that is soft rather than severe. How to style: braid the waterfall first, then gather the hair into a low ponytail, twist it into a bun, and pin it securely, tucking the dropped strands into the bun as you go. Leave two thin strands loose at the front to frame the face, and finish with a pearl pin or a small flower at the side of the bun.
Time and cost: twenty to thirty minutes at home, or a salon updo session. Common mistake: making the bun too tight, which pulls the braid and flattens it — keep the bun soft and a little loose, and the braid will stay visible. Quick verdict: the low-bun waterfall is the formal updo for women who do not like formal updos — soft, elegant, and comfortable.
23. The Waterfall Braid with a Side Bun
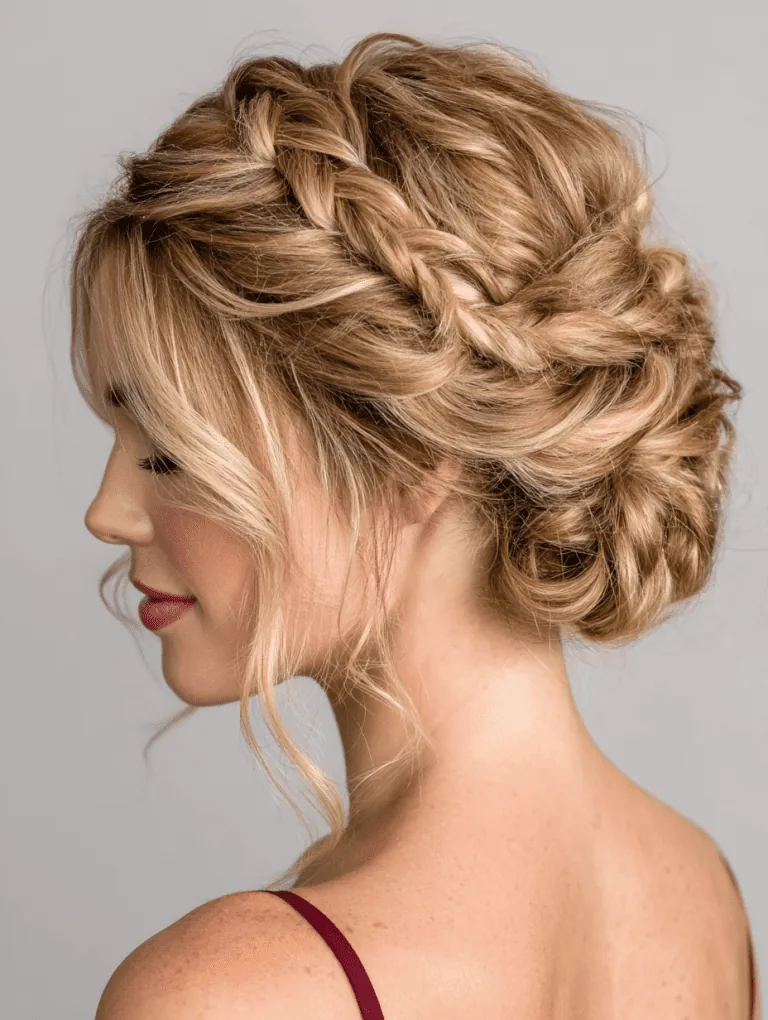
The waterfall braid with a side bun moves the bun to one side of the head, so the braid travels diagonally and the bun sits just behind one ear. It is the most romantic waterfall updo, because the asymmetry is soft and pretty, and it suits a wedding guest, a prom, or a formal evening where the hair should be up but not severe. The side bun also shows off the neck and the earrings on one side, which makes it a lovely choice with a one-shoulder dress or a detailed neckline.
Best for: formal events, weddings and proms, especially with an asymmetric dress. How to style: braid the waterfall toward the side where the bun will sit, gather the hair into a low side ponytail, and twist it into a soft bun, pinning it securely. Leave a few strands loose at the front on the opposite side, so the face is framed, and add a flower or a pearl pin at the top of the bun.
Pros: romantic, flattering, and it photographs beautifully from the front. Cons: a side bun is heavier on one side, so it needs three or four pins to stay balanced all evening. Quick verdict: the side-bun waterfall is the most romantic updo in this guide — choose it when the occasion is special and the dress is too.
24. The Waterfall Braid with a Fishtail Finish
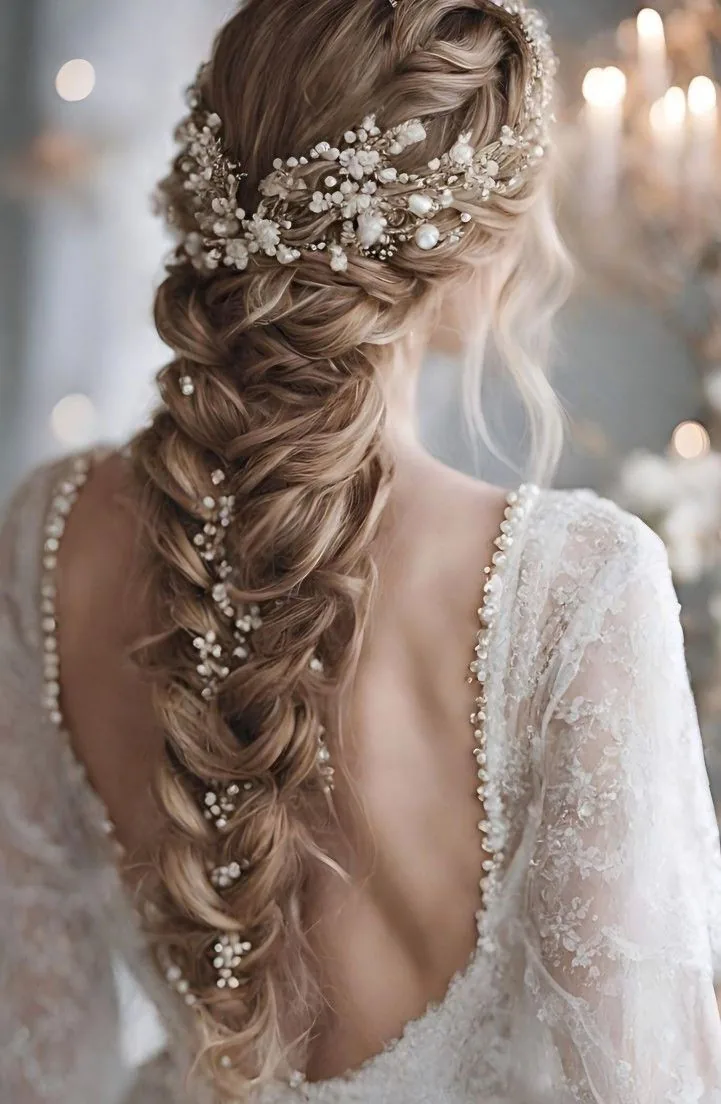
The waterfall braid with a fishtail finish starts as a waterfall and ends as a fishtail: the braid travels across the head dropping strands, and then the remaining hair is plaited into a fine, herringbone fishtail instead of an ordinary three-strand braid. The result is a style with two textures — the open, airy waterfall at the top and the fine, detailed fishtail at the end — and it is the waterfall braid for women who love braiding and want to show it off. It looks intricate, and it is, but it is really just two simple techniques joined together.
Best for: long hair, festivals and photographs, where the detail will be seen and appreciated. How to style: braid the waterfall across the back of the head, then, when you reach the end, split the remaining hair into two sections and fishtail it — taking a thin strand from the outside of one section and crossing it to the inside of the other, alternating sides, until you reach the ends. Pancake the fishtail gently so it looks full, and secure it with a small elastic.
Time and cost: twenty to twenty-five minutes at home, because the fishtail is slower than an ordinary braid. Common mistake: making the fishtail too tight, which makes it look thin — keep it loose and pancake it open. Quick verdict: the fishtail finish is the waterfall braid for braid lovers — detailed, pretty, and worth the extra five minutes.
25. The Waterfall Braid with a French Braid Finish
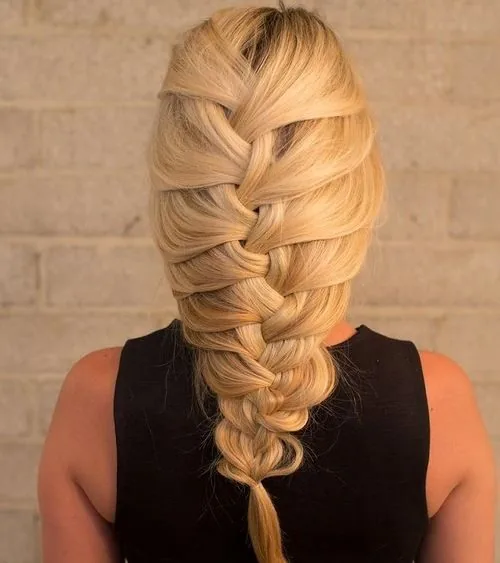
The waterfall braid with a French braid finish is the most secure waterfall braid in this guide: the waterfall travels across the head, and then the remaining hair is gathered into a French braid that runs down the back, holding everything in place. It is the waterfall braid for a long day, a wedding, or any occasion when the style needs to last from morning to midnight, because the French braid at the end anchors the whole style. It is also a beautiful style in its own right, with the open waterfall at the top and the neat French plait below it.
Best for: long days, weddings, and women who want a waterfall braid that will not slip. How to style: braid the waterfall across the back of the head, then gather the remaining hair — including the dropped strands — and French braid it down the back, adding hair from the sides as you go. Secure the end with an elastic, and pancake both braids gently so they look full and even.
Pros: the most secure waterfall braid, and it looks lovely from behind. Cons: the French braid hides the dropped strands once it gathers them in, so the waterfall effect is strongest at the top. Quick verdict: the French finish is the practical waterfall — pretty at the front, secure at the back, and built to last all day.
26. The Waterfall Braid with a Dutch Braid Twist
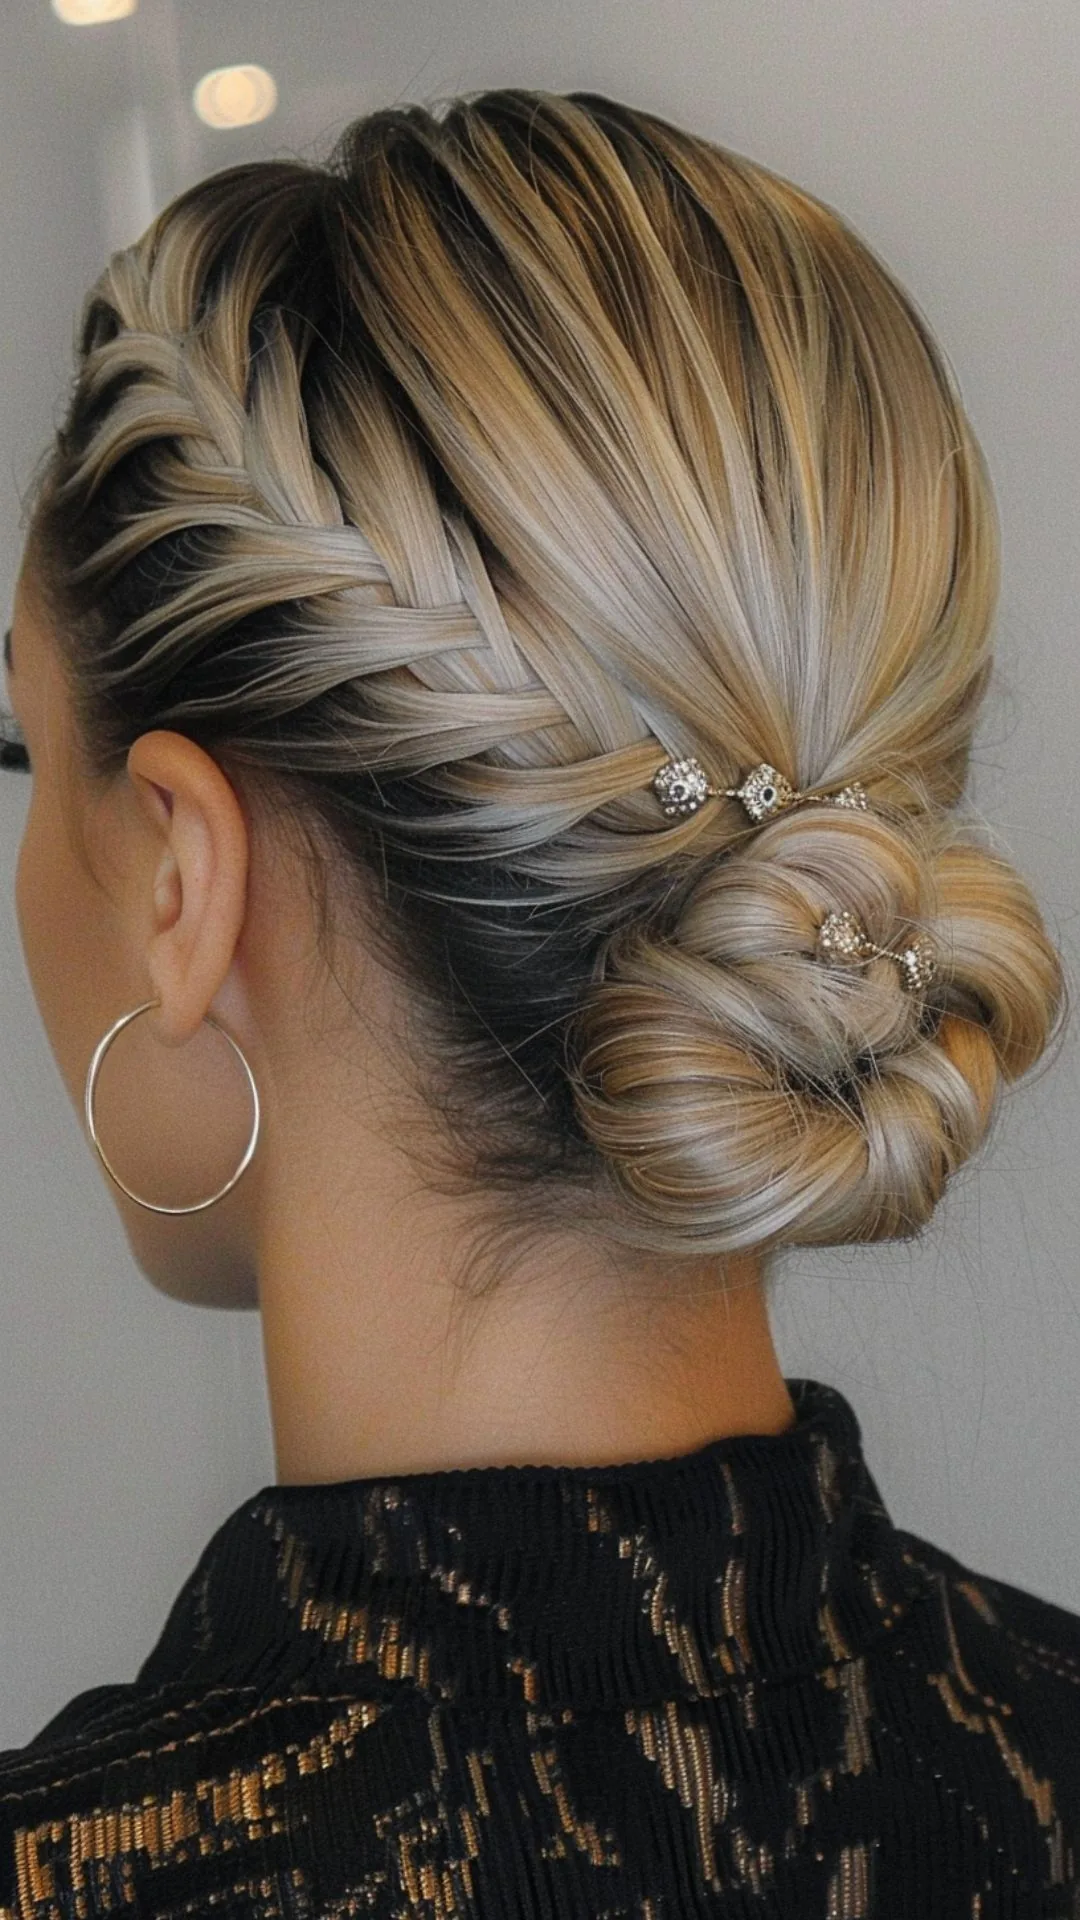
The waterfall braid with a Dutch braid twist uses the Dutch technique — strands crossed under instead of over — so the plait sits on top of the hair like a raised cord, bold and visible. It is the most dramatic waterfall braid, because the raised plait catches the light and stands out against the hair, and it suits women who want their braid to be noticed. The dropped strands fall from a plait that looks sculpted rather than flat, which gives the whole style a stronger, more defined shape than an ordinary waterfall braid.
Best for: thick hair, which shows off a raised Dutch plait best, and for photographs, where the bold braid reads clearly. How to style: braid the waterfall with the strands crossing under the middle strand instead of over it, dropping a strand at each step exactly as you would in an ordinary waterfall. Keep the tension even, and pancake the plait afterwards to make it look even bolder. Finish with a pin at the end, and curl the dropped strands so they fall in soft waves.
Pros: bold, visible, and it holds well because the Dutch plait grips the hair. Cons: it is a little harder to do on yourself, because crossing under feels unfamiliar at first. Quick verdict: the Dutch twist is the waterfall braid with attitude — choose it when you want the braid, not just the cascade, to be the star.
27. The Waterfall Braid with Highlights
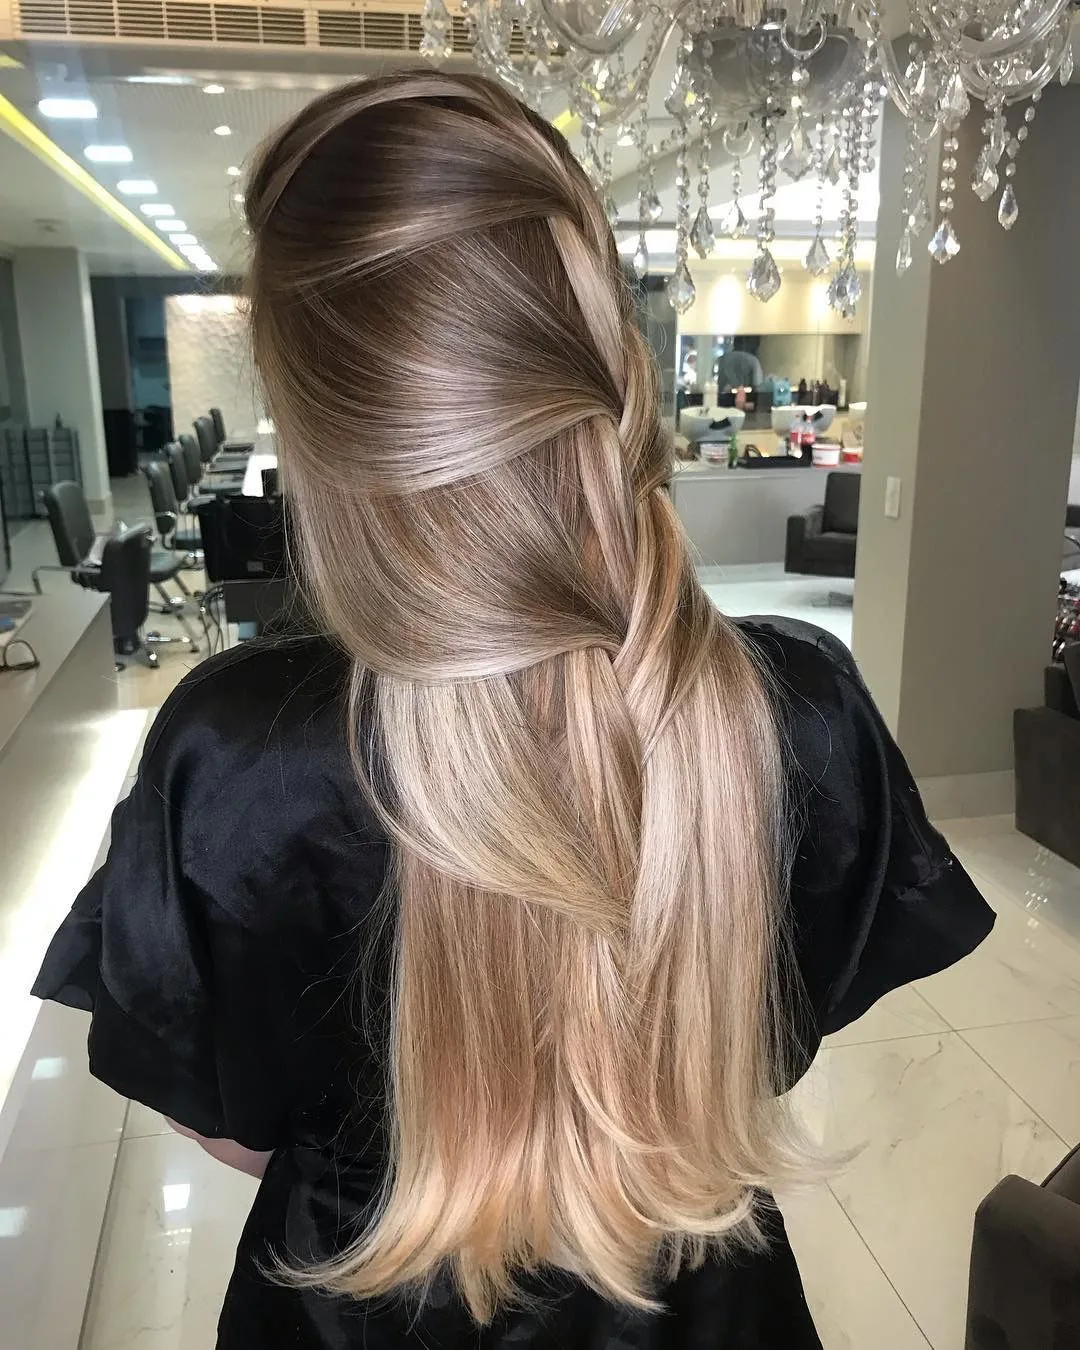
The waterfall braid with highlights is the style that shows off colour best: the braid pulls strands from different layers of the hair and lays them side by side, so the lighter pieces catch the light along the plait and the darker pieces fall behind them. The result is a braid that looks three-dimensional, with the highlights tracing the path of the plait across the head. It is the waterfall braid for women who have just had their colour done and want to show it off, and it is the reason so many colourists recommend a waterfall braid for the first photograph after a balayage.
Best for: highlighted, balayaged or ombre hair, where the colour variation makes the braid pop. How to style: braid a little looser than usual, and pancake the plait open, so the lighter strands are visible along the edges of the braid. Curl the dropped strands so the highlights fall in separate, visible curls, and finish with a shine spray, which will make the lighter pieces catch the light even more.
What to ask your colourist: for face-framing highlights and a few lighter pieces through the mid-lengths, placed where the braid will travel. Cost: the colour service, plus the styling. Quick verdict: highlights and waterfall braids belong together — the braid is the frame, and the colour is the picture.
28. The Waterfall Braid with Blonde Hair
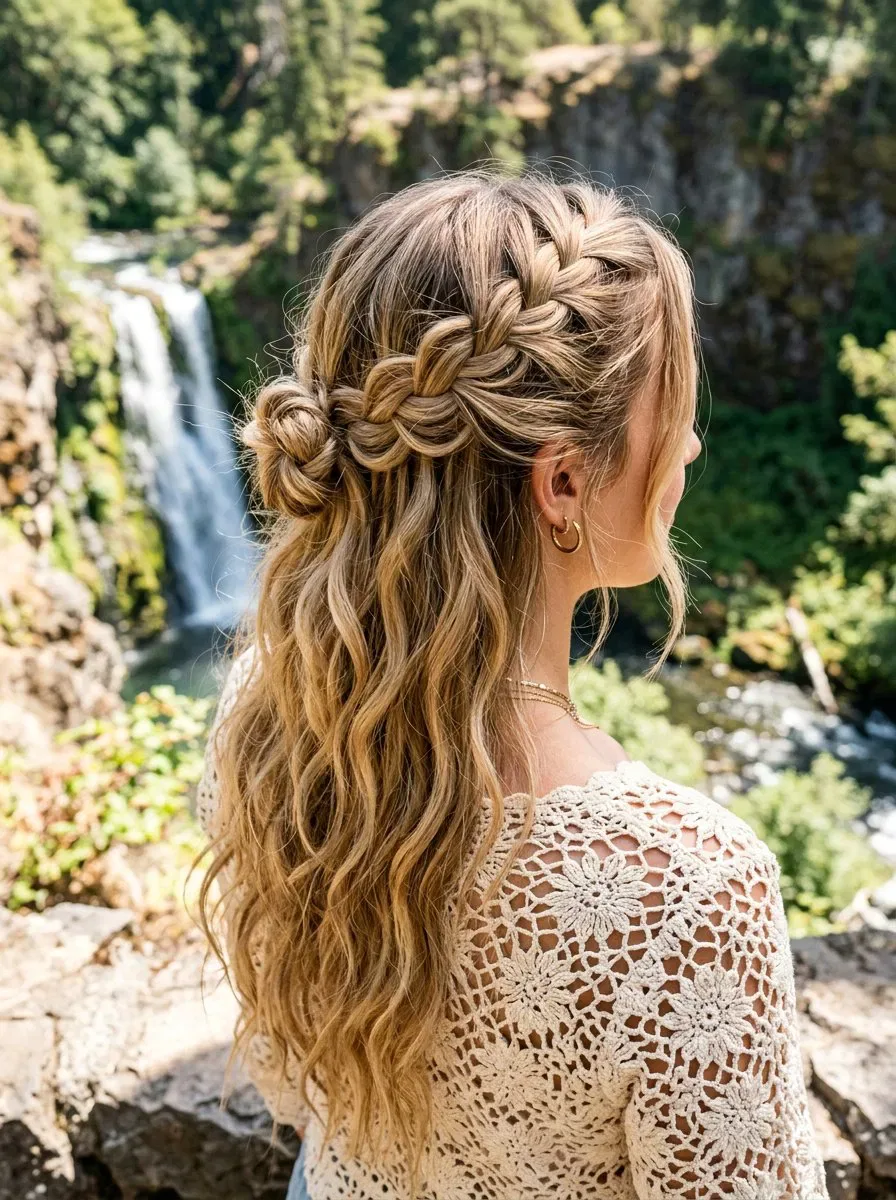
The waterfall braid with blonde hair is the sunniest version of the style: the plait shows clearly against the light hair, the dropped strands fall like pale ribbons, and the whole style glows in sunlight. Blonde hair makes the braid more visible than dark hair, because every crossing is clear, and it also makes the style look softer and more romantic, especially in shades of honey blonde or golden blonde. It is a beautiful summer style, and it photographs wonderfully in natural light, where the blonde catches the sun and the braid looks almost luminous.
Best for: blonde hair of any shade, from platinum to honey, and for summer weddings and outdoor photographs. How to style: braid on second-day hair with a little texturising spray, because blonde hair can be fine and slippery, and pancake the plait open so the braid looks full. Curl the dropped strands with a large-barrel wand, and finish with a shine spray rather than a heavy hairspray, so the blonde stays bright and touchable.
Common mistake: using a heavy, yellowing hairspray on blonde hair, which can dull the colour — choose a clear, lightweight spray. Maintenance: blonde hair needs regular toning to stay bright, and the braid will show any brassiness, so keep the colour fresh. Quick verdict: blonde hair makes the waterfall braid look like sunlight — wear it outside, and let the light do the work.
29. The Waterfall Braid with Brunette Hair

The waterfall braid with brunette hair is the richest, most elegant version of the style: the dark hair makes the braid look deep and glossy, the dropped strands fall in smooth, shiny ribbons, and the whole style has a polished, expensive feel. Brunette hair shows the braid clearly, because the plait creates shadows and highlights as it crosses the hair, and it suits a formal event, a wedding, or any occasion when the hair should look sleek and refined. It is also the hair colour that suits a waterfall braid with a ribbon or a pearl pin best, because the light accessory stands out against the dark hair.
Best for: brunette hair, especially dark brown and espresso shades, and for formal events. How to style: braid on hair with a little shine serum through the ends, so the plait looks glossy, and keep the dropped strands smooth — a flat iron through the ends will give them a sleek, polished fall. Add a pearl pin or a light-coloured ribbon for contrast, or leave the braid plain and let the shine speak for itself.
Pros: looks polished, photographs beautifully, and the braid is clearly visible. Cons: dark hair shows frizz more easily, so a little smoothing serum is essential. Quick verdict: brunette hair gives the waterfall braid its most elegant look — dark, glossy, and quietly luxurious.
30. The Waterfall Braid with Red Hair
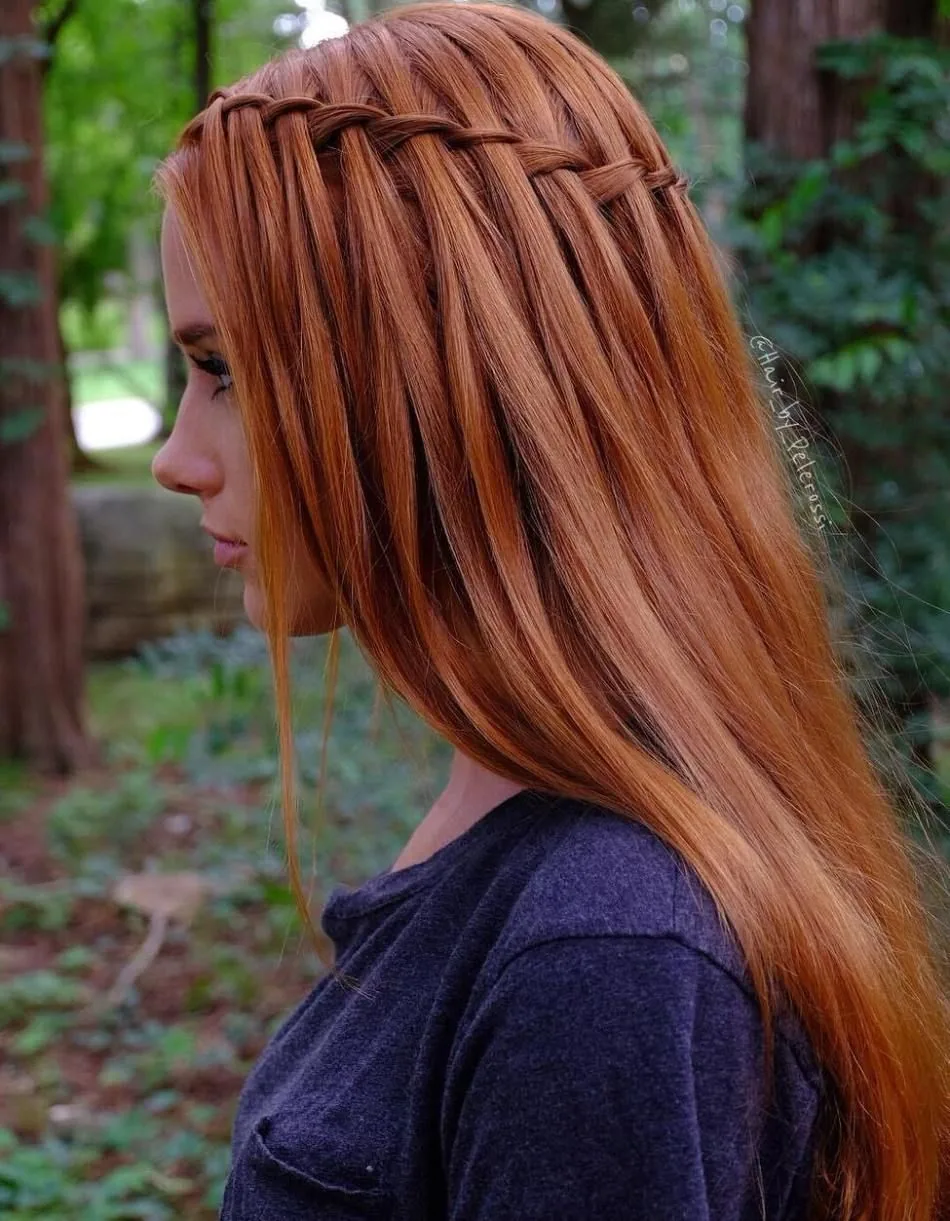
The waterfall braid with red hair — copper, auburn or ginger — is the most striking version of the style: the warm, fiery colour makes the braid look like it is glowing, and the dropped strands fall in rich, coppery waves that catch the light at every turn. Red hair is naturally eye-catching, and a waterfall braid gives it a structure that shows off the colour in a way loose hair cannot, because the plait pulls strands from different layers and lays them side by side, so the different tones of the red are all visible at once.
Best for: red and copper hair, and for autumn weddings and photographs, where the warm colour suits the season. How to style: braid loosely and pancake the plait open, so the different tones of the red show along the braid, and curl the dropped strands so they fall in separate, glowing curls. Use a colour-safe shampoo and a cool rinse, because red fades faster than any other colour, and the braid will show fading first.
Pros: the colour does half the work, and the style looks extraordinary with almost no accessories. Cons: red hair needs the most colour maintenance of any shade here, so keep the colour fresh. Quick verdict: red hair and a waterfall braid are a perfect match — the colour is the decoration, and the braid is the frame that shows it off.
31. The Waterfall Braid with a Ribbon
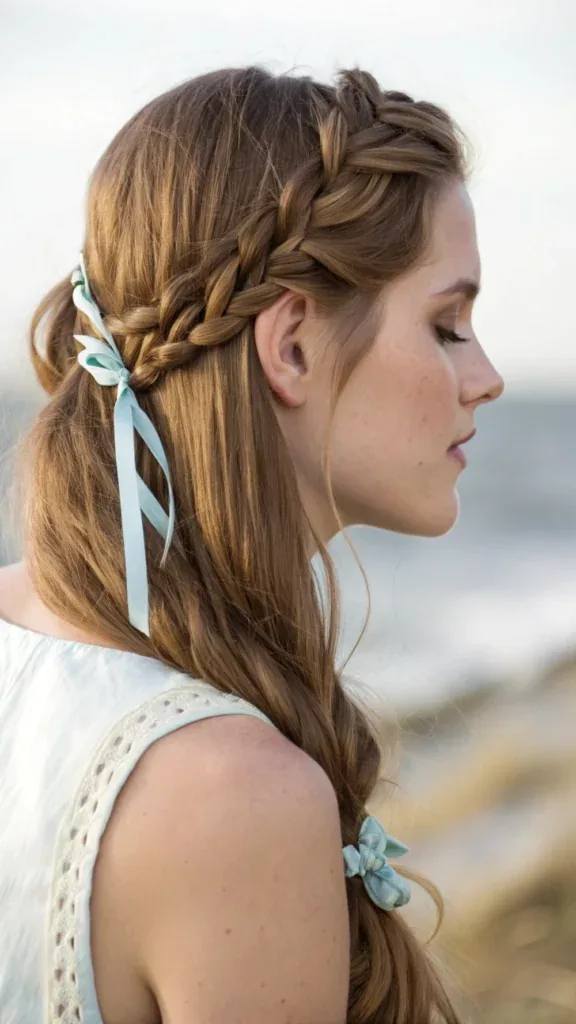
The waterfall braid with a ribbon threads a ribbon through the plait, so a line of colour runs along the braid and ties at the end in a small bow. It is the softest, most romantic accessory for a waterfall braid, and it suits a garden party, a prom, a wedding, or any occasion when the hair should look pretty and a little bit old-fashioned in the best way. The ribbon can match the dress, the flowers, or the season — a pale pink for spring, a deep burgundy for autumn, a white or ivory for a wedding — and it turns an ordinary waterfall braid into a coordinated outfit.
Best for: proms, garden parties and weddings, where the ribbon can match the dress or the flowers. How to style: choose a thin, soft ribbon, about half an inch wide, and thread it through the braid as you go, or weave it through the finished plait with a bobby pin. Tie the end in a small bow where the braid finishes, and let the ribbon tails fall with the dropped strands. Keep the ribbon light, or it will drag the braid down.
Pros: inexpensive, easy, and it makes the style look coordinated. Cons: a heavy or wide ribbon will pull the braid out of shape, so choose a thin one. Quick verdict: a ribbon is the simplest way to dress up a waterfall braid, and it costs almost nothing.
32. The Waterfall Braid with Fresh Flowers
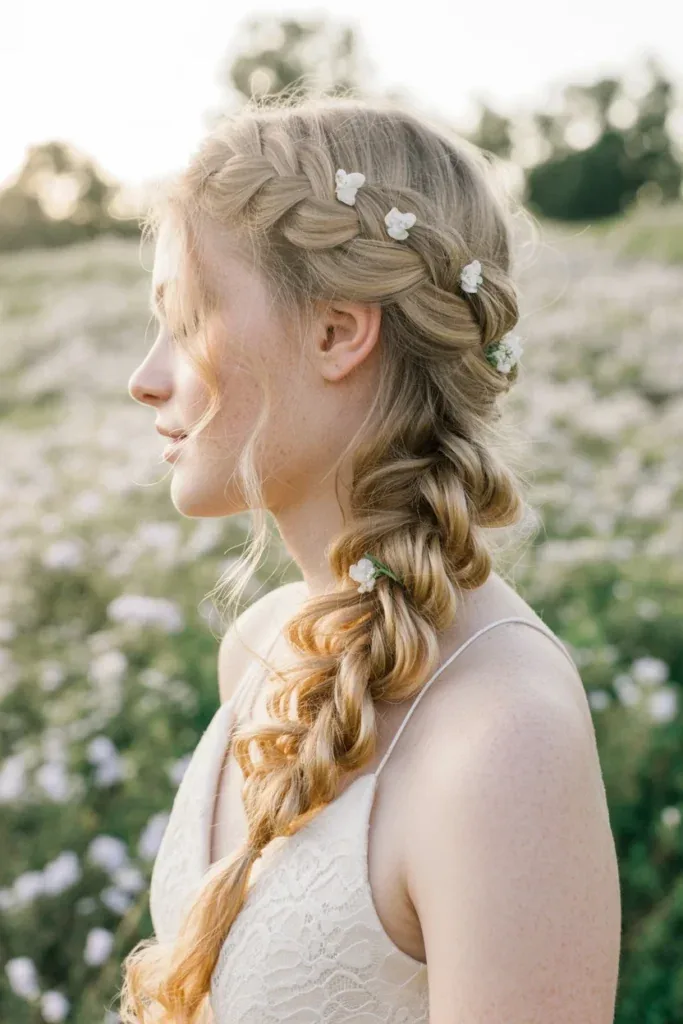
The waterfall braid with fresh flowers tucks small blooms into the plait, so the flowers sit along the braid like a garland, with the dropped strands falling below them. It is the most romantic accessory for a waterfall braid, and the one that suits a garden wedding, a summer party, or a festival best. Small flowers work best — baby’s breath, tiny roses, lavender, or small daisies — because they are light enough not to drag the braid down, and their stems can be hidden under the plait so only the blooms show.
Best for: garden weddings, summer parties and festivals, where fresh flowers suit the setting. How to style: braid first, then tuck the flowers into the plait one by one, using a bobby pin to anchor each stem under the braid. Space them evenly, every two or three inches, and keep them small — three or four flowers are enough, and more will overwhelm the braid. Mist the flowers lightly with water before the event so they stay fresh, and keep the style out of direct sun for as long as you can.
Pros: beautiful, romantic, and it smells lovely. Cons: fresh flowers wilt, so the style is best for a few hours rather than all day. Quick verdict: flowers and waterfall braids belong together — the braid is the stem, and the flowers are the bloom.
33. The Waterfall Braid with Pearl Pins
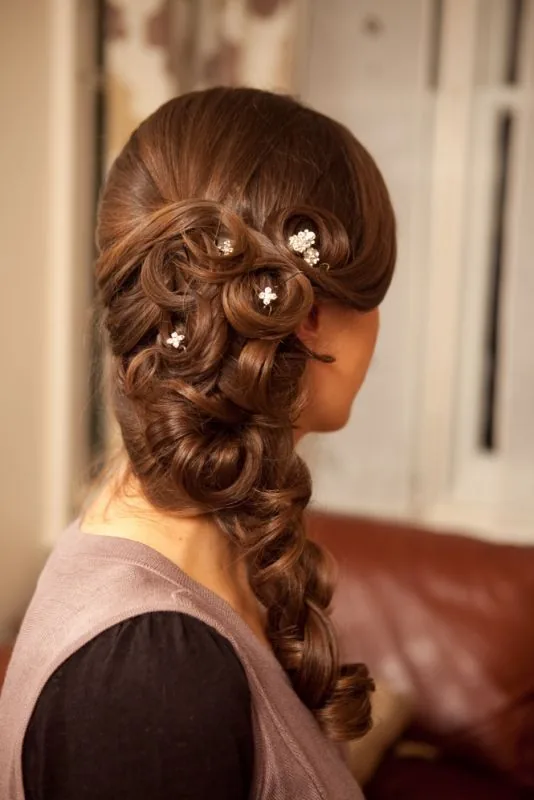
The waterfall braid with pearl pins scatters small pearl pins along the plait, so the braid catches the light at every step. It is the most elegant accessory for a waterfall braid, and the one that suits a wedding, a prom, or a formal evening best, because pearls are classic, understated, and they never look overdone. Three or four pearl pins, spaced evenly along the braid, are enough — they should look like dew on the plait, not like a necklace draped over it. The pins also have a practical job: they anchor the braid and help it hold its shape.
Best for: weddings, proms and formal events, especially with a pearl necklace or pearl earrings, so the whole look is coordinated. How to style: braid first, then push the pearl pins into the plait at intervals, angling each one so the pearl sits on top of the braid and the pin disappears underneath it. Space them evenly, and use pins that match your hair colour so the metal does not show.
Pros: elegant, reusable, and they help the braid hold. Cons: cheap pearl pins can look plastic in photographs, so choose good-quality ones. Quick verdict: pearl pins are the waterfall braid’s jewellery — a few, well placed, and the style is finished.
34. The Waterfall Braid with a Headband
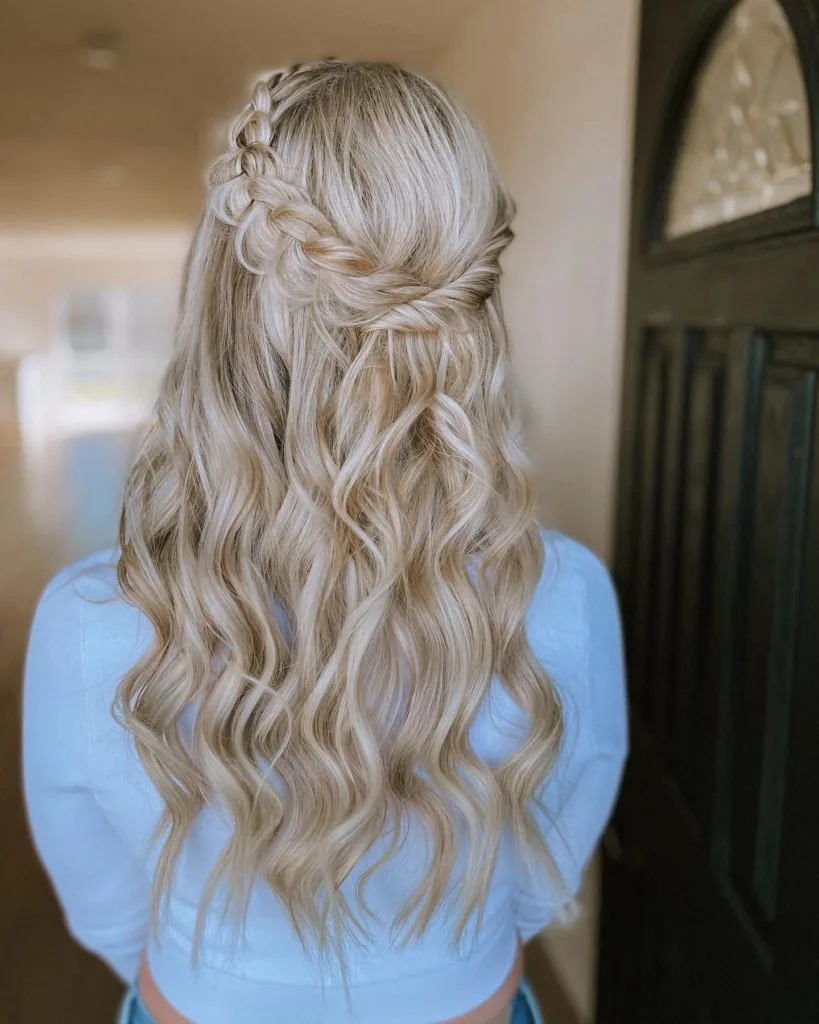
The waterfall braid with a headband pairs the plait with a thin, elegant band — a metal headband, a beaded band, or a small tiara — worn just in front of the braid, so the two lines frame the face together. It is the waterfall braid for a formal event, a prom, or a wedding, where the headband adds a little sparkle and the braid adds the romance. The combination works because the headband and the braid do different jobs: the headband is the jewellery, and the braid is the hairstyle, and together they look complete without either one having to do too much.
Best for: proms, weddings and formal events, especially with a tiara or a beaded headband. How to style: braid the waterfall first, then place the headband just in front of the braid, so the two sit parallel to each other across the head. Choose a thin band — a wide band will hide the braid — and pin the headband in place behind the ears so it does not slide forward over the braid.
Pros: adds sparkle without much effort, and the headband helps hold the front hair in place. Cons: a heavy headband can give you a headache over a long evening, so choose a light one. Quick verdict: a headband and a waterfall braid are a natural pair — one line of sparkle, one line of hair, and the face framed between them.
35. The Boho Waterfall Braid
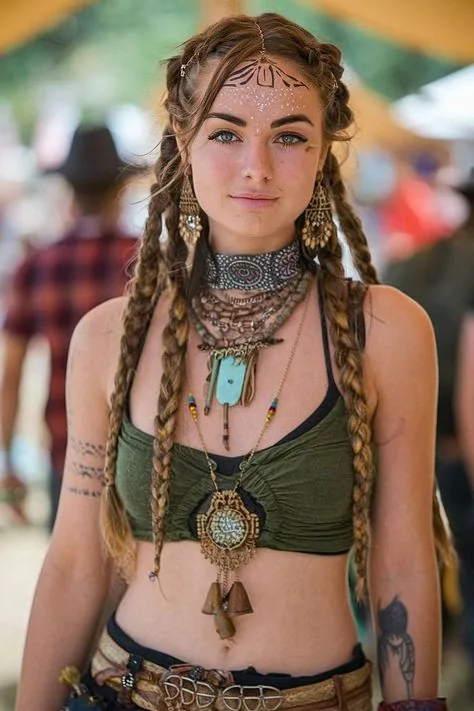
The boho waterfall braid is the loosest, most relaxed version of the style: the braid is pancaked wide open, the dropped strands are left wavy and a little messy, and the whole look is soft, undone and free-spirited. It suits a festival, a beach wedding, a summer party, or any day when the hair should look like it happened naturally. The boho version is deliberately imperfect — a few strands pulled loose at the front, a braid that is a little uneven, a flower or two tucked in — and that imperfection is exactly what makes it look boho rather than bridal.
Best for: festivals, beach weddings and summer parties, and for women who like their hair to look effortless. How to style: braid loosely, pancake the plait open generously, and leave the dropped strands wavy — a sea-salt spray and a scrunch is enough. Pull a few thin strands loose at the front to frame the face, and add a small flower or a feather pin if you like. Do not use much hairspray: the boho look should move when you do.
Pros: comfortable, forgiving, and it looks better as the day goes on. Cons: it will not read as formal, so do not choose it for a black-tie event. Quick verdict: the boho waterfall is the free-spirited version — loose, soft, and made for a summer day.
36. The Waterfall Braid for a Festival
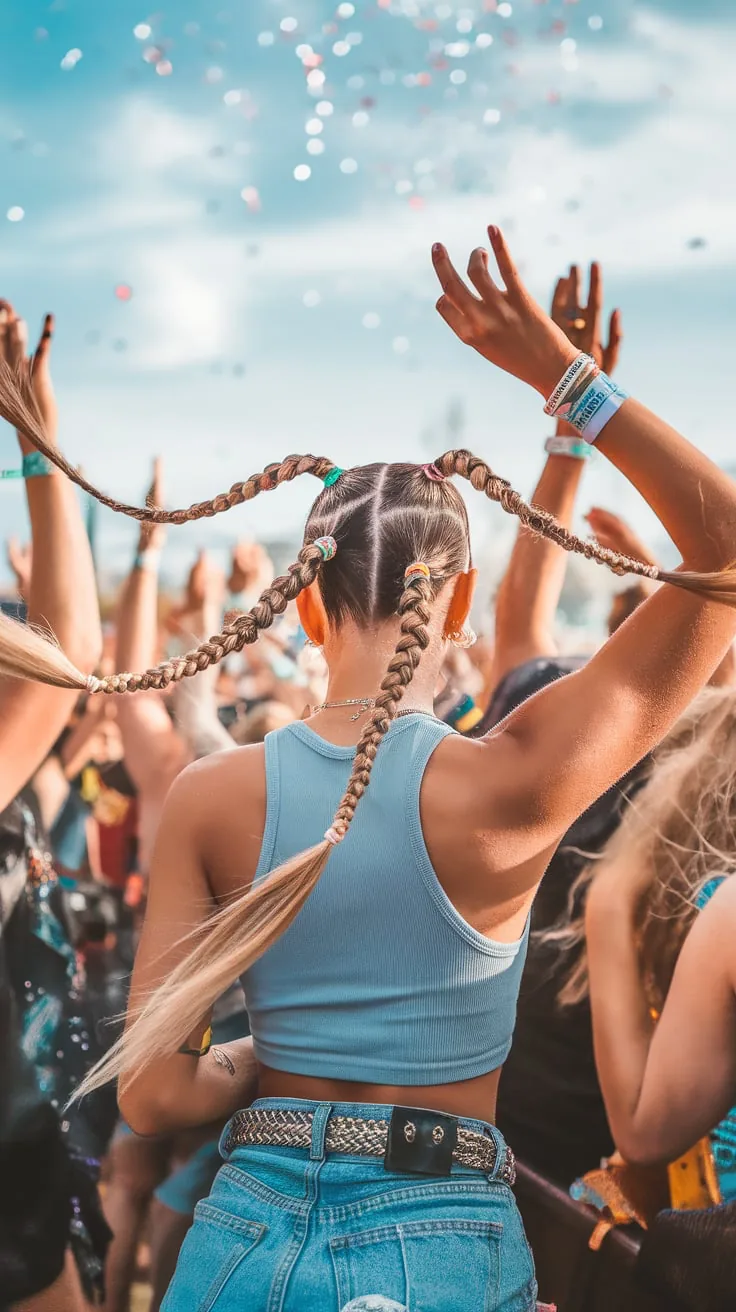
The waterfall braid for a festival is the boho version with a little more sparkle: a loose waterfall braid, wavy dropped strands, and a few fun details — glitter along the part, a coloured ribbon, or small flowers tucked into the plait. It is the festival hairstyle that actually survives a festival, because the braid keeps the front hair out of the face while the loose hair stays soft and comfortable, and it looks better as the day goes on, when the braid loosens a little and the waves get a little wilder. It is practical and pretty at the same time, which is rare at a festival.
Best for: music festivals, outdoor parties and summer days, where the hair needs to hold up in heat and wind. How to style: braid on second-day hair with plenty of texturising spray, pancake the plait open, and add your festival details — a little glitter along the part, a ribbon, or a few small flowers. Pin the braid well, because you will be moving, dancing and sweating, and the style needs to hold for hours.
Pros: practical, comfortable, and it looks better lived-in. Cons: glitter and flowers will need topping up through the day, so bring spares in your bag. Quick verdict: the festival waterfall is the braid that can dance — loose, sparkly, and built to last the day.
37. The Waterfall Braid for Work
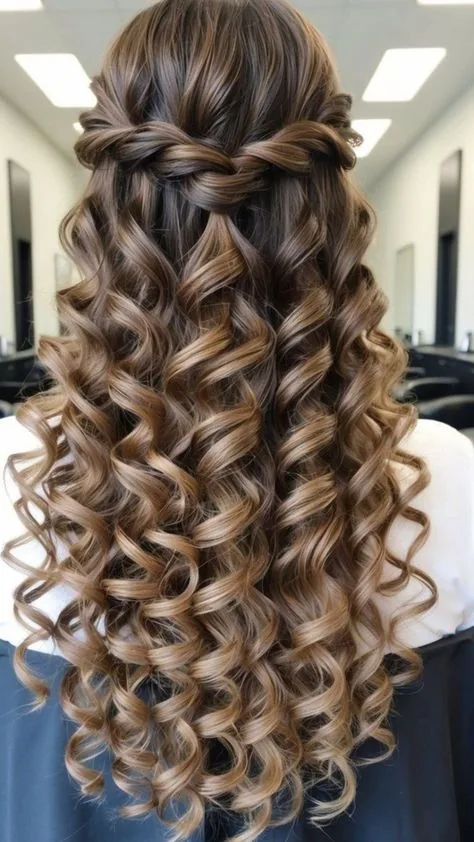
The waterfall braid for work is the neat, polished version of the style: a single waterfall braid across the back of the head, with the dropped strands kept smooth and the rest of the hair tidy, so the style reads as deliberate and professional rather than romantic. It is the waterfall braid for the office, because it keeps the hair out of the face, it holds its shape through a long day, and it looks like you made an effort without looking like you are going to a wedding. The key is neatness: a tidy plait, smooth dropped strands, and no flowers or ribbons.
Best for: the office, meetings and professional settings, especially with medium to long hair. How to style: braid neatly and a little tighter than usual, smooth the dropped strands with a flat iron or a smoothing serum, and pin the braid in three places so it holds all day. Keep the accessories to nothing — no flowers, no pearls, no ribbon — and let the braid itself be the detail. A low ponytail or a low bun at the end will make it even more work-appropriate.
Pros: professional, comfortable, and it keeps the hair out of the way. Cons: it needs to be redone if it loosens, because a sagging braid looks untidy at work. Quick verdict: the work waterfall is the neat version — tidy plait, smooth strands, no decoration, and it will carry you through the day.
38. The Waterfall Braid for Everyday Wear
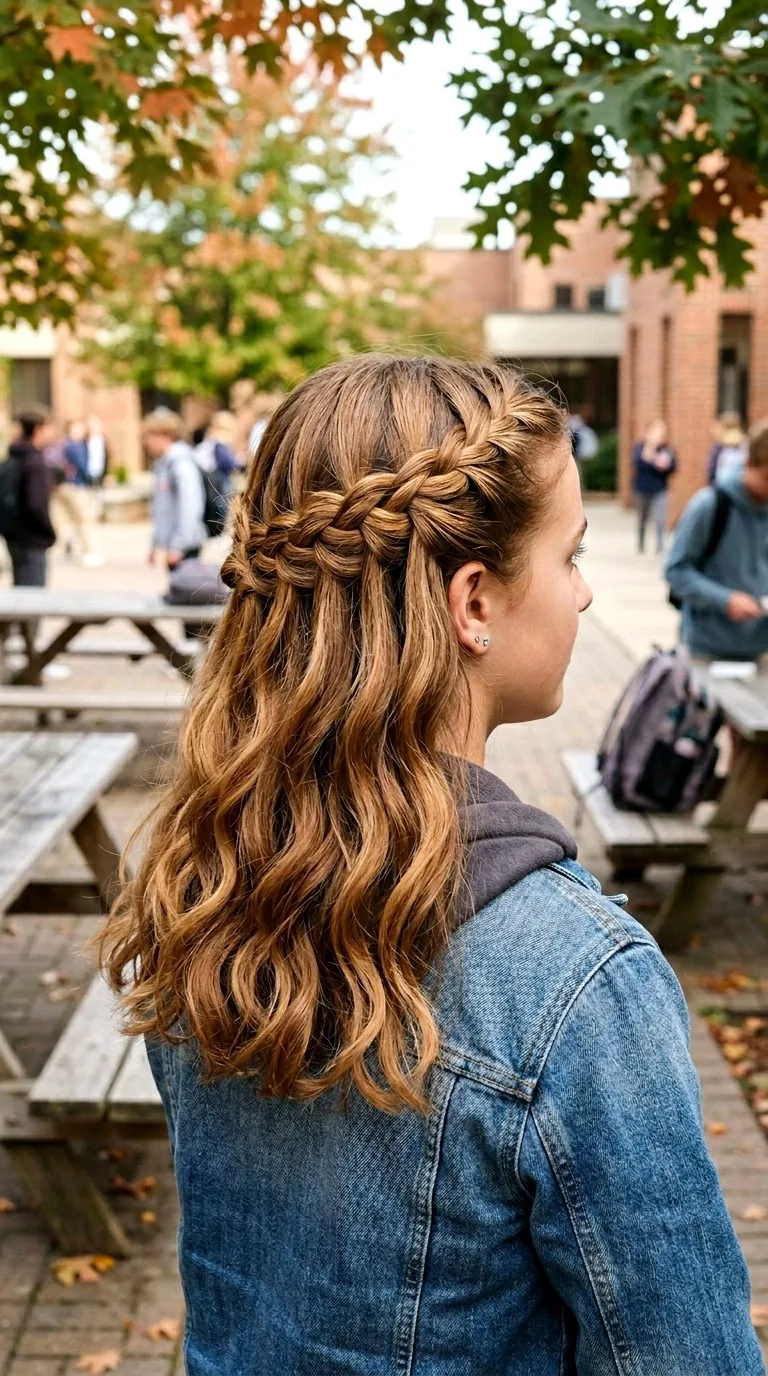
The waterfall braid for everyday wear is the quick, simple version: a single half-up waterfall braid, done in ten minutes, with the rest of the hair left loose and natural. It is the waterfall braid for school, college, errands, or a day out — a style that makes ordinary hair look pretty without any special occasion, and without any special effort. It is also the best waterfall braid to practise on, because you will wear it often enough to get good at it, and the more you wear it, the faster and neater it gets.
Best for: school, college and everyday life, and for women learning to waterfall braid. How to style: braid on second-day hair, travel across the back of the head, and pin the end under the loose hair. Leave the dropped strands exactly as they are — no curling, no waving — because the everyday version does not need it. A little dry shampoo at the roots is the only product, and the style is done.
Time and cost: ten minutes at home, no salon, no accessories, no special products. Common mistake: trying to make the everyday version perfect — it does not need to be. A slightly uneven everyday braid looks natural and pretty, and nobody will notice. Quick verdict: the everyday waterfall is the one you will actually wear — quick, pretty, and it makes an ordinary day feel a little special.
39. The Waterfall Braid for a Beach Holiday
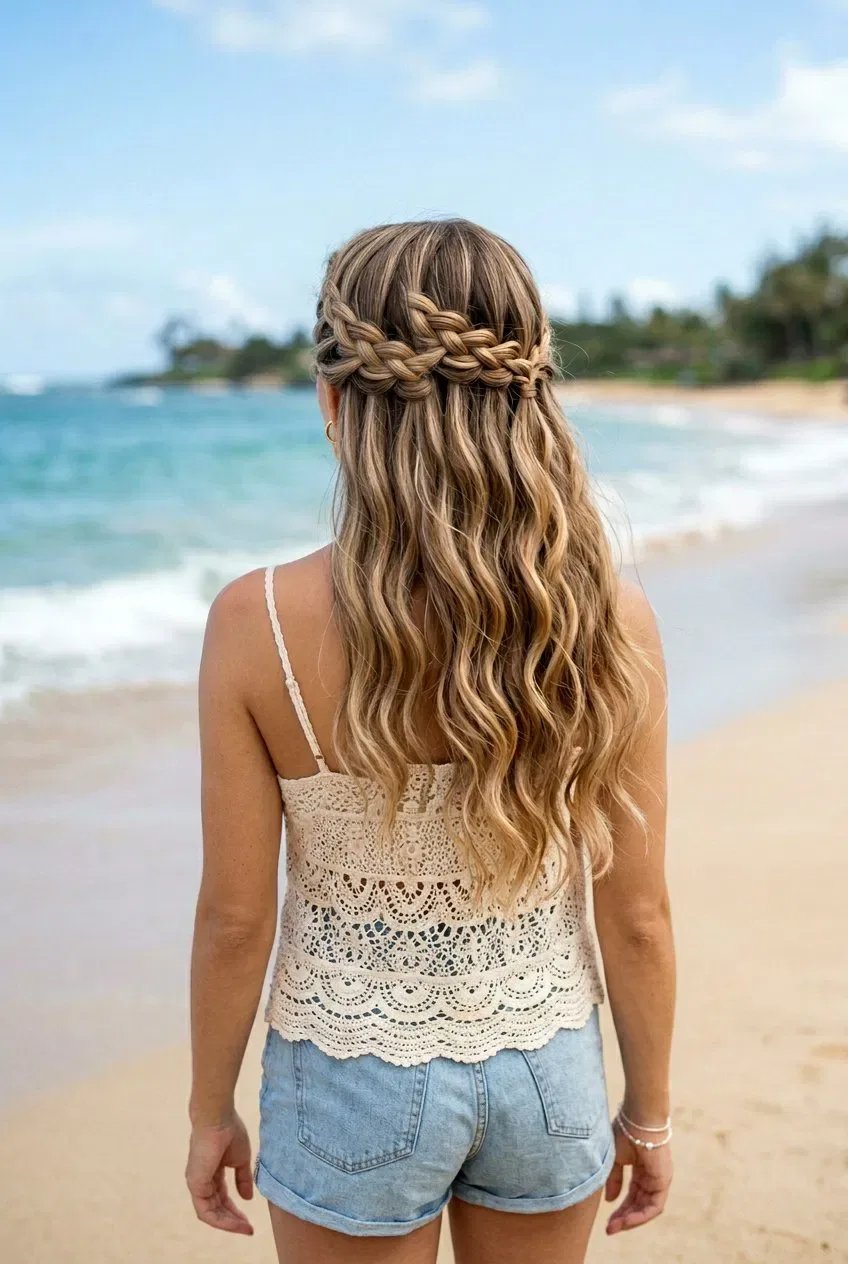
The waterfall braid for a beach holiday is the style that survives salt water, wind and sun: a loose waterfall braid, with the dropped strands left wavy and a little salty, and the whole look soft and sun-kissed. It keeps the front hair out of the face while the rest of the hair stays loose and comfortable, and it looks better after a swim than before, because the salt water gives the hair the texture the braid needs. It is the holiday hairstyle that photographs beautifully on the beach, with the braid catching the light and the waves falling behind it.
Best for: beach holidays, seaside weddings and summer vacations, where the hair will get wet and windy anyway. How to style: braid on dry hair with a sea-salt spray, pancake the plait open, and leave the dropped strands natural — no curling wand needed, because the sea and the sun will wave them for you. Rinse the hair with fresh water after swimming, and re-braid in the evening if you want the style fresh for dinner.
Pros: practical in wind and water, and it looks better lived-in. Cons: salt water dries the hair out, so use a leave-in conditioner in the evening. Quick verdict: the beach waterfall is the holiday braid — loose, salty, sun-kissed, and made for the seaside.
40. The Waterfall Braid for a Garden Party
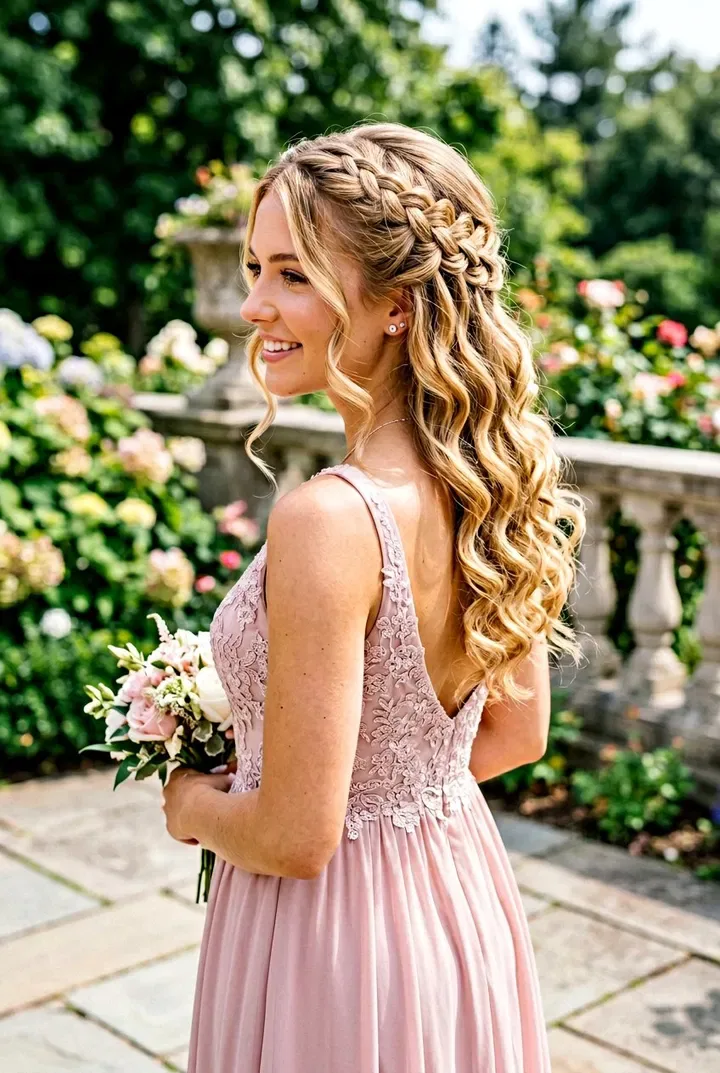
The waterfall braid for a garden party is the soft, pretty version of the style: a half-up waterfall braid with gentle curls, a few small flowers tucked into the plait, and the rest of the hair falling in soft waves. It suits a garden party perfectly, because the setting is romantic and outdoors, and the braid is romantic and soft — the style and the occasion match. It also suits a floral dress, a straw hat, and an afternoon in the sun, and it photographs beautifully against greenery, where the braid and the flowers echo the garden around it.
Best for: garden parties, afternoon teas, christenings and summer lunches. How to style: braid the classic half-up waterfall, curl the dropped strands with a large-barrel wand, and tuck two or three small flowers — baby’s breath or tiny roses — into the braid. Keep the flowers small and the curls soft, so the style looks garden-fresh rather than bridal, and finish with a light spray.
Pros: romantic, pretty, and it suits the setting perfectly. Cons: fresh flowers wilt in the sun, so the style is best for an afternoon rather than all day. Quick verdict: the garden-party waterfall is the style that belongs in a garden — soft, floral, and made for a summer afternoon.
41. The Waterfall Braid with a Side Part
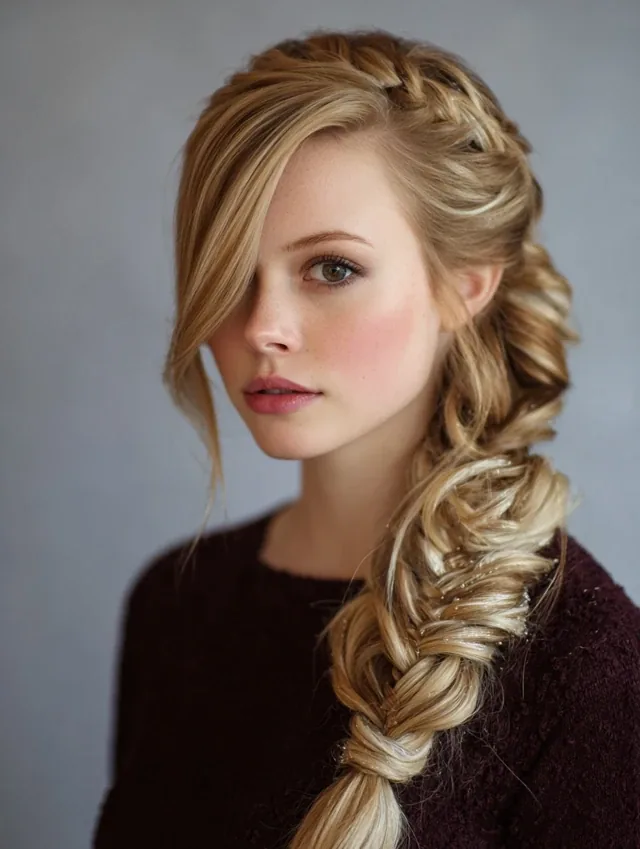
The waterfall braid with a side part starts the braid at a deep side part, so the plait follows the part line and the dropped strands fall on the fuller side of the hair. It is the most elegant waterfall braid, because the side part gives the whole style an asymmetric, glamorous line, and it suits a formal evening, a wedding, or any occasion when the hair should look polished. The side part also adds volume on one side, which makes the braid look fuller, and it frames the face in a way a centre part never quite does.
Best for: formal events, and for women with a strong side part who want the braid to follow it. How to style: part the hair deeply on one side, start the braid at the part, and travel across the back of the head, dropping strands as you go. Curl the dropped strands on the fuller side a little more than the other side, so the style stays balanced, and pin the braid at the far side under the loose hair.
Pros: elegant, flattering, and it adds volume where you want it. Cons: a deep side part can make the braid sit unevenly if the part is not straight, so take a moment to get the part right. Quick verdict: the side-part waterfall is the glamorous version — a deep part, a diagonal braid, and a style that looks like old Hollywood.
42. The Waterfall Braid with a Centre Part
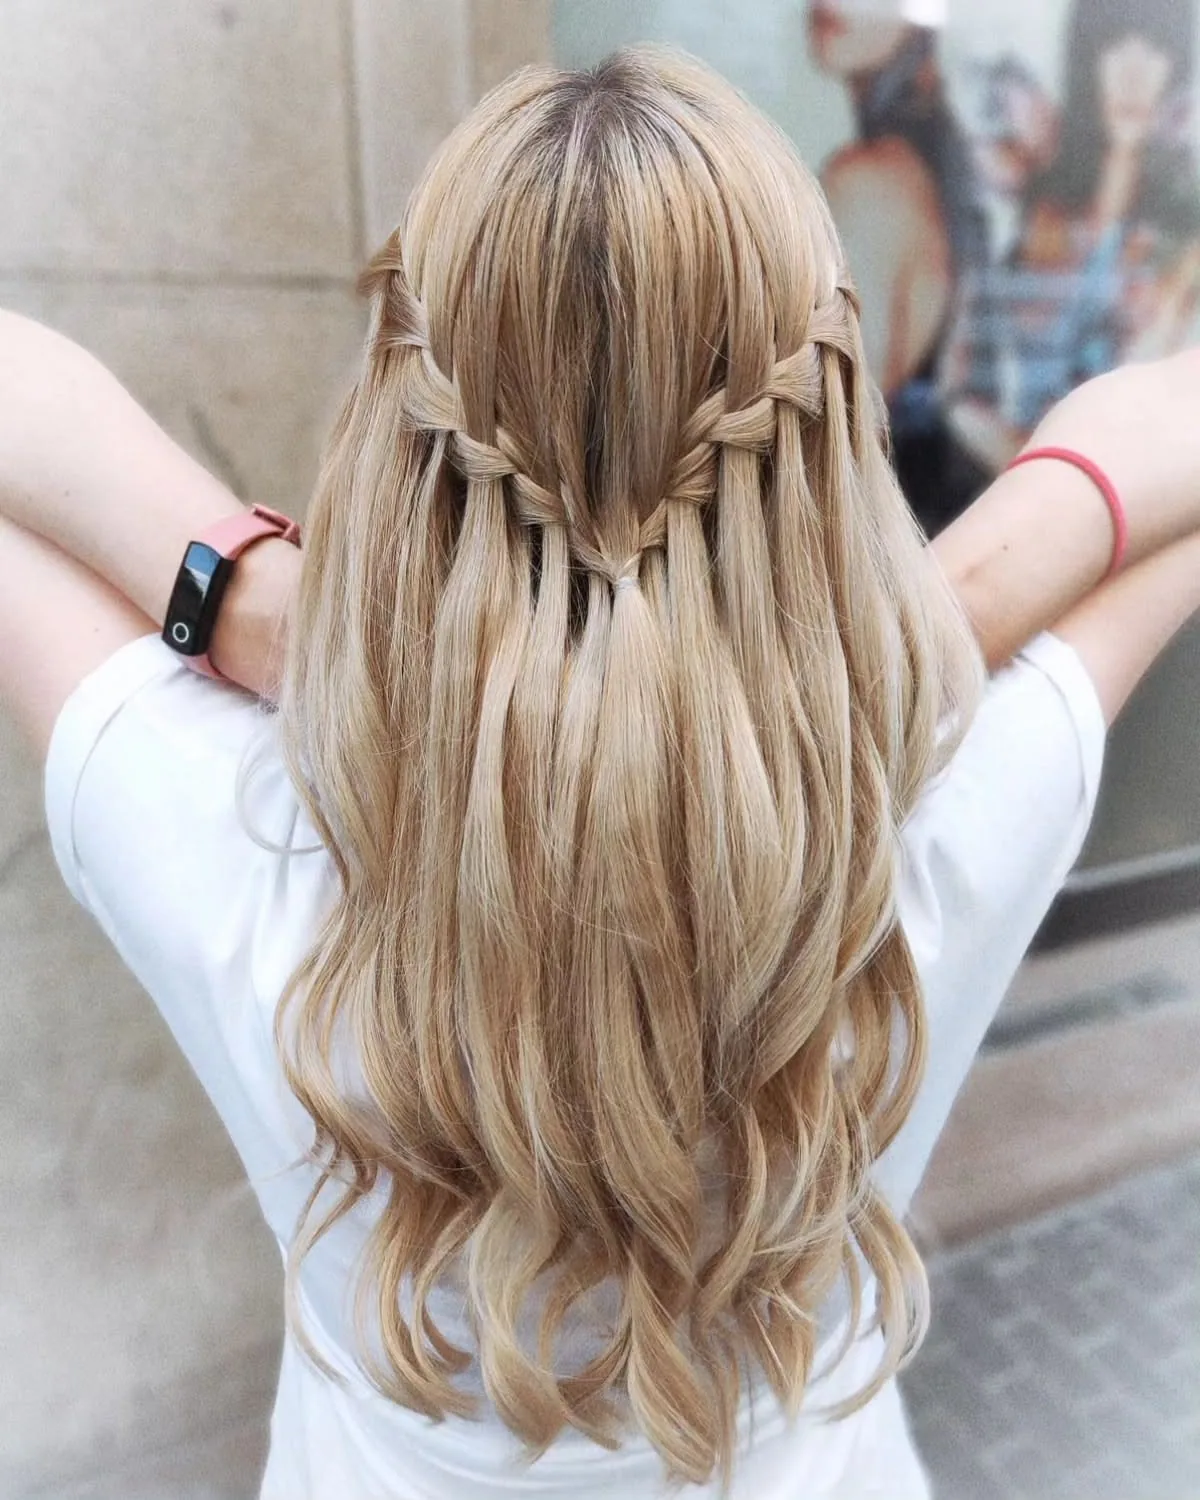
The waterfall braid with a centre part is the most symmetrical waterfall braid: the hair is parted in the middle, and the braid travels evenly across the back of the head, with the dropped strands falling in matching cascades on both sides. It suits a double waterfall braid best, where the two plaits meet in the middle and the symmetry is the whole point, and it is the version that looks most balanced in photographs, because the style is the same from both sides. It is also the most classic version, because a centre part is the traditional starting point for a waterfall braid.
Best for: double waterfall braids, weddings and photographs, where symmetry matters. How to style: part the hair in the middle, braid from each temple toward the centre, and secure the two ends together in the middle with a small elastic, covered by a strand of hair or a decorative pin. Keep both braids at the same height and the same tightness, or the meeting point will sit crooked.
Pros: symmetrical, balanced, and it photographs beautifully. Cons: matching the two sides takes practice, and a centre part does not suit every face shape. Quick verdict: the centre-part waterfall is the classic, balanced version — symmetrical, pretty, and made for a double braid.
43. The Waterfall Braid with Volume at the Crown
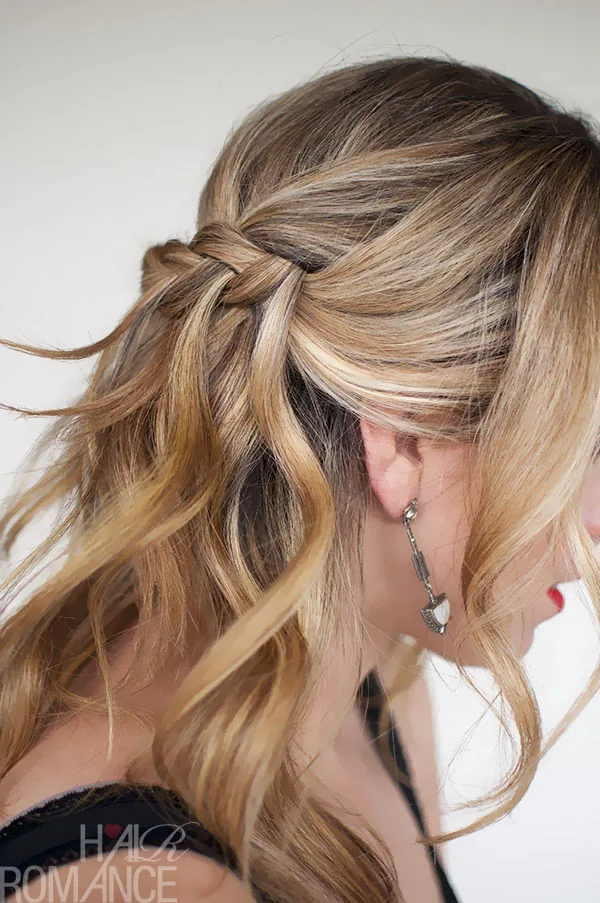
The waterfall braid with volume at the crown adds height at the top of the head, so the braid sits below a soft, lifted crown and the whole style looks fuller and more glamorous. It is the waterfall braid for a formal evening, a wedding, or any occasion when the hair should look big and dramatic, and it suits women with fine or flat hair best, because the volume at the crown makes the whole style look thicker. The lift also balances the face, lengthening a round face and softening a long one, which is why stylists reach for this version when they want the waterfall braid to look its most polished.
Best for: formal events, and for fine or flat hair that needs a lift. How to style: backcomb the crown gently before you braid, smooth the top layer over the backcombing, and then braid the waterfall below the lifted section. Pin the braid in place, and finish with a light spray at the crown to hold the height. Do not backcomb the dropped strands — they should stay soft and smooth, so the contrast between the lifted crown and the falling strands is clear.
Common mistake: backcombing too much, which makes the crown look like a beehive rather than a soft lift — a little goes a long way. Maintenance: the volume will drop over a few hours, so carry a small comb and a travel spray. Quick verdict: volume at the crown is the waterfall braid’s lift — a little height, a lot of glamour.
44. The Glam Waterfall Braid for a Formal Evening
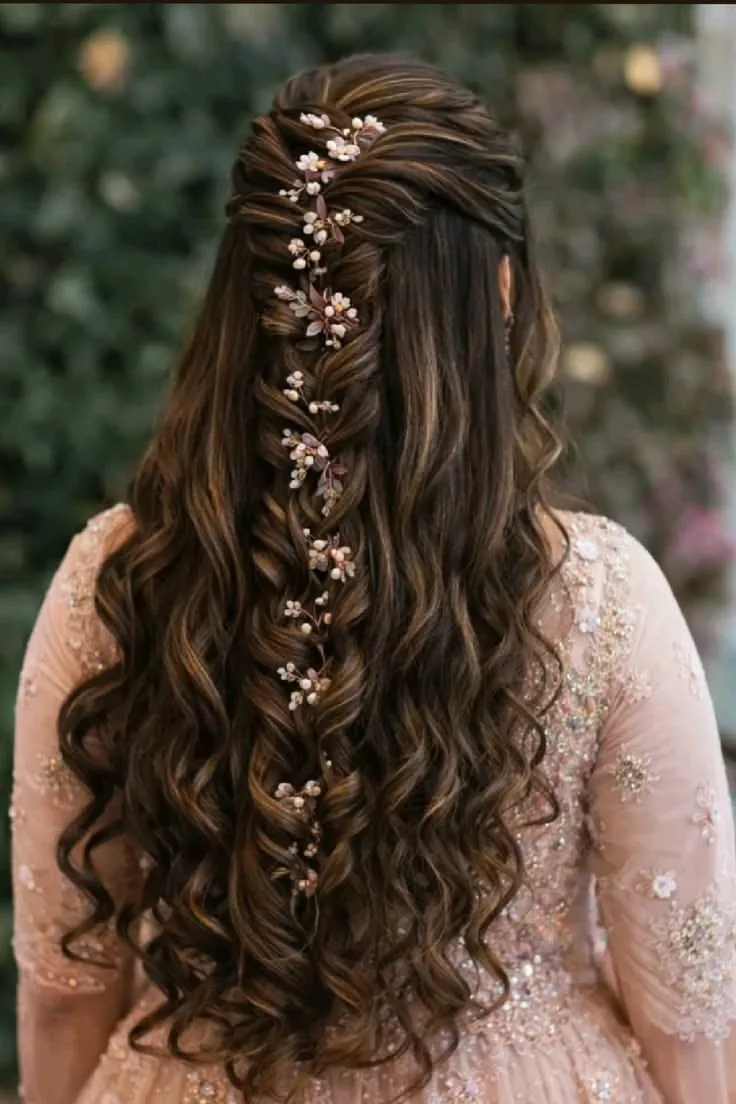
The glam waterfall braid for a formal evening is the most polished version of the style: a neat, pancaked waterfall braid, with the dropped strands curled into defined, glossy curls, and a pearl pin or a crystal clip at the end of the braid. It suits a black-tie dinner, a gala, or any evening when the dress is long and the hair should be just as dramatic. The braid gives the style structure, the curls give it movement, and the pin gives it sparkle — and together they make a style that looks like it took a salon an hour, even if it took you twenty minutes at home.
Best for: formal evenings, galas and black-tie events, especially with a long gown. How to style: braid neatly and pancake the plait open so it looks full, curl the dropped strands with a medium-barrel wand and let each curl cool before you touch it, and finish with a shine spray and a single statement pin at the end of the braid. Keep the front smooth and the face open, so the style reads as glamorous rather than busy.
Time and cost: twenty to thirty minutes at home, or a salon styling session before the event. What to ask your stylist: for a trial run with the dress, so the braid and the neckline work together. Quick verdict: the glam waterfall is the formal version at its best — structured, glossy, sparkling, and made for a long dress and a long evening.
What is a waterfall braid?
A waterfall braid is a braid in which one strand is dropped out of the plait at each step and left to fall free, while a new strand is picked up to take its place. The result is a braid across the head with loose strands cascading below it, like water falling through the plait. It is based on a French braid, with one change: instead of adding hair to the bottom strand, you let it drop.
How do you do a waterfall braid?
To do a waterfall braid, take a section at the temple, split it into three strands, and cross them as you would a French braid. Each time you reach the bottom strand, drop it and let it fall, then pick up a new small section from just behind it to replace it. Repeat across the head, finish with a few plain crosses, and secure the end with a small elastic or a pin. Practise on second-day hair, which has more grip than freshly washed hair.
Is a waterfall braid hard to do?
A waterfall braid is not hard if you can already French braid — it is the same technique with one extra step, dropping the bottom strand. Most women get it on the third try. The hardest part is braiding behind your head where you cannot see, so start with a side waterfall braid, which you can watch in the mirror, and move to a braid across the back once you are confident.
How long does a waterfall braid last?
A waterfall braid usually lasts four to six hours on its own, and all evening with two or three bobby pins hidden along the plait and a light mist of flexible hairspray. It loosens by about a quarter over the first hour, so braid it a little tighter than you want it to end up. On second-day hair with texturising spray, it holds noticeably longer than on freshly washed hair.
Can you do a waterfall braid on short hair?
Yes, you can do a waterfall braid on hair from about chin length, though the braid will be a short detail across the front or the side rather than a full cascade. Use thin sections, keep the braid small, and pin the end behind the ear. On hair shorter than chin length, the braid will not have enough to hold onto, so a waterfall braid is not the best choice.
Does a waterfall braid work on straight hair?
Yes, a waterfall braid works on straight hair, and it shows the plait more clearly than on any other hair type. Straight hair is slippery, though, so add texture first — a little dry shampoo or texturising spray — braid a little tighter than usual, and pin the plait in two or three places. Without that grip, a straight-hair waterfall braid will usually slide apart within the hour.
Can you wear a waterfall braid to a wedding?
Yes, a waterfall braid is one of the most popular wedding hairstyles, for brides and bridesmaids alike. Brides usually wear it half-up with soft curls and a few fresh flowers or pearl pins, with the veil pinned just above the braid. Do a trial run at least a month before the wedding, and have the braid done a little tighter than usual, because it loosens over the day.
How do you stop a waterfall braid from slipping?
To stop a waterfall braid from slipping, start on second-day hair or hair with texturising spray, braid a little tighter than you want the finished style to be, and pin the plait in two or three places with bobby pins hidden under the hair. A light mist of flexible hairspray on the braid itself — not on the dropped strands — will also help, and a French or Dutch finish at the end anchors the whole style.
What is the difference between a waterfall braid and a French braid?
A French braid gathers all the hair into the plait, so nothing is left loose. A waterfall braid uses the same three-strand crossing, but it drops the bottom strand at each step and leaves it to fall free, picking up a new strand to replace it. A French braid is secure and practical; a waterfall braid is romantic and decorative, with half the hair left loose below the plait.
How do you make a waterfall braid look fuller?
To make a waterfall braid look fuller, backcomb the crown gently before you braid, use slightly larger sections, and pancake the plait open after you finish — pulling at the edges of the braid a millimetre at a time to widen it. Curling the dropped strands also makes the style look fuller, because curled hair takes up more space than straight hair. Avoid heavy products, which weigh the braid down.
Conclusion
The waterfall braid is a small trick with a big reward: drop one strand at each step, and an ordinary French braid becomes a romantic cascade. Behind the pretty pictures is a simple truth — the style is half braid and half loose hair, and that is why it works for so many occasions. It is soft enough for a wedding, neat enough for work, loose enough for a festival, and quick enough for an ordinary day. Every style in this guide is a variation on that one dropped strand: half-up or crown, side or double, curled or wavy, with flowers, pearls or a ribbon.
Start with the classic half-up waterfall braid, and learn it on second-day hair with a little texture spray. Wear it plain first, then add the curls, then the flowers or the pearls when the occasion calls for them. And when someone asks how you got your hair to look like that, tell them the truth: you braided it like a French braid, and you let a little of it go. The waterfall braid is proof that sometimes the prettiest thing you can do with your hair is to let it fall.