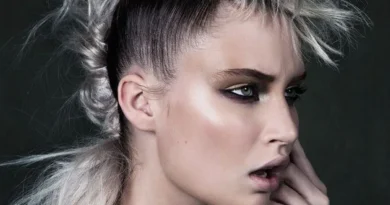
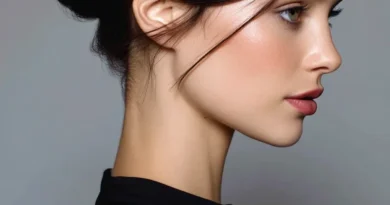
Milkmaid Braid Hairstyles for Women: Crown Braids, Boho Halos and Flower-Finished Looks for Every Occasion
A milkmaid braid is the hairstyle that makes everyone look twice: two braids lifted up and pinned across the crown of the head, like a halo, so the hair frames the face and the whole look feels soft, romantic and a little bit like a fairytale. It is the braid that works everywhere — at a wedding, in a meadow, at a festival, at the office — because it keeps the hair completely off the face and neck while looking far more complicated than it really is. There is something timeless about it: milkmaids, folk dancers, brides and festival-goers have all worn some version of this crown, and the reason it never goes out of style is that it suits almost every face, every hair type and every occasion.
This guide gathers 31 milkmaid braid hairstyles for women, from the classic milkmaid crown to boho messy halos, flower-finished braids, ribbon-woven crowns and wedding milkmaid braids — plus versions for short, medium, long, thick, fine, curly and straight hair, and looks for work, festivals, garden parties and black-tie evenings. Eight guides cover what a milkmaid braid really is, how it differs from a crown braid, the length and prep you need, the braiding methods that work best, how to keep it in place all day, and the mistakes that make a crown slip or sag. One honest note before you begin: a milkmaid braid is easier than it looks, but it does need bobby pins, a little texture in the hair, and five minutes of patience — and once you have done it twice, you will wonder why you ever thought it was hard.
What Is a Milkmaid Braid — And Why It Looks So Romantic
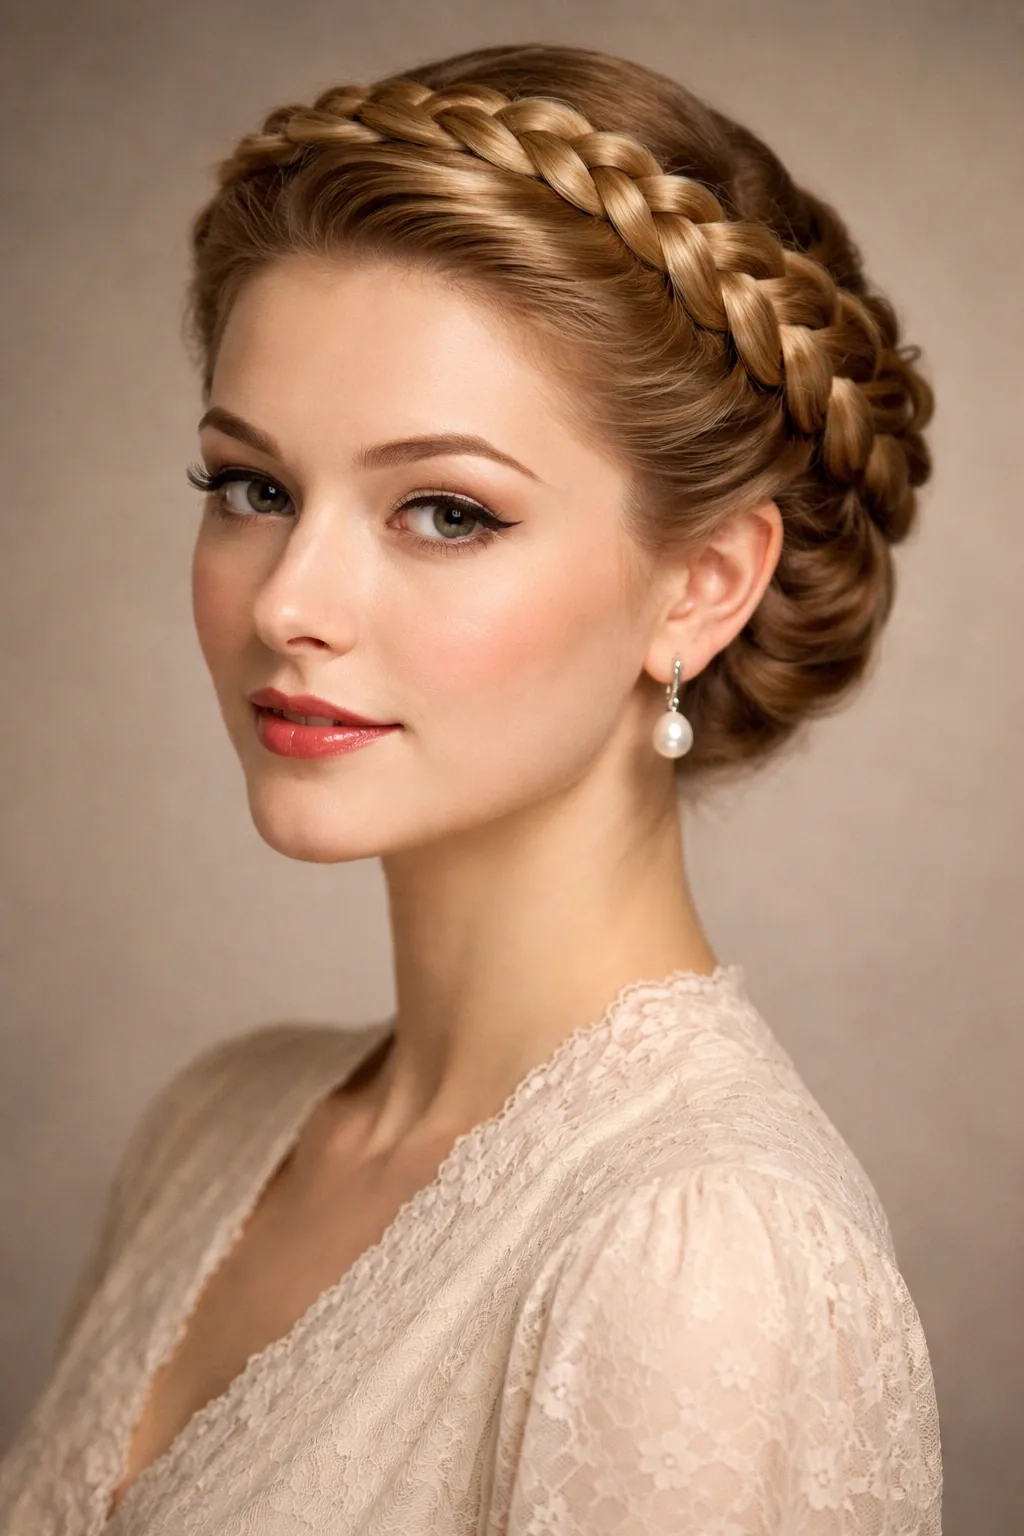
A milkmaid braid is a hairstyle in which the hair is divided into two braids — usually one on each side of the head — and the braids are then lifted up, crossed over the top of the head and pinned in place, so they form a crown or halo around the head. The name comes from the traditional look of European milkmaids and folk dancers, who wore their braids wound around their heads to keep their hair out of the way while they worked. The style survived because it is practical as well as pretty: the hair is completely off the face and neck, it stays put for hours, and it looks soft and romantic at the same time.
What makes a milkmaid braid different from an ordinary updo is the visible braid itself. The braids are the decoration — their texture, their thickness and the way they sit across the crown are the whole point of the style. A milkmaid braid can be neat and polished, with every strand in place, or loose and boho, with soft pieces pulled out around the face. It can be dressed up with flowers, ribbon or pearls, or left completely plain. The best milkmaid braids look effortless, even when they are carefully pinned, and the secret is in the finish: a braid that has been gently pulled apart — pancaked — so it looks full, and a few soft strands left loose at the temples so the style never looks severe.
Milkmaid Braid vs Crown Braid vs Halo Braid — What Is the Difference?
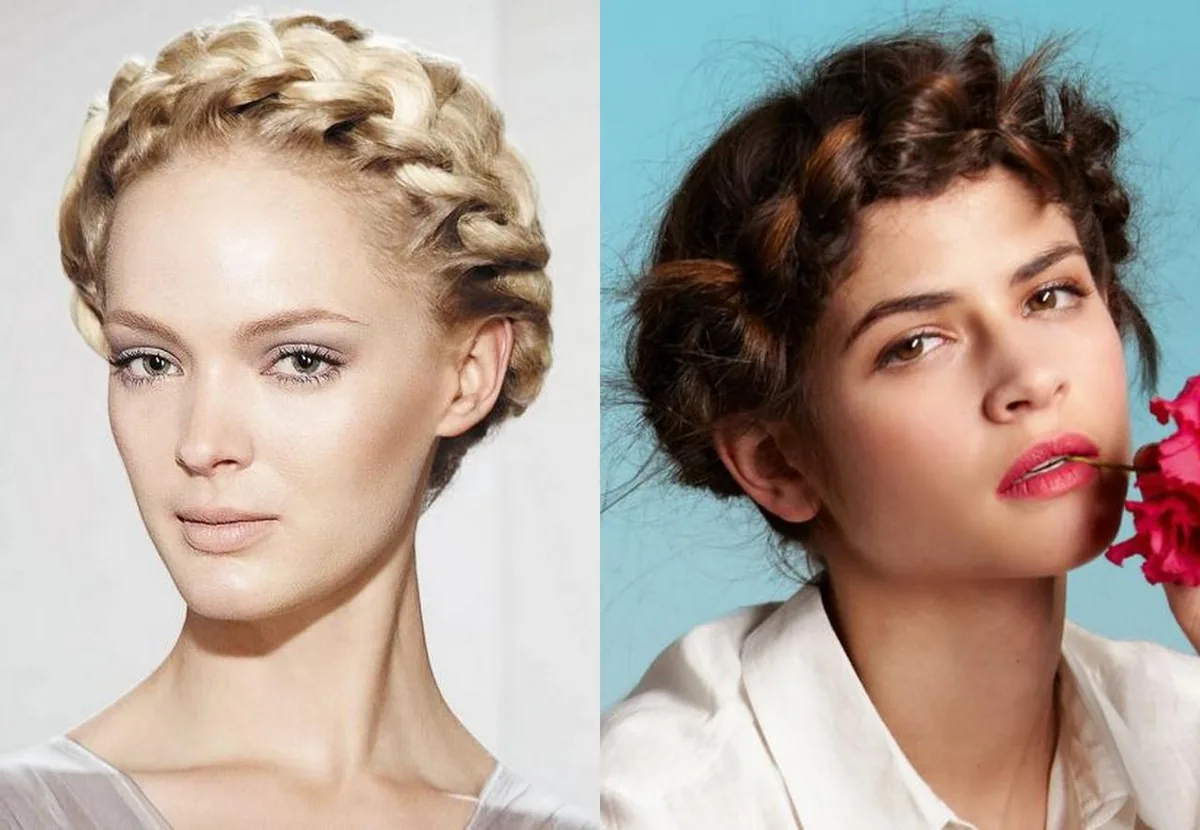
The three names are often used as if they mean the same thing, and in practice they overlap a lot — but there is a real difference in how each one is made. A milkmaid braid is made from two separate braids, one from each side of the head, which are crossed over the top and pinned down. A crown braid is usually a single braid worked around the head, following the hairline like a crown — often a Dutch or French braid that circles the whole head. A halo braid is very similar to a crown braid, but the braid sits higher and more loosely, like a halo floating above the head, and it is often made from one long braid wrapped around.
For most women, the difference matters less than the result: all three give you a braided ring around the head, and all three keep the hair off the face. The milkmaid braid is the easiest of the three to do on yourself, because you braid two simple plaits at the sides and pin them up — no braiding around the back of your own head, which is the hardest part of a crown braid. The crown braid looks the most polished and continuous, because there is no join where two braids cross, while the milkmaid braid has a natural crossing point at the top that can be covered with a flower or a pin. If you are learning, start with the milkmaid braid. If you want the smoothest, most seamless ring, ask a stylist for a crown braid.
Hair Length and Prep — What You Need Before You Start
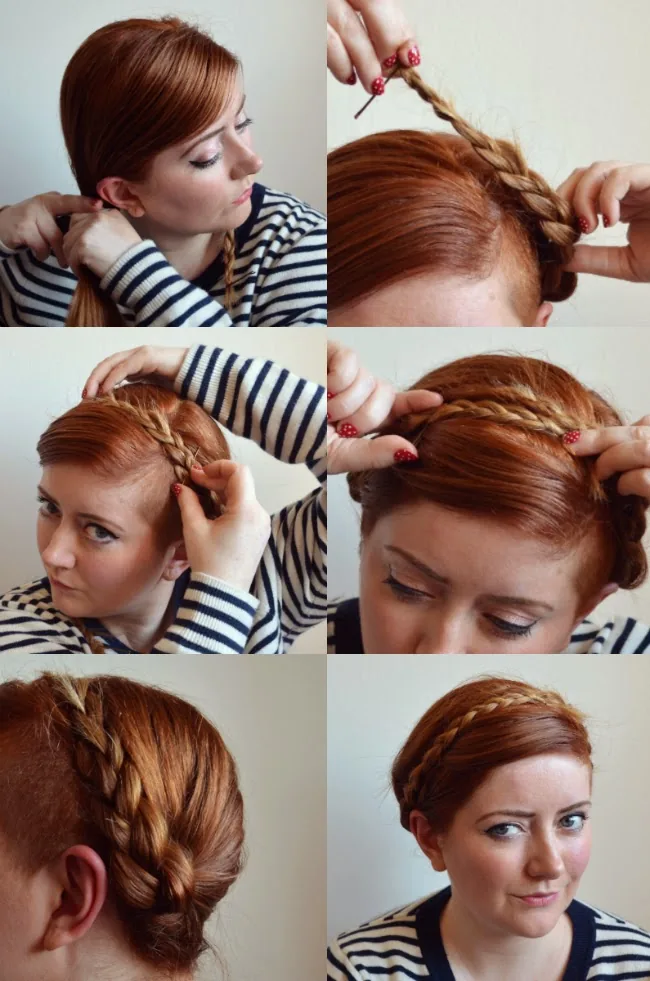
A milkmaid braid works best on hair that reaches at least the shoulders, because the braids need enough length to travel from behind the ears, up and over the crown, and meet at the top. Shoulder-length hair is the minimum for a true milkmaid braid, and it works beautifully — the braids sit neatly across the crown with just enough length to pin. Medium and long hair give you the fullest crown, because longer braids can be wrapped further around the head and pinned more securely. Short hair is not ruled out: a faux milkmaid braid, made with two small braids pinned up and the ends tucked under, can give the same look on a bob, and it is covered in section 9.
Preparation matters more than length. A milkmaid braid holds best on hair that is not freshly washed — second-day hair has texture and grip, while slippery clean hair slides out of pins. If your hair is very clean, work a little dry shampoo or texturising spray through it first, and braid on slightly damp or dry hair, never soaking wet. You will need a comb, two small clear elastics, a handful of bobby pins that match your hair colour, and a light-hold hairspray to finish. Braid each side from behind the ear, keep the braids loose rather than tight, and pancake them — gently pull the edges of each braid outward — before you pin them up, so the crown looks full rather than thin.
Braiding Methods for a Milkmaid Crown — Dutch, French or Fishtail?
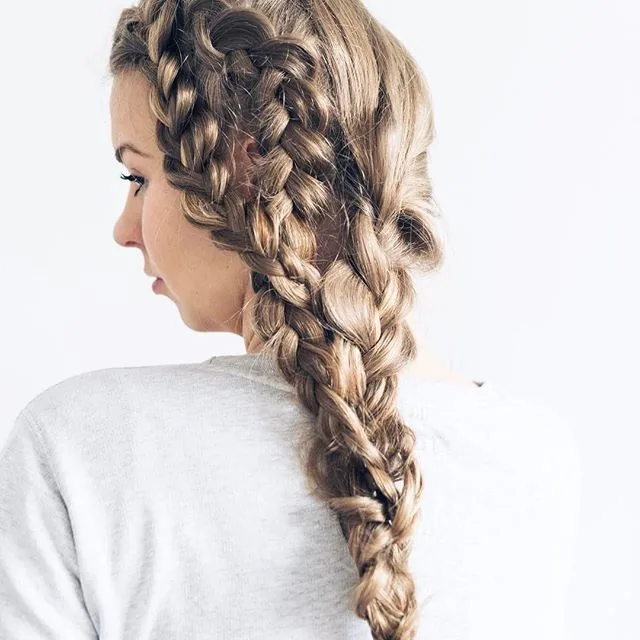
The classic milkmaid braid uses two simple three-strand plaits, and for most women that is all you need — the plaits are easy, they pancake beautifully, and they sit flat against the head when pinned. But the braiding method changes the look completely. A Dutch braid — where the strands cross under rather than over — makes the braid stand out from the head, so the crown looks raised, bold and three-dimensional. A French braid — strands crossed over — sits flatter and looks smoother and more polished. A fishtail braid makes a finer, more intricate crown with a delicate, woven texture that photographs beautifully.
Which method should you choose? For a boho or festival milkmaid braid, choose Dutch braids: the raised texture is the whole point, and the crown looks fuller. For a wedding or formal milkmaid braid, choose French braids or simple plaits: the smoother finish looks more elegant and photographs more cleanly. For a romantic, intricate crown, choose fishtail braids — but allow extra time, because a fishtail takes twice as long to braid as a plait. One practical tip: whichever method you use, braid loosely. A tight braid looks thin once it is pinned up, while a loose braid can be pancaked into a full, soft crown. Loose braiding is the single easiest way to make a milkmaid braid look expensive.
How to Keep a Milkmaid Braid in Place All Day
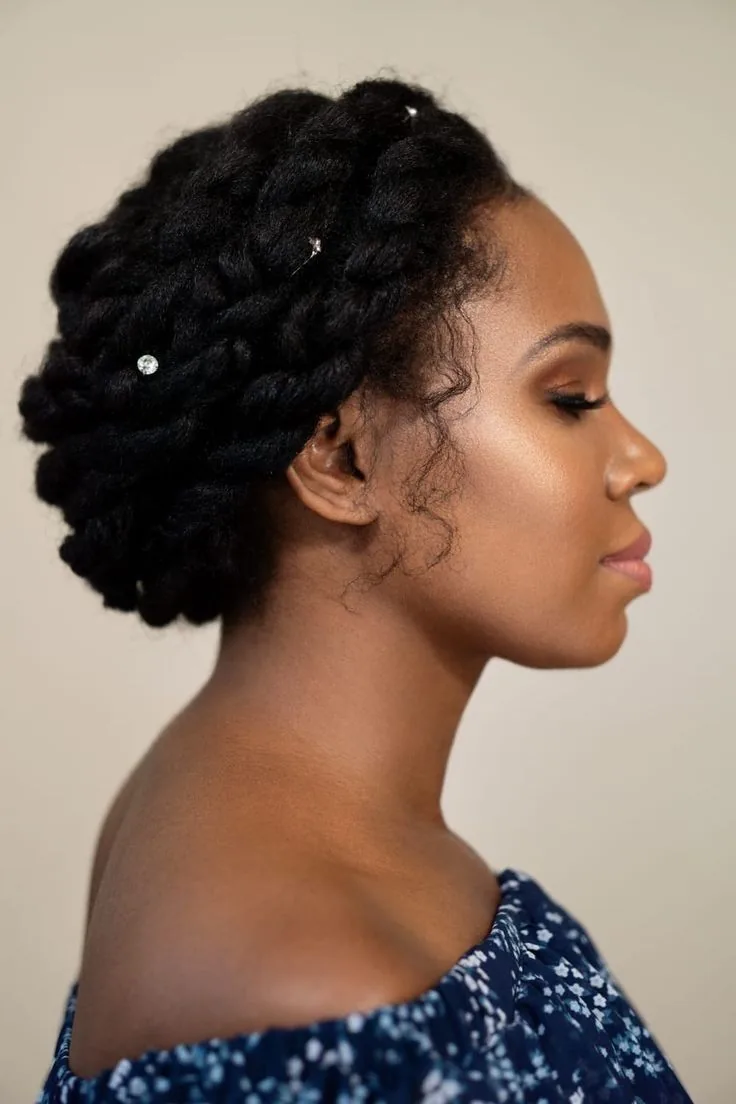
A milkmaid braid that slips is the most common complaint about the style, and it is almost always a pinning problem, not a braiding problem. The trick is to pin the braids to each other and to the hair underneath, not just to the scalp. Cross two bobby pins in an X over each join — one pin sliding in from the left, one from the right — so they lock each other in place. Pin the ends of the braids under the crown, tucking them beneath the opposite braid, so there are no loose ends sticking out. And pin through the braid itself, catching the hair underneath it, rather than pinning beside the braid where the pin has nothing to hold.
A few more habits make the crown last. Work on hair with texture — dry shampoo at the roots, a little texturising spray through the lengths — so the pins have something to grip. Braid on the looser side, because a tight braid pulls at the scalp and works its pins loose as the day goes on. Finish with a light-hold hairspray, holding the can a foot away and misting the crown, not soaking it. For a wedding or a long day, carry three spare bobby pins in your bag and check the crown once in the afternoon — a single pin re-placed takes ten seconds, and it is the difference between a crown that lasts twelve hours and one that gives up at lunch.
Flowers, Ribbons and Pearls — Dressing Up a Milkmaid Braid
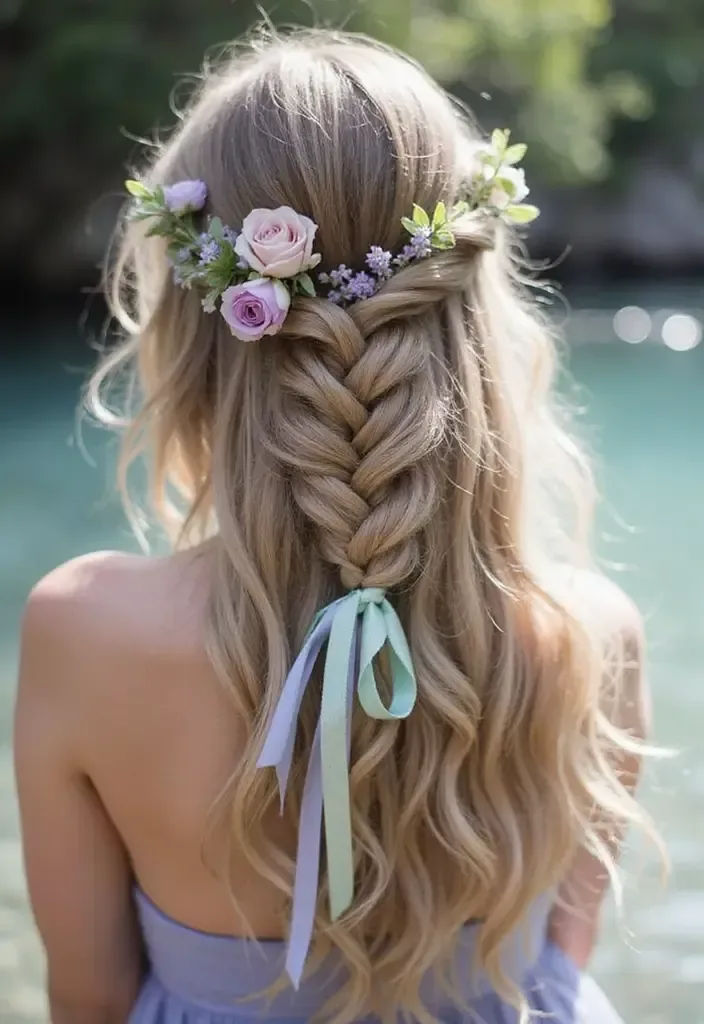
A milkmaid braid is the best hairstyle there is for accessories, because the crown itself is a frame — and flowers, ribbon and pearls all sit naturally in it. Fresh flowers are the classic choice: baby’s breath tucked into the braid, small roses pinned along the crown, or a few wildflowers for a garden-party look. The rule with fresh flowers is to keep them small and light — a heavy flower will drag the braid down — and to tuck the stem into the braid itself, pinning through the stem so the flower cannot slide. Dried flowers last longer and survive a whole wedding day, while silk flowers are the safest choice if anyone in the party has hay fever.
Ribbon is the second classic: weave a narrow ribbon through the braid as you plait it, so the colour runs through the crown, or tie a small bow where the two braids cross at the top. Pearls are the most elegant option — small pearl pins pushed into the braid at intervals, or a single pearl comb at the front of the crown. The rule for all three is the same: one accent at a time. A milkmaid braid with flowers and ribbon and pearls is a costume; a milkmaid braid with just flowers is a look. Choose the accent that matches the occasion — flowers for a garden party, pearls for a wedding, ribbon for a festival — and let the braid do the rest.
Milkmaid Braids for Every Occasion — Wedding, Work, Festival and More
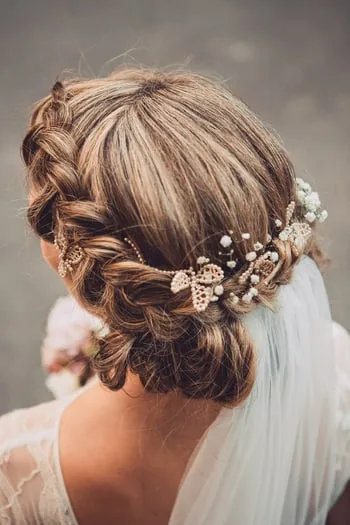
The milkmaid braid is one of the few hairstyles that genuinely works for every occasion, because the same crown can be dressed up or down. For a wedding — as the bride or a bridesmaid — the milkmaid braid is at its best: neat, polished, with flowers or pearls, and a veil pinned under the crown if you want one. For a festival, the same braid goes boho: loose, messy, with a flower crown or ribbon and soft strands around the face. For work, the milkmaid braid is polished and practical — the hair is completely off the face, it lasts all day, and it reads as deliberate and neat in a way a ponytail never quite does.
For a formal evening, the milkmaid braid becomes glamorous: a smooth, defined crown, a deep side part, pearl pins and a long dress. For a garden party or a summer lunch, it is romantic and light — loose braids, baby’s breath, a sundress. The only occasion where a milkmaid braid needs care is a very conservative workplace or a black-tie event with a strict dress code, and even there the polished version passes easily. The trick is to match the finish to the occasion: neat and smooth for formal, loose and textured for casual. The braid itself never changes — only the finish does — which is why one hairstyle can carry you from a festival field to a wedding aisle.
Common Milkmaid Braid Mistakes and How to Fix Them
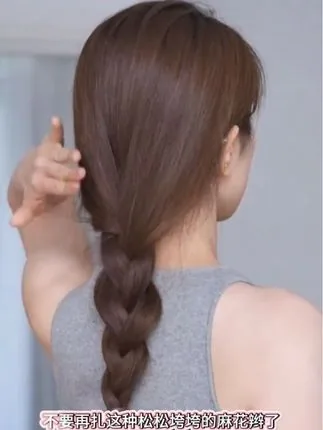
The most common milkmaid braid mistake is braiding too tightly. A tight braid looks thin once it is pinned up, it pulls at the scalp, and it works its pins loose as the day goes on. The fix is to braid loosely and pancake the braid — gently pull the outer edges of each braid outward — before you pin it up, so the crown looks full and soft. The second mistake is pinning badly: pins placed beside the braid, or pins that only catch the top layer of hair, will slide out. Pin through the braid and into the hair underneath, cross two pins in an X, and tuck the braid ends under the opposite braid.
The other mistakes are about preparation and proportion. Braiding on freshly washed, slippery hair is a recipe for a crown that falls down by midday — use dry shampoo or texturising spray first, or braid on second-day hair. Making the braids too thin is another: if your hair is fine, braid with a little texturising powder at the roots and pancake generously, or add a small braid extension for fullness. And the mistake that costs the most is over-accessorising — flowers and ribbon and pearls all at once, which hides the braid itself. The milkmaid braid is the decoration; the accessories are the finishing touch. Get the braid right first, then add one accent, and stop there.
1. The Classic Milkmaid Braid Crown
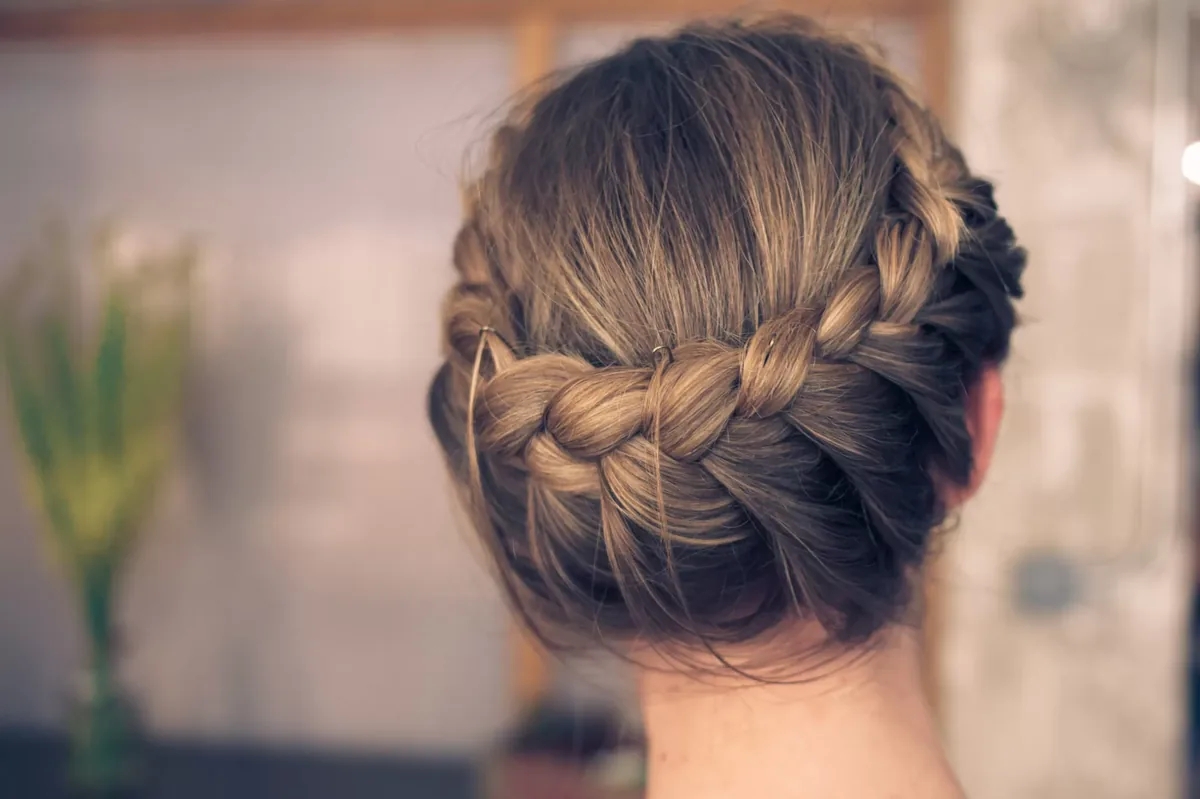
The classic milkmaid braid crown is the original: two simple three-strand braids, one from each side of the head, lifted up, crossed over the crown and pinned in place, so the braids form a neat ring around the top of the head. It is the style that started everything — practical, romantic and quietly elegant — and it works because the braids themselves are the decoration. There is nothing fussy about it: a centre part, two braids, a few bobby pins, and the hair is completely off the face and neck. It shows off the face, it elongates the neck, and it has a soft, storybook quality that no other updo quite matches.
Best for: almost every face shape, and especially oval and heart-shaped faces, where the crown frames the features without overwhelming them. How to style it: part the hair down the middle, braid each side into a loose three-strand plait starting behind the ear, pancake each braid gently, then lift the left braid across the crown and pin it above the right ear, and do the same with the right braid. Time and cost: about ten minutes at home, no salon visit needed, just pins and elastics. Quick verdict: if you only learn one milkmaid braid, learn this one — it is the foundation every other version in this guide is built on.
2. The Double Milkmaid Braid Crown
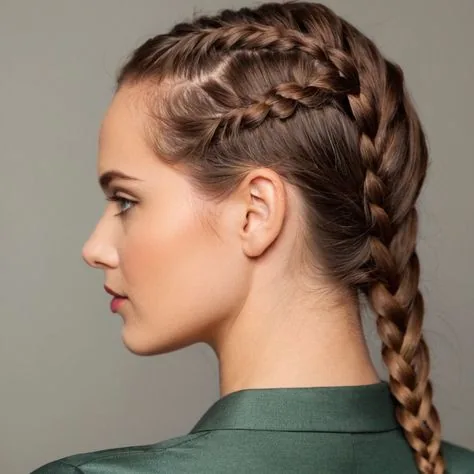
The double milkmaid braid crown takes the classic and doubles it: instead of one braid from each side, you make two braids on each side — four braids in total — and cross them over the crown in pairs, so the crown looks thicker, more textured and more intricate. The result is a fuller, more dramatic halo, with the braids overlapping like a woven basket. It is the milkmaid braid for women with thick hair, or for anyone who wants the crown to be the main event rather than a quiet detail.
Best for: thick, long hair, where four braids have enough volume to look intentional rather than crowded. How to style it: divide each side of the hair into two sections, braid all four loosely, pancake them, then cross the front pair over the crown first and pin, then lay the back pair over the top and pin again. Pros and cons: the crown is fuller and holds better than a single pair, but it takes twice as long — about twenty minutes — and it needs more pins. Common mistake: braiding all four braids too tightly, which makes the crown look thin and pulled. Keep them loose and the double crown will look like a woven halo.
3. The Boho Messy Milkmaid Braid

The boho messy milkmaid braid is the relaxed, undone version of the classic crown: the braids are loose, the edges are pulled apart generously, and soft strands are left loose around the face and at the nape, so the whole style looks as if it happened naturally rather than being carefully constructed. It is the milkmaid braid for festivals, holidays and summer evenings — the one that looks best with a sundress, a flower crown and bare shoulders. The mess is deliberate: every loose strand is a choice, and the crown still holds its shape.
Best for: wavy and textured hair, which holds a loose braid naturally, and for anyone who finds neat updos too severe. How to style it: braid on second-day hair with texturising spray, pancake the braids hard so they look wide and soft, pin them up loosely, then pull out a few face-framing strands and curl them lightly. Maintenance: it actually improves as the day goes on — the looser it gets, the more boho it looks — so there is nothing to fix. Who should avoid it: if you need a polished look for work or a formal event, this is not the version — choose the classic crown instead. Quick verdict: the easiest milkmaid braid to wear, and the hardest to get wrong.
4. The Milkmaid Braid with Baby’s Breath Flowers
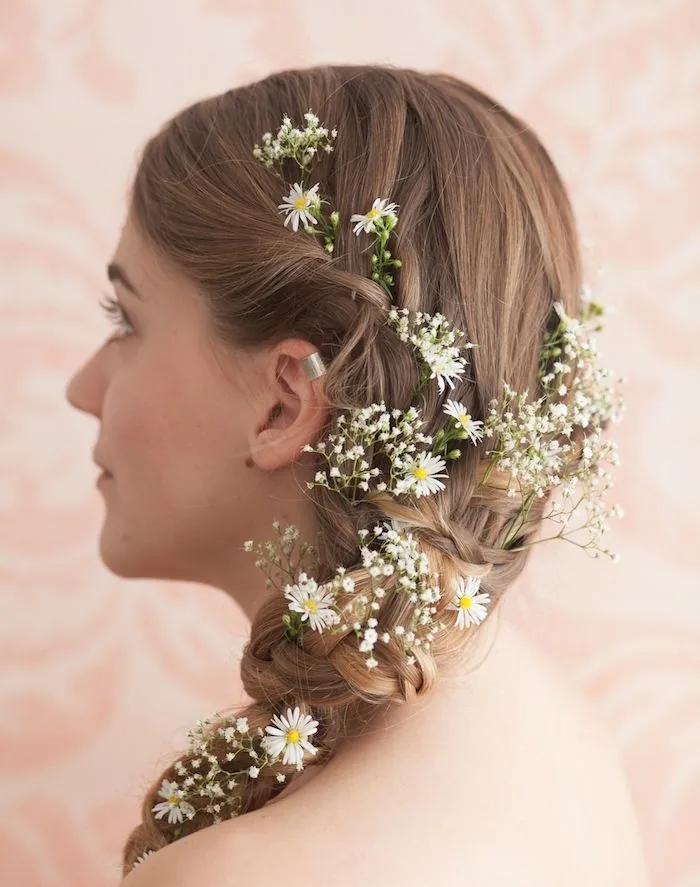
The milkmaid braid with baby’s breath is the most delicate flower version there is: tiny white baby’s breath sprigs tucked into the braids along the crown, so the flowers look like small clouds of white floating on the braid. Baby’s breath is light, so it never drags the braid down, and it is cheap and easy to find, which makes it the favourite flower for bridesmaids and garden parties. The white against the hair — any hair colour — is soft and romantic, and the effect is a crown that looks as if it grew there.
Best for: weddings, bridesmaids, garden parties and christenings, and for every hair colour, because white baby’s breath suits them all. How to style it: build the classic milkmaid crown first, then cut the baby’s breath into small sprigs of two or three inches, tuck each stem into the braid and pin through the stem so it cannot slide. Pros and cons: the flowers are light and cheap, but fresh baby’s breath wilts after a few hours in heat — for a long day, use dried baby’s breath, which looks almost identical and lasts all day. Cost: a bunch of baby’s breath costs very little, and the whole look needs no salon visit. Quick verdict: the prettiest milkmaid braid for the least money.
5. The Milkmaid Braid with Fresh Roses
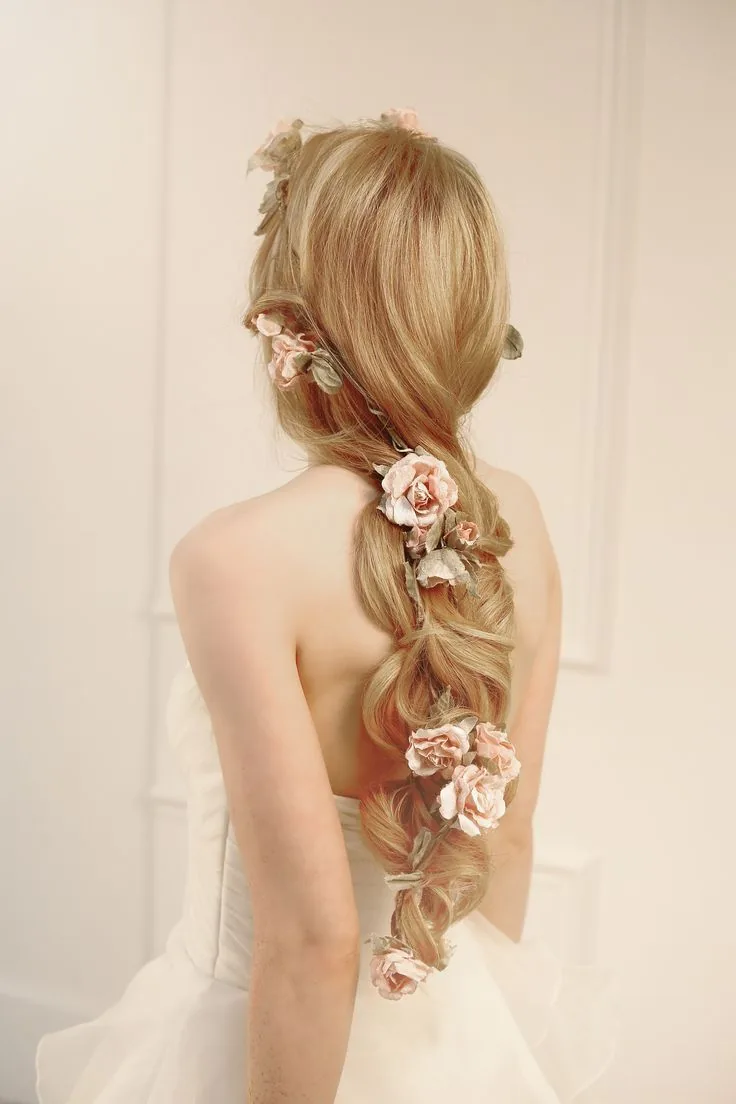
The milkmaid braid with fresh roses is the most romantic version in this guide: small fresh roses — spray roses, not full-sized blooms — pinned along the crown, so the braid looks like a garland. Roses are the flower of romance, and on a milkmaid braid they turn a pretty hairstyle into a statement: a bride’s crown, a Valentine’s look, a garden-party showpiece. The key is size — small spray roses sit naturally in the braid, while a full-sized rose is too heavy and too big, and will pull the crown down and look out of place.
Best for: brides, romantic occasions and photoshoots, and for medium to long hair, where the crown is thick enough to hold the roses. How to style it: build a neat classic crown, then pin small spray roses at intervals along the braid, pinning through the stem and the braid together, and place one larger rose where the two braids cross at the top. Maintenance: fresh roses last about four to six hours once cut, so add them as late as possible before the event, and keep the braid out of direct sun until then. Cost: a few spray roses are inexpensive, though a florist can prepare them for you for a small fee. Who should avoid it: anyone with hay fever should choose silk roses instead — they look identical in photographs.
6. The Wedding Milkmaid Braid Crown
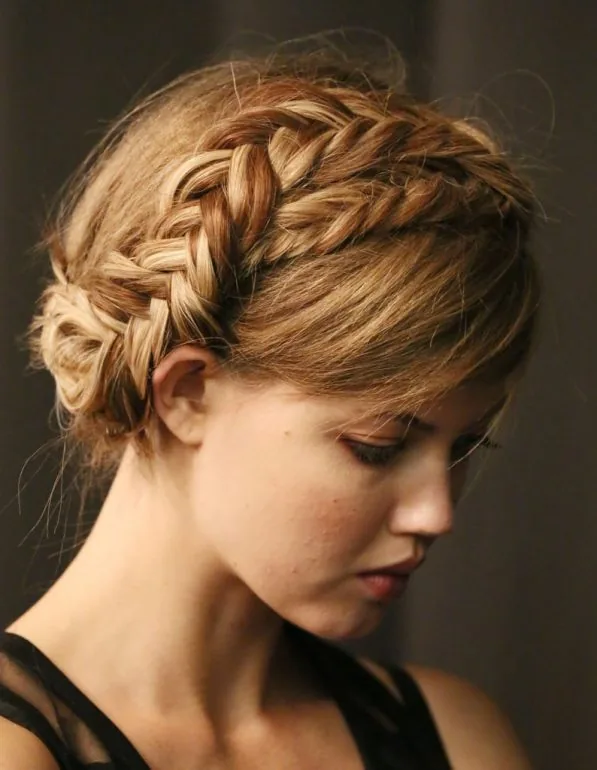
The wedding milkmaid braid crown is the bridal version of the classic: a neat, polished crown, braided smoothly, pinned securely, and finished with pearls or small white flowers — a style that looks extraordinary with a gown and photographs beautifully, because the braided ring frames the face from every angle. Brides love it because it is practical as well as beautiful: the hair stays completely off the face and neck through a long day, it holds under a veil, and it does not need touching up between the ceremony and the dancing. It is a bridal style that is completely, unmistakably romantic.
Best for: brides and bridesmaids, and for any formal occasion where the hair needs to last twelve hours. What to ask your stylist for: a smooth, defined milkmaid crown with Dutch braids for texture, pearl pins along the braid, and a trial run at least a month before the wedding. Time and cost: the styling on the day takes forty-five minutes to an hour, and the cost is a salon bridal styling session — worth it, because a wedding crown needs to be perfect from the first photograph to the last dance. Maintenance: a trial run is essential — wear the crown for a full day, with the veil, to test how it holds. Quick verdict: the milkmaid braid was made for weddings.
7. The Milkmaid Braid with Ribbon Woven In
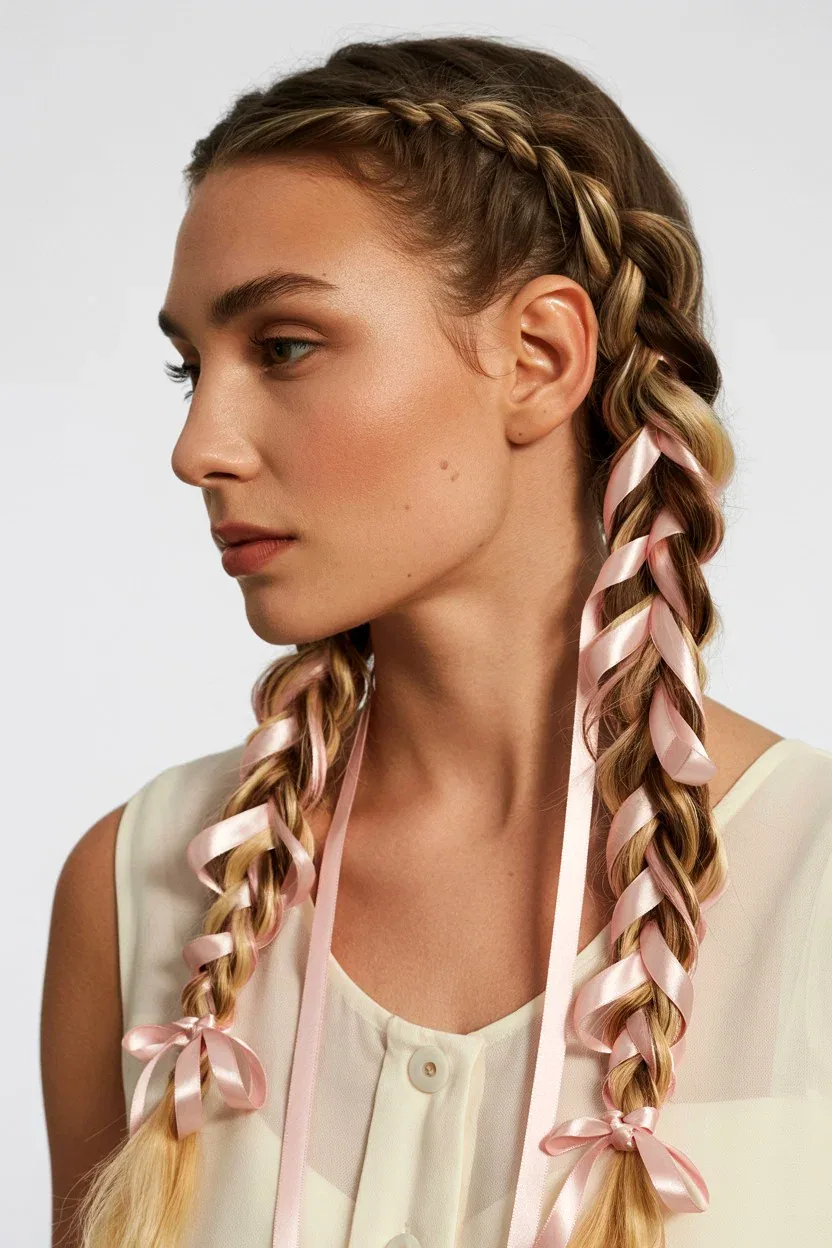
The milkmaid braid with ribbon woven in is the most charming version of the crown: a narrow ribbon — velvet, satin or grosgrain — woven through the braids as you plait them, so the colour runs through the crown like a thread through fabric. The ribbon adds colour without adding weight, and it turns a plain braid into something personal: a velvet ribbon in the wedding colours, a gingham ribbon for a country look, a silk ribbon for a party. It is the milkmaid braid with a story in it.
Best for: anyone who wants colour in the crown without flowers, and for themed occasions — a wedding in a particular colour, a festival, a country fair. How to style it: tie the ribbon to the top of one strand before you start braiding, and treat the ribbon as a fourth strand, weaving it through the plait as you go. Pros and cons: the ribbon is light, cheap and endlessly customisable, but it can slip if it is not tied securely at the start — knot it firmly and pin the ends under the crown. Cost: a length of ribbon costs almost nothing, and the whole look is do-it-yourself. Quick verdict: the smallest change that makes the biggest difference to a milkmaid braid.
8. The Milkmaid Braid with Loose Face-Framing Curls
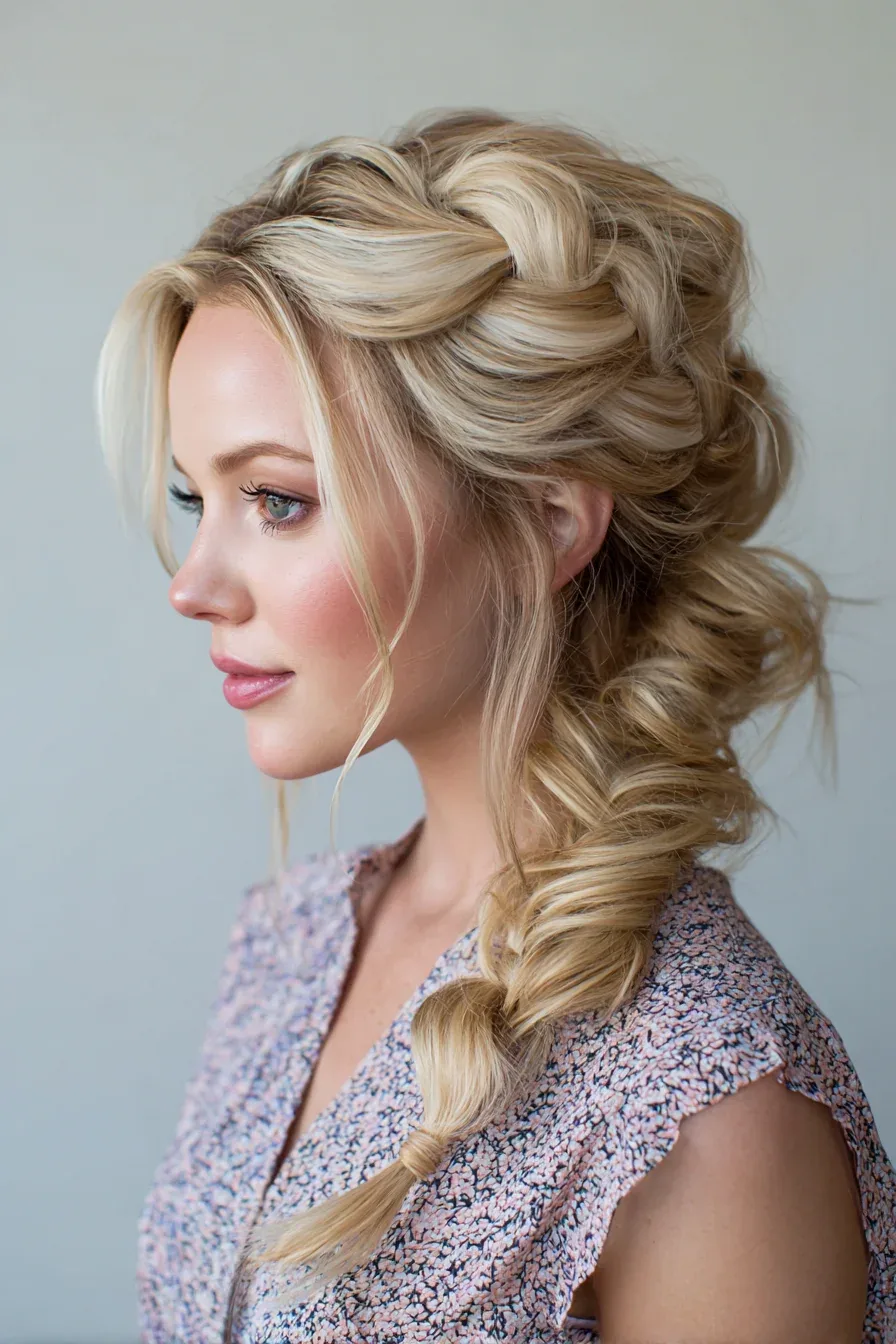
The milkmaid braid with loose face-framing curls is the softest version of the crown: the braids are pinned up neatly, but soft curls are left loose at the temples and around the face, so the style never looks severe and the face is framed in a gentle, romantic way. The curls soften the crown, they flatter the cheekbones, and they make the whole style look effortless — as if the hair fell that way on its own. It is the milkmaid braid for women who love updos but hate the scraped-back feeling.
Best for: round and square faces, where the loose curls break up the symmetry and soften a strong jaw, and for anyone with naturally wavy hair. How to style it: build the classic crown, then pull out two thin sections at each temple, curl them lightly with a curling wand, and let them fall. Maintenance: the curls will loosen through the day, which only makes the style softer — there is nothing to fix. Common mistake: pulling out too much hair, which weakens the crown and makes it look unfinished. Keep the loose sections thin — a finger’s width on each side is enough. Quick verdict: the most flattering milkmaid braid for most faces.
9. The Milkmaid Braid for Short Hair
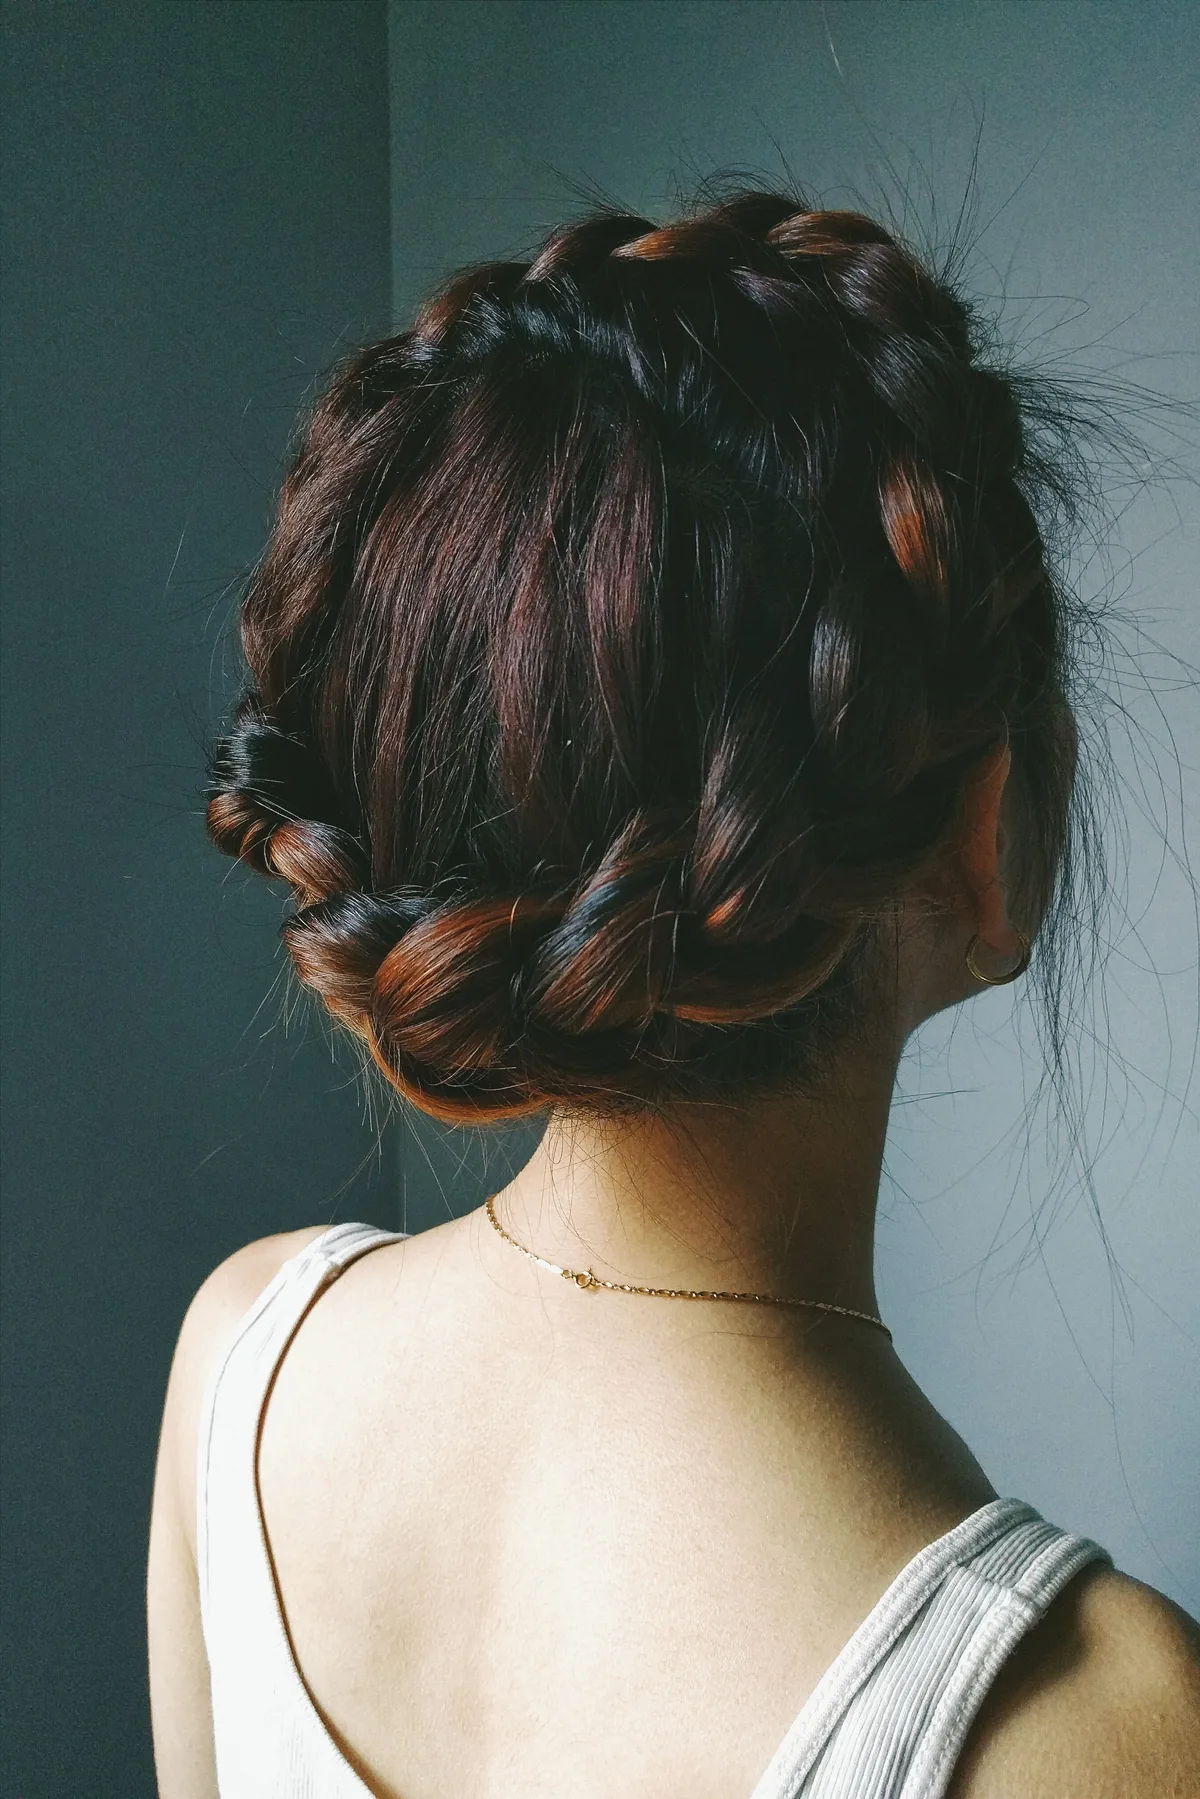
The milkmaid braid for short hair is the faux crown: a version of the style made for bobs and lobs, where the hair is too short for two full braids to meet across the crown. Instead, you make two small braids at the sides, pin them up and across, and tuck the ends under the opposite braid — or use a small braid extension, or a braided headband, to complete the ring. The result looks like a milkmaid braid from the front, which is the angle that matters most, and it gives short-haired women the same romantic crown.
Best for: bobs and lobs, and for anyone growing out a short cut who wants an updo. How to style it: part the hair in the middle, braid a small three-strand plait on each side starting at the temple, pancake it, lift it across the crown and pin it above the opposite ear, tucking the ends under. Pros and cons: it is quick — about eight minutes — but the crown will be thinner than on long hair, so pancake generously and add a flower or a pin where the braids cross to hide the join. Who should avoid it: hair shorter than chin length will struggle — below the chin, the faux crown works; above it, a braided headband is the better choice. Quick verdict: short hair can wear a milkmaid braid too.
10. The Milkmaid Braid for Long Hair
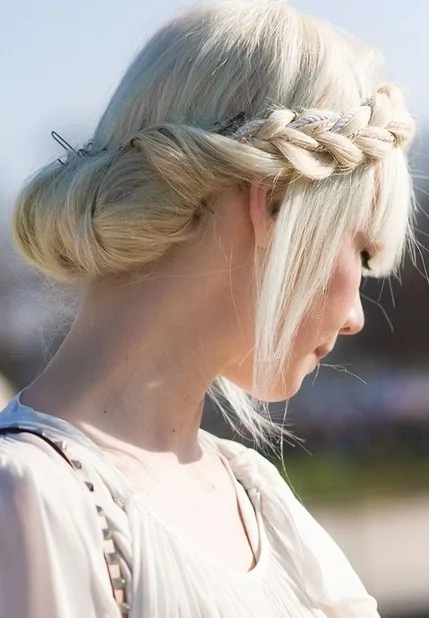
The milkmaid braid for long hair is the fullest, most dramatic version of the crown: with long hair, the braids are thick, they wrap further around the head, and they can be crossed twice for a double-wrapped crown that looks like a woven halo. Long hair gives you options a shorter length cannot — a crown that circles the whole head, braids that overlap at the front and the back, and a finish so full it looks like a plaited wreath. It is the milkmaid braid at its most impressive.
Best for: hair past the shoulders and beyond, and especially thick long hair, where the crown is naturally full. How to style it: braid each side loosely from behind the ear, pancake generously, then cross the braids over the crown and pin, wrapping any extra length around the head a second time and pinning the ends under. Maintenance: long braids are heavy, so pin in an X at every join and carry spare pins — the weight will test the pins by the afternoon. Time and cost: fifteen to twenty minutes at home, no salon needed. Common mistake: braiding too tightly, which makes long braids look thin — braid loose and let the length do the work. Quick verdict: long hair was made for this crown.
11. The Milkmaid Braid for Medium Hair
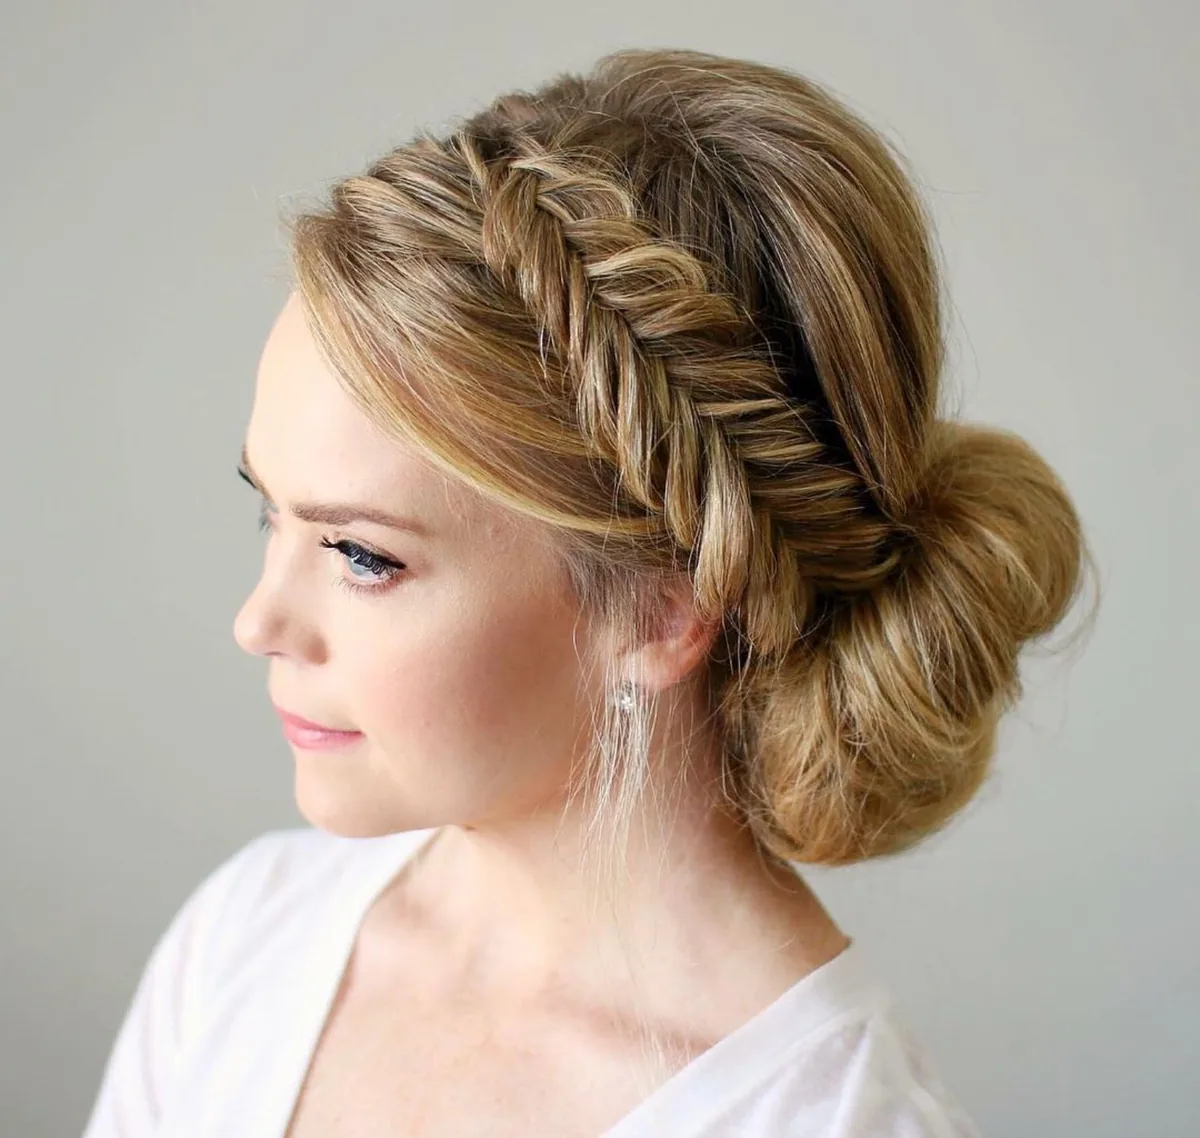
The milkmaid braid for medium hair is the sweet spot: shoulder-length hair is long enough for two braids to meet comfortably across the crown, and short enough that the braids are light and easy to pin. It is the length where the milkmaid braid is easiest — the braids are the right thickness, the crown sits neatly, and the style holds all day without the weight of long hair pulling at the pins. Most women who wear a milkmaid braid regularly have medium hair, and this is why.
Best for: shoulder-length hair, and for first-timers learning the style. How to style it: part the hair down the middle, braid each side loosely, pancake, cross over the crown and pin — the classic method, with no adaptations needed. Pros and cons: the crown holds better than on long hair because it is lighter, but it will be a little thinner — pancake the braids well and add a small flower at the crossing point for fullness. Time: about ten minutes. Cost: nothing beyond pins and elastics. Quick verdict: if your hair is medium length, the milkmaid braid is your easiest updo — learn it once and you will wear it for years.
12. The Milkmaid Braid for Thick Hair
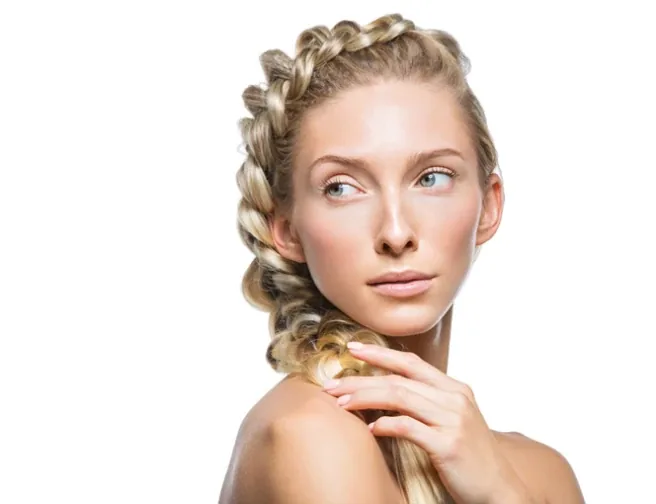
The milkmaid braid for thick hair is the crown at its fullest: thick hair makes thick braids, and thick braids make a crown with real presence — a halo you can see from across the room. Thick hair is the easiest hair type for a milkmaid braid, because the braids hold their shape, they pancake into wide, soft plaits, and they stay pinned without slipping. The challenge is not volume but weight: a thick crown is heavy, and it needs strong pinning to last the day.
Best for: thick, dense hair, where the crown is naturally full and dramatic. How to style it: braid loosely — thick hair braided tightly looks like rope — pancake generously, and pin in an X at every join, using large bobby pins that match your hair colour. Maintenance: the crown will hold well, but check the pins once in the afternoon, because the weight works on them over hours. Time: fifteen minutes, because thick hair takes longer to braid. Cost: no salon needed, though a stylist can thin the braids slightly if the crown feels too heavy. Who should avoid it: nobody — thick hair is the milkmaid braid’s best friend. Quick verdict: the fullest crown in this guide.
13. The Milkmaid Braid for Fine Hair
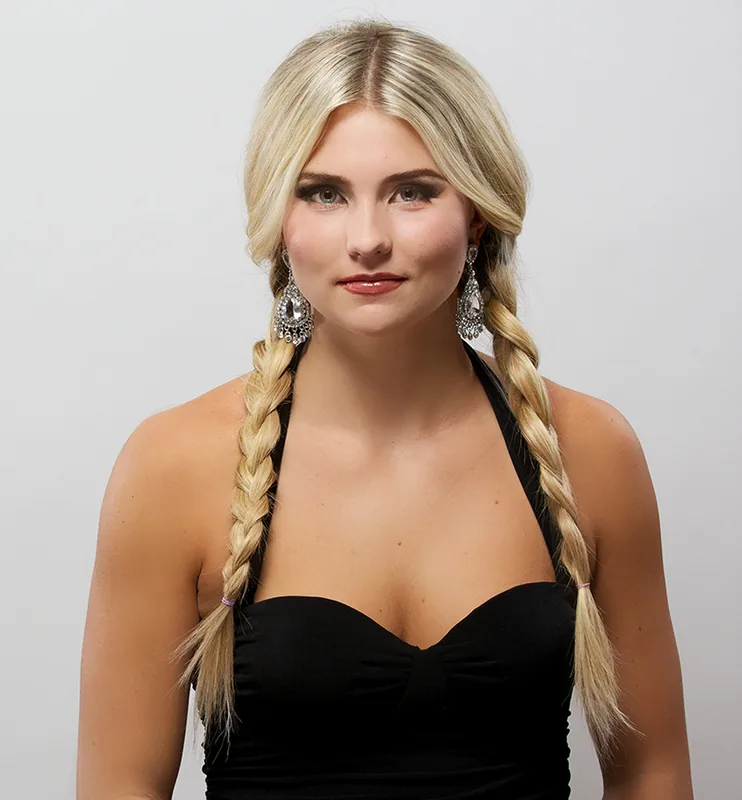
The milkmaid braid for fine hair is proof that the crown is not only for thick hair: with the right preparation, fine hair makes a beautiful, delicate milkmaid braid with its own kind of elegance. The key is texture — fine hair needs grip before it is braided, or the braids will be thin and the pins will slide out. A little dry shampoo at the roots, a dusting of texturising powder, and a loose braid that is pancaked hard will make a fine-hair crown look twice as full as it really is.
Best for: fine, low-density hair, and for anyone who has been told a milkmaid braid will not work for them. How to style it: work texturising powder through the roots, braid loosely, pancake each braid by pulling the edges outward, and pin with small bobby pins in an X. Pros and cons: the crown is lighter and more comfortable than on thick hair, but it needs more pins and more preparation — and a flower or ribbon at the crossing point hides the join beautifully. Common mistake: braiding too tightly, which makes fine braids look like string. Braid loose, pancake hard, and the crown will look full. Quick verdict: fine hair can wear a milkmaid braid — it just needs a little help.
14. The Milkmaid Braid for Curly Hair
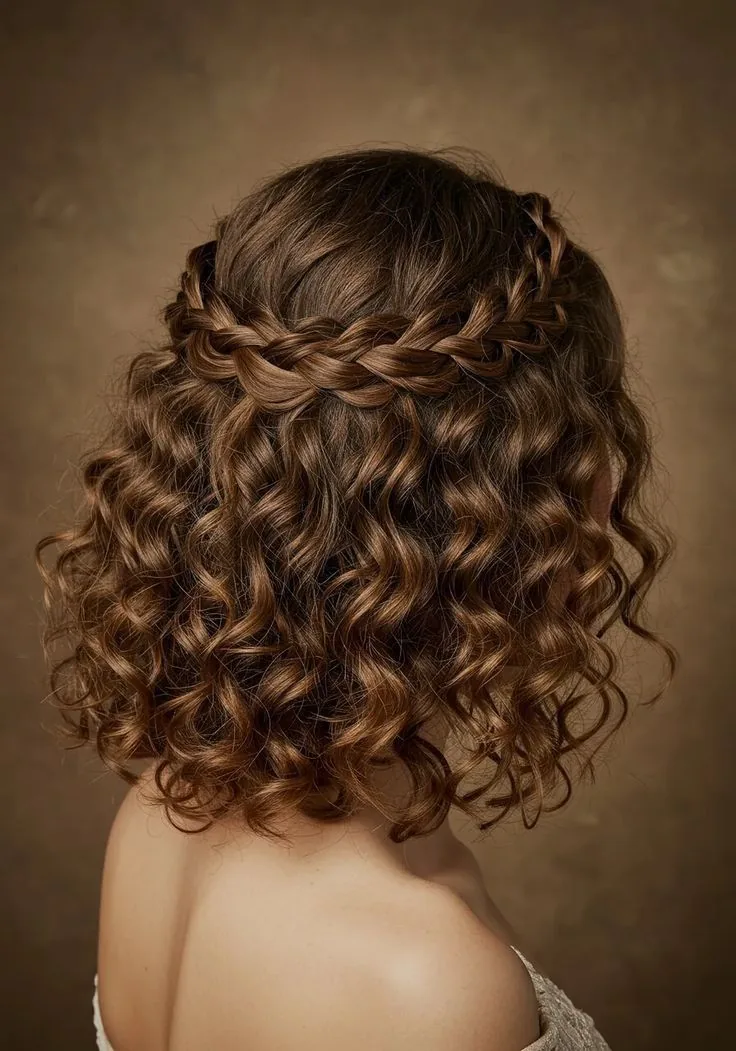
The milkmaid braid for curly hair is the crown with texture built in: curly hair braided loosely makes a milkmaid braid with a soft, romantic, slightly undone finish, because the curls spring out of the braid and give it a natural fullness that straight hair has to fake with pancaking. The braid looks lived-in from the first minute, the crown holds its shape well because the curls grip each other, and the loose curls around the face are already there — no curling wand needed.
Best for: naturally curly and wavy hair, where the texture does half the work. How to style it: braid on dry, stretched curls — not freshly washed and wet, which will shrink and pull the crown tight — braid loosely, pancake gently, and pin up. Maintenance: the crown holds well, and a light mist of hairspray is enough to finish it. Pros and cons: the texture is gorgeous and the hold is strong, but curly braids can look uneven if the curl pattern varies — embrace the unevenness, it is what makes the style look natural. Time: ten to fifteen minutes. Quick verdict: curly hair and milkmaid braids were made for each other.
15. The Milkmaid Braid for Straight Hair
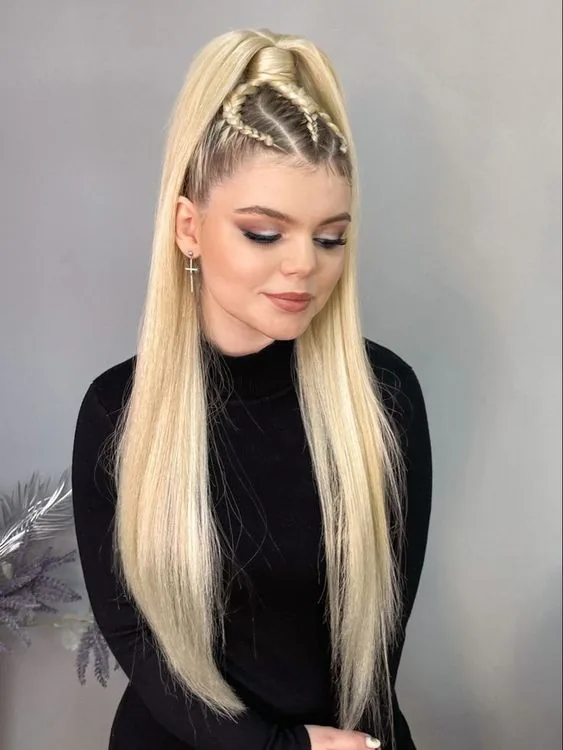
The milkmaid braid for straight hair is the sleekest version of the crown: straight hair braided neatly makes a smooth, defined milkmaid braid with clean lines and a polished finish, and the braid’s texture shows up crisply against the smooth hair. The challenge is grip — straight hair is slippery, and a milkmaid braid on straight hair needs texture added before braiding, or the pins will slide out by lunchtime. With preparation, though, the straight-hair crown is one of the most elegant versions there is.
Best for: straight and slightly wavy hair, and for polished, formal occasions. How to style it: work dry shampoo through the roots and texturising spray through the lengths, braid loosely, pancake gently, pin in an X at every join, and finish with hairspray. Common mistake: braiding on freshly washed straight hair with no product — the crown will fall down. Always add texture first. Maintenance: check the pins once in the afternoon and carry spares. Time: ten minutes plus five minutes of prep. Cost: a can of dry shampoo and a handful of pins. Quick verdict: straight hair needs prep, but the result is the sleekest milkmaid braid there is.
16. The Milkmaid Braid with Dutch Braids
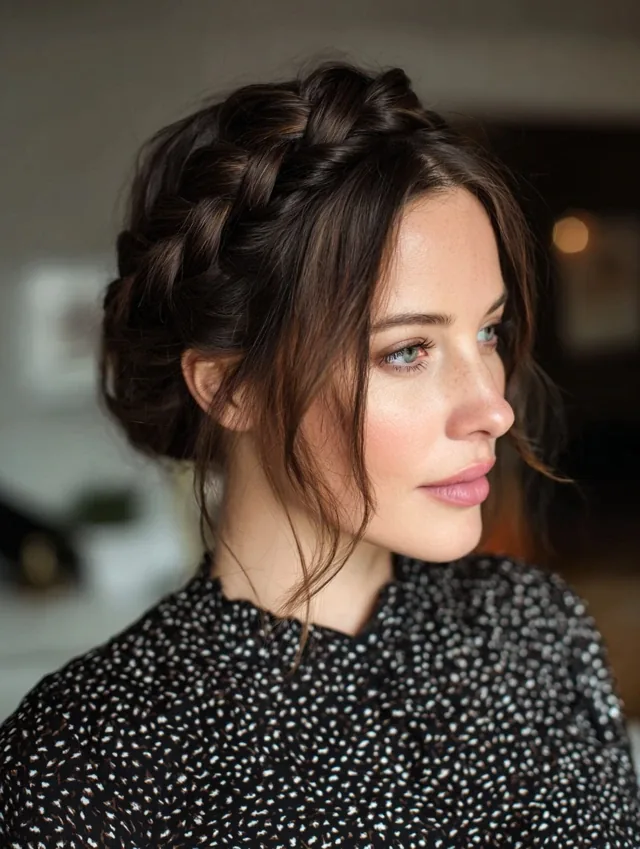
The milkmaid braid with Dutch braids is the boldest version of the crown: Dutch braids — where the strands cross under rather than over — stand out from the head, so the crown looks raised, three-dimensional and full of texture. The Dutch milkmaid crown is the one that photographs best, because the raised braid catches the light and the crown has a clear, sculpted shape. It is the milkmaid braid for women who want the braid itself to be the star.
Best for: boho and festival looks, and for anyone who wants a fuller-looking crown. How to style it: part the hair down the middle, Dutch-braid each side from behind the ear — crossing the strands under — pancake the braids, cross them over the crown and pin. Pros and cons: the crown looks thicker and more dramatic than a classic plait crown, but Dutch braiding takes practice, and it is harder to do on yourself at the back of the head — practice the braids at the sides first. Time: fifteen to twenty minutes. Cost: nothing beyond pins. Quick verdict: if you want the most eye-catching milkmaid braid, braid Dutch.
17. The Milkmaid Braid with French Braids
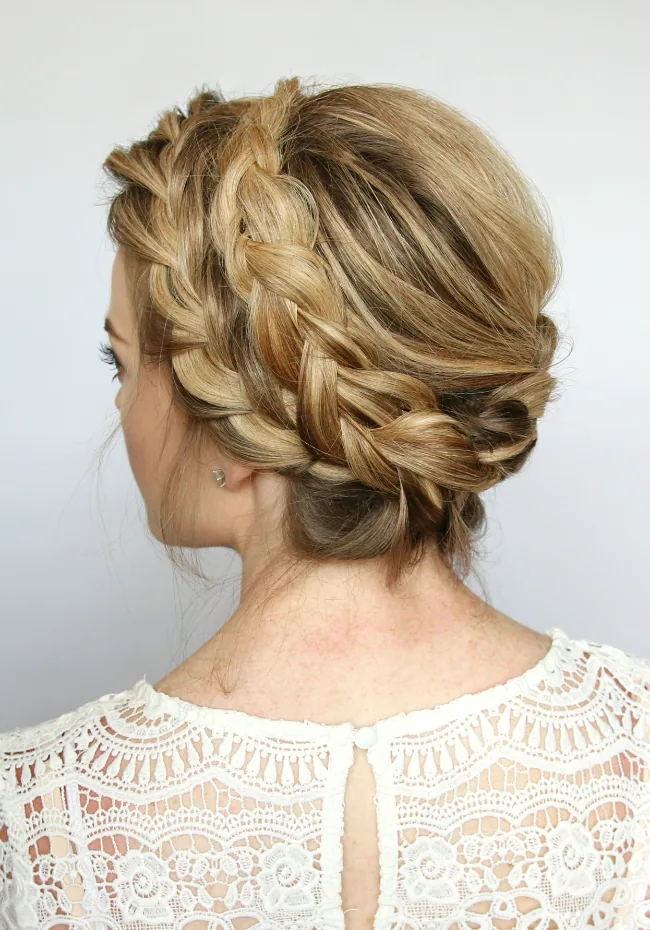
The milkmaid braid with French braids is the smoothest, most polished version of the crown: French braids — strands crossed over — sit flatter against the head than Dutch braids, so the crown looks neat, sleek and elegant rather than bold and textured. It is the milkmaid braid for weddings, for work and for formal evenings, where the finish should be refined rather than boho. The French braid crown looks as if it was done by a stylist, even when you did it yourself in ten minutes.
Best for: formal occasions, work and weddings, and for straight hair, where the smooth finish shows best. How to style it: French-braid each side from the temple, keeping the braid close to the head, pancake lightly — a French braid crown needs less pancaking than a Dutch one — cross over the crown and pin. Pros and cons: the finish is the most polished of any milkmaid braid, but the crown looks a little thinner than a Dutch crown, so pancake the edges gently for fullness. Time: fifteen minutes. Cost: pins only. Quick verdict: the most elegant milkmaid braid — choose French when the occasion is formal.
18. The Milkmaid Braid with Fishtail Braids
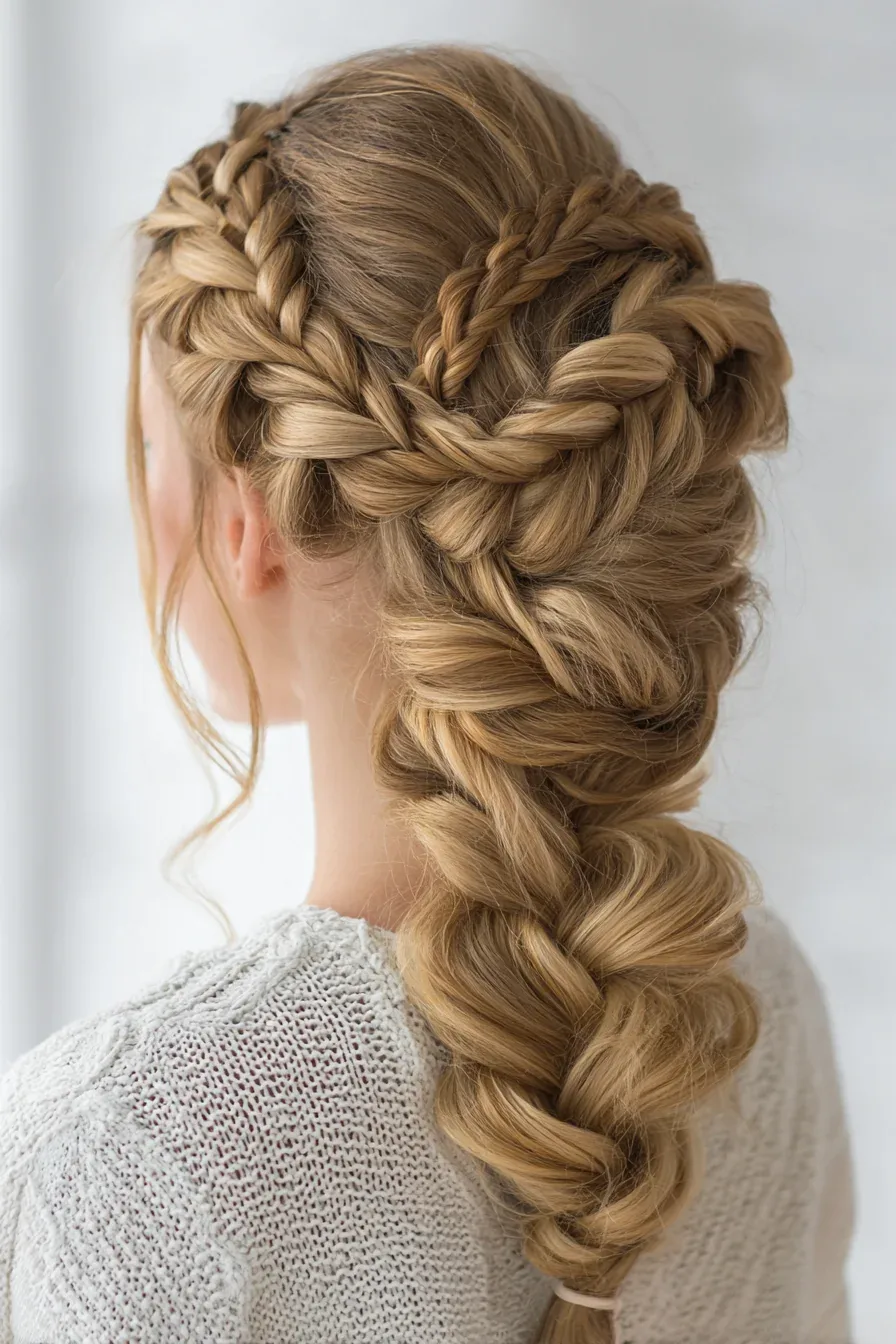
The milkmaid braid with fishtail braids is the most intricate version of the crown: a fishtail braid — made by crossing small sections from each side — has a fine, woven, almost herringbone texture that looks delicate and detailed, and on a milkmaid crown it turns the braid into jewellery. The fishtail crown is the one that gets the most compliments, because it looks far more complicated than it is, and it photographs beautifully — the fine weave catches the light in a way a plain plait never does.
Best for: romantic occasions, photoshoots and weddings, and for long hair, where the fishtail has enough length to show its pattern. How to style it: fishtail-braid each side loosely, pancake gently — a fishtail pancakes beautifully — cross over the crown and pin, hiding the ends under the opposite braid. Pros and cons: the texture is the most beautiful of any milkmaid braid, but a fishtail takes twice as long to braid as a plait — allow twenty-five to thirty minutes. Common mistake: fishtailing too tightly, which makes the braid look thin and stiff. Keep it loose. Quick verdict: the prettiest milkmaid braid, and worth the extra time.
19. The Milkmaid Braid with a Centre Part
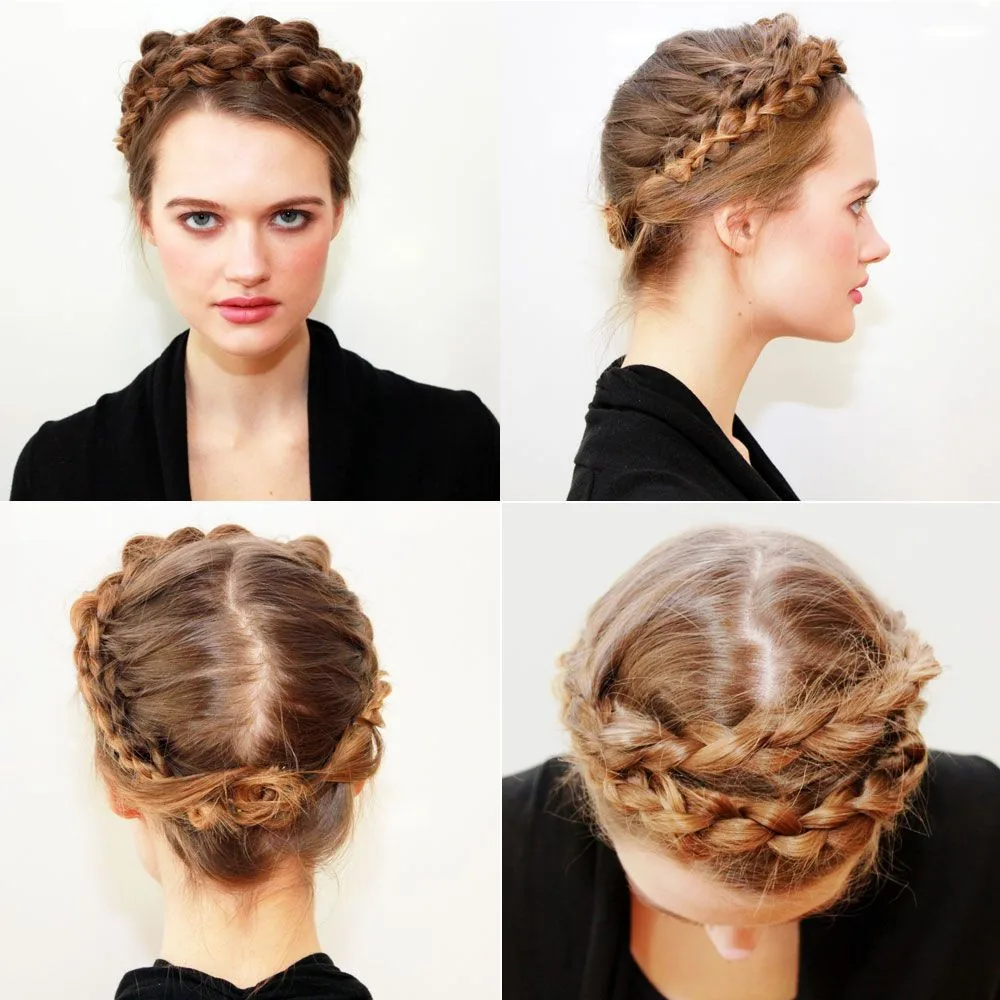
The milkmaid braid with a centre part is the most symmetrical version of the crown: the hair is parted exactly down the middle, the two braids are mirror images, and the crown sits evenly around the head, with the braids crossing at the top in a neat, balanced X. The symmetry is the point — it gives the style a classic, almost regal quality, and it suits the face perfectly evenly, framing both sides the same way. It is the milkmaid braid as it was traditionally worn.
Best for: oval and heart-shaped faces, where symmetry flatters the features, and for formal occasions. How to style it: part the hair with the tail of a comb, straight down the middle from forehead to nape, braid each side identically, pancake evenly, cross over the crown and pin. Maintenance: the part needs to be set while the hair is damp so it stays straight — a centre part that wanders looks untidy. Time: ten minutes. Cost: nothing. Who should avoid it: a centre part can emphasise asymmetry in the face, so if your features are noticeably uneven, a side part will flatter you more. Quick verdict: the classic, balanced milkmaid braid.
20. The Milkmaid Braid with a Side Part
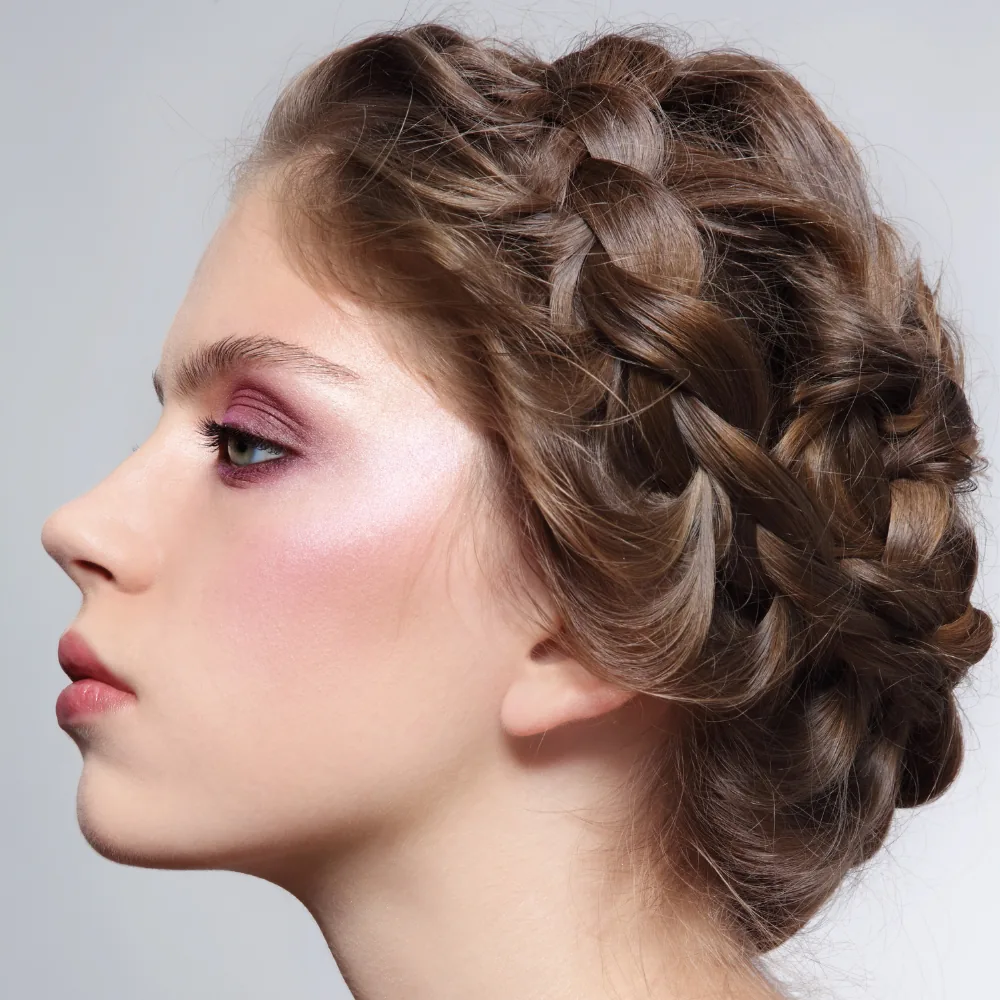
The milkmaid braid with a side part is the glamorous version of the crown: a deep part on one side sweeps the hair across the forehead, gives the crown an asymmetric line, and adds volume on one side — so the whole style looks more dramatic and more polished than the symmetrical centre-part version. The side part changes everything: it creates a sweeping diagonal across the face, it adds height on one side, and it gives the milkmaid braid an old-Hollywood quality that suits an evening out.
Best for: round and square faces, where the diagonal sweep breaks up the symmetry and softens a strong jaw. How to style it: part the hair deeply on one side while it is damp, braid the heavier side into a fuller braid and the lighter side into a thinner one, pancake, cross over the crown and pin. Pros and cons: the side part is more flattering for most faces than a centre part, but the two braids will be uneven in thickness — embrace that, it is what makes the style look glamorous. Time: ten minutes. Cost: nothing. Quick verdict: if you want your milkmaid braid to feel instantly more glamorous, part it on the side.
21. The Half-Up Milkmaid Braid
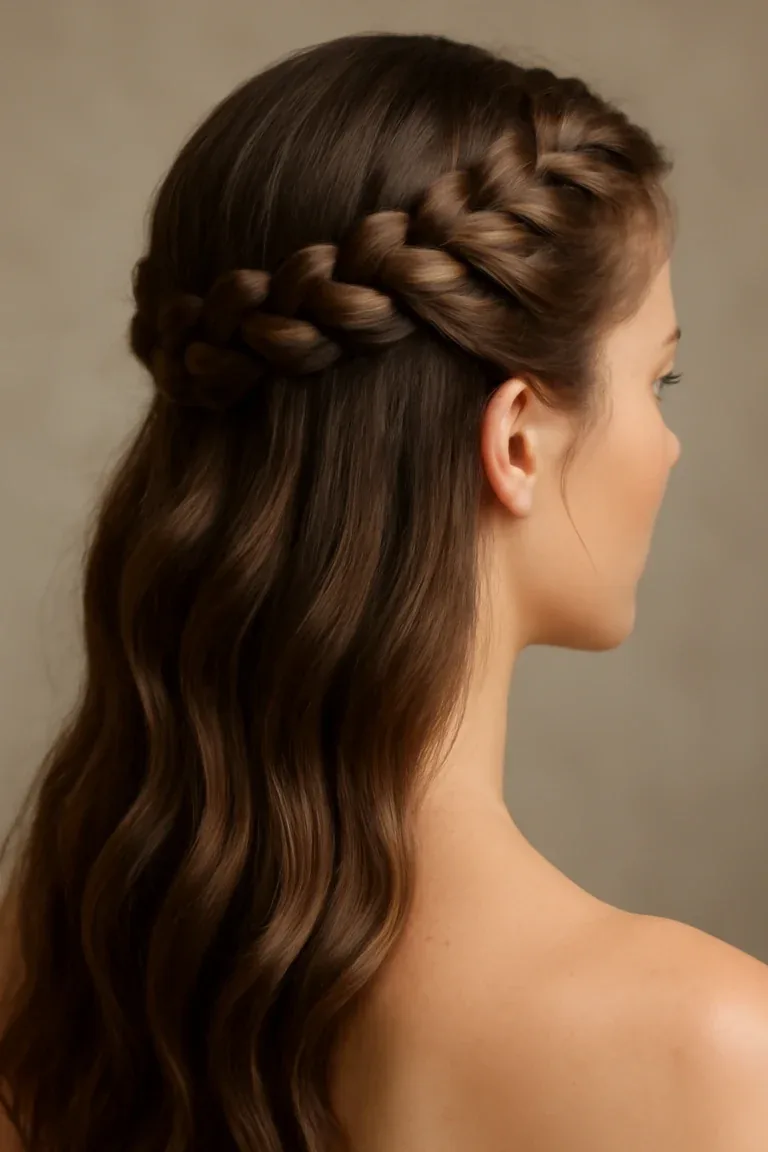
The half-up milkmaid braid is the best of both worlds: the crown is braided and pinned up like a classic milkmaid braid, but the rest of the hair is left down — loose, wavy or straight — so you get the romantic crown and the flowing hair at the same time. It is the milkmaid braid for women who love the crown but do not want all their hair up, and it is the most versatile version in this guide: it works for a wedding, a festival, a date night, or an ordinary day when you want to feel a little bit special.
Best for: long and medium hair, and for anyone who feels a full updo is too severe. How to style it: take the top section of hair from each temple, braid each side loosely, cross the braids over the crown and pin, leaving the rest of the hair down — curl the loose hair lightly for a romantic finish. Maintenance: the crown holds well because it is light, and the loose hair can be refreshed with a quick brush. Time: twelve minutes. Cost: pins only. Common mistake: taking too much hair into the braids, which leaves the loose hair thin — take only the top layer. Quick verdict: the milkmaid braid for women who love wearing their hair down.
22. The Milkmaid Braid with Bangs
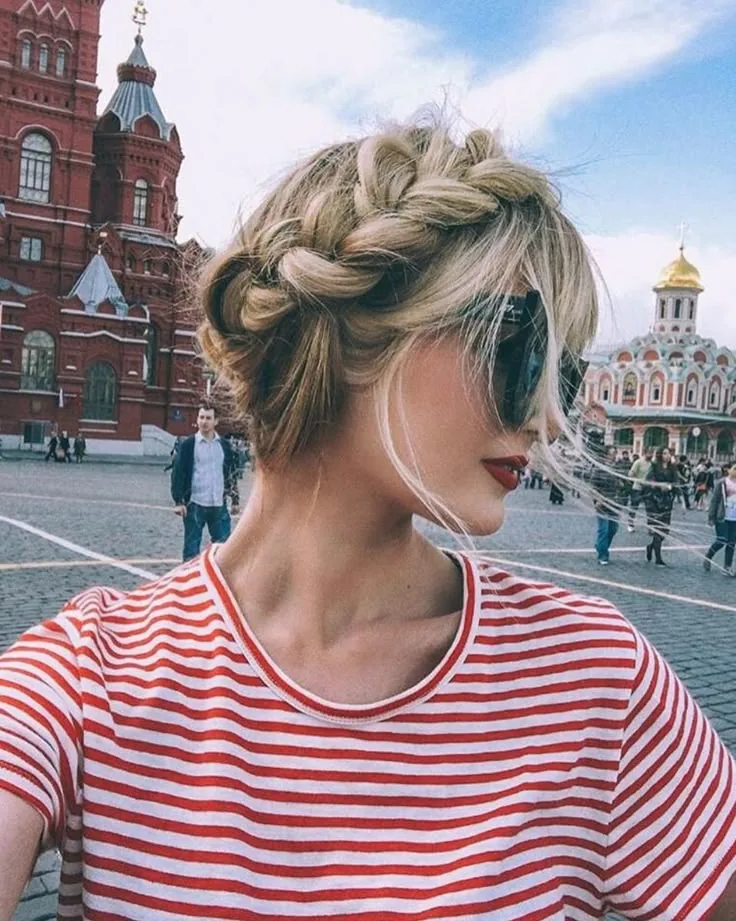
The milkmaid braid with bangs is the softest, most youthful version of the crown: a fringe of hair falls across the forehead while the braids circle the crown above it, so the face is framed twice — once by the fringe, once by the braid. The bangs break up the roundness of the crown, give the face a frame, and add a romantic, playful touch that suits almost everyone. They can be blunt and straight, soft and wispy, or swept to one side, blending into the crown.
Best for: long and oval faces, where the fringe shortens the forehead and balances the length, and for anyone who wants a softer milkmaid braid. How to style it: build the classic crown, leaving the fringe out of the braids entirely, then style the fringe as usual — a quick blow-dry or a light curl. Maintenance: the bangs need the most attention of any part of the style — they frizz first in humidity, so a little leave-in in the morning keeps them smooth. Time: ten minutes plus two for the fringe. Cost: nothing. Common mistake: braiding the bangs into the crown, which pulls the fringe back and defeats the purpose. Keep the fringe free. Quick verdict: the most romantic milkmaid braid for long faces.
23. The Milkmaid Braid with a Veil
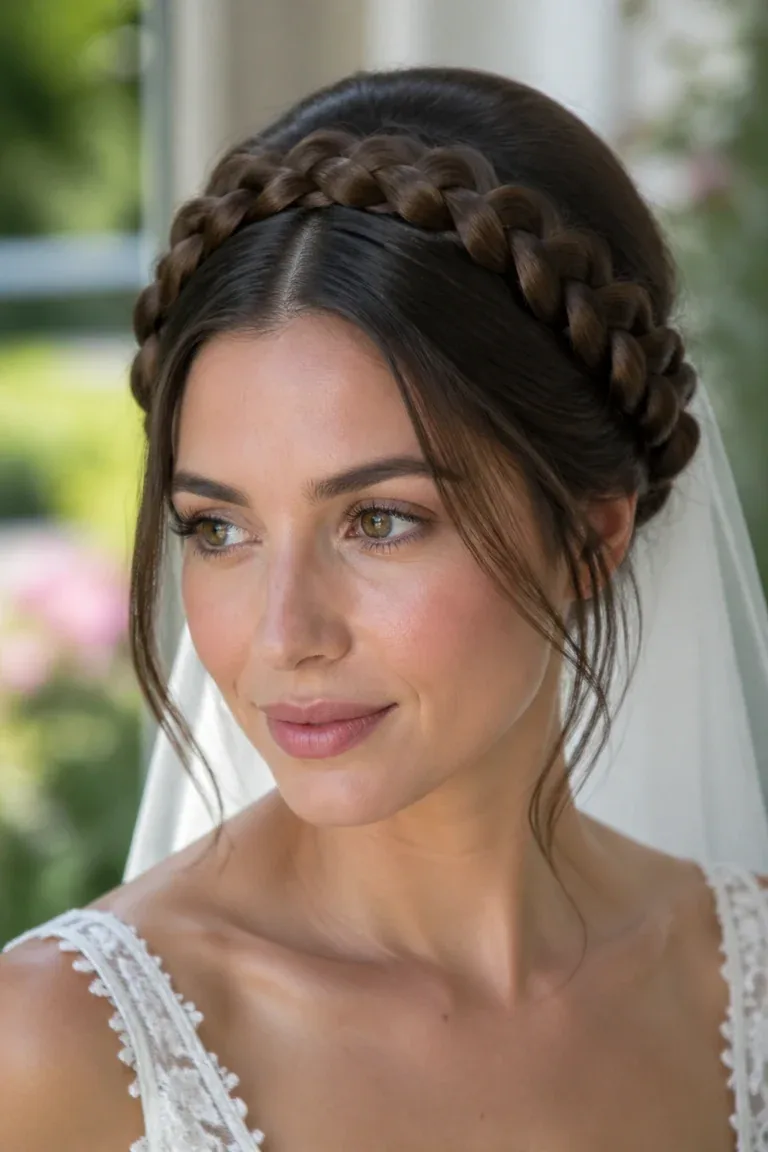
The milkmaid braid with a veil is the bridal crown at its most traditional: the braids circle the head, and a veil is pinned underneath the crown at the back, so the veil falls from beneath the braid and the crown itself stays completely visible from the front. It is the veil placement that makes the milkmaid braid so bridal — the braid frames the face, the veil frames the braid, and the whole look is soft, romantic and timeless. Brides who choose a milkmaid braid with a veil rarely regret it: it photographs beautifully, it holds all day, and it feels like a fairytale.
Best for: brides, and for any formal occasion where a veil is worn. What to ask your stylist for: a neat, secure milkmaid crown with the veil pinned under the crown at the back, using two crossed bobby pins through the veil comb and the braid. Time and cost: the styling takes forty-five minutes to an hour, and the cost is a bridal styling session. Maintenance: do a trial run with the veil, and wear the crown for a full day before the wedding to test the hold. Common mistake: pinning the veil on top of the crown, which hides the braid — always pin it underneath. Quick verdict: the most bridal milkmaid braid there is.
24. The Milkmaid Braid with a Flower Crown
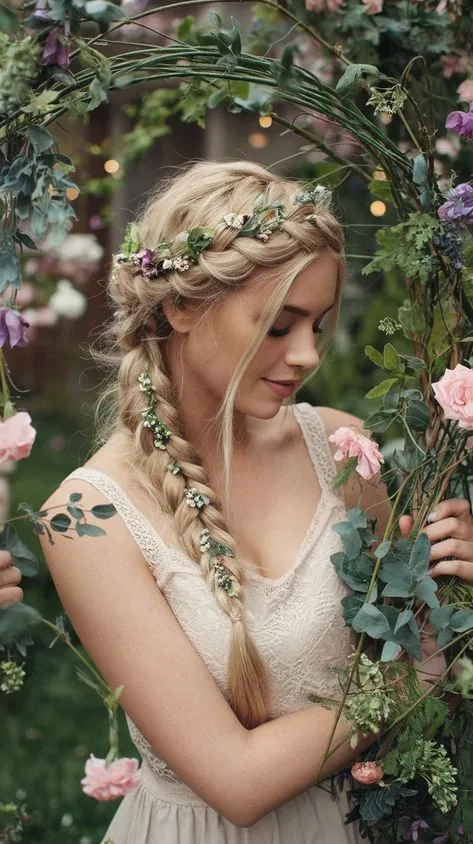
The milkmaid braid with a flower crown is the festival version of the style: a full flower crown — fresh or silk flowers on a wire or ribbon base — worn over the milkmaid braid, so the flowers sit on top of the braids and the whole head looks like a garden. It is the most joyful milkmaid braid in this guide, and the most photogenic: the flowers and the braids together make a look that is pure summer, pure festival, pure celebration. It suits a festival, a boho wedding, a photoshoot, or any day when you want your hair to make people smile.
Best for: festivals, boho weddings and photoshoots, and for long and medium hair, where the crown is thick enough to support the flower crown. How to style it: build a loose boho milkmaid crown first, then place the flower crown over it, sitting just behind the hairline, and pin it in two places so it cannot slide. Pros and cons: the look is spectacular, but a heavy flower crown can drag the braids down — choose a light crown, and pin it to the braids, not just to the hair. Cost: a silk flower crown is inexpensive and lasts for years; a fresh one is a florist’s job. Quick verdict: the most joyful milkmaid braid — wear it when you want to celebrate.
25. The Milkmaid Braid with Pearls
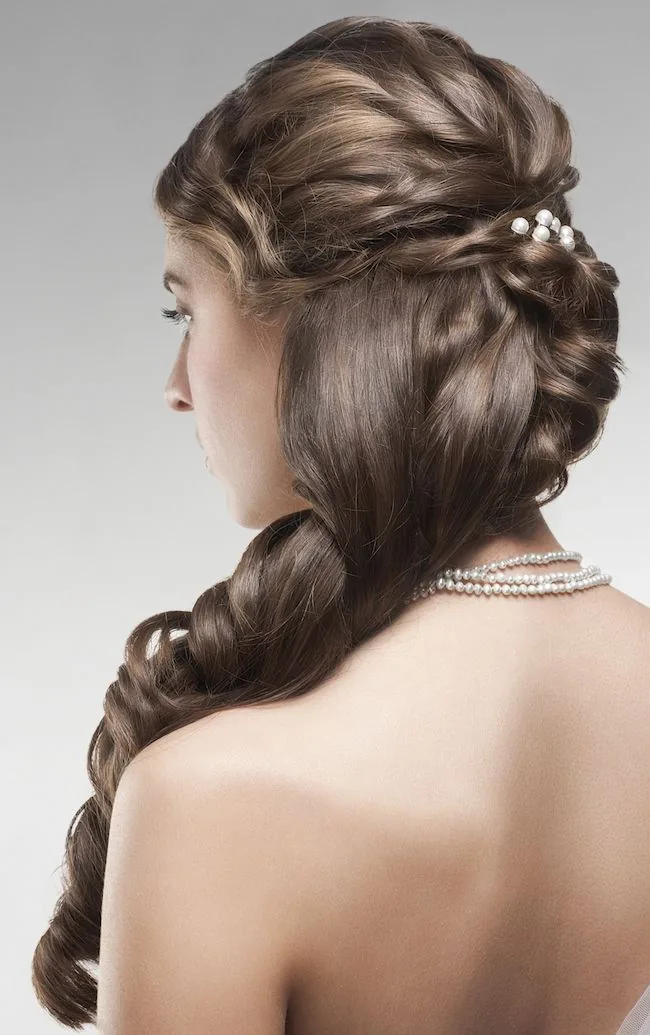
The milkmaid braid with pearls is the most elegant version of the crown: small pearl pins pushed into the braids at intervals along the crown, so the pearls catch the light every time the head moves. Pearls against braided hair are one of the most beautiful combinations in hairstyling — soft, luminous and completely timeless — and a few pearls are all it takes, because the pearls do the work. They suit a wedding, a formal evening, a christening, or any day when you want the crown to feel like jewellery.
Best for: weddings and formal occasions, and for every hair colour, because white pearls suit them all. How to style it: build a neat classic or French-braid crown, then push small pearl pins into the braid at intervals — three or four pearls are enough — and place one larger pearl where the braids cross. Maintenance: the pins need nothing beyond a quick check that they are secure, and they last for years. Cost: a pack of pearl pins is inexpensive; real pearls are a different budget, but imitation pearls look identical in photographs. Common mistake: using too many pearls, which makes the crown look crowded. Three or four, placed with space between them, is the elegant number. Quick verdict: the most elegant milkmaid braid.
26. The Festival Milkmaid Braid
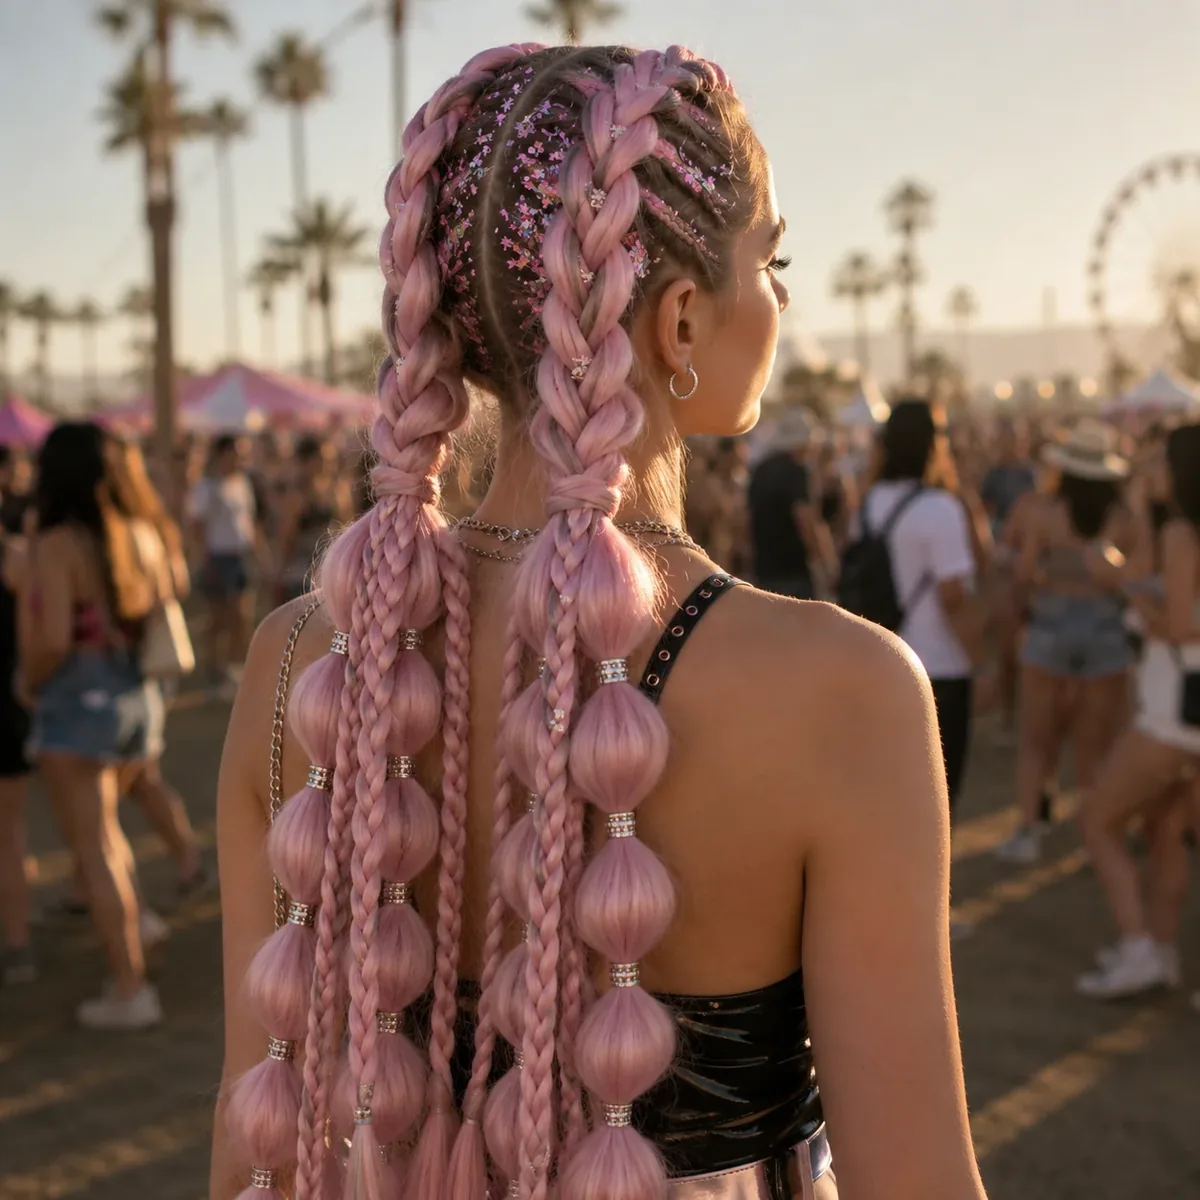
The festival milkmaid braid is the boho crown turned up to full volume: loose Dutch braids, pancaked hard, with ribbon woven through, a flower crown or a few wildflowers, glitter at the parting, and soft strands loose around the face. It is the milkmaid braid for a music festival, a summer fair or a beach holiday — a style that is meant to be danced in, photographed, and left a little messy by the end of the day. The festival milkmaid braid does not try to be neat. It tries to be fun, and it succeeds.
Best for: festivals, concerts, holidays and summer parties, and for wavy and textured hair. How to style it: braid on second-day hair with texturising spray, use Dutch braids for a raised crown, pancake hard, weave in a ribbon, pin up loosely, and add flowers and a little glitter at the parting. Maintenance: it improves as it loosens — there is nothing to fix, and a few spare pins in your bag are all you need. Time: twenty minutes. Cost: ribbon, flowers and glitter cost very little. Who should avoid it: if the occasion is formal, choose the classic crown instead — glitter does not belong at a wedding. Quick verdict: the most fun milkmaid braid in this guide.
27. The Milkmaid Braid for Work

The milkmaid braid for work is the polished, practical version of the crown: a neat, smooth milkmaid braid, with no loose strands, no flowers and no glitter, that keeps the hair completely off the face and neck through a long day. It is professional without being severe — the braided crown reads as deliberate and neat in exactly the way a good haircut does — and it is practical, because it does not need touching up between meetings. The work milkmaid braid is the updo for women who want their hair out of the way without a ponytail.
Best for: office work, teaching, healthcare and any job where the hair needs to stay put. How to style it: braid neatly on smooth, detangled hair, use French braids or simple plaits for a flat finish, pin securely in an X at every join, smooth the edges with a little gel, and finish with hairspray. Maintenance: a morning check of the pins is all it needs — the crown holds all day. Time: ten minutes. Cost: pins only. Common mistake: leaving loose strands around the face, which looks boho rather than professional. For work, keep every strand in the braid. Quick verdict: the most practical milkmaid braid — neat, comfortable and all-day reliable.
28. The Milkmaid Braid for a Formal Evening
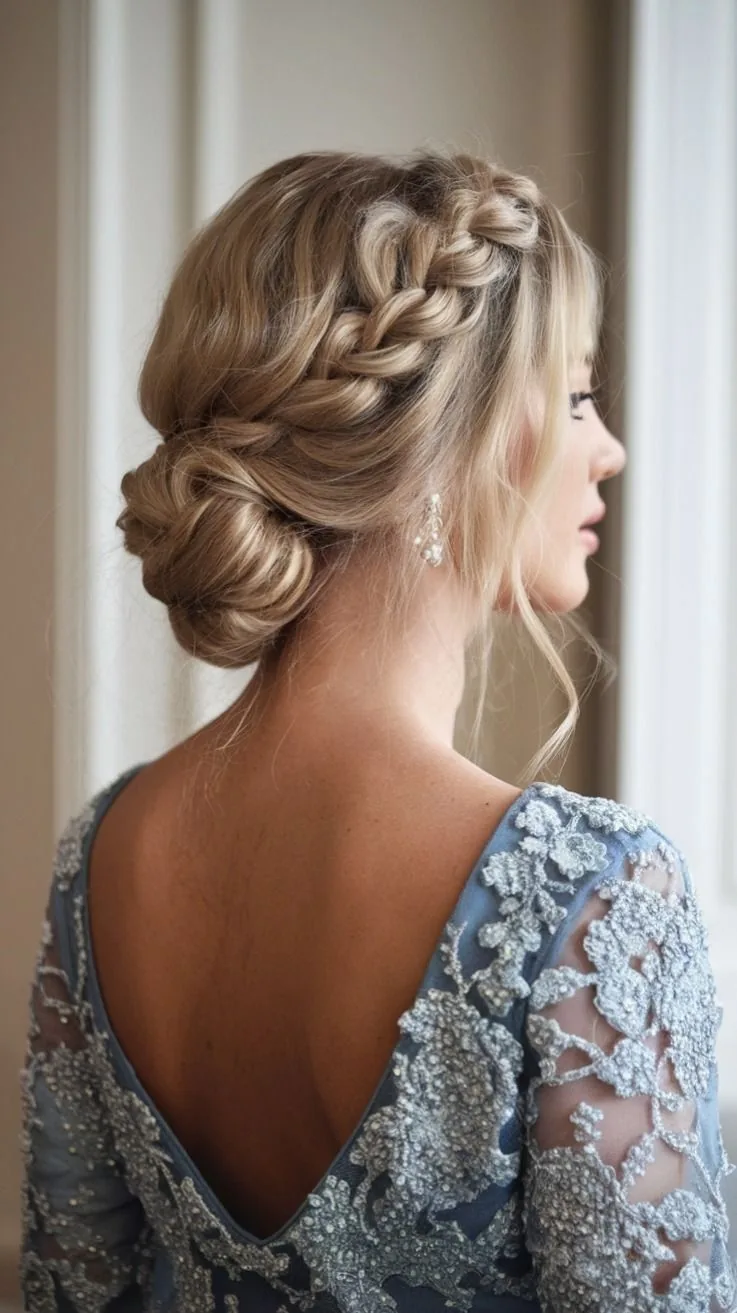
The milkmaid braid for a formal evening is the glamorous crown: a smooth, defined milkmaid braid, with a deep side part, pearl pins along the braid, and a sleek finish — a style that looks extraordinary with a long dress and photographs beautifully, because the braided ring frames the face from every angle. The milkmaid braid’s height and shape balance a long gown perfectly, and the crown does the work that an updo does for other hair types, elongating the neck and framing the shoulders. It is the milkmaid braid at its most sophisticated.
Best for: black-tie dinners, galas, weddings as a guest, and any evening when the dress is long. What to ask your stylist for: a smooth French-braid milkmaid crown with a deep side part, pearl pins, and a trial run before the event. Time and cost: the styling takes thirty to forty-five minutes, and a salon styling session is worth it for a formal event. Maintenance: a light-hold hairspray finishes the crown, and a single pin check in the evening is all it needs. Common mistake: making the crown too loose and boho for a formal occasion — for a formal evening, the braid should be smooth and defined. Quick verdict: the most glamorous milkmaid braid.
29. The Milkmaid Braid with a Silk Scarf
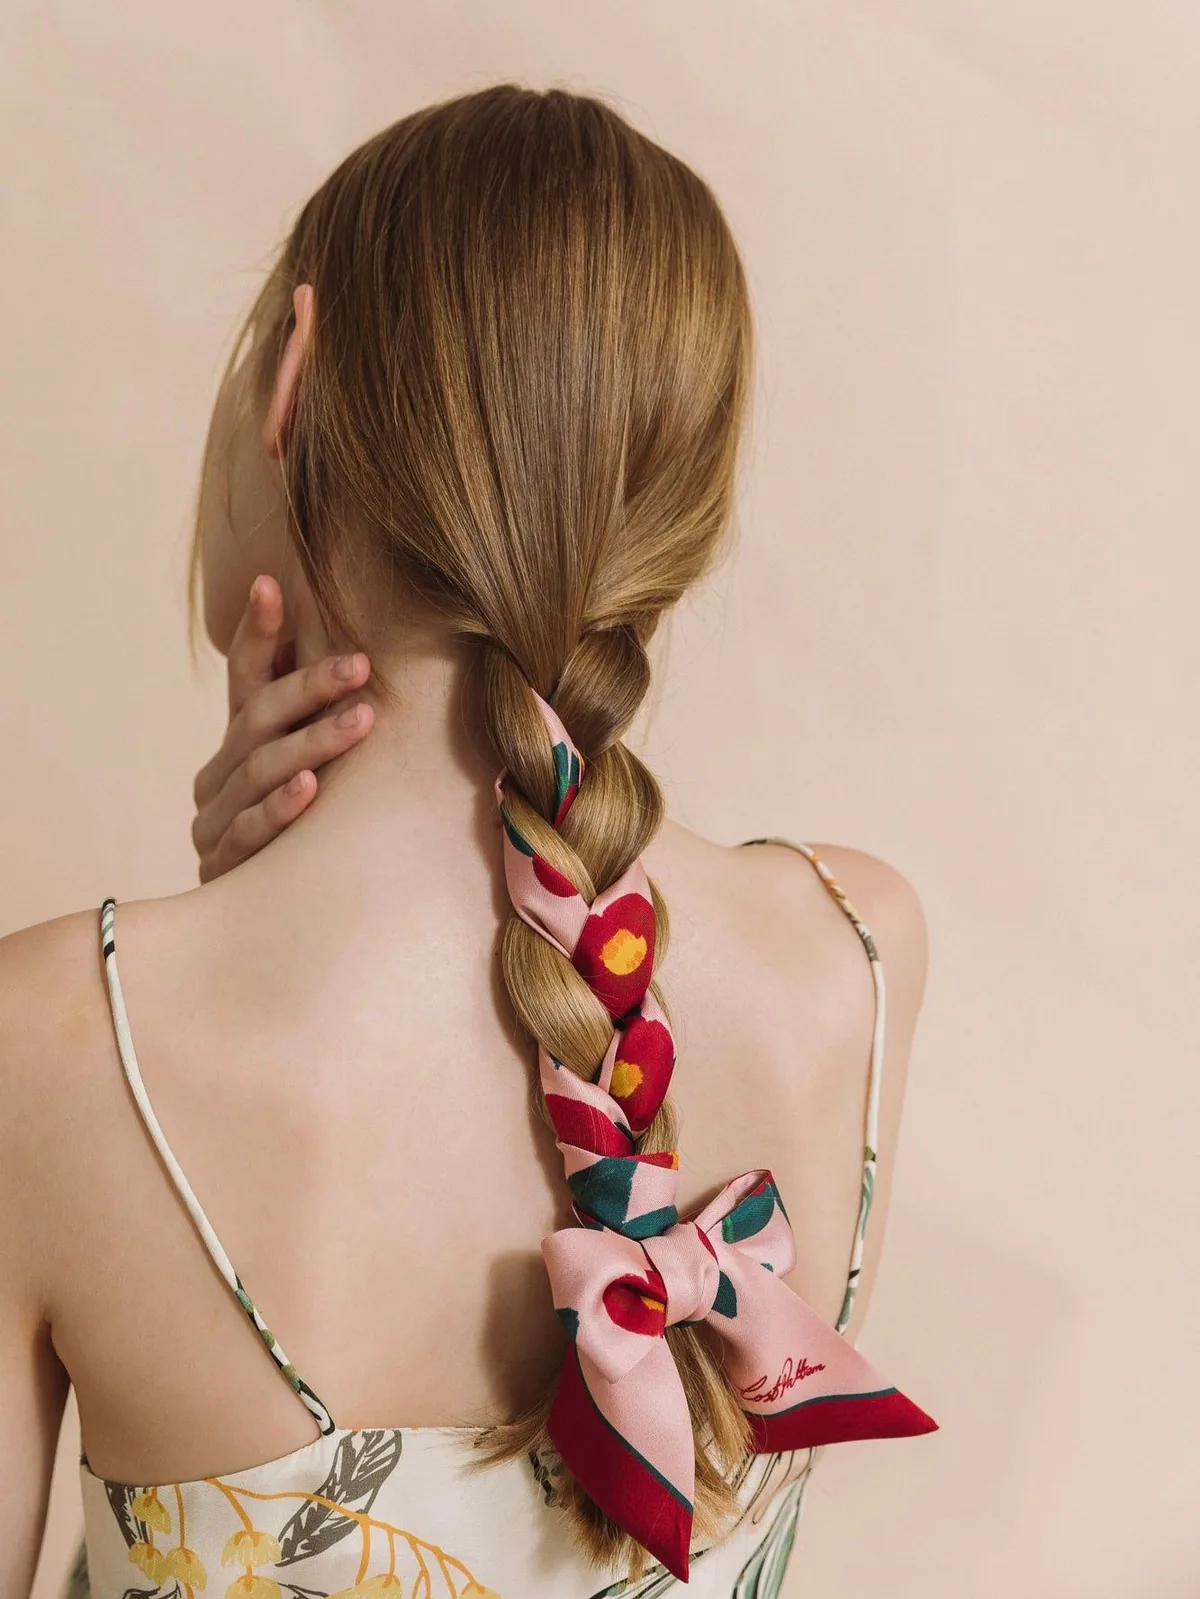
The milkmaid braid with a silk scarf is elegance with a practical streak: a silk scarf tied around the crown, knotted at the side or the back, adds colour and pattern while protecting the braids and keeping the crown in place. A silk or satin scarf is the right fabric, because it does not absorb moisture the way cotton does, and it glides over the hair instead of creating friction. The scarf can be a thin band across the front of the crown, or a wider wrap — and each version gives the same braid a completely different mood.
Best for: summer days, bad hair days, holidays, and anyone who wants colour in the crown without flowers. How to style it: build the classic crown first, then tie the scarf loosely around the crown, knotting it at the side, and tuck the ends under the braid. Pros and cons: the scarf is cheap, reusable and endlessly variable, but a scarf tied too tightly will flatten the crown — tie it loosely, and vary the knot position so the braids are not always pressed in the same place. Time: a minute or two to tie. Cost: the price of a scarf. Quick verdict: the most versatile milkmaid braid accessory.
30. The Milkmaid Braid for a Summer Garden Party
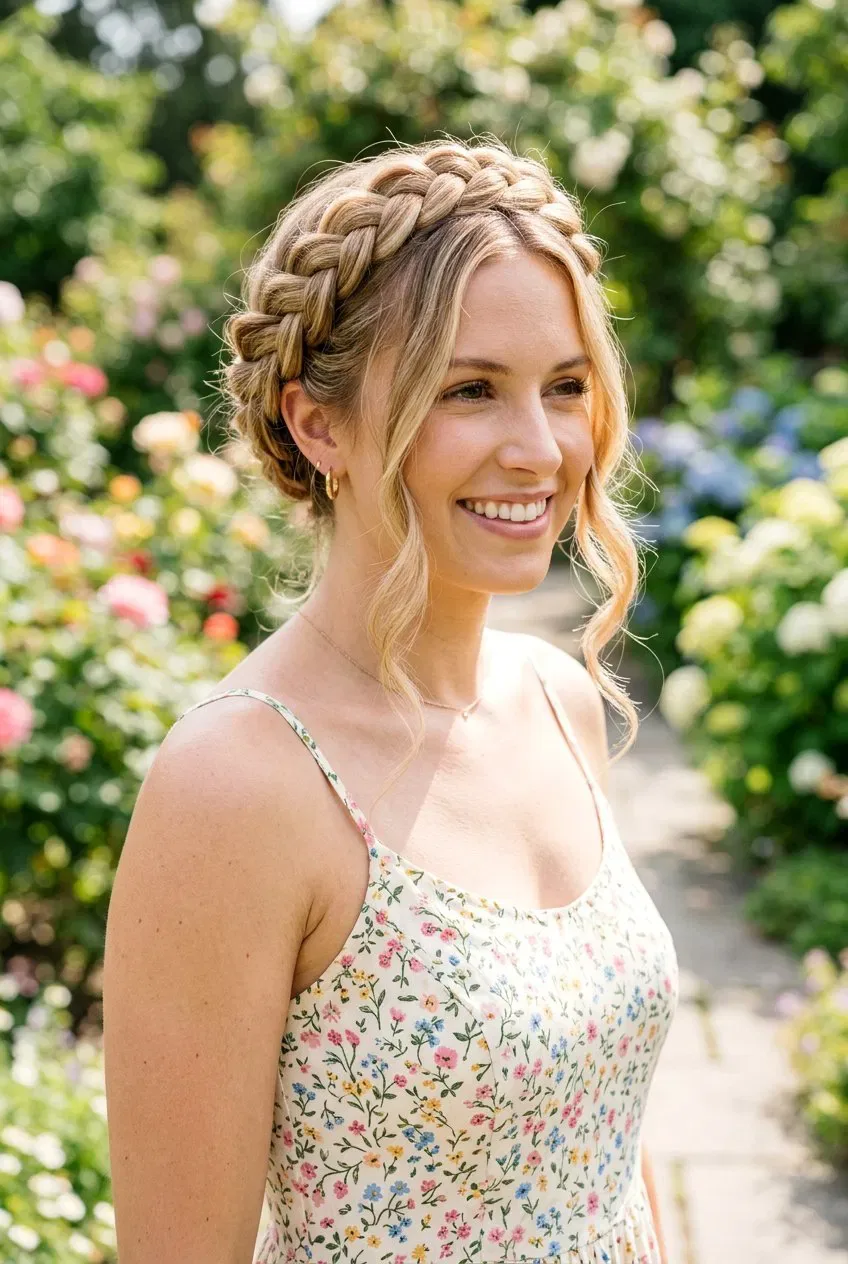
The milkmaid braid for a summer garden party is the lightest, most romantic version of the crown: loose braids, baby’s breath or small wildflowers tucked into the braid, soft curls around the face, and a sundress — a style that looks as if it belongs in a garden, because it does. It is the milkmaid braid for afternoon tea, a christening, a baby shower, or a long lunch under the trees. The garden-party milkmaid braid is soft, light and unforced, and it is the easiest crown to wear in the heat, because the hair is completely off the neck.
Best for: garden parties, baby showers, christenings and summer lunches, and for wavy hair, which holds a loose braid naturally. How to style it: braid loosely on second-day hair, pancake gently, pin up, tuck in a few sprigs of baby’s breath, and pull out two soft face-framing curls. Maintenance: the style improves as it loosens in the heat — there is nothing to fix. Time: twelve minutes. Cost: a few sprigs of baby’s breath and a handful of pins. Common mistake: over-accessorising — for a garden party, flowers alone are enough. Quick verdict: the most romantic daytime milkmaid braid.
31. The Romantic Loose-Wave Milkmaid Braid
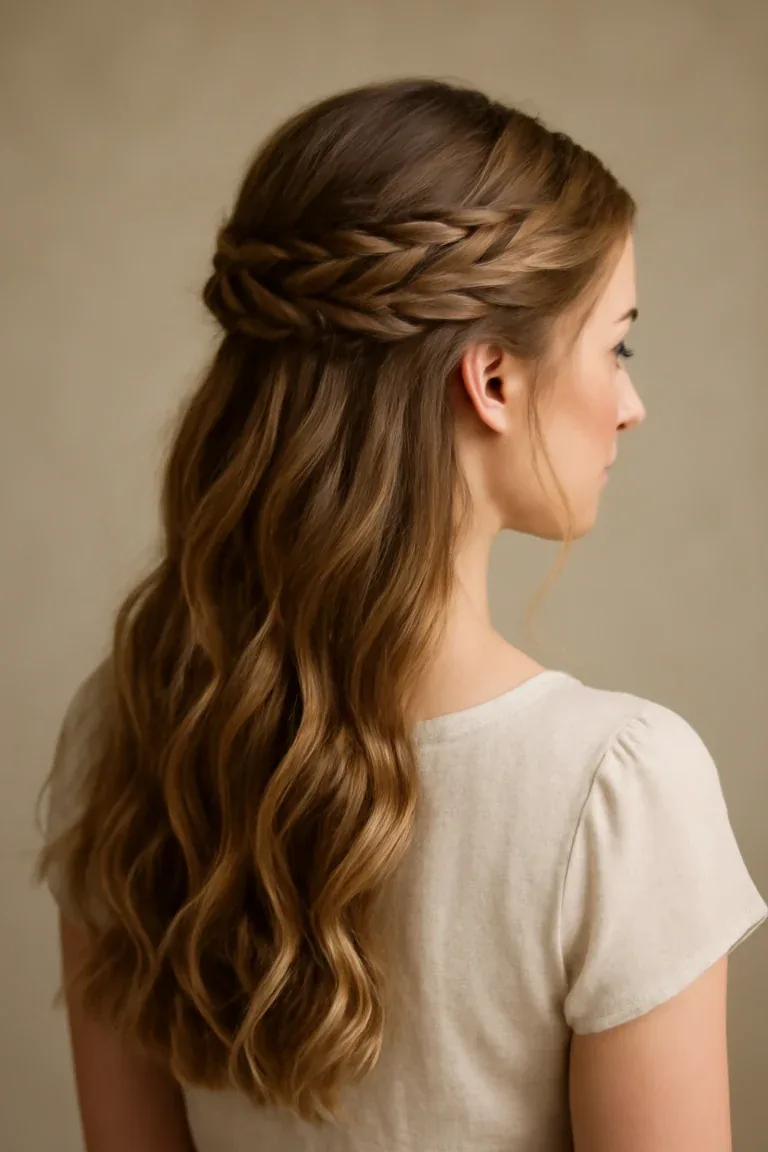
The romantic loose-wave milkmaid braid is the softest crown in this guide: the braids are loose and pancaked, the hair underneath is left in soft waves, and the whole style has a dreamy, windswept quality — as if the braid was done in a hurry before a walk in the countryside, and the waves fell into place on their own. It is the milkmaid braid for a date night, an engagement shoot, or any evening when you want to look romantic without looking done-up. The looseness is the point: this crown is not trying to be perfect, and that is why it is beautiful.
Best for: date nights, engagement shoots and romantic evenings, and for wavy hair, where the waves are already there. How to style it: curl the hair loosely first, then braid the top sections loosely, pancake, cross over the crown and pin, leaving the waves underneath to fall. Maintenance: the waves will loosen through the evening, which only makes the style softer. Time: twenty minutes including curling. Cost: pins only, plus a curling wand you already own. Who should avoid it: if you need the crown to last twelve hours without a touch-up, choose the classic crown — this one is made for an evening, not a whole day. Quick verdict: the most romantic milkmaid braid — soft, loose and unforgettable.
What is a milkmaid braid?
A milkmaid braid is a hairstyle in which the hair is divided into two braids, one on each side of the head, and the braids are lifted up, crossed over the crown and pinned in place, so they form a braided ring or halo around the head. The hair is worn up, off the face and neck, and the braids themselves are the decoration. Milkmaid braids suit almost every face shape and work on shoulder-length hair and longer.
How long does my hair need to be for a milkmaid braid?
Your hair needs to reach at least the shoulders for a true milkmaid braid, because the braids need enough length to travel from behind the ears, up and over the crown, and meet at the top. Shoulder-length hair works well, and medium and long hair give the fullest crown. If your hair is shorter than chin length, try a faux milkmaid braid with two small side braids pinned up, or a braided headband, which gives the same look from the front.
How do I do a milkmaid braid on myself?
To do a milkmaid braid on yourself, part your hair down the middle, braid each side into a loose three-strand plait starting behind the ear, and secure each braid with a small elastic. Gently pull the edges of each braid outward to make it look fuller, then lift the left braid across the crown and pin it above the right ear, and do the same with the right braid. Pin through the braid and into the hair underneath, crossing two pins in an X at each join, and finish with hairspray.
How long does a milkmaid braid last?
A milkmaid braid lasts all day — eight to twelve hours — if it is pinned properly. The key is to braid on hair with texture, such as second-day hair or hair with dry shampoo, to pin through the braid and into the hair underneath, and to cross two bobby pins in an X at each join. Carry three spare pins in your bag and check the crown once in the afternoon, and it will hold from morning to night.
Can I wear a milkmaid braid with short hair?
Yes, you can wear a milkmaid braid with short hair, as a faux milkmaid braid. Make two small braids at the sides, pin them up and across the crown, and tuck the ends under the opposite braid. A flower or a pin where the braids cross hides the join. Hair at chin length and below works well; hair shorter than chin length is better suited to a braided headband, which gives the same crowned look from the front.
Will a milkmaid braid suit a round face?
Yes, a milkmaid braid suits a round face — and it is one of the most flattering updos for one. The height of the crown lengthens the face, and loose face-framing curls at the temples break up the roundness and soften the cheeks. Choose a crown with a little height on top, leave two soft strands loose around the face, and avoid pulling the braids too tightly against the head, which can emphasise roundness.
How do I stop my milkmaid braid from slipping?
To stop a milkmaid braid from slipping, braid on hair with texture — second-day hair, or hair with dry shampoo and texturising spray — and pin through the braid and into the hair underneath, not beside the braid. Cross two bobby pins in an X at every join, tuck the braid ends under the opposite braid, and finish with a light-hold hairspray. Use bobby pins that match your hair colour, and carry spares for a quick fix in the afternoon.
Can I wear a milkmaid braid to a wedding?
Yes, you can wear a milkmaid braid to a wedding, as the bride or as a guest or bridesmaid. For a bride, choose a neat, polished crown with pearls or small white flowers, and do a trial run at least a month before the wedding, wearing the crown for a full day with the veil. For a guest or bridesmaid, a softer crown with baby’s breath or a ribbon is perfect. A milkmaid braid holds all day, photographs beautifully, and keeps the hair off your face while you dance.
How do I add flowers to a milkmaid braid?
To add flowers to a milkmaid braid, build the crown first, then cut the flowers into small sprigs of two or three inches, tuck each stem into the braid, and pin through the stem so the flower cannot slide. Use small, light flowers — baby’s breath, spray roses or small wildflowers — because heavy flowers drag the braid down. For a long day, use dried flowers, which look almost identical to fresh ones and last all day, or silk flowers if anyone has hay fever.
How do I take a milkmaid braid out without tangles?
To take a milkmaid braid out without tangles, remove the bobby pins first, one at a time, then take out the elastics, and gently unravel each braid with your fingers, starting from the ends and working upward. Do not brush the hair while the braids are still in, and do not pull the braids apart roughly. Once the braids are out, run your fingers through the hair, then brush gently from the ends upward. A little leave-in conditioner on the ends will smooth any frizz left by the braids.
Conclusion
The milkmaid braid is not the hardest hairstyle — it asks for two braids, a handful of bobby pins, a little texture in the hair, and five minutes of patience — but it gives back more than it asks for: a crown that frames the face, keeps the hair off the neck, and turns an ordinary day into something a little bit like a fairytale. Every style in this guide is a variation on the same simple idea: two braids, crossed over the crown, pinned in place. Neat or boho, flowered or plain, for a wedding or a festival, for work or for a garden party — the braid itself never changes, only the finish does.
Start with the classic crown, if you are not sure — part the hair down the middle, braid each side loosely, pancake the braids, cross them over the top and pin. Wear it once, and you will see why the milkmaid braid has lasted for generations: it is practical, it is romantic, and it suits almost everyone. Then make it yours — add flowers, weave in a ribbon, try Dutch braids, leave a few curls loose around your face. The crown is yours to wear however you like. And when someone asks how you got your hair to look like that, tell them the truth: you braided it, you pinned it up, and you wore it like the crown it is.