Hair That Survives the Highway: 33 Road Trip Hairstyles That Stay Put From Mile One to the Last Stop
Somewhere around hour three of a road trip, every hairstyle gets tested. The windows are down, the wind is doing its worst, the air conditioning is blasting dry air at your face, and you have just woken up from a nap in the passenger seat with your hair pressed flat on one side and wild on the other. Then comes the rest stop, the roadside diner, the viewpoint photo — and you want to look like the trip, not like the wind. That is what this guide is for: hairstyles that are built for the highway, not the salon chair.
This guide gathers 33 road trip hairstyles that stay put from mile one to the last stop — wind-proof braids, low buns that survive a car nap, claw-clip twists you can redo at a red light, and hat-friendly styles for every roadside stop. Eight travel guides first walk you through the ideas that matter: how to pack a hair kit the size of a sandwich bag, which styles need no heat at all, how to wind-proof your hair when the windows go down, and how to refresh everything in five minutes at a rest stop. Whether you are driving, navigating, napping in the back seat, or posing at the next overlook, there is a style here that will hold.
Packing a Tiny Hair Kit for the Road
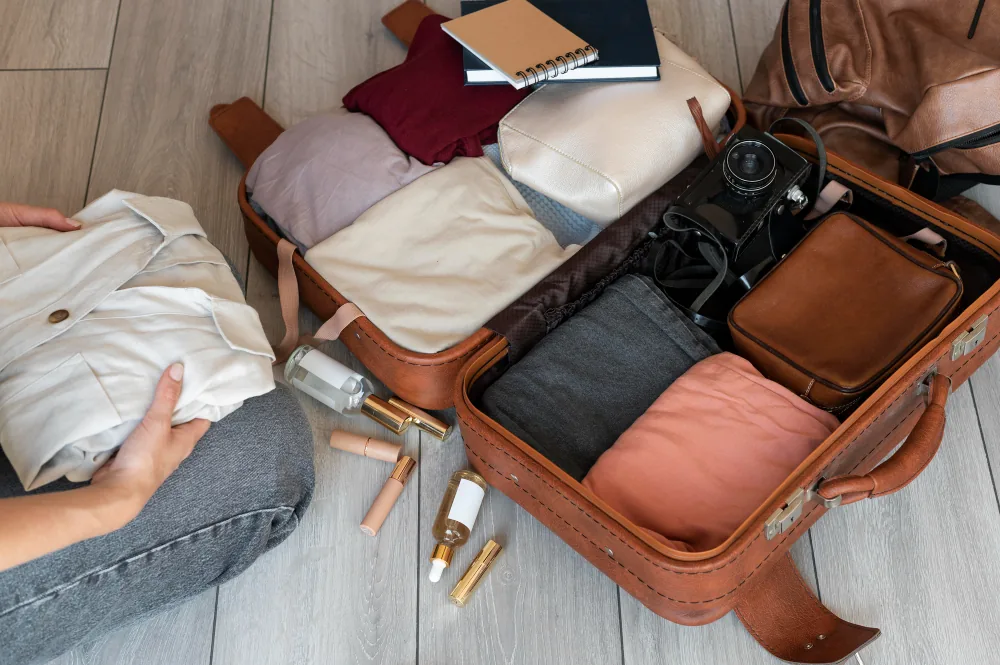
A road trip hair kit does not need to be a suitcase. Everything you need fits in a sandwich bag: four hair elastics, six bobby pins, one claw clip, a travel-size dry shampoo, a small bottle of leave-in conditioner or hair oil, a folding brush or a wide-tooth comb, and one silk scarf or bandana. That is the whole kit, and it weighs almost nothing. The scarf does triple duty — it wraps a bun, covers a bad-hair moment at a roadside stop, and works as a pillow cover when you nap in the car.
Keep the kit in the glove box or the door pocket, not buried in a suitcase in the boot — the whole point is that you can reach it without unpacking the car. Pack elastics in two sizes, because a thick elastic that holds a braid will not hold a fine ponytail, and a thin one will snap on thick hair. Quick verdict: if it does not fit in a sandwich bag, it does not belong on a road trip — seven items, one bag, done.
No-Heat Styles That Survive the Drive
A car has no plug socket for a curling iron, and a rest-stop bathroom is no place for a blow-dry, so the best road trip hairstyles are the ones that need no heat at all. Braids, twists, buns and claw-clip styles all work on air-dried hair, and they actually hold better on hair that has a little texture in it. Second-day hair is ideal for the road: it has grip, it holds a braid without slipping, and it does not go flat the way freshly washed hair does in dry car air.
The trick is to style damp hair the night before you leave. Braid damp hair before bed and you wake up with soft waves; twist it into a low bun overnight and you get gentle volume in the morning. If you must style on the road, a little leave-in conditioner or a drop of hair oil gives damp-feeling grip without any tools. Common mistake: trying to curl or straighten hair in a hotel bathroom before a long drive — the first hour of wind and AC will undo it. Quick verdict: if it needs a plug, leave it at home.
Wind-Proofing Your Hair With the Windows Down
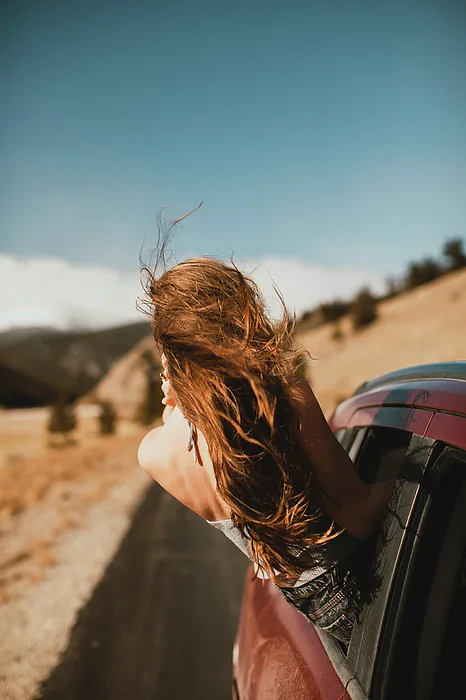
Windows down is half the joy of a road trip, and the enemy of every hairstyle. Wind does two things: it tangles the lengths together, and it pulls loose pieces out of any style that is not anchored. The fix is not to fight the wind but to contain the hair before it starts. A braid is the most wind-proof style there is, because every strand is woven in; a low bun is second, because the hair is gathered and pinned close to the head. Loose hair with the windows down is a tangle waiting to happen.
A few habits help. Braid or bun the hair before the windows go down, not after it has already tangled. A light mist of leave-in conditioner before you set off keeps the lengths slippery, so strands slide past each other instead of knotting. And a silk scarf tied over a low bun is the old-school answer — it looks chic at a roadside stop and it stops the wind completely. Pros and cons: braids win on wind, but take a few minutes to do; a claw clip is instant, but it will not survive a highway-speed window. Quick verdict: braid it before you open the window.
Rest-Stop Refreshes in Five Minutes
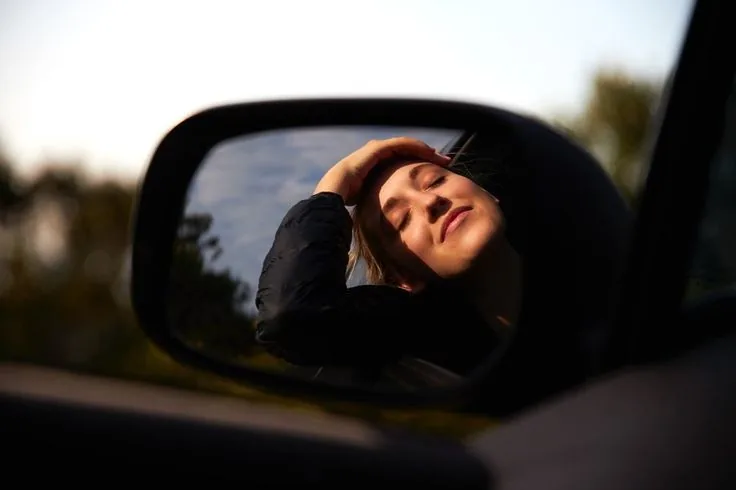
Every road trip has a moment when you catch your reflection in a rest-stop mirror and realise your hair has been through something. The five-minute refresh is a road trip skill worth learning: take the style down, brush it out with your fingers or a folding brush, spray dry shampoo at the roots, and rebuild the style tighter than before. A braid redone at a rest stop always looks better than the one you did at home, because the hair has texture and grip by then.
Work in this order: detangle first, then dry shampoo, then restyle. Dry shampoo on tangled hair just makes the tangle worse, and restyling without detangling locks the mess in. If you have no dry shampoo, a little baby powder or even plain water on the roots works in a pinch. A silk scarf tied over the finished style buys you another two hours of neatness. What to ask your stylist: nothing — this is a habit, not a cut — but a cut with long layers refreshes more easily than a blunt one. Quick verdict: down, brush, spray, rebuild — five minutes, good as new.
Hat-Friendly Styles for Roadside Stops

A road trip means hats: a baseball cap for the sun, a wide-brim hat at a viewpoint, a beanie when the evening turns cold. The rule for hat hair is the same as for church hats — keep the bulk low and the crown smooth. A low ponytail through the back of a baseball cap, a low braid under a wide-brim hat, or a low bun below a beanie all work, because the hat sits on a smooth crown and the style hangs below the brim.
The styles that fight hats are the ones with height: a top knot will push a cap up, and a high ponytail will not fit through the cap opening at all. If you know you will wear a hat all day, choose a low braid or a low ponytail before you leave, and let the hat do the rest. A bandana tied over a low bun doubles as a hat in a pinch and keeps the sun off your parting. Common mistake: putting the hat on over a high bun and then wondering why the hat sits crooked. Quick verdict: build the style from the hat down — low, smooth, and out of the way.
Sleeping in the Car Without Wrecking Your Hair
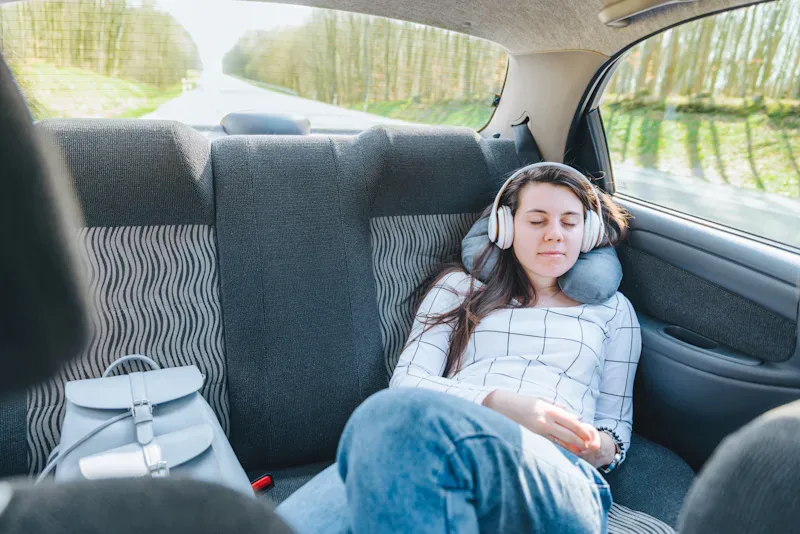
Somebody has to nap in the passenger seat, and the car seat headrest is not kind to hairstyles. Sleeping on loose hair flattens one side and tangles the other; sleeping on a high bun presses it into a dent; sleeping on a braid is the only option that wakes up looking the same as it went to sleep. A loose low braid, worn over one shoulder or down your back, survives a car nap better than any other style, because there is nothing to crush and nothing to dent.
A silk scarf helps enormously here too: wrap it around your hair before you nap, and it stops the seat fabric from frizzing the lengths. If you prefer a bun, make it a very low, loose one at the nape, and sleep with your head tilted slightly forward so the bun hangs free instead of pressing against the headrest. When you wake up, shake the braid out, add a drop of oil to the ends, and you are ready for the next stop. Pros and cons: a braid is the best nap style but takes minutes to do; a scarf is instant but can slip off. Quick verdict: braid it, scarf it, sleep on it.
Humidity, AC and Frizz on the Road
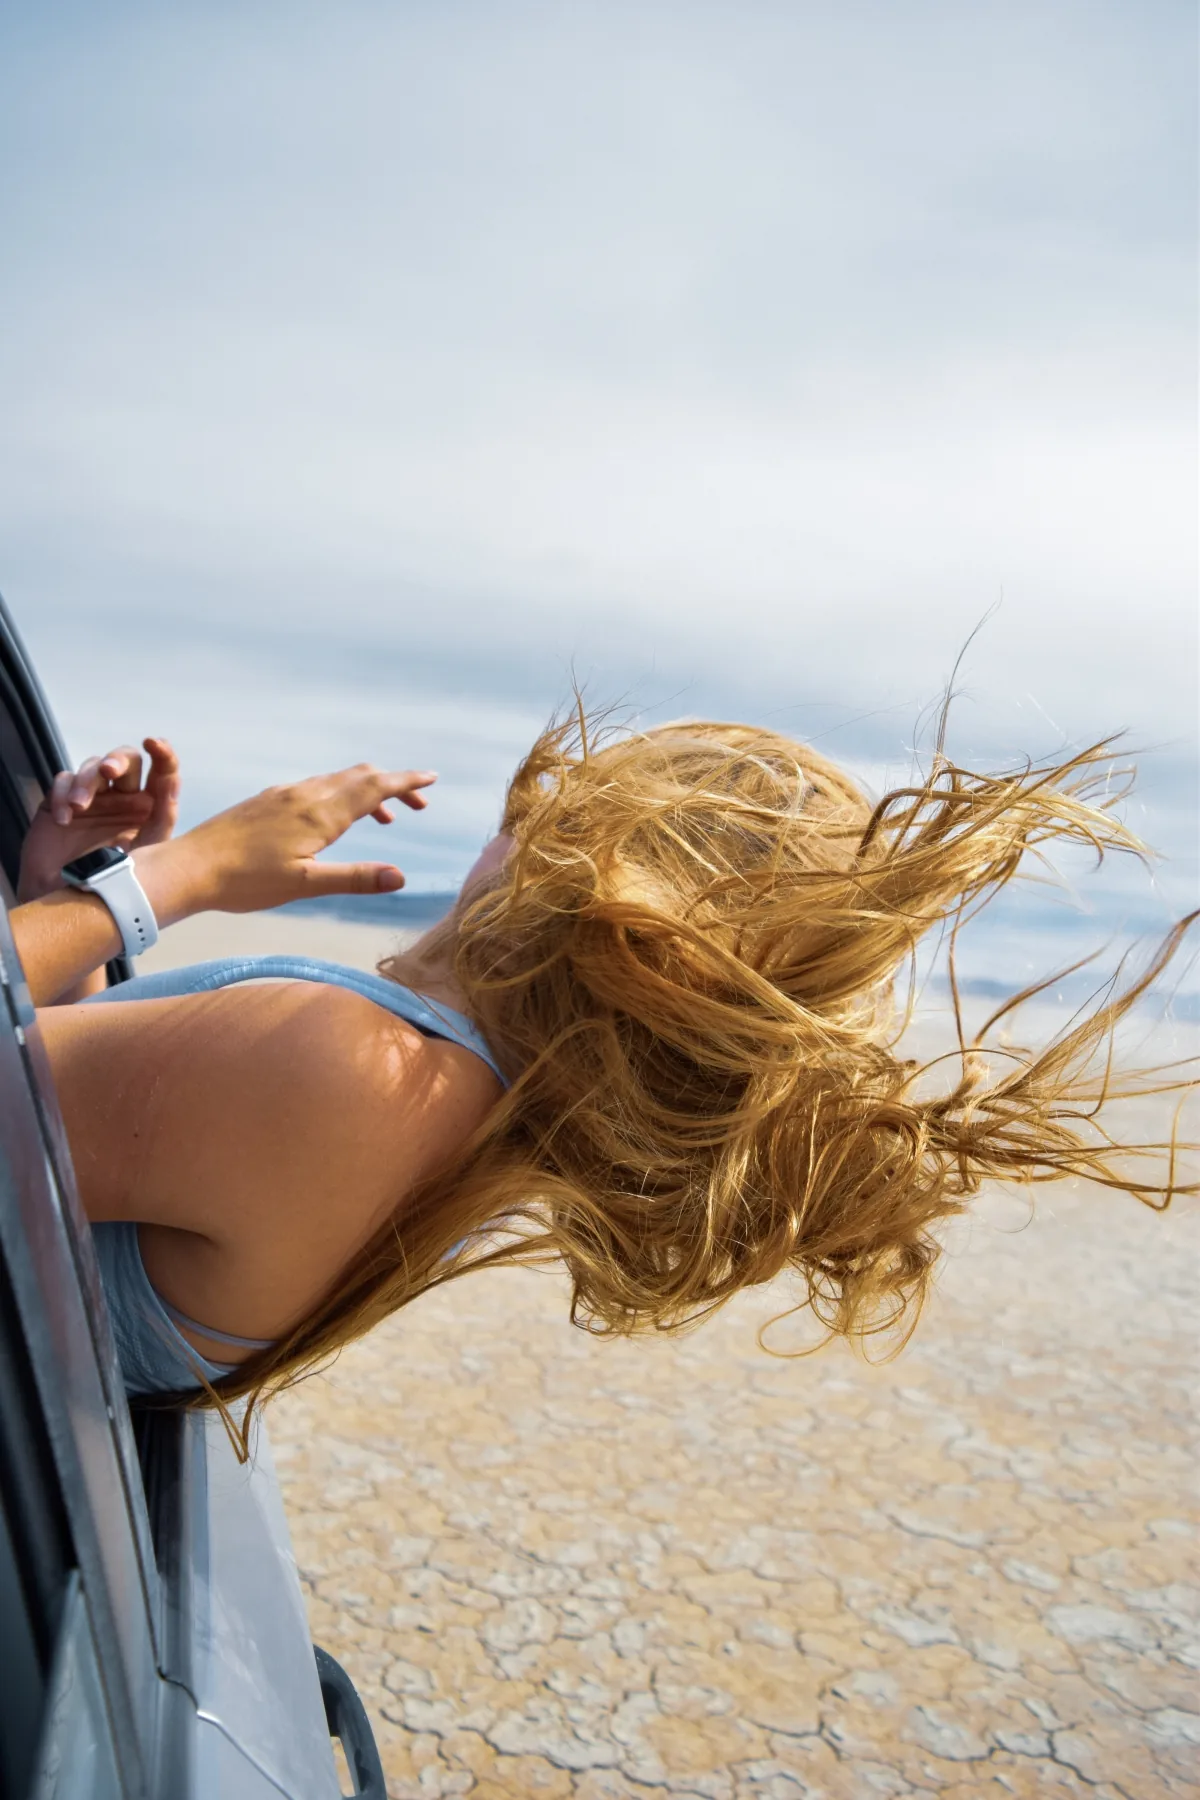
A road trip takes your hair through every climate in a single day: dry, blasting air conditioning in the car, humid air at a coastal stop, dry desert wind at a viewpoint, and rain at a petrol station. That is a recipe for frizz, and the answer is moisture and containment. Hair that is well moisturised frizzes less, so a leave-in conditioner or a drop of hair oil before you set off is the cheapest frizz insurance there is — and a braid or a bun contains whatever frizz does appear, instead of letting it halo around your face.
The AC is the sneaky one: hours of dry air blowing at your face dries the front pieces first, which is why the hair around your face always looks worst at the end of a long drive. Point the vents at your body, not your face, and keep the front pieces pinned back or braided in. If frizz does arrive, smooth a tiny drop of oil over the surface with your palms — never brush dry, frizzy hair, which only makes it bigger. Common mistake: loading on hairspray, which goes sticky in humidity. Quick verdict: oil beats spray on the road.
Quick Fixes With One Elastic (and Nothing Else)
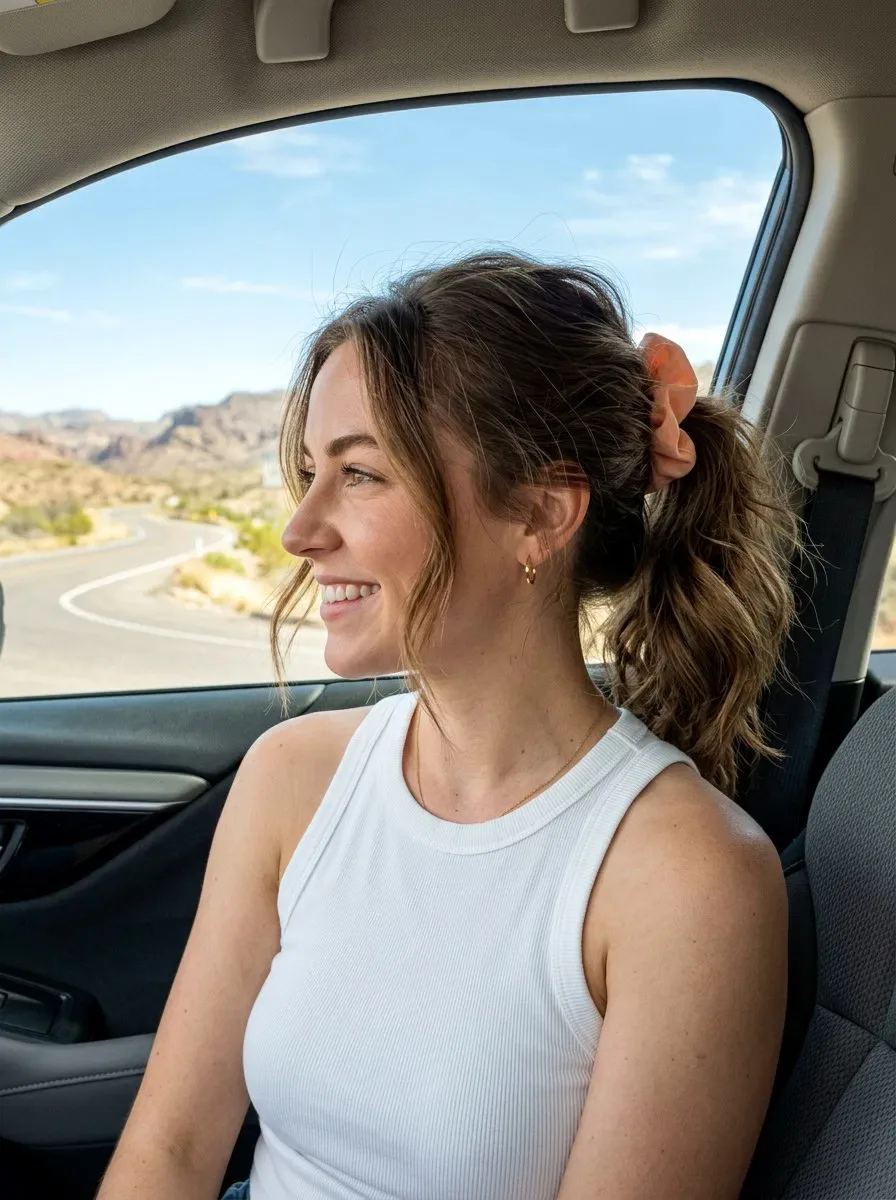
Sooner or later on every road trip, you will need to fix your hair with whatever is in your pocket — usually one elastic and nothing else. The good news is that one elastic is enough for most of the styles in this guide. A low ponytail is the obvious fix, but a low ponytail twisted into a bun and looped through the elastic a second time is a two-minute updo. A single braid needs only one elastic at the end. And a half-up style needs only one elastic to lift the top section out of your face.
Learn the loop-through bun: gather the hair low, pull it halfway through the elastic, let the loop sit like a bun, and tuck the ends around the base. It holds for hours, it needs no pins, and it works on almost any length past the shoulders. If the elastic is the only thing you have, avoid styles that need pins — a French twist will fall apart, but a braid will not. Cost and time: one elastic, thirty seconds. Quick verdict: one elastic, one braid, one bun — the road trip holy trinity.
1. The Low Messy Bun That Holds for Hours
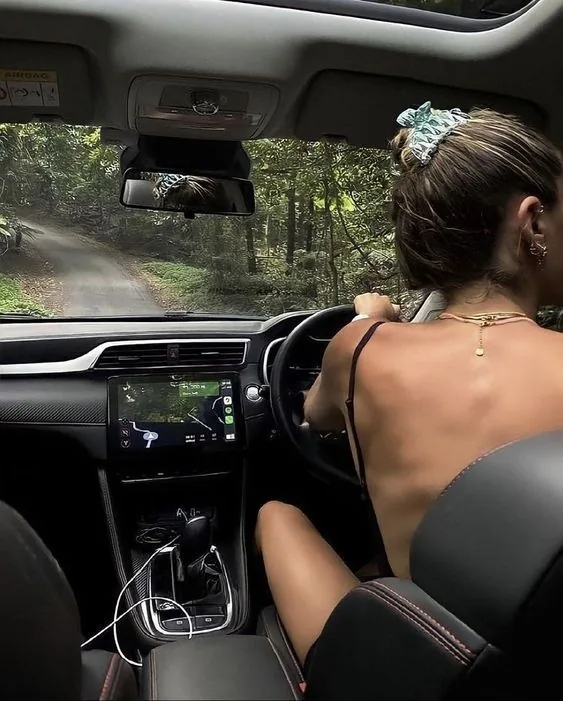
The low messy bun is the road trip classic, and it earns that place honestly. The hair is gathered low at the nape, twisted loosely and pinned, which keeps it off your neck, out of the wind, and comfortable against a car seat headrest for hours. The looseness is deliberate: it softens the face, it forgives a nap in the passenger seat, and when a few pieces fall loose at a rest stop, it only looks more relaxed.
Best for: long drives, car naps, and anyone who wants one style for the whole day. How to style it: add a little texture spray, gather the hair loosely at the nape, twist it into a bun, pin it in two or three places, and pull out a few soft pieces at the front. What to ask your stylist: nothing — this is a styling choice that works on almost any medium-to-long cut. Quick verdict: the one style every road trip needs.
2. The Classic Low Ponytail
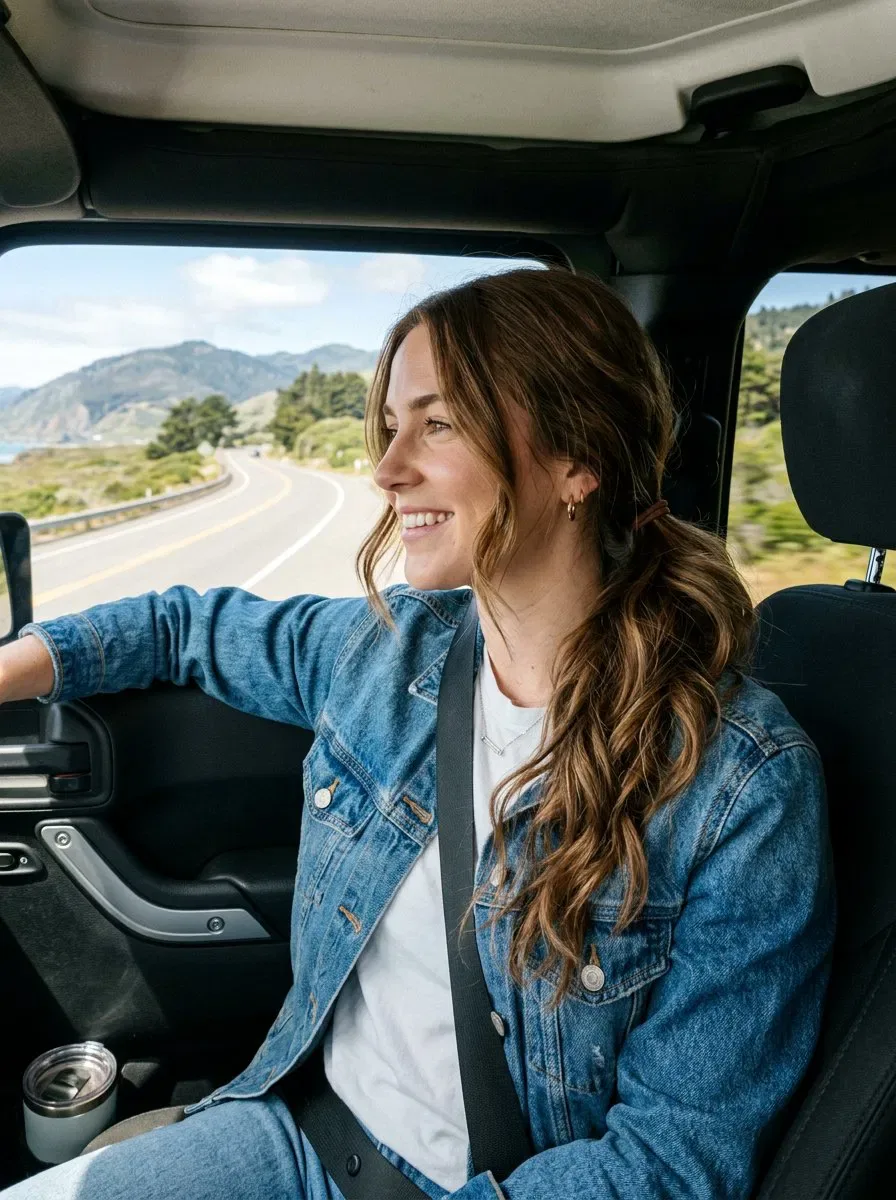
A low ponytail is the simplest road trip hairstyle there is, and sometimes the simplest is the right answer. Gathered at the nape, it keeps the hair contained and comfortable, it sits below a baseball cap and below a car headrest, and it takes about thirty seconds — which matters when you are the one driving and the rest stop is five minutes long. Wrap a strand of hair around the elastic and it goes from a gym ponytail to a road trip look.
How to style it: smooth the hair with a brush and a little serum, gather it low at the nape, secure it, and wrap a strand around the base, pinning it underneath. Pros and cons: it takes seconds, holds all day and suits every hair type — but a very tight, very sleek ponytail with nothing at the sides can look severe, so keep the front soft. Cost and time: free, and thirty seconds. Quick verdict: the fastest fix on the highway.
3. The Bubble Ponytail
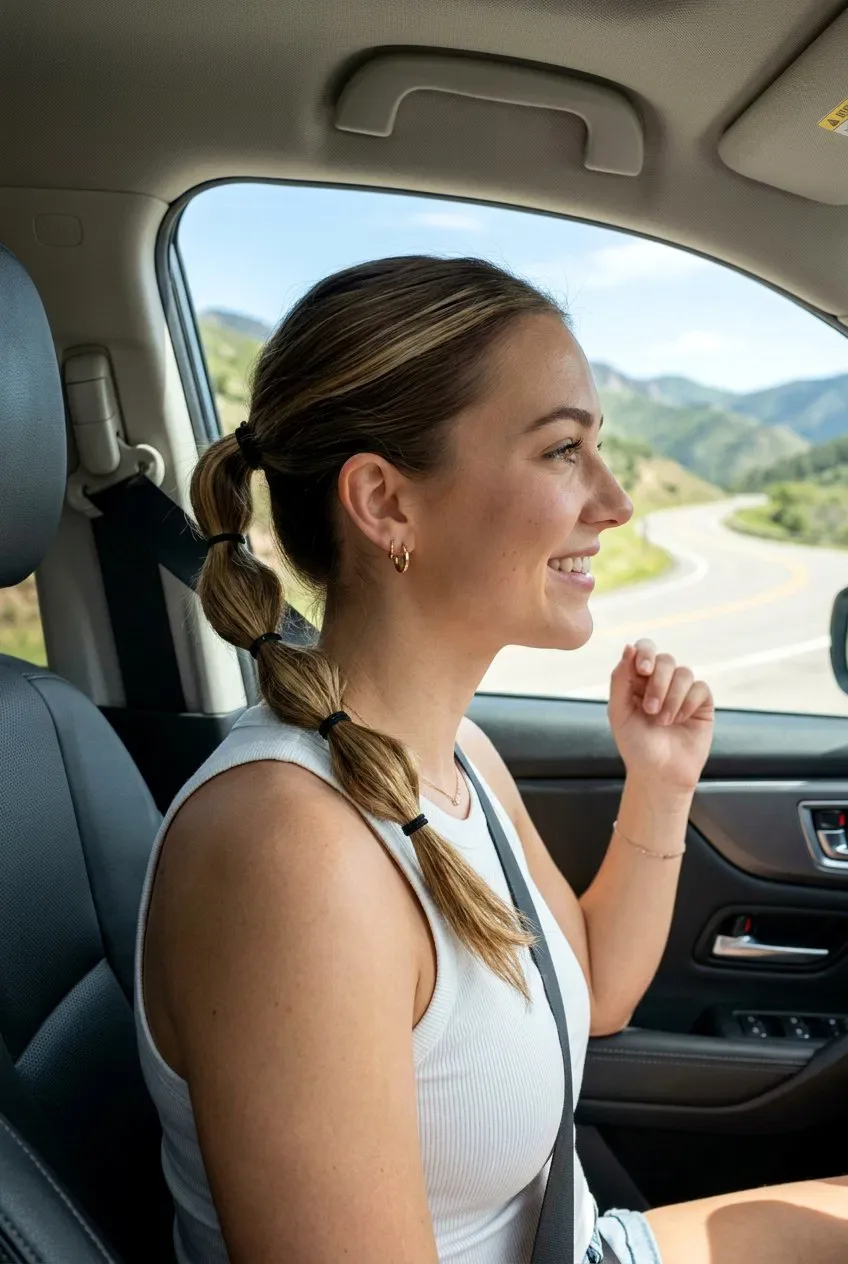
A bubble ponytail is a low ponytail with personality, and it is made for road trips. The ponytail is tied low, then tied again at intervals down its length, with each section gently pulled out to form soft bubbles. It holds its shape for hours, it keeps long hair neatly contained in the wind, and it photographs beautifully at viewpoints — which is half the point of a road trip.
Best for: long hair, and women who want a ponytail with a little more fun. How to style it: gather the hair low, secure it, then add small elastics every few inches down the ponytail, pulling each section out gently for fullness. Maintenance: almost none — if a bubble flattens, pull it out again. Who should avoid it: very short hair, which cannot bubble. Quick verdict: the ponytail, dressed up for the road.
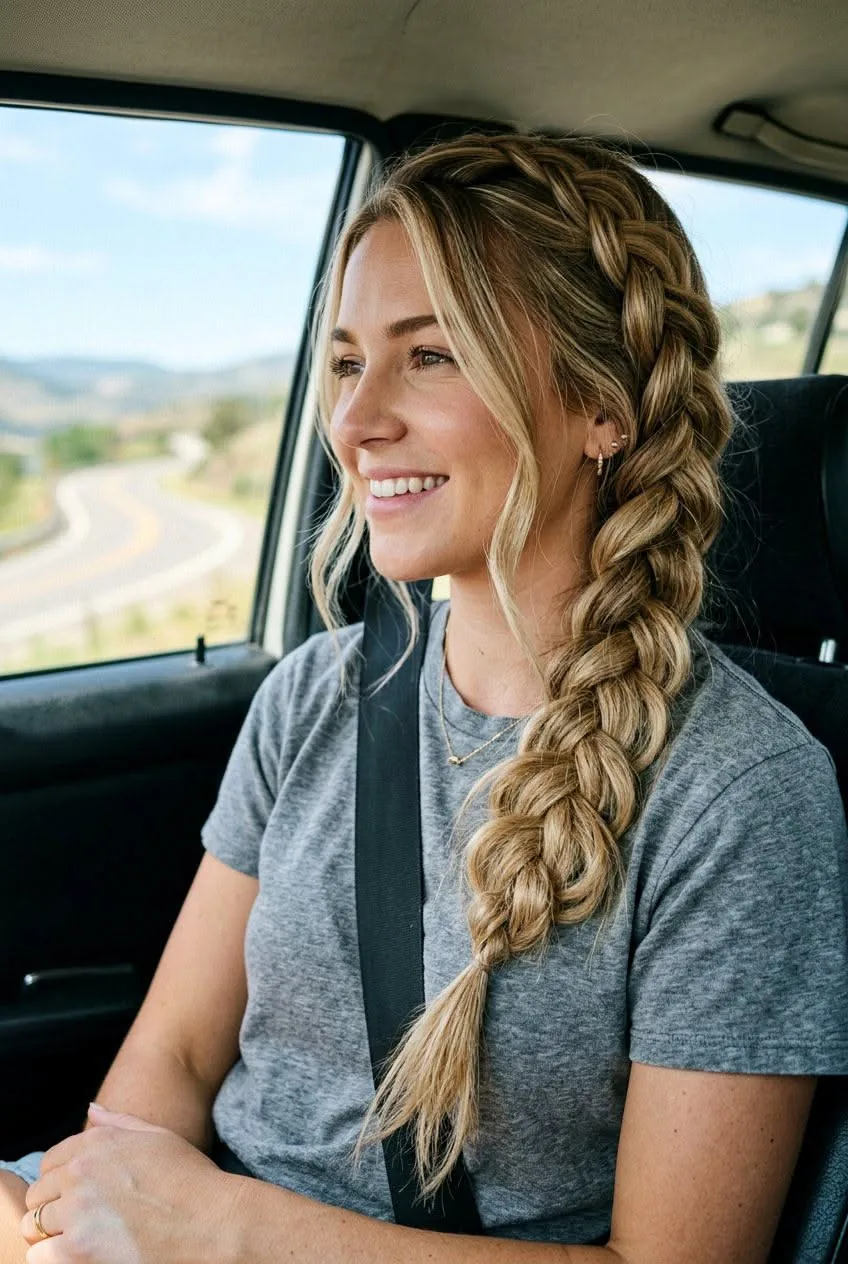
4. The Single Dutch Braid
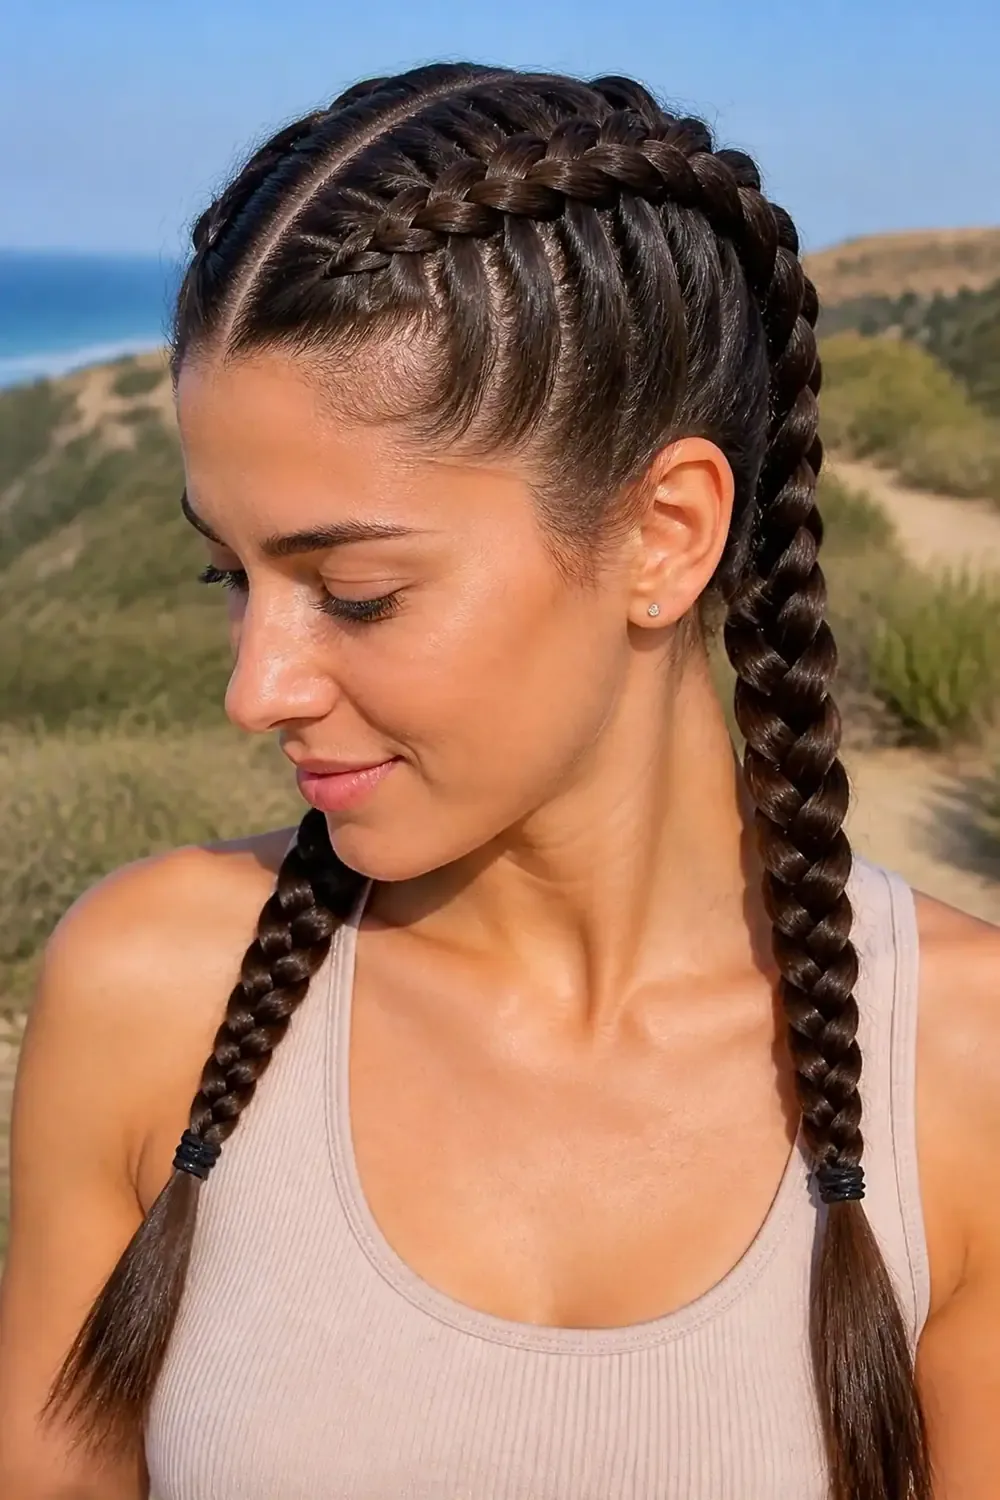
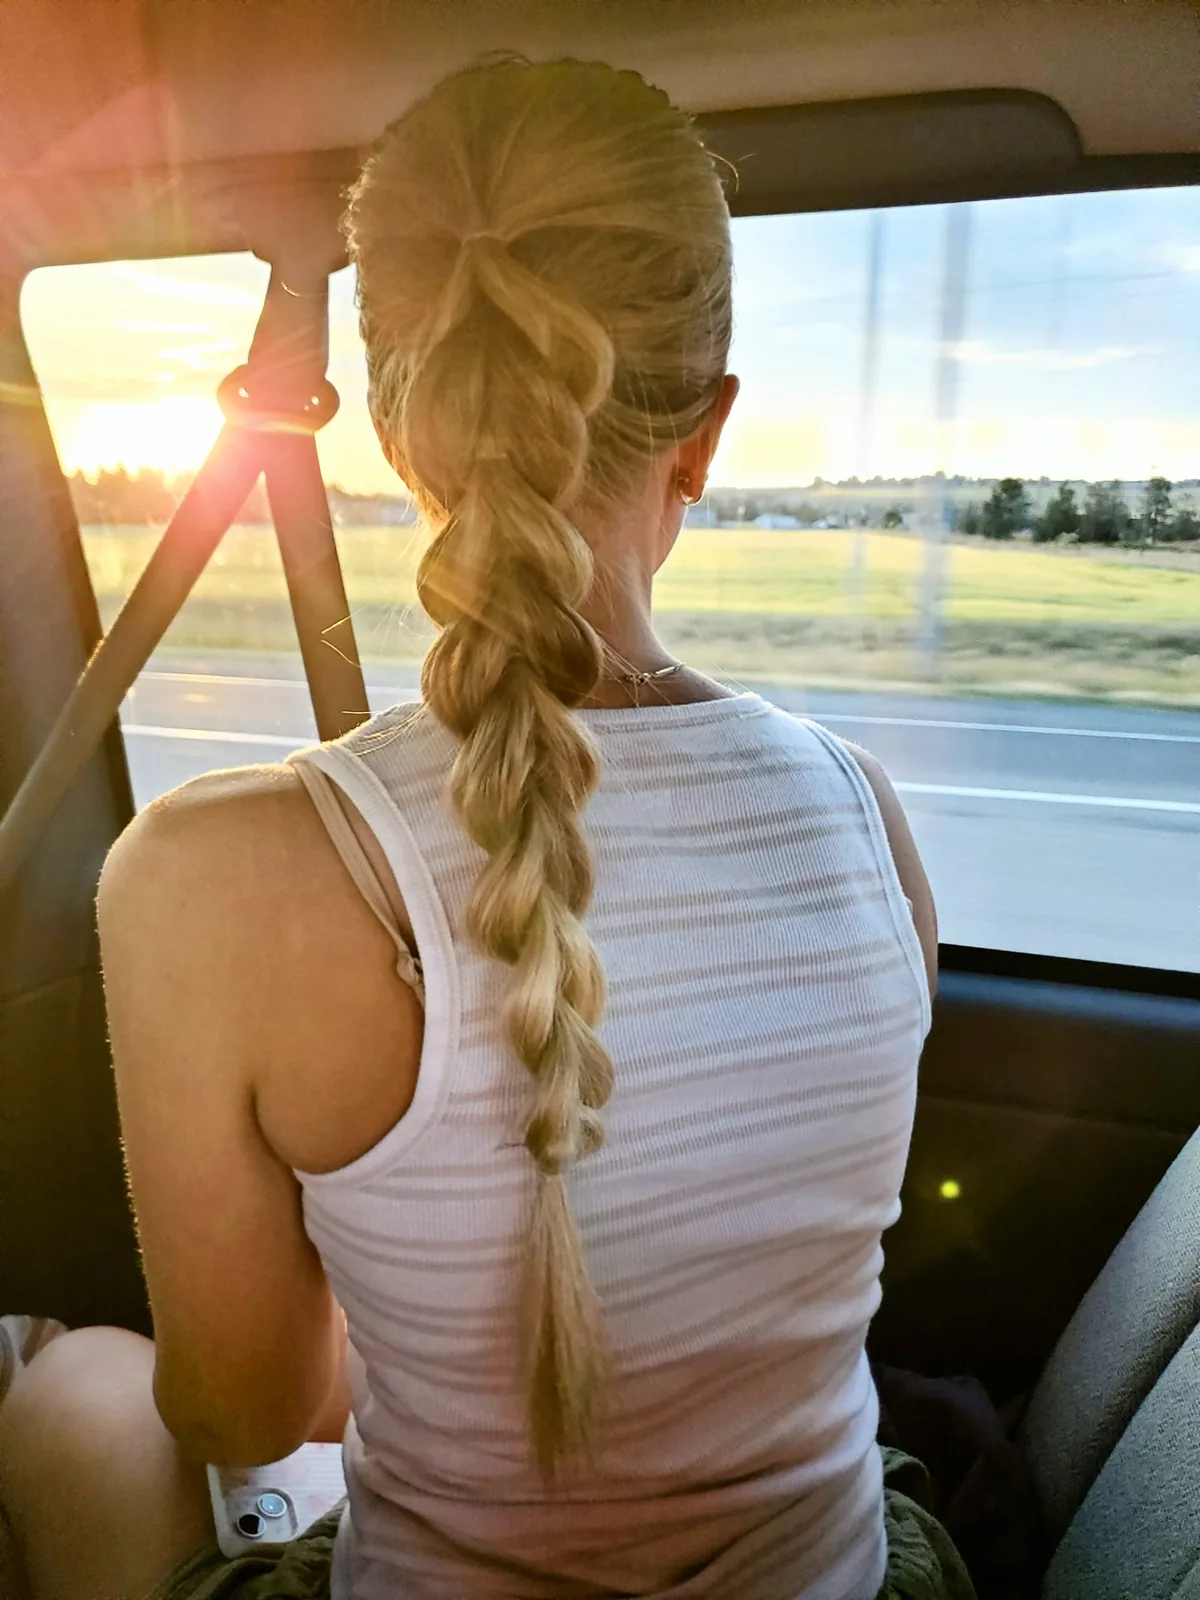
If you could only pick one road trip hairstyle, pick this one. A single Dutch braid — braided under, so it sits on top of the hair like a rope — is the most wind-proof style in this guide. Every strand is woven in, nothing flaps in the wind, nothing tangles, and it survives a car nap, a hike to a viewpoint, and a long drive without a single pin. It looks just as good at the last stop as it did at mile one.
How to style it: gather the hair at the crown, divide it in three, and braid under, adding hair from each side as you go down, then tie the end. Pros and cons: it holds all day and looks great, but it takes practice — do a trial run before the trip, not in a moving car. Common mistake: braiding too tightly, which gives you a headache by the second hour. Quick verdict: the most road-proof style here.
5. The Classic French Braid
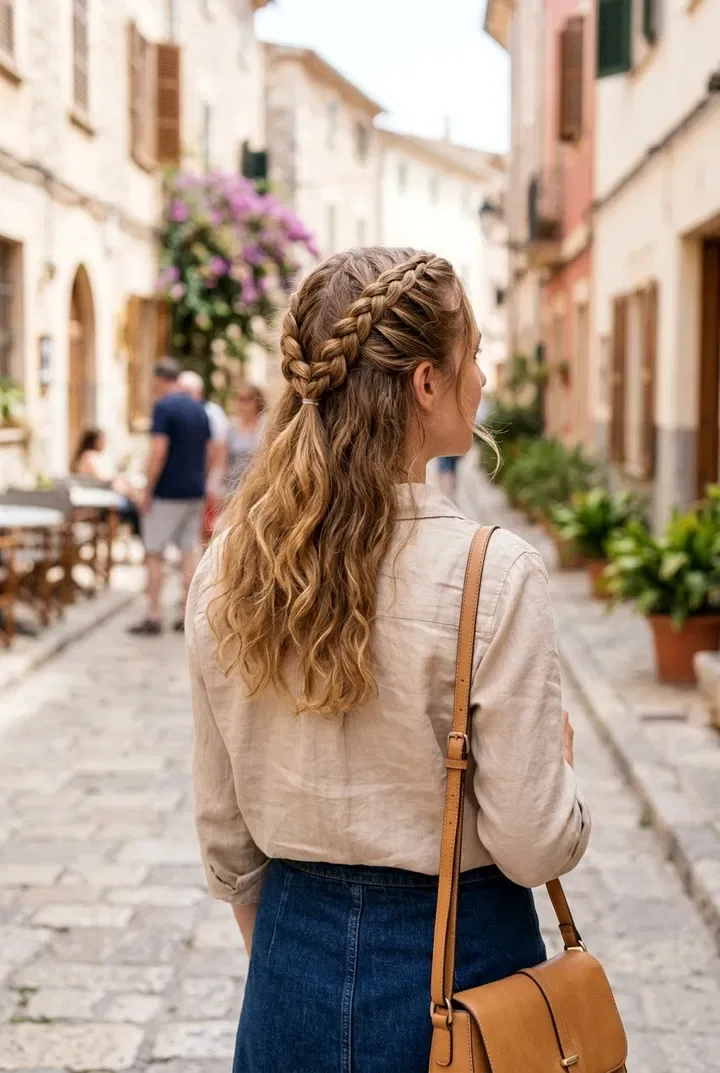
The French braid is the Dutch braid’s softer sister, and for a road trip it is just as useful. The hair is braided over, so the braid sits flatter against the head, which makes it more comfortable against a car seat and easier to wear under a hat. It keeps every strand contained, it holds through wind and naps, and it looks polished enough for a nice dinner at the end of the day.
Best for: medium to long hair, and drivers who lean back against a headrest. How to style it: start at the crown, divide the hair in three, and braid over, adding hair from each side as you go. Cost and time: about five minutes, one elastic. Who should avoid it: very short hair, which will not reach down the back. Quick verdict: flat, comfortable, and completely wind-proof.
6. Two French Braids — the Boxer Braids
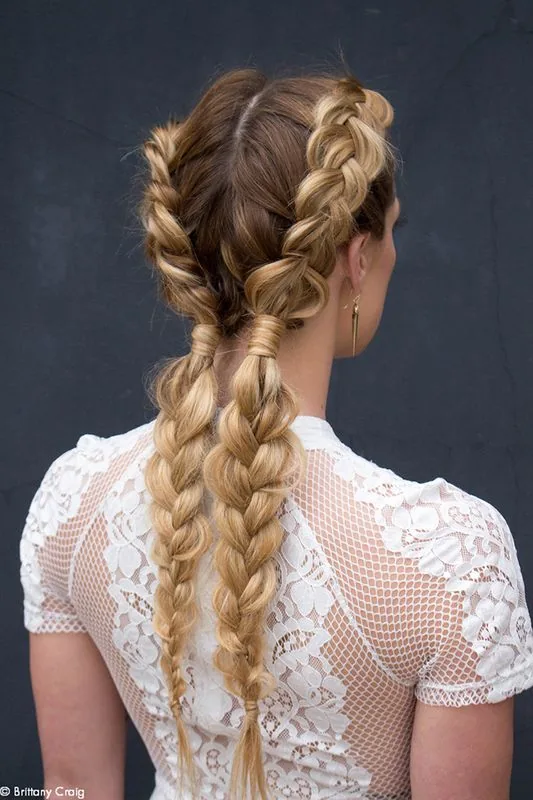
Two French braids are the road trip upgrade on the single braid: the hair is split down the middle and each side is braided, which spreads the weight, keeps the hair completely contained, and looks sporty and fun in road trip photos. They are the best choice if you plan to do anything active at a stop — a short hike, a swim, a walk around a town — because they will not move at all.
How to style it: part the hair down the middle, French-braid each side from the front hairline to the nape, and tie both ends. Pros and cons: they are the most secure style here and they look great, but they take ten minutes and a mirror — do them before you leave, not at a rest stop. Maintenance: none all day. Quick verdict: the most secure style on the highway.
7. The Fishtail Braid Over One Shoulder

A fishtail braid worn over one shoulder is the prettiest wind-proof style in this guide. The fishtail weave creates a delicate, lace-like pattern, and when it is pulled out gently it looks full and romantic rather than tight and severe. Worn over one shoulder, it stays visible in photos, it keeps the hair off your neck, and it never tangles in the wind because every strand is woven in.
How to style it: sweep the hair to one side, split it in two, and fishtail-braid by taking small pieces from the outside of each half to the inside of the other, then pull the braid out gently for fullness. Best for: long hair and scenic stops. Common mistake: rushing it — a fishtail takes about ten minutes, so start it before you leave. Quick verdict: the braid for women who like a little detail.
8. The Side Braid

A side braid is the easiest braid in this guide, and one of the most useful on the road. It brings the hair forward over one shoulder, where it is visible and pretty, it keeps it out of the way when you lean back in the car seat, and it holds its shape through a long drive without a single pin. A loose, pulled-out braid looks best — a tight, thin braid can look severe, while a soft, chunky one looks relaxed and adds real presence in photos.
Best for: long hair, and anyone who wants a braid they can do without a mirror. How to style it: sweep the hair to one side, braid loosely, and gently pull the edges out to make it fuller, then tie with a soft elastic. Pros and cons: it is fast, forgiving and comfortable, but it can slide forward when you lean back — tuck it behind the seatbelt. Quick verdict: the easiest braid on the road.
9. The Milkmaid Braid Crown

The milkmaid braid — two braids pinned up and across the crown — is a sweet, old-fashioned style that is also one of the most secure you can wear on a road trip. Once the braids are pinned, nothing moves: not in the wind at a viewpoint, not during a car nap, not through a dozen stops. It has a gentle, storybook quality that looks lovely in travel photos, and it keeps every strand off your face and neck in the heat.
How to style it: part the hair in the middle, braid each side, bring the braids up and across the crown, and pin the ends underneath each other. Best for: long hair and hot days. Common mistake: braiding too tightly, which gives you a headache on a long drive — keep the braids loose. Cost and time: ten minutes and four pins. Quick verdict: pinned, pretty, done — all day.
10. The Low Chignon
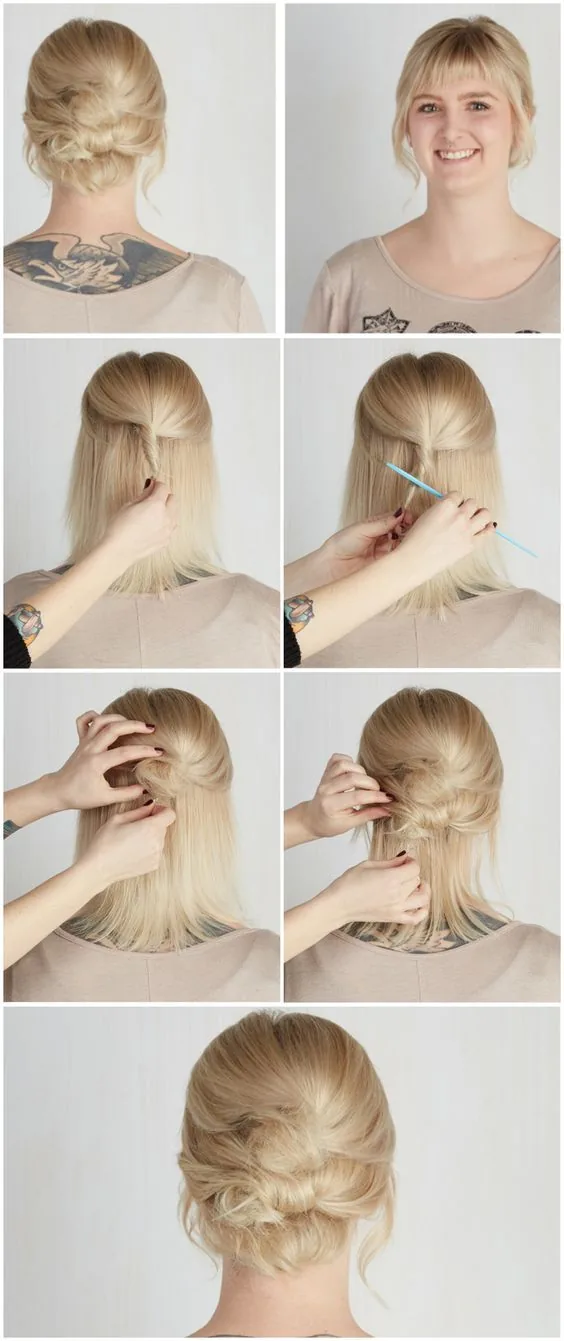
The low chignon is the most elegant road trip hairstyle, and it is far more practical than it looks. The hair is gathered low at the nape, twisted into a soft roll and pinned, which creates a smooth, graceful shape that sits below a hat, below a headrest, and out of the wind. It looks polished at a nice restaurant at the end of the day, and it holds for hours without a mirror check.
Best for: a nicer stop, a dinner out, and women who want to look polished all day. How to style it: smooth the hair back, gather it low, twist it into a roll and pin it in three places, then mist with a flexible-hold spray. Pros and cons: it is elegant and holds beautifully, but it needs pins and a mirror — do it before you leave, not in a moving car. Quick verdict: the road trip updo that still looks like evening.
11. The Twisted Low Updo
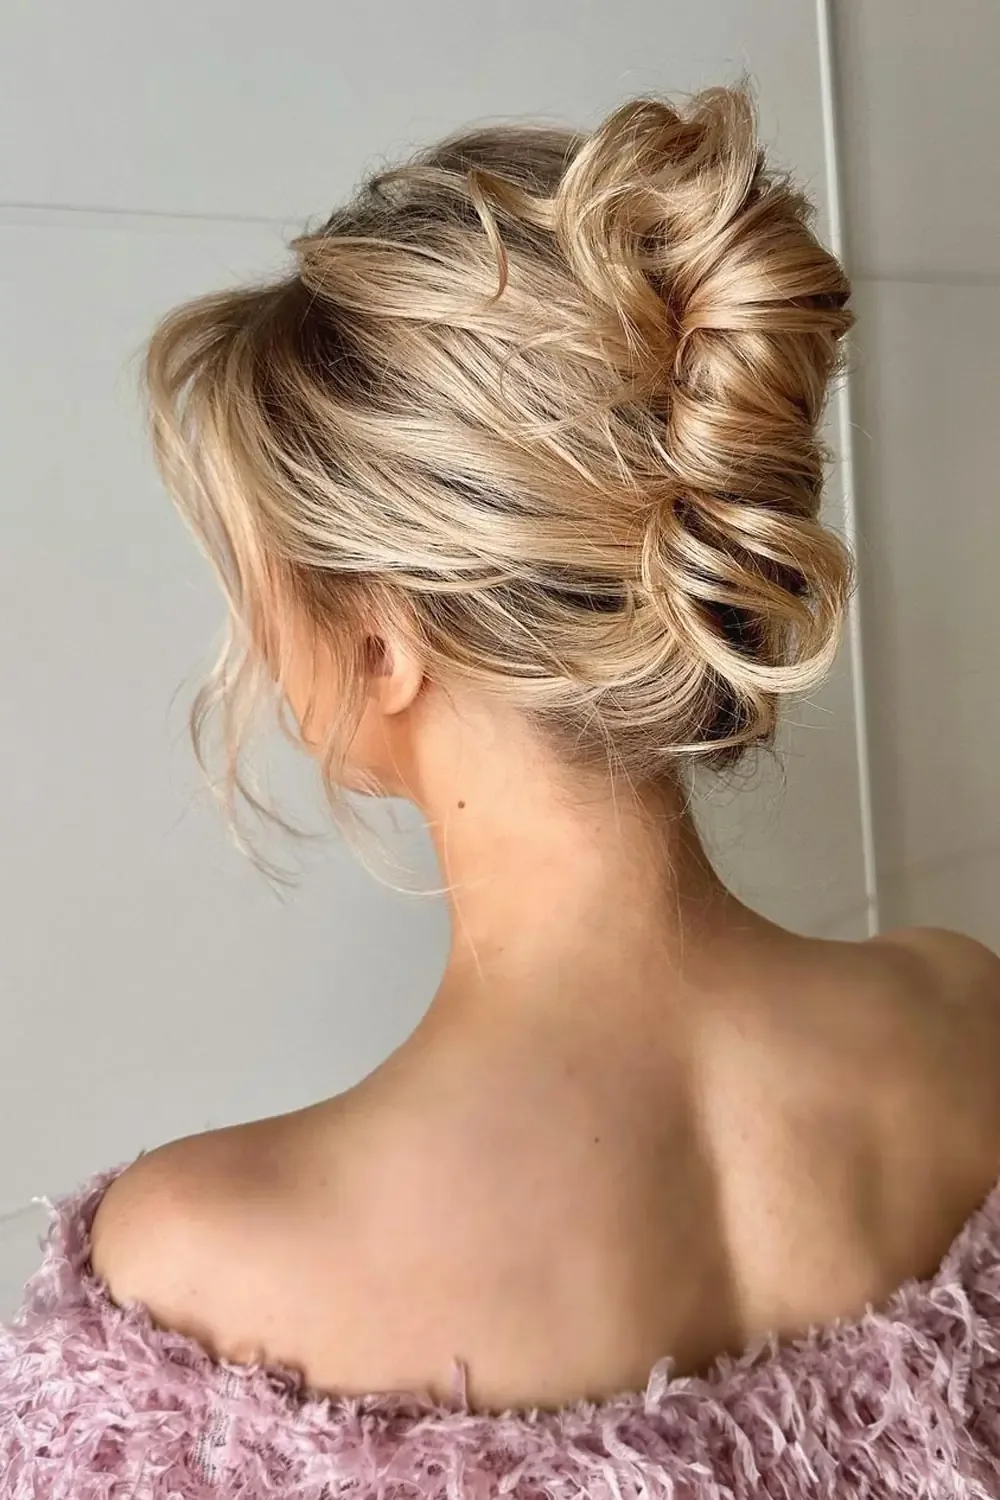
A twisted low updo is the middle ground between a chignon and a braid: the hair is divided into two or three sections, each one twisted, and the twists are pinned together low at the nape. The result is a soft, textured shape that looks far more complicated than it is, and it holds for hours because every twist is pinned separately. It is a beautiful choice for the last stop of the day, when you want to look like you made an effort.
How to style it: divide the hair into three low sections, twist each one toward the centre, and pin the twists together at the nape, tucking the ends underneath. Best for: medium to long hair. Maintenance: none on the day. Who should avoid it: anyone who hates pins — this one needs at least four. Quick verdict: the updo that looks like a salon visit but is really just three twists.
12. The Half-Up Top Knot
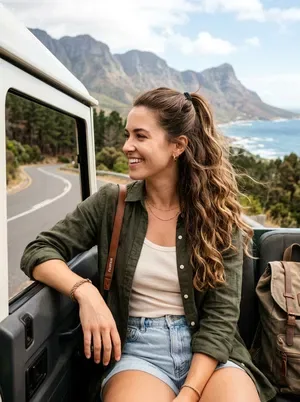
A half-up top knot is the road trip compromise: the top half is lifted into a small knot, which keeps the hair out of your face while you drive, while the bottom half falls loose for softness. It takes one minute, it needs one elastic, and it can be redone at every rest stop without a mirror. It is the style to reach for when a full updo feels like too much and loose hair feels like too little.
Best for: medium to long hair, and drivers who want the hair out of their eyes. How to style it: gather the top section from temple to temple, twist it into a small knot and secure it with an elastic. Common mistake: making the knot too big, which pulls at the hairline — keep it small and loose. Cost and time: one minute, one elastic. Quick verdict: the one-minute fix that actually holds.
13. Half-Up Half-Down With Soft Waves
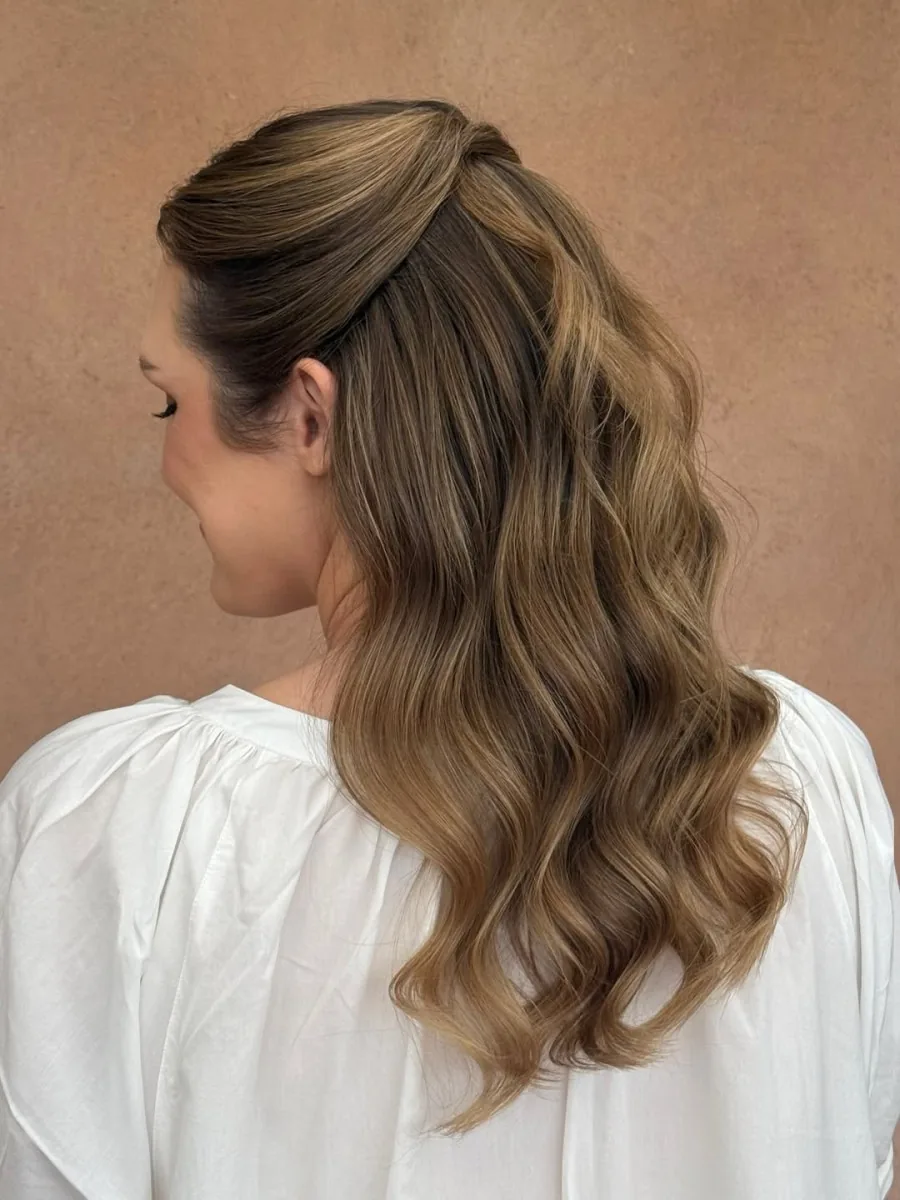
Half-up half-down is the best of both worlds for a road trip: the top half is lifted and pinned, which shows off your face and keeps the hair out of your eyes while you drive, while the bottom half falls in soft waves that add gentle movement in photos. The key is to keep the lifted section soft and low — a gentle half-up at the crown, not a tight high pull — so the style looks relaxed rather than stretched.
Best for: medium to long hair, and scenic drives where you want photos. How to style it: gather the top section from temple to temple, twist it once and secure it with crossed bobby pins or a small clip. Pros and cons: it is pretty and practical, but the loose lengths will tangle if the windows are down — braid them loosely or pin them up for the windy stretches. Quick verdict: five minutes to a style that looks like you tried much harder.
14. The Claw Clip Twist
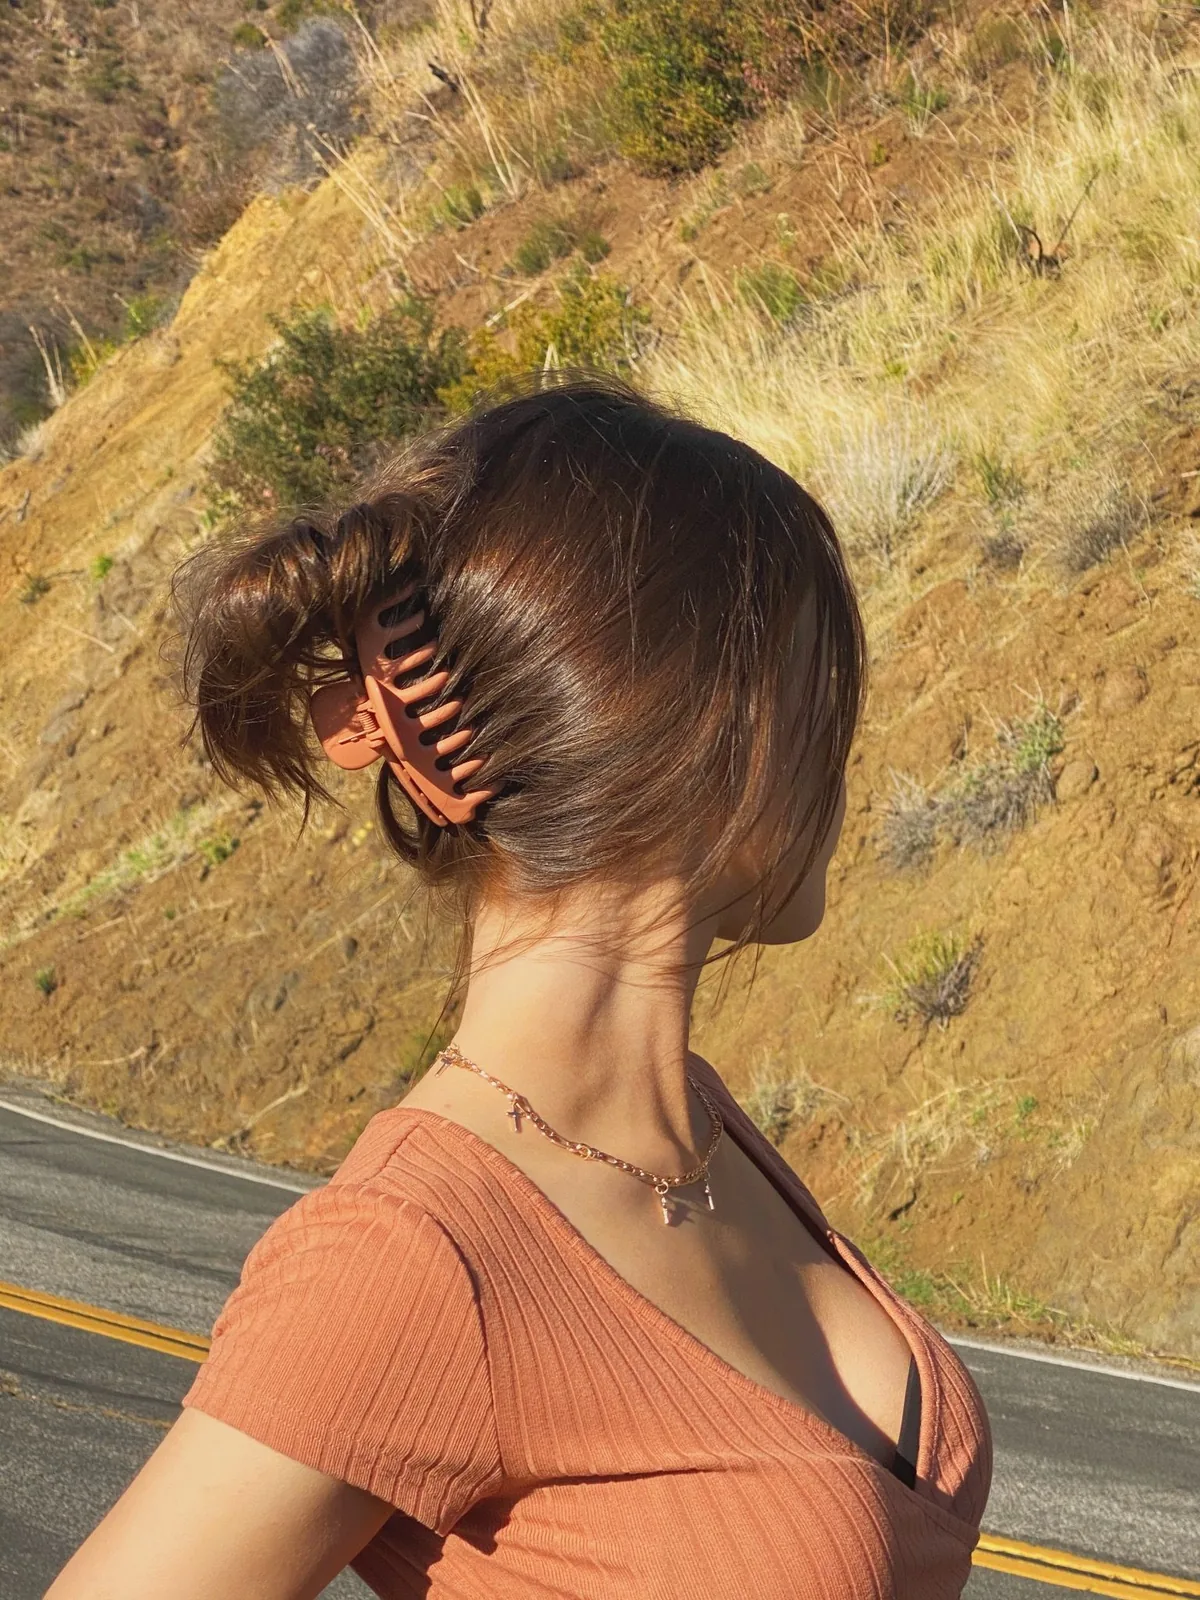
The claw clip twist is the road trip hero. Twist the hair up, clip it, done — three seconds, no pins, no elastic, and it can be redone at every rest stop without a mirror. It keeps the hair off your neck in the heat, it survives a car nap better than a ponytail, and it looks effortlessly chic in photos. Every road trip hair kit should have a claw clip in it, and this is the style that earns its place.
How to style it: gather the hair at the back, twist it up against the head, fold the ends over, and clip it in place. Best for: medium to long hair, and anyone who hates fiddling with pins. Common mistake: a clip that is too small for thick hair — it will slip within an hour, so size the clip to your hair. Cost and time: three seconds and one clip. Quick verdict: the fastest real hairstyle on this list.
15. The Claw Clip Low Bun
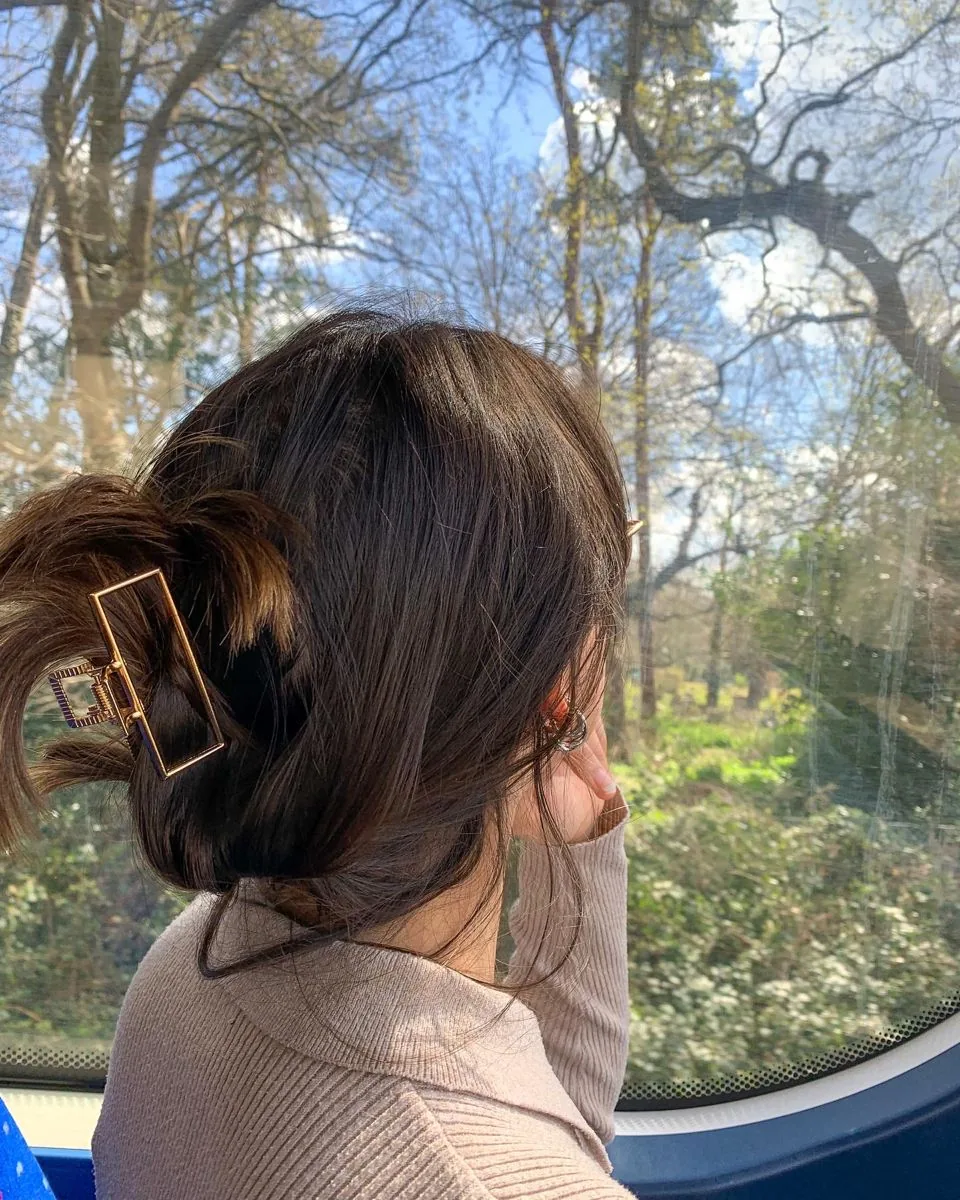
A claw clip low bun is the calmer sister of the claw clip twist: instead of twisting the hair up the back of the head, you gather it low at the nape, twist it once, and clip it there. It sits below a hat, below a headrest, and out of the wind, and it is the most comfortable style in this guide for a long drive. It also survives a nap, because there is nothing high on the head to press into the seat.
Best for: long drives, car naps, and thick hair that slips out of elastics. How to style it: gather the hair low, twist it into a loose bun, and clip it with a large claw clip. Pros and cons: it is comfortable, fast and secure, but the clip can press against a headrest if it is very bulky — choose a flat clip for driving days. Maintenance: none. Quick verdict: the comfiest clip style here.
16. The Messy Top Knot
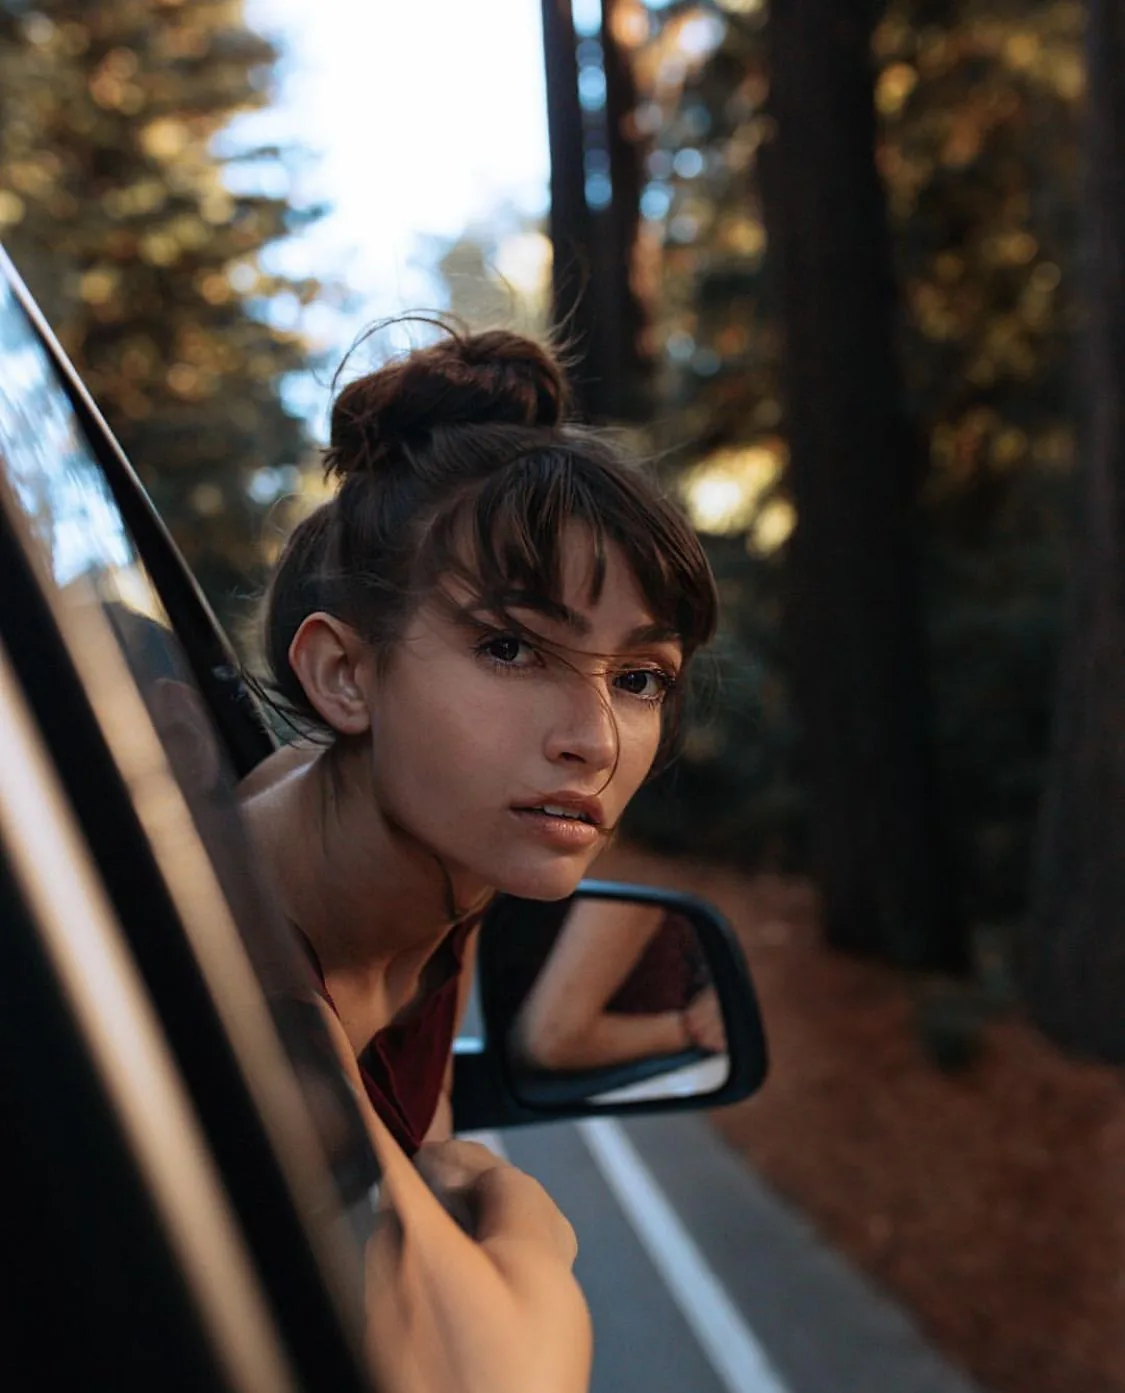
A messy top knot is the road trip style for the days when you simply do not care — in the best way. The hair is piled high, twisted loosely and secured, which keeps it completely off your neck in the heat and out of the way while you drive. It is not the style for a hat, and it is not the style for a nap, but for a hot day with the windows down and a playlist on, it is perfect.
How to style it: gather the hair high, twist it loosely, wrap it into a knot and secure it with an elastic and one pin. Cost and time: one minute. Who should avoid it: anyone wearing a hat that day, and anyone planning to nap — a top knot and a headrest do not mix. Common mistake: making it too neat, which turns messy into formal. Quick verdict: hot day, high knot, done.
17. The Low Side Bun
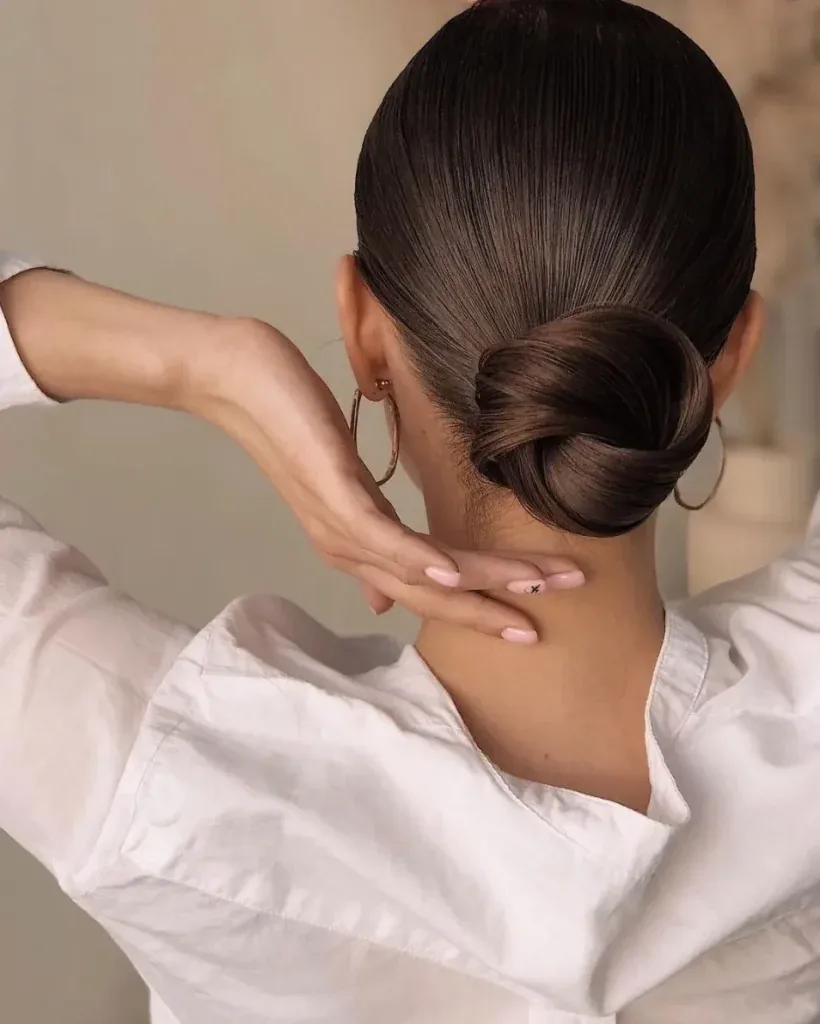
A low side bun — a bun that sits just behind one ear rather than in the centre — is a gentle, romantic variation on the classic low bun, and it looks lovely in road trip photos. The asymmetry adds softness and a little interest, and it is a beautiful choice if you usually part your hair on one side. It sits comfortably under a hat, it holds for hours, and it looks just as good from the passenger seat as it does from the front.
Best for: medium to long hair, and photo stops. How to style it: sweep the hair to one side, gather it low behind the ear, twist it into a bun and pin it in three places, leaving two soft tendrils at the front. Pros and cons: it is elegant and easy, but it can feel uneven if you are not used to a side style — do a trial run before the trip. Maintenance: none on the day. Quick verdict: the low bun, with a romantic twist.
18. The Braided Low Bun
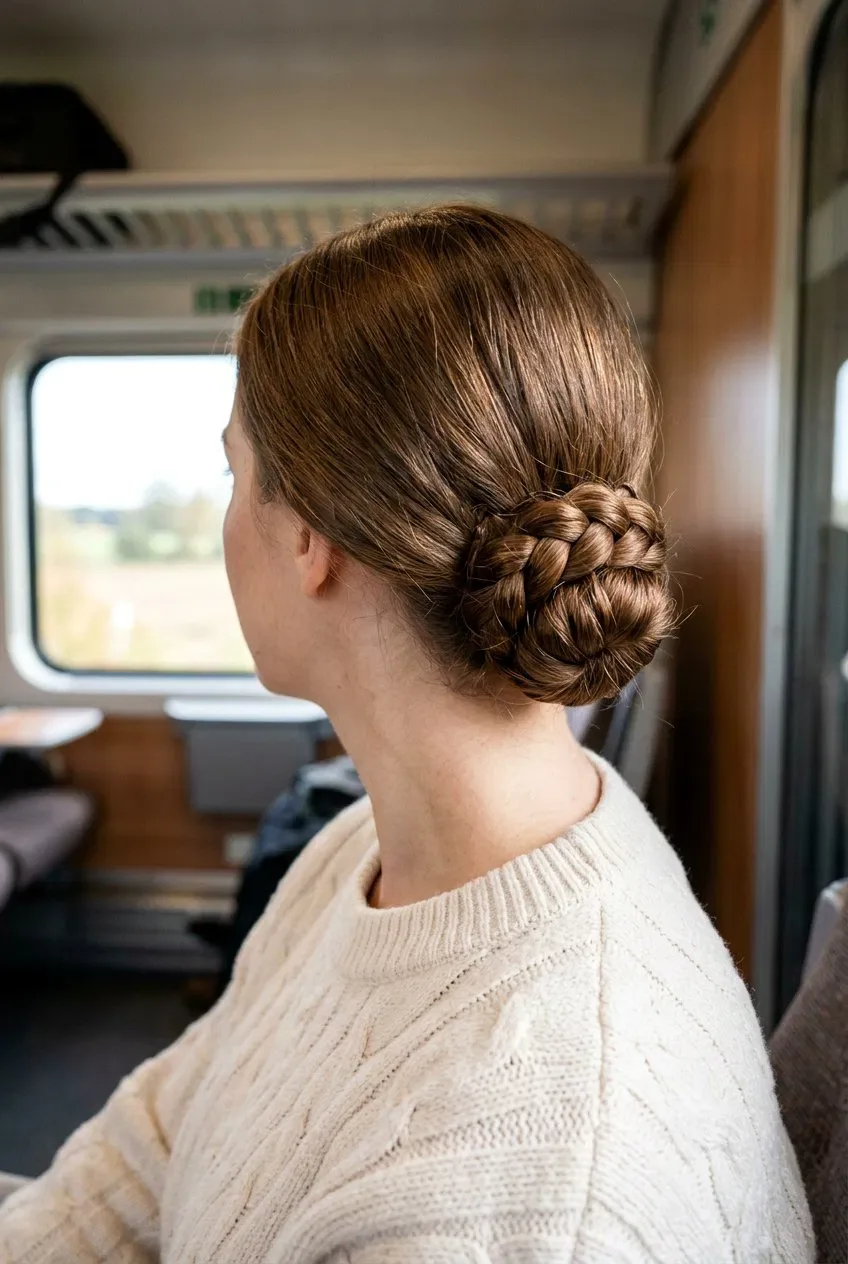
A braided low bun combines the two most reliable road trip styles — a braid and a bun — into one. The hair is braided first, then the braid is coiled into a low bun and pinned, which gives the bun beautiful texture and makes it far more secure than an ordinary bun, because the braid itself holds the shape. It is a lovely choice for a long driving day followed by a nice dinner, because it looks special without needing any attention in between.
How to style it: braid the hair low, coil the braid into a bun at the nape, and pin it in three places, tucking the end underneath. Best for: medium to long hair. Common mistake: braiding too tightly, which makes the bun stiff rather than soft. Cost and time: about ten minutes. Quick verdict: two reliable styles, better together.
19. The Scarf-Wrapped Low Bun
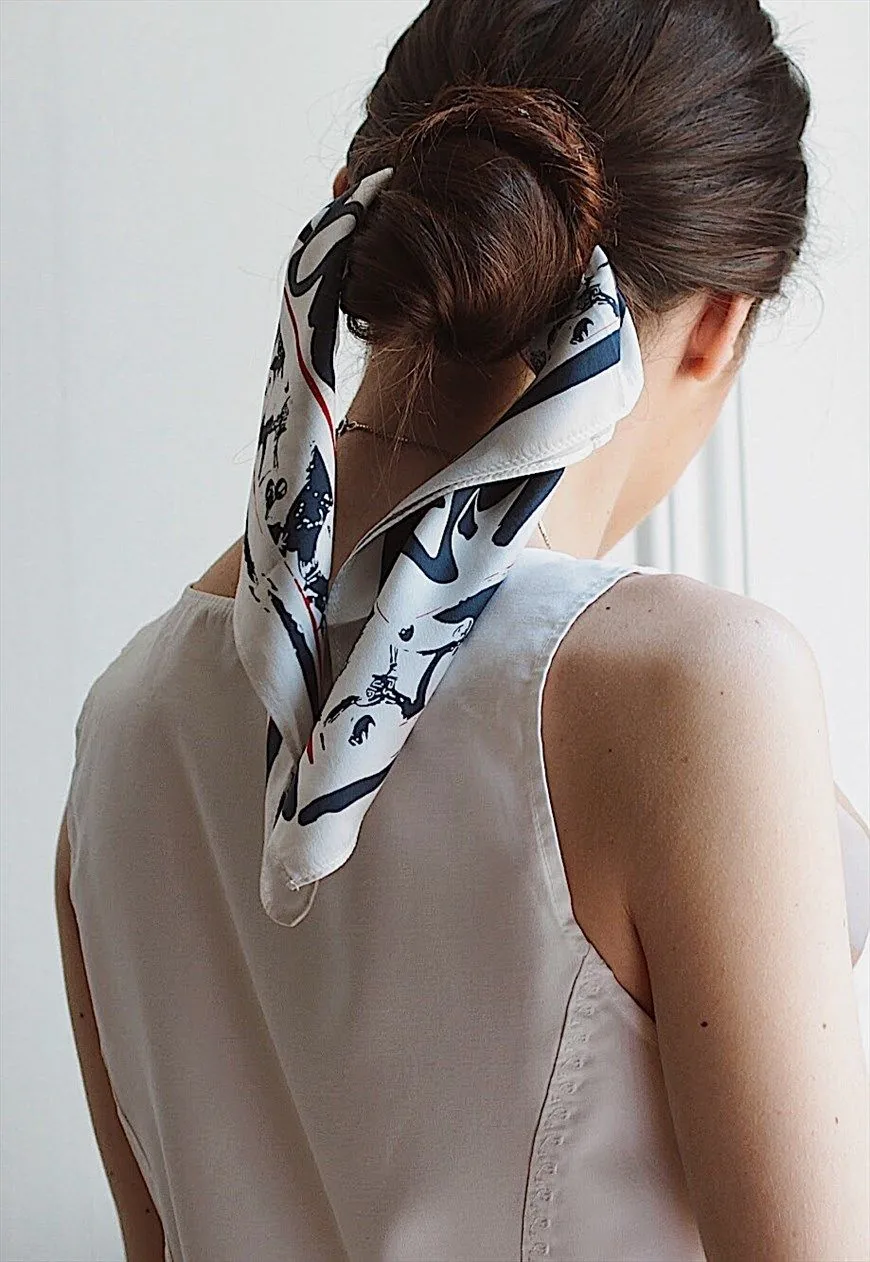
A silk scarf wrapped around a low bun is one of the most elegant road trip hairstyles, and one of the most practical. The scarf adds colour and polish, it keeps flyaways in place, it stops the wind completely, and it turns the simplest bun into a deliberate, dressed-up style. Choose a scarf that picks up a colour in your outfit, wrap it around the base of the bun, and tie it in a small bow or tuck the ends underneath.
Best for: windy days, viewpoint photos, and anyone who wants an easy way to dress up a simple bun. How to style it: make a low bun first, then fold a silk scarf into a band, wrap it around the base of the bun and tie it neatly. Pros and cons: it is quick, pretty and wind-proof, but the scarf needs to be silk or satin — cotton slips. Who should avoid it: nobody, as long as the scarf is secured with a pin. Quick verdict: the fastest way to make a simple bun look special.
20. The Bandana Ponytail

A bandana ponytail is the road trip look: a low ponytail with a bandana tied around the base or folded as a headband. It is casual, it is practical, and it is the style that says you are on an adventure. The bandana keeps flyaways down, absorbs sweat on a hot day, and covers a parting that has gone frizzy in the humidity — and it takes about ten seconds to tie.
How to style it: make a low ponytail, then fold a bandana into a band and tie it around the base, or wear it as a headband with the knot at the top. Best for: hot days, casual stops, and second-day hair. Common mistake: tying it too tight, which gives you a headache by the second hour. Cost and time: one bandana, ten seconds. Quick verdict: the most road-trip style on this list.
21. The Baseball Cap Ponytail
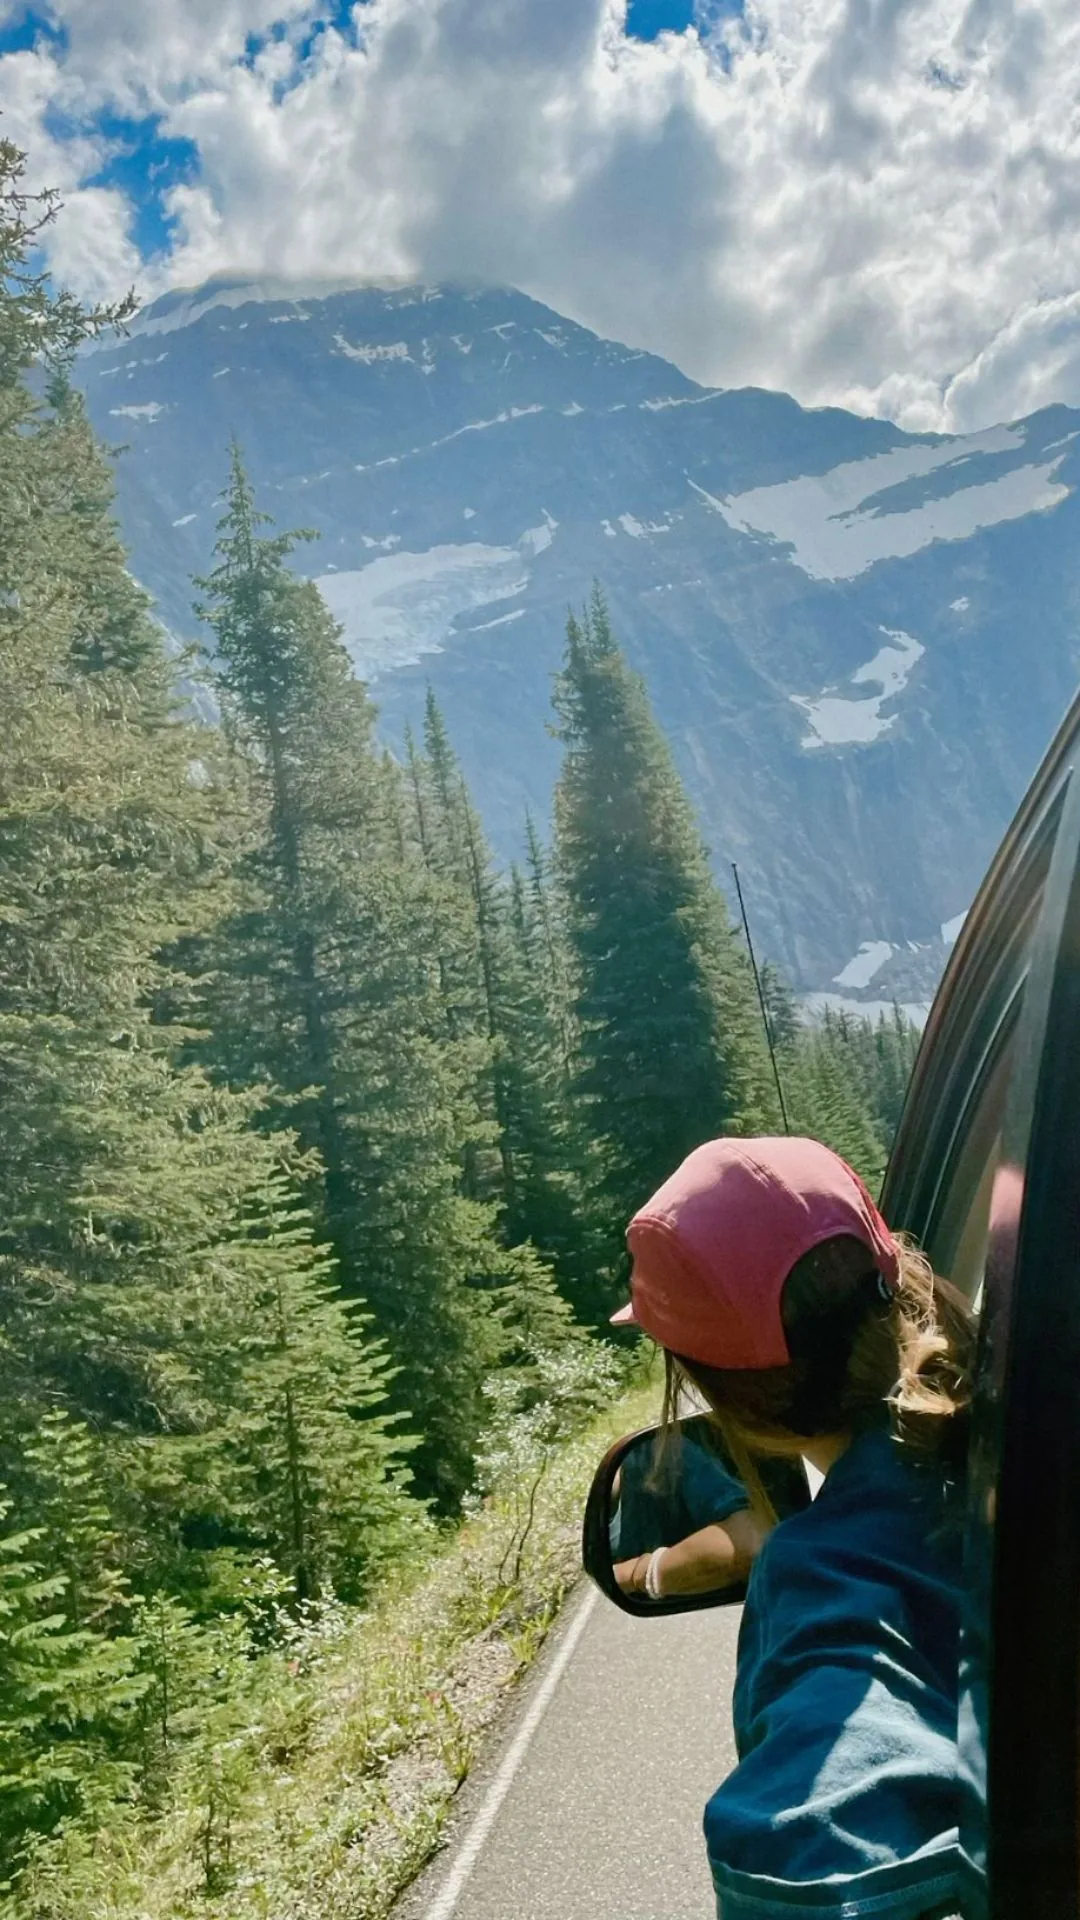
A low ponytail pulled through the back of a baseball cap is the road trip uniform, and it works because it solves two problems at once: sun protection and hair control. The cap shades your face and your parting, the low ponytail keeps the hair contained, and together they survive wind, heat and a long day of stops without any attention at all. It is the style for the days when the sun is the main problem.
How to style it: put the cap on first, then pull a low ponytail through the opening at the back, and smooth the front pieces under the cap. Pros and cons: it is instant, practical and sun-safe, but a very high ponytail will not fit through the cap opening — keep it low. Maintenance: none. Quick verdict: cap on, ponytail through, go.
22. The Headband Half-Up Style

A headband with a half-up style is a classic road trip look that never really goes out of fashion. The headband keeps the hair off the face, the half-up section adds a little lift at the crown, and the rest of the hair falls softly — it is pretty, comfortable, and it takes about two minutes. Choose a wide fabric headband for a long drive, because it stays put better than a thin one and it doubles as a sweatband on a hot day.
Best for: medium to long hair, and warm driving days. How to style it: gather the top section from temple to temple, secure it with a small clip, then place the headband just behind the hairline. Common mistake: a headband that is too tight, which gives you a headache by the second hour — it should sit comfortably, not grip. Cost and time: two minutes and one headband. Quick verdict: the fastest pretty style for a hot drive.
23. The Low Bubble Braid
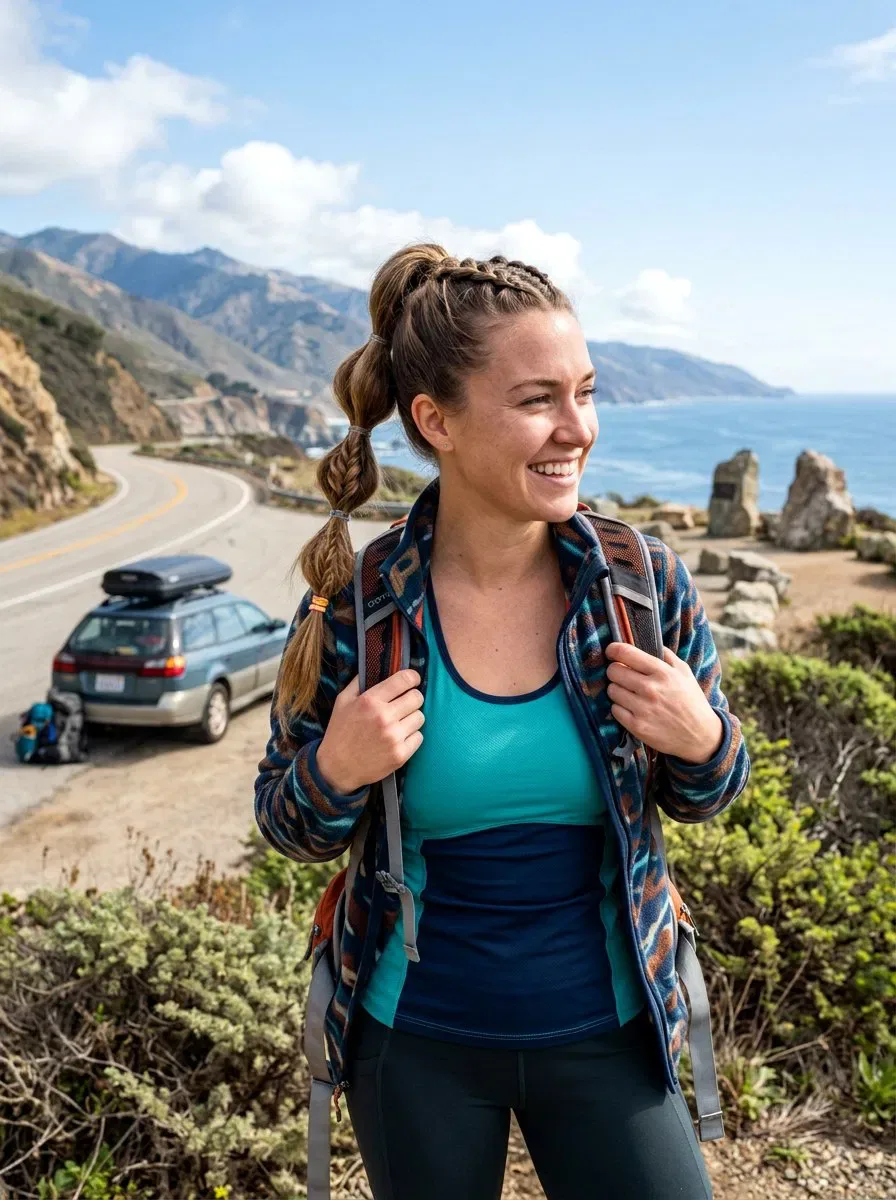
A low bubble braid is a braid made of bubbles: the hair is gathered into a low ponytail, then tied at intervals and pulled out into soft, round sections. It looks like a braid from a distance, but it is far easier to do — no braiding skill needed, just elastics and a gentle pull. It holds its shape in the wind, it keeps long hair contained, and it looks fun in photos.
How to style it: gather the hair low, secure it, then add small elastics every few inches down the ponytail, pulling each section out gently for fullness. Best for: long hair and anyone who cannot braid. Pros and cons: it is secure, pretty and easy, but it needs a few elastics — keep spares in your hair kit. Who should avoid it: very short hair, which cannot bubble. Quick verdict: the braid for people who cannot braid.
24. The Rope Twist Ponytail
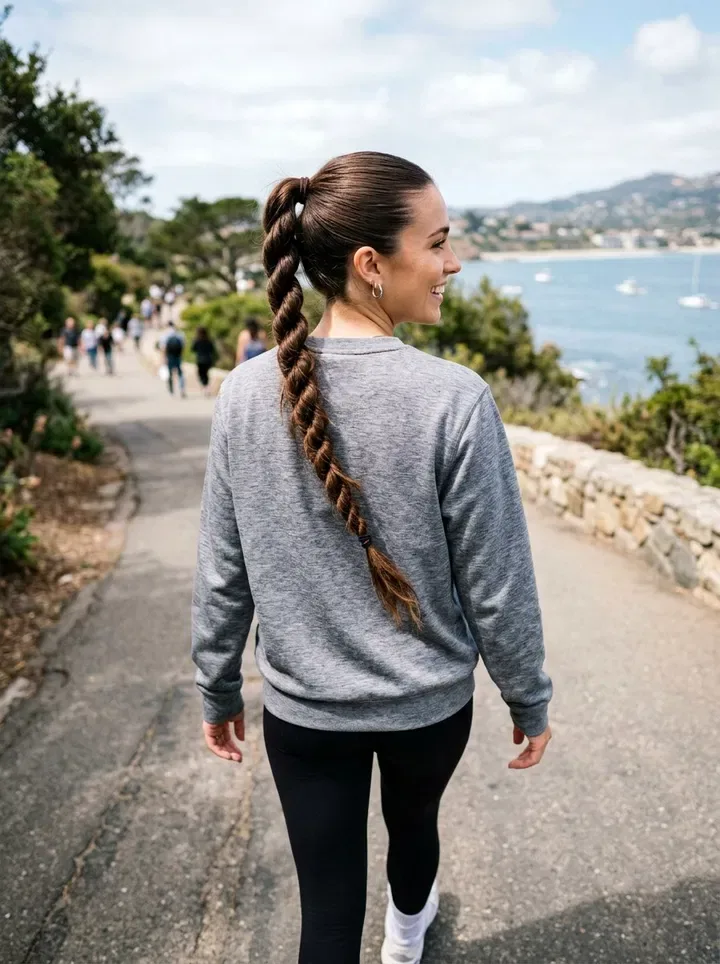
A rope twist ponytail is a low ponytail with a twist — literally. The ponytail is divided in two, each half is twisted in the same direction, and the two twists are wound around each other and tied. The result is a neat, rope-like ponytail that holds its shape far better than an ordinary ponytail in the wind, because the twists lock the hair together. It takes about two minutes and it looks far more polished than the effort suggests.
How to style it: make a low ponytail, split it in two, twist each half in the same direction, wind them around each other, and tie the end. Best for: medium to long hair, and windy days. Common mistake: twisting the halves in opposite directions, which makes the rope unwind — same direction for both, always. Quick verdict: two minutes, and it will not budge.
25. Double Dutch Braids Into a Low Bun
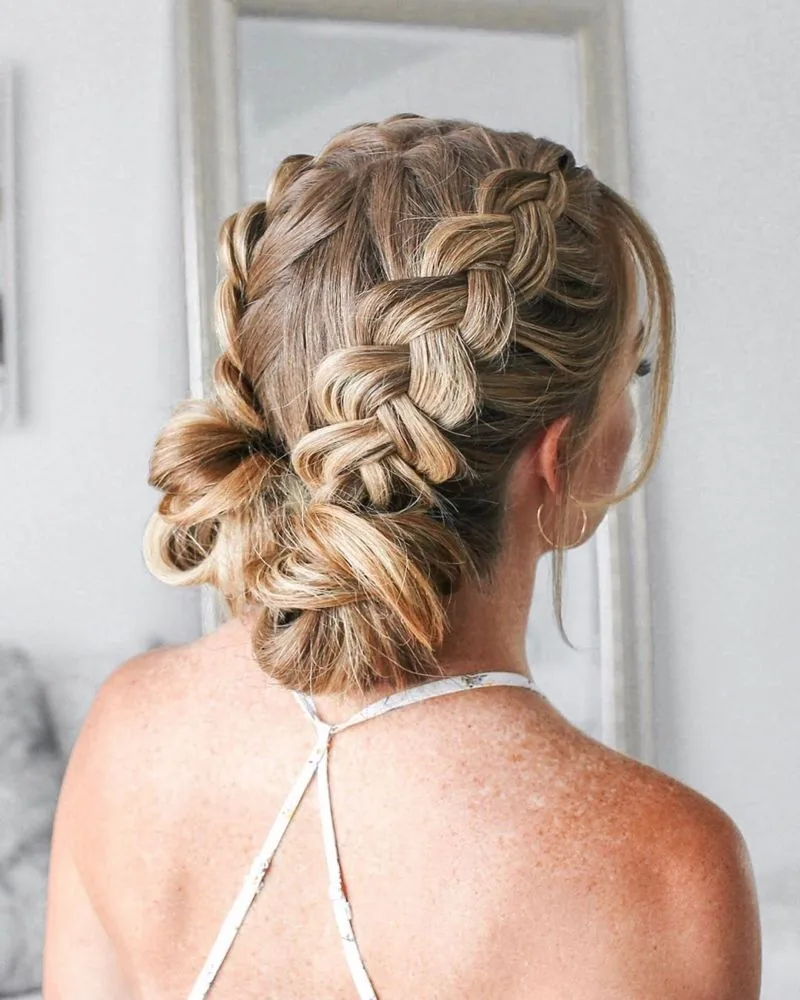
Double Dutch braids finished into a low bun are the most secure style in this guide, and the one to choose for the longest, hardest day on the road. The braids hold the front and sides completely, the bun gathers the rest, and nothing — wind, naps, hats, humidity — moves any of it. It is the style for a day that starts with a sunrise drive and ends with a dinner you want to look good at.
How to style it: Dutch-braid each side from the front hairline to the nape, then gather the two braids together, twist them into a low bun and pin it. Pros and cons: it is the most secure style here, but it takes fifteen minutes and a mirror — do it before you leave, not at a rest stop. Maintenance: none all day. Quick verdict: the all-day, all-weather style.
26. The Sleek Low Bun With a Centre Part
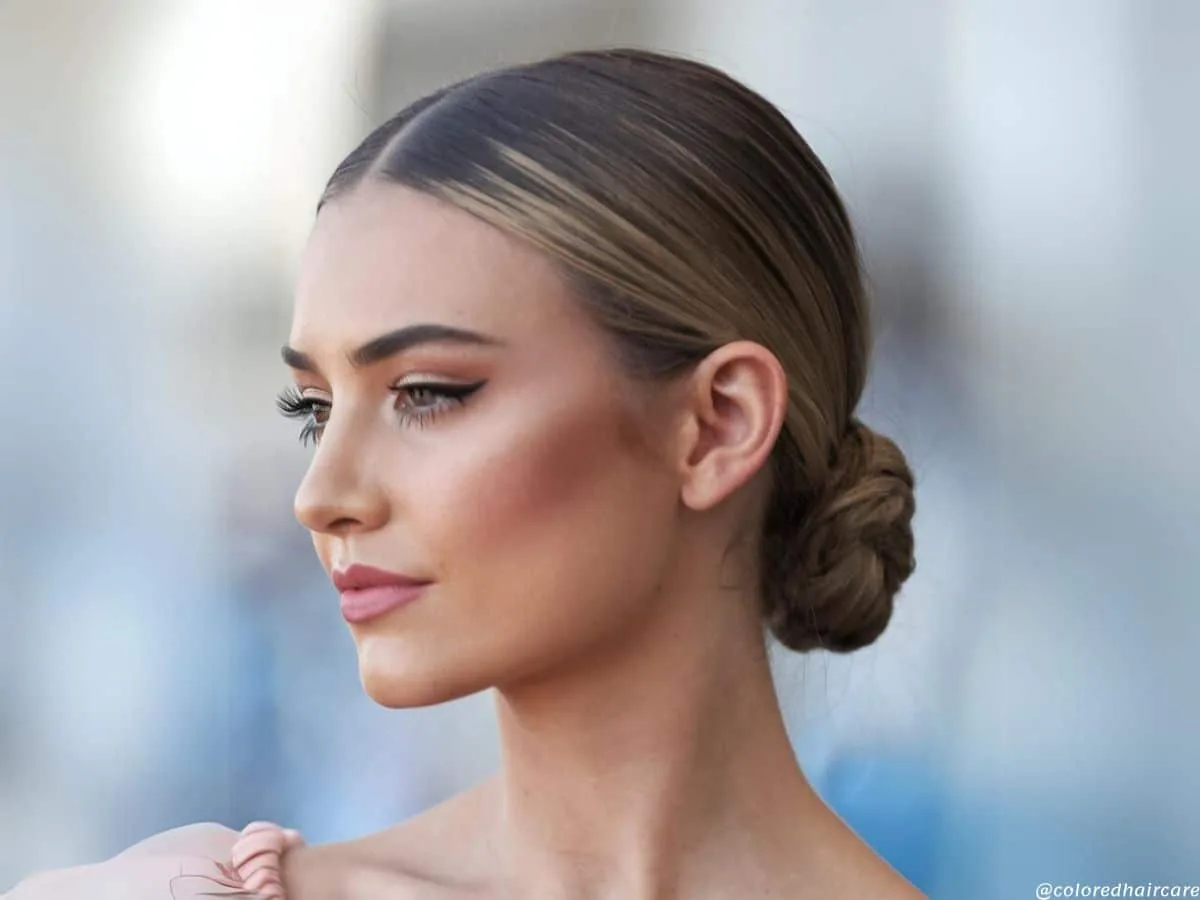
A sleek low bun with a centre part is the most polished, minimal look in this guide, and on a road trip it reads as calm, confident and completely put together. The centre part keeps the face symmetrical, the smooth hair shows off the cheekbones, and the low bun sits below a hat and below a headrest. It pairs beautifully with sunglasses and a simple outfit, and it photographs wonderfully at viewpoints.
Best for: straight and wavy hair, and women who love a clean, minimal look. How to style it: part the hair in the centre, smooth it back with a brush and a little gel, gather it low, twist it into a bun and pin it in three places. Pros and cons: it is quick, holds all day and looks expensive — but it is a severe look, so soften it with sunglasses or a softer neckline. Cost and time: five minutes and a few pins. Quick verdict: minimal, sleek and serene — the editorial choice.
27. Soft Waves With a Middle Part
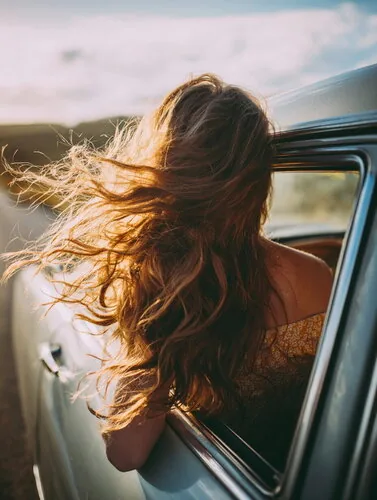
Soft waves with a middle part are a calm, symmetrical look that flatters almost everyone and suits a road trip perfectly — with one condition: the wind. Loose waves and open windows are a tangle waiting to happen, so this is the style for the stretches when the windows are up and the AC is on, or for the moment you arrive. The waves fall evenly, framing the face gently, while the middle part keeps the look balanced and understated.
Best for: long and medium hair, and arrival moments rather than windy driving. How to style it: braid damp hair the night before, undo it in the morning for soft waves, and finish with a light texture spray. What to ask your stylist: ask for long layers that start at the cheekbones so the waves have somewhere to fall. Common mistake: wearing it loose with the windows down — braid it for the drive, wear it down at the stop. Quick verdict: the arrival style, not the driving style.
28. The Textured Lob

A textured lob — a long bob with soft, piecey layers through the ends — is a modern, lived-in cut that happens to be perfect for a road trip. It sits at the shoulders, so it never falls into your face when you lean back, and the layers give it movement without needing a single pin. It looks good air-dried or blow-dried, it survives a car nap without denting, and it suits a hat beautifully, because the length sits below the brim.
Pros and cons: it is versatile, easy to style and flattering on fine and thick hair alike, but the texture can look messy if the layers are cut too short, so ask for long, soft layers rather than choppy ones. How to style it: work a little texture cream through damp hair, scrunch the ends and let it dry naturally. Maintenance: a trim every eight weeks keeps the shape. Quick verdict: the easiest polished road trip cut — wash, scrunch, go.
29. The Simple Shoulder-Length Blowout
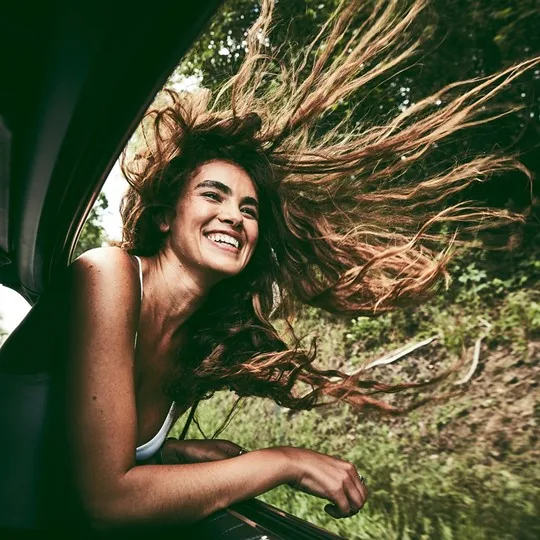
Best for: straight and wavy hair, shoulder-length cuts, and short driving days. How to style it: blow-dry in sections with a large round brush, turning the ends under, and finish with a drop of shine serum. Pros and cons: it is clean and polished, but it will drop in humidity and tangle in the wind, so it is not the best choice for a long, windows-down day. Maintenance: a volumising mousse on damp hair helps it last. Quick verdict: the salon-fresh look — enjoy it while it lasts.
30. Curtain Bangs Pinned Back
Curtain bangs are lovely on a road trip, as long as they are pinned back. Left loose, they blow into your eyes the moment the window goes down; pinned back with two small clips, they frame the face softly and stay exactly where you put them. It is a small trick that makes a big difference, and it is the difference between a style that works on the road and one that fights you all day.
Best for: long hair with curtain bangs, and windy days. How to style it: sweep the bangs to each side, pin them back with small flat clips, and let the rest of the hair fall or braid it. Pros and cons: the bangs are easy to style and easy to grow out, but they do need a trim every four to six weeks if you want them to stay at cheekbone length. Common mistake: leaving them loose with the windows down. Quick verdict: pin them back, and curtain bangs are a road trip style too.
31. Pinned-Back Sides With Soft Curls

Pinning back the sides with soft curls is the simplest way to wear your hair down on a road trip and still keep it out of your face. Two small sections are taken from each temple, twisted or braided back, and pinned behind the head, while the rest of the hair falls in soft curls. It is romantic, it is practical, and the pins do the work while the curls do the pretty — just keep the loose lengths loosely braided for the windy stretches.
How to style it: curl the hair first, take a section from each temple, twist them back and pin them together behind the head with crossed bobby pins. Pros and cons: it is quick, pretty and secure, but it needs enough length to pin back — very short hair will need a different option. Maintenance: none on the day. Who should avoid it: nobody — the pinned sections can be as small or as large as you like. Quick verdict: down, but out of your face — the best of both.
32. The Wavy Lob With a Deep Side Part

A wavy lob with a deep side part is a small change that makes a big difference on a road trip. The deep part sweeps a heavy section of hair across the forehead and down one side of the face, which adds instant softness and a little drama, while the waves give the lob movement and body. It is polished, modern and a little bit glamorous, and it needs no pinning at all — which makes it a wonderful choice for a short drive to a nice lunch.
Best for: straight and wavy hair, and shorter driving days. How to style it: part the hair deeply on one side while it is damp, blow-dry the heavier side with a round brush for a soft sweep, and add loose waves through the lengths. Cost and time: a quick salon cut and about fifteen minutes of styling. Common mistake: parting too shallowly, which turns a dramatic sweep into an ordinary side part. Quick verdict: one deep part changes everything.
33. Two Low Pigtail Braids
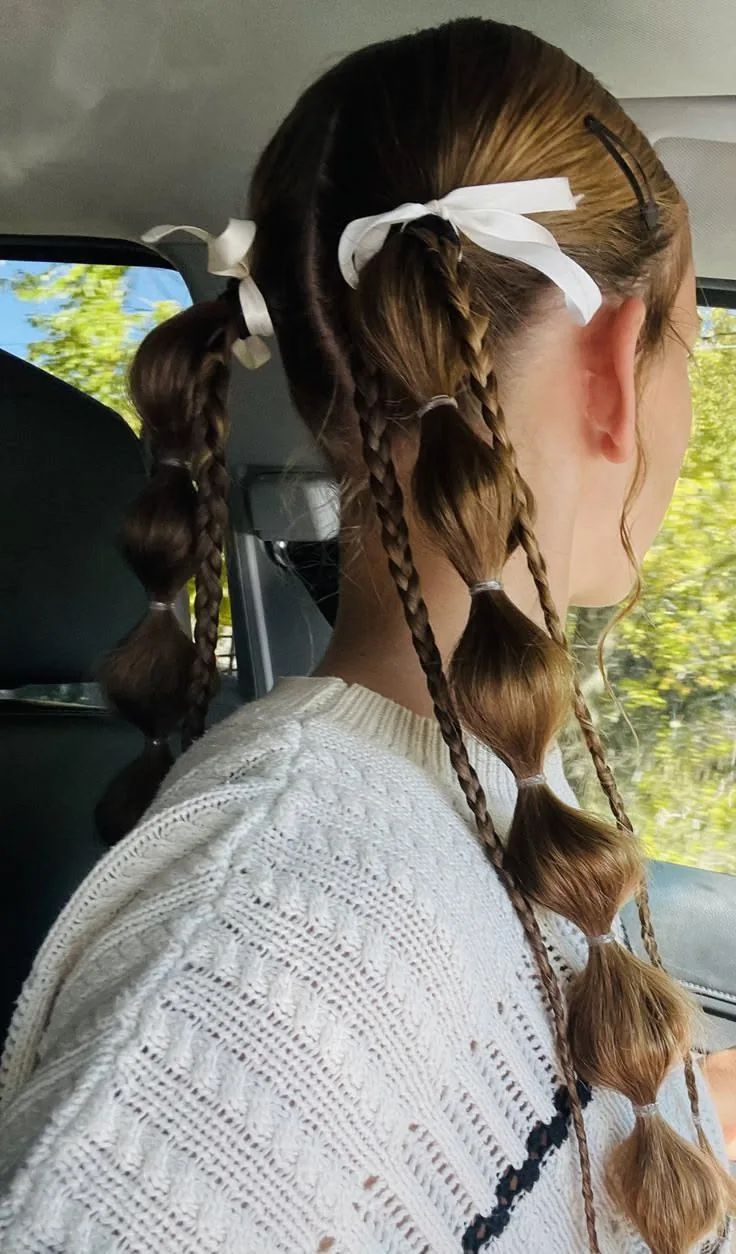
Two low pigtail braids are the last style in this guide, and the most fun. The hair is split down the middle and each side is braided low, which keeps the hair completely contained, spreads the weight evenly, and looks playful and young in road trip photos. They survive wind, naps and hikes, they work on almost any length past the shoulders, and they are the easiest braids to do on yourself — you can see both sides in the mirror.
How to style it: part the hair down the middle, braid each side loosely from behind the ear down, and tie both ends. Best for: long drives, active stops, and anyone who wants a style that will not move. Pros and cons: they are secure, easy and fun, but they are a casual look — save the chignon for dinner. Maintenance: none all day. Quick verdict: the last style, and the one that will still look perfect at the last stop.
What is the best hairstyle for a long road trip?
The best hairstyle for a long road trip is a braid — a single Dutch or French braid, or two French braids. A braid keeps every strand woven in, so it cannot tangle in the wind, it survives a car nap without denting, and it looks the same at the last stop as it did at mile one. A low bun or a claw clip twist is the next best choice, and loose hair is the worst choice for a long drive.
How do I stop my hair tangling in the wind on a road trip?
Braid or bun your hair before the windows go down, not after it has already tangled. A braid is the most wind-proof style, because every strand is woven in. A light mist of leave-in conditioner before you set off also helps, because it keeps the lengths slippery so strands slide past each other instead of knotting. A silk scarf tied over a low bun stops the wind completely.
Can I wash my hair during a road trip?
Yes, but second-day hair usually holds a road trip style better than freshly washed hair, because it has more grip. If you do wash it, dry it fully and add a little texture spray or dry shampoo at the roots before styling, so braids and pins have something to hold onto. Many travellers wash their hair in the evening at the hotel, braid it damp before bed, and wake up with soft waves for the next day.
What is the best hairstyle for sleeping in the car?
A loose low braid is the best hairstyle for sleeping in the car. There is nothing to crush against the headrest and nothing to dent, so it wakes up looking the same as it went to sleep. A silk scarf wrapped around the hair before you nap helps too, because it stops the seat fabric from frizzing the lengths. Avoid a high bun or a top knot, which will press into a dent.
How do I refresh my hair at a rest stop without a shower?
Take the style down, brush it out with your fingers or a folding brush, spray dry shampoo at the roots, and rebuild the style tighter than before. Work in this order — detangle first, then dry shampoo, then restyle — because dry shampoo on tangled hair just makes the tangle worse. A braid redone at a rest stop always looks better than the one you did at home, because the hair has texture and grip by then.
What hairstyles work with a baseball cap on a road trip?
Low styles work with a baseball cap: a low ponytail pulled through the back of the cap, a low braid, or a low bun. Keep the bulk low and the crown smooth, so the cap sits properly. A high bun or a high ponytail will push the cap up or will not fit through the opening at all, so keep the style low and let the hat do the rest.
What should I pack in a road trip hair kit?
Pack four hair elastics, six bobby pins, one claw clip, a travel-size dry shampoo, a small bottle of leave-in conditioner or hair oil, a folding brush or wide-tooth comb, and one silk scarf or bandana. Everything fits in a sandwich bag, and it should live in the glove box or door pocket — not buried in a suitcase in the boot — so you can reach it without unpacking the car.
How do I stop frizz on a road trip?
Moisturise before you set off — a leave-in conditioner or a drop of hair oil is the cheapest frizz insurance there is — and contain the hair in a braid or a bun, so whatever frizz appears is held in instead of haloing around your face. Point the car vents at your body, not your face, because dry AC air dries the front pieces first. If frizz does arrive, smooth a tiny drop of oil over the surface with your palms; never brush dry, frizzy hair.
Are braids or buns better for a road trip?
Braids are better for wind, activity and long drives, because every strand is woven in and nothing can come loose. Buns are better for naps and for looking polished at a nice stop, because they sit low and flat against a headrest. The best road trip plan is to braid for the drive and re-style into a low bun or a claw clip twist when you arrive — both take only a few minutes.
How long will a road trip hairstyle last?
A well-done braid or low bun will last a full day on the road — eight to ten hours — with no attention at all, and a quick rest-stop refresh can stretch it further. Loose styles last an hour or two at most with the windows down. The styles that last longest are the ones that are anchored low and pinned or braided in more than one place, so no single pin or elastic is doing all the work.
Conclusion
Road trip hair is not about the fanciest hairstyle — it is about a style that survives the highway. The 33 hairstyles in this guide are all chosen with that in mind: braids that cannot tangle in the wind, low buns that survive a car nap, claw-clip twists you can redo at a red light, and hat-friendly styles for every roadside stop. The right road trip hairstyle does not demand your attention all day — it lets you forget about your hair and enjoy the drive.
Start with the guides, not the gallery. Pack the tiny hair kit, choose a style that needs no heat, braid it before the windows go down, and keep a scarf and a spare elastic within reach. Try your style the night before you leave, not in a moving car, and remember the rest-stop refresh: down, brush, spray, rebuild. Your hair should be the least of your worries on the road. Now it can be.