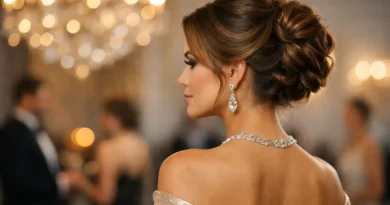
Ride-Ready Hair: 41 Horseback Riding Hairstyles That Fit Under a Helmet and Survive the Trail
A horse does not care what your hair looks like, but your helmet does — and so do the reins, the wind, and the three hours you will spend in the saddle. Horseback riding is one of the few sports where your hairstyle is also safety equipment: hair that is loose can catch in reins and tack, hair piled high will not fit under a helmet at all, and a style that looks perfect in the stable mirror can be a tangled mess by the first canter. The best horseback riding hairstyles for women are the ones you forget about once you mount — low, flat, pinned, and braided — because a good riding style stays put from the first trot to the last dismount.
This guide gathers 41 horseback riding hairstyles for women, chosen for real days in the saddle: styles that fit flat under a helmet, braids that do not tangle in the wind, buns that survive a full day at the stable, and polished show-ring looks that still pass the judge’s eye. Eight guides first walk you through what actually matters: helmet fit and hair bulk, windproof braids, all-day stable hair, show-ring polish versus trail practicality, keeping hair out of reins and tack, sweat and helmet-hair recovery, long-hair safety around horses, and quick stable-to-dinner transitions. Whether you ride English or Western, show or trail, whether your hair is long, short, curly, or straight, there is a style here that will carry you through the ride — and still look good when you take the helmet off.
Helmet Fit and Hair Bulk: Why Low and Flat Wins
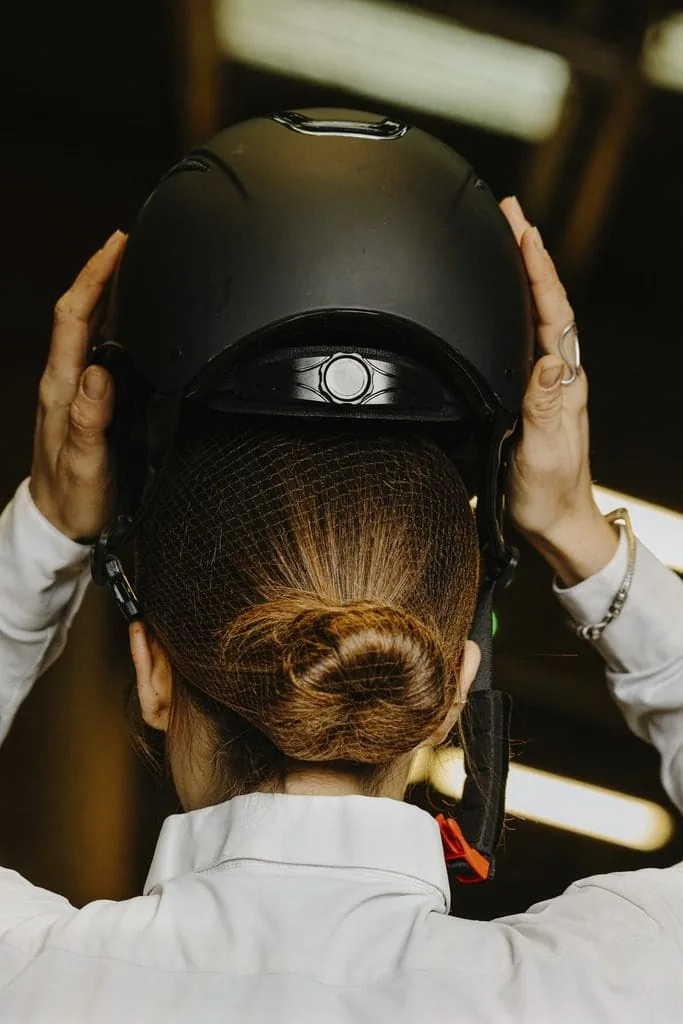
A riding helmet only protects you if it sits level on your head, low on your forehead, and snug enough not to rock — and hair bulk is the enemy of all three. A high bun, a top knot, or a thick ponytail gathered at the crown pushes the helmet up and forward, leaves a gap at the back, and turns a well-fitted helmet into a wobbly hat. The fix is simple and non-negotiable: keep everything low and flat. Gather hair at the nape or below, keep buns small and tight to the head, and braid the length flat down the back. If your helmet fits differently with your hair up than with it down, your riding style is wrong, not your helmet.
Best for: every rider, because helmet fit is safety, not style. How to check it: put your hair in your riding style, then put the helmet on — it should sit level, cover your forehead to about an inch above your eyebrows, and stay put when you shake your head. Common mistake: buying a bigger helmet to fit a high bun instead of lowering the bun. A helmet that is too big is a helmet that will not protect you. Quick verdict: low and flat is not a style preference at the stable, it is the rule that makes every other style in this guide work.
Braids That Don’t Tangle in Wind
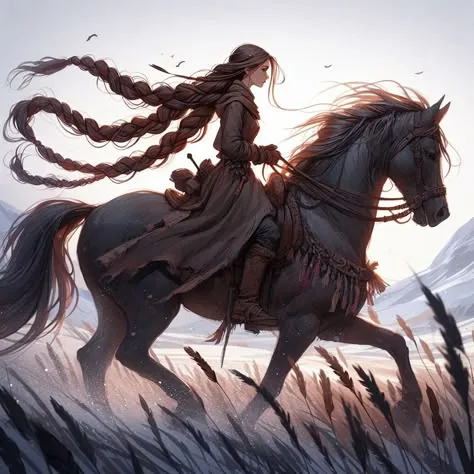
At a canter, the wind hits your hair at twenty miles an hour, and loose hair turns into a knot in minutes. The braids that survive are the ones that are built tight at the scalp and sealed at the ends: a French or Dutch braid that starts at the hairline and gathers hair all the way down, a fishtail with small, even sections, or two braids instead of one so the weight is split. Loose, soft braids look romantic in photographs and fall apart on the trail, so save the softness for after the ride. Before you mount, braid damp hair with a little leave-in conditioner or a dab of styling cream — damp hair braids tighter, and the cream keeps flyaways from whipping into a tangle.
Pros: a tight braid is the only style that truly survives wind, and it doubles as a heatless wave when you take it out later. Cons: braiding tightly for hours can pull at the hairline, so keep the front sections firm but not painful. Maintenance: re-braid the last few inches at a water break if the ends start to fray, and carry one spare elastic in your pocket. Who should avoid it: nobody — but if your hair is very short, braid what you can and pin the rest flat. Quick verdict: if it cannot survive a canter, it is not a riding braid.
Styles That Survive a Full Day at the Stable
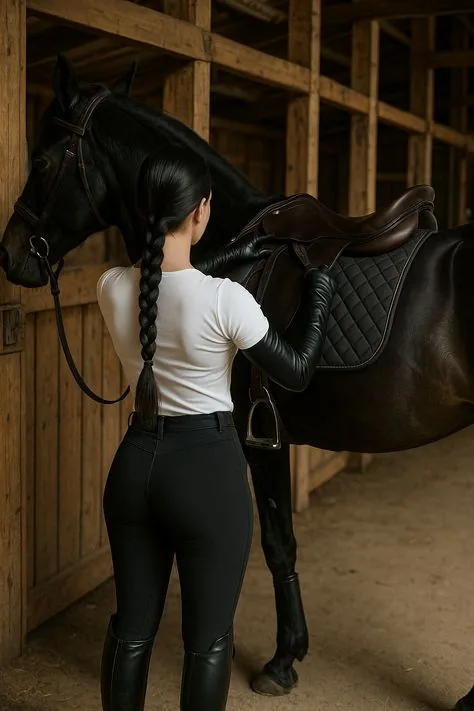
A day at the stable is not one ride — it is grooming, tacking up, riding, untacking, mucking out, and riding again, often eight hours in heat, dust, and sweat. The styles that survive a full day are the ones built in layers: a braid or a bun that is pinned at three points, not one, and made with products that hold through sweat rather than melting in it. Hairspray alone will not survive a day at the stable; pins, elastics, and a braid will. Build the style in the morning with dry shampoo at the roots, a firm braid or a low bun, and two spare pins in your pocket, and it will still be there at evening stables.
How to style it: start with second-day hair if you can — it holds better than freshly washed hair — and work a little texture spray or dry shampoo through the roots before you braid or pin. Best for: anyone who rides more than once a day, or who spends the whole day at the yard. Pros: a layered style needs no mirror and no fuss, and you can re-pin it by feel between rides. Cons: a style built this firmly can feel tight by late afternoon, so loosen the front pieces at lunch and re-pin them. Cost and time: nothing extra, just ten minutes in the morning and two spare pins.
Show-Ring Polish vs Trail Practicality
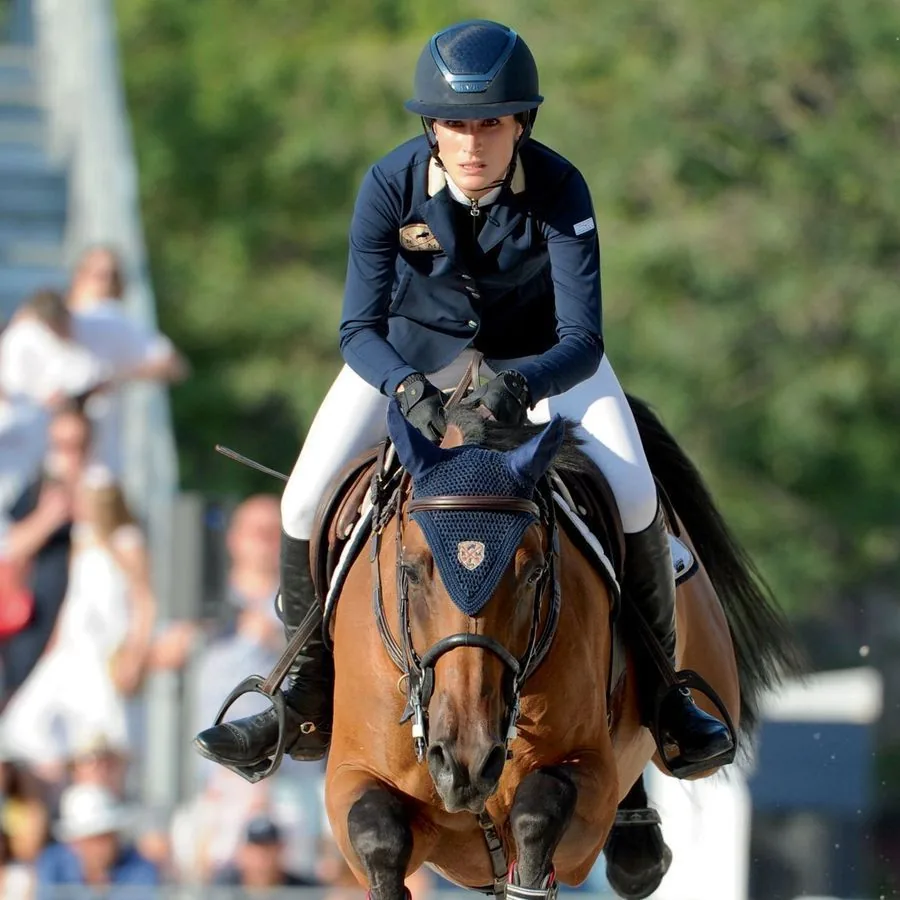
The show ring and the trail want different things from your hair, and knowing which one you are riding decides the style. In the show ring, the judge sees a silhouette: a neat, low bun or a pair of hunter braids under a polished helmet, no flyaways, no loose ends, everything tucked into a hairnet. On the trail, nobody is judging, and the priorities are wind, branches, sweat, and comfort — a single sturdy braid or a low ponytail that you can re-tie with one hand. A show style on the trail is wasted effort, and a trail style in the show ring looks unfinished, so choose for the day you actually have.
Why it works: the silhouette is what the judge remembers, and a clean hairline with a neat bun reads as polished from every angle in the ring. On the trail, the same neatness matters less than durability, and a braid that survives a branch is worth more than a bun that does not. Who should avoid what: show riders should avoid loose ends and flyaways entirely, and trail riders should avoid anything that needs a mirror to fix. Common mistake: wearing a show bun on a long trail ride, then spending the afternoon re-pinning it. Quick verdict: polish for the ring, durability for the trail, and never confuse the two.
Keeping Hair Out of Reins and Tack
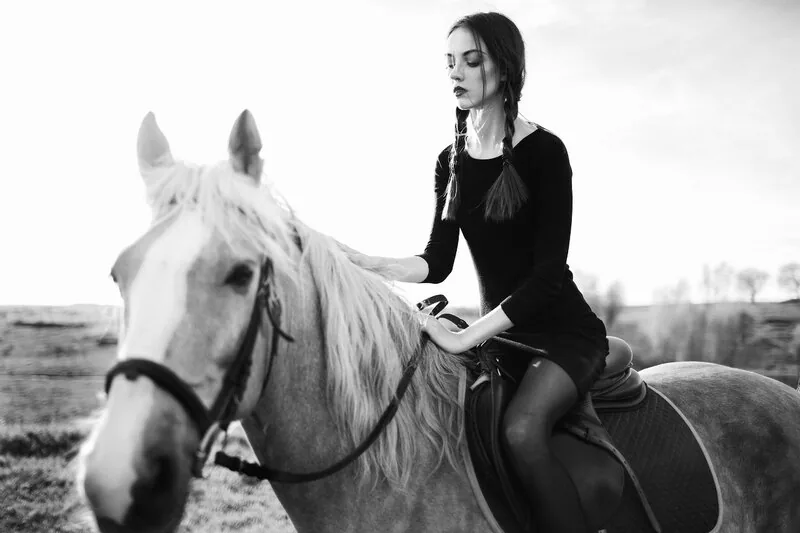
Loose hair and reins are a bad combination. A strand caught under a rein changes the contact with the horse’s mouth, a long ponytail whipping forward can startle a young horse, and hair tangled in a martingale or a breastplate is a hazard for both of you. The rule is that no hair should hang past your shoulder blades when you ride, and nothing should be able to swing forward over your shoulders. Braid it, bun it, or tuck it — but contain it. A braid down the back is the safest shape there is, because it lies flat against your spine and cannot swing, while a low bun is even safer, because there is nothing hanging at all.
Pros: contained hair means cleaner rein contact and a calmer horse, which is worth more than any look. Cons: none, except that a style that is fully contained can feel severe, so soften the front with a side part or a few pinned-back face-framing pieces. Maintenance: check at the mounting block that nothing is hanging loose, and re-tuck the ends after every ride. Who should avoid it: nobody should ride with loose hair past the shoulders — it is the one style rule at the stable that is genuinely about safety, not fashion.
Sweat and Helmet-Hair Recovery
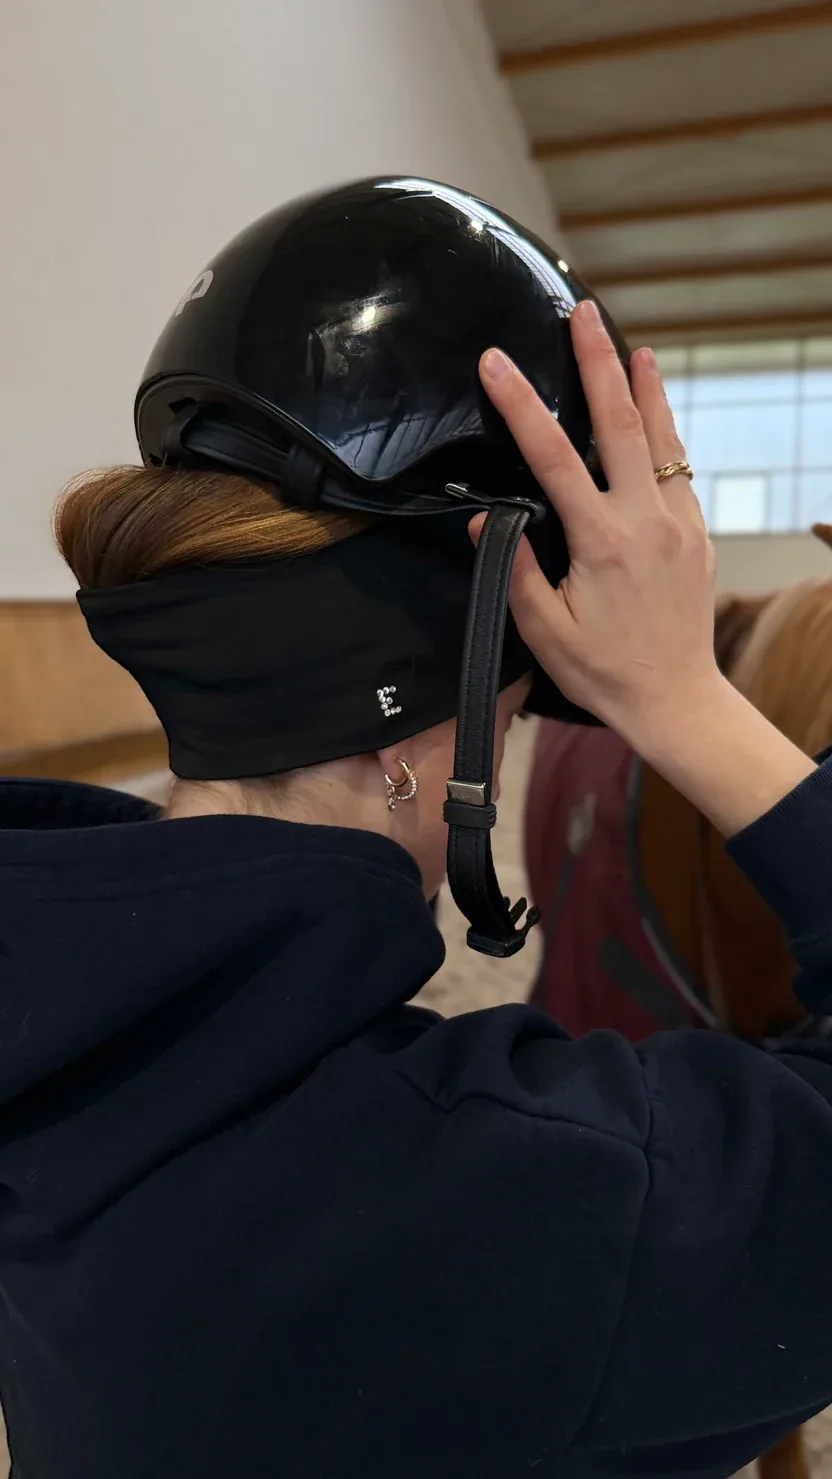
Every rider knows helmet hair: the flat crown, the damp roots, the dent across the forehead where the helmet sat, and the frizz at the hairline where sweat dried. It is unavoidable, but it is also fixable in about two minutes, and the fix starts before you ride. A little dry shampoo at the roots before you put the helmet on absorbs sweat as it happens, and a silk or satin helmet liner reduces friction and frizz. After the ride, take the helmet off, flip your head forward, shake the roots with your fingers, and add a spritz of dry shampoo or texture spray — and the flat, damp shape comes back to life.
How to style it: keep a small recovery kit in your tack box — dry shampoo, a wide-tooth comb, two bobby pins, and a small bottle of texture spray. Best for: anyone who rides and then has somewhere to be, from the yard to dinner. Pros: the whole recovery takes two minutes and no mirror, and it works on every hair type. Cons: dry shampoo used too often can build up, so wash it out properly at the end of the day. Common mistake: trying to fix helmet hair with a brush, which flattens it further — fingers and texture spray are the tools, not a brush.
Long-Hair Safety Around Horses
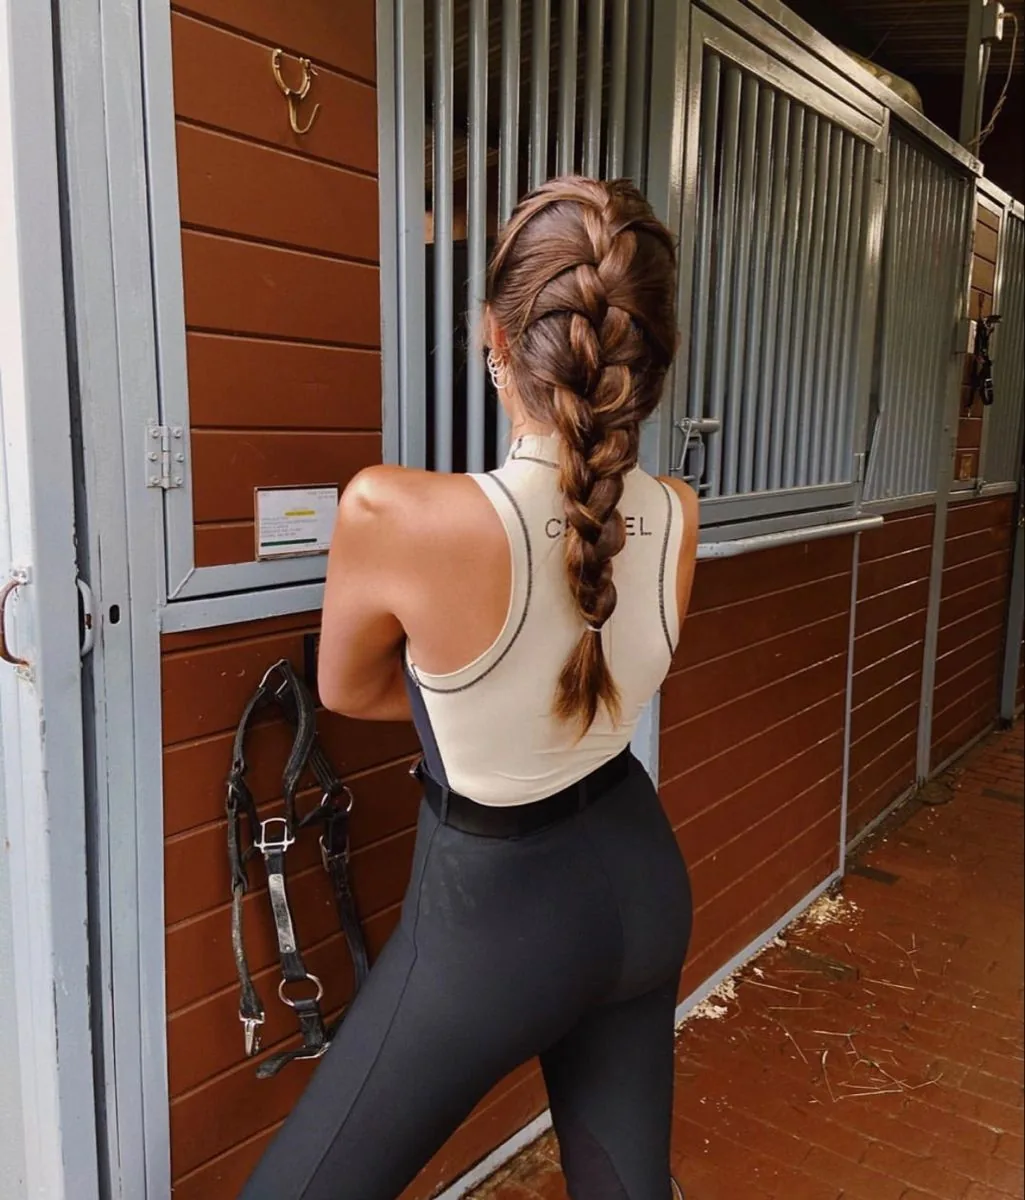
Horses are strong, curious, and very close to your head when you are grooming, tacking up, or leading them — and long, loose hair is something they can step on, pull, or catch. A horse that turns its head while your hair is hanging loose can trap a strand under a halter, and a horse that spooks while you are leading it can pull you off balance if your hair is caught. Around horses on the ground, the rule is the same as in the saddle: hair contained, hair braided or bunned, nothing hanging. A single braid tucked into your jacket or a low bun is the safest shape at the yard, and it is also the most practical, because it keeps your hair out of the feed bucket, the water trough, and the hay.
Why it works: a contained style cannot be stepped on, pulled, or caught, and it keeps your vision clear when you are working around a thousand-pound animal. How to style it: braid before you enter the stable, not after, and tuck the braid end into your collar or jacket on windy days. Who should avoid it: nobody with long hair should work around horses with it loose — not even for a quick photograph. Cost and time: nothing, just the habit of braiding first and grooming second. Quick verdict: at the stable, contained hair is safety gear, and it costs nothing to wear.
Quick Stable-to-Dinner Transitions
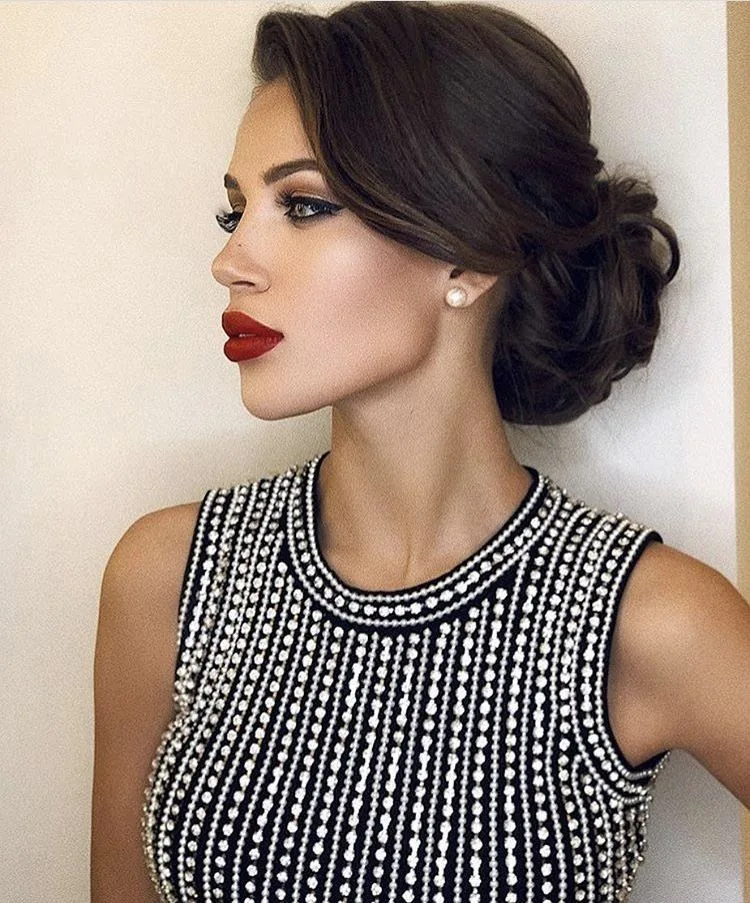
The best riding styles have a second act. A low bun that comes down into soft waves, a braid that opens into a textured half-up, a sleek ponytail that loosens into a low chignon — these are the styles that take you from the stable to dinner in five minutes, without a shower and without a styling tool. The trick is to build the riding style with a second look in mind: braid hair that has a little texture spray in it, so it waves when it comes out; pin a bun with pins you can remove one by one, so it drops into shape; and keep a silk scarf or a ribbon in your bag, because one accessory turns a riding style into an evening style.
How to style it: after the ride, take the braid or bun out, shake the roots, add dry shampoo, and re-pin the front pieces back with a pretty clip or tie the scarf around a low ponytail. Pros: you get two looks from one style, and the second one takes five minutes. Cons: a style that was sweaty all day will not look freshly washed, so dry shampoo is doing real work here — use it generously at the roots. Maintenance: none after the transition, just the scarf or the clip. Quick verdict: plan the dinner look when you build the riding look, and the evening will take care of itself.
1. The Low Helmet Bun
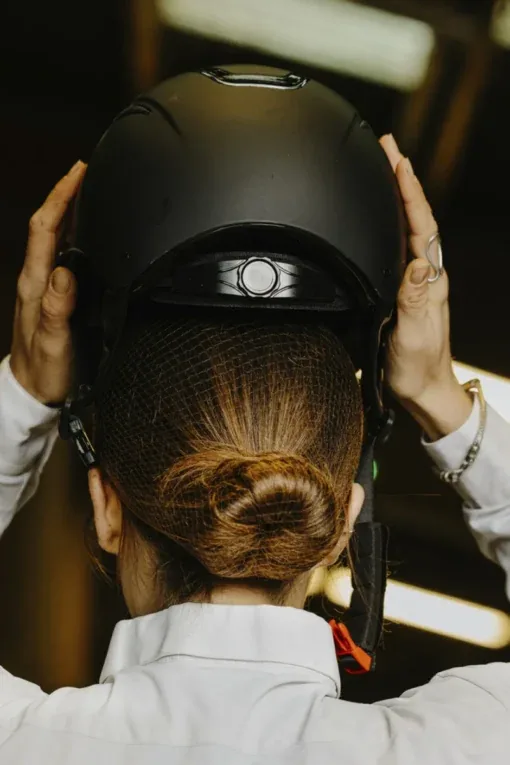
The low helmet bun is the single most useful hairstyle in riding, and it has earned that place for a reason. The hair is gathered low at the nape, twisted into a small, flat coil, and pinned tight to the head — no height, no bulk, nothing for the helmet to sit on. It is the style that lets a helmet sit exactly where it should, level and snug, and it is the style that survives a whole day at the yard without a single re-pin. A low bun also keeps every strand contained, so nothing catches in the reins, nothing whips in the wind, and nothing falls into your face at a canter.
Best for: every rider, every discipline, every hair length from shoulder to waist. How to style it: gather the hair low at the nape, twist it into a coil, wrap it flat against the head, and pin it with crossed bobby pins at the base and both sides — three pins minimum, five for thick hair. What to ask your stylist for: a low, flat bun with a clean centre or side part and no height at the crown. Pros: it fits under any helmet, it holds all day, and it looks neat in the show ring. Cons: very thick hair can make the bun bulky, so split it into two smaller coils pinned side by side. Maintenance: one re-pin at lunch, and you are done.
2. The Classic Low Ponytail Under the Helmet
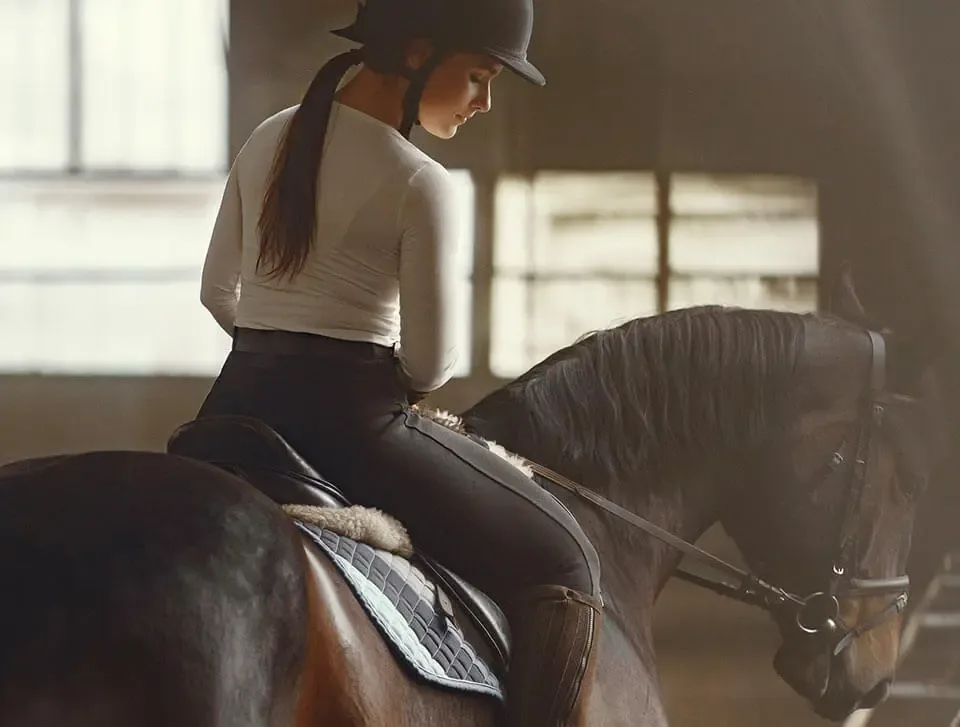
The classic low ponytail is the riding style most women reach for first, and for good reason: it takes thirty seconds, it fits flat under a helmet, and it keeps hair out of the way without any skill at all. Gathered low at the nape, it lies flat down the back, it cannot swing forward over your shoulders, and it is easy to re-tie with one hand at a water break. It is not the most polished style in this guide, but it is the most honest one — the style for a quiet hack, a schooling session, or a morning when you need to be in the saddle in ten minutes.
Why it works: the low position keeps the helmet level, and the single elastic is the simplest fastening there is. How to style it: brush the hair smooth, gather it at the nape, secure it with a strong elastic, and wrap a small strand around the elastic to hide it. Common mistake: gathering the ponytail too high, which pushes the helmet forward and lets the tail swing. Pros: fast, comfortable, and easy to redo. Cons: a ponytail can tangle in wind on a long ride, so braid the tail itself on windy days. Quick verdict: the thirty-second style that every rider should be able to do blindfolded.
3. Double French Braids
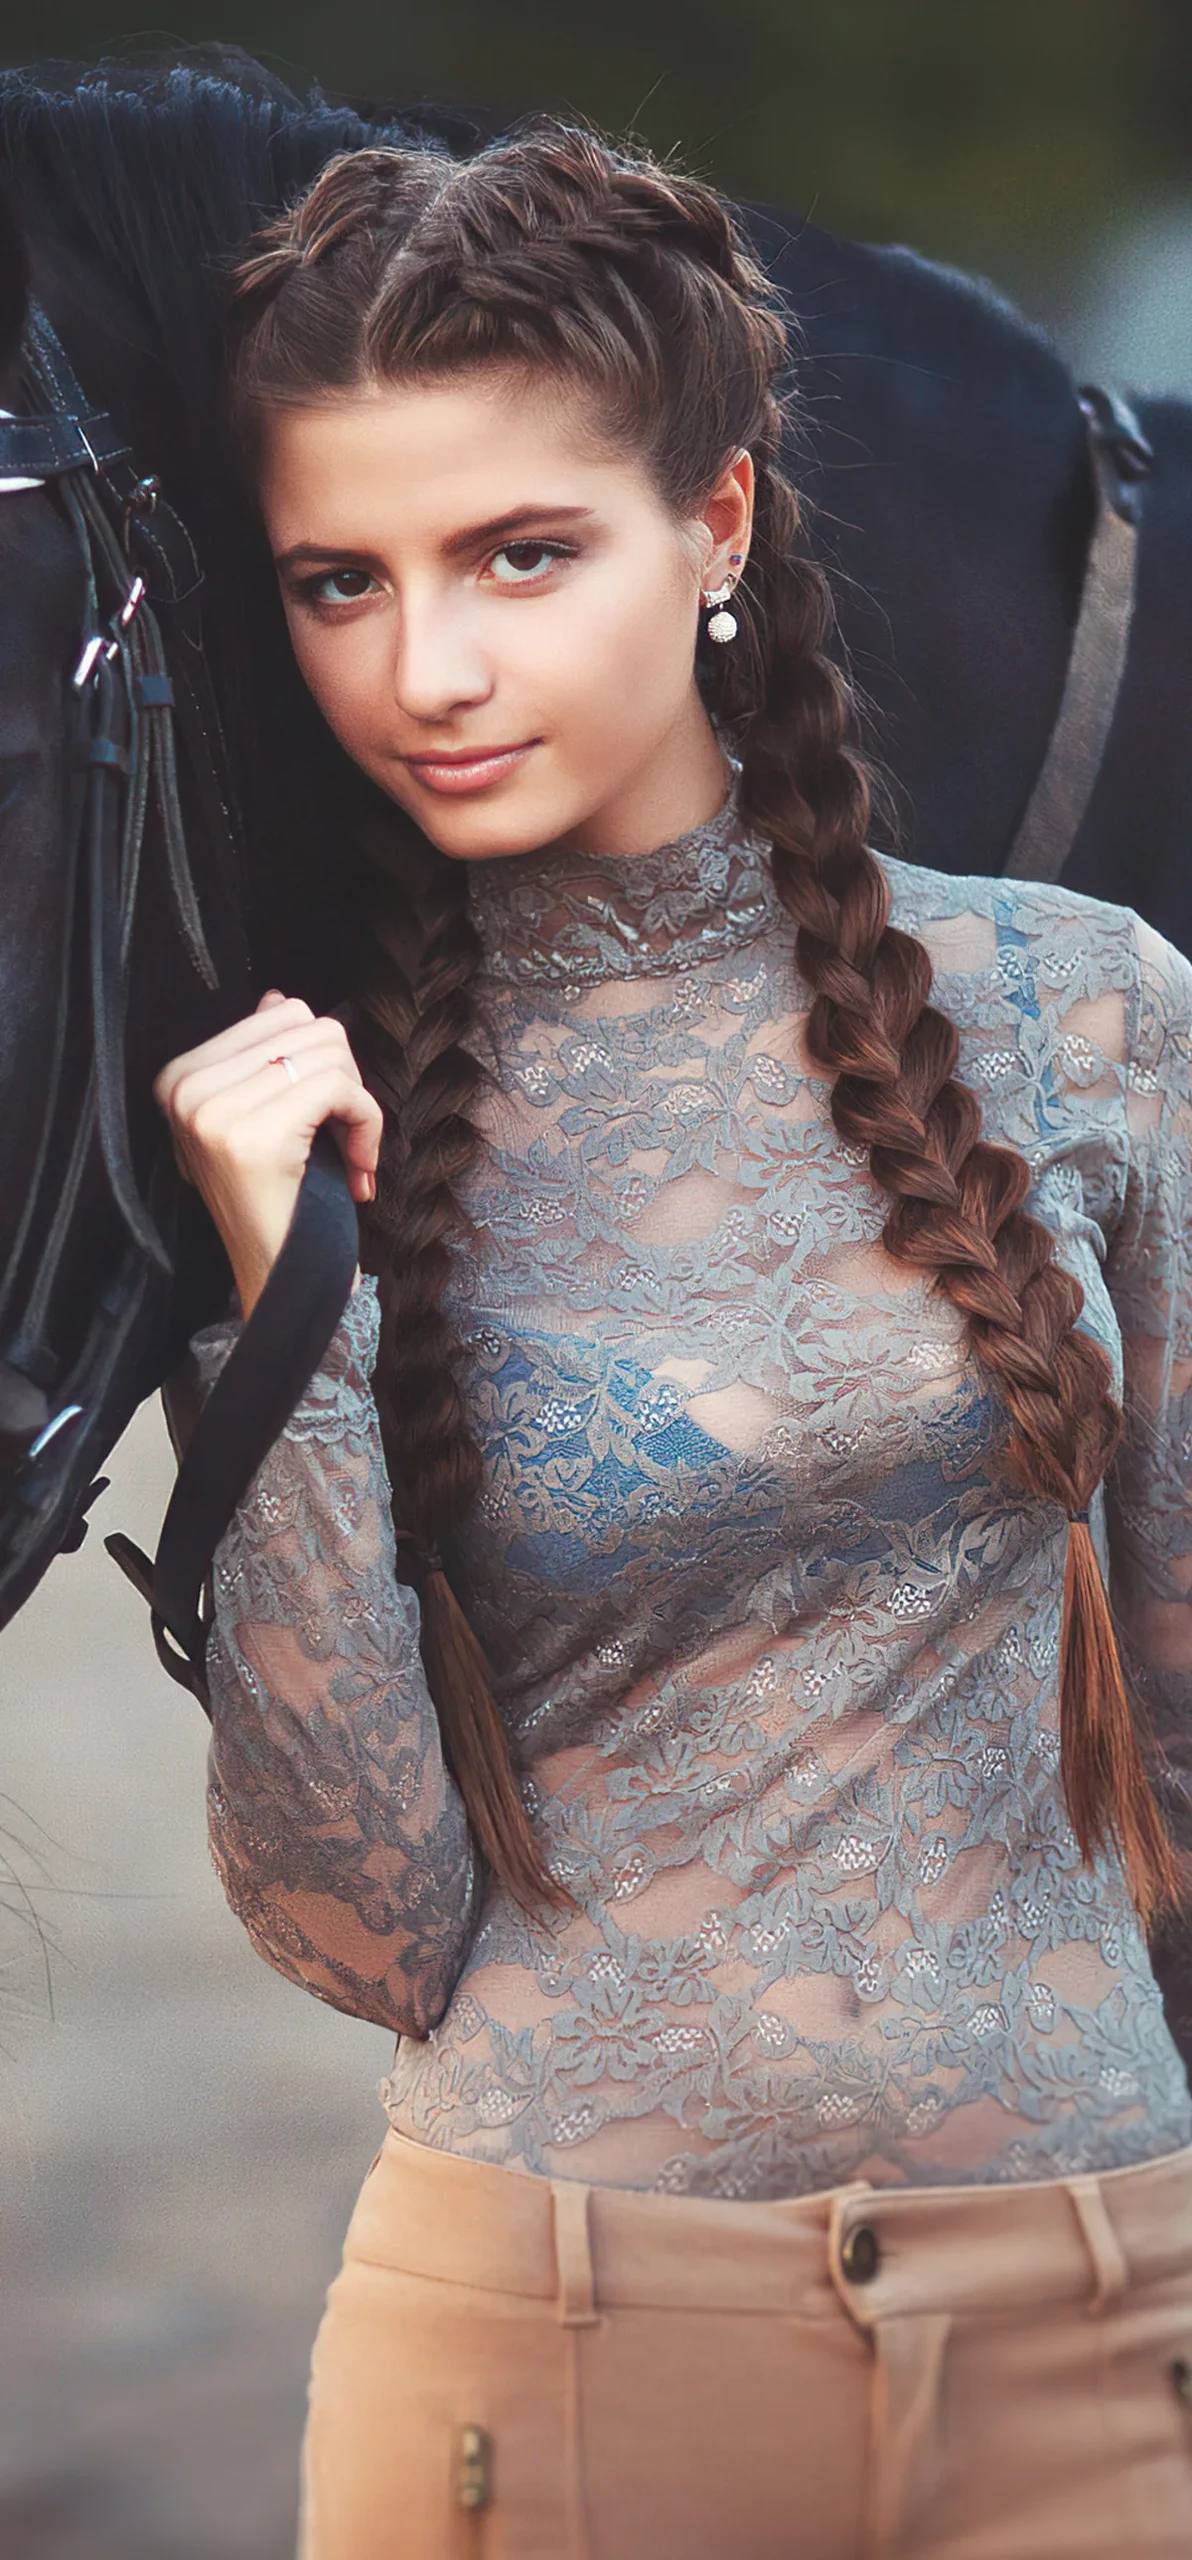
Double French braids are the toughest style in this guide, and the one most riders trust for a long day. Two braids, one down each side, split the weight of the hair in half, lie flat under a helmet, and cannot tangle the way a single loose length can. They start at the hairline, gather hair all the way down, and finish in two neat tails that stay put at a gallop. They are also the style that looks good after the helmet comes off, because the braids hold their shape and the hair underneath has a soft wave when you finally take them out.
Best for: long or thick hair, windy days, and full days at the stable. How to style it: part the hair down the middle, French-braid each side from the hairline to the nape, then braid the tails to the ends and seal them with small elastics. Pros: the most windproof style there is, and it keeps hair completely contained. Cons: it takes ten minutes and two hands, so it is a morning style, not a mounting-block style. Maintenance: re-braid the last few inches at a break if the ends fray. Who should avoid it: nobody — but very short hair will need extensions of patience, not length.
4. The Single French Braid
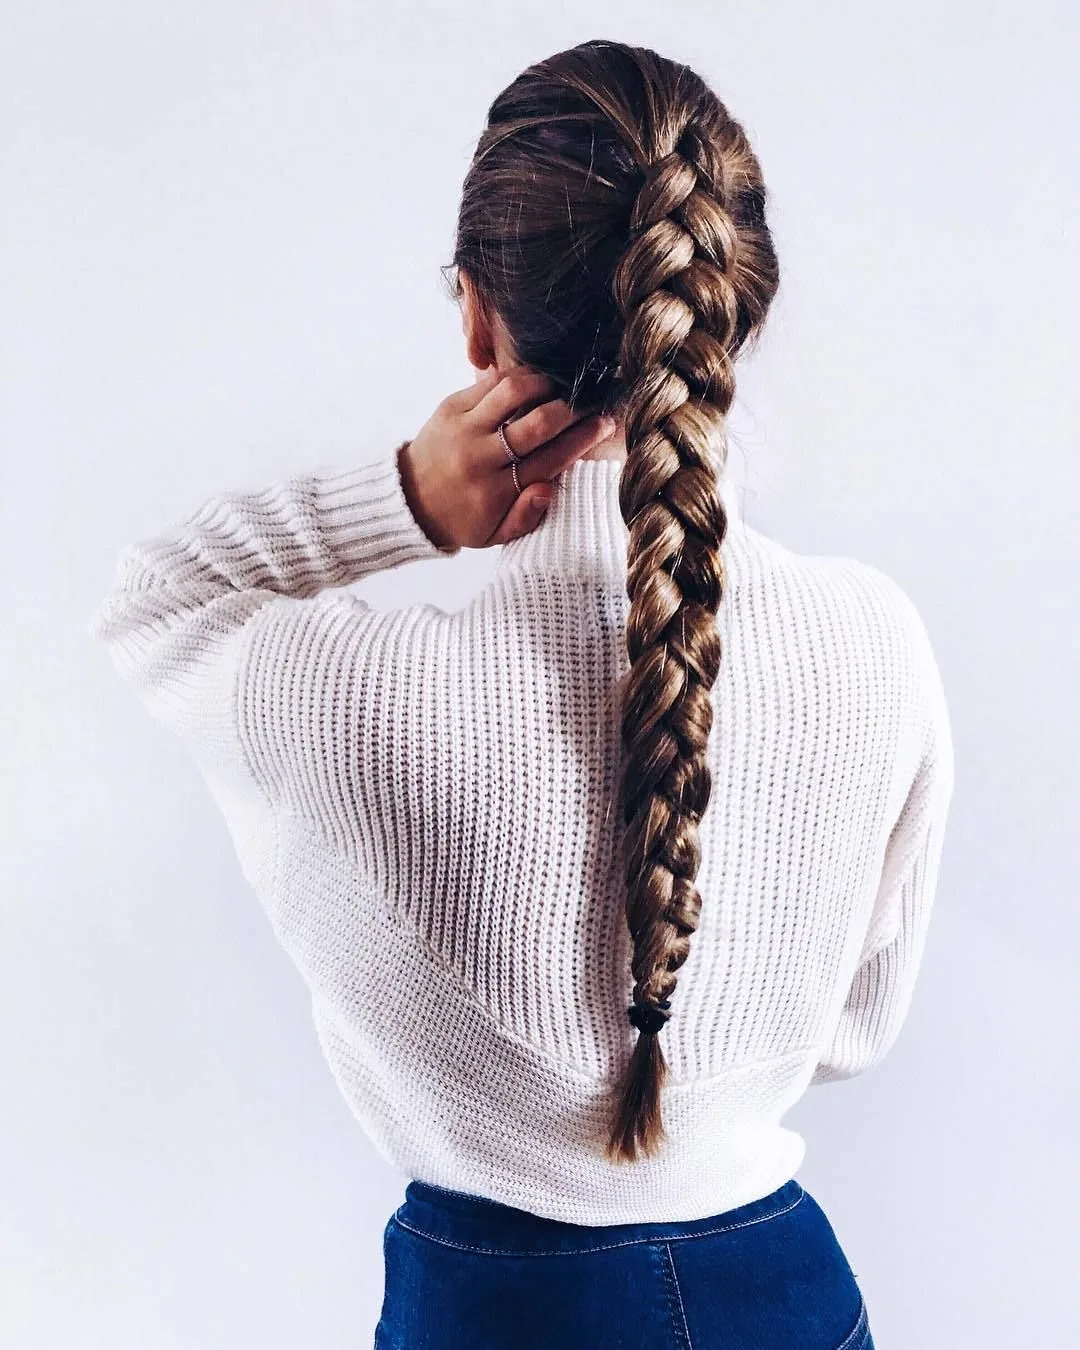
The single French braid is the classic riding braid: one braid, straight down the back, starting at the crown and gathering hair as it goes. It lies flat under a helmet, it cannot swing forward, and it keeps every strand contained from the hairline to the ends. It is simpler than double braids and faster to do, which makes it the everyday choice for schooling, hacking, and lessons — the braid you can do in five minutes in the stable aisle and trust for the whole ride. It also ages well through the day: as it loosens slightly, it softens into a relaxed, textured look rather than falling apart.
How to style it: start at the crown, gather hair from each side as you braid down, and keep the sections even so the braid lies straight. Best for: medium to long hair, everyday riding, and riders who braid their own hair. Pros: fast, flat, and completely contained, with a pretty wave when you take it out. Cons: a single braid can swing at a fast canter, so tuck the end into your jacket on windy days. Common mistake: braiding too loosely at the crown, which lets the helmet push the braid sideways. Keep the top sections firm, and the rest will follow.
5. The Dutch Braid Down the Back
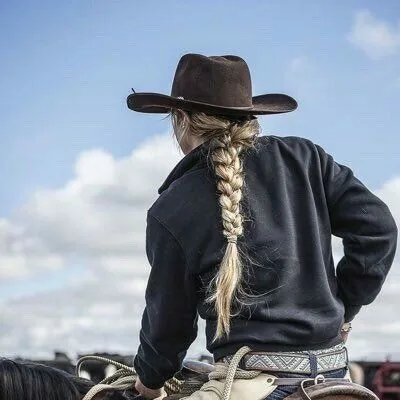
A Dutch braid is a French braid turned inside out — the sections cross under instead of over — and the result is a braid that sits on top of the hair like a raised rope, bold and visible from behind. For riding, that raised shape is a strength: it is firmer, it holds its shape longer, and it is easier to re-pin if it loosens. It lies flat enough under a helmet when it starts low, and it is the braid that photographs best from behind, which matters when the show photographer is standing at the far end of the ring. It is the braid for the rider who wants her riding hair to look deliberate, not just practical.
Best for: thick hair, show days, and riders who want a braid with presence. How to style it: cross the sections under rather than over, keep the tension even, and start the braid low at the crown so the helmet sits flat over it. Pros: holds longer than a French braid and looks striking from behind. Cons: it takes a little practice to keep the tension even, and a raised braid can press under a tight helmet if it starts too high. Maintenance: one re-pin at the nape if it slips. Quick verdict: the French braid’s bolder sister, and the one that holds best on a long day.
6. The Fishtail Braid
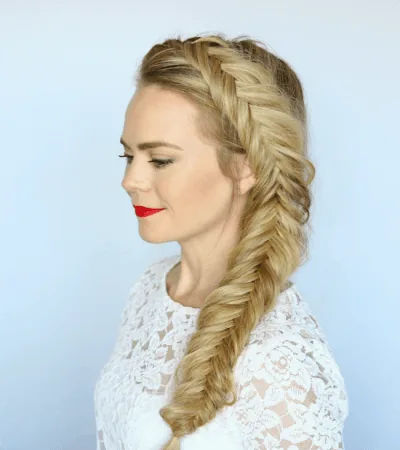
The fishtail braid looks intricate and takes no more skill than patience: two sections, small pieces crossed from one side to the other, over and over until the braid is done. The result is a flat, fine-textured braid that lies beautifully down the back and holds through wind better than most braids, because the small sections lock together. It is the braid for the rider who wants something prettier than a plain plait without giving up any durability, and it is the braid that turns into the loveliest waves when you take it out after the ride.
Why it works: the fine, interlocked sections cannot slip the way a three-strand braid can, so it stays neat for hours. How to style it: divide the hair into two sections, take a small piece from the outside of one and cross it to the inside of the other, and repeat — small pieces make a finer braid, larger pieces make a chunkier one. Pros: beautiful, flat, and very secure once it is done. Cons: it takes longer than a French braid, so it is a morning style. Common mistake: pulling the pieces too wide, which makes the braid loose and prone to tangling. Keep the pieces small and the tension firm.
7. Two Low Pigtail Braids
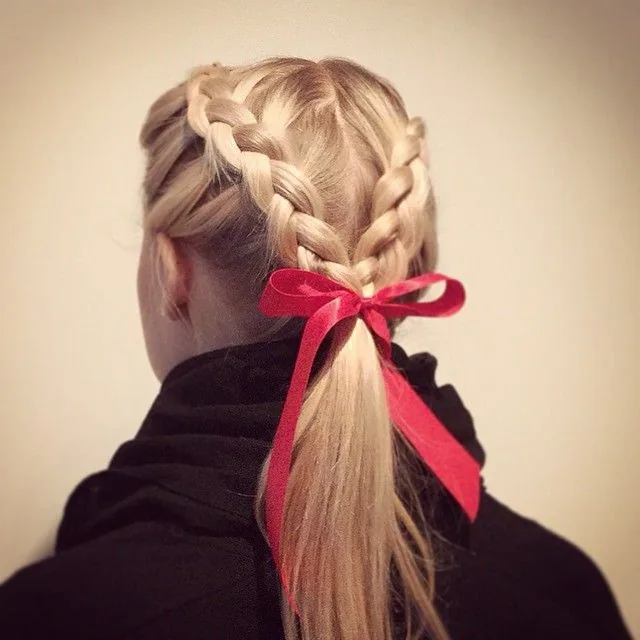
Two low pigtail braids are the practical, no-fuss answer for a long trail ride: one braid on each side, starting low behind the ears, lying flat against the shoulders, and staying put no matter how fast you go. Unlike high pigtails, which push a helmet up and bounce at a trot, low pigtails sit below the helmet’s edge and barely move at all. They are also the easiest style to fix on the trail — if one loosens, you can re-braid it in two minutes without a mirror, sitting on a mounting block or standing by a fence.
Best for: trail rides, young riders, and anyone who wants a style that is easy to redo. How to style it: part the hair down the middle, braid each side low behind the ear, and secure the ends with small elastics. Pros: symmetrical, stable, and simple to repair on the trail. Cons: it can read young, so keep the braids neat and the parting clean if you want it to look grown-up. Maintenance: re-braid one side at a water break if it frays. Who should avoid it: nobody — but for the show ring, choose hunter braids instead, which are the formal version of this shape.
8. The Braided Low Bun
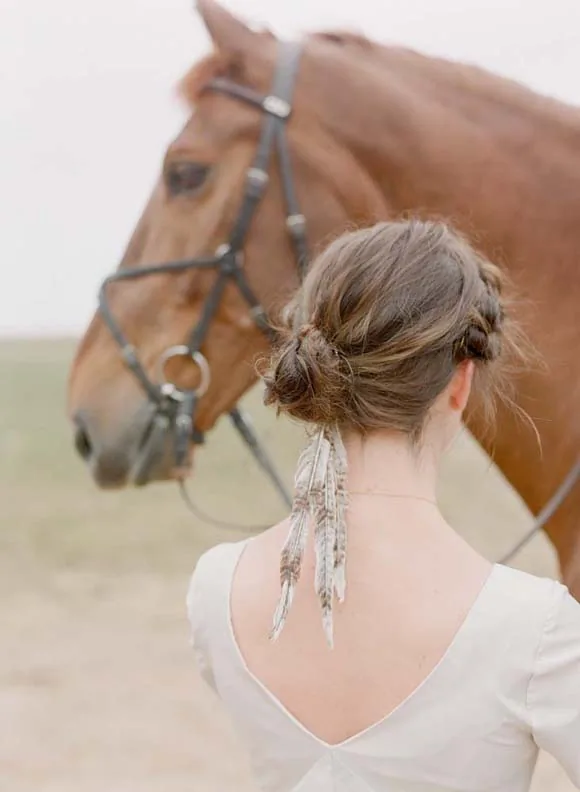
The braided low bun is the low helmet bun with one upgrade: braid the hair first, then coil the braid into a bun. The braid gives the bun texture and grip, so it holds without slipping, and the coiled braid looks far more polished than a plain bun — neat enough for the show ring, tough enough for the trail. It is the style for the rider who wants her practical hair to look like she thought about it, because the braid shows from every angle and the bun stays flat under the helmet.
How to style it: braid the hair low into a single plait, coil the plait flat against the nape, and pin it with crossed bobby pins at the base and both sides. Best for: medium to long hair, show days, and riders who want one style for both the ring and the yard. Pros: holds better than a plain bun, looks more polished, and the braid texture hides flyaways. Cons: it takes a few minutes longer than a plain bun, and very thick hair can make the coil bulky — split it into two coils if you need to. Quick verdict: the plain bun’s prettier, tougher sister.
9. The Show-Ring Low Chignon
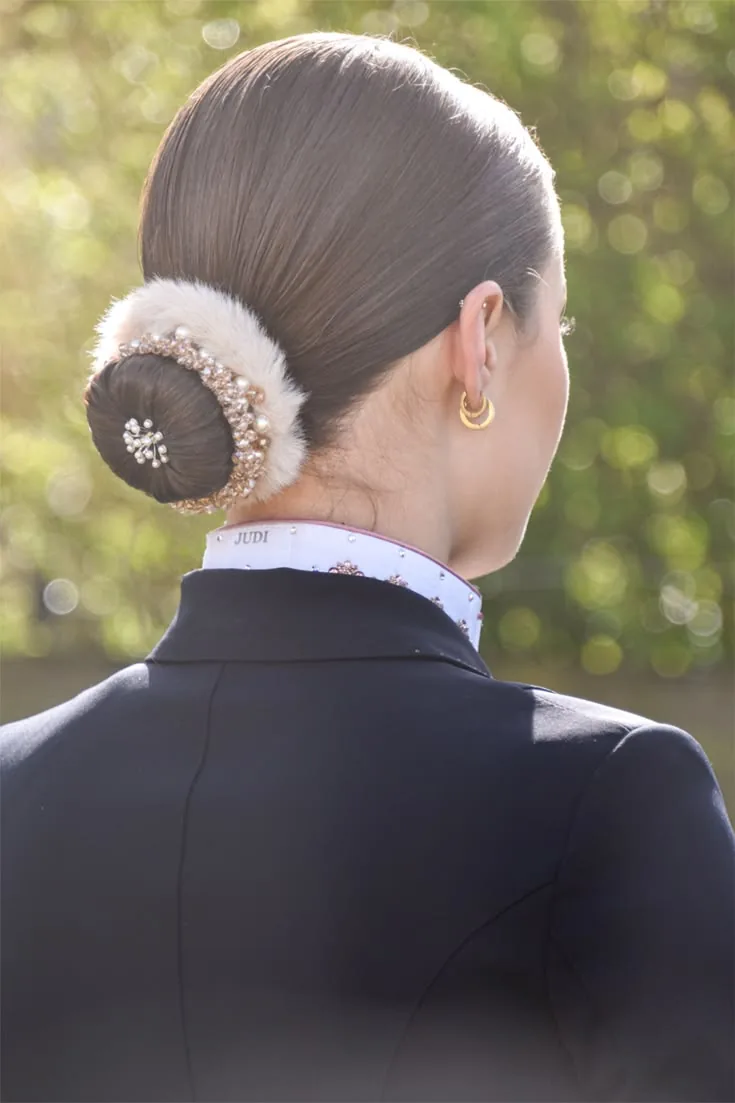
In the show ring, the low chignon is the standard for a reason: it is neat, low, flat, and invisible under a helmet, and it gives the judge a clean, polished silhouette. The hair is smoothed back, gathered at the nape, and coiled into a small, tight knot that sits exactly where a helmet ends — no bulk, no bumps, no loose ends. A hairnet over the chignon finishes the look, and the result is the classic equestrian silhouette that has been in the ring for decades. It is formal, it is correct, and it photographs beautifully from the side.
Best for: hunter, jumper, and equitation classes, and any judged ride. How to style it: smooth the hair with a shine serum, gather it low, coil it tight, pin it flat, and cover it with a fine hairnet that matches your hair colour. What to ask your stylist for: a low, centred chignon with a clean part and no height at the crown. Pros: the most correct show-ring look there is, and it holds through a whole class. Cons: it is a formal style, so it can feel severe — soften the front with a side part. Maintenance: none during the class, just a re-pin between rounds.
10. Hunter Braids
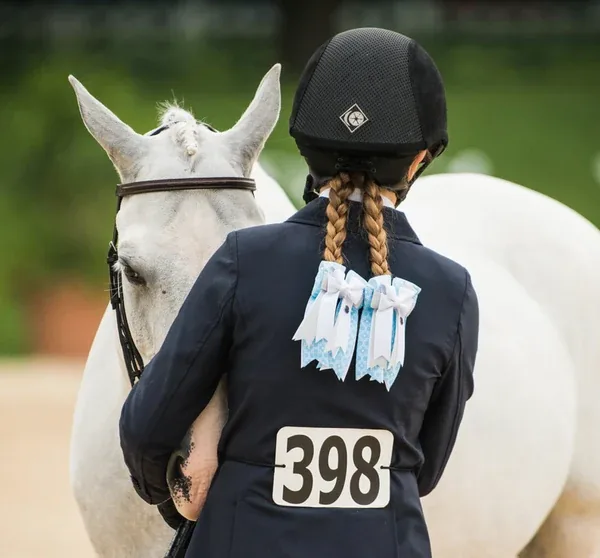
Hunter braids are the traditional show-ring braid: small, tight, evenly spaced braids along the top of the neck, finished with yarn or thread, and tucked neatly under the helmet. In the hunter ring they are part of the turnout, as expected as polished boots and a clean saddle pad, and they signal a rider who knows the traditions of the ring. They take time and a steady hand — or a good braider — but the result is unmistakable: a neat, even row of braids that holds for the whole show and looks perfect in every photograph.
Why it works: the small, tight braids lie completely flat, so the helmet sits perfectly, and the even spacing reads as polish from the judge’s box. How to style it: part the hair in small, even sections along the mane line, braid each one tightly, and secure with yarn in a colour that matches your hair. Pros: the most traditional show-ring look, and it holds all day. Cons: it takes thirty minutes or more, and most riders need help or practice to get the spacing even. Cost and time: a braider at a show charges for the service, so budget for it — or learn it yourself before the season starts. Who should avoid it: trail riders, who do not need it.
11. The Dressage Low Bun with a Hairnet
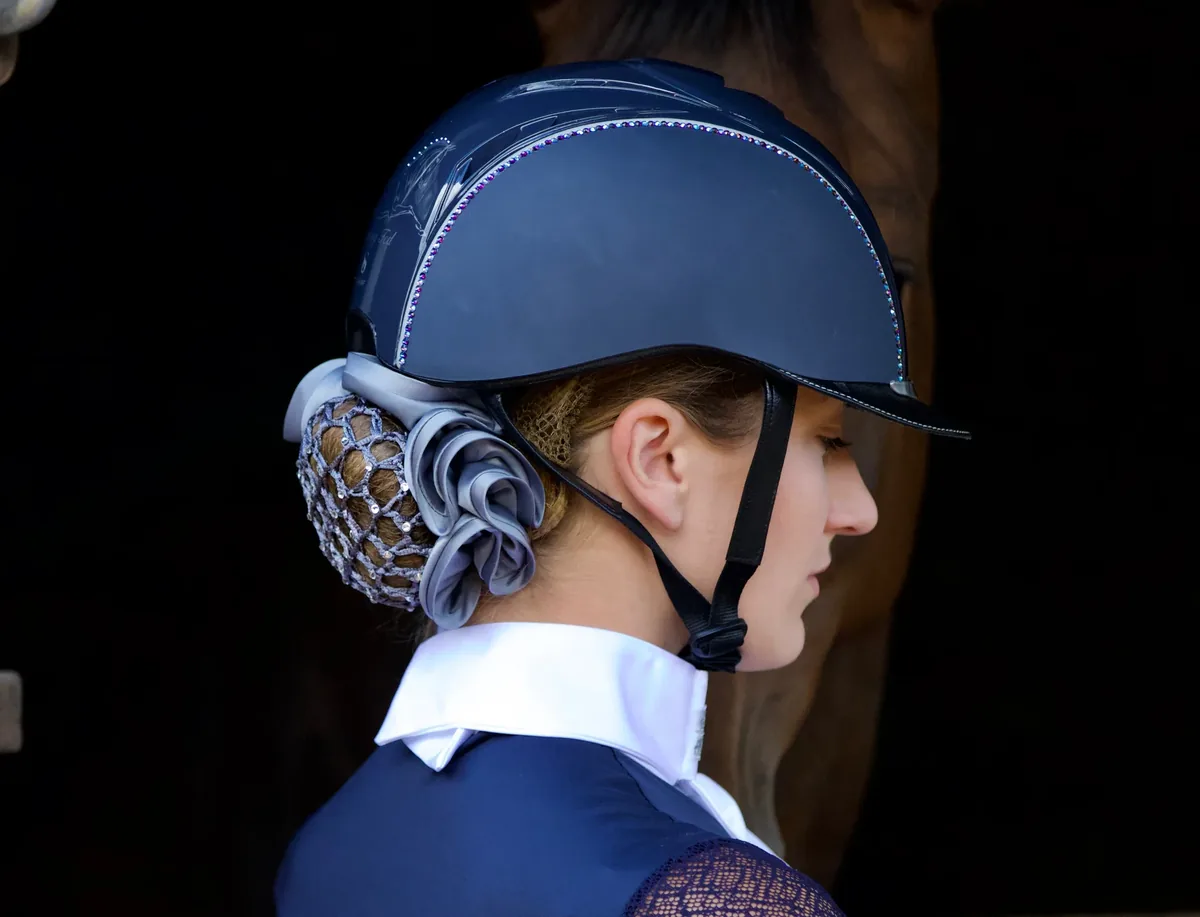
Dressage is the most formal discipline in the ring, and its hairstyle is the most disciplined too: a low bun, perfectly smooth, covered with a fine hairnet, with not a single flyaway. The dressage bun sits low at the nape, tight to the head, and the hairnet — in a colour that matches your hair — holds every strand in place through a test that can last ten minutes of collected, precise movement. It is the style that says you take the details seriously, and in dressage, the details are the whole sport.
Best for: dressage tests, formal competitions, and any judged ride where polish matters. How to style it: smooth the hair with gel or serum, gather it low, coil it into a small bun, pin it flat, and cover it with a hairnet secured with two pins. Pros: the neatest, most secure style in this guide, and it never moves. Cons: it is the most formal look here, so it can feel stiff for a casual ride — save it for competition. Maintenance: none at all during the test. Common mistake: using a hairnet that does not match your hair colour, which makes the bun look like a separate object. Match the net, and it disappears.
12. The Western Low Ponytail
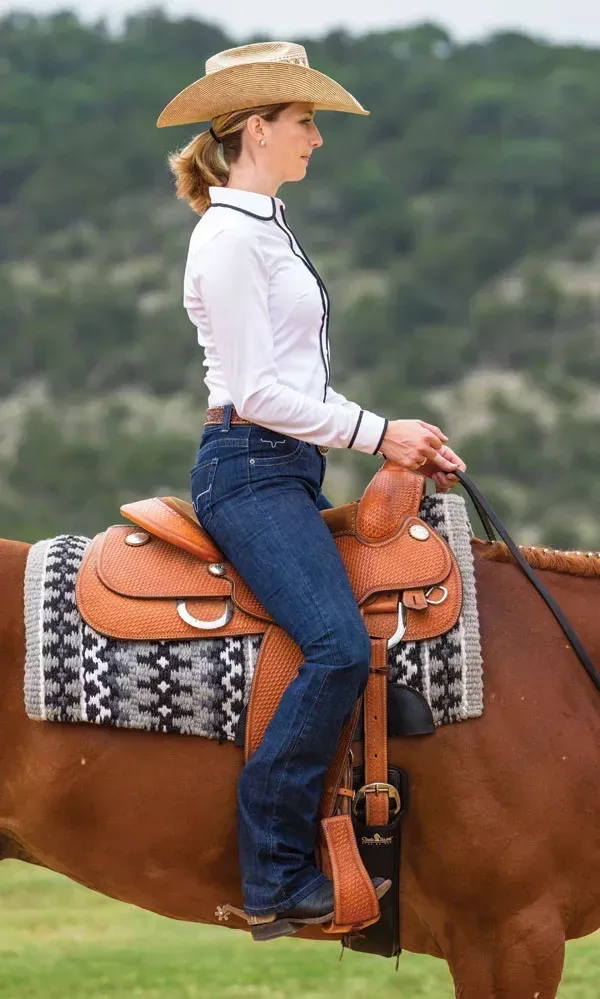
Western riding has its own look, and the low ponytail is at the centre of it: gathered low at the nape, lying flat down the back, long enough to show, neat enough to stay out of the reins. Under a Western hat it sits comfortably, and under a helmet it fits just as well, which makes it the style for the rider who switches between the two. It is relaxed, practical, and unmistakably Western — the style for reining, trail, and ranch work, where the priorities are comfort, durability, and a silhouette that looks right with a hat.
How to style it: gather the hair low, secure it with a strong elastic, and wrap a leather tie or a strand of hair around the elastic for a finished look. Best for: Western disciplines, trail rides, and long days in the saddle. Pros: comfortable under a hat or a helmet, easy to redo, and it suits the Western silhouette. Cons: a long ponytail can tangle in wind, so braid the tail on windy days or tuck it into your collar. Quick verdict: the Western classic — simple, durable, and right for the discipline.
13. The Side Braid Over One Shoulder
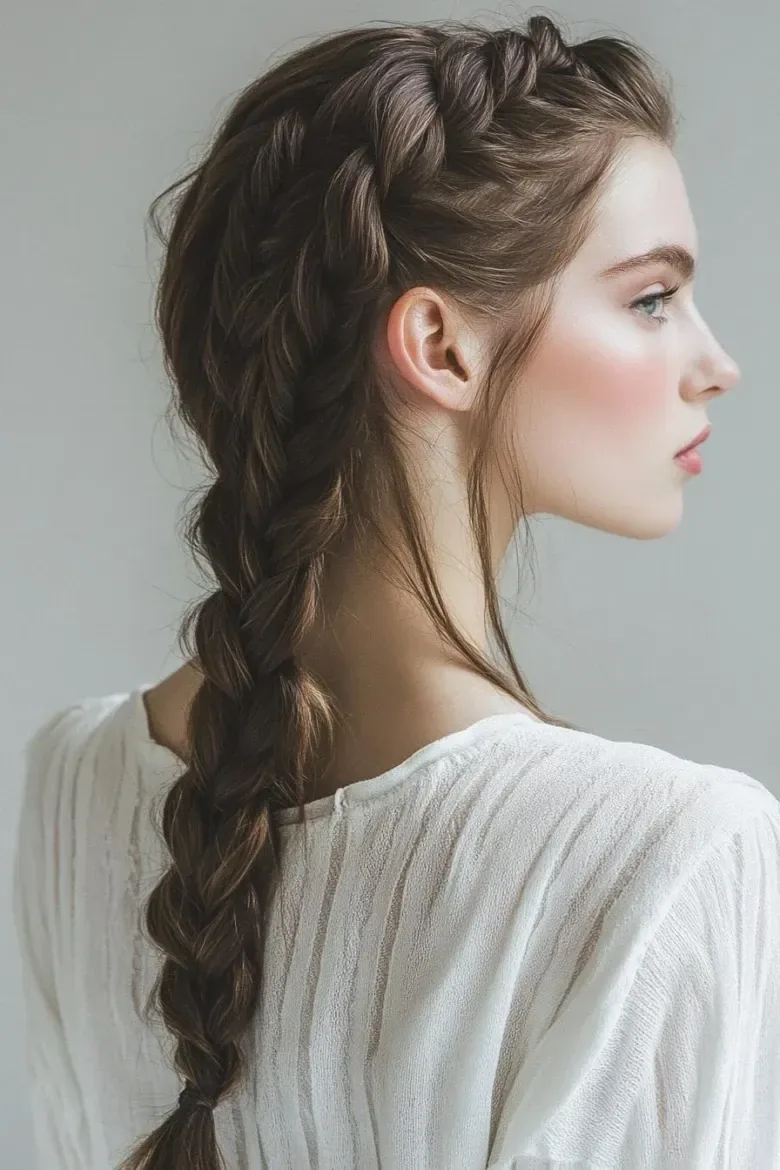
The side braid is the riding braid that looks best after the ride: gathered over one shoulder, loose and textured, it is the style for the photograph at the mounting block, the walk back to the stable, and the drink afterwards. During the ride it is less practical than a braid down the back — it can swing forward at a trot — so it is best for a slow hack, a walk on a quiet trail, or a schooling session where you can keep an eye on it. Braid it loosely for softness, or tightly for durability, and pin the front pieces back so nothing falls into your face.
Best for: slow rides, photo days, and the walk home from the stable. How to style it: sweep the hair to one side, braid it loosely from behind the ear, and secure the end with a small elastic. Pros: romantic, photogenic, and easy to do. Cons: it can swing forward and catch in the reins at speed, so keep it for slow work. Common mistake: braiding it too loosely for a fast ride. If you are going to canter, braid it down the back instead. Maintenance: re-pin the front pieces if they fall loose.
14. The Rope Braid Ponytail
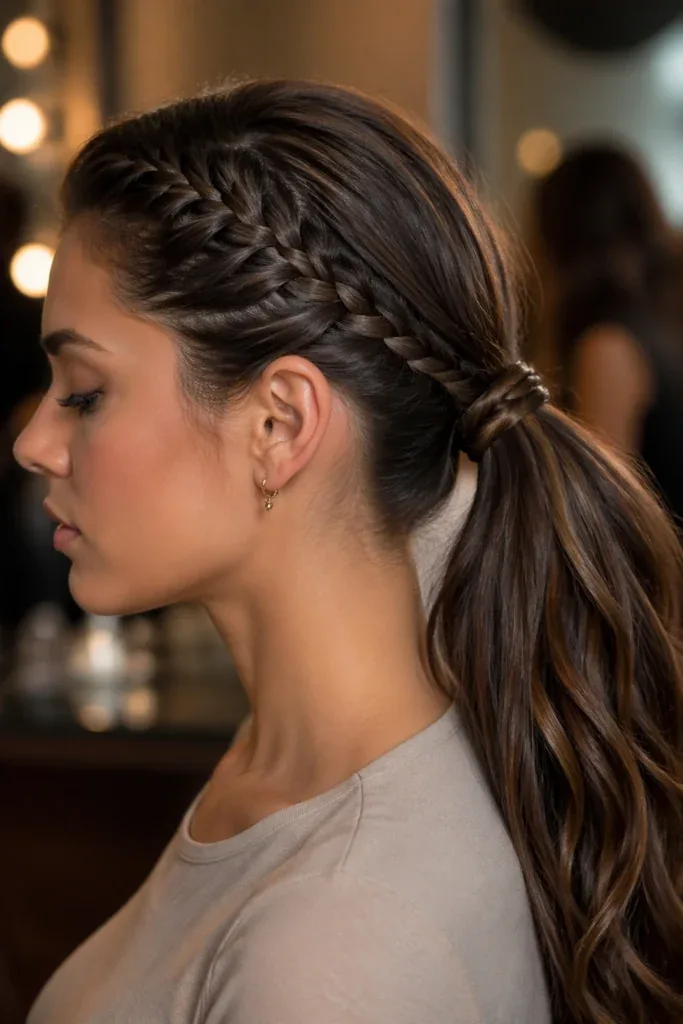
The rope braid is the fastest braid in this guide: two strands, twisted in the same direction and then wound around each other, and the result is a strong, rope-like plait that holds through wind and movement. As a ponytail, it is the style for the rider who wants a braid but has two minutes, not ten — gather the hair low, split it into two, twist, wind, and secure. It is tougher than a plain ponytail and prettier than a plain plait, and it is the braid that survives a long trail ride without a single re-do.
Why it works: the twisted strands lock together, so the braid cannot slip or loosen the way a three-strand plait can. How to style it: gather the hair into a low ponytail, split it into two sections, twist each section the same way, then wind them around each other in the opposite direction and secure the end. Pros: very fast, very strong, and it looks more intricate than it is. Cons: it can unravel at the ends if the elastic is loose, so use a strong elastic and a small pin. Quick verdict: the two-minute braid that holds like a ten-minute one.
15. The Bubble Braid Ponytail
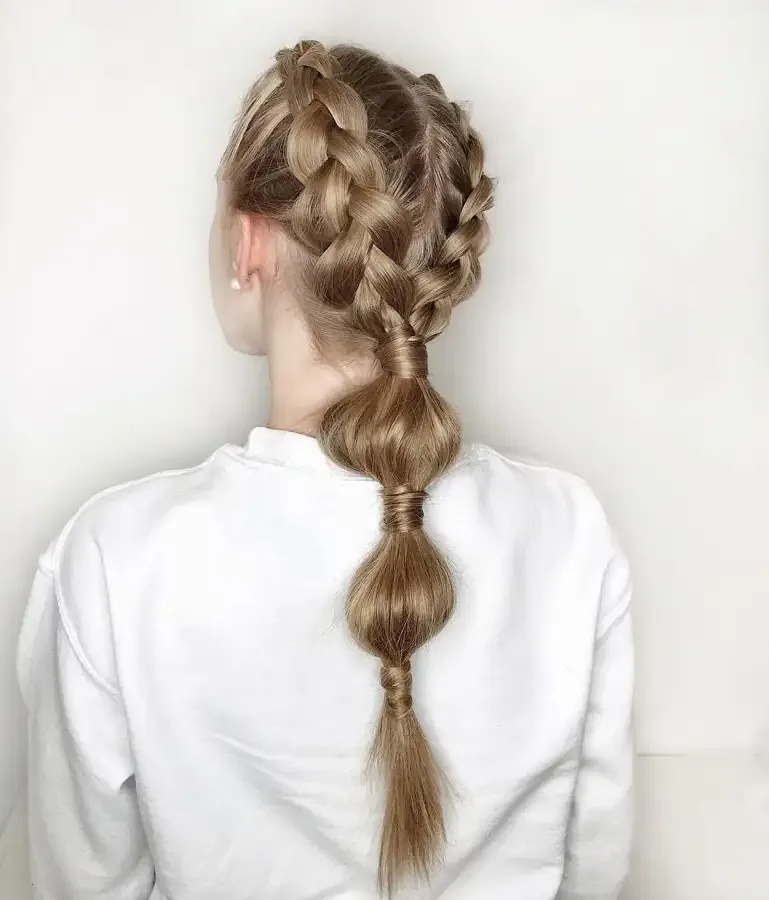
The bubble braid is the playful one: a low ponytail divided into sections with small elastics, each section puffed out into a bubble, running down the back like a string of pearls. It is not a show-ring style, and it is not trying to be — it is the style for a fun trail ride, a beach ride, or a day at the yard with friends. It holds well, because each elastic is a separate anchor, and it is easy to fix: if one bubble loosens, you re-puff it in seconds. It also looks wonderful in photographs, because the bubbles catch the light and give the hair shape from behind.
Best for: casual rides, beach rides, and riders who want a fun look. How to style it: gather the hair into a low ponytail, add elastics every few inches, and gently pull each section out into a bubble. Pros: fun, photogenic, and easy to repair. Cons: the elastics can snag fine hair, so use snag-free elastics and remove them gently. Maintenance: re-puff a bubble if it flattens. Who should avoid it: show riders — save it for the trail, where it belongs.
16. The Low Twisted Bun
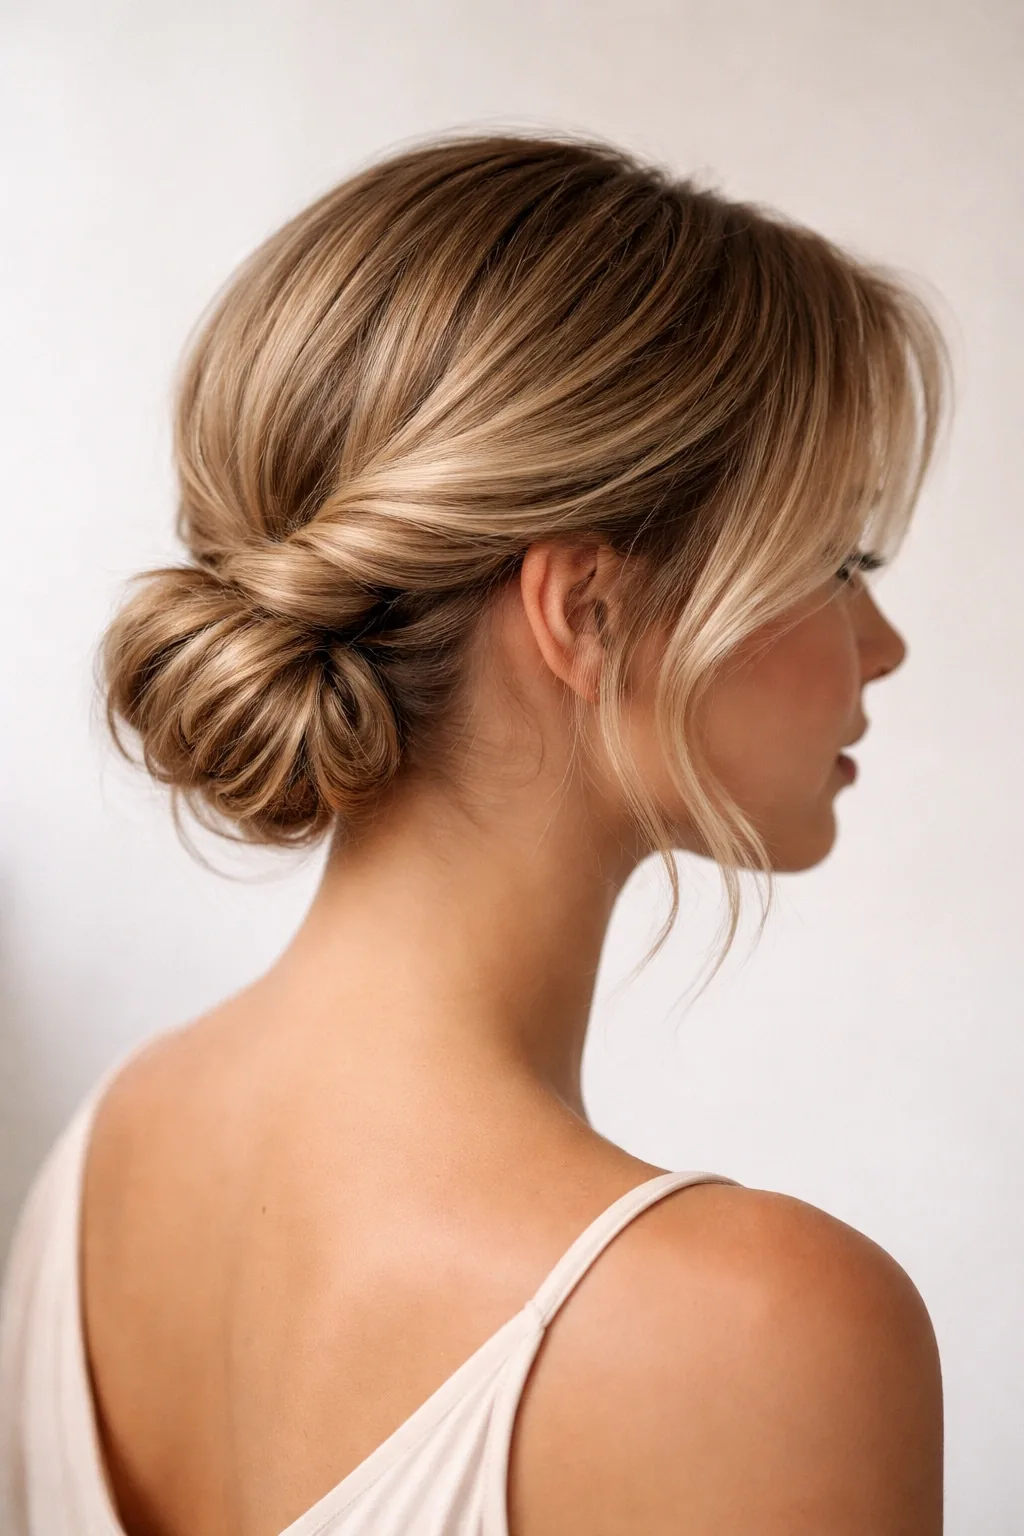
The low twisted bun is the low bun’s softer cousin: instead of coiling the hair into a tight knot, you twist it into a rope and wrap the rope into a bun, which gives the bun texture and a slightly looser, more romantic shape. It is still flat enough for a helmet, still contained enough for the reins, but it looks less severe than a plain bun — the style for the rider who wants her practical hair to have a little softness. It is also the bun that is easiest to do on yourself, because a twist is more forgiving than a coil.
How to style it: gather the hair low, twist it into a rope, wrap the rope around its base, and pin it flat with crossed bobby pins. Best for: medium to long hair, everyday riding, and riders who find a plain bun too severe. Pros: soft, textured, and easy to do on yourself. Cons: a twisted bun can loosen faster than a coiled one, so pin it at three points. Common mistake: twisting too loosely, which lets the bun sag. Keep the twist firm, and the bun will hold. Quick verdict: the bun for riders who want softness without giving up security.
17. The Milkmaid Braid
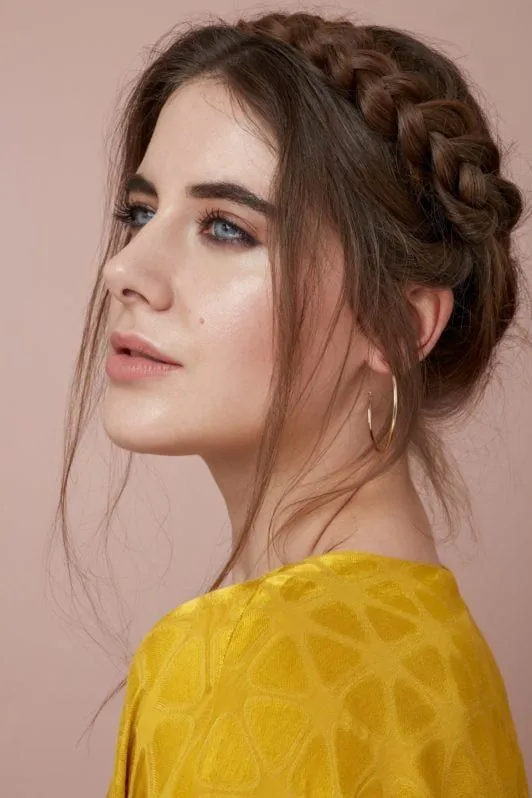
The milkmaid braid is two braids, crossed over the top of the head and pinned into a crown — a style that keeps every strand off the neck and out of the way, which is exactly what you want on a hot day at the stable. It is romantic and old-fashioned, and it is also one of the most practical hot-weather styles there is, because the hair is completely off the neck and cannot stick to sweaty skin. Under a helmet it fits flat, because the braids lie against the head rather than piling up, and after the ride it looks just as good as it did before.
Best for: hot days, long hair, and riders who want their hair completely off their neck. How to style it: braid two low pigtails, cross them over the top of the head, and pin each one to the opposite side with bobby pins hidden under the braid. Pros: keeps hair off the neck, looks romantic, and holds all day. Cons: it takes practice to get the braids to sit evenly, and very thick hair can make the crown bulky. Maintenance: re-pin one side if it slips. Who should avoid it: riders in a hurry — this is a ten-minute style, not a two-minute one.
18. The Crown Braid
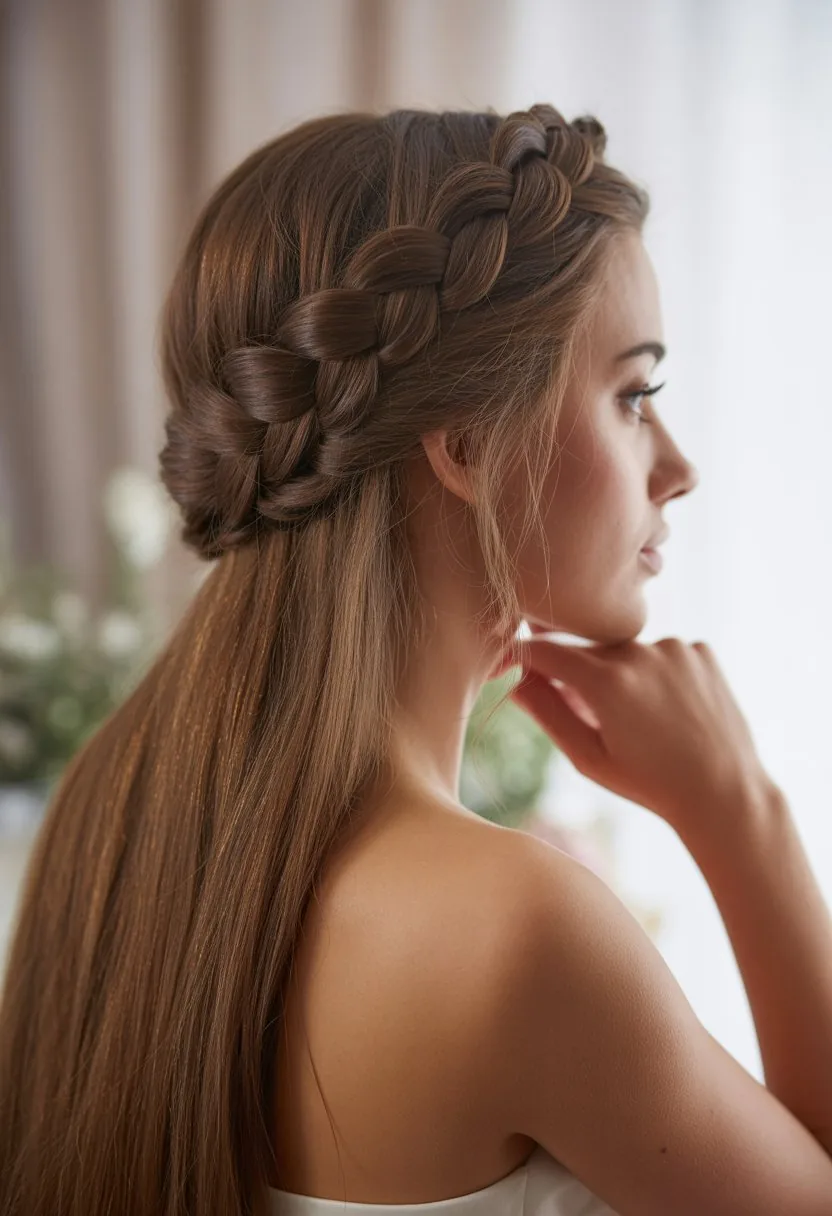
The crown braid is a single braid that travels around the head like a halo, gathering hair as it goes and finishing where it started. It is the most secure updo in this guide that is not a bun, because the braid is anchored to the scalp all the way around, and nothing can slip. It keeps hair off the neck, out of the reins, and flat under a helmet, and it looks elegant enough for a show day and practical enough for a trail ride. It is the braid for the rider who wants her hair completely contained but does not want a bun.
How to style it: start behind one ear, braid around the hairline, gathering hair as you go, and pin the end under the start of the braid. Best for: long hair, hot days, and riders who want a secure updo without a bun. Pros: completely contained, very secure, and beautiful from every angle. Cons: it takes practice to braid around the head evenly, and it is hard to do on yourself the first few times. Common mistake: braiding too tightly at the hairline, which pulls and hurts by midday. Keep the front sections firm but comfortable.
19. The Half-Up Braided Crown
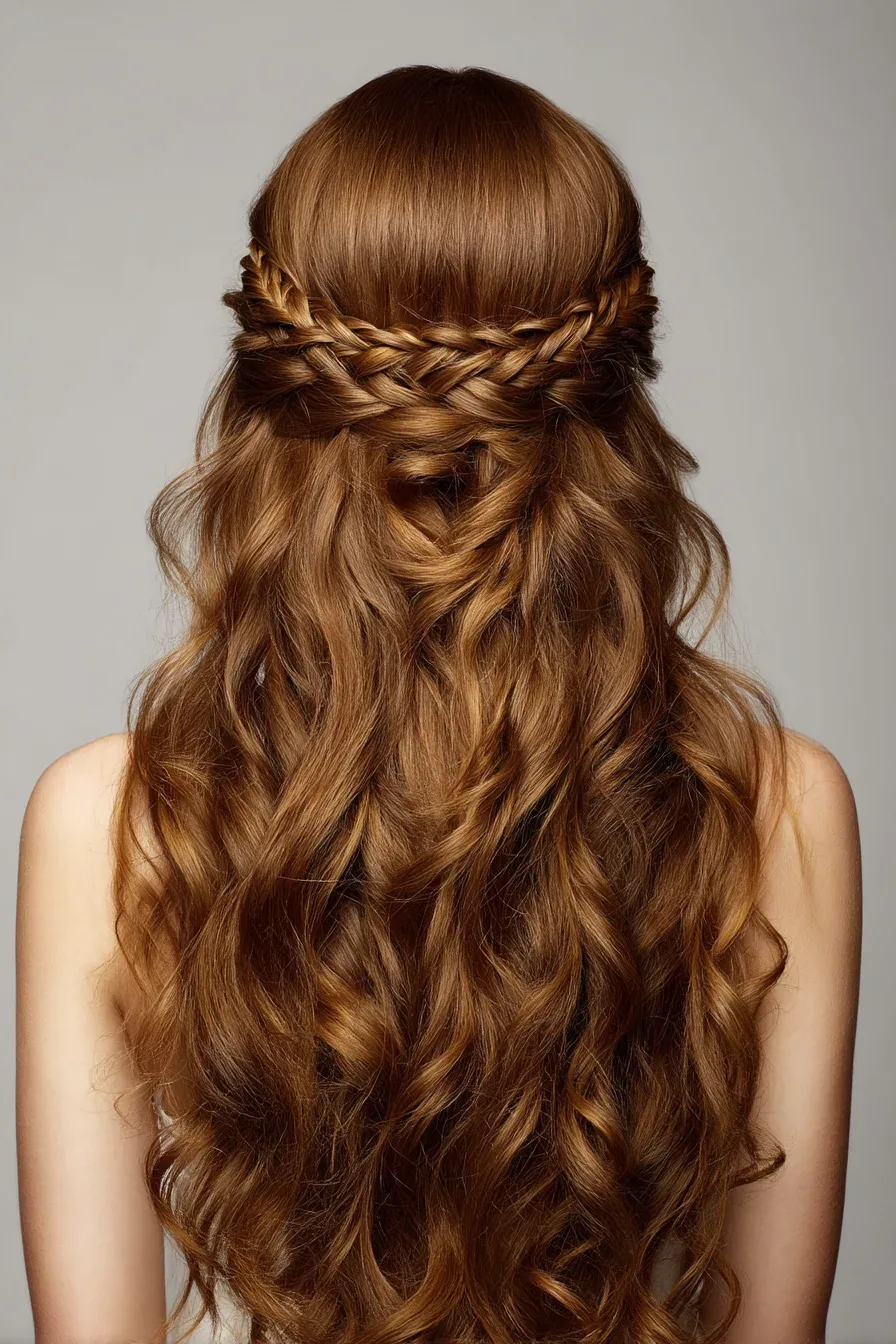
The half-up braided crown is the compromise between up and down: two small braids from each side, crossed at the back of the head and pinned, while the rest of the hair falls loose. It keeps the front pieces out of your face and out of the reins, which is the practical part, and it keeps the length loose, which is the romantic part. It is best for a slow hack or a walk, when the loose length will not tangle, and it is the style for the rider who cannot decide between a braid and wearing her hair down — and does not have to.
Why it works: the braided crown gives the style its shape, and the loose lengths give it softness, so it photographs beautifully from the front and the back. How to style it: braid a small section from each side, cross them at the back, pin them, and leave the rest loose — curled softly or in natural waves. Pros: romantic, flattering, and the crown holds the front pieces back all ride. Cons: the loose length can tangle in wind, so save it for calm days. Common mistake: braiding the crown too tightly, which pulls the front pieces back and looks severe. Keep it soft, and let a few fine pieces fall at the front.
20. The Half-Up Low Ponytail
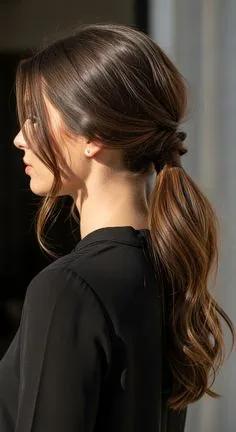
The half-up low ponytail is the simplest half-up style there is: the top half of the hair gathered low at the back, the bottom half left loose. It keeps the front pieces and the crown out of your face, which is what matters on a horse, and it leaves the length free, which is what makes it feel relaxed. It is the style for a quiet hack, a lesson, or a morning at the yard when you want your hair to look like you thought about it without spending ten minutes on it. A small elastic and one pin are all it needs.
Best for: medium to long hair, casual rides, and riders who like wearing their hair down. How to style it: gather the top half low at the back, secure it with a small elastic, and wrap a strand around the elastic to hide it. Pros: fast, comfortable, and flattering. Cons: the loose length can tangle on a windy day, so braid the lower half on windy days. Maintenance: re-tie the top half if it slips. Who should avoid it: riders on a fast or windy ride — choose a full braid instead.
21. The Sleek Straight Low Ponytail
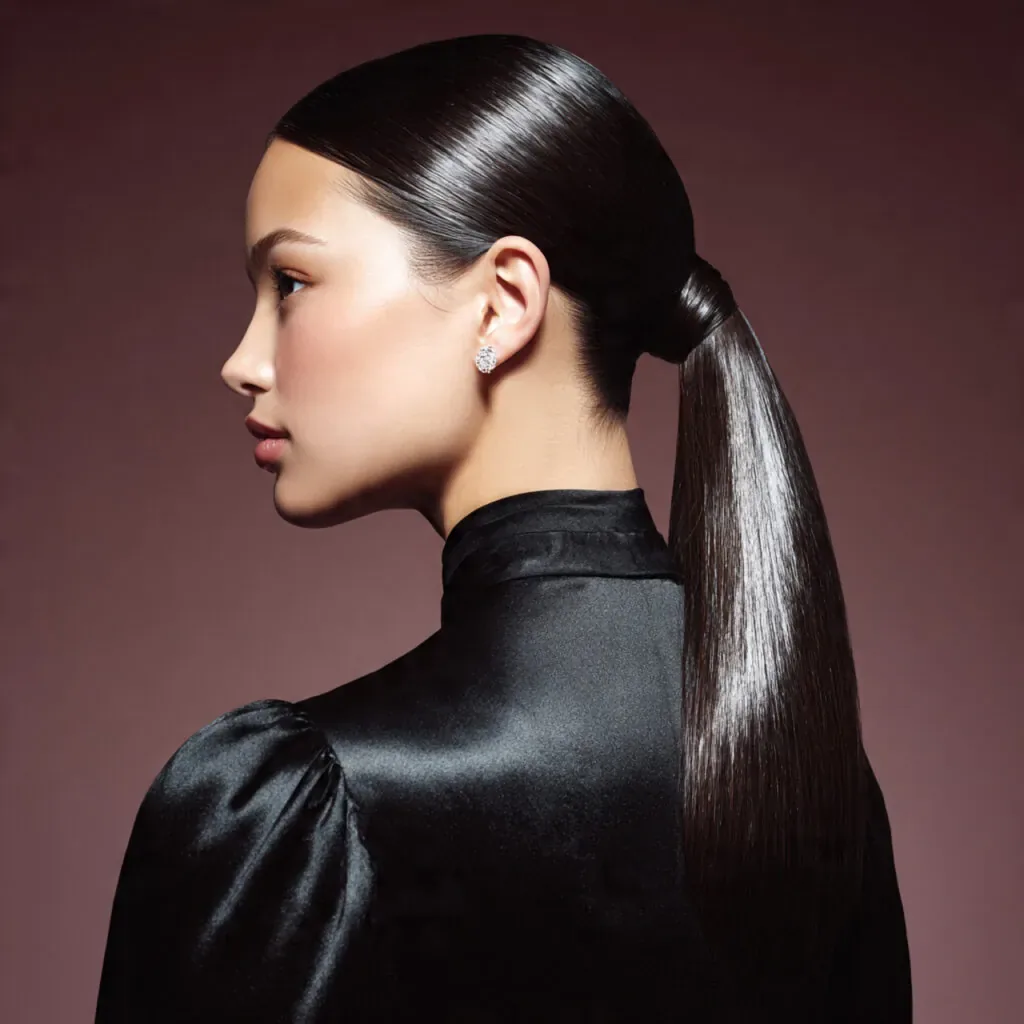
The sleek straight low ponytail is the polished version of the classic: hair smoothed with serum, gathered low at the nape, and falling straight and shiny down the back. It is the ponytail for the rider who wants her everyday style to look deliberate — a show-day ponytail, a schooling ponytail, or a ponytail for the photograph at the mounting block. The shine is the point: a smooth surface catches the light, and a straight ponytail with shine looks expensive even when it took three minutes.
How to style it: smooth the hair with a shine serum, brush it straight back, gather it low, and secure it with a strong elastic wrapped with a strand of hair. Best for: straight hair, show days, and riders who love a polished look. Pros: sleek, shiny, and very photogenic. Cons: straight hair shows every flyaway, so a little serum on the surface is essential. Common mistake: gathering the ponytail too high, which pushes the helmet forward. Keep it low, and the helmet will sit level. Quick verdict: the ponytail, polished to its best.
22. The Textured Low Ponytail
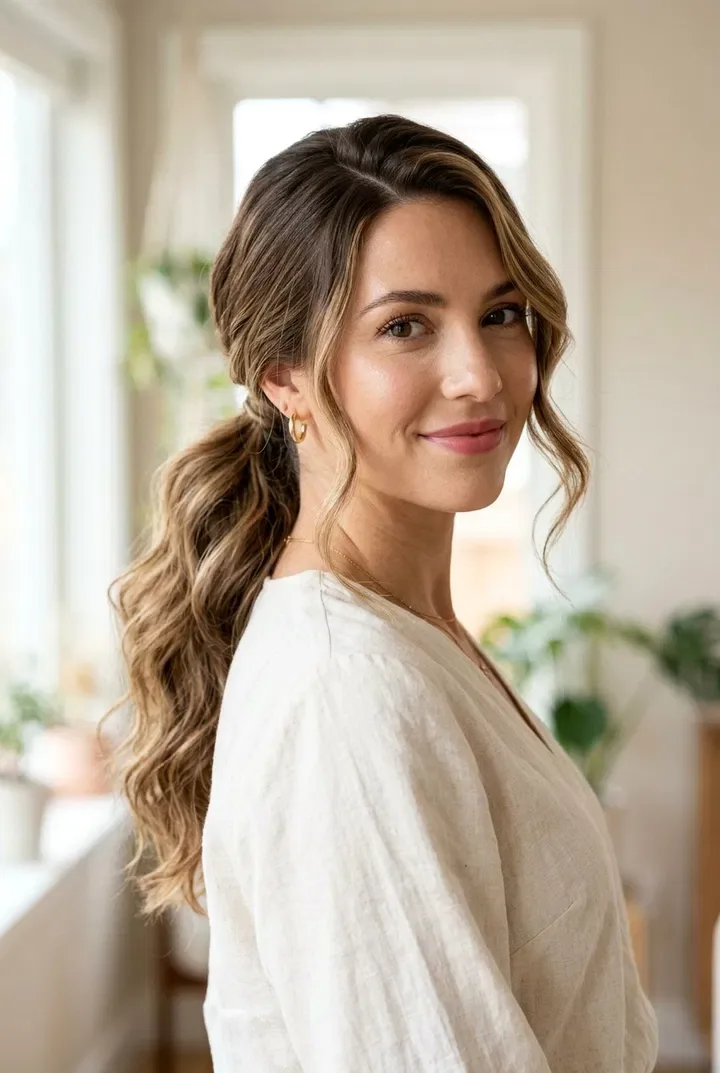
The textured low ponytail is the relaxed version: hair with a little wave, a little volume at the crown, and a ponytail that is gathered low but not pulled tight. It is the ponytail for a trail ride, a schooling session, or a day at the yard when you want your hair to look effortless rather than polished. The texture is the point — a little dry shampoo at the roots, a little texture spray through the lengths, and the ponytail has movement and body instead of lying flat and severe. It is also the most forgiving ponytail in this guide, because texture hides flyaways and bumps.
Best for: wavy hair, casual rides, and riders who prefer a relaxed look. How to style it: add dry shampoo at the roots and texture spray through the lengths, gather the hair low, and secure it loosely. Pros: relaxed, forgiving, and easy to do. Cons: texture can turn to frizz in humidity, so a little serum on the ends helps. Maintenance: re-tie it once during the day if it loosens. Who should avoid it: show riders — the show ring wants sleek, not textured.
23. The Low Messy Bun

The low messy bun is the stable-yard bun: gathered low, twisted loosely, pinned with a few pins, and not worried about perfection. It is the bun for a morning of mucking out, a schooling session, or a day when you need your hair up and out of the way and you have two minutes to do it. It is still low and flat enough for a helmet, still contained enough for the reins, but it is relaxed — a few loose pieces at the front, a soft shape at the back, and no shine serum in sight. It is the bun that says you are here to ride, not to pose.
How to style it: gather the hair low, twist it loosely, coil it into a bun, and pin it with three or four bobby pins — do not smooth it, and let a few pieces fall. Best for: everyday riding, stable work, and riders who want a fast, comfortable bun. Pros: very fast, very comfortable, and it looks better as it loosens. Cons: it can look untidy in the show ring, so save it for the yard. Common mistake: pinning it too tightly, which defeats the point. Let it be soft, and it will hold. Quick verdict: the two-minute bun that every rider actually wears.
24. The Sock Bun, Worn Low
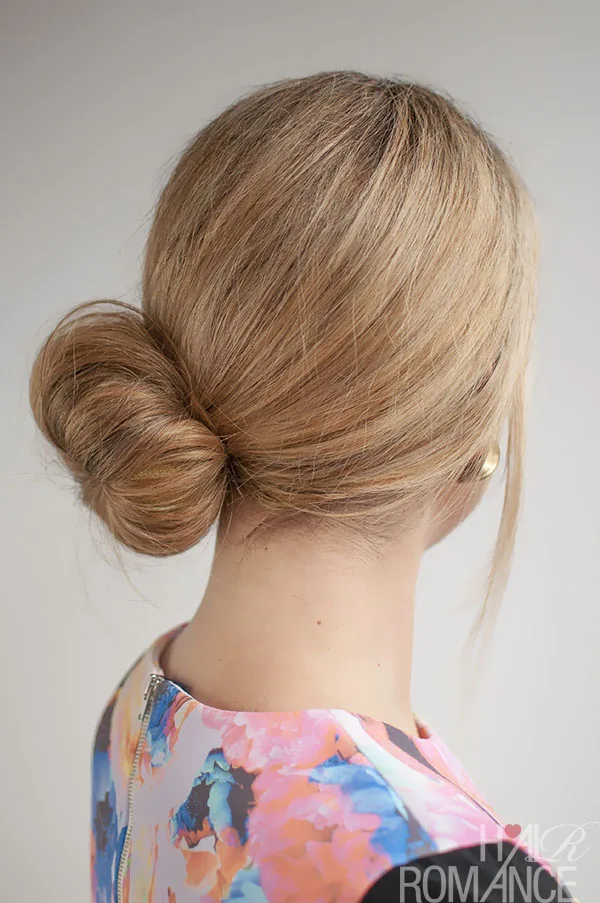
The sock bun is the neatest bun in this guide, and it is also the most reliable: a foam donut or a rolled sock gives the bun its shape, so it is perfectly round, perfectly even, and perfectly secure. Worn low at the nape, it is flat enough for a helmet and neat enough for the show ring, and it is the bun for the rider whose hair is fine or thin, because the donut gives the bun volume that her own hair cannot. It is also the bun that holds best through a long day, because the shape is built into the donut, not into the hair.
Best for: fine or thin hair, show days, and riders who want a perfectly neat bun. How to style it: pull the hair through the donut, spread it evenly over the donut, tuck the ends under, and pin it flat. Pros: perfectly neat, very secure, and it gives fine hair volume. Cons: it takes a few minutes and a donut, so keep one in your tack box. Maintenance: none — once it is pinned, it stays. Cost and time: a foam donut costs almost nothing and lasts for years. Who should avoid it: nobody, but very thick hair may not need it.
25. The Braided Ponytail Wrap
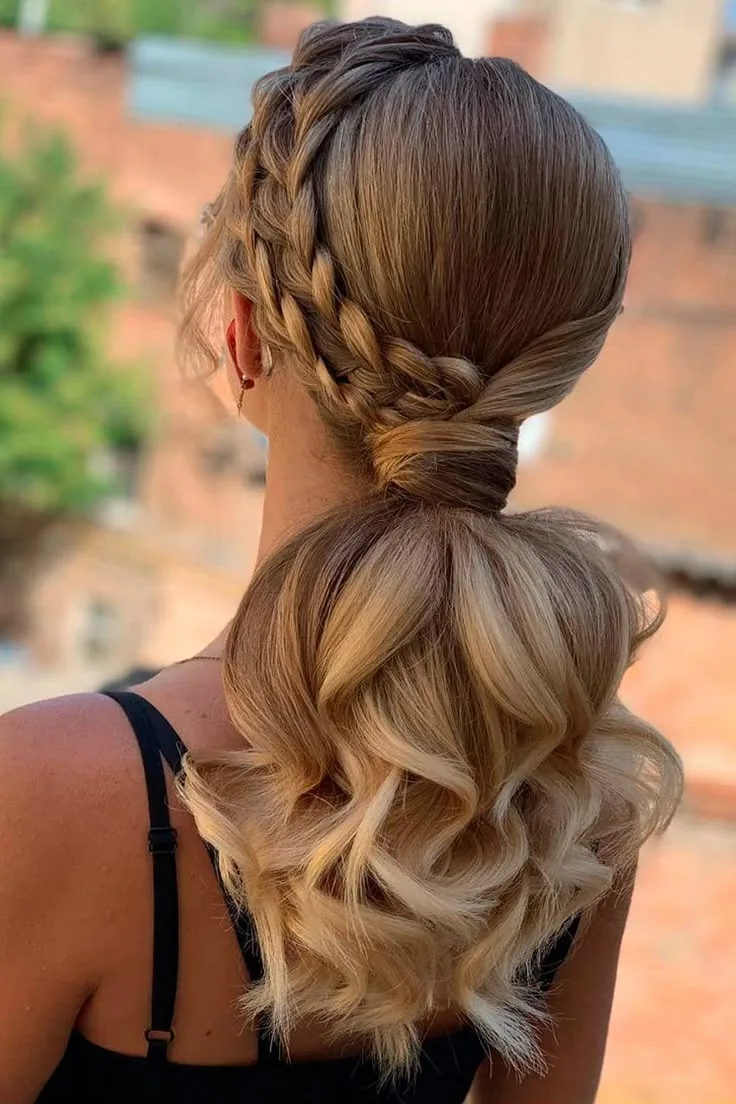
The braided ponytail wrap is a small detail that makes a plain ponytail look finished: a thin braid, wrapped around the base of the ponytail, hiding the elastic and giving the style a polished, deliberate look. It takes one extra minute — braid a small section from underneath the ponytail, wrap it around the base, and pin it — and the result is a ponytail that looks like it belongs in the show ring rather than the stable aisle. It is the detail for the rider who wants her everyday ponytail to look a little more considered.
How to style it: gather the hair into a low ponytail, take a small section from underneath, braid it thinly, wrap it around the elastic, and pin it underneath. Best for: medium to long hair, show days, and riders who love a polished detail. Pros: a tiny change with a big visual payoff, and it hides the elastic completely. Cons: the thin braid can slip in very smooth hair, so pin it twice. Quick verdict: one minute, one braid, and the ponytail looks finished.
26. The Low French Twist
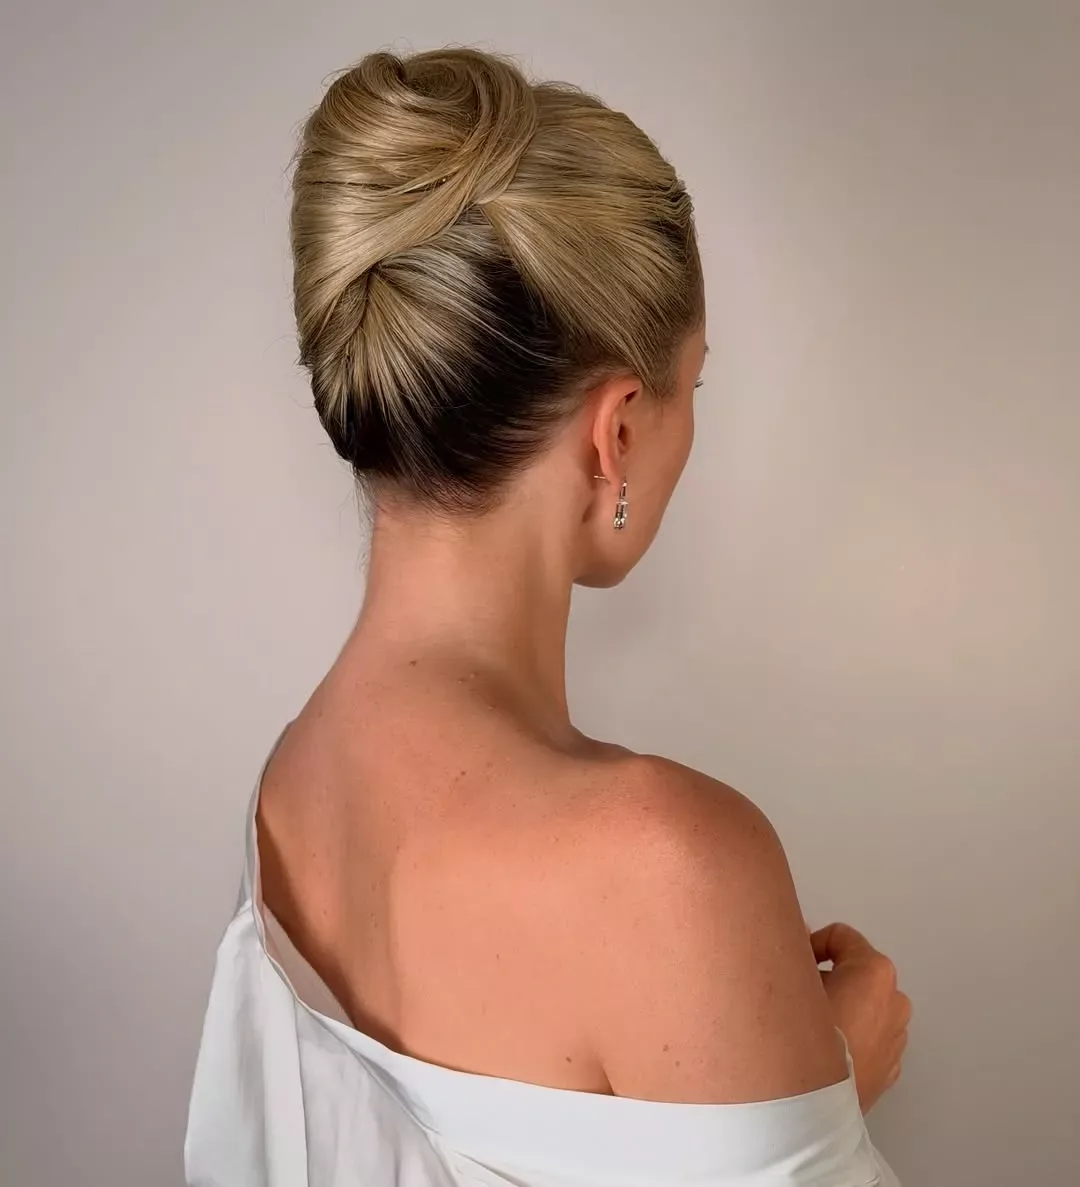
The French twist is the most elegant hairstyle ever invented, and worn low it is also a riding style: the hair swept up the back of the head and twisted into a vertical roll, pinned neatly along its spine, low enough to fit under a helmet and neat enough for the show ring. It lengthens the neck, it looks extraordinary from the side, and it holds all day without a single touch-up. It is the style for the formal ride, the competition, or the day when you want your riding hair to look like an occasion.
Best for: medium to long hair, formal competitions, and riders who love classic elegance. How to style it: gather the hair low, twist it upwards along the back of the head, tuck the ends in, and pin the twist at three points — the top, the middle, and the base. What to ask your stylist for: a soft French twist, not a severe one, with a little softness at the front. Pros: it lengthens the neck, it photographs beautifully, and it holds all day. Cons: it takes a stylist to do well — this is not a do-it-yourself style for most riders. Maintenance: none. Once it is pinned, it stays.
27. The Gibson Tuck
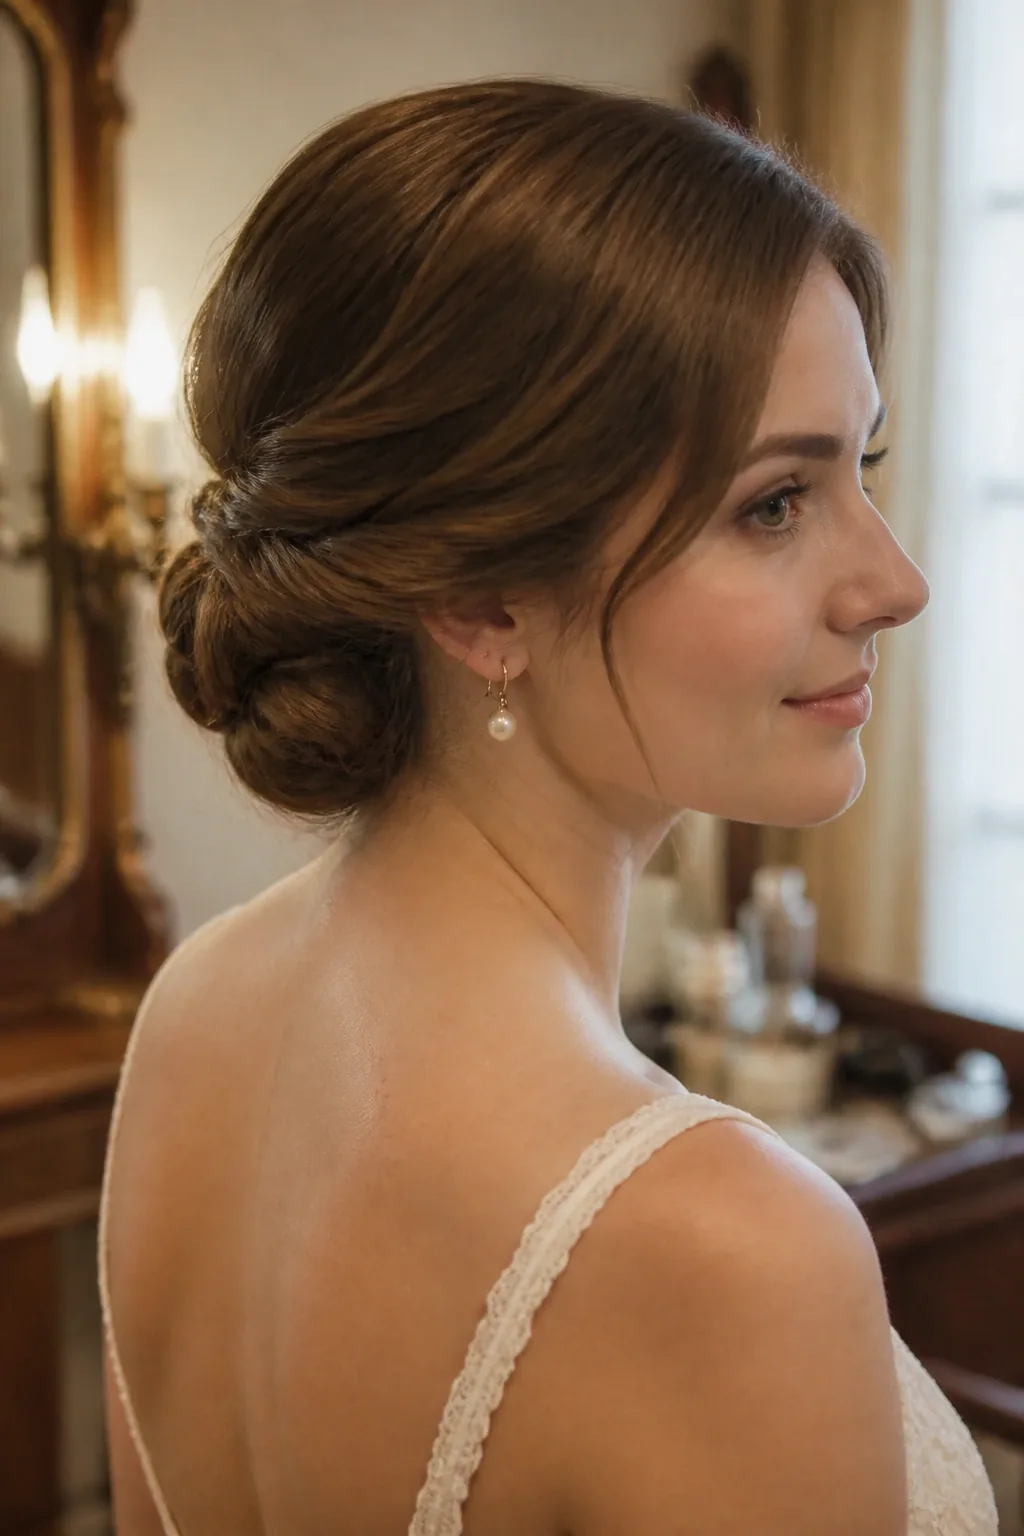
The Gibson tuck is a vintage style that is perfect for riding: the hair is gathered low, looped up, and tucked into a roll at the nape, so there is no bun and no ponytail — just a neat, flat roll that sits exactly where a helmet ends. It is soft, romantic, and completely contained, and it is the style for the rider who wants something different from a bun without giving up any security. It is also one of the easiest vintage styles to do on yourself, because it is a tuck, not a twist, and it forgives a little messiness.
How to style it: gather the hair low, make a small pocket with your fingers above the elastic, and tuck the ends up and into the pocket, pinning the roll flat. Best for: medium to long hair, vintage lovers, and riders who want a soft, flat style. Pros: flat, contained, and romantic, with no bulk at all. Cons: it can loosen in very smooth hair, so pin it at three points and use a little texture spray. Maintenance: re-tuck the ends if they slip out. Quick verdict: the vintage roll that was made for a helmet.
28. The Low Knot with a Scarf
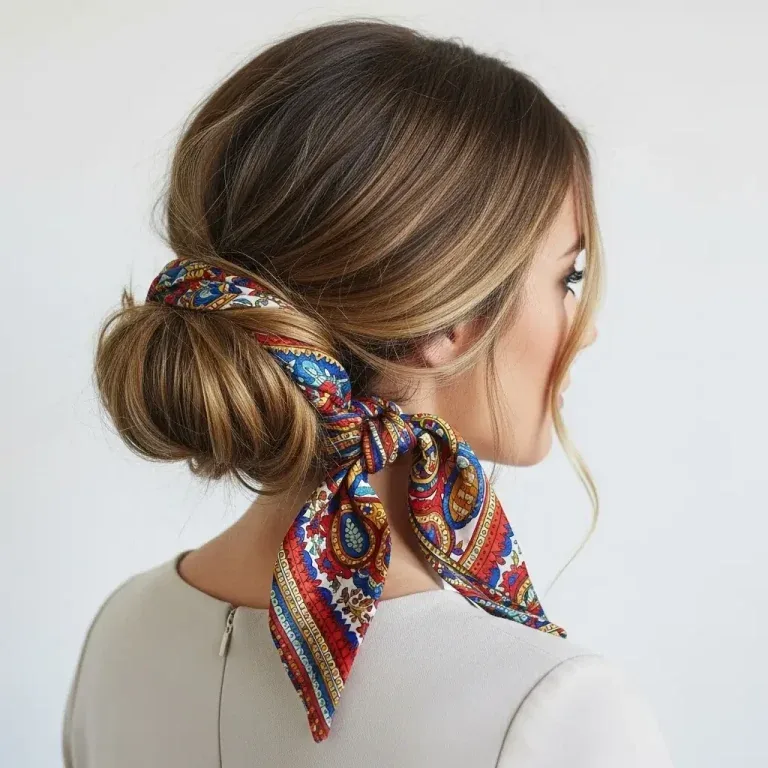
The low knot with a scarf is the riding style with a little personality: a small, flat knot at the nape, wrapped with a silk scarf that is tied neatly and tucked in. The scarf does two jobs — it holds the knot in place, and it gives the style colour and character — and it is the style for a trail ride, a Western ride, or a day at the yard when you want your hair to look like you. Under a helmet, the scarf must be thin and flat, tied low and tucked away, so it does not add bulk or slip.
Best for: trail rides, Western riding, and riders who love an accessory. How to style it: tie the hair into a low knot, wrap a thin silk scarf around its base, tie it neatly, and tuck the ends under the knot. Pros: colourful, personal, and the scarf adds grip. Cons: a thick scarf adds bulk under a helmet, so choose a thin silk one and keep it flat. Common mistake: tying the scarf too high, which pushes the helmet up. Keep it low, and the helmet will sit level. Who should avoid it: show riders — the ring wants a hairnet, not a scarf.
29. The Short Bob Tucked Under the Helmet
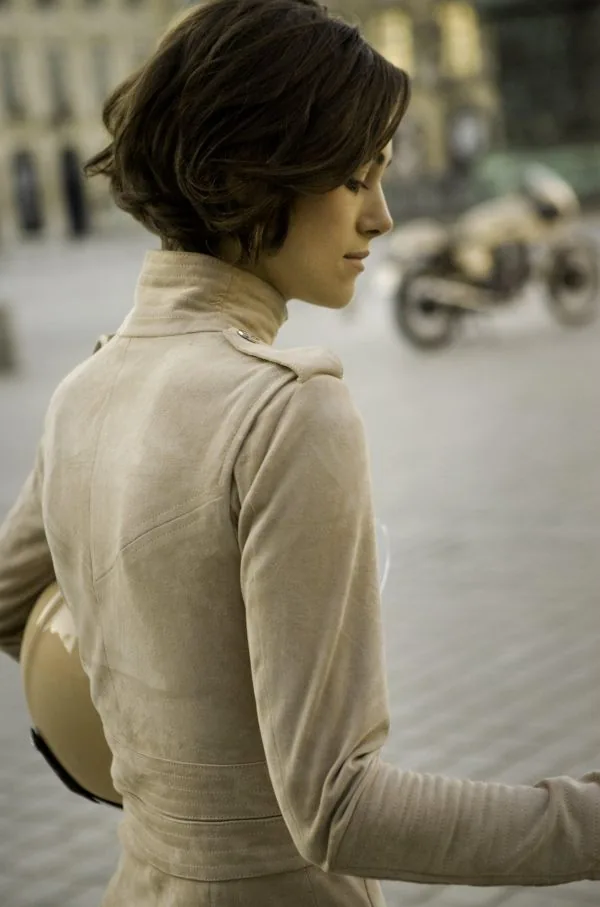
Short hair is the easiest hair to ride with, and a bob is the easiest short style of all: it fits under a helmet without any gathering, pinning, or braiding, and it comes out looking almost the same as it went in. The trick is the tuck — push the front pieces behind your ears or pin them back, so nothing falls into your face, and smooth the back flat so the helmet sits level. A bob with a side part is the most practical shape, because the part gives the hair a direction and keeps it from falling forward.
Why it works: there is nothing to catch in the reins, nothing to tangle in the wind, and nothing to re-pin. How to style it: part the hair to the side, smooth it with a little serum, and pin the front pieces back with two small clips. Pros: the fastest riding style there is, and it needs no maintenance at all. Cons: a bob can flip out at the ends under a helmet, so a little serum on the ends keeps it smooth. Maintenance: none. Quick verdict: if you ride every day, a bob is the haircut that makes it easy.
30. The Pixie with a Headband
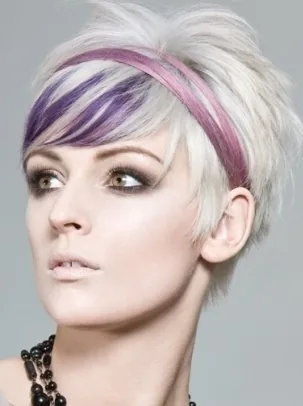
A pixie cut is the ultimate riding haircut: short, light, and completely unbothered by helmets, wind, reins, or sweat. Add a thin, flat headband and you have the whole style — the headband keeps the front pieces out of your eyes and out of your face, and it sits flat under a helmet without adding bulk. It is the style for the rider who wants to spend zero minutes on her hair and all of her time on her horse, and it is the style that looks just as good after the helmet comes off as it did before.
Best for: short hair, hot days, and riders who want the lowest-maintenance style there is. How to style it: smooth the pixie with a little styling cream, slide a thin, flat headband into place, and tuck the front pieces behind it. Pros: no tangles, no re-pinning, no helmet-hair drama. Cons: a pixie needs regular trims to keep its shape, so budget for the salon. Maintenance: none during the ride. Who should avoid it: nobody — but if you love long hair, this is a haircut, not a style, so choose it only if you are ready for the chop.
31. The Curly Low Puff Ponytail
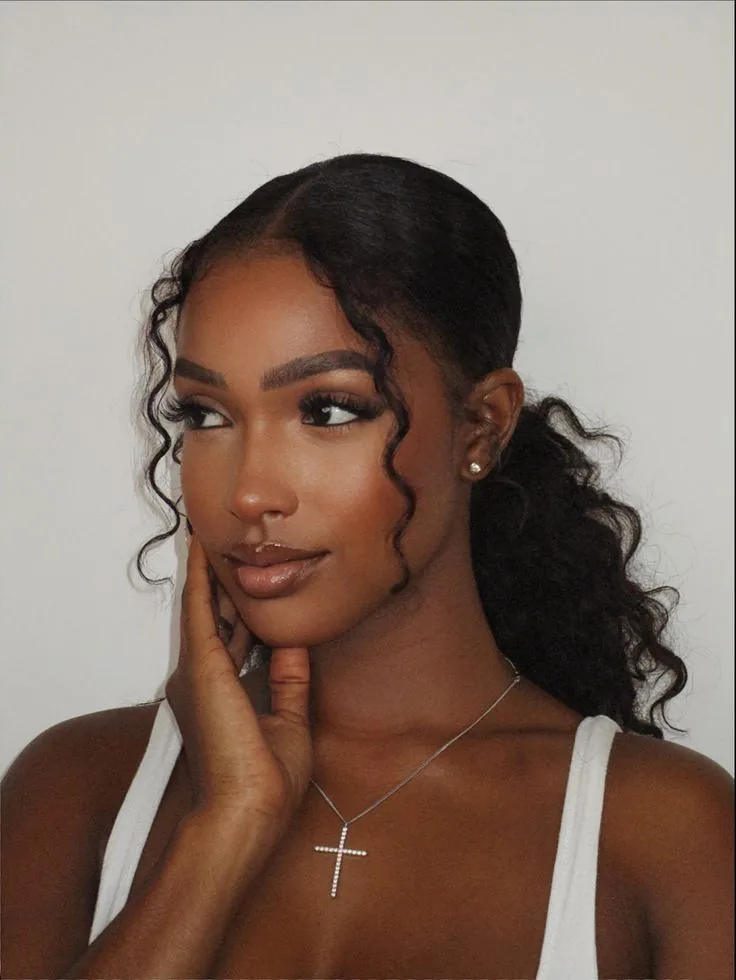
Curly hair has its own rules, and the low puff ponytail is the curly rider’s best friend: the curls gathered low at the nape, held with a soft, snag-free tie, and left to be a puff — full, soft, and completely contained. It fits flat under a helmet when it is gathered low, it keeps the curls out of the reins, and it does not fight the curl pattern the way a tight braid can. A little leave-in conditioner before you gather it keeps the curls defined and the frizz down, and a satin-lined helmet or a silk scarf under the helmet protects the curls from friction.
Best for: curly and coily hair, everyday riding, and riders who want to work with their curls, not against them. How to style it: apply leave-in conditioner, gather the curls low with a soft tie, and let the puff sit at the nape. Pros: comfortable, protective, and it respects the curl pattern. Cons: a puff can flatten under a helmet, so fluff it with your fingers after the ride. Common mistake: using a tight elastic, which breaks curls and causes frizz. Use a soft tie, and the curls will thank you.
32. The Curly Braided Crown
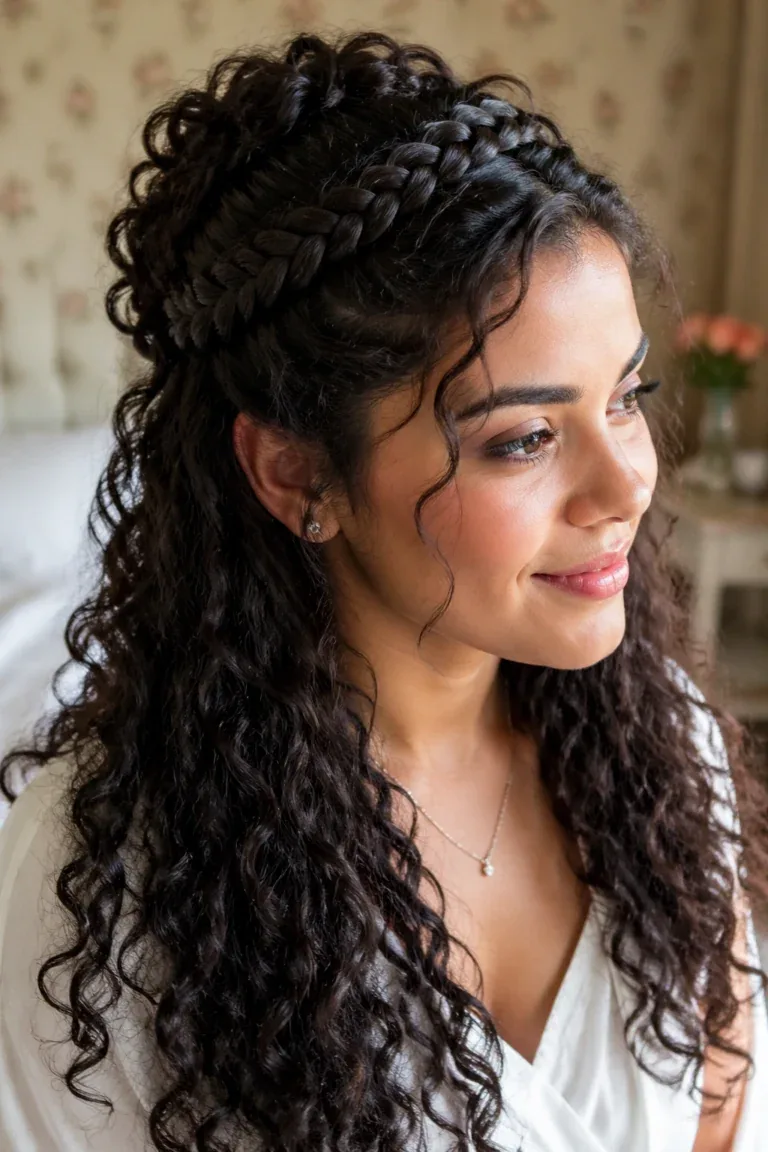
The curly braided crown is the braided crown adapted for curly hair: two braids from each side, crossed at the back, with the curls left loose and full underneath. It keeps the front pieces out of your face, which is what matters on a horse, and it lets the curls do what they do best — be full, soft, and beautiful. Braid curly hair when it is damp and has leave-in conditioner in it, because damp curls braid more smoothly and hold their shape better, and pin the crown with bobby pins that match your hair colour so they disappear into the curls.
How to style it: on damp, conditioned hair, braid a section from each side, cross them at the back, and pin them, leaving the rest of the curls loose. Best for: curly hair, slow rides, and riders who want a crown without losing their curls. Pros: keeps the front back, lets the curls shine, and looks romantic. Cons: the loose curls can tangle in wind, so save it for calm days or braid the length too. Maintenance: re-pin the crown if it slips. Quick verdict: the crown, made for curls.
33. The Loose Side Fishtail
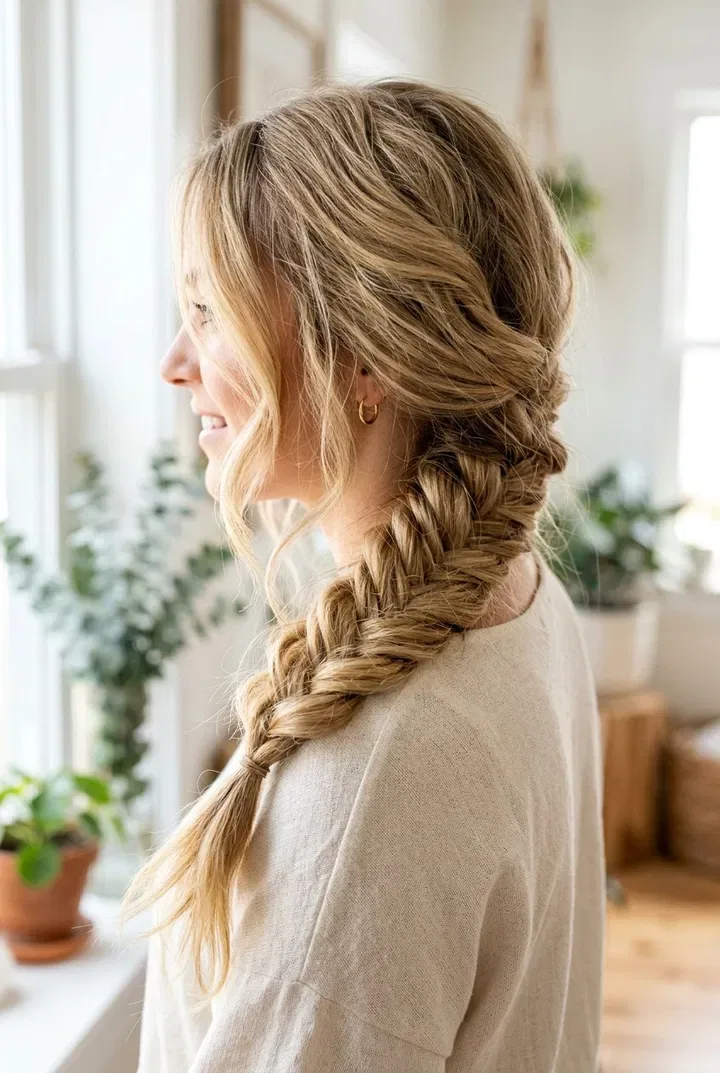
The loose side fishtail is the fishtail’s relaxed sister: swept over one shoulder, braided loosely with soft, pulled-out sections, and finished with a small elastic. It is the braid for a slow hack, a beach ride, or the walk back to the stable — not for a fast canter, when a loose braid will tangle, but for the days when the ride is gentle and the photograph matters. The looseness is the point: pull the sections out gently after braiding, and the braid becomes soft, full, and romantic, with a boho feel that a tight braid never has.
Best for: slow rides, photo days, and riders who love a soft, boho look. How to style it: sweep the hair to one side, fishtail-braid it loosely, and gently pull the sections out for fullness. Pros: soft, romantic, and very photogenic. Cons: it tangles in wind, so keep it for calm days. Common mistake: braiding it loosely for a fast ride. If you are going to canter, braid it tightly down the back instead. Maintenance: re-pin the front pieces if they fall loose.
34. Two Dutch Braids into a Low Bun
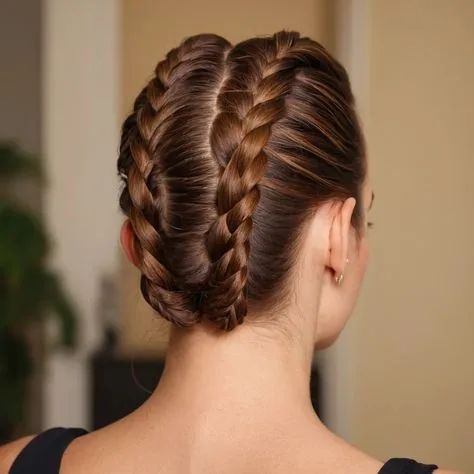
Two Dutch braids into a low bun is the toughest updo in this guide: two braids from the hairline, meeting at the nape, and coiled together into a single low bun. It is the style that cannot slip, because the braids anchor it to the scalp and the bun anchors the braids — a double lock that holds through a gallop, a jump course, or a full day at the stable. It is also the style that looks the most deliberate, because the raised Dutch braids show from the front and the bun shows from the back, and the combination reads as polished from every angle.
How to style it: part the hair down the middle, Dutch-braid each side to the nape, then coil both braids together into a low bun and pin it flat. Best for: long or thick hair, competition days, and riders who want the most secure updo there is. Pros: the most secure updo in this guide, and it looks polished. Cons: it takes fifteen minutes and two hands, so it is a morning style. Maintenance: none — once it is pinned, it stays. Who should avoid it: riders in a hurry, who should choose a single braid instead.
35. The Braided Headband Half-Up
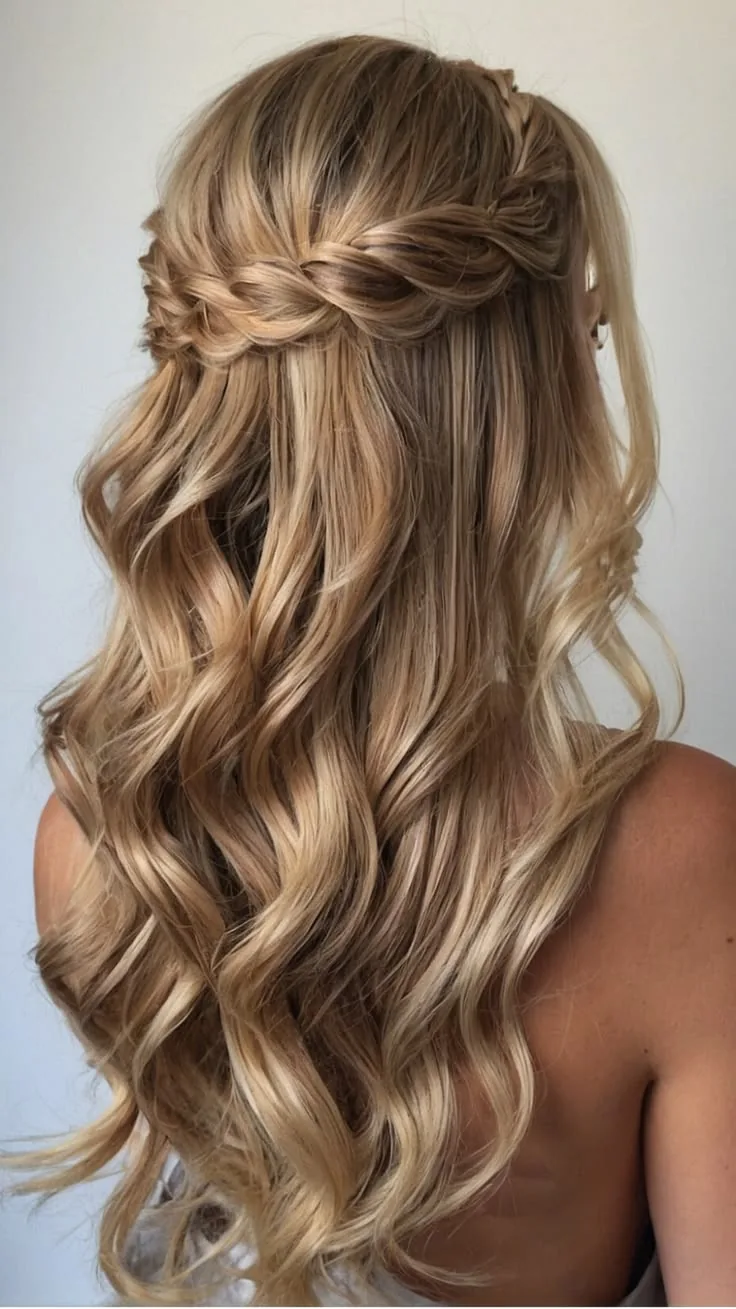
The braided headband half-up is a headband made of your own hair: a thin braid from behind one ear, crossed over the top of the head, and pinned behind the other ear, with the rest of the hair left loose. It keeps the front pieces out of your face without a single accessory, which is the practical part, and it looks like a headband, which is the pretty part. It is best for a slow hack or a lesson, when the loose length will not tangle, and it is the style for the rider who wants her hair to look like she thought about it without wearing anything in it.
Best for: medium to long hair, casual rides, and riders who love a braided detail. How to style it: braid a thin section from behind one ear, lay it across the top of the head, and pin it behind the other ear. Pros: no accessory needed, keeps the front back, and looks delicate. Cons: the loose length can tangle in wind, so save it for calm days. Common mistake: braiding the headband too thickly, which looks heavy. Keep it thin, and it will look like a real headband. Quick verdict: a headband you grow yourself.
36. The Low Ponytail with a Ribbon Wrap
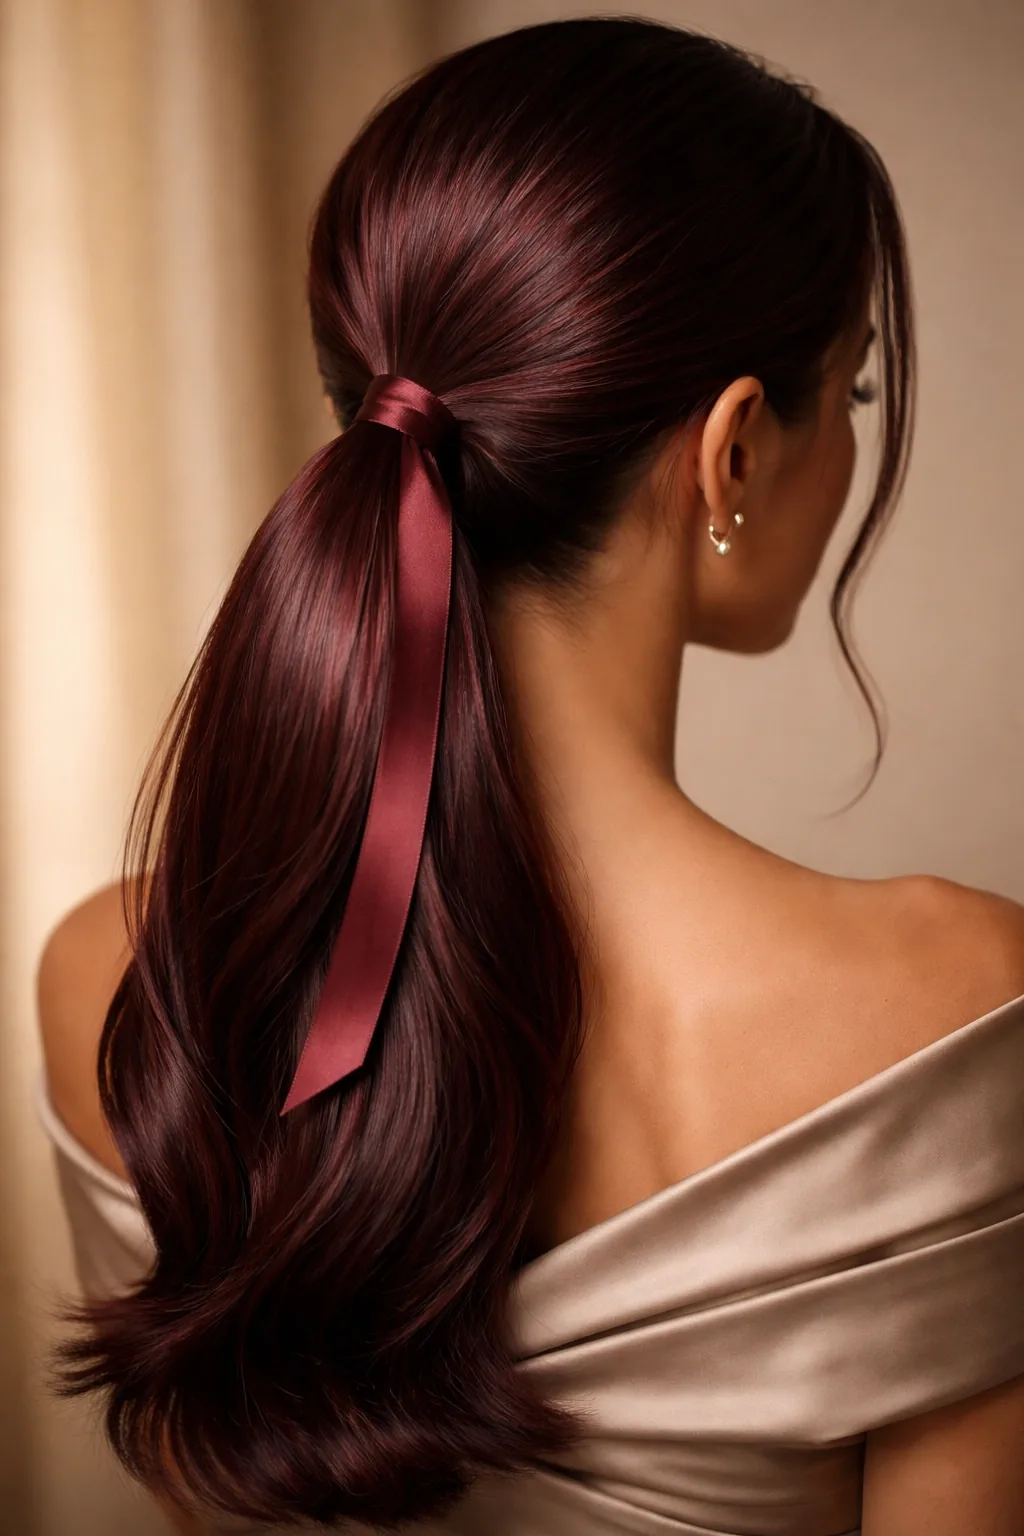
The low ponytail with a ribbon wrap is the ponytail dressed up for the show ring: a low ponytail, wrapped at its base with a velvet or grosgrain ribbon in a colour that matches your jacket or your horse’s browband, tied in a small bow or a neat knot. The ribbon hides the elastic, adds a touch of colour, and gives the ponytail a finished, deliberate look — the difference between a ponytail and a show ponytail. Under a helmet, the ribbon must be tied flat and low, so it does not add bulk or slip.
How to style it: gather the hair into a low ponytail, wrap the ribbon around the elastic several times, and tie it in a small bow or knot, tucking the ends in. Best for: show days, hunter classes, and riders who love a classic detail. Pros: a tiny change with a big visual payoff, and the ribbon adds grip. Cons: a ribbon can slip in very smooth hair, so pin it underneath. Cost and time: a ribbon costs almost nothing, and the wrap takes one minute. Who should avoid it: trail riders, who do not need it — save it for the ring.
37. The Wavy Lob Pinned Back
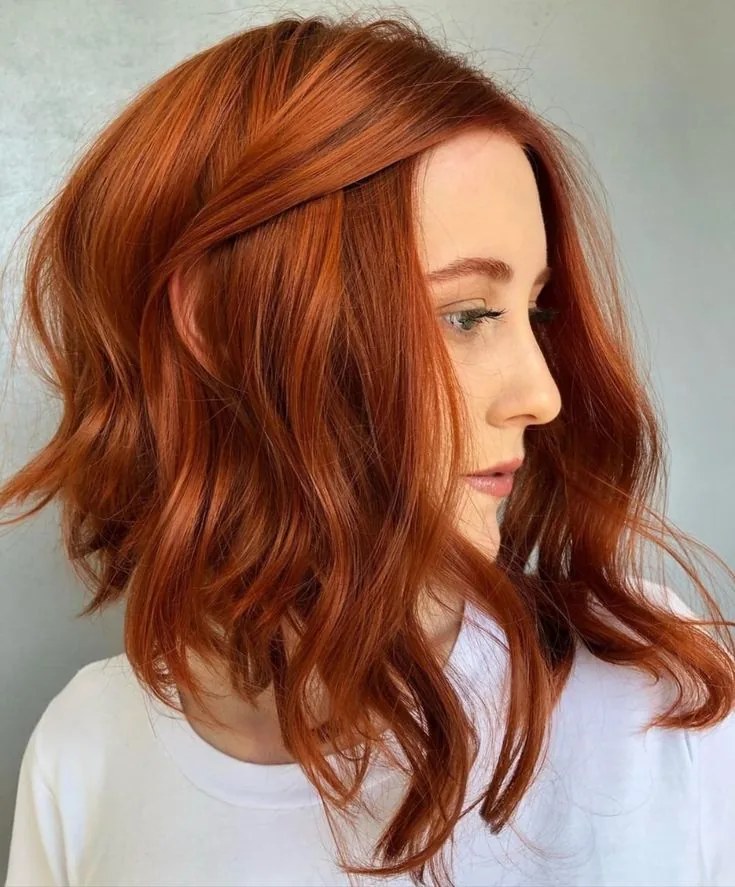
The wavy lob — a long bob that falls to the shoulders — is the shoulder-length rider’s best style: long enough to gather, short enough to stay out of trouble, and wavy enough to look good with almost no effort. Pinned back at the front with two small clips, it keeps the face clear and the hair out of the reins, and it fits under a helmet without any gathering at all. It is the style for the rider who wants the ease of short hair with the versatility of long hair, and it is the style that looks just as good at dinner as it does at the stable.
Best for: shoulder-length hair, everyday riding, and riders who want versatility. How to style it: part the hair to the side, smooth it with a little serum, and pin the front pieces back with two small clips. Pros: easy, versatile, and it needs no maintenance. Cons: a lob can flip out at the ends under a helmet, so a little serum on the ends keeps it smooth. Maintenance: none. Quick verdict: the shoulder-length sweet spot for riders.
38. The Show Jumping Sleek Bun
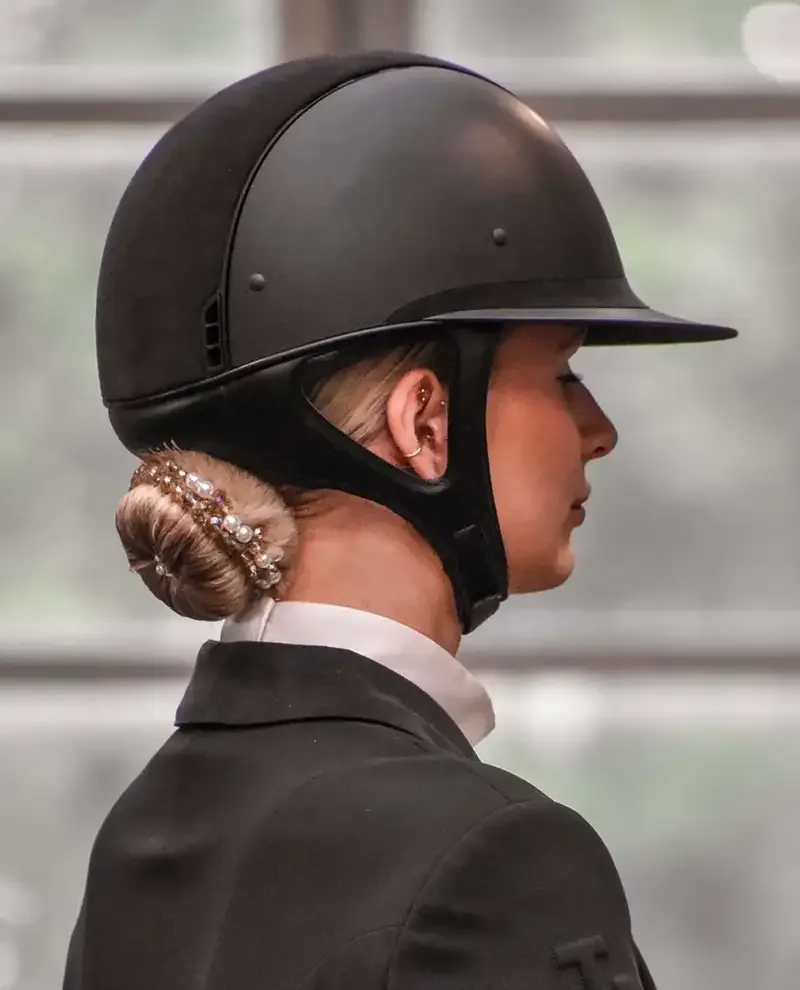
Show jumping is fast, and its hairstyle is built for speed: a sleek bun, smoothed with gel, gathered low, coiled tight, and covered with a hairnet — nothing loose, nothing to move, nothing to distract. The sleek bun sits flat under the helmet, it cannot come undone over a course of fences, and it gives the judge a clean, professional silhouette. It is the bun for the rider who is going to jump, and who wants her hair to be the last thing she thinks about when she enters the ring.
How to style it: smooth the hair with gel or serum, gather it low, coil it into a tight bun, pin it flat, and cover it with a hairnet that matches your hair colour. Best for: show jumping, eventing, and any fast, judged ride. Pros: the most secure bun for speed, and it looks professional. Cons: it is a formal style, so it can feel severe — soften the front with a side part. Maintenance: none during the round, just a re-pin between rounds. Common mistake: using too little gel, which lets flyaways escape at speed. Use enough to keep the surface smooth.
39. Two Rope Braids
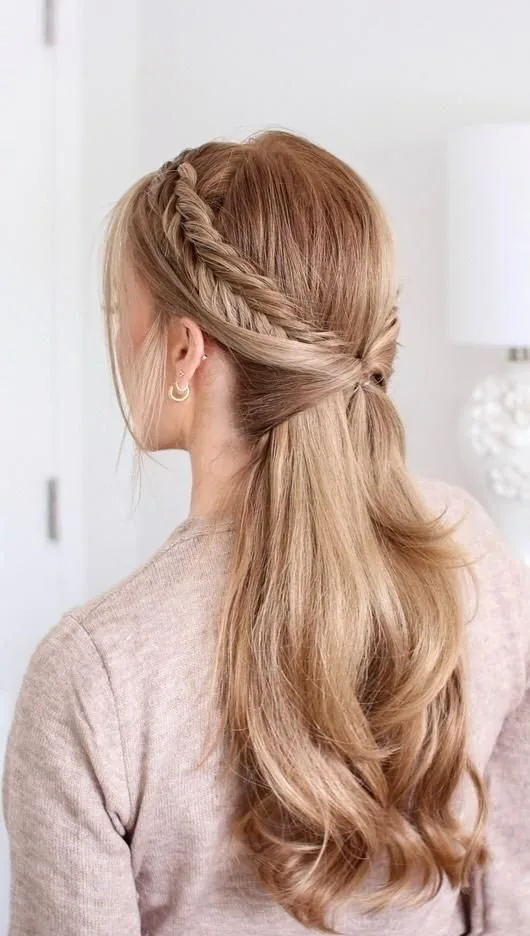
Two rope braids are the rope braid doubled: one on each side, twisted and wound, lying flat against the shoulders and staying put at any speed. They split the weight of the hair in half, they lie flat under a helmet, and they are the fastest double braid in this guide — two minutes a side, no skill required, just a twist and a wind. They are the braids for a long trail ride, a beach ride, or a day when you want double braids but do not have ten minutes for French braids.
Best for: long hair, trail rides, and riders who want double braids in a hurry. How to style it: part the hair down the middle, split each side into two, twist each strand the same way, wind them around each other, and secure the ends. Pros: very fast, very strong, and they stay put. Cons: rope braids can unravel at the ends if the elastic is loose, so use a strong elastic and a small pin. Maintenance: re-twist the last few inches at a break if they fray. Quick verdict: double braids in four minutes.
40. The Low Side Bun
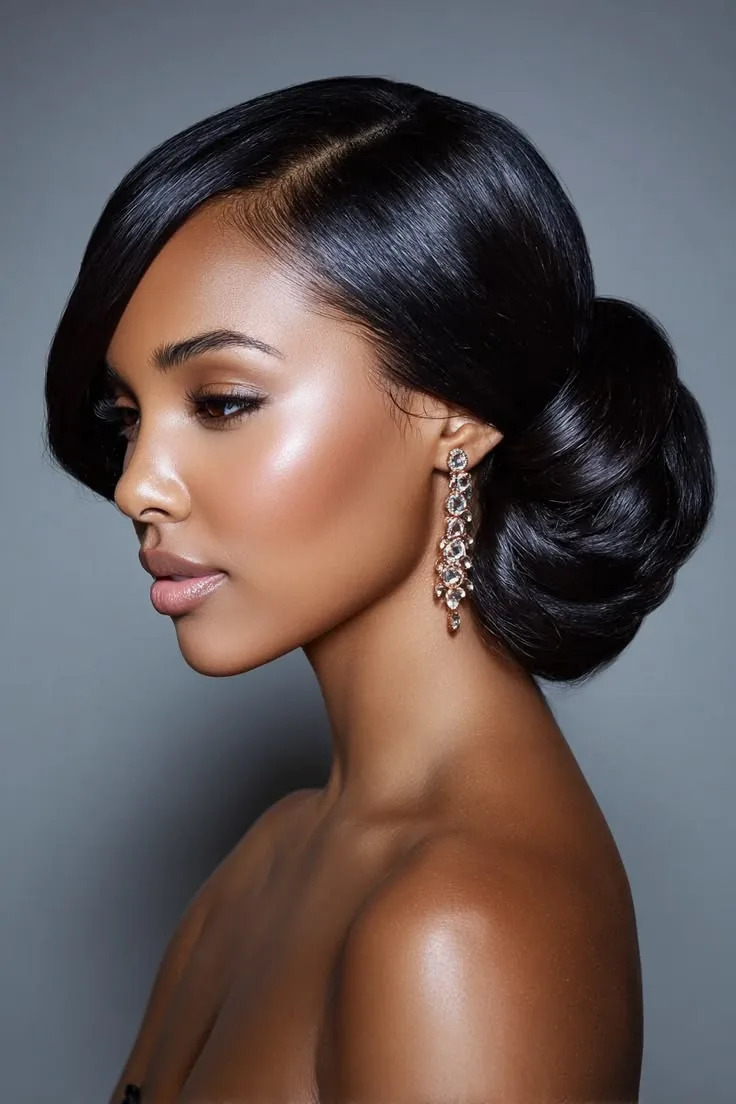
The low side bun is the low bun moved to one side: gathered behind one ear, coiled into a small, flat knot, and pinned tight to the head. It is still low and flat enough for a helmet, still contained enough for the reins, but it has a little asymmetry that makes it look softer and more interesting than a centred bun. It is the bun for the rider who wants her practical hair to have a little character, and it is the bun that photographs beautifully from the side — which is where most stable photographs are taken.
How to style it: sweep the hair to one side, gather it behind the ear, coil it into a small bun, and pin it flat with crossed bobby pins. Best for: medium to long hair, photo days, and riders who want a softer bun. Pros: soft, flattering, and it photographs well from the side. Cons: a side bun can press against a helmet strap if it sits too high, so keep it low, behind the ear and below the strap. Common mistake: placing it too high, which pushes the helmet up. Keep it low, and the helmet will sit level. Quick verdict: the bun with a little personality.
41. The Polished Low Bun with Pearl Pins
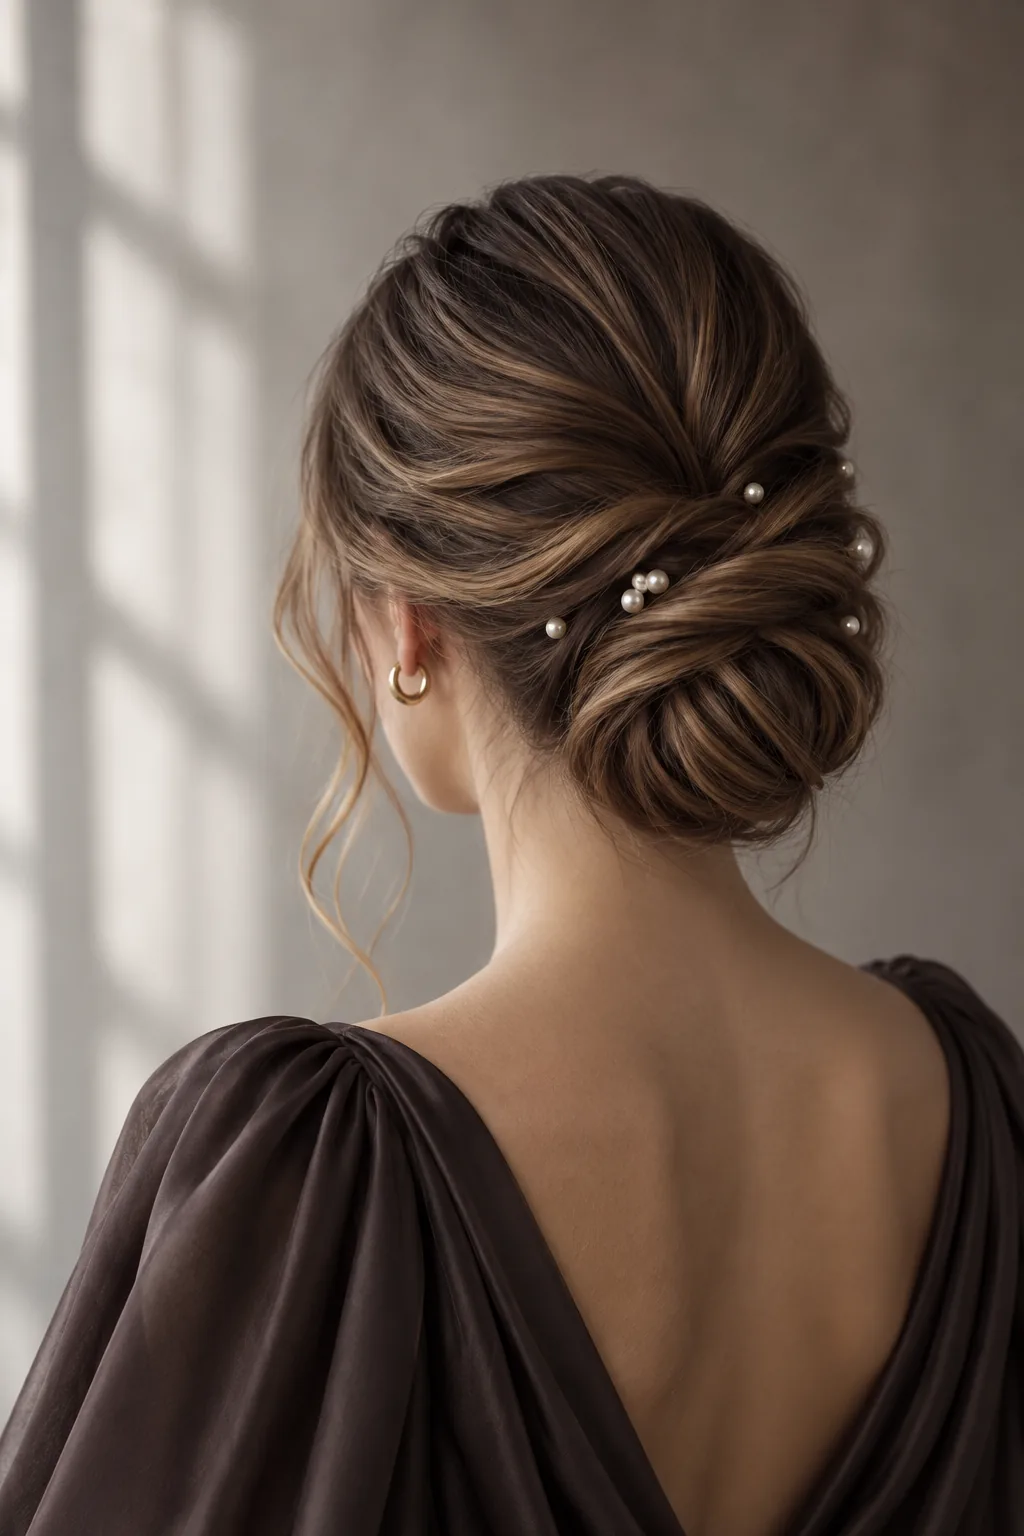
The polished low bun with pearl pins is the show-day bun: a low bun, smoothed to a shine, coiled tight, and finished with two or three pearl pins placed at the side, where they catch the light and glow softly in every photograph. It is the bun for the championship, the final, or the day when you want your riding hair to look like an occasion — elegant without being formal, polished without being severe. The pearls do the dressing up while the bun does the holding, and the combination is the classic equestrian silhouette at its best.
Best for: championship days, formal competitions, and riders who love a classic detail. How to style it: build a low, polished bun, smooth the surface with a shine serum, and place the pearl pins in a small cluster at one side — not scattered, but grouped, so they read as one detail. Pros: the pearls suit every hair colour and every jacket, and they cost very little. Cons: pearl pins can slip in very fine hair, so pin them through the bun itself, not just the surface. Maintenance: none at all. Who should avoid it: nobody — but if you are wearing statement earrings, skip the pearls and let the earrings be the statement.
What hairstyle fits best under a riding helmet?
The hairstyles that fit best under a riding helmet are low and flat: a low bun, a low ponytail, or a French or Dutch braid down the back. High buns, top knots, and ponytails gathered at the crown push the helmet up and forward, so they do not fit safely. Keep everything gathered at the nape or below, keep buns small and tight to the head, and check that your helmet sits level and snug with your hair styled the way you will ride.
Can I wear my hair down while horseback riding?
You should not wear your hair fully down while horseback riding, because loose hair can catch in reins and tack, tangle in the wind, and fall into your face at speed. Short hair worn down is fine if the front pieces are pinned back, and a half-up style works for a slow hack, but long hair should always be braided, bunned, or tied back before you mount. Contained hair is safer for you and calmer for the horse.
What is the best braid for horseback riding?
The best braid for horseback riding is a French or Dutch braid down the back, because it lies flat under a helmet, keeps every strand contained, and survives wind better than any other braid. Double French braids are even tougher for long or thick hair, and a fishtail braid is a good choice when you want something prettier without giving up durability. Braid damp hair with a little leave-in conditioner for the tightest, longest-lasting result.
How do I stop my hair tangling while riding?
Stop your hair tangling while riding by braiding it tightly from the hairline to the ends, sealing the ends with a strong elastic, and tucking the braid into your jacket on windy days. A little leave-in conditioner or styling cream before you braid keeps flyaways down, and two braids tangle less than one because the weight is split. Avoid loose styles on windy days, and re-braid the last few inches at a water break if the ends start to fray.
What hairstyle should I wear for a horse show?
For a horse show, wear a low chignon, a sleek low bun with a hairnet, or hunter braids, depending on your discipline. Dressage wants a low bun with a hairnet, hunters want hunter braids or a low chignon, and show jumping wants a sleek, gelled bun. Whatever you choose, keep it low, flat, neat, and free of flyaways, because the judge sees a silhouette, and a clean hairline with a neat bun reads as polished from every angle.
How do I fix helmet hair after riding?
Fix helmet hair after riding by taking the helmet off, flipping your head forward, shaking the roots with your fingers, and adding a spritz of dry shampoo or texture spray. A little dry shampoo at the roots before you ride absorbs sweat as it happens, and a silk helmet liner reduces friction and frizz. Do not use a brush, which flattens the hair further — fingers and texture spray are the tools that bring the shape back.
Is long hair safe around horses?
Long hair is safe around horses only when it is contained — braided, bunned, or tied back — because loose hair can be stepped on, pulled, or caught in a halter or tack. Braid your hair before you enter the stable, not after, and tuck the braid into your jacket on windy days. Around horses on the ground, the rule is the same as in the saddle: nothing hanging loose past your shoulders.
What is the best hairstyle for trail riding?
The best hairstyle for trail riding is a sturdy braid — a French braid, a Dutch braid, or double braids — because it survives wind, branches, and hours in the saddle without needing a mirror. A low ponytail works for a short, calm trail, and a low bun works if you prefer an updo, but a braid is the style that holds best on a long trail. Carry one spare elastic in your pocket so you can re-tie or re-braid without going back to the stable.
Can I wear a bun under a riding helmet?
Yes, you can wear a bun under a riding helmet, as long as it is low and flat — gathered at the nape, coiled tight to the head, and small enough not to push the helmet up. A high bun or a top knot will not fit safely under a helmet, so keep the bun low and check that your helmet sits level, covers your forehead to about an inch above your eyebrows, and stays put when you shake your head.
How do I take my riding hair to dinner after the stable?
Take your riding hair to dinner by building the riding style with a second look in mind: take the braid or bun out, shake the roots, add dry shampoo, and re-pin the front pieces back with a pretty clip, or tie a silk scarf around a low ponytail. A braid taken out leaves soft waves, a bun taken out leaves volume, and one accessory — a scarf, a ribbon, or a pearl pin — turns a riding style into an evening style in about five minutes.
Conclusion
Horseback riding asks more of a hairstyle than almost any other sport: it has to fit under a helmet, survive the wind, stay out of the reins, and still look good when the helmet comes off. The 41 hairstyles in this guide are all chosen with that in mind — braids that do not tangle, buns that sit flat, show-ring styles that pass the judge’s eye, and trail styles that hold from the first trot to the last dismount. The right riding hairstyle does not demand your attention in the saddle — it lets you forget about your hair and focus on your horse.
Start with the guides, not the gallery. Think about what your ride actually holds — a show ring or a trail, a hot day or a windy one, a quick lesson or a full day at the stable — and pick the style family that fits it. Keep it low and flat, build it on pins and braids rather than spray, and carry two spare pins and one spare elastic in your pocket. Your hair should be the least of your worries on a horse. Now it can be.