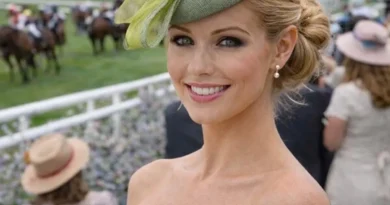
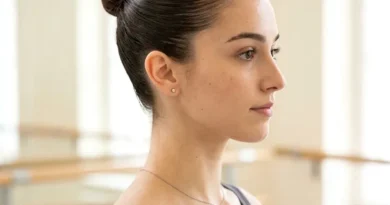
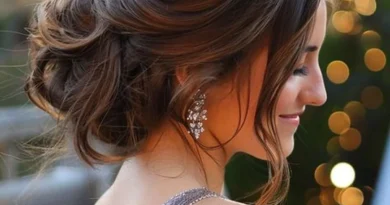
Picture-Perfect and Photo-Ready: 41 Hairstyles for a Passport Photo That Look Natural and Neat
Finding the right hairstyles for a passport photo is trickier than it sounds, because the style has to do two jobs at once. It needs to look like you on a normal day, and it also needs to stay neat, tidy and completely out of the way of your face. A passport photo is not the place for a dramatic new look, a heavy fringe, or hair falling across one eye. The best choice is usually a simple, polished version of a style you already wear, so the photo still feels natural when you show it at the airport, at work, or anywhere else your ID is checked. That is why the styles in this guide are all simple, low and secure, with the hair smoothed back, tucked behind the ears, or gathered at the nape, so your face stays clear and the photo still looks like you.
Most passport-photo guidance follows the same common-sense rules: your hair should not cover your face or your eyes, your ears often need to be visible, and your expression should stay neutral with your mouth closed. A plain background and even lighting help too, but your hair is the part you can control before you sit down. The ideas below focus on practical, photo-ready styles that keep your features clear, suit different hair lengths and textures, and still look soft and natural rather than stiff or overdone. Read the short guides first for the basics, then pick one of the 41 styles that fits your hair length, texture and usual routine.
What Passport Photo Rules Mean for Your Hair
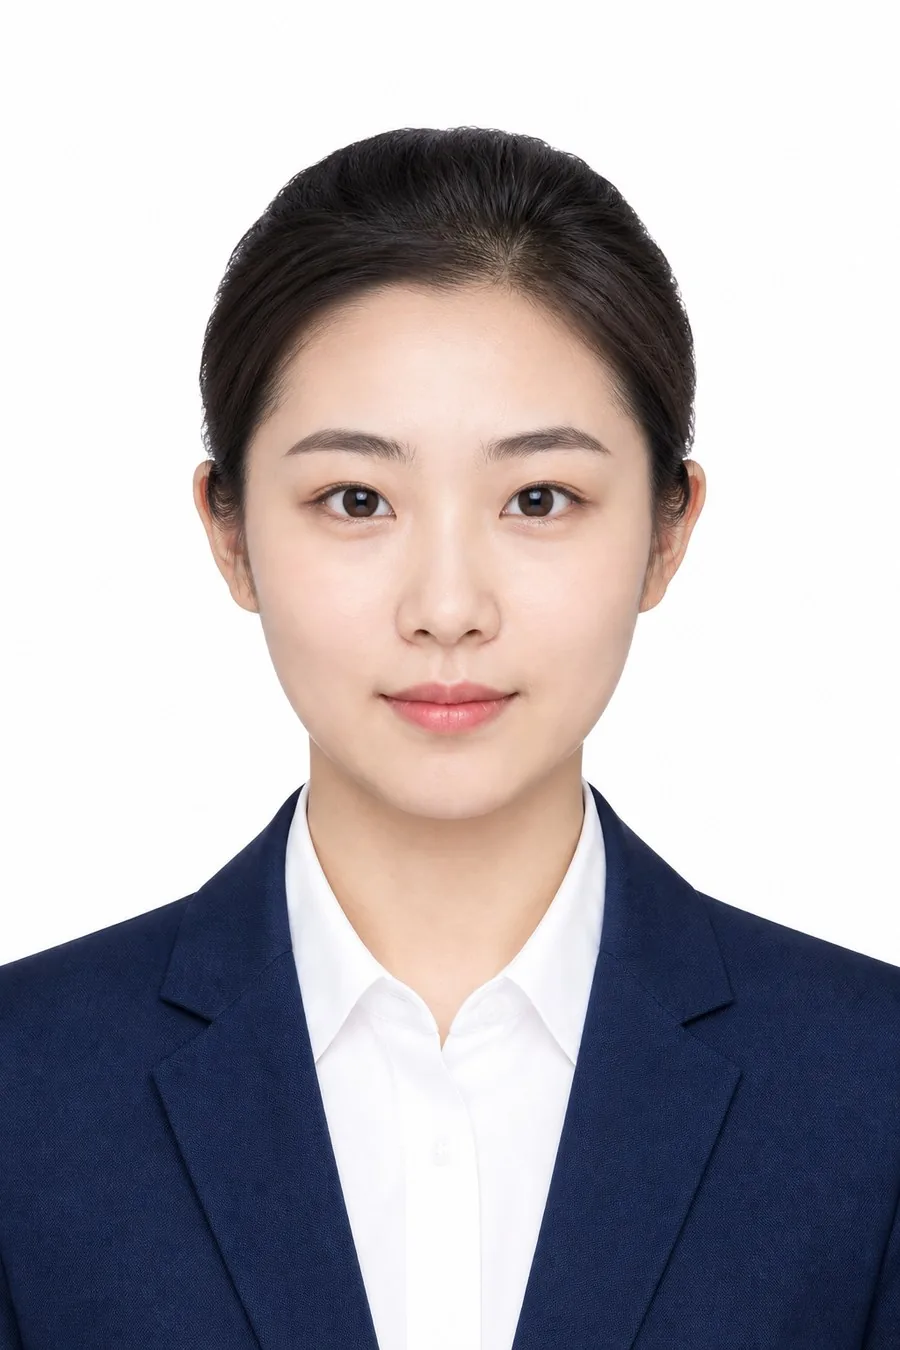
Passport-photo rules are really about identification: the camera needs a clear, straight-on view of your face. That means no hair across your forehead, eyes, cheeks, or chin, and no bulky style that changes the shape of your head. If your hair usually falls forward, plan to pin it back, tuck it behind your ears, or gather it low so your face stays fully visible.
Exact requirements can vary by country, so always check the official guidance for your own passport before your appointment. As a safe starting point, choose a style that shows both ears, keeps your hairline clear, and looks the same from the front as it does in real life. Simple and tidy will always photograph better than clever or complicated. If you wear your hair up every day, keep it up for the photo; if you usually wear it down, a tucked-back version will look far more like you than a style you never wear.
Keeping Hair Off Your Face and Eyes
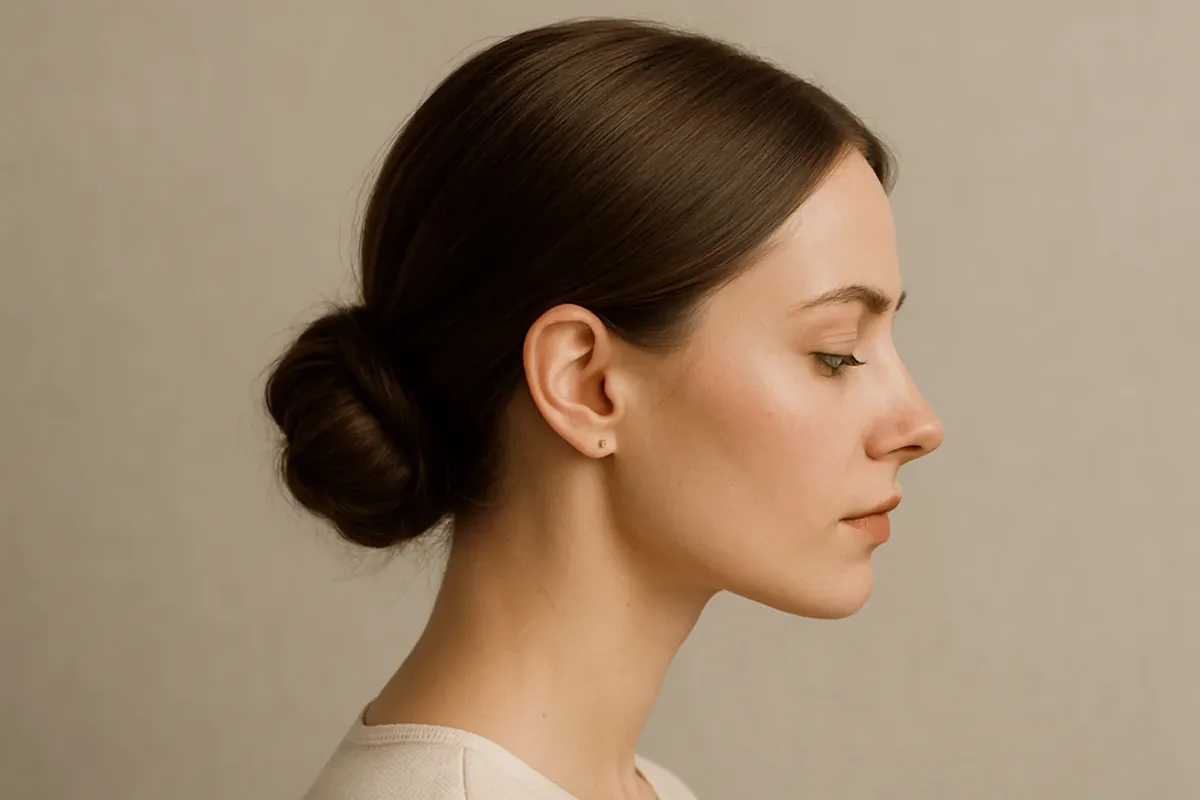
The first job of any passport-photo hairstyle is keeping loose hair away from your eyes. Even one strand across an eyebrow can distract from your face and make the photo look untidy. Use a fine-tooth comb to smooth the front sections back, then secure them with small, flat pins that sit close to the head and do not show in the photo.
If you have layers or a fringe, test the style in a mirror and take a quick phone photo from straight ahead. What looks fine from the side can still fall forward from the front. A light mist of hairspray or a little smoothing cream can help, but keep the finish soft and natural rather than stiff or shiny. Carry a couple of spare pins too, because a strand that slips on the way to the booth can be fixed in seconds, while a photo with hair over an eye may need a full retake.
The Best Passport Photo Styles by Hair Length
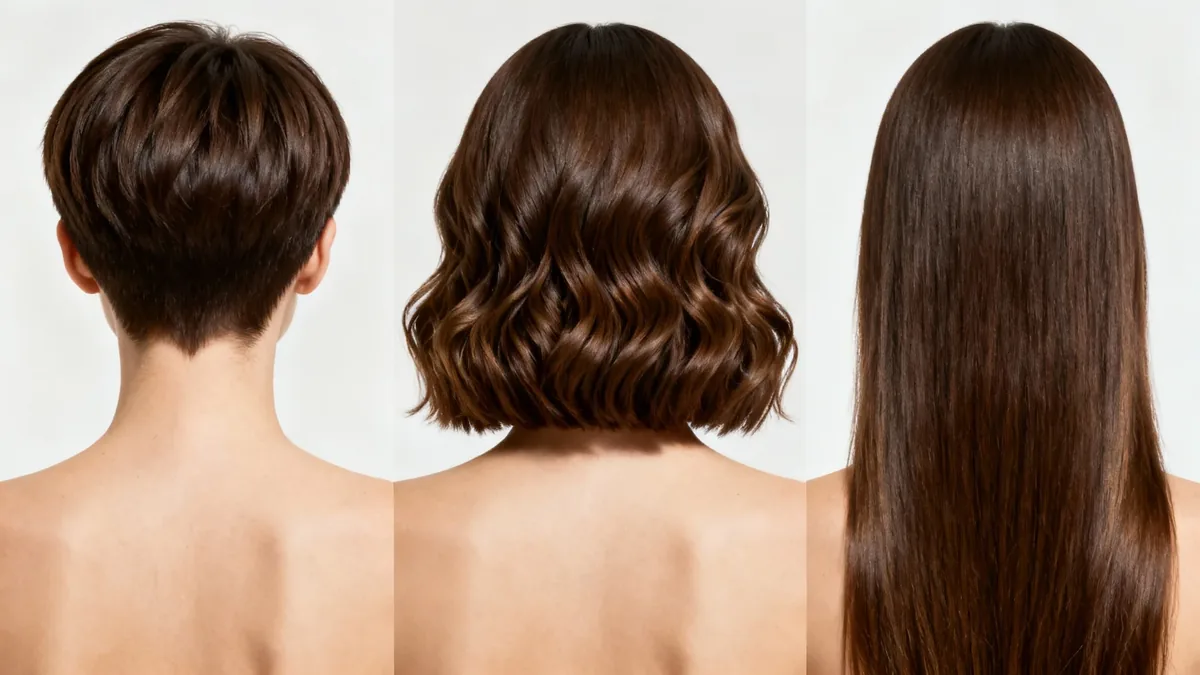
Short hair often works best when it is smoothed back or tucked neatly behind the ears, with the shape kept close to the head. A little texture is fine, but avoid volume that makes your hair look much wider than usual. Medium hair gives you more choice: a low ponytail, a low bun, or hair worn down and tucked back can all work well.
Long hair needs the most control, because it can easily fall forward over the shoulders and into the frame. A low ponytail, a low braid, or a low bun keeps the length behind you and your face clear. Whichever length you have, pick a style you can redo quickly if it slips, and keep the front smooth and simple. A style you can redo in a minute is always safer than one that needs a mirror and ten pins.
Curly and Coily Hair in a Passport Photo
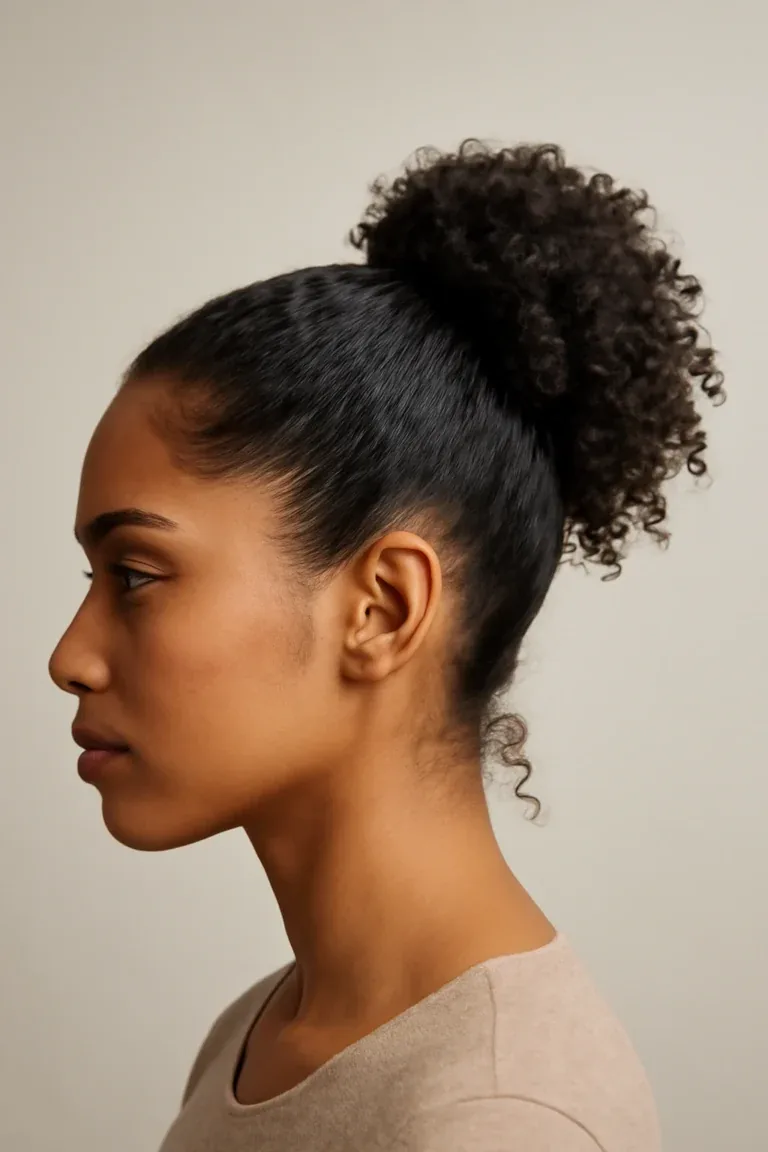
Curly and coily hair photographs beautifully when it is defined and kept off the face. You do not need to straighten your curls for a passport photo — in fact, your natural texture helps the photo look like you. The key is control at the front: smooth the hairline, pin back any curls that fall over your eyes, and keep the sides tucked or gathered low.
A low puff, a low bun, or a side part with the front pinned back can all work well. Use a curl cream or light gel to reduce frizz on the day, and avoid adding lots of volume at the crown, which can change your outline. Test the style in bright light, because frizz and flyaways show up more clearly in a photo than in a mirror. Style your curls as usual, check the front in a phone photo, and pin back only the curls that fall forward.
Glasses and Hair: Keeping Both Neat in the Photo
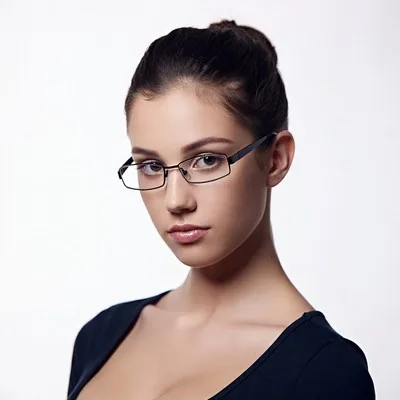
If you wear glasses, your hair needs to work around them, not compete with them. Keep the sides smooth and tucked behind your ears so the frames sit properly and your eyes stay visible. Avoid thick hair over the temples, which can push glasses out of place or create shadows across your face.
Check the official rules for your country first, because some places ask you to remove glasses for the photo, while others allow them if there is no glare. Either way, choose a low, flat style at the back so it does not lift the arms of your glasses. A quick check in the mirror, head straight, will show whether hair and frames are sitting neatly together. Also wipe the lenses before the photo, because smudges and glare can distract from your eyes, and sit facing the camera straight on so the frames sit evenly on both sides.
Long Hair Pulled Back vs Worn Down
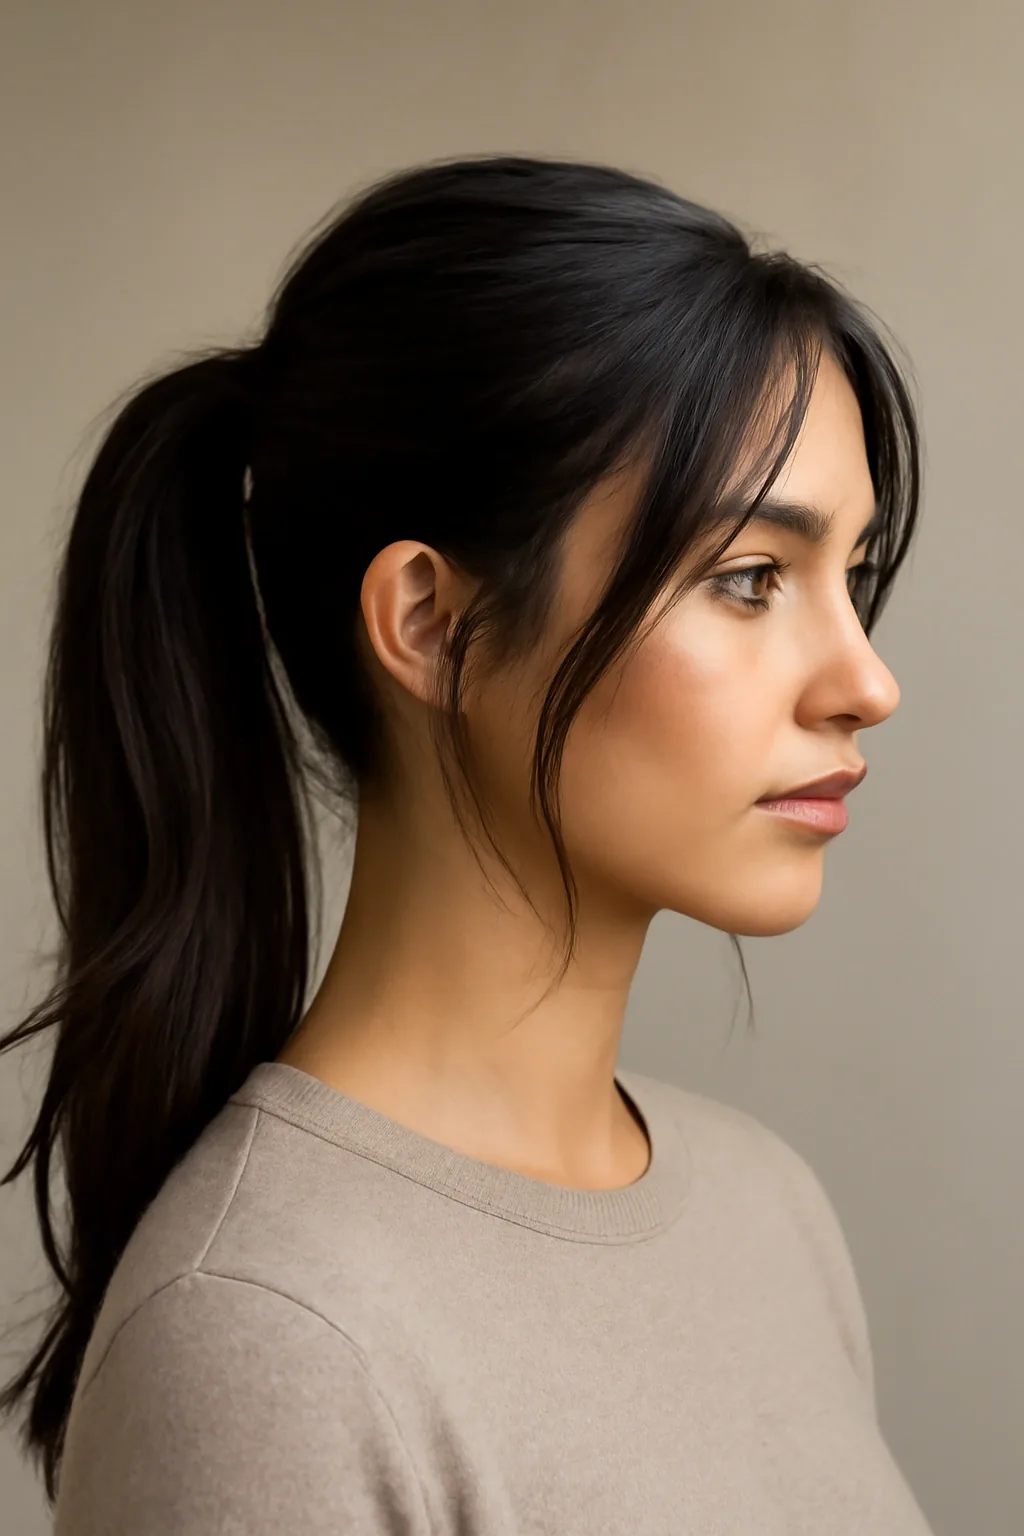
Pulled-back hair is the safer choice for a passport photo. A low ponytail or bun keeps every strand behind your shoulders, shows your ears, and stays put while you sit for the photo. It also looks the same from every angle, which is exactly what an ID photo needs.
Worn-down hair can still work if it is smooth, tucked behind the ears, and kept off your face and shoulders. The risk is movement: one turn of the head and a section can fall forward. If you prefer your hair down, test it by sitting still, turning slightly, and checking a front-facing photo before you decide. If you are unsure, pulled back is the safer choice, because it cannot slip forward, and you can always let your hair down again as soon as the photo is taken.
Quick Fixes at the Photo Booth
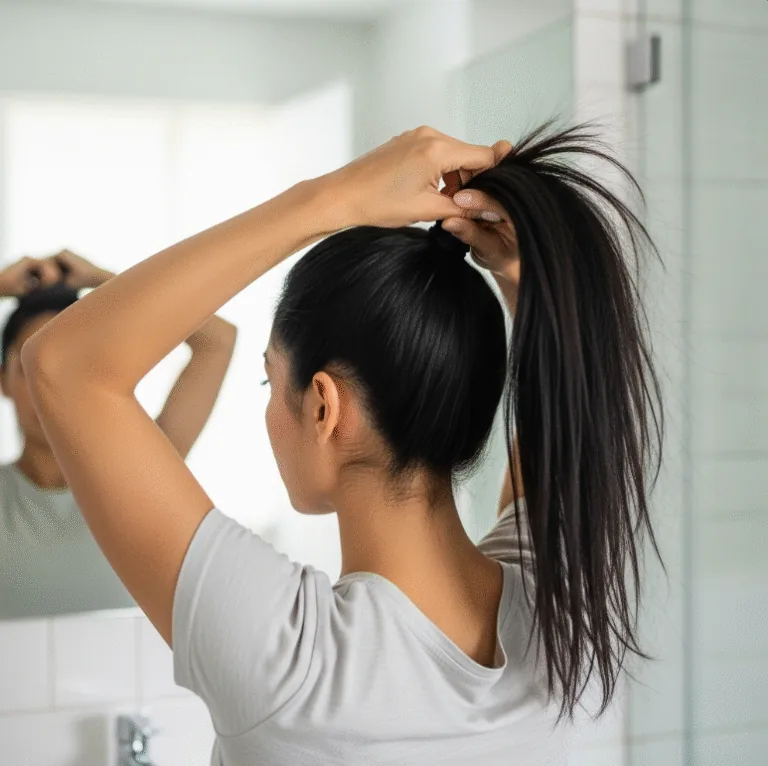
Even a well-planned style can slip on the way to the photo booth, so pack a tiny kit: a small brush or comb, two or three flat bobby pins, a spare hair tie, and a little smoothing cream or hairspray. These take up almost no space and can save the whole photo.
Before the photo is taken, do a fast front-facing check: hair off the eyes, ears visible, no flyaways sticking up, and no pins showing. Smooth the front with your hands, tuck the sides back, and sit up straight. Thirty seconds of fixing now is much easier than retaking a photo you do not like. Also check that your top is neat and your shoulders are level, because a last-minute tidy of hair and clothing together makes the whole photo look calmer and more professional.
What to Avoid: Hats, Heavy Accessories and Hair Over the Eyes
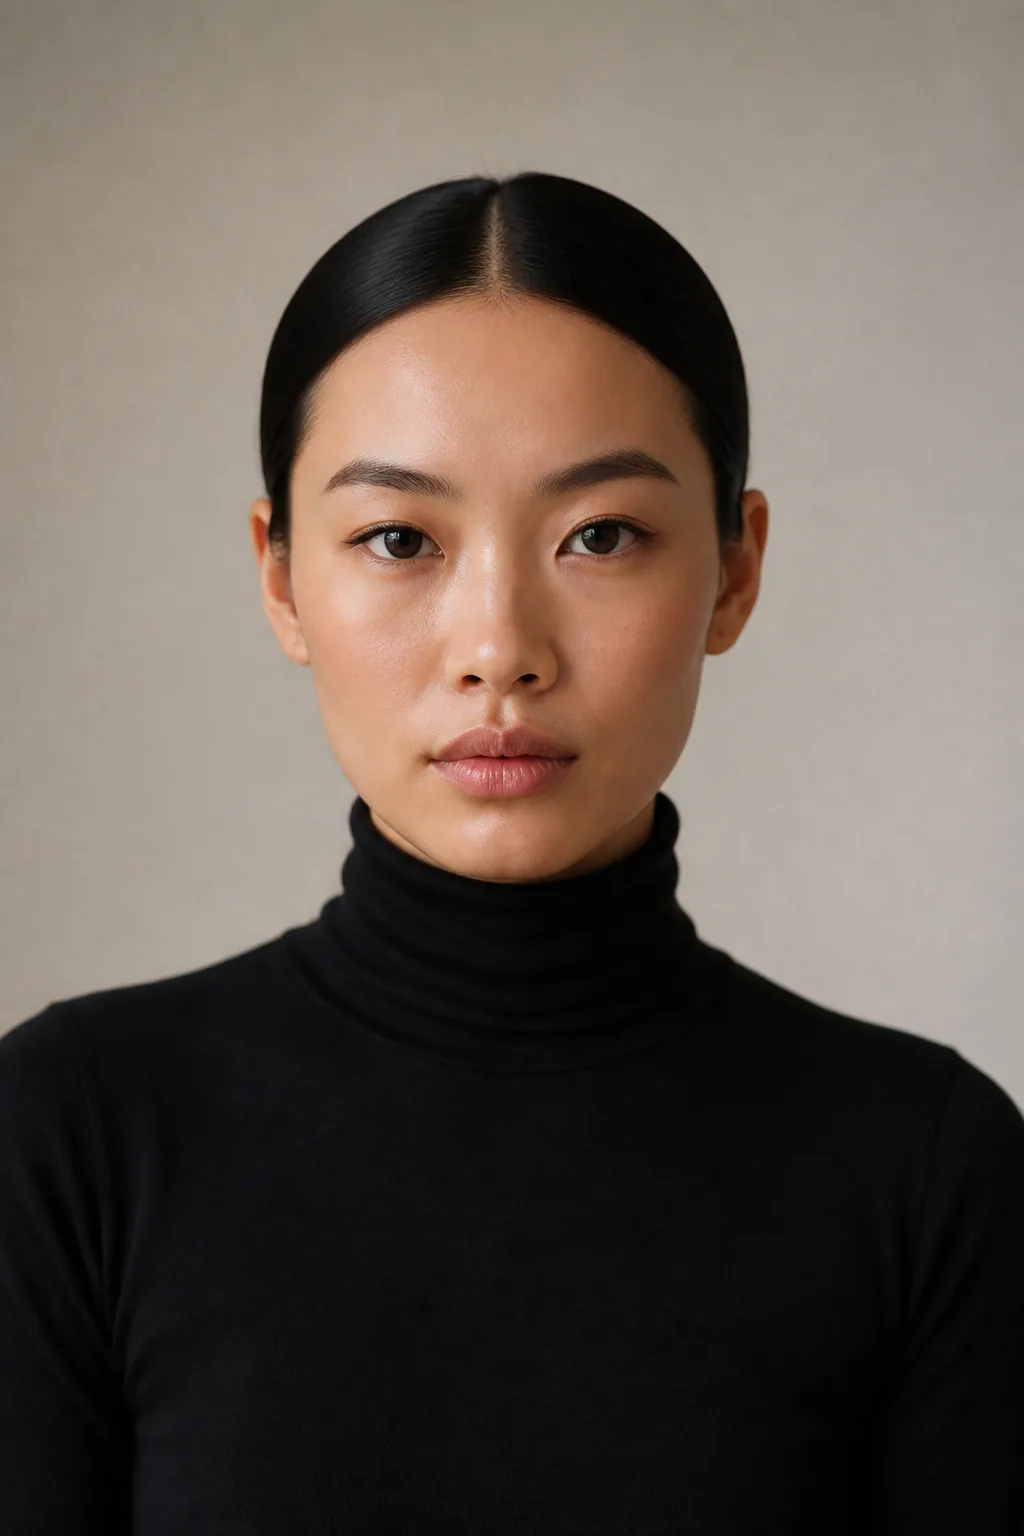
Some things should stay out of a passport photo altogether. Hats and head coverings are usually not allowed unless they are worn for religious reasons, and large hair accessories, chunky clips, bows, and headbands can distract from your face or cast shadows. Keep accessories small, flat, and close to your natural hair colour if you use them at all.
Also avoid a heavy fringe over the eyes, hair pulled across one cheek, and very high or wide styles that change your head shape. The goal is a clear, honest picture of you. If a style needs constant adjusting or hides part of your face, it is not the right choice for this photo. When in doubt, leave the accessory out and choose the simplest style you own, because a plain, clear photo is always accepted more easily than a stylish one that hides part of your face.
1. The Classic Low Ponytail
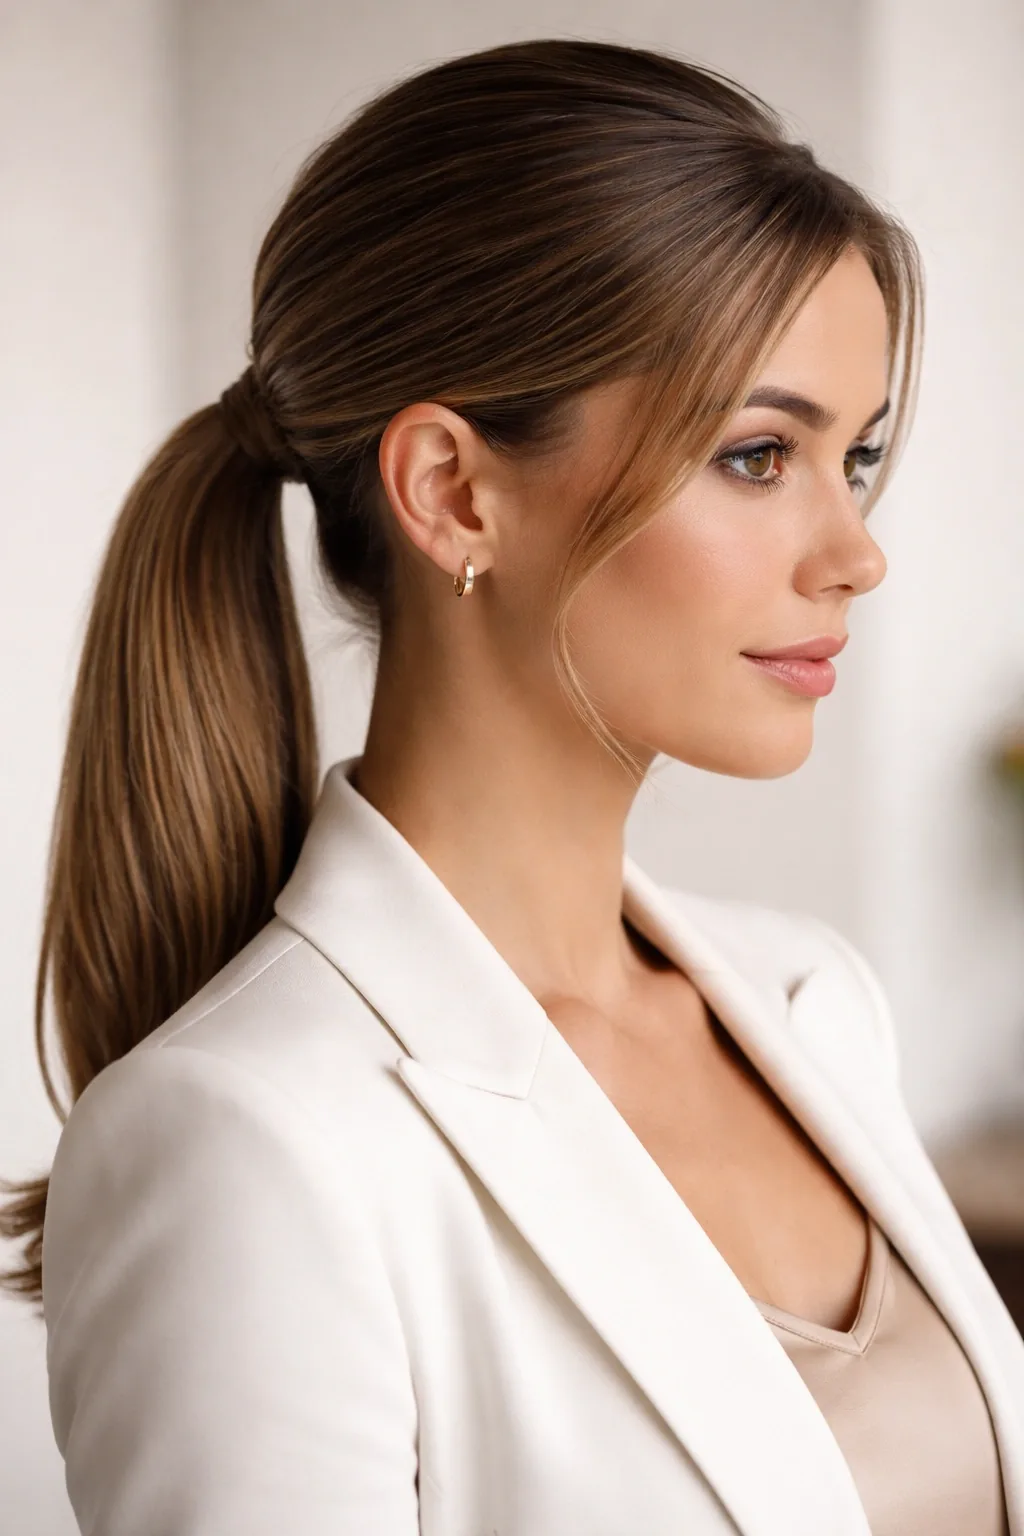
Best for: almost everyone, and especially for long or thick hair that needs to stay completely out of the way. How to style: brush your hair smooth, gather it at the nape of your neck, and secure it with a plain elastic that matches your hair colour. Smooth the front with a comb and tuck any loose pieces behind your ears.
What to ask for at the salon: a clean, low ponytail with no bumps at the crown and a smooth hairline. This style takes about five minutes, costs nothing if you do it yourself, and lasts all day. Quick verdict: the simplest, safest passport-photo choice — neat, natural, and hard to get wrong. It also photographs well with glasses, suits most hair textures, and if a few strands escape, you can smooth them back in seconds without starting over. It is also a good choice if you are short on time on photo day.
2. The Sleek Middle-Part Low Bun
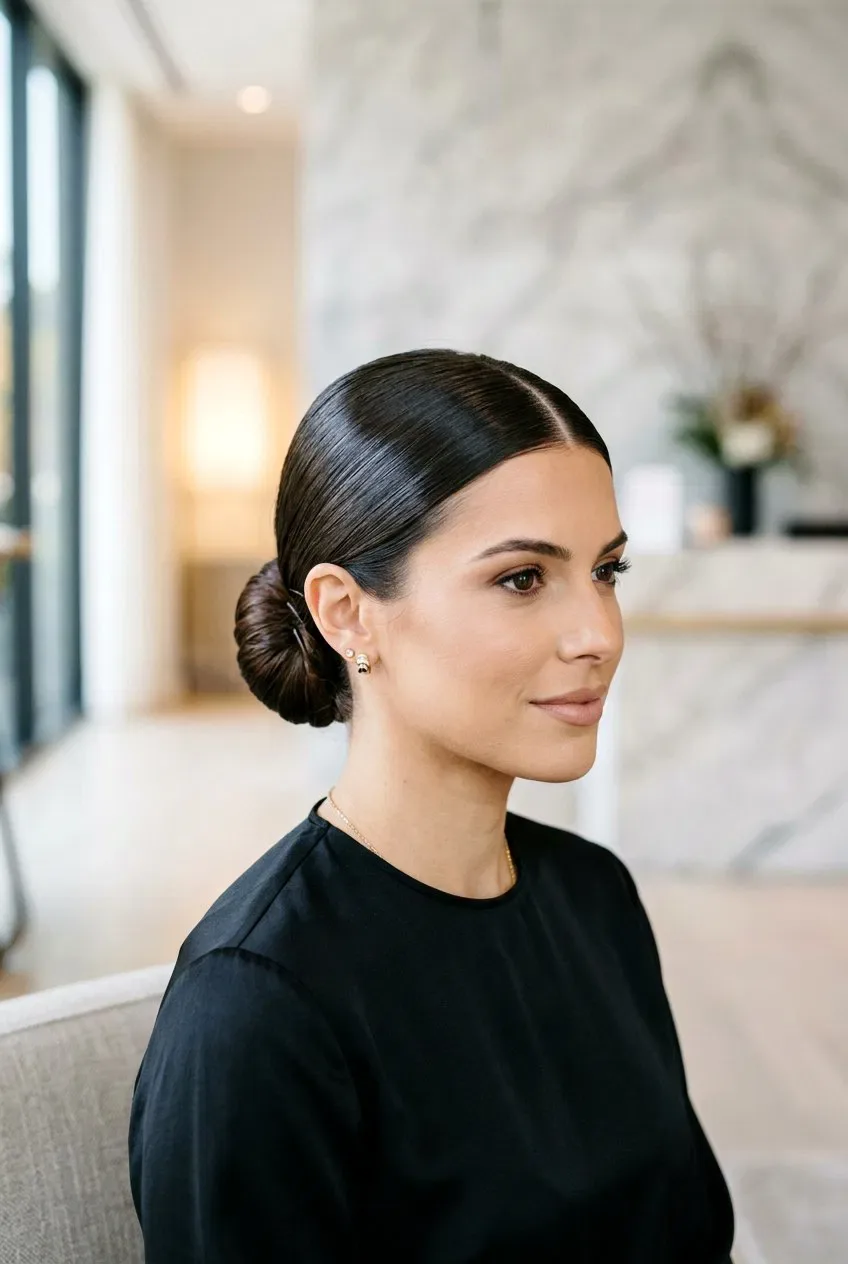
The sleek middle-part low bun is one of the most polished passport-photo styles, and it suits straight and wavy hair best. Part your hair neatly down the centre, smooth both sides back, twist the length into a small bun at the nape, and pin it flat so it does not stick out or add width to your head.
Pros: it shows both ears, keeps your face completely clear, and looks tidy from every angle. Cons: it can feel severe if your hair is pulled too tight, and a centre part does not suit every face shape. Soften it with a little smoothing cream and a gentle finish, rather than a wet, scraped-back look. Keep the bun small and flat at the nape, and check from the side that it does not stick out, because a bulky bun can change the shape of your head in the photo. A small bun also sits neatly under a collar, and the style needs no touch-ups once it is pinned.
3. The Side-Part Low Bun
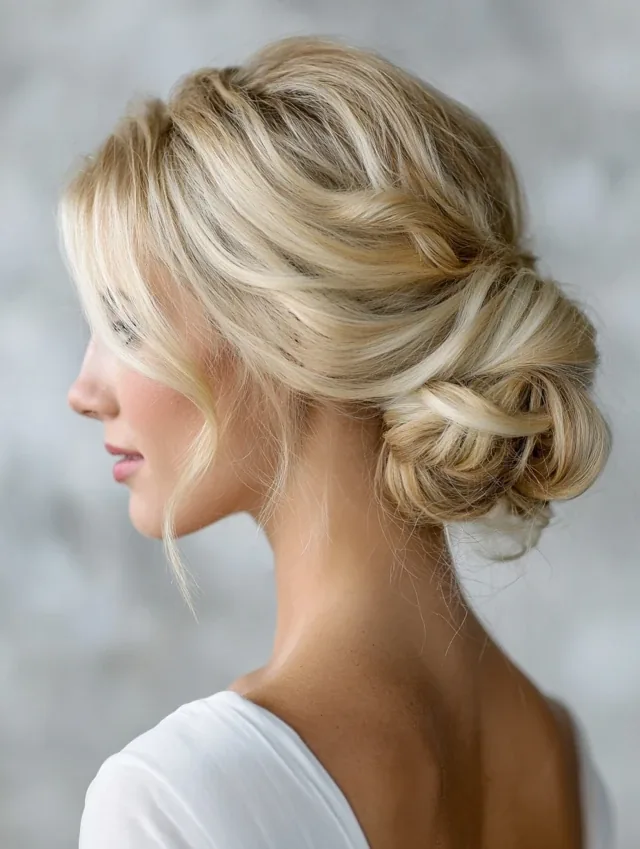
A side part is a kind and flattering change if a centre part feels too harsh on you. Sweep your hair to your usual side, smooth it back, and gather it into a low bun just below the crown of your neck. Keep the part clean and the sides flat, so nothing falls forward over your cheek.
Common mistakes: letting the heavier side flop forward, pinning the bun too high, or leaving a loose strand near the eye. Check the style from the front, not just the side, and pin the heavier section flat behind the ear. This style works well for medium and long hair and holds neatly for hours. It also suits wavy and slightly curly hair, because the side part gives the front a soft, natural fall while the bun keeps everything else secure behind you. The side part also softens the look, so the photo feels natural rather than severe.
4. The Neat French Twist
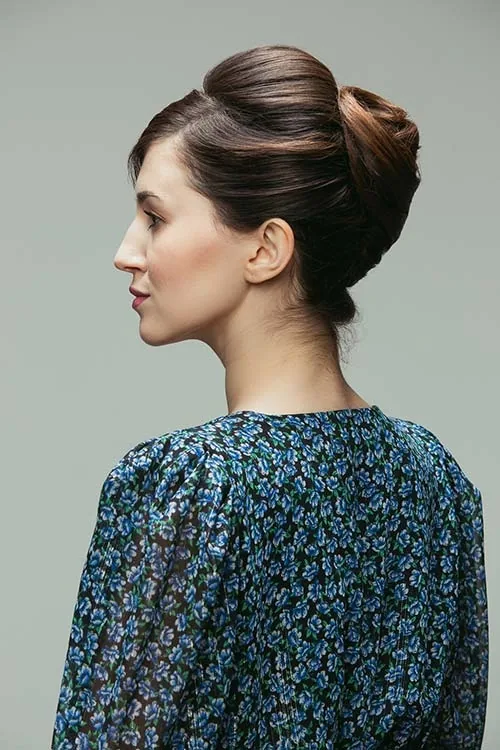
The French twist looks elegant without looking fussy, which makes it a lovely choice for a passport photo. Gather your hair low, twist it upwards, tuck the ends in, and pin it securely along the twist. Smooth the front and sides so your face and ears stay fully visible.
Maintenance and how long it lasts: a well-pinned twist holds for a full day, but it needs enough pins and a little hairspray to stay put. Practice it once before photo day, because it is harder to fix in a hurry than a ponytail. If your hair is very fine or slippery, use a few extra pins and a light texturising spray first. The twist also works well for medium and long hair, and it keeps the back tidy without adding height or width that could distract from your face. It is a good choice for a formal photo, because it looks tidy without looking stiff.
5. The Low Chignon
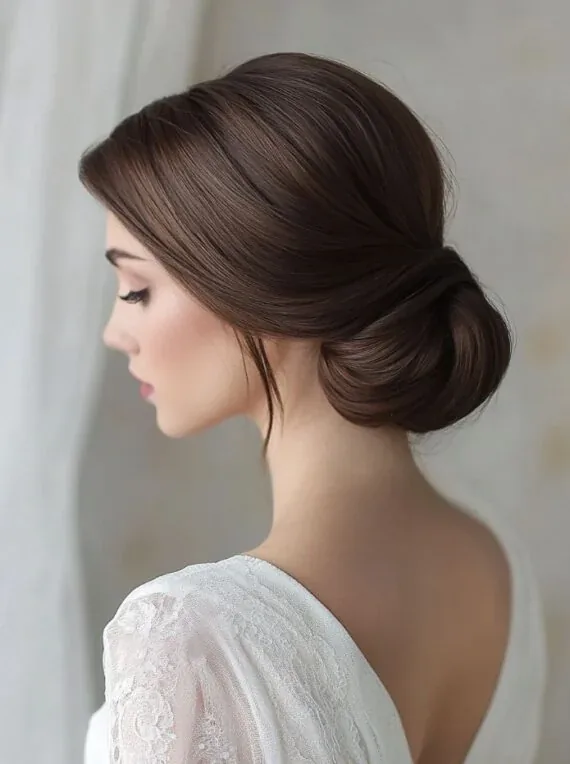
The low chignon is a softer cousin of the low bun, with a slightly looser, more relaxed finish. Gather your hair at the nape, twist or loop it into a small knot, and pin it flat. Leave the front smooth and the sides tucked back, so the softness stays at the back and your face remains clear.
Cost and time: about ten minutes at home, with no special tools beyond pins and an elastic, or a quick salon style if you want it extra smooth. It suits medium and long hair and looks natural rather than stiff. Avoid pulling it too loose at the front, or pieces may slip forward during the photo. For the neatest result, smooth the hair first, keep the knot small and flat, and pin any loose ends underneath so nothing sticks out from the side. The chignon also suits most face shapes, because the soft finish keeps it from looking severe.
6. Half-Up, Half-Down, Pinned Back
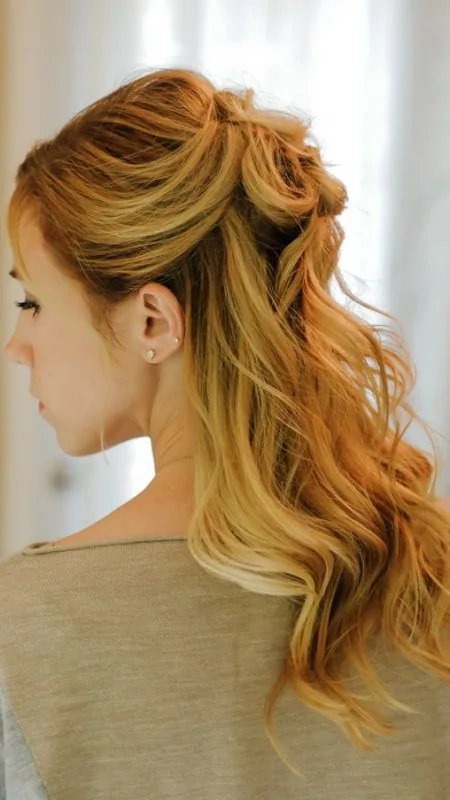
Best for: anyone who wants to keep some hair down while still showing their face clearly. How to style: take the top section from each temple, smooth it back, and pin the two sides together at the back of your head. Keep the rest of the hair smooth, tucked behind your ears, and sitting behind your shoulders.
Who should avoid it: if your hair is very layered or slippery, the pinned section may slide loose, and if your hair is very short, there may not be enough length to pin back neatly. Test it with a front-facing photo first, and carry spare pins in case a section drops forward at the booth. It also works well for wavy hair, because the pinned-back top keeps the front clear while the length underneath still shows your natural texture. It is a flexible choice, because you can loosen or tighten the pinned section to suit your hair.
7. The Soft Blowout Tucked Behind the Ears
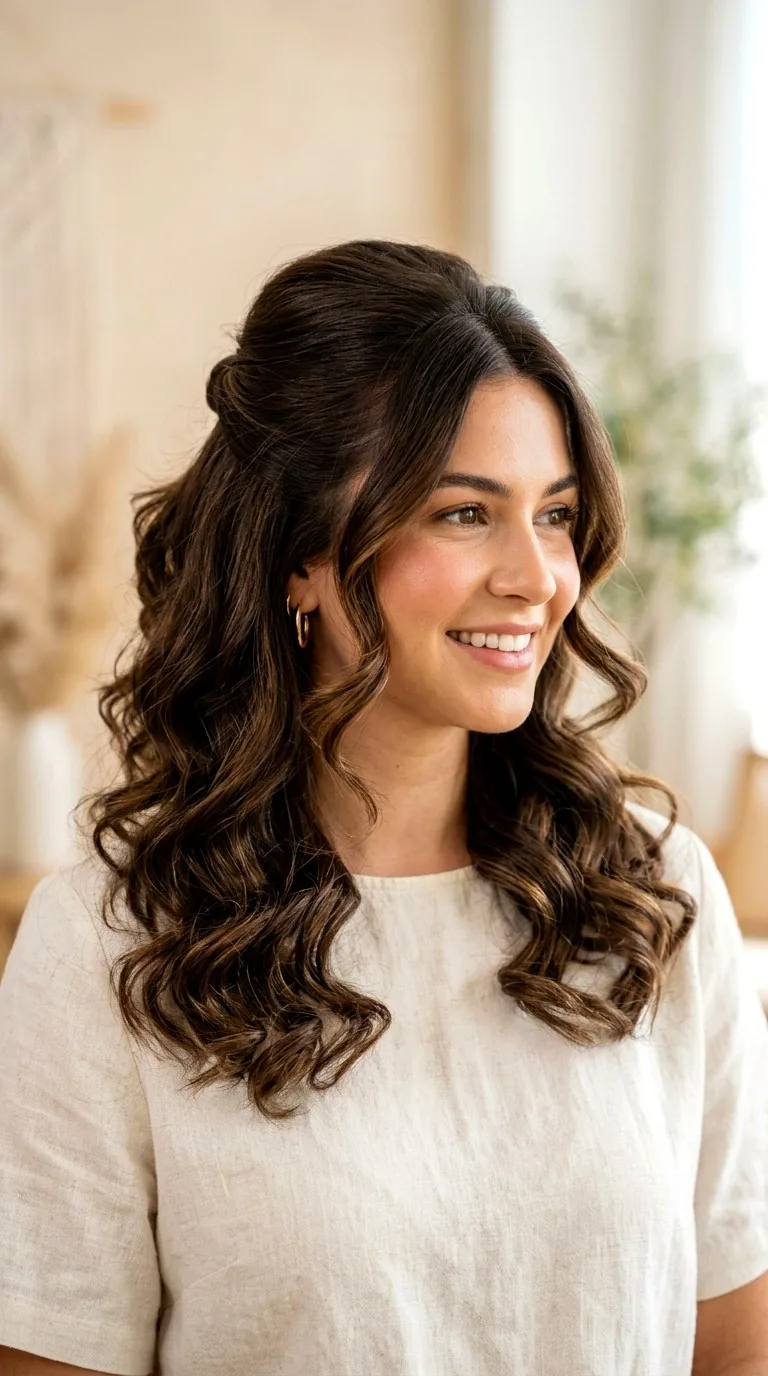
A soft blowout can look beautifully natural in a passport photo, as long as the hair is tucked firmly behind the ears. Blow-dry your hair smooth with a round brush, add a little volume at the roots, then tuck both sides back and pin them flat if needed. The finish should look like healthy, everyday hair, not a salon event style.
Pros: it looks natural, suits most face shapes, and works well if you dislike pulled-back styles. Cons: it is the least secure style on this list, because smooth hair can slide forward. Use a light-hold spray, keep the front sections short enough to stay tucked, and check your reflection before the shutter clicks. If your hair is very smooth or fine, pin the tucked sections flat behind your ears, because even a small slip can cover part of your face. A blowout also looks natural in person, so the photo will still look like you.
8. Straight Hair with a Centre Part
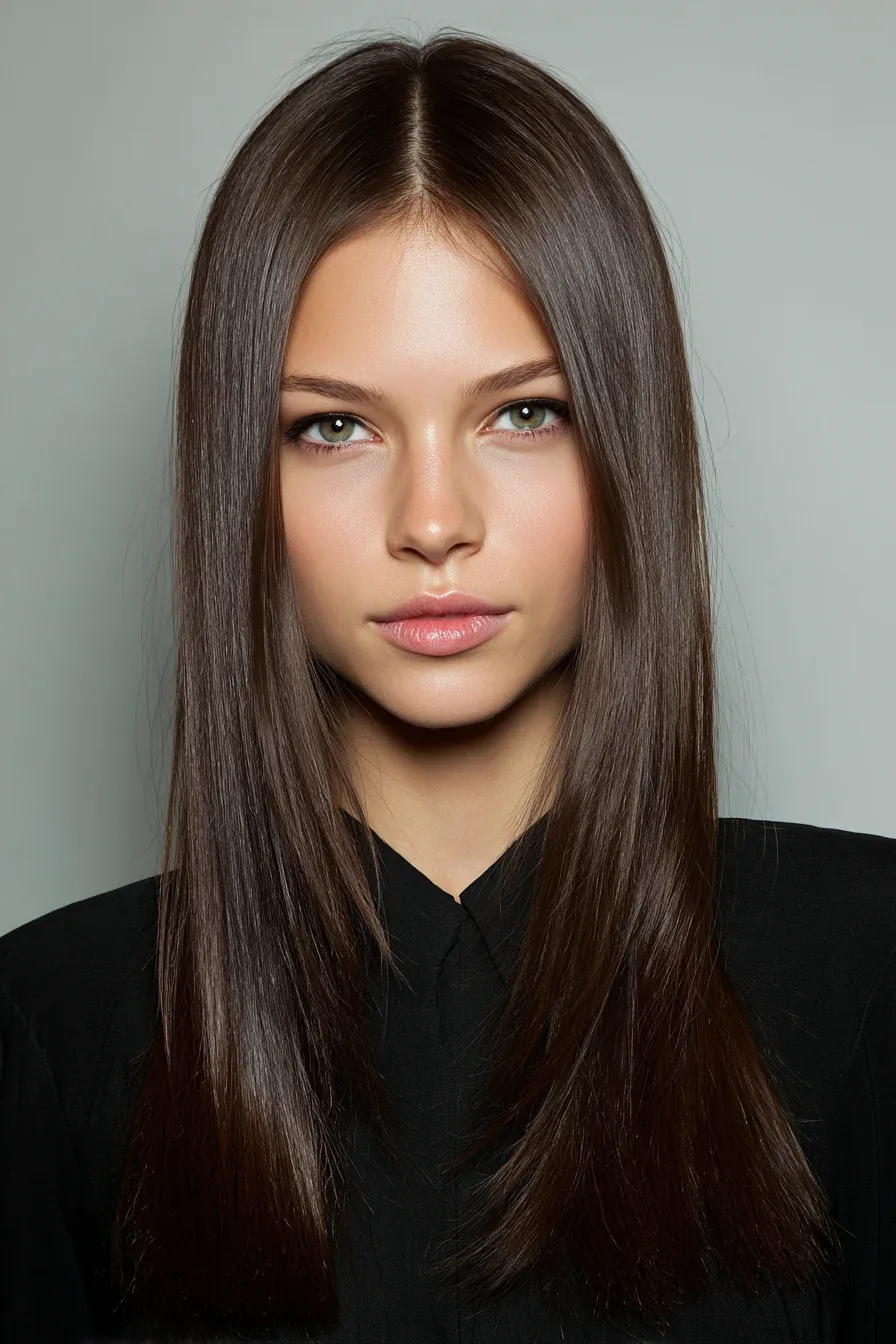
Straight hair with a centre part is clean, simple, and very photo-friendly. Part your hair down the middle, smooth both sides with a straightener or brush, and tuck them behind your ears. The symmetry suits a straight-on ID photo, because the frame stays balanced and your face stays the focus.
Common mistakes: letting the front pieces fall forward, adding too much shine spray so the hair looks wet, or leaving the ends uneven. Trim any straggly ends before photo day and use a small amount of smoothing serum. This style takes about ten minutes and suits straight and slightly wavy hair best. It is also one of the easiest styles to fix at the booth, because you only need a comb and a couple of pins to smooth the part and tuck the sides back. The centre part also keeps the photo balanced, with your face as the clear focus.
9. The Side Part with Tucked Sides
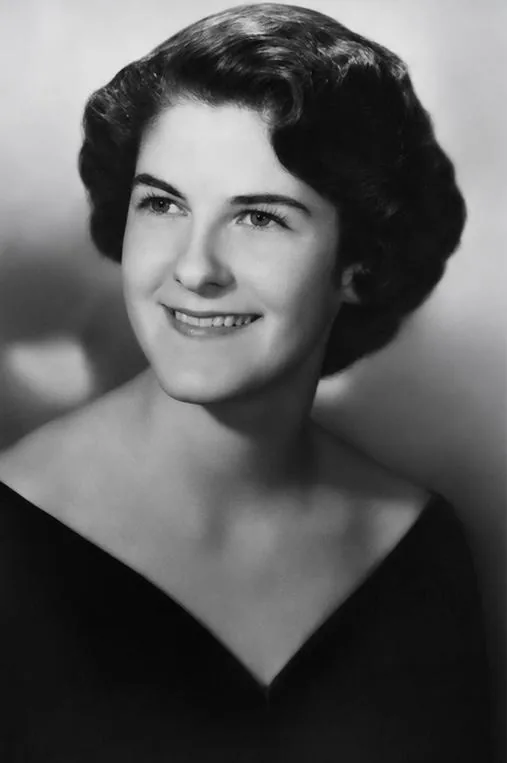
Best for: anyone who finds a centre part too stark, or whose hair naturally falls to one side. How to style: create a clean side part, smooth the hair down on both sides, and tuck each side behind the ear. Pin the tucked sections flat so they stay put and your ears remain visible.
What to ask for: a tidy side part with no heavy volume on one side and no hair over the forehead. Quick verdict: an easy, flattering everyday style that translates well to an ID photo, as long as you keep the tucked sides secure and check them from the front before the photo is taken. It suits straight, wavy and lightly curly hair, and it takes only a few minutes once your part is in place. It is also quick to fix at the booth, because a comb and two pins are all you need to smooth the part again.
10. The Low Braided Ponytail
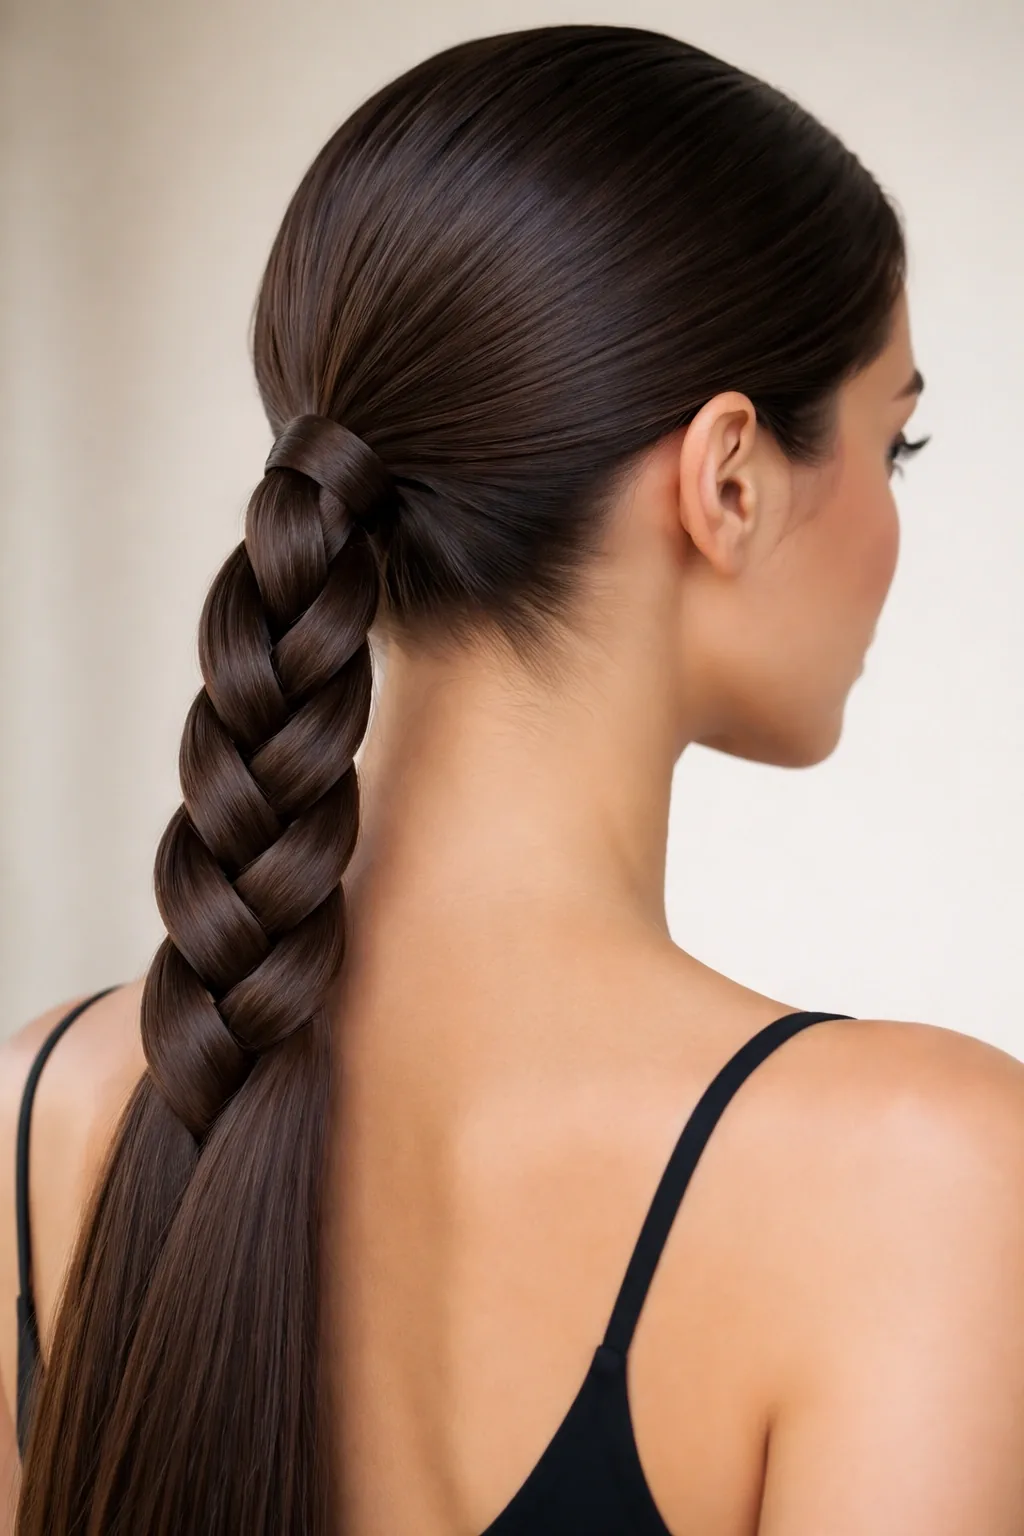
The low braided ponytail is practical, neat, and ideal for long hair. Gather your hair into a low ponytail at the nape, braid the length, and secure the end with a small elastic. Keep the braid behind your shoulder so it does not creep into the frame, and smooth the front before you start braiding.
Maintenance and how long it lasts: a braid holds all day with almost no touch-ups, and it keeps long hair from falling forward. It takes about ten minutes once you know the steps. Avoid a high ponytail base or a loose, messy braid, both of which can look untidy and change your outline in the photo. Keep the braid slim and behind your shoulder, and smooth the front once more before the photo, so the whole style looks neat from straight ahead. The braid also keeps long hair from moving, so the photo stays neat even if you turn your head.
11. The Classic Braid Over One Shoulder
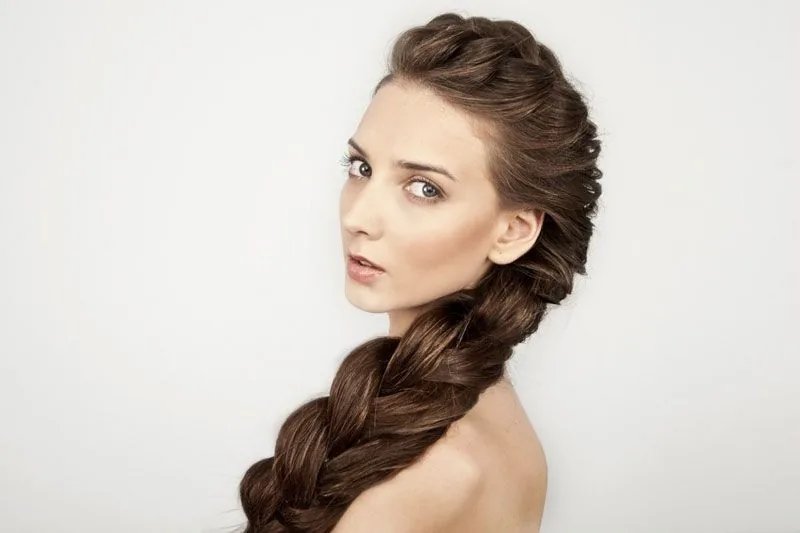
A classic braid over one shoulder looks soft and natural, and it keeps long hair under control. Part your hair as usual, smooth the front, gather the hair to one side, and braid it loosely but neatly down over your shoulder. Keep the braid slim and close to the body so it does not widen your silhouette.
Who should avoid it: if your hair is very short, a shoulder braid may not hold, and if you want the most formal ID look, a low bun or ponytail may suit you better. Cost and time: free at home, about five to ten minutes, and it stays neat for hours with just one elastic and a couple of pins at the front. Keep the part clean and the front smooth, and make sure the braid sits over your shoulder, not across your chest, so it stays out of the frame. It is also a gentle style for long hair, because it holds the length without pulling tightly at the front.
12. The Low Fishtail Braid
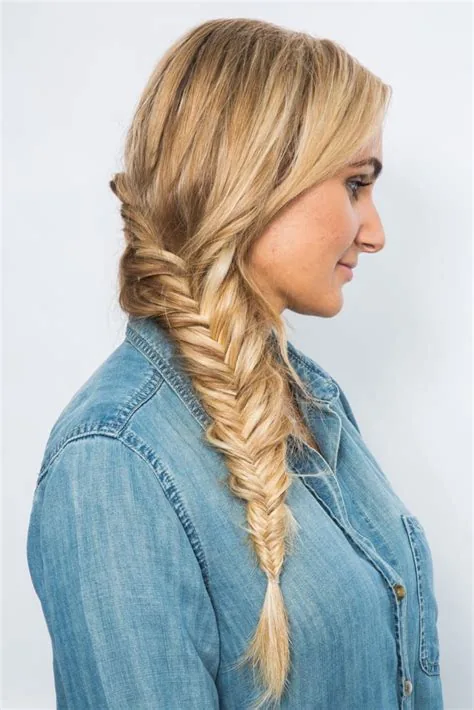
The low fishtail braid looks detailed and polished, yet it is still simple enough for an ID photo. Gather your hair low, split it into two sections, and cross small pieces from each side to the other until you reach the end. Secure it with a small elastic and gently smooth the front.
Pros: it holds long hair neatly, looks tidy from the front, and lasts all day. Cons: it takes longer than a normal braid — allow fifteen minutes — and it is fiddly to fix if it loosens. Practice it the day before, keep the braid low and slim, and avoid pulling pieces out for a messy finish. It suits long, straight and wavy hair best, and because the braid is so secure, it is a good choice if you have to travel to your photo appointment. The fishtail also looks neat from the front, because the plait stays slim and close to the body.
13. The Dutch Braid into a Low Bun
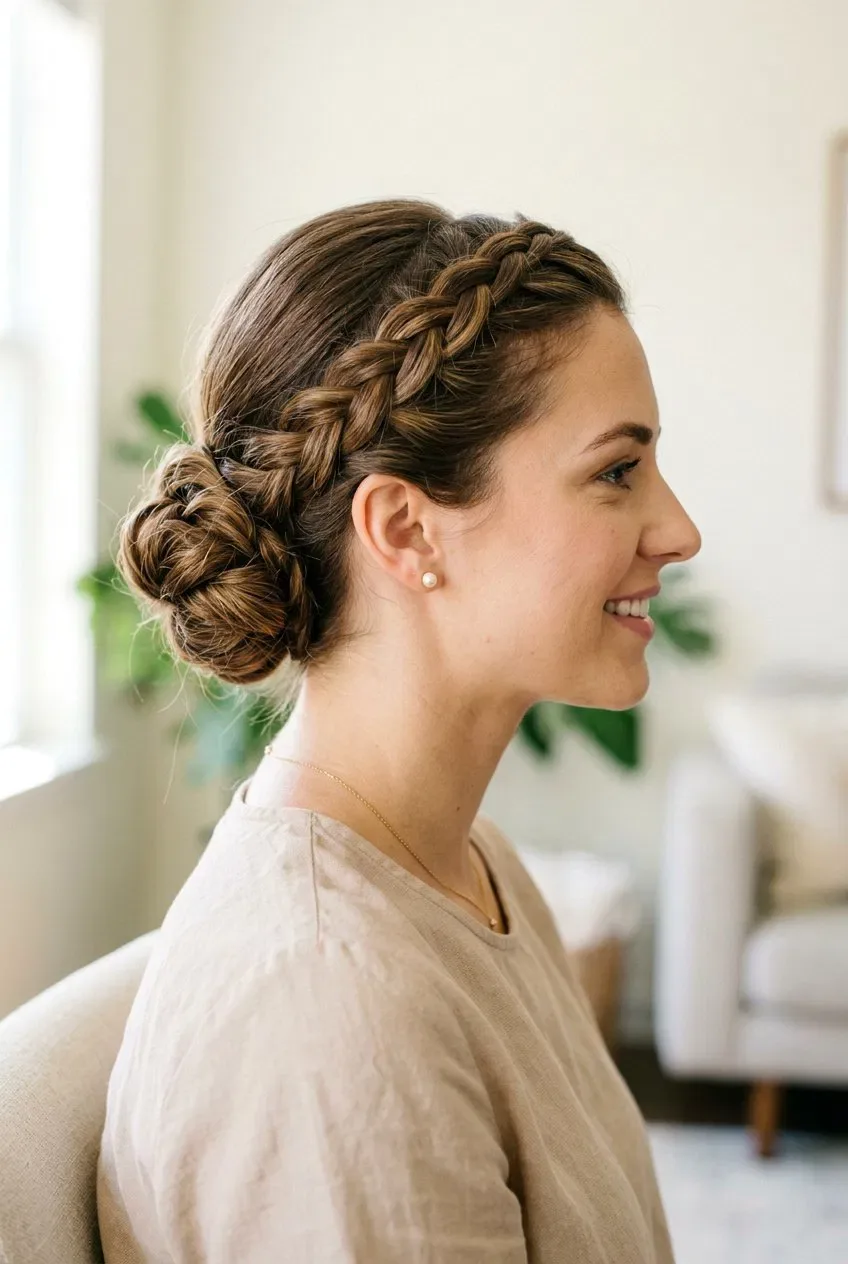
Best for: thick or long hair that needs extra hold, and anyone who wants a braid without hair hanging down. How to style: Dutch-braid from the front hairline back along the head, keeping the braid close and smooth, then gather the remaining hair into a low bun at the nape and pin it flat.
What to ask for: a flat, neat Dutch braid that follows the head, ending in a small low bun with no bulk at the sides. This style keeps every strand off your face and lasts all day. Quick verdict: one of the most secure passport-photo styles here, ideal if your photo appointment is far from home or you need the style to survive travel. It also keeps thick hair flat and tidy, and it holds its shape for hours without pins slipping or strands falling forward. It is also a practical choice for thick hair, because the braid keeps the weight flat and secure.
14. The Braided Crown, Pinned Back
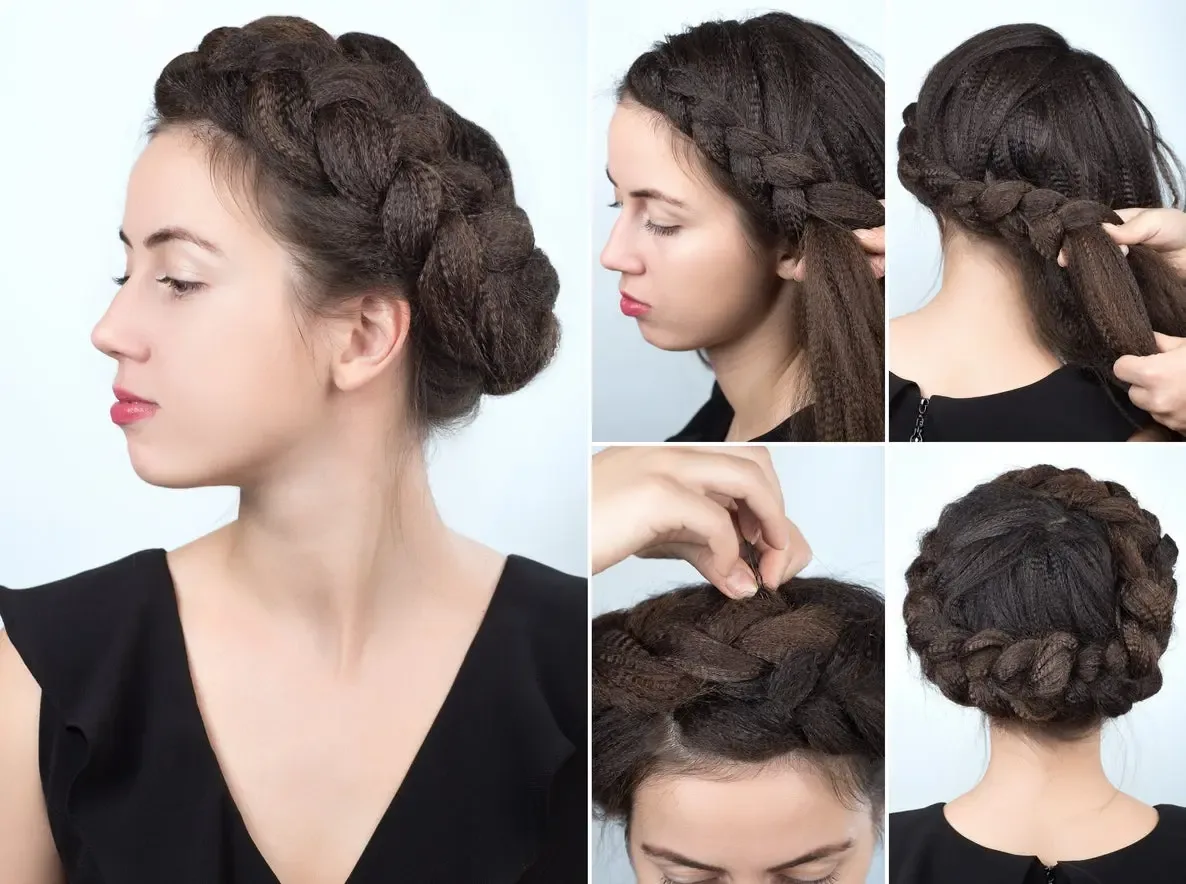
Best for: Medium to long hair that needs to stay completely off the face. The braided crown works beautifully for straight, wavy, and lightly textured hair, and it holds its shape for hours without constant fixing.
How to style: Part the hair in the middle or to the side, then braid a simple three-strand braid along each side of the head, working from the front toward the back. Join the two braids at the back and pin them flat with bobby pins that match your hair color. Keep the braid close to the scalp so it reads as neat rather than bulky.
What to ask: At the salon, ask for a flat, low-profile braided crown that sits close to the head and keeps every strand behind the ears. Ask the stylist to pin the braid at the back, not on top, so it does not add height that could look odd in a small passport photo.
15. The Polished Low Messy Bun
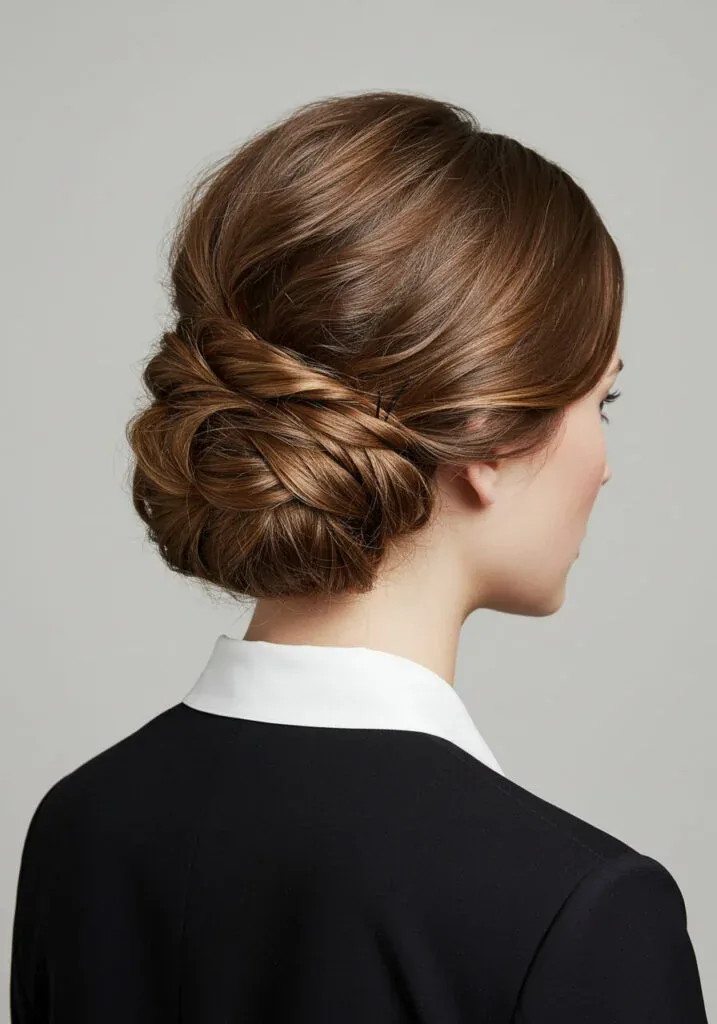
Pros: This style looks soft and natural while keeping every strand away from the face. It suits almost every hair type, from fine to thick, and it photographs well because the low placement keeps the focus on your face. It is also forgiving — a few loose strands look intentional rather than messy.
Cons: If the bun is too loose, it can slip during the day, and very fine hair may need extra pins to stay put. In humid weather, flyaways can appear faster than with a tighter bun, so a light hairspray is a good idea before the photo.
Quick verdict: A polished low messy bun is one of the easiest hairstyles for a passport photo when you want something soft but tidy. Gather the hair at the nape, twist it into a loose bun, pin it securely, and smooth the front with a brush. It takes about five minutes and looks effortless in the frame.
16. The Textured Low Bun
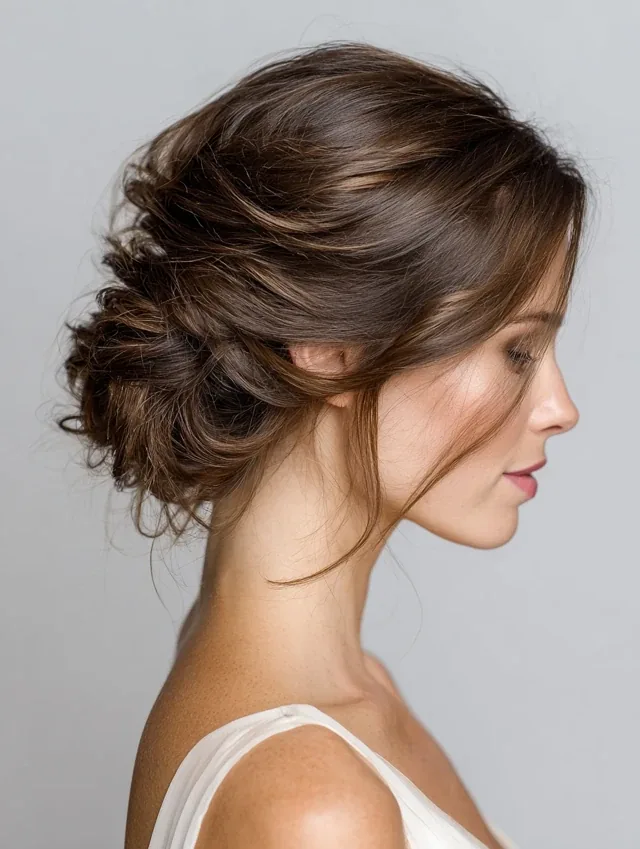
Common mistakes: The biggest mistake is making the bun too bulky at the back, which can push the head forward in the photo or look unbalanced in a tight crop. Another is leaving too much texture at the front — wispy pieces are fine, but anything near the eyes will draw attention away from your face.
How to get it right: Start by adding a little texture spray or dry shampoo at the roots for grip. Gather the hair low at the nape and twist it into a bun, leaving the texture visible in the bun itself rather than at the hairline. Pin the bun flat and smooth the top and sides with a brush. A few face-framing strands can stay, but tuck them behind the ears so the whole face stays clear.
Why it works: The texture adds volume and life to the style without any fuss, and the low placement keeps the silhouette neat. It is a good choice for wavy and thick hair that might look flat in a completely smooth bun.
17. The Sleek High Ponytail
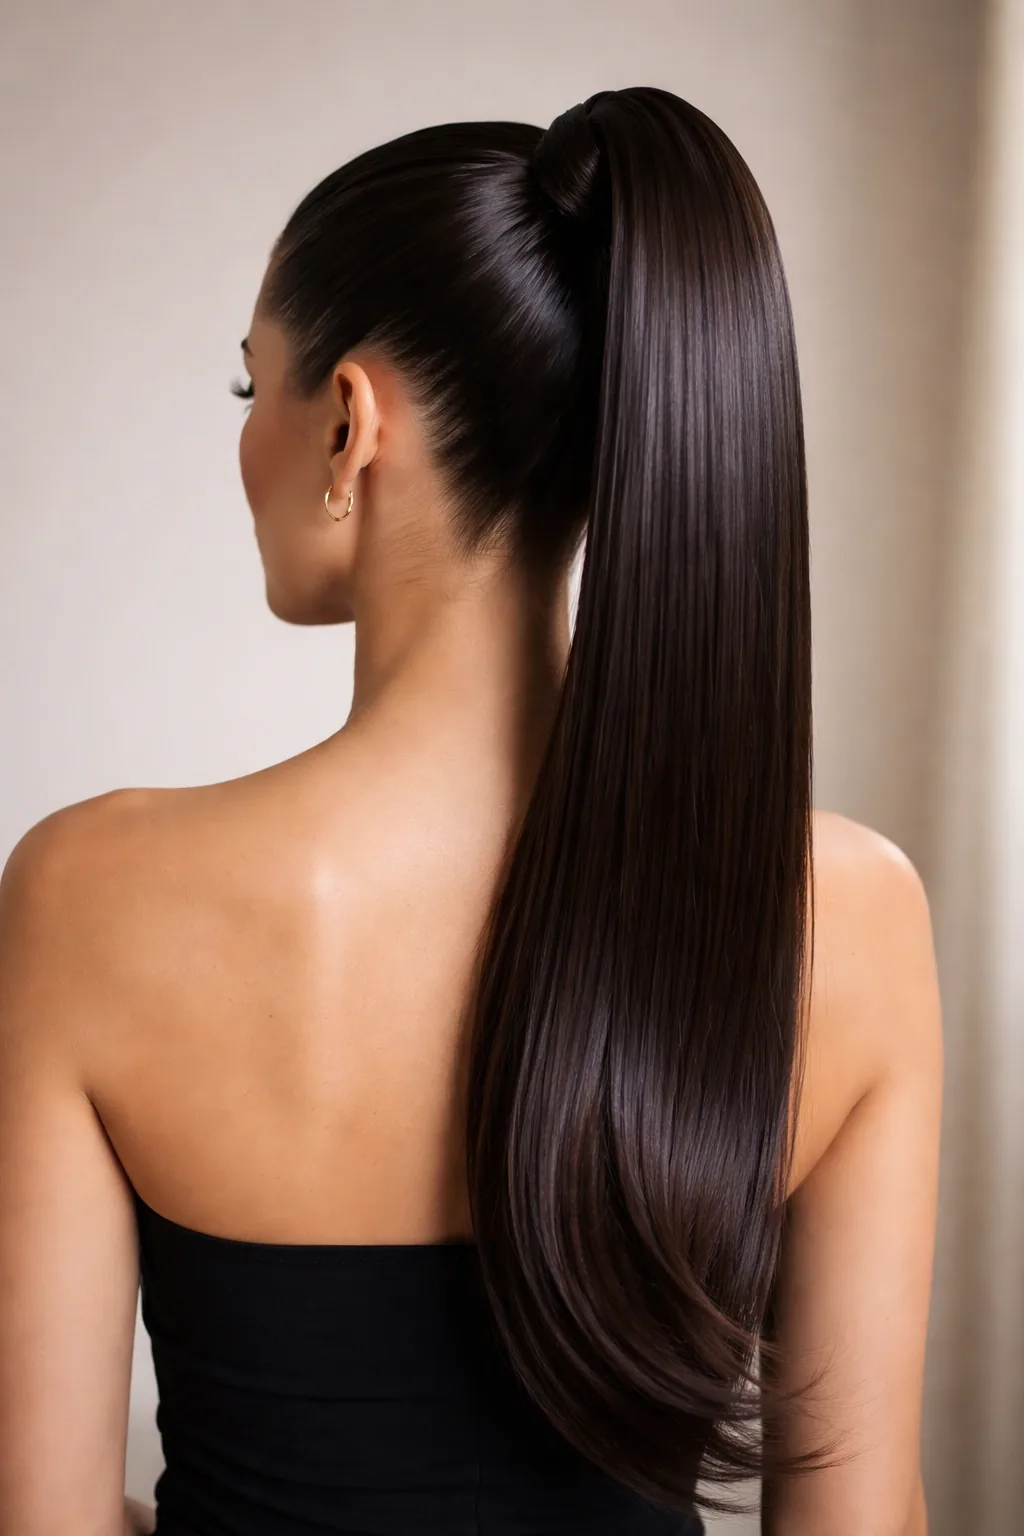
Best for: Long, straight hair and anyone who wants a clean, lifted look. A high ponytail opens up the face completely and gives the photo a fresh, polished feel. It works well for oval and heart-shaped faces and for hair that holds a smooth finish.
How to style: Brush the hair back smoothly and gather it high at the crown, making sure there are no bumps along the sides. Secure it with a strong elastic, then wrap a small section of hair around the elastic and pin it underneath for a finished look. Smooth flyaways with a light gel or hairspray, and check from the side that the ponytail falls neatly behind the shoulders.
What to watch out for: A ponytail pulled too tight can look severe and may cause discomfort, so keep the tension firm but comfortable. If your hair is very thick, use two elastics for extra hold so the style does not sag before the photo is taken.
18. The Low Bubble Ponytail
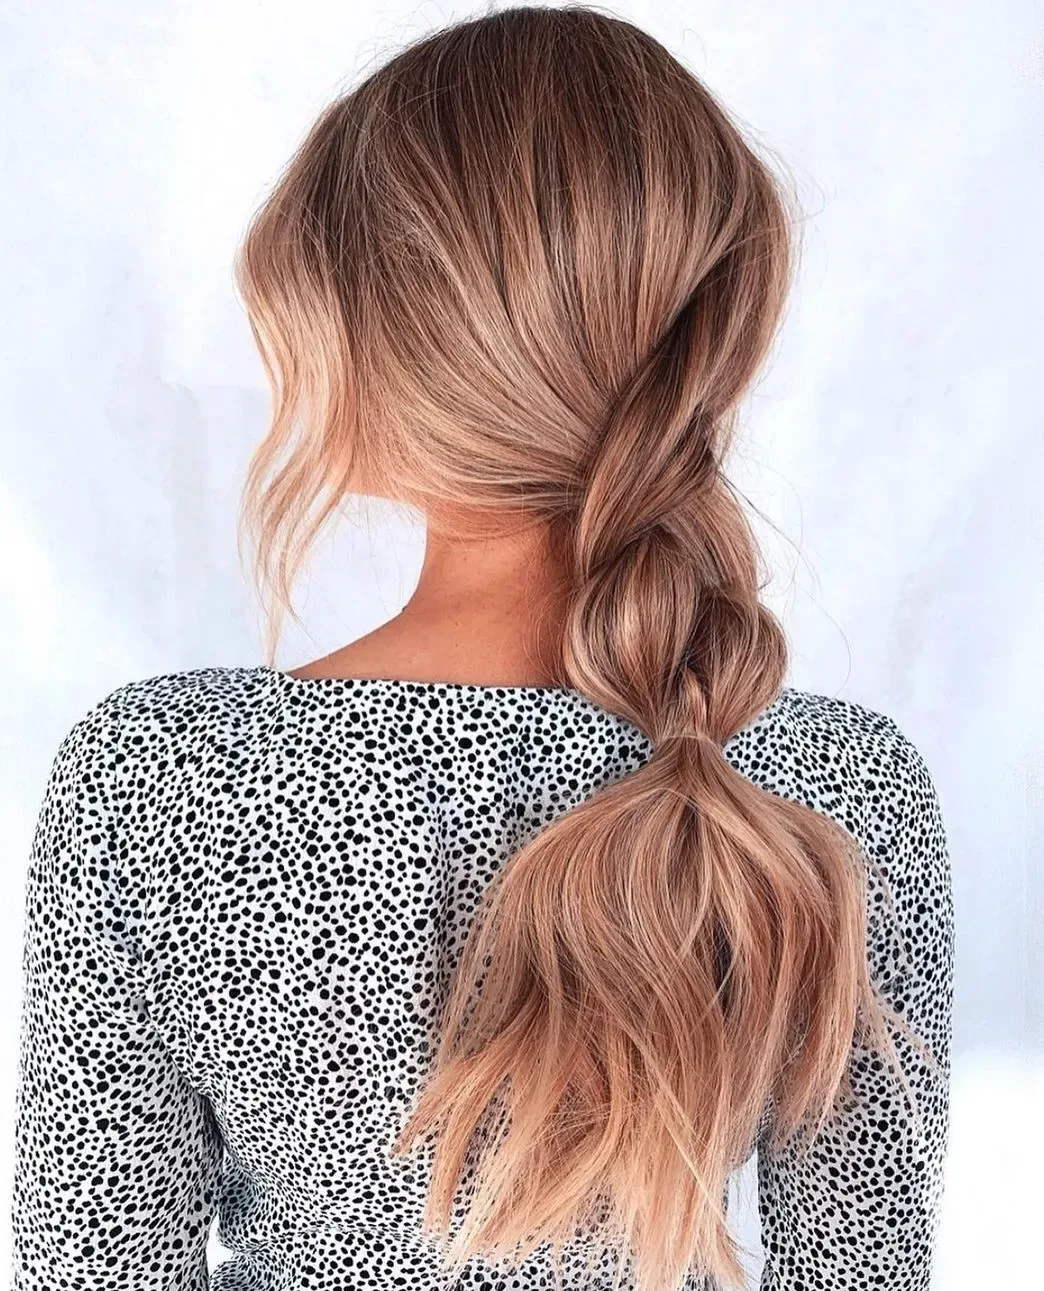
Cost and time: This is a no-cost style you can do at home in under ten minutes. All you need is a brush, a few small elastics, and a light-hold hairspray. There is no need for a salon visit or any special tools, which makes it a great last-minute option before a photo appointment.
How to style: Gather the hair into a low ponytail at the nape and secure it with an elastic. Add another elastic a few inches down the length, then gently pull the section between the elastics outward to create a soft bubble shape. Repeat once or twice depending on your hair length, keeping the bubbles even and neat.
Quick verdict: The low bubble ponytail looks playful yet tidy, and the low placement keeps it passport-friendly. It suits medium to long hair best, and it holds well all day. Just make sure the bubbles sit behind the shoulders so nothing creeps into the frame.
19. The Twisted Low Ponytail
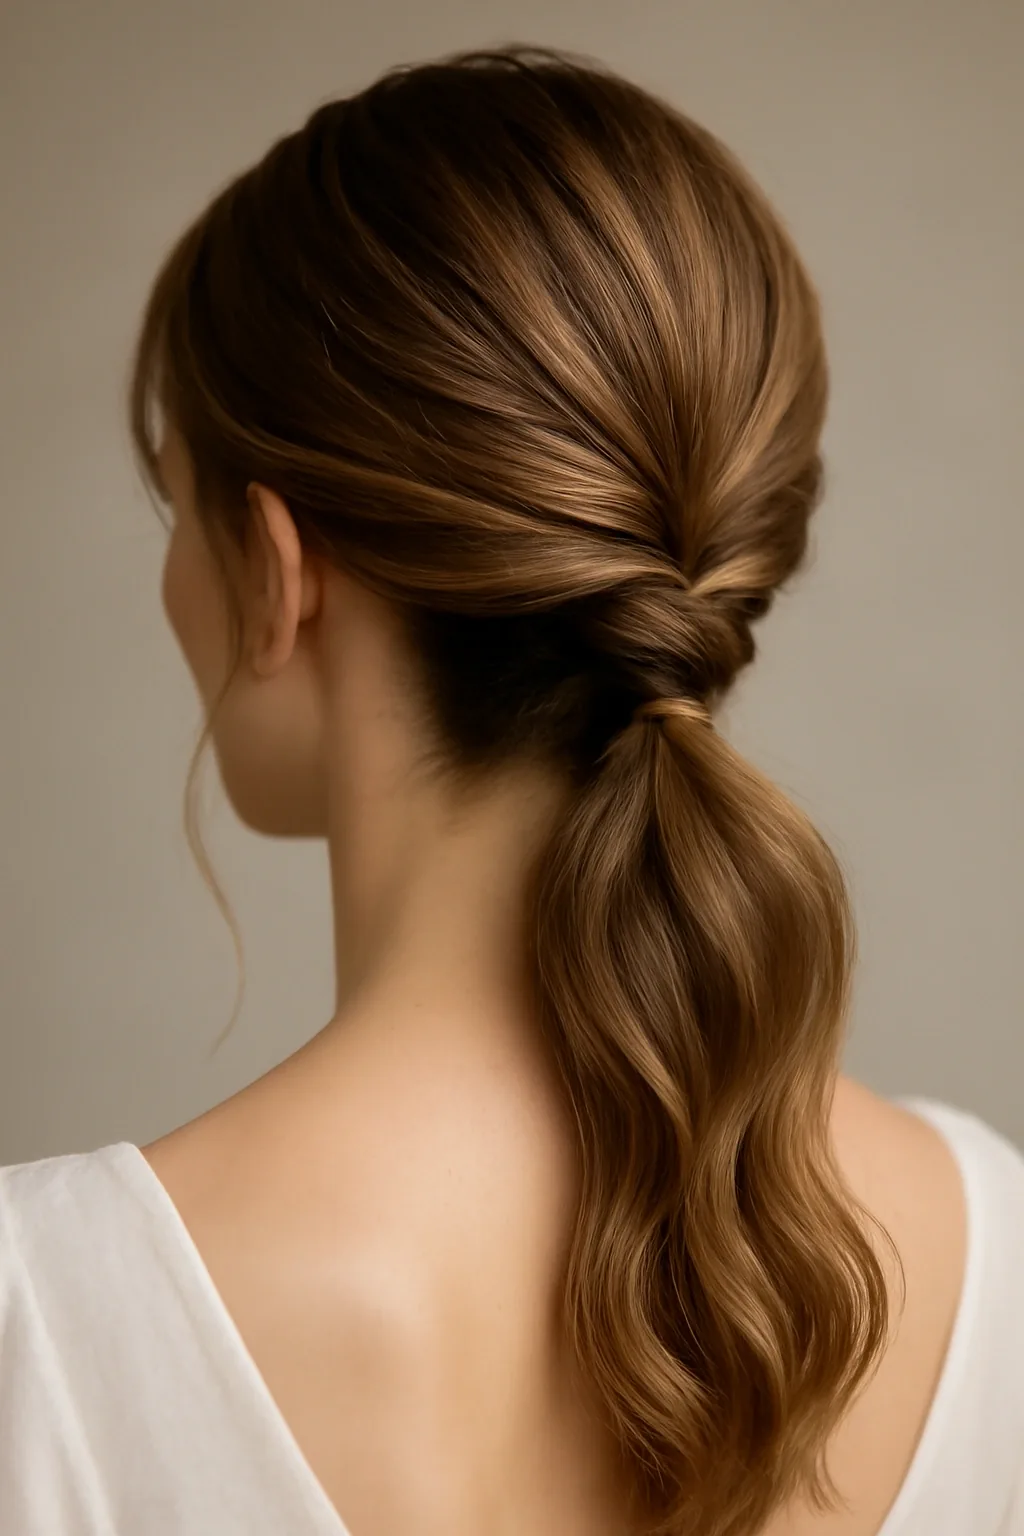
Maintenance: This style is very low maintenance. Once the twist is pinned and the ponytail is secured, it stays in place for hours with little need for touch-ups. A quick mist of hairspray at the start is usually enough, and you can carry a couple of bobby pins in your bag just in case a section loosens.
How long it lasts: Expect it to hold comfortably for a full day, including through a photo appointment and any waiting time. It works well in most weather, though very humid days may call for a stronger-hold spray to keep the twist smooth.
How to style: Part the hair in the middle, then twist a section from each side of the head toward the back. Join the two twists at the nape, secure them with pins, and gather everything into a low ponytail. The twist adds a pretty detail at the back while the front stays smooth, clean, and completely clear of the face.
20. Curly Hair Pinned Back from the Face
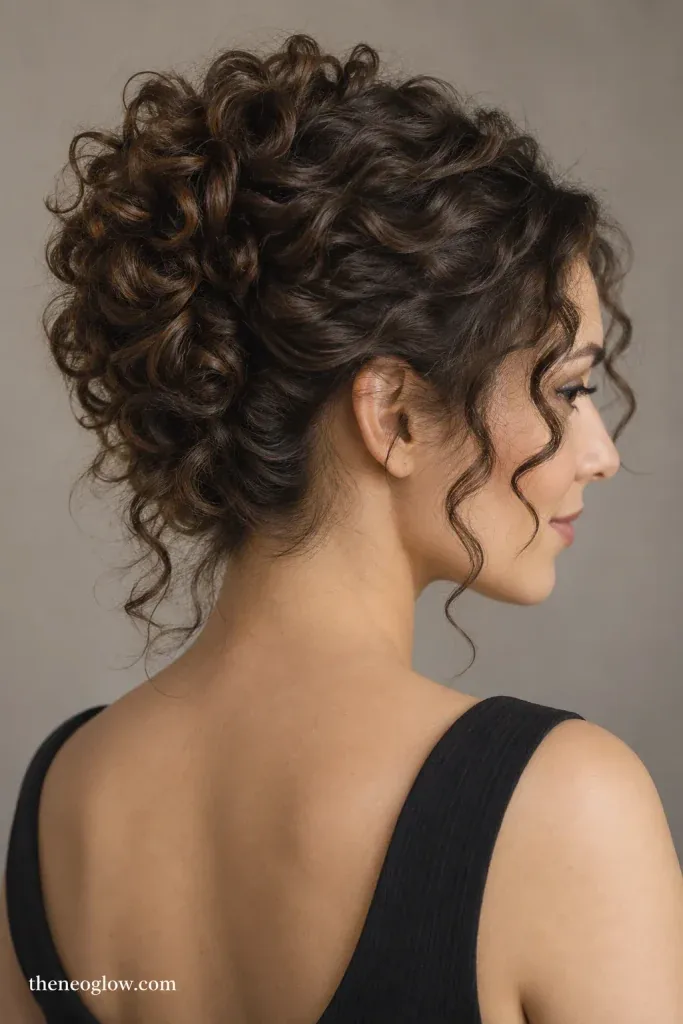
Who should avoid it: This style is not the best choice if your curls are very short and springy, since pins may not hold them back for long. It can also be tricky for very fine curls that slip out of pins easily. In those cases, a headband-free low bun or a half-up style may hold better.
Best for: Medium to long curly hair that has enough length to pin securely behind the ears. The style lets your natural curls show while keeping the face fully visible, which is exactly what a passport photo needs. It suits all face shapes and works with loose waves through to tighter curls.
How to style: Define the curls with a leave-in cream or curl gel, then take the front sections from each side and pin them back behind the ears with flat bobby pins. Let the rest of the curls fall naturally behind the shoulders. Check that no curl falls across the eyes or cheeks before the photo.
21. Defined Curls Worn Down Behind the Shoulders
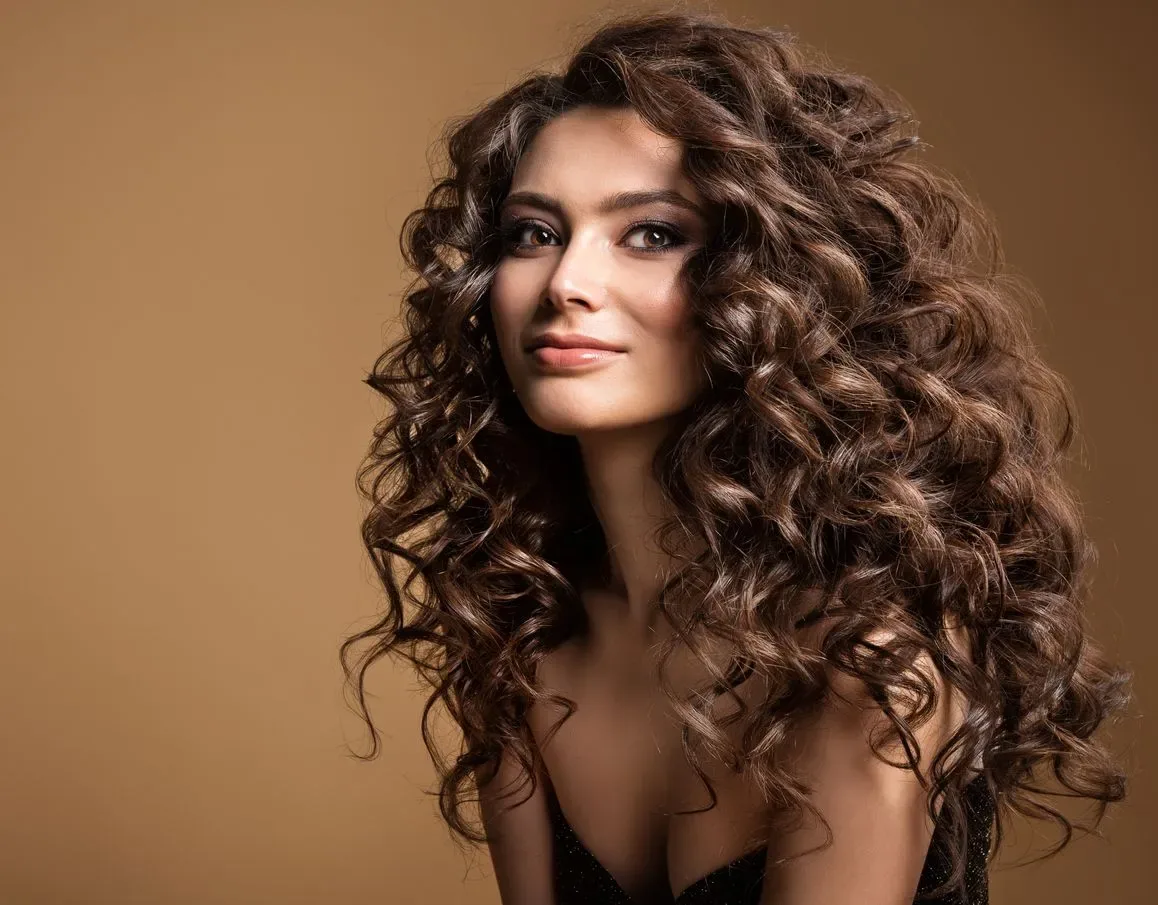
Pros: Wearing defined curls down looks natural and shows off your real hair texture, which is ideal for an ID photo that should look like you. The curls frame the shoulders rather than the face, so your features stay fully visible. It also needs no pins or ties, so there is nothing to slip or come loose.
Cons: Curls can frizz in humidity, and if they are too voluminous at the sides they may widen the silhouette in a small photo. You will also need to keep them swept back, since any curl that falls forward can cover part of the face.
Quick verdict: This is one of the most natural hairstyles for a passport photo for curly-haired women. Define the curls, part the hair in the middle, and sweep everything back over the shoulders. A little curl cream and a light scrunch are all it takes to look polished and photo-ready.
22. The Coily Puff Pulled Back
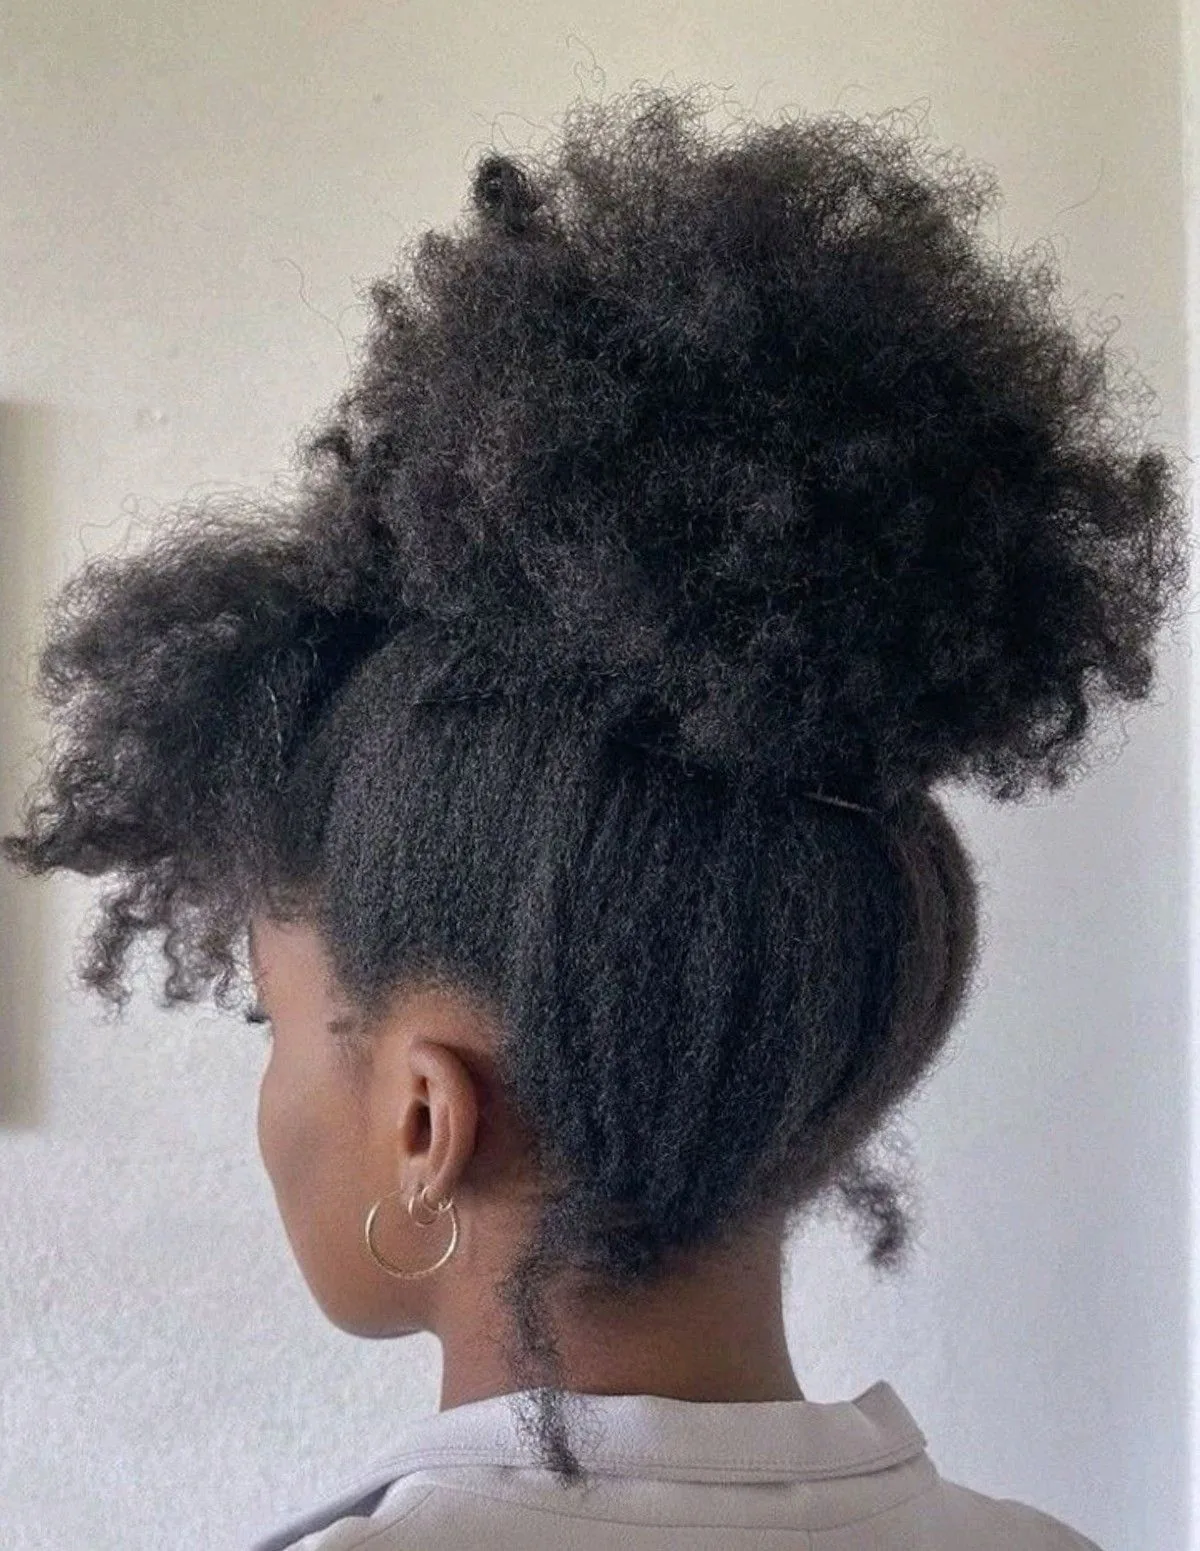
Common mistakes: Pulling the puff too tight can flatten the coils and cause discomfort, while leaving the front too loose lets coils fall toward the forehead. Another mistake is using a band that is too thin, which can snap or dig in, or skipping edge control so the hairline looks unfinished in the photo.
How to get it right: Moisturize the hair first, then brush it back gently with a soft-bristle brush, smoothing the edges with a small amount of edge control. Gather the coils into a puff at the crown or slightly back, securing it with a wide, soft band that holds without pulling. Fluff the puff lightly for shape, but keep it neat and balanced.
Why it works: The puff keeps every coil away from the face while celebrating natural texture. It photographs beautifully because the shape is clean and the face is completely open, making it a reliable choice for a passport photo.
23. The Short Bob with Tucked Sides
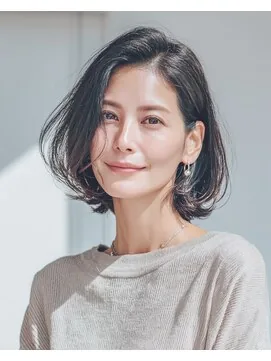
Best for: Chin-length to jaw-length bobs, straight or slightly wavy. Tucking the sides behind the ears opens up the whole face and gives the bob a neat, intentional finish. It suits most face shapes and is especially flattering on round and square faces.
How to style: Blow-dry the bob smooth or let it air-dry with a little smoothing cream. Part the hair in the middle or to the side, then tuck both sides neatly behind the ears. Use a flat bobby pin on each side if the hair tends to slip forward, and finish with a light mist of hairspray.
What to ask: If you are getting a cut before the photo, ask for a bob that sits just at or below the jawline with clean ends, so the tucked sides stay put. Ask the stylist to show you how to tuck it so you can repeat the look at home on photo day.
24. The Neat Pixie Cut
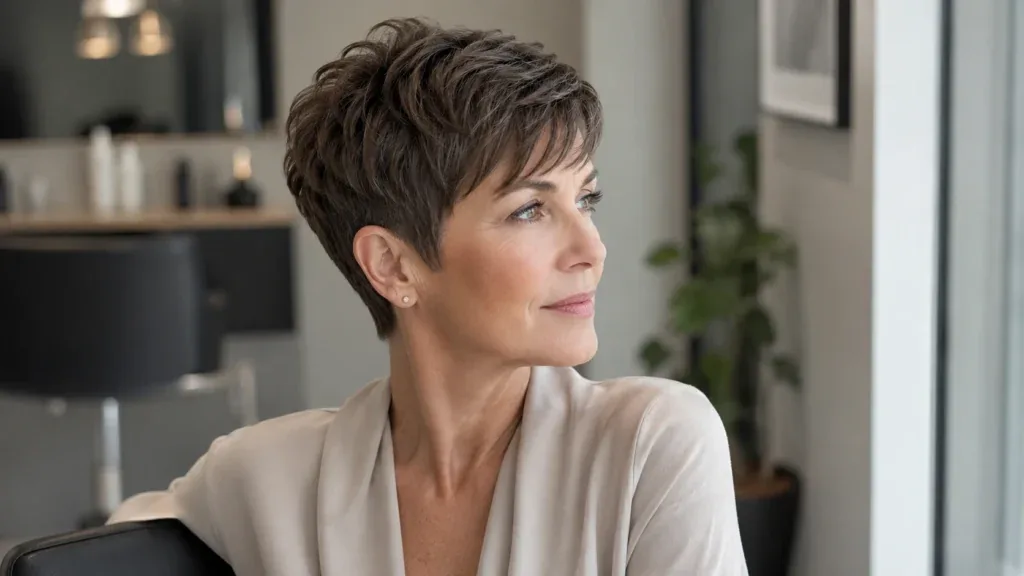
Cost and time: A pixie cut is one of the fastest styles to get photo-ready, taking only a few minutes of styling at home. The main cost is the haircut itself, since a pixie needs a trim every four to six weeks to keep its shape. On photo day, a little pomade or styling cream is all you need.
How to style: Work a small amount of pomade through damp or dry hair, sweeping the top back or to the side so the forehead and eyes stay clear. Keep the sides flat and neat, and smooth any pieces that stick out. The goal is a clean silhouette with no hair falling across the face.
Quick verdict: A neat pixie is a perfect passport-photo style because there is almost nothing to go wrong. The face is fully open, the hair stays put, and the look is polished with minimal effort. Just make sure the cut is fresh and the fringe is swept well away from the eyes.
25. The Lob Tucked Behind the Ears
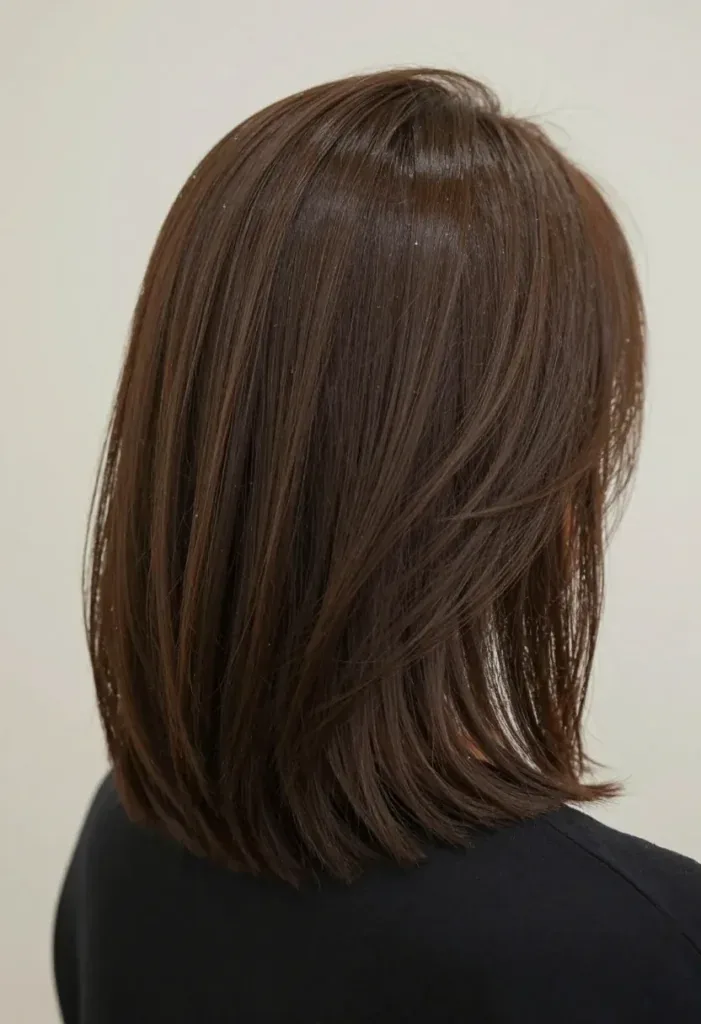
Maintenance: A lob, or long bob, is easy to maintain between cuts, needing a trim every eight to ten weeks. On photo day, it needs almost no work — a quick blow-dry or a pass with a flat iron is enough to smooth the ends and keep the tuck in place.
How long it lasts: The tucked style holds all day with just a couple of pins or a light spray, since the length sits comfortably behind the ears. It also survives humidity better than looser styles, because there is less hair at the front to frizz or fall forward.
How to style: Part the hair in the middle, smooth the top with a brush, and tuck both sides behind the ears. Let the back fall straight down past the shoulders. If the ends flip outward, a quick pass with a flat iron will keep the silhouette clean and tidy for the camera.
26. Shoulder-Length Layers Pushed Back
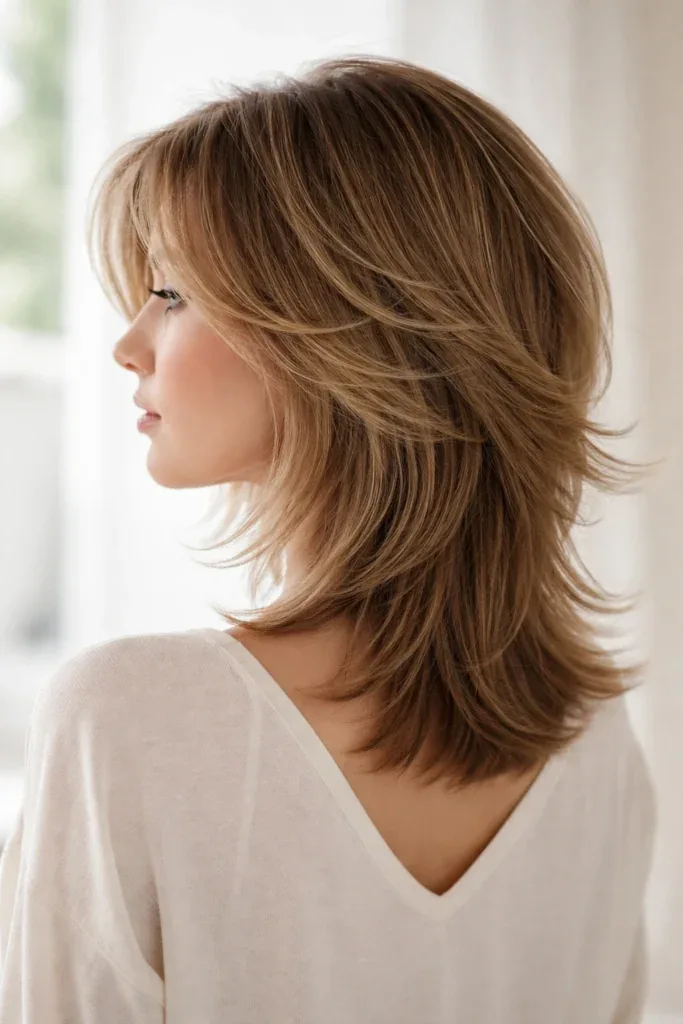
Who should avoid it: If your layers are very short at the front, they may keep falling forward no matter how much product you use, which risks covering part of the face in the photo. Very fine hair can also struggle, since pushed-back layers may slide forward during the day. In either case, a pinned-back style or a low ponytail will hold more reliably.
Best for: Shoulder-length hair with longer front layers that can be swept back smoothly. The layers add soft movement and volume while the pushed-back shape keeps the face completely open. It suits straight and wavy hair and most face shapes.
How to style: Blow-dry the hair back away from the face, using a round brush to lift the roots slightly. Smooth the top with a brush and a little styling cream, then pin the front layers back behind the ears if needed. The ends should fall neatly behind the shoulders, not forward onto the chest.
27. Slicked-Back Short Hair
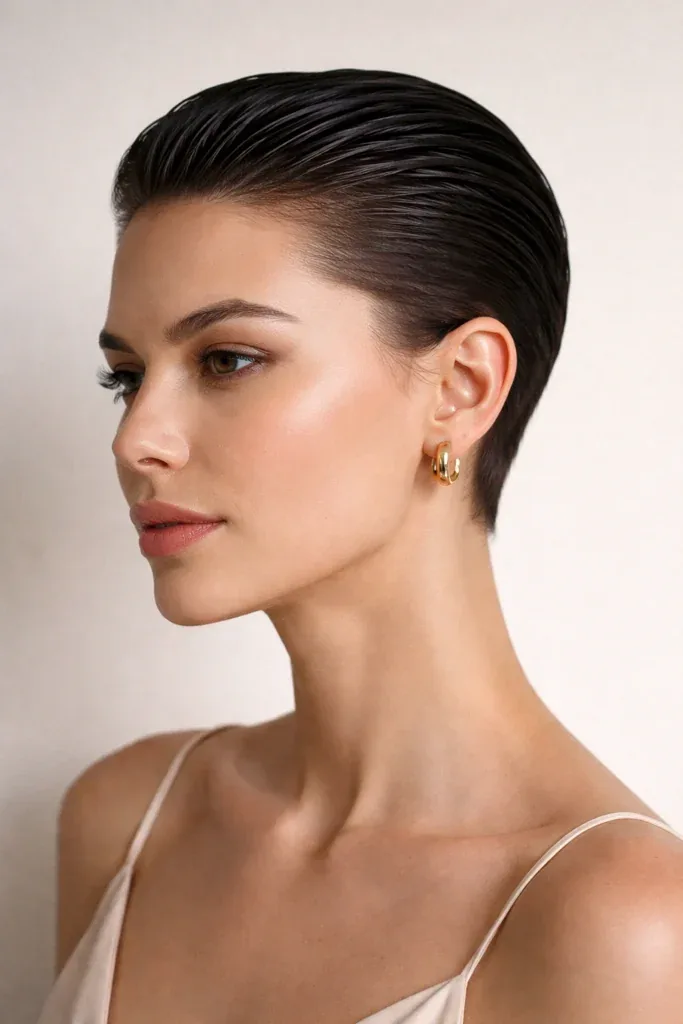
Pros: Slicked-back short hair is clean, sharp, and completely fuss-free. The face is fully visible, the style holds for hours, and it photographs with a strong, confident finish. It also works in any weather, since there is no loose hair to blow around or frizz.
Cons: The look can feel severe if too much product is used, and it shows the hairline clearly, so it may not suit everyone. It also needs the right amount of hold — too little and the hair falls forward, too much and it looks stiff or greasy.
Quick verdict: For short hair, slicking it back is one of the simplest and most reliable passport-photo choices. Apply a small amount of pomade or gel to damp hair, comb it straight back, and smooth the sides flat. Check the hairline in a mirror and tidy any stray pieces before the photo. The result is neat, natural, and ready for the camera in minutes, with no pins or ties to worry about.
28. The Side-Part Pixie
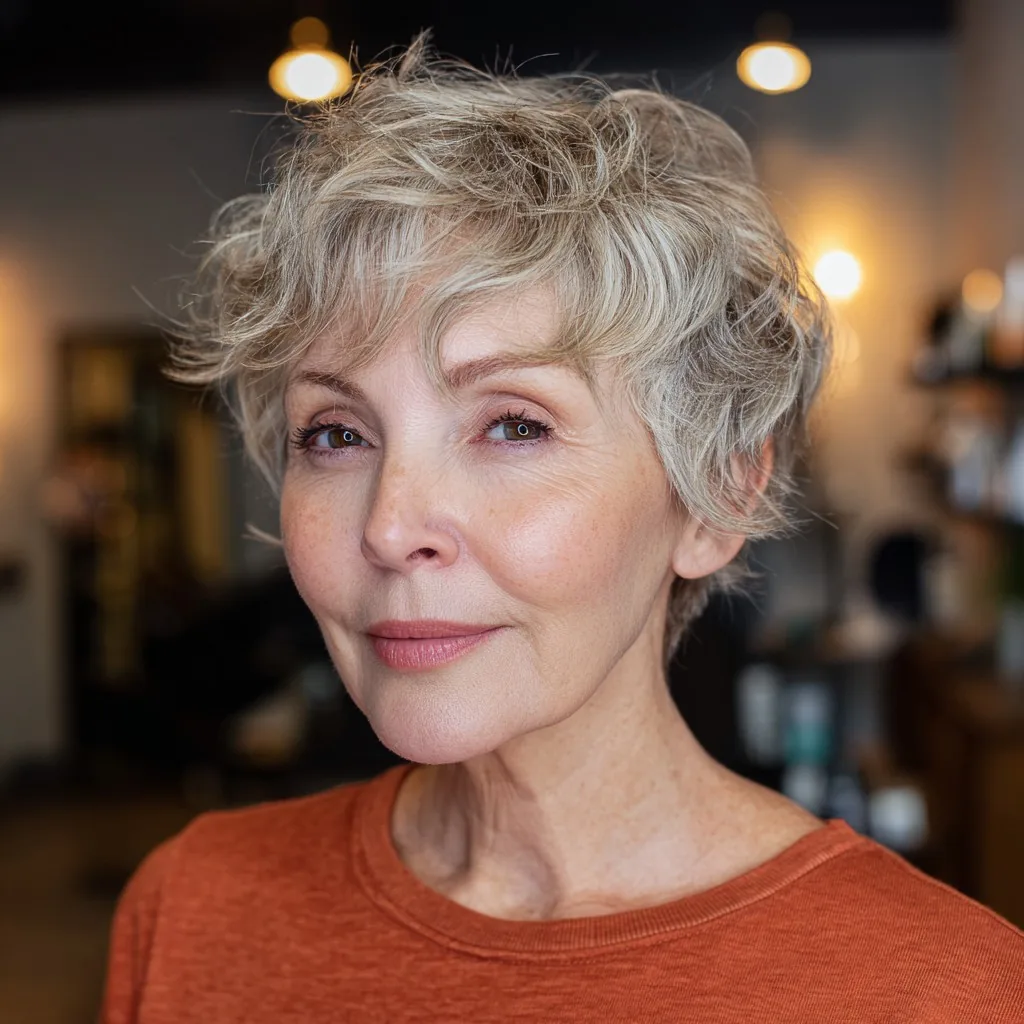
Best for: short hair that still needs a clear, polished shape. A side part gives a pixie direction and keeps the front from falling flat across the forehead. It suits straight, wavy, and fine hair, and it photographs well because the face stays completely open. If your pixie is growing out, this is one of the easiest ways to make it look intentional rather than in-between.
How to style: part the hair on one side while it is slightly damp, then smooth the longer side back and to the side with a small amount of styling cream. Tuck the shorter side neatly behind the ear and let the top lie flat, not puffed up. A light-hold hairspray will keep flyaways down without making the cut look stiff or helmet-like.
What to ask: ask your stylist to keep the fringe long enough to sweep to the side, with clean lines around the ears. That way, the cut frames your face without covering your eyes, and you will not need pins or constant fixing on photo day.
29. The Wavy Lob, Pinned Back
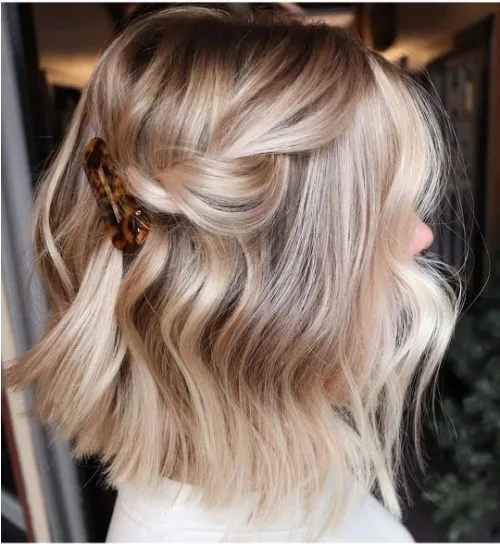
A wavy lob pinned back is relaxed but tidy, which is exactly what an ID photo needs. The waves add softness and movement, while the pins stop the front sections from drifting toward your eyes. It works well for shoulder-length hair that has natural wave, and it needs very little heat styling if your texture already cooperates.
Pros: it looks natural, takes only a few minutes, and suits most face shapes. The pinned-back front keeps your features visible, and the loose waves stop the style from looking severe. Cons: if your hair is very thick, the pins may slip, and strong wind or humidity can loosen the waves. Use two matching pins on each side and a light mist of hairspray for extra hold.
Keep the part simple — centre or slightly off-centre both work — and check the photo from the front before you leave. The goal is balance: neat at the sides, soft through the lengths, and nothing covering your face.
30. The Straight Lob with a Centre Part
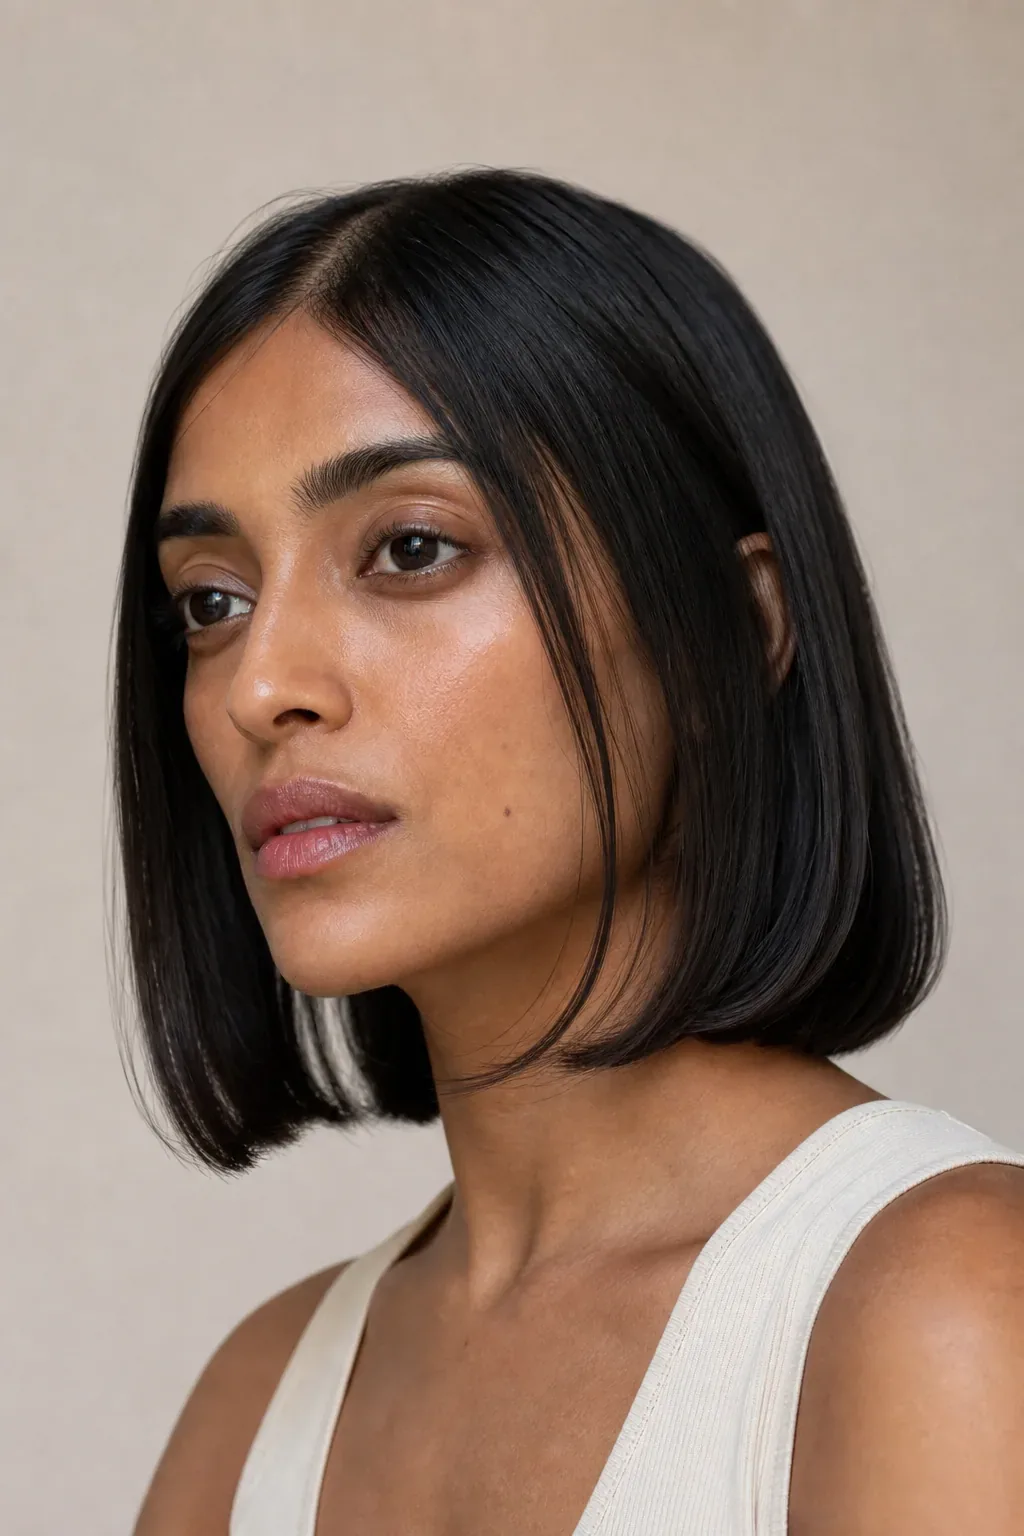
A straight lob with a centre part is clean, symmetrical, and very easy to read in a photo. It gives the face a balanced frame without adding volume where you do not need it. This is a strong choice if your hair is naturally straight or you are happy to smooth it with a flat iron before the appointment.
Common mistakes: letting the front pieces fall forward over the cheeks, which can soften the jawline but also hide part of the face. Tuck both sides behind your ears or brush them back so your features stay clear. Another mistake is using too much shine serum, which can look greasy under bright camera light. Use a pea-sized amount, only through the mid-lengths and ends.
Do not add a deep fringe or heavy layers at the front. Keep the ends blunt or lightly textured, check that both sides look even, and you will have a simple style that lasts for years in a passport.
31. The Low Side Ponytail
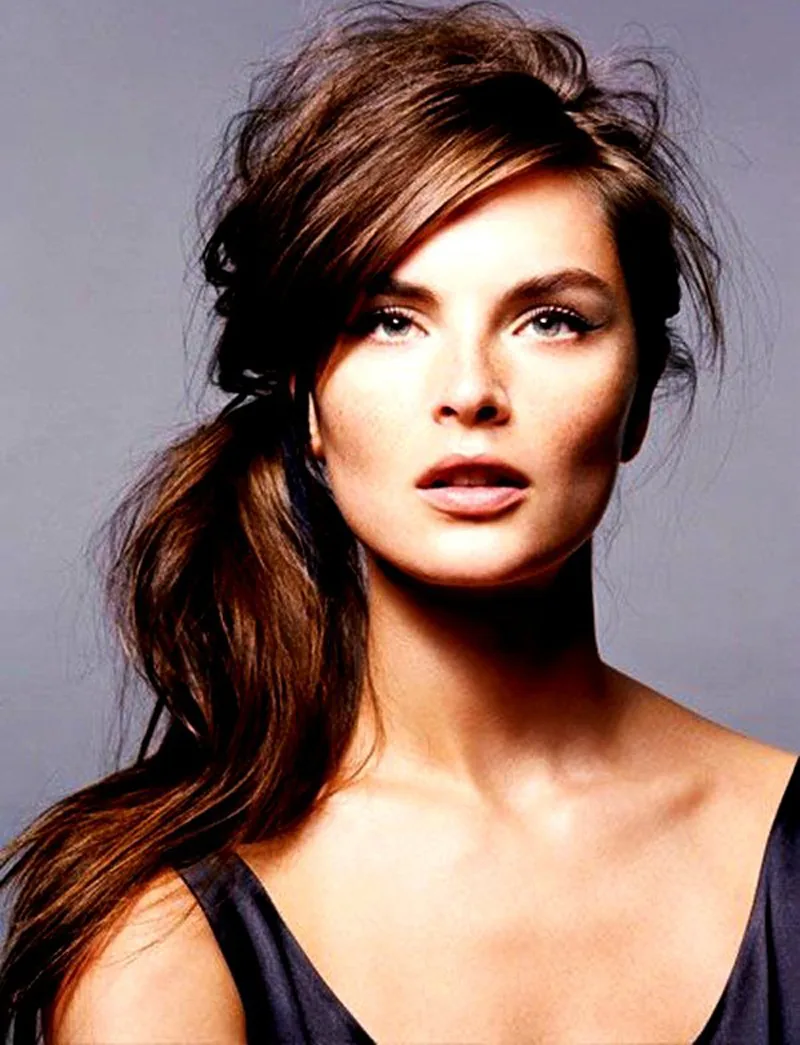
A low side ponytail is softer than a ponytail pulled straight back, but just as neat. It keeps the hair controlled while leaving a gentle, flattering shape at the side. It is a good option for medium to long hair, especially if a high ponytail feels too sporty or a bun feels too formal for you.
Maintenance: this style is easy to redo, which makes it practical on photo day. Smooth the top with a brush, secure the ponytail low behind one ear, and wrap a small strand of hair around the elastic to hide it. A light-hold spray will control flyaways for several hours without making the hair crunchy.
How long it lasts: comfortably through a photo appointment and beyond, as long as the elastic is secure. Check that the ponytail sits low enough not to pull at your face, and that no loose pieces are falling across your eyes or cheeks.
32. The Rope Braid Low Ponytail
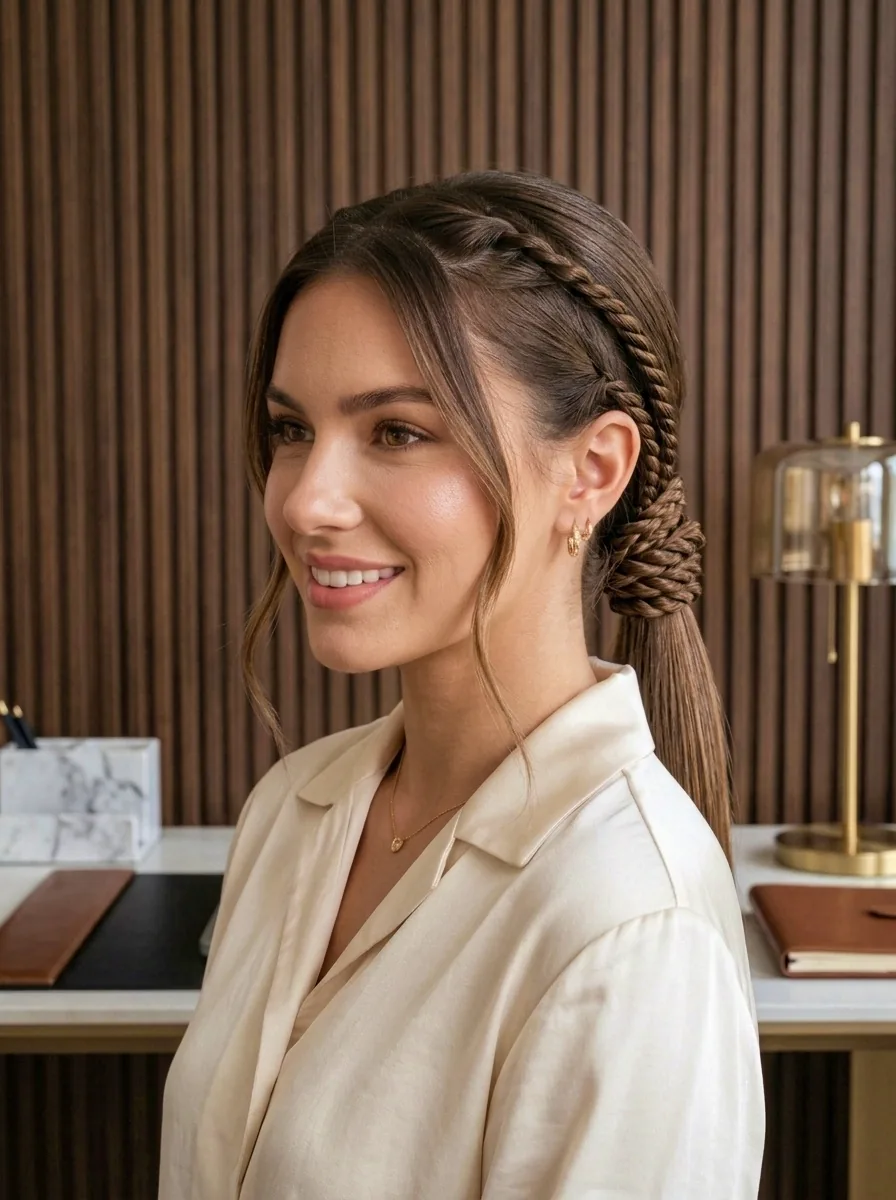
A rope braid low ponytail adds a little detail without looking fussy. Two strands twisted together create a clean, rope-like texture that holds well and photographs neatly. It is ideal if you want something a bit more interesting than a plain ponytail, but still want your face completely visible.
Cost and time: this is a free, at-home style that takes about five to ten minutes once you know the twist. No special tools are needed — just a brush, a clear elastic, and optionally a small amount of styling cream to stop the strands from fraying. If you are short on time, practise once the day before so the twist feels easy.
Start with smooth, brushed hair, divide the ponytail into two sections, twist each one the same way, then twist them around each other and secure the end. Keep the top neat and the braid low, and the result will look polished, not playful.
33. Double Braids into a Low Bun
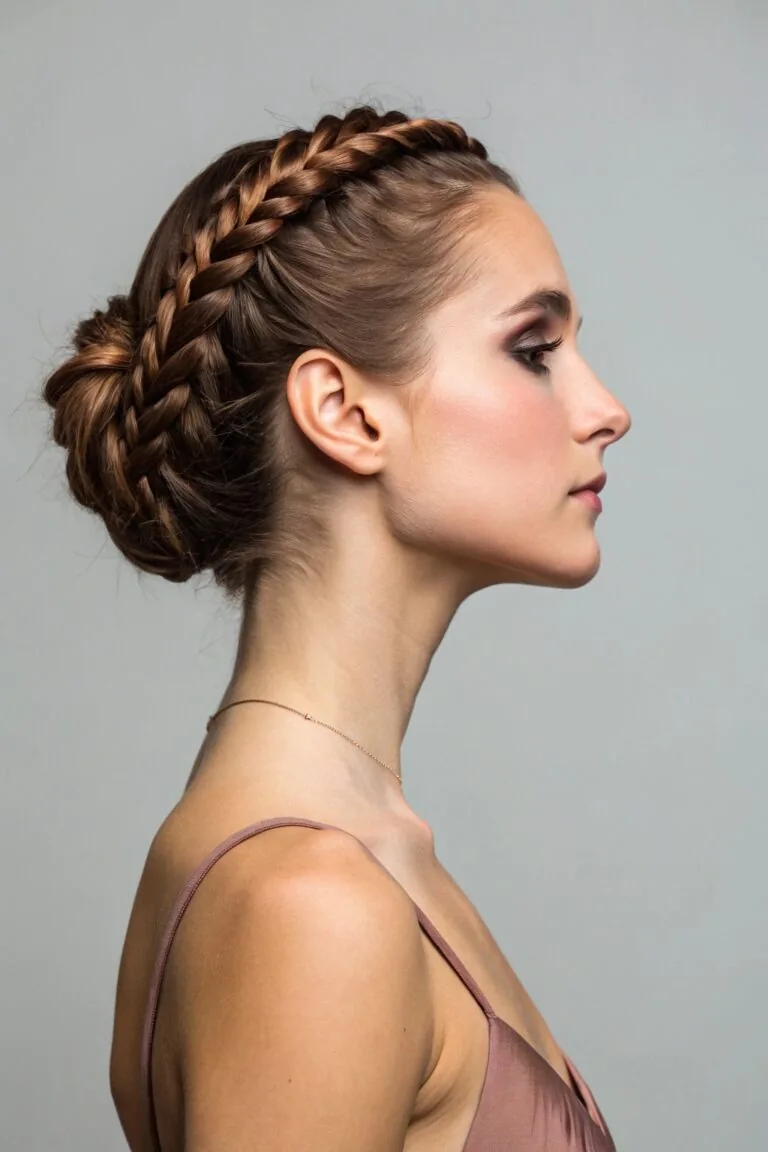
Double braids into a low bun look neat, secure, and surprisingly elegant. The braids keep the sides smooth and controlled, while the bun anchors everything at the nape. It is a smart choice for thick or long hair that can feel heavy when worn down, and it stays put through a long appointment.
Who should avoid it: if you have very fine hair, two braids can look thin and may pull at the hairline. In that case, one loose braid into a low bun will give a similar effect with less tension. Also avoid this style if tight braids give you a headache, or if your hair is very short — the braids need enough length to reach the bun comfortably.
Part the hair down the middle, braid each side toward the back, then join the braids into a low bun. Keep the braids snug but not painful, and smooth any bumps with a brush before you pin the bun.
34. The Halo Braid, Pinned Back
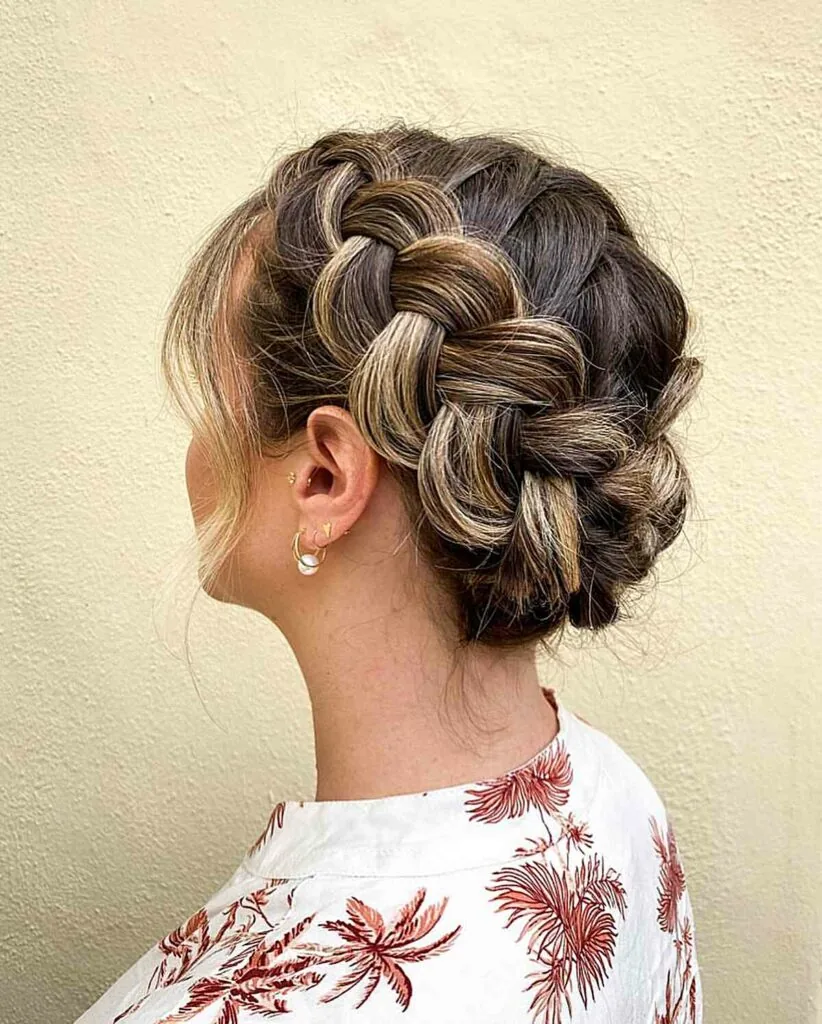
Quick verdict: a halo braid pinned back is pretty, practical, and photo-friendly — as long as it is kept flat and neat. It sweeps the hair away from the face in a soft circle, so your eyes, brows, and cheekbones stay completely clear. It works best on medium to long hair with enough length to braid around the head.
The trick is to keep the braid close to the head and not too bulky. A thick, raised braid can cast shadows or draw attention away from your face, while a flatter braid looks tidy and balanced. Pin the end securely underneath and smooth the front with a little styling cream.
If braiding all the way around feels tricky, braid just the front section and pin it back instead. You will get the same swept-back effect with far less effort, and the style will still look intentional in the photo.
35. The Sleek Slicked-Back Bun
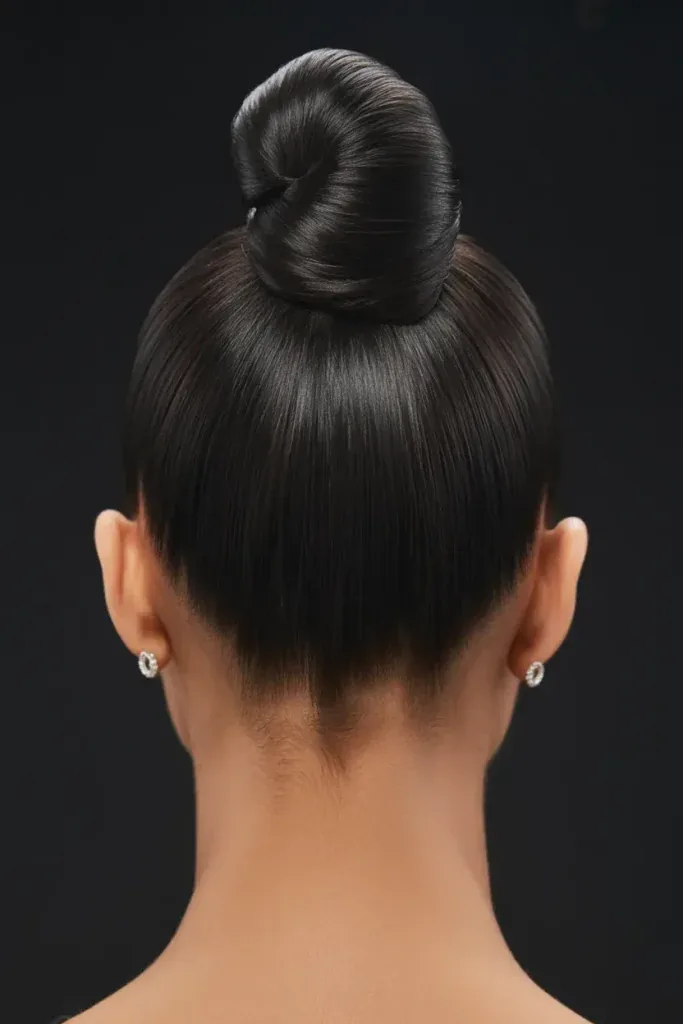
Best for: anyone who wants a sharp, clean, no-fuss photo. A sleek slicked-back bun removes every distraction, so the camera sees your face clearly. It suits straight and wavy hair, and it is especially helpful in humid weather, when looser styles can frizz or fall flat.
How to style: brush the hair straight back from the forehead, smooth it with a small amount of gel or styling cream, and gather it into a low or mid-height bun. Use a fine-tooth comb for the front, then secure the bun with pins. A light mist of hairspray will hold flyaways without adding shine that looks wet in photos.
What to ask: if you are getting this done at a salon, ask for a smooth finish with no bumps at the crown and a bun that sits flat. Avoid a very high, tight bun, which can look severe — a low, neat bun is softer and more flattering.
36. The Curly Low Bun
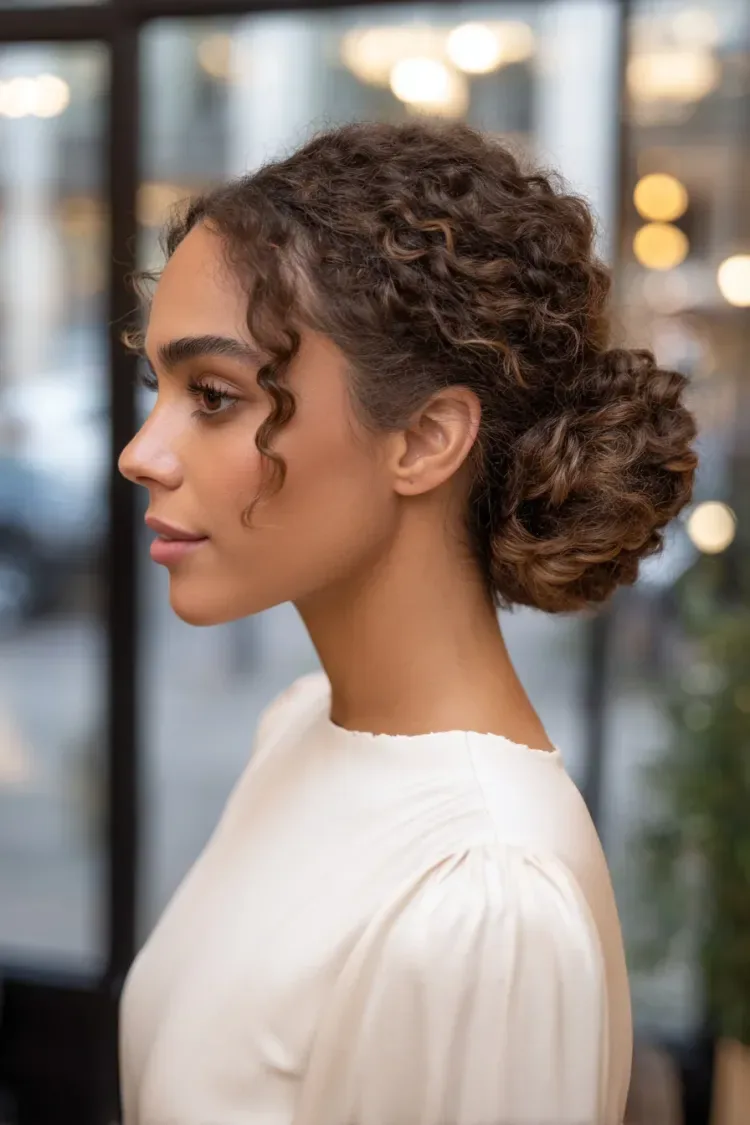
A curly low bun lets you keep your natural texture while still looking tidy. Instead of fighting your curls, this style gathers them into a soft bun at the nape, with the front smoothed back so your face stays open. It is one of the most forgiving passport styles for curly hair, because it does not ask for straightening or heavy heat.
Pros: it controls volume, keeps curls off the face, and works with your natural pattern rather than against it. Cons: if the curls are very springy, the bun can look uneven, and loose curls at the front may need pinning. Use a curl cream to define the texture, then pin any stray pieces back before the photo.
Keep the bun low and soft, not pulled tight. A little natural fullness is fine — the aim is neat, not flat — as long as nothing covers your eyes or the sides of your face.
37. Wavy Hair with a Centre Part, Tucked Back
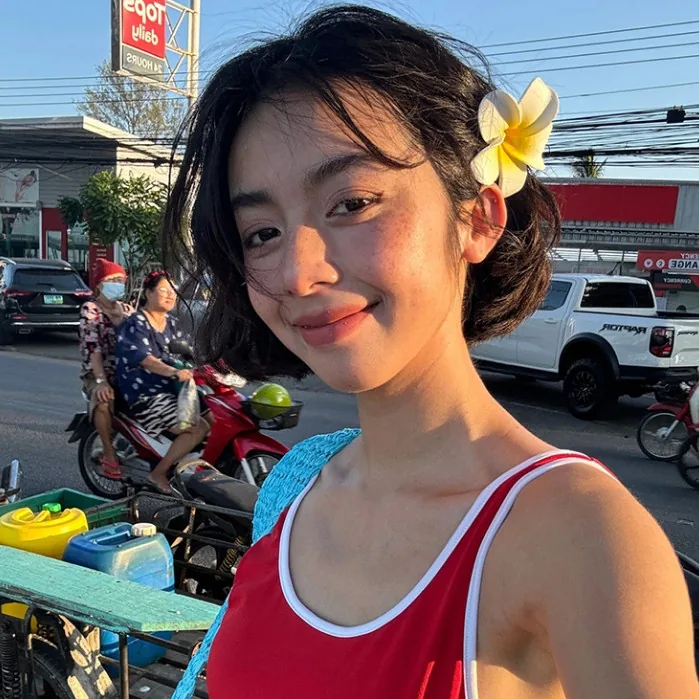
Wavy hair with a centre part, tucked back, is simple, natural, and very reliable for a photo. The centre part creates balance, the waves add softness, and tucking the hair behind the ears keeps the face completely clear. It is a good choice if you like wearing your hair down but want it to look deliberate rather than loose.
Common mistakes: tucking only one side, which can make the photo look lopsided, and leaving the front too puffy, which can hide the hairline. Tuck both sides evenly and smooth the top with your hands or a brush. Another mistake is using heavy mousse, which can make waves look stiff — a small amount of light cream is enough.
Check the style from the front and both sides before the photo. If a wave keeps springing forward, pin it discreetly behind the ear and the look will stay neat.
38. Long Layers Brushed Back
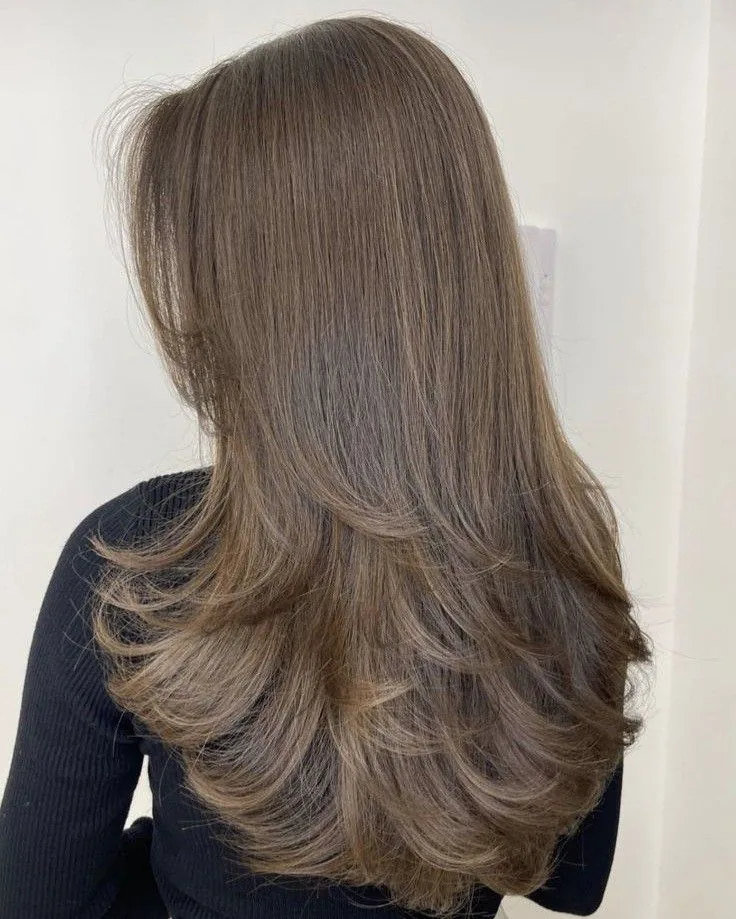
Long layers brushed back give movement without mess. The layers stop long hair from looking heavy or flat, while brushing everything back keeps the face open and the photo clean. This style suits straight and wavy hair, and it is especially flattering if you want length in the photo without loose strands falling forward.
Maintenance: brush the hair back from the forehead, then let the layers fall behind the shoulders. A light-hold spray will help the front stay back for the appointment, and a quick brush before the photo will remove any tangles. If your hair is fine, a little volumising spray at the roots can stop the top from looking flat.
How long it lasts: easily through a photo session, though very long hair may need a quick re-brush if it slips forward. Keep a small brush or comb in your bag, and check the front once more just before the camera clicks.
39. Side-Part Long Hair, Swept Back
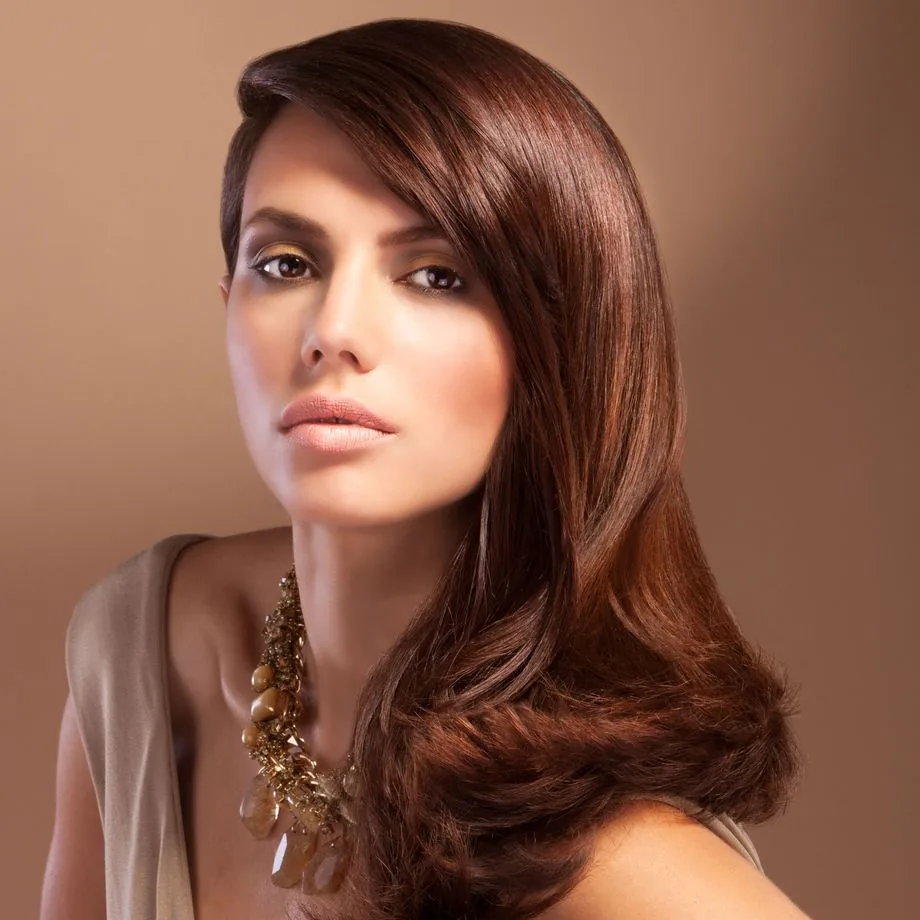
Side-part long hair, swept back, is soft, classic, and easy to wear. The side part adds a gentle shape at the front, while sweeping the hair back keeps your eyes and cheekbones visible. It is a good middle ground if a centre part feels too strict and wearing your hair fully down feels too loose.
Cost and time: this style costs nothing and takes about two to five minutes. You need only a brush, a side part, and optionally a light-hold spray or a couple of discreet pins. If your hair is freshly washed, a small amount of styling cream will help it stay swept back instead of sliding forward.
Sweep the longer side back behind the shoulder and tuck the shorter side behind the ear. Check that the part is clean and the hair is not covering one eye more than the other, then you are ready for the photo.
40. The Short Curly Crop
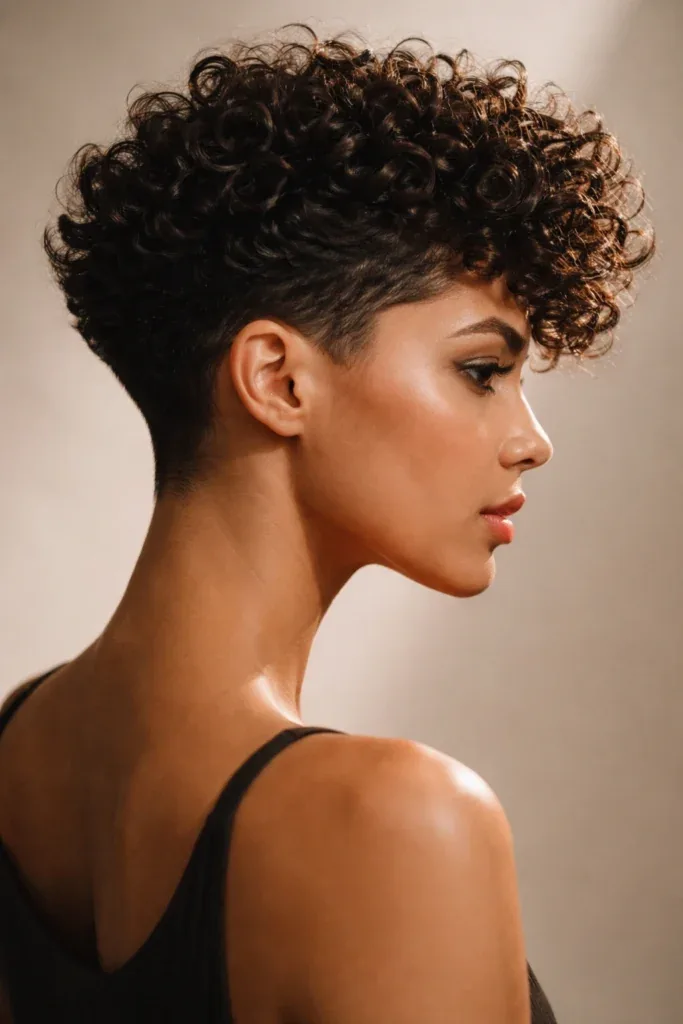
A short curly crop is fresh, low-maintenance, and naturally photo-ready. The short length keeps curls controlled, while the crop shape frames the face without hiding it. It is a great choice if you love your curls but want a style that needs almost no pinning or fuss on photo day.
Who should avoid it: if your curls are very tight and short, they may spring up at the front and cover the forehead, so check the length carefully before the appointment. Also avoid it if you are growing your hair out and the crop would feel too short for you — a passport photo lasts for years, so choose a length you will still like.
Define the curls with a small amount of curl cream, keep the front neat, and let the shape sit naturally. The result should look like you on a good hair day, not like a style you have to work hard to hold.
41. The Timeless Low Updo for Mature Hair
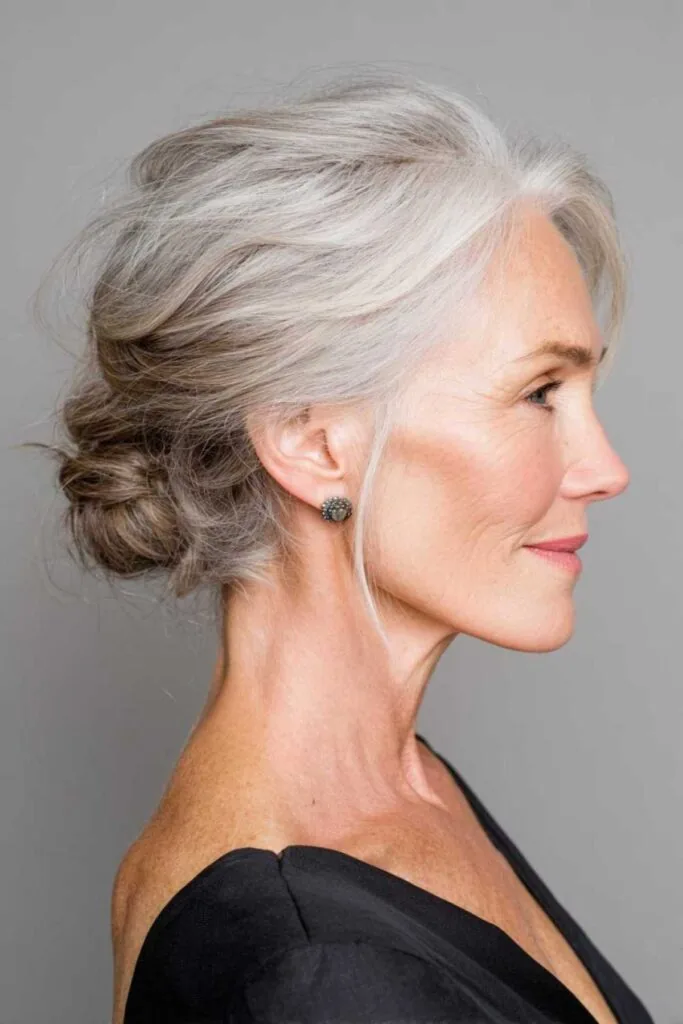
Quick verdict: a timeless low updo is elegant, flattering, and hard to get wrong. It lifts the hair away from the face, softens the features, and looks polished without trying too hard. For mature hair, it is especially kind — it adds structure while still looking soft and natural.
Keep the updo low and loose rather than high and tight. A gentle roll or twist at the nape, with a few soft pieces pinned back at the sides, will look graceful and comfortable. Avoid pulling the hair too tightly, which can look severe and feel uncomfortable through a long appointment, especially if you are sitting for several attempts.
Finish with a light-hold spray and check that the front is smooth and the ears are not hidden by loose hair. This is a classic choice that will still look good when you look back at the photo years later.
Can I wear my hair down in a passport photo?
Yes, you can wear your hair down in a passport photo, as long as it does not cover your face, eyes, or eyebrows. Keep the front tucked behind your ears or brushed back, and check that both sides look even. Loose, neat waves or straight hair usually work well, but avoid styles that fall across your cheeks or forehead.
Does my hair have to show my ears in a passport photo?
No, your hair does not usually have to show your ears in a passport photo, but your full face must be clearly visible. Some countries prefer the ears to be visible, so tucking your hair behind your ears is a safe choice. If you are unsure, check the official guidance for your country before your appointment.
Can I wear bangs or a fringe in a passport photo?
Yes, you can wear bangs or a fringe, but they must not cover your eyes or eyebrows. Keep them trimmed above the brows and styled neatly to one side if needed. If your fringe keeps falling forward, pin it back or sweep it aside so your face stays fully visible in the photo and your features are easy to recognise.
Can I wear a head covering in my passport photo?
Yes, you can wear a head covering in a passport photo if you wear it for religious or medical reasons. It should not hide your face, and your full face, from chin to forehead, must still be clearly visible. Check your country’s official rules first, as some places may ask for a letter or extra proof.
Can I wear glasses in my passport photo?
In most cases, you should remove your glasses for a passport photo, because glare and frames can hide your eyes. Some countries allow glasses only for medical reasons, with a signed statement from a doctor. If you normally wear glasses, check the official rules first and be ready to take them off before the photo is taken.
Can I wear my hair in a ponytail for a passport photo?
Yes, a ponytail is fine for a passport photo, especially a low ponytail that keeps the hair neat and off your face. Smooth the top, secure it firmly, and make sure no loose strands cover your eyes or cheeks. A high ponytail can also work, but a low style usually looks softer and more natural.
What should I do with curly hair for a passport photo?
Keep your curls defined and pulled back from your face. A low bun, a low ponytail, or curls pinned behind the ears all work well. Use a curl cream to control frizz, and pin back any pieces that fall toward your eyes. The aim is to show your natural texture while keeping your face completely clear.
Can I wear hair accessories in a passport photo?
Yes, you can wear small, simple hair accessories, such as discreet pins, a plain clip, or a thin headband. They should hold your hair back without covering your face or drawing attention away from it. Avoid large bows, bulky clips, shiny decorations, or anything that casts a shadow on your face or hides your hairline.
Should I get a haircut before my passport photo?
It can help to get a haircut before your passport photo, but do not try a brand-new style on the same day. A light trim a few days before will tidy the ends and make styling easier. If you want a bigger change, get it done at least a week early so you have time to get used to it.
Which hairstyles should I avoid for a passport photo?
Avoid hairstyles that cover your eyes, eyebrows, or part of your face, such as a heavy fringe, loose hair falling across your cheeks, or a high, messy bun. Also avoid very bulky styles, strong partings that hide one side, or anything with lots of volume at the front. Choose a neat style that keeps your face fully visible.
Conclusion: Pick the Hairstyle That Lets Your Face Do the Talking
The best hairstyles for a passport photo are not the most dramatic ones — they are the neat, natural styles that keep your face clear and let you look like yourself. Whether you choose a low bun, a sleek ponytail, soft waves tucked back, or a short crop, the aim is the same: hair off the face, eyes visible, and a calm, tidy finish that will still look good years from now.
Before your appointment, practise your chosen style once, check it from the front, and pack a brush and a couple of pins for a quick fix. With the right choice, your passport photo can feel less like a chore and more like a simple, confident portrait — one you will be happy to show for years to come.