Clay, Creativity and Cute Hair: 31 Hairstyles for a Pottery Class That Stay Put at the Wheel
There is something wonderfully calming about a pottery class: the hum of the wheel, the cool slip of wet clay between your fingers, and the slow, satisfying rise of a bowl taking shape. Then you lean in to centre the clay, and a loose strand of hair falls forward, straight into the wet mess. Anyone who has spent an afternoon at the wheel knows the feeling. That is why choosing the right hairstyles for a pottery class matters just as much as picking the right clay body or glaze. A style that looks lovely in the mirror at home can unravel, slip or soak up clay dust within twenty minutes of throwing, so the best pottery hair is planned for the studio, not just for the selfie on the way there.
This guide brings together 31 styles that were made for exactly that setting, from a classic low bun that sits neatly under an apron strap to braids that keep every strand behind your shoulders, claw-clip twists you can fix in ten seconds, and scarf styles that catch the dust before your hair does. Whether your hair is long, short, curly or fine, and whether you are a complete beginner or a regular at the wheel, you will find a style that stays put through centring, pulling, trimming and glazing. Each idea comes with practical studio notes, so you can walk into class confident that your hair will behave while your hands get gloriously messy.
Why Pottery Hair Must Stay Back
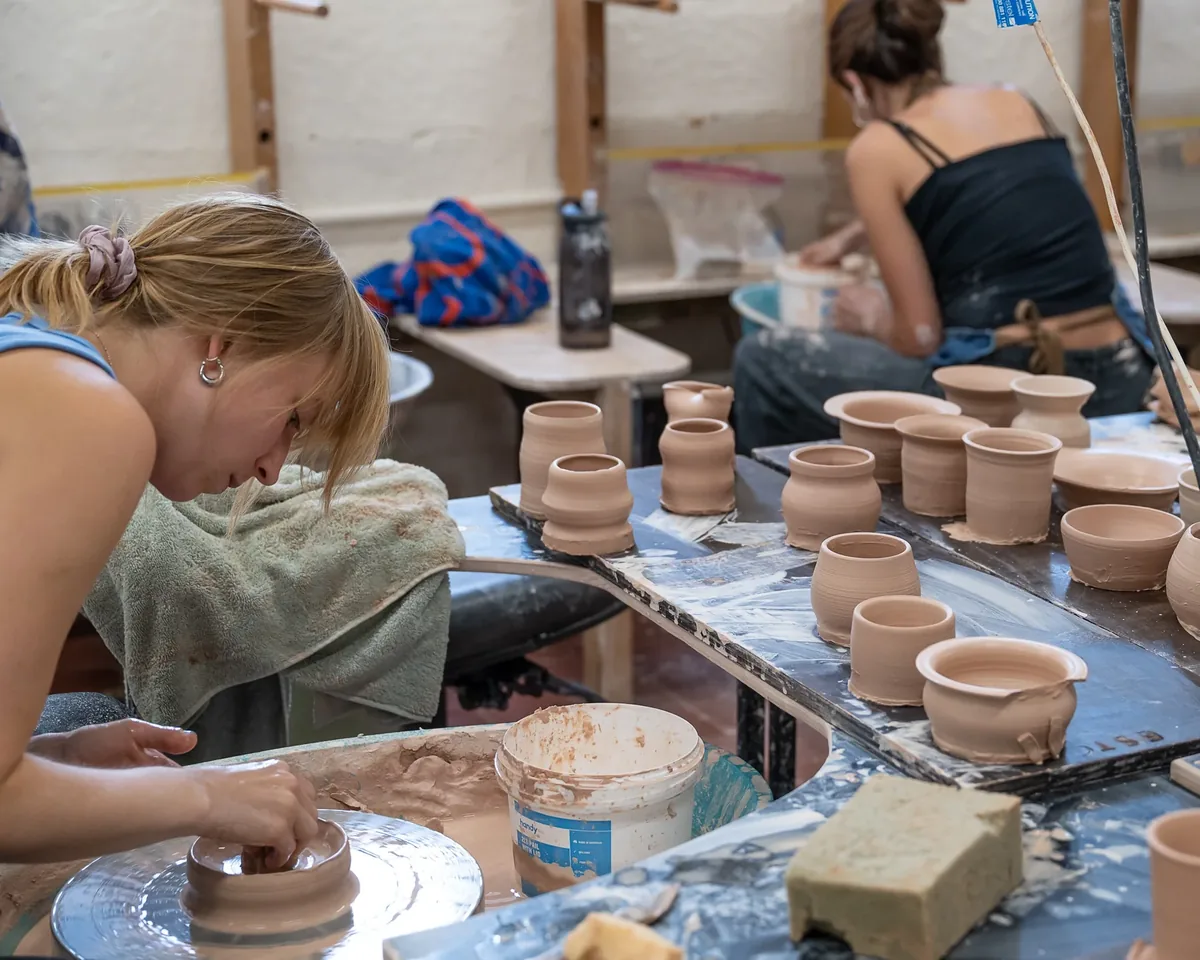
Pottery is one of the few creative hobbies where loose hair is not just annoying, it is genuinely in the way. You lean forward over a spinning wheel, your head close to the clay, and gravity pulls every loose strand toward the wet surface. A single hair in a thrown pot can leave a line in the wall of the piece, and hair caught in a spinning wheel head is a safety problem nobody wants. Keeping your hair back is the first rule of the studio, before aprons, before tool kits, before choosing a glaze.
There is also the simple matter of comfort. A three-hour class with hair sticking to a clay-covered neck is miserable, and constantly pushing strands back with wet, muddy hands only spreads the mess. A secure style lets you forget about your hair entirely and focus on the clay, which is the whole point of being there. Think of your hairstyle as part of your studio kit, as essential as your apron and your towel.
Clay Dust and Your Hair: What It Does and How to Limit It
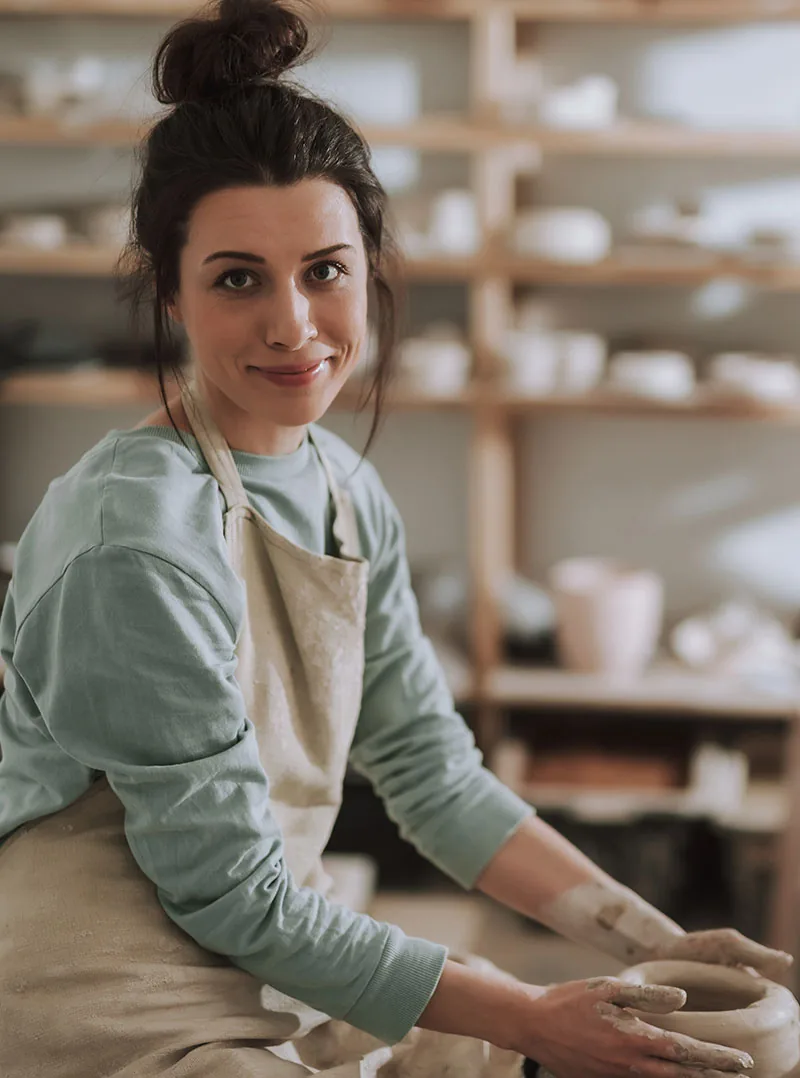
Clay dust is the quiet side effect of pottery that nobody warns beginners about. Dry clay, trimming scraps and bisque dust all float in studio air, and hair is a natural trap for fine particles. Dry, porous or curly hair picks up the most dust, and by the end of a trimming session your hair can feel gritty, look dull and smell faintly of earth. It is not dangerous in the small amounts found in a normal class, but it is unpleasant, and it dries hair out over time if you never protect it.
The fix is mostly about coverage and containment. Styles that gather the hair into a compact shape, a bun, a braid or a twist, expose far less surface to dust than loose hair does. A silk scarf or a bandana over the top adds another layer, and a light mist of leave-in conditioner before class gives dust less to cling to. After class, a thorough rinse matters more than a heavy shampoo: lukewarm water first to flush the dust out, then a gentle wash.
Keeping Hair Out of the Wheel, the Slip and the Glaze
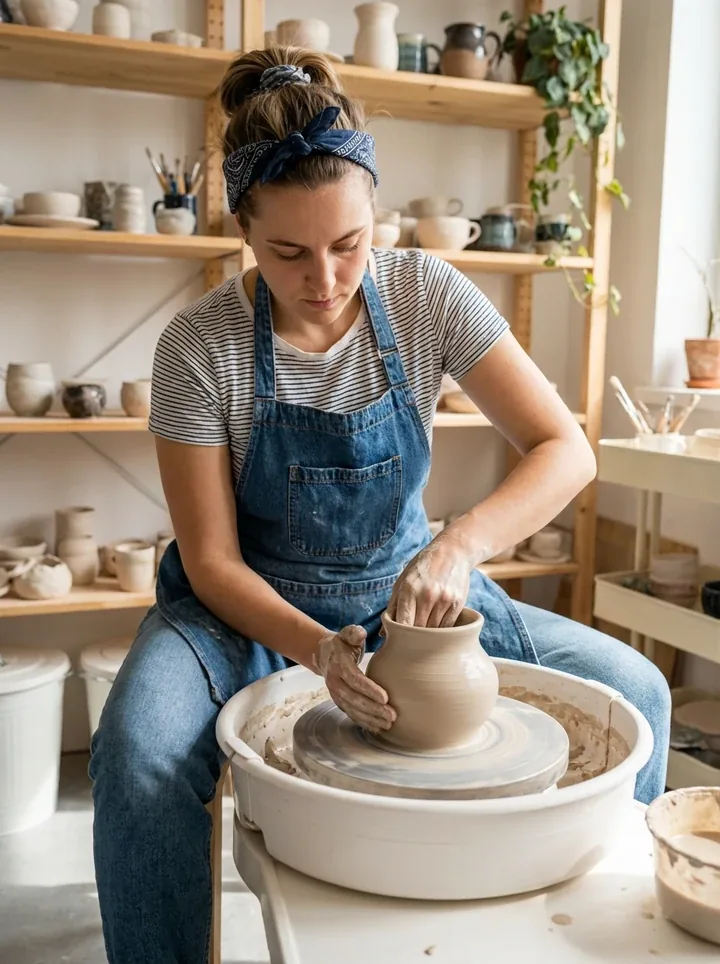
The pottery wheel is the one place where loose hair crosses from messy to risky. The wheel head spins fast enough to wind a long strand around it in a second, and while most studio wheels have guards, a dangling ponytail or a loose braid end can still catch. The rule is simple: nothing should hang below your shoulders while you throw. High buns, tucked braids and short styles all pass this test; long loose ponytails and half-up styles with trailing ends do not.
Glazing brings a different problem. Glaze buckets sit at waist height, and leaning over one with loose hair can dip a strand straight into the glaze, which stains and is hard to wash out. The same goes for slip trailing and decorating, where you work close over the piece. Before you start glazing, do a quick check: bend forward as if you were leaning over a bucket, and see if anything falls past your chin. If it does, pin it up before you pick up a brush.
The Best Pottery Styles by Hair Length
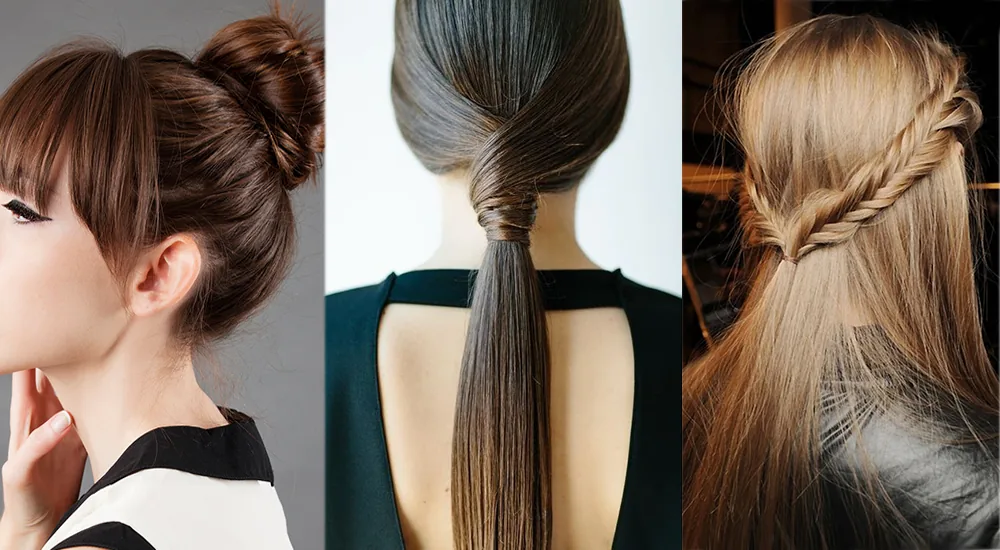
Long hair has the most options at the wheel, and also the most to lose. A long braid, a low bun or a braided bun keeps the length contained and out of the clay, while a ponytail on its own is risky because the tail swings forward every time you lean in. If your hair reaches your waist, braid it first and then coil the braid into a bun: two layers of security, and the weight sits low where it does not pull on your neck during a long class.
Medium hair suits claw clips, low twists and half-up knots, all of which take seconds and hold well through a session. Short hair has the easiest time of all, since a pixie or a bob barely reaches the wheel, but it still benefits from a headband or clips to keep the front pieces out of your eyes. Whatever your length, the test is the same: lean forward, shake your head gently, and check that nothing moves. If it holds through that, it will hold through class.
Aprons, Scarves and Headbands That Actually Work
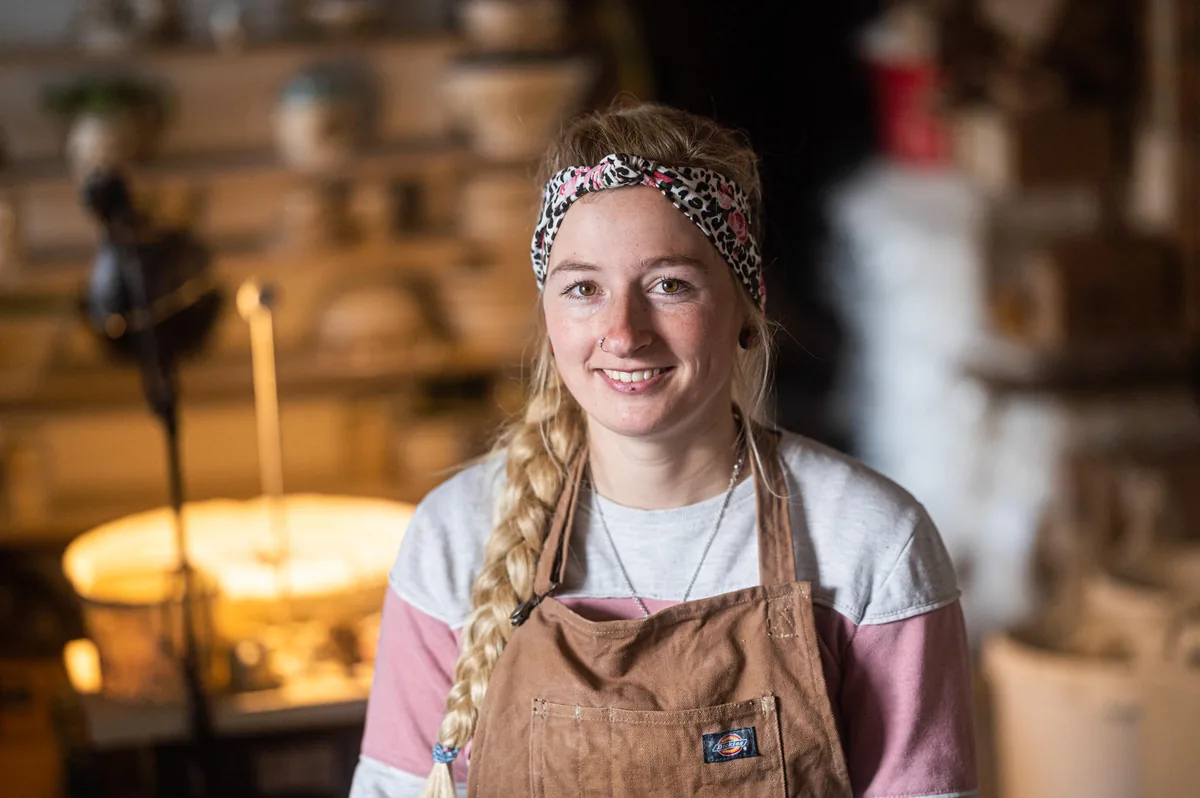
A pottery apron protects your clothes, but it can also help your hair. Cross-back apron straps hold a low bun in place rather than fighting it, while a halter-neck apron strap can press on a high bun and loosen it over an hour. If your studio apron has a neck strap, choose a low style and let the strap sit above the bun, not on top of it. Split-leg aprons are worth the small extra cost, because you sit at the wheel with your legs apart and a full apron bunches up.
Scarves and headbands are the studio’s secret weapon. A silk scarf folded into a band keeps flyaways back and catches dust before it reaches your hair, and a cotton bandana does the same job for a fraction of the price. Wide fabric headbands grip better than thin elastic ones when your hands are wet, and they do not slide the way metal clips can once clay dust gets on them. Keep one spare in your bag: a dusty scarf is easy to swap, and a fresh one feels wonderful halfway through a long class.
Quick Fixes Between Throws: Resetting Your Hair in Ten Seconds
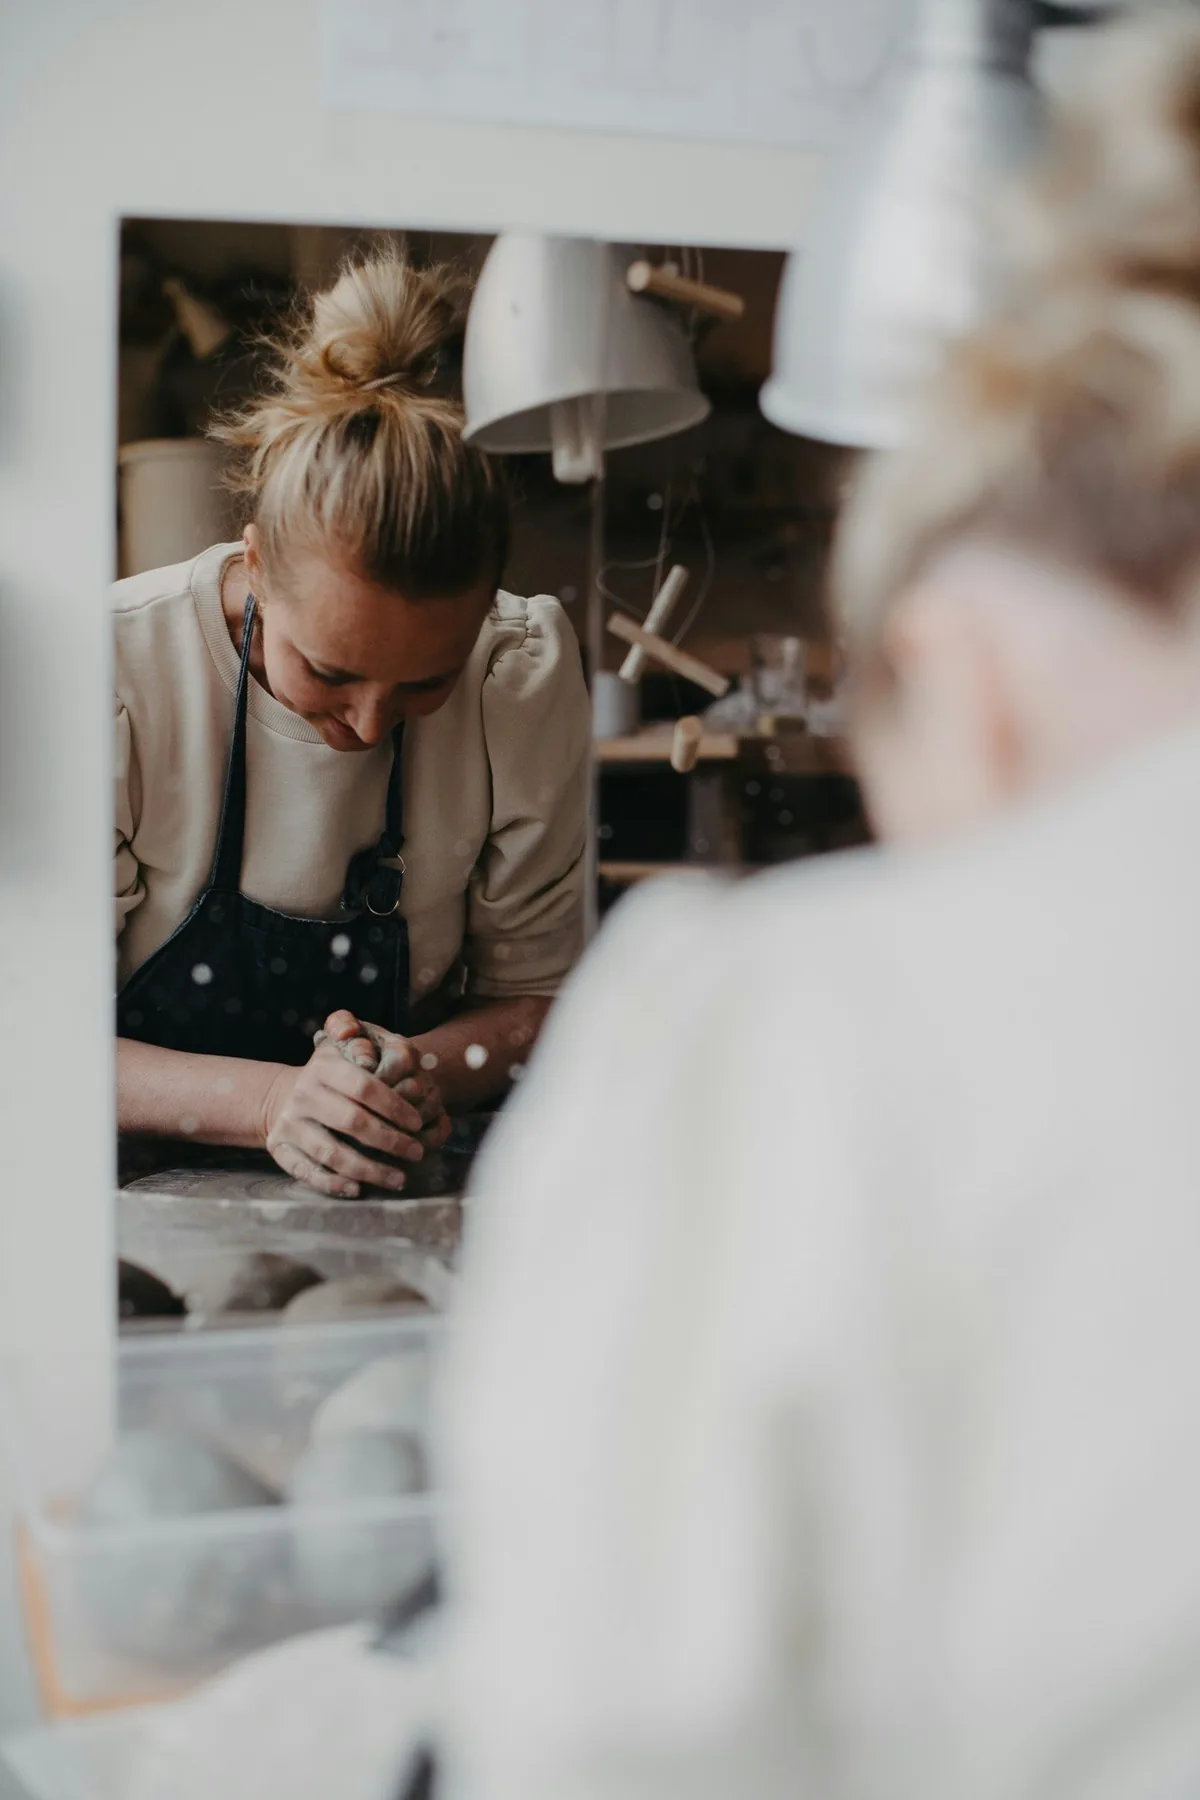
Even the best style loosens during a pottery class. Centring clay pulls your shoulders forward, trimming makes you twist, and three hours of leaning in will test any elastic. The trick is to fix your hair between throws, not during one: while your piece is covered or while you wait for the wheel, take ten seconds to re-pin, re-twist or re-clip. Your hands will be damp, so keep a small towel in your lap and dry your fingers first, or the pins will slide.
Build a tiny studio hair kit and keep it in your apron pocket: two bobby pins, one spare elastic, one small claw clip and a mini comb. That is all you need for almost any rescue. A claw clip is the fastest fix of all, one twist and one clip and you are back at the wheel. Avoid re-doing a full braid mid-class; it takes too long and your clay will dry out. Save the full restyle for the break, and use quick fixes in between.
Washing Clay Out of Your Hair: A Gentle Routine That Works
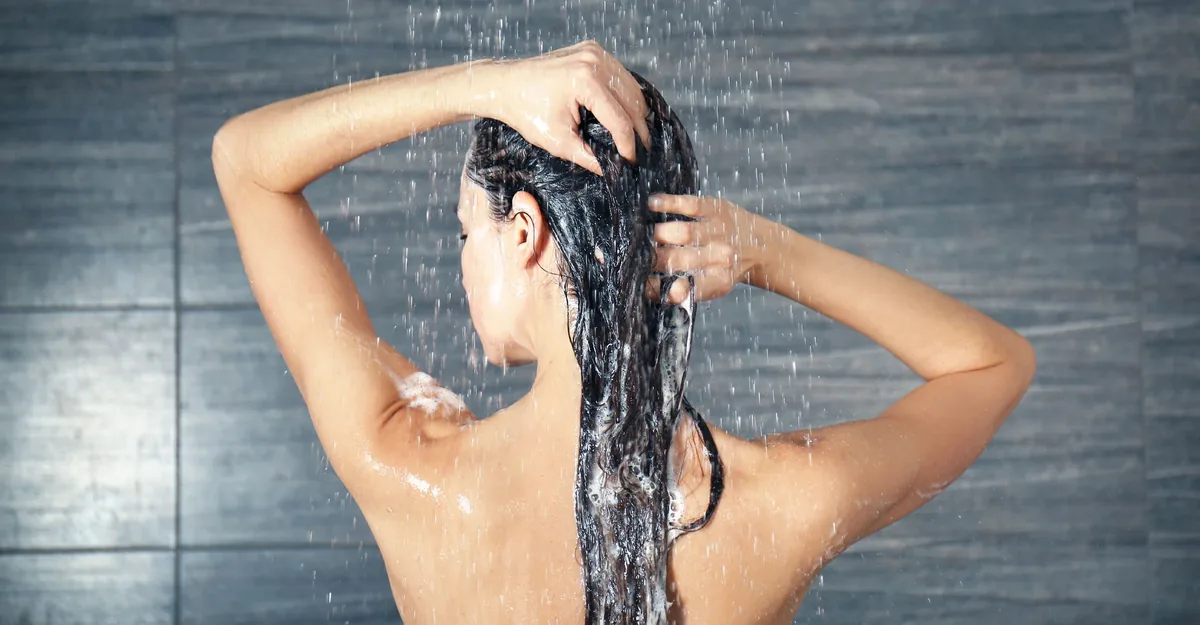
Clay washes out of hair more easily than most beginners fear, as long as you rinse before you shampoo. Start with lukewarm water and let it run through your hair for a full minute before you touch a bottle: water alone carries away most of the loose clay and dust. Then use a gentle, sulfate-free shampoo, work it through with your fingertips rather than your nails, and rinse again. If your hair still feels gritty, repeat the rinse rather than scrubbing harder, which only tangles the clay deeper into the strands.
Once a week, if you throw regularly, add a deeper clean. A clarifying shampoo once a week lifts the fine dust that daily washing misses, followed by a good conditioner on the lengths only. Curly hair benefits from a co-wash after class instead of a full shampoo every time, since clay dust dries curls out fast. Whatever your hair type, never try to brush dry clay out of dry hair: wet it first, or you will break strands and spread the dust further.
Studio Pottery vs Home Pottery: How Your Hair Routine Changes
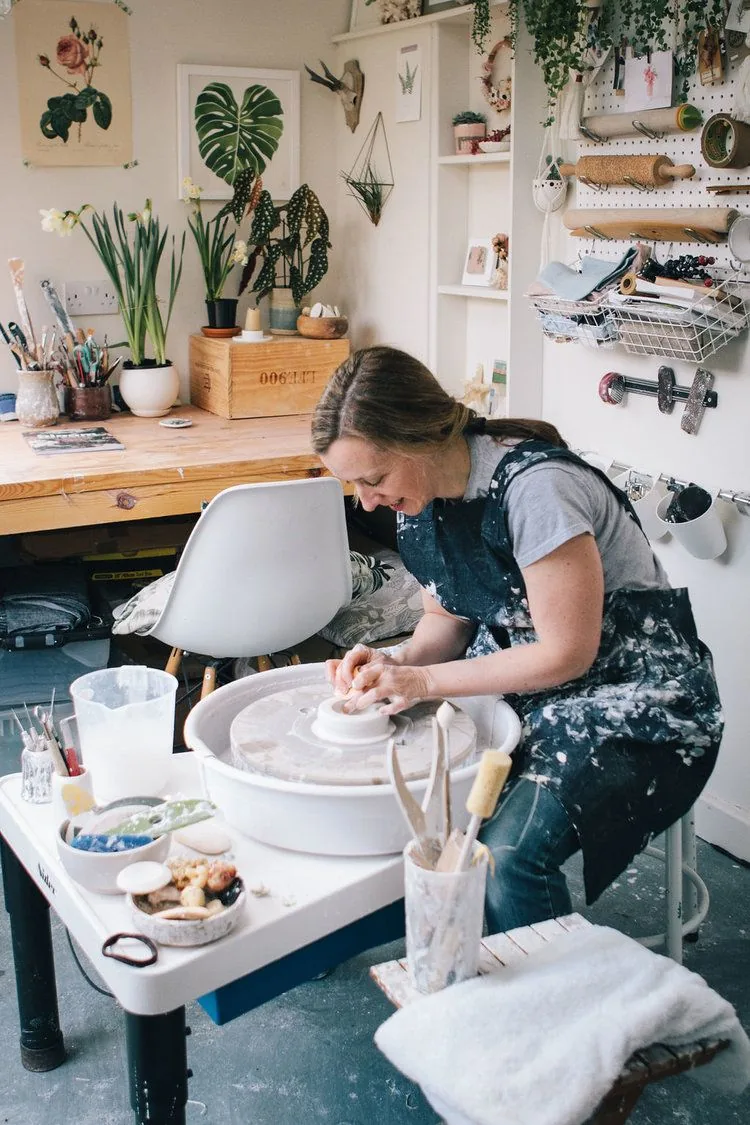
A shared studio and a home wheel ask different things of your hair. In a shared studio, you are around other people’s dust, you share tools and sinks, and you may be throwing for three hours straight, so a fully contained style and a scarf are worth the effort. There is also the social side: studio classes are photographed, people chat between throws, and a style that looks polished as well as practical earns its keep.
At home, you control the pace, so you can throw in a quick top knot and rinse your hair between sessions without anyone watching. The trade-off is that home studios are often smaller, dustier and less ventilated, so the dust problem can actually be worse, especially if you mix glazes or trim at home. The habit that serves both settings is the same: contain the hair before you touch the clay, cover it if you are trimming, and rinse it properly afterwards. Build the routine once and it becomes automatic.
The Classic Low Bun
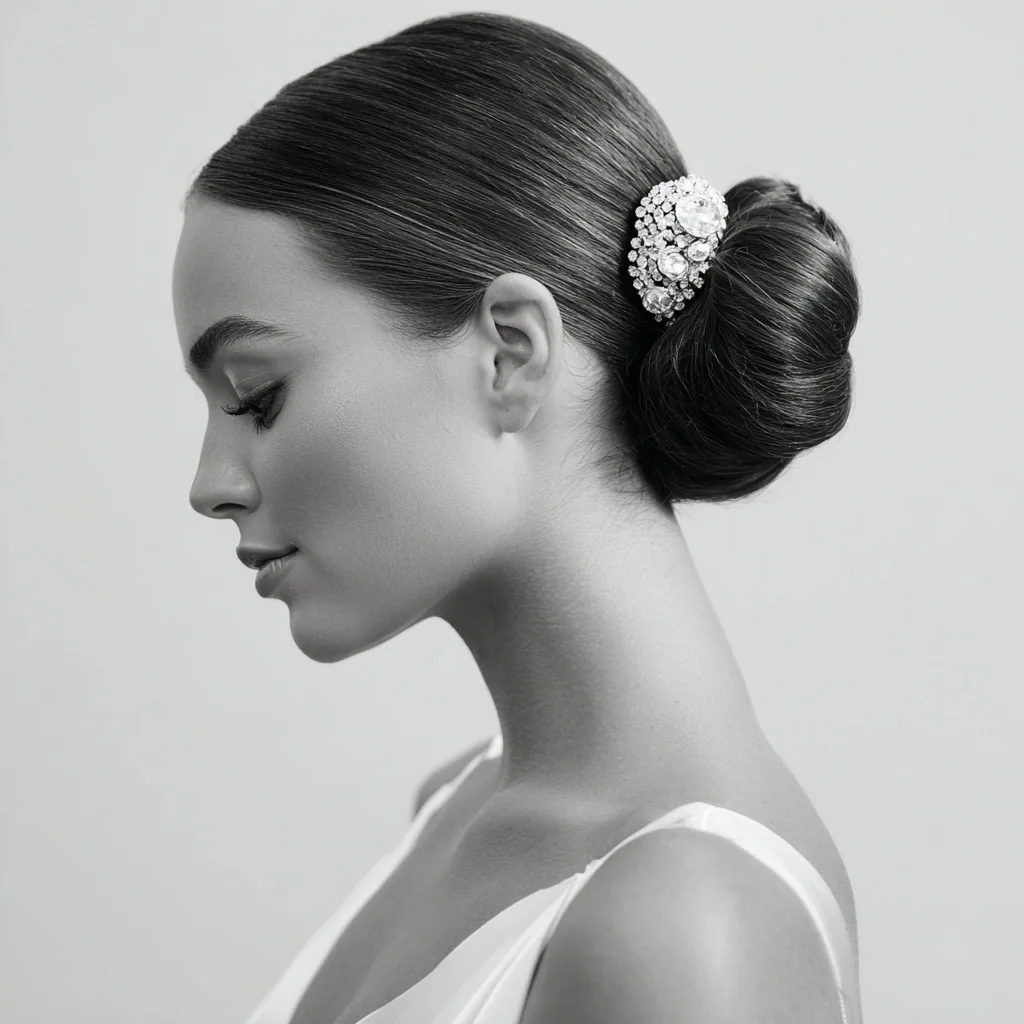
Best for: almost everyone, and the safest first choice for a pottery class. A low bun sits at the nape, below the apron strap, so nothing presses on it while you sit at the wheel. It keeps every strand behind your shoulders, survives three hours of leaning forward, and still looks neat in the class photograph at the end.
How to style: brush the hair smooth, gather it low at the nape and twist it into a coil. Pin the coil flat against your head with three or four bobby pins, crossing them for grip, and finish with a light mist of hairspray. If your hair is very thick, split it into two twists first and coil them together so the bun lies flatter. Quick verdict: the pottery-class default for a reason — simple, secure and flattering on every face shape.
Maintenance: a low bun rarely needs attention during class, but if it starts to sag, push one more pin through the centre of the coil rather than rebuilding it. A bun that sits low and flat also stays comfortable under a cross-back apron, and it leaves the neck free so you stay cool while the studio warms up.
The French Braid That Stays Behind Your Shoulders
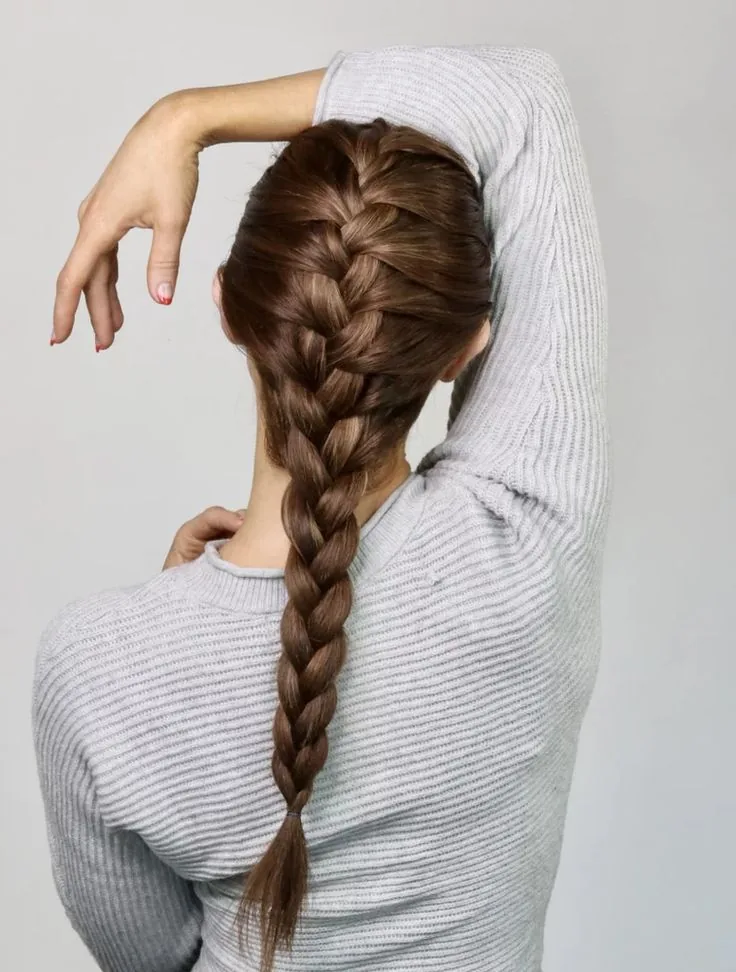
A French braid is the hardest-working braid in the studio because it locks the hair to the scalp from the crown down. Nothing hangs loose, nothing swings forward when you lean over the wheel, and the braid itself gets more secure the longer you wear it. It also handles clay dust well, since the hair is packed tightly and very little surface is exposed.
Common mistake: braiding too loosely at the top, which lets the crown puff out and catch dust. Start tight at the hairline and ease off only near the ends. Maintenance: if the braid loosens by the end of class, you can re-braid just the last few inches without undoing the whole thing. Tie the end with a snag-free elastic and tuck the tail under your apron strap.
A High Ponytail with a Wrapped Base
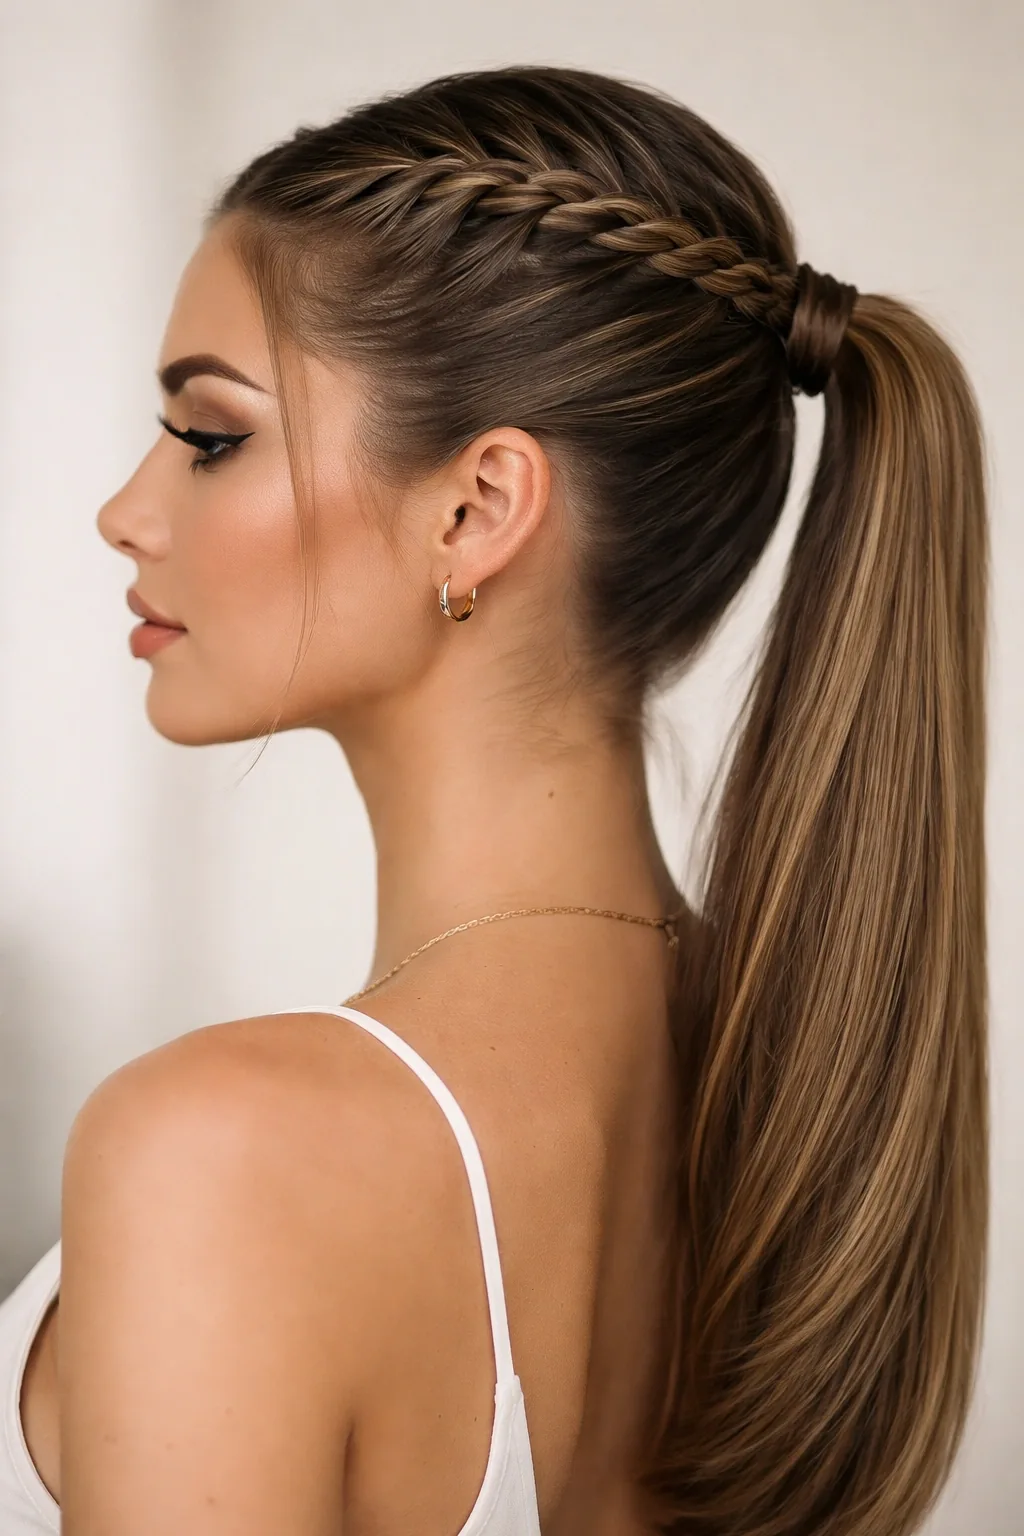
A high ponytail feels fresh and energetic, but at the wheel it needs one smart tweak: wrap the base. A bare elastic lets the tail swing and shed flyaways every time you lean in, while wrapping a strand of hair around the elastic anchors the whole ponytail and stops it drooping as the class goes on. The result looks polished rather than rushed, and it holds up through centring and pulling.
Pros and cons: it is quick, it keeps the neck cool, and it suits most hair types. The downside is swing: if your hair is very long, the tail can still reach the clay when you lean right in. The fix is simple, braid the tail loosely once it is up, or clip the tail to your apron strap with a small claw clip while you throw. Who should avoid it: anyone with very heavy hair that pulls at the crown after an hour.
The Claw Clip Twist
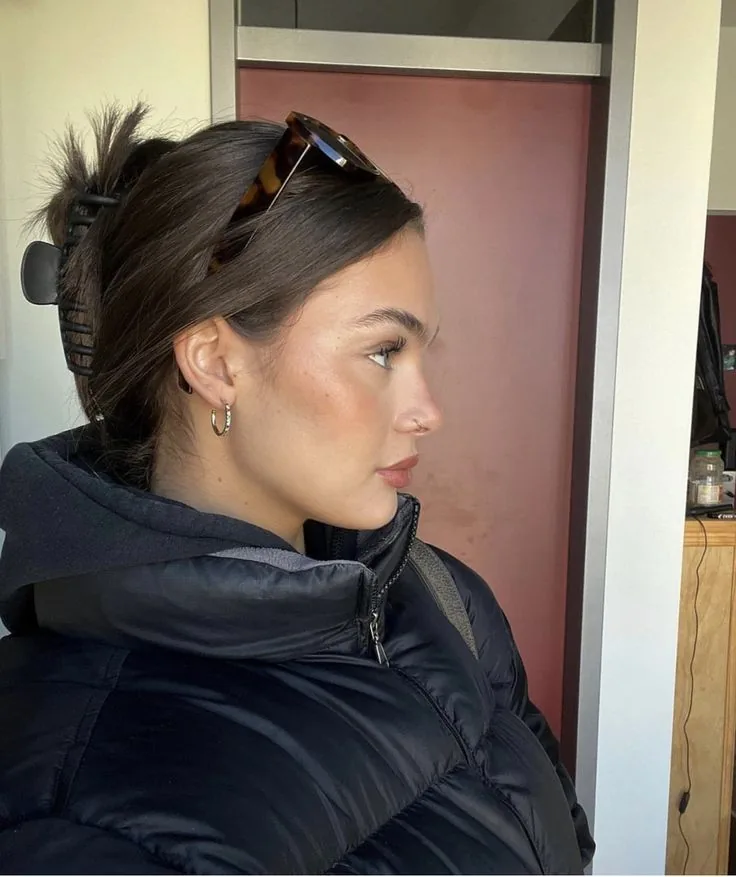
If you only learn one pottery hairstyle, make it this one. Twist the hair up, fold it, clip it, done in under ten seconds, and it holds through a whole class. The claw clip grips even damp hair, which matters when your hands are wet from the wheel, and it is the easiest style in this whole guide to redo between throws.
Cost and time: one large claw clip costs very little and lasts for years, and the style itself takes less than a minute, even on thick hair. What to ask for: if you are getting your hair cut before a pottery course, ask your stylist to keep enough length for a twist, even a short twist holds better than loose hair. Choose a matte clip rather than a shiny one: clay dust shows less on matte plastic, and it grips better.
A Messy Bun with a Silk Scarf
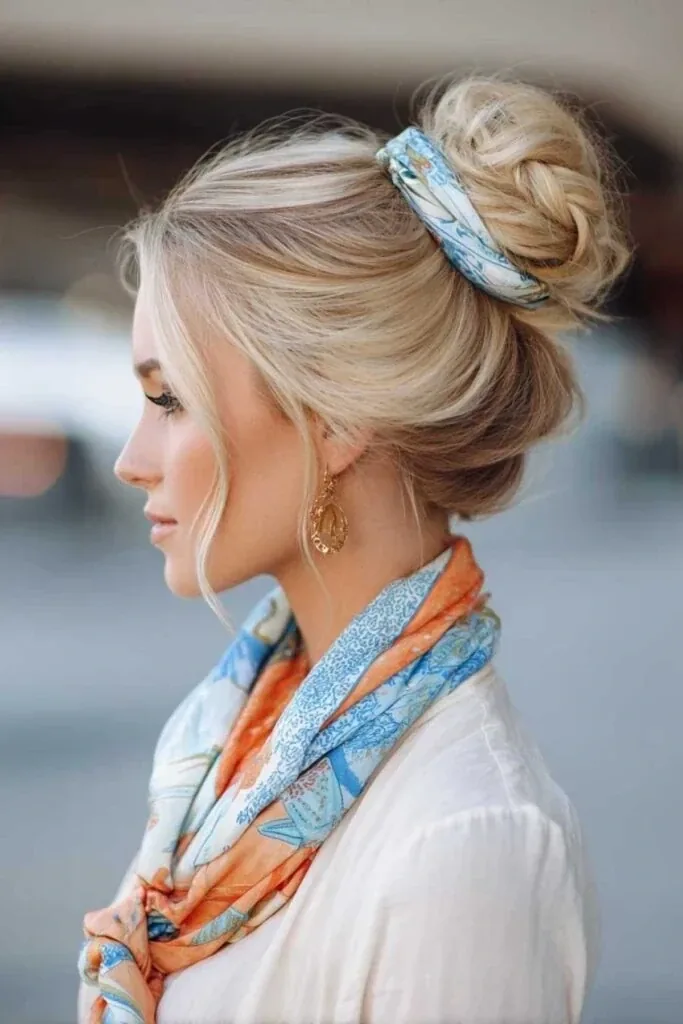
This is the style for the potter who wants to look like she tried, without actually trying very hard. A loose, soft bun keeps the hair up and out of the clay, while a silk scarf wrapped around the base catches dust, hides flyaways and adds a splash of colour that photographs beautifully against a clay-covered apron. It is relaxed, pretty and genuinely practical.
How to style: gather the hair into a high, loose bun and pin it loosely so it keeps its soft shape. Fold a silk scarf into a band and wrap it around the base of the bun, tying it at the side or tucking the ends in. Common mistake: wrapping the scarf too tightly, which pulls the bun flat and gives you a headache by the second hour. Keep it snug but comfortable, and carry a spare scarf in your bag.
The Dutch Braid Crown
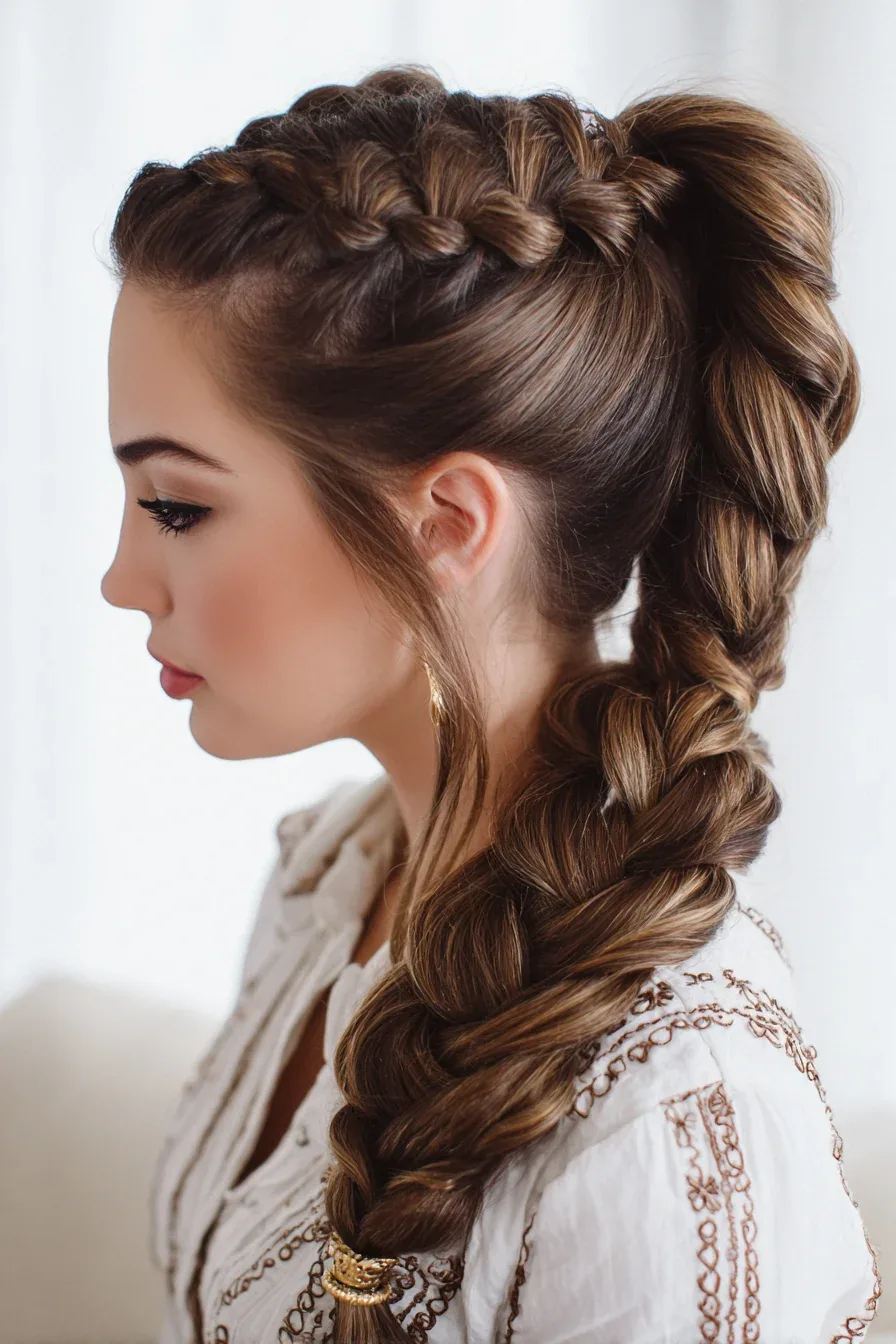
A Dutch braid crown looks like you spent an hour on your hair, when really it is one of the most secure styles you can wear to the wheel. The braid runs around the head like a headband, so there is no tail at all to fall forward, and the raised braid catches the light beautifully in studio photographs. It is a favourite for evening pottery classes and pottery socials.
Best for: medium to long hair, and anyone who hates ponytails. The crown suits round and oval faces especially well, since it adds height at the top. Maintenance: pin the end of the braid under the start with two crossed bobby pins, and mist with hairspray before class. If a piece escapes during trimming, tuck it back and add one pin rather than redoing the whole crown.
A Low Ponytail with a Silk Scarf
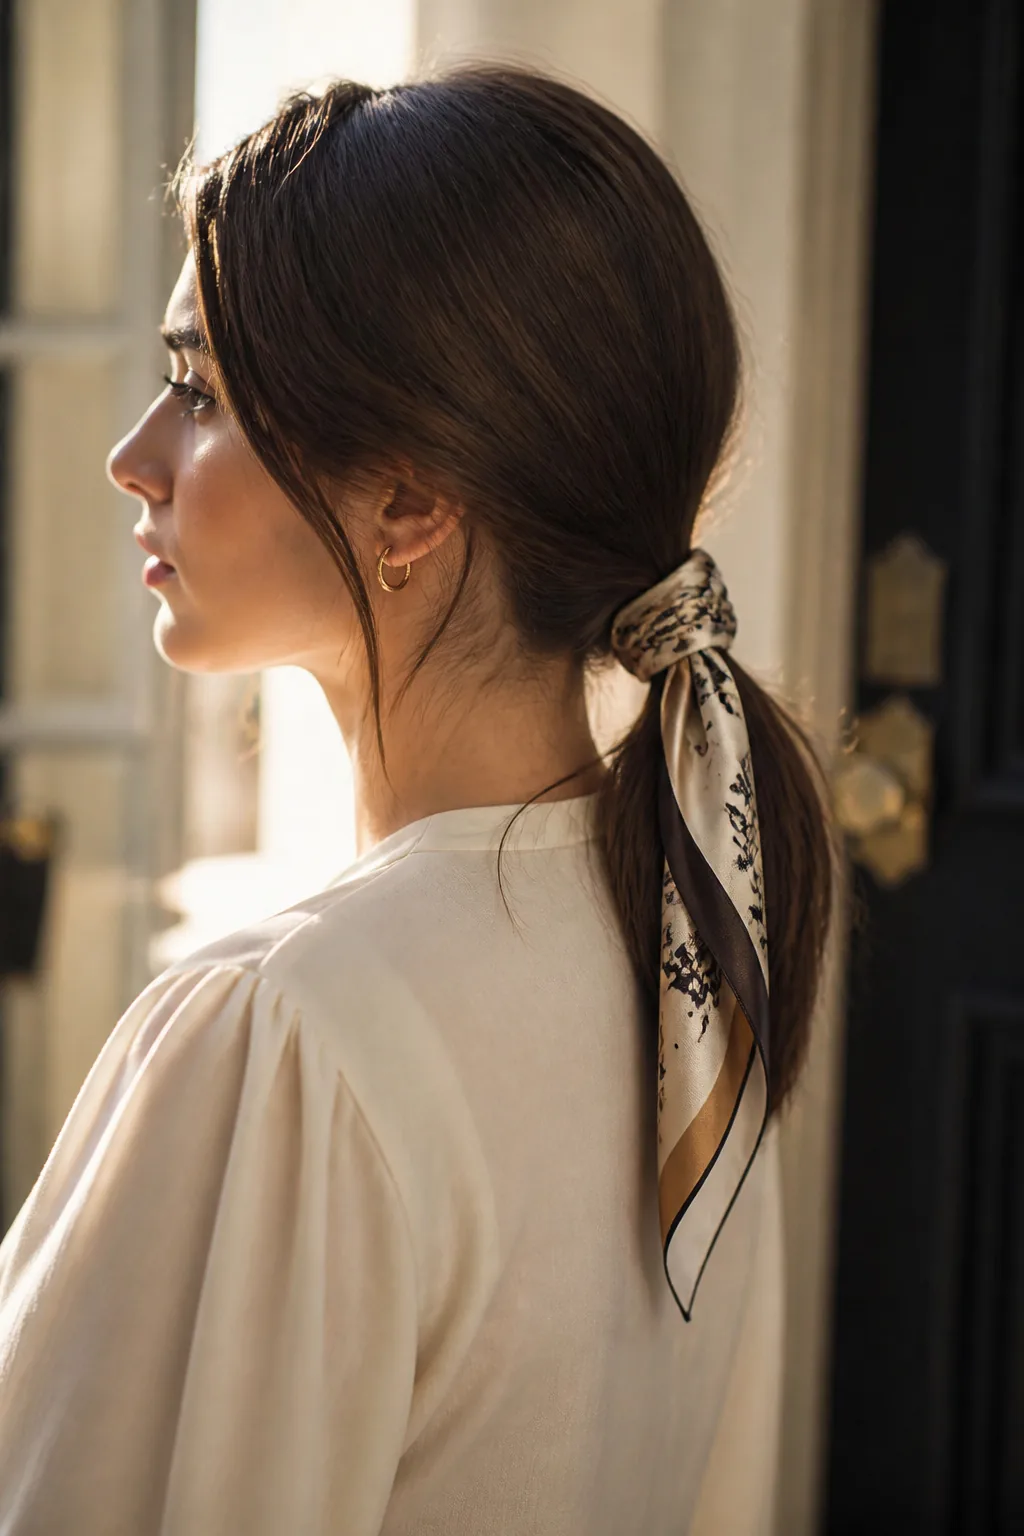
A low ponytail is the quiet, reliable cousin of the high ponytail, and at the wheel it is the better choice. It sits below the apron strap, it does not swing, and it does not pull on the crown during a long session. Tying it with a silk scarf instead of an elastic makes it look intentional rather than thrown together, and the scarf absorbs a little of the dust that would otherwise reach your hair.
Pros and cons: it is comfortable for hours, gentle on fine hair, and easy to redo in seconds. The trade-off is that it is less secure than a bun for very long hair, so braid the tail if your hair passes your shoulders. Quick verdict: the best low-effort style in this guide for beginners who want to look polished on their very first day.
The Bubble Braid
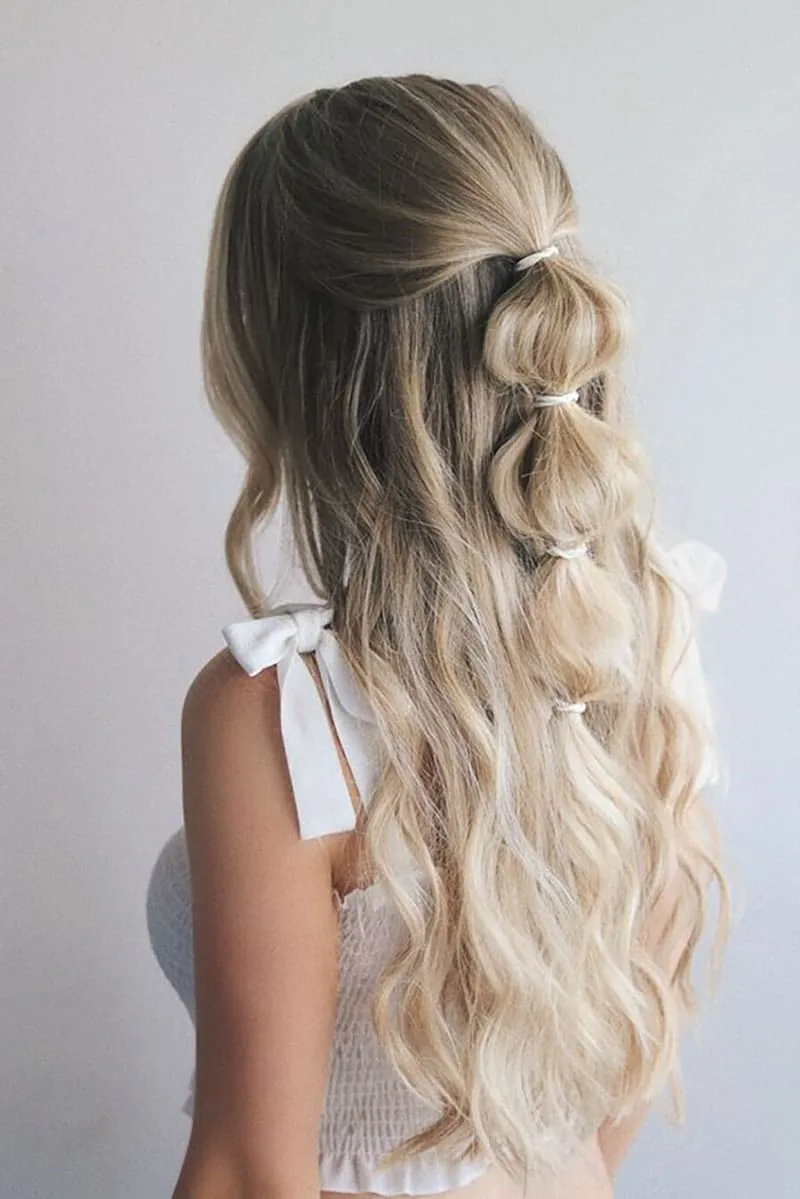
The bubble braid is pure fun, and it is surprisingly studio-friendly. Because the hair is divided into sections by elastics all the way down, nothing hangs loose, and each bubble is anchored, so the style does not slide forward when you lean over the wheel. It also photographs wonderfully, which matters if your studio posts class pictures.
How to style: make a high or low ponytail, then add elastics every few inches down the tail and gently pull each section wider to form the bubbles. Who should avoid it: anyone with very fine hair, since the bubbles can look thin and the elastics can snag. Use fabric-covered elastics and a little texturising spray first, and the bubbles will hold their shape for the whole class.
A Fishtail Braid Over One Shoulder
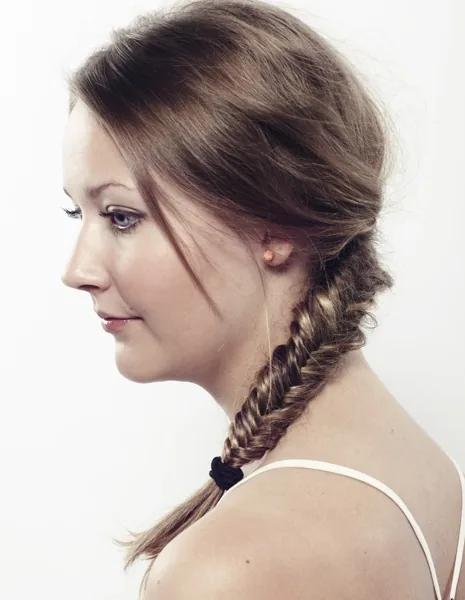
A fishtail braid worn over one shoulder keeps the hair visible in front-facing photographs while still keeping it out of the clay, as long as you pin the braid to your shoulder or apron strap. The fine, woven texture of a fishtail holds together better than a regular three-strand braid, so it survives hours of leaning and turning without unravelling.
Best for: long, thick hair, where the fishtail pattern really shows. Common mistake: letting the braid hang free while you throw. A free braid swings forward exactly when you lean in to centre the clay. One small clip attaching the braid to your apron strap solves it completely, and nobody in class will even notice it is there.
The Half-Up Top Knot
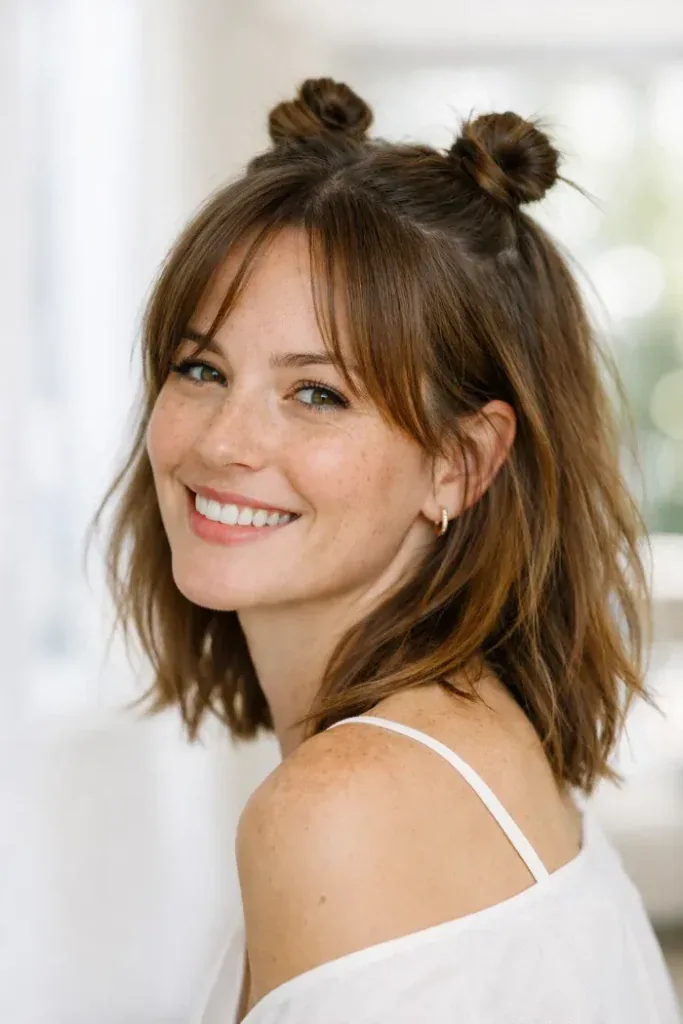
The half-up top knot is the compromise style: the top half of your hair is secured out of your face, while the bottom half stays loose and looks relaxed. It works well for shorter classes and for hand-building sessions, where you sit more upright and lean over the wheel less. It is also one of the quickest styles here, taking under a minute.
Pros and cons: it keeps the front pieces out of your eyes and looks effortlessly stylish. The catch is the loose bottom half, which can still reach the clay when you lean in to throw. Who should avoid it: throwers working on the wheel for a full session. If you love this look, save it for hand-building, glazing or decorating days, and choose a full updo for wheel days.
How to style it well: secure the top section with a small elastic first, then twist it into a knot and pin it, rather than trying to knot loose hair. The elastic gives the knot something to grip, and the style will survive a whole hand-building session without slipping. A few face-framing pieces left loose at the front keep it looking soft rather than severe.
The Sleek Chignon
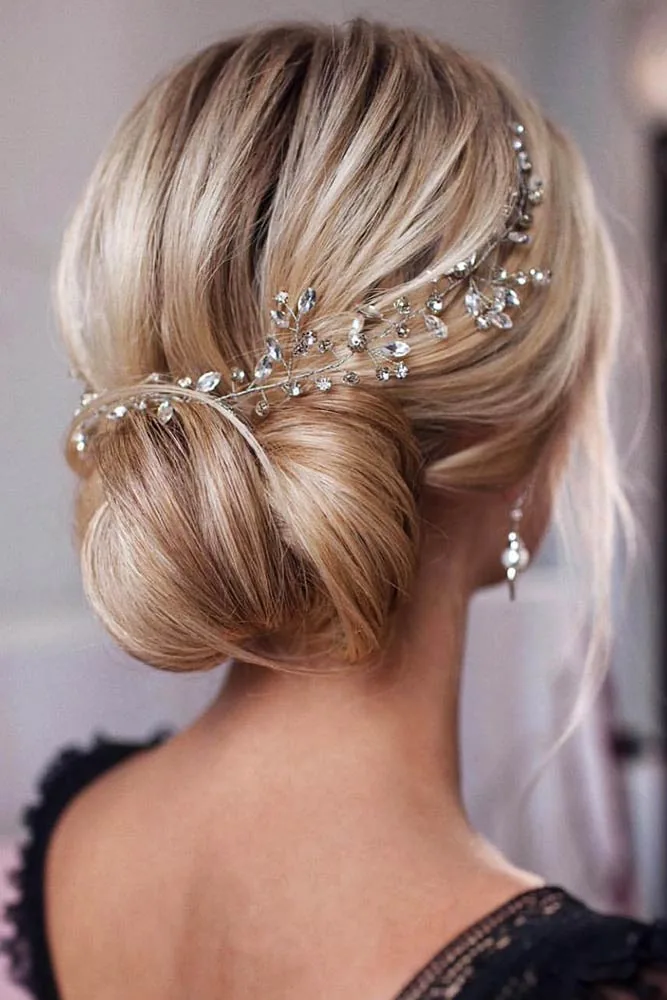
A sleek chignon is the most elegant style in this guide, and it earns its place because it is also one of the most secure. The hair is smoothed back, twisted and pinned low, so there are no flyaways to catch dust and no loose ends to dip into slip. It suits evening classes, studio showcases and the kind of pottery social where you want to look polished.
How to style: smooth the hair back with a little serum, twist it into a low roll and pin it flat with U-shaped pins. Maintenance: a sleek style shows every stray hair, so carry a small comb and a couple of pins. If the chignon loosens, re-pin the base rather than rebuilding it, and a light mist of hairspray will reset the smooth finish in seconds.
Double French Braids
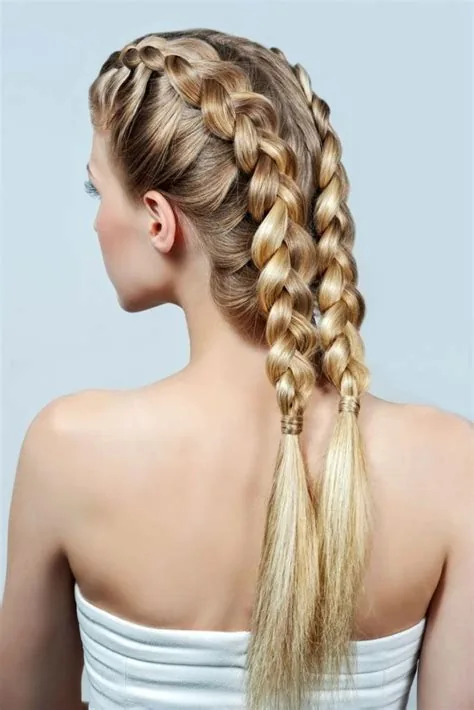
Two French braids are better than one when your hair is thick or very long, because the weight is split evenly and neither braid pulls. They sit flat against the head, they do not swing, and they keep every strand contained from hairline to ends. For a long throwing session, they are one of the most comfortable styles you can wear, since the weight is balanced.
Cost and time: about five minutes once you have practised, and no tools beyond two elastics. What to ask your stylist: ask for the braids to start high at the crown so they stay visible and secure, and to finish with the tails tucked into a low bun for a fully contained style. That tucked version is the one experienced potters wear to all-day workshops.
The Braided Low Bun
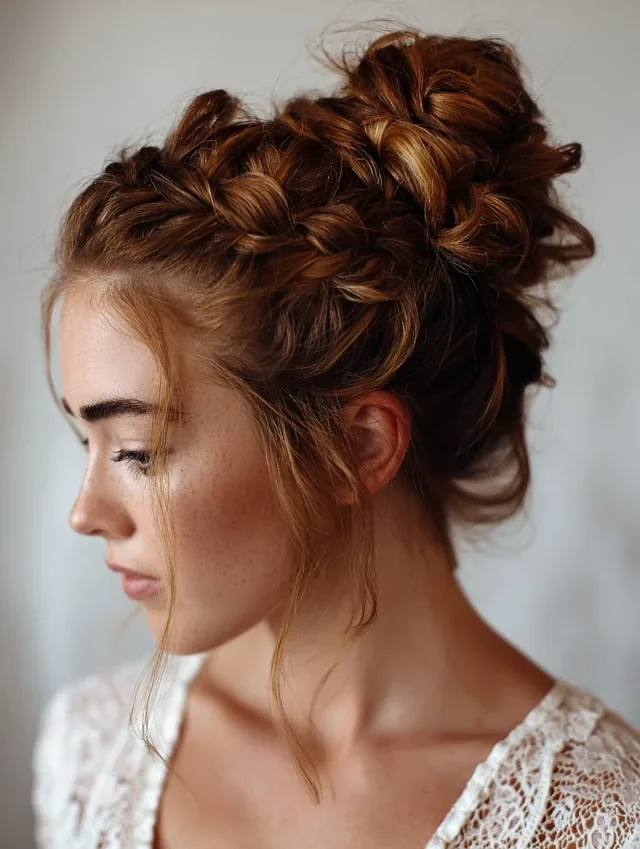
This style combines the two most reliable pottery techniques, a braid and a bun, into one. You braid the hair first, then coil the braid into a low bun, so the hair is locked twice over. It is the style to choose for an all-day pottery workshop, a throwing intensive or any class where you will not get a proper break to fix your hair.
Best for: long or thick hair that escapes from ordinary buns. The braid stops the bun from unravelling, and the bun stops the braid from swinging. Common mistake: coiling the braid too tightly, which makes the bun stick out and catch on the apron strap. Coil it flat against the head and pin through the braid itself, not just around it, and it will sit neatly for hours.
The Curly Pineapple Updo
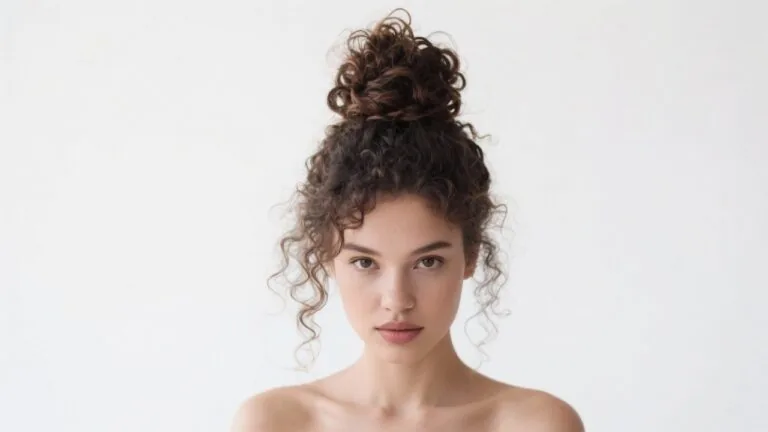
Curly hair and pottery can be a difficult combination, because clay dust clings to curls and loose curls fall forward constantly. The pineapple updo solves both problems: all the curls are gathered high on top of the head, away from the wheel, and the curls themselves are contained in one soft pile. It protects the curl pattern, too, since the hair is not being pulled flat or crushed under an apron strap.
How to style: flip your head forward, gather the curls loosely at the very top and secure them with a satin scrunchie, which is gentler on curls than a plain elastic. Maintenance: a silk scarf over the top adds dust protection and keeps the pineapple from flopping forward when you lean in. After class, refresh the curls with a little water and leave-in conditioner rather than washing straight away.
A Textured Lob Tucked Behind the Ears
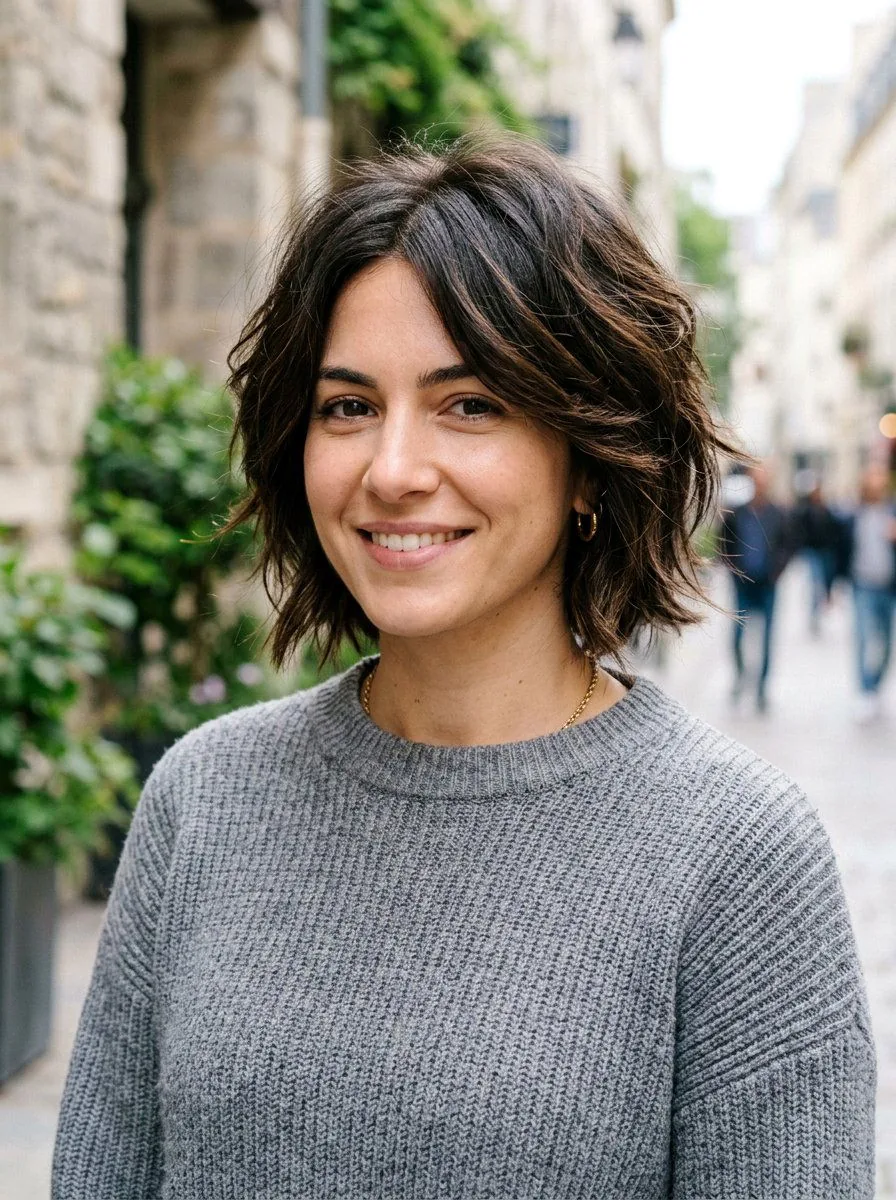
A textured lob is one of the best haircuts for a regular potter, because it is short enough to stay out of the clay on its own. Tucked behind the ears, it frames the face, stays clear of the wheel and needs almost no styling at all. It is the lowest-maintenance style in this guide, and it looks good even after three hours in a dusty studio.
Pros and cons: no pins, no elastics, no mid-class fixes, and it dries quickly after the post-class wash. The only catch is the front pieces, which can fall forward when you lean in. Two small clips at the temples solve that in seconds. Quick verdict: if you are thinking of cutting your hair shorter for a pottery course, this is the cut to ask for.
A Side Braid with a Headband
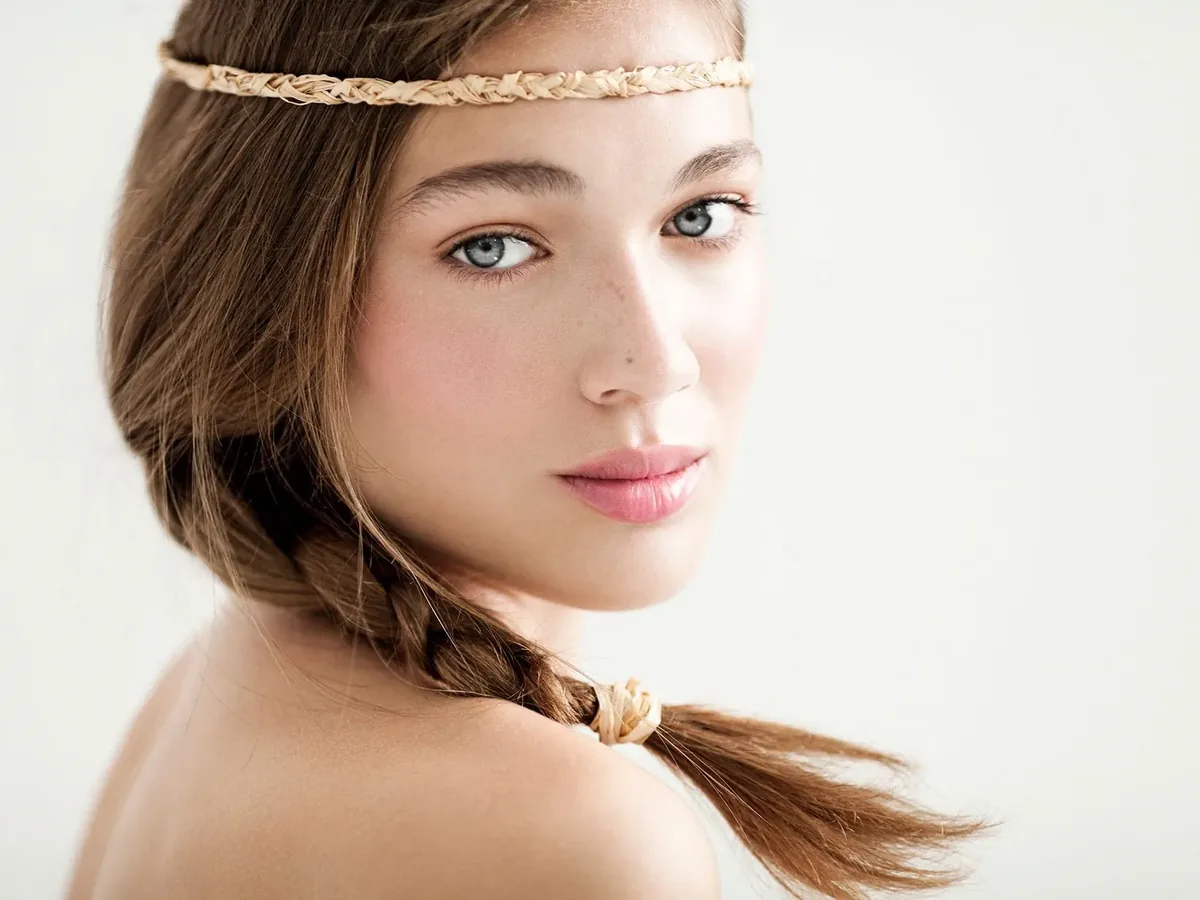
A side braid is pretty and practical, and a headband makes it properly studio-proof. The braid keeps the length contained on one side, while the headband holds back the front pieces that would otherwise fall into your eyes, and into the clay, every time you look down at the wheel. Together they cover the two places hair usually escapes from.
Best for: medium-length hair and anyone growing out bangs. What to ask for: a fabric headband rather than a thin metal one, since fabric grips better once clay dust is in the air and does not slide. Pin the braid to your shoulder with a small clip while you throw, and unclip it for the class photograph at the end.
The Low Twisted Bun
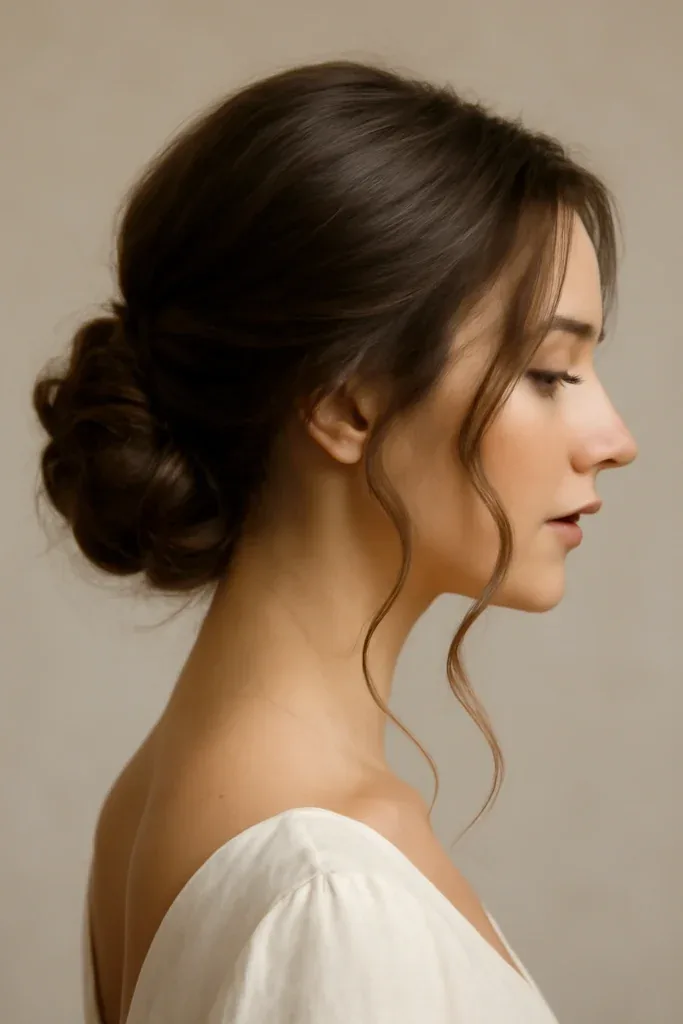
A low twisted bun is the softer sister of the classic low bun. Instead of coiling the hair, you twist two sections around each other and pin the twist low at the nape. It has a lovely, rope-like texture that looks more interesting than a plain bun, and the twist itself grips the hair, so it holds even on smooth, fine hair that usually slips out of pins.
How to style: part the hair, twist each side towards the back, cross the twists over each other and pin the ends underneath. Common mistake: twisting too loosely at the nape, which lets the bun sag by the end of class. Keep the first twist firm, and the rest will follow. A single U-shaped pin through the centre of the twist is worth more than five pins around the edge.
A Pixie Cut with a Headband
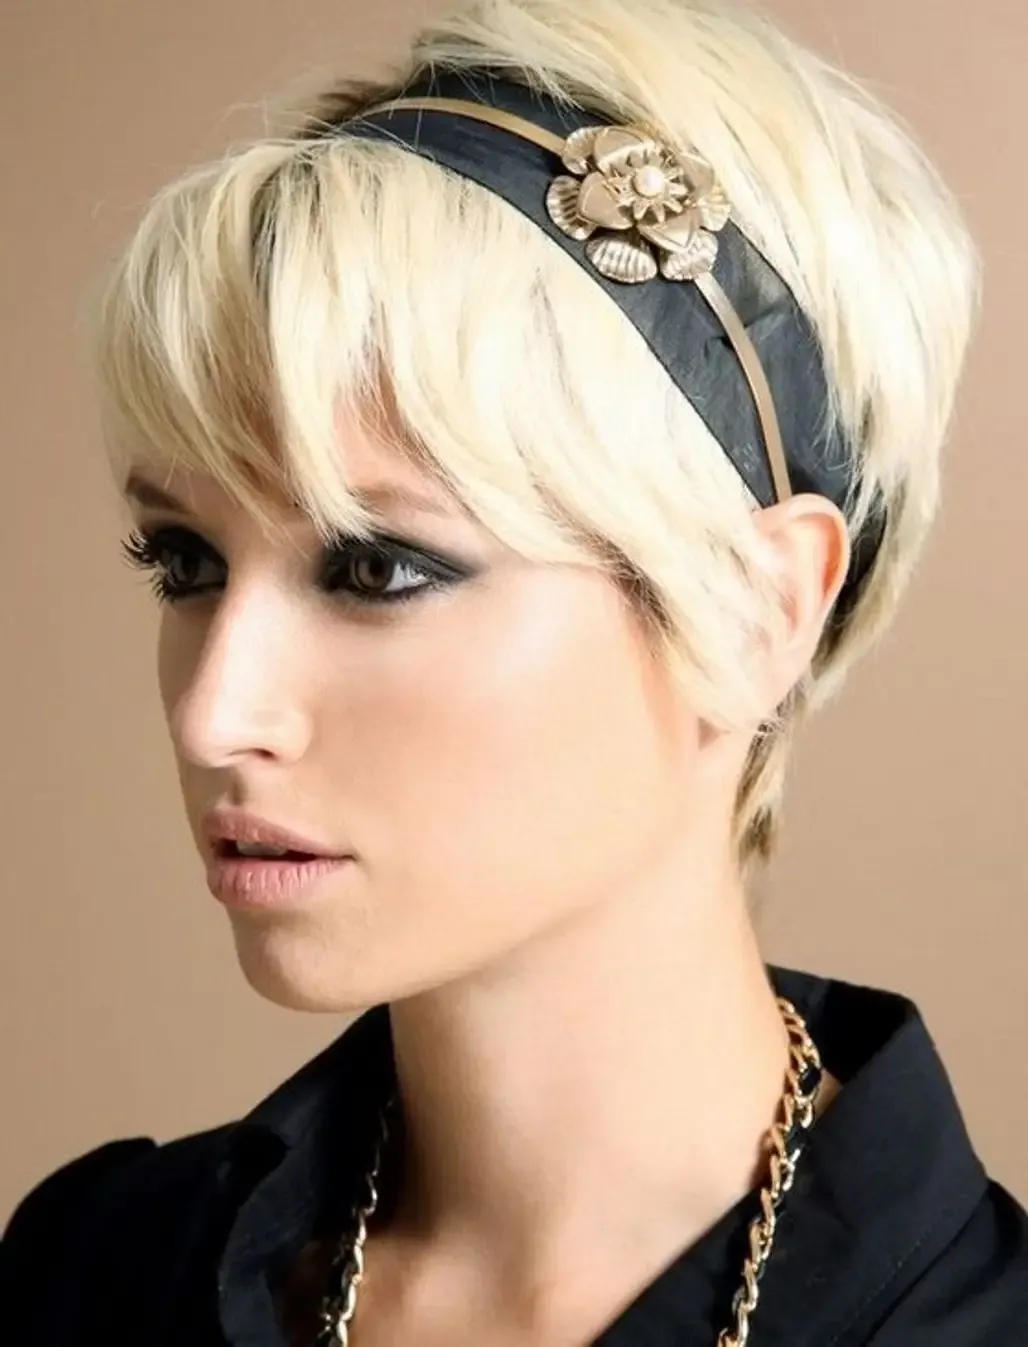
A pixie cut is the ultimate pottery haircut: nothing reaches the wheel, nothing needs pinning, and clay dust has almost nowhere to hide. Add a headband and you have the front pieces handled too, plus a pop of colour that makes the whole look feel finished. It is the style for potters who want to think about their hair as little as possible.
Pros and cons: zero mid-class maintenance, fast washing afterwards, and it always looks neat. The trade-off is styling range: you cannot braid or bun a pixie, so the headband and clips are your main tools. Who should avoid it: nobody for practical reasons, but if you love long hair, this is a big commitment. Try a faux-pixie pin-up first to see if you like the feeling.
A Short Bob with Clips
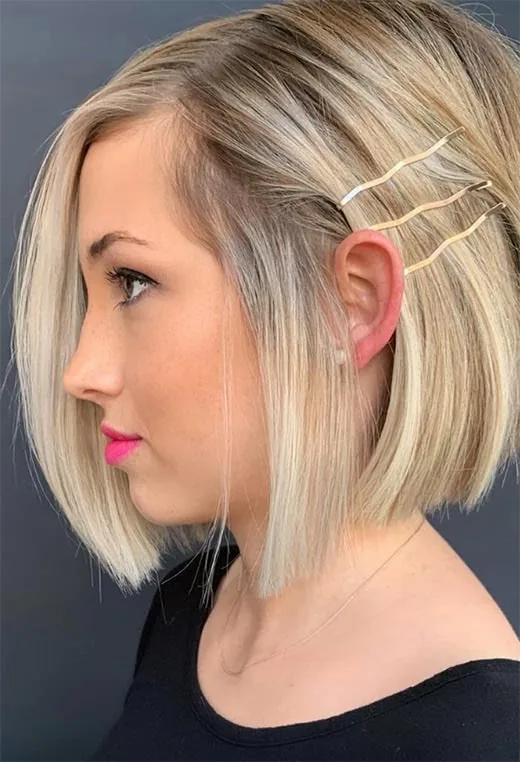
A short bob sits just above the shoulders, which is almost the perfect pottery length: short enough to stay out of the clay, long enough to feel feminine and versatile. Two flat clips at the front keep the face-framing pieces back while you work, and they double as a style statement, since decorative clips are very much in fashion.
Maintenance: almost none. Cost and time: a bob needs a trim every six weeks to keep its shape, but daily styling takes under two minutes. If your bob is growing out and the ends start brushing the wheel, switch to a low ponytail or a claw clip for throwing days until your next trim.
The Rope Braid Ponytail
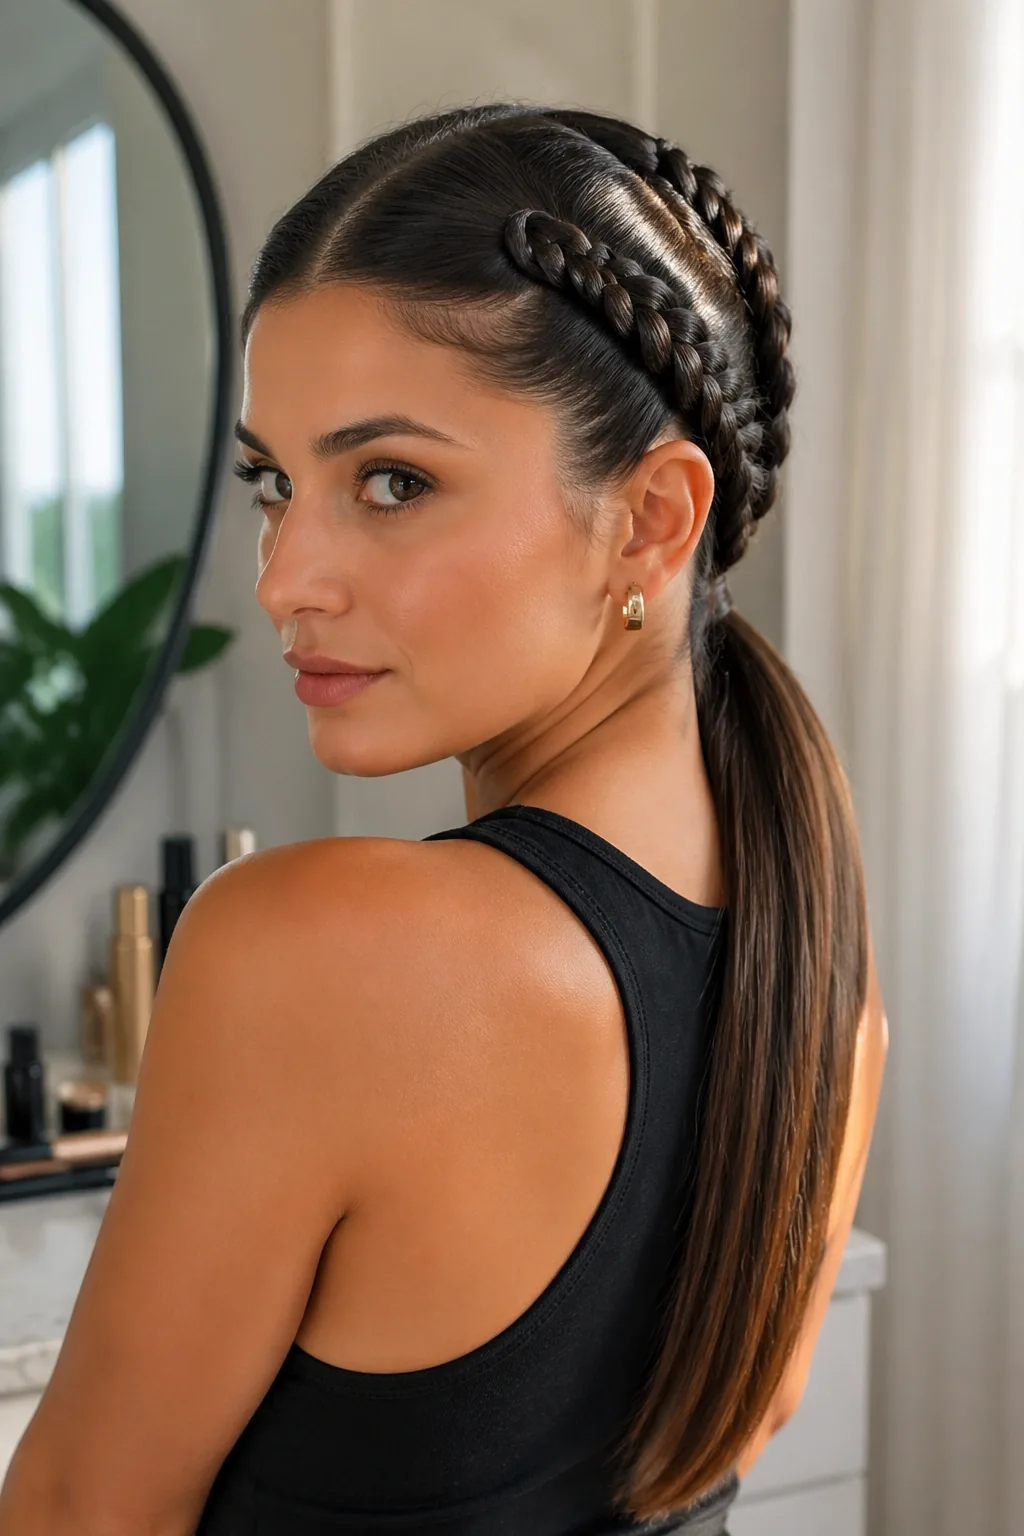
A rope braid is made by twisting two sections of hair around each other, and it is one of the fastest braids to learn. As a ponytail, it keeps the tail compact and controlled, so it does not swing or shed flyaways the way a loose ponytail does. It looks neat, a little bit nautical, and it holds up beautifully through a long class.
Best for: straight or slightly wavy hair, where the rope texture shows clearly. How to style: gather the hair into a ponytail, split it in two, twist each section the same way, then twist them around each other in the opposite direction and secure the end. Quick verdict: quicker than a French braid, more secure than a plain ponytail, and a great first braid to learn.
Maintenance: a rope braid holds its shape well, but the end can start to unravel if the elastic is loose. Use a small, snag-free elastic and wrap it twice, and check it once halfway through class. If your hair is layered, a light mist of hairspray before braiding will stop the shorter layers from poking out of the twist.
The Braided Crown
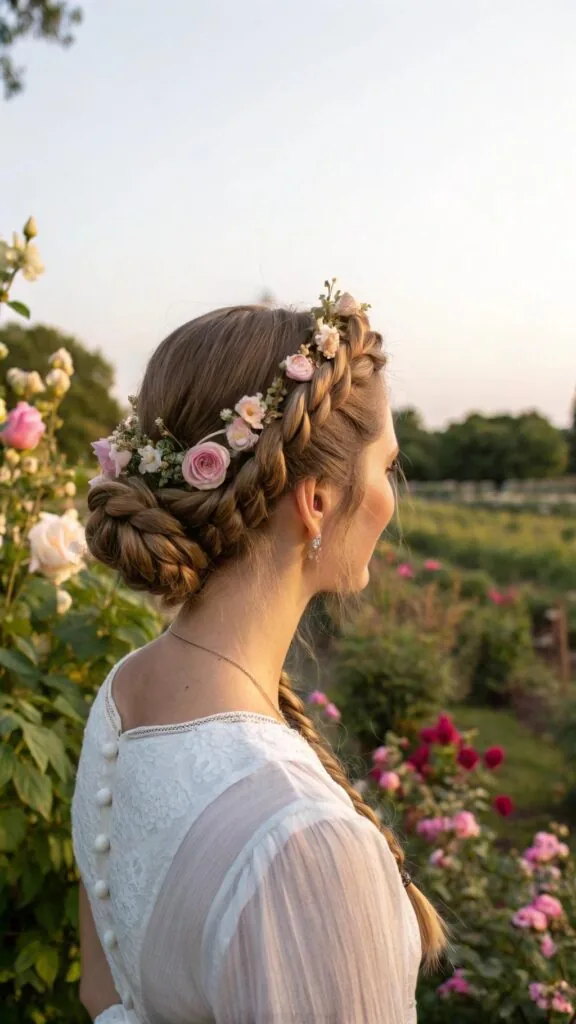
A braided crown wraps the hair around the head like a halo, so there is no tail, no swing and nothing to fall forward. It is one of the most secure styles in this guide, and also one of the prettiest, which makes it a favourite for pottery date nights, studio parties and the end-of-course showcase where everyone photographs each other’s work.
Common mistake: braiding the crown too loosely so it slides down over the ears by the second hour. Braid it snugly against the scalp and pin the join at the back with two crossed pins. Maintenance: if you have very thick hair, split it into two braids and wrap them in opposite directions: the crown will lie flatter and feel lighter on your head.
A High Bun with a Scrunchie
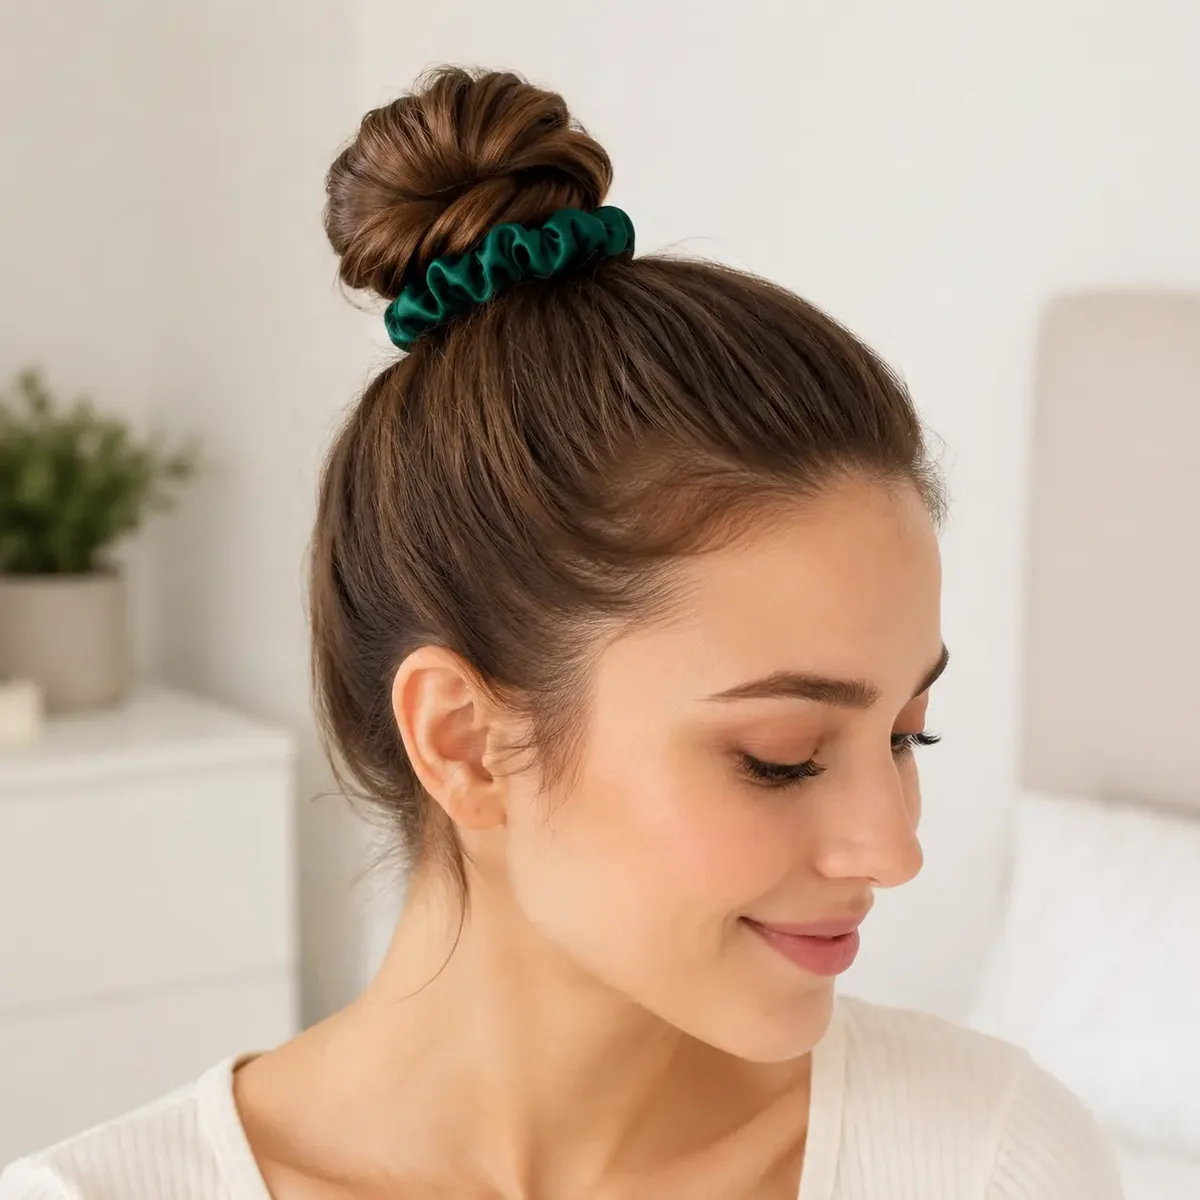
A high bun with a scrunchie is the cheerful, comfortable classic. The scrunchie is gentler than a plain elastic, so it does not dent or break the hair, and it holds a bun securely even when your hands are damp from the wheel. A satin or velvet scrunchie also catches less dust than a fabric one with a rough texture.
Pros and cons: it keeps the neck cool, it takes thirty seconds, and it suits every hair type. The downside is height: a very high bun can catch on a halter-neck apron strap, so choose a cross-back apron or wear the bun slightly lower. What to ask for: a scrunchie in a dark colour, since clay dust shows up fast on pale fabric.
Side-Swept Waves Pinned Back
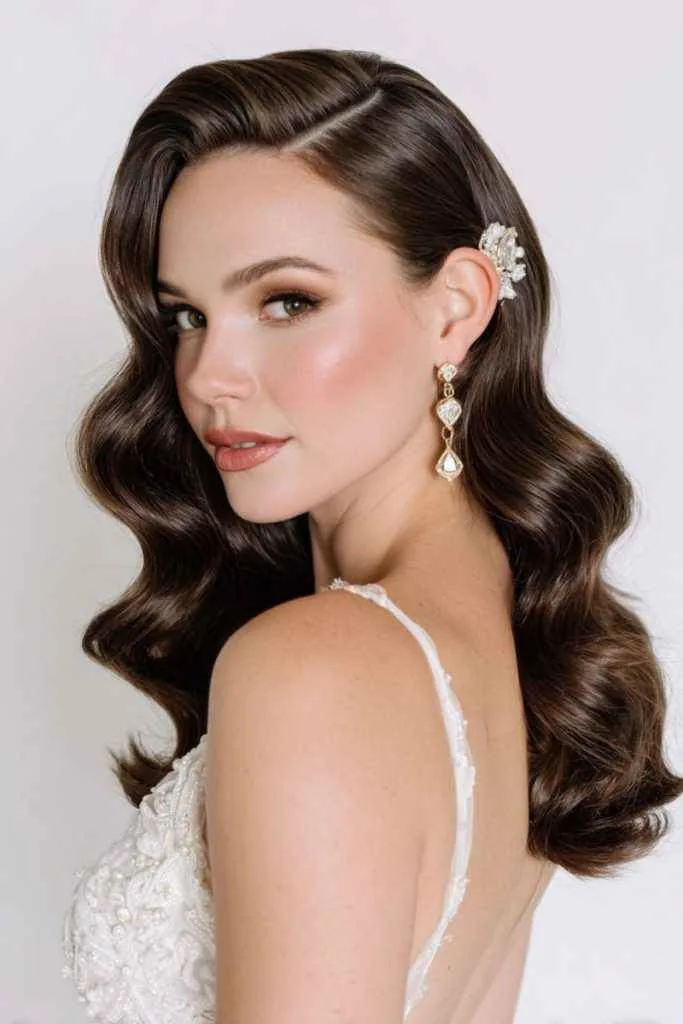
Side-swept waves look soft and romantic, and with the right pinning they can work in the studio too. The key is to pin the waves back on one side, so the hair sweeps across the face but never falls forward over the wheel. It is a good choice for glazing and decorating days, when you sit more upright than you do at the wheel.
Who should avoid it: anyone throwing on the wheel for a full session, since loose waves and a spinning wheel are a bad combination. How to style: sweep the waves to one side, pin the top section flat with two crossed bobby pins, and mist with a flexible-hold spray so the waves can move without falling. Save this one for the days when your hands stay mostly dry.
A Dutch Braid into a Low Bun
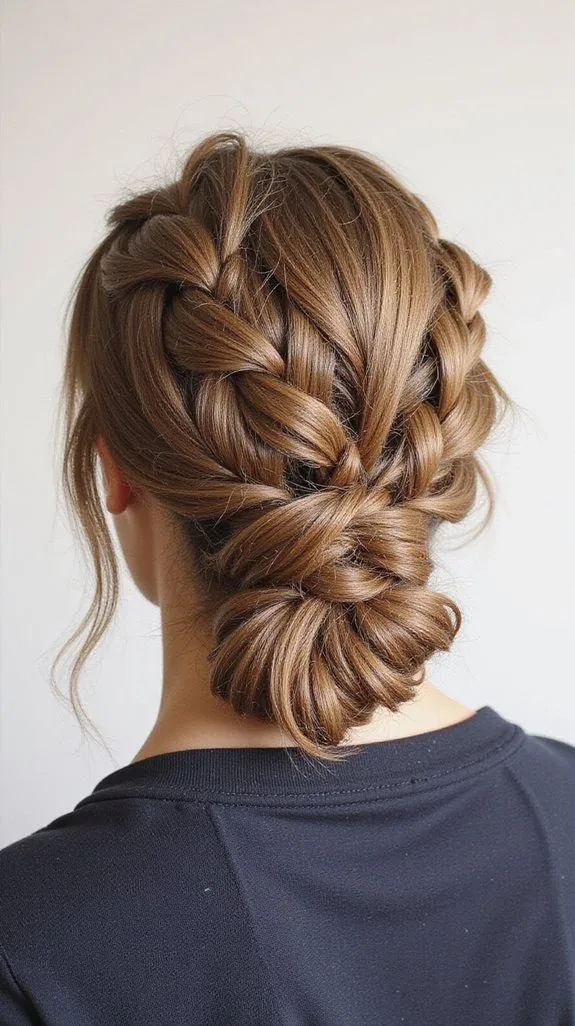
Start with a Dutch braid at the crown and finish by coiling the end into a low bun, and you get the most secure style in this entire guide. The braid locks the front and crown, the bun locks the ends, and there is genuinely nothing left to fall forward. Experienced potters wear this to all-day workshops and throwing intensives, and it still looks neat at the end of the day.
Best for: long, thick hair that defeats ordinary buns. Maintenance: almost none, which is the point. Cost and time: about five minutes to build, and it repays that investment by never needing a mid-class fix. If you can only master one style before a pottery course, make it this one.
A Messy Top Knot with Pinned Face-Framing Pieces
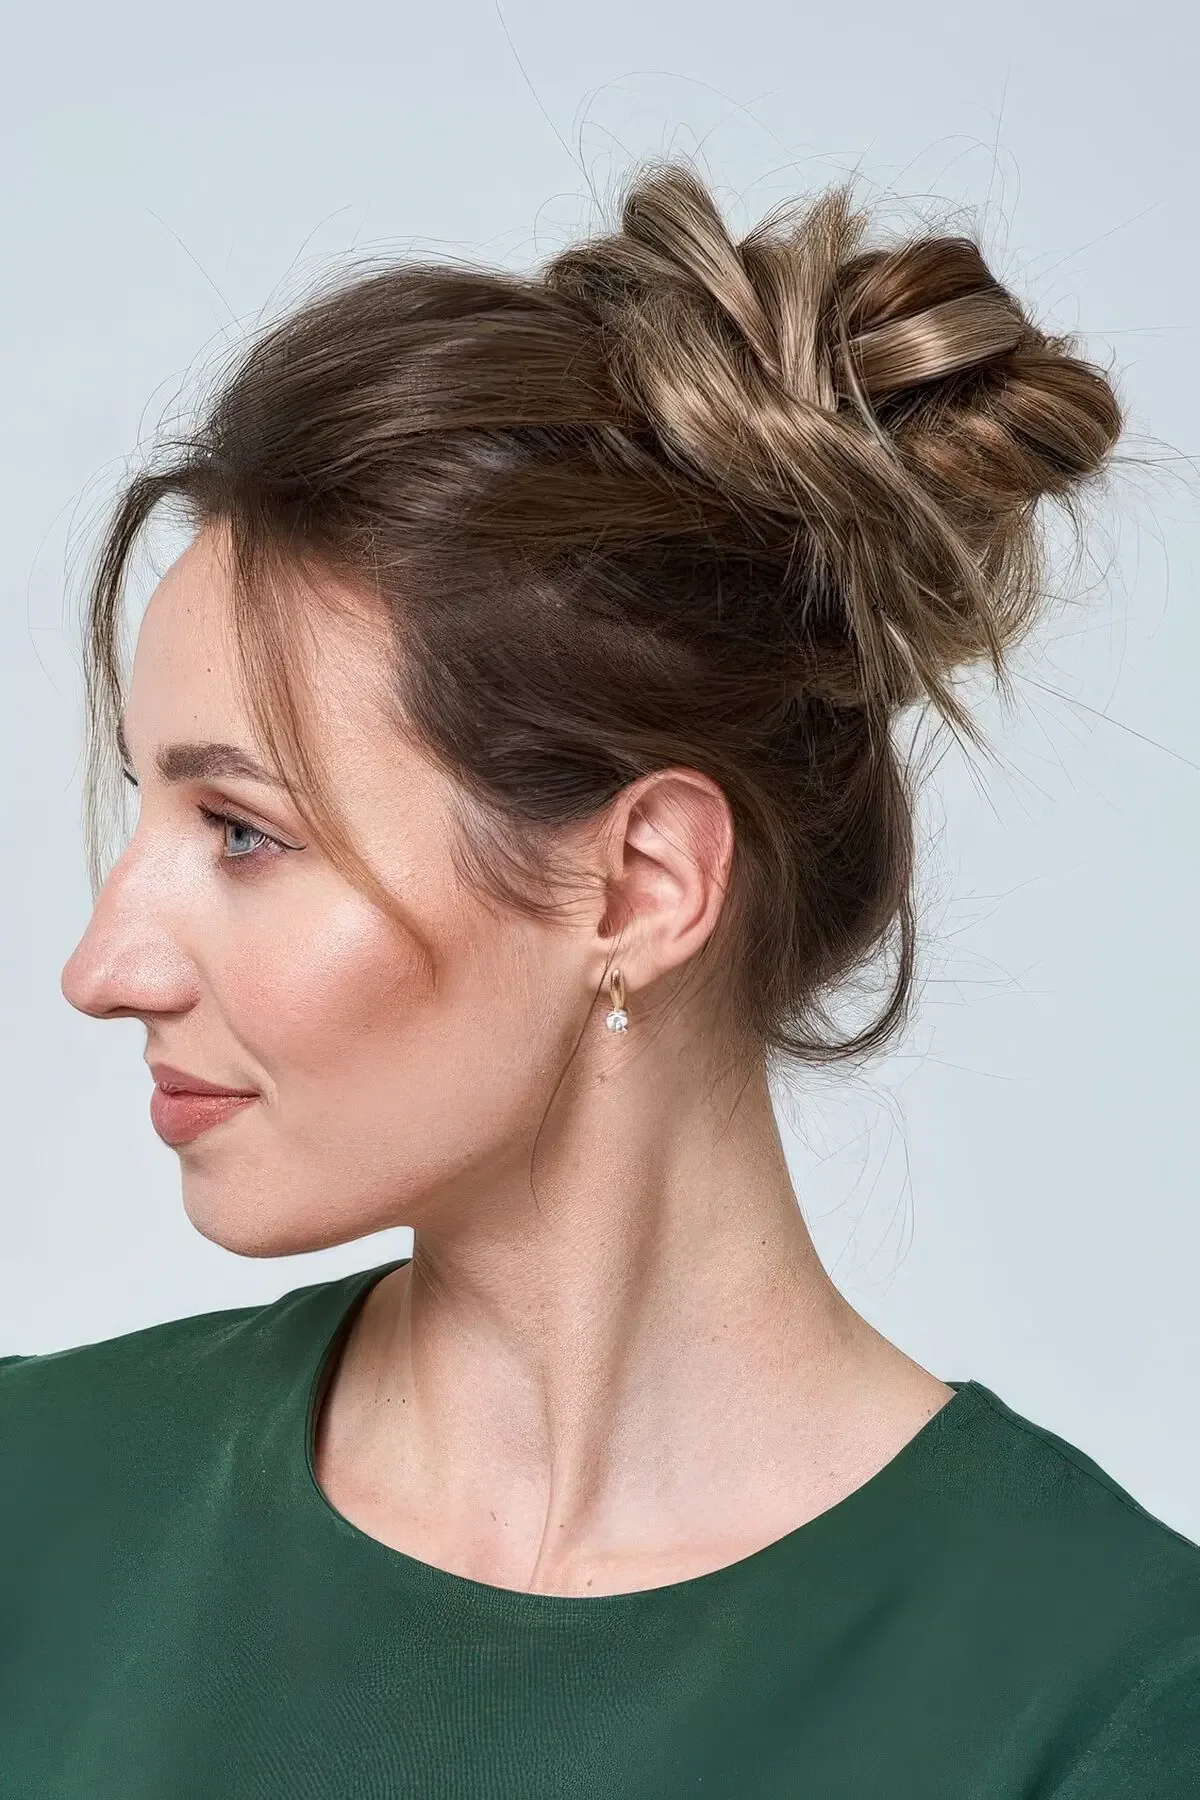
A messy top knot is the style most potters actually wear, even if they do not call it that. It is fast, it is comfortable, and it keeps the hair right out of the way. The one refinement that makes it studio-ready is pinning the face-framing pieces back, so the loose strands that usually fall forward are secured before you sit down at the wheel.
How to style: gather the hair high, twist it loosely and pin it into a soft knot, then take the two front pieces and pin them back behind your ears with flat clips. Common mistake: making the knot too tight, which pulls at the hairline and hurts after an hour. A messy top knot should feel loose and easy; if it aches, rebuild it lower and looser.
The French Twist
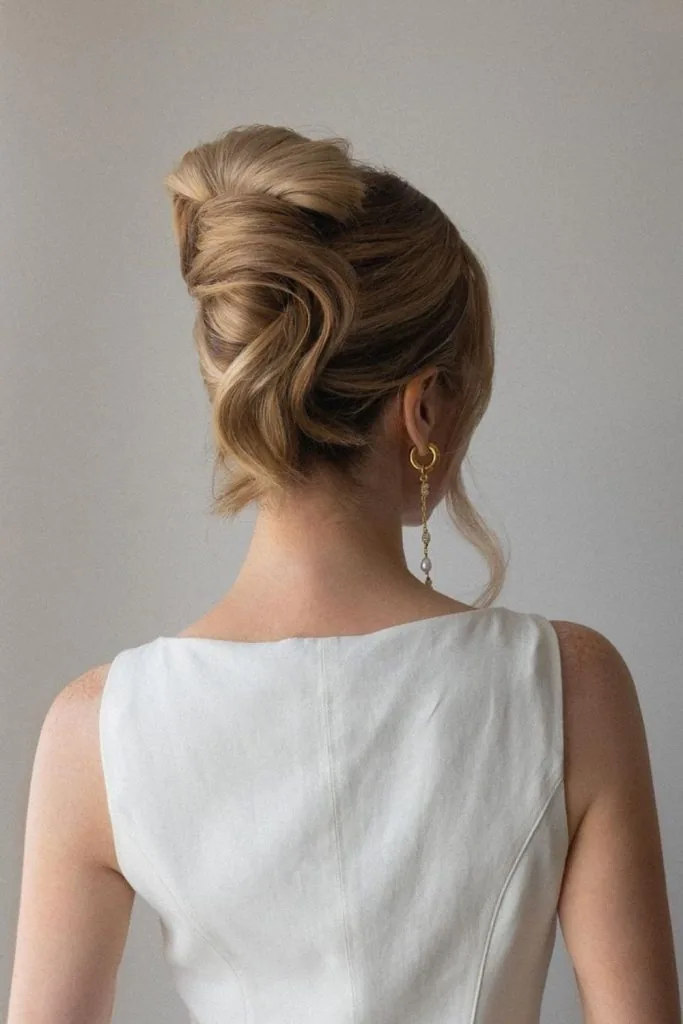
The French twist is the classic updo for a reason: it is elegant, it is secure, and it has survived decades of formal occasions for good reason. In a pottery class it works beautifully, because the whole length of the hair is folded up and pinned vertically, leaving nothing to swing or dip. It suits evening classes and studio events where you want to look polished.
Best for: medium to long hair, and anyone who finds buns uncomfortable. Maintenance: the twist needs a few strong pins to hold through a long session, so use U-shaped pins rather than flat bobby pins, and push them in from opposite directions so they lock against each other. If the twist loosens, a single extra pin at the base will usually rescue it.
A Low Ponytail with a Braided Wrap
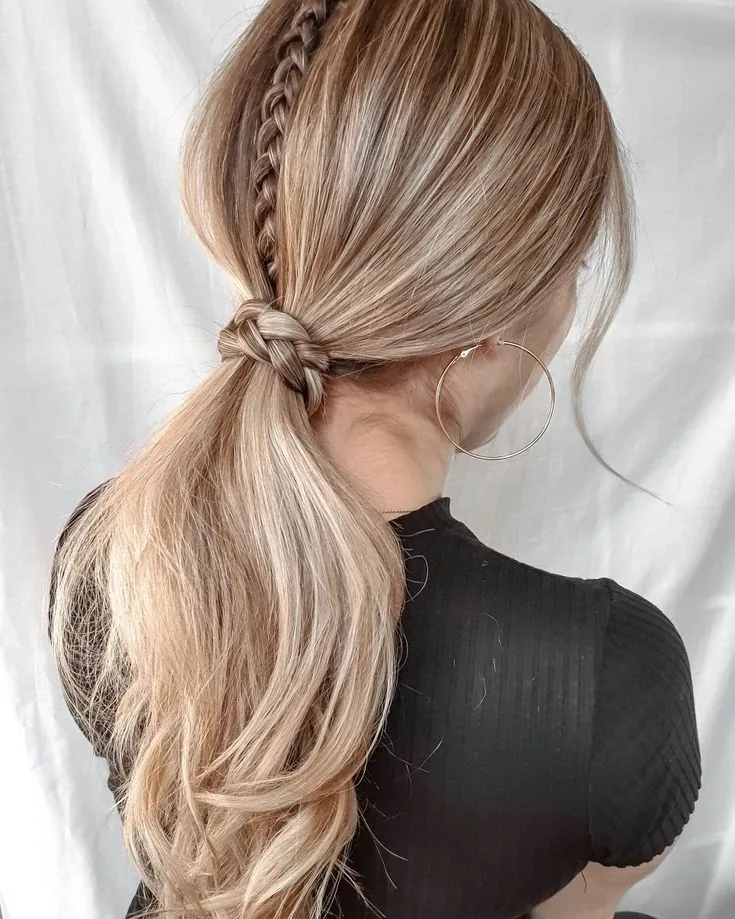
Take a low ponytail, wrap a thin braid around its base instead of a plain strand of hair, and you have a style that looks far more considered than the effort it took. The braided wrap anchors the ponytail, stops the elastic from sliding down as the class goes on, and adds a pretty detail that shows in photographs.
Pros and cons: it is comfortable for hours, gentle on the hair, and easy to redo in seconds. The trade-off is the same as any ponytail: a long tail can swing forward. Who should avoid it: throwers with waist-length hair, unless they braid the tail as well. For everyone else, this is one of the easiest ways to look polished at the wheel.
A Curly Half-Up Claw Clip
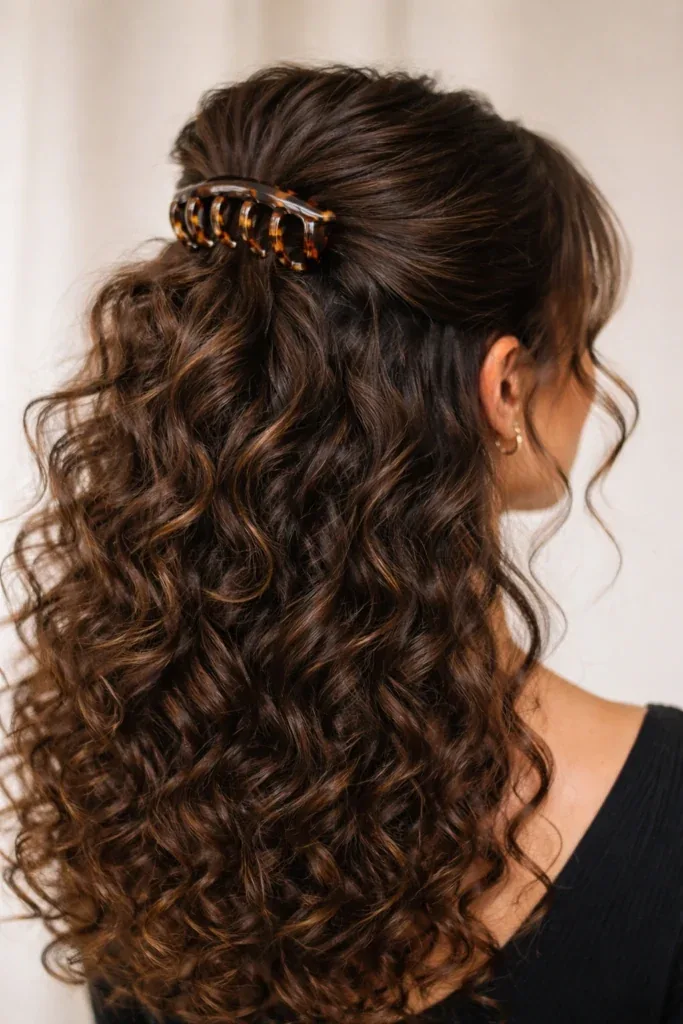
Curly hair has a mind of its own in a pottery studio, and a half-up claw clip is one of the kindest ways to manage it. The top section is clipped up and out of your face, while the curls underneath keep their shape and bounce. The clip grips curls well because the texture itself helps it hold, and it is far gentler than pulling curls into a tight ponytail.
How to style: gather the top half of the curls, twist them once and clip them with a large claw clip. Maintenance: after class, refresh the curls with water and a little leave-in conditioner rather than brushing them out. Common mistake: using a clip that is too small, which pops open halfway through class. Choose a clip that spans the full width of the gathered section.
Sleek Straight Hair in a Low Ponytail
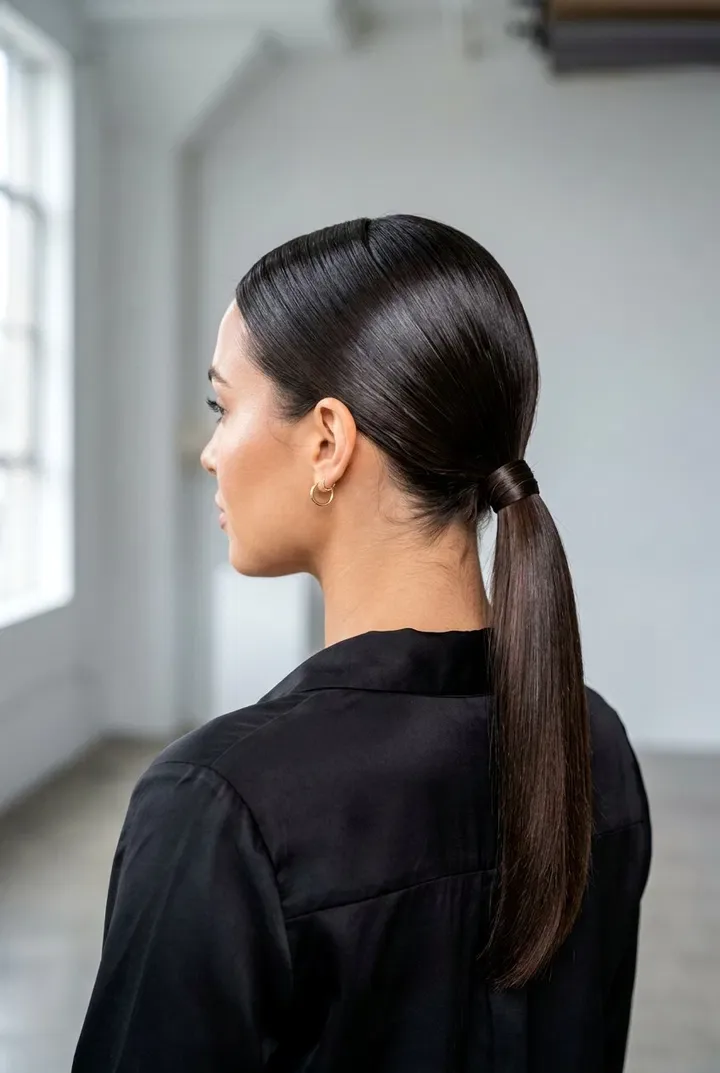
Straight hair slips out of pins more easily than any other hair type, which is why a sleek low ponytail is such a good pottery choice for it. The ponytail gathers everything into one secure bundle, the sleek finish keeps flyaways down, and a little serum adds shine without making the hair slippery. It is simple, it is chic, and it stays put.
Best for: straight and fine hair, where braids and twists tend to slide out. What to ask your stylist: ask for a cut with slightly blunt ends, which sit more neatly in a ponytail than heavily layered ends. Quick verdict: the lowest-fuss style in this guide for straight hair, and one that looks just as good at the end of class as at the start.
The Braided Headband Style
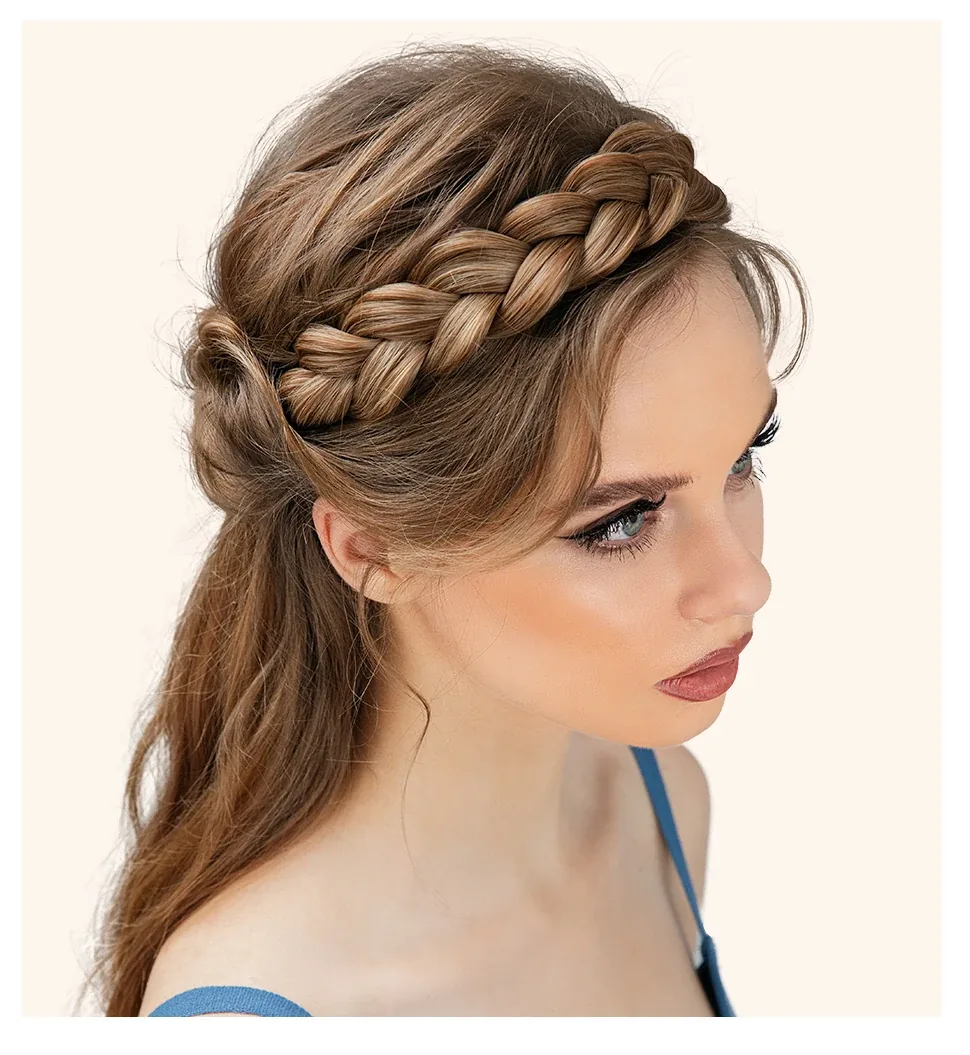
A braided headband is a small braid worn across the front of the hair like a hairband, and it solves the most common pottery hair problem: the front pieces falling into your eyes. It works with the rest of the hair worn up or down, so it pairs with almost every other style in this guide, and it looks lovely in its own right.
How to style: take a section of hair from behind one ear, braid it, and bring it across the front of your head, pinning it behind the other ear. Pros and cons: it holds the front back all class with no elastic and no headband to slip. The catch is that it takes a little practice to braid neatly across the front, so try it at home once before class day.
Space Buns: Double Buns for a Playful Class

Space buns are the most playful style in this guide, and they are surprisingly practical. Two small buns sit high on either side of the head, so nothing hangs anywhere near the wheel, the weight is perfectly balanced, and the style survives a whole class without a single fix. They are a favourite for pottery socials, date-night classes and anyone who likes their studio look to have a sense of fun.
Best for: medium to long hair, and for anyone whose single bun always slides to one side. Common mistake: placing the buns too low, which makes them look like earmuffs and lets them catch on the apron strap. Place them high, at the corners of the crown, and secure each one with its own elastic and two pins. Quick verdict: cute, comfortable and completely clay-proof.
Can I wear my hair down to a pottery class?
No, not while you are throwing on the wheel. Loose hair falls forward into the clay, catches dust and can catch on the spinning wheel head. Save loose styles for glazing or decorating days, when you sit more upright, and wear your hair up for any wheel work.
What is the best hairstyle for a pottery class with long hair?
A Dutch braid into a low bun is the most secure choice for long hair, because the braid locks the front and the bun locks the ends. A braided low bun and double French braids are close seconds. Avoid a plain high ponytail, since a long tail swings forward when you lean in.
How do I get clay out of my hair?
Rinse with lukewarm water for a full minute before you shampoo, so the water carries the loose clay away. Then use a gentle shampoo, rinse again, and condition the lengths. Never brush dry clay out of dry hair, and use a clarifying shampoo once a week if you throw regularly.
Is a headband or a scarf better for pottery?
A scarf is better for dust protection, because it covers more hair, while a headband is better for simply keeping the front pieces out of your eyes. Many potters wear both: a scarf over a bun for throwing, and a headband alone for glazing days.
What hairstyle works for short hair at a pottery class?
Short hair is already studio-friendly. A pixie or a bob barely reaches the wheel, so you mainly need to manage the front pieces with a headband or two flat clips. A textured lob tucked behind the ears is one of the easiest pottery styles there is.
How do I keep curly hair out of the clay?
Gather the curls into a pineapple updo or a high bun with a satin scrunchie, and add a silk scarf for dust protection. Avoid tight ponytails, which stretch the curl pattern, and refresh the curls after class with water and leave-in conditioner instead of brushing them out.
Should I wear an apron strap over or under my bun?
Under a low bun is best. A cross-back apron works well with a low bun, while a halter-neck strap can press on a high bun and loosen it. If your apron has a neck strap, choose a low style and let the strap sit above the bun.
Can glaze damage my hair?
Glaze can stain hair and is difficult to wash out, so keep your hair away from glaze buckets by wearing it fully up and doing a quick lean-forward check before you start glazing. If glaze does get into your hair, rinse it out with water right away and shampoo as soon as you can.
How often should I wash my hair if I take weekly pottery classes?
Rinse after every class and shampoo gently, then use a clarifying shampoo once a week to lift fine clay dust. Curly hair can co-wash after class instead of shampooing every time. Always condition the lengths, since clay dust dries hair out over time.
What is the easiest pottery hairstyle for a complete beginner?
The claw clip twist. Twist the hair up, fold it and clip it: ten seconds, no braiding skill needed, and it holds through a whole class. The classic low bun is the next easiest, and both can be redone between throws with damp hands.
Your Hair, Out of the Clay and Into the Creativity
Pottery is at its best when you forget everything except the clay, and the right hairstyle is what lets you do that. Whether you choose the classic low bun, a Dutch braid into a low bun, a ten-second claw clip twist or a playful pair of space buns, the test is always the same: lean forward, shake your head gently, and check that nothing moves. If it holds through that, it will hold through centring, pulling, trimming and glazing, and you can spend the whole class thinking about your pot instead of your hair.
So before your next class, pick one style from this guide, practise it once at home, and pack your tiny studio hair kit: two pins, a spare elastic and a claw clip in your apron pocket. Your future self, clay on her hands and a beautiful bowl on the wheel, will be glad you did. These hairstyles for a pottery class are not about looking perfect in a dusty studio. They are about giving your creativity room to breathe, one secure, comfortable, clay-proof style at a time.