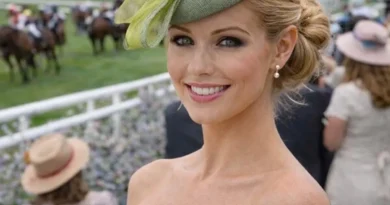
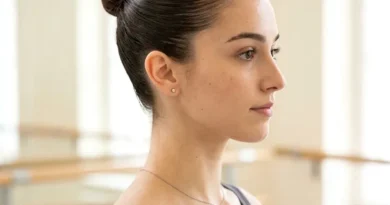
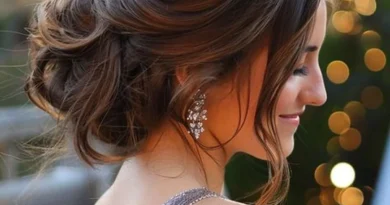
33 Hairstyles for a Work Conference That Stay Polished From Keynote to Networking Drinks
A work conference is a marathon disguised as a meeting. You arrive before the first keynote with your hair freshly styled, and by the time the afternoon panels roll around you have sat through hours of talks, shaken dozens of hands, posed for a group photo, and maybe stepped outside into wind or humidity between sessions. Then comes the evening networking reception, where the same hairstyle has to look just as sharp as it did at 9 a.m. That is why choosing the right hairstyles for a work conference is a different job from picking a hairstyle for a normal office day. A conference style has to survive a full day, look good from the front row and the back row, and hold up on camera as well as in person.
This guide brings together 33 styles built for exactly that challenge, from a sleek low bun that never moves to a blowout that photographs beautifully, a braided low bun that locks everything in place, and a half-up twist that takes you from the keynote stage to the networking drinks without a single restyle. Whether your hair is long, short, curly or fine, and whether you are speaking on a panel, presenting a poster or simply working the room, you will find a style that stays polished from the first session to the last handshake. Each idea comes with practical conference notes, so you can walk into the venue knowing your hair will behave all day.
Styles by Session Type: Keynotes, Panels and Breakouts
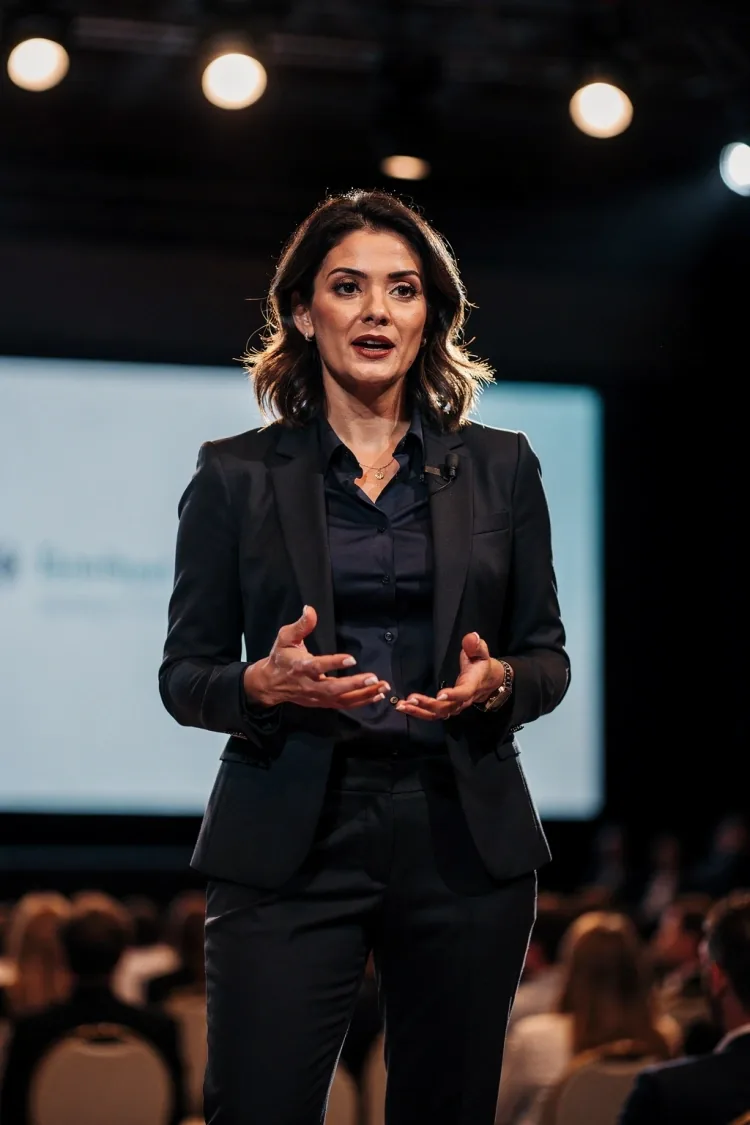
Not every session at a conference asks the same thing of your hair. A keynote puts you on a stage under bright lights, in front of hundreds of people and often a camera, so the style needs to be clean from every angle, with nothing falling across your face while you speak. A low bun, a smooth chignon or a sleek blowout all work here, because they read as deliberate and they stay put while you move, gesture and turn toward the slides.
Panel discussions are more relaxed but they last longer, so comfort matters as much as polish. You will be seated for an hour or more, often with a camera at eye level, and a style that presses against the back of a chair will flatten by the end. Choose something low and flat at the back, like a low ponytail or a twisted bun, rather than a high bun that collides with the headrest. Breakout sessions are the most forgiving: you are up close with a small group, so a softer style with a little movement, such as pinned-back waves or a half-up twist, feels approachable and still looks professional.
All-Day Hold: How to Make Conference Hair Last 12 Hours
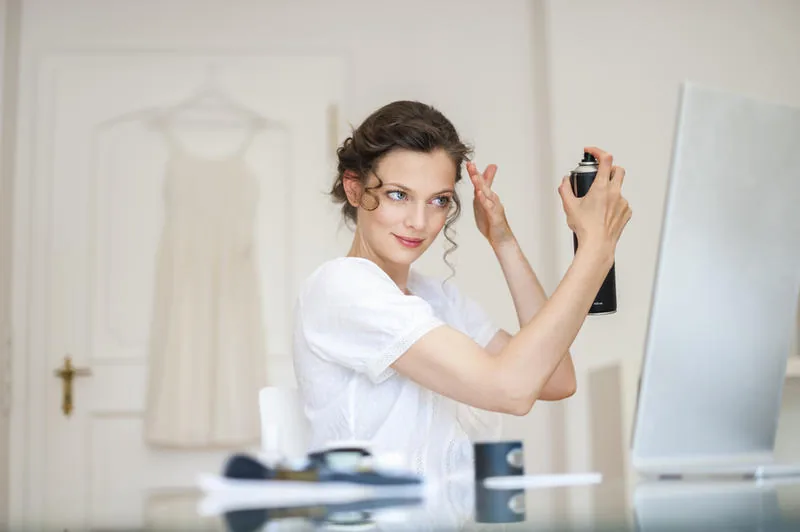
A conference day can easily run twelve hours, from the first coffee to the last drink at the reception, and most hairstyles are not built for that. The secret to all-day hold is layering: start with a good foundation, then build the style on top of it. Blow-dry with a volumising mousse if your hair is fine, or a smoothing cream if it is thick, and always let the hair cool completely before you pin or tie it. Warm hair that is styled too soon will relax and drop within an hour.
Finish with products that work in stages rather than one heavy spray. A light-hold spray while you build the style, a stronger hold once it is set, and a small travel-size spray in your bag for a mid-afternoon reset. Pins matter too: use U-shaped pins for buns and crossed bobby pins for anything that needs to grip, and push each pin in against the direction the hair wants to fall. The quick test before you leave the hotel room is simple: shake your head gently, then bend forward as if you were picking up your conference bag. If nothing moves, the style will survive the day.
Camera-Ready Hair for Hybrid Calls and Video Panels

Hybrid conferences mean your hair is now judged on a laptop screen as well as in the room, and the camera is far less forgiving than the human eye. Webcams flatten volume, wash out colour and exaggerate frizz, so the styles that look best on video are the ones with clear shape and a clean outline. A smooth blowout, a sleek low bun or a polished ponytail all read clearly on screen, while very loose, fine hair can blur into a haze of flyaways under bad lighting.
Before a video panel, do a quick camera check in the actual room if you can. Sit where you will sit, open the camera, and look at the outline of your hair against the background. If your hair disappears against a dark backdrop, add a little shine spray or a lighter accessory to define the silhouette. Keep the front pieces away from your face, because a strand falling across your cheek on camera looks like a mistake even when it is not. And remember that the top of the frame cuts off at the forehead, so height at the crown reads well on video, a small lift at the roots makes a real difference.
What to Avoid at a Work Conference
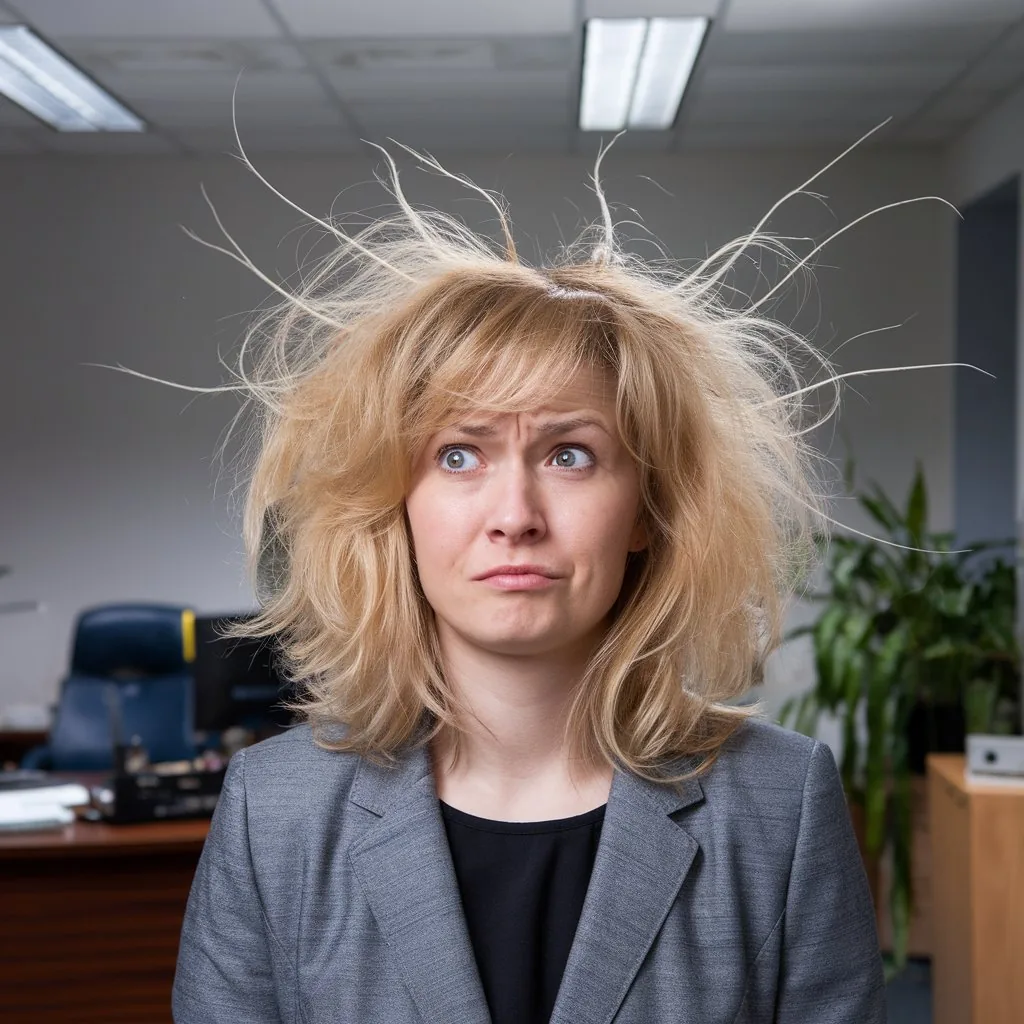
Some hairstyles are lovely in everyday life and completely wrong for a conference. Anything that needs constant fixing is the first to go: if you catch yourself touching your hair every few minutes, the style is failing, and every person you talk to will notice. Avoid very high ponytails that swing when you turn your head, loose hair that falls forward every time you lean over a table, and styles held together by a single elastic or clip.
There are a few other traps worth knowing. Heavy, wet-look products can leave marks on a blazer collar and photograph badly under stage lighting. Overly casual styles, such as a messy top knot or beachy waves with no structure, can undermine an otherwise sharp outfit, especially if you are speaking or meeting senior colleagues. And anything brand-new is a risk: a conference is not the day to try a style you have never worn before. If you would not trust it through a long dinner and a photo, do not trust it through a twelve-hour conference day.
The 5-Minute Touch-Up Kit to Pack in Your Conference Bag
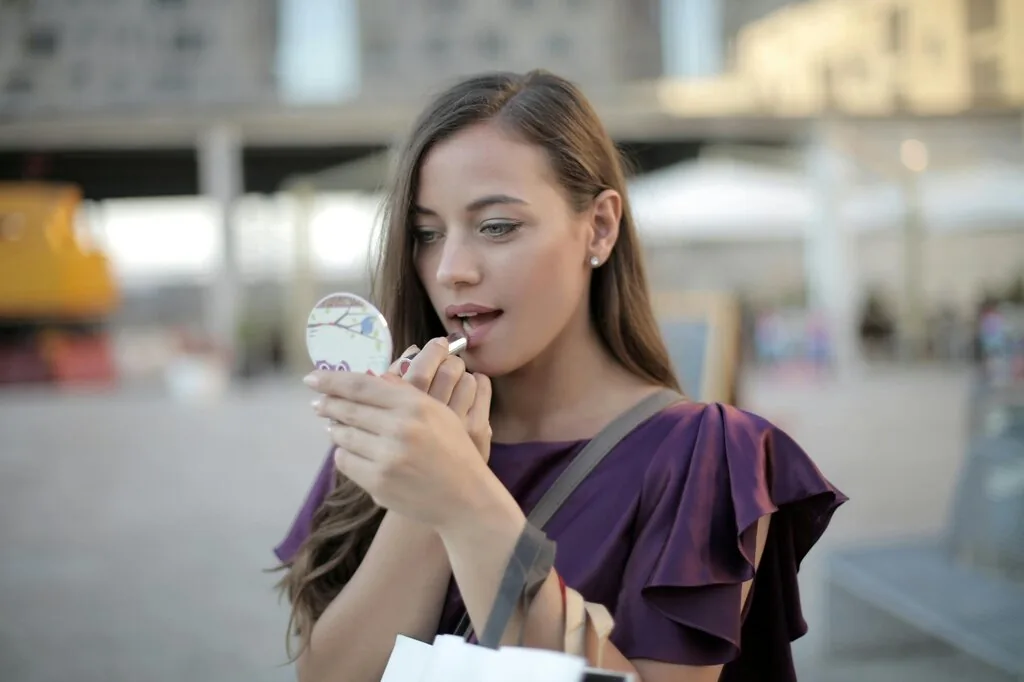
Every conference veteran carries a small hair kit, and it fits in a pouch no bigger than a phone. The essentials are simple: three bobby pins, one spare elastic, a small claw clip, a travel-size hairspray, a mini comb and a couple of blotting papers for the hairline. That is the whole kit, and it rescues almost any style that loosens during the day. Keep it in the front pocket of your conference bag, not buried under notebooks, because you will need it between sessions, not at the end of the day.
The best time for a touch-up is the coffee break between sessions, never during one. Step aside, check the back of your hair in a mirror or a phone camera, and fix only what has actually moved. A quick re-pin at the base of a bun, a mist of spray over the crown, or a fresh clip at the temples is usually enough. Avoid rebuilding the whole style mid-day: it takes too long, it rarely looks as good as the morning version, and you will miss the start of the next session. Small fixes, done early, keep a good style alive until the evening reception.
Matching Your Hair to Business Attire
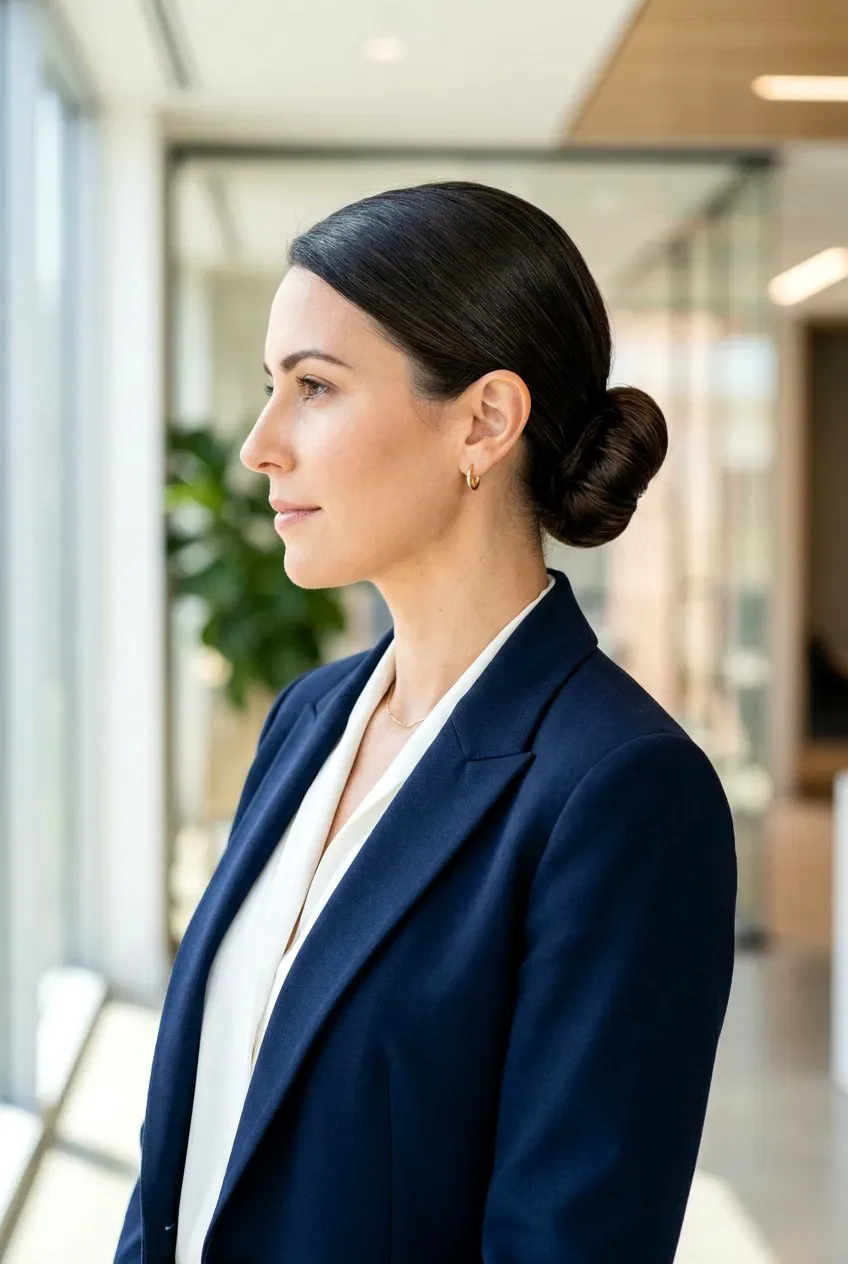
Hair and outfit work as a pair at a conference, and the wrong combination can throw the whole look off. A sharp, structured blazer pairs best with a clean, structured style: a sleek low bun, a smooth chignon or a polished ponytail. The lines match, and nothing competes with the tailoring. A softer outfit, such as a silk blouse or a knit dress, can carry a softer style, like pinned-back waves or a low textured bun, without looking untidy.
There are two practical rules worth remembering. First, keep hair off the collar of a blazer or a high-necked top, because hair rubbing against fabric all day creates frizz and leaves stray strands on dark material. A low bun or a tucked style solves this completely. Second, think about the badge and lanyard. Conference lanyards sit right where a long ponytail or loose hair falls, and hair tangled in a lanyard clip is a small misery that repeats all day. Wear the hair up and back, and the lanyard stays out of the way.
Conference Hair by Length: Short, Medium and Long
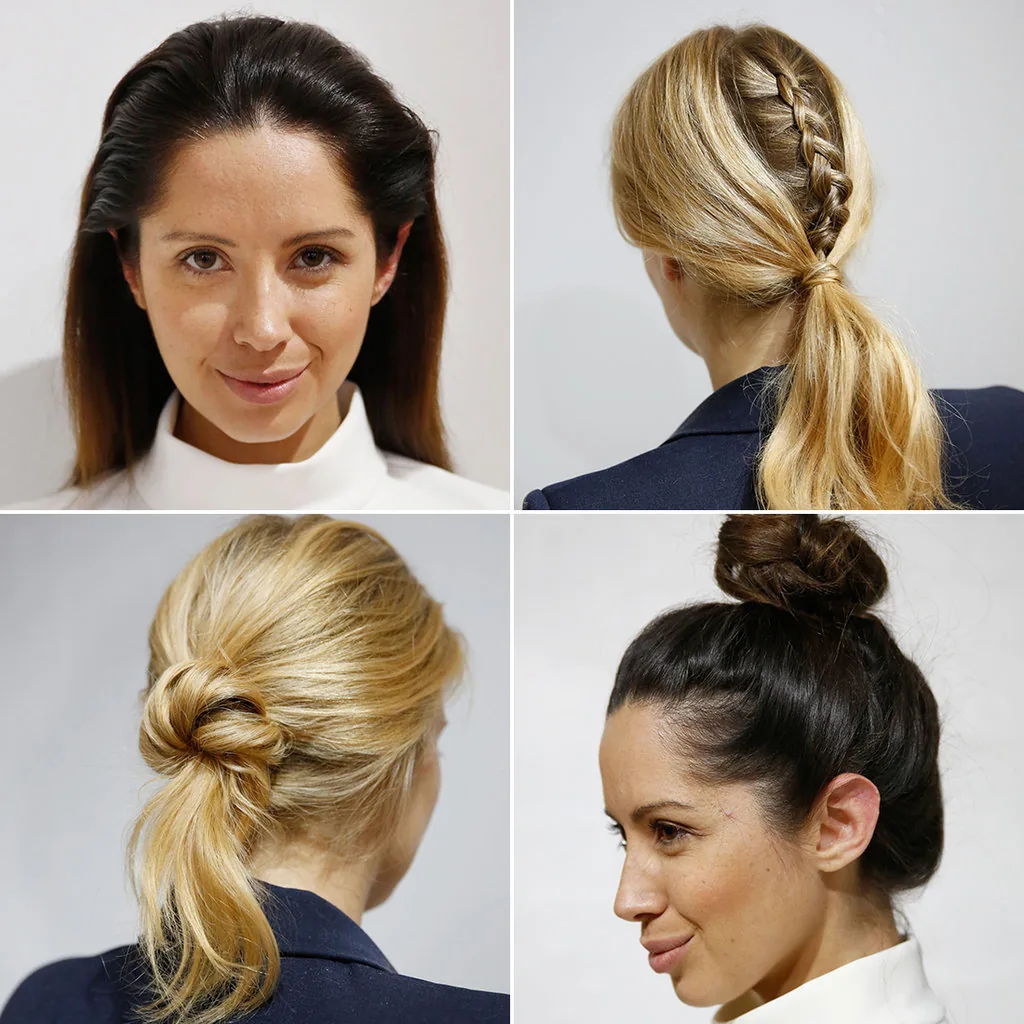
Short hair is the easiest conference hair there is. A polished pixie or a neat bob barely moves all day, it dries fast after a morning wash, and it photographs cleanly from every angle. The main job is the front: keep the fringe or face-framing pieces out of your eyes with a little styling cream or two flat clips, and the rest takes care of itself. A short style also pairs beautifully with statement earrings, which is a nice bonus for evening networking.
Medium hair is the most versatile length for a conference, since it can be worn up or down with equal polish. A lob worn sleek, a half-up twist or a low bun all work, and the length is short enough that nothing swings or tangles in a lanyard. Long hair needs the most planning, because the weight pulls styles down over a long day. Braid the hair first and then coil it, or choose a low bun with strong pins, and always do the lean-forward test before you leave. Whatever your length, the rule is the same: the style should feel secure at 9 a.m. and still feel secure at 9 p.m.
Day to Evening: Taking One Style from Keynote to Networking Drinks
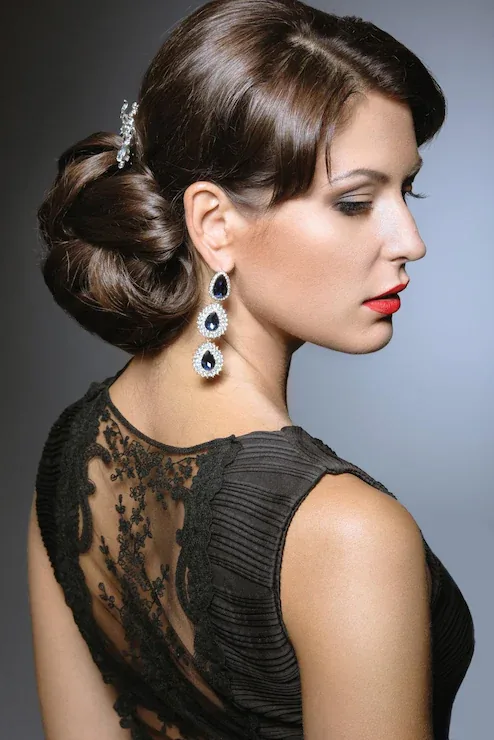
The smartest conference trick is not carrying two hairstyles, it is choosing one that can change its mood in five minutes. Start the day with a polished base, such as a low bun, a sleek ponytail or a smooth chignon, and keep it deliberately neat for the daytime sessions. Then, before the evening reception, make three small changes: loosen a couple of face-framing pieces, add a little texture or shine spray, and swap a plain pin for a decorative one or a slim gold clip.
The changes are small but the effect is real. Loosened pieces soften the outline, shine spray catches the evening light, and a single elegant accessory signals that the working day is over. If you wore your hair down during the day, the evening move is the opposite: sweep it up into a low bun or a twist, which instantly looks more formal. Either way, do the change in the restroom before the reception, not at the table. Five minutes of preparation buys you an evening of looking like you planned it all along.
The Sleek Low Bun
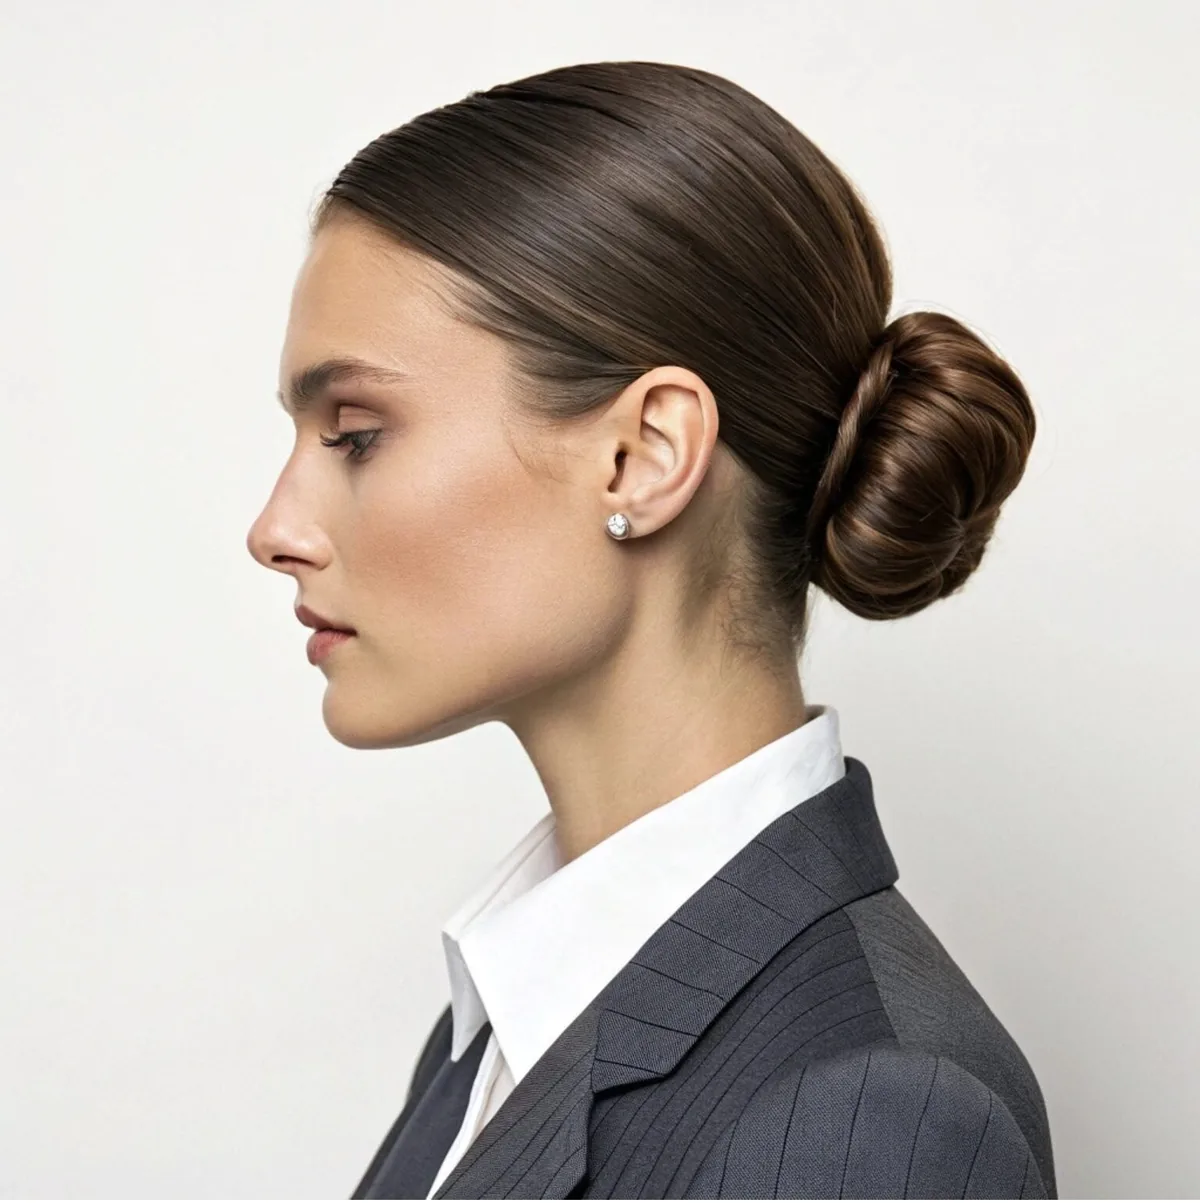
Best for: keynote speakers, panelists and anyone who will be photographed. The sleek low bun is the most reliable conference hairstyle there is: it sits at the nape, below the collar, so it never collides with a blazer, a lanyard or a chair back, and it looks identical at 9 a.m. and 9 p.m. It reads as deliberate and polished from every angle, which is exactly what you want when a camera is involved.
How to style: smooth the hair back with a little serum, gather it low at the nape and twist it into a flat coil. Pin the coil with U-shaped pins pushed in from opposite directions so they lock against each other, and finish with a medium-hold spray. If your hair is very thick, split it into two twists first and coil them together so the bun lies flatter against the head. Quick verdict: the conference default for a reason — simple, secure and flattering on every face shape.
Maintenance: a sleek low bun rarely needs attention during the day, but if it starts to sag after lunch, push one more pin through the centre of the coil rather than rebuilding it. A bun that sits low and flat also stays comfortable through hours of sitting, and it leaves the neck free so you stay cool in a warm conference hall.
The Polished Low Ponytail
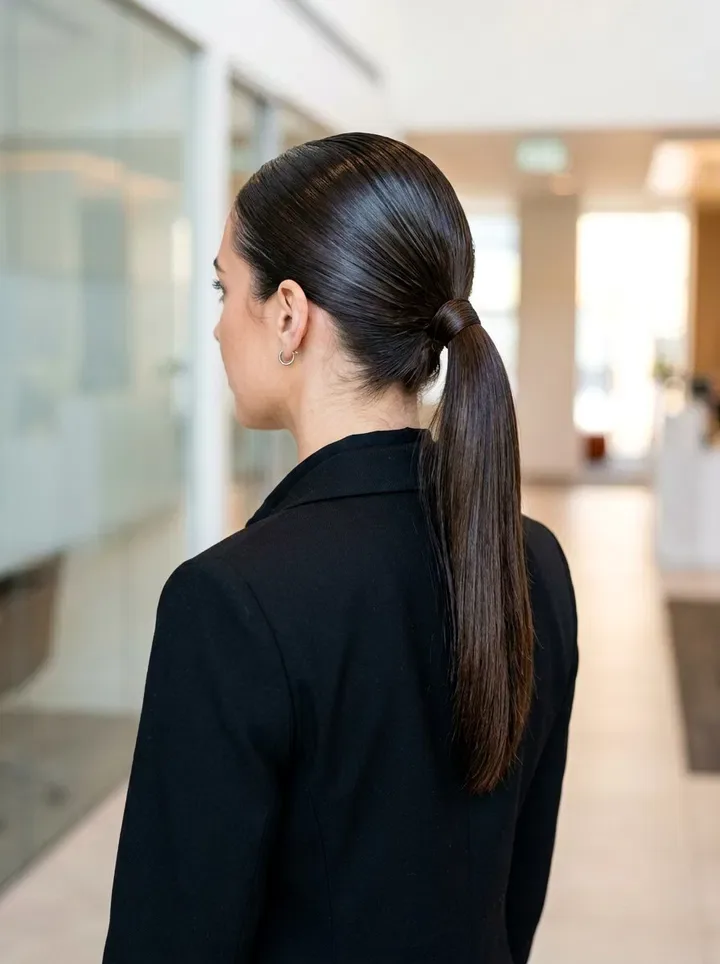
A low ponytail is the quiet professional of conference hair: understated, comfortable and far more polished than its reputation suggests, provided it is done properly. The key is the finish. A ponytail tied with a bare elastic and left to its own devices looks rushed; the same ponytail smoothed with serum, tied low at the nape and finished with a wrapped strand of hair looks like a deliberate choice. It suits almost every face shape and works with every hair type.
Pros and cons: it is gentle on fine hair, comfortable for twelve hours, and easy to redo in seconds between sessions. The trade-off is hold: a ponytail on very thick or heavy hair can slide down over the day, so anchor it with two crossed bobby pins above the elastic. Who should avoid it: anyone with waist-length hair, unless the tail is braided, because a long tail swings forward every time you lean over a table to take notes.
The Classic French Twist
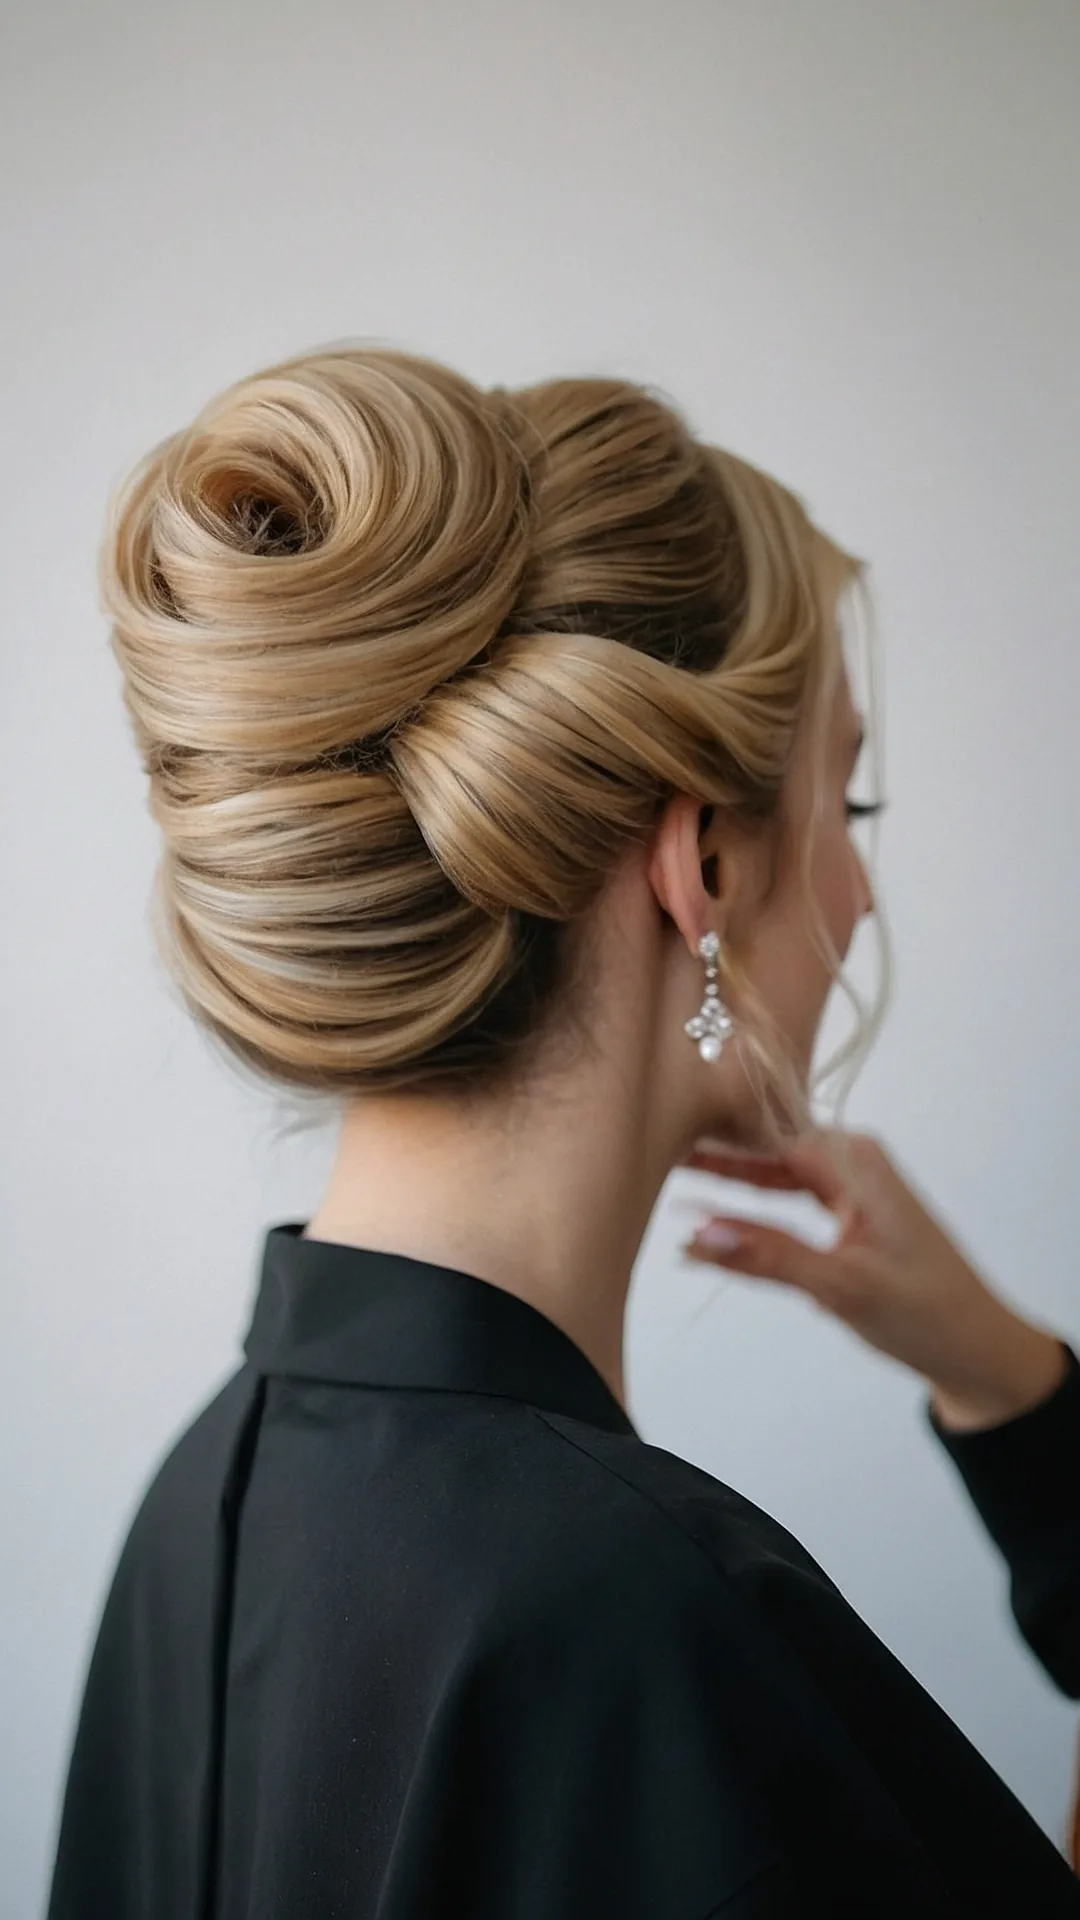
The French twist is the most elegant style in this guide, and it earns its place because it is also one of the most secure. The whole length of the hair is folded up and pinned vertically, so there is nothing to swing, nothing to dip into your coffee, and nothing to catch in a lanyard. It suits evening receptions and awards dinners as well as daytime sessions, which makes it a strong choice if you have one style for the whole day.
How to style: sweep the hair to one side, twist it upward against the head and pin it vertically with U-shaped pins, tucking the ends inside the twist. Common mistake: using flat bobby pins instead of U-shaped ones. A French twist needs pins that grip from both directions, so push them in from opposite sides until they lock. Cost and time: about five minutes once you have practised, and no tools beyond pins and spray.
The Smooth Chignon
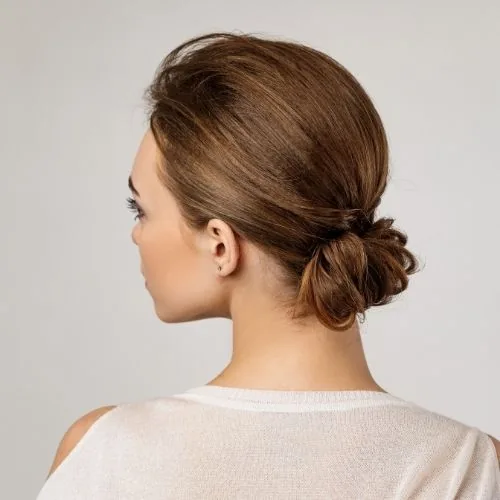
A smooth chignon is the French twist’s softer cousin: the hair is gathered low, rolled and pinned flat, giving a clean, rounded shape that photographs beautifully and never moves. It is the style to choose when you want to look polished without looking severe, and it pairs especially well with a tailored blazer or a silk blouse. Because the hair is contained in one smooth shape, it also holds up well under stage lighting, where flyaways show up fast.
Best for: medium to long hair, and anyone presenting on stage. Maintenance: a sleek style shows every stray hair, so carry a small comb and a couple of pins in your conference bag. If the chignon loosens, re-pin the base rather than rebuilding it, and a light mist of hairspray will reset the smooth finish in seconds. What to ask your stylist: ask for the chignon to sit low and flat, not high, so it clears the collar and the chair back.
The Half-Up Twist
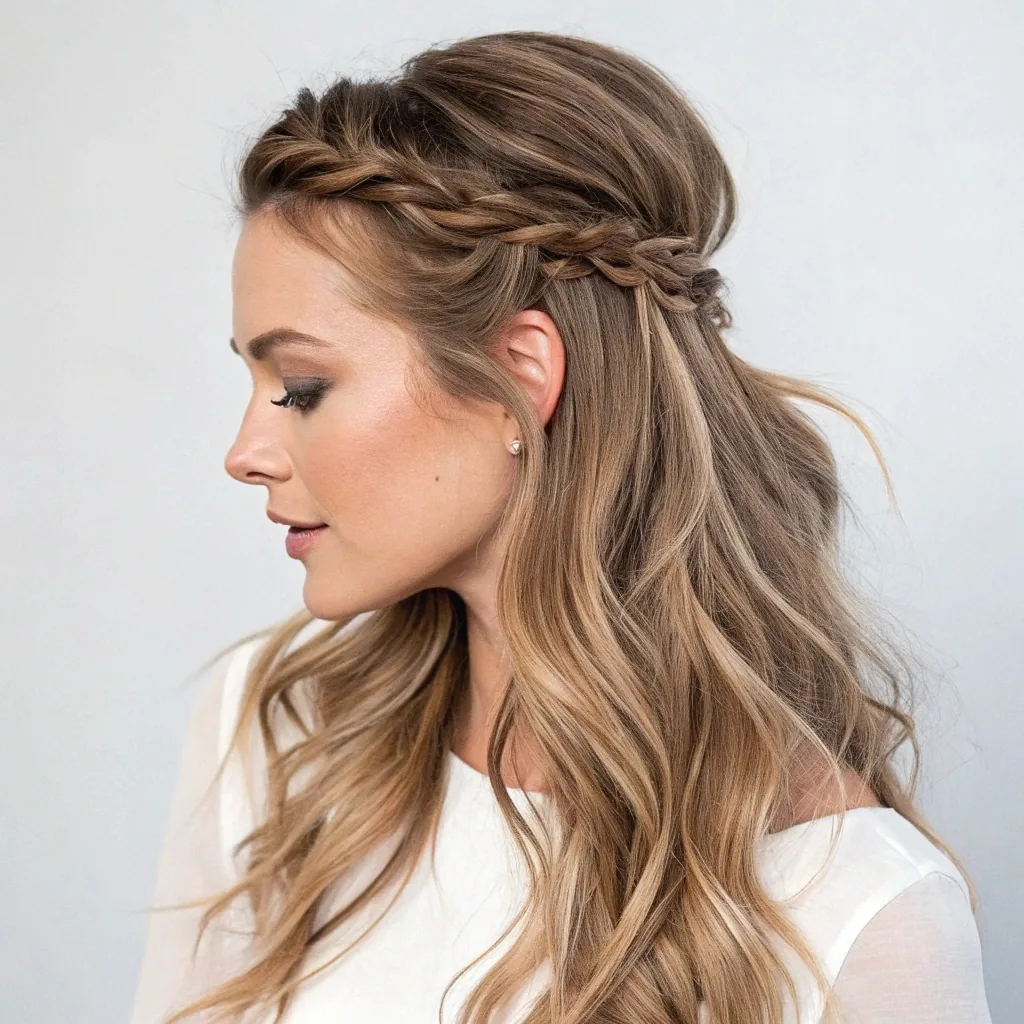
The half-up twist is the compromise style that works harder than it looks. The top half of your hair is twisted back and secured, keeping the front out of your face, while the bottom half stays loose and looks relaxed and approachable. It is a good choice for breakout sessions and networking, where you want to look friendly rather than formal, and it takes under two minutes to build.
Pros and cons: it keeps the front pieces out of your eyes and looks effortlessly stylish. The catch is the loose bottom half, which can still fall forward when you lean over a table. Who should avoid it: keynote speakers and anyone working at a laptop all day, since loose hair and leaning forward are a bad combination. If you love this look, save it for the networking sessions and choose a full updo for the stage.
The Side-Swept Blowout
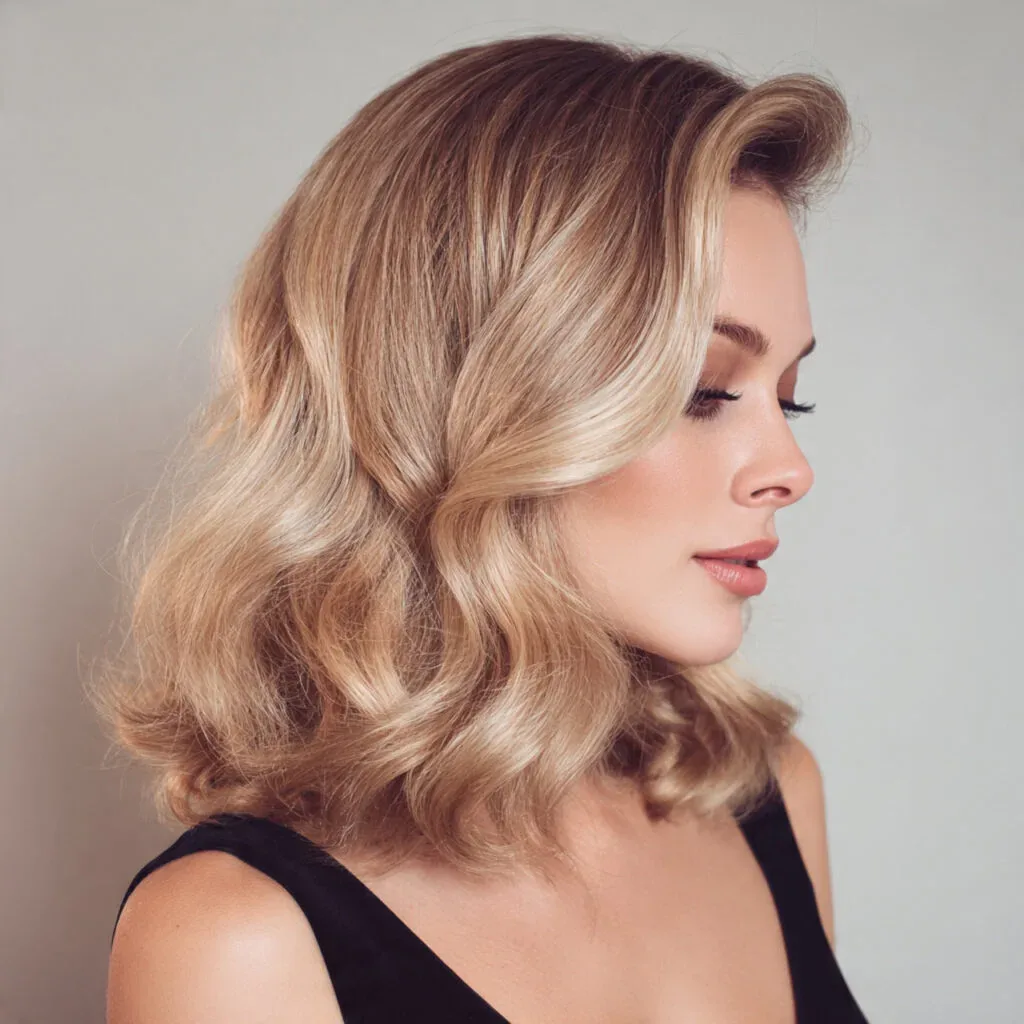
A side-swept blowout is the most camera-friendly loose style in this guide. The hair is blown out smooth with volume at the roots, then swept to one side, so it frames the face, moves naturally and looks fantastic in photographs. It is a strong choice for a panel discussion or a fireside chat, where you are seated and the camera is at eye level, and it gives a softer, more approachable impression than a tight updo.
How to style: blow-dry with a round brush, lifting at the roots for volume, then sweep the hair to one side and pin the top section flat with two crossed bobby pins hidden underneath. Common mistake: skipping the pins. Without them, the sweep collapses within an hour and the hair falls across your face. Time and cost: a salon blowout takes about 45 minutes and is worth booking the morning of the conference if you have a big presentation.
The Sleek Straight Lob
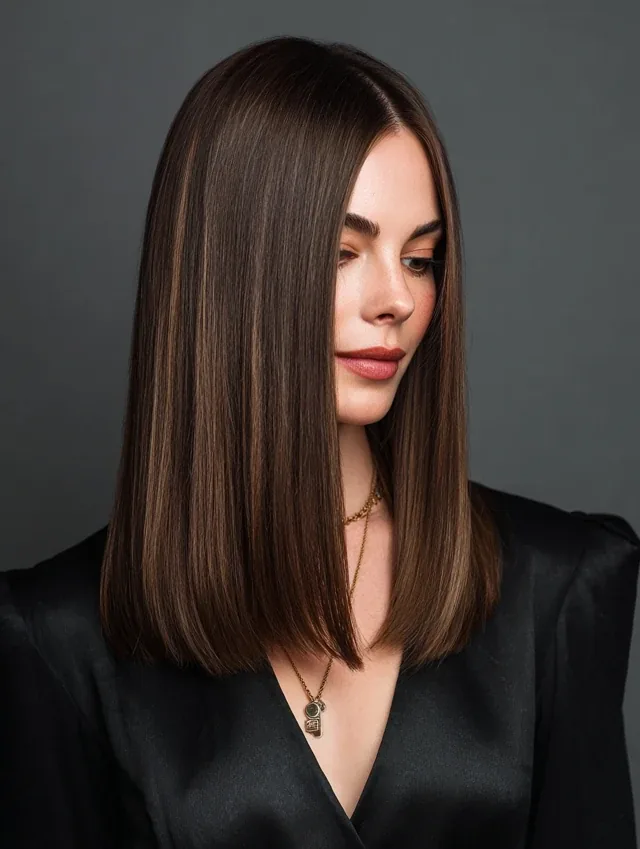
A sleek straight lob is one of the best haircuts for a regular conference-goer, because it is short enough to stay out of the way on its own and long enough to feel polished and versatile. Worn straight and smooth, it frames the face, stays clear of the collar and the lanyard, and needs almost no maintenance during the day. It is the lowest-effort style in this guide, and it looks good even after eight hours in a conference hall.
Pros and cons: no pins, no elastics, no mid-day fixes, and it dries quickly after a morning wash. The only catch is the front pieces, which can fall forward when you lean in to read a name badge or a document. A little styling cream at the roots keeps them in place. Quick verdict: if you are thinking of cutting your hair shorter before conference season, this is the cut to ask for.
The Soft Low Chignon with a Centre Part
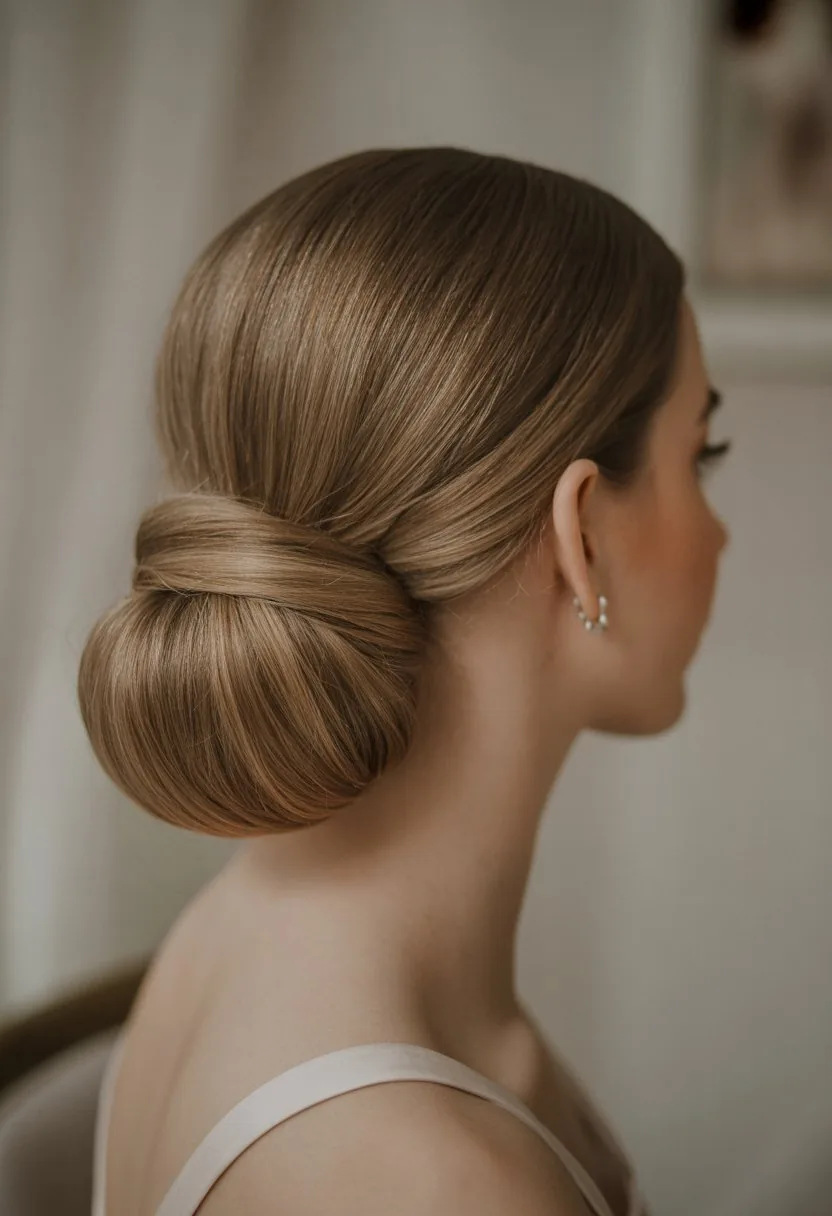
This is the chignon for people who find a sleek updo too severe. A centre part softens the face, the chignon itself is kept slightly loose and textured, and a few fine pieces are left free at the temples. The result looks polished but human, which is a good balance for a conference: professional enough for the stage, approachable enough for the coffee queue.
Best for: round and oval faces, where a centre part adds symmetry and length. How to style: part the hair in the centre, smooth the sides back with a little cream, and roll the lengths into a low, loose chignon, pinning it flat at the nape. Common mistake: leaving the face-framing pieces too long. Anything that reaches past the chin will fall forward during the day, so keep those pieces short and pin them back if they start to escape.
The Braided Low Bun
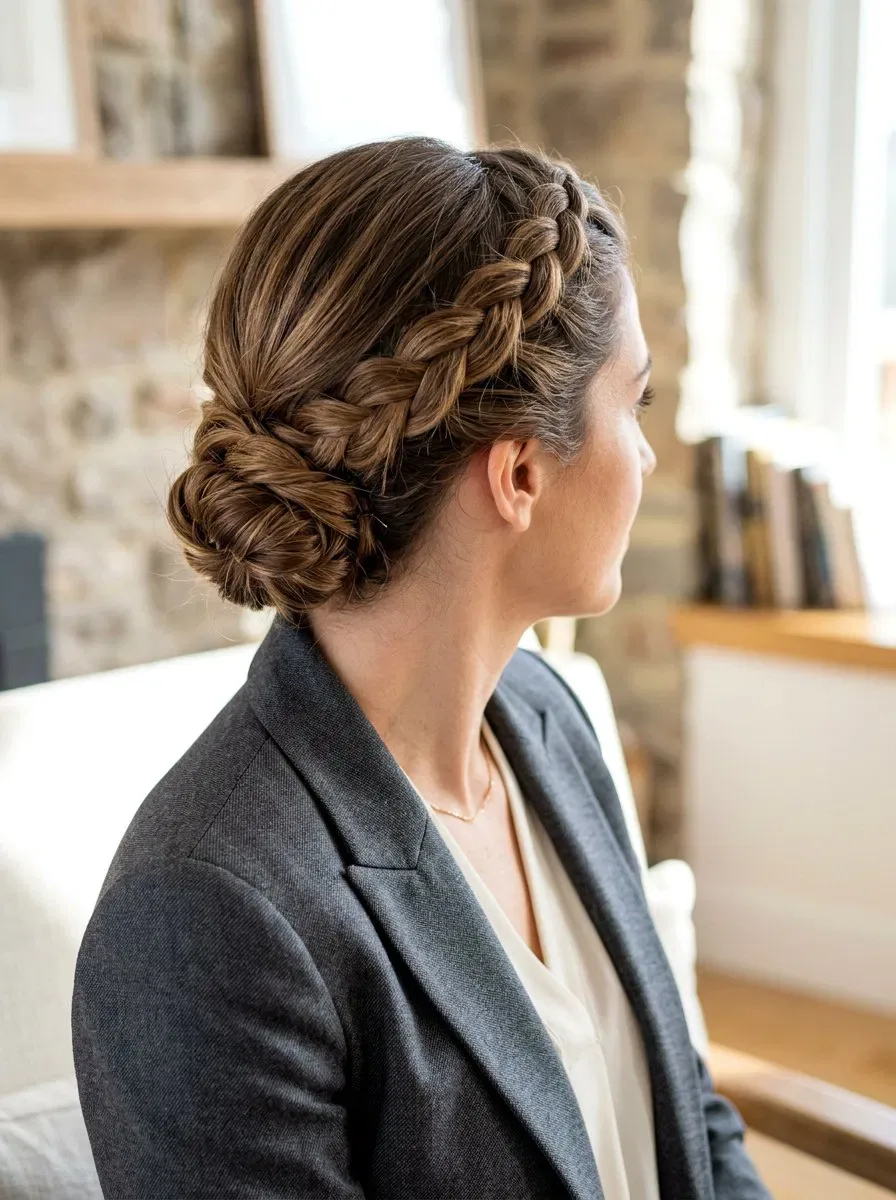
This style combines the two most reliable conference techniques, a braid and a bun, into one. You braid the hair first, then coil the braid into a low bun, so the hair is locked twice over. It is the style to choose for a multi-day conference, a long workshop or any day when you will not get a proper break to fix your hair, because it genuinely does not move.
Best for: long or thick hair that escapes from ordinary buns. The braid stops the bun from unravelling, and the bun stops the braid from swinging. Maintenance: almost none, which is the point. Cost and time: about five minutes to build, and it repays that investment by never needing a mid-day fix. If you can only master one style before a conference, make it this one.
The Wrapped Ponytail
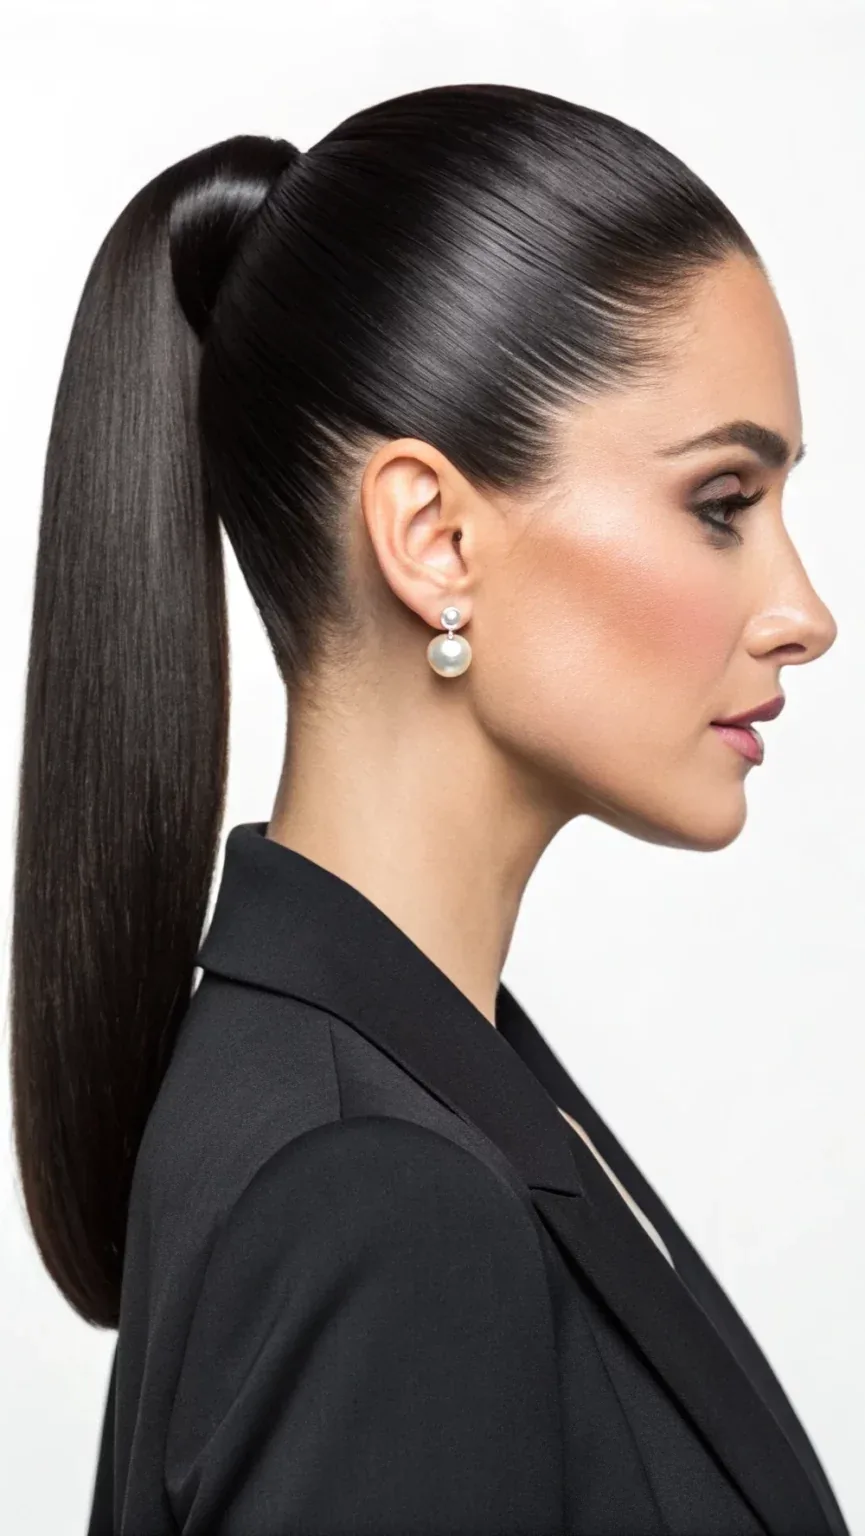
Take a low ponytail and wrap a strand of hair around its base instead of leaving the elastic bare, and you have a style that looks far more considered than the effort it took. The wrapped strand anchors the ponytail, stops the elastic from sliding down as the day goes on, and adds a small, polished detail that shows up in photographs. It is one of the easiest upgrades in this guide.
How to style: tie the ponytail low, take a thin strand from underneath, wrap it around the elastic two or three times and pin the end underneath with a bobby pin. Pros and cons: comfortable for hours, gentle on the hair, and easy to redo in seconds. The trade-off is the same as any ponytail: a long tail can swing forward, so braid the tail if your hair passes your shoulders. Quick verdict: the best five-minute upgrade for anyone who wears a ponytail to work.
The Voluminous Blowout
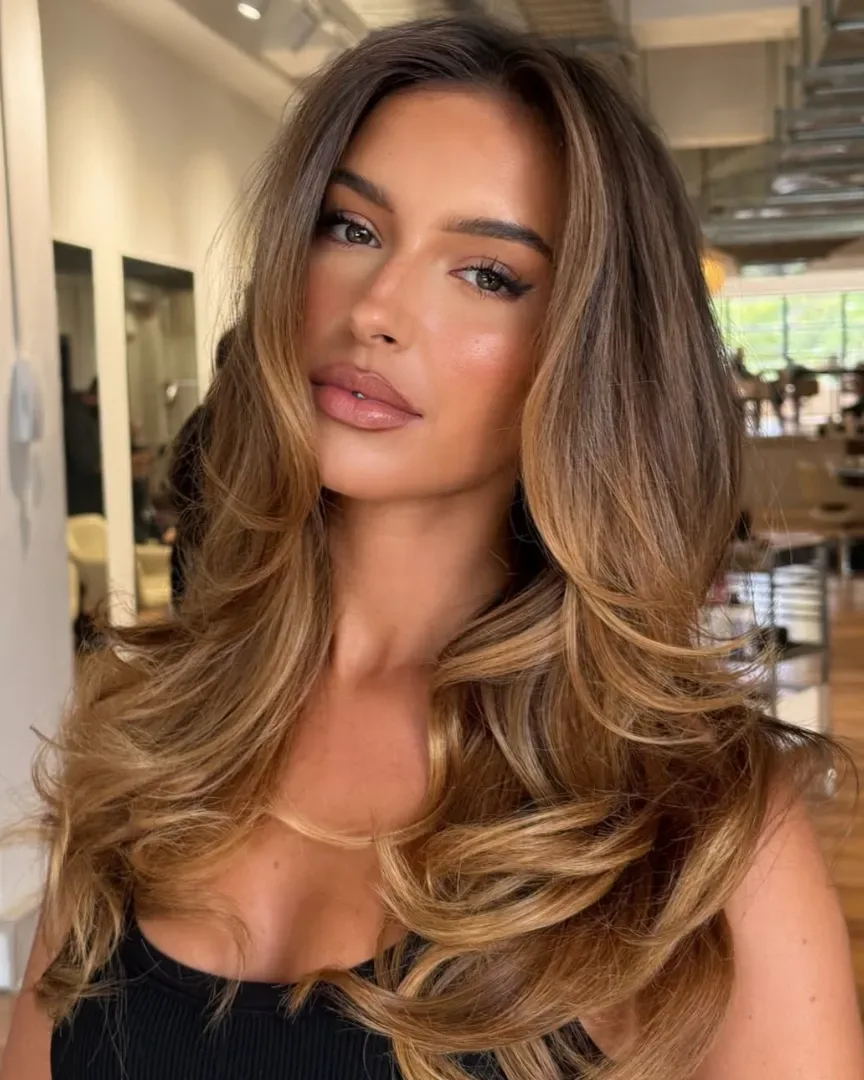
A voluminous blowout is the power hairstyle of the conference world: big, smooth, shiny hair that reads as confident from across the room and photographs beautifully. It is the style to book when you are the keynote speaker, the host or the person everyone will be looking at, because it carries presence in a way no updo can. The volume also holds up well on camera, where flat hair can disappear against a dark background.
How to style: blow-dry in sections with a large round brush, lifting at the roots, then set the volume with rollers or a cool shot from the dryer while the hair is still warm. Maintenance: volume drops over a long day, so carry a travel-size texturising spray and revive the roots with a quick lift and mist at the afternoon break. Who should avoid it: anyone presenting outdoors or in a humid venue, where the volume will collapse within an hour no matter what you do.
The Textured Low Bun
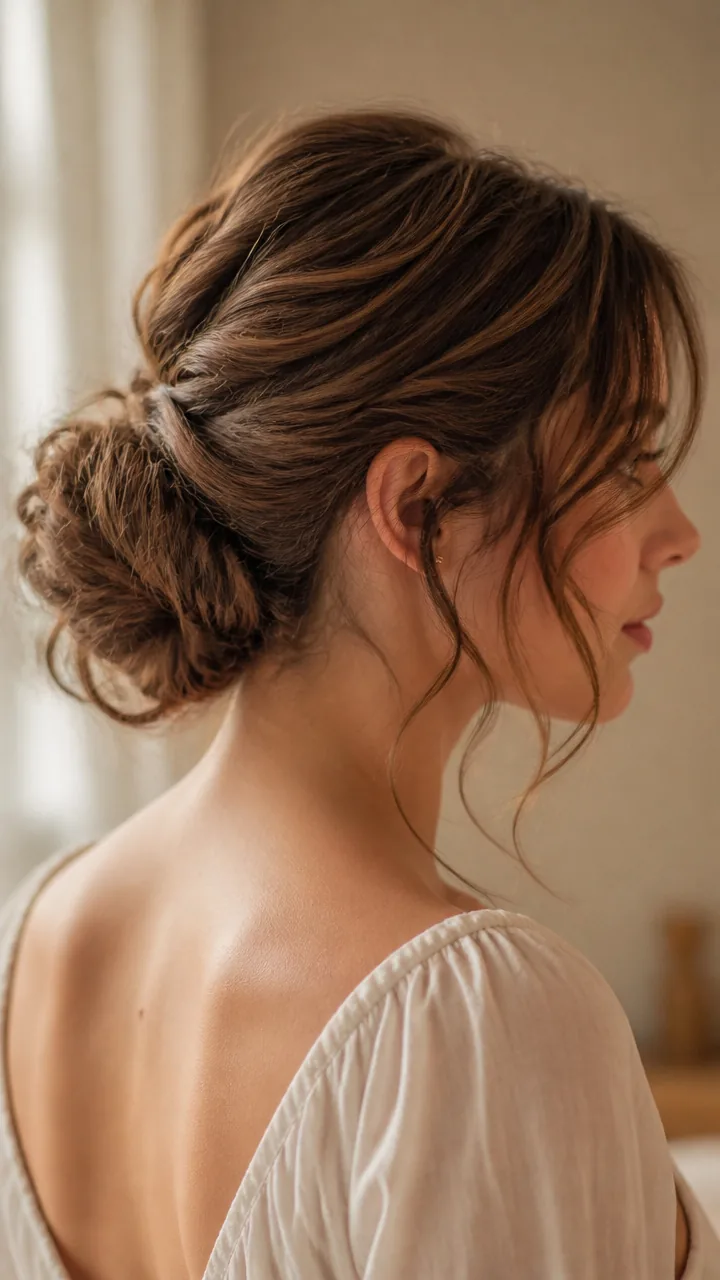
A textured low bun is the softer sister of the sleek low bun. Instead of smoothing every strand flat, you add a little texture first, with a texturising spray or a gentle backcomb, and then gather the hair into a low bun that keeps a soft, lived-in shape. It looks less severe than a sleek bun, which makes it a good choice for creative industries and for networking sessions where you want to look approachable.
Best for: fine hair, where texture adds grip and stops the bun from sliding out. How to style: mist the hair with texturising spray, gather it low and twist it loosely, pinning the coil with U-shaped pins and leaving a few soft pieces at the temples. Common mistake: adding too much texture, which makes the bun look messy rather than soft. One light mist is enough; the bun should still read as intentional, not accidental.
The Elegant Top Knot
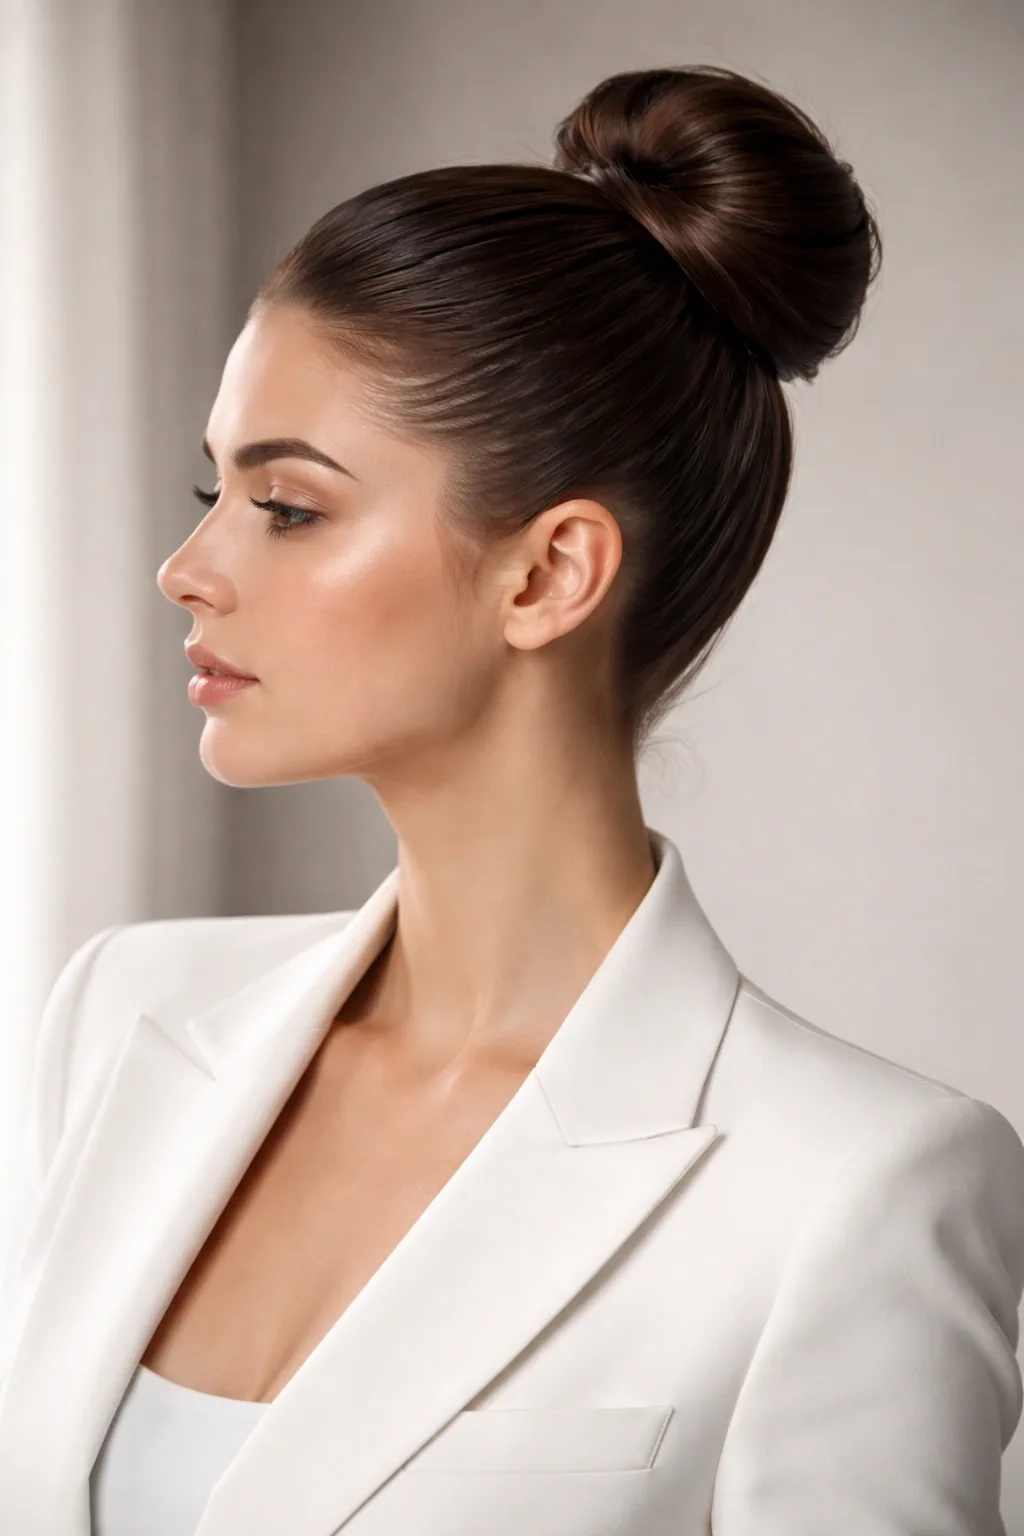
A top knot can look too casual for a conference, but done properly it is one of the most polished styles in this guide. The difference is in the finish: smooth the hair back with serum, place the knot high and centred, and wrap it neatly so there are no stray loops or flyaways. Worn this way, it looks deliberate and chic, and it keeps the neck cool in a warm conference hall.
Pros and cons: it keeps the hair completely out of the way, it takes under a minute, and it suits every hair type. The downside is the chair back: a high knot presses against a headrest during long seated sessions, so this style suits standing networking and short talks better than an all-day panel. Who should avoid it: anyone sitting for hours at a time. For seated sessions, drop the knot lower and it becomes a low bun instead.
The Side Part Bob

A side part bob is the classic professional haircut for a reason. The deep side part adds instant polish and a little asymmetry, which photographs well and frames the face, while the bob itself is short enough to need no pinning, no tying and no mid-day rescue. It is the style for the conference-goer who wants to think about her hair as little as possible.
Maintenance: almost none. Cost and time: a bob needs a trim every six weeks to keep its shape, but daily styling takes under five minutes with a round brush or a flat iron. What to ask your stylist: ask for the part to be cut in, so the hair naturally falls to one side, and for the ends to be slightly blunt, which sit more neatly than heavily layered ends. If your bob is growing out and the ends start brushing the collar, switch to a low ponytail for conference days until your next trim.
The Curly Low Ponytail
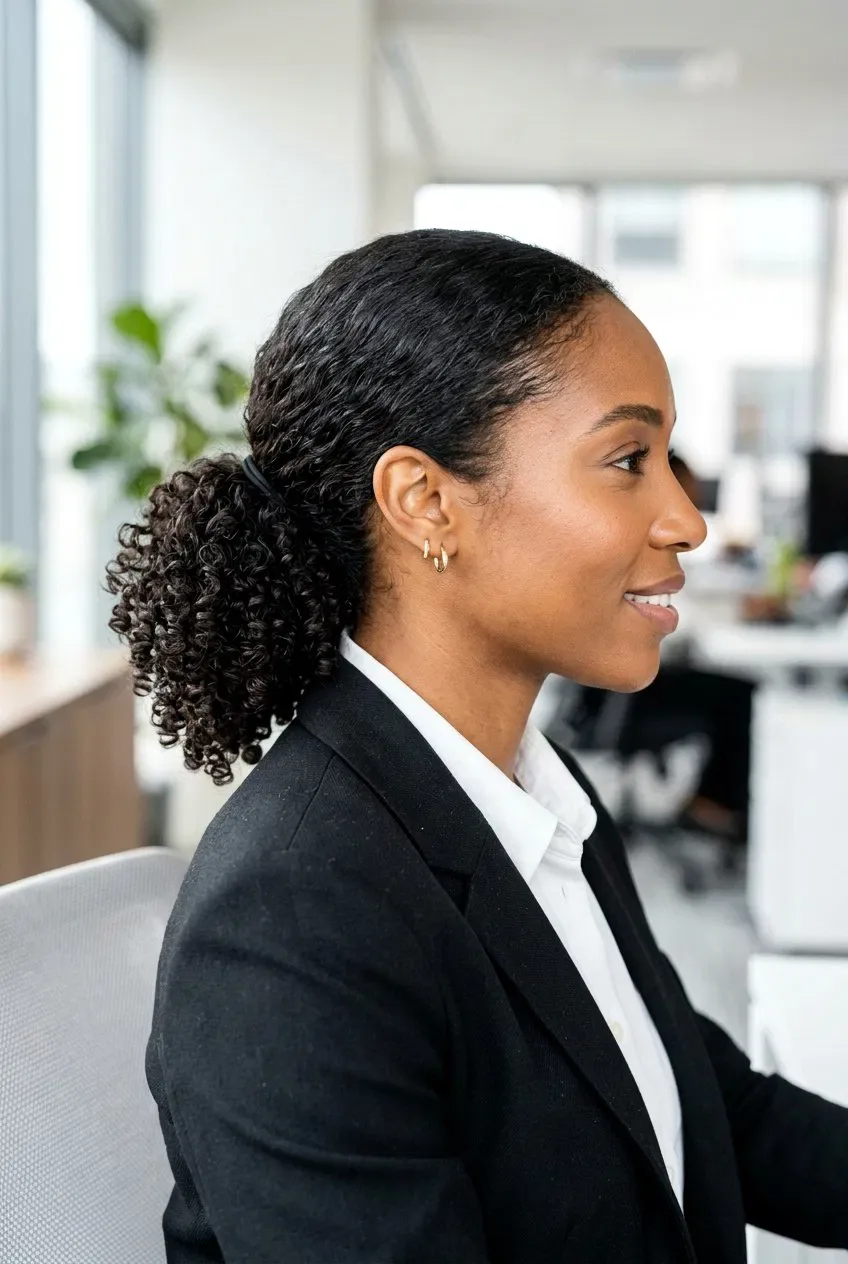
Curly hair and long conference days can be a difficult combination, because curls expand in warm rooms and frizz under stage lights. A low ponytail solves both problems: the curls are gathered into one contained shape at the nape, away from the face, and the curl pattern itself is protected, since the hair is not being pulled flat or crushed under a blazer collar.
How to style: smooth the front with a little curl cream, gather the curls low and secure them with a satin scrunchie, which is gentler on curls than a plain elastic. Maintenance: a silk scarf over the top during travel adds frizz protection, and a quick refresh with water and leave-in conditioner at the afternoon break revives the curls without a full restyle. Common mistake: using a tight elastic, which stretches the curl pattern and leaves a dent. Keep it loose and let the curls do the work.
Pinned-Back Waves
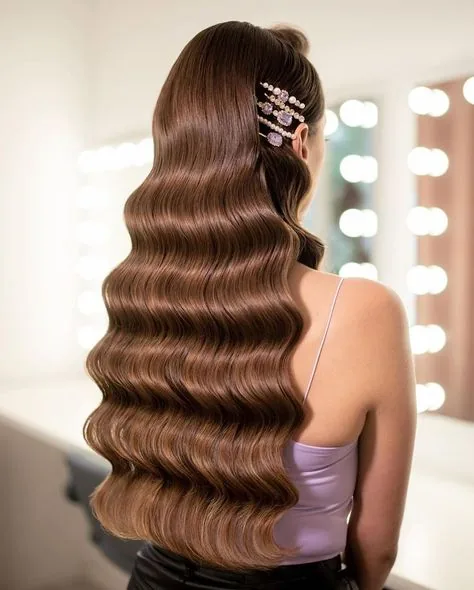
Pinned-back waves look soft and confident, and with the right pinning they can work all day at a conference. The key is to pin the waves back on both sides, so the hair sweeps away from the face but keeps its movement, rather than falling forward every time you lean over a table. It is a good choice for networking and breakout sessions, where a softer look helps you seem approachable.
Who should avoid it: keynote speakers and anyone presenting on a stage, since loose waves and bright lights are a bad combination for frizz. How to style: create soft waves with a large-barrel iron, then pin the top sections flat behind the ears with two crossed bobby pins on each side, and mist with a flexible-hold spray so the waves can move without falling. Save this one for the sessions where you are mostly listening, not presenting.
The Sophisticated French Braid
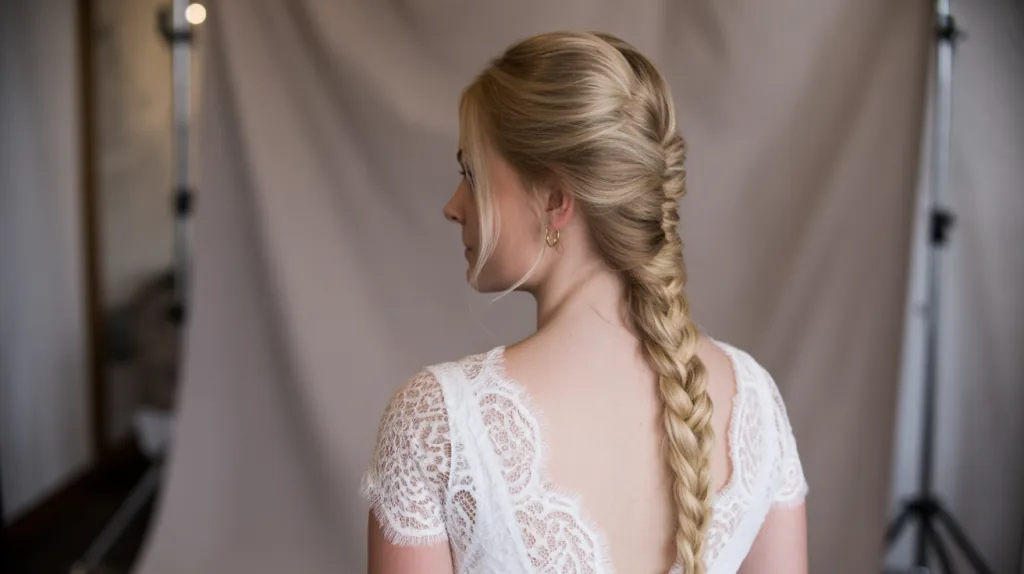
A French braid is the hardest-working braid in the professional world because it locks the hair to the scalp from the crown down. Nothing hangs loose, nothing swings forward when you lean over a table, and the braid itself gets more secure the longer you wear it. Worn low and neat, with no loose pieces, it reads as polished and intentional rather than casual, which is exactly the line a conference braid needs to walk.
Best for: long hair, and anyone who hates ponytails. The braid suits round and oval faces especially well, since it adds height at the crown. Common mistake: braiding too loosely at the top, which lets the crown puff out and look untidy by the afternoon. Start tight at the hairline and ease off only near the ends. Maintenance: if the braid loosens by the end of the day, you can re-braid just the last few inches without undoing the whole thing.
The Low Twisted Bun
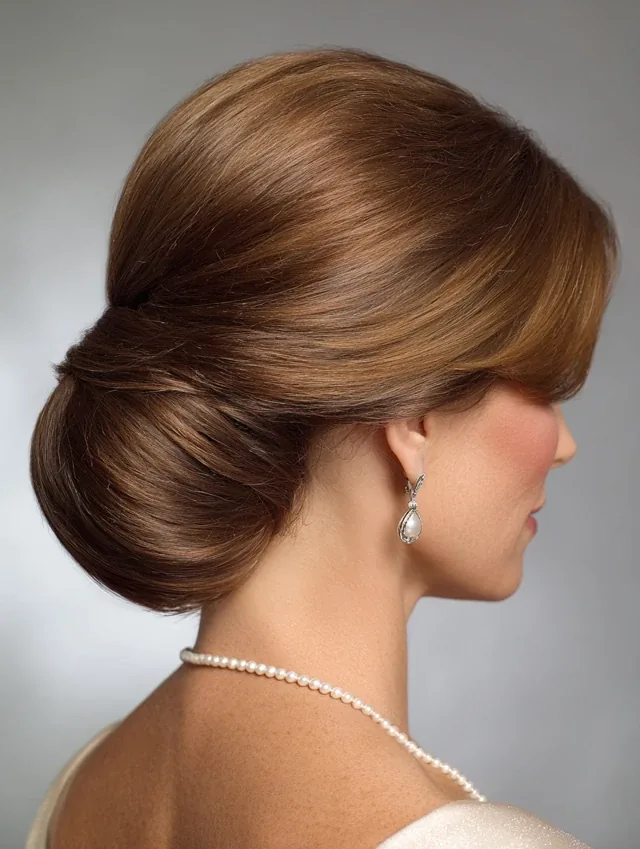
A low twisted bun is the softer sister of the classic low bun. Instead of coiling the hair, you twist two sections around each other and pin the twist low at the nape. It has a lovely, rope-like texture that looks more interesting than a plain bun, and the twist itself grips the hair, so it holds even on smooth, fine hair that usually slips out of pins.
How to style: part the hair, twist each side towards the back, cross the twists over each other and pin the ends underneath. Common mistake: twisting too loosely at the nape, which lets the bun sag by the afternoon. Keep the first twist firm, and the rest will follow. A single U-shaped pin through the centre of the twist is worth more than five pins around the edge. Quick verdict: a quietly elegant choice that holds better than it looks like it should.
The Sleek High Bun
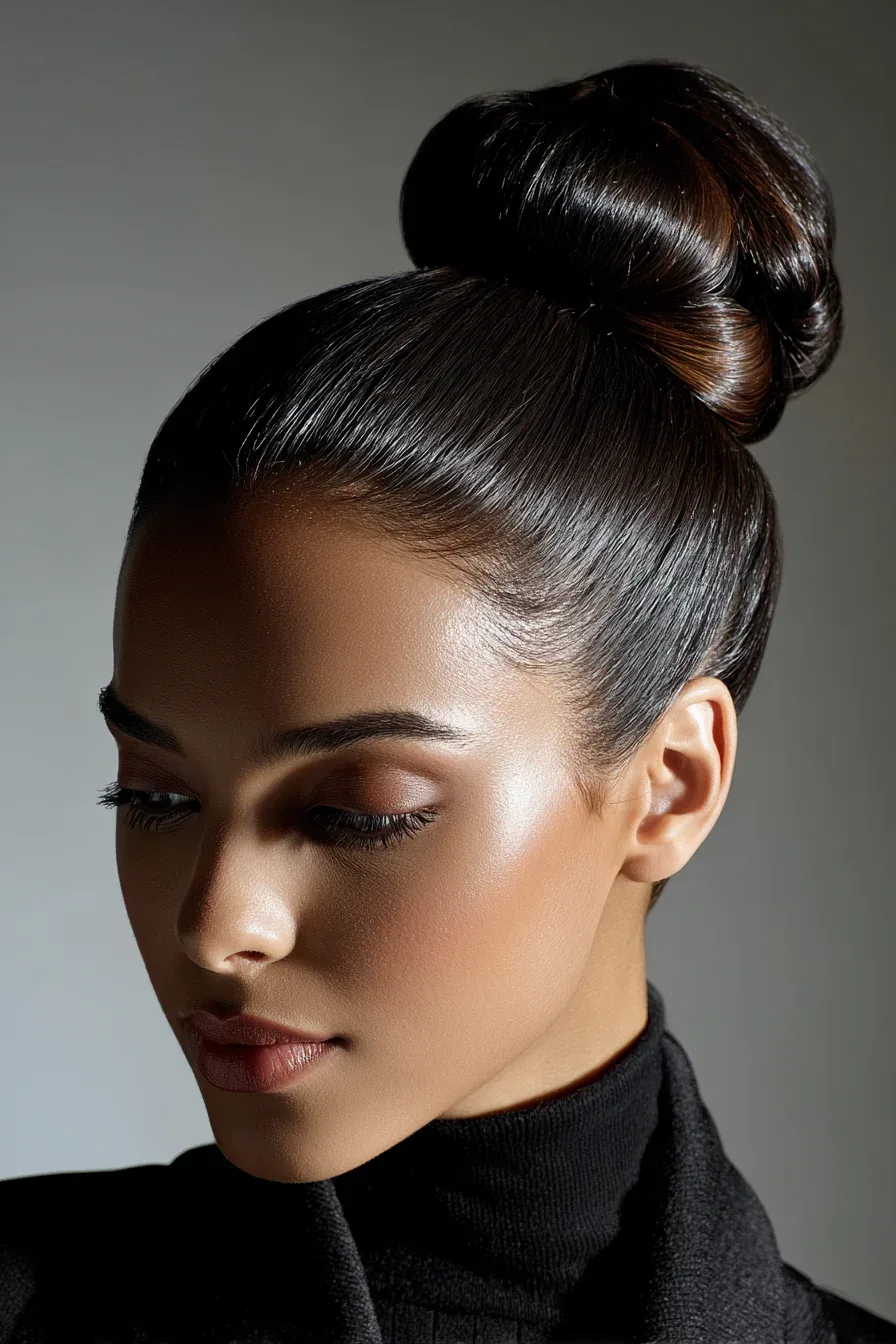
A sleek high bun is the most striking updo in this guide: the hair is smoothed back and gathered high, giving a clean silhouette that looks sharp from the front row and photographs beautifully. It is a strong choice for a presentation or a keynote, where you want to look commanding, and it keeps the neck completely free, which is a relief in a warm hall.
Pros and cons: it keeps the hair fully out of the way, it takes two minutes, and it suits every hair type. The downside is comfort during long seated sessions: a high bun presses against a chair back, so save it for days when you are mostly standing, presenting or networking. What to ask for: a bun that sits high but slightly back, not right on top of the head, so it clears the headrest and does not pull at the hairline.
The Classic Blowout with Curtain Bangs
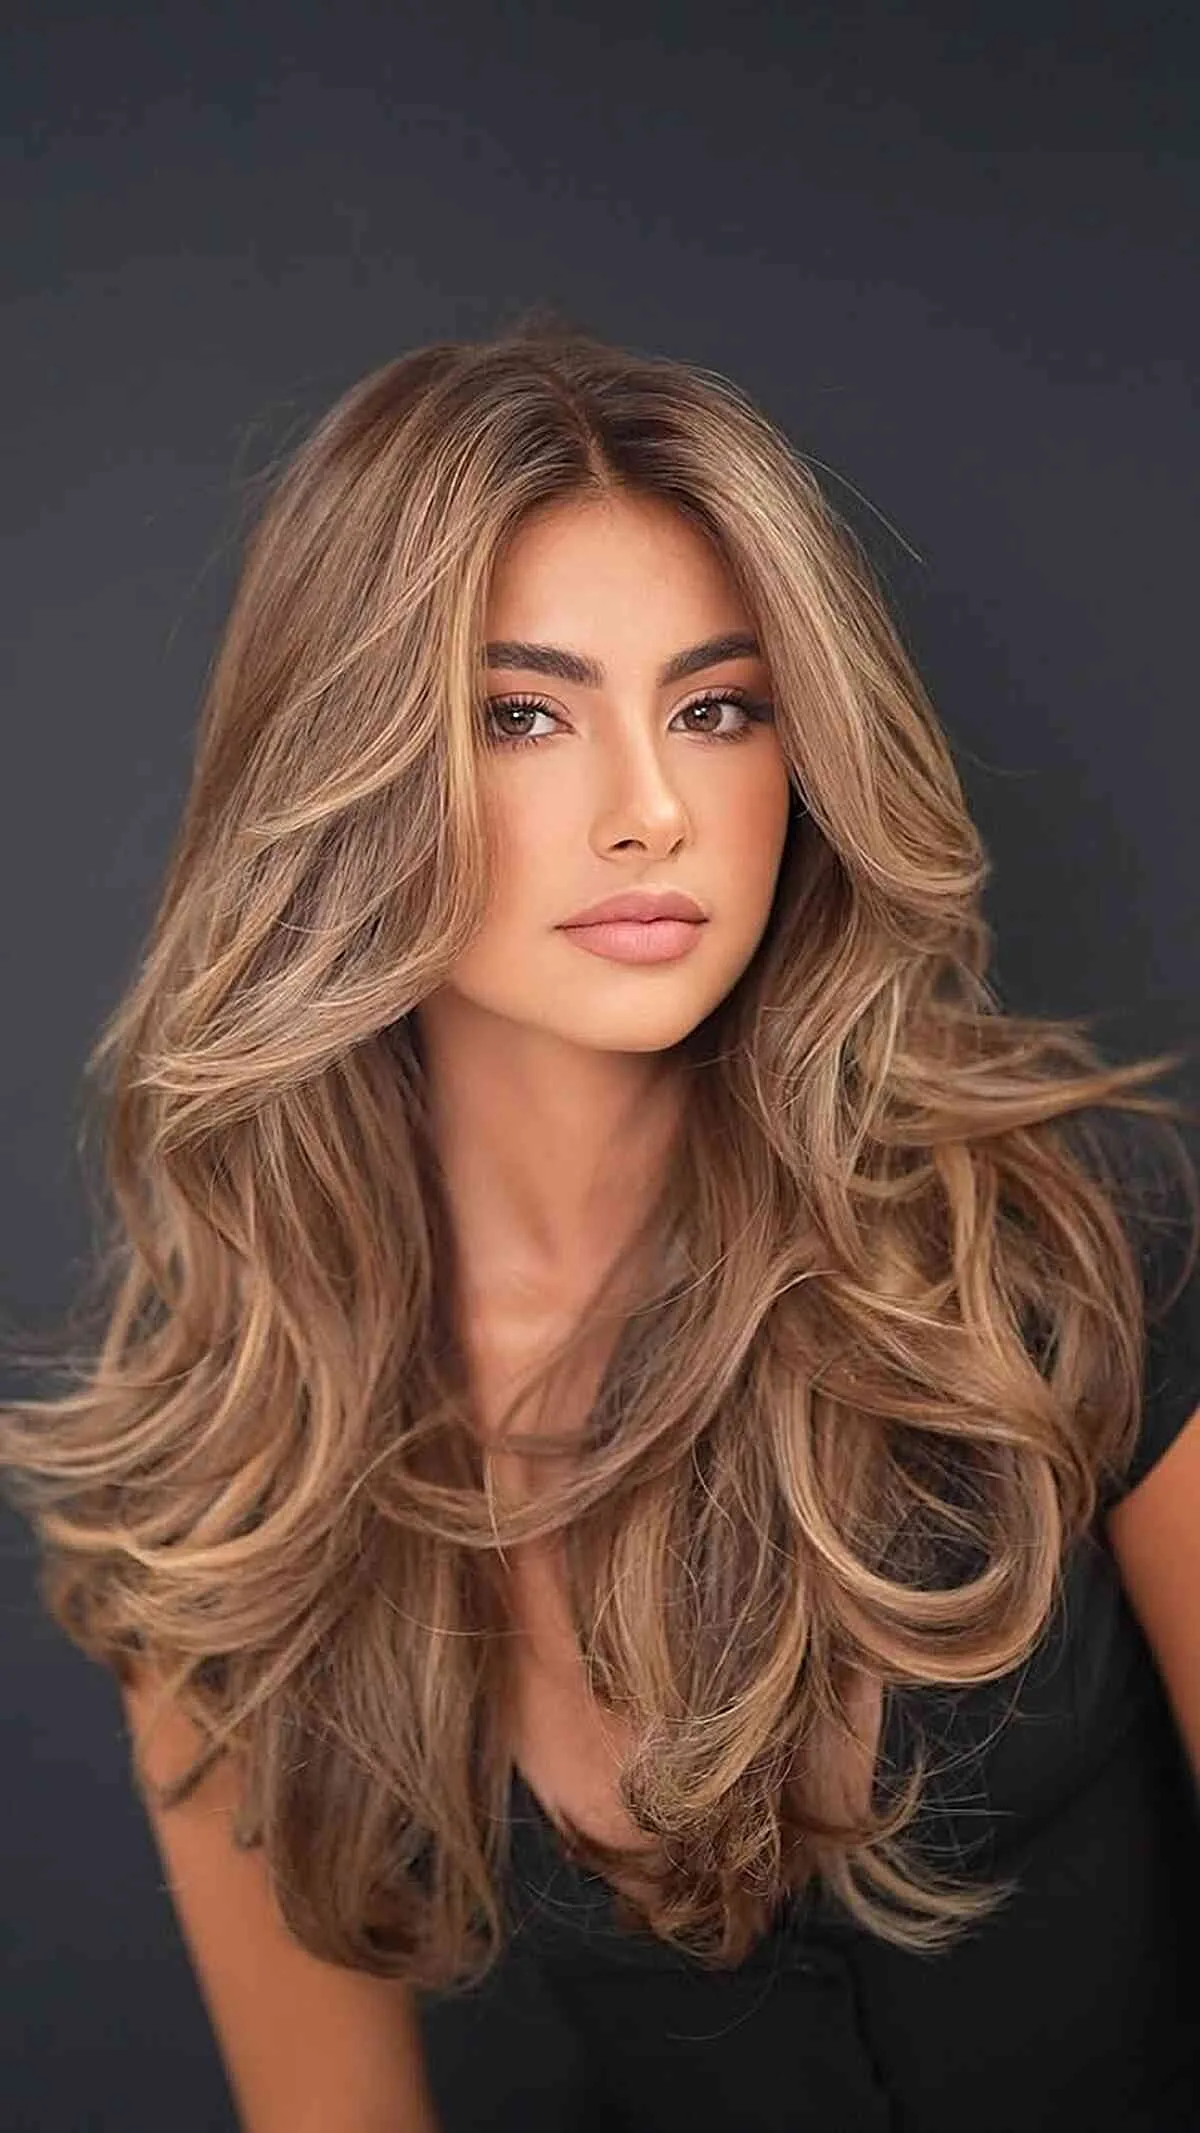
Curtain bangs are the friendliest fringe for a conference, because they frame the face without ever falling into your eyes. Paired with a classic blowout, they give the hair a soft, finished shape that looks great on camera and in person, and they hide a multitude of sins, from a tired forehead to a hairline that needs a little help after a long flight.
Best for: medium to long hair, and anyone who wants a fringe without the commitment of a straight-across cut. How to style: blow-dry the bangs forward with a round brush, then sweep them to either side of the centre part, and blow the rest of the hair out smooth. Maintenance: curtain bangs need a quick brush-through at the afternoon break, so keep a small brush in your bag. If they start to separate, a mist of dry shampoo at the roots will revive them in seconds.
The Half-Up Claw Clip
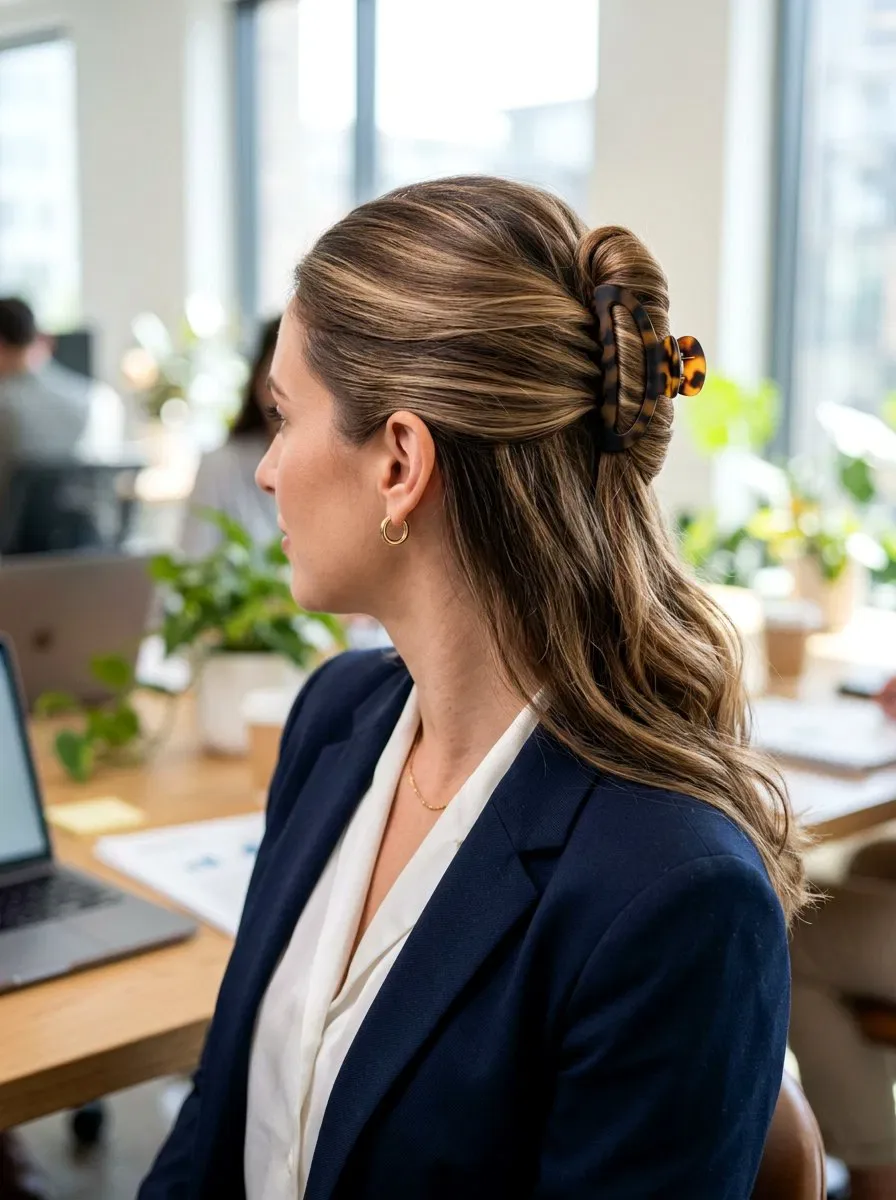
A claw clip has no business looking this professional, and yet it does. Gather the top half of your hair, twist it once and clip it, and you have a style that keeps the front out of your face while the rest stays loose and relaxed. It is the fastest style in this guide, taking under a minute, and it is the easiest to redo between sessions, which matters when you have a ten-minute coffee break and a full afternoon ahead.
Cost and time: one good claw clip costs very little and lasts for years. What to ask for: a matte clip in a neutral colour, such as tortoiseshell or black, rather than a bright or glittery one, since a neutral clip reads as a deliberate accessory and a bright one reads as casual. Common mistake: using a clip that is too small, which pops open halfway through the afternoon. Choose a clip that spans the full width of the gathered section.
The Subtle Braided Crown
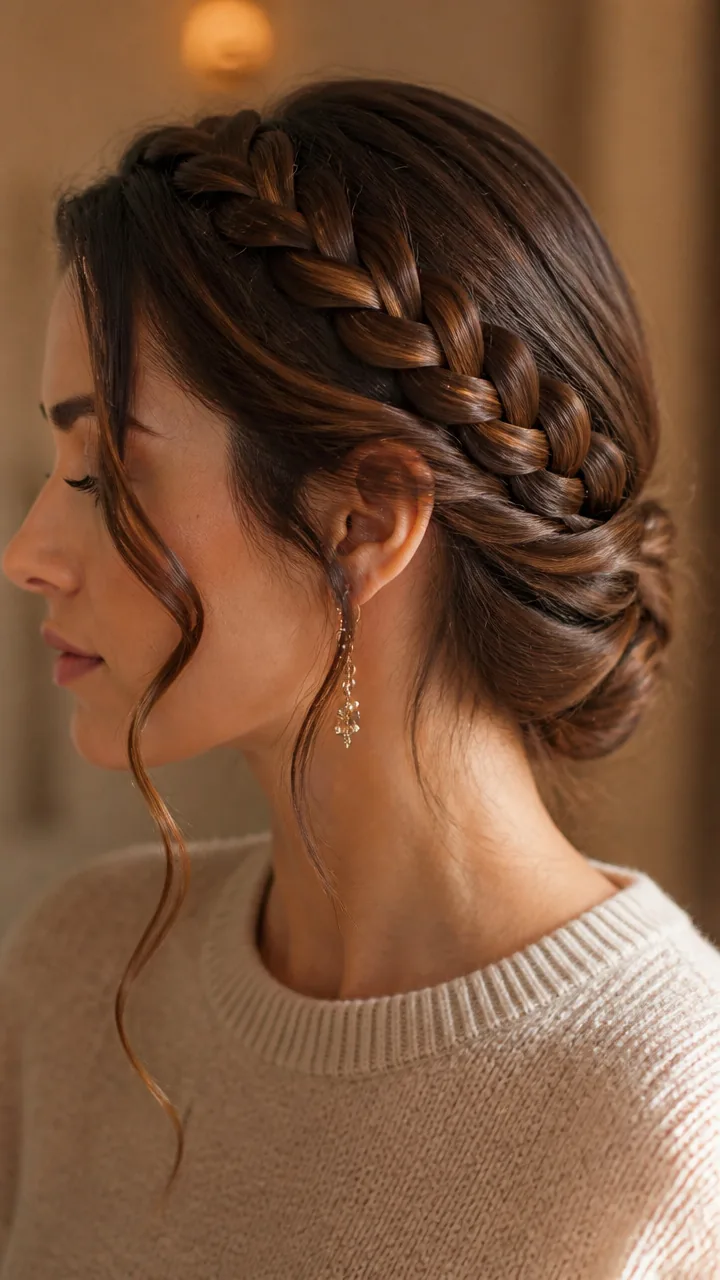
A braided crown wraps the hair around the head like a halo, so there is no tail, no swing and nothing to fall forward. Done subtly, with a single slim braid and no flowers or volume, it reads as polished and a little bit distinctive, which makes it a good choice for a creative-industry conference or an evening reception where you want to stand out without looking overdone.
Best for: medium to long hair, and for anyone whose single bun always slides to one side. Common mistake: braiding the crown too loosely so it slides down over the ears by the afternoon. Braid it snugly against the scalp and pin the join at the back with two crossed pins. Maintenance: if you have very thick hair, split it into two braids and wrap them in opposite directions: the crown will lie flatter and feel lighter on your head.
The Straight and Sleek Midi
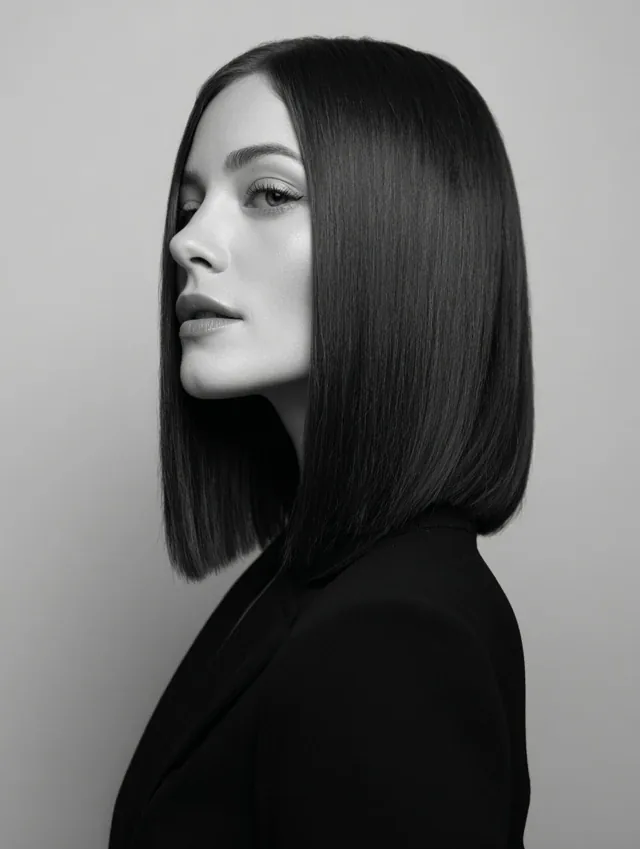
A straight, sleek midi cut is the minimalist’s conference hairstyle: shoulder-grazing, perfectly smooth, and completely unbothered by a long day. It sits above the collar, so it never tangles in a lanyard or rubs against a blazer, and it needs no pins, no elastics and no mid-day rescue. It is the style for the conference-goer who wants to look sharp without thinking about her hair at all.
Best for: straight and fine hair, where braids and twists tend to slide out. What to ask your stylist: ask for a cut with slightly blunt ends, which sit more neatly than heavily layered ends, and for a smoothing treatment if your hair frizzes in air conditioning. Quick verdict: the lowest-fuss style in this guide for straight hair, and one that looks just as good at the evening reception as it did at the morning keynote.
Soft Curls with a Deep Side Part
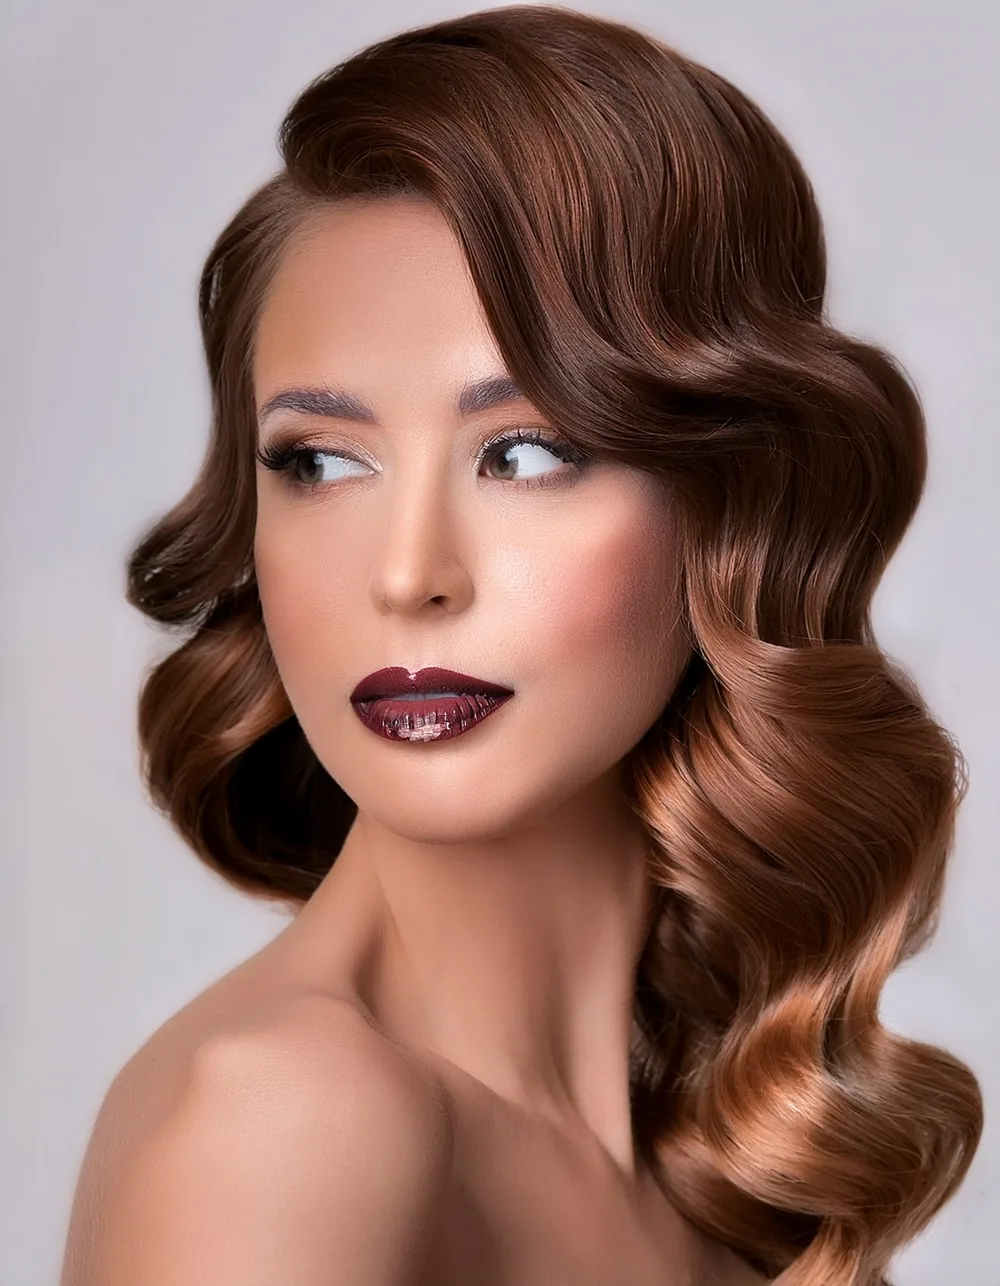
Soft curls with a deep side part are the most glamorous loose style in this guide, and they earn their place at a conference because the deep part gives the curls structure. Without the part, curls can look unruly by the afternoon; with it, they fall in a deliberate sweep that frames the face and photographs beautifully. It is a strong choice for an evening reception or a dinner, where the lighting is softer and the mood is more relaxed.
How to style: curl the hair in large sections with a wide-barrel iron, brush the curls out gently so they fall into soft waves, then create a deep side part and pin the smaller side flat behind the ear. Common mistake: curling the hair too tightly. Conference curls should be soft and brushed out, not springy, or they will tighten further as the day goes on and the room warms up.
The Low Bun with Face-Framing Layers
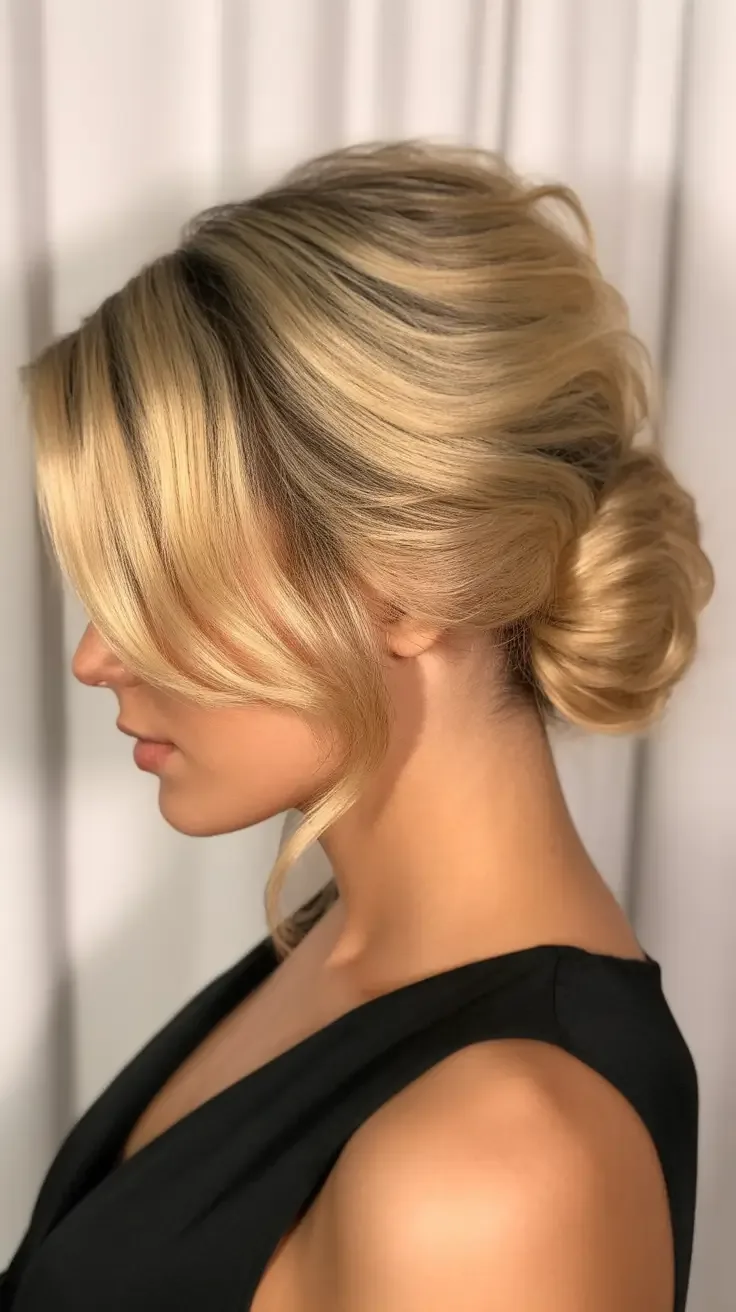
This is the low bun for people who find a fully slicked-back style too severe. The bun itself is neat and low, but a few fine layers are left free at the front to soften the face. The result is polished but not severe, which is a good balance for a conference: professional enough for the stage, gentle enough for the coffee queue.
Best for: square and heart-shaped faces, where soft front pieces balance a strong jawline or a wide forehead. How to style: leave the two front sections out, smooth the rest into a low bun, then curl the front pieces lightly and let them fall just past the cheekbones. Common mistake: leaving the front pieces too long. Anything that reaches past the chin will fall forward during the day, so keep them short and pin them back if they start to escape.
The Polished Pixie
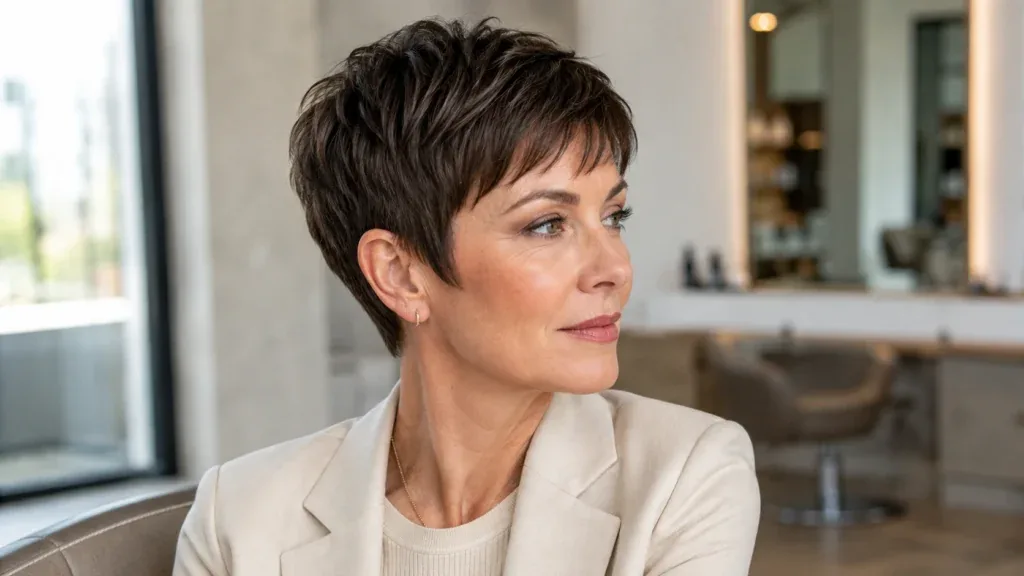
A polished pixie is the ultimate low-maintenance conference haircut: nothing reaches the collar, nothing needs pinning, and it looks neat from the first session to the last drink. Styled with a little wax or cream for definition, it reads as sharp and modern, and it pairs beautifully with statement earrings or a bold lip, which is a nice bonus for the evening reception.
Pros and cons: zero mid-day maintenance, fast washing afterwards, and it always looks intentional. The trade-off is styling range: you cannot braid or bun a pixie, so the styling product and the accessories do the work. Who should avoid it: nobody for practical reasons, but if you love long hair, this is a big commitment. Try a faux-pixie pin-up first, sweeping long hair up and pinning it short at the nape, to see if you like the feeling before you cut.
The Fishtail Braid Low Ponytail
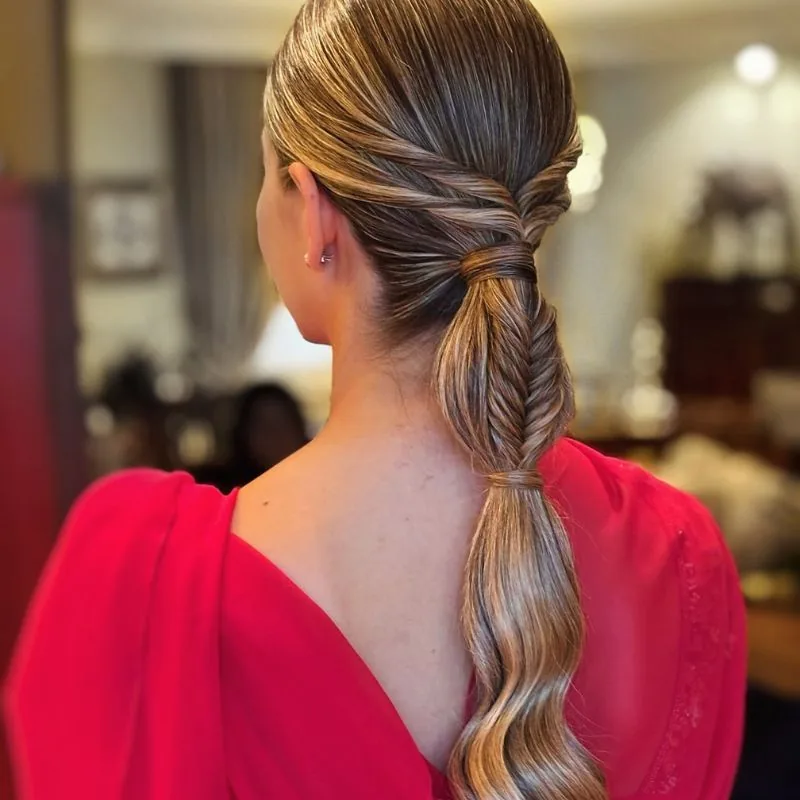
A fishtail braid worn as a low ponytail keeps the hair visible and interesting while still keeping it fully contained. The fine, woven texture of a fishtail holds together better than a regular three-strand braid, so it survives hours of sitting, standing and leaning over tables without unravelling, and it looks far more considered than a plain ponytail.
Best for: long, thick hair, where the fishtail pattern really shows. How to style: tie a low ponytail, split the tail in two, and weave small sections from the outside of each half to the inside of the other, working down to the ends. Common mistake: pulling the fishtail too tight, which makes it look stiff. Gently pull the edges of the braid wider once it is finished, and the fishtail will look full and soft rather than severe.
The Tucked-Behind-the-Ears Bob
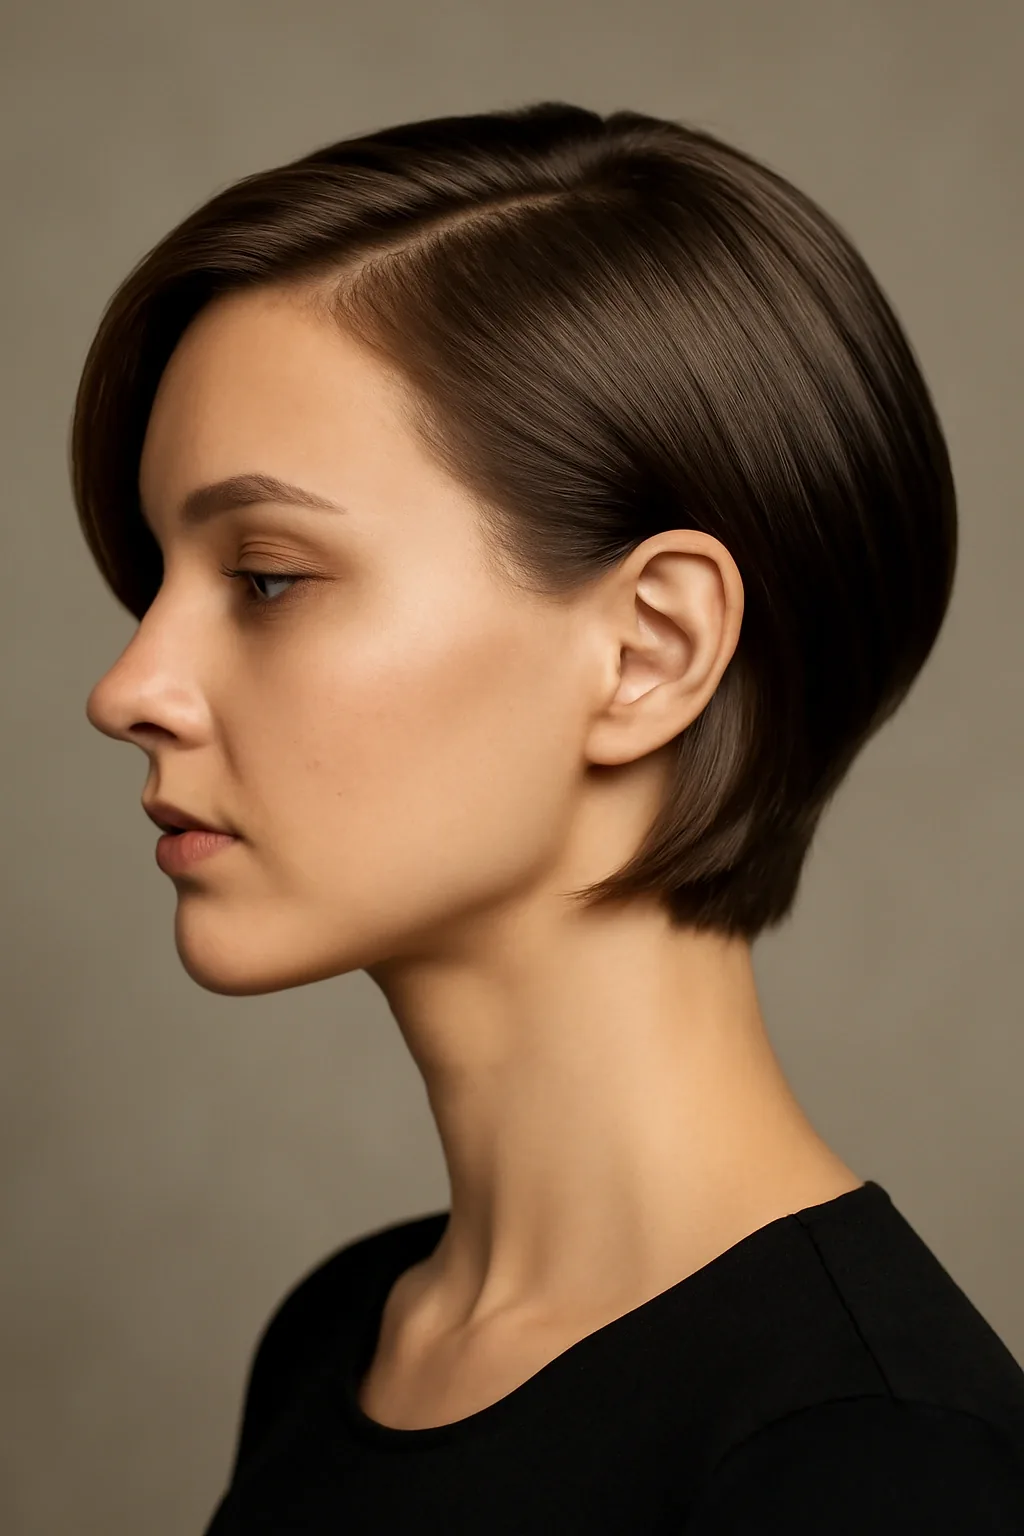
A bob tucked behind the ears is the simplest style in this guide, and sometimes the simplest is the smartest. The hair is short enough to stay out of the way on its own, and tucking it behind the ears keeps the face clear, shows off earrings, and stops the front pieces from falling forward when you lean in. It is the style for the conference-goer who wants to look polished with zero effort.
Maintenance: almost none, though a little styling cream at the roots keeps the tuck in place. Cost and time: a bob needs a trim every six weeks to keep its shape, but daily styling takes under two minutes. Quick verdict: if your bob is growing out and the ends start brushing the collar, switch to a low ponytail or a claw clip for conference days until your next trim.
The Elegant Side Bun

An elegant side bun is the low bun’s more romantic cousin: the hair is gathered low and to one side, then coiled into a soft bun that sits just behind the jaw. It frames the face beautifully, photographs well from the front, and feels a little more special than a centred bun, which makes it a good choice for an evening reception or a conference dinner.
Best for: medium to long hair, and for anyone who finds a centred bun too severe. How to style: part the hair deeply to one side, sweep it low to the opposite side and coil it into a soft bun, pinning it flat behind the ear. Common mistake: placing the bun too far forward, so it sits on the cheek and looks like a mistake. Keep it behind the jawline, and it will read as deliberate and elegant.
The Rope Braid Ponytail
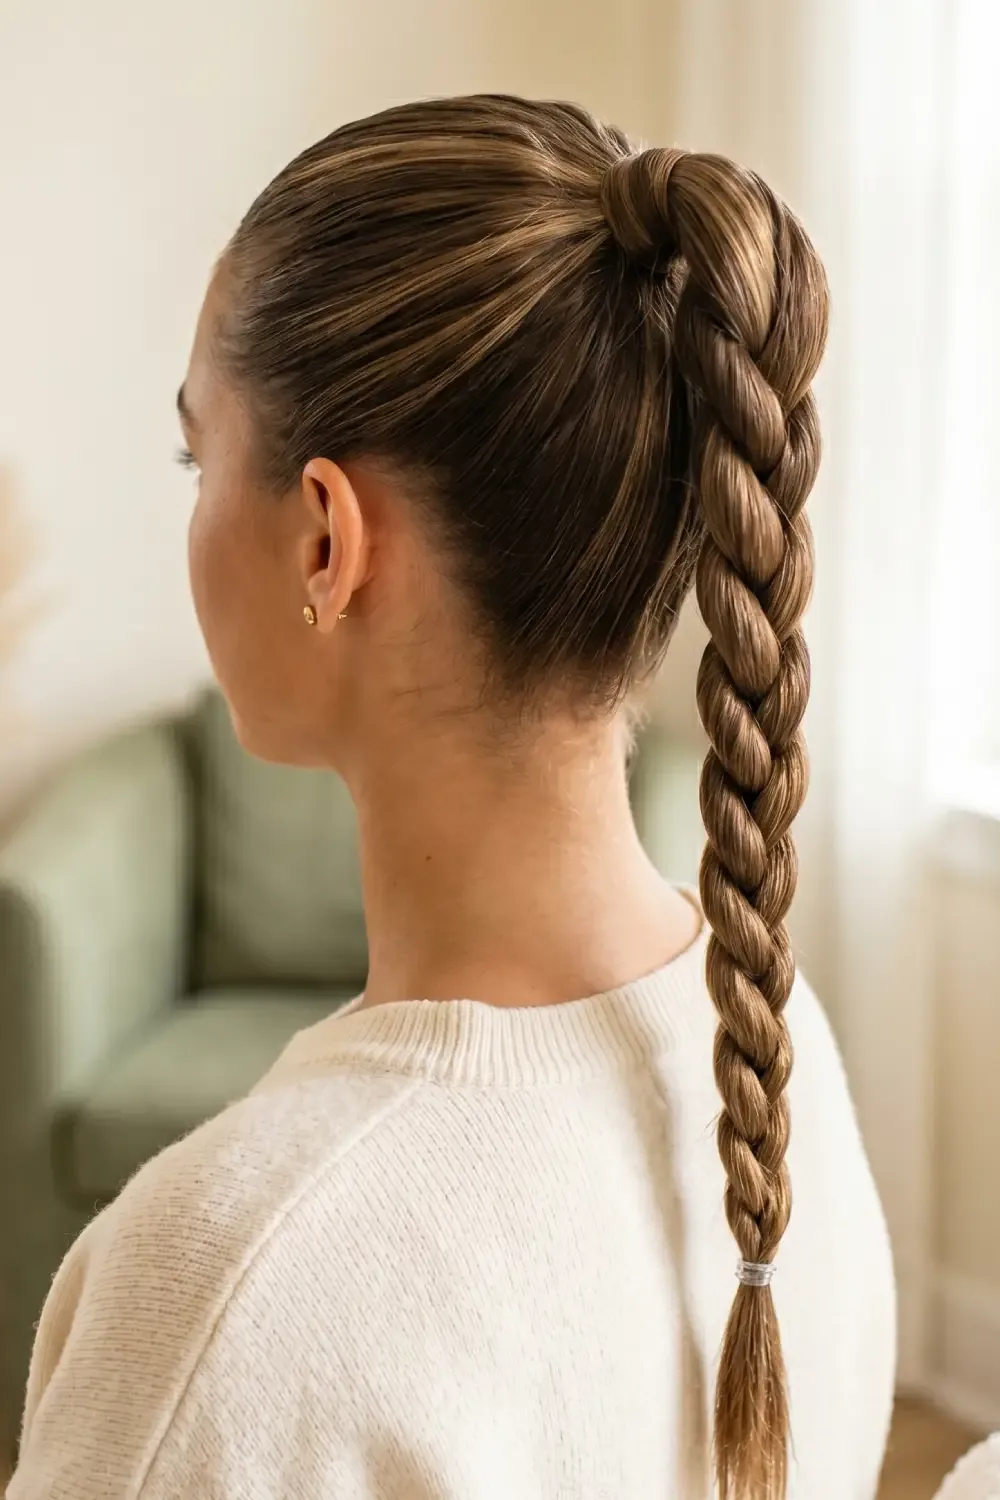
A rope braid is made by twisting two sections of hair around each other, and it is one of the fastest braids to learn. As a ponytail, it keeps the tail compact and controlled, so it does not swing or shed flyaways the way a loose ponytail does. It looks neat, a little bit polished, and it holds up beautifully through a long conference day.
Best for: straight or slightly wavy hair, where the rope texture shows clearly. How to style: gather the hair into a low ponytail, split it in two, twist each section the same way, then twist them around each other in the opposite direction and secure the end. Quick verdict: quicker than a French braid, more secure than a plain ponytail, and a great first braid to learn.
Maintenance: a rope braid holds its shape well, but the end can start to unravel if the elastic is loose. Use a small, snag-free elastic and wrap it twice, and check it once at the afternoon break. If your hair is layered, a light mist of hairspray before braiding will stop the shorter layers from poking out of the twist.
The Smooth Sock Bun
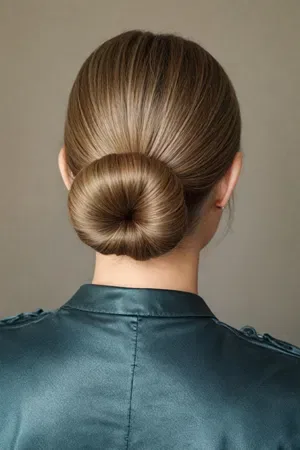
A sock bun is the secret weapon of conference hair: a doughnut-shaped form that turns any ponytail into a perfectly round, perfectly smooth bun in under a minute. The result looks like you spent half an hour on your hair, when really you spent sixty seconds, and it is one of the most secure styles in this guide, since the form itself holds the hair in place.
How to style: tie a ponytail at the height you want the bun, pull it through the doughnut form, spread the hair evenly over the form and tuck the ends underneath, securing them with pins. Pros and cons: perfectly round every time, very secure, and it works even on fine hair that would never hold a bun on its own. The only catch is the form itself: keep a spare in your conference bag, because a lost doughnut means no bun. Cost and time: a form costs very little, and the style takes under a minute.
The Wavy Lob with a Side Part
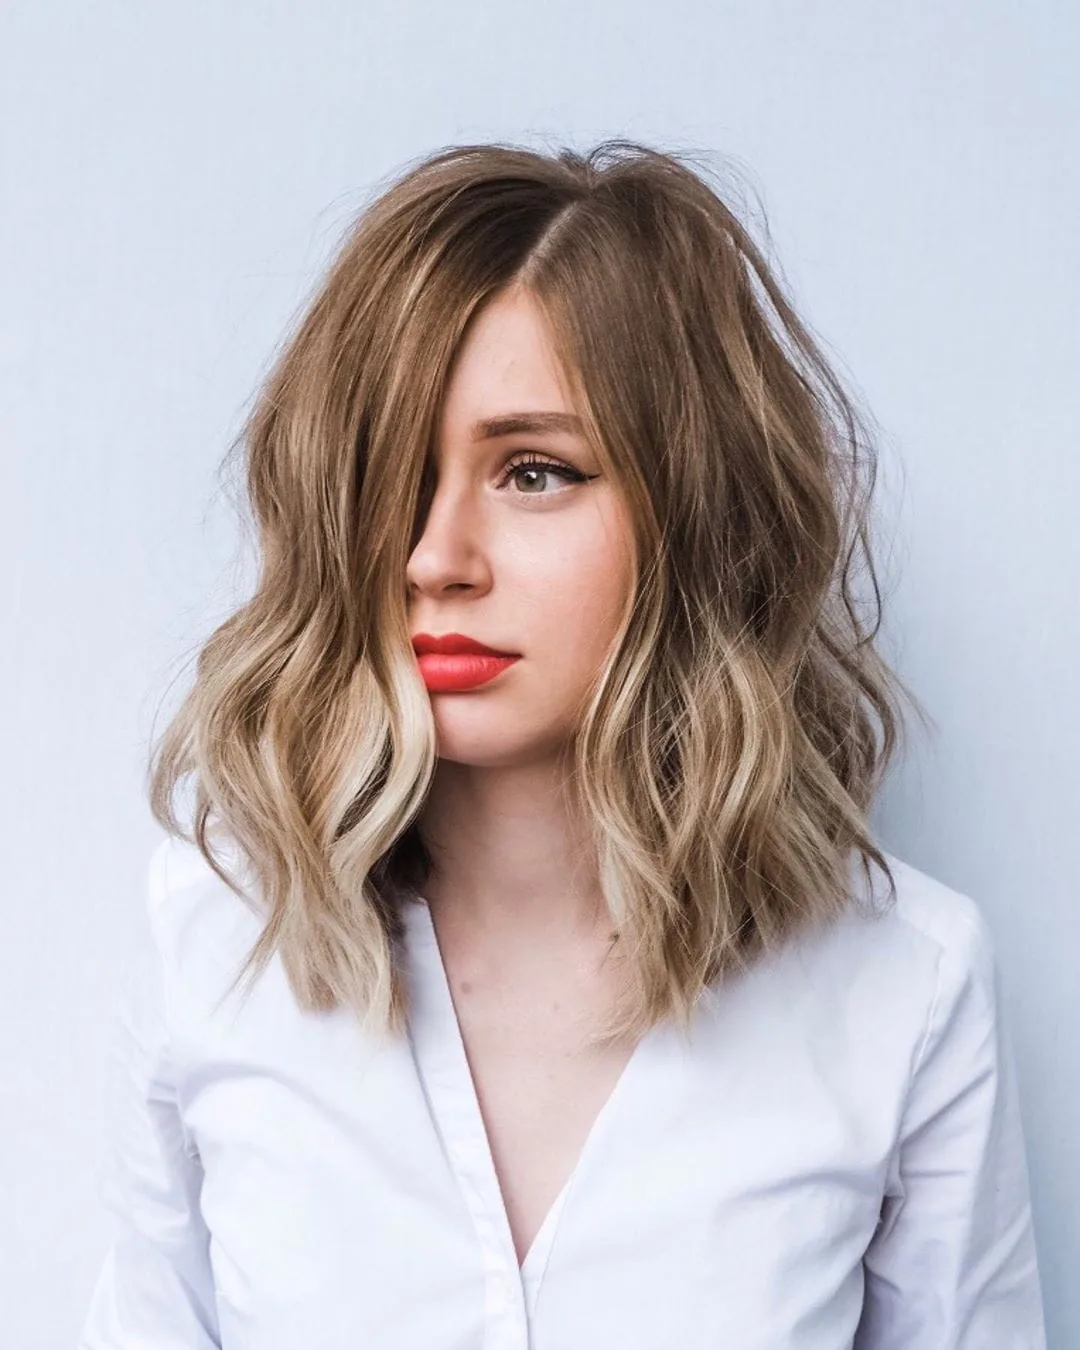
A wavy lob with a side part is the most relaxed style in this guide that still reads as professional. The waves give the hair movement and softness, the side part gives it structure, and the length is short enough that nothing swings or tangles. It is a good choice for a creative-industry conference or a day of breakout sessions, where a softer look helps you seem approachable.
Best for: naturally wavy hair, where the texture does most of the work. How to style: create soft waves with a flat iron or a large-barrel curling iron, brush them out gently, and set a deep side part. Common mistake: over-styling the waves. A wavy lob should look like your hair, only better, not like you spent an hour with a curling iron. If the waves start to drop by the afternoon, a quick mist of texturising spray at the roots will revive them.
The Classic Updo with a Hairpin Detail
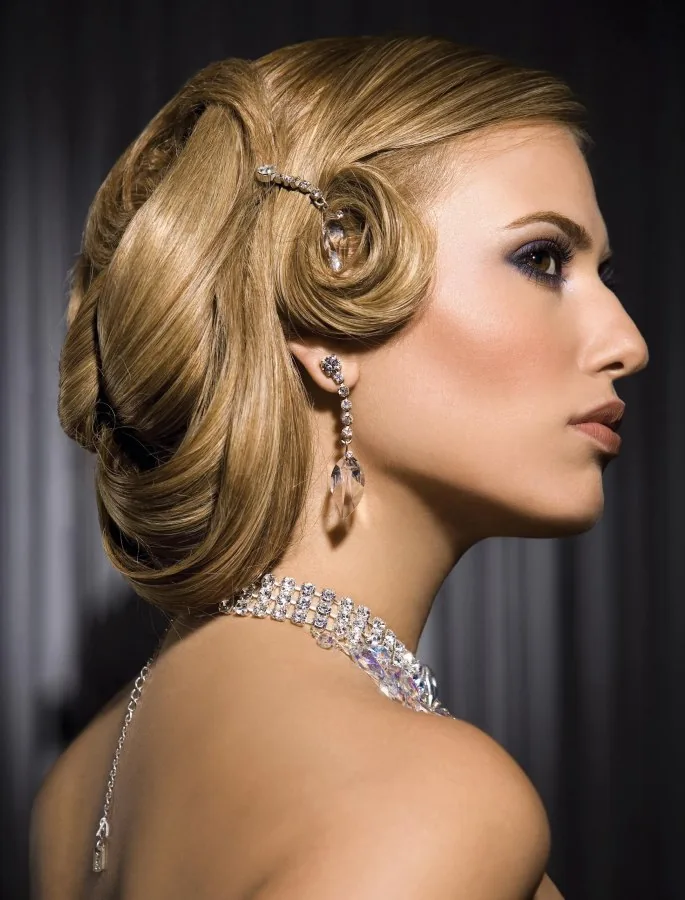
This is the style for the conference dinner, the awards night or the closing reception: a classic updo, smooth and low, finished with a single elegant hairpin. The hairpin is the whole trick. It turns a simple bun or twist into something that looks considered and a little bit special, and it costs almost nothing. Choose a slim gold pin, a pearl pin or a simple tortoiseshell comb, and keep everything else plain.
Best for: evening events, and for anyone who wants one style that can go from the daytime sessions to the dinner without a full restyle. How to style: build your usual low bun or twist in the morning, then add the hairpin just before the evening event, placing it above the bun where it catches the light. Quick verdict: the smallest change in this guide, and one of the most effective. A single good hairpin can make a daytime style feel like an evening one.
What is the best hairstyle for a work conference?
A sleek low bun is the best all-round choice for a work conference, because it stays put for twelve hours, looks polished from every angle, and never collides with a blazer, a lanyard or a chair back. A smooth chignon and a polished low ponytail are close seconds. The best style is the one you have worn before and trust, not a brand-new style you try on conference day.
Should I wear my hair up or down at a work conference?
Wear it up if you are speaking, presenting or on camera, because an updo keeps the hair out of your face and looks deliberate under stage lighting. Wear it down only if the style is genuinely secure, such as a sleek lob or a pinned-back blowout, and you are mostly listening rather than presenting. When in doubt, wear it up: it is the safer choice in every setting.
How do I make my hairstyle last all day at a conference?
Layer your hold: start with a good blow-dry and let the hair cool completely before you style it, then use a light-hold spray while you build the style and a stronger hold once it is set. Use U-shaped pins for buns and crossed bobby pins for anything that needs grip, and carry a travel-size spray and three spare pins for a quick reset at the afternoon break.
What hairstyles look good on camera during a hybrid conference?
Styles with a clear, clean outline look best on camera: a smooth blowout, a sleek low bun or a polished low ponytail. Webcams flatten volume and exaggerate frizz, so keep the front pieces away from your face and add a little shine spray so the hair reads clearly against the background. Do a quick camera check in the actual room before your session starts.
Can I wear a ponytail to a work conference?
Yes, a low ponytail is perfectly professional at a conference, provided it is polished: smooth it with serum, tie it low at the nape, and wrap a strand of hair around the elastic so it looks deliberate rather than rushed. Avoid high ponytails that swing when you turn your head, and braid the tail if your hair is very long.
What should I avoid wearing in my hair at a work conference?
Avoid anything that needs constant fixing, such as a very high ponytail, loose hair that falls forward, or a style held together by a single clip. Avoid heavy wet-look products, which mark blazer collars and photograph badly, and avoid overly casual styles like a messy top knot. Never try a brand-new style on conference day.
How do I transition my conference hairstyle from day to evening?
Start with a polished base, such as a low bun or a sleek ponytail, and make three small changes before the evening reception: loosen a couple of face-framing pieces, add a little shine or texture spray, and swap a plain pin for a decorative one. If you wore your hair down during the day, sweep it up into a low bun or a twist, which instantly looks more formal.
What hairstyle works best for short hair at a work conference?
Short hair is already conference-friendly. A polished pixie or a neat bob barely moves all day and photographs cleanly from every angle. The main job is the front: keep the fringe or face-framing pieces out of your eyes with a little styling cream or two flat clips. A side part bob is one of the easiest and most polished short conference styles there is.
How do I keep frizz under control in a conference hall?
Start with a smoothing cream or serum before you style, and finish with a flexible-hold spray. Air conditioning and stage lights both dry the air out, which makes frizz worse, so keep a travel-size anti-frizz serum in your bag and smooth a tiny amount over the crown at the afternoon break. Avoid touching your hair during sessions, since hands transfer oil and make frizz worse.
Should I get my hair done professionally before a conference?
If you have a big presentation or you are speaking on stage, yes: a salon blowout or updo the morning of the conference is worth it, because it will hold better and photograph better than a home style. Book the appointment for the morning of the event, not the day before, and bring a photo of the style you want. For a regular attendee day, a good home style is perfectly fine.
From the First Keynote to the Last Handshake
Conference day asks a lot of your hair: twelve hours, bright lights, cameras, handshakes, wind between sessions and a long evening reception. The styles in this guide are built for exactly that, from the sleek low bun that never moves to the blowout that photographs beautifully, the braided low bun that locks everything in place and the half-up twist that takes you from the keynote to the networking drinks without a restyle. The test is always the same: shake your head gently, bend forward as if you were picking up your conference bag, and check that nothing moves. If it holds through that, it will hold through the keynote, the panels and the reception.
So before your next conference, pick one style from this guide, practise it once at home, and pack your tiny touch-up kit: three pins, a spare elastic, a claw clip and a travel-size spray in the front pocket of your conference bag. Your future self, standing at the networking reception with her hair still looking like it did at 9 a.m., will be glad you did. These hairstyles for a work conference are not about looking perfect in a conference hall. They are about giving you one less thing to think about, so you can spend the whole day thinking about the work, the people and the ideas that brought you there in the first place.