How to Get blunt twist Hair That Looks Effortless (But Isn’t)
You’ve seen it all over your social media feeds: that impossibly cool, chic hairstyle where the ends are perfectly blunt, the twists are immaculate, yet the overall vibe is one of laid-back, “I-just-woke-up-like-this” elegance. This is the magic of blunt twist hair. It’s the holy grail of protective styling—a look that appears simple but is the result of a meticulous process and a deep understanding of hair technique.
Let’s be real, the “effortless” look is rarely effortless. Behind every stunning head of blunt twist hair is a series of deliberate steps, from the initial prep to the final snip. But the payoff is immense. You get a style that is not only incredibly stylish and versatile but also fantastic for protecting your natural hair from the elements and daily manipulation.
If you’re ready to unlock the secrets to achieving this coveted look, you’re in the right place. This comprehensive guide will walk you through every stage of the process, transforming you from an admirer to a master of the art of the blunt twist.
The Allure of the Blunt Twist: More Than Just a Hairstyle
Before we dive into the “how,” let’s talk about the “why.” Why has blunt twist hair become such a phenomenon? The reasons are as layered as the style itself.
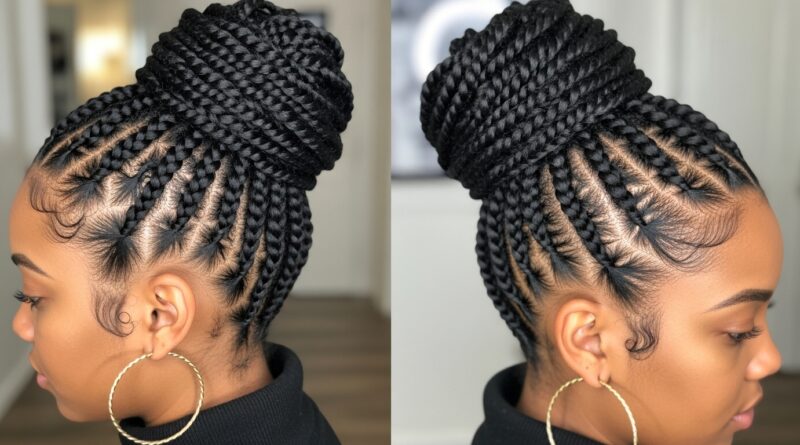
First, there’s the undeniable aesthetic appeal. The clean, sharp ends of a blunt cut provide a modern, polished contrast to the textured body of the twists. This combination creates a visually striking silhouette that is both structured and soft. It’s a style that commands attention without trying too hard.
Secondly, it’s a powerful protective style. By keeping your natural hair neatly twisted and tucked away, you shield it from breakage caused by styling, environmental stress, and friction from clothing and pillows. This allows your hair to retain length and moisture more effectively, giving it a much-needed break.
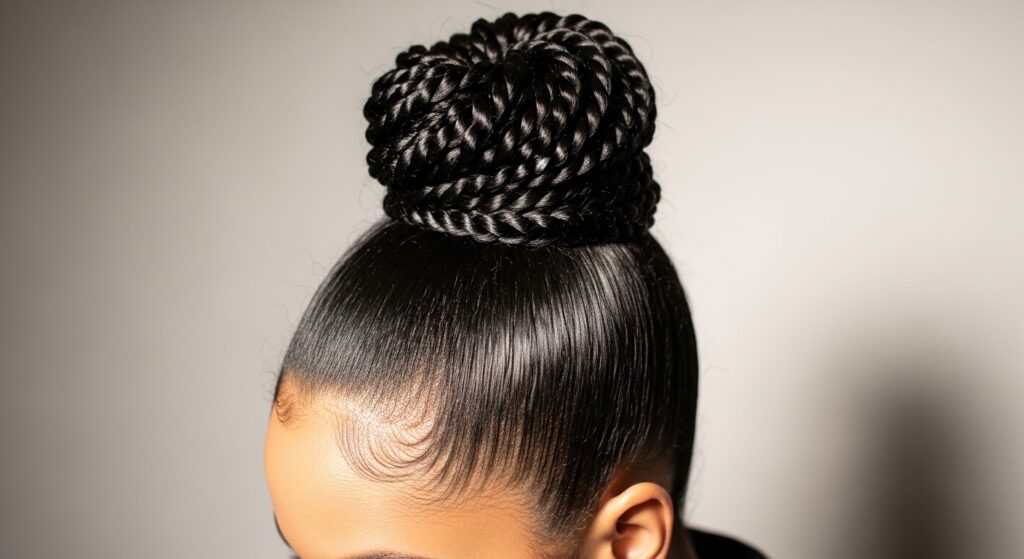
Finally, there’s the versatility. Don’t let the simple name fool you. Blunt twists can be styled in a multitude of ways—high buns, low ponytails, half-up, half-down styles, or accessorized with chic scarves and statement earrings. It’s a single installation that offers a week’s (or month’s!) worth of distinct looks.
Gathering Your Arsenal: The Right Tools for the Job
You wouldn’t build a house without a blueprint and the right tools, and the same goes for creating flawless blunt twists. Having the correct products and implements is half the battle. Here’s what you’ll need to assemble before you begin:
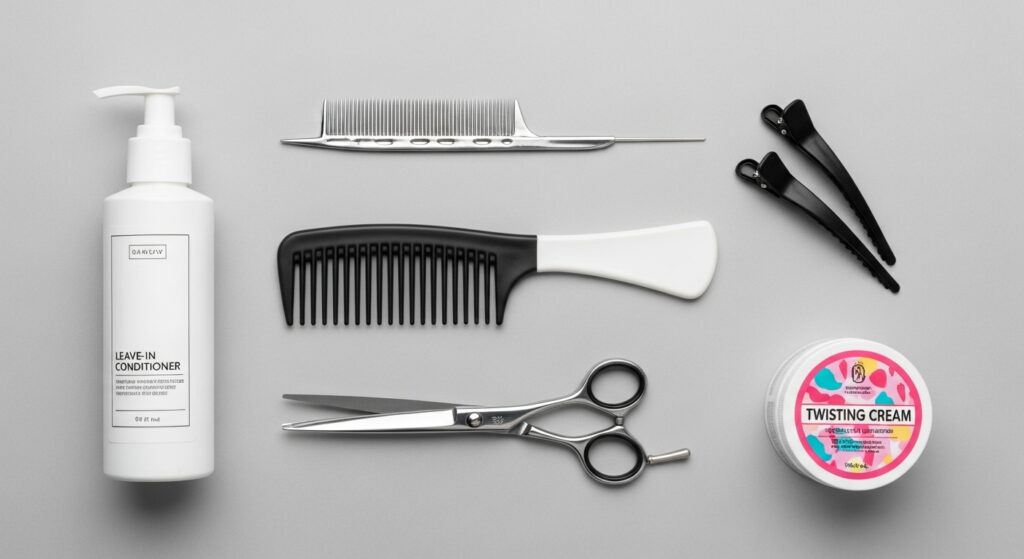
For Hair Prep: A clarifying shampoo to remove any product buildup, a deep conditioner for moisture and strength, a wide-tooth comb for detangling, and a leave-in conditioner.
For the Twisting Process: A rat-tail comb for creating clean, sharp parts, hair clips or duckbill clips to section off hair, a high-quality twisting cream or butter (look for one with good hold that isn’t too sticky), and a light oil (like jojoba or argan) to add shine and reduce frizz.
For the “Blunt” Factor: This is non-negotiable—a pair of sharp, professional-grade hair shears. Using dull scissors or, heaven forbid, paper scissors, will crush the hair shaft and lead to frayed, split ends, completely defeating the purpose of the blunt cut. Invest in a good pair; your hair will thank you.
The Foundation of Flawlessness: Prepping Your Natural Hair
This is arguably the most critical step. The health and appearance of your finished style are directly dependent on the care you give your hair underneath. Skipping prep is like painting a wall without priming it—the results will be lackluster and potentially damaging.
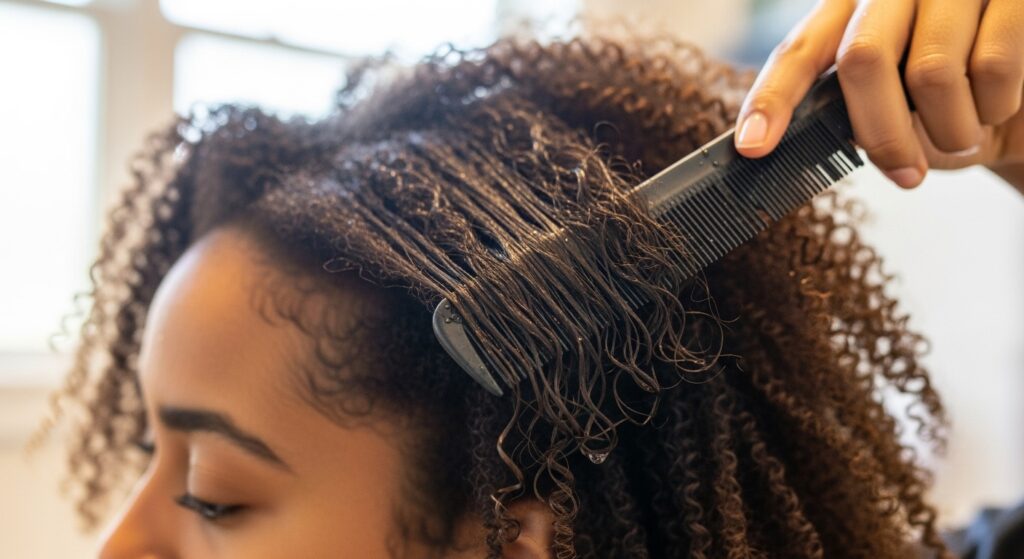
Start with a thorough wash day. Use a clarifying shampoo to ensure your scalp and hair are completely clean and free of any residue that could prevent moisture from penetrating. Follow up with a rich deep conditioner, focusing on your ends, which are the oldest and most fragile part of your hair. Allow the conditioner to sit under a steamer or hooded dryer for at least 20-30 minutes for maximum absorption.
Once you’ve rinsed, apply a leave-in conditioner to your damp hair to lock in that hydration. Then, detangle with a wide-tooth comb from the ends up to the roots, working in small sections. This minimizes breakage and ensures your natural hair is smooth and ready to be twisted. Your hair should be stretched—either through blow-drying on a cool setting or by doing stretched styles like banding—to make the twisting process easier and to achieve a neater result.
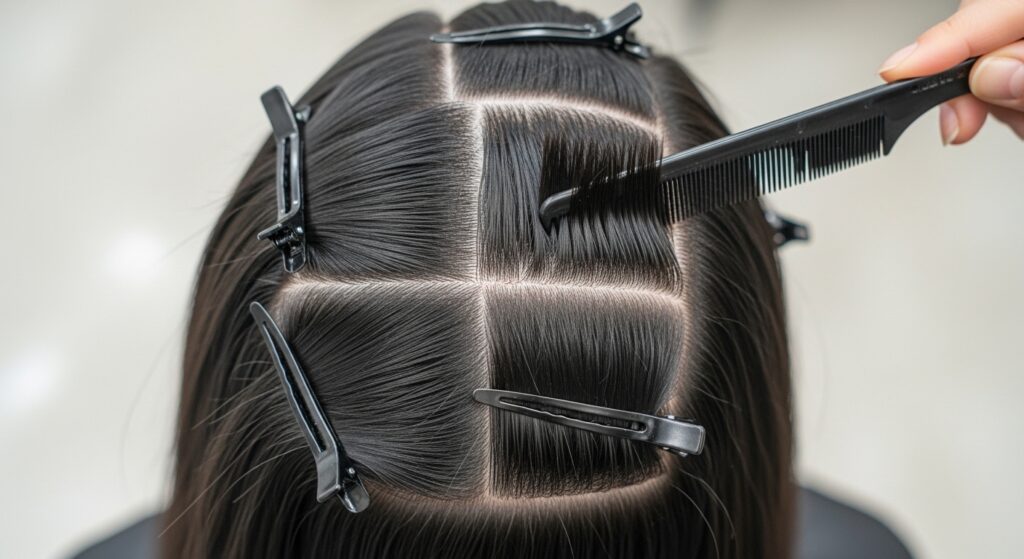
The Art of the Part: Sectioning for Success
Precise sectioning is what separates an amateur-looking style from a salon-quality one. Clean parts not only make the style look more polished but also ensure that the tension is evenly distributed across your scalp, preventing unnecessary stress and potential traction alopecia.
Begin by dividing your hair into four main quadrants: from the top of your head to the nape of your neck, and from ear to ear. Secure three sections with clips and work on the fourth. Within that quadrant, use the end of your rat-tail comb to create smaller, manageable sections. The size of these sections will determine the thickness of your twists. For a fuller, chunkier look, make larger sections. For a more intricate, finer look, create smaller parts.
Take your time with this step. It might feel tedious, but this attention to detail is what creates the “effortless” illusion. A neatly parted base makes the entire installation process smoother and the final outcome exponentially more stunning.
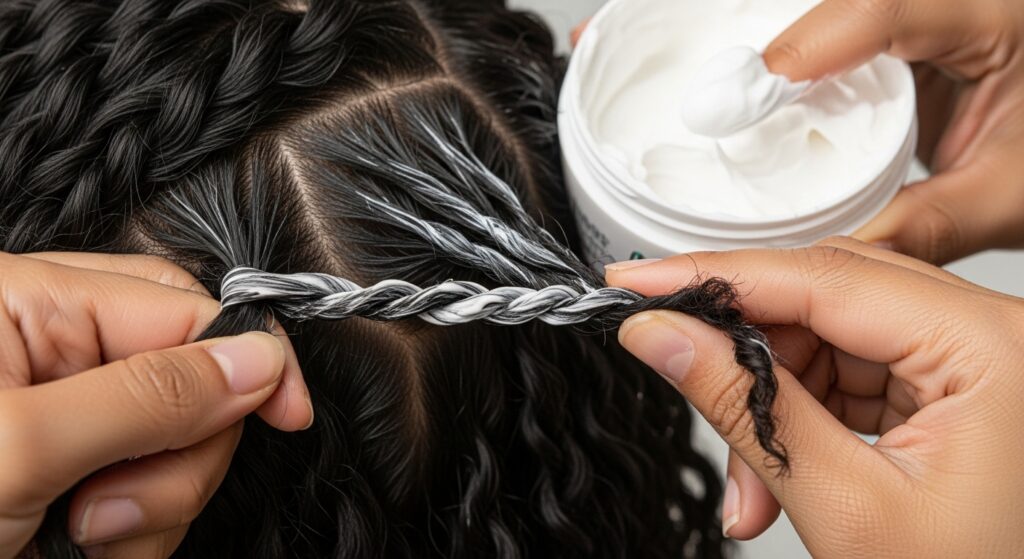
The Main Event: Mastering the Twisting Technique
Now for the fun part—creating the twists themselves. How you twist will impact the longevity and neatness of your style.
Take one of your small, pre-parted sections. Apply a modest amount of twisting cream from root to tip, ensuring the hair is evenly coated but not overloaded with product (which can attract dirt and cause flaking).
To begin the twist, split the section into two equal parts. Cross the right piece over the left, then the new right piece over the new left. Continue this twisting motion all the way down to the ends. The key is to maintain consistent tension—not so tight that it causes discomfort or puts stress on your edges, but tight enough that the twist is secure and doesn’t easily unravel.
Some people prefer to two-strand twist on slightly stretched, damp hair for a stretched result, while others twist on dry hair for more definition. Experiment to see what works best for your hair texture and desired outcome. Repeat this process meticulously across your entire head.
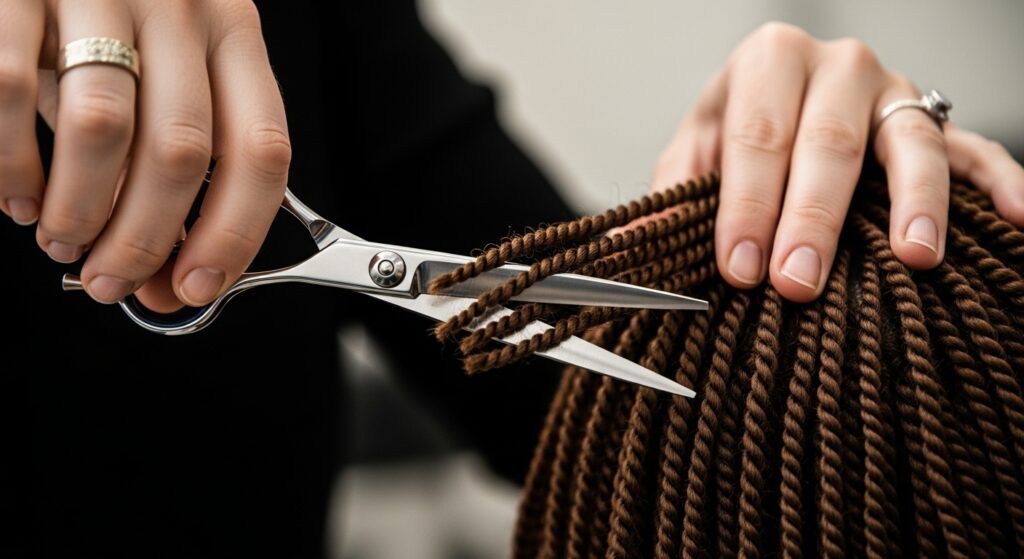
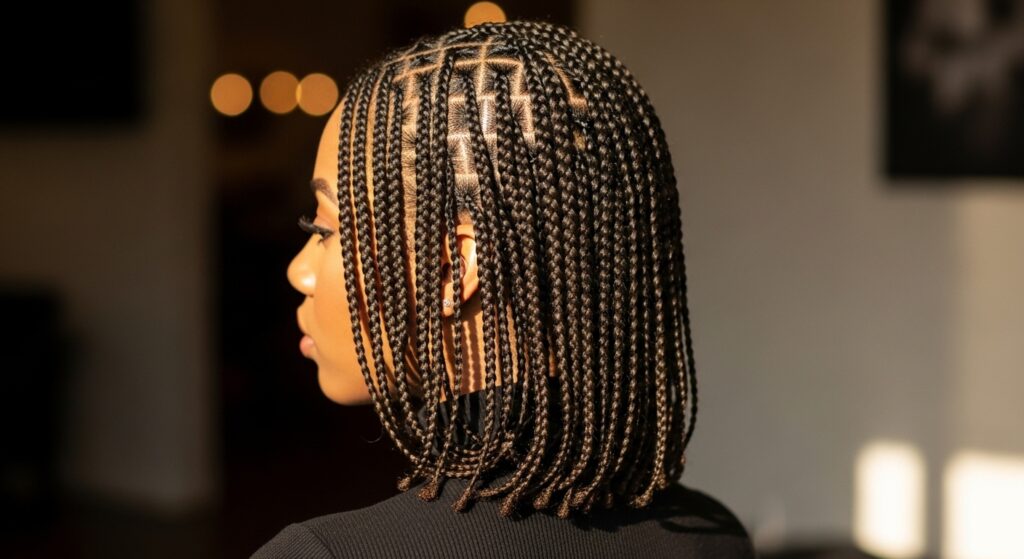
The Grand Finale: Creating the Perfect Blunt Cut
This is the moment of truth. Do not attempt to cut your twists until your entire head is completely twisted and you are happy with the partings and overall look. This ensures a uniform length.
Gather all your twists at the back of your head, as if you were making a low ponytail. Hold them together firmly but gently. Look in the mirror and decide on your desired length. Do you want them to graze your shoulders? Sit at your jawline? Once you’ve decided, take your sharp hair shears and in one confident, straight-across motion, snip off the ends.
The single, clean cut is crucial. Do not saw at the hair or make multiple small cuts, as this will create an uneven, jagged line. That one decisive snip is what gives you the crisp, sharp, “blunt” edge that defines the style. After the initial cut, you can release the twists and do any minor, individual adjustments if you notice a few longer pieces, but the bulk of the work should be done in that first cut.
Beyond Installation: Maintaining Your Masterpiece
Your work isn’t done once the twists are in and cut. Proper maintenance is what will keep your blunt twists looking fresh for weeks.
At night, preserve your style by wrapping your hair in a silk or satin scarf or sleeping on a satin pillowcase. This prevents friction that causes frizz and helps maintain the sharpness of your ends.
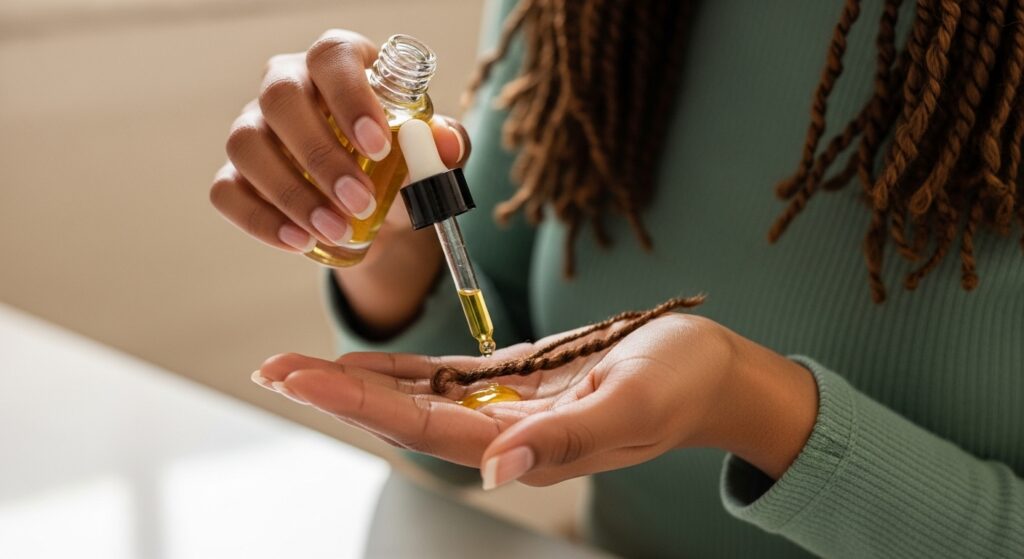
To refresh your twists in the morning, a light spritz of water or a water-and-oil mix in a spray bottle can help revitalize them. Gently smooth any frizz with your hands or a soft-bristle brush. Avoid heavy products during your wear time, as they can build up and make your hair look dull and greasy.
When it’s finally time to take your twists down, be as gentle as you were when putting them in. Carefully unravel each twist and detangle with your fingers or a wide-tooth comb before washing. This prevents matting and minimizes shedding, ensuring your natural hair emerges from its protective style vacation just as healthy and strong as when it went in.
Embrace the “Effortless” Illusion
Achieving the perfect blunt twist hairstyle is a labor of love. It requires patience, precision, and the right knowledge. But as you’ve seen, it’s far from an impossible task. By following these steps—meticulous prep, precise sectioning, consistent twisting, and a confident, clean cut—you can create a stunning, head-turning style that looks like you simply rolled out of bed with perfect hair.
So, embrace the process. Enjoy the ritual of caring for your hair. And wear your flawless blunt twists with the confidence of someone who knows the secret: that the most effortless-looking beauty is often the most carefully crafted.