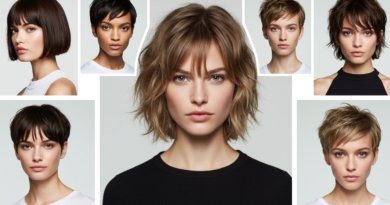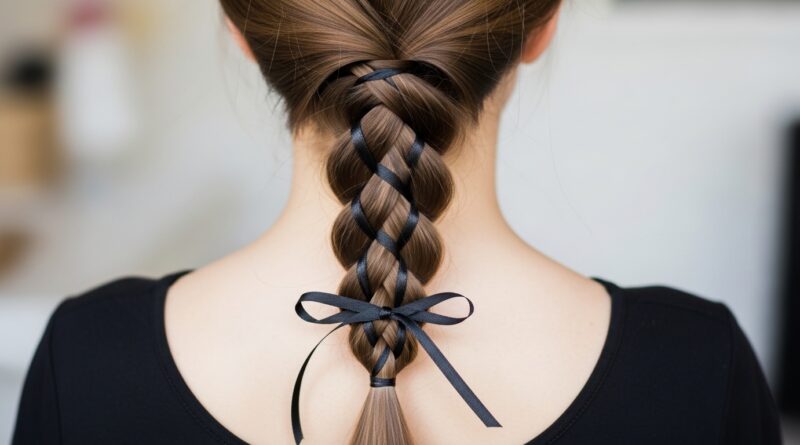
Loop 13 Infinity Braids That Flow Forever Stylishly
Okay, let’s be real. We’ve all spent an hour on a complicated braid, only to have it start unraveling by lunch. It’s frustrating. You want something that looks intricate and put-together, but that actually holds up from your morning coffee to your evening wind-down.
That’s exactly why I fell head over heels for the Infinity Braid. It sounds fancy, but I promise it’s one of the most forgiving, beautiful styles out there. Once you get the simple loop motion, it’s almost meditative to do.
This guide is your shortcut. I’m breaking down the entire process into bite-sized, easy-to-follow steps. No fancy skills needed. Just your fingers, a couple of elastics, and a few minutes. Let’s create a braid that flows forever stylishly.
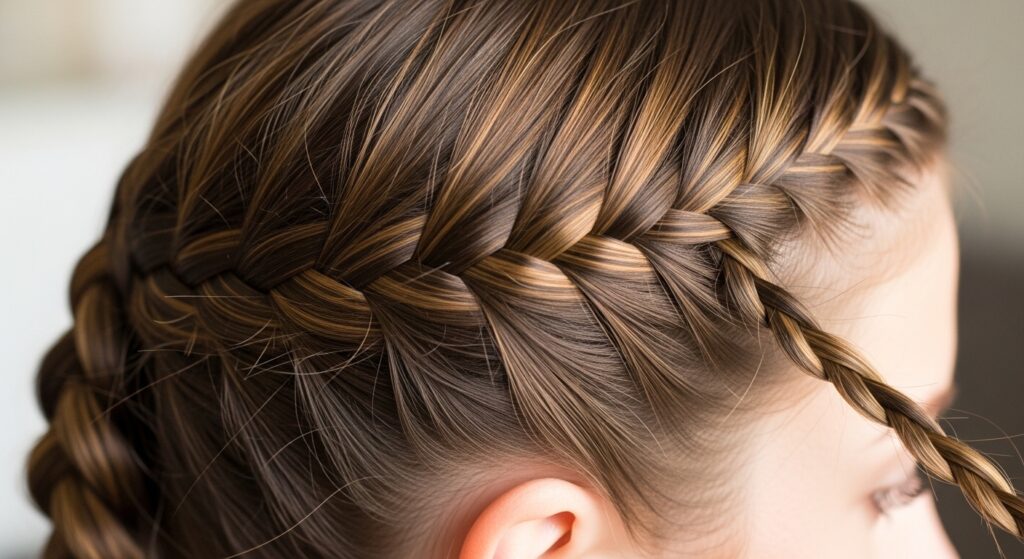
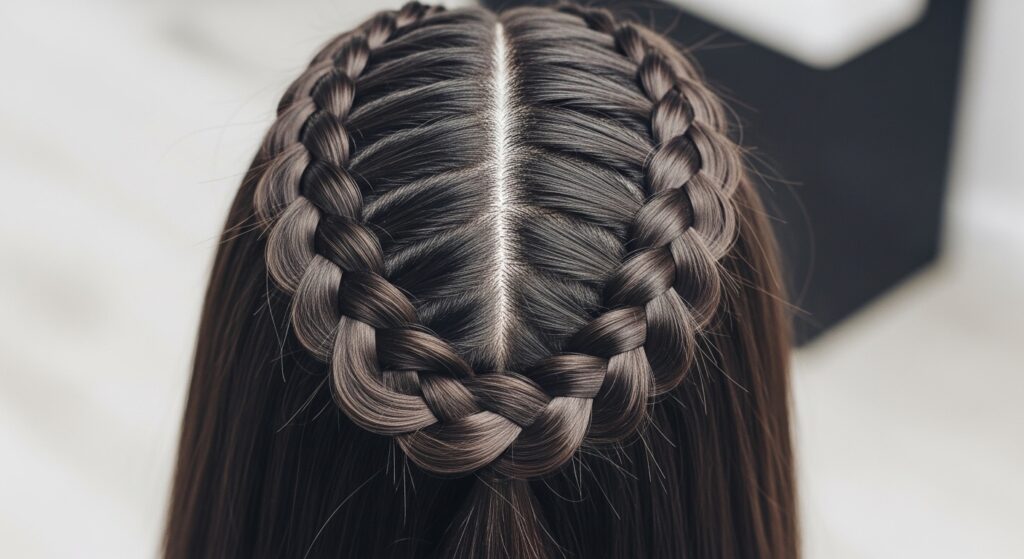
What Exactly Is An Infinity Braid?
Think of it as a cousin to the classic French braid, but with a magical twist—literally. Instead of crossing three sections over each other, you create a continuous loop with two sections.
You pick up hair as you go, which is what makes it so secure. The result is a stunning, rope-like braid that looks impossibly complex. But the secret? It’s just one simple motion repeated.
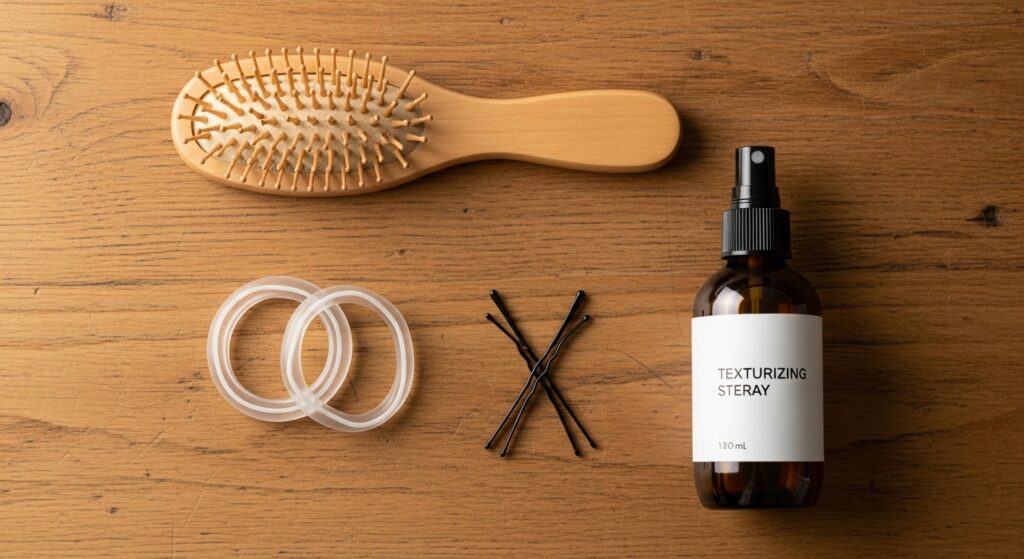
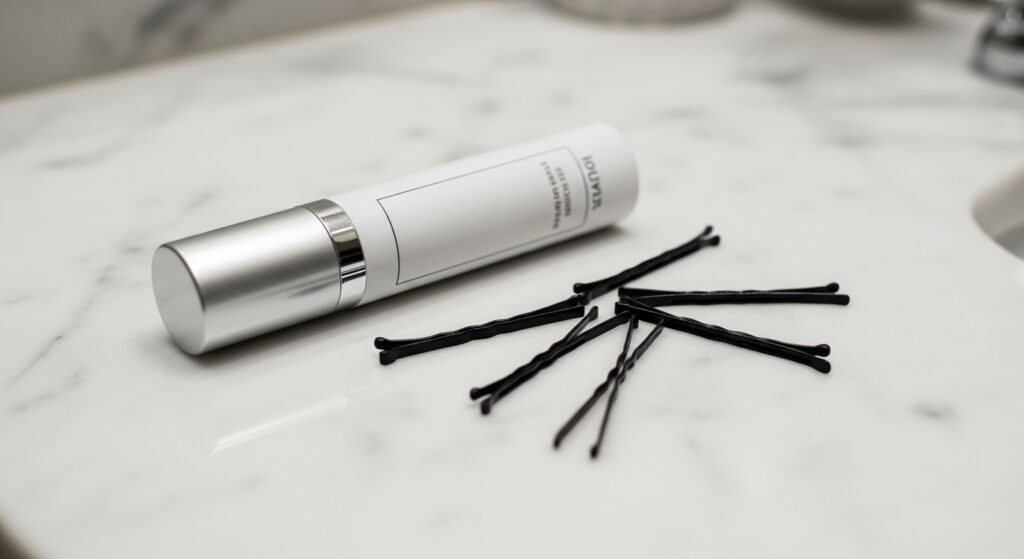
Gather Your Simple Tools
You don’t need a pro kit for this. Raid your bathroom drawer. A fine-tooth comb or brush is key for a smooth start. You’ll need a few small, clear elastics that match your hair color.
A couple of bobby pins are good for taming ends. That’s truly it! If your hair is very slippery, a light-hold texturizing spray can give it a tiny bit of grip, making the braiding easier.
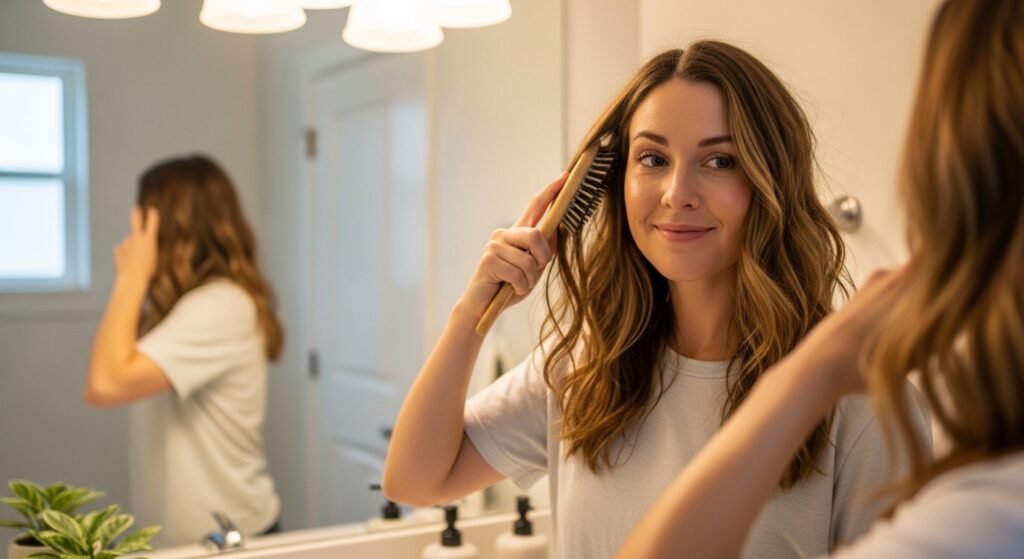
Start With The Perfect Base
This braid works best on day-old hair or hair with a bit of texture. If your hair is freshly washed and silky, add that texturizing spray. It makes a world of difference.
Decide where you want your braid. A side infinity braid is gorgeous and romantic. A centered one down the back feels more elegant. Brush through thoroughly to remove all tangles before you start sectioning.
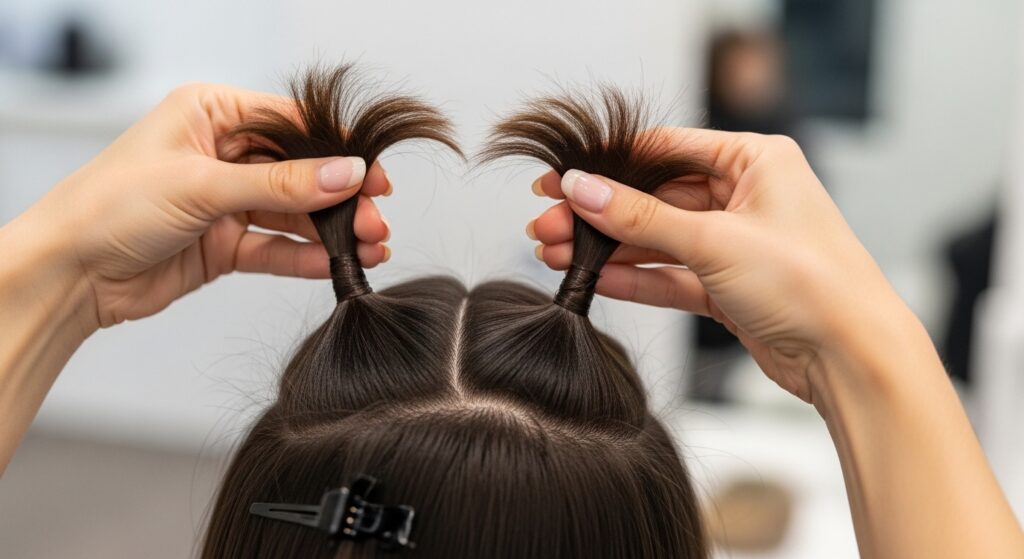
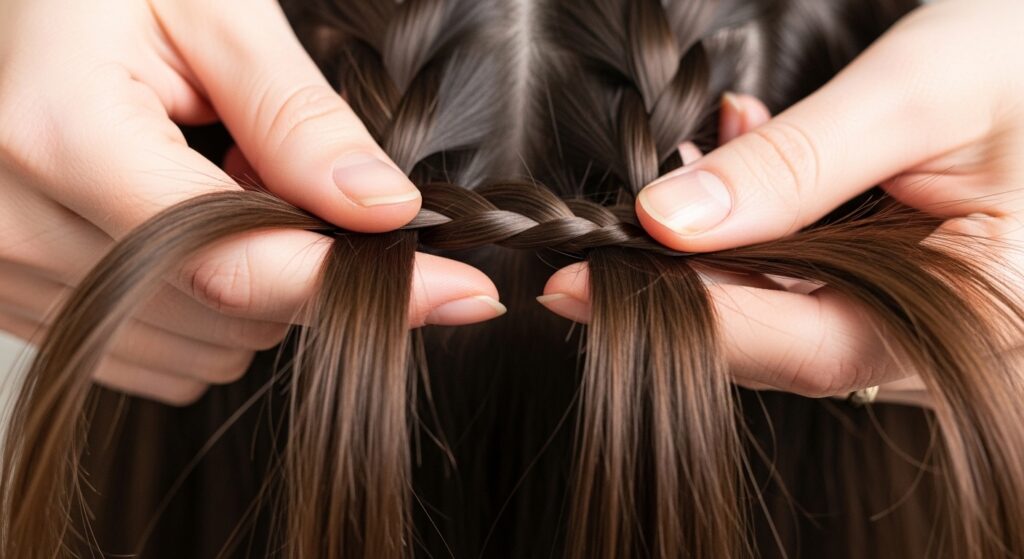
Section Your Hair For Success
At the crown of your head, take a triangular section of hair. Split this section into two equal parts, Part A and Part B. Secure the rest of your hair out of the way with a clip so it doesn’t get mixed up.
This initial section doesn’t need to be huge. You’ll be adding more hair to it with each loop. Make sure your two parts are even for a balanced look.
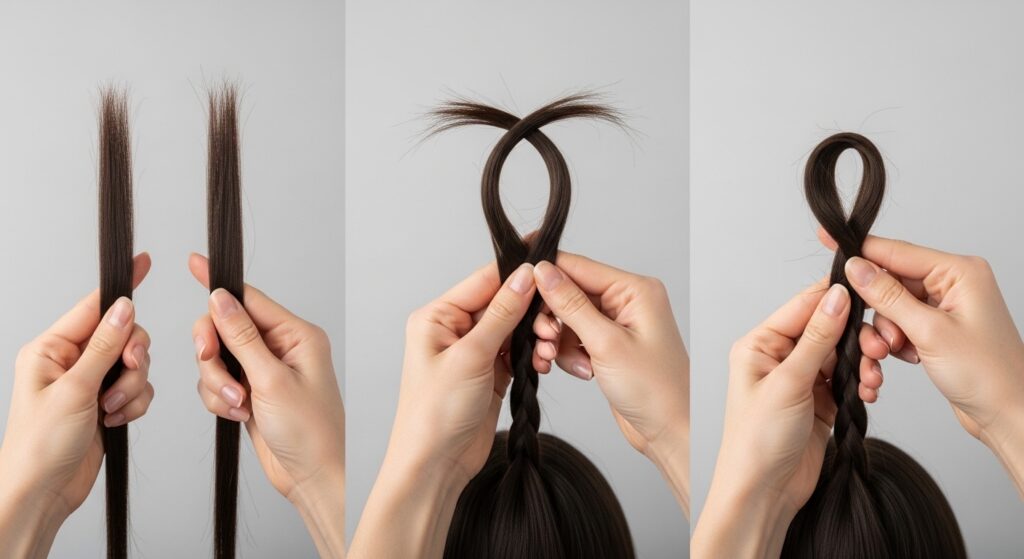
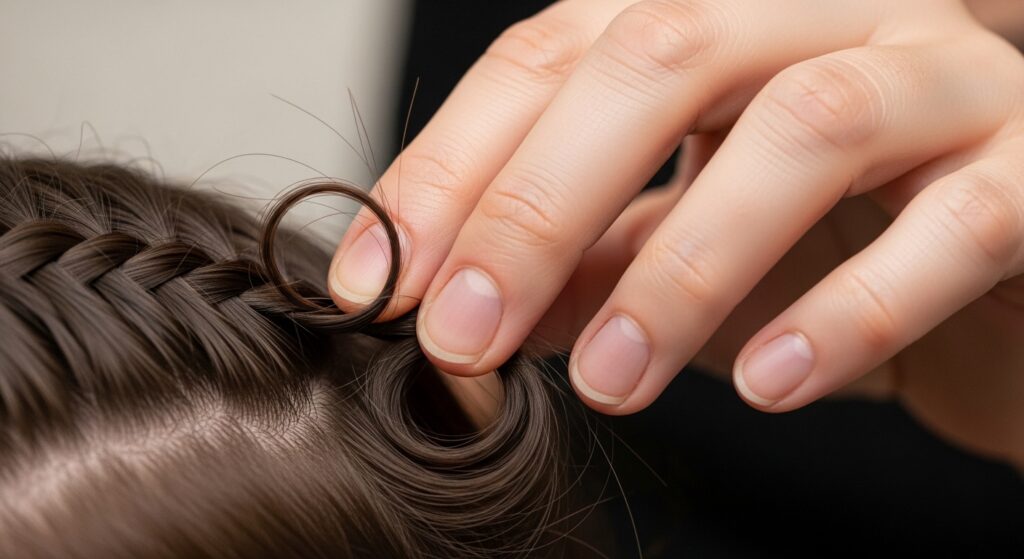
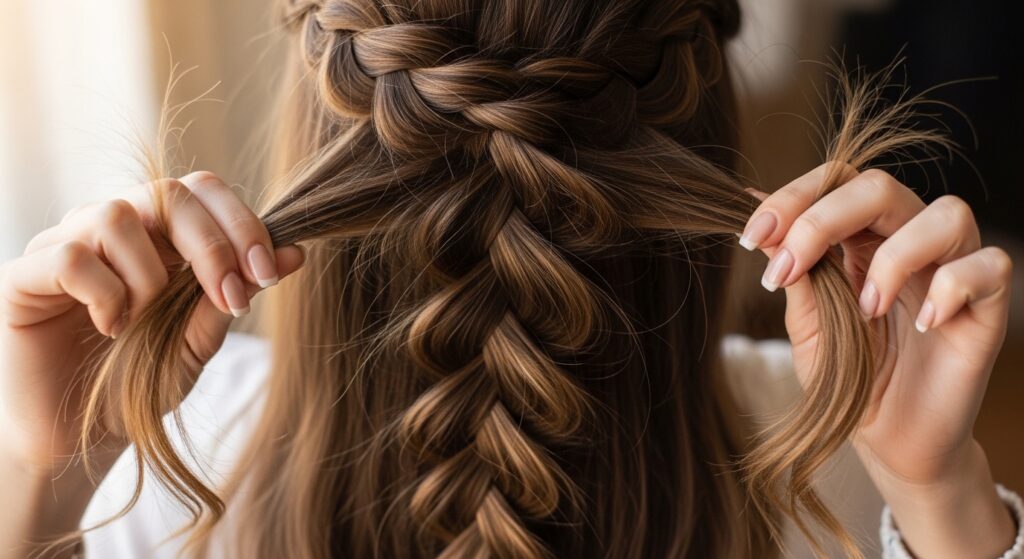
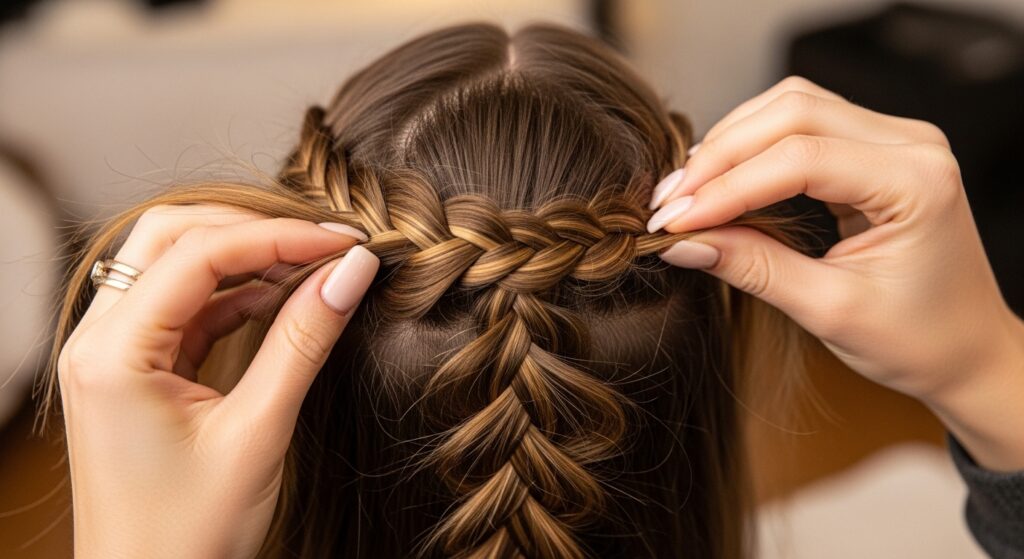
The Core “Loop” Motion Explained
This is the only move you need to learn. Hold Part A in your left hand and Part B in your right. Cross Part A over Part B, as if you’re starting to tie a knot.
Now, here’s the magic. Instead of dropping it, you’re going to bring that same Part A back under and toward you, creating a loop. It feels weird the first time, then it clicks. Practice this motion a few times before adding hair.
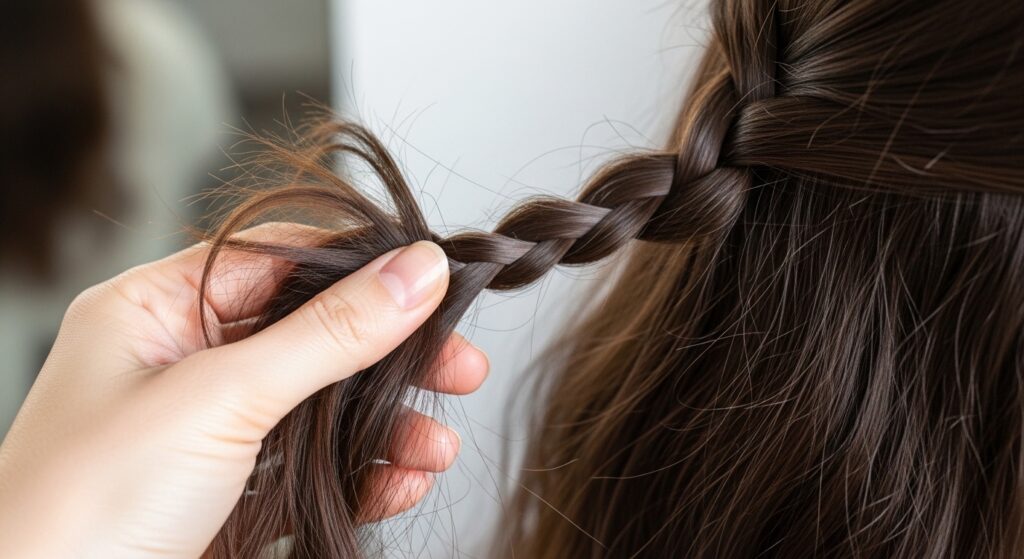
Add Hair To The First Loop
Now, let’s build the braid. After you make that first loop with Part A, use your free fingers to pick up a thin section of hair from the front of your head (near your hairline) and add it to Part A.
This is just like adding hair in a French braid. This new hair gets incorporated into the loop you just made. This is what anchors the braid to your head and creates that beautiful, woven look.
Repeat The Motion On The Other Side
Mirror the move. Now, take Part B and cross it over Part A. Create the same loop motion, bringing Part B back under and toward you.
Then, pick up a thin section of hair from the opposite side of your head (near your hairline) and add it to Part B. You’ve now completed one full cycle. See the pattern starting?
Keep Your Tension Consistent
This is the pro tip. Don’t pull the sections too tight or leave them too loose. Aim for a firm, even tension as you loop and add hair.
Consistent tension is what makes the braid look neat and uniform all the way down. If you feel it getting loose, gently tighten the last loop before adding the next section of hair.
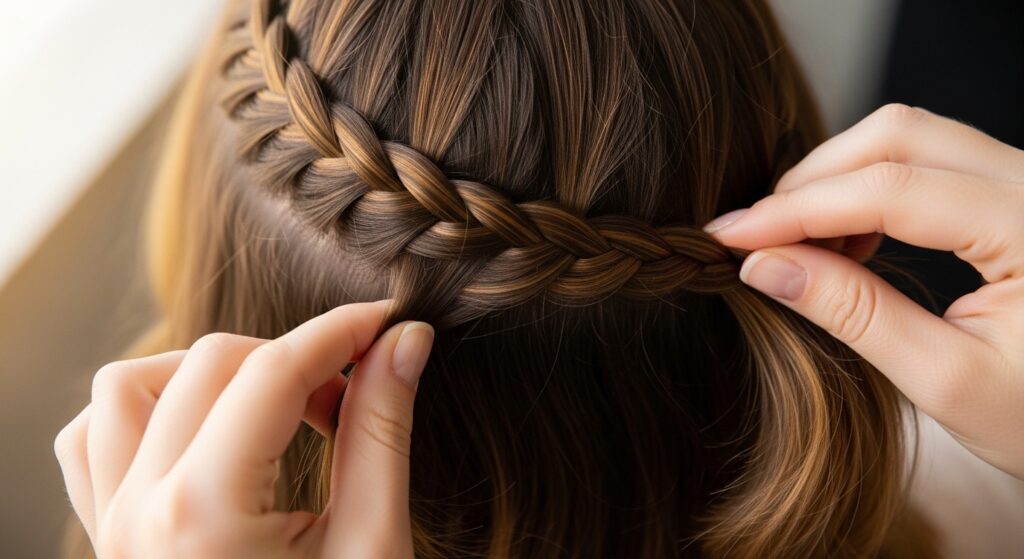
Working Down The Side Of Your Head
As you continue looping and adding hair, you’ll naturally work down the side of your head. Always pick up new hair from the front hairline and the top of your head, not from below the braid.
Keep the braid close to your head if you want a tighter look, or let it angle away slightly for a softer, more bohemian feel. This style is so versatile for different vibes, from old money hair to romantic goth hairstyles.
Transitioning To The Back
Once you reach about the middle of your ear, you’ll run out of new hair to add from the side. This is when you start picking up hair from the lower section you clipped away earlier.
Release a little hair from the clip at a time. Simply incorporate it into your next loop, just like you’ve been doing. The motion doesn’t change at all.
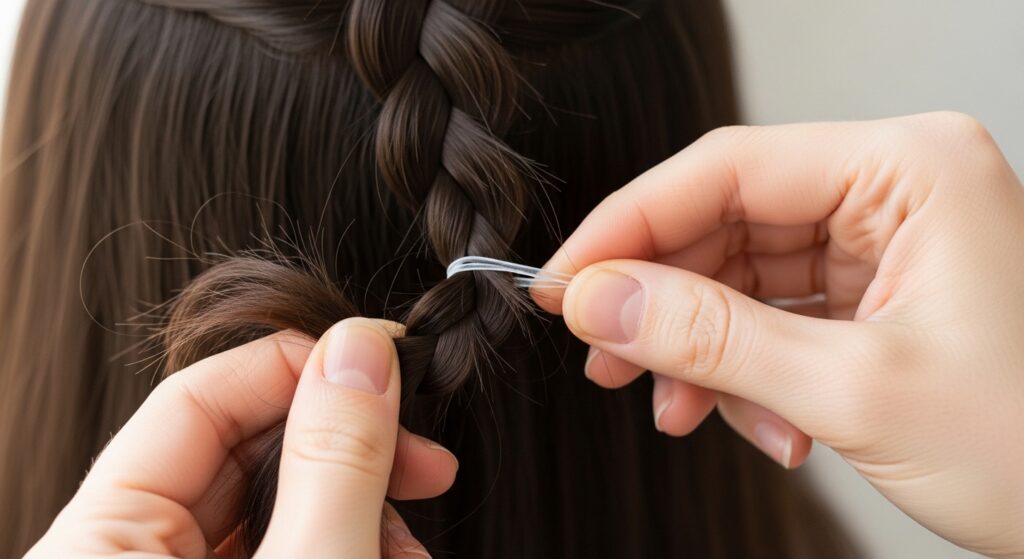
Finishing The Braid
When you have no more hair left to add, you’ll be left with two sections. Continue the infinity loop motion with just these two sections for a few more twists.
This creates a beautiful, tapered end. Once you’re happy with the length, secure the end with one of your clear elastics. Give the whole braid a very gentle tug to loosen it slightly for a softer, fuller look.
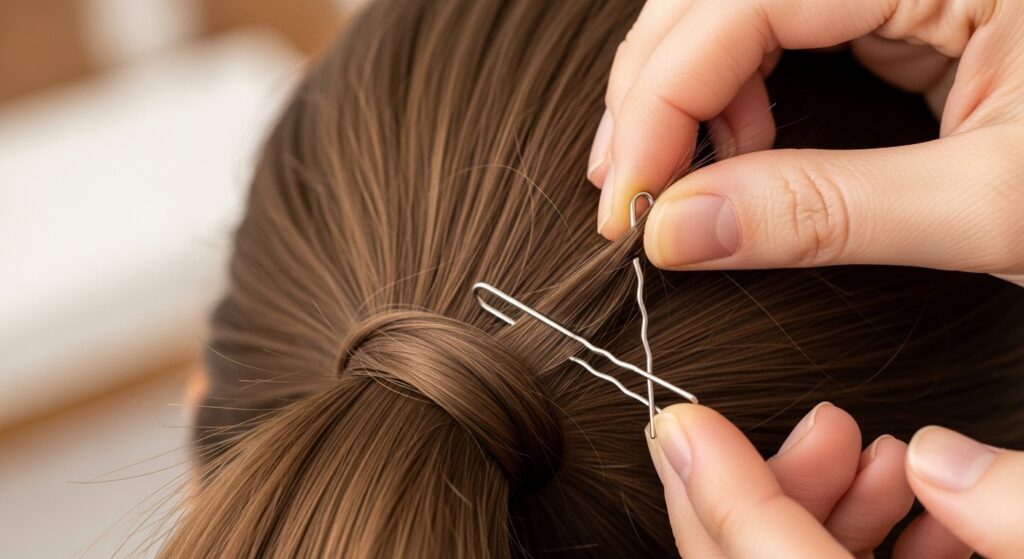
How To Hide The Elastic Like A Pro
Take that little tail of hair at the end and wrap it around the base of the elastic. Use a bobby pin to secure the wrapped hair underneath the braid, hiding the pin.
This tiny detail makes the braid look seamless and professionally done. It’s a trick I use for almost every braided style, especially polished looks like a quiet luxury bob with a braided accent.
Make It Big & Boho
For a boho-chic vibe, gently pull on the outer loops of the braid once it’s secured. Pull horizontally to widen the braid and create a piecey, effortless look.
Start from the top and work your way down. This makes the braid look fuller, softer, and less perfect. It’s a gorgeous contrast to sharper cuts like the asymmetrical lob.
Try A Sleek, Polished Version
For an elegant, runway-ready look, skip the pulling. Instead, mist a light-hold hairspray on a soft-bristle brush and gently smooth down any flyaways along the braid’s part.
This polished finish feels very modern and fits right in with the 2026 hairstyles trend of intentional, clean styling. It’s a stunning way to elevate an everyday look.
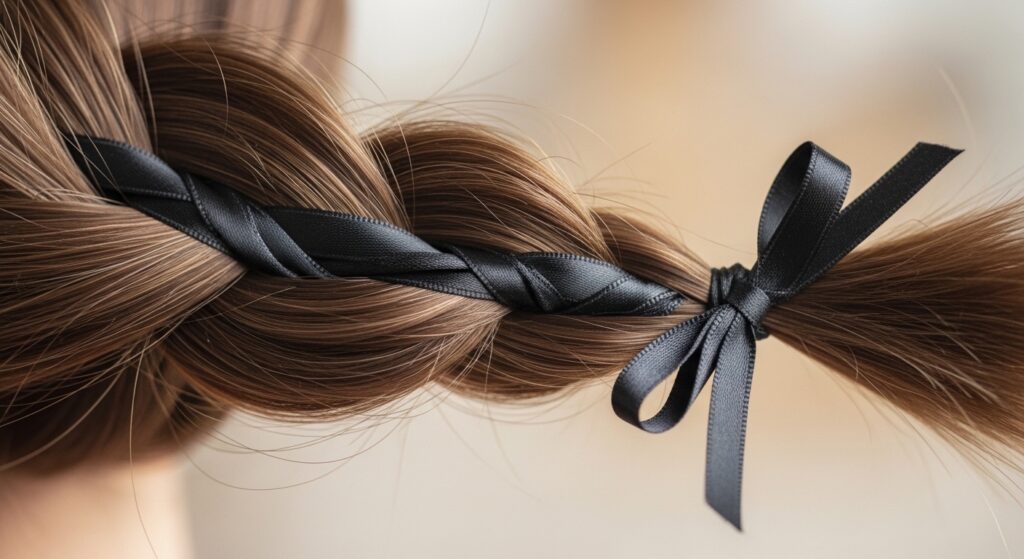
Add Ribbons For A Romantic Touch
Incorporate a thin silk ribbon for a dreamy effect. When you create your first two sections, tie the ribbon to the base of one section. Treat the ribbon as part of that hair section as you braid.
It gets woven right in. This is a beautiful hack for romantic goth hairstyles or just adding a pop of color. Tie the ribbon into a small bow at the end.
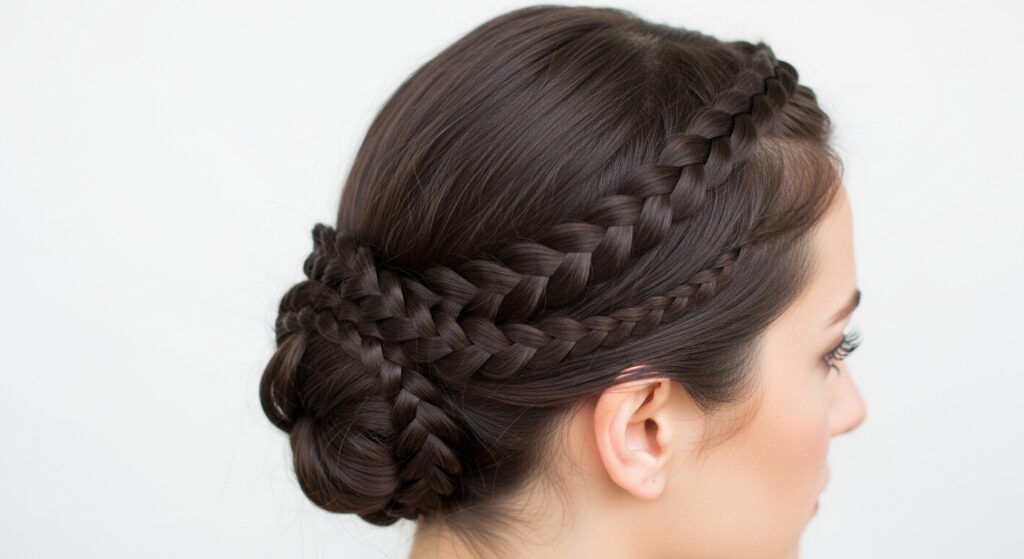
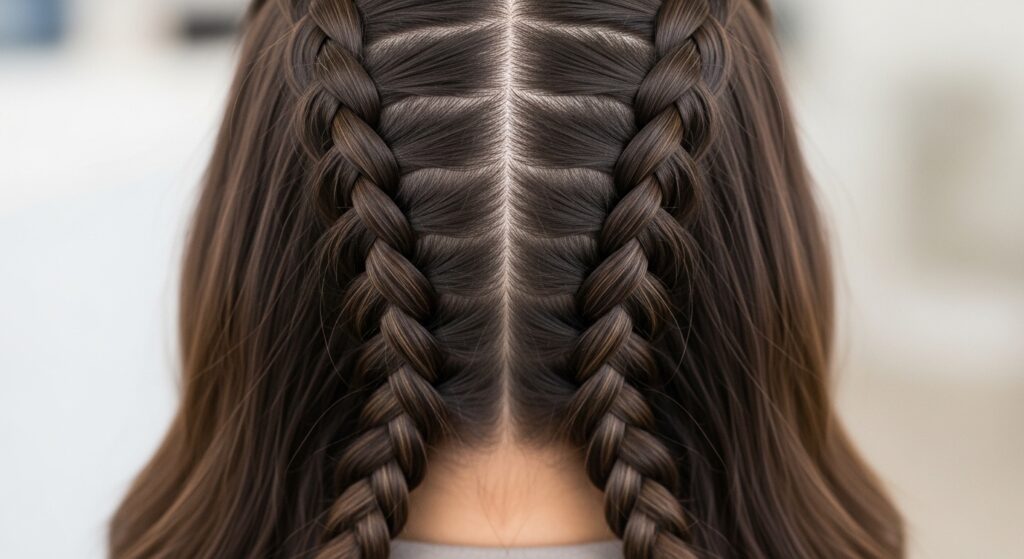
Create A Double Infinity Braid
Feeling ambitious? Part your hair down the middle. Create two identical infinity braids, one on each side. This double look is absolutely striking and perfect for a festival or a bold statement.
It pairs unexpectedly well with edgier cuts like the vampire haircut or hime cut, blending softness with structure.
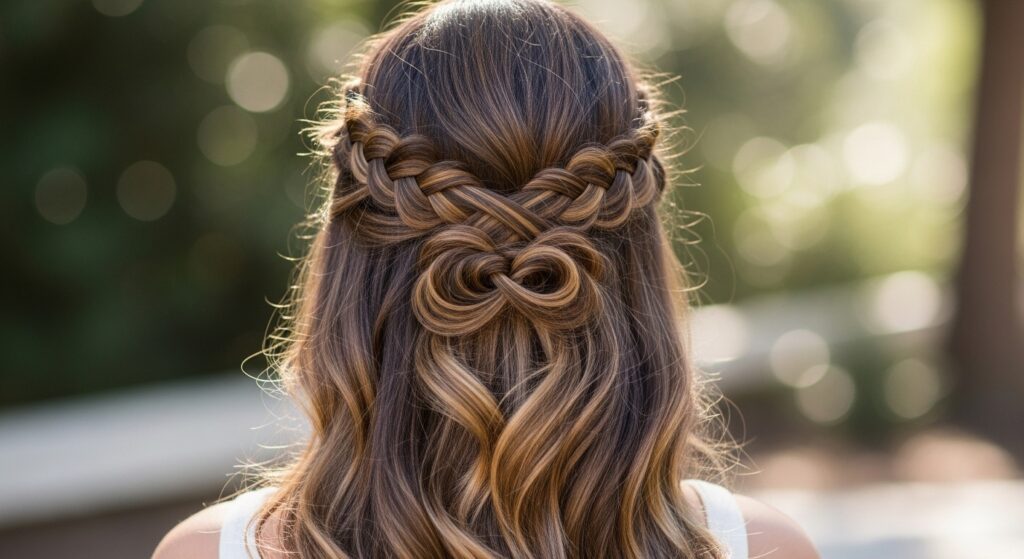
Style It As A Half-Up Crown
This is my favorite lazy-day upgrade. Create your infinity braid along your front hairline, from one temple to the other. When you finish, pin the ends under the braid at the opposite side.
It creates a gorgeous, ethereal crown that keeps hair out of your face. It’s the perfect half-up style that still feels special and put-together.
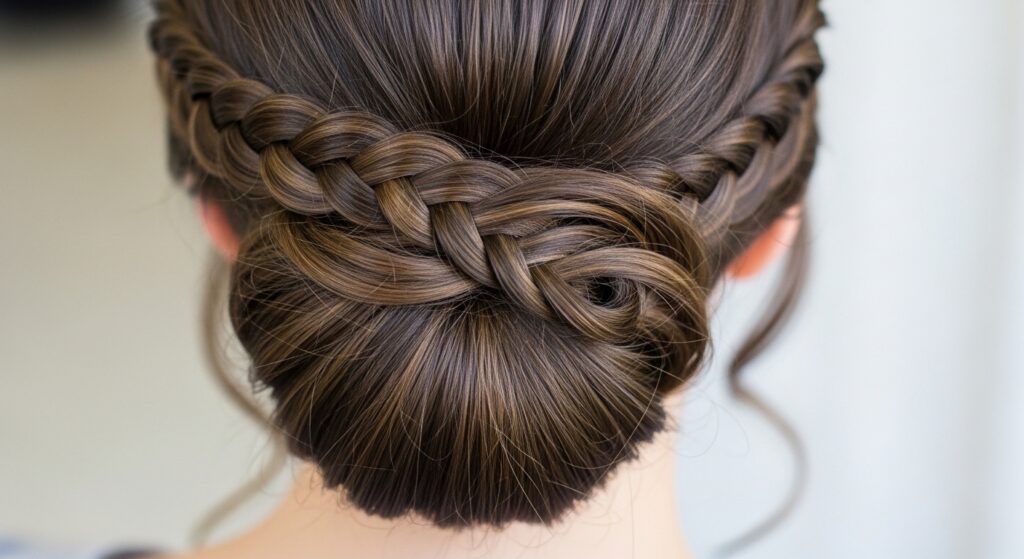
Pair It With A Chic Low Bun
For ultimate elegance, make your infinity braid a side braid. Once it’s complete, twist the tail and wrap it into a low bun at your nape. Secure with pins.
This style is pure quiet luxury bob energy—even if you have long hair. It’s sophisticated, secure, and looks incredible from every angle.
Fix Common Mistakes Instantly
If your braid looks lumpy or uneven, don’t panic. You can often fix it by gently tightening the loops from the bottom up. Slide your fingers up the braid, nudging the loops closer together.
If a section is too loose, use a bobby pin to anchor it to the braid underneath, hidden from view. Most mistakes are easy to camouflage.
Make It Last All Day & Night
To fight frizz and sag, a single spritz of strong-hold hairspray along the finished braid works wonders. Focus on the crown area where you started.
Carry an extra clear elastic and a couple of bobby pins in your bag for a quick mid-day fix. But honestly, this braid is known for its staying power once you get the tension right.
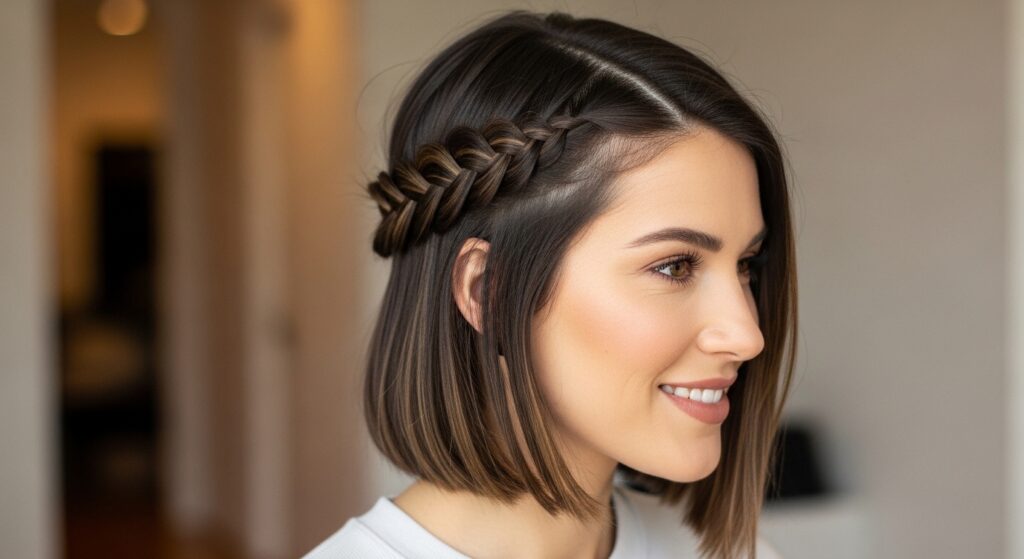
Adapt It For Shorter Hair
Have a bob or lob? You can still rock this! Start the braid much lower, right at your occipital bone (the bump at the back of your head). Use smaller, thinner sections of hair.
You’ll create a beautiful, detailed accent braid that blends into your shorter length. It’s a fantastic way to add detail to an asymmetrical lob.
Why This Braid Is A Forever Style
Trends come and go, but techniques like this are timeless. It works for the gym, a wedding, the office, or a date. It’s the kind of skill that becomes part of your beauty toolkit forever.
Whether you’re channeling glitchy glam hair with a piecey texture or a slicked-back look, this braid adapts. It’s more than a style; it’s a foundation for endless creativity.
And there you have it—your complete guide to mastering the infinity braid. It might feel a little fiddly the very first time you try it, but I promise by the third attempt, your fingers will just know what to do. It becomes second nature.
That’s the best part about learning these foundational styles. They give you the confidence to tweak them, play with them, and make them your own. Whether you add ribbons, pair it with a bun, or wear it perfectly sleek, it’s a look that always feels special.
I’d love to see your creations! Did you try the boho pull-apart method or the sleek polished version? What was the biggest “aha” moment for you? Tell me everything in the comments below—I read every single one.
Save this post to Pinterest so you always have these steps handy for your next hair day. Trust me, you’ll want to come back to it.