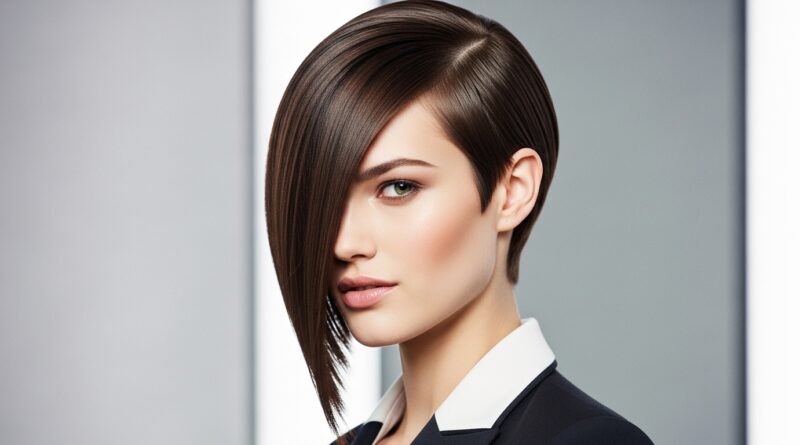
Braid Your Own Extensions at Home Like a Pro
Hey friend. Let’s talk about that feeling. You see a gorgeous, intricate braid on Pinterest, maybe one of those romantic goth hairstyles or a perfectly messy bohemian look, and you think, “I could never do that on my own hair.” I’ve been there. But what if I told you the secret isn’t magic fingers? It’s adding extensions.
Braid-in extensions give you instant length, volume, and that “wow” factor without the commitment. They’re the ultimate hack for creating everything from an old money hair vibe to 2026 hairstyles that are taking over your feed.
And doing it yourself? Totally possible. It saves a salon trip and lets you play with color and style risk-free. This guide is your no-stress, start-to-finish playbook. I’m breaking it down into simple, pro-level steps so you can nail it on the first try.
Grab your coffee, and let’s turn you into your own hairstylist.
Why Braid-In Extensions Are a Game-Changer
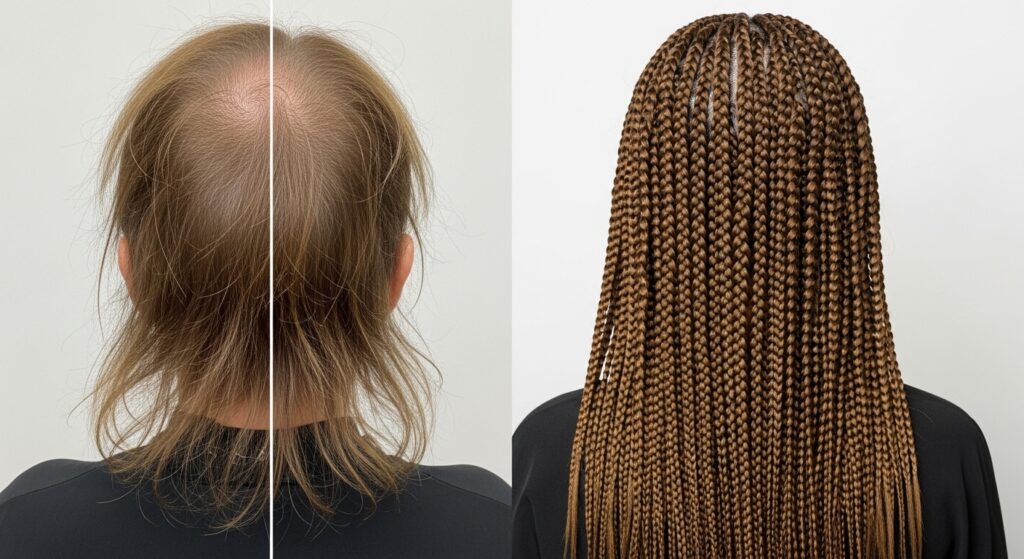
First, let’s get excited about why this is worth it. Braid-in extensions, often called clip-ins you braid over, are the most forgiving way to add hair. Unlike permanent methods, you can take them out at night. This means zero damage and total versatility.
They create an instant base for any updo or style. Want to try the vampire haircut or a hime cut for a day? Extensions let you experiment. They add the thickness needed for those intricate, glitchy glam hair textures that look so cool online.
Think of them as your secret tool for:
- Major volume without teasing or product buildup.
- Experimenting with bold colors (like peekaboo highlights) safely.
- Mastering complex braids on hair that’s usually too slippery or short.
Gathering Your Pro Tool Kit
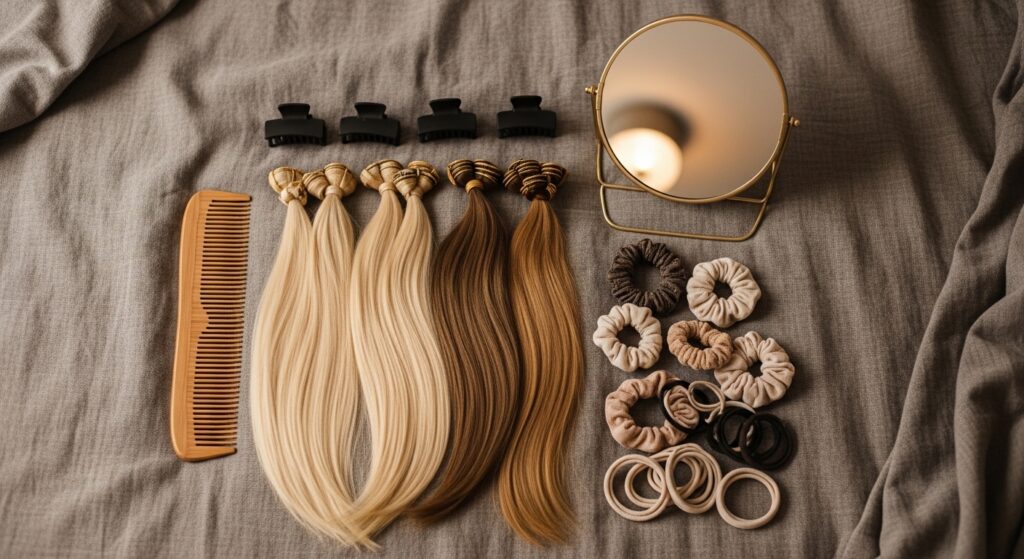
You don’t need a salon full of equipment. Just a few key items will set you up for success. Having everything within arm’s reach is the first pro tip. It makes the whole process smooth and relaxing, not frantic.
Here’s your must-have list:
- Human Hair Extensions: Clip-in wefts are best. Get 2-3 packs for a full head. Quality matters—it blends better.
- Fine-Tooth Comb & Tail Comb: For detangling and creating clean partings.
- Sectioning Clips: These are your best friends for keeping hair organized.
- Strong, Clear Elastics: Small ones to secure the base of your braids.
- Styling Mirror: A two-sided mirror helps you see the back of your head.
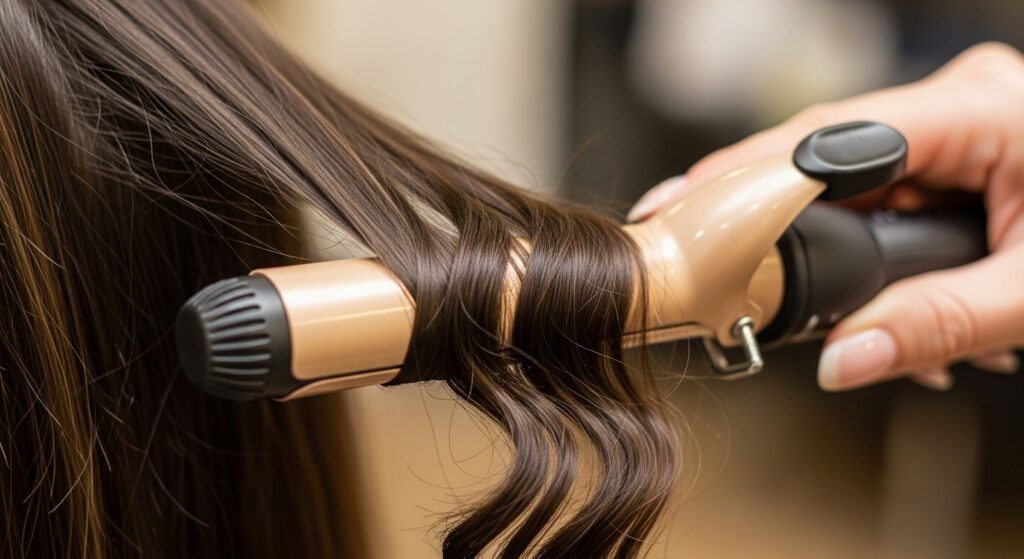
Choosing the Perfect Extension Hair
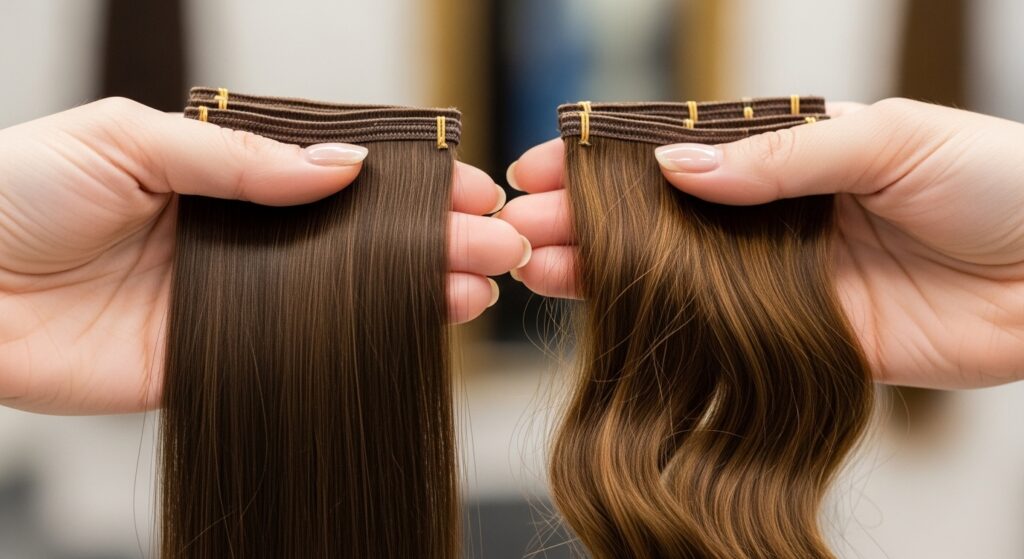
This is the most important step for a seamless blend. The goal is for the extensions to disappear into your natural hair. If you’re aiming for a quiet luxury bob look, the match needs to be perfect.
Focus on texture first. If your hair is bone-straight, get straight extensions. If it’s wavy, get wavy. You can always style them later. For color, match to your ends, not your roots, for the most natural look.
When in doubt, go a shade lighter. You can always use a tinted dry shampoo or spray to darken slightly. For trendy looks like romantic goth hairstyles, you might add a colored streak pack for a pop of dark burgundy or black.
Prepping Your Natural Hair
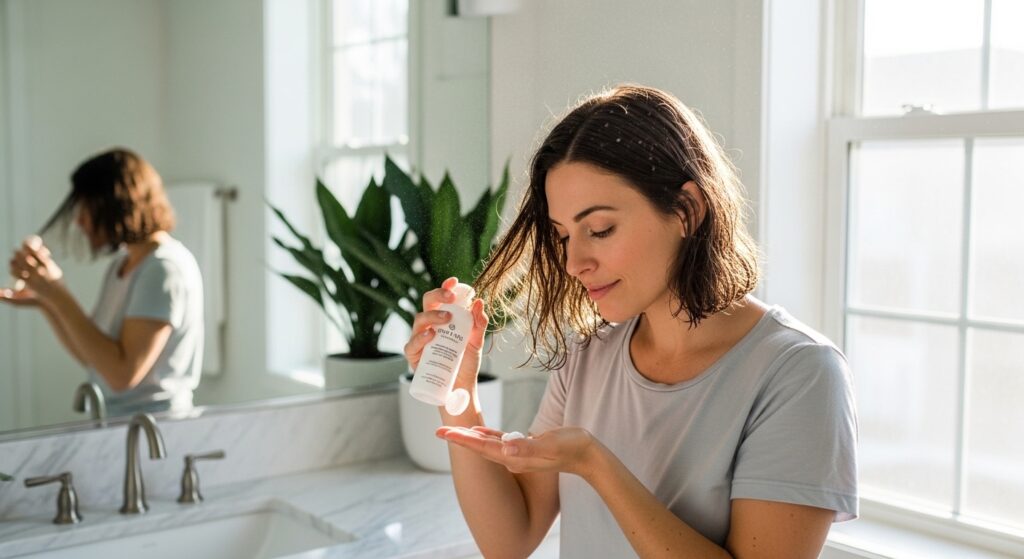
Great braids start with a great base. Your natural hair needs a bit of grip, but not too much. I find day-two hair is ideal—there’s a little natural oil to prevent slipping, but it’s not freshly washed and slick.
If you just washed, use a light texturizing spray. Avoid heavy creams or oils. Brush your hair thoroughly to remove all tangles. This seems obvious, but it’s crucial for smooth, even sections.
You want your hair to be manageable but not silky. A tiny bit of dry shampoo at the roots can add perfect volume and texture. This prep work ensures your braids hold tight and the clips grip securely all day.
The Foundation: Sectioning Like a Stylist
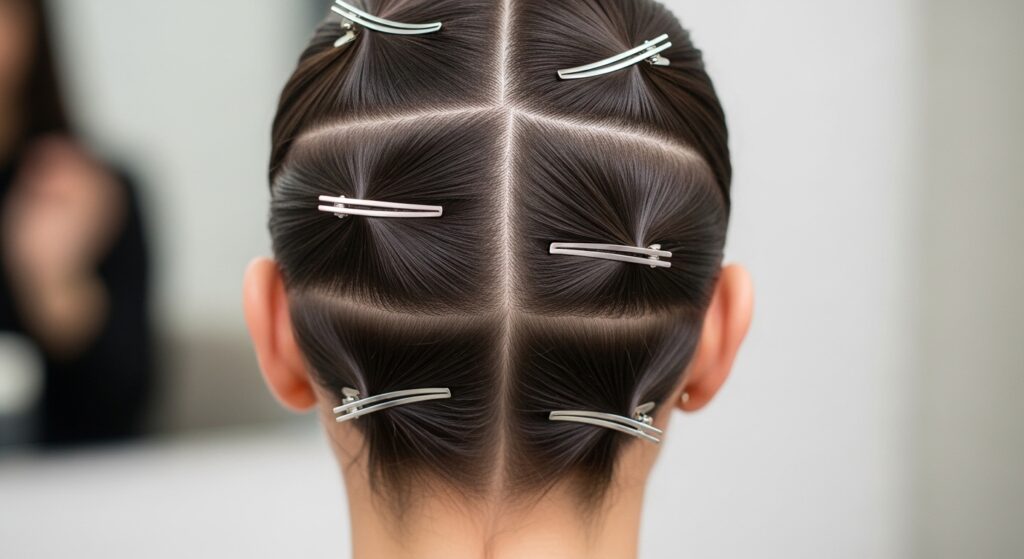
Clean sections are the secret to professional-looking results. Don’t just grab hair randomly. We’ll work from the bottom up. Use your tail comb to make sharp parts.
Start by parting your hair ear to ear, separating the top half from the bottom. Clip the top section out of the way. Then, divide the bottom section horizontally into two more layers. You’ll have three working sections: a bottom, a middle, and the top crown.
This method ensures full coverage and prevents bulky, obvious tracks. It also makes braiding easier because you’re working with small, manageable pieces. Good sectioning is what makes an asymmetrical lob with extensions look like it grew that way.
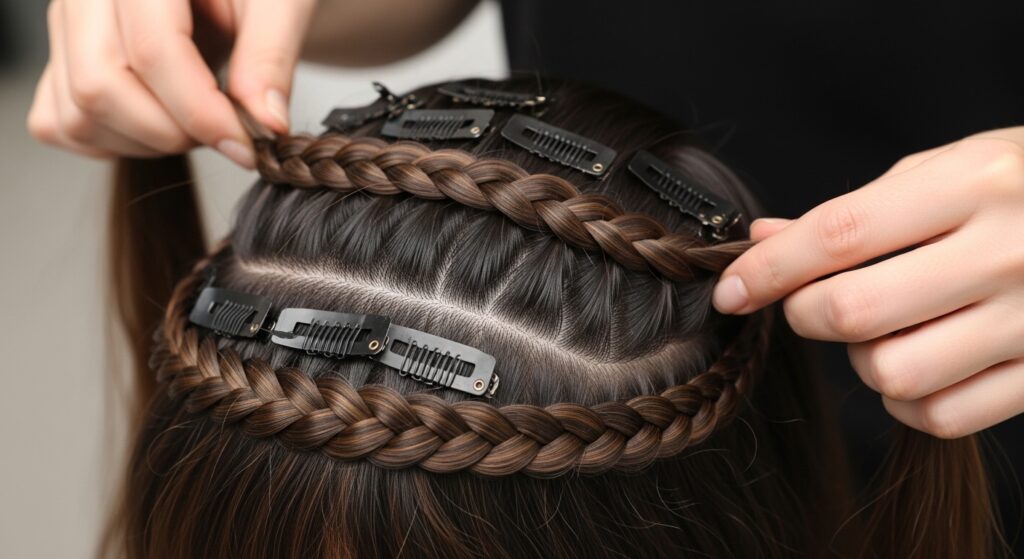
Step 1: Applying the First Bottom Weft
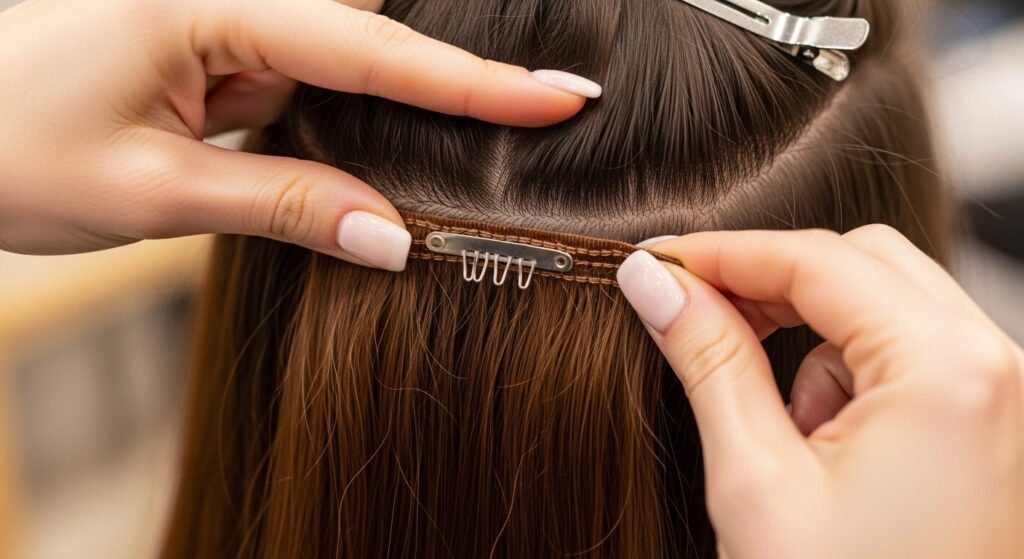
Let’s start at the very bottom, where it’s easiest to hide. Take your first weft (usually the widest one) and unclip all the clips. Lay it horizontally along the part you created at your nape.
Clip it in place, starting from the center and moving outwards. Make sure the clips are snapped shut tightly against your scalp. Then, take a small section of your natural hair from just above the weft and comb it down over the clips.
This is called “sandwiching” the weft. It completely hides the track. Lightly mist this covering hair with hairspray for hold. This bottom layer is your anchor and will support all the hair above it.
Step 2: Creating the Base Braid
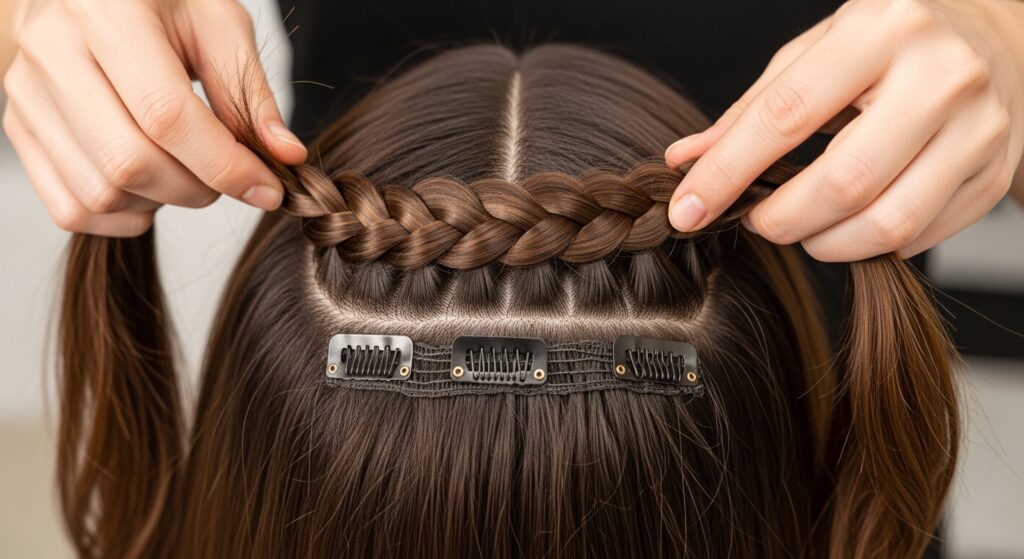
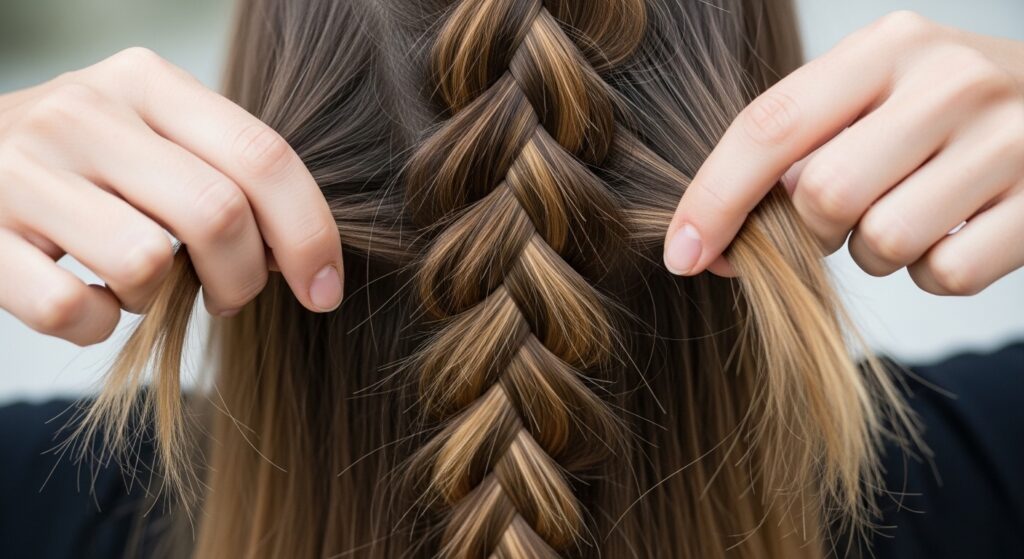
Now, we create the braid that will hold everything. Combine the natural hair covering the weft with the hair from the weft itself. Gently brush them together into one unified section.
Begin braiding a standard three-strand braid. Braid tightly and neatly, keeping it close to your head. As you braid, you’re literally weaving your natural hair with the extension hair, locking it in place.
Secure the end of this braid with a clear elastic. Don’t braid all the way down the extension length yet. Just braid about 3-4 inches to create a solid anchor. This braid is what gives the style longevity and security, perfect for active days.
Step 3: Building Up the Middle Layer
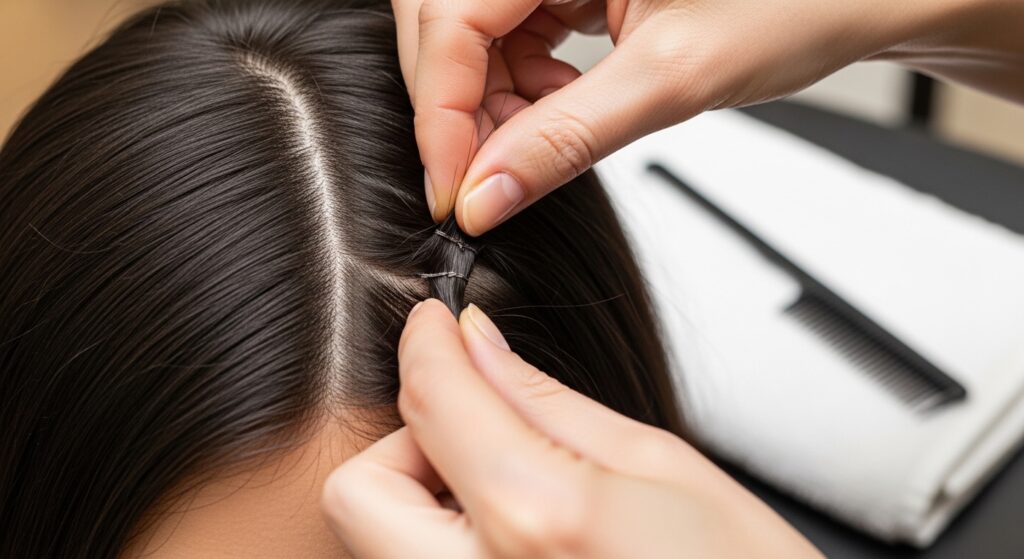
Release the next section of your hair up. You should see a clean horizontal part. Take your next weft and clip it directly onto this part line, just above the first braid you created.
Repeat the same process: clip it in securely, take a thin layer of natural hair from above the weft, and comb it down to cover the clips. Mist it lightly for grip.
Then, combine this new covering hair with the new weft hair and the tail of the first braid. Yes, you’ll now be braiding three sections together: the old braid tail, the new weft, and new natural hair. This layers the volume seamlessly.
Step 4: Repeating for Full Coverage
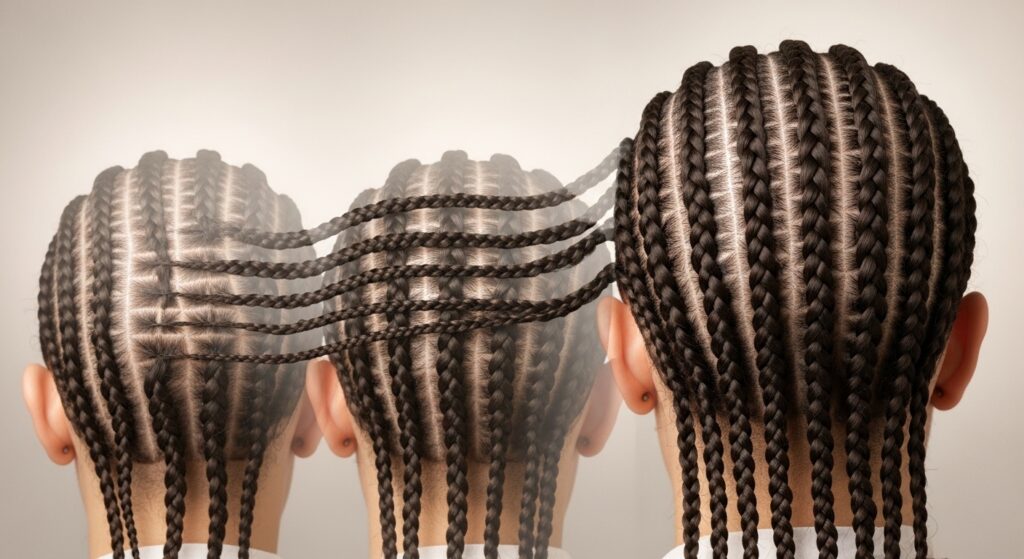
Continue this pattern all the way up your head. Clip, cover, and braid. Each new braid incorporates the tail of the previous one. This builds a connected, sturdy lattice of braids that holds immense weight and looks incredibly cool on its own.
As you move up, you might switch to slightly narrower wefts, especially near the crown. The goal is to follow the natural shape of your head. Keep your part lines clean and horizontal.
By the time you reach the top section, you’ll have a series of parallel braids running up the back of your head. This foundation is what allows for epic styles, from mermaid tails to that coveted glitchy glam hair texture.
Step 5: Securing the Top Crown Section
The crown is the most visible part, so blending is key. For your final weft, place it carefully so it blends with your natural hairline. You may need to angle it slightly or use a smaller weft.
Apply the same clip-and-cover technique. When you take the covering hair from above, make it a very fine, natural-looking layer. You want to avoid a bulky, obvious line.
Braid this final section, incorporating all the previous braid tails. Once secured, you should have one master braid or several braids that feel very secure to the touch. Gently tug on them—they shouldn’t budge.
Styling the Braids: The Fun Begins
Now for the magic. Those foundation braids might look a little neat and flat. To add volume and a lived-in feel, gently pull apart the loops of each braid. Start from the top and work down, tugging outward to widen them.
This “pancaking” technique makes the braids look fuller, softer, and less perfect. It also helps further blend your natural hair with the extensions. Don’t be afraid to really loosen them up for a bohemian effect.
You can stop here for a cool, edgy look with multiple braids. Or, you can use these braids as a base for the styles we’ll talk about next. This volume is the heart of the 2026 hairstyles trend—maximalist yet wearable.
Style 1: The Voluminous Ponytail
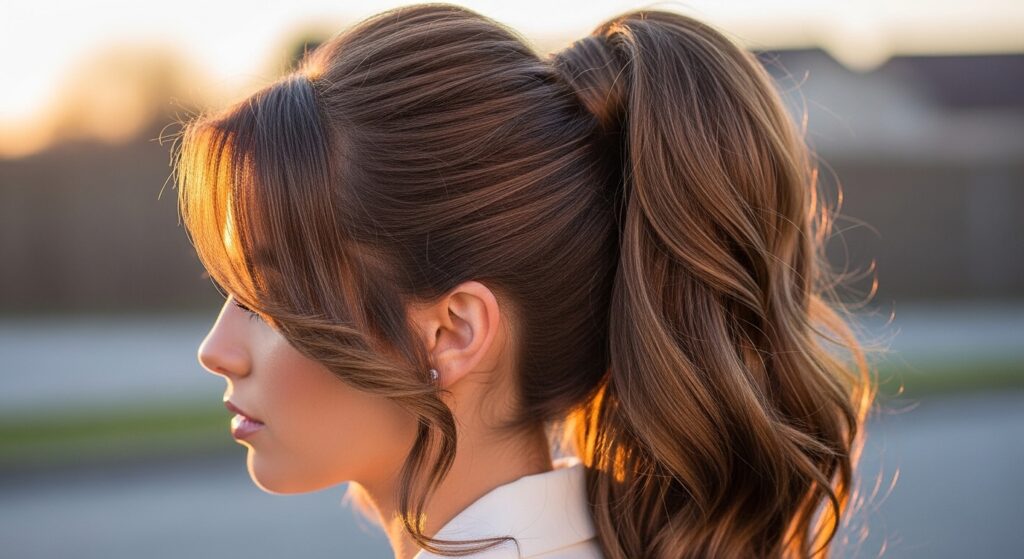
This is the easiest win. Gather all your braided hair and your natural top hair into a high, mid, or low ponytail. The difference will astound you. The braids give the pony unbelievable thickness and length.
Secure it with a strong hair tie. For a seamless look, take a small piece of hair from the ponytail and wrap it around the elastic, pinning it underneath. This is the ultimate old money hair trick—polished, thick, and healthy-looking.
Pull out a few face-framing pieces to soften the look. This style works for the gym, the office, or a night out. It’s practical, but makes a huge aspirational statement.
Style 2: The Mermaid Fishtail Braid
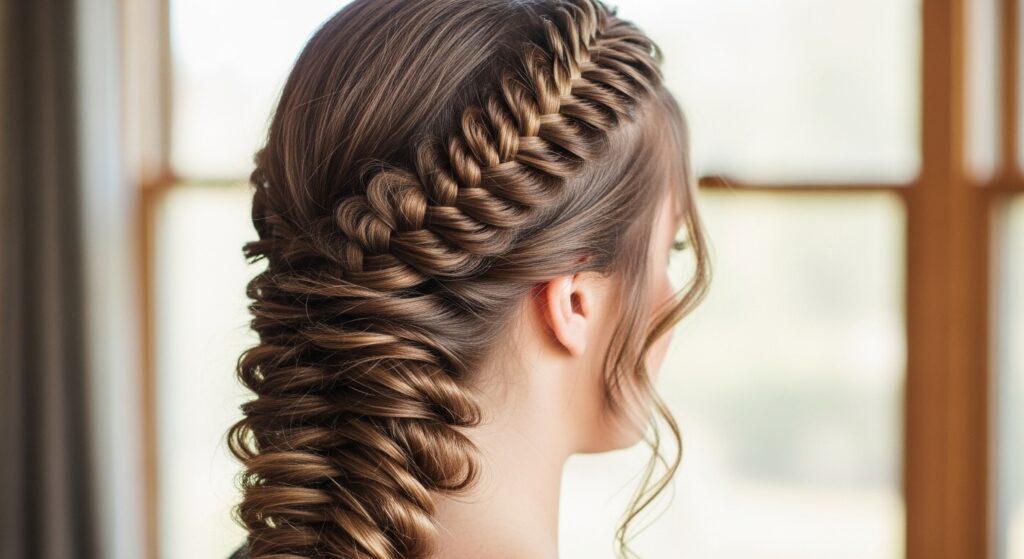
With your braided base, a fishtail is suddenly simple. Combine all the hair into one section. Split it into two equal parts. Take a thin strand from the outside of part A, cross it over, and add it to part B.
Repeat from the outside of part B, crossing over to part A. The extensions give you so much hair to work with, making the pattern of the fishtail really pop. Keep your pieces small for a detailed, intricate look.
Secure the end with an elastic and gently pull the braid apart to amplify it. This style nails that romantic, ethereal vibe and is perfect for when you want to feel a little extra special.
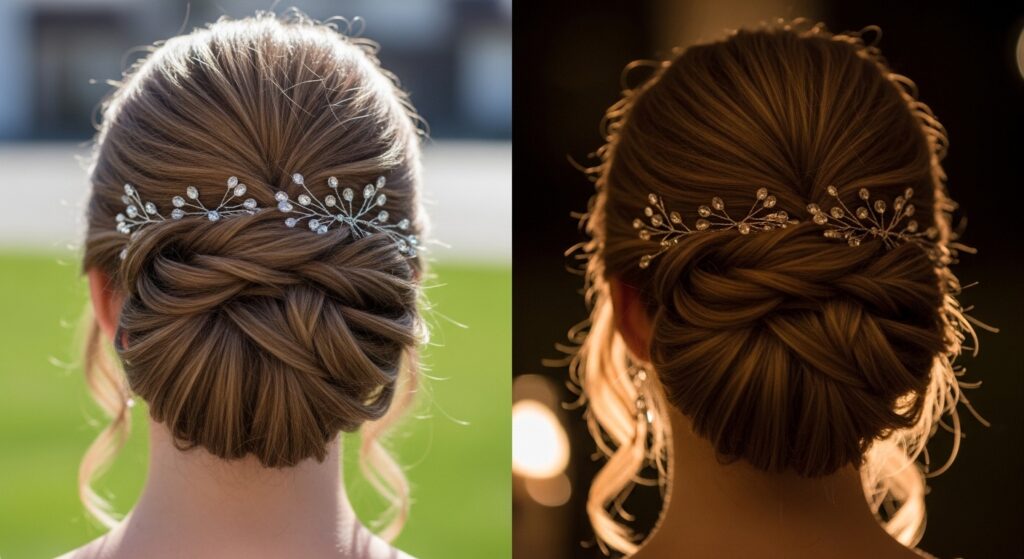
Style 3: A Chic, Textured Updo
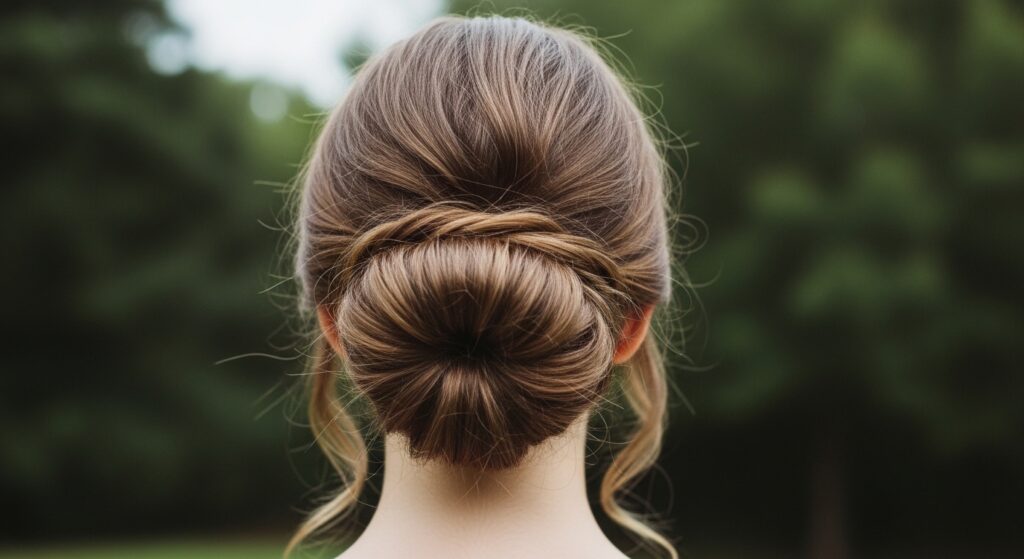
Twist your ponytail into a loose bun or knot. Instead of making it tight and neat, let pieces fall out. The goal is “artfully messy.” Use bobby pins to secure the base, but don’t catch every stray piece.
The braids inside create a ton of texture and hold, so the updo stays put without a hundred pins. This style showcases the quiet luxury bob mentality—it’s undone but deeply intentional and expensive-looking.
Spray with a flexible hold hairspray. This is my go-to for weddings, dates, or any event where I want to look like I didn’t try too hard, but absolutely did.
Style 4: Half-Up, Half-Down Perfection
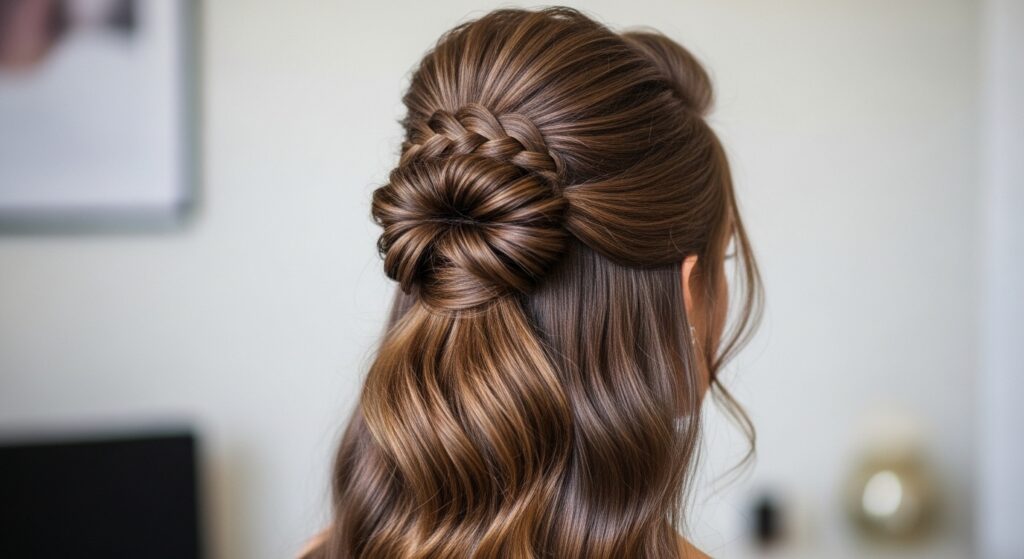
Take the top section of your hair (including the top braids) and gather it as if for a half-up ponytail. But instead of just tying it, create a small, loose braid with that section before securing it.
This adds a beautiful detail and keeps the half-up style from looking too basic. The extensions make the down portion look incredibly lush and full, like you have the hair of your dreams.
It’s a sweet, romantic style that works with everything from jeans to a dress. It’s a great way to dip your toes into the romantic goth hairstyles aesthetic by using darker extension shades.
Blending Tips for an Invisible Finish
Even with a perfect color match, texture blending is key. Always style your natural hair and the extensions together. If you curl your hair, take sections that include both your hair and the extension hair.
Use a light-hold texture spray on your hands and scrunch the roots of your natural hair to match the volume of the extensions. If your extensions are shinier, a tiny bit of dry shampoo on them can mattify them to blend.
Check your work in different lights—especially natural sunlight. Tuck any stubborn pieces of your natural hair behind the braided base. The final look should feel like one cohesive head of hair.
Making It Trendy: The Asymmetrical Lob
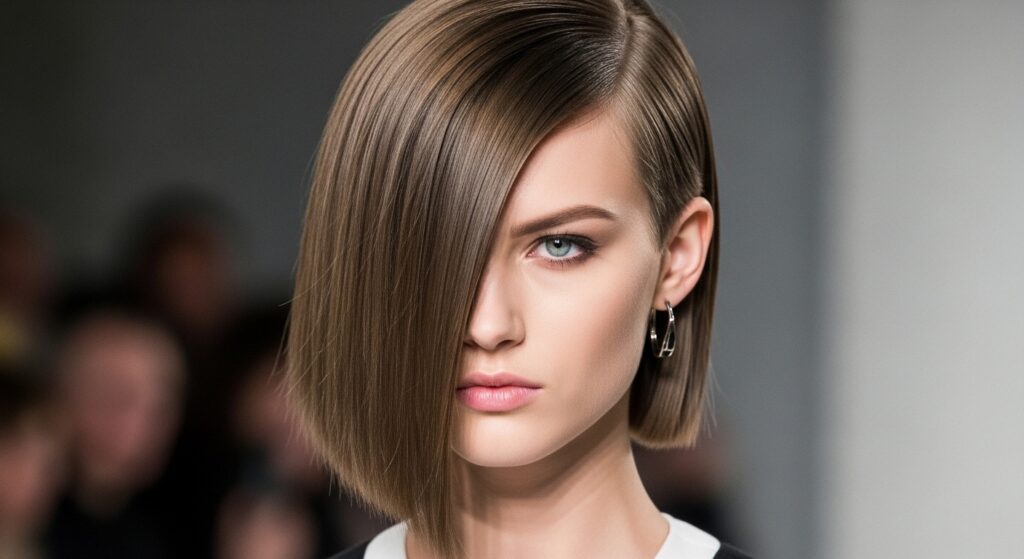
You can create trendy cuts without scissors! For an asymmetrical lob, style all your hair to one side. Use the length and weight of the extensions to create a sharp, angled line in the front.
Keep the hair smoother and straighter for this look. The braided base ensures the hair on the shorter side still has tons of volume at the roots. It’s a dramatic, fashion-forward style that’s completely temporary.
This is a fantastic way to test-drive a major cut. It plays right into the glitchy glam hair trend by being a little unexpected and sharply modern.
Making It Trendy: The Vampire Hime Cut
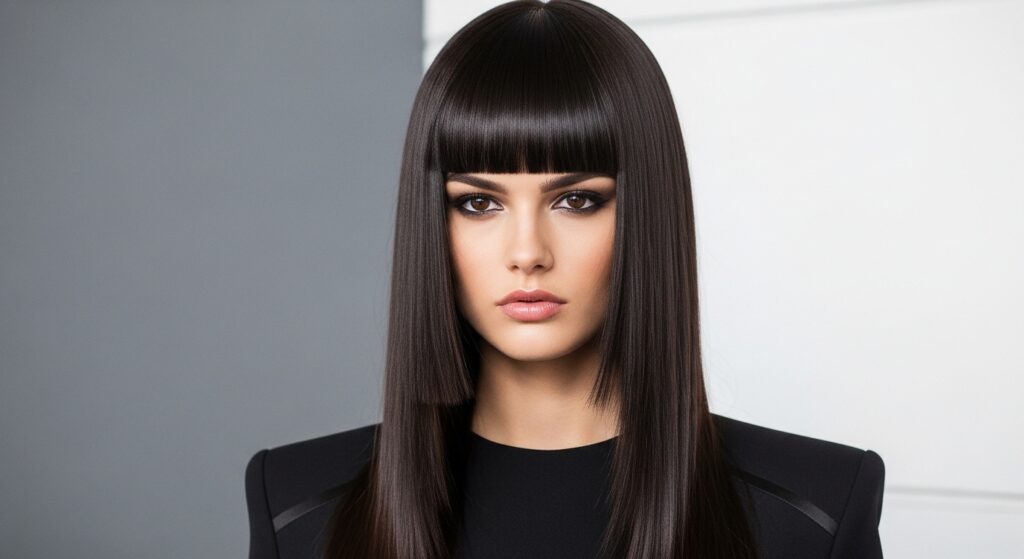
This look is all about blunt lines. Create a deep side part. Use the extension length to form the long, dramatic “hime” (princess) side locks in the front. Keep the rest of the hair sleek and straight.
For the blunt bangs, you can use a clip-in fringe or carefully style your natural hair forward. The contrast between the sharp bangs and the long hair is striking. It’s a bold mix of the vampire haircut and traditional hime cut.
Accessorize with dark lipstick for the full effect. This style is a conversation starter and shows how extensions let you play with extreme shapes safely.
Day-to-Night Transition Tips
You put in the work—make it last! For day, keep styles simple: loose waves, a low pony, or a braid. The beauty is the added thickness looks polished even when casual.
To transition to night, focus on accessories and texture. Add a few sparkly pins to your updo. Or, quickly run a curling iron through the ends for more defined, glamorous waves.
Change your part for instant volume refresh. A side part feels more dramatic for evening. A spritz of shine spray can also elevate the look, making it perfect for dinner or drinks.
Caring for Your Extensions Post-Style
To make your investment last, care for them gently. When you take them out, carefully unbra