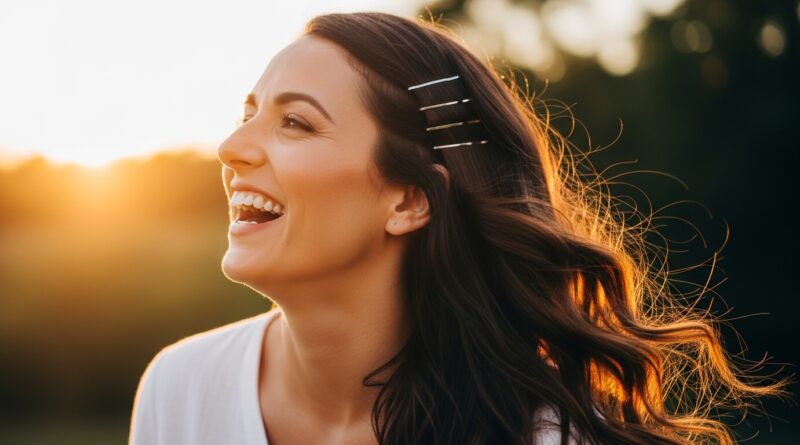
Clips 16 Vintage Barrette Rows Lining Parts Playfully Retro
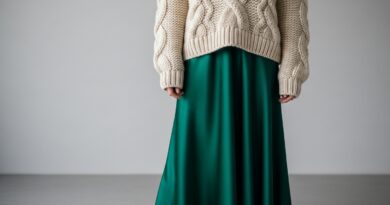
Okay, I have a confession. I was digging through my grandma’s old jewelry box last weekend, and I found a treasure trove of vintage barrettes. Not just a few, but a whole collection. It got me thinking about how we’re always looking for the next big thing in 2026 hairstyles, from the quiet luxury bob to the vampire haircut.
But what if the coolest update is actually a blast from the past? I’m talking about taking those classic clips and using them in a totally new, super intentional way.
Forget just clipping back your bangs. The trend I’m seeing everywhere is lining multiple barrettes in neat rows along your part. It’s playful, it’s retro, and it adds instant personality to any hairstyle. The best part? It takes two minutes and you probably already have the tools in your drawer. Let’s break down exactly how to do it and make it feel fresh.
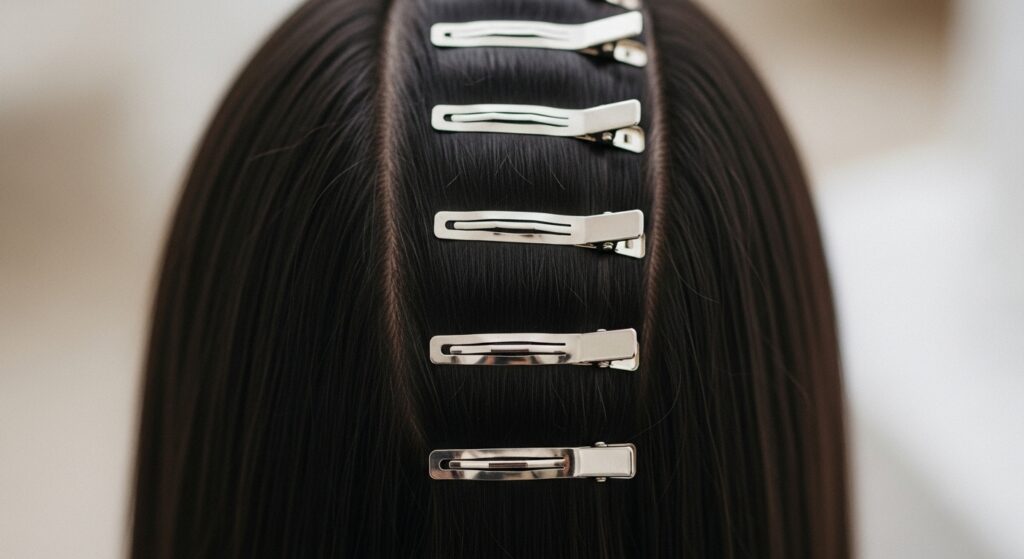
What Is The Barrette Row Trend?
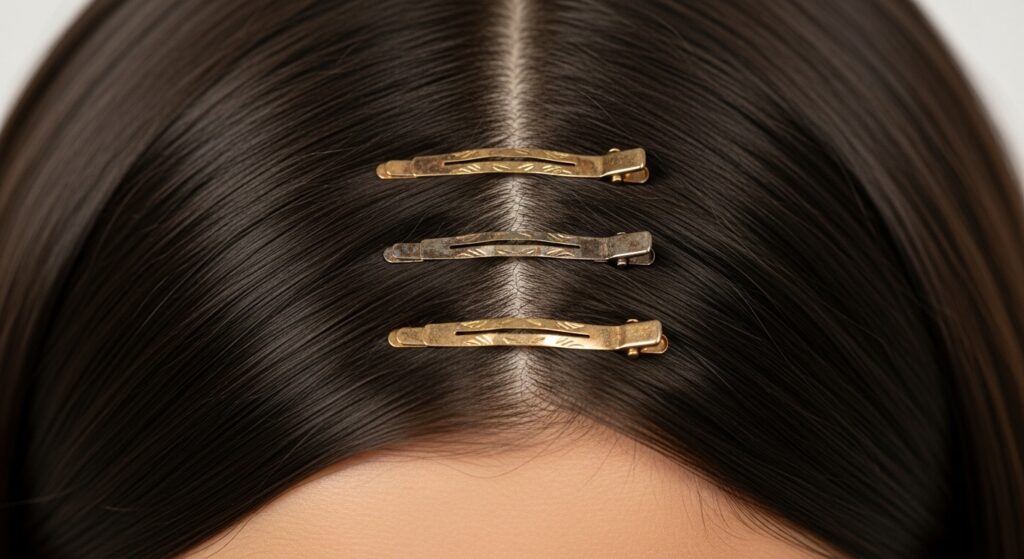
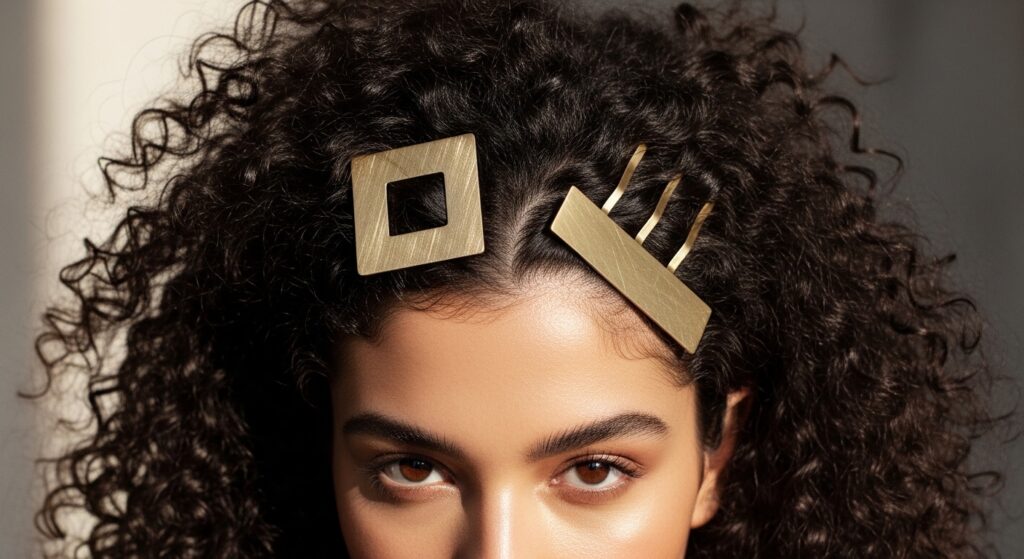
This isn’t about throwing in a single clip. The look is defined by precision. You create a clean, straight part and then line two or more barrettes in a row along one side of it. It’s structured yet whimsical.
It works because it adds a graphic, almost jewelry-like detail to your hair. It feels like an extension of the old money hair aesthetic—polished but with a hint of playful nostalgia. It’s a detail that makes people look twice.
Why This Retro Style Feels So New Right Now
Fashion is cyclical, but it always comes back with a twist. We’re in a moment that loves mixing eras. Think glitchy glam hair or romantic goth hairstyles—they all blend different times.
This barrette trend taps into that. It takes a super girly, 90s accessory and styles it with a modern, almost architectural precision. It’s the perfect counterbalance to effortless, lived-in waves or a sleek asymmetrical lob.
The Perfect Haircuts to Showcase Your Barrettes
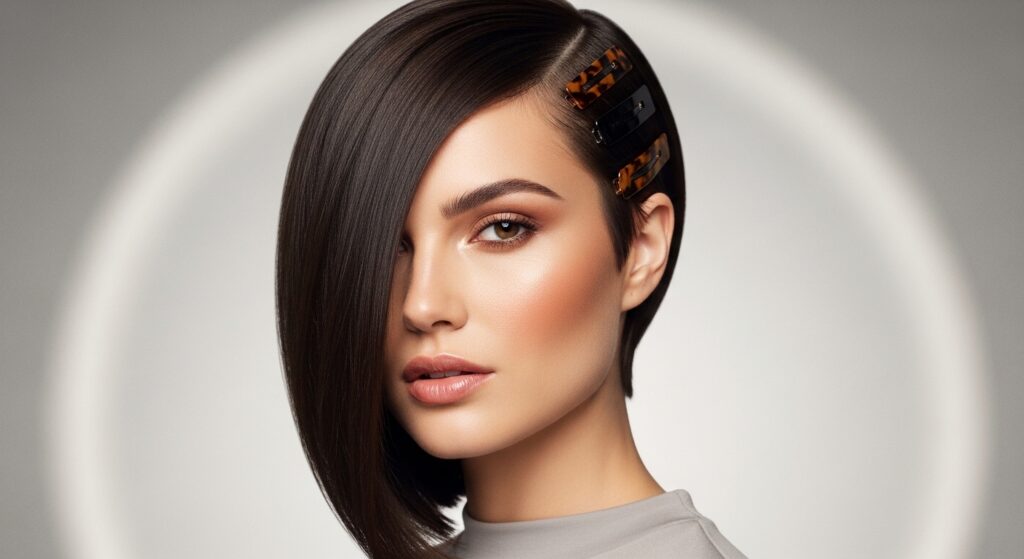
This trick works on almost any length, but it shines on certain cuts. A blunt quiet luxury bob creates a stunning canvas. The clean lines of the haircut and the geometric barrette row complement each other perfectly.
It also looks amazing on longer hair, especially with face-framing layers. Even edgier cuts like the hime cut or a shaggy vampire haircut can be softened and accessorized with this row of clips.
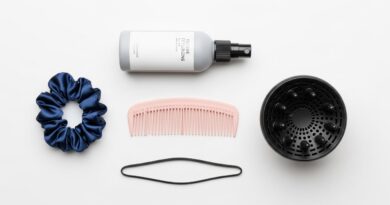
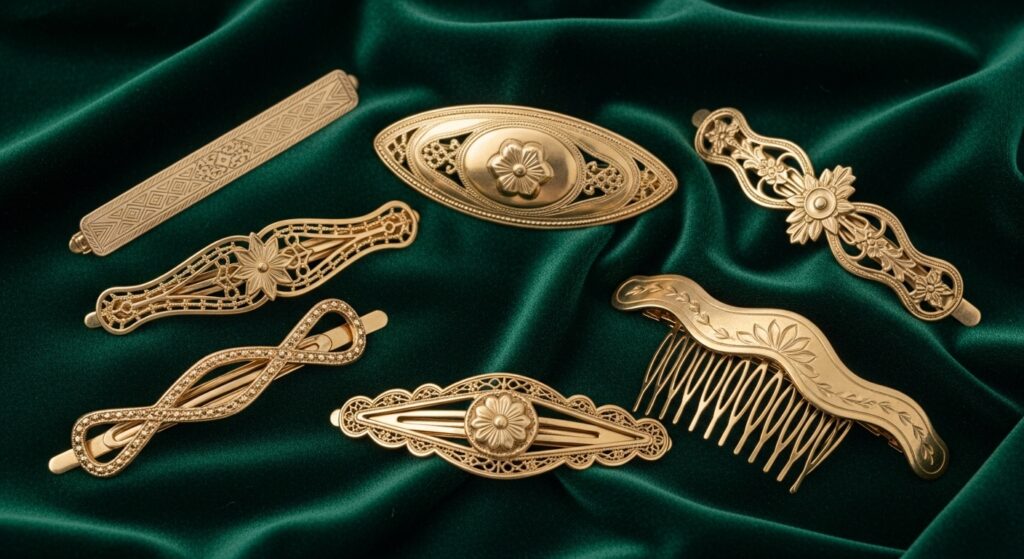
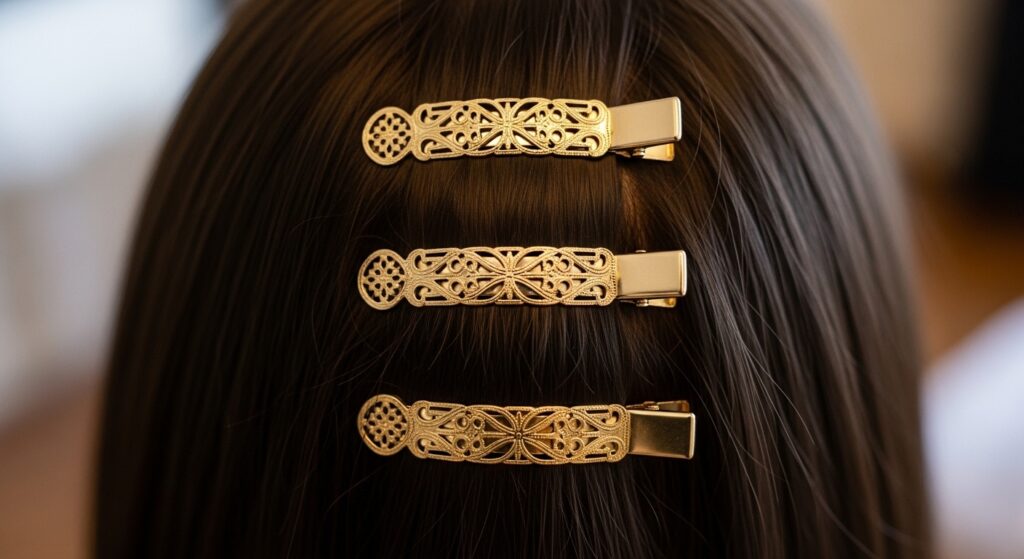
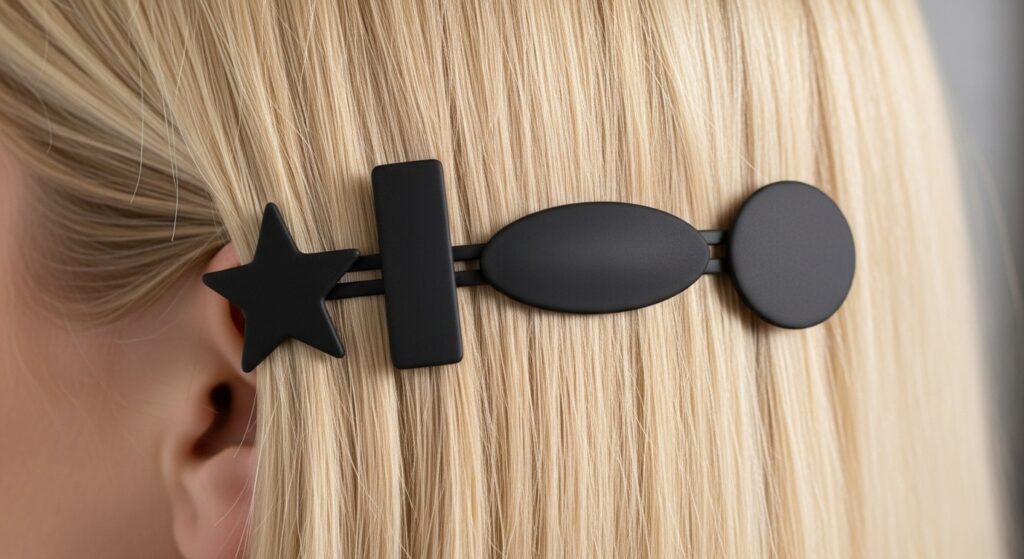
Gathering Your Barrette Collection: What to Look For
You don’t need fancy new clips. Raid your old stash or hit the thrift store. The key is to find barrettes that are similar in style but not necessarily identical. A cohesive theme ties it together.
- Metal Finishes: Look for all gold-tone, all silver, or all tortoiseshell.
- Size: Smaller, daintier barrettes (about 1-2 inches) work best for multiple rows.
- Shape: Classic rectangle, oval, or simple designs are easiest to line up neatly.
Step One: Creating the Perfect Part
This style lives and dies by a crisp part. Don’t just use your fingers. Grab a tail comb from your makeup bag. Dampen the teeth slightly with water or a tiny bit of styling cream for extra control.
Draw the comb from the front of your hairline straight back to the crown. Look straight into the mirror to ensure it’s centered or positioned exactly where you want your side part. This clean line is your guide.
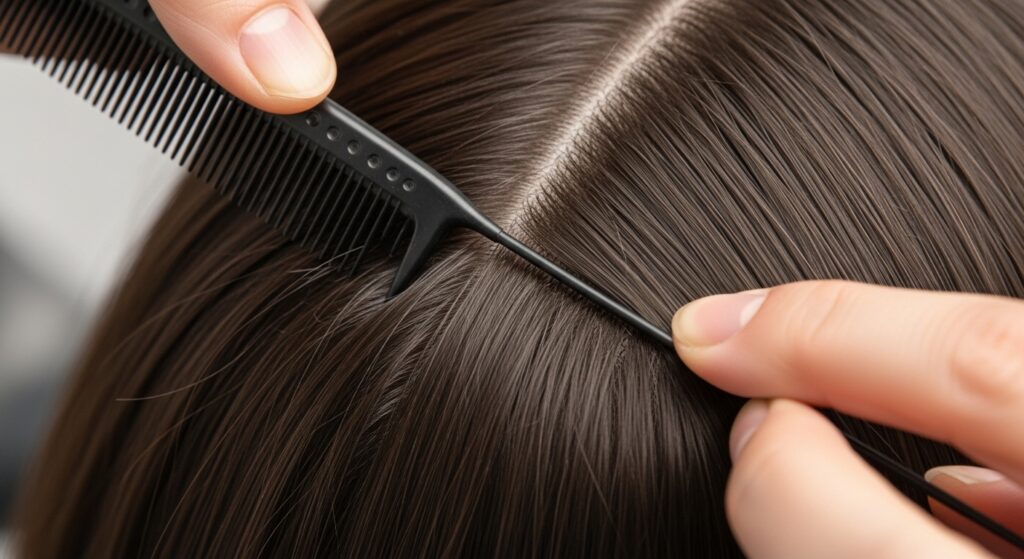
Step Two: Sectioning the Hair for Your First Clip
You’ll be clipping the barrettes to the *side* of the part, not on top of it. Decide which side will get the decoration. Use the tip of your tail comb to separate a small, thin section of hair right next to the part line on that side.
This first section should be just enough to fill the clip—about half an inch to an inch wide. Smooth it gently with your fingers or a brush before clipping. This keeps the look polished.
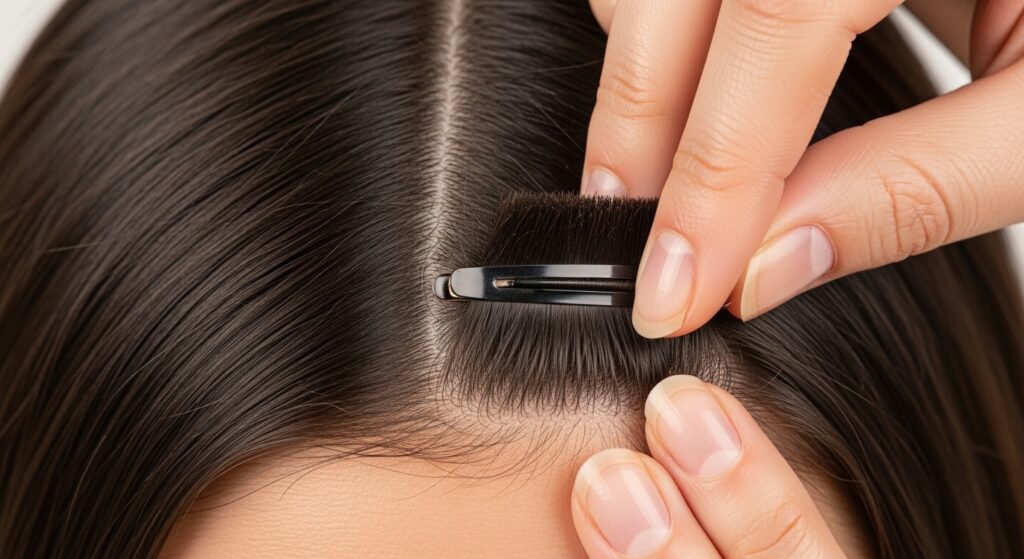
Step Three: Placing Your First Anchor Barrette
Your first clip is the anchor. Place it about an inch back from your hairline. Open the barrette, slide it over your prepared section of hair, and snap it closed firmly against your scalp.
Give it a gentle tug to make sure it’s secure. This first one sets the direction for the entire row. Make sure it’s sitting straight and not angled.
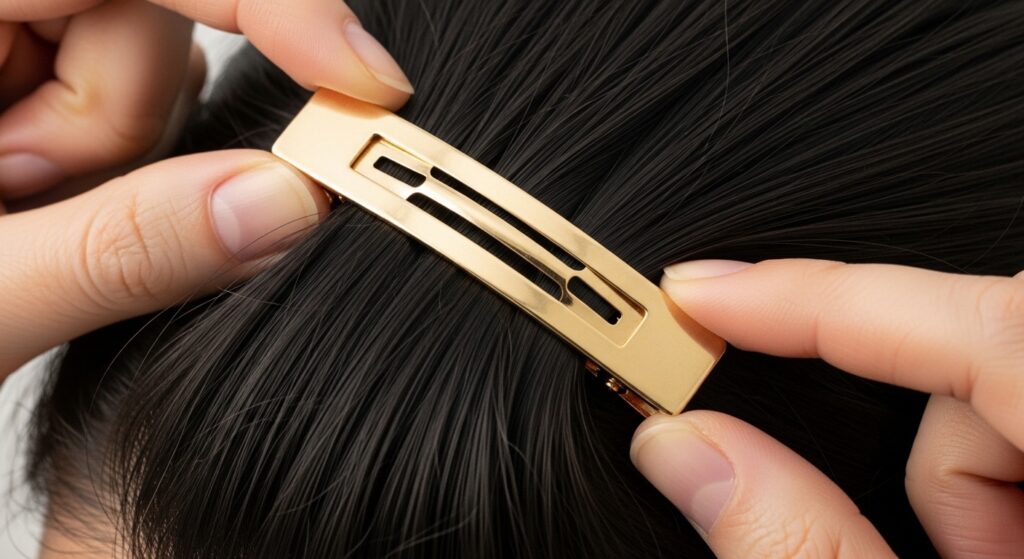
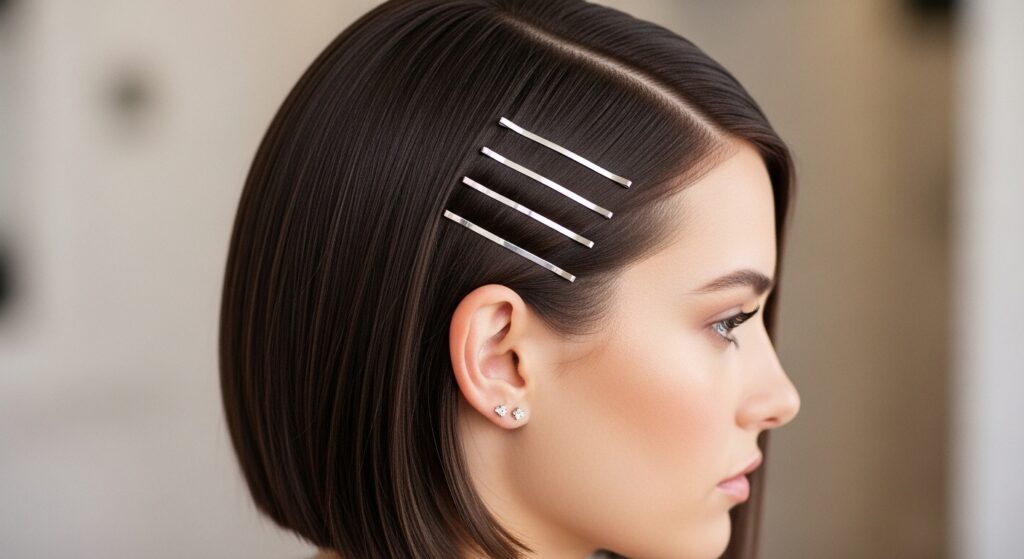
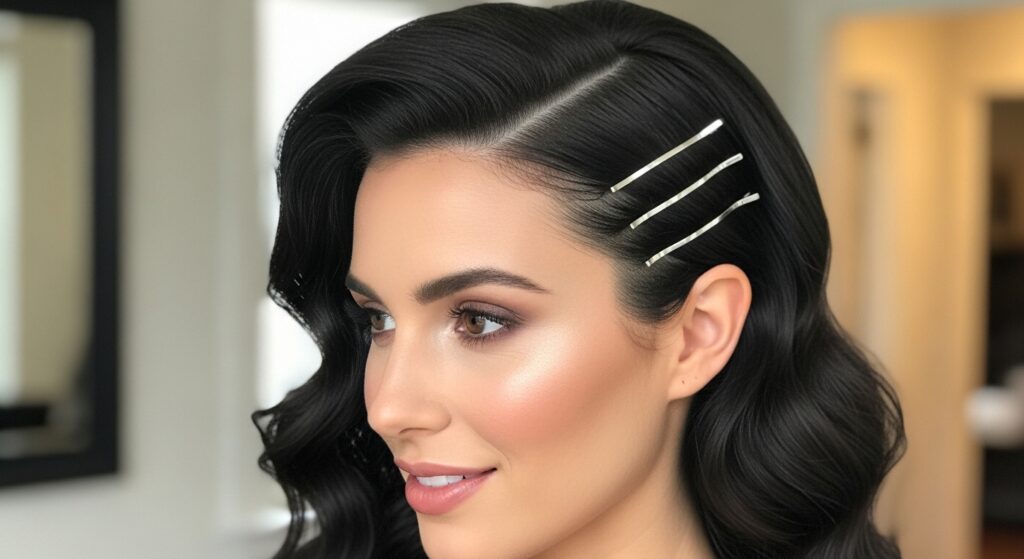
Step Four: Building the Row Down Your Part
Now, move down your part line. Use the comb to pick up another similar-sized section right below the first clip. The goal is to create a straight line of clips following your part.
Space them evenly, about one to two inches apart. You can use 2, 3, or even 4+ barrettes depending on your hair length and how dramatic you want the look to be.
Pro Tip: Keeping the Row Perfectly Straight
The biggest challenge is keeping that line looking intentional, not sloppy. Here’s my trick: after placing each clip, stand back and look in the mirror head-on. Check their alignment.
You can also use the edge of a makeup brush or a ruler held against your screen to visually check if they’re all in a row. A tiny adjustment makes a huge difference.
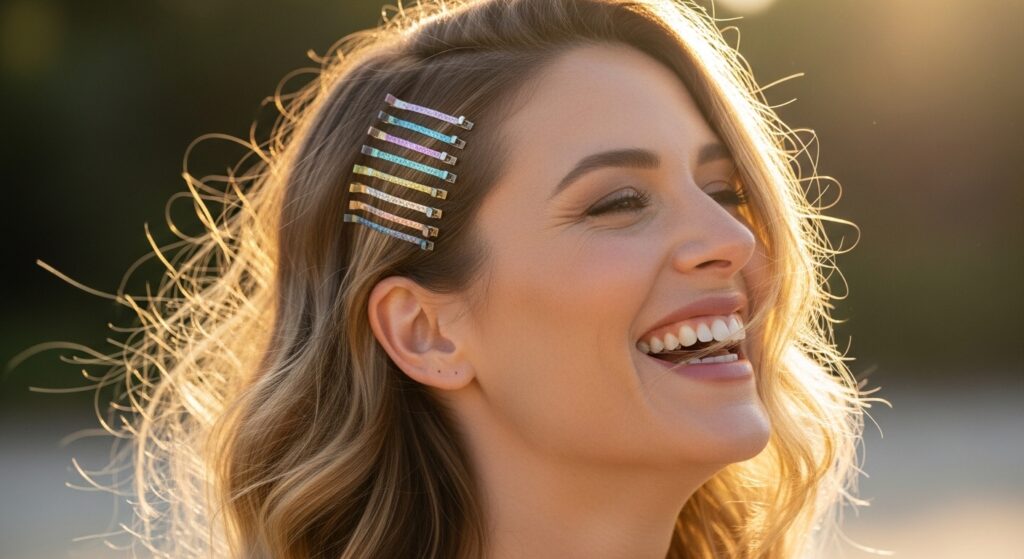
Mixing and Matching Barrette Styles Playfully
Once you master the basic row, get playful. Try mixing different shapes that share a common color. For example, a rectangle, then a circle, then a heart—all in pearl.
This adds a glitchy glam hair vibe, like your look is delightfully “coded” wrong. It shows personality and keeps the trend from feeling too precious or matchy-matchy.
Adapting the Look for a Deep Side Part
This isn’t just for center parts! A deep side part is a gorgeous option. Create your dramatic side part, then line the barrettes on the *larger* side of your hair, following the curve of the part.
This version feels very old money hair and romantic. It adds detail to the sweeping volume of a deep side part, perfect for a night out or a wedding.
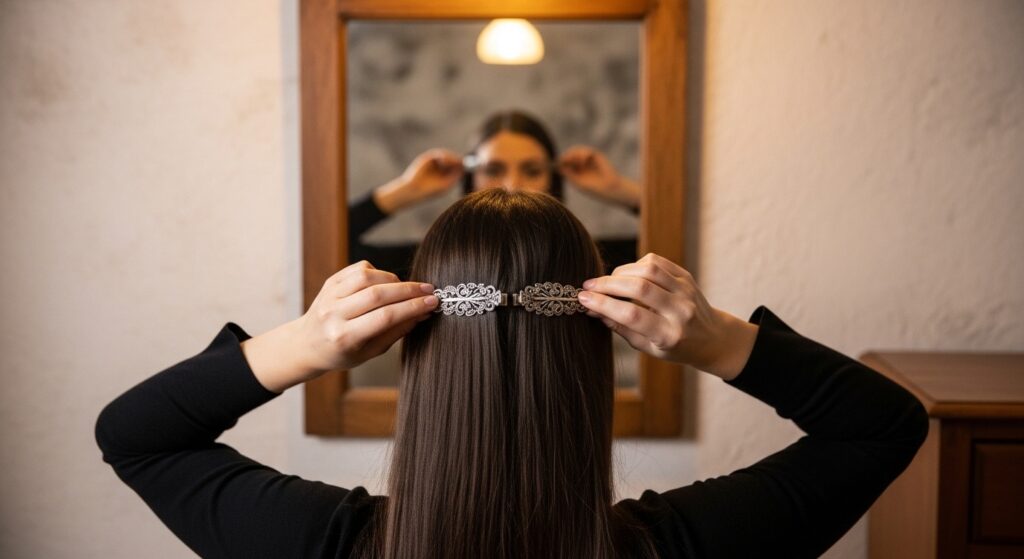
Pairing Barrettes with “Old Money” Waves
For that classic, old money hair texture, create soft, polished waves with a curling iron or rollers. Brush them out gently for a seamless, luxurious wave.
Then, add your barrette row. The combination of timeless waves and vintage clips is absolutely unbeatable. It’s elegant but secretly easy, which is the whole goal.

Adding a Gothic Twist with Darker Accents
Lean into the romantic goth hairstyles trend by choosing your barrettes carefully. Opt for jet black, dark velvet, or silver with black gem details.
Style your hair with texture and a bit of undone volume. The neat row of dark clips against messy waves or a vampire haircut creates a beautiful, intentional contrast.
Making it Work with Short Hair and Bobs
Short hair lovers, this is for you! On a sharp asymmetrical lob or a classic bob, the barrette row becomes a major focal point. It adds the decoration that longer hair might get from braids or ponytails.
Just make sure your sections are very neat. On shorter hair, any messiness is more noticeable. Use a bit of pomade to smooth the sections before clipping.
Styling on Textured and Curly Hair
This trend isn’t just for straight hair! On curly or coily textures, it looks amazing. Apply your styling products as usual and let your curls set.
Once your hair is dry, create your part and gently smooth the chosen section with a tiny bit of gel on your fingers before clipping. The barrettes will sit on top of your gorgeous texture, adding a cool accent.
The “Glitchy Glam” Approach to Placement
For a true glitchy glam hair moment, break the rules *on purpose*. After placing a straight row, add one “error” clip. Place a single, contrasting barrette slightly off the line, or on the opposite side of the part.
It should feel intentional, like a digital glitch. This works best with a very sleek, modern base hairstyle to sell the effect.
Using Barrettes as a Functional Tool
This style isn’t just pretty; it’s practical. Those barrettes are holding that section of hair neatly in place. It’s a great way to keep shorter layers or bangs off your face on a windy day or during work.
Think of it as an upgrade from a basic bobby pin. You’re solving a minor hair annoyance (hair in your face) with a major style statement.
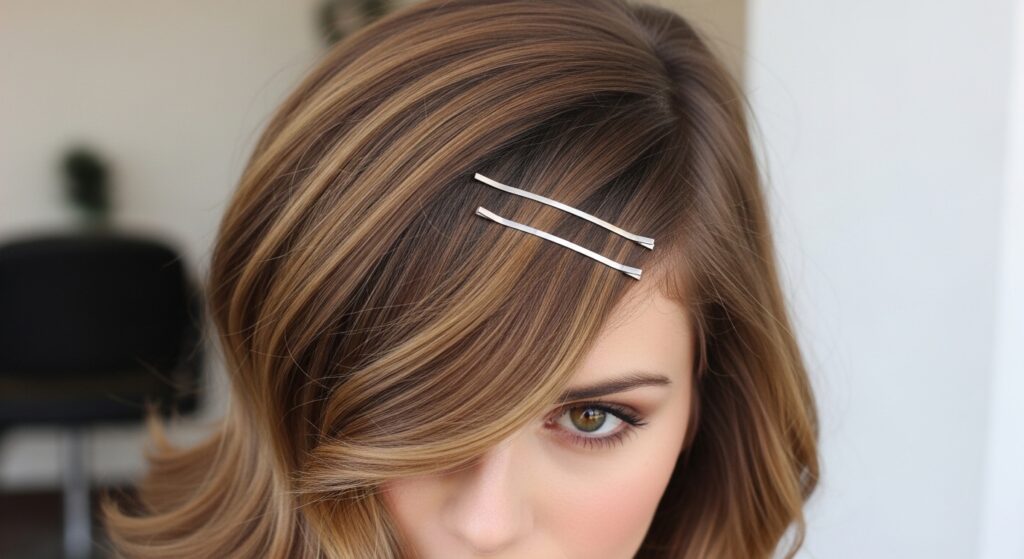
Choosing Barrettes for Fine Hair vs. Thick Hair
If you have fine hair, look for barrettes with a good, strong grip or a rubberized pad inside. This prevents them from sliding out. Smaller, lighter clips are also less likely to weigh hair down.
For thick hair, you might need larger clips or simply use more of them to make an impact. Make sure they snap closed firmly to hold your dense sections.
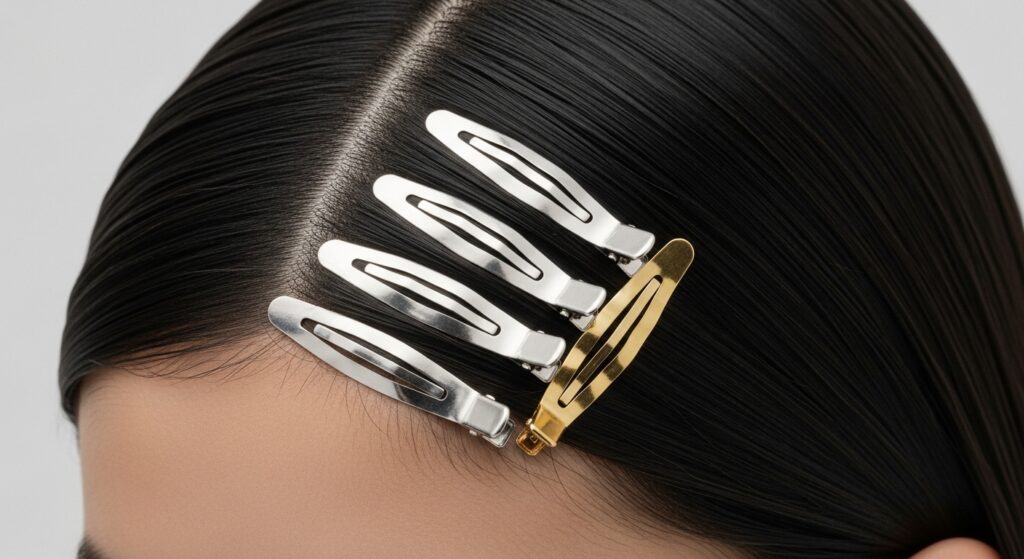
Creating a Double Row for Maximum Impact
Ready to level up? Try a double row. Place your first row as usual. Then, directly underneath it and parallel, place a second row of barrettes.
Use either identical clips for a uniform look or slightly smaller ones for the second row. This is a high-impact look perfect for a party or a festival.
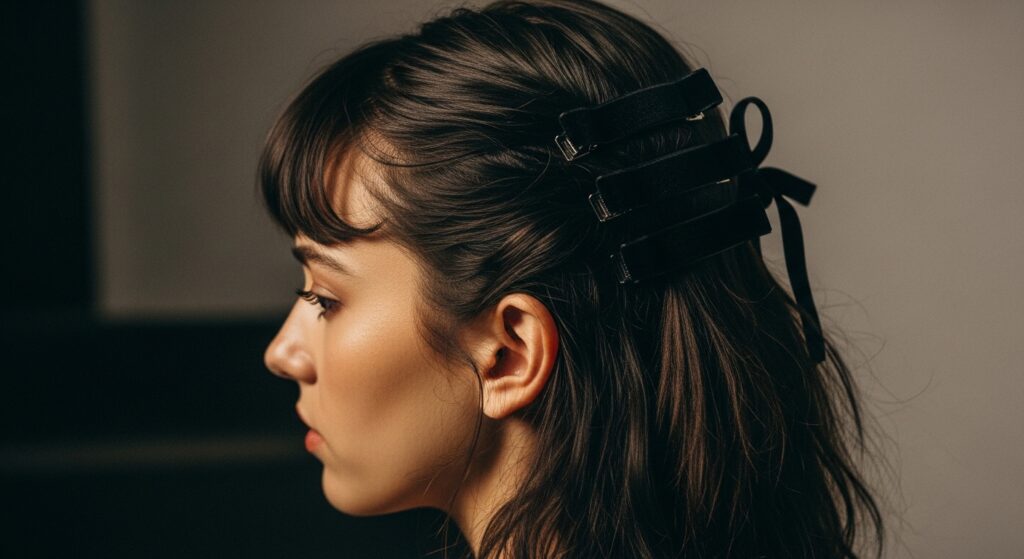
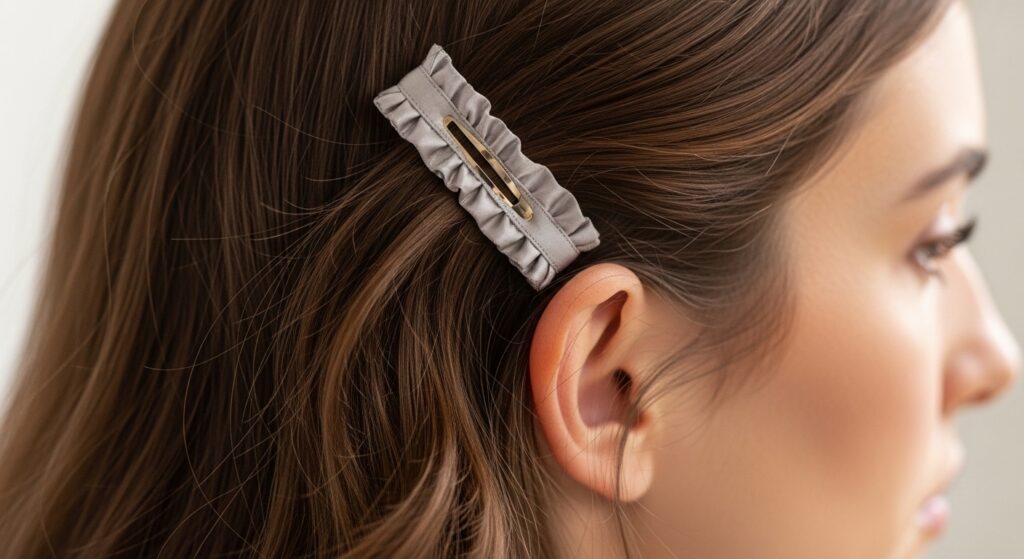
Incorporating Ribbons and Embellished Clips
Don’t limit yourself to plain metal. Vintage barrettes often have beautiful details. Look for clips with small pearls, rhinestones, or attached ribbons.
A barrette with a trailing silk ribbon can be incorporated into the row for a ultra-romantic, fairy-like feel. Just let the ribbon drape down with your hair.
Quick Fixes for Common Barrette Problems
Is a clip slipping? Rub the inside tips with a clear eyeliner or a dab of hair wax to add grip. Is it not lying flat? Make sure you’re clipping a section thin enough for the barrette to close completely.
Does the row look messy? Take it all out, re-do your part, and start over. Sometimes a fresh start is faster than fiddling.

How This Simple Trick Updates Your Whole Vibe
A tiny change can refresh your entire look. Throwing on jeans and a tee? Adding a barrette row makes it feel styled. It shows you paid attention.
It bridges the gap between casual and put-together. In the world of 2026 hairstyles, it’s these small, personal touches that will stand out more than any drastic cut.
So, that’s my latest little obsession. It’s funny how the simplest ideas—like digging through an old box of clips—can spark a whole new way to wear your hair. It doesn’t require a salon appointment or fancy products, just a bit of playful intention.
I love that it works whether you’re rocking a hime cut or long mermaid waves. It’s a tiny detail that packs a big personality punch. Give it a try this week and see how it makes you feel.
Save this post to Pinterest to keep these tips handy! And I’d love to know—do you have a stash of vintage barrettes waiting for a comeback? What’s your favorite way to wear them? Tell me in the comments!