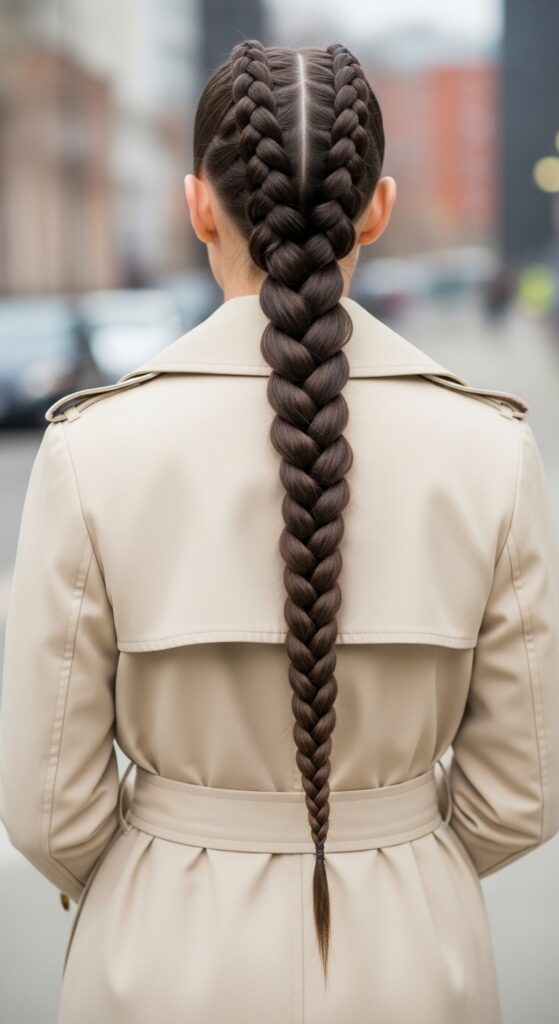
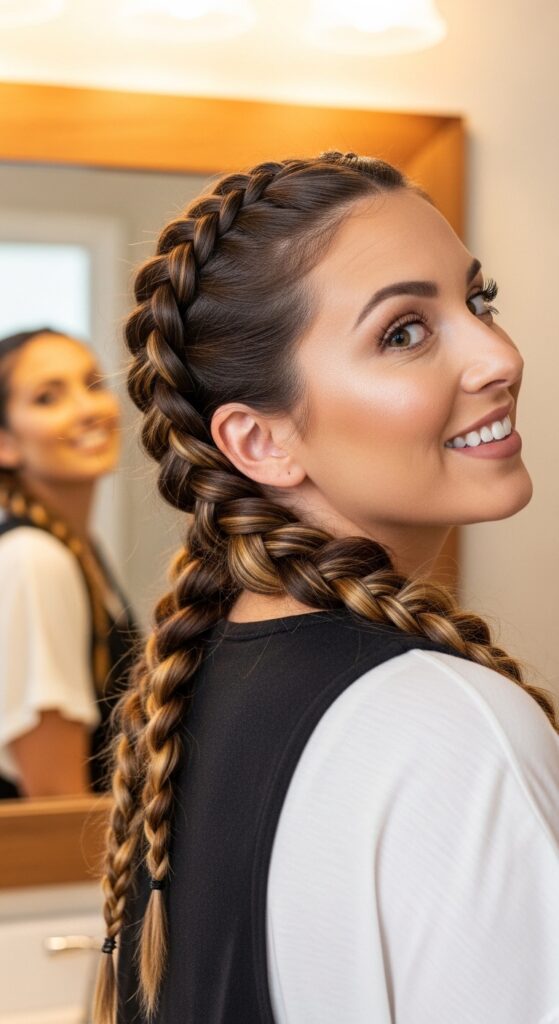
Evolve 18 Triple French Braids Layered for Dimensional Depth
Okay, let’s be real. We’ve all seen that perfect, intricate braid on someone else and thought, “I could never.” I’m here to tell you that you totally can. The Evolve 18 Triple French Braids look is that stunning, dimensional style that seems straight off the runway, but guess what? It’s built on a technique you already know.
This isn’t about being a salon expert. It’s about layering three simple French braids to create insane depth and texture. It works on almost every hair type and length, and it’s way more forgiving than a single, perfect braid.
Think of this as your secret weapon for looking like you spent hours, when really, it’s just smart styling. Whether you’re chasing that old money hair polish or adding a twist to romantic goth hairstyles, this method is your foundation. Let’s break it down, step-by-step.
Why This Triple Braid Method is a Game-Changer
One braid is pretty. Three braids, layered together, create a whole new level of visual interest. The magic is in the dimension. Each braid sits at a slightly different height on your head, catching the light separately.
This creates shadows and highlights that make your hair look thicker and more dynamic. It’s the difference between flat and fabulous. It’s that detailed, intentional look that feels very “now” and moves beyond basic styles.
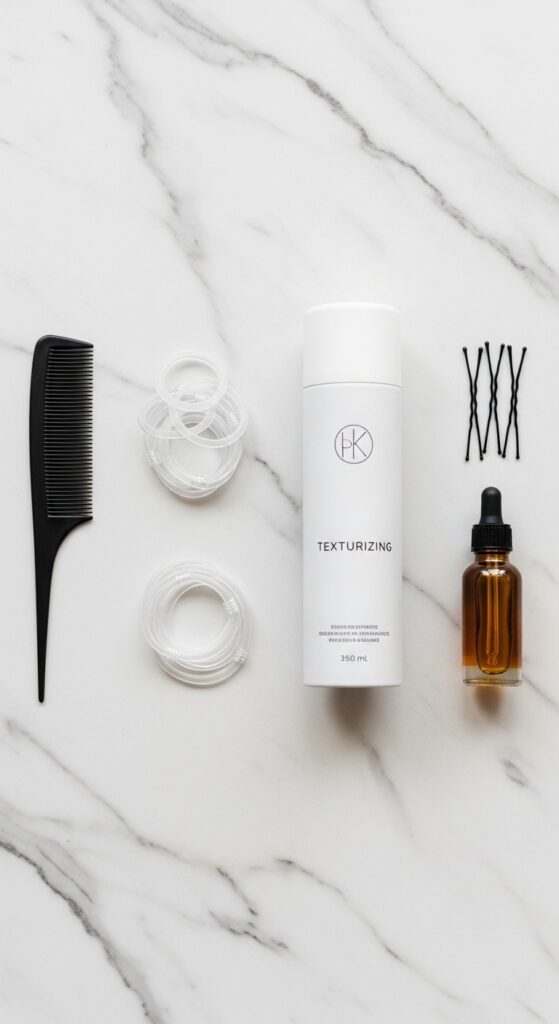
Gathering Your Simple Tools
You don’t need a pro kit for this. Raid your bathroom drawer and you’re basically set. The right tools just make the process smoother and help the style last.
- A fine-tooth comb for clean sections.
- Strong, small elastics that match your hair color.
- A light-hold texturizing spray or mousse.
- A few bobby pins for securing ends.
- A shine serum or hair oil for flyaways.
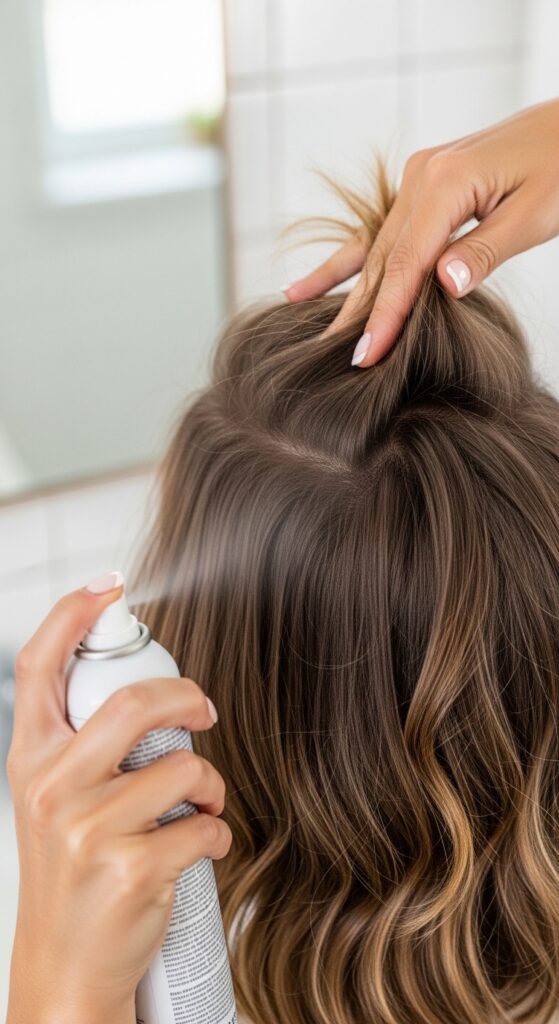
The Perfect Prep: Clean vs. Day-Old Hair
This style works best on hair that isn’t squeaky clean. Day-two or even day-three hair has the perfect amount of natural texture and grip to hold the braids without slipping.
If you just washed, don’t panic. Spray a texturizing spray or dry shampoo at your roots and mid-lengths. Work it through with your fingers. You want your hair to feel slightly “lived-in,” not slippery smooth.
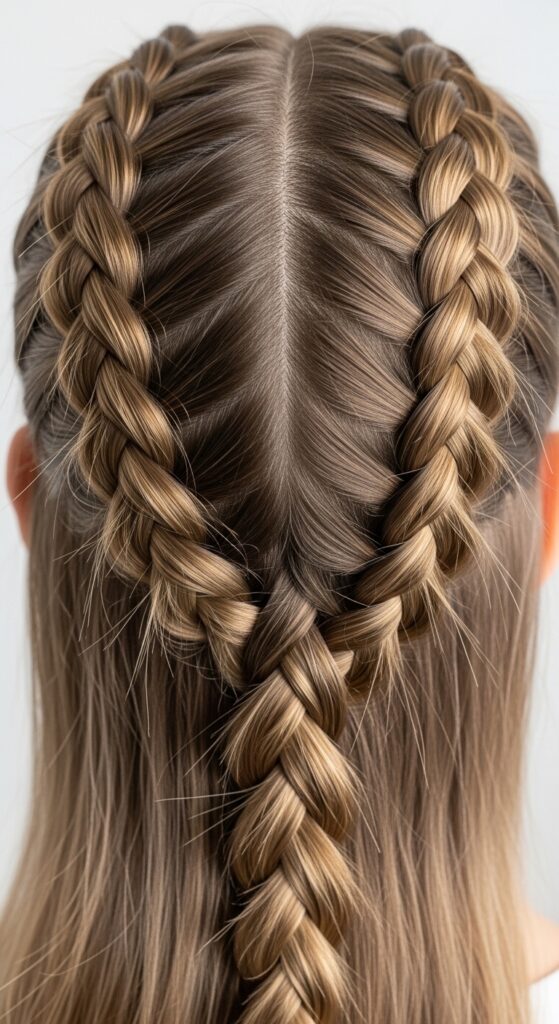
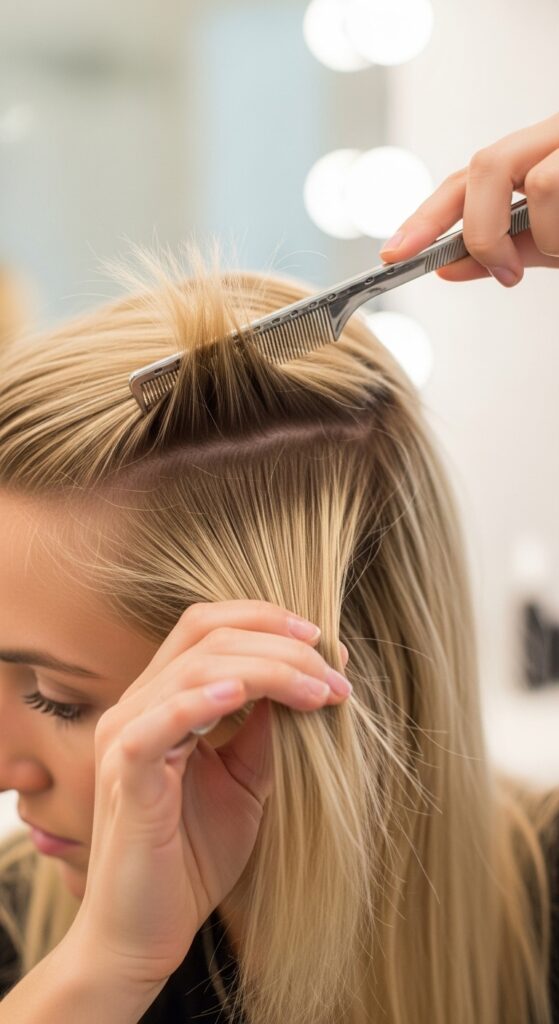
Mapping Your Sections: The Blueprint
Before you braid a single strand, visualize the map. We’re creating three horizontal braids that stack vertically. The first braid starts at your temple and goes around your head like a headband.
The second braid starts just below it, and the third follows suit at the nape of your neck. Drawing these mental lines first prevents wonky, uneven braids later. Precision here pays off big time.
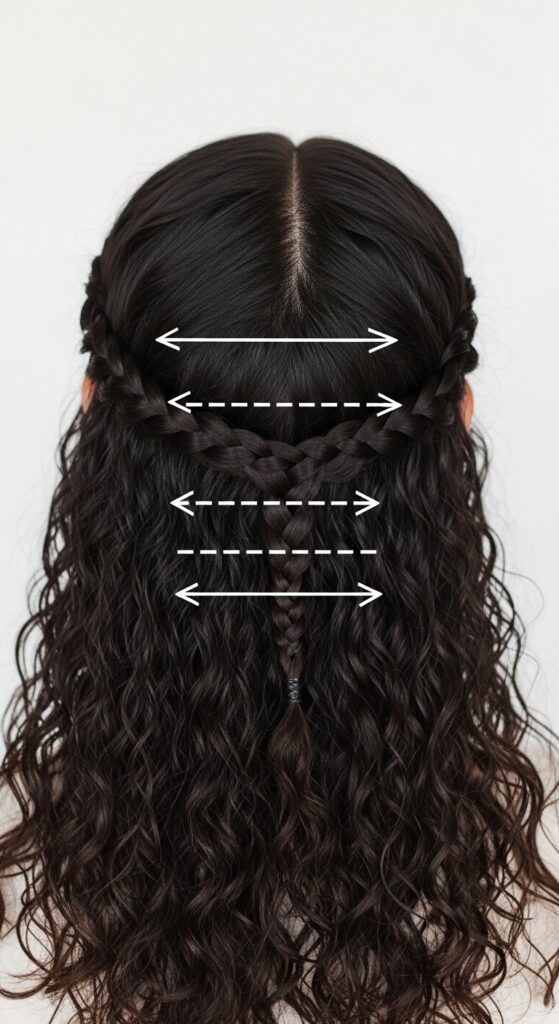
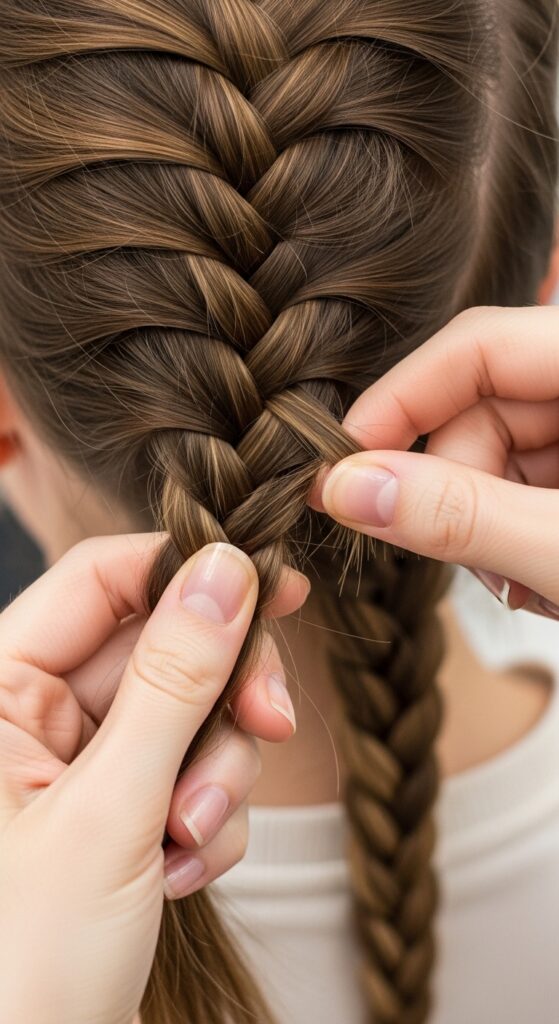
Step 1: Creating the Top Crown Braid
Start with a deep side part or a middle part, whatever you prefer. Take a horizontal section about two inches thick from temple to temple, above your ears. This is your crown section.
Begin a classic French braid along this line, adding in small, equal sections from the top and bottom as you go. Keep it snug but not tight. Braid all the way to the ends on the opposite side and secure with a clear elastic.
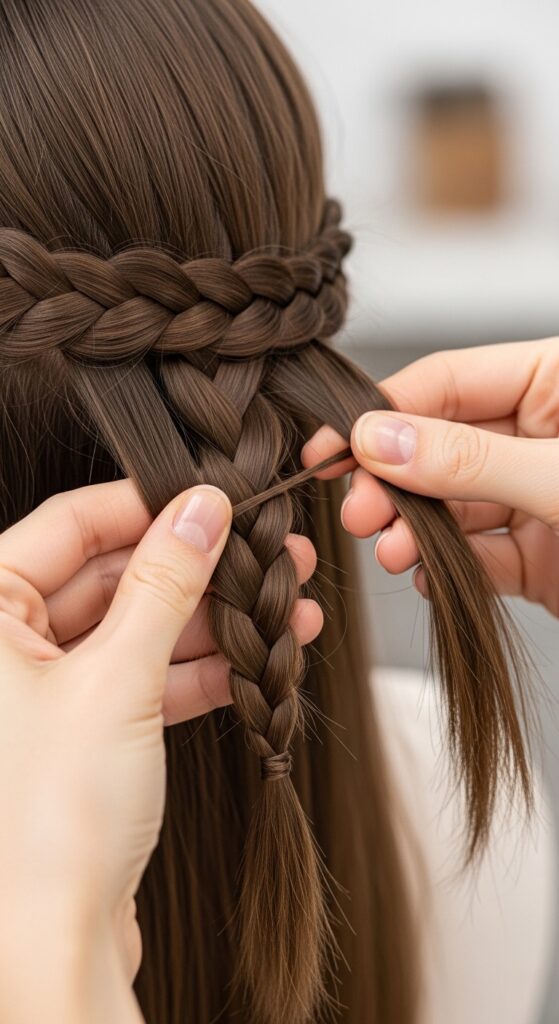
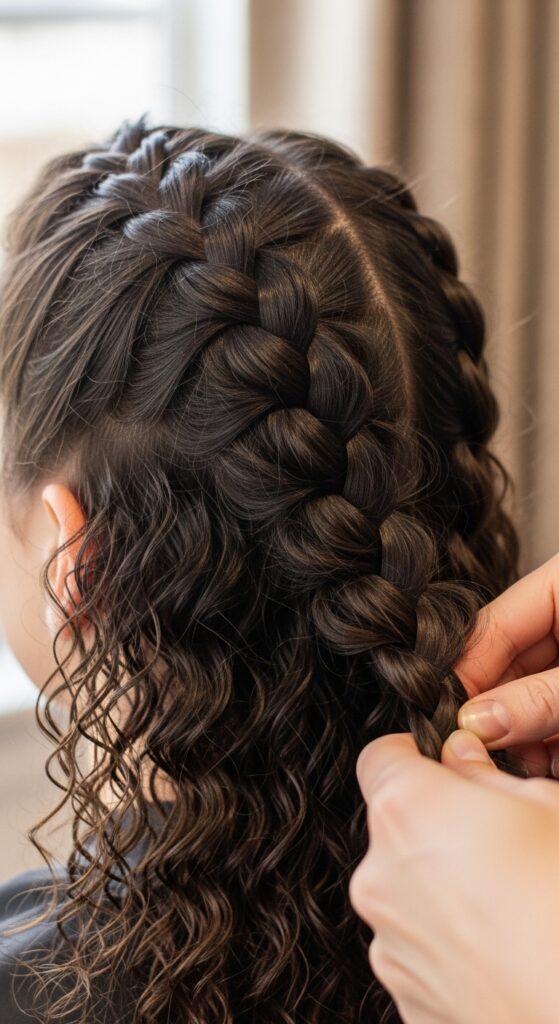
Step 2: Starting the Middle Braid for Depth
Directly below the first braid, take another horizontal section. Let down a thin layer of hair from above to cover the first braid’s elastic start. This middle braid is the secret to the dimensional look.
Repeat the French braiding process, moving parallel to your first braid. As you braid, you’ll be covering the tail of the top braid, which starts to build that beautiful, layered effect.
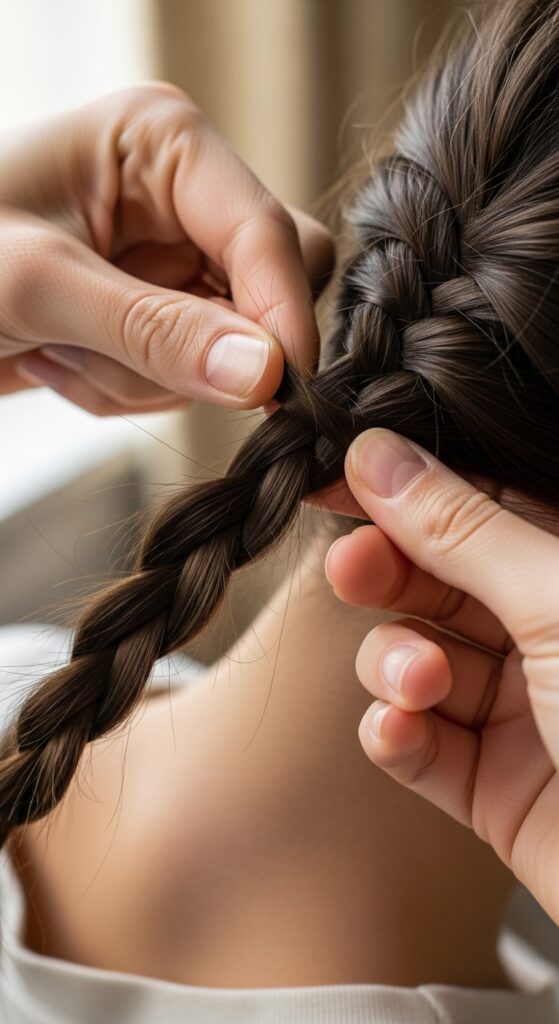
Step 3: Adding the Final Nape Braid
For the third braid, gather the remaining hair at the nape of your neck. You can include any loose hair from the middle section. This braid often feels the easiest because you have all the hair collected.
French braid this section straight back or slightly to the side, following the curve of your head. Secure the end with another elastic. You should now have three distinct, parallel braids.
How to Braid Tight (But Not Too Tight)
The goal is secure, not scalp-tightening. Pull each new section firmly enough to feel tension, but not so hard it pulls your eyes. Consistency is key—try to use the same amount of tension for each addition.
If your braids are too loose, they’ll fall apart. Too tight, and they’ll be painful and look severe. Aim for a comfortable, polished hold. Practice makes perfect here.
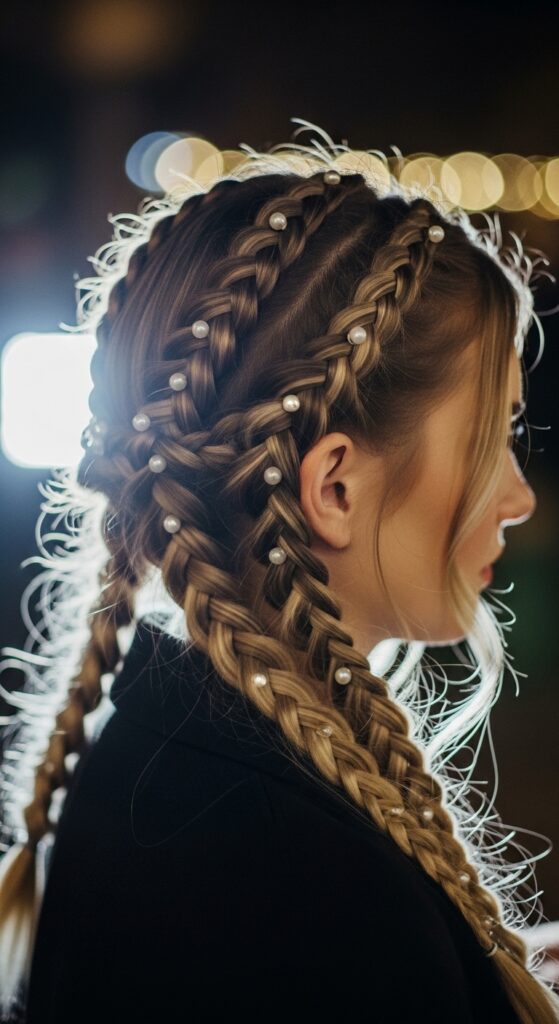
The Art of the “Pancake” Fluff for Volume
This is the most important step! Once all three braids are secured, gently pull at the outer loops of each braid. Use your thumbs and forefingers to tug sections outward, widening the braid.
Start from the top of the braid and work down. This “pancaking” creates instant volume, softens the look, and lets those layers really shine. Don’t be shy—fluff it good!

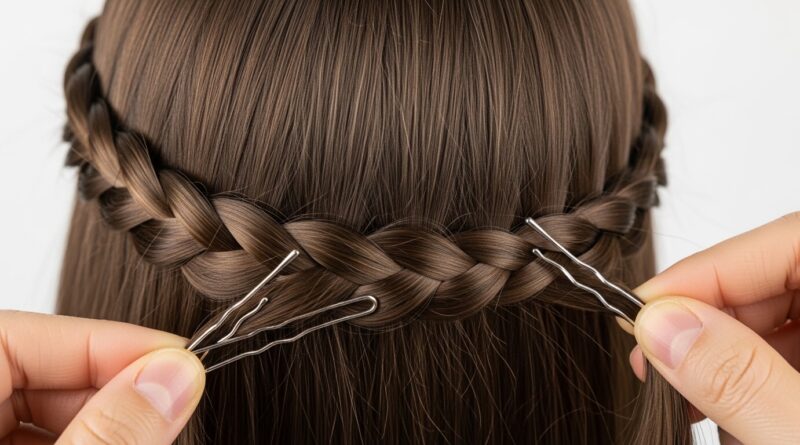
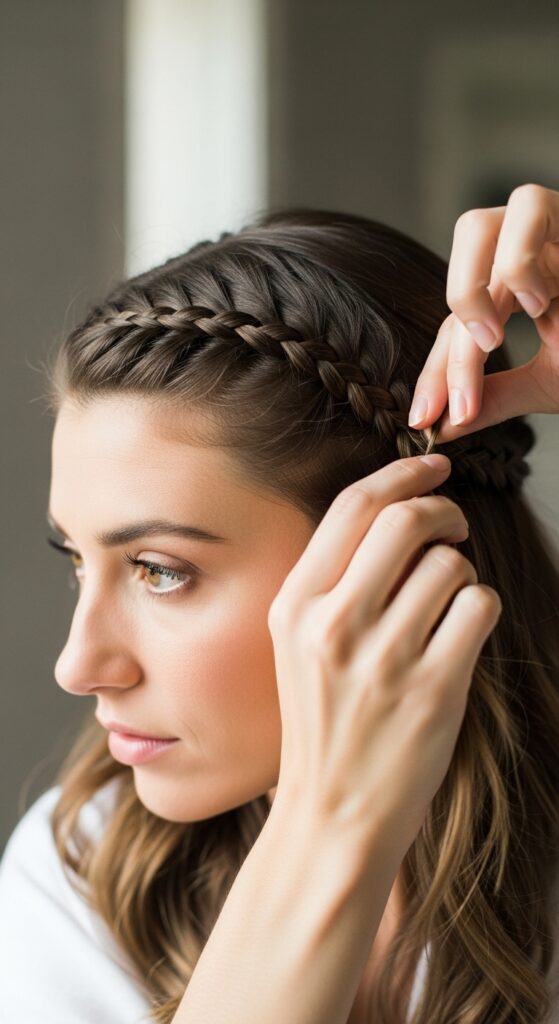
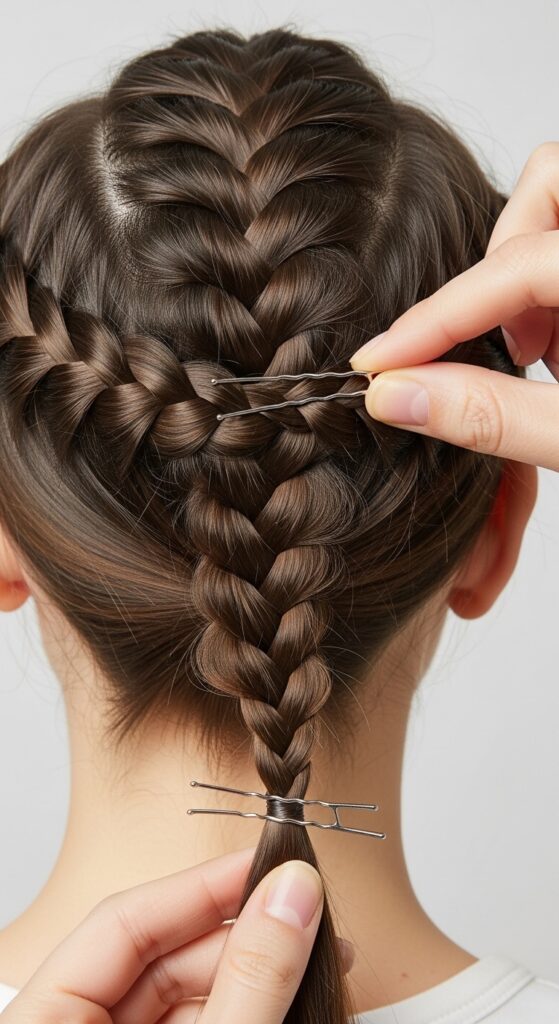
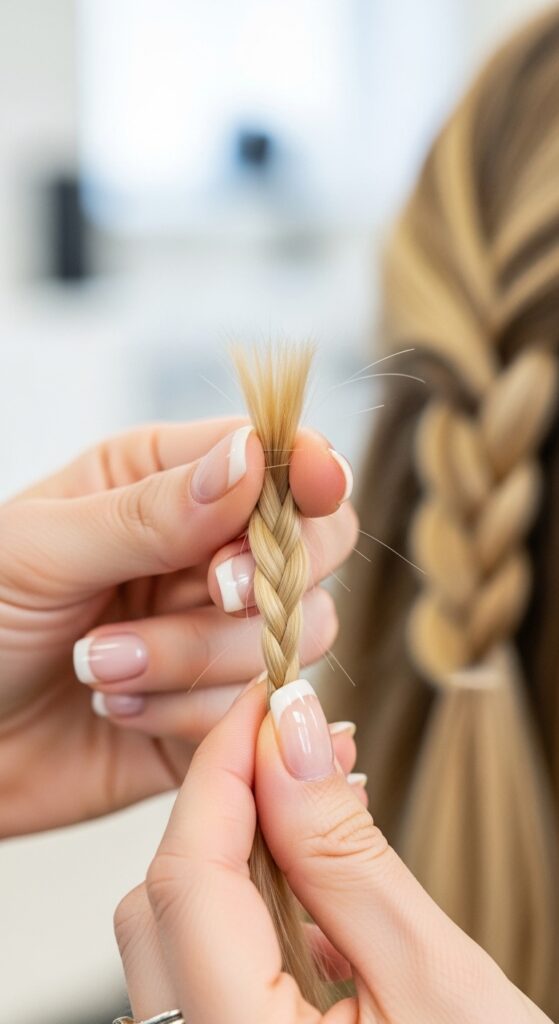
Securing and Hiding the Ends Neatly
You have three braid tails. The prettiest finish is to coil each one individually into a small, flat bun and pin it underneath the braid above it. This hides the elastics and creates a seamless look.
Alternatively, you can gather all three tails together at the end and secure them with one elegant ribbon or a larger clip. Tuck any shorter pieces in with bobby pins.
Setting It All: Hairspray for Hold
Lock in your masterpiece. Use a light-hold, flexible hairspray. Hold the can about ten inches away and give a light mist all over.
Pay extra attention to the braided sections and any flyaways at your crown. You want to preserve the soft, pancaked texture, not make it crunchy. A flexible spray is your best friend.

Adapting for Fine or Thin Hair
If you have fine hair, texturizing spray is non-negotiable. Use it liberally in your prep. When you pancake, be more gentle—pull just a little to widen the braids without making them sparse.
A great trick is to backcomb the sections very lightly before you braid them. This adds instant grit and volume for the braid to hold onto, making your hair look much thicker.
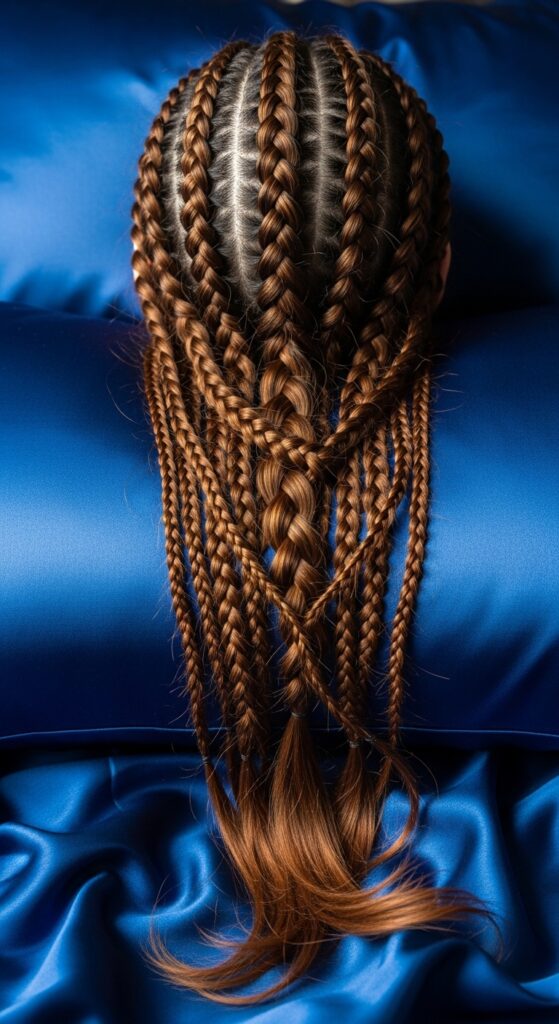
Making It Work on Thick or Curly Hair
Your texture is a huge advantage! Use a smoothing cream or oil before braiding to manage frizz and define your curls within the braid. Don’t fight your curl pattern—braid with it.
Your pancaking will be incredible because you have so much volume to work with. You might find you only need two braids for a full look. Let your natural texture be the star.
From Day to Night: Quick Glam Updates
This style is the perfect day-to-night base. For evening glam, pull out a few soft face-framing pieces. Add some sparkly pins along the braid lines or weave in a delicate ribbon.
For a glitchy glam hair vibe, add a few strategic, colored clip-in extensions pieces under the top braid. It’s an easy way to look like you changed your whole hairstyle in two minutes.
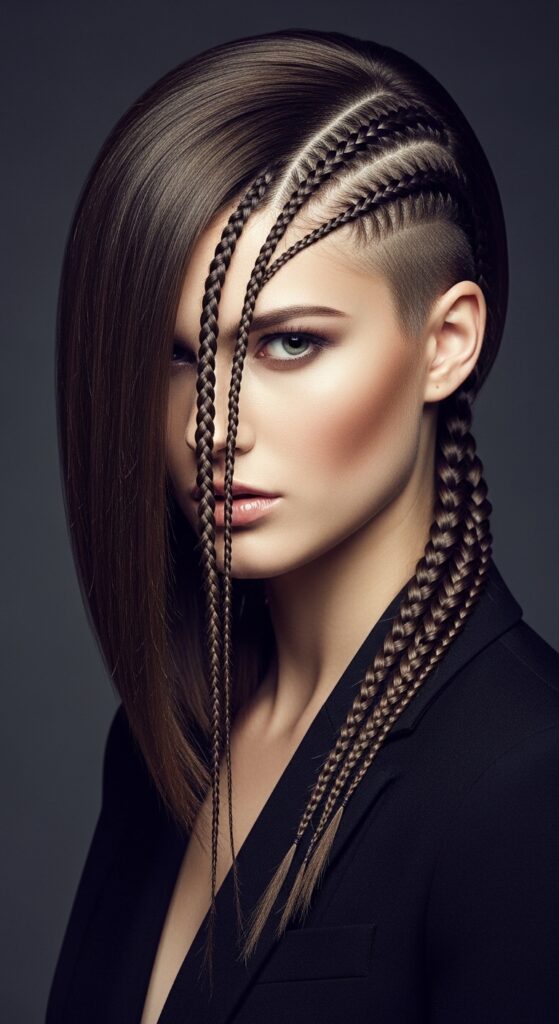
Pairing with Other 2026 Hair Trends
This braided look is incredibly versatile. It pairs perfectly with face-framing layers or a shag cut. Imagine it with the front pieces of a hime cut—so striking!
It also adds beautiful detail to simpler cuts like the asymmetrical lob or a quiet luxury bob. It’s that mix of intricate and effortless that defines the best 2026 hairstyles.
The “Old Money” Polish Version
For that old money hair aesthetic, sleekness is key. After braiding, use a toothbrush and a little gel to slick down any baby hairs or flyaways.
Keep the pancaking more subtle and controlled. The goal is pristine, not bohemian. It should look like you were born with perfectly elegant, dimensional braids.
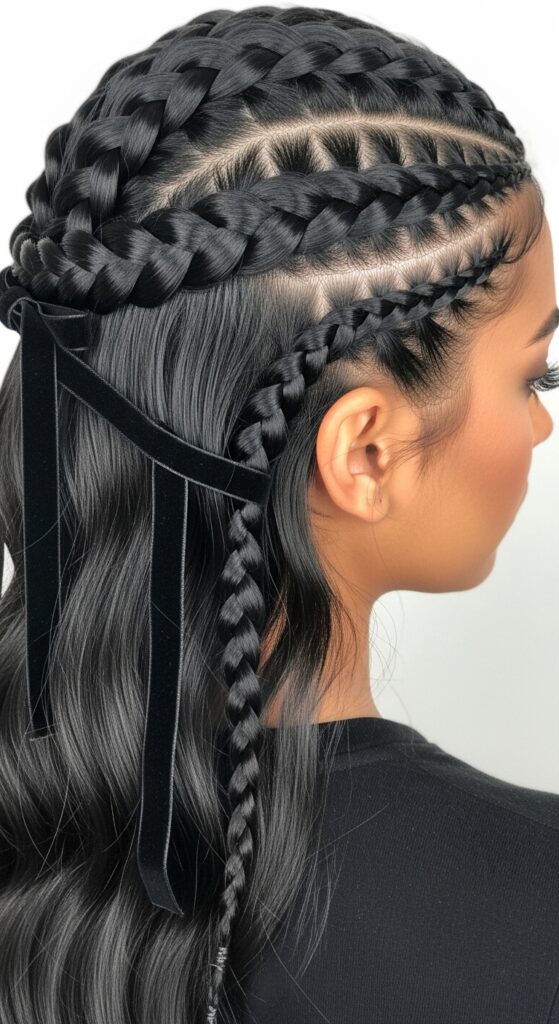
A Dark Romantic & Goth Twist
Lean into romantic goth hairstyles or a vampire haircut mood. Start with deep, dark hair or add a temporary color spray. Before braiding, create a deep side part.
Weave in a single strand of black velvet ribbon or a chain jewelry piece into one of the braids. Keep the texture a bit messier and more dramatic for a beautifully undone, romantic feel.
Solving Common Braiding Problems
Braids looking lumpy? Your sections were probably uneven. Next time, take smaller, more frequent additions. Hair slipping out? You’re not grabbing enough hair from the bottom when adding new sections.
Elastics showing? Make sure you’re using clear or color-matched ones, and remember to tuck the ends under. Practice fixes everything, I promise.
How to Make It Last for Days
Yes, this can be a protective style! Before bed, loosely wrap the braids in a silk scarf or use a silk pillowcase. In the morning, just touch up the pancaking and spray any frizz.
Day two might be even better as it softens. You can also re-braid just the lower sections if the top still looks great. It’s the gift that keeps on giving.
My Final Pep Talk for You
If your first attempt isn’t perfect, that’s totally normal. Hair has a learning curve. The beauty of three braids is that if one is a little off, the others distract from it.
Each time you try it, you’ll get faster and the result will get smoother. You’re not just learning a hairstyle; you’re learning a technique you can use forever. That’s a win.
Your Next Style Adventure
Mastered this? You’ve officially leveled up your braid game. This layered technique opens doors. Try it on damp hair for a gorgeous wave pattern when you take it down.
Or, use it as a half-up style. The skills you just learned are the foundation for so many looks, from red carpet to casual weekend. What will you try next?
And there you have it—your guide to creating that gorgeous, dimensional braid you’ve been admiring. It looks complex, but when you break it into three simple parts, it’s completely doable. Remember, the best hairstyles come from a place of playing and having fun with your hair.
Don’t stress about perfection. A little looseness adds to the romantic, lived-in feel. This style is all about celebrating texture and movement. I hope you feel empowered to give it a try this week.
Save this post to Pinterest so you always have the steps handy! Did you try the triple braid? Tell me in the comments—what was the easiest part, and what tricky spot are you going to practice next? I love hearing from you!