Techniques 22 Algorithmic Braid Spacing Symmetrical Perfection Every Time
Okay, let’s be real. How many times have you watched a braiding tutorial, followed it exactly, and still ended up with one side fat and the other side weirdly skinny? Or those little pieces that just won’t stay in? I’ve been there so many times it’s not even funny.
It feels like you need three hands and a degree in geometry to get a braid that looks symmetrical and perfect from every angle. Especially with all the intricate 2026 hairstyles popping up, precision is everything.
That’s why I became obsessed with finding a foolproof system. I stopped just “eyeballing it” and started using a simple, repeatable algorithm. It changed everything for me.
This post is your quick-start guide to that system. I’m breaking down the exact techniques I use to get algorithmic braid spacing and symmetrical perfection, every single time. No more guesswork.
Why “Eyeballing It” Always Fails Us
We think we can judge spacing by sight, but our brains aren’t great at it in a mirror. What looks even from the front can be a total mess from the back. This is the root of most braiding frustration.
Without a plan, sections naturally get thicker or thinner as we go. We pull from the easiest spot, not the correct one. This leads to a braid that lacks that polished, intentional look.
Whether you’re going for an old money hair vibe or a detailed romantic goth hairstyles look, consistency is key. An algorithm removes the guesswork and gives you that consistency.
The Core Algorithm: Section, Don’t Grab
This is the mindset shift. Don’t just grab hair as you go. Before you start braiding, you mentally (or literally) map your sections. Think of it like drawing a grid on your hair.
For a standard three-strand braid, you’re dividing the hair into three primary columns. The algorithm is about maintaining the width of each column from top to bottom.
Every time you cross a strand, you take a new piece that is the same width as the previous pieces in that column. This disciplined approach is what leads to symmetrical perfection.
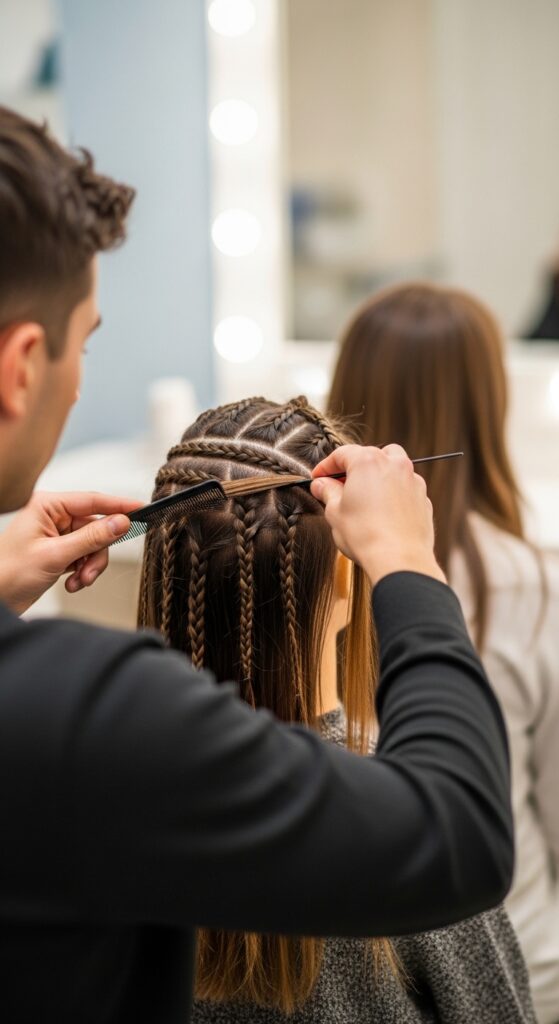
Tool You Absolutely Need: A Tail Comb
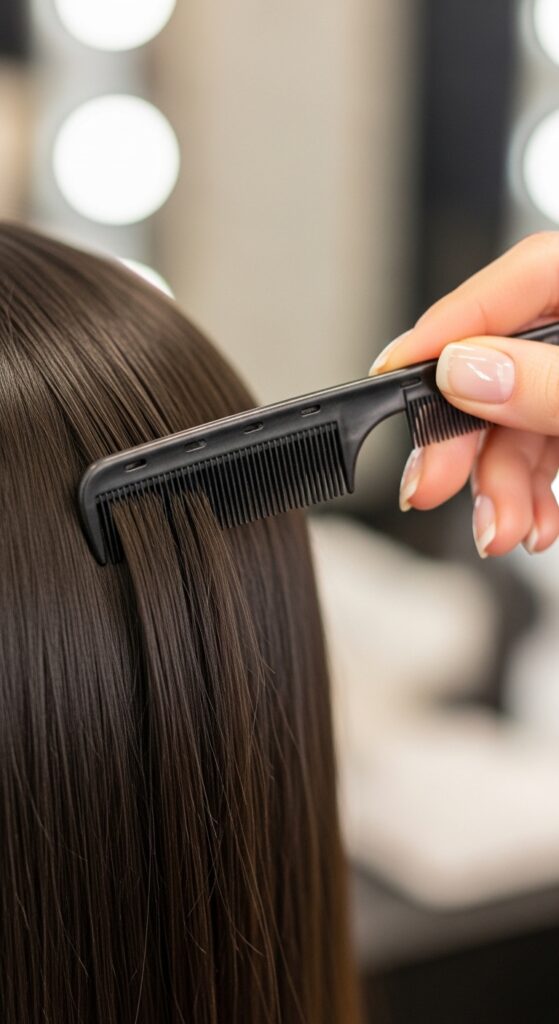
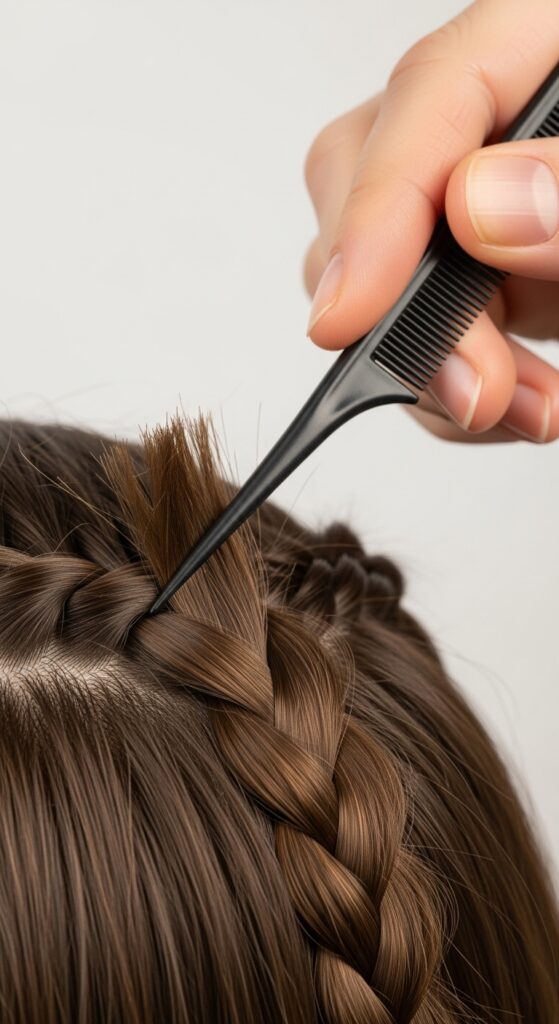
Your fingers are too wide for precision. A fine-tail comb is non-negotiable for this technique. It’s the tool that lets you execute the algorithm perfectly.
Use the tail to create clean parts and to pick up perfectly even subsections of hair. It gives you surgical control, which is what you need for that glitchy glam hair precision or a clean asymmetrical lob.
It might feel fussy at first, but after three tries, you’ll wonder how you ever braided without it. This $5 tool is a game-changer.
Step 1: The Anchor Part
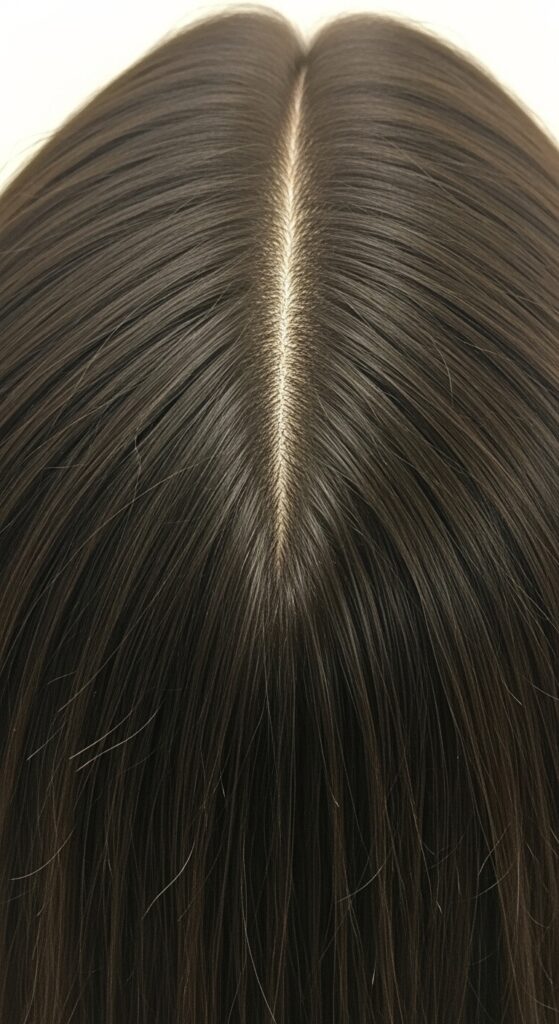
Everything hinges on your starting part. For a centered braid, like a classic French or Dutch, you need a perfectly straight center part from your forehead to the nape of your neck.
Use the tail of your comb, starting at the hairline. Look straight ahead in the mirror, don’t tilt your head. Follow the natural curve of your head down to the bottom.
This anchor part is your braid’s spine. If it’s crooked, the whole braid will be off. Take your time here. This step alone fixes 50% of symmetry issues.
Step 2: Mapping Your Three Columns
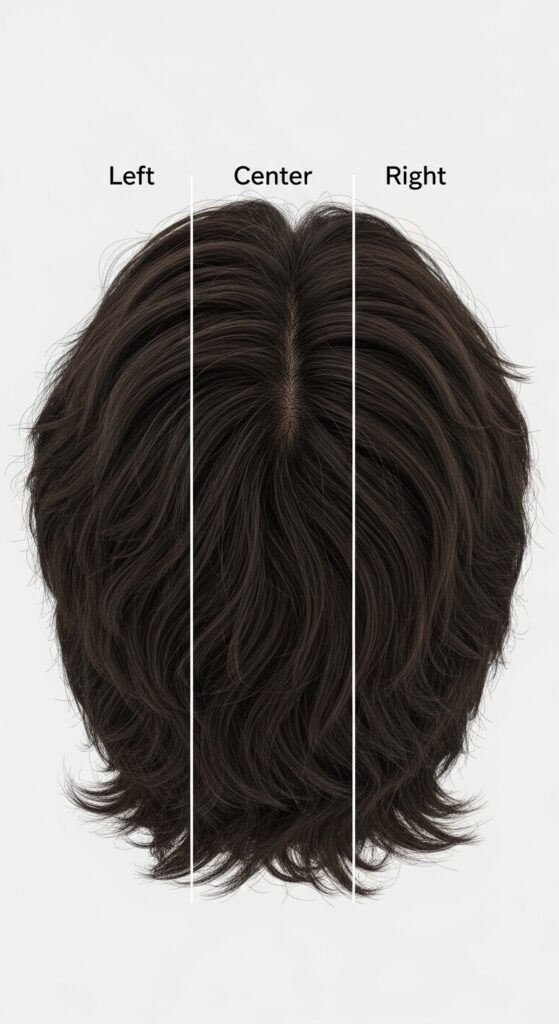
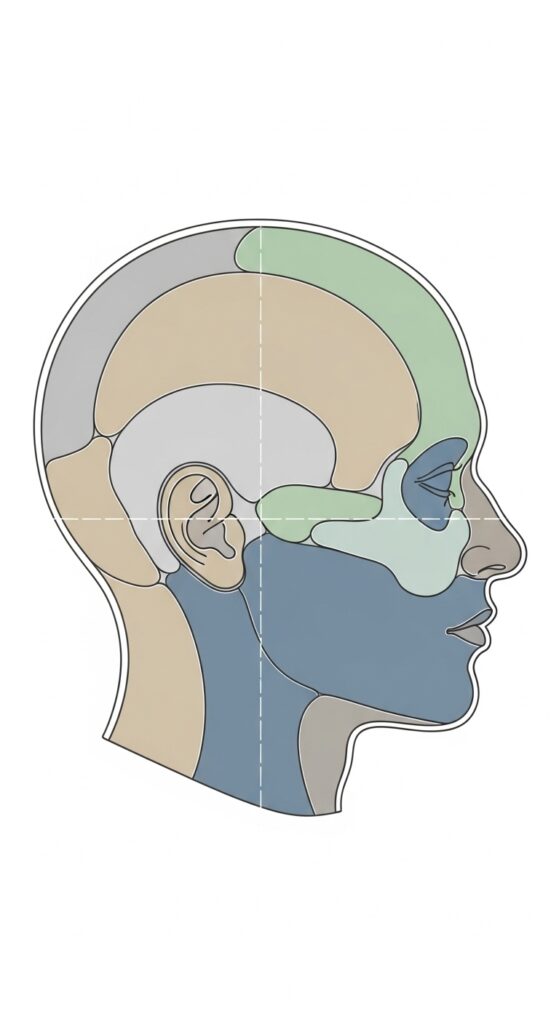
Now, mentally divide the hair on each side of your center part. You’re creating three vertical columns of hair: Left, Center, and Right.
The Center column is the hair directly along that center part. The Left and Right columns are the remaining hair on each side. They should feel visually even in volume.
Your goal is to braid by pulling hair only from its designated column. This keeps the braid balanced and prevents pulling from the “wrong” side, which causes lopsidedness.
Step 3: Starting Your First Cross
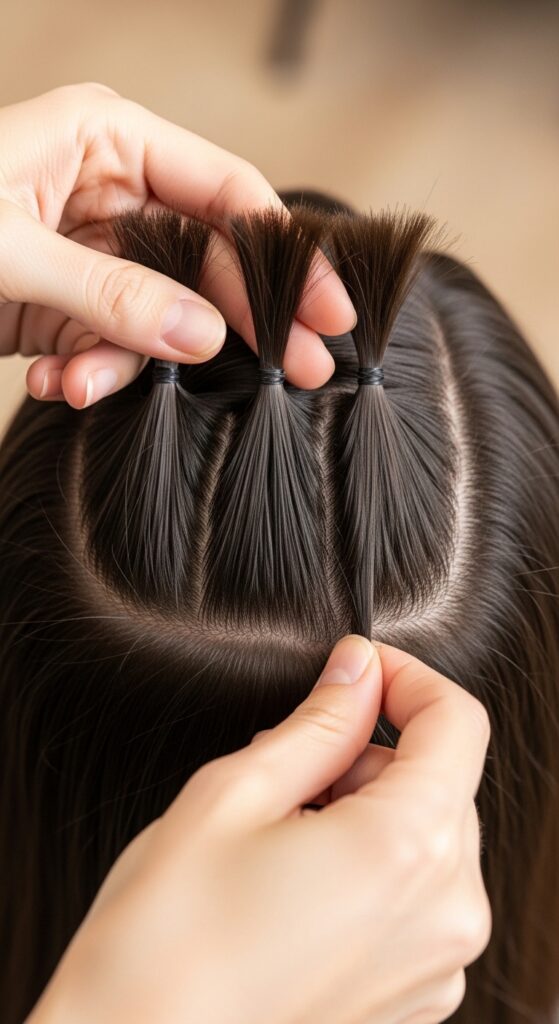
At the crown, use your tail comb to gather three starting sections. They must be equal in size. This is your foundation. If these are uneven, the whole braid amplifies that mistake.
Take a section from the Right column, the Center column, and the Left column. Hold them separately. Do your first crossover, just like a basic braid.
Already, you’ll see how clean it looks. This structured start is what gives you that salon-quality base. It’s the first step to a perfect vampire haircut braid or a sleek hime cut accent.
Step 4: The “Add-In” Rule
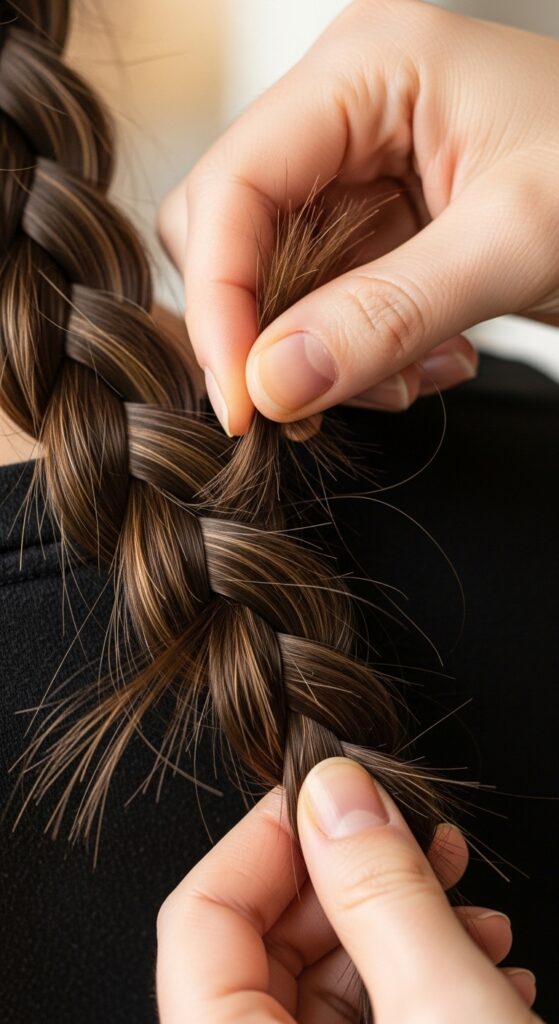
Here’s the magic rule. When you are about to cross a strand over, that is the only time you add hair to it. And you only add hair from the column that strand is currently over.
So, if your right strand is crossing over toward the left, you add hair only from the Right column before crossing it. Use the tail comb to pick up a thin, even subsection.
The width of this new piece should match the width of the strand you’re adding it to. This maintains consistent volume and spacing down the entire braid.
Step 5: Maintaining Consistent Tension

Tension is your silent partner. Pull each crossover with the same firmness. Don’t pull one side tighter than the other. A consistent, medium-firm tension is ideal.
If your tension varies, your braid will look bumpy and uneven, even if your sections are perfect. Think of it as weaving—steady and even.
This is especially crucial for textured looks or 2026 hairstyles that play with detail. Good tension makes the braid look intentional and professional, not sloppy.
Step 6: Checking Your Work As You Go

Don’t wait until the end! Every few crosses, use a hand mirror to check the back of your head. Look for column drift. Are you accidentally pulling from the center column for a side strand?
Also, look at the spacing between the “add-in” points. They should look like a neat, dotted line running parallel to your braid. If they’re zigzagging, correct your next section.
This real-time feedback is how you learn and correct instantly. It turns practice into perfect results much faster.
Applying This to a French Braid
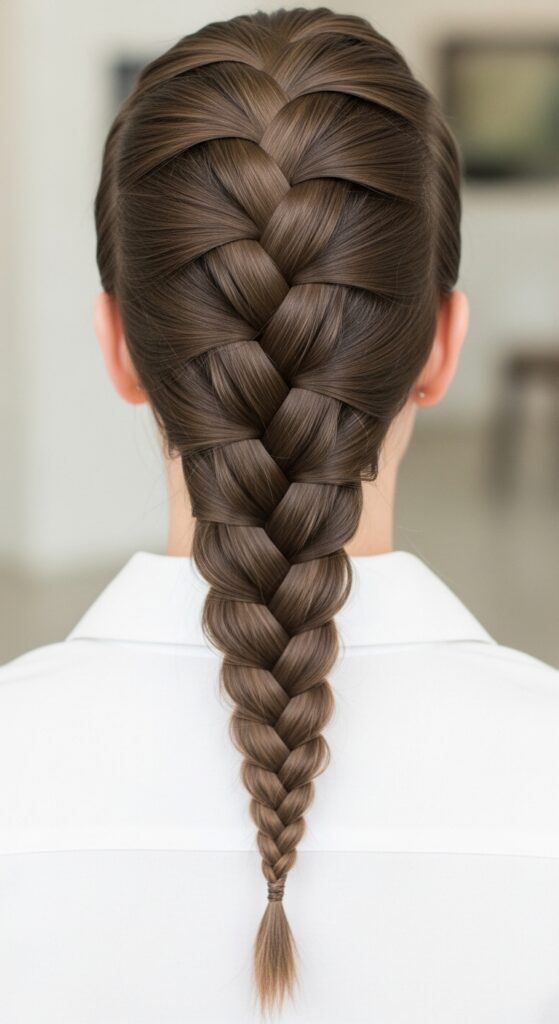
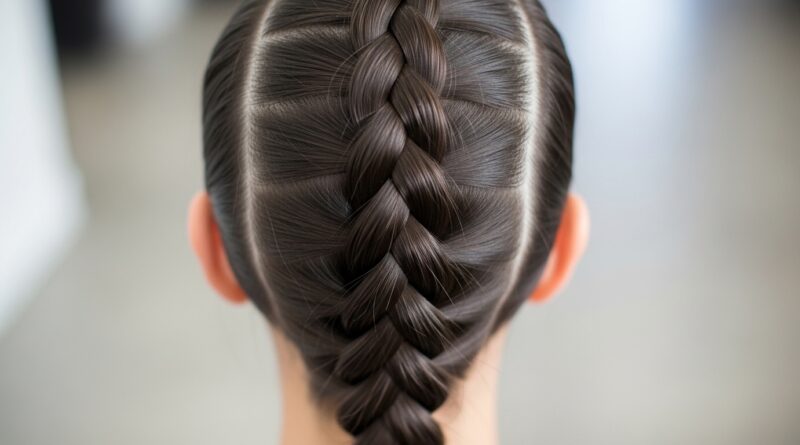
The French braid is just our algorithm in action. You start at the crown with your three even sections. As you braid down, you add hair to the outer strands before crossing them.
Remember: right strand crosses left, add from the Right column first. Left strand crosses right, add from the Left column first. The center strand never gets added to; it’s the anchor.
Follow this rule strictly, and your French braid will be balanced, with even “bubbles” and no thin spots. It’s the ultimate test of the system.
Applying This to a Dutch Braid
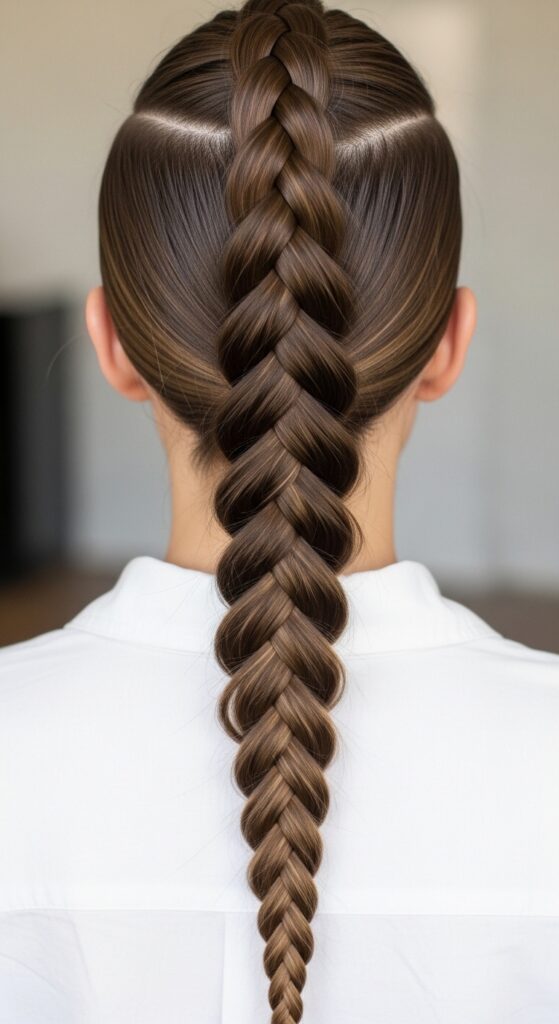
A Dutch braid (the inverted one that pops out) uses the exact same algorithm! The only difference is the direction of the cross—you cross strands under, not over.
The mapping is identical. The “add-in” rule is identical. You still only add hair to a strand from the column it’s currently over, just before you cross it under.
This technique is perfect for achieving that bold, glitchy glam hair look with major impact. The precision makes it look editorial, not messy.
Fixing a Lopsided Braid Midway
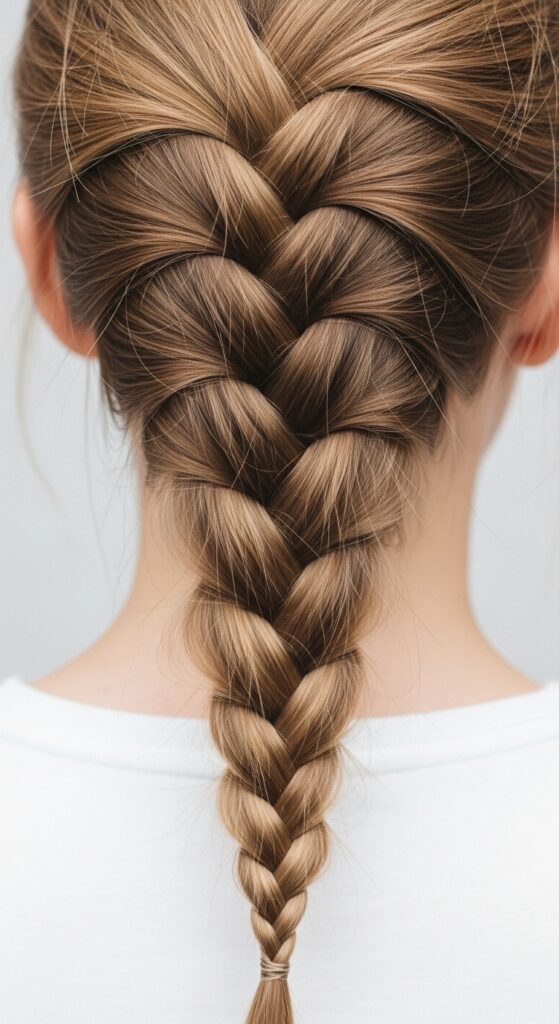
Caught a mistake? Don’t panic or start over. Gently pull on the outer edges of the braid’s “bubbles” to widen them and redistribute the hair.
You can also gently tug the braid sections sideways to shift volume from a thicker side to a thinner side. This is called “pancaking” and it’s a lifesaver.
It won’t fix a major error, but it can smooth out small inconsistencies. It’s your emergency brake for achieving symmetrical perfection when you’re almost done.
Algorithm for a Side Braid
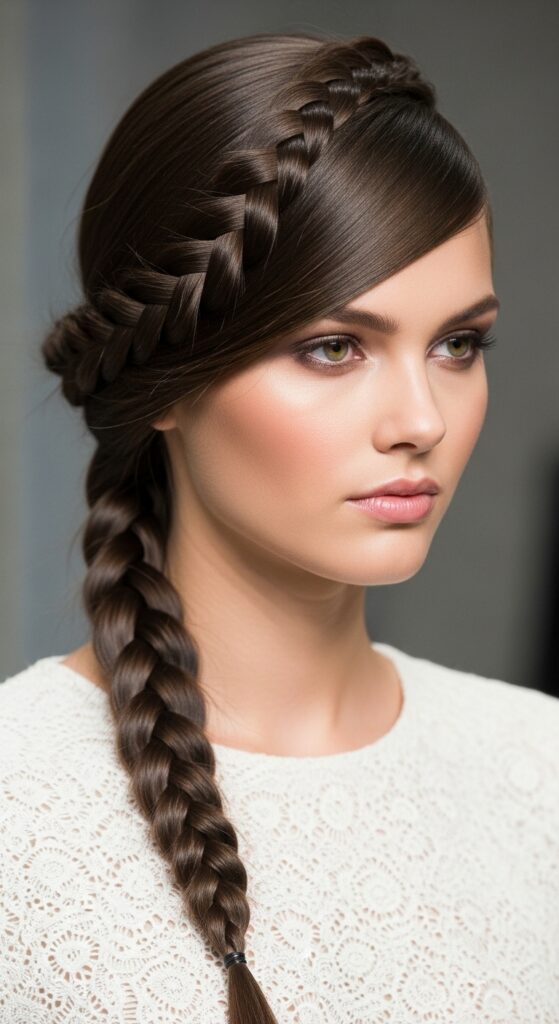
For a side braid, your “anchor part” is a deep side part. Your three columns are now different sizes! The side with more hair will have a wider column.
The algorithm still works. Your sections within each column should be proportional. The key is to keep your crossover angles consistent as you braid across the head.
This creates an elegant, old money hair look that’s still perfectly balanced within its own framework. It looks effortless because the technique is solid.
Creating Perfect Twin Braids
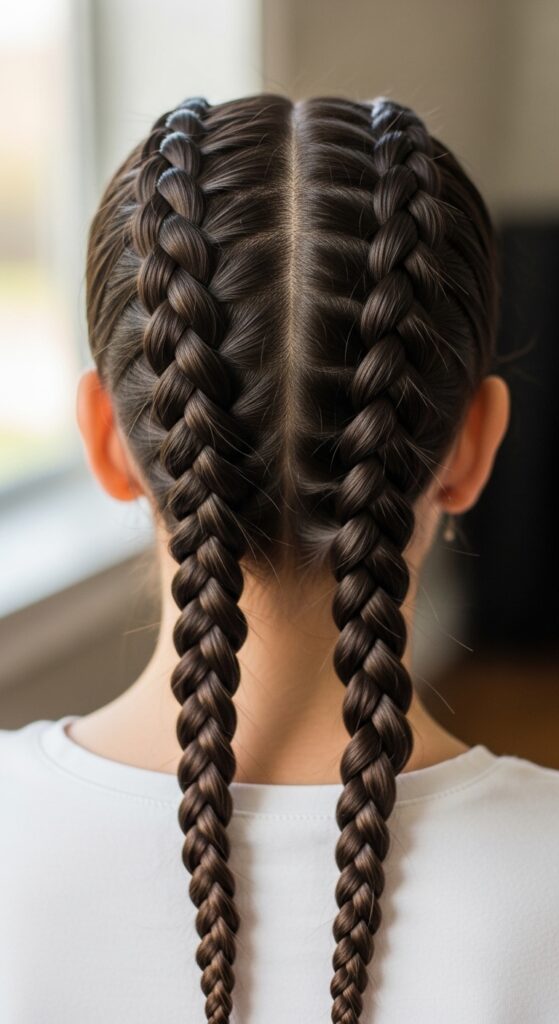
Twin braids are the ultimate symmetry test. Do not braid one completely, then the other. You will forget your tension and spacing.
Instead, work in stages. Do the first two crosses on the left braid, then the first two crosses on the right braid. Mirror your movements.
Go back and forth. This ensures your hands use the same muscle memory for both sides, guaranteeing matching braids. It’s a foolproof method for a playful yet polished look.
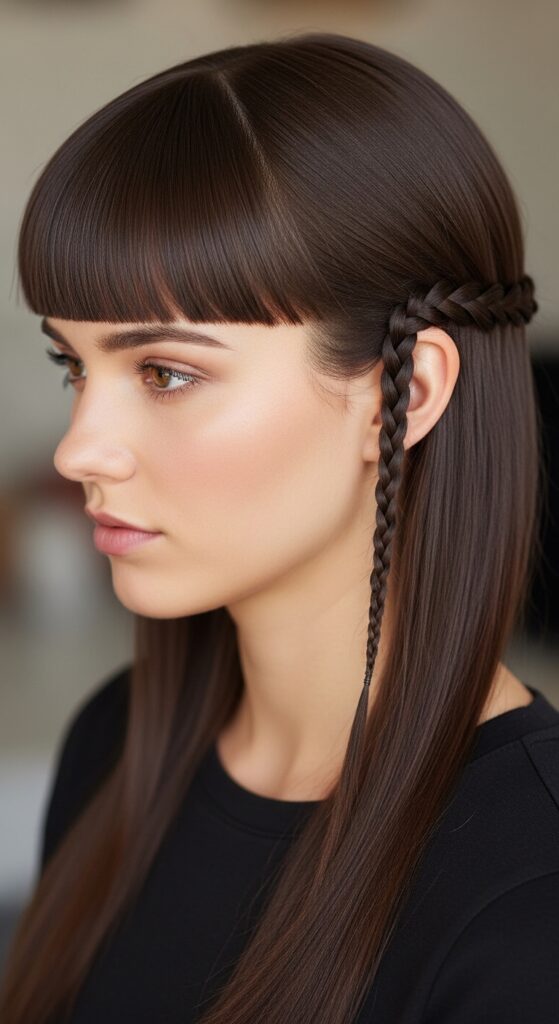
Incorporating This into an Asymmetrical Lob

An asymmetrical lob is a bold cut, and adding a braid needs finesse. Use a small, tight version of the algorithm for a delicate accent braid along the longer side.
Map a thin column of hair from temple to behind the ear. Use your tail comb for microscopic sections. This precise braid contrasts beautifully with the blunt cut.
It adds a detail that feels intentional and chic, not like an afterthought. It’s a great way to play with the quiet luxury bob trend.
Using the Method for a Hime Cut
The hime cut features those dramatic sidelocks. Try braiding just one! Because the section of hair is isolated, it’s a great place to practice the algorithm.
Keep the braid small and tight, following the curve of your cheek. The perfection of the braid will highlight the sharp, graphic lines of the cut.
It blends traditional structure with modern edge, a hallmark of many trending 2026 hairstyles. Precision is everything here.
Adapting for Romantic Goth Hairstyles
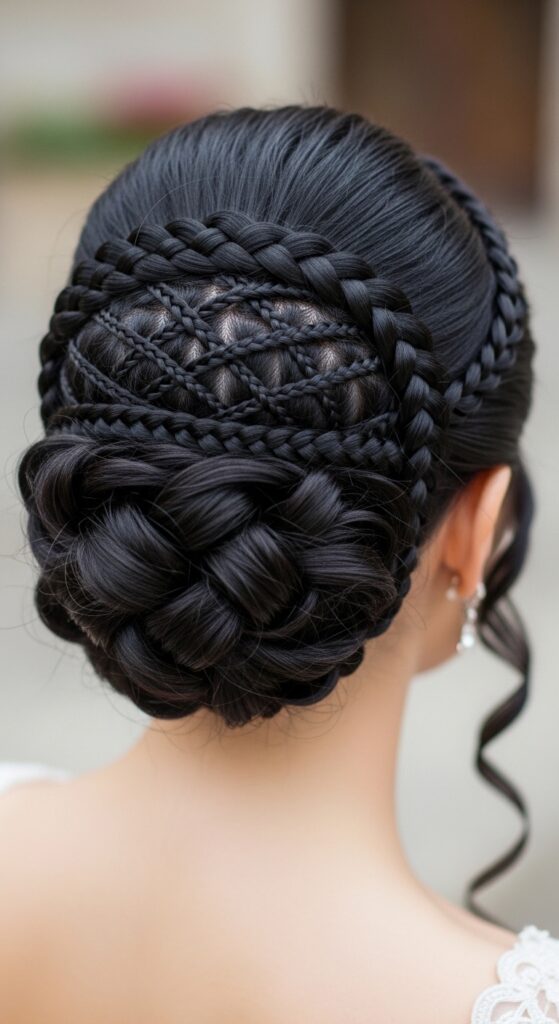
Romantic goth hairstyles often involve multiple braids woven into an updo. If one braid is messy, it ruins the intricate effect.
Use this algorithmic spacing for each individual braid. Even if they’re tiny, the discipline of even sections makes the whole style look masterful and hauntingly beautiful.
It turns a potentially messy style into one of symmetrical perfection, which is the core of that elegant, dark romance aesthetic.
Building a “Glitchy Glam” Braided Crown
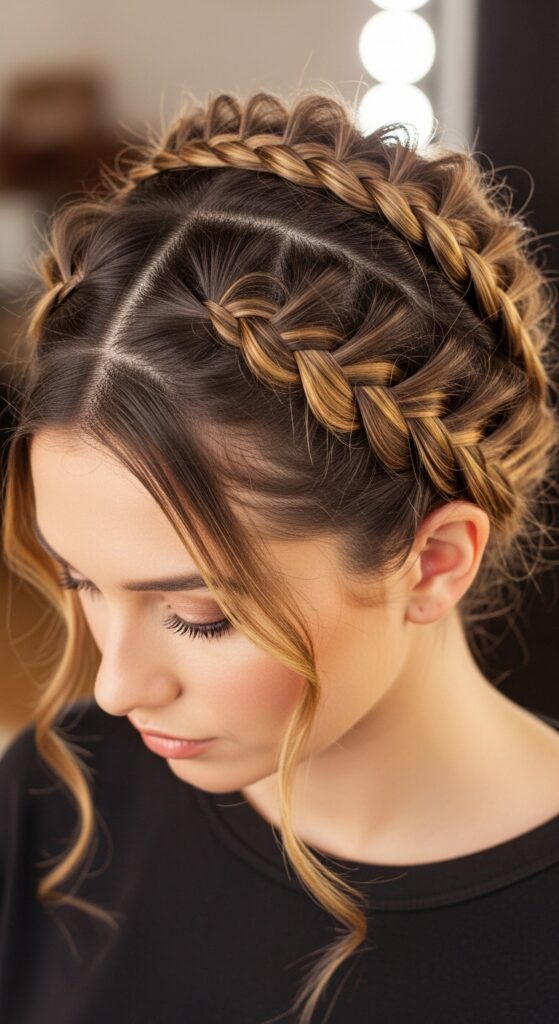
Glitchy glam hair is about controlled imperfection. But to make it look cool, not messy, the base has to be perfect. Start with a flawless Dutch braid around your head using the algorithm.
Then, *strategically* pull out a few select pieces to create the “glitch.” Because the underlying braid is perfect, the pulled pieces look like an artistic choice.
This is where technique enables creativity. You have to know the rules to break them in a stylish way.
Practice Drills for Muscle Memory
Muscle memory is key. Practice the “add-in” rule on a mannequin or a patient friend. Don’t worry about style, just about the motion.
Do five minutes a day just focusing on picking up even sections with your tail comb and crossing them. Your hands need to learn the spacing without you overthinking.
This drill separates those who can occasionally get a good braid from those who can nail it under any condition, even on themselves.
Common Mistakes & How to Stop Them
Mistake 1: Grabbing sections with your fingers. Solution: Always use the tail comb for add-ins.
Mistake 2: Adding hair to a strand after it’s crossed. Solution: Add only *before* the cross.
Mistake 3: Letting your columns drift. Solution: Pause and mentally re-map your columns every few crosses. These quick fixes will lock in the habit.
Your Quick-Reference Cheat Sheet
- Create a straight anchor part.
- Mentally map Left, Center, Right columns.
- Start with three even sections at the crown.
- Add hair to a strand ONLY from the column it’s over, JUST BEFORE crossing.
- Maintain rock-steady tension with every cross.
- Check the back frequently with a hand mirror.
Print this, screenshot it, stick it on your mirror. Follow it like a recipe until it becomes second nature. This sheet is your shortcut.
You’ve Got This
I know this felt like a lot of steps at first. But honestly, it’s just one simple rule repeated: section, add, cross, repeat. That’s the whole algorithm.
The first time you do it, it might feel slow. That’s okay. The second time will be faster. By the fifth time, your hands will just know what to do.
You’re not just learning to braid. You’re learning a method that applies to any intricate style. That’s a skill that lasts a lifetime.
So, that’s my not-so-secret secret. It’s not about having magical hands. It’s about having a reliable plan. Ditching the “eyeball method” for this simple algorithm took my braids from “okay” to “oh, wow, did you do that yourself?”
The best part? Once this feels easy, you can start bending the rules on purpose. You can make one column deliberately thicker for a cool, unbalanced effect. But you’ll do it with control, not by accident. That’s when the real fun begins.
I’d love to hear how it goes for you. Which trick made the biggest difference? Was it the tail comb or the column mapping? Tell me in the comments below!
Save this post to Pinterest to keep this braiding algorithm handy for your next hair day!