Micro Braids: Are They Worth the Time and Effort?
Hey friend. Let’s talk about micro braids. You’ve seen them all over your feed—those impossibly tiny, intricate braids that look like a crown of delicate art. And you’re wondering, with your crazy schedule, is committing to a 6+ hour salon session actually worth it?
I got them done last summer, and let me tell you, it was an experience. My neck was sore, my patience was tested, but the result? A whole new level of low-maintenance glam. This isn’t just about a hairstyle; it’s a lifestyle shift.
So, are they worth the time and effort? I’m breaking down everything: the good, the bad, the itchy, and the utterly fabulous. Whether you’re chasing that effortless old money hair vibe or just want a break from daily styling, let’s figure this out together.
What Exactly Are Micro Braids?
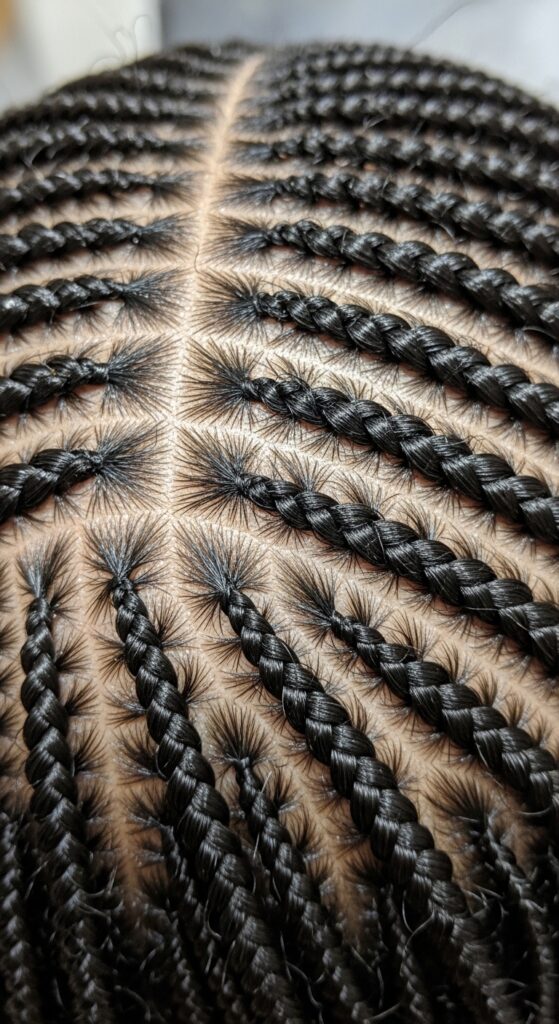
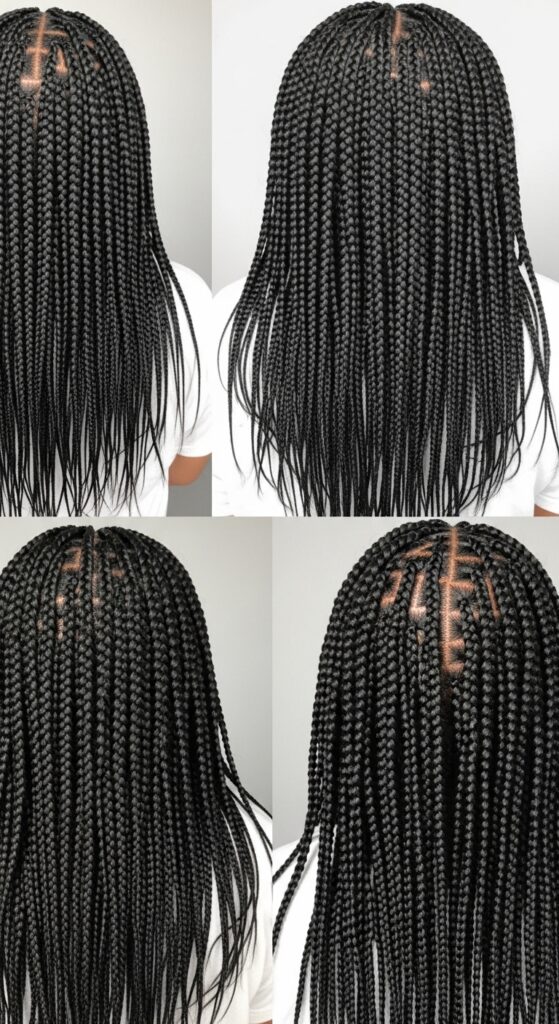
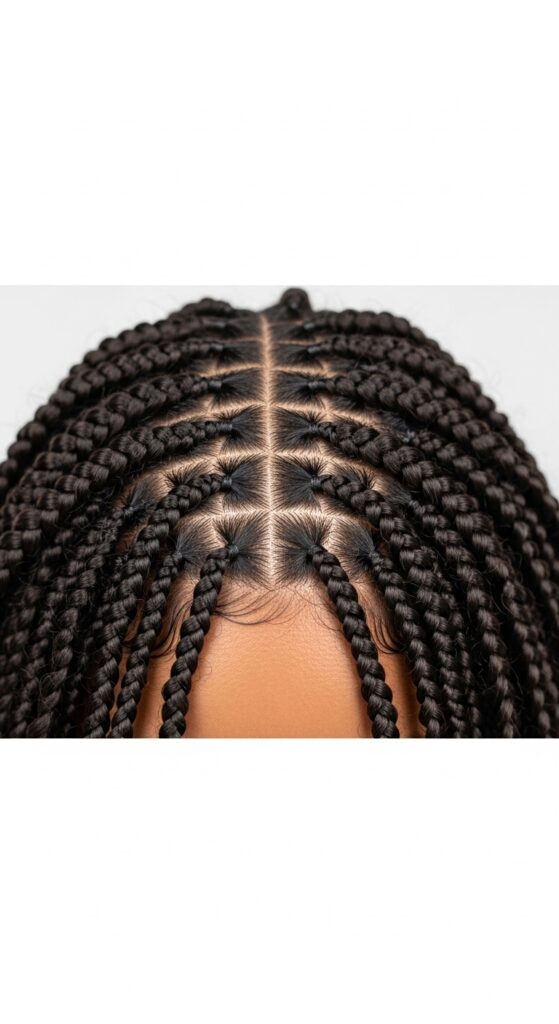
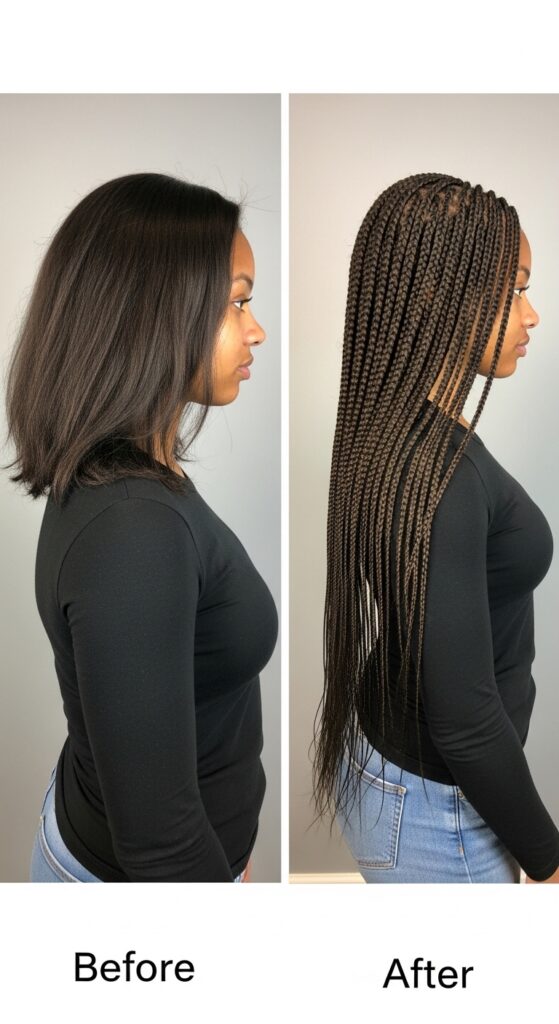
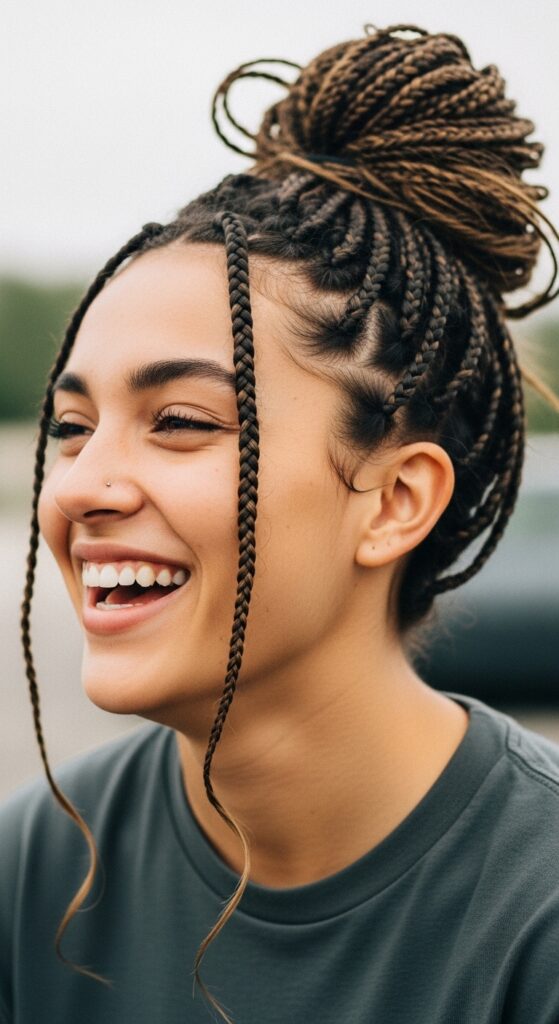
Think of micro braids as the super-fine, delicate cousins of traditional box braids. They’re created by sectioning hair into very small, precise parts and braiding them down to the ends. The goal is a seamless, natural look where the braids blend beautifully with your scalp.
They’re typically done with added synthetic or human hair for length and durability. Because the sections are so small, you end up with a lot of braids—we’re talking hundreds. This density is what creates that gorgeous, full effect and allows for incredible versatility.
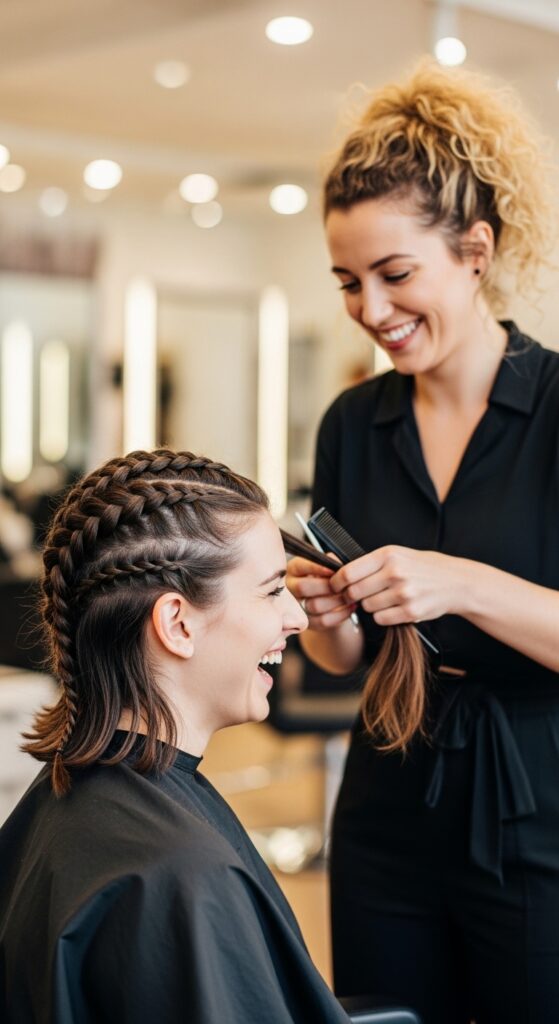
The Time Investment: Be Prepared
Let’s be real: this is the biggest hurdle. Getting micro braids installed is a marathon, not a sprint. You need to block out a serious chunk of your day, or even two.
- Installation Time: For medium-length, dense braids, expect 6 to 10 hours in the salon chair. Some stylists may split this over two days.
- Preparation Time: Don’t forget the wash, deep condition, and detangling session beforehand. This can add another 1-2 hours.
- Mental Prep: Bring snacks, water, a good podcast playlist, and a patient friend. Your neck and back will thank you.
The Upfront Cost Breakdown
Quality braiding costs money. The price reflects the immense skill and time required. Don’t be shocked by quotes; see it as an investment in weeks of easy styling.
Prices vary wildly by location, stylist reputation, and hair length. You could pay anywhere from $250 to $800 or more. This usually includes the hair extension material. Always get a clear quote before you book to avoid surprises.
While it’s a big upfront cost, divide it by the 6-8 weeks you’ll wear them. Suddenly, the daily cost looks a lot more manageable compared to constant salon visits for other 2026 hairstyles.
The Major Pros: Why You Might Love Them
Once they’re in, the benefits are incredible. This is where all that effort pays off big time.
- Ultimate Low Maintenance: Wake up, shake your head, and go. Seriously. No daily heat styling or complex routines.
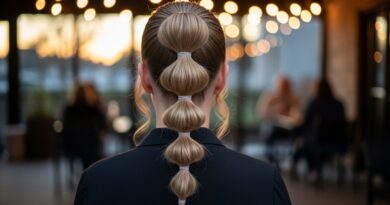
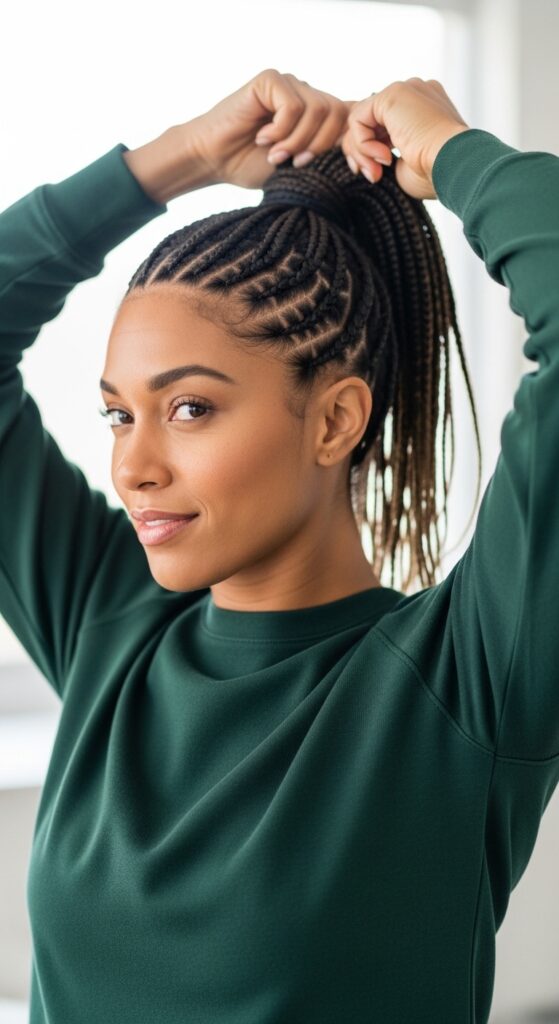
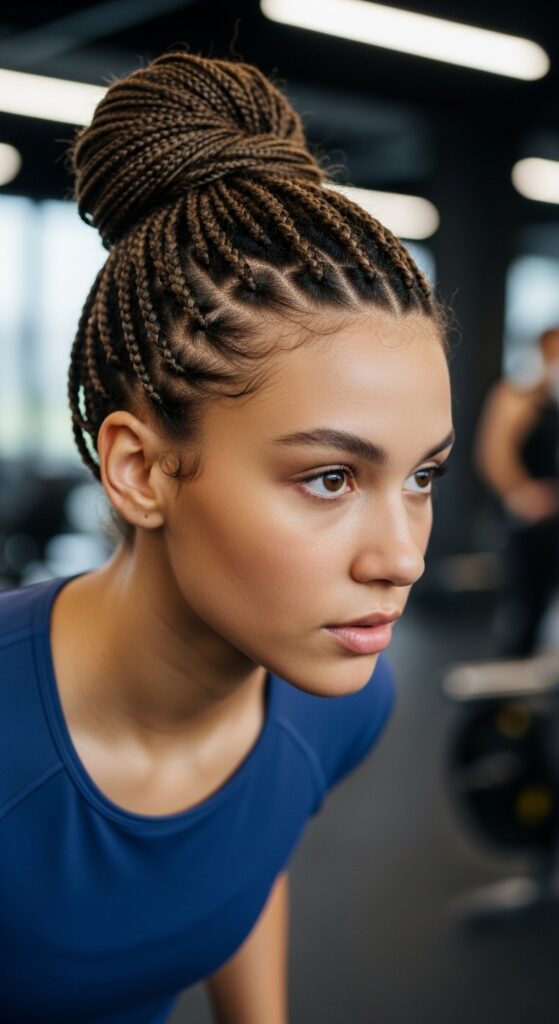
- Style Versatility: Wear them down, in a high ponytail, a chic bun, or half-up. They look good 24/7.
- Hair Protection: They’re a fantastic protective style. Your natural hair is tucked away, safe from breakage and environmental damage.
- Long-Lasting: With proper care, they can look fresh for 6 to 8 weeks.
The Honest Cons: The Itchy Truth
It’s not all perfect. Being honest means talking about the less-glamorous parts too.
The first week can bring serious itchiness as your scalp adjusts. Tightness is also common; if it’s painful, tell your stylist immediately. The weight of all that hair can cause tension if not installed carefully.
You also have to commit to a specific care routine to avoid buildup and mildew. And let’s not forget the take-down process—it’s time-consuming and requires gentle patience to prevent hair loss.
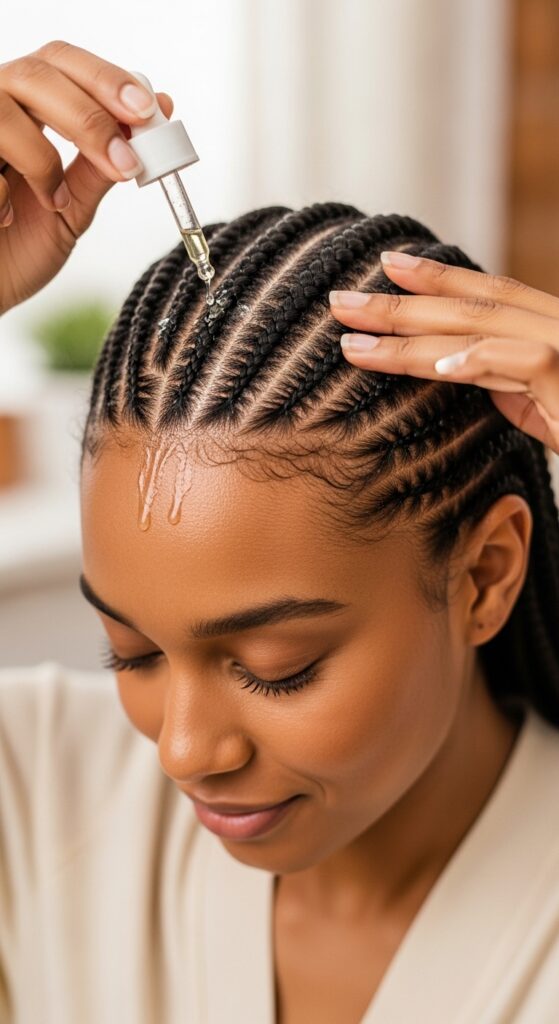
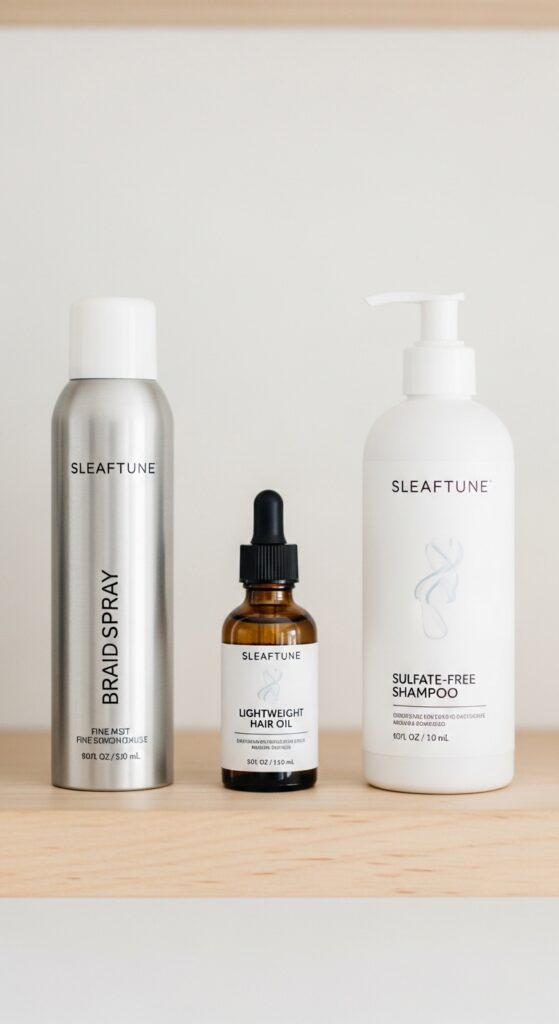
Daily Care Routine Made Simple
Caring for your micro braids is non-negotiable. A simple routine keeps them fresh and your scalp healthy.
- Scalp Care: Use a lightweight oil or braid spray every few days on your scalp to combat dryness and itch.
- Cleansing: Wash every 2-3 weeks with a diluted, sulfate-free shampoo. Focus on the scalp and rinse thoroughly.
- Drying: This is crucial! Dry your scalp and braids completely with a low-heat dryer or a cool setting. Never go to bed with damp braids.
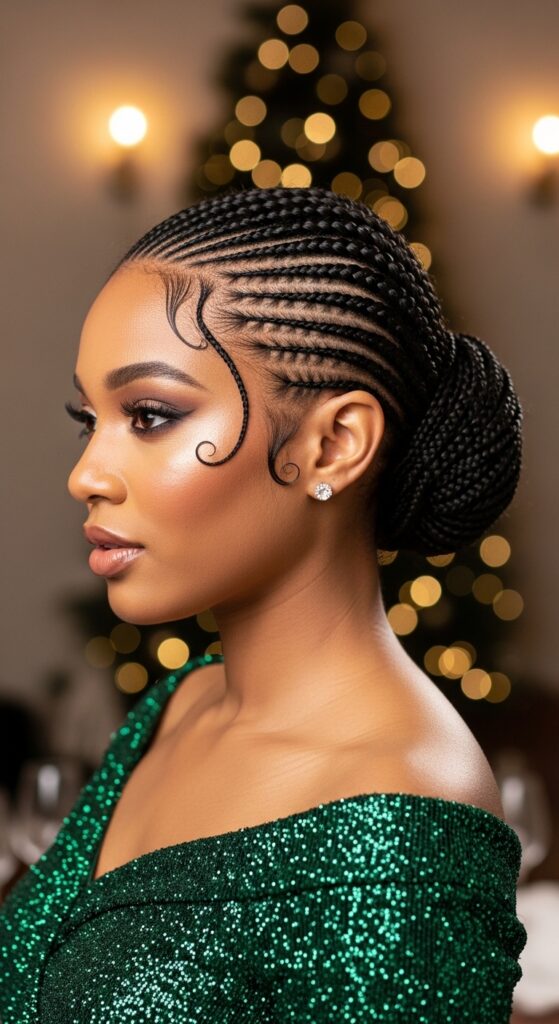
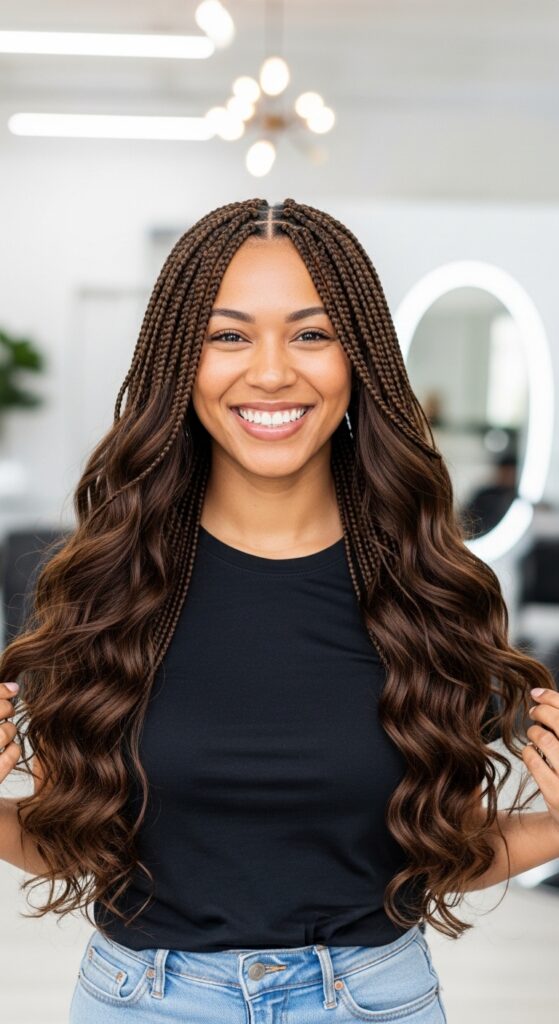
Styling Versatility: Endless Options
This is the fun part! Micro braids are a blank canvas. Feeling a quiet luxury bob vibe? Tuck them under into a blunt, chin-length style. Want some edge? Try an asymmetrical lob look by parting them deeply to one side.
You can add beads, cuffs, or ribbons for a pop of personality. For a night out, create a dramatic side-swept look or intricate updo. The sheer number of braids means any style holds incredibly well.

How They Compare to Other Braids
How do micro braids stack up against knotless or traditional box braids? It’s all about size and installation.
Knotless braids have a smoother, flatter root and are often considered less tension-heavy. Traditional box braids use larger sections, so they’re faster to install but don’t offer the same delicate, seamless look.
Micro braids are the finest and most time-intensive. They create the most natural scalp appearance but require the most commitment upfront. It’s a trade-off between installation time and aesthetic fineness.
Can You Do Them at Home?
I won’t lie, the DIY route is a heroic undertaking. It requires advanced skill, extreme patience, and the ability to braid the back of your own head neatly.
If you’re a braiding novice, I strongly recommend a professional. The tension is so important to get right to avoid hair loss. For seasoned braiders, it’s possible but plan for multiple sessions over a weekend. Your arms will need breaks.
Consider a happy medium: have a pro do the initial install, then you can maintain the style and do your own touch-ups as needed.
Who Are Micro Braids Best For?
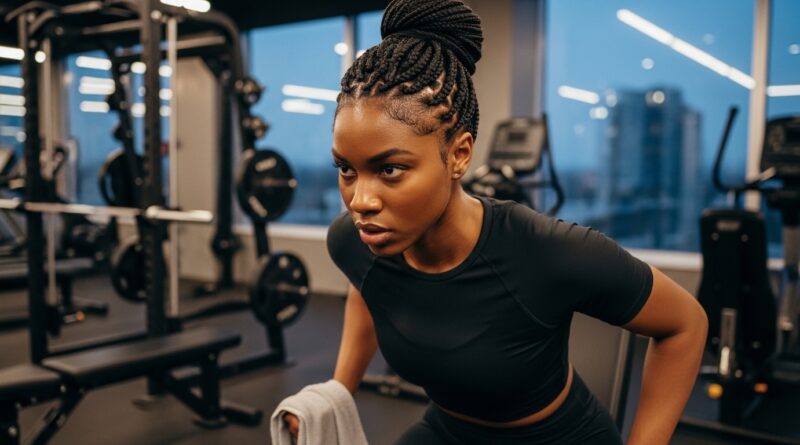
Micro braids are a dream for the busy, on-the-go person who wants to minimize morning routine chaos. They’re perfect for travelers, athletes, or anyone in a humid climate who fights with their natural texture daily.
They’re also great for anyone wanting a long-term protective style to encourage hair growth. If you have fine or medium-density hair, the added hair can give you the full, lush look you’ve always wanted.
If you have a very sensitive scalp or are prone to hair loss, consult with a dermatologist or trusted stylist first to ensure it’s a safe option for you.
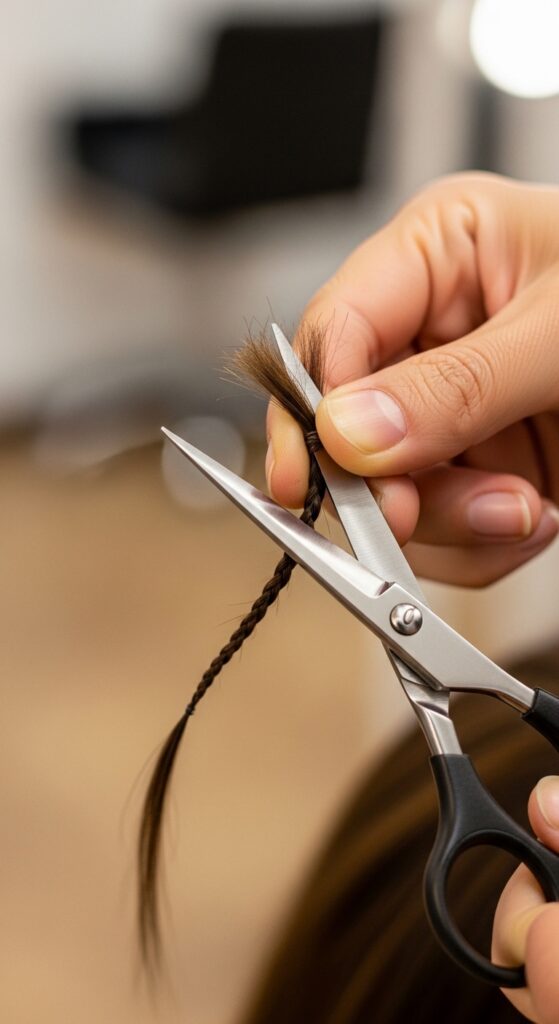
The Take-Down Process: Be Gentle
Removing your braids is just as important as installing them. Rushing can lead to significant breakage. Set aside a generous amount of time—it can take several hours.
- Condition First: Apply a rich conditioner or detangling spray to each braid before you start cutting and unraveling.
- Slow Unraveling: Use small scissors to carefully cut the added hair near the tip, then gently unravel the braid with your fingers.
- Detangle & Wash: Once all braids are out, gently detangle with a wide-tooth comb. Follow with a clarifying shampoo and a deep conditioning treatment.
Common Mistakes to Avoid
A few wrong moves can turn this great style into a problem. Here’s what to watch for.
- Too Tight: Insist on comfortable tension. Pain during installation means pain later and potential hair loss.
- Poor Drying: Skipping the blow-dryer after washing is the top cause of mildew and unpleasant smells.
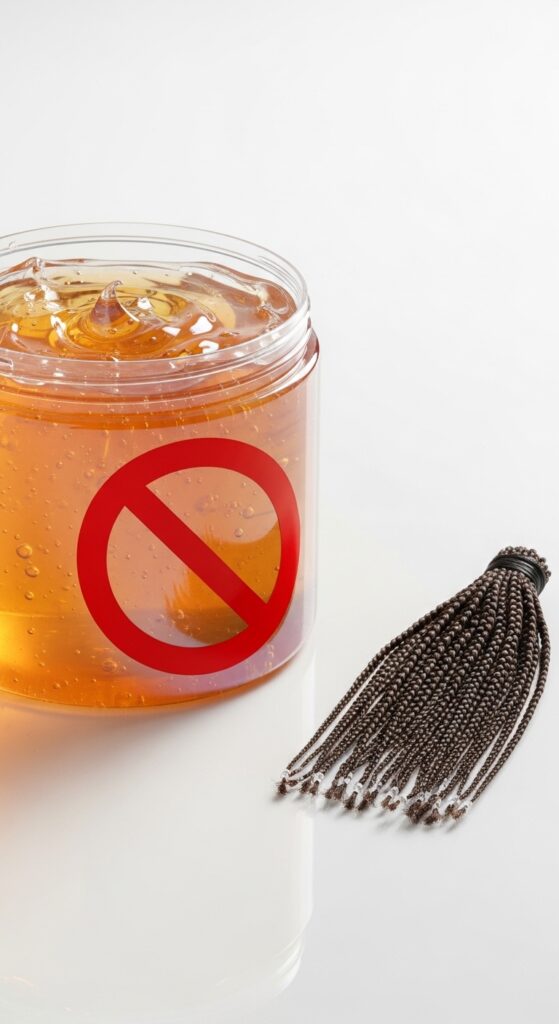
- Heavy Products: Avoid gels, heavy creams, or waxes. They cause fast buildup that’s hard to wash out.
- Wearing Too Long: Don’t keep them in past 8 weeks. New growth causes too much tension and matting.
Micro Braids on Different Hair Textures
Micro braids can be installed on straight, wavy, curly, and coily hair textures. The key is in the preparation and the stylist’s expertise.
For straighter, finer hair, stylists often use techniques to create more grip so the braids hold. For tightly coiled textures, the braiding pattern works with the natural curl to create a strong, lasting foundation.
The final look will differ slightly. On straighter hair, they may have a more uniform, sleek appearance, while on curlier hair, they can blend even more seamlessly for a truly natural look.
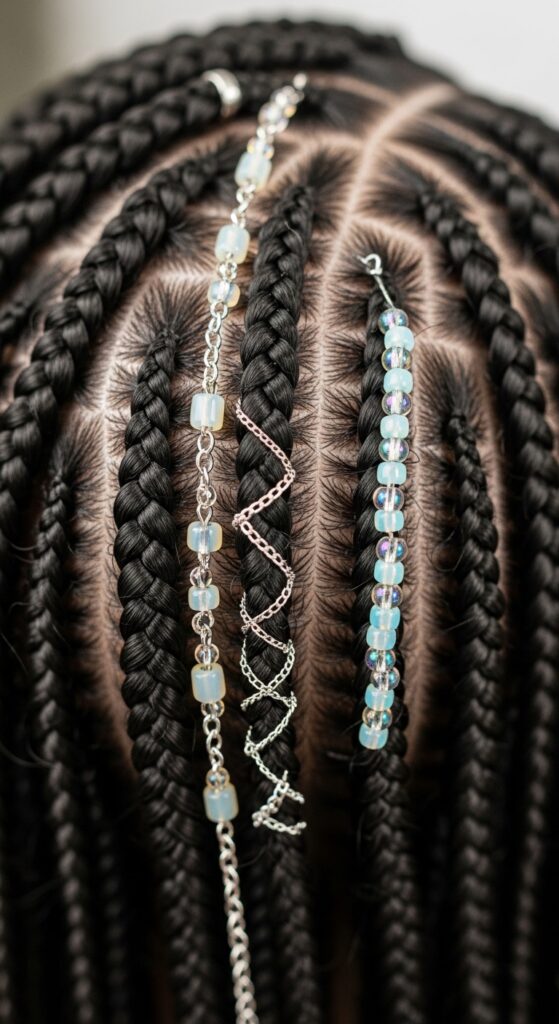
Accessorizing Your Look
Accessories take micro braids to the next level. Think minimalist for day and dramatic for night.
Slip in a few face-framing romantic goth hairstyles inspired pieces like black velvet ribbons or delicate silver chains. For a touch of glitchy glam hair, try iridescent bead strands woven through a few braids.
Simple gold or silver cuffs are my everyday go-to. They add polish without effort. Just avoid anything with sharp edges that can snag and unravel the braid.
Seasonal Style Adaptations
Micro braids are a year-round winner, but you can tweak your style with the seasons.
In summer, opt for high buns and ponytails to keep cool. Use a moisturizing spray to combat dryness from sun and chlorine. In winter, wear them down under a beanie for extra warmth, but ensure your scalp is dry to avoid dampness.
They’re perfect for holiday parties—imagine a sleek, side-parted style with a few strategic sparkly accessories. It beats fighting with a curling iron any day.
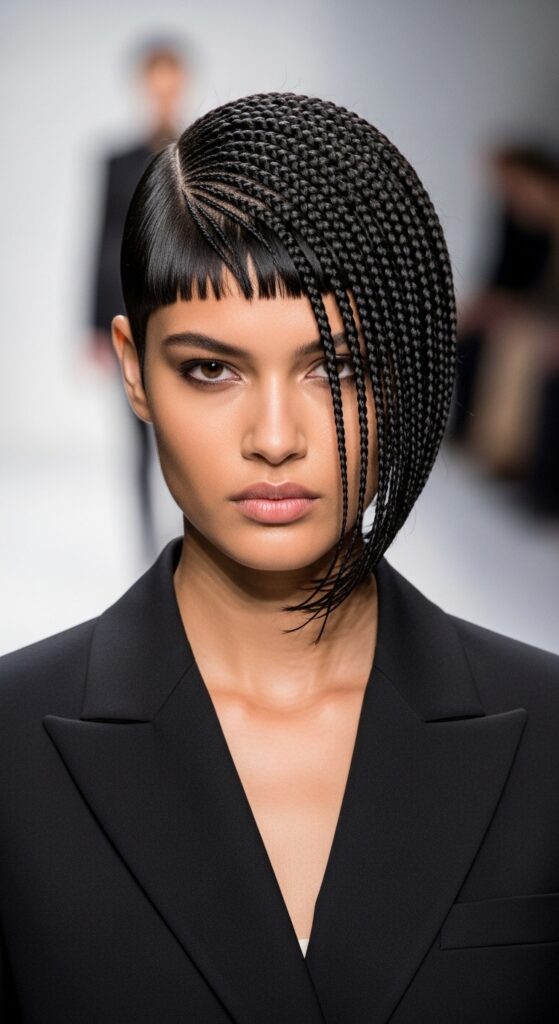
Inspiration from 2026 Trends
Even classic styles get fresh updates. For a modern twist, look at trending shapes.
Ask your stylist to cut your micro braids into a sharp asymmetrical lob or a textured vampire haircut with dramatic, piecey layers. You could even incorporate the front-heavy, fringe elements of a hime cut by leaving certain face-framing braids shorter.
The beauty is that these are just cuts into the braided hair—totally reversible when you take them down. It’s a risk-free way to play with the most daring 2026 hairstyles.
Myths About Micro Braids Debunked
Let’s clear up some common fears. No, micro braids do not automatically ruin your hair. Damage comes from improper installation, poor care, or rough removal.
No, they are not “dirty” hairstyles. With a proper wash routine, your scalp can be cleaner than when you’re daily styling with heavy products. And no, they aren’t only for certain hair types or ethnicities. They’re a versatile protective style for anyone willing to care for them correctly.
When to See a Professional
Listen to your scalp. It’s telling you something. See a stylist immediately if you experience:
- Persistent, severe pain or headaches after the first few days.
- Signs of infection: redness, pus, or extreme swelling around the braid bases.
- Noticeable hair loss or breakage during wear (beyond normal shedding).
- An unbearable odor that doesn’t go away after a proper wash and thorough drying.
Don’t suffer in silence. A good stylist will want to help fix any issues.

Long-Term Hair Health Impact
Done right, micro braids can be a net positive for your hair health. The long break from heat styling and daily manipulation allows your natural hair to rest and grow.
The key is to give your hair a breather between installations. After taking them out, spend at least a month or two focusing on moisture, protein treatments, and gentle styles. This cycle of protection followed by dedicated care can lead to stronger, longer hair over time.
My Personal Verdict
So, after all that, was it worth it for me? Honestly, yes. The freedom I had for those two months was incredible. I traveled, I swam, I worked out, and I literally rolled out of bed looking put-together.
Would I do it again? Absolutely, but only when I know I have a clear weekend for installation and a trusted stylist available. It’s not an impulse decision, but a planned investment in my time and sanity.
It taught me patience and gave me a real appreciation for the art of braiding. The confidence boost of having a great hair day for 60 days straight? Priceless.
Your Next Steps
Feeling inspired? Don’t just jump in. Do your homework. Start by researching highly-recommended braiders in your area. Look at their portfolios—do their finished braids look neat, healthy, and installed with care?
Book a consultation. Talk about your hair goals, your scalp sensitivity, and ask ALL your questions. Get that clear price quote. Then, if it feels right, block out that date in your calendar and get ready for a transformative, if lengthy, experience.
So, there you have it—the full, unfiltered scoop on micro braids. It’s a big decision, but for the right person with the right preparation, it can be a total game-changer. It’s less about following every micro-trend and more about finding what gives you back your time and confidence.
Remember, the best hairstyle is one that makes you feel like you, whether that’s the intricate art of micro braids, the sleekness of a quiet luxury bob, or the boldness of a vampire haircut. It’s your hair, your rules.
Save this post to Pinterest to keep this guide handy for when you’re ready to take the plunge! And I’d love to know—are you team “yes, let’s do it” or team “I’ll admire from afar”? Spill your thoughts in the comments below!