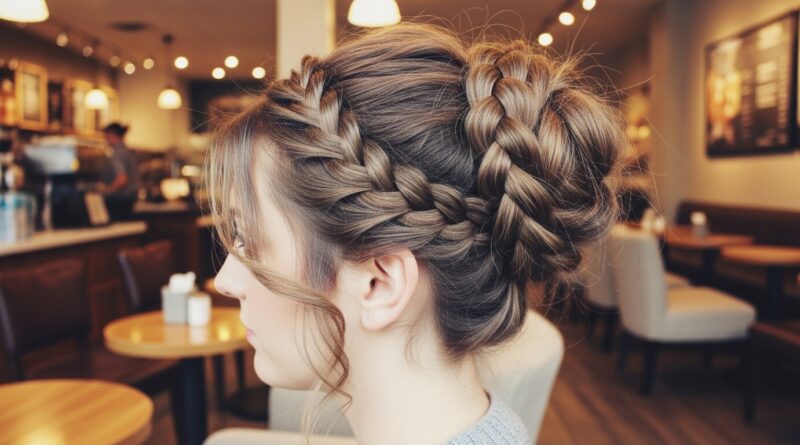
22 Rope Braid Hairstyles Twisted Strands Half Up Low Ponytail Variations
Okay, let’s be real. We’ve all seen the rope braid and thought, “That looks gorgeous, but also… complicated.” I used to think the same thing. But what if I told you this one simple technique is the secret to 22 completely different looks?
From a five-minute upgrade to your low ponytail to the star of your next wedding guest outfit, the rope braid is your new best friend. It’s that perfect mix of effort and elegance we’re all chasing.
This isn’t about perfection. It’s about easy, wearable styles that make you feel put-together. I’m breaking down everything, from the basic twist to how to weave it into the biggest 2026 hairstyle trends. Get ready to get inspired.
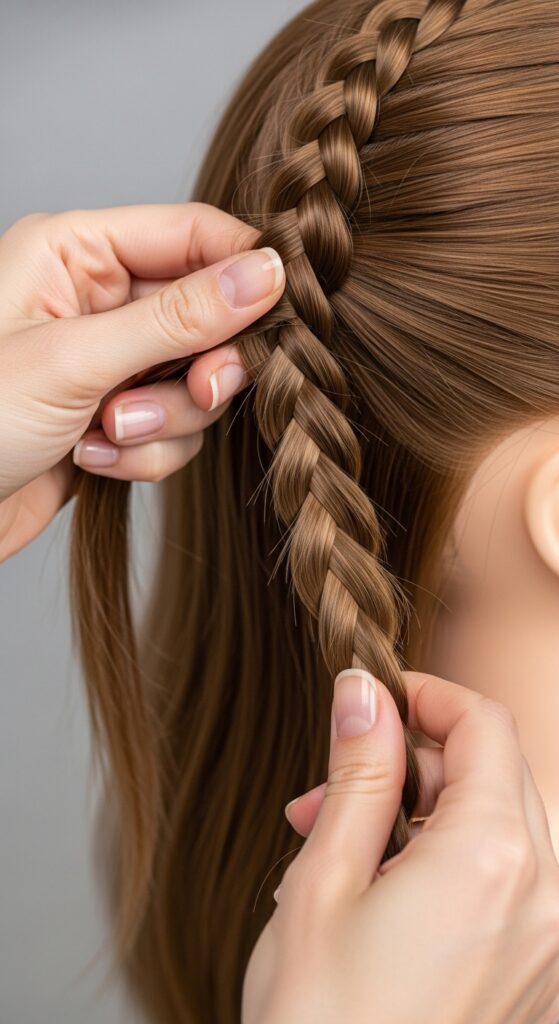
1. The Foundation: How to Rope Braid in 30 Seconds
First, let’s demystify the braid itself. A rope braid is just two sections twisted around each other. It’s easier than a regular three-strand braid once you get the motion down. The key is keeping the twist consistent.
Here’s the foolproof method:
- Divide a section of hair into two equal parts.
- Twist both sections to the right (clockwise).
- Now, cross the right section over the left, wrapping them together. It feels like you’re twisting a piece of rope!
- Continue twisting each section individually, then crossing, all the way down. Secure with a clear elastic.
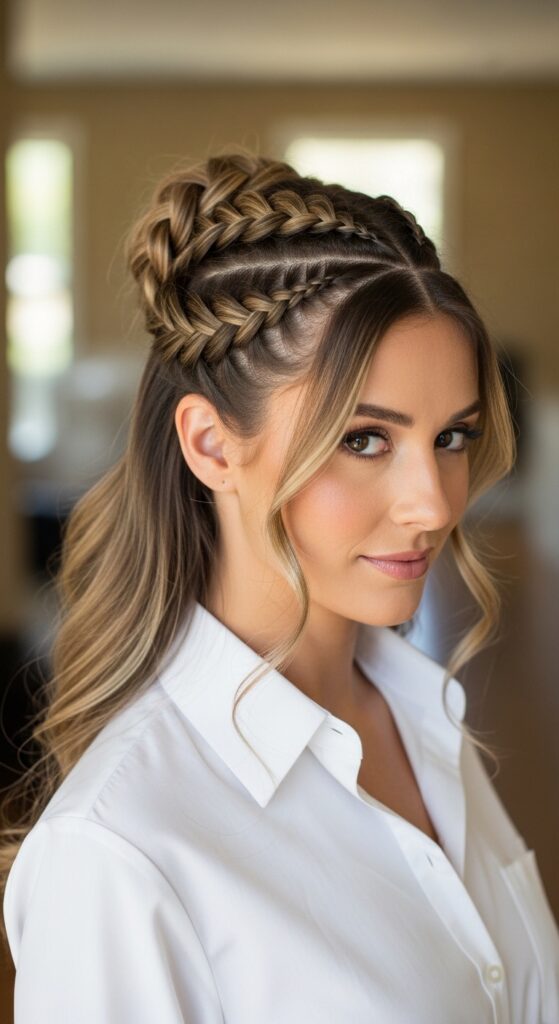
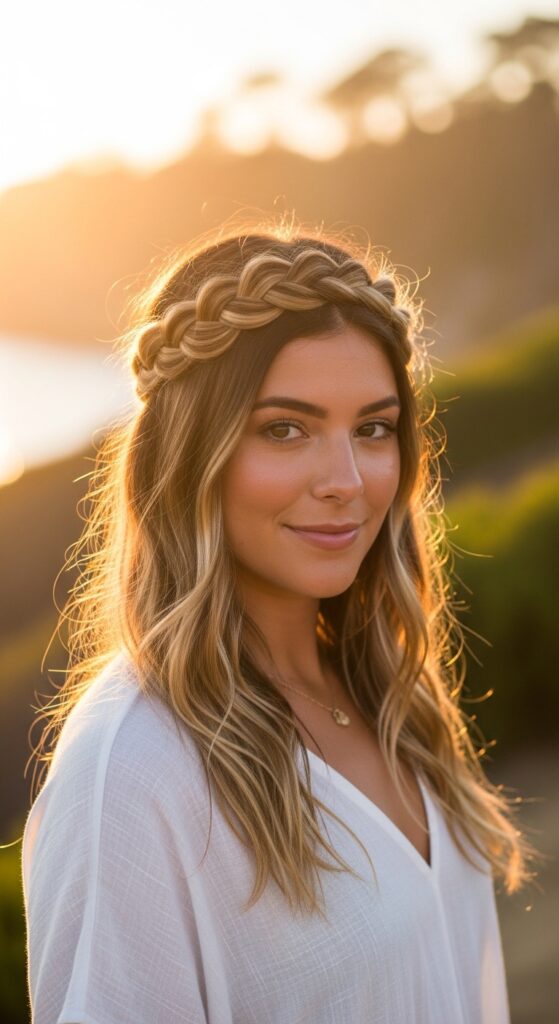
2. The Half-Up Crown: Your Instant “Old Money Hair” Moment
This is my go-to for looking polished in seconds. It gives off that effortless, “quiet luxury” vibe without trying too hard. It works on day-old hair beautifully and keeps strands out of your face.
Simply take two front sections, create a rope braid on each side, and pull them to the back of your head. Cross them and pin them in place. Leave the rest of your hair down for soft, romantic volume. It’s the perfect bridge between casual and chic.
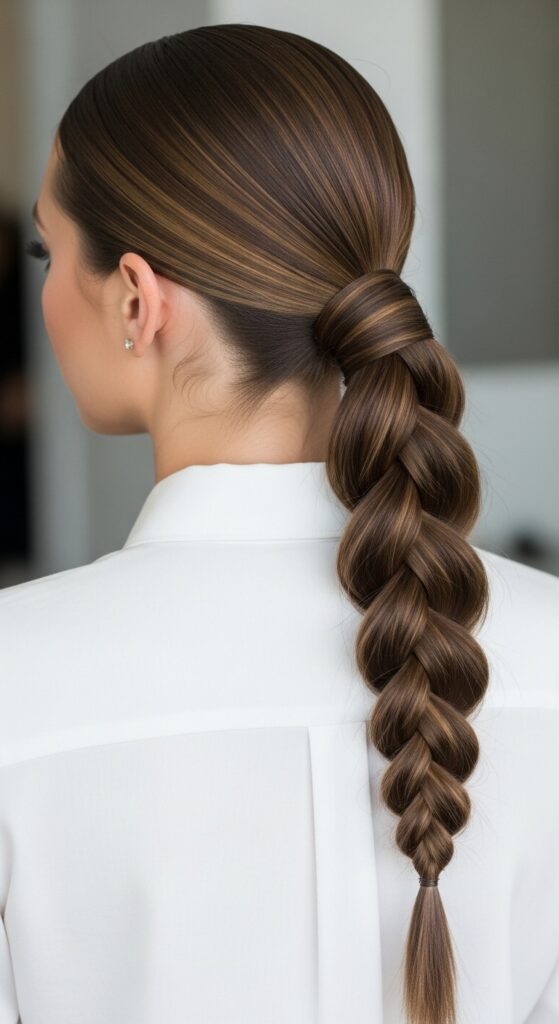
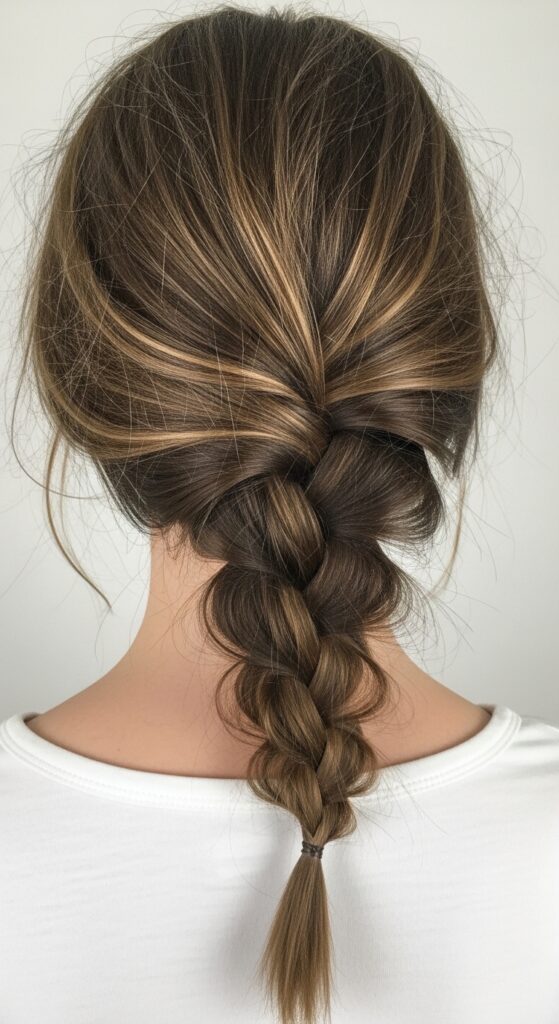
3. Twisted Low Ponytail Upgrade
Never wear a basic ponytail again. This one-minute upgrade changes everything. Gather your hair into a low ponytail and secure it loosely. Take a small section from underneath the ponytail and wrap it around the elastic to hide it.
Now, split the ponytail itself into two parts. Twist them into one large rope braid and secure the end. Gently pull on the twists to make it look fuller. It’s sleek, intentional, and so much prettier.
4. Boho Rope Braid Headband
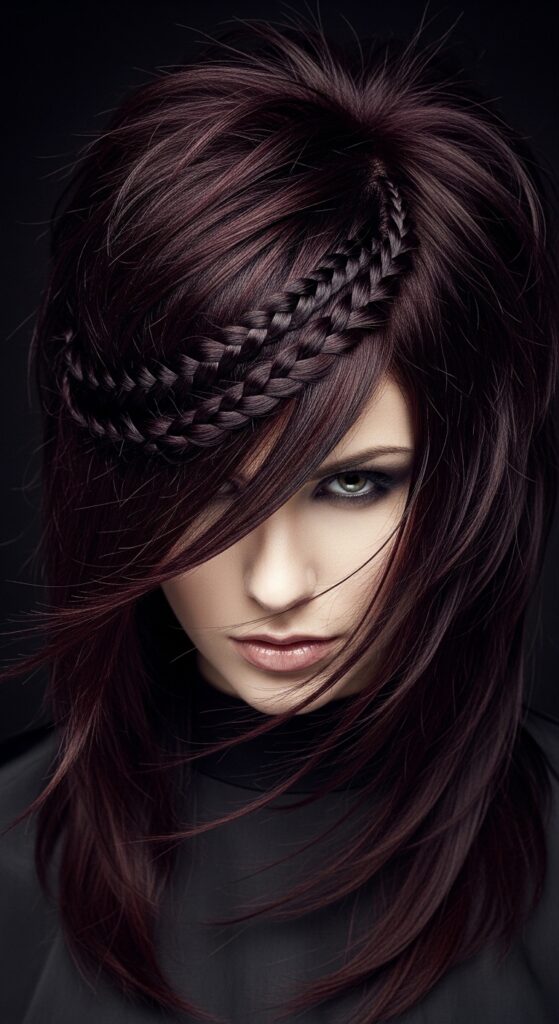
For a festival or a sunny day, this is a lifesaver. Create a rope braid along your hairline, starting above one ear and finishing above the other. Don’t make it too tight.
Once it’s secured, gently pull on the outer edges of the braid to make it wider and flatter, like a headband. Tuck the end behind your opposite ear and pin it. Leave your hair down and wavy for the ultimate free-spirited feel.
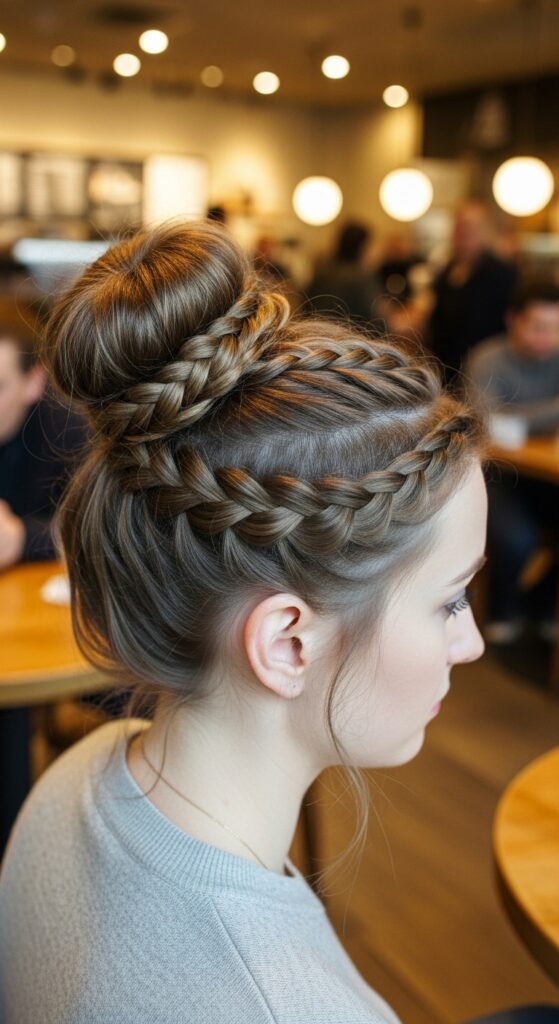
5. Rope Braid into a Messy Bun
Take your messy bun from “I just threw this up” to “I am a style icon.” Pull your hair into a high ponytail and rope braid the entire length. Don’t worry about flyaways.
Then, simply wrap the braid around the base of the ponytail to form a bun. Secure with pins. The texture of the rope braid gives the bun so much more dimension and holds its shape all day. It’s a game-changer.
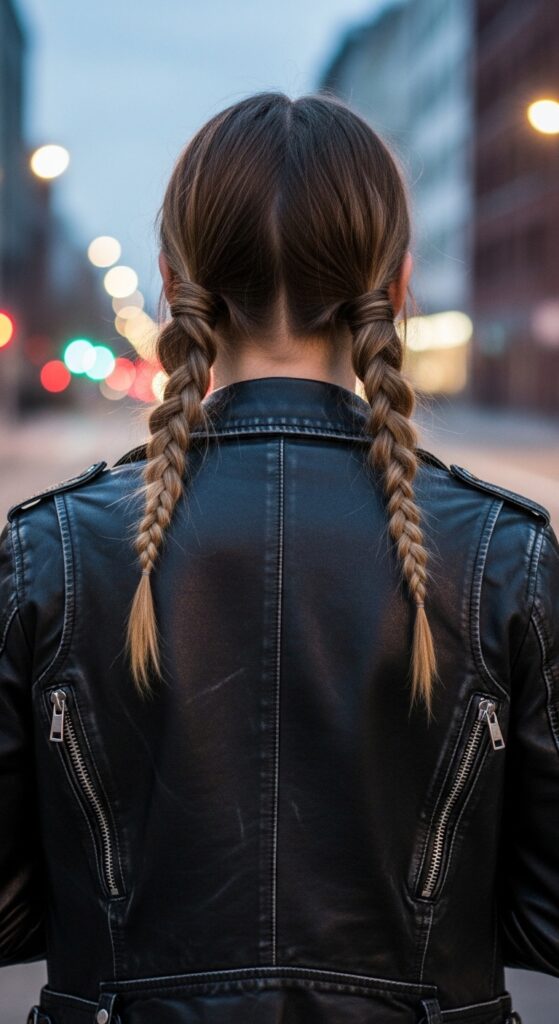
6. Double Rope Braid Pig Tails
Before you think “too young,” hear me out. When done with rope braids, this look feels modern and cool, not childish. Part your hair down the middle and create two low pigtails.
Turn each section into a rope braid. The key is to keep them a bit loose and gently tug them wider after. This style pairs perfectly with an asymmetrical lob length, adding playful detail to a sharp cut.
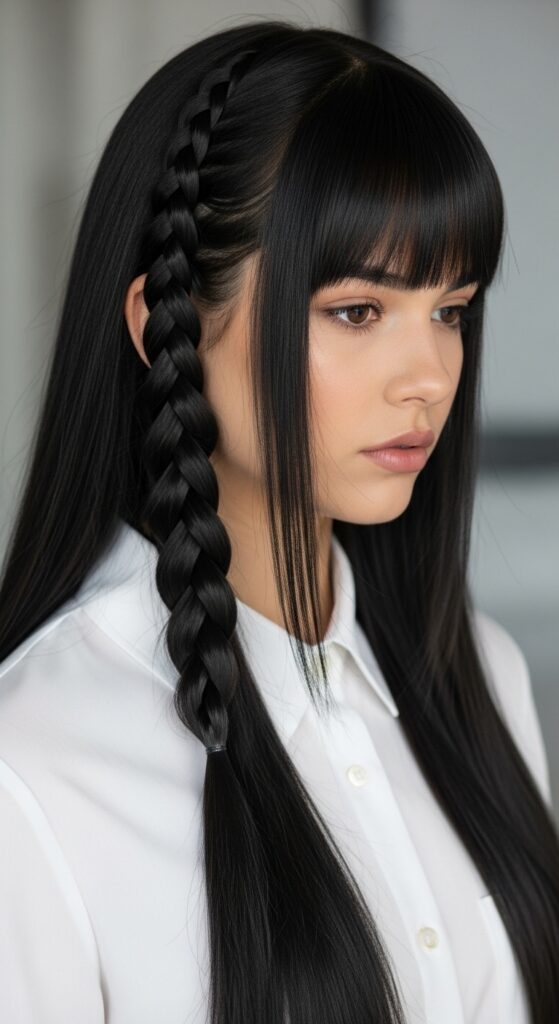
7. The “Glitchy Glam” Accent Braid
Glitchy glam hair is all about intentional imperfection. Add a single, small rope braid to an otherwise sleek style. Try it with a deep side part.
Braid a thin section just above your ear and let it disappear into your down-do. Or, braid it and pin it back in an unexpected way. It’s that subtle, “something’s different” detail that defines the trend.
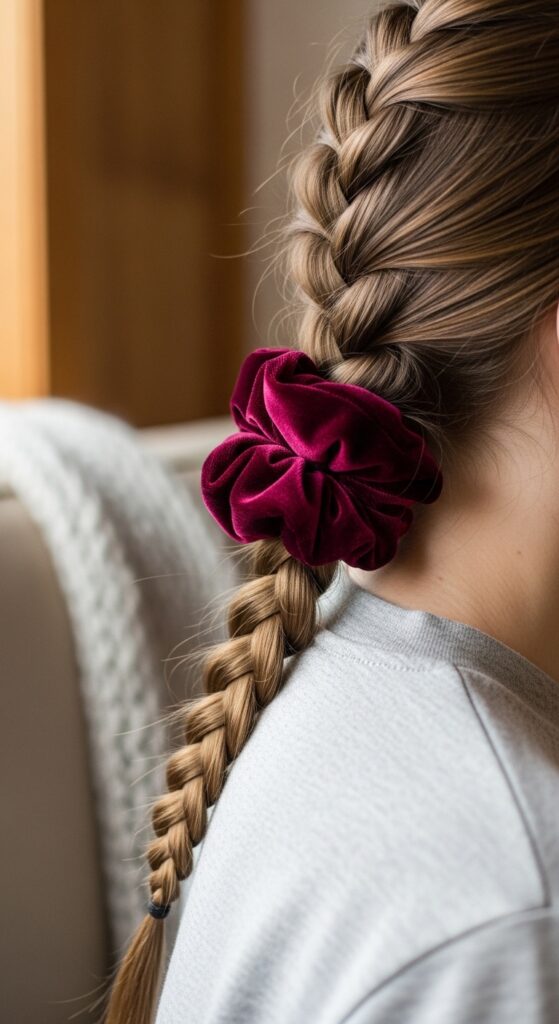
8. Rope Braid with a Scrunchie
Scrunchies are back, and they’re the perfect partner for a rope braid. The texture looks amazing against the fabric. Create a low, side-parted rope braid with all your hair.
Instead of a regular elastic, use a large silk or velvet scrunchie to secure the end. Let the tail of the braid be shorter. It’s cozy, nostalgic, and incredibly stylish.
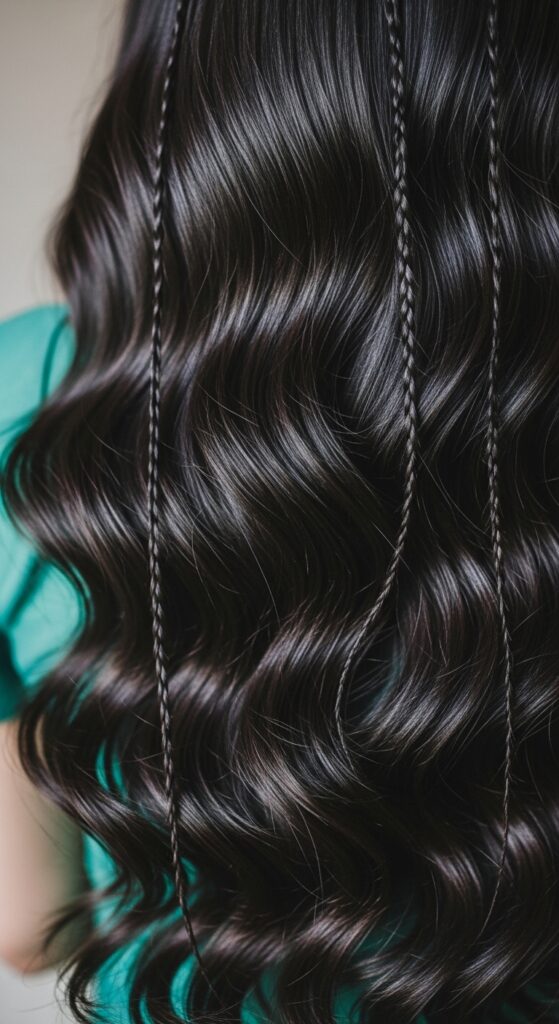
9. Mermaid Waves with Rope Braid Highlights
This is for when you want to feel romantic. Create large, loose waves with a curling iron. Then, pick out two or three random face-framing sections.
Turn just those small sections into tiny, delicate rope braids. Weave them into your waves. It looks like you’ve been swimming in the ocean, with strands magically braided by the sea. Pure romantic goth hairstyles energy.
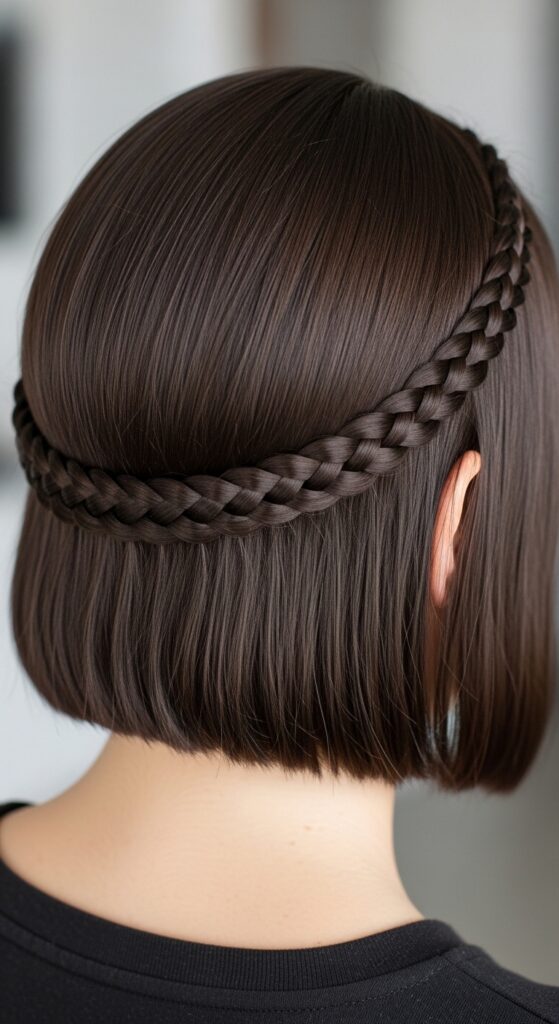
10. The Sophisticated “Quiet Luxury Bob” Twist
If you have a bob, you can still play! This works beautifully on a quiet luxury bob. Take a section from behind one ear, rope braid it horizontally along the nape of your neck, and pin it behind the other ear.
It’s a hidden detail that’s so chic. From the front, your bob looks pristine and sharp. From the back, there’s a surprising, elegant twist. It’s the definition of understated style.
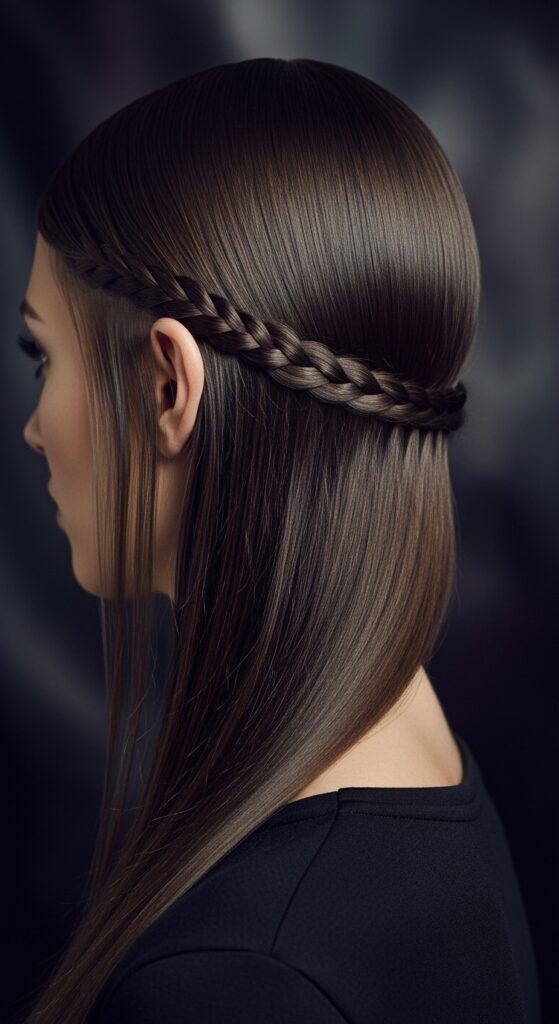
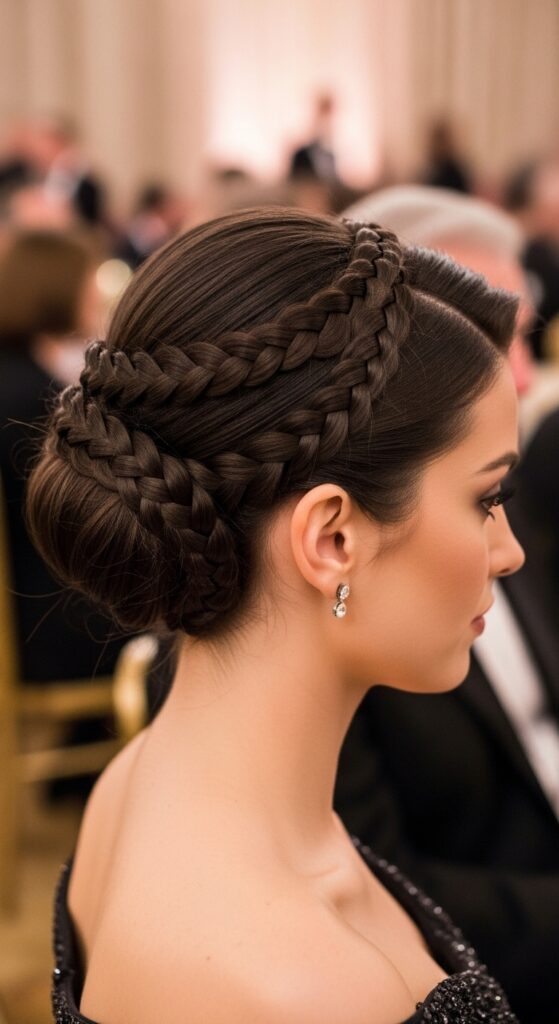
11. Rope Braid Halo for Long Hair
This is the ultimate special occasion style for long hair. It looks intricate but is just two braids. Create a center part. Make a rope braid on each side, starting at the temples.
Bring them around the back of your head like a halo, pinning as you go. Tuck the ends under and secure. You can leave the back hair down or twist it into a low chignon. It’s absolutely stunning.
12. The Modern “Vampire Haircut” Companion
The sharp, layered vampire haircut begs for textured details. A rope braid is perfect because it’s sleek yet has edge. Try a single, tight rope braid along a heavily layered side.
Or, braid the longer front pieces and blend them back. It accentuates the dramatic layers and adds a touch of romanticism to the bold cut, tying it into romantic goth hairstyles perfectly.
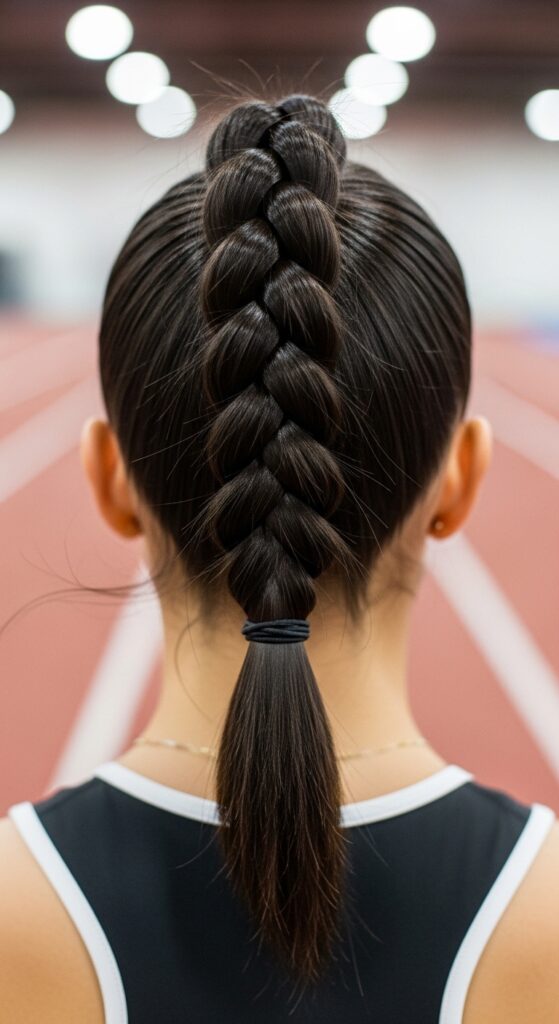
13. Rope Braid Wrap on a High Ponytail
Elevate your gym ponytail instantly. After securing a high ponytail, take a small section from underneath. Twist it into a thin rope braid.
Wrap that braid around the base of the ponytail to conceal the elastic, pinning the end underneath. It looks polished and keeps every hair in place during your workout. Form and function!
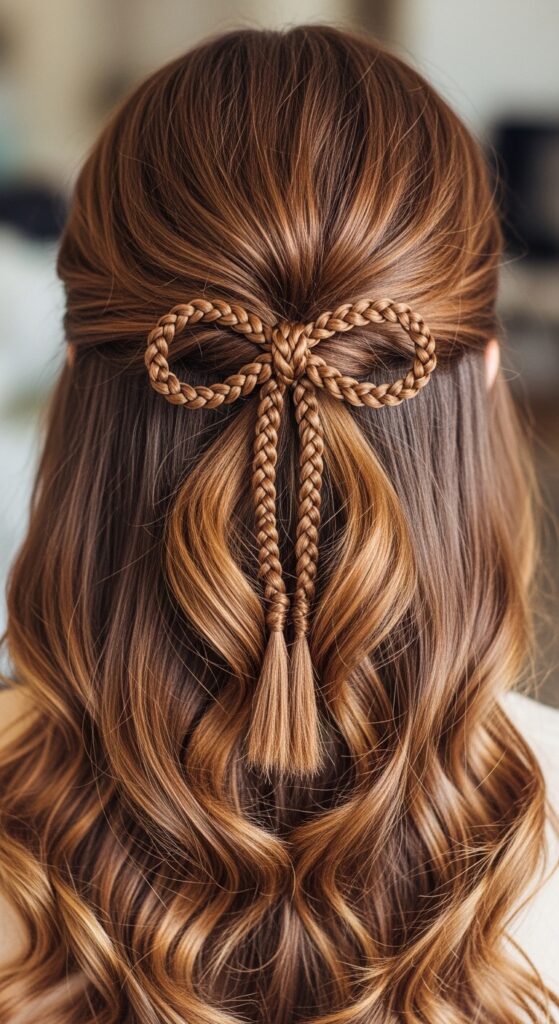
14. Half-Up with a Rope Braid Bow
This is adorable and fun. Create a small half-up section. Instead of just securing it, split it into two and make two short rope braids.
Tie them together into a small bow at the back of your head! Leave the ends dangling. It’s a sweet, playful touch that works for brunch or a date night.
15. The “Hime Cut” Side Accent
The iconic hime cut features strong, straight lines. A rope braid can soften it beautifully. Take one of the long, front sidelocks (the hallmark of the cut).
Isolate that section and turn it into a clean rope braid, letting it fall forward over your shoulder. It maintains the graphic shape of the cut while adding a unique, personal detail.
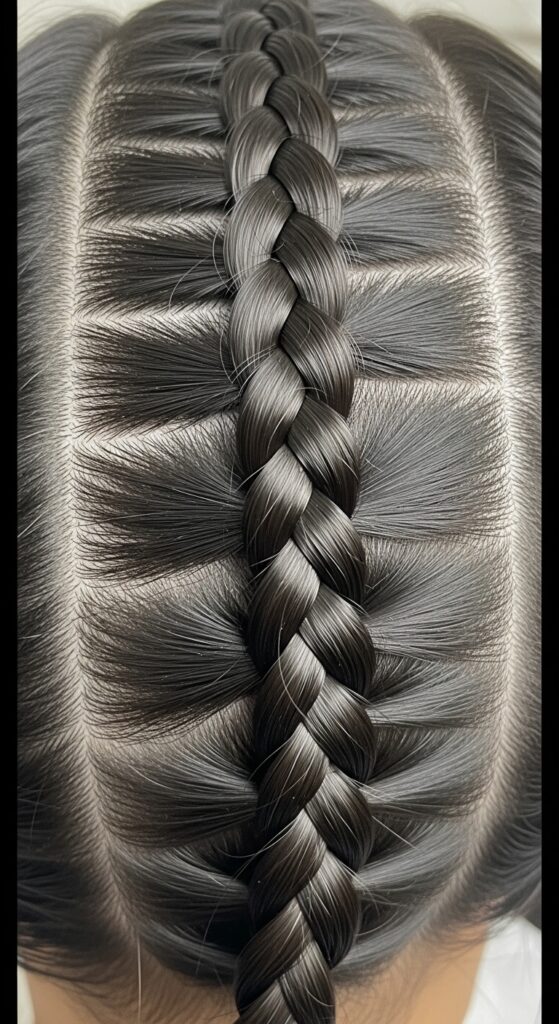
16. Double Dutch Rope Braids
For insane texture and hold, try this. Part your hair down the middle. Instead of regular Dutch braids, do Dutch rope braids. This means adding hair to each section as you rope braid it along your scalp.
It creates a stunning, 3D effect that’s super secure. Wear it down or gather the ends into buns. It’s a head-turning look for active days or festivals.
17. The Tucked Rope Braid Bob
Another genius trick for bobs and lobs. Create a rope braid on one side of your head, starting at the temple and going back. Once it reaches behind your ear, stop adding hair and just finish the braid.
Then, tuck the end of the braid behind your ear and pin it invisibly. It’s a sleek, side-swept look that adds incredible interest to shorter hair.

18. Fishtail & Rope Braid Combo
Why choose one braid when you can have two? This looks incredibly complex but is simple. Divide your hair in half vertically. On one side, do a fishtail braid. On the other, do a rope braid.
Bring them together into a low ponytail or bun. The mix of textures is so cool and artistic, fitting right into the experimental side of 2026 hairstyles.

19. The “I Woke Up Like This” Bedhead Braid
Embrace the texture of unwashed hair. Rope braids hold better in day-two or three hair! Rake your fingers through your hair to create volume, then gather a top section.
Do a loose, messy rope braid, letting pieces fall out. Pull it to the side. This isn’t about neatness; it’s about that cool, effortless vibe. Perfect for running errands in style.
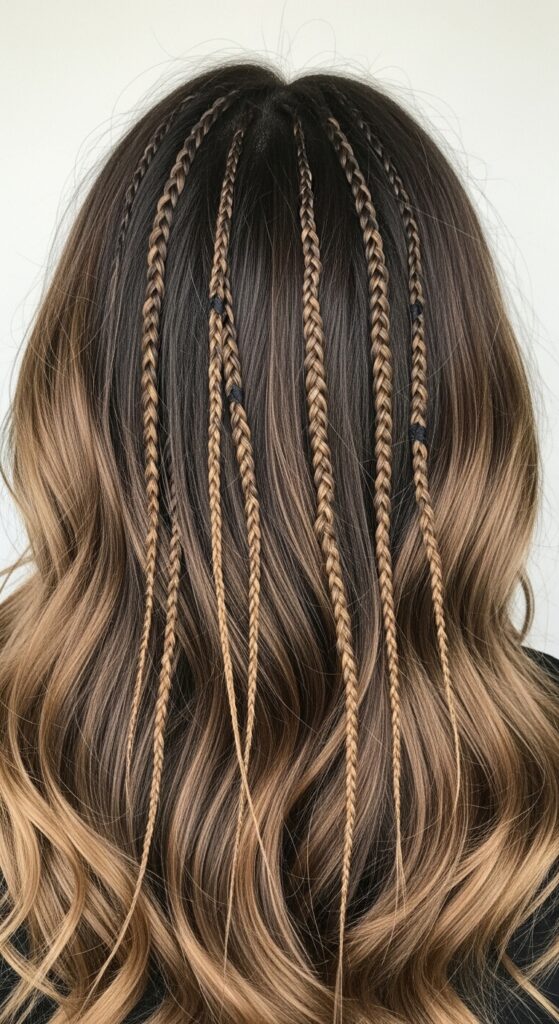
20. Rope Braid Hair Tap
This is a fun alternative to a full braid. Create multiple, very small rope braids scattered randomly through your hair. Just braid an inch or two and then stop, securing the tiny tail with a mini elastic.
It adds pops of texture and detail throughout your down-do. It’s a great way to play with the glitchy glam trend without committing to a full braid.
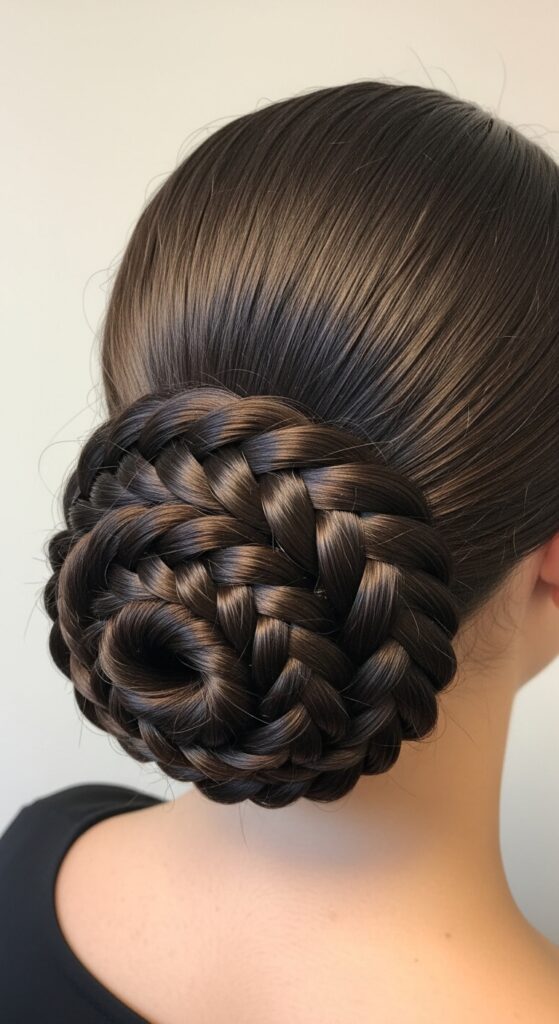
21. The Elegant Low Chignon
For the office or a wedding, this is a winner. Pull your hair into a low, loose ponytail. Rope braid the tail, but don’t make it too tight.
Coil the braid into a knot or a bun at the nape of your neck, pinning securely. The rope braid gives the chignon beautiful definition and keeps it from looking boring. It’s pure old money hair elegance.
22. The Side-Swept Romantic Look
This is my favorite for date night. Sweep all your hair to one shoulder. From the side opposite the sweep, take a front section and begin a rope braid.
Braid it along your hairline, across your forehead, and down into the bulk of your hair, incorporating more strands as you go. It’s a romantic, cascading effect that’s incredibly flattering.
And there you have it! Twenty-two ways to use one simple braid to refresh your entire look. The beauty of the rope braid is its versatility—it can be messy or sleek, hidden or the main event.
My biggest tip? Don’t stress about making it perfect. A few loose pieces actually make it look better. The goal is to have fun and feel great, not to achieve a salon-perfect result every time.
I’d love to hear which style you’re trying first! Did you have a favorite? Save this post to Pinterest to keep all these ideas handy for your next hair day. Tag me if you try one—I love seeing your creations!