Box Braids, Your Way: 38 Styles From Waist-Length Classics to Shoulder-Grazing Bobs
Box braids are the protective style that does it all: they protect your natural hair, they last for weeks, and they can be worn sleek, boho, long, short, coloured or accessorised without ever looking the same twice. The technique is simple — your hair is divided into square-shaped sections and each section is braided with added hair — but the results are anything but simple. Change the size of the sections, change the length, change the parting or the colour, and you have a completely different hairstyle. That is why box braids have stayed at the top of protective styling for decades: one install, endless ways to wear it.
This guide walks you through 38 box braids hairstyles for women, organised the way you will actually choose them: by braid size and length. You will find jumbo braids for a fast install, medium braids for the everyday classic, small braids for maximum styling freedom, knotless braids for a lighter, more natural feel, bobs for a fresh short look, waist-length braids for maximum drama, coloured braids for a statement, and accessorised styles for weddings, holidays and everything in between. Eight guides cover what to know before you book, how long an install takes and what it costs, how to prep your hair, how to care for your scalp, and how to take braids down safely. Every style notes install time, cost, maintenance and who it suits — so you can book your appointment already knowing exactly what to ask for.
Box Braids vs Knotless Braids — What to Know Before You Book
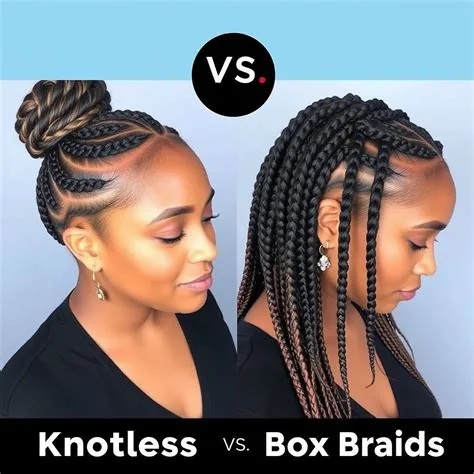
The first decision before any box braid appointment is the oldest one: classic box braids or knotless? In classic box braids, the added hair is knotted at the root with your own hair, which creates a small, firm bump at the scalp and a very secure hold. In knotless braids, the braider starts with your natural hair and feeds the added hair in gradually, so there is no knot, no bump, and far less tension at the hairline. Knotless braids lie flatter, move more naturally, and feel lighter from the first day — which is why so many women who found classic braids too tight have switched to them.
Classic braids still have their place: they are usually a little cheaper, a little faster to install, and they hold their shape for a touch longer, especially at the roots. Knotless braids cost more and take longer, and because there is no knot anchoring them, they can start to look grown-out a little sooner. The honest rule is simple: if your scalp is sensitive, your edges are fragile, or you want braids you can pull into a high ponytail on day one, choose knotless. If your budget is tight and you want the longest-lasting hold, classic box braids are still a great choice. Either way, tell your braider about your scalp and your edges before the first braid goes in — a good braider will adjust the tension, and a great one will tell you when a style is too tight for your hair.
How Long Do Box Braids Take, and What Do They Cost?
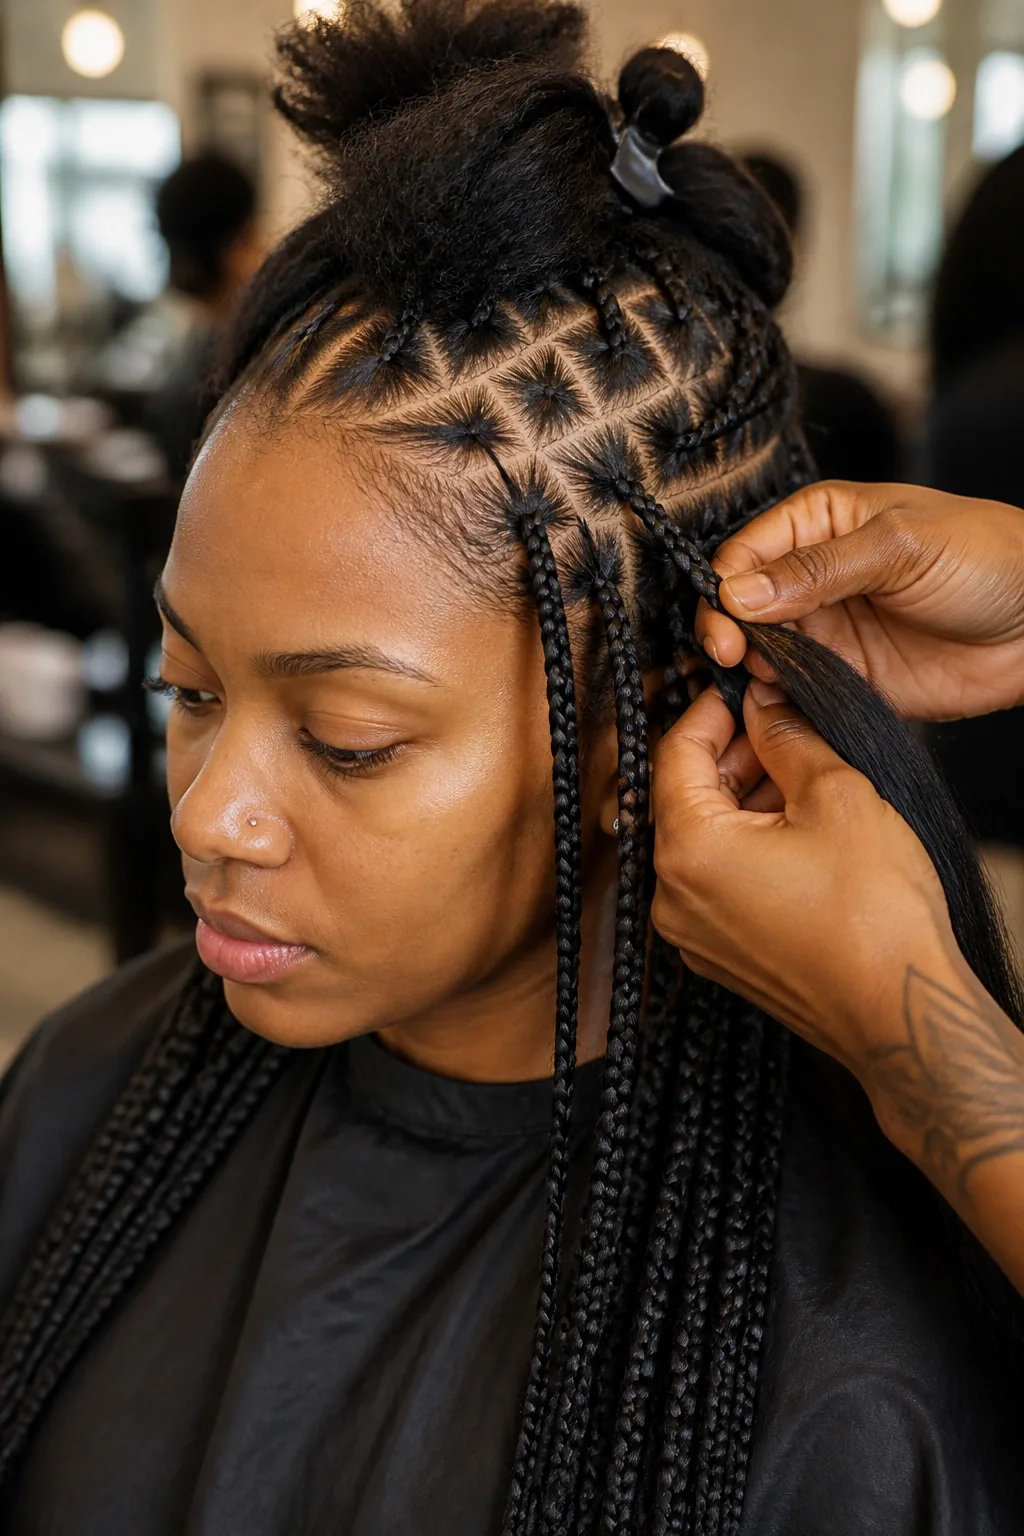
A box braid appointment is a half-day commitment, so it helps to know the numbers before you book. Jumbo braids are the fastest, usually 2 to 4 hours, because there are fewer braids to make. Medium braids take 4 to 6 hours. Small braids are the marathon: 6 to 10 hours, sometimes split across two days. Knotless braids add an hour or two to each of those times, because the feed-in technique is slower. Waist-length or butt-length braids add time too, since every braid is longer to finish. Bring snacks, water, a charger and something to watch — you will be in the chair for a while.
Cost varies by city, braider and length, but a rough guide in the US is $150 to $300 for jumbo or medium braids, $200 to $400 for small braids, and $250 to $500 or more for knotless or waist-length styles. The hair itself is often included, but always ask — some braiders charge separately for the packs, and coloured or human-hair blends cost more. The cheapest braider is not always the best deal: a rushed, too-tight install can cost you edges and a take-down repair that no discount is worth. Book a braider whose work you have seen, ask for a price that includes the hair, and confirm how long the appointment will take before the day arrives.
Prepping Your Hair Before Box Braids
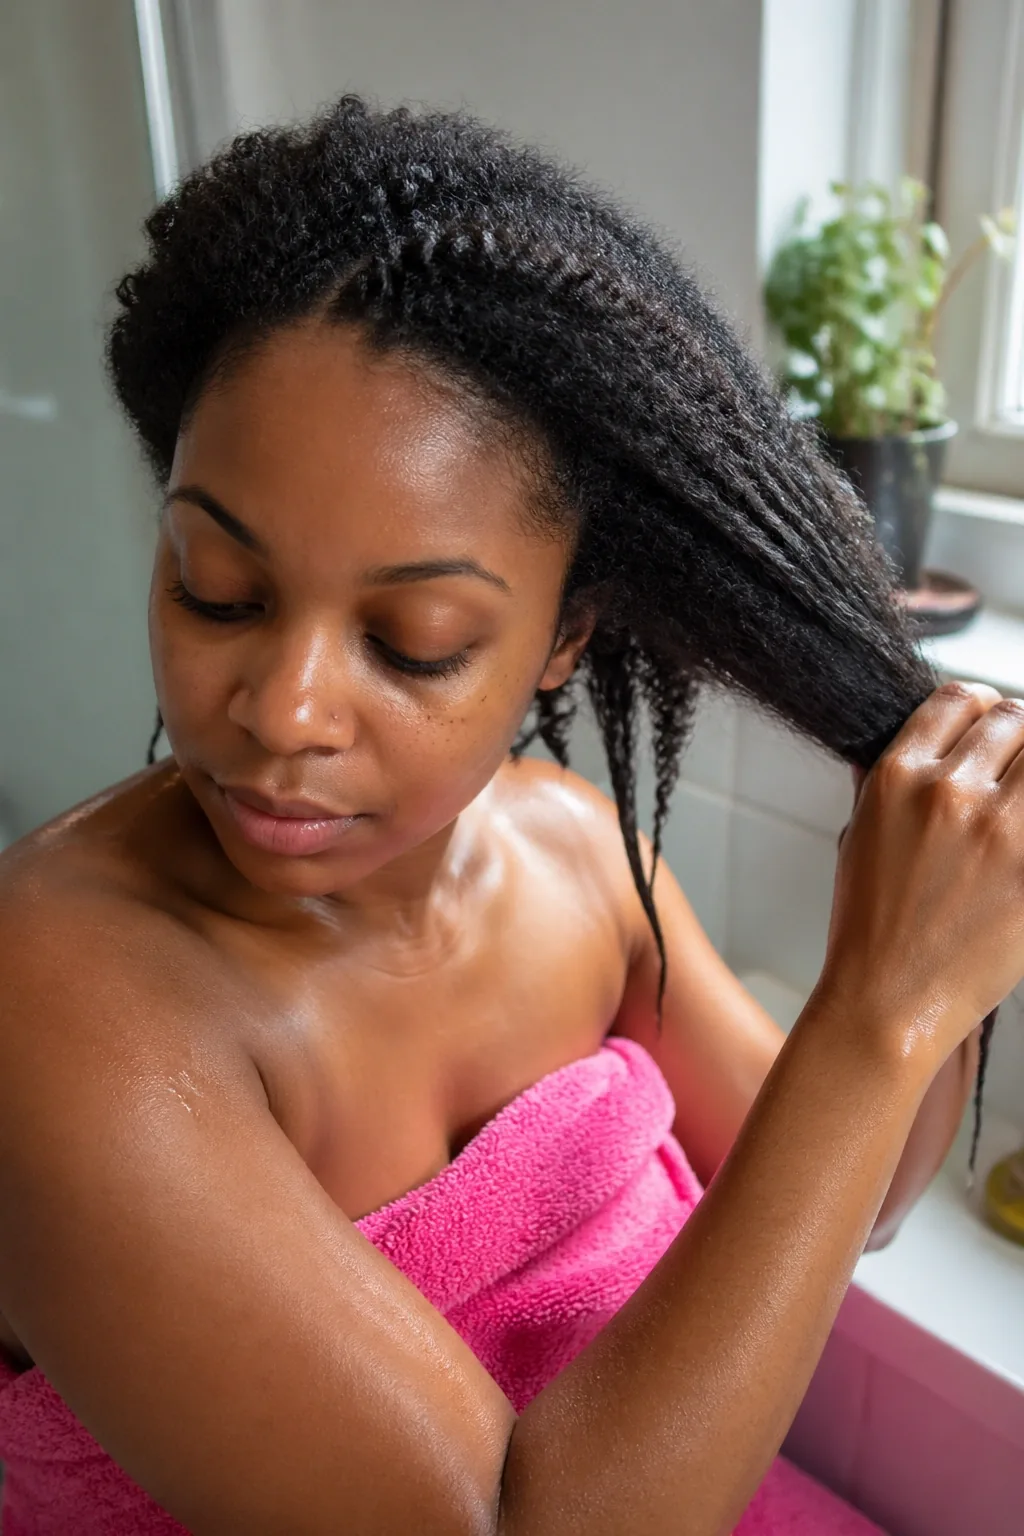
Box braids only protect your hair if the hair underneath is healthy when they go in — braids installed on dry, tangled or damaged hair will not fix it, they will just hide it for a few weeks. Start a week before your appointment: wash your hair thoroughly, deep-condition it, and detangle it completely, section by section, so the braider is not fighting knots. If your hair is very shrunken or curly, stretch it first — blow-dry it on low heat or do a few chunky twists overnight — because stretched hair braids faster, neater and with less breakage at the roots.
On the day itself, arrive with clean, dry, detangled hair unless your braider specifically asks you to come with it washed another way. Trim any split ends beforehand, because braids will not stop them travelling up the strand. Tell your braider about any tender spots, thinning edges or recent breakage, and about any products your scalp reacts to. Skip heavy oils and butters on installation day — they make the hair slippery and the braids will not grip. Good prep takes an evening of your time, but it is the difference between braids that look fresh for six weeks and braids that start frizzing in week two.
Choosing Your Braid Size — Jumbo, Medium or Small
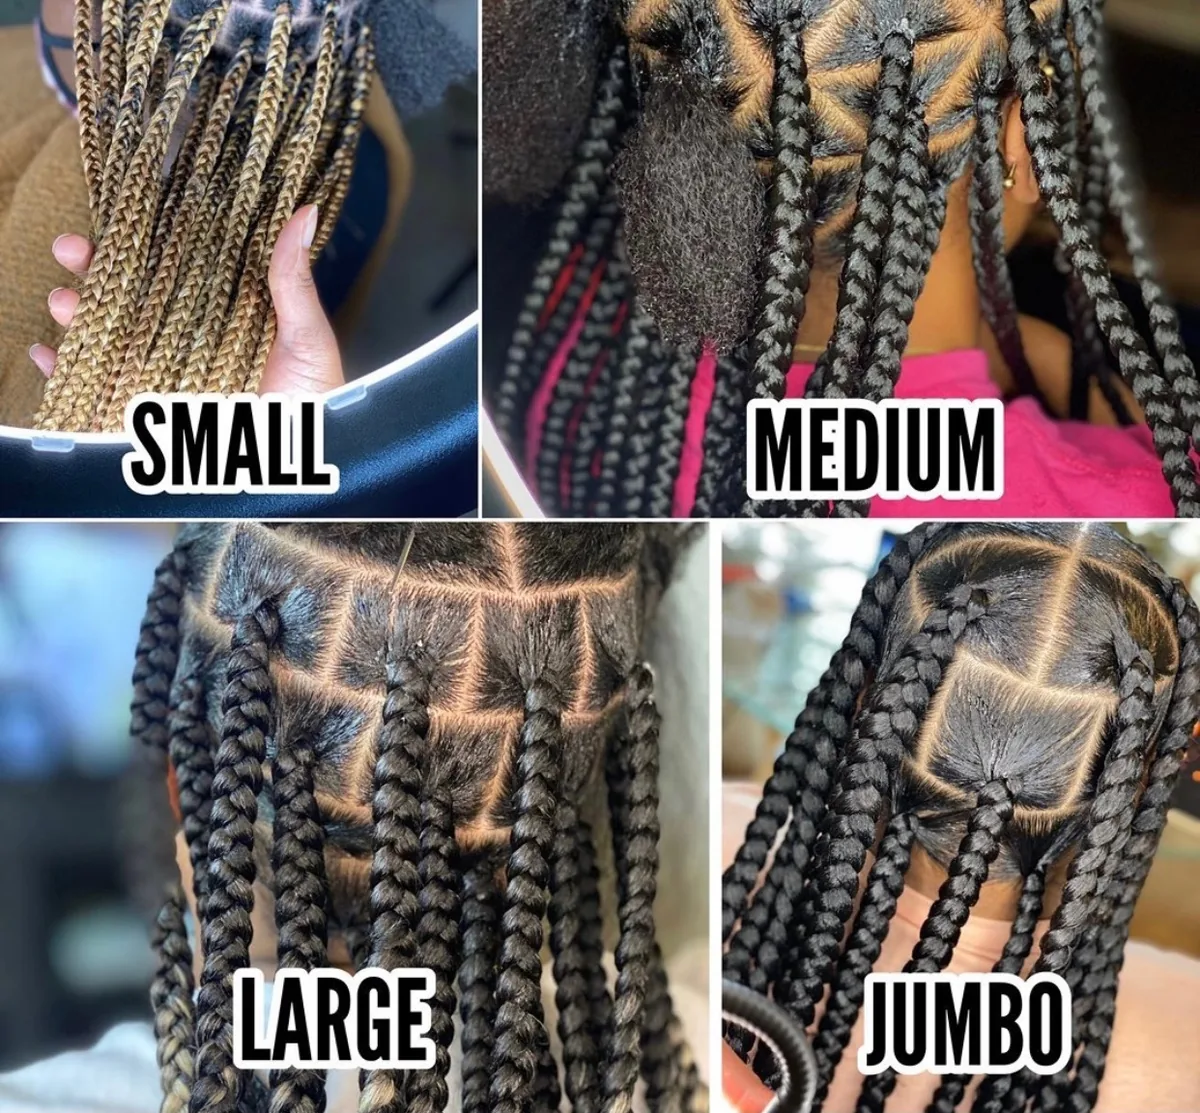
Braid size is the single biggest decision in a box braid install, because it changes everything: the time in the chair, the cost, the weight on your scalp, how long the style lasts, and how many ways you can style it. Jumbo braids are big, bold and fast — a full head in a few hours — and they make a statement all on their own. Medium braids are the classic, the size most women picture when they think of box braids: versatile, not too heavy, and easy to style up or down. Small braids take the longest and cost the most, but they last the longest, look the most natural, and can be styled almost like loose hair.
Think about your life, not just the look. If you work out most days, jumbo or medium braids dry faster and are easier to manage than a head full of small braids. If you want a style that lasts eight weeks, small braids hold their neatness longest. If your hair is fine or your scalp is sensitive, jumbo braids can be surprisingly heavy, while small braids spread the weight across more sections and feel lighter. And if this is your first time in braids, medium is the safe middle ground — long enough to feel like a real change, light enough to wear comfortably, and quick enough that you are not in the chair all day. When in doubt, ask your braider to show you photos of each size on hair like yours.
Scalp Care and the Itch While Braids Are In
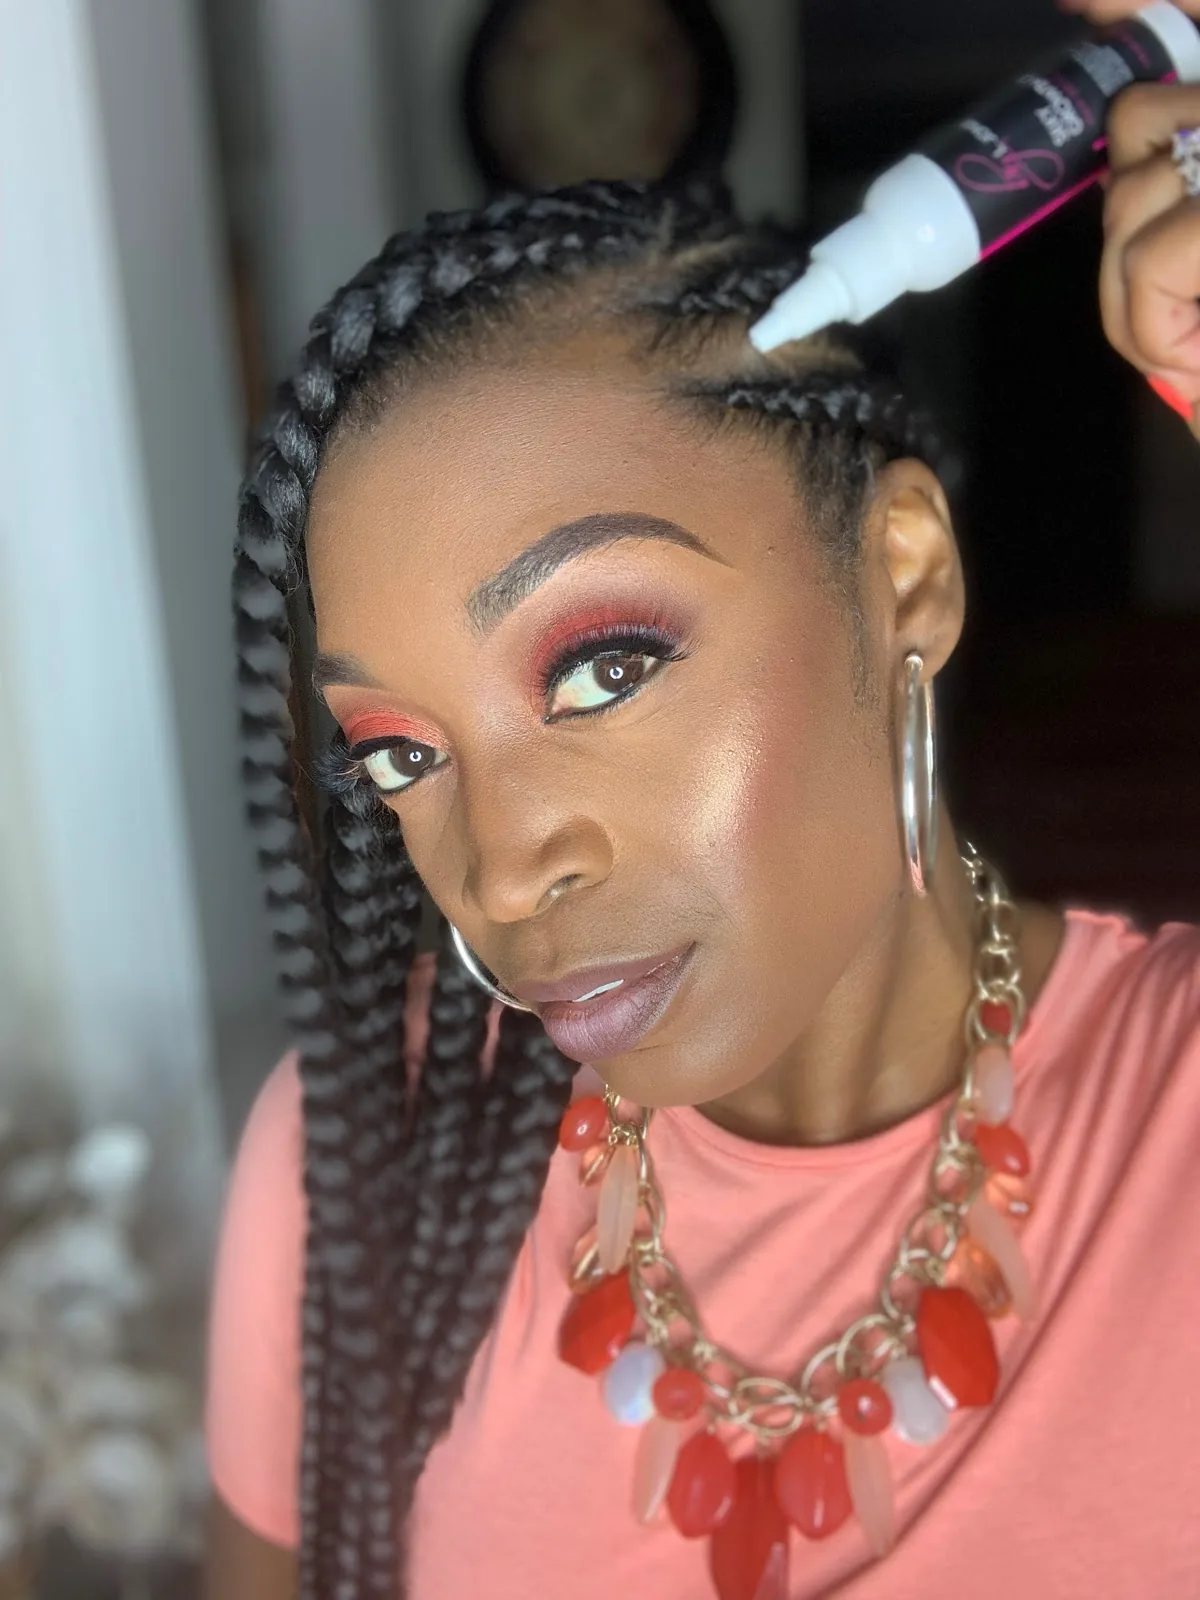
An itchy scalp is the most common complaint with box braids, and it is also one of the most preventable. The itch usually comes from one of three things: product build-up on the scalp, dryness under the braids, or an allergic reaction to the added hair. The fix for the first two is a simple routine: once or twice a week, spray your scalp with a light leave-in or a diluted apple cider vinegar rinse, massage gently with your fingertips — never your nails — and follow with a light oil on the parts. Keep it light: heavy oils and greases trap build-up and make the itch worse.
If the itch starts within the first day or two and comes with bumps or redness, the added hair may be the problem. Some synthetic braiding hair is coated in an alkaline finish that irritates sensitive scalps, and the classic fix is to soak the hair in a basin of warm water with a splash of apple cider vinegar for 15 to 20 minutes before the install, then rinse and let it dry. Tell your braider if you have a sensitive scalp — many will do the vinegar rinse for you, or use a brand you tolerate. And if the itching is severe, with swelling or broken skin, take the braids down: no hairstyle is worth a scalp injury, and your hair will thank you for listening to it.
Sleeping, Working Out and Keeping Braids Neat
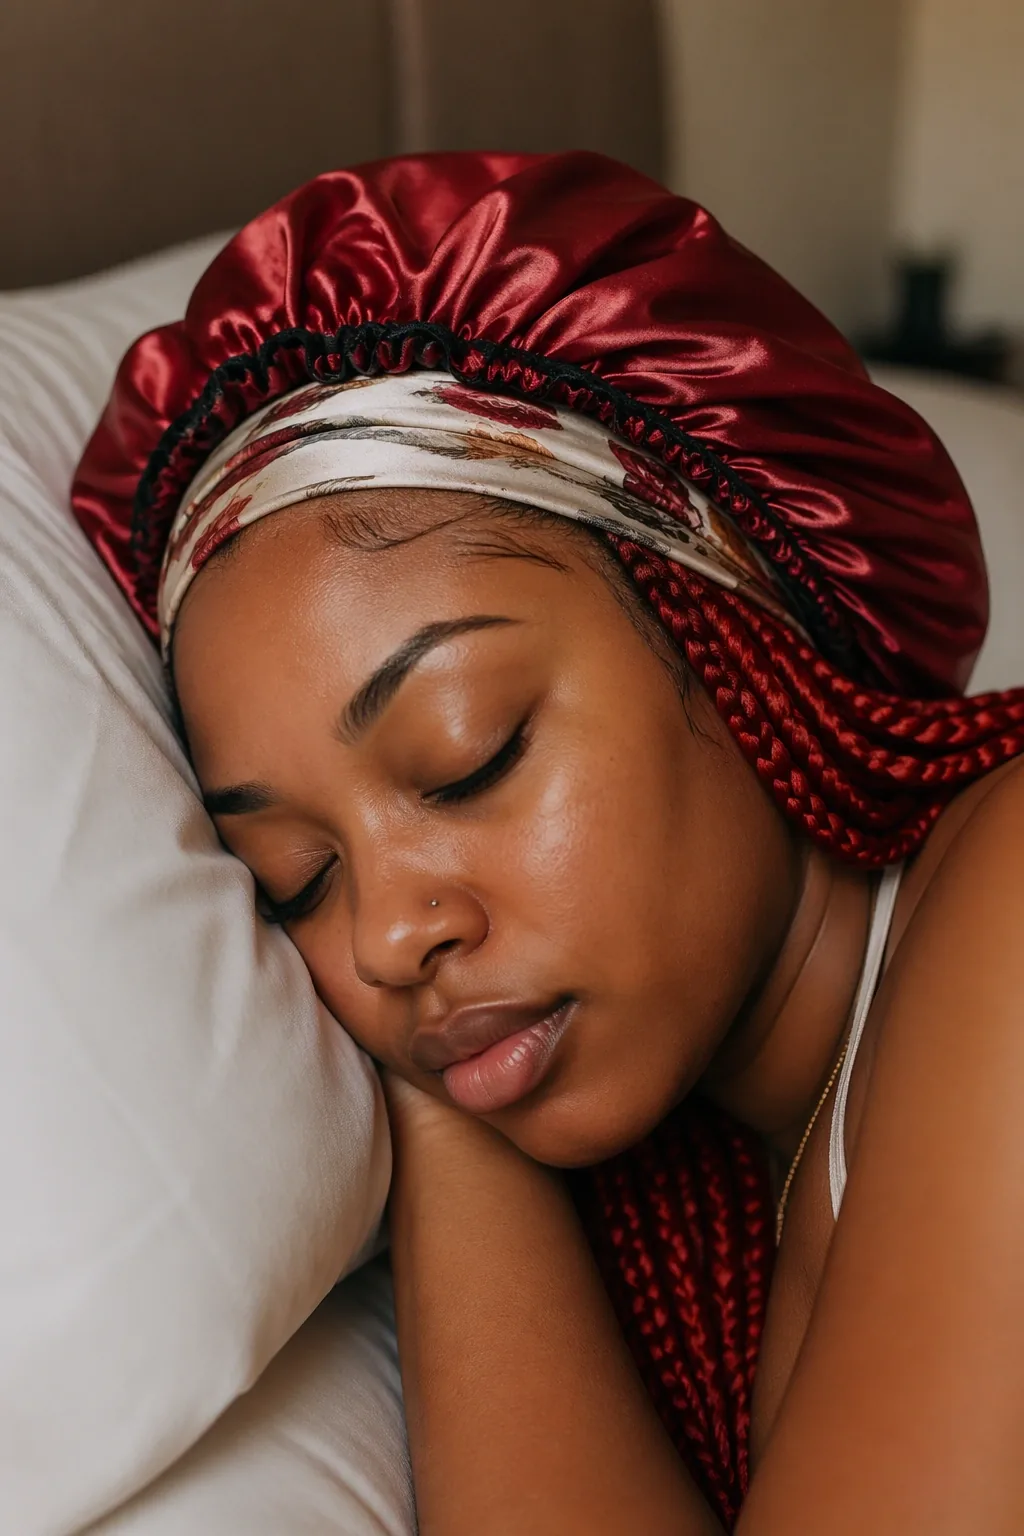
Box braids are low-maintenance, not no-maintenance, and the small habits between appointments are what keep them looking fresh for six weeks instead of three. At night, always tie them down: a silk or satin bonnet, or a silk scarf wrapped around the edges, stops the braids rubbing against cotton pillows, which is what causes frizz at the roots and frayed ends. If your braids are long, loosely braid them into one or two big plaits before bed so they do not tangle while you sleep. A silk pillowcase is a good backup for the nights the bonnet slips off.
For workouts, tie the braids up and off your neck, and after a sweaty session, wipe your scalp with a damp cloth or a diluted witch-hazel pad, then let the braids air-dry fully before you tie them down again — damp braids tied up tightly are what cause that musty smell. Wash the braids themselves every one to two weeks with a diluted shampoo, focusing on the scalp and letting the suds run down the lengths; do not pile the braids on top of your head and scrub, or they will tangle. And resist the urge to redo the front braids every week: constant re-braiding stresses the same edges you are trying to protect.
Taking Box Braids Down Safely, Without Breakage
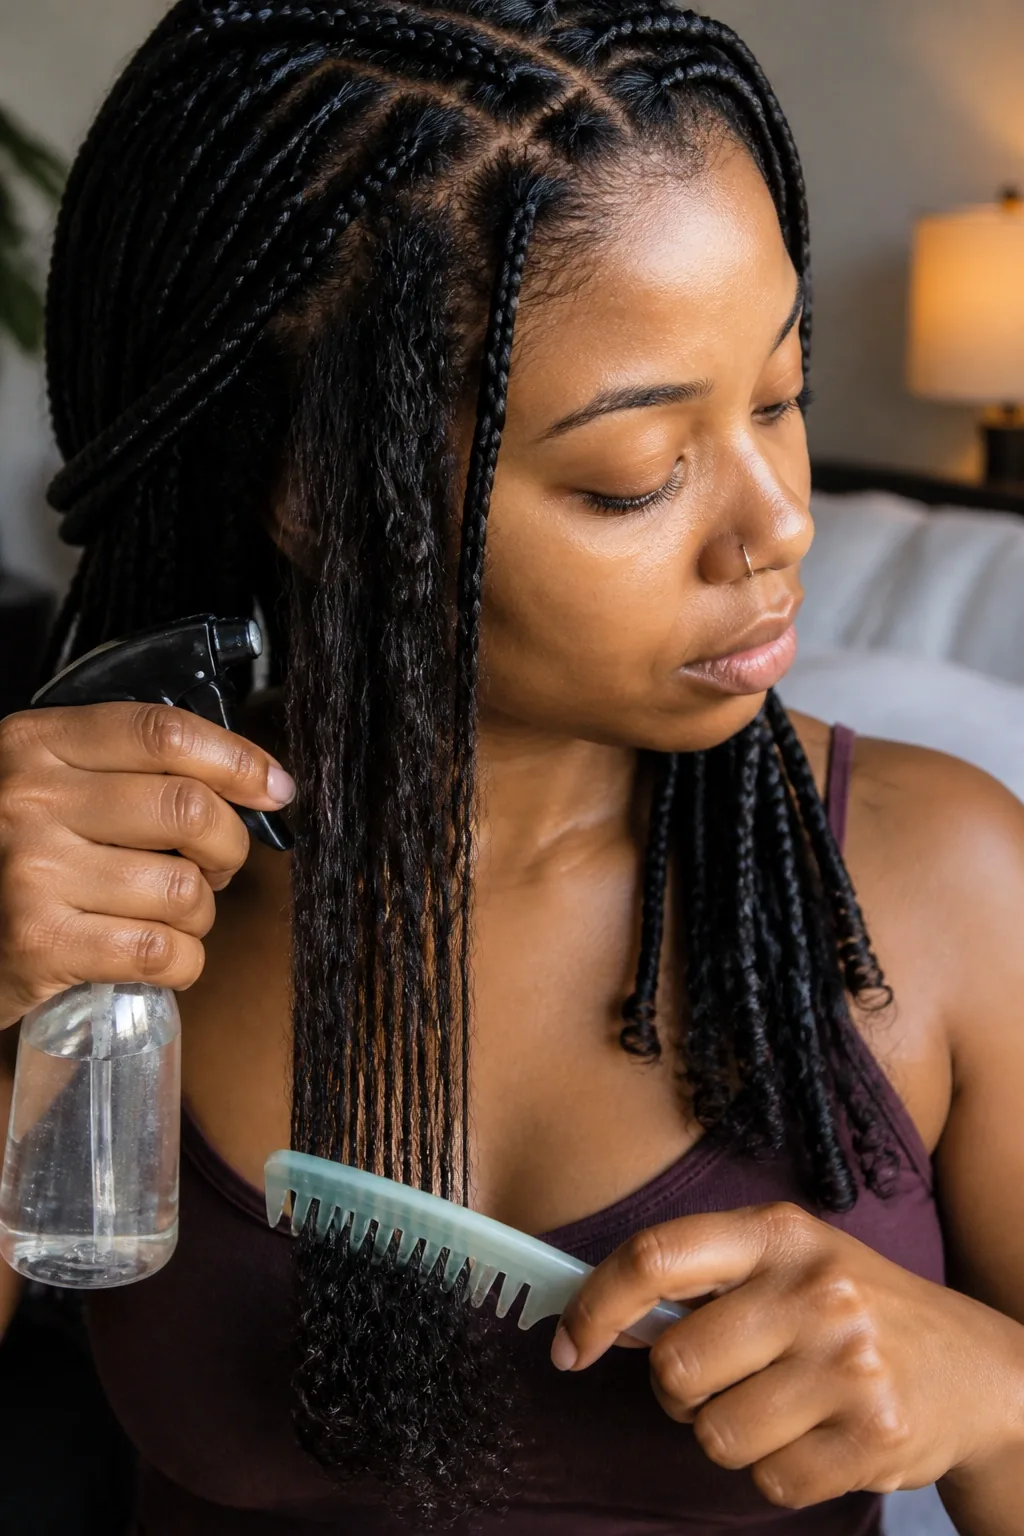
How you take box braids down matters as much as how you put them in — most braid-related breakage happens during takedown, not while the braids are worn. Never rush it: set aside a few hours, work in sections, and cut the added hair a few inches below where your natural hair ends, so you are never cutting near your own hair. Unravel each braid gently from the ends upward, and as each braid comes out, detangle that section with your fingers before you move on — the shed hair that has collected in each braid over six weeks will come out as a small ball, and that is normal, not breakage.
Once all the braids are out, do not reach for the shampoo straight away. Detangle the whole head with a wide-tooth comb and a slippery conditioner, working from the ends up, then wash and deep-condition before you do anything else. This is also the moment to check your hair honestly: if your edges feel thinner or a spot feels tender, give your hair a break of at least two weeks before the next install, and wear it loose or in low-manipulation styles in between. A good takedown leaves your hair in the same condition it went in — or better — and that is the whole point of a protective style.
How Long Box Braids Last — and When to Refresh Them
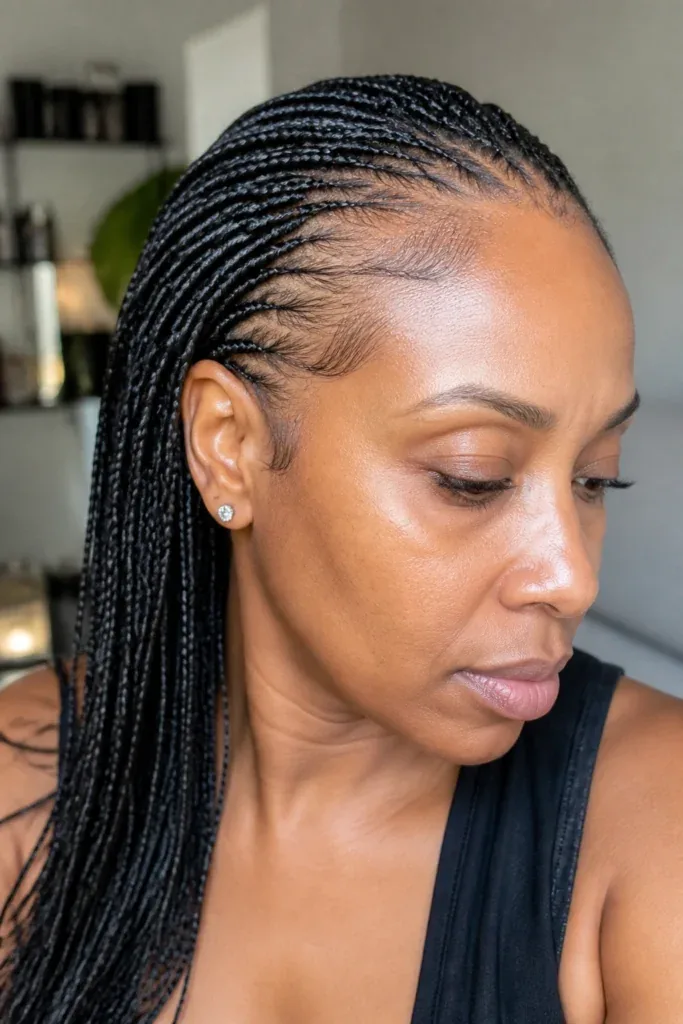
Box braids are usually worn for 4 to 8 weeks, and the honest answer to how long they last is that it depends on the size, your hair growth, and how well you care for them. Small braids last longest, often a full 8 weeks, because the small sections hide new growth. Jumbo braids show growth fastest and usually look their best for 4 to 6 weeks. Knotless braids look incredibly natural at first, but the roots can start to look fuzzy sooner, around the 4 to 5 week mark. Your hair grows about half an inch a month, so by week six there will be visible new growth at every part — that is normal, and it is the main reason braids start to look tired.
The sign that it is time to take them down is not a date on the calendar, it is your hair telling you: the roots are matted, the edges are starting to thin, the braids feel heavy, or your scalp is constantly itchy despite a good routine. Leaving braids in for 10 or 12 weeks does not give you extra protection — it gives you matting, tangles and breakage at the roots. A good rhythm is 6 weeks in braids, then 2 weeks of rest with your hair loose or in simple styles, then a fresh install. That cycle protects your hair far better than back-to-back installs ever will, and your edges will stay exactly where they belong.
1. The Classic Jumbo Box Braids
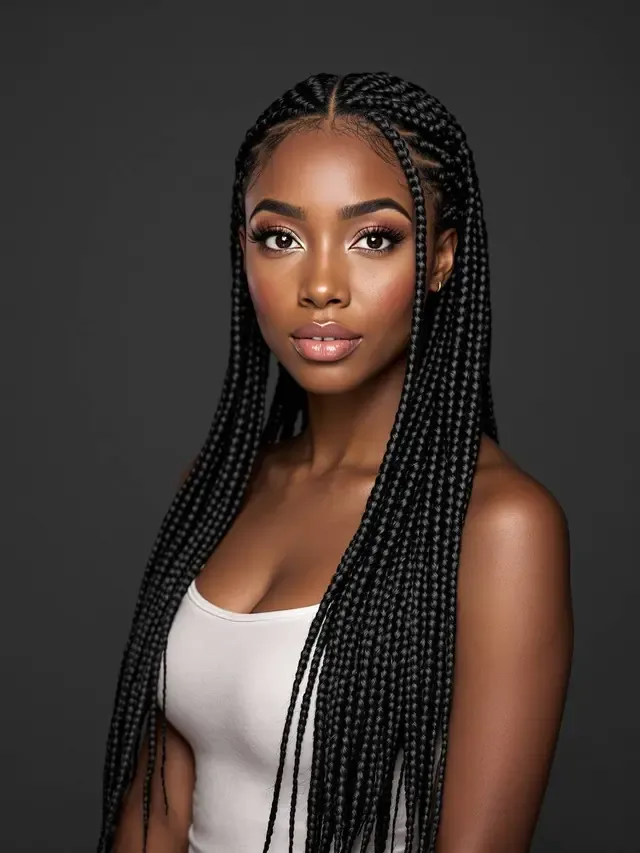
Classic jumbo box braids are the bold, confident version of the style: thick sections, clean square parts, and braids that make a statement before you say a word. A full head usually needs only 20 to 30 braids, which means a faster install, less time in the chair, and a style that is light on fuss and heavy on impact. The parts are part of the look — neat, visible squares that give the style its name and its graphic, architectural feel. Wear them long and loose down your back, or sweep them up, and the braids do the talking.
Best for: a first-time braider, a quick install, and anyone who wants maximum impact with minimum chair time. How to style: wear them down with a middle or side part, or pull them into a high ponytail for instant drama. What to ask your braider: for neat, even parts and braids that start without pulling at your hairline. Install time: 2 to 4 hours. Cost: roughly $150 to $250. Quick verdict: the fastest route to a full head of braids — bold, beautiful, and done by lunchtime.
2. Jumbo Box Braids with Curly Ends
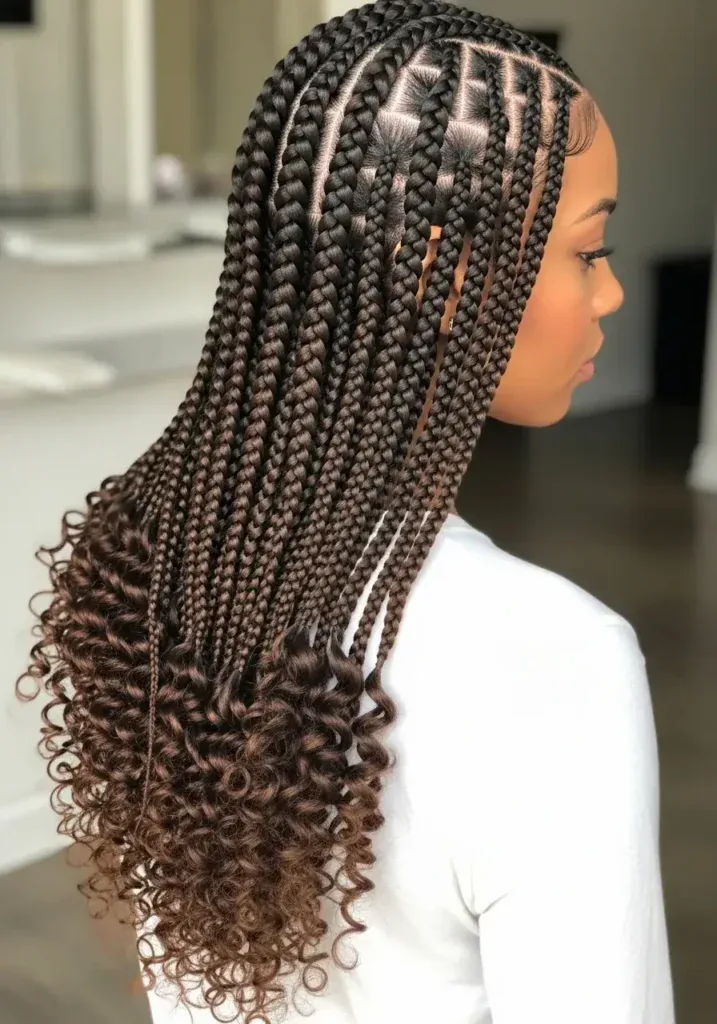
Jumbo box braids with curly ends take the boldness of jumbo braids and soften it with a romantic finish: the last few inches of each braid are left unbraided and curled, so the style ends in soft, bouncy curls instead of straight tips. The contrast is lovely — structured, chunky braids on top and loose, touchable curls at the bottom — and it stops the style from feeling heavy or severe. This is the version to choose when you love jumbo braids but want them to feel a little more feminine, a little more playful, and a lot more like a finished hairstyle rather than just braids.
Pros: softer and more romantic than straight-ended jumbo braids, and the curls move beautifully. Cons: the curly ends need a little upkeep — a curl refresher and a gentle finger-comb every few days — and they can tangle if you sleep on them loose. Common mistake: leaving the ends too long and unbraided, which makes them mat; keep the curly section to the last 3 or 4 inches. Maintenance: refresh the curls with a light mousse and tie the braids in a loose plait at night. Who should avoid it: anyone who wants a truly zero-effort style. Install time: 3 to 5 hours. Quick verdict: jumbo braids with a soft ending — bold up top, romantic at the tips.
3. Jumbo Box Braids in a High Ponytail

Jumbo box braids in a high ponytail are the style for the days when you want your braids up, out of your face, and impossible to ignore. The braids are gathered high on the crown and secured, and the length falls down the back like a thick, glossy rope — it swings when you walk, it photographs beautifully, and it turns an everyday braid install into a look. Because jumbo braids are thick, the ponytail has real weight and presence; wrap one braid around the base to hide the elastic and the whole thing looks finished, not thrown up in a hurry.
Best for: workouts, hot days, nights out, and anyone who loves a high ponytail but wants it to last. How to style: gather the braids high, secure with a strong elastic, and wrap one braid around the base, pinning the end underneath. What to ask your braider: for the front braids to be installed loosely enough that a high ponytail does not pull at your edges. Install time: 2 to 4 hours for the braids, plus 5 minutes to style. Cost: roughly $150 to $250. Quick verdict: the easiest way to make jumbo braids feel red-carpet ready — one ponytail, instant drama.
4. Jumbo Box Braids with a Middle Part
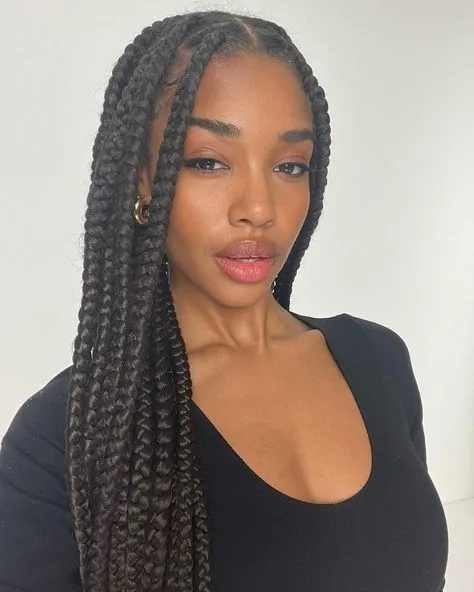
Jumbo box braids with a middle part are the clean, symmetrical version of the style: the braids fall evenly on both sides of the face, the parts are crisp and straight, and the whole look has a polished, deliberate feel. The middle part suits the boldness of jumbo braids perfectly, because the symmetry balances the thickness — nothing is fighting for attention, and the face is framed evenly. This is the version to choose when you want your braids to look neat and intentional, and when you love the look of a centre part on your face shape. It also photographs beautifully from the front, which is why it is a favourite for photos and occasions.
Pros: clean, balanced, and very photogenic. Cons: a middle part does not suit every face — on a very long face it can add length, and on a round face it can emphasise width. Common mistake: making the part too wide, which leaves a visible strip of scalp; keep it neat and narrow. Maintenance: the part will need a light edge-control touch-up every few days to stay crisp. Who should avoid it: anyone who knows a side part flatters them far more — the same braids with a side part can be a completely different look. Install time: 2 to 4 hours. Quick verdict: jumbo braids at their most polished — symmetrical, sleek, and camera-ready.
5. Jumbo Goddess Box Braids
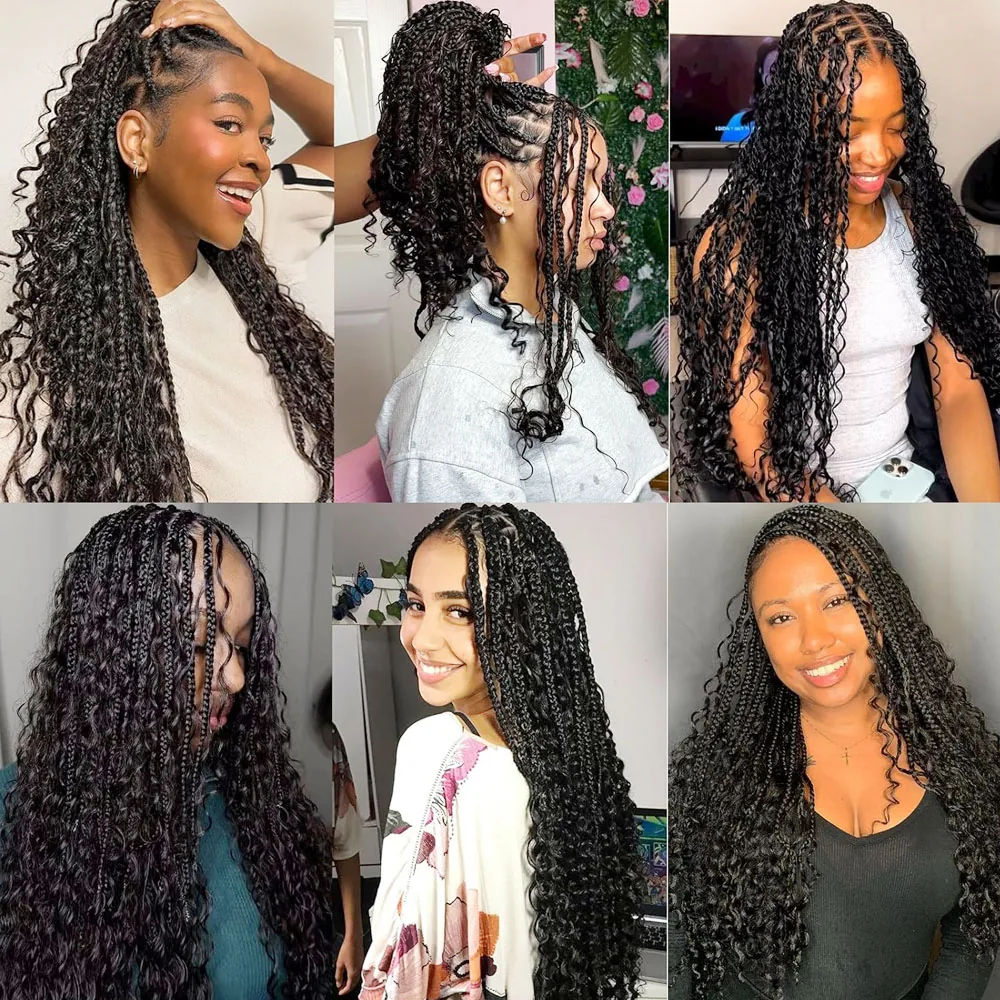
Jumbo goddess box braids are jumbo braids with a boho soul: curly pieces of hair are left out along the braids and at the ends, so the style has soft, loose curls woven through the structure. The effect is softer, wilder and more romantic than plain jumbo braids — less graphic, more goddess — and it is one of the most requested variations in salons right now. The curls catch the light, they move when you do, and they stop the braids from looking too neat or too severe. If classic jumbo braids feel a little too structured for you, the goddess version is the answer.
Best for: holidays, festivals, photoshoots, and anyone who loves the boho look. How to style: wear them down and let the curls fall free, or pull the front braids back and let the curls frame your face. What to ask your braider: for the curly pieces to be distributed evenly, not all at the front, and for human-hair curls if your budget allows — they last longer and tangle less. Install time: 3 to 5 hours. Cost: roughly $200 to $300. Quick verdict: jumbo braids, softened — the boldest braids with the prettiest finish.
6. The Classic Medium Box Braids
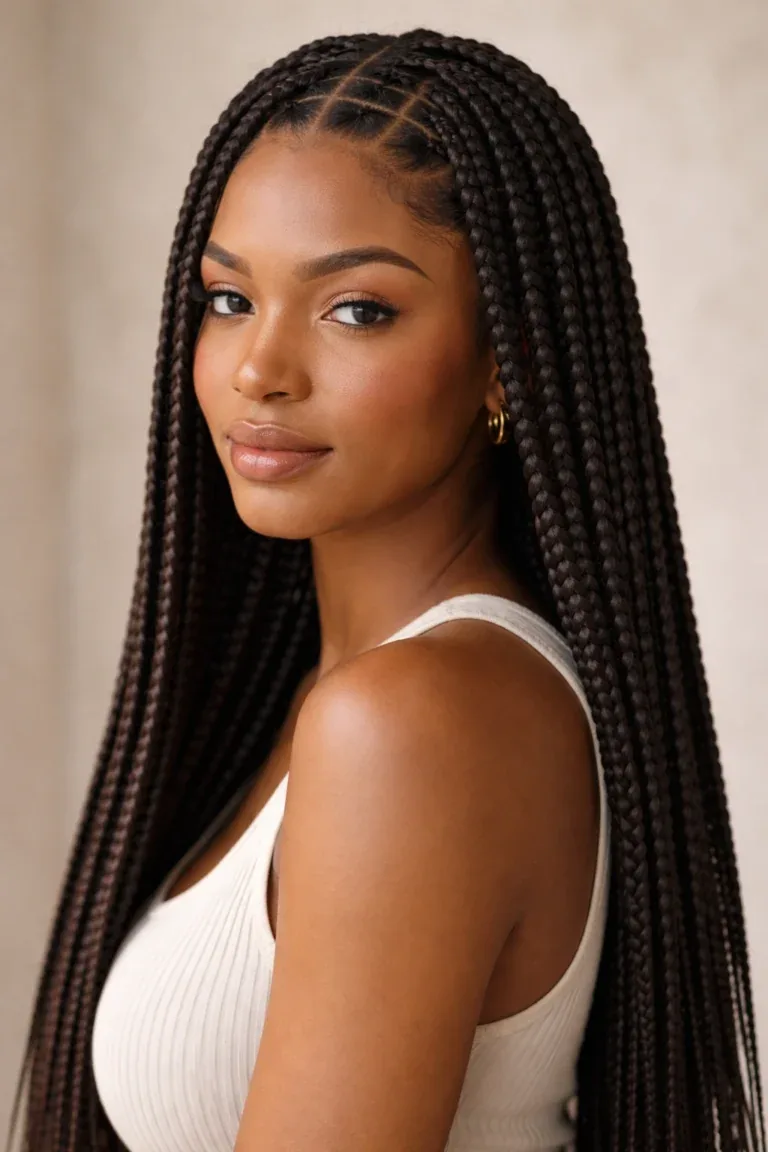
Classic medium box braids are the style most women picture when they hear the words box braids: neat square parts, braids about the width of a pencil, and a full head that falls past the shoulders. Medium is the Goldilocks size — not so big that the style feels heavy, not so small that you are in the chair all day — and it is the most versatile size there is. You can wear medium braids down, up, in a bun, in a ponytail, half-up or fully accessorised, and every version works. If you only ever get one set of box braids, make it this one.
Best for: first-timers, everyday wear, and anyone who wants the most versatile braid size. How to style: start with a middle part worn down, then try a high bun or a half-up style in week two when you want a change. What to ask your braider: for even parts and a length that sits between the shoulder blades and the waist — mid-back is the classic. Install time: 4 to 6 hours. Cost: roughly $180 to $300. Quick verdict: the classic for a reason — medium braids do everything, and they do it well.
7. Medium Box Braids with a Side Part
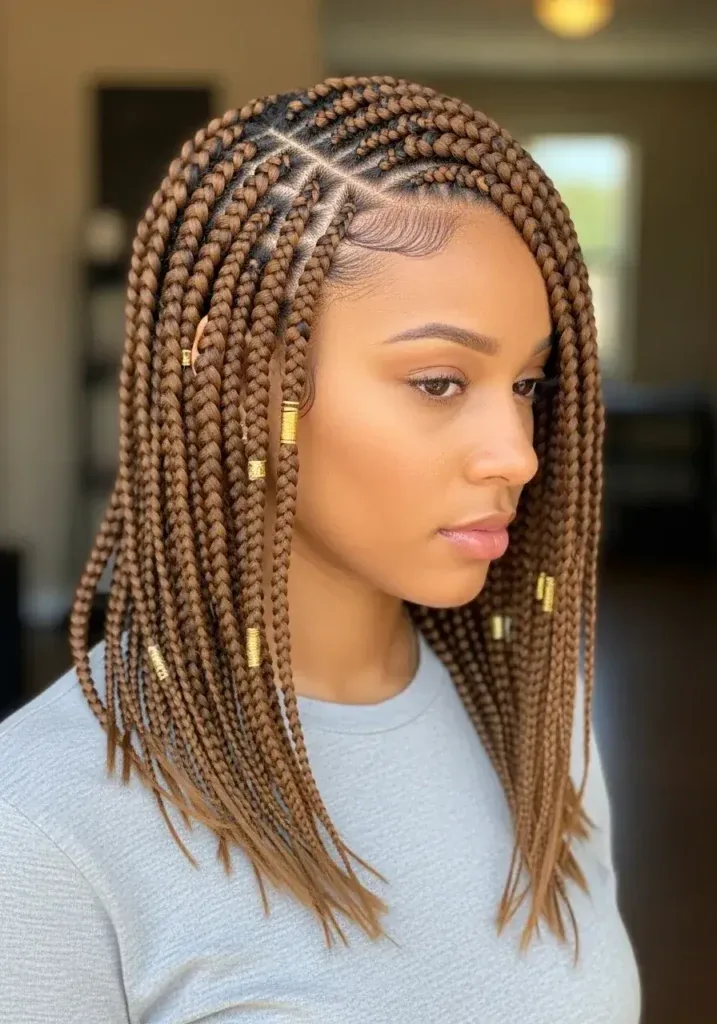
Medium box braids with a side part are the classic with a little more personality: the deep side part sweeps the braids across the forehead, creates a heavy fall of braids on one side, and gives the style a glamorous, old-Hollywood feel. The asymmetry flatters most face shapes — it softens a square jaw, adds width to a long face, and gives a round face a lovely diagonal line. It is also the easiest way to make a familiar style feel new again: the same braids, parted differently, look like a different hairstyle. Try the side part on day one and switch to the middle part in week three, and you have two looks from one install.
Pros: flattering on most faces, glamorous, and an easy way to refresh the style mid-wear. Cons: the heavy side can feel weighty on the neck, and the part needs edge control to stay neat. Common mistake: parting too deeply, which puts too much weight on one side and can pull at the hairline. Maintenance: smooth the part with edge control every few days and re-part carefully, never forcing the braids. Who should avoid it: anyone with a very tender hairline on one side. Install time: 4 to 6 hours. Quick verdict: the classic, with a sweep — one part, a whole new attitude.
8. Medium Box Braids in a Top Knot Bun
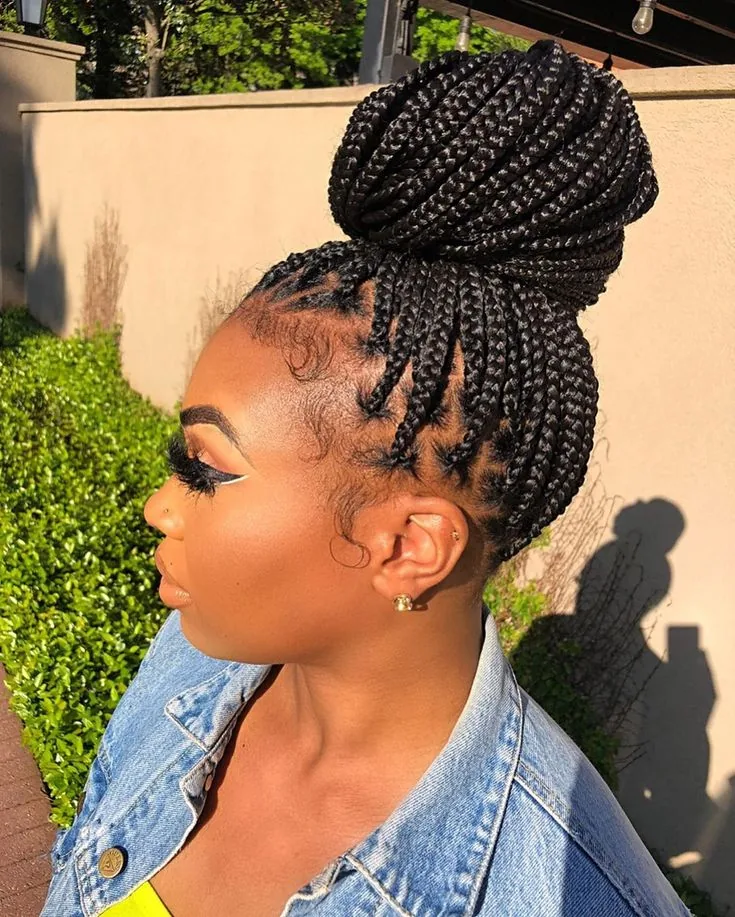
Medium box braids in a top knot bun are the updo that makes braids feel instantly polished: the braids are gathered high on the crown, twisted into a big, textured bun, and the result is a style that works for the office, a wedding, or a night out. Medium braids make the best top knot, because there are enough braids to build a full, satisfying bun without it becoming too heavy to wear all day. Leave a couple of braids out at the front to frame the face, or keep it all swept up for a clean, sculpted look. Either way, the top knot turns a protective style into a statement updo in about three minutes.
Best for: work, formal events, hot weather, and anyone who wants their braids up and off their neck. How to style: gather the braids high, twist them into a bun, and secure with a strong elastic and a few pins — wrap the last braid around the base to hide the elastic. What to ask your braider: for braids light enough to wear in a high bun comfortably, and for the front braids to be installed without excess tension. Install time: 4 to 6 hours for the braids, plus 3 minutes to style. Cost: roughly $180 to $300. Quick verdict: the three-minute updo — braids up, face open, style sorted.
9. Medium Boho Box Braids
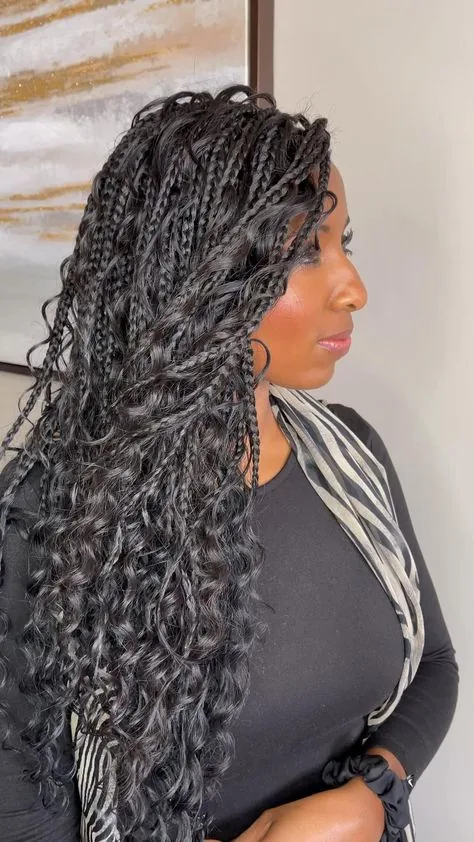
Medium boho box braids are the free-spirited version of the classic: curly strands are left out along the length of the braids, so the style has soft, loose texture woven through the neat braiding. The contrast is what makes it beautiful — structured braids and wild curls living in the same hairstyle — and the result feels relaxed, romantic and a little bit undone in the best way. Boho braids are the style for holidays, beach trips, festivals and any day when you want your hair to look like you are on vacation, even if you are not. They photograph wonderfully, they move beautifully, and they make medium braids feel like a whole new style.
Pros: romantic, textured, and very photogenic. Cons: the loose curls tangle more easily than plain braids and need gentle care. Common mistake: using cheap synthetic curls that frizz within a week — ask for good-quality curls, or human hair if your budget stretches. Maintenance: finger-comb the curls every few days, refresh with a light mousse, and braid the hair loosely at night. Who should avoid it: anyone who wants a truly low-effort style with no curl care. Install time: 5 to 7 hours. Cost: roughly $220 to $350. Quick verdict: the classic, gone boho — neat braids, wild curls, and a holiday feeling that lasts for weeks.
10. Medium Box Braids with Curls at the Ends
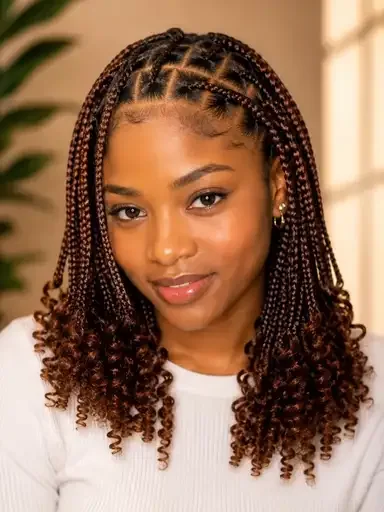
Medium box braids with curls at the ends are the softer sister of the classic: the braids run neat and straight for most of their length, then the last few inches are left unbraided and curled into soft, bouncy spirals. The curly ends stop the style from feeling flat or severe, they add movement every time you turn your head, and they give the braids a finished, salon-styled feel that plain straight ends never quite achieve. This is a wonderful choice for medium braids, because the curls are small enough to hold their shape for weeks and light enough not to tangle the way longer curly sections can.
Best for: special occasions, date nights, and anyone who wants their braids to feel a little more dressed up. How to style: wear them down so the curls show, or pull the front braids back and let the curls fall at the sides. What to ask your braider: for the curly section to be the same length on every braid, so the finish looks even. Install time: 5 to 7 hours. Cost: roughly $200 to $320. Quick verdict: neat braids, soft ending — the small change that makes medium braids feel special.
11. The Classic Small Box Braids
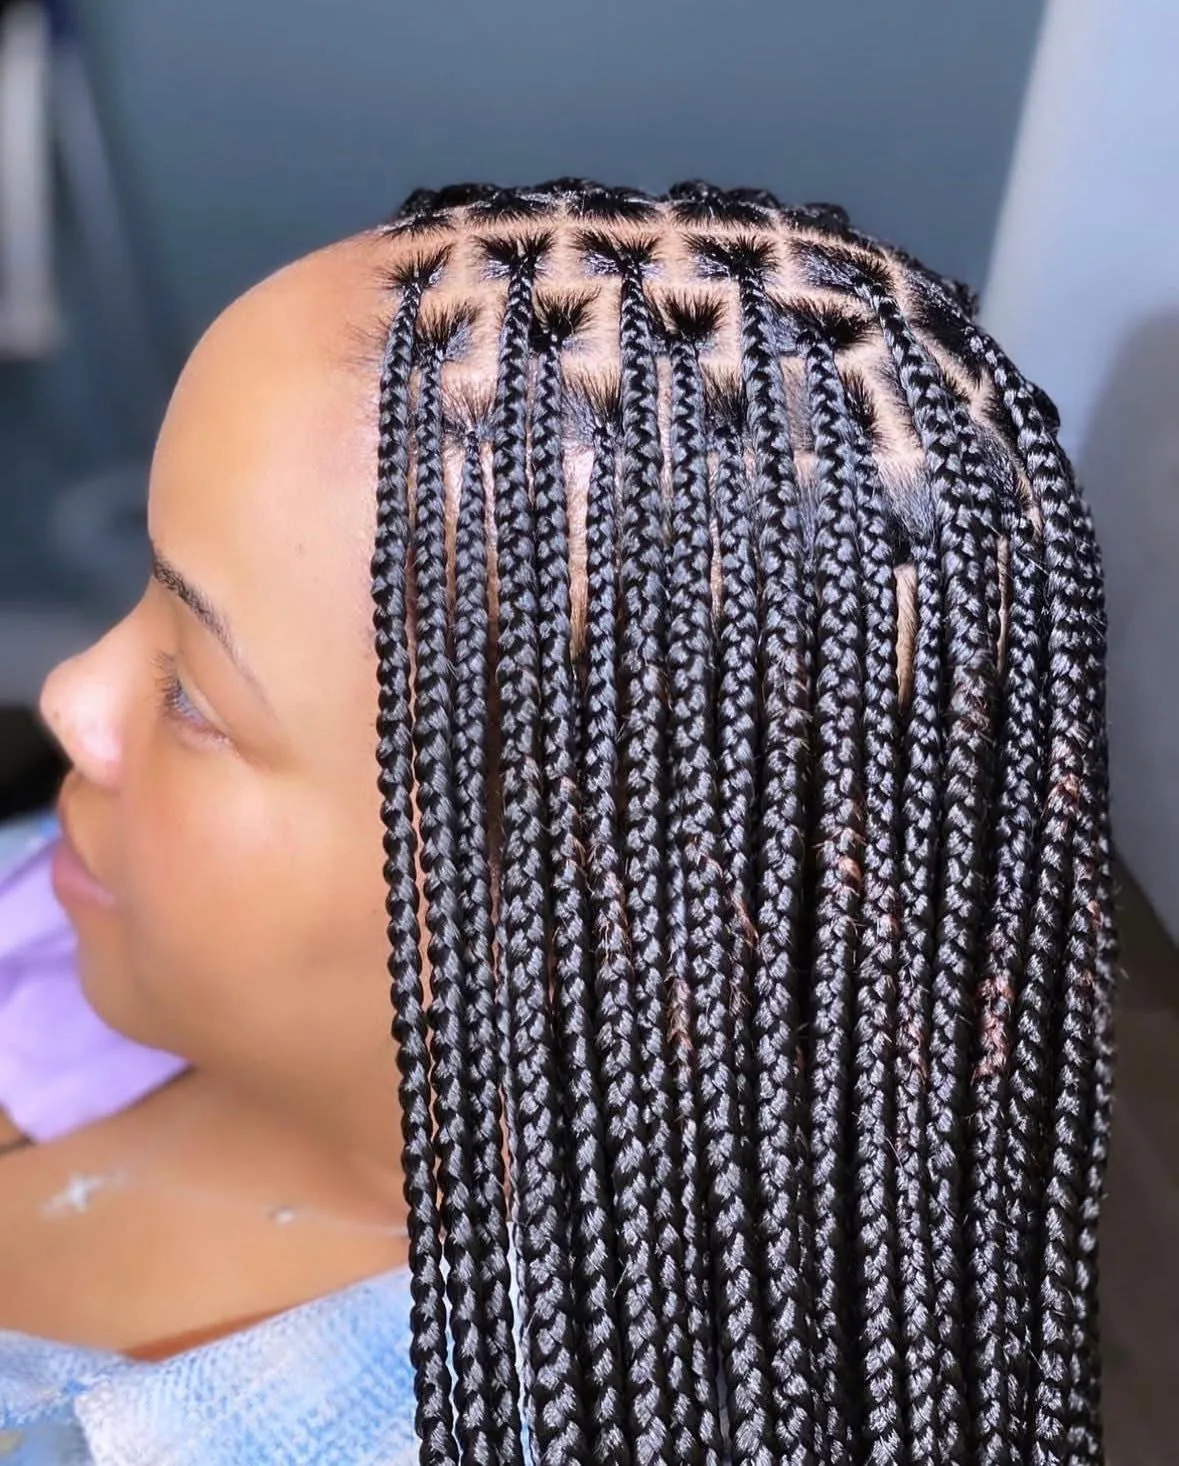
Classic small box braids are the most versatile braids you can get: fine, neat sections, dozens of braids, and a full head that moves and styles almost like loose hair. Small braids take the longest to install and cost the most, but they give you the most in return — they last the longest, they hide new growth the best, and they can be styled into almost anything: buns, ponytails, updos, half-up styles, and braids-on-braids that would be impossible with jumbo sections. If you want a protective style that truly behaves like hair, small braids are the one.
Best for: long wear, maximum styling freedom, and anyone who wants braids that last a full 8 weeks. How to style: wear them down for the first week, then start experimenting — small braids hold a bun, a crown braid and a high ponytail beautifully. What to ask your braider: for small, even parts and a realistic time estimate — this is an all-day appointment. Install time: 6 to 10 hours. Cost: roughly $250 to $400. Quick verdict: the longest day in the chair, and the longest-lasting braids you will own.
12. Small Box Braids with Beads
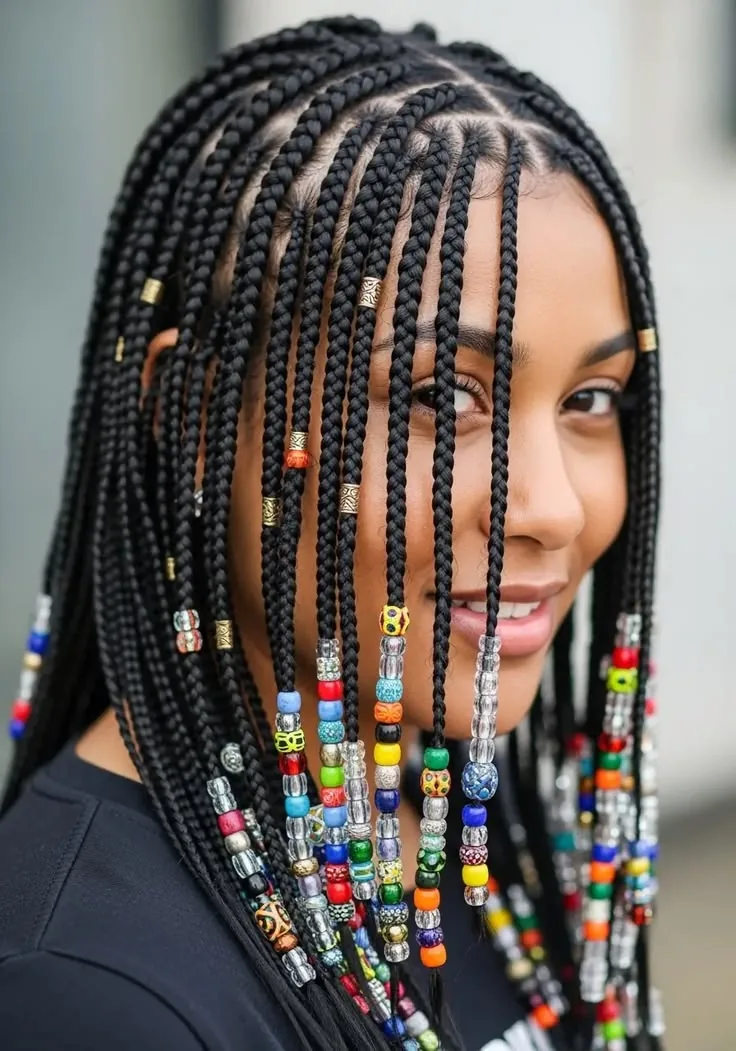
Small box braids with beads are the playful, personal version of the classic: wooden, gold or colourful beads are threaded onto the ends of the braids, and the style instantly becomes yours. Beads add weight, movement and sound — they click gently when you move — and they turn a neat head of braids into a piece of jewellery. The look is rooted in tradition and completely personal at the same time: choose wooden beads for a natural feel, gold cuffs for glamour, or bright colours for a festival. Small braids take beads best, because the fine ends thread through beads easily and the beads sit neatly.
Pros: personal, beautiful, and a wonderful way to make a classic style your own. Cons: beads add weight, they can catch on clothing and scarves, and they need to be removed carefully at takedown. Common mistake: threading beads too tightly, which stresses the ends of the braids — leave a little room. Maintenance: check the beads weekly and replace any that have cracked. Who should avoid it: anyone who sleeps on their stomach or wears a lot of high collars — beads and fabric do not mix. Install time: 6 to 10 hours, plus 30 minutes for the beads. Cost: roughly $250 to $400, plus beads. Quick verdict: small braids, made personal — beads are the jewellery your braids were waiting for.
13. Small Box Braids Styled into a Crown
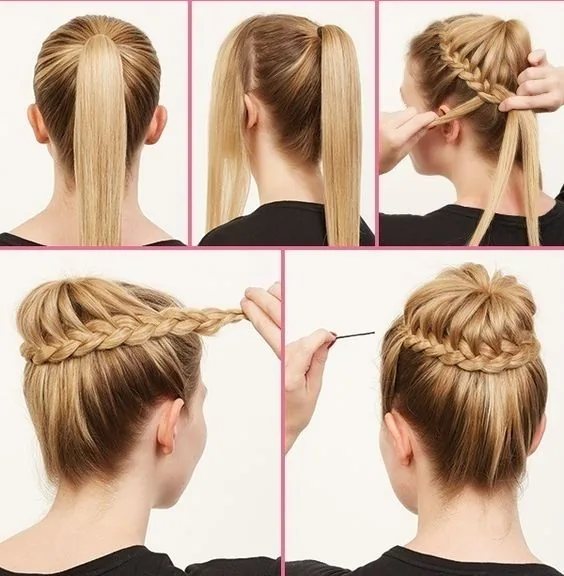
Small box braids styled into a crown are the updo that turns a protective style into a work of art: the fine braids are wrapped around the head in a halo, pinned in place, and the result is a regal, sculpted look that suits weddings, formal events and any day you want to feel like royalty. Small braids are the only size that can do a true crown, because the fine sections wrap smoothly and the pins disappear into the texture. The style keeps every braid off your neck and shoulders, shows off your face and your earrings, and photographs beautifully from every angle.
Best for: weddings, formal events, and anyone who wants an unforgettable updo. How to style: wrap the braids around the head in a halo, pin as you go, and tuck the ends underneath — a braider or stylist can do this in 20 minutes. What to ask your braider: for small, lightweight braids that wrap easily, and for the front braids to be installed loosely enough to style up without pulling. Install time: 6 to 10 hours for the braids, plus 20 minutes to style. Cost: roughly $250 to $400. Quick verdict: the crown is the reason small braids exist — fine, flexible, and fit for a queen.
14. Small Box Braids with a Deep Side Part
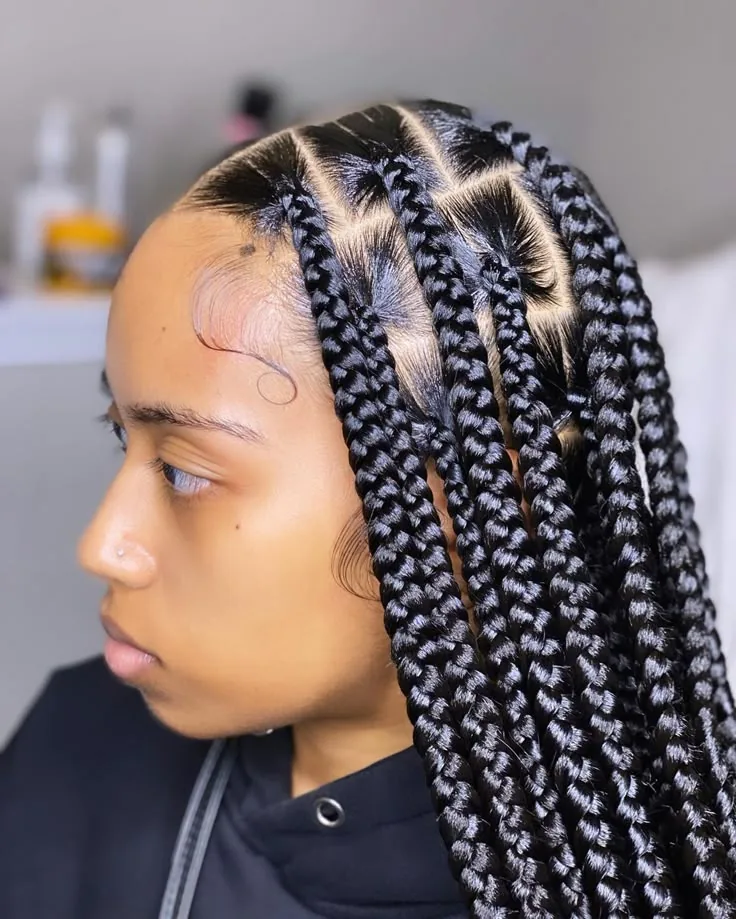
Small box braids with a deep side part are the most glamorous version of small braids: the deep part sweeps a heavy fall of fine braids across the forehead, the face is framed by a curtain of braids on one side, and the whole style has a dramatic, red-carpet quality. Because small braids are so fine, the sweep looks soft and fluid rather than heavy, and the part itself can be made razor-neat. This is the style for a night out, a photoshoot, or any occasion when you want your braids to feel like a hairstyle, not just a protective style — and it is one of the most flattering looks for a round or square face, where the diagonal sweep breaks up the symmetry.
Pros: dramatic, flattering, and endlessly photogenic. Cons: the heavy side can feel weighty over a long evening, and the deep part needs regular edge control. Common mistake: sweeping too much hair to one side, which pulls at the hairline — keep the part deep but the weight balanced. Maintenance: smooth the part every few days and avoid re-parting in the same spot every day. Who should avoid it: anyone with a tender hairline. Install time: 6 to 10 hours. Quick verdict: small braids at their most glamorous — one deep part, instant drama.
15. The Classic Knotless Box Braids
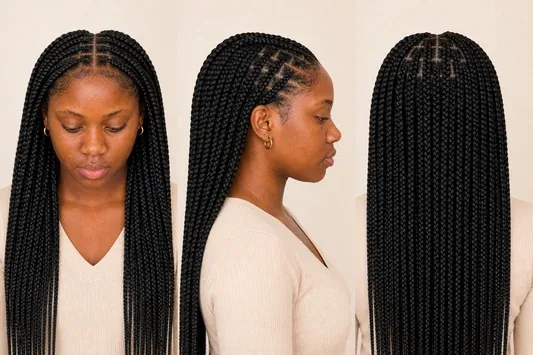
Classic knotless box braids are the gentler revolution in protective styling: the braids start with your own hair and the added hair is fed in gradually, so there is no knot at the root, no bump, and no pulling at your hairline. The result looks more natural from the first day — the braids lie flat, they move like real hair, and you can pull them into a ponytail immediately without the tight, sore feeling that classic braids sometimes bring. For many women, knotless braids are the style that finally made box braids comfortable, and once they switch, they rarely go back.
Best for: sensitive scalps, fragile edges, and anyone who found classic braids too tight. How to style: wear them down with a middle part, or pull them into a high ponytail on day one — no waiting for them to loosen up. What to ask your braider: for the feed-in to start small and build gradually, so the roots stay neat and flat. Install time: 5 to 8 hours. Cost: roughly $250 to $450. Quick verdict: the comfortable classic — all the beauty of box braids, none of the tension.
16. Knotless Box Braids with Curly Ends
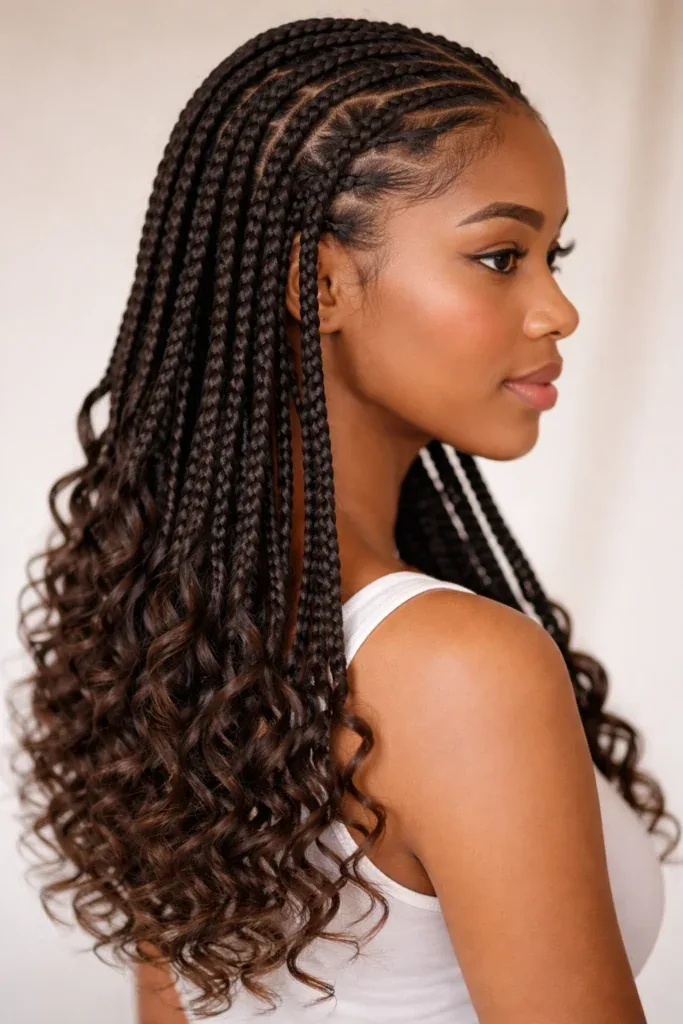
Knotless box braids with curly ends combine the two softest ideas in braiding: a tension-free start and a romantic, curly finish. The braids lie flat and natural at the roots, and the last few inches bloom into soft curls that move and catch the light. It is a gentle style in every sense — gentle on the scalp, gentle on the eye — and it suits women who want their braids to look as natural as possible while still feeling like a real hairstyle. The curly ends also hide the point where the braid finishes, so the whole style looks seamless from root to tip.
Pros: natural-looking, comfortable, and beautifully soft at the ends. Cons: knotless braids can look grown-out sooner than classic braids, and the curly ends need a little care. Common mistake: expecting knotless braids to last as long as classic ones — plan for 4 to 6 weeks of peak neatness, not 8. Maintenance: refresh the curls with mousse every few days and keep the roots smooth with edge control. Who should avoid it: anyone on a tight budget — knotless costs more, and the curly finish adds time. Install time: 6 to 8 hours. Cost: roughly $280 to $450. Quick verdict: the softest braids you will wear — gentle at the roots, romantic at the ends.
17. Medium Knotless Box Braids
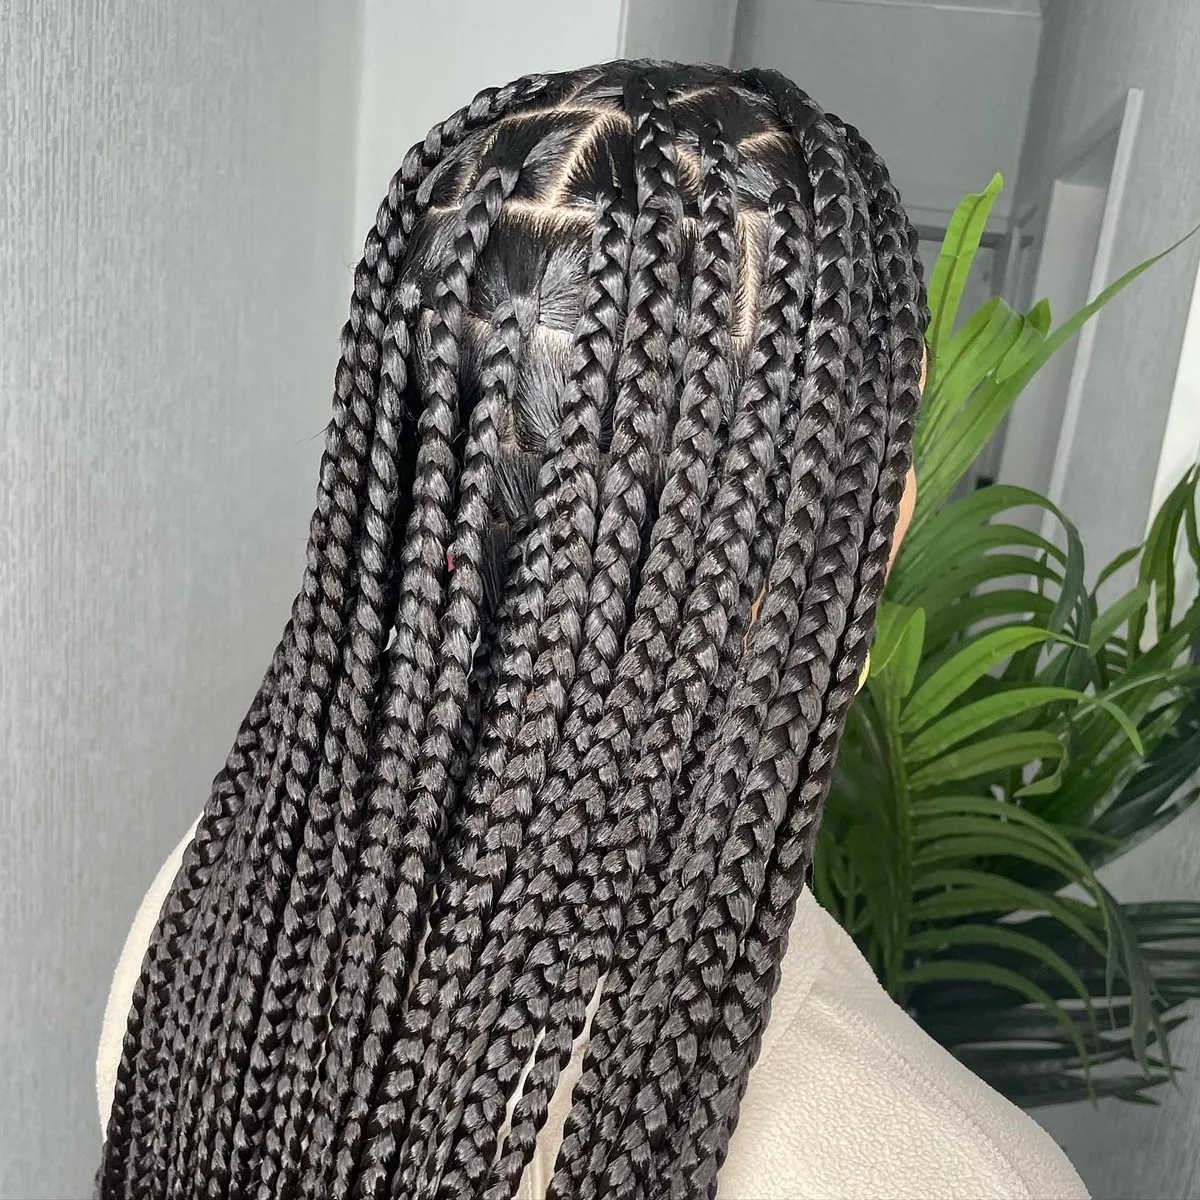
Medium knotless box braids are the sweet spot of the knotless world: braids about a pencil-width, a natural flat start, and a full head that is versatile enough to wear any way you like. Medium knotless braids are the most popular knotless size, because they balance everything — they are not too heavy, not too slow to install, and not too expensive, while still giving you that seamless, natural look that makes knotless braids special. Wear them down, in a bun, in a ponytail or half-up, and they behave like your own hair, just longer and more versatile.
Best for: a first knotless install, everyday wear, and anyone who wants the natural look without the small-braid time commitment. How to style: start with a middle part worn down, then try a low bun or a half-up style when you want a change. What to ask your braider: for medium sections, a clean feed-in, and a length that falls to mid-back. Install time: 5 to 7 hours. Cost: roughly $250 to $400. Quick verdict: the knotless classic — natural, comfortable, and easy to wear every single day.
18. Small Knotless Box Braids
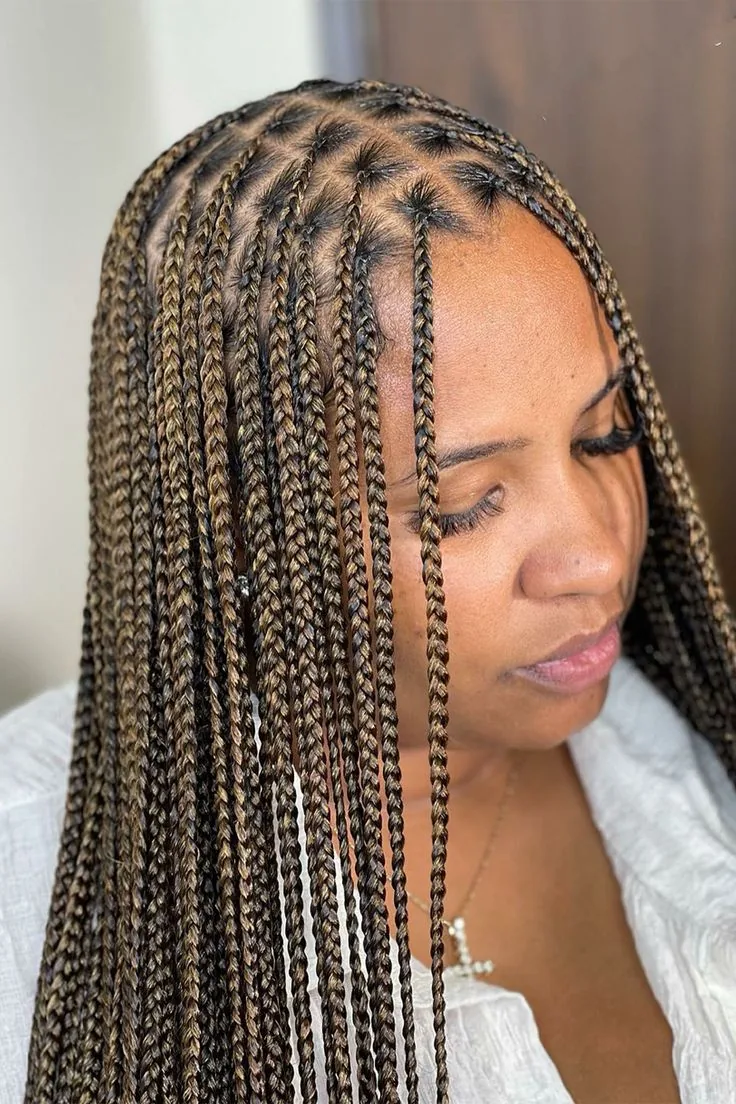
Small knotless box braids are the most natural-looking braids in this whole guide: fine sections, a flat, knot-free start, and a full head of braids that could almost pass for loose hair from a distance. They are also the biggest investment — the longest install, the highest cost — but they repay it with the longest wear of any knotless style and the most styling freedom. Small knotless braids can be worn in a bun, a crown, a ponytail or loose, and every version looks effortless, because the fine braids move so naturally. If you want braids that nobody can tell are braids, this is the one.
Best for: the most natural look, long wear, and maximum styling freedom. How to style: wear them down for a week, then explore updos — small knotless braids hold a crown braid and a top knot beautifully. What to ask your braider: for a realistic time estimate and a price that includes the hair, and for the smallest sections your hair can support without stress. Install time: 7 to 10 hours. Cost: roughly $300 to $500. Quick verdict: the ultimate knotless — the longest day, the most natural result, and braids that truly move like hair.
19. Knotless Box Braids in a Low Bun
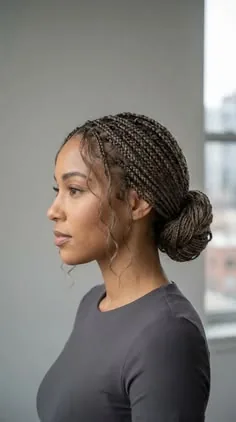
Knotless box braids in a low bun are the elegant, understated updo that knotless braids were made for: the braids gather low at the nape, twist into a soft, textured bun, and the flat, knot-free roots make the whole style look smooth and seamless from the front. Because there is no knot at the scalp, the bun sits close and comfortable, with no bumps or pulling — it is the updo you can wear from a morning meeting to a late dinner without a single adjustment. Leave a few braids out at the front for softness, or sweep everything back for a clean, sculpted finish.
Pros: elegant, comfortable, and very easy on the edges. Cons: a low bun can feel a little formal for everyday wear, and it hides the length you paid for. Common mistake: twisting the bun too tightly, which pulls at the nape — keep it soft and secure it with pins, not force. Maintenance: smooth the front with edge control and re-pin the bun once during a long day. Who should avoid it: anyone who wants their braids to be the star — this style is about the silhouette, not the braids themselves. Install time: 5 to 8 hours for the braids, plus 5 minutes to style. Quick verdict: the quiet luxury of knotless braids — smooth, seamless, and effortlessly elegant.
20. The Box Braid Bob
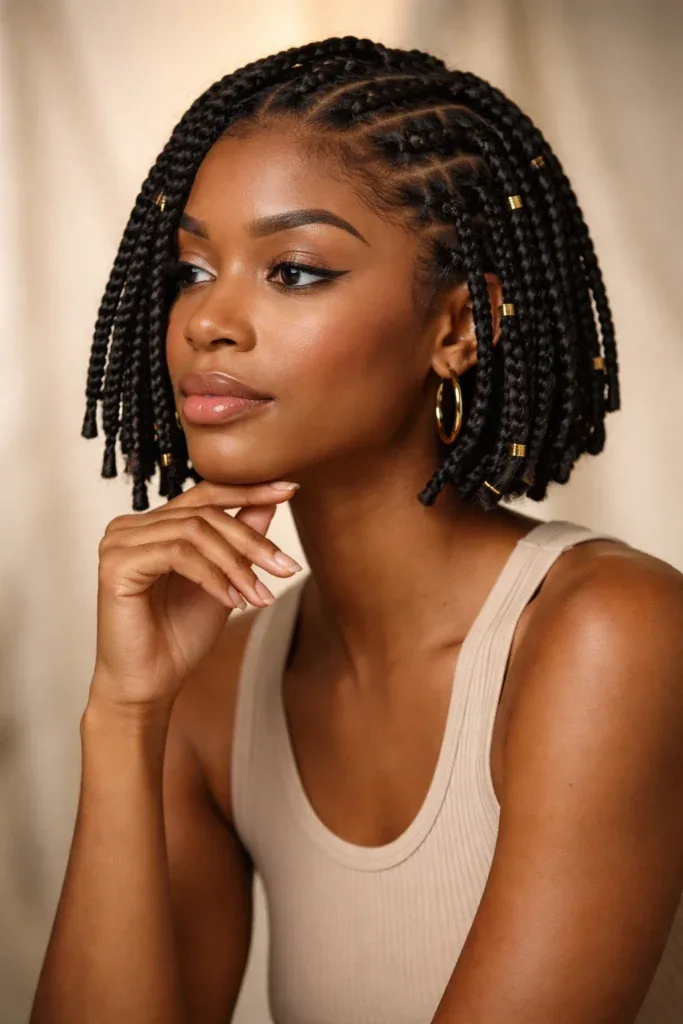
The box braid bob is the fresh, modern answer to long braids: the braids stop at the chin or just below it, and the result is a chic, graphic bob that feels light, looks sharp, and turns heads for all the right reasons. A braid bob is cooler in summer, faster to install, lighter on the scalp, and easier to wash and maintain than any long style — and it has a fashion edge that long braids simply do not have. It is the braid style for women who want a change, not just a protective style, and it pairs beautifully with bold earrings, a strong lip, and a confident attitude.
Best for: summer, a fresh change, and anyone who wants braids without the weight of long lengths. How to style: wear it with a middle part for a sharp, graphic look, or a side part for softness — and try tucking one side behind the ear. What to ask your braider: for a blunt, even finish and a length that hits at the jaw or just below. Install time: 3 to 5 hours. Cost: roughly $150 to $250. Quick verdict: the coolest braids you will wear — short, sharp, and seriously stylish.
21. The Angled Box Braid Bob
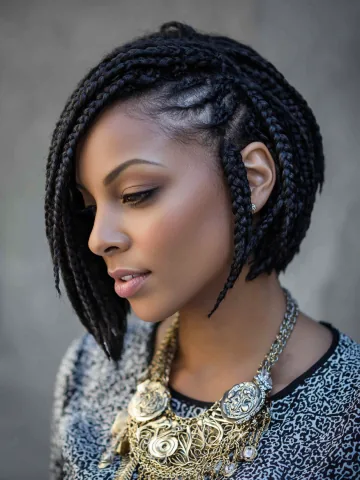
The angled box braid bob is the bob with a twist — literally: the braids are longer at the front and shorter at the back, creating a sharp, diagonal line that frames the face and gives the style a fashion-forward edge. The angle elongates the face, draws the eye forward, and makes the bob feel like a haircut rather than just short braids. It is the style for women who love a bob but want something more interesting than a straight-across finish, and it photographs beautifully from the side, where the angle is most visible. Pair it with a middle or deep side part and the effect is even stronger.
Pros: face-framing, fashionable, and a real statement. Cons: the angle needs to be cut precisely — an uneven angle is very visible on a bob. Common mistake: asking for the angle without checking it suits your face — on a very round face, a strong angle can be more flattering than on a long one, so ask your braider’s honest opinion. Maintenance: the front braids will frizz first, so smooth them with a light mousse weekly. Who should avoid it: anyone who wants to grow their braids out — the angle only works at bob length. Install time: 3 to 5 hours. Cost: roughly $150 to $280. Quick verdict: the bob with an edge — angled, face-framing, and impossible to ignore.
22. The Box Braid Bob with Curls
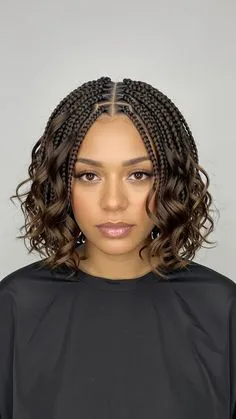
The box braid bob with curls is the playful version of the braid bob: the braids stop at the chin, and the ends curl softly, so the bob has movement, bounce and a romantic finish instead of a blunt edge. The curls soften the graphic line of the bob, they frame the face beautifully, and they make the style feel fun rather than severe. This is the bob for women who love short braids but want them to feel soft, and for anyone who worries a straight bob will look too harsh on their face. The curls do the softening, and the bob does the styling.
Best for: a soft, playful short style, and anyone who finds a blunt bob too severe. How to style: wear it with a side part and let the curls fall around the face, or tuck one side back for an asymmetric look. What to ask your braider: for the curls to be even on both sides, and for a length that sits at the chin, not above it. Install time: 3 to 5 hours. Cost: roughly $160 to $280. Quick verdict: the bob, softened — short braids with a bounce, and a style that smiles back at you.
23. Short Box Braids with a Side Sweep
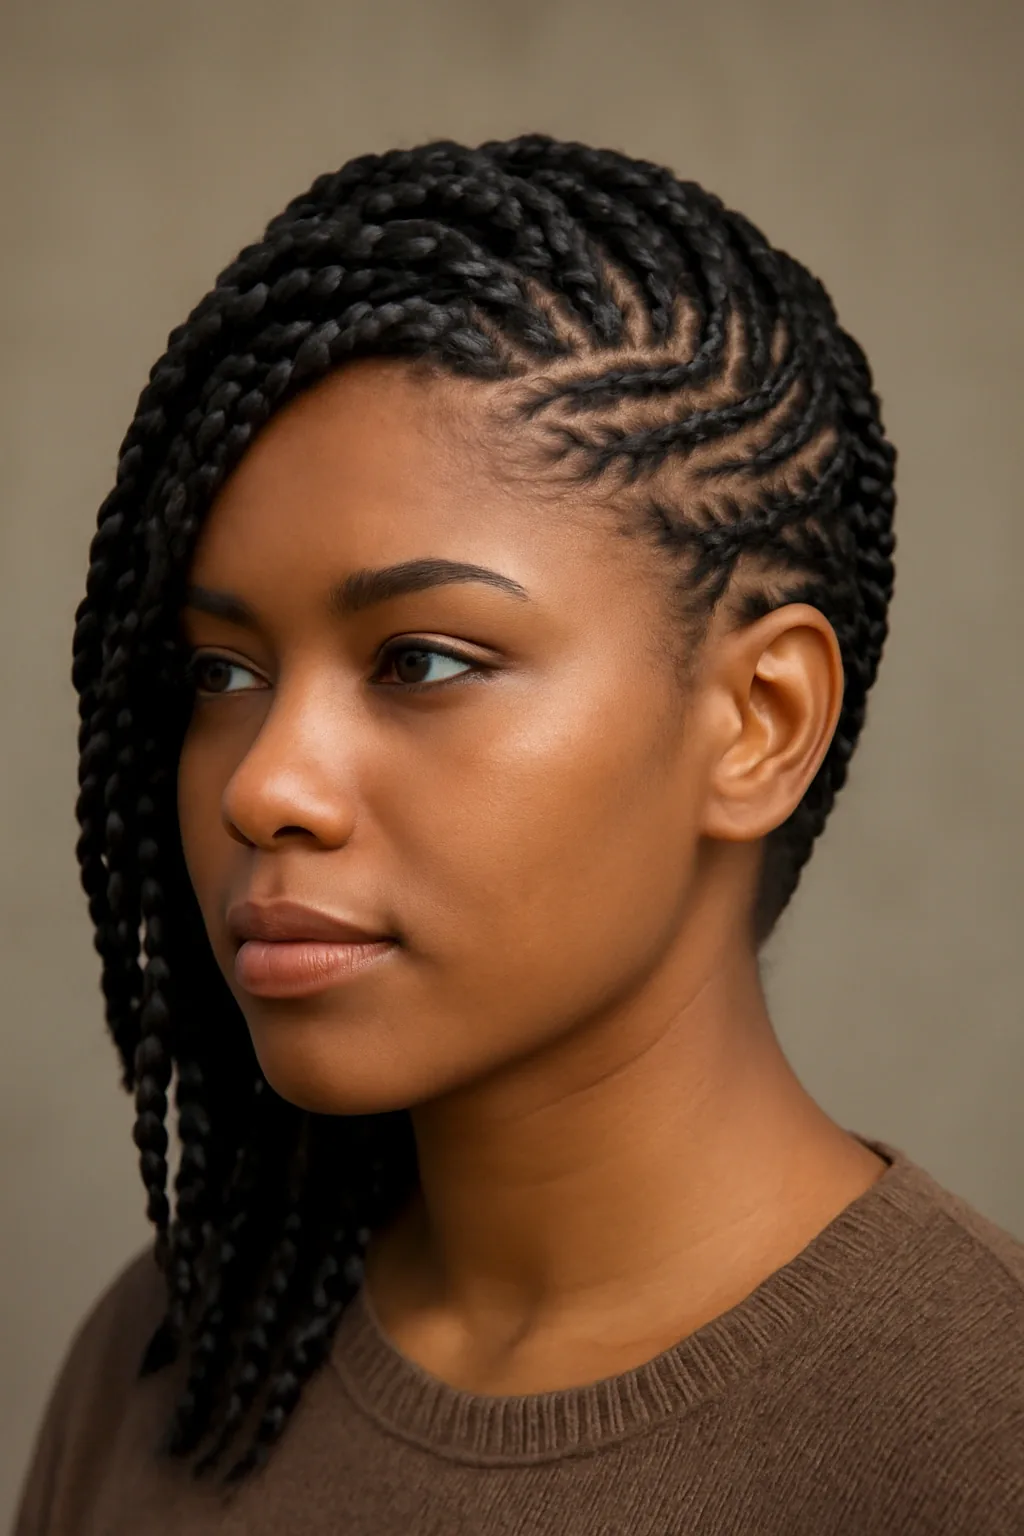
Short box braids with a side sweep are the effortless version of the braid bob: the braids are short, the part is deep on one side, and the whole style sweeps across the forehead in a heavy, glossy fall. The sweep gives short braids a glamorous, grown-up feel — it is the look of a woman who knows exactly what suits her — and it flatters most face shapes, because the diagonal line breaks up symmetry and draws the eye to the cheekbones. Short braids with a side sweep are also wonderfully practical: they stay out of your face, they dry fast, and they need almost no styling in the morning.
Pros: glamorous, practical, and very flattering. Cons: the sweep needs edge control to stay in place, and the style can feel a little one-note after a few weeks. Common mistake: making the sweep too heavy, which pulls at the hairline — keep it full but balanced. Maintenance: smooth the sweep daily with a little edge control and re-part carefully. Who should avoid it: anyone who loves changing their part often — this style commits to the side. Install time: 3 to 5 hours. Cost: roughly $150 to $250. Quick verdict: short braids, swept to the side — glamorous, practical, and ready in seconds.
24. Waist-Length Box Braids
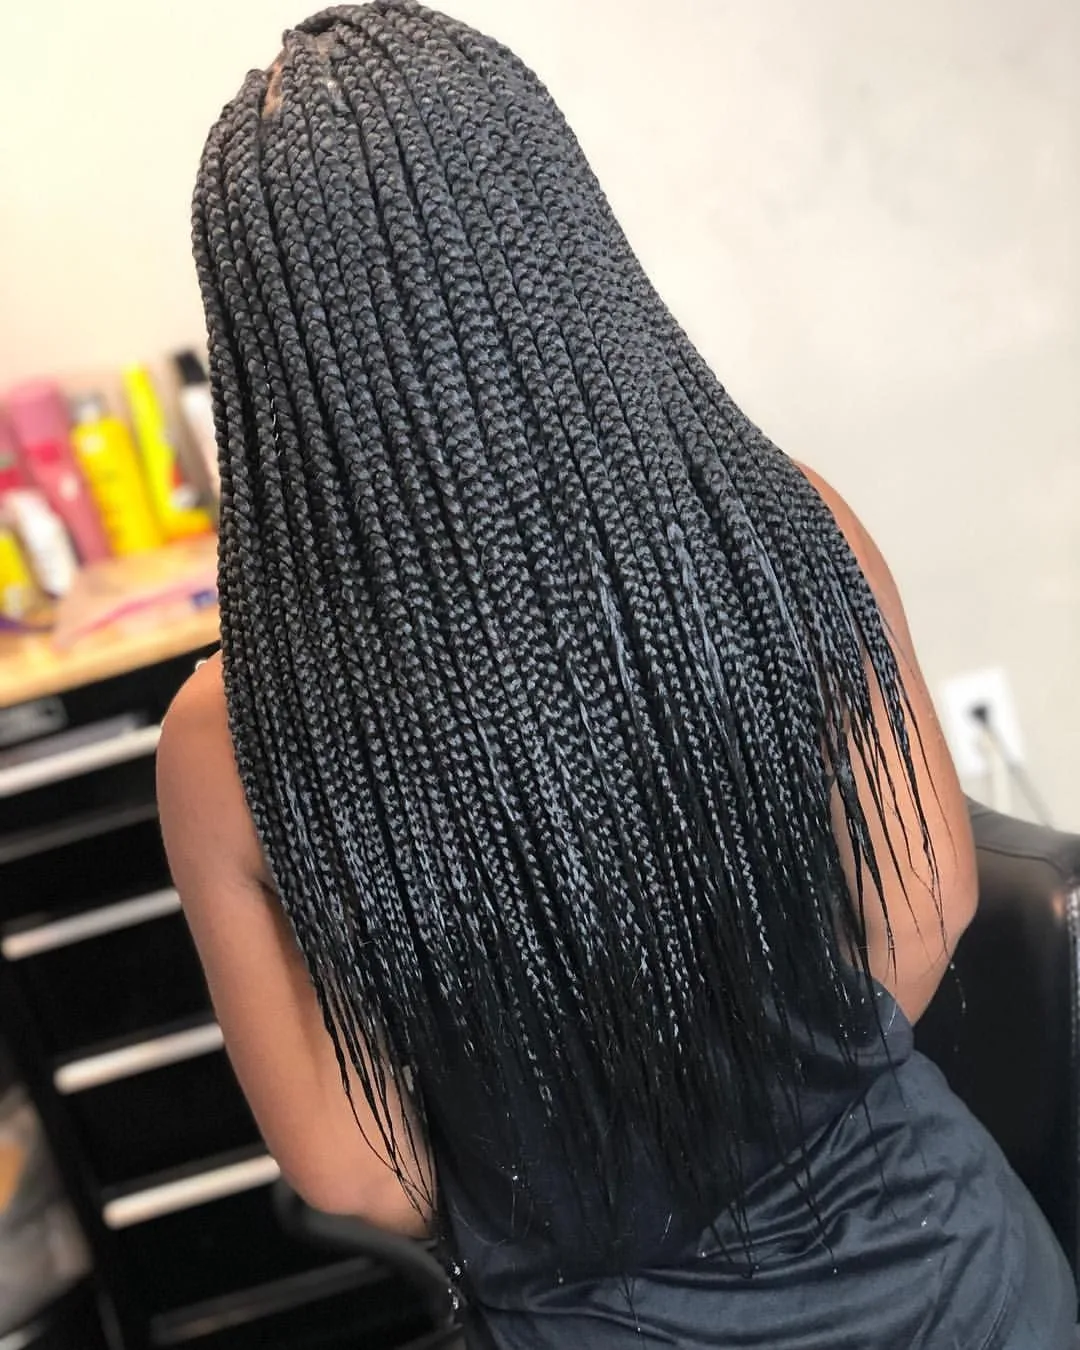
Waist-length box braids are the drama queens of protective styling: braids that fall to the waist, move like a curtain when you walk, and make every outfit look more deliberate. Long braids are a commitment — more hair, more time, more cost, and more weight — but they repay it with a presence that no shorter style can match. They can be worn down, in a ponytail that reaches the small of your back, in a bun the size of a grapefruit, or in a braid-on-braid that takes a full evening to build. If you have ever wanted to know what it feels like to have hair down to your waist, this is how you find out.
Best for: a dramatic look, photoshoots, holidays, and anyone who has always wanted very long hair. How to style: wear them down with a middle part for maximum impact, or pull them into a high ponytail and let the length do the talking. What to ask your braider: for lightweight braiding hair and for the braids to be installed without excess tension — long braids are heavy, and your edges will feel it. Install time: 6 to 9 hours. Cost: roughly $250 to $450. Quick verdict: the longest, boldest braids you will wear — a statement that starts at your head and ends at your waist.
25. Butt-Length Box Braids
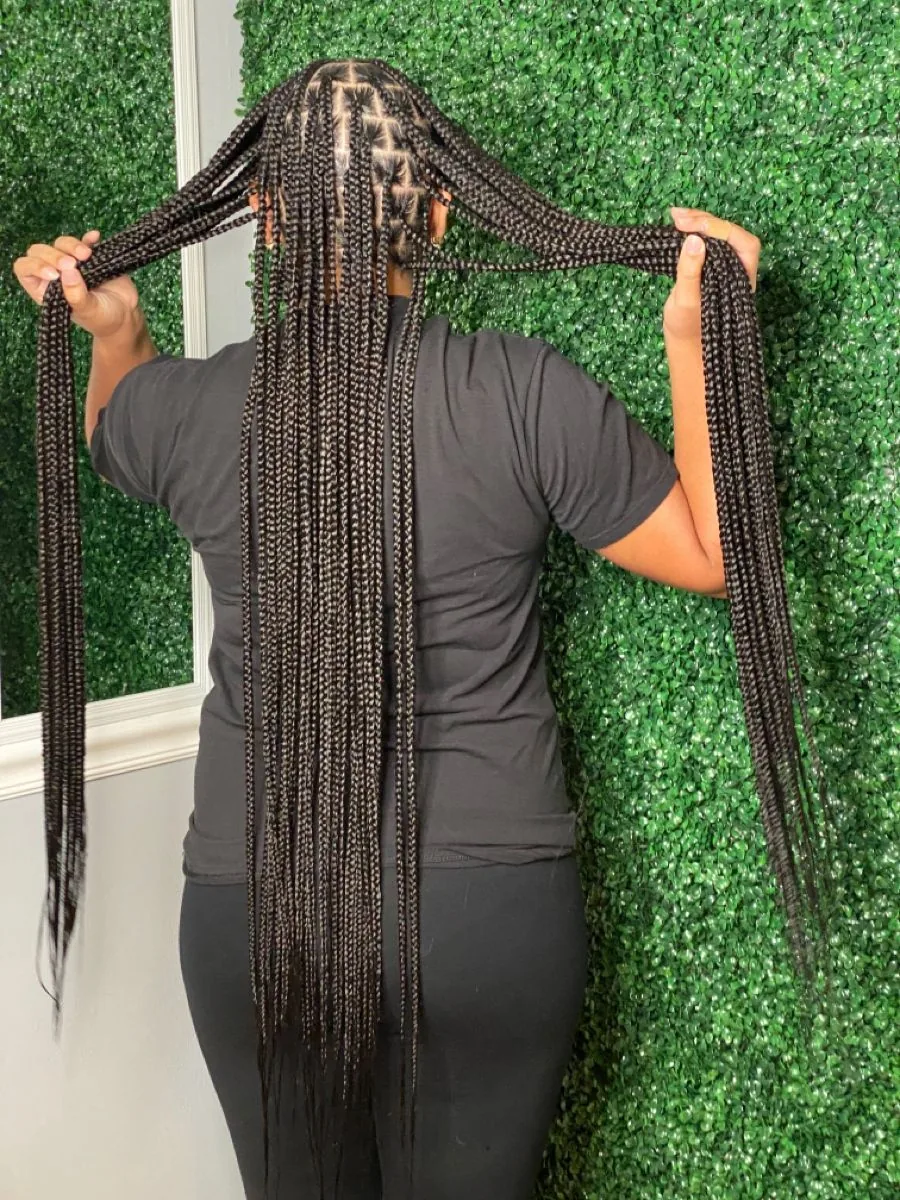
Butt-length box braids are waist-length braids taken to the extreme: braids that fall past the waist to the hips, with a drama and a presence that stops people in their tracks. This is the longest practical braid length, and it is not for the faint-hearted — the install takes most of a day, the braids are heavy, and everyday things like sitting down, driving and sleeping need a little planning. But for a holiday, a photoshoot, or a once-in-a-while statement, there is nothing like it. The braids move like water, they catch the light, and they make you feel like a different person.
Pros: maximum drama, maximum length, and a look nobody forgets. Cons: heavy, high-maintenance, and impractical for workouts and long drives. Common mistake: choosing butt-length braids for everyday life without trying waist-length first — the extra length is a real lifestyle change. Maintenance: braid the hair loosely at night, keep it off the floor when you sit, and wash in sections so the braids do not tangle. Who should avoid it: anyone with a sensitive scalp, a bad neck, or a job that involves a lot of movement. Install time: 7 to 10 hours. Cost: roughly $300 to $500. Quick verdict: the extreme — not everyday braids, but the most dramatic braids you will ever wear.
26. Long Box Braids in a High Ponytail
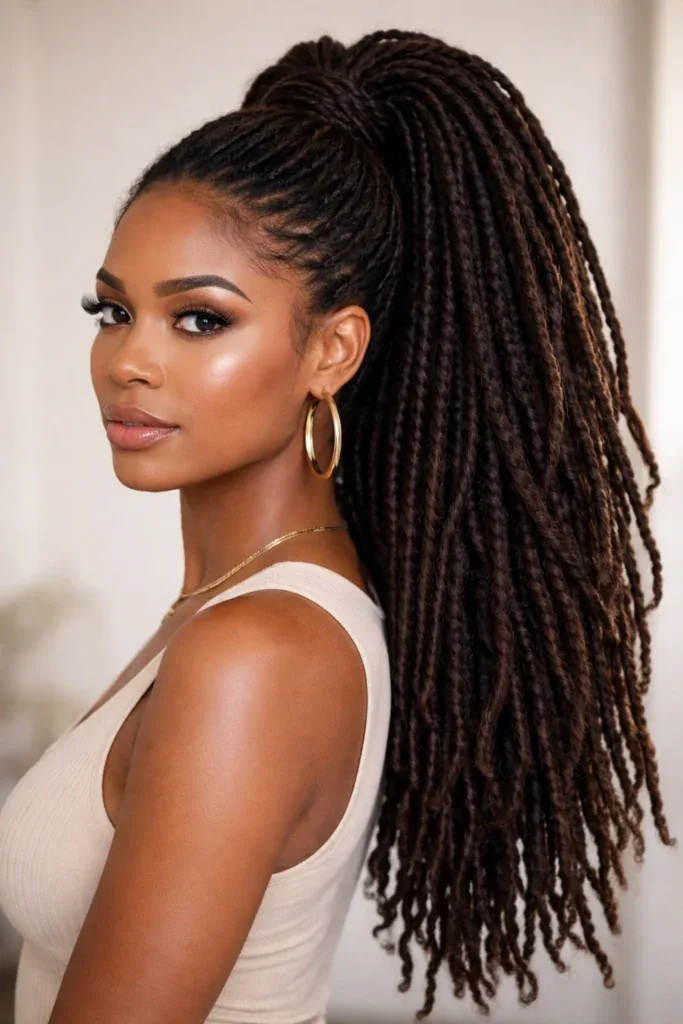
Long box braids in a high ponytail are the look that turns a protective style into a red-carpet moment: the braids are gathered high on the crown, secured, and the length falls down the back in a thick, glossy cascade. The ponytail shows off the length, it shows off the neatness of the parts, and it keeps the braids off your shoulders and out of your way — which is exactly what you want on a hot day, at the gym, or on a night out. Wrap a braid around the base to hide the elastic, add a gold cuff or two, and the ponytail looks like it took an hour, not five minutes.
Best for: nights out, workouts, hot weather, and anyone who wants their long braids to make an entrance. How to style: gather the braids high, secure with a strong elastic, and wrap one braid around the base, pinning the end underneath. What to ask your braider: for the front braids to be installed loosely enough for a high ponytail, and for lightweight hair so the ponytail does not pull. Install time: 6 to 9 hours for the braids, plus 5 minutes to style. Cost: roughly $250 to $450. Quick verdict: long braids, worn high — the ponytail that makes an entrance before you do.
27. Long Box Braids in a Half-Up Style
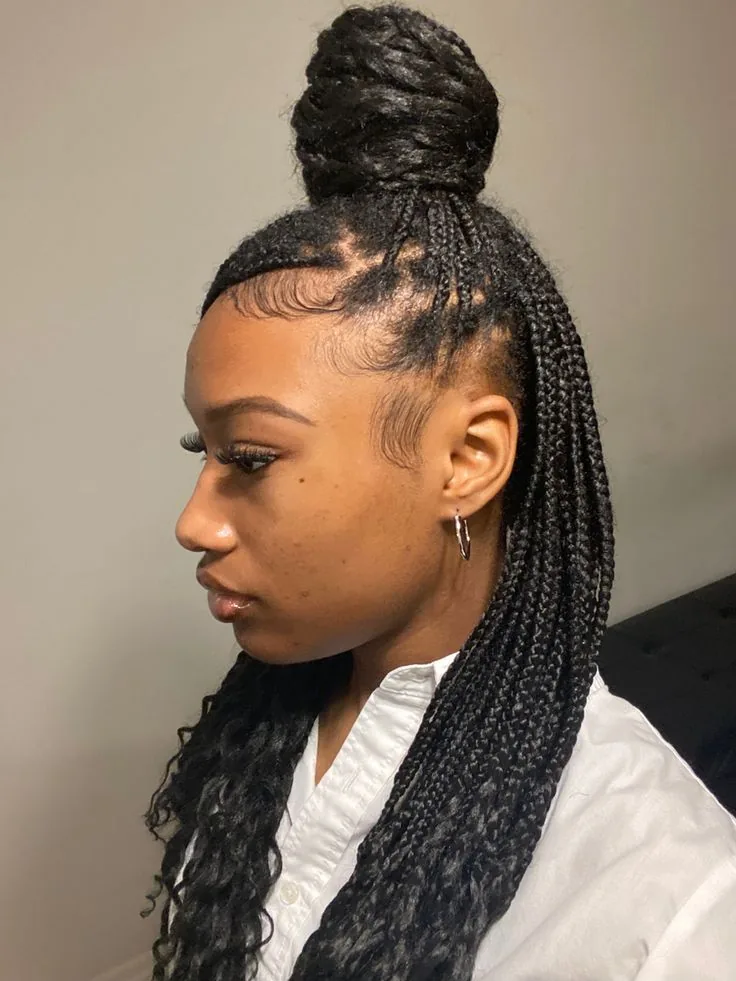
Long box braids in a half-up style are the best of both worlds: the top half is gathered into a bun or a ponytail at the crown, and the rest falls long and loose down the back. You get the elegance of an updo and the drama of long braids in the same hairstyle, and the style keeps the braids off your face while showing off the length you paid for. It is the look for a wedding guest, a date night, or any day when you want your braids to feel dressed up without being fully pinned up. And because the top half is secured, the style stays neat for hours, even in wind or heat.
Pros: elegant and practical, with the length on full display. Cons: the top half can feel heavy by the end of a long day, and the style needs a strong elastic. Common mistake: gathering too much hair into the top half, which makes the bun heavy and pulls at the front — take a smaller section than you think you need. Maintenance: re-secure the top half once during a long day and smooth the front with edge control. Who should avoid it: anyone with a tender scalp — a half-up style concentrates the weight at the crown. Install time: 6 to 9 hours for the braids, plus 5 minutes to style. Quick verdict: half up, all drama — the top half does the work, the bottom half does the showing off.
28. Burgundy Box Braids
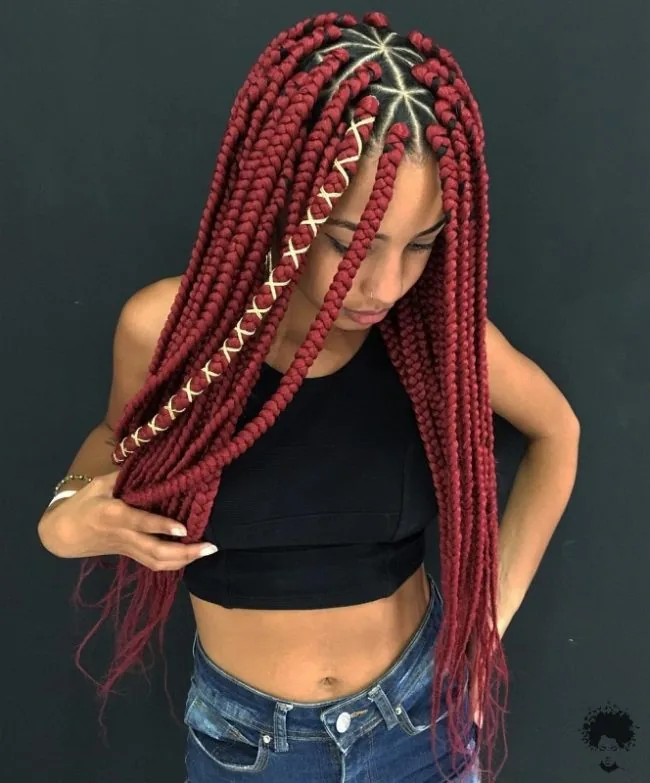
Burgundy box braids are the colour that flatters almost everyone: a deep, rich red-wine shade that warms the skin, makes the eyes pop, and turns a classic braid install into a statement without ever looking garish. Burgundy works on every skin tone, it fades gracefully rather than going brassy, and it looks just as good in a bun as it does worn loose down the back. It is the colour to choose when you want a change but you do not want a colour that fights with your wardrobe — burgundy goes with black, with denim, with neutrals, and with almost everything else you own.
Best for: a first colour, autumn and winter, and anyone who wants a statement that still feels grown-up. How to style: wear them down with a middle part so the colour shows in full, or pull them into a high bun and let the colour be the accessory. What to ask your braider: for a burgundy shade that suits your skin tone — deeper wine for deeper skin, brighter burgundy for lighter skin. Install time: 4 to 7 hours. Cost: roughly $200 to $350. Quick verdict: the colour that suits everyone — rich, warm, and impossible to get wrong.
29. Honey Blonde Box Braids
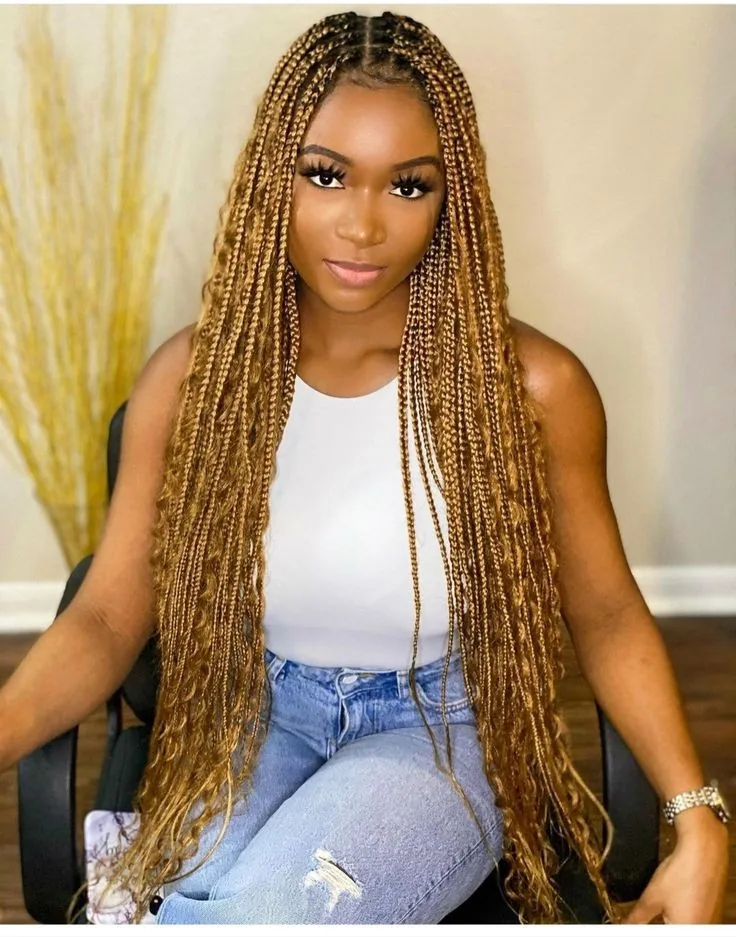
Honey blonde box braids are sunshine in a protective style: warm, golden, honey-toned braids that lighten the whole face, catch the light beautifully, and feel like summer even in the middle of winter. Blonde braids make a statement — they are brighter, bolder and more noticeable than any natural shade — and they suit women who love to stand out. The honey tone is the key: it is warm, not ashy, so it flatters warm and deep skin tones beautifully, and it looks wonderful against a tan. Pair them with gold jewellery and the whole look glows.
Pros: bright, warm, and wonderfully photogenic. Cons: blonde braiding hair can show dirt and build-up more than dark hair, and it needs a little more washing. Common mistake: choosing a blonde that is too light for your skin tone — honey blonde, not platinum, is the flattering choice for most women. Maintenance: wash every one to two weeks and keep the braids tied down at night so the light colour stays bright. Who should avoid it: anyone who wants a low-profile style — blonde braids are a statement, not a secret. Install time: 4 to 7 hours. Cost: roughly $200 to $350. Quick verdict: sunshine, braided — warm, golden, and made for summer.
30. Ombre Box Braids
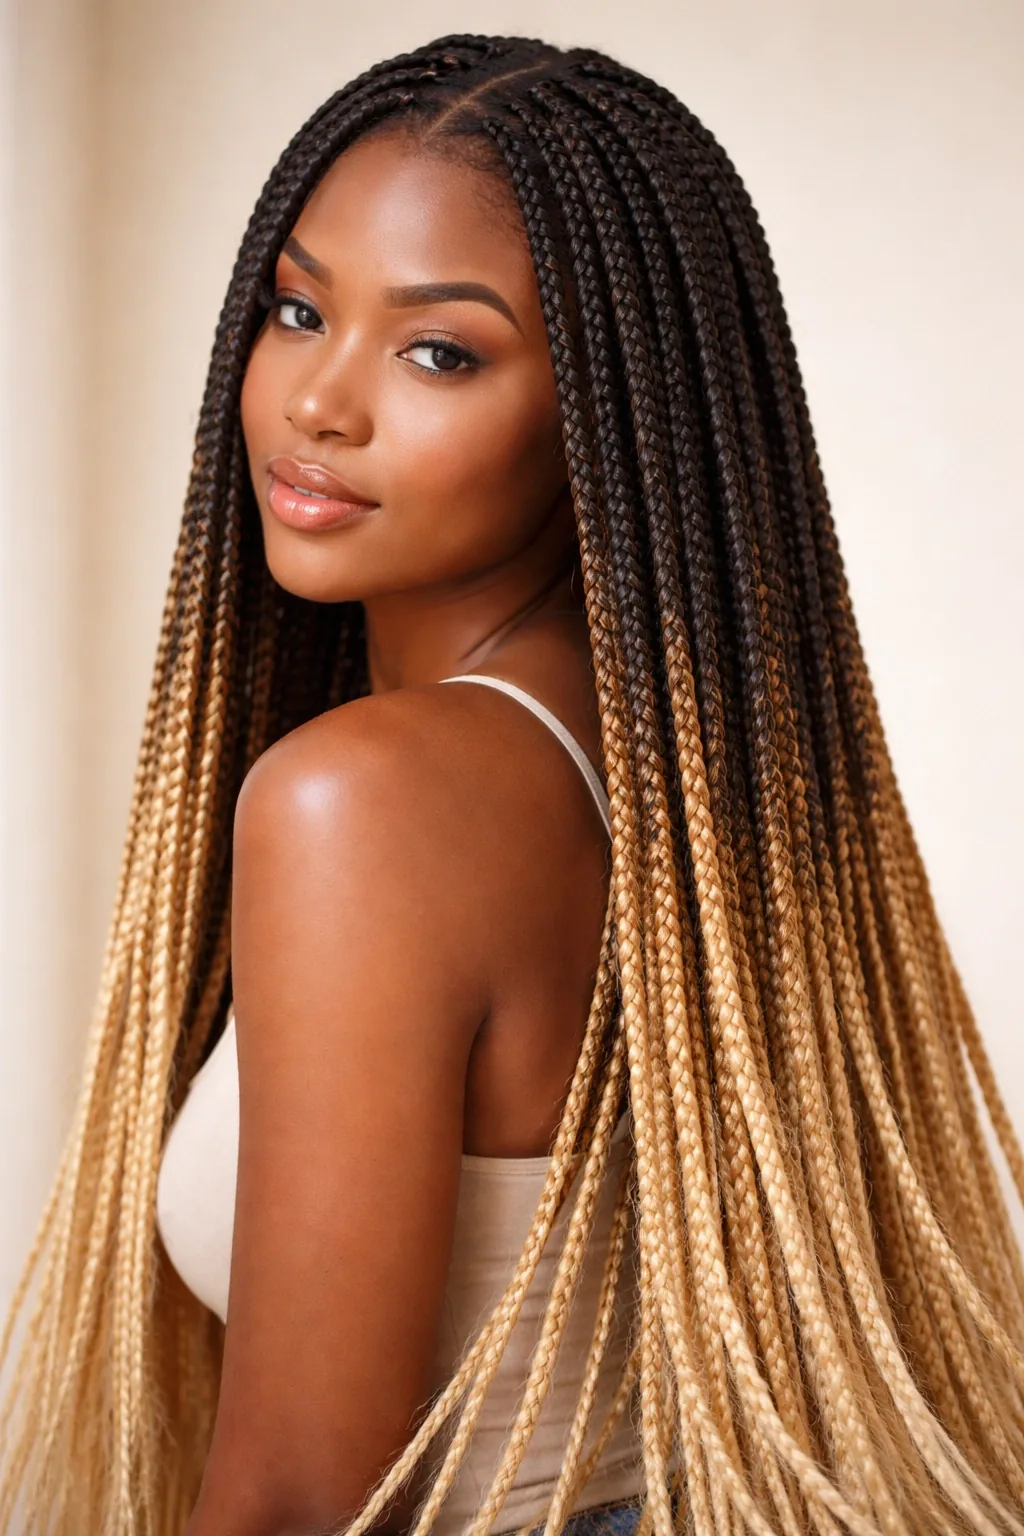
Ombre box braids are the colour effect that never goes out of style: dark at the roots, gradually lightening to a lighter shade at the ends, so the braids have depth, dimension and a beautiful gradient from top to bottom. The ombre effect makes the braids look longer, it makes the colour look more expensive, and it grows out gracefully — because the roots are dark, new growth blends in rather than standing out. Choose a natural ombre, dark brown to honey, for a subtle, expensive look, or a bold one, black to burgundy or blonde, for a real statement. Either way, the gradient does the work.
Best for: a colour change without the commitment, and anyone who wants dimension in their braids. How to style: wear them down so the full gradient shows, or pull them into a ponytail and let the lighter ends be the star. What to ask your braider: for ombre hair with a gradual transition, not a harsh line, and for the lighter ends to be a shade that flatters your skin. Install time: 4 to 7 hours. Cost: roughly $200 to $350. Quick verdict: two colours, one seamless gradient — the easiest way to make braids look expensive.
31. Peekaboo Colour Box Braids
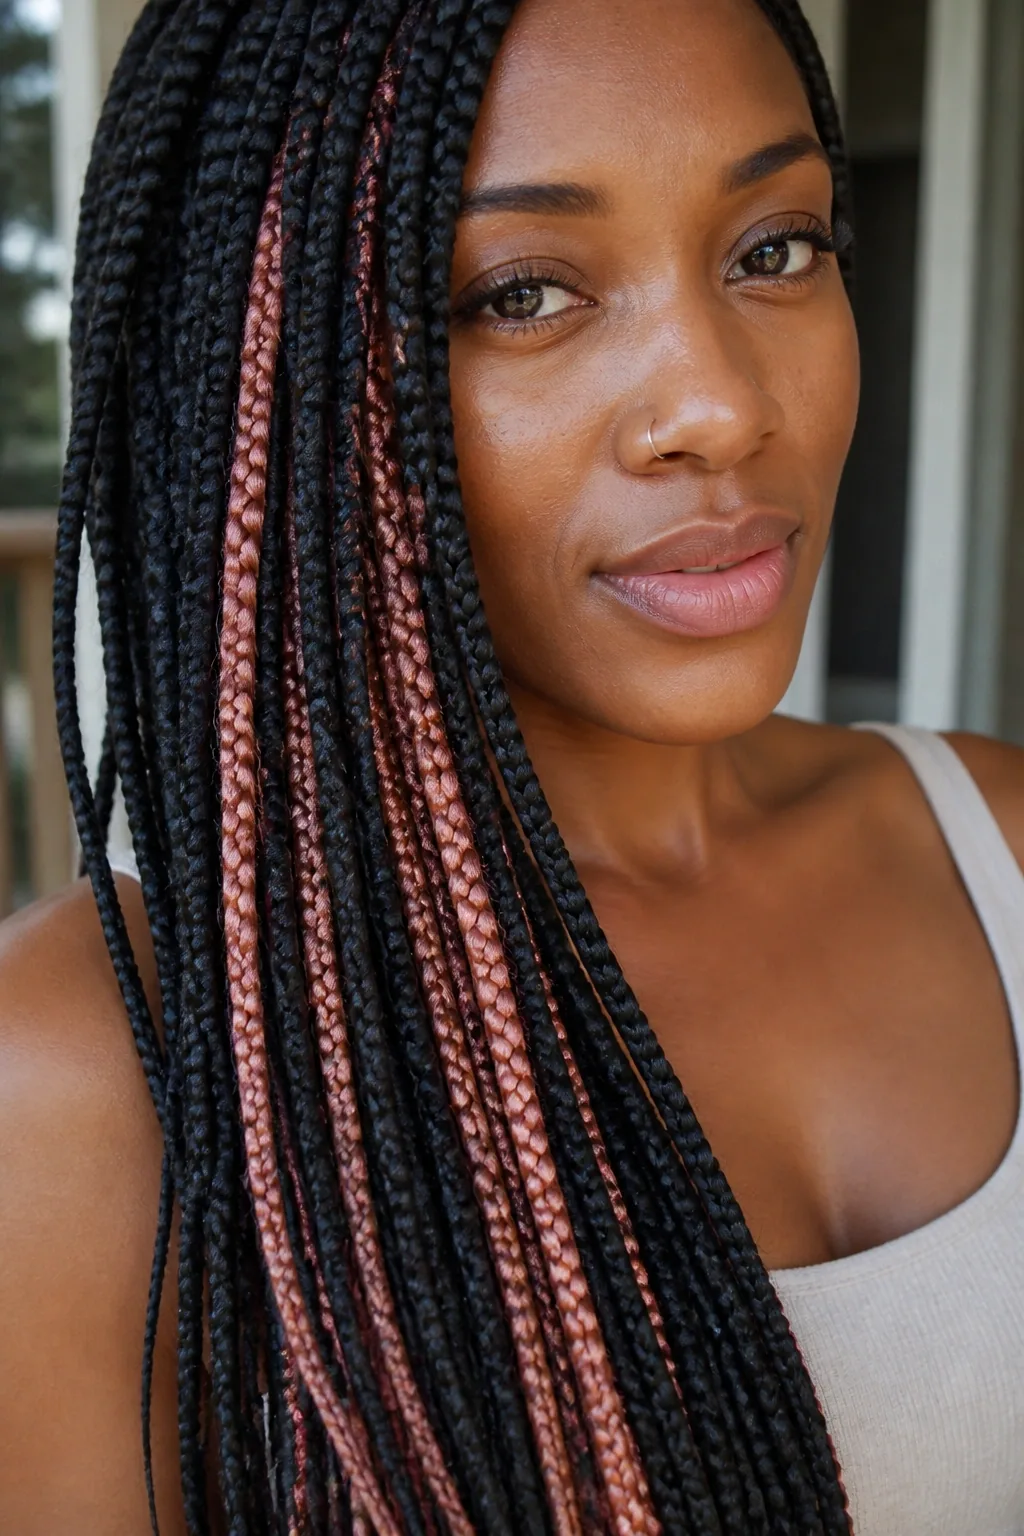
Peekaboo colour box braids are the secret colour: most of the braids are a natural shade, but a few hidden braids underneath — or a panel at the nape, or a streak at the front — are a bright, unexpected colour. The colour only shows when you move, when the wind catches the braids, or when you pull them up, which makes it feel like a surprise rather than a statement. It is the perfect choice for women who want colour but work in a conservative office, or for anyone who loves the idea of bright braids but is not ready to commit their whole head to it. Choose pink, blue, purple or red — the peekaboo is yours to hide or show.
Pros: fun, flexible, and office-friendly. Cons: the colour can be hard to find in braiding hair, and it may need to be ordered in advance. Common mistake: placing the colour where it never shows — put at least one coloured braid at the front or at the parting, so the peekaboo actually peeks. Maintenance: the same as any braids, but wash the coloured braids gently so the colour does not bleed. Who should avoid it: anyone who wants their colour to be the first thing people see — this is a whisper, not a shout. Install time: 4 to 7 hours. Cost: roughly $200 to $350. Quick verdict: colour with a secret — there when you want it, hidden when you do not.
32. Box Braids with Gold Cuffs
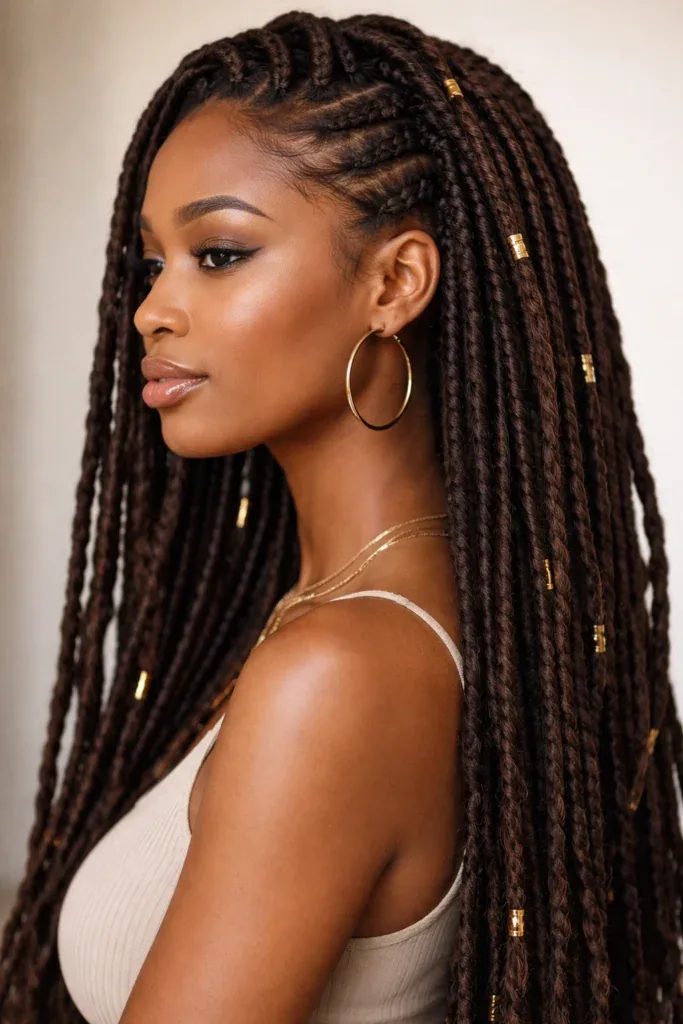
Box braids with gold cuffs are the simplest upgrade in this whole guide: small gold rings and cuffs are threaded onto a few braids, and the style instantly looks more expensive, more deliberate, and more like jewellery. Gold cuffs catch the light, they draw the eye to the braids, and they turn an everyday install into something that feels dressed up. The trick is restraint — a cuff on every braid is too much, but a cuff on five or six braids, placed near the front and at the ends, is just right. Choose gold for warmth, silver for coolness, or mix the two if your jewellery already does.
Best for: special occasions, photos, and anyone who wants a quick glamour upgrade. How to style: place the cuffs near the front where they show, and at the ends of a few braids for balance. What to ask your braider: for the cuffs to be added at the end of the install, and for them to be secured so they do not slide off. Install time: 4 to 6 hours, plus 10 minutes for the cuffs. Cost: roughly $180 to $300, plus cuffs. Quick verdict: the ten-minute upgrade — a few gold cuffs, and your braids look like jewellery.
33. Box Braids with Beads and Shells
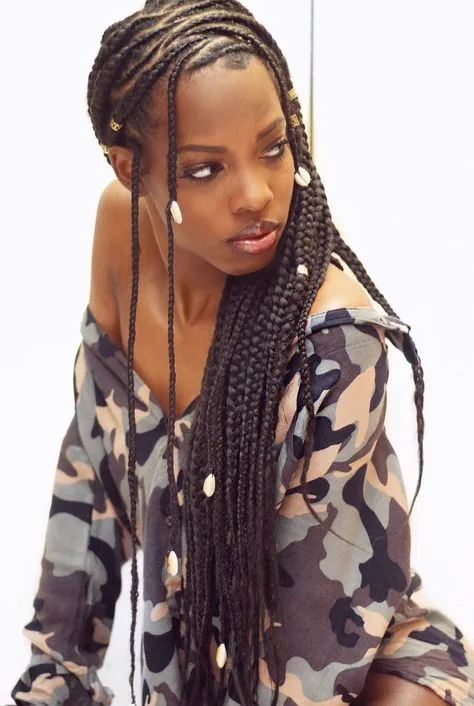
Box braids with beads and shells are the style with the deepest roots: beads and cowrie shells have decorated braids for centuries, and they bring a cultural richness, a personal meaning and a beautiful sound to the style. Wooden beads feel natural and earthy, gold beads feel glamorous, and cowrie shells — long a symbol of beauty and prosperity — feel meaningful. Mix them, or choose one and commit to it: beads at the ends, shells scattered through the braids, or a single shell at the front as a focal point. The style is yours to make personal, and that is exactly the point.
Pros: beautiful, meaningful, and deeply personal. Cons: beads and shells add weight and can catch on scarves and collars. Common mistake: overloading the braids — a few well-placed beads look better than a hundred crowded ones. Maintenance: check the beads weekly and remove any that have cracked or loosened. Who should avoid it: anyone who sleeps face-down or wears a lot of high-necked clothing. Install time: 4 to 7 hours, plus 30 minutes for the accessories. Cost: roughly $200 to $350, plus beads and shells. Quick verdict: braids with history — beads and shells make the style yours, in every sense.
34. Box Braids with a Scarf or Head Wrap
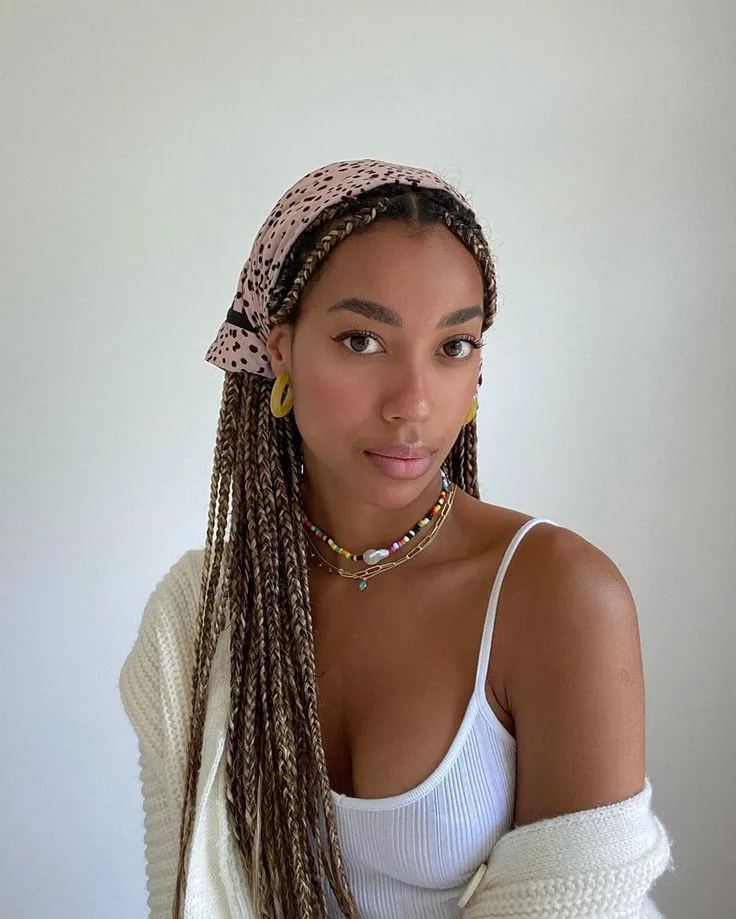
Box braids with a scarf or head wrap are the style for the days when you want your braids protected, your look polished, and your morning effortless: a silk or satin scarf is wrapped around the front of the head, the braids fall free behind it, and the result is elegant, practical and endlessly versatile. The scarf protects your edges, it keeps the front braids neat, and it adds a pop of colour or pattern that changes the whole outfit. Choose a bold print for a statement, a solid silk for elegance, or a matching scarf for a coordinated look — the wrap is the accessory that does the work of three.
Best for: bad hair days, travel, and anyone who loves a head wrap. How to style: wrap the scarf around the front, tie it at the back or the side, and let the braids fall loose behind it. What to ask your braider: for the front braids to be neat and flat, so the scarf sits smoothly. Install time: 4 to 6 hours for the braids, plus 2 minutes to wrap. Cost: roughly $180 to $300, plus a scarf. Quick verdict: the two-minute transformation — a scarf, a wrap, and braids that look brand new.
35. Box Braids in Space Buns
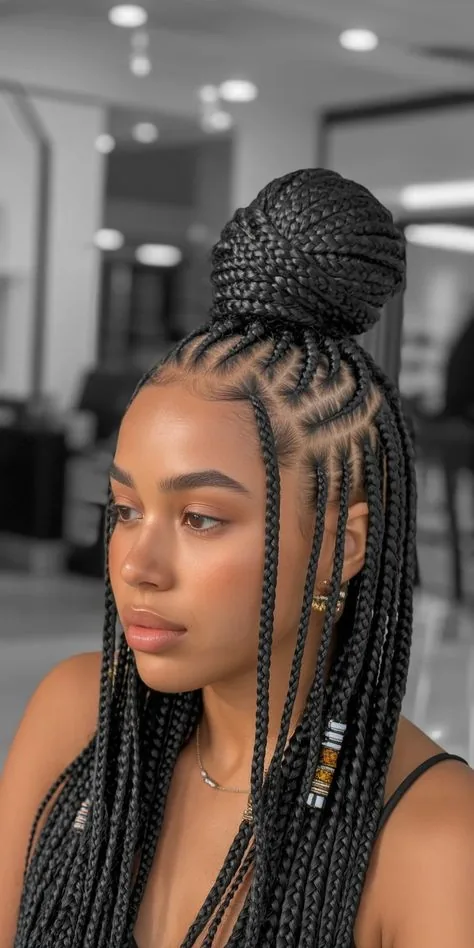
Box braids in space buns are the fun, playful version of the style: the braids are divided into two sections and twisted into two buns on either side of the head, and the result is youthful, energetic and impossible to take too seriously. Space buns are the style for festivals, parties, holidays and any day when you want your braids to feel like fun rather than formal. They keep the braids off your neck, they show off your face, and they photograph beautifully — which is why they are a favourite for concerts and celebrations. Leave a few braids out at the front to frame the face, or sweep everything up for the full effect.
Pros: fun, youthful, and wonderfully practical in hot weather. Cons: not the right choice for a formal office or a conservative event. Common mistake: making the buns uneven — part the hair straight down the middle and build the buns at the same height. Maintenance: re-pin the buns once during a long day and smooth the front with edge control. Who should avoid it: anyone who wants a grown-up, understated look — space buns are a statement of fun. Install time: 4 to 6 hours for the braids, plus 10 minutes to style. Quick verdict: braids, gone playful — two buns, one big smile, and a style that never takes itself seriously.
36. Box Braids in a Braided Crown Updo
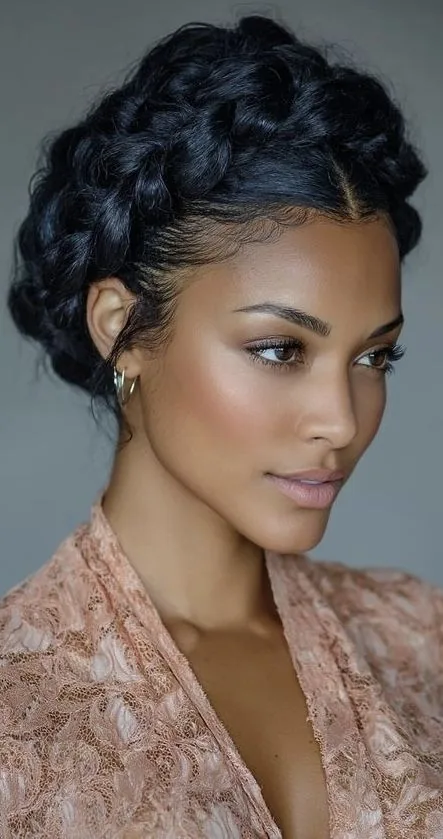
Box braids in a braided crown updo are the formal, regal version of the style: the braids are wrapped around the head in a halo, pinned in place, and the result is a sculpted, architectural updo that suits weddings, galas and any evening when you want to look unforgettable. The crown keeps every braid off your shoulders, shows off your neckline and your earrings, and gives the back of the head a beautiful, intricate detail that photographs wonderfully. It is the updo that makes a protective style feel like a ballgown hairstyle — and it is surprisingly comfortable to wear all evening, because the weight is distributed evenly around the head.
Best for: weddings, formal events, and anyone who wants a show-stopping updo. How to style: wrap the braids around the head in a halo, pin as you go, and tuck the ends underneath — a stylist can do this in 20 to 30 minutes. What to ask your braider: for braids light enough to wrap comfortably, and for the front braids to be installed loosely enough to style up. Install time: 4 to 7 hours for the braids, plus 30 minutes to style. Cost: roughly $200 to $350. Quick verdict: the crown updo — braids, elevated to royalty, and an updo nobody will forget.
37. Box Braids for a Wedding or Formal Event
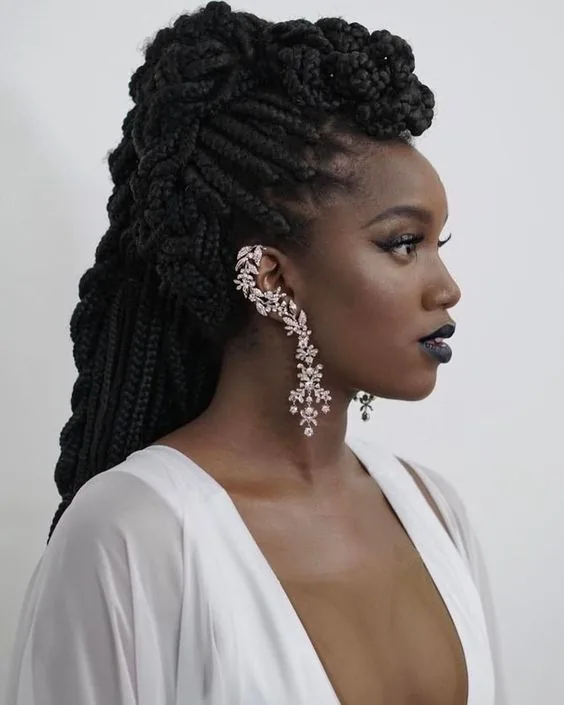
Box braids for a wedding or formal event are proof that a protective style can be the most elegant hairstyle in the room: the braids are swept into a low bun, a crown, or a soft half-up style, a few gold cuffs or pearl pins are added, and the result is polished, sophisticated and completely your own. Brides are choosing braids more and more, because they hold all day, they photograph beautifully, and they do not need a single touch-up between the ceremony and the last dance. Bridesmaids love them for the same reason — a head of braids in a low, soft updo looks coordinated without being identical, and every woman can style hers her own way.
Best for: brides, bridesmaids, wedding guests, and any black-tie evening. How to style: sweep the braids into a low bun or a soft half-up style, add gold cuffs or pearl pins, and leave a few braids out at the front for softness. What to ask your braider: for a trial style before the big day, and for the braids to be installed at least a week before the event so they settle. Install time: 4 to 7 hours, plus 30 minutes to style. Cost: roughly $200 to $400. Quick verdict: braids, dressed for the ball — elegant, secure, and beautiful from the first photo to the last dance.
38. Box Braids for the Gym and Everyday Wear
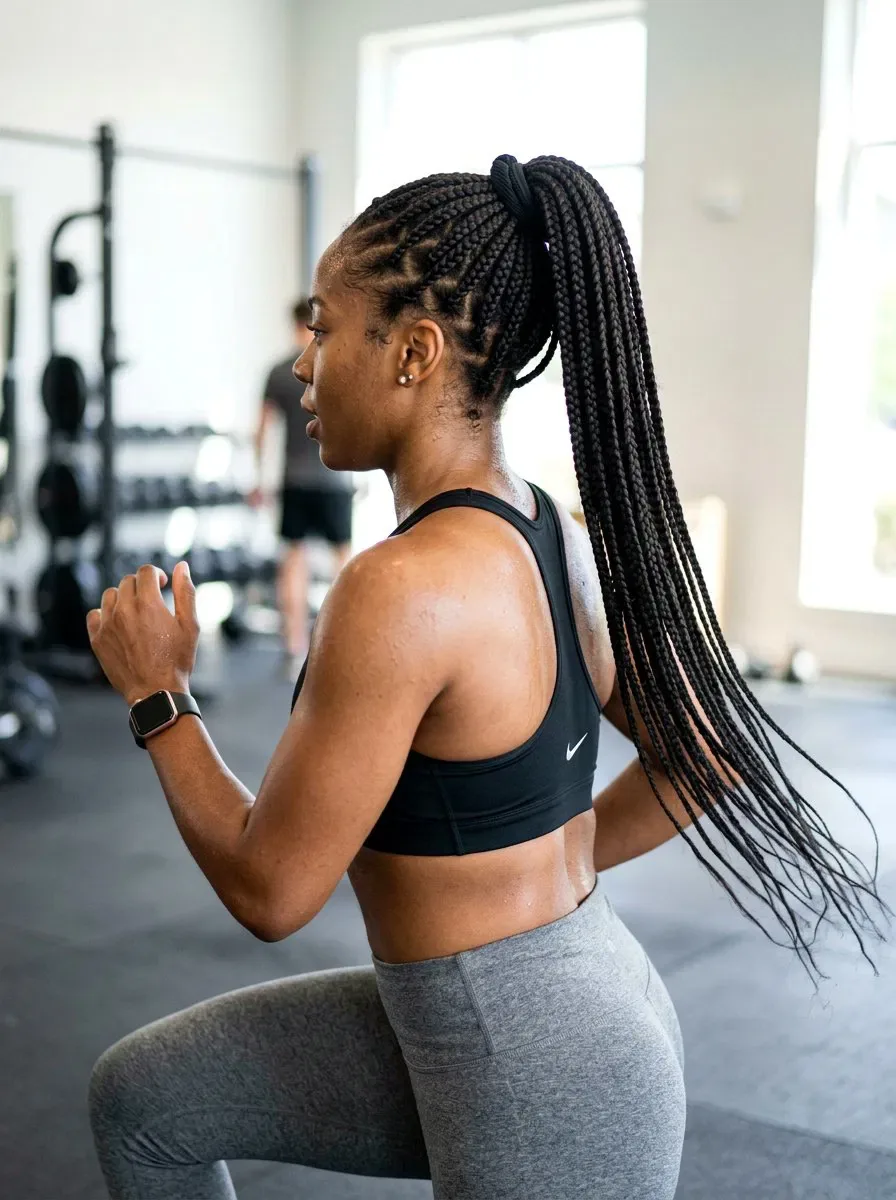
Box braids for the gym and everyday wear are the practical, hardworking version of the style: the braids are pulled into a high ponytail or a top knot, the scalp is kept clean with a quick wipe after a workout, and the style survives sweat, rain and a busy week without a single bad hair day. This is the reason so many active women choose box braids — they are the only hairstyle that looks the same after a workout as it did before one, and they free you from the daily decision of what to do with your hair. Medium or jumbo braids are the best gym size, because they dry fastest and are easiest to tie up.
Pros: sweat-proof, low-effort, and always ready. Cons: a sweaty scalp needs regular cleaning, and long braids can feel heavy during a hard workout. Common mistake: tying damp braids up tightly after a workout — let them air-dry first, or they will smell musty. Maintenance: wipe the scalp after every workout, wash the braids every one to two weeks, and tie them in a loose plait at night. Who should avoid it: nobody — this is the everyday workhorse of braiding, and it suits every lifestyle. Install time: 2 to 6 hours, depending on size. Cost: roughly $150 to $300. Quick verdict: the everyday hero — braids that work as hard as you do, and never have a bad hair day.
How long do box braids last?
Box braids usually last 4 to 8 weeks. Small braids last longest, often a full 8 weeks, while jumbo braids look their best for 4 to 6 weeks. Take them down when the roots are matted, the edges feel thin, or your scalp is constantly itchy — leaving them in longer does not protect your hair, it damages it.
How long does it take to get box braids?
A full head of box braids takes 2 to 10 hours, depending on size and length. Jumbo braids take 2 to 4 hours, medium braids 4 to 6 hours, and small braids 6 to 10 hours. Knotless braids add an hour or two, and waist-length or butt-length braids add more time still.
How much do box braids cost?
In the US, box braids typically cost $150 to $500, depending on size, length, location and the braider. Jumbo and medium braids are usually $150 to $300, small braids $250 to $400, and knotless or waist-length styles $250 to $500 or more. Always ask whether the hair is included in the price.
Are knotless braids better than box braids?
Knotless braids are better for sensitive scalps and fragile edges, because there is no knot at the root and far less tension. They look more natural and can be styled up from day one. Classic box braids are usually cheaper, faster to install, and hold their neatness a little longer. The best choice depends on your scalp, your budget and how long you want them to last.
Do box braids damage your hair?
Box braids do not damage your hair when they are installed correctly, worn for 4 to 8 weeks, and taken down gently. Damage happens when braids are installed too tightly, left in for too long, or ripped out in a hurry. Keep the tension comfortable, moisturise your scalp, and take the braids down carefully, section by section.
Can I wash box braids?
Yes, you can and should wash box braids every one to two weeks. Use a diluted shampoo, focus on the scalp, and let the suds run down the braids rather than piling them on top of your head. Rinse thoroughly and let the braids air-dry completely before you tie them down, so they do not develop a musty smell.
How do I stop my scalp itching with box braids?
Spray your scalp once or twice a week with a light leave-in or a diluted apple cider vinegar rinse, massage gently with your fingertips, and follow with a light oil on the parts. If the itch starts in the first day or two with bumps or redness, the added hair may be irritating your scalp — soaking it in apple cider vinegar water before the install often helps.
What size box braids should I get?
Jumbo braids are best for a fast install and a bold look. Medium braids are the most versatile and the best choice for a first install. Small braids last longest and offer the most styling freedom, but they take the longest and cost the most. If your scalp is sensitive, small braids spread the weight best; if you want a quick, light style, jumbo is the answer.
Can I work out with box braids?
Yes, box braids are one of the best hairstyles for working out. Tie them into a high ponytail or a top knot, and after your workout, wipe your scalp with a damp cloth and let the braids air-dry fully before you tie them down. Medium or jumbo braids dry fastest and are the easiest gym size.
How do I take box braids down without breakage?
Set aside a few hours, work in sections, and cut the added hair a few inches below where your natural hair ends. Unravel each braid gently from the ends upward, finger-detangle each section as it comes out, then detangle the whole head with a wide-tooth comb and conditioner before washing and deep-conditioning.
Conclusion
Box braids are not one hairstyle — they are thirty-eight of them, and the one that suits you is the one that fits your hair, your scalp, your budget and your life. Jumbo braids for a fast, bold install. Medium braids for the everyday classic. Small braids for the longest wear and the most styling freedom. Knotless braids for a lighter, more natural feel. A bob for a fresh change, waist-length braids for maximum drama, colour for a statement, and beads, cuffs and scarves to make the whole style yours. The size and the length are the decisions that matter — everything else is styling.
Book a braider whose work you have seen, arrive with clean, detangled hair, and tell them honestly about your scalp and your edges. Wear the braids for four to eight weeks, care for your scalp while they are in, and take them down gently, section by section, when the time comes. Do that, and your box braids will do exactly what a protective style is supposed to do: protect your hair, save you time every morning, and make you feel like yourself — only more so.