Four-Strand Braid: How to Master This Complex Technique
Have you ever scrolled through social media, mesmerized by intricate braids that look like woven art, and wondered, “How do they do that?” Chances are, you were looking at the elegant and sophisticated cousin of the classic three-strand braid: the four-strand braid. While it appears dauntingly complex, this beautiful technique is absolutely within your reach. Mastering the four-strand braid unlocks a new world of hairstyling possibilities, from stunning updos to eye-catching accents in everyday looks. This guide is designed to demystify the process, breaking it down into simple, manageable steps. By the end, you’ll not only understand the mechanics but will be able to weave this gorgeous braid with confidence.
Why the Four-Strand Braid is Worth the Effort
Before we dive into the how, let’s talk about the why. You might be comfortable with French braids and Dutch braids, so what does a fourth strand add? The answer lies in texture and dimension. A four-strand braid creates a flatter, more ribbon-like, and intricately woven appearance. It looks fuller and more detailed than a traditional braid, making it perfect for special occasions or when you want to elevate a simple look. It’s a braid that announces patience and skill, yet its foundation is a simple, repeatable pattern. Learning this technique enhances your overall dexterity and understanding of braiding theory, making other complex styles easier to tackle in the future.
Essential Preparation: Setting Yourself Up for Success
Like any craft, success starts with preparation. For braiding, your hair’s condition and your tools are key. Begin with slightly textured hair. If your hair is freshly washed and too smooth, use a light texturizing spray or dry shampoo to add grip. This prevents the strands from slipping as you work. You’ll also need a fine-tooth comb for precise sectioning, a few hair elastics (preferably clear or matching your hair color), and a clip to hold sections out of the way. A spray bottle with water can be helpful to tame flyaways. Most importantly, position yourself in front of a mirror with good lighting and allow yourself patience. Your first attempt is a learning experience, not a final product.

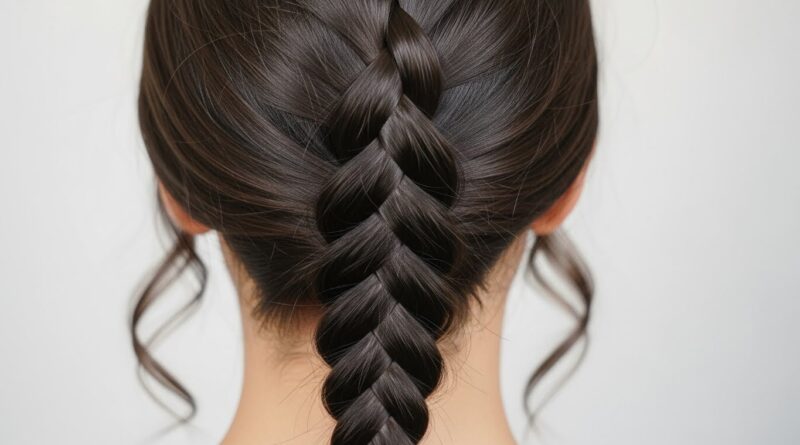
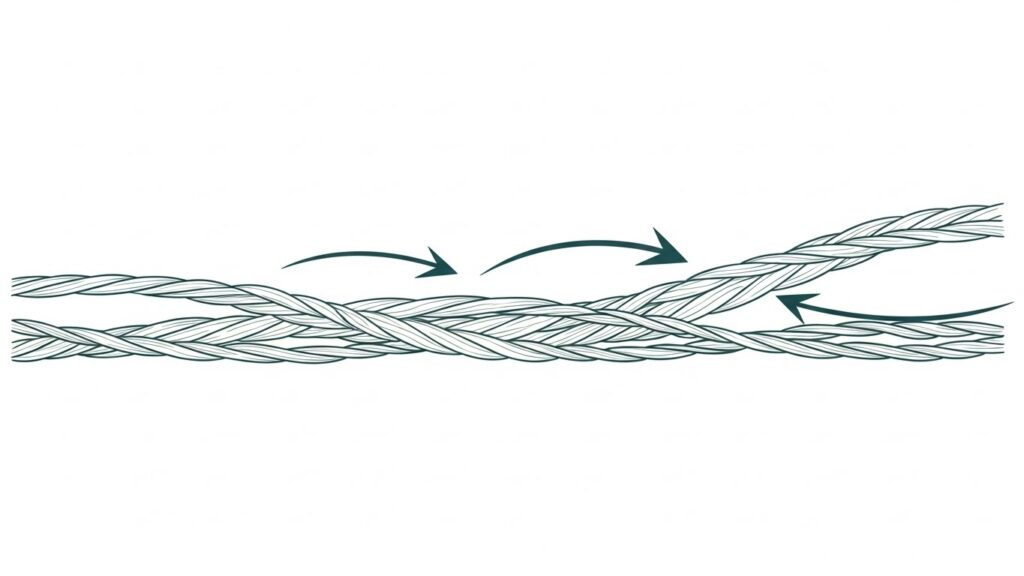
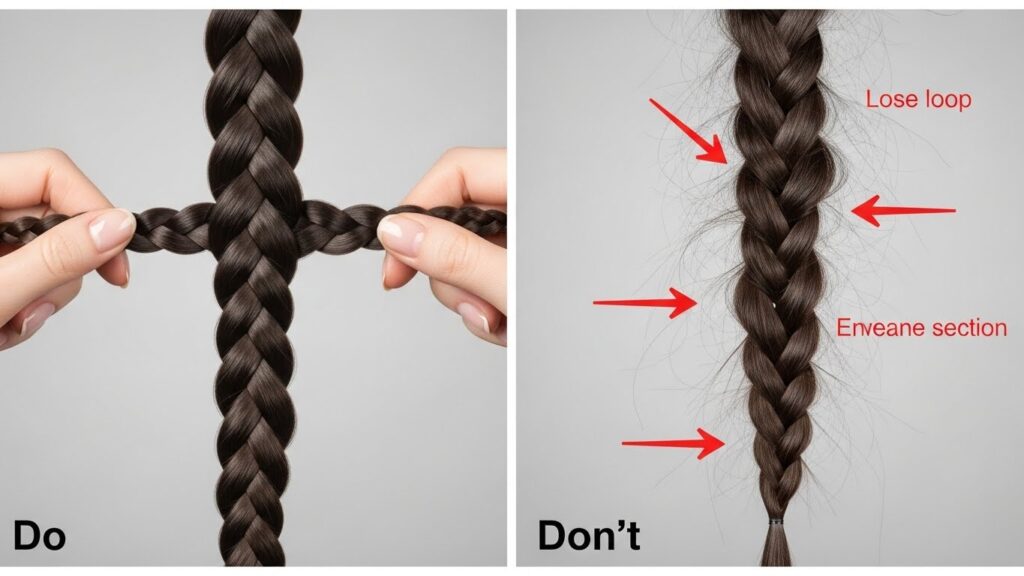
The Core Technique: The Over-Under Method Explained
The most common and manageable method for a four-strand braid is the “over-under” technique. It builds directly on the muscle memory of a three-strand braid but with a crucial added step. The key is to always remember you are working with four separate sections, which we will label from left to right as Strand 1, Strand 2, Strand 3, and Strand 4. The mantra for this braid is: “Outer strand goes over two, then under one.” Let’s break that down into a crystal-clear, step-by-step process.
Step 1: Section Your Hair. Comb your hair thoroughly. Using the fine end of your comb, create four even sections of hair. Hold them separately between your fingers, keeping them taut and distinct. This initial evenness is critical for a uniform braid.
Step 2: The Starting Move. Take the farthest left strand (Strand 1). Move it over Strand 2 and under Strand 3. It should now be positioned between Strand 3 and Strand 4. Your new order from left to right is: 2, 3, 1, 4.
Step 3: The Mirror Move on the Right. Now take the farthest right strand (Strand 4). Move it over Strand 1 (the one you just moved) and under Strand 3. It should now sit between Strand 2 and Strand 3. Your new order is: 2, 4, 3, 1.
Step 4: Repeat the Pattern. Continue this sequence. Always take the outermost strand and weave it toward the center: left strand goes over two, under one; right strand goes over two, under one. Pull the strands firmly and evenly after each move to maintain tension and definition.
Step 5: Secure and Assess. Once you’ve braided to the ends, secure it with an elastic. Take a moment to look at your work. The pattern should resemble a tight, woven band. If sections look loose or uneven, don’t worry—this improves dramatically with practice.
Pro Tips and Troubleshooting Common Mistakes
Even with clear instructions, hurdles can appear. Here are solutions to common four-strand braid challenges. Problem: My braid looks loose and messy. Solution: This is almost always a tension issue. Pull each strand firmly and consistently after every single weave. The braid tightens as you go, so don’t be afraid to pull snugly. Problem: I keep losing track of the strands. Solution: Say the pattern out loud as you go: “Left over, over, under. Right over, over, under.” Also, ensure your starting sections are very distinct. Problem: The braid twists or doesn’t lay flat. Solution: Pay attention to the direction of your “over” moves. They should be flat across the head, not angled. Practice on a hair mannequin or a friend before attempting it on your own head, as the reverse motor skills can be tricky.
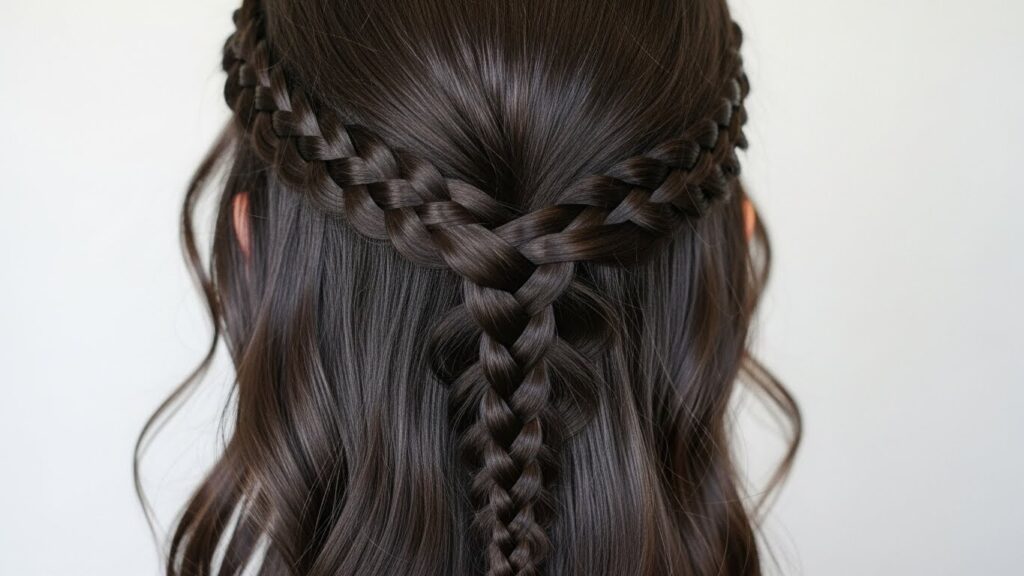
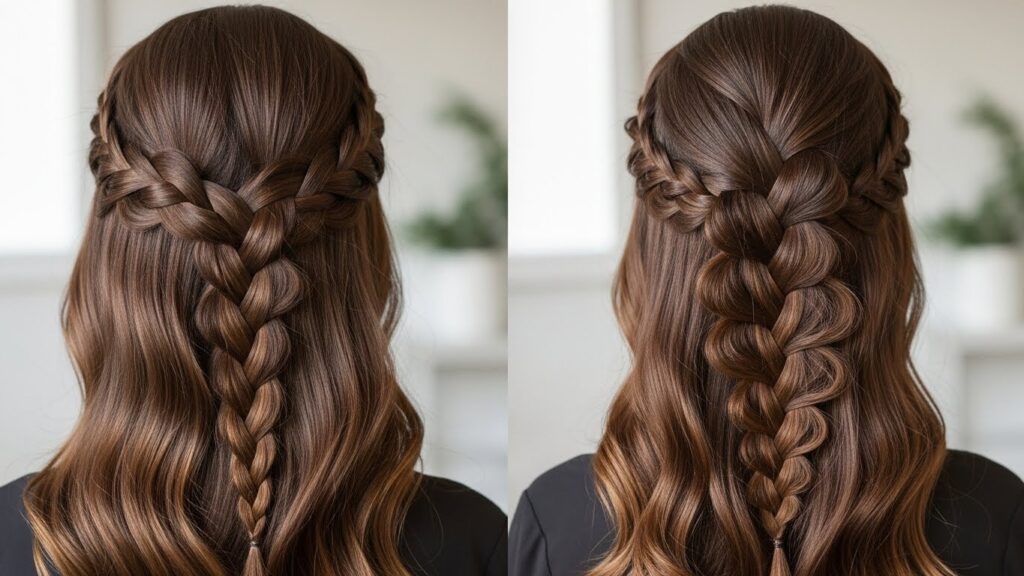
Creative Variations and Hairstyle Inspirations
Now that you’ve conquered the basic technique, it’s time to play! The four-strand braid is incredibly versatile. Try a Four-Strand French Braid by adding small sections of hair to each outer strand as you braid down the head. For a boho vibe, create a four-strand crown braid around your head. You can also use a smaller four-strand braid as an accent piece within a ponytail or bun, or even combine two four-strand braids for a truly epic look. Experiment with different textures—try braiding slightly damp hair for a smoother look, or use heavily textured hair for a romantic, undone feel.

Practice Makes Perfect: Your Path to Mastery
The journey from novice to master is paved with practice. Don’t be discouraged if your first few attempts aren’t Instagram-ready. Practice on a ribbon or yarn to get the hand movements down without the complication of hair. Set aside 10 minutes each day to run through the pattern. As your muscle memory builds, your speed and consistency will improve dramatically. The beauty of mastering a technique like the four-strand braid is that it becomes a permanent skill in your styling arsenal, one that allows you to express creativity and add a touch of intricate beauty to your everyday life.