Glam 20 Nano Fiber Extensions Lightweight Blending Undetectably Fine
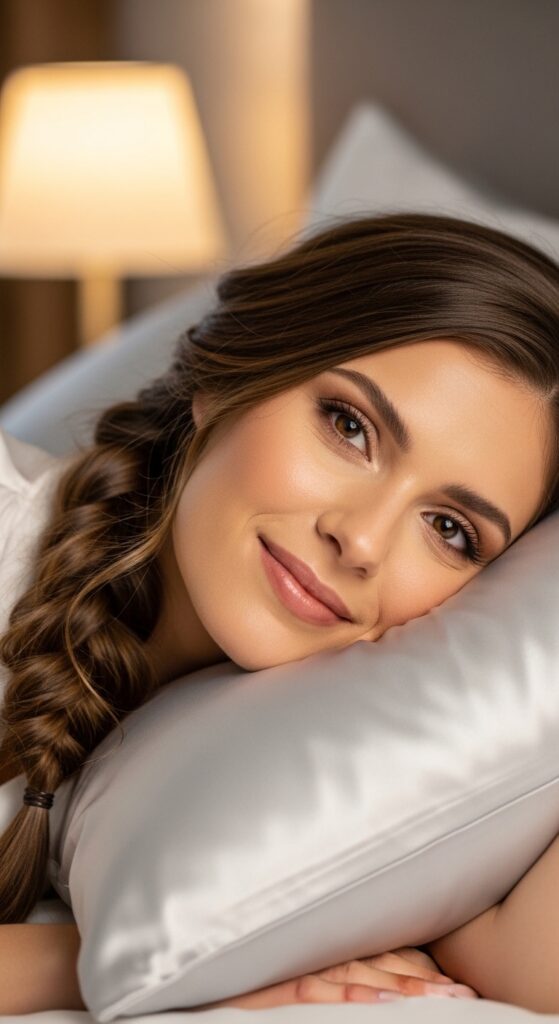
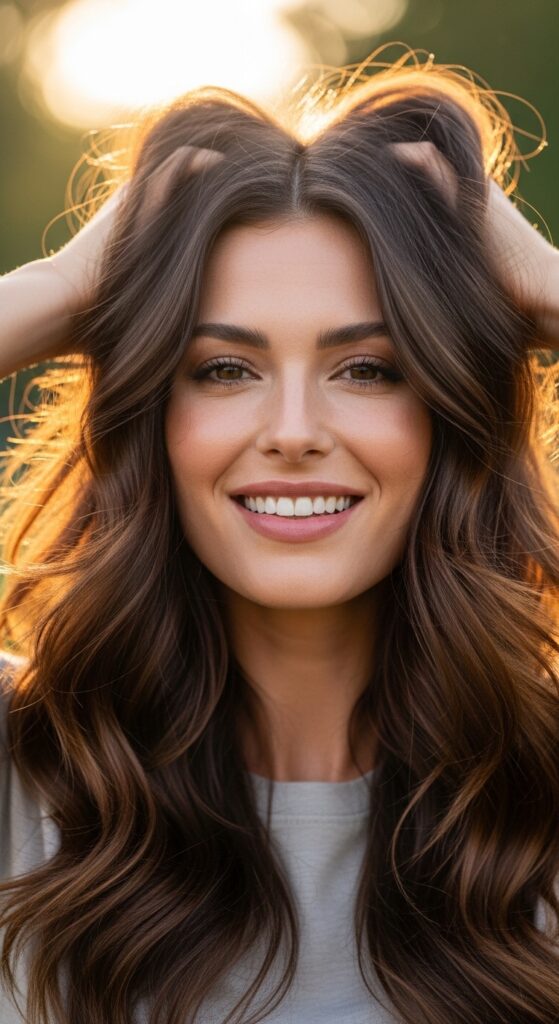
Okay, let’s talk about the hair dream we all share: having that full, luscious, touchable hair that looks like it just… grew that way. No bulky wefts, no obvious tracks, no heavy weight pulling on your scalp. Just pure, seamless volume and length. If you’ve ever tried extensions and felt like they were more trouble than they were worth, I get it. That’s why I had to write about this.
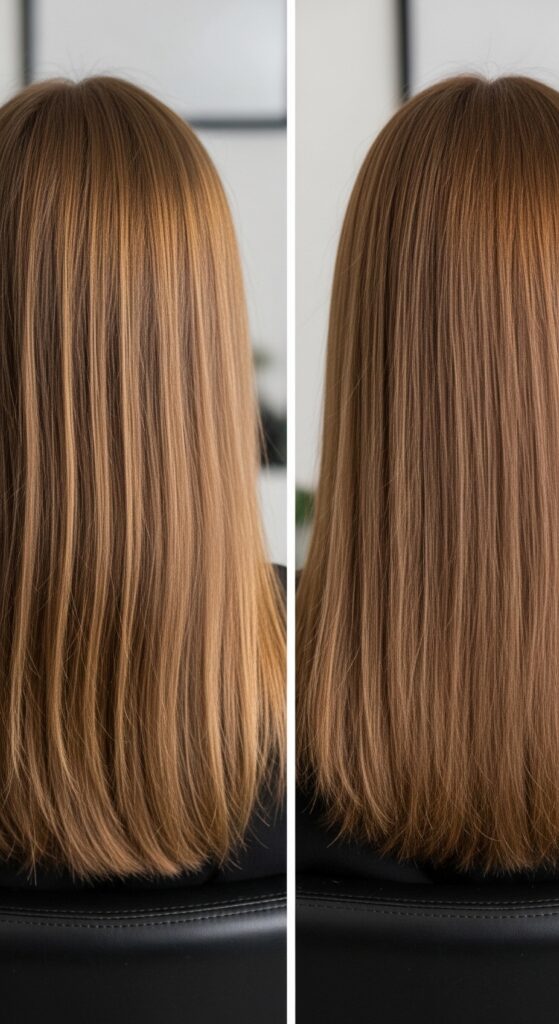
I recently got my hands on the Glam 20 Nano Fiber Extensions, and friends, it’s a different world. The “nano” part is the whole game-changer. We’re talking about the tiniest, most undetectable bonds you can imagine, designed for lightweight blending that feels like your actual hair.
This isn’t about a dramatic, obvious transformation (unless you want that!). It’s about subtle enhancement. It’s the secret behind a lot of those “old money hair” and “quiet luxury bob” looks you’re saving on Pinterest. It’s hair that looks and feels real because it blends so perfectly with your fine strands.
So, if you have fine or thin hair and thought extensions weren’t for you, stick with me. I’m breaking down everything from the initial consult to styling your new, gorgeous hair. This is the practical, no-BS guide I wish I’d had.
What Are Nano Fiber Extensions, Really?
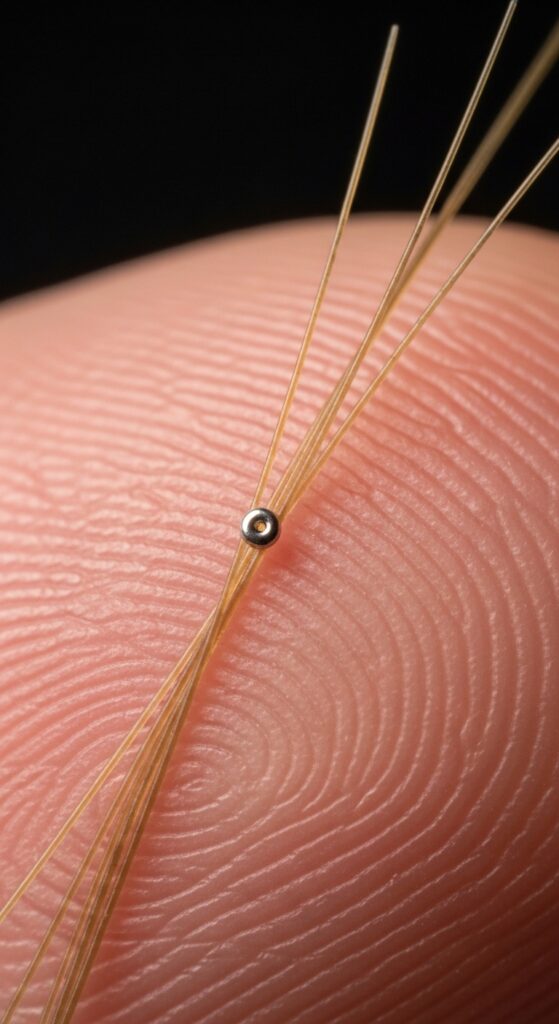
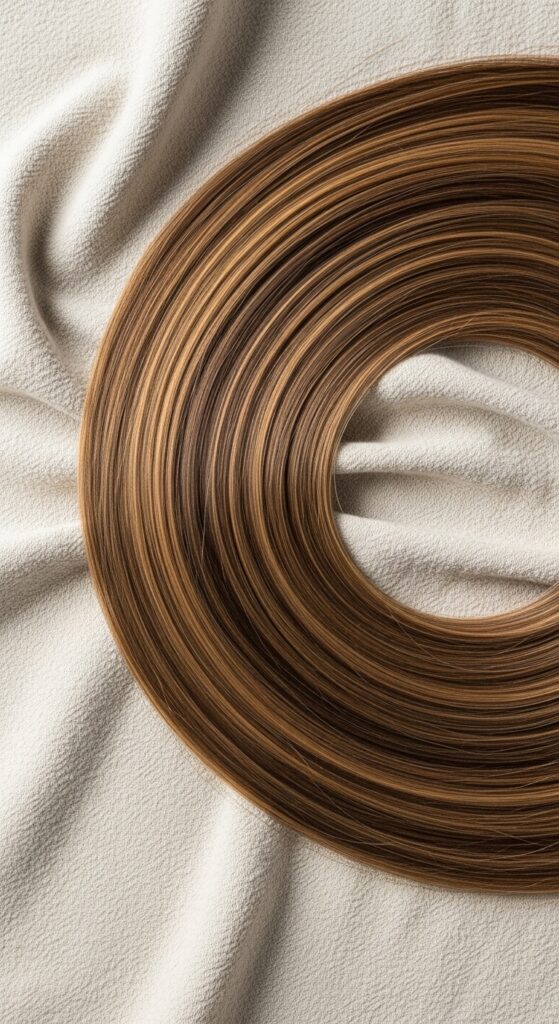
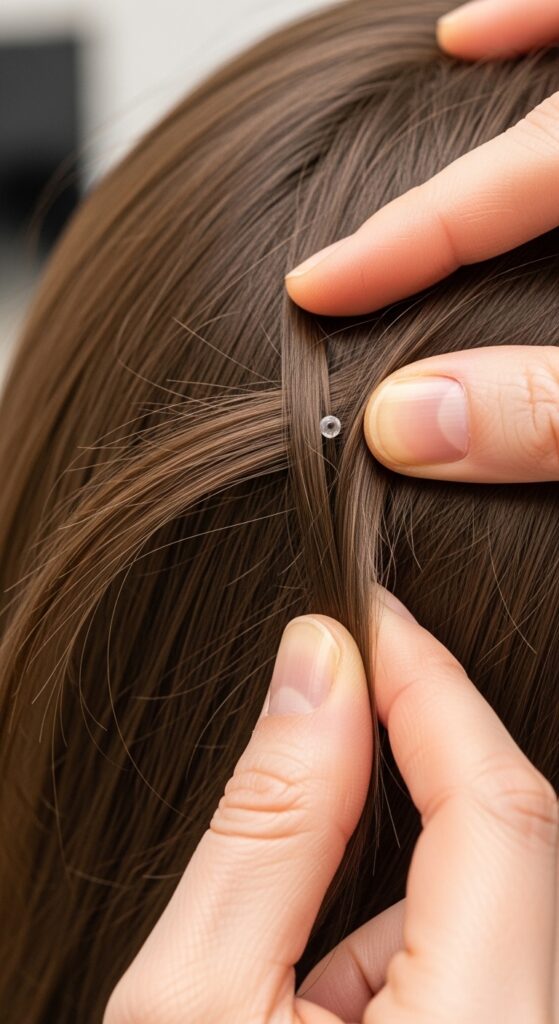
Let’s start with the basics. Nano ring extensions are a type of hair extension where tiny, bead-like bonds are used to attach individual wefts of hair to very small sections of your natural hair. The bond is about the size of a ballpoint pen tip, which is why they call it “nano.”
Compared to traditional methods like tape-ins or larger micro-links, nanos are champions of discretion. They’re designed to lie completely flat against your scalp, hidden within your root volume. This makes them a top pick for anyone wanting that undetectably fine, seamless look, especially if your hair is on the thinner side.
The Glam 20 System: What Makes It Special
The “Glam 20” refers to the specific system and the quality of the hair used. It’s not just about the nano bead; it’s about the hair that comes with it. This is remy human hair, meaning the cuticles are intact and aligned. This prevents tangling and matting, so it behaves just like your bio hair.
The system is designed for maximum comfort and lightweight blending. You get the volume and length without the bulky, heavy feeling that can damage your natural hair over time. It’s built for everyday wear and for creating those effortless 2026 hairstyles we’re all starting to see.
Why They’re a Game-Changer for Fine Hair
If you have fine hair, you know the struggle. Most extensions are made for thicker hair and can look obvious or feel too heavy. They can slip out or cause breakage. Nano fibers are the lightweight solution we’ve been waiting for.
Because the bonds are so small, they can be placed strategically where you need volume most—usually around the crown and framing the face—without weighing down your delicate strands. This creates a natural, full effect from root to tip that looks like you were just blessed with amazing hair genetics.
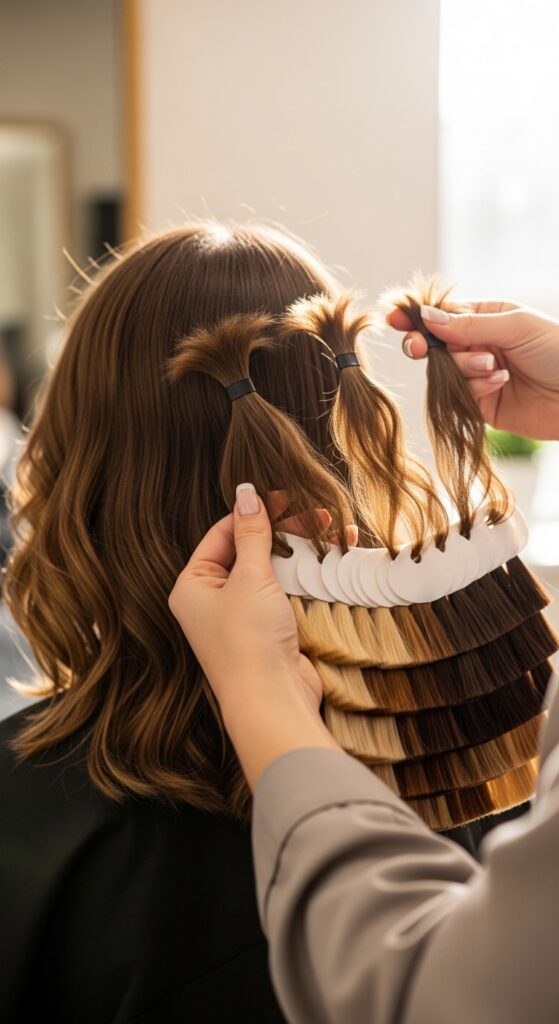
The Consultation: Getting Your Color Match Right
This is the most important step for that “undetectable” promise. A good stylist will take multiple small swatches from different areas of your head because your hair is likely not one solid color. They’ll blend several extension shades to match your natural highlights and lowlights perfectly.
Don’t be afraid to ask for a custom blend. The goal is that when those extensions are in, no one—not even you in bright sunlight—can see where your hair ends and the extensions begin. This is the foundation of any quiet luxury bob or seamless look.
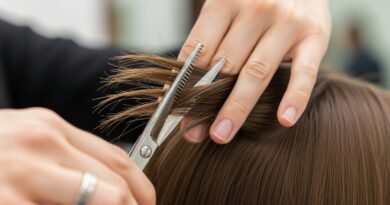
The Installation Process Explained
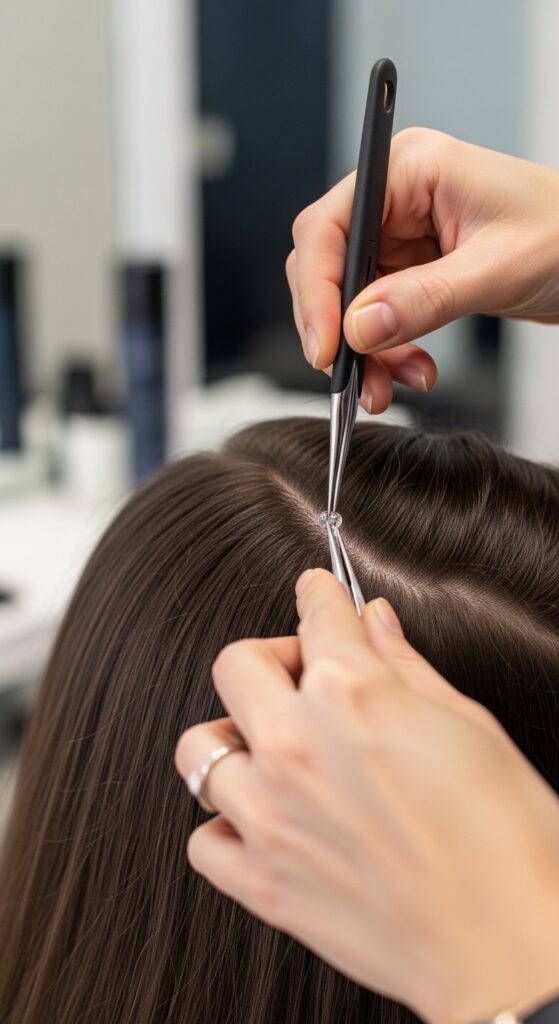
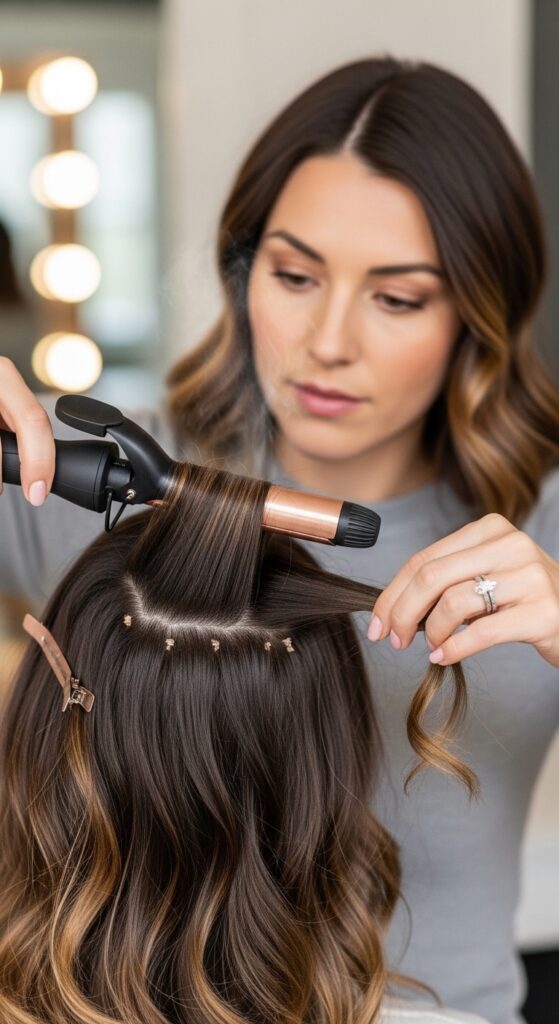
So, what actually happens during the appointment? Your stylist will start by sectioning your hair cleanly. They use a special tool to pull a tiny section of your natural hair through the nano bead. Then, the extension weft is looped and the bead is clamped down securely.
The process is repeated row by row. It does take a few hours, so bring a book or podcast! But the result is worth the time. There’s no heat, glue, or tape involved, which is much gentler on your hair.
Immediate Aftercare: The First 48 Hours
Your scalp might feel a little tender, like you’ve had your hair in a tight ponytail, for a day or two. That’s completely normal. Avoid washing your hair for at least 48 hours to let the bonds settle. Stick to loose, low hairstyles.
Sleeping with your hair in a loose braid or a low ponytail is key. This prevents tangling and reduces any pulling on the bonds while you sleep. Use a silk or satin pillowcase—it’s a game-changer for reducing friction.
Washing Your Hair with Extensions
Wash your hair less frequently—aim for 2-3 times a week. Always use sulfate-free products. In the shower, wash your scalp gently with your fingertips, avoiding rough scrubbing. Let the shampoo rinse down the lengths; don’t pile your hair on top of your head.
Condition from the mid-lengths to the ends, avoiding the root area where the bonds are. Rinse with cool water to help seal the hair cuticles for extra shine. Gently squeeze out water with a microfiber towel; never rub.

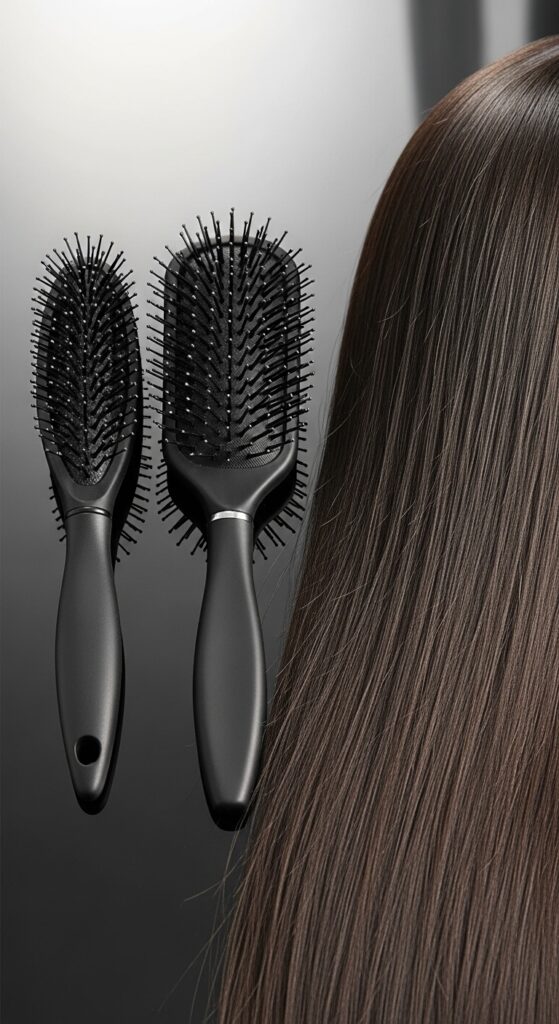
Brushing and Detangling Daily
You need the right tools. A soft-bristle brush or a special extension loop brush is non-negotiable. Start by gently detangling the very ends of your hair. Then, work your way up in small sections, holding the hair at the roots to minimize tension on the bonds.
Brush your hair morning and night to prevent any knots from forming. This simple habit is the best way to keep your extensions (and your natural hair) healthy, smooth, and tangle-free between washes.
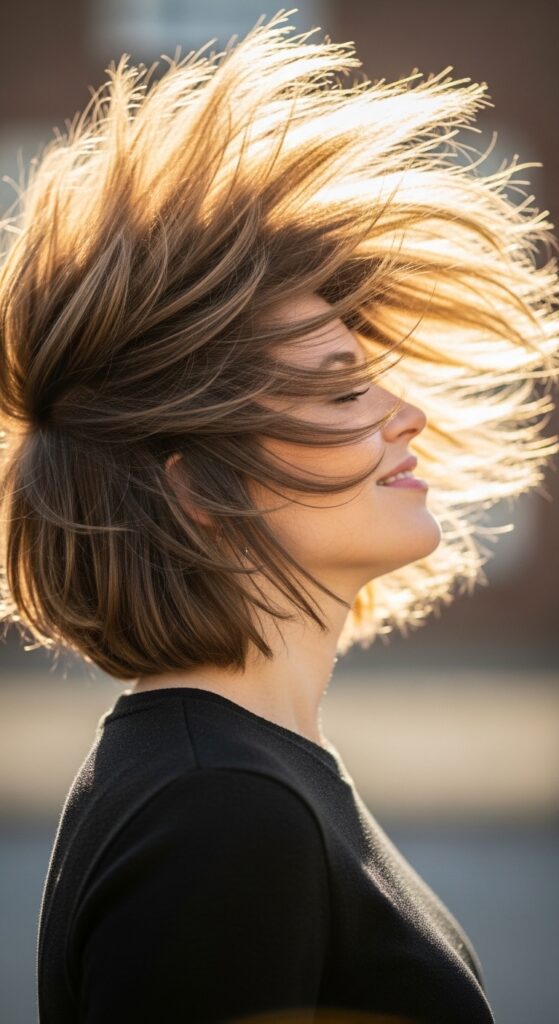
Styling with Heat: Do’s and Don’ts
Yes, you can use heat! This is quality hair. But always, always use a heat protectant spray first. Keep your styling tools (curling irons, straighteners) on a medium heat setting—around 300-350°F is plenty.
Avoid applying direct heat right on the nano bonds. When curling, try to keep the clamp away from the root area. This protects the integrity of the bond and your natural hair. Embrace air-drying for a more natural, lived-in wave too.
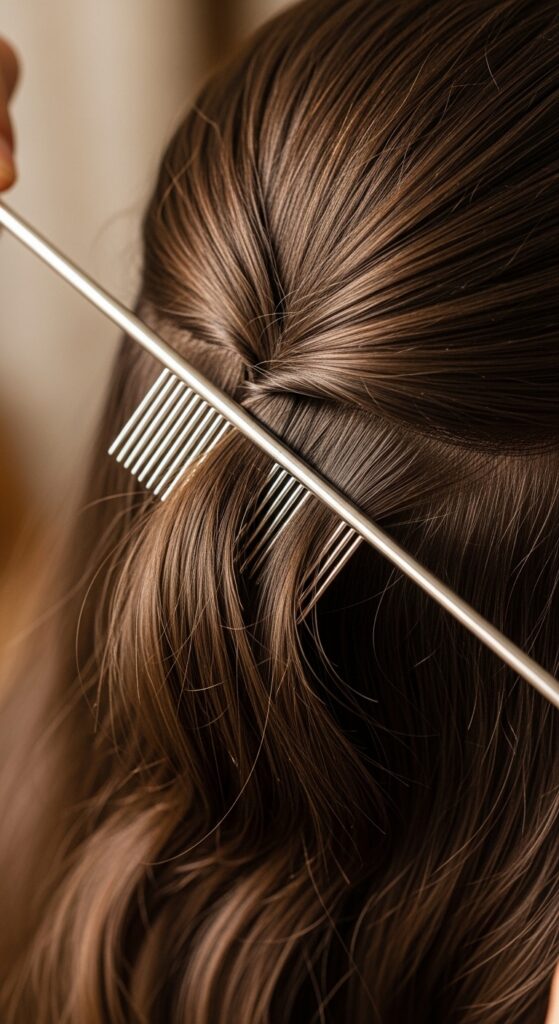
Creating an Undetectable Part
This is where the magic happens. After styling, use the tail of a comb or a pointed brush to gently tease apart your hair where you want your part. Gently backcomb the very top layer of hair at the root for a tiny bit of lift.
This technique helps to cover any beads that might be near the part line. The key is a light touch. You want a soft, natural-looking part that doesn’t look too perfectly lined, which is a hallmark of that old money hair aesthetic.
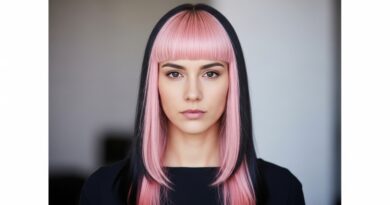
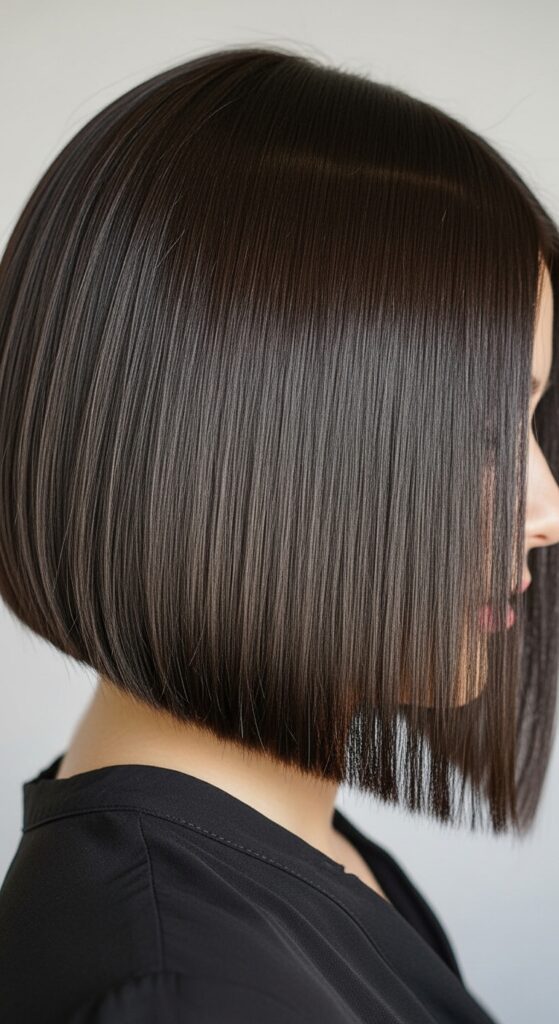
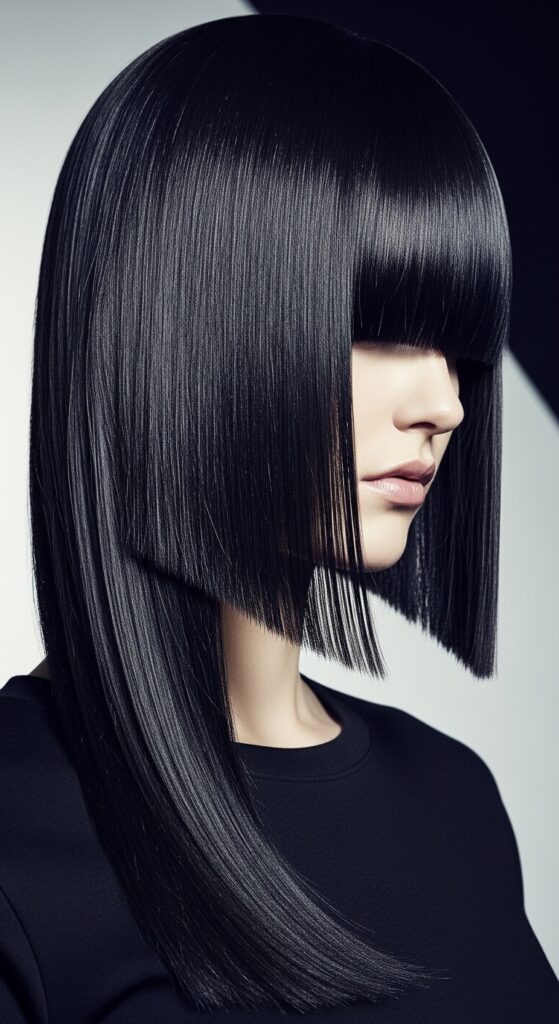
Mastering the “Quiet Luxury Bob”
With the added length and volume from your nanos, achieving that perfect quiet luxury bob is simple. Ask your stylist to cut the extensions to blend into a one-length or slight A-line bob. The goal is impeccable, sharp lines and a glass-like shine.
Style it with a flat iron for a sleek, polished finish. The extensions give you the density needed for that blunt cut to look truly impactful and expensive, without a single strand out of place.
Getting the “Asymmetrical Lob” Just Right
The asymmetrical lob (long bob) is all about playful, modern shape. With extensions providing the canvas, your stylist can cut a dramatic longer-in-front, shorter-in-back style that has the weight and body to hold the shape.
Add loose waves for texture. This style works amazingly with extensions because they give the shorter back section the fullness it needs to balance the longer front, creating that cool-girl edge.
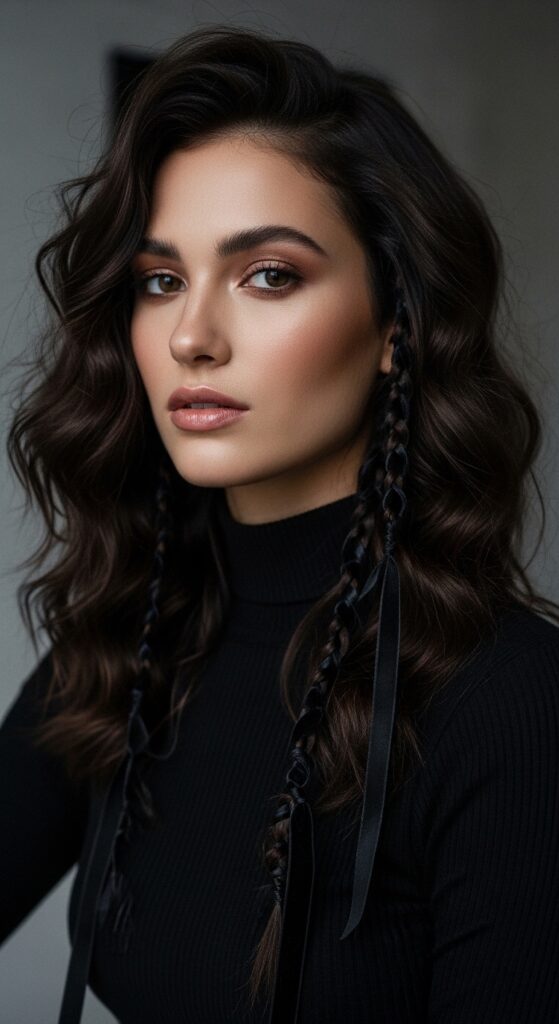
Channeling “Romantic Goth” Vibes
Think less scary, more poetic. Romantic goth hairstyles are all about dark romance and texture. Use your length to create deep, voluminous waves or intricate braids intertwined with thin, velvet ribbons.
Add a deep side part and face-framing pieces. The nano extensions give you the thickness to make braids look full and dramatic, perfect for achieving that soft yet edgy vampire haircut inspiration.
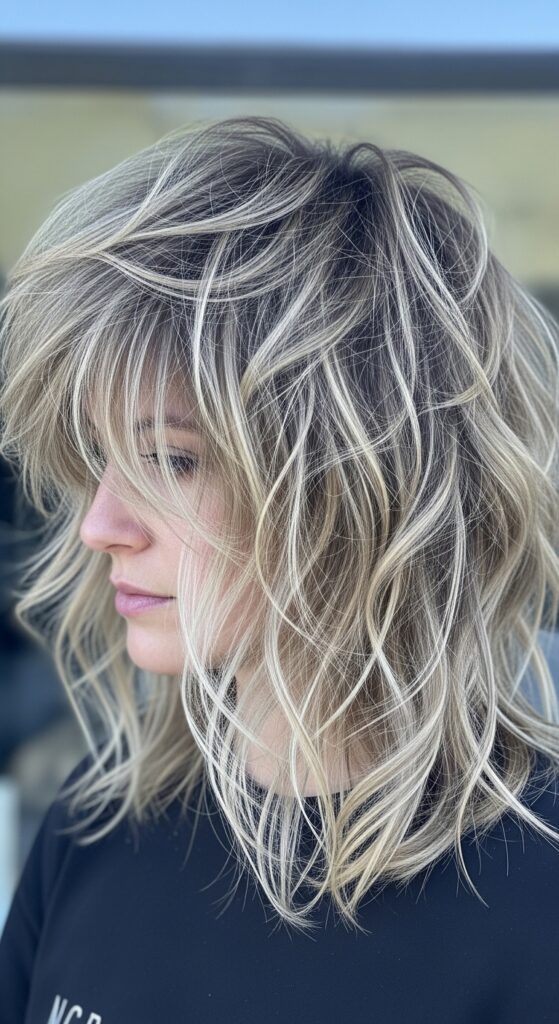
Experimenting with “Glitchy Glam” Texture
Glitchy glam hair is intentionally imperfect and textured. It’s like your hair had a cool, digital error. To get this look, braid small sections of your damp hair overnight. In the morning, unravel them and gently separate the waves with your fingers.
Use a texturizing spray for piece-y definition. The extra length from the extensions makes these braids longer and the resulting waves more pronounced, giving you that artfully messy, high-fashion look.
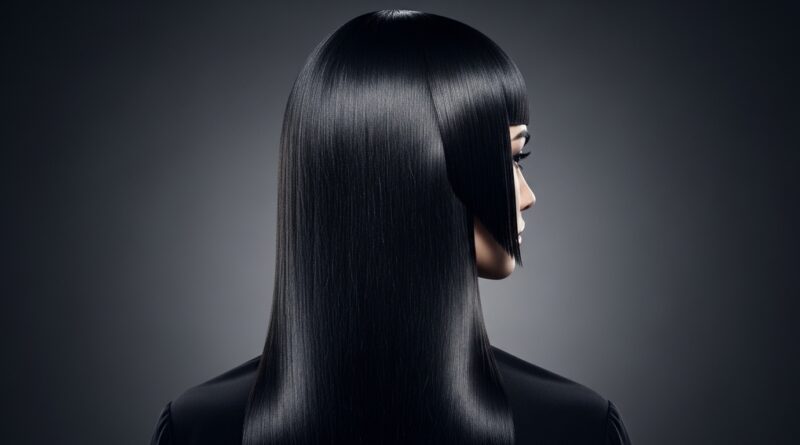
The Elegance of a “Hime Cut”
The hime cut, inspired by historical Japanese princesses, features straight, long hair with dramatic, blunt-cut front pieces. Nano extensions are perfect for this because they provide the flawless, heavy straight hair required.
Your stylist will cut the strong, cheekbone-length front sections from the added hair. This style relies on extreme health and shine, which the high-quality Glam 20 hair delivers beautifully.
Updos and Ponytails Made Easy
Finally, you can have a thick, luxurious ponytail! For a high pony, brush all your hair back gently. Use a bristle brush to smooth the top, but leave it a little soft for a natural look. Secure with a snag-free hair tie.
For updos, loose braids and low buns are your best friends. The extra length and volume make everything look more polished and substantial. Just remember to be gentle when securing the style near the bonds.

Maintenance Appointments: What to Expect
You’ll need a move-up appointment every 6-8 weeks. As your natural hair grows, the bonds will move about an inch away from your scalp. Your stylist will carefully remove each bond and re-attach it closer to the root.
This appointment is quicker than the initial install. It’s crucial for keeping your extensions looking fresh, comfortable, and preventing any tangling with your new growth. Don’t skip it!

Common Problems & How to Fix Them
- Tangling: This usually means you need to brush more often or are using the wrong products. Brush thoroughly before bed and after workouts.
- Slipping: If a bead feels loose, see your stylist. Don’t try to fix it yourself. It usually means the bond wasn’t secured tightly enough.
- Itchy Scalp: Ensure you’re rinsing all product out thoroughly. A clarifying shampoo (on the scalp only) once a month can help.
When to Take a Break & Remove Them
It’s healthy to give your hair a rest every 12-18 months. Continuous wear without a break can put stress on the same areas of your hair. A full removal should always be done by a professional.
During your break, focus on deep conditioning treatments and scalp health. This ensures your natural hair stays strong and healthy, ready for another round of extensions if you choose.

Are They Worth the Investment?
Let’s be real: high-quality nano extensions are an investment. You’re paying for the hair, the skilled installation, and the maintenance. But if you’ve always wanted thicker, longer hair and have fine hair, it can be completely transformative.
Think of it as a semi-permanent style that boosts your confidence daily. For many of us, the ability to wake up and have great hair without a fight is worth every penny. It simplifies your routine in the best way.
My Final, Honest Thoughts
I went into this hoping for more volume, but I got a total confidence boost. The Glam 20 Nano Fibers delivered on the lightweight blending promise. They feel like part of my hair, and the styling versatility is incredible.
If you’re considering them, do your research, find an amazing certified stylist, and be ready to commit to the care routine. It’s not zero maintenance, but it’s practical maintenance that becomes second nature. For me, it’s been a 100% positive change.
So, that’s the full scoop on my experience with Glam 20 Nano Fiber Extensions. It’s not a magic trick, but it’s pretty close—a real-world solution for us fine-haired girls who just want more to work with.
Remember, the best hairstyle is the one that makes you feel the most like yourself, whether that’s a quiet luxury bob or romantic goth waves. The right tools just help you get there faster.
I’d love to hear from you! Have you tried nano extensions? Are you thinking about taking the plunge? Drop your questions or your own tips in the comments below—let’s chat all things hair!
Save this post to Pinterest to keep this guide handy for your consultation or next salon visit!