Gracefully 19 Seamless Lace Front Adjustments Fitting Perfectly Everyday
Hey friend. Let’s talk about the one thing that can make or break your wig game: the fit. That sinking feeling when you’ve got a gorgeous new lace front, but it just doesn’t sit right? We’ve all been there. It feels bulky, it shifts, and you spend the whole day adjusting instead of living your life.
But what if I told you that with a few simple tweaks, you can get that seamless, “is-this-even-a-wig?” fit every single time? No more stress, no more tell-tale signs. Just perfect, effortless hair.
This isn’t about complicated hacks. It’s about smart, everyday adjustments that actually work. I’m sharing my 19 go-to tips for a flawless, comfortable fit that lasts all day. Let’s get your wig looking and feeling like it was made just for you.
1. The Pre-Fit Scalp Prep Is Everything
Think of your scalp as the foundation for a house. If it’s bumpy or oily, everything you put on top will be unstable. A smooth, clean base is non-negotiable for a seamless fit.
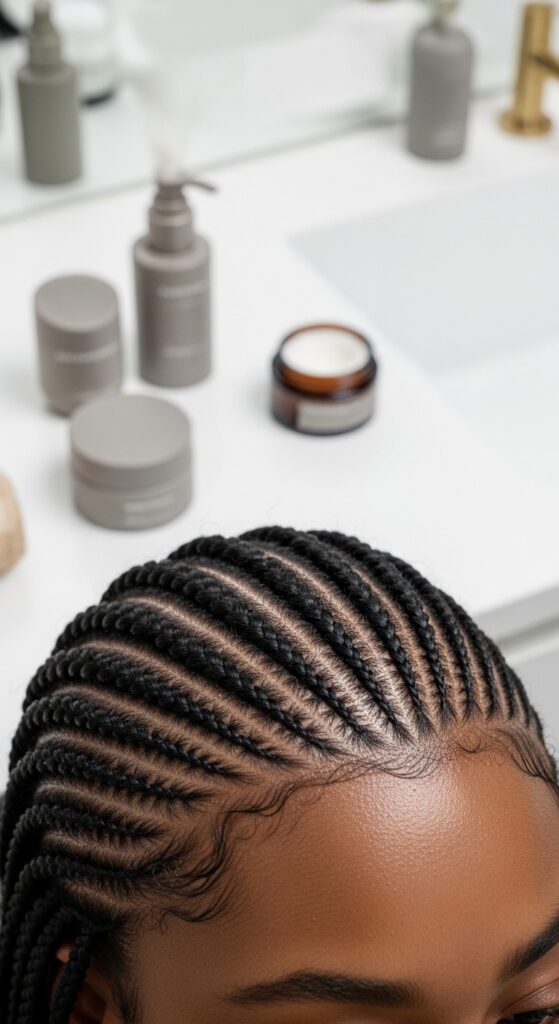
Start with clean, dry hair. If your hair is long, braid it flat or use a wig cap that matches your skin tone. For an even smoother surface, a little moisturizer on your edges can help, but avoid greasy products.
- Wash and thoroughly dry your natural hair.
- Flatten hair with braids, pin curls, or a wig cap.
- Apply a light, non-greasy moisturizer to your hairline.
2. Finding Your True Wig Size Matters

This is the most common mistake! Wigs come in average sizes, but our heads don’t. A wig that’s too tight causes headaches, and one that’s too loose will slide. Take five minutes to measure.
Use a soft tape measure. Go around your head: start at your front hairline, behind your ear, around the nape, and back to the front. Compare to the wig brand’s size chart. Most offer free resizing for a small fee.
3. The Magic of Adjustable Straps
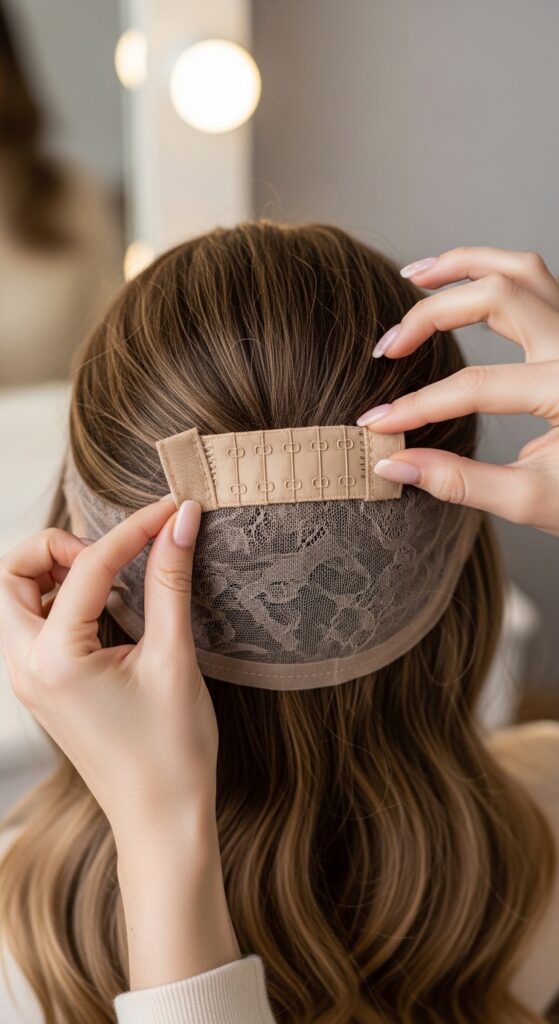
Those little straps at the back are your best friends. They’re there for a reason! Don’t just set them once and forget them. Your head can swell slightly throughout the day due to heat or salt.
Start with them on the loosest setting when you first put the wig on. Once it’s positioned, tighten them just until it feels secure without pressure. You should be able to fit one finger comfortably between the strap and your nape.
4. Securing the Front With Wig Tape
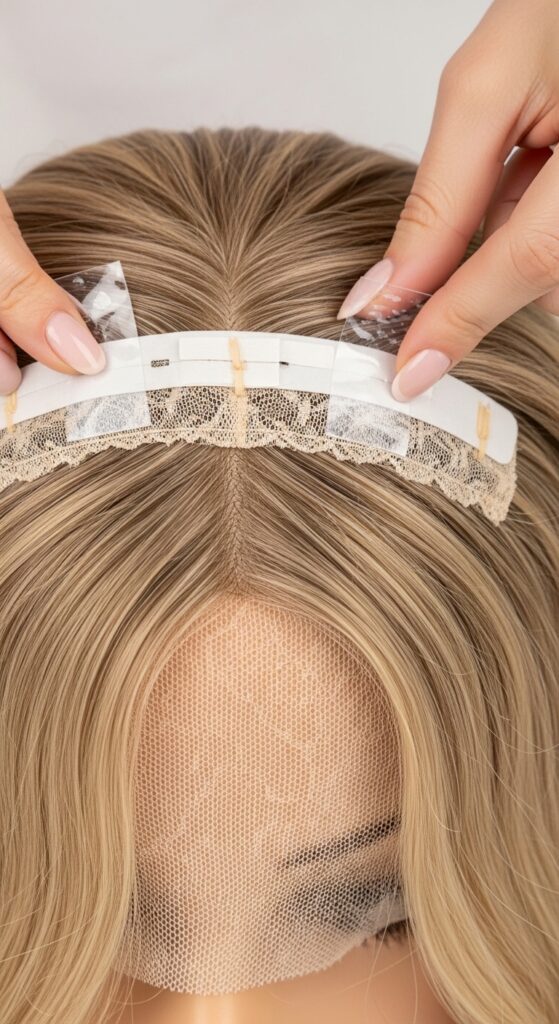
For ultimate security at the hairline, especially for active days, wig tape is a game-changer. It keeps that lace perfectly flat and prevents any lifting. The key is to use it sparingly.
Cut a very thin strip—about half the width of the tape roll. Apply it along the front lace, just behind the hairline. Press firmly. Always apply to a clean, oil-free forehead and lace for the strongest hold.
- Use a thin strip to avoid bulk.
- Apply to clean, dry skin and lace.
- Press and hold for 30 seconds to activate the adhesive.
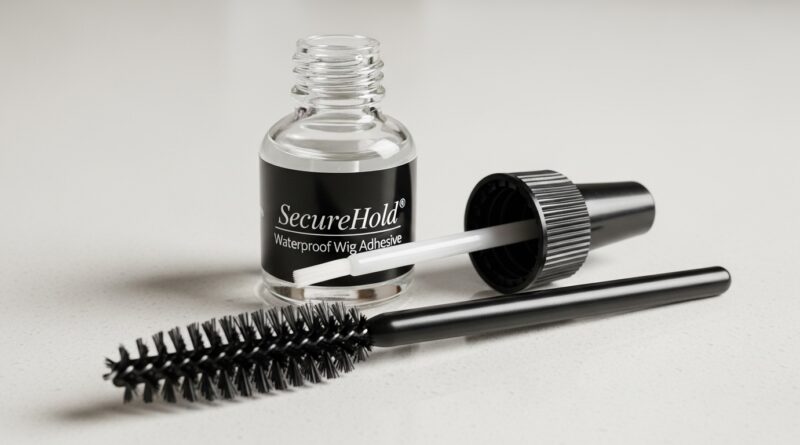
5. The Gentle Power of Wig Glue
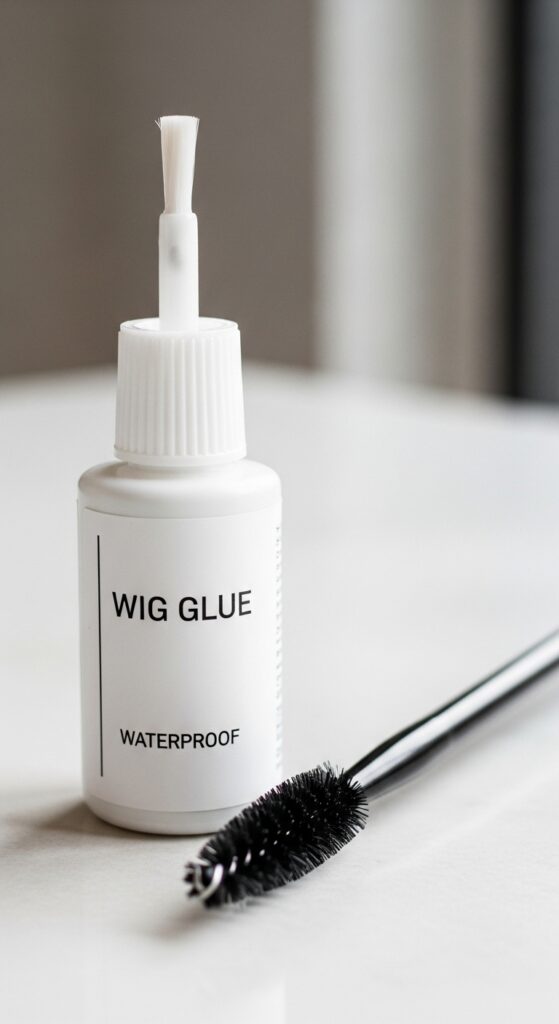
If you need a hold that lasts for days, a good wig glue or adhesive is the answer. This is great for vacations or busy weeks. It creates an undetectable bond when applied correctly.
Apply a thin, even layer to your clean forehead and let it get tacky. Do the same on the clean lace. When both are tacky, press the lace down starting from the center and working outwards. Use a spoolie to blend your baby hairs.
6. Blending Your Baby Hairs Naturally
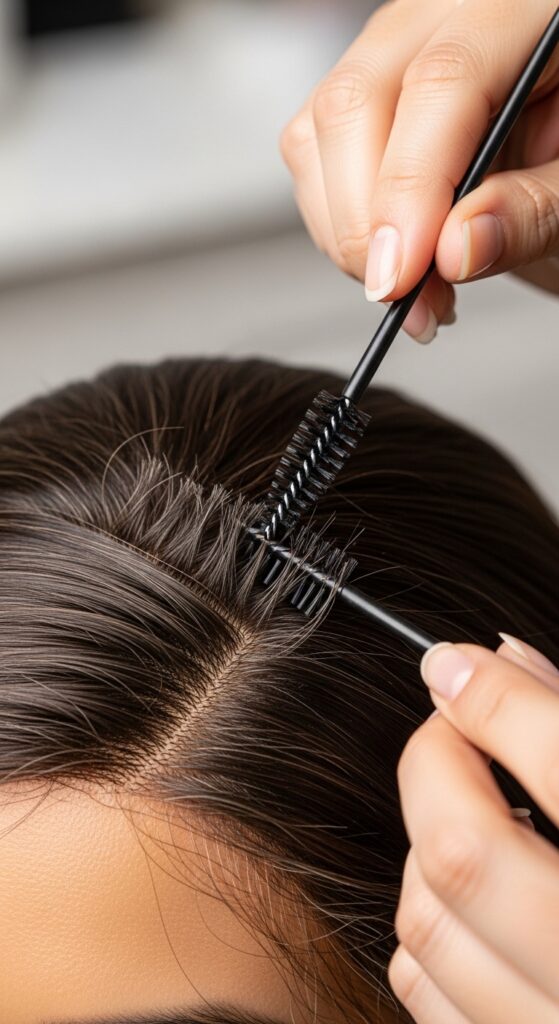
This tiny step makes a huge difference in realism. Most lace fronts come with a “bleached knot” area that can look dense. Pulling out a few hairs softens the transition from your skin to the wig.
Use a pointed tool like a tail comb or a spoolie. Gently tease out tiny, wispy hairs along the front. Style them with a bit of edge control or gel to match your natural pattern. This works for any style, from an old money hair look to romantic goth hairstyles.
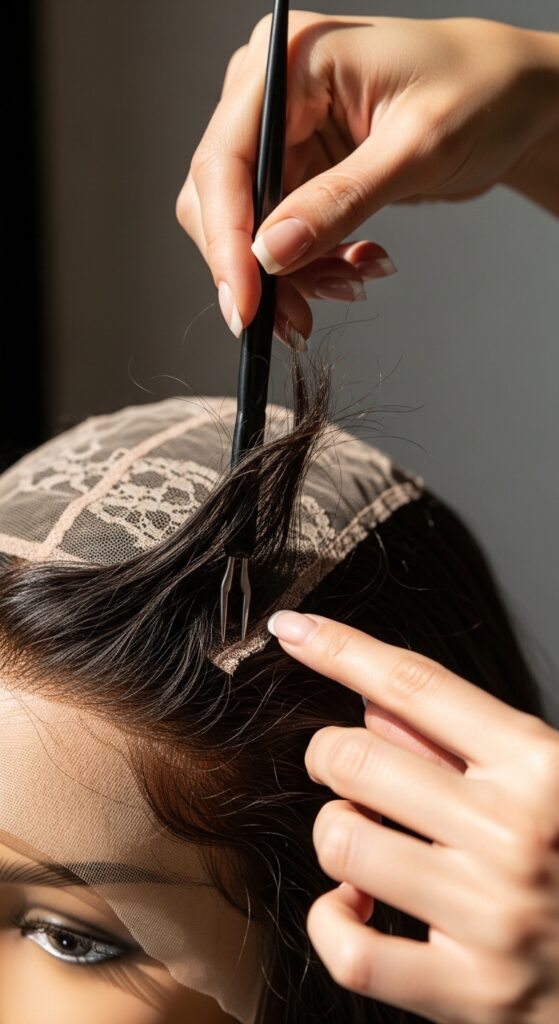
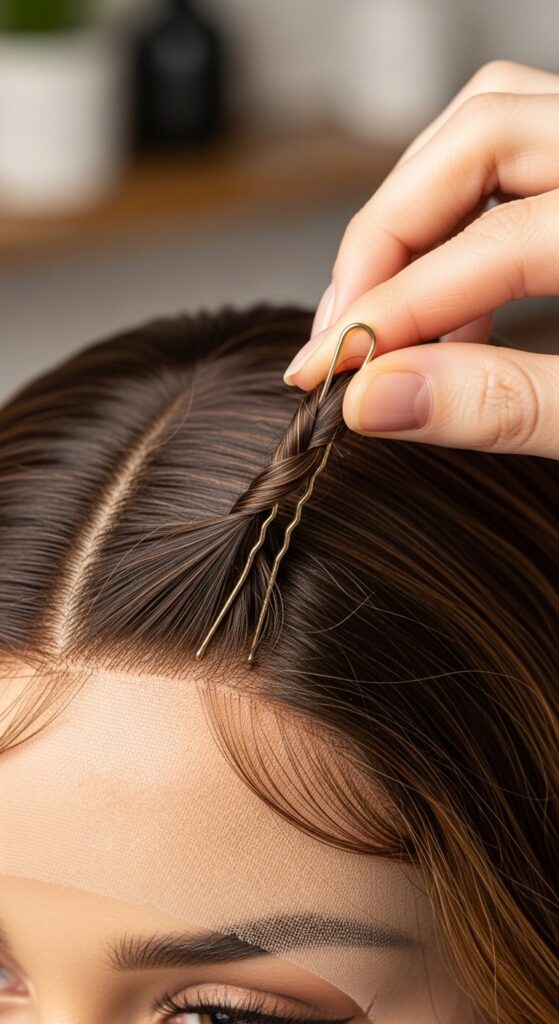
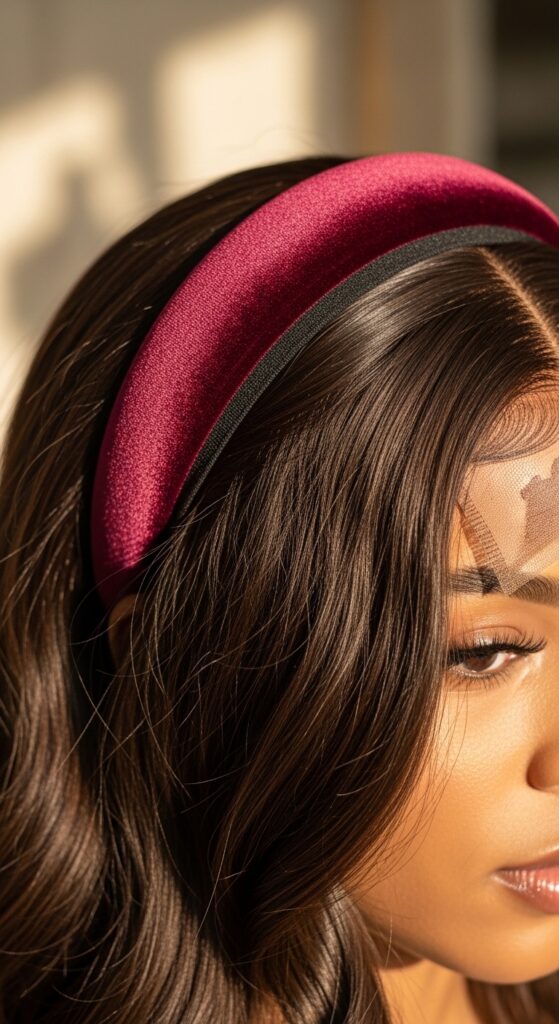
7. Customizing the Lace for Your Hairline
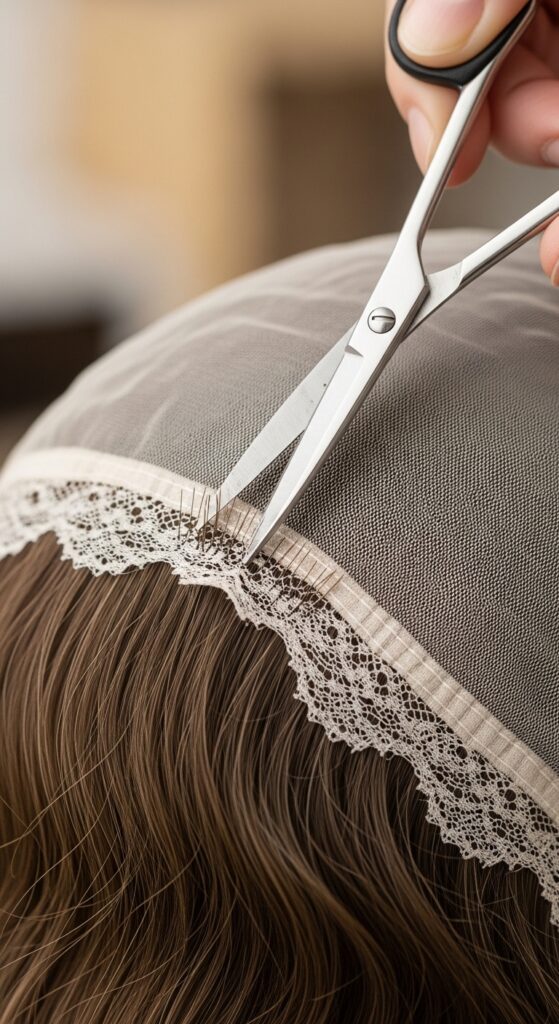
Never wear the lace as it comes out of the box. Trimming it to match your unique hairline is crucial. A straight, factory-cut lace is a dead giveaway. We want an irregular, natural-looking edge.
Put the wig on a mannequin head or your own head. With sharp scissors, trim small, jagged pieces off the lace. Go slowly. Leave about 1/4 inch of lace to lay flat on your skin. Don’t cut the hair itself!
8. Heat Styling for a Flawless Part
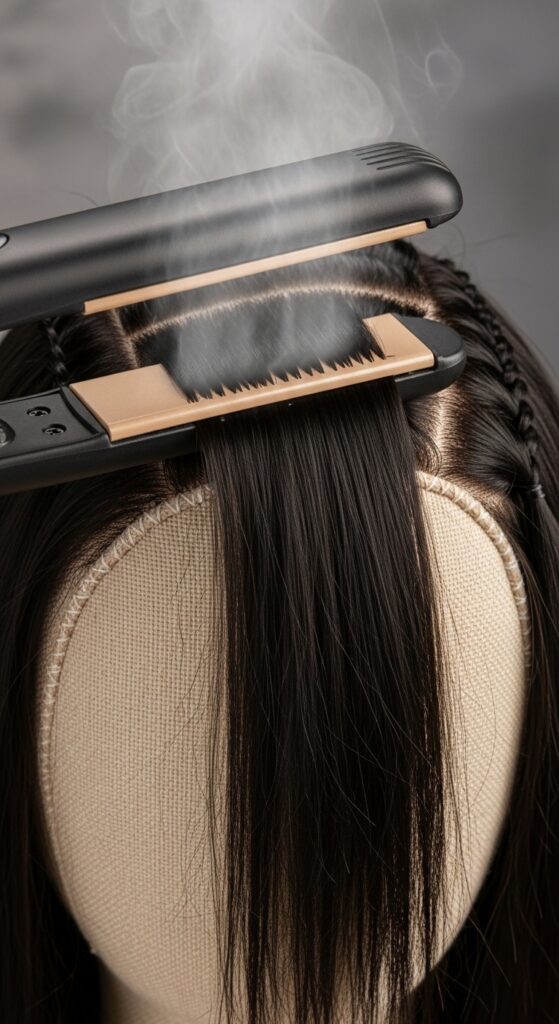
Sometimes the base material around the part can look puffy. A quick hit of heat solves this. It melts the fibers slightly, allowing the part to sit flat and look more like a natural scalp.
Set your flat iron to a low heat setting (around 250°F). Gently clamp the iron over the part area for 2-3 seconds. Use a pressing cloth if you’re nervous. This creates a stunning, realistic part for styles like the quiet luxury bob.
9. Using Got2b Glued for a Quick Fix
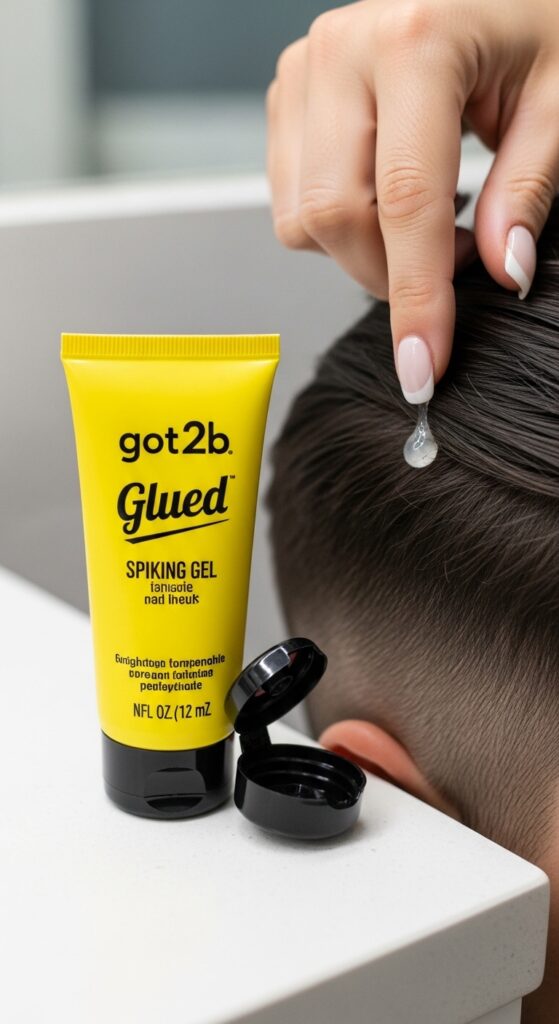
This is my favorite budget-friendly, quick-hold secret. It’s a styling gel that works like a charm for short-term wear. It’s easy to apply, holds well, and washes off with just water.
Apply a thin line of the gel along your hairline. Let it get slightly tacky. Press the lace into it and hold. Use a damp cloth to clean any excess. Perfect for when you want to try a bold 2026 hairstyles trend for a night out without commitment.
10. The Ponytail Test for Secure Fit
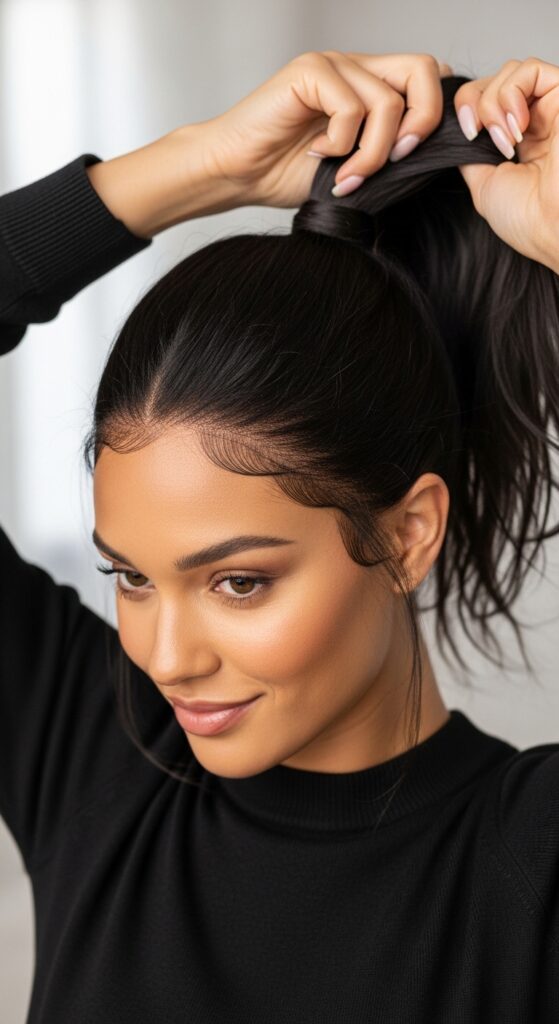
Can you put your hair up without the whole wig moving? That’s the ultimate test. If your fit passes this, you’ve nailed it. It means the perimeter is secure and the tension is evenly distributed.
After applying your wig, gently gather the hair into a ponytail. The wig should not lift at the nape or the temples. If it does, check your strap tightness and front adhesive. This security is key for active styles or a sleek asymmetrical lob.
11. Combating the “Bulky Temple” Look
Many wigs are densest at the temples, which can create an unnatural, bulky shape. Thinning this area slightly makes the wig look more like it’s growing from your scalp. It frames your face beautifully.
Use a comb to isolate a small section at the temple. With thinning shears or carefully with regular scissors, point-cut into the ends of the hair to remove some weight. Less is more. You can always take more off later.
12. Setting Your Style With Cool Air
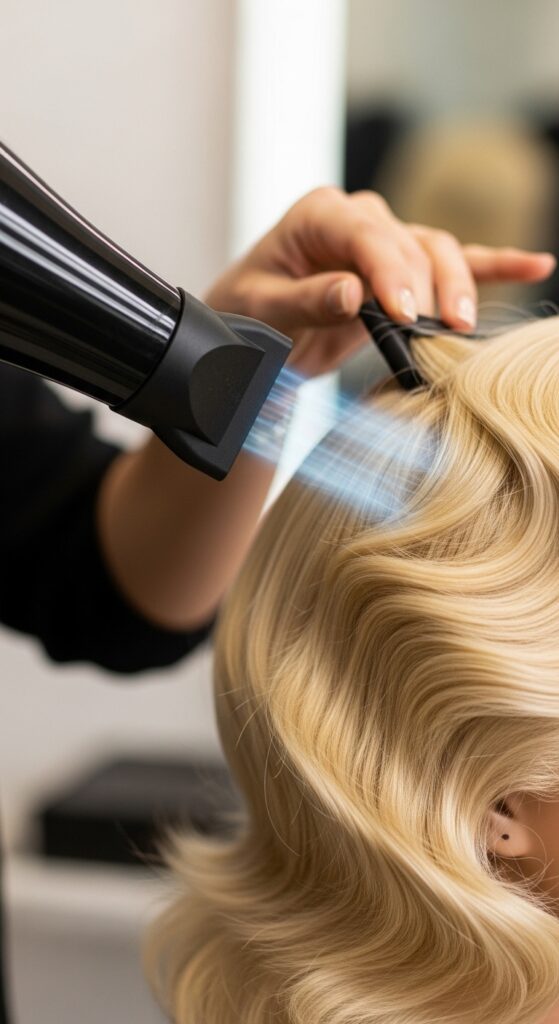
After you’ve styled your wig—whether it’s curls or a sleek look—lock it in. Using the cool setting on your blow dryer sets the style and helps reduce any frizz caused by friction or adjustment.
Once you’re happy with the style, flip your head over and blast the roots and lengths with cool air for a minute. This helps the fibers “remember” their shape. It’s the final touch for polished looks like the glitchy glam hair texture.
13. Daily Dust-Off for a Fresh Look
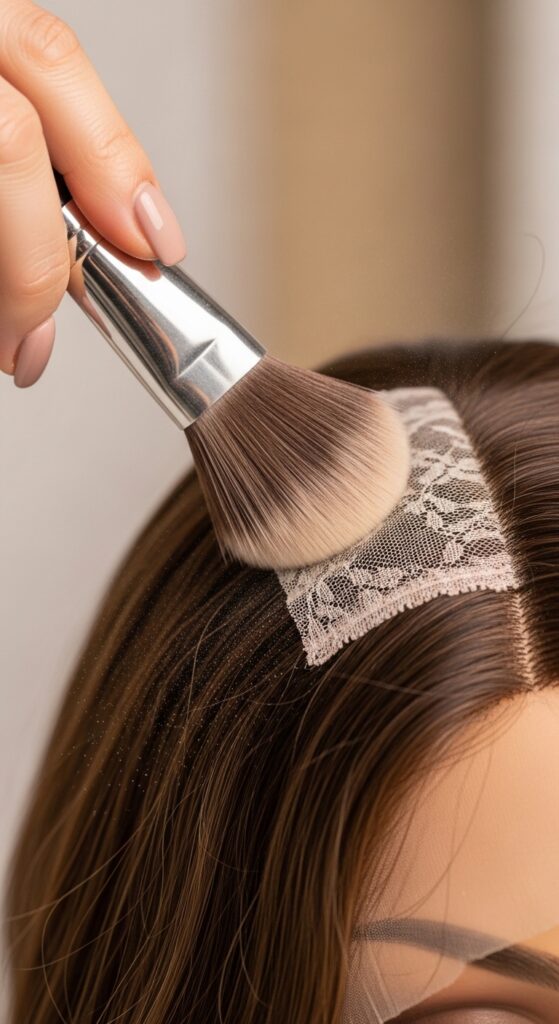
Throughout the day, dust and makeup can settle on the part and hairline, making it look dull or ashy. A quick 30-second refresh makes it look brand new again. Keep a tool in your bag.
Use a clean, soft makeup brush or a spare toothbrush dedicated to your wigs. Gently brush away any debris from the part and hairline. This instantly revives the color and makes the scalp look realistic.
14. The Right Wig Cap Color for You
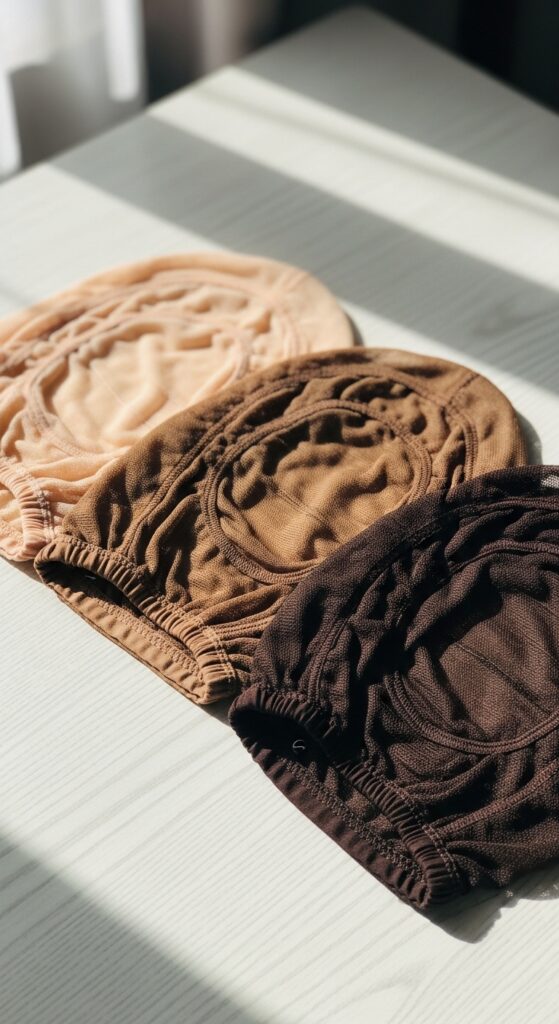
If you use a wig cap, its color matters more than you think. A cap that contrasts with your skin tone can create a shadow under the lace, breaking the illusion. We want it to disappear.
Match the cap to your scalp color, not your face foundation shade. Test it against your skin in natural light. The right color makes the lace blend seamlessly, especially for delicate styles like the hime cut with its straight-across bangs.
15. Storing Your Wig to Keep Its Shape
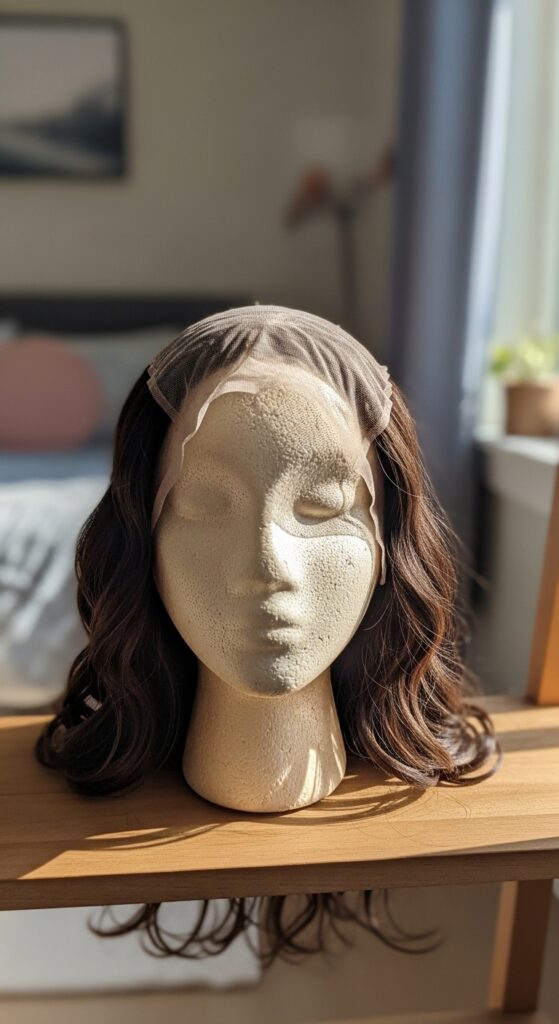
How you store your wig directly affects how it fits next time. Throwing it in a drawer will flatten the cap and tangle the hair, making it harder to get a smooth fit. Proper storage saves you time.
Always keep it on a wig stand or mannequin head. This preserves the cap’s shape and the hairstyle. Cover it with a hair net to keep dust off. A well-kept wig is easier to put on perfectly every single time.
16. Managing Sweat and Oil Build-Up

Let’s be real—our scalps sweat. Under a wig, that moisture can loosen adhesive and make the cap slip. Managing this keeps your fit secure and fresh from morning to night.
Use an antiperspirant wipe on your hairline before application. Throughout the day, a light dusting of translucent powder on your forehead can absorb oil. For the wig itself, a little dry shampoo at the roots absorbs any moisture.
17. Adjusting for Different Hairstyle Trends
Different trending styles need different fitting approaches. A sleek bob needs a flawless front, while a textured vampire haircut might allow for a slightly more undone hairline. Think about your final look.
For sleek styles, focus on strong adhesive and a perfectly flat lace. For textured, voluminous styles, you can be a bit more relaxed. Use the texture to hide the lace slightly. Always fit the wig with the final style in mind.
18. The “Wig Grip” Band Secret
If you have sensitivity to adhesives or just want a no-mess option, a wig grip is a lifesaver. It’s a velvet or silicone headband that grips your natural hair and the wig cap, preventing slippage.
Place the wig grip around your head over your flattened hair. Then, put your wig on over it. The grip holds the wig securely while the velvet is gentle on your skin. It’s the most comfortable option for all-day wear.
19. Knowing When to Take a Break

Your natural scalp health is the most important thing. A perfect fit also means knowing when to give your skin a breather. This prevents irritation and keeps your hairline healthy for the long term.
Listen to your skin. If it feels itchy or tender, take a day off. Use that time to deep condition your natural hair and moisturize your scalp. A healthy base will always make your wigs look and feel better.
20. Your Confidence Is the Best Accessory
At the end of the day, the most seamless adjustment is in your mindset. When you know your wig is secure and looks great, you carry yourself differently. That confidence shines brighter than any hairstyle.
Practice these tips until they become second nature. The goal isn’t perfection, but ease. When you stop worrying about your hair, you can truly own any look, from boardroom chic to weekend casual. That’s the real magic.
And there you have it, friend. Nineteen little secrets that add up to one big win: a wig that feels like a second skin. It might seem like a lot at first, but you’ll quickly find your own favorite two or three steps that work perfectly for your routine.
The beauty of this is freedom. When your hair is effortlessly taken care of, you have so much more mental space for everything else. You can rock that asymmetrical lob on a Tuesday just because it feels right.
Save this post to Pinterest so you always have your fitting checklist handy! Which tip are you most excited to try first? Let me know in the comments below—I love hearing what works for you.