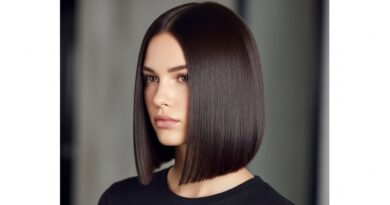
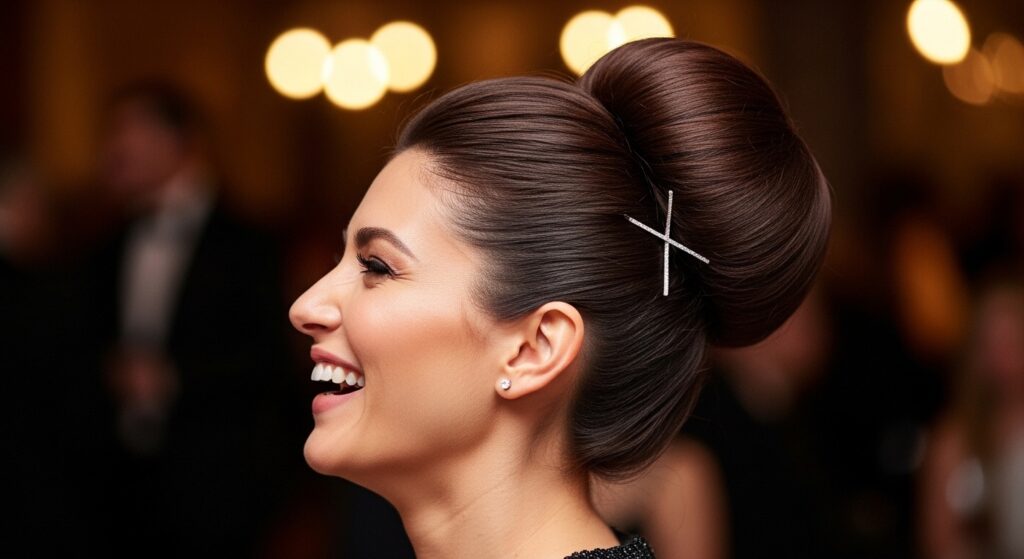
Hacks 11 Donut Bun Stuffing Achieving Fullness Without Extensions
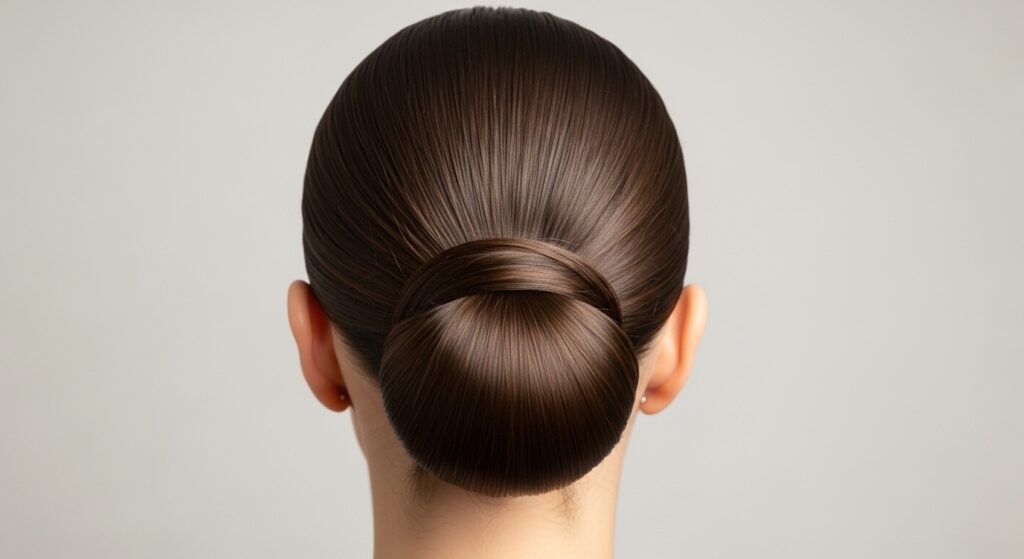
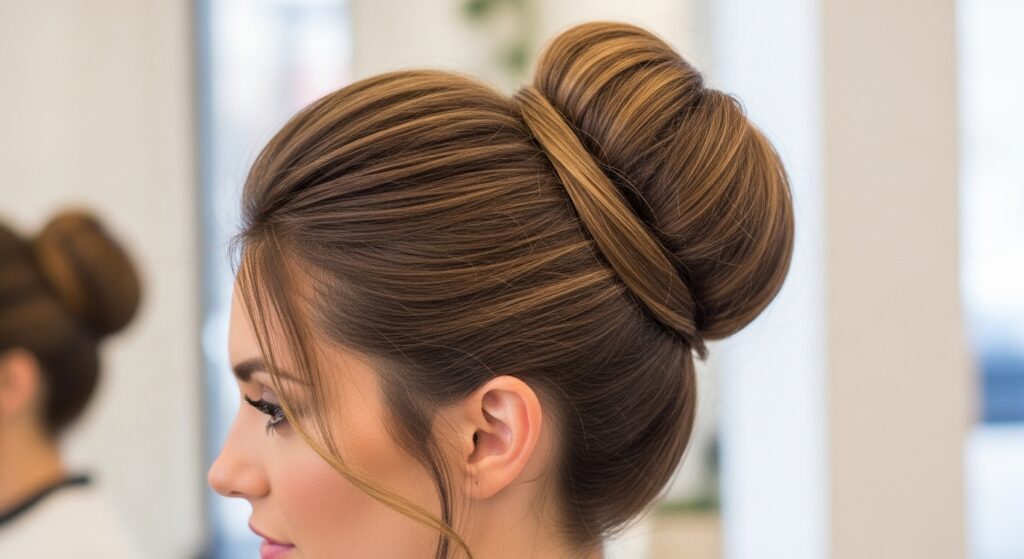
Okay, let’s talk about the donut bun. It’s that classic, elegant updo we all love for looking put-together in two minutes flat. But if your hair is fine, thin, or just doesn’t have the volume you crave, that little foam donut can feel a bit… deflating. You end up with a sad, flat bun that screams “I tried” instead of the full, luxurious look you were going for.
I’ve been there. For years, I thought I just couldn’t achieve that gorgeous, full bun without expensive extensions or a ton of backcombing (hello, damage!). But then I started playing with some seriously simple stuffing hacks. Game. Changer.
This isn’t about adding more hair. It’s about working smarter with what you’ve got. I’m sharing my top 11 hacks to stuff that donut bun so it looks impossibly full, thick, and expensive. These are my go-to secrets for instant fullness that lasts all day. Let’s get into it.
1. The Sock Bun Secret: Your First Upgrade
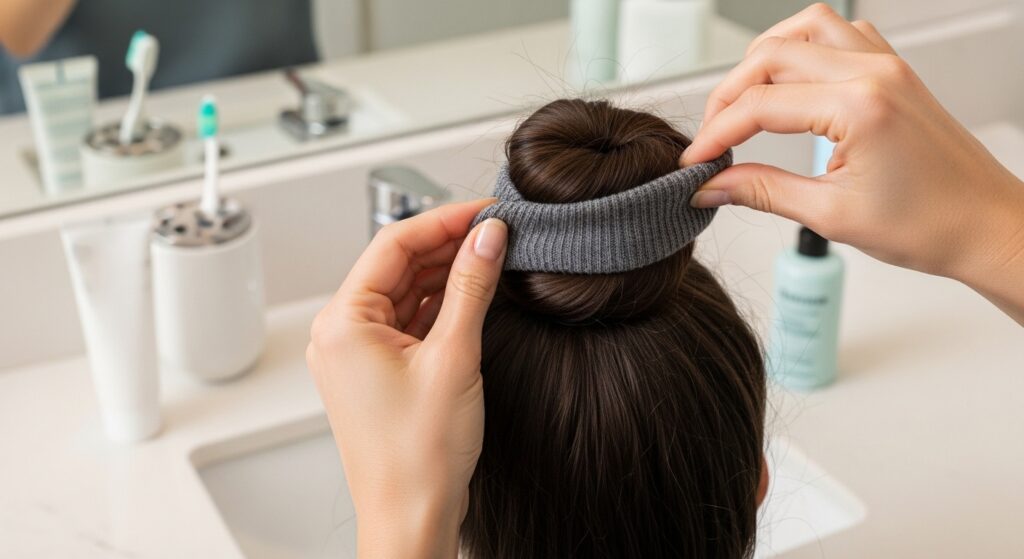
Before we even get to stuffing, let’s rethink the donut itself. Sometimes, the classic foam ring is too rigid. For a softer, more malleable base, make a bun from a sock. Yes, a sock!
Cut the toe off a clean, old sock (ankle socks are perfect) and roll it into a doughnut shape. This creates a base that’s easier to manipulate and stuff because it’s more forgiving than foam. It’s the perfect starter hack for a fuller-looking foundation.
2. Create a Teasing Backbone First
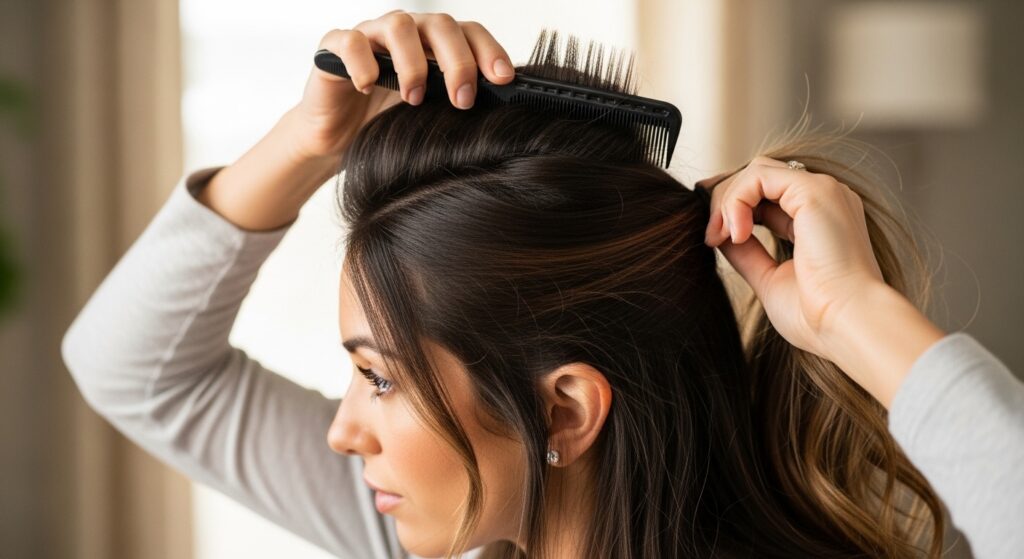
Fullness starts at the roots. Before you even put your hair in a ponytail, lightly tease the hair at the crown. We’re not talking 80s big hair—just a little grit for lift.
Focus on the section that will wrap over the bun. This creates a “backbone” of volume that your styled hair will sit over. It makes the final bun look taller and more supported, giving you that coveted, lifted silhouette.
3. The Ponytail Placement is Everything
Where you place your ponytail dictates everything. For a classic, full look, position it where you want the center of your bun to be. This is usually at the crown of your head.
Avoid placing it too high for a balanced look. A mid-height ponytail gives you enough length to wrap around the donut completely, which is key for covering all the stuffing and creating a seamless, thick appearance.
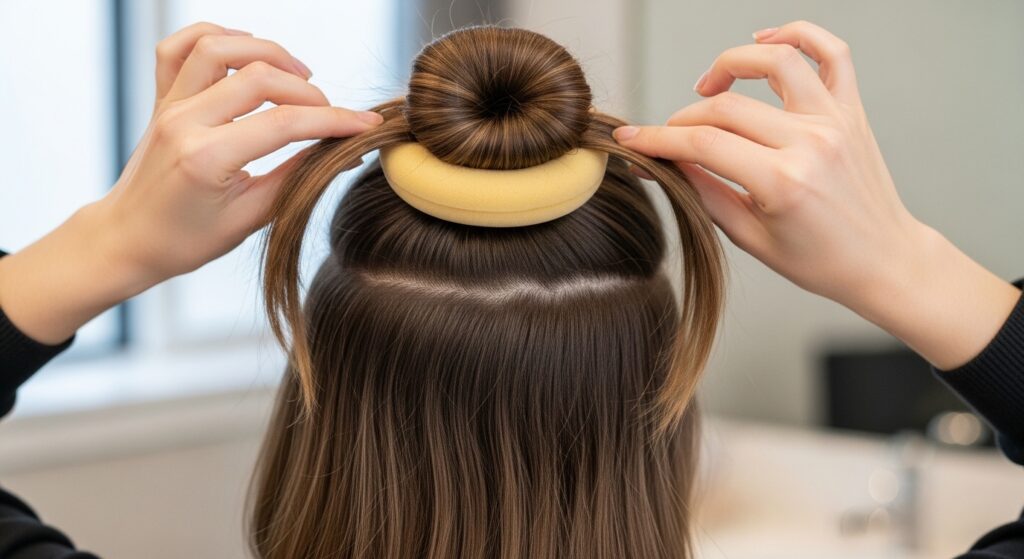
4. Stuff With Tissue Paper for Instant Bulk
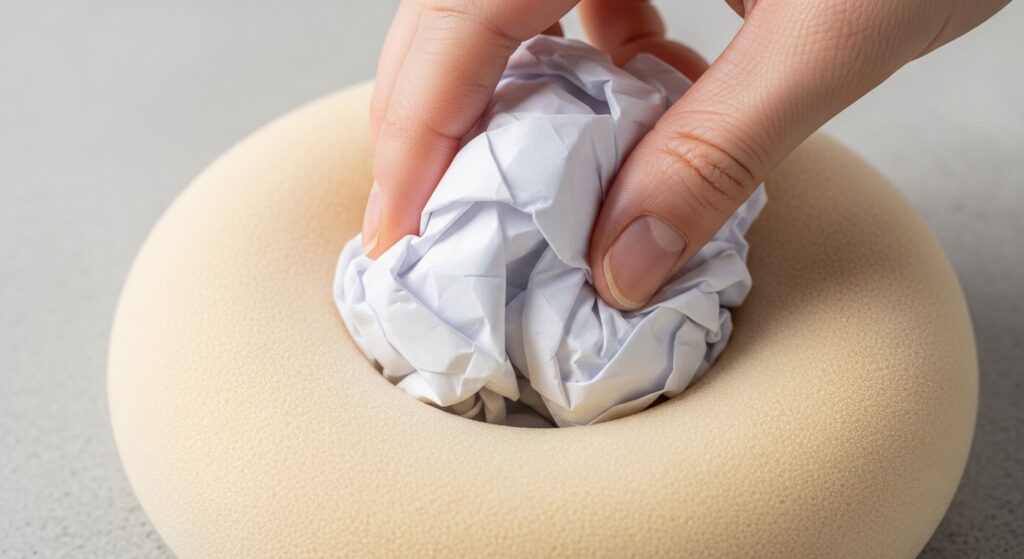
This is the ultimate quick fix. Before you put the donut on your ponytail, take a sheet or two of matte tissue paper. Crumple it loosely and stuff it into the center hole of the donut.
This instantly plumps up the donut from the inside, making it wider and giving your hair more to wrap around. It’s lightweight, so it won’t drag your hair down, but it adds serious visual volume the second you put it on.
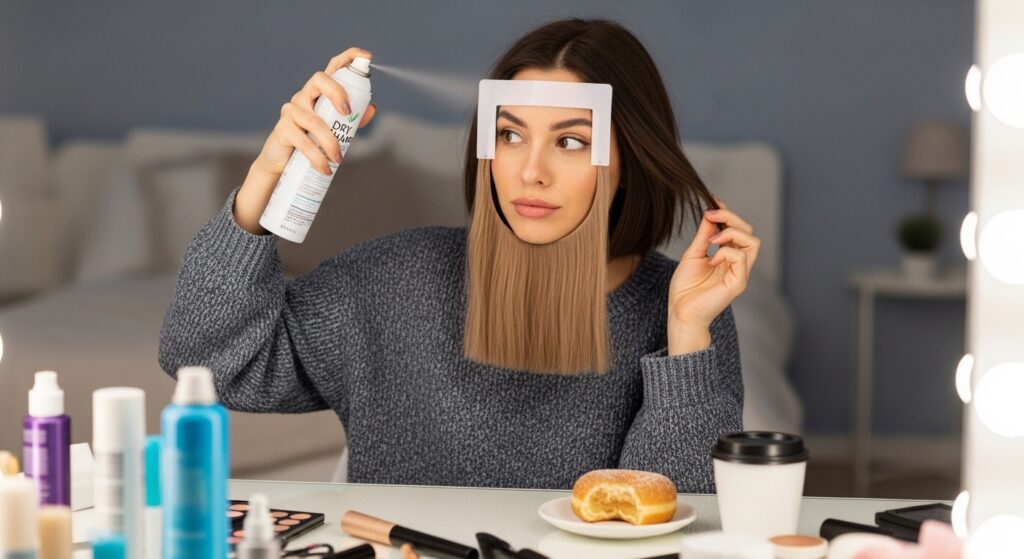
5. Use Dry Shampoo for Grip & Texture
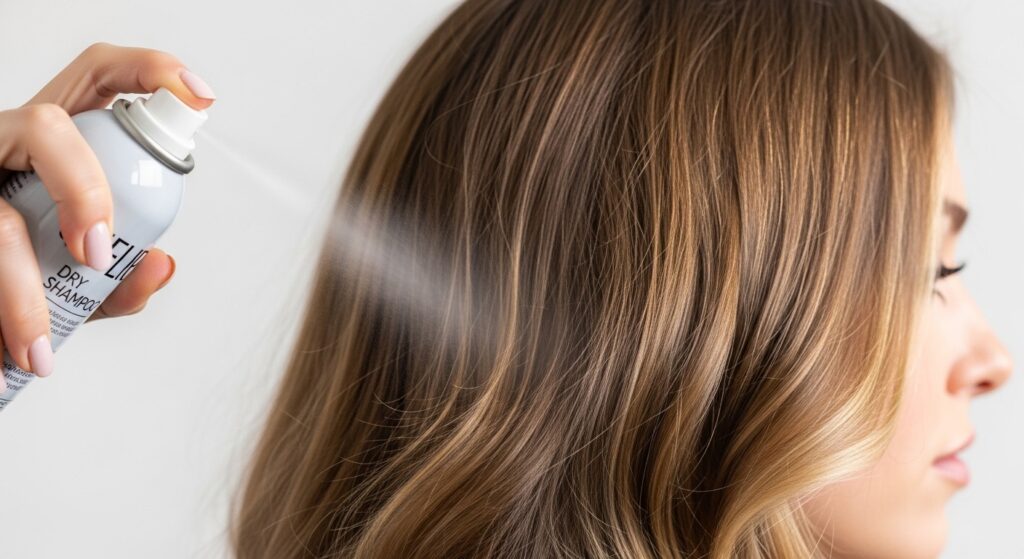
Fine, silky hair slips right out of buns. The solution? Dry shampoo is your best friend. Spray it at the roots of your ponytail and along the lengths before you start styling.
It adds that perfect amount of grit and texture, giving the hair something to hold onto. This helps every strand stick in place as you wrap it, preventing gaps and creating a much denser, fuller-looking bun. It’s a non-negotiable step for me.
6. The “Pancake” Your Hair Technique
Once your hair is wrapped around the donut and secured with bobby pins, don’t stop there. Gently grab the sides of the wrapped hair and pull it outward, like you’re “pancaking” it.
This flattens the hair against the donut, making it wider and covering more surface area. It transforms a skinny, wrapped bun into a full, disc-like shape. Just be gentle so you don’t pull it all the way out!
7. Bobby Pin in a Cross-Lock Pattern
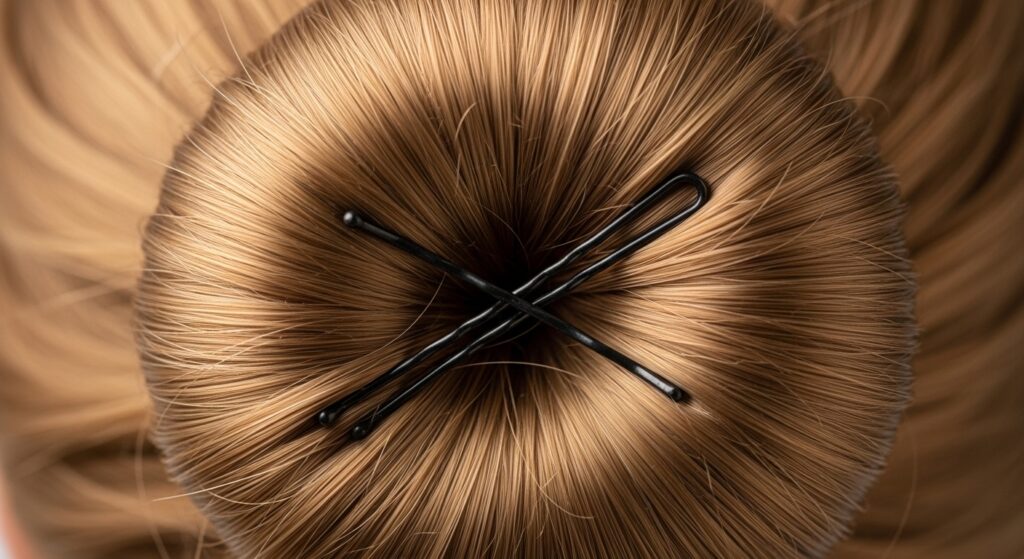
Securing your bun properly keeps it full all day. Don’t just poke bobby pins in randomly. Insert them in a cross-lock pattern. Slide one pin in one direction, then take another and slide it in the opposite direction, forming an “X”.
This technique locks the hair to the donut and to itself much more securely than pins placed parallel. A secure bun won’t sag or loosen, which means the fullness you created stays put from your morning coffee until dinner.
8. Hide Gaps With a Strategic Hair Tie
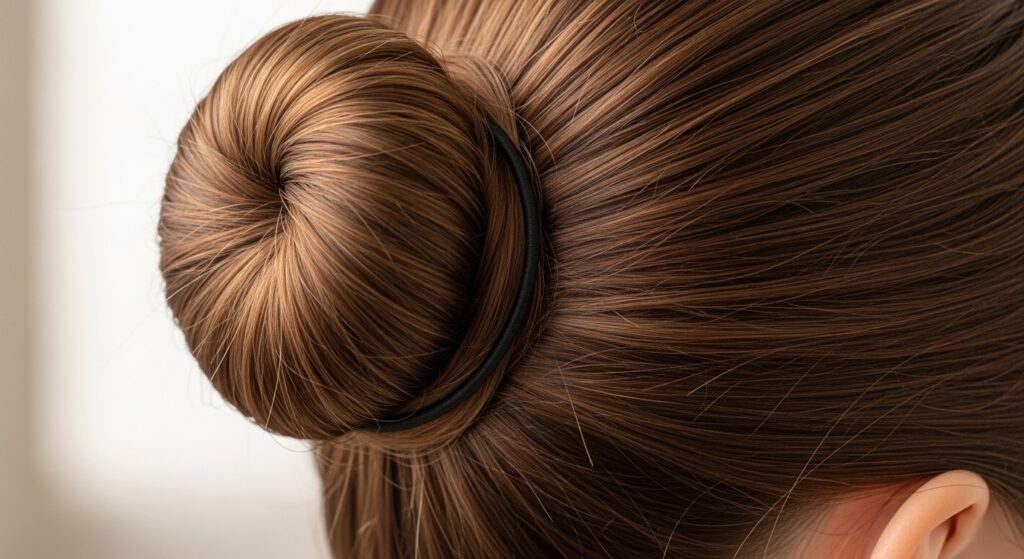
Sometimes, a small gap or loose section appears at the base of your ponytail after wrapping. Instead of redoing the whole thing, use a tiny, clear elastic. Simply wrap it around the base of the bun where the gap is.
This pulls everything tight and smooth, hiding any holes instantly. Then, you can take a tiny section of loose hair from underneath and wrap it around the elastic to conceal it completely. It’s a seamless save.
9. Leave Out a Face-Framing Section
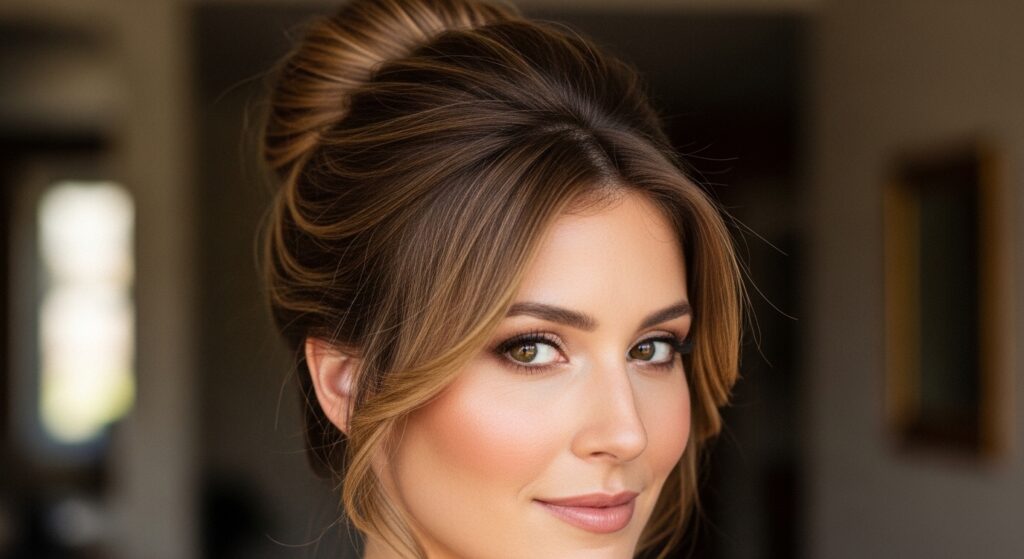
Leaving out a few face-framing pieces does two things. First, it’s soft and romantic, giving off those romantic goth hairstyles or old money hair vibes. Second, it’s a practical volume trick.
By not pulling every single hair super tight into the ponytail, you allow for natural volume around your face. These pieces can be lightly curled or tucked later, adding to the overall illusion of abundant, lush hair.
10. Tuck & Roll, Don’t Just Wrap

Instead of just wrapping your ponytail around the donut, try a tuck-and-roll method. Separate your ponytail into two sections. Tuck the ends of the bottom section up into the center of the donut.
Then, take the top section and roll it over the donut. This creates layers of hair over the base, adding depth and thickness. It’s a more advanced wrap that results in a bun that looks intricately full, not just wrapped.
11. The Final Hairspray Cloud Method
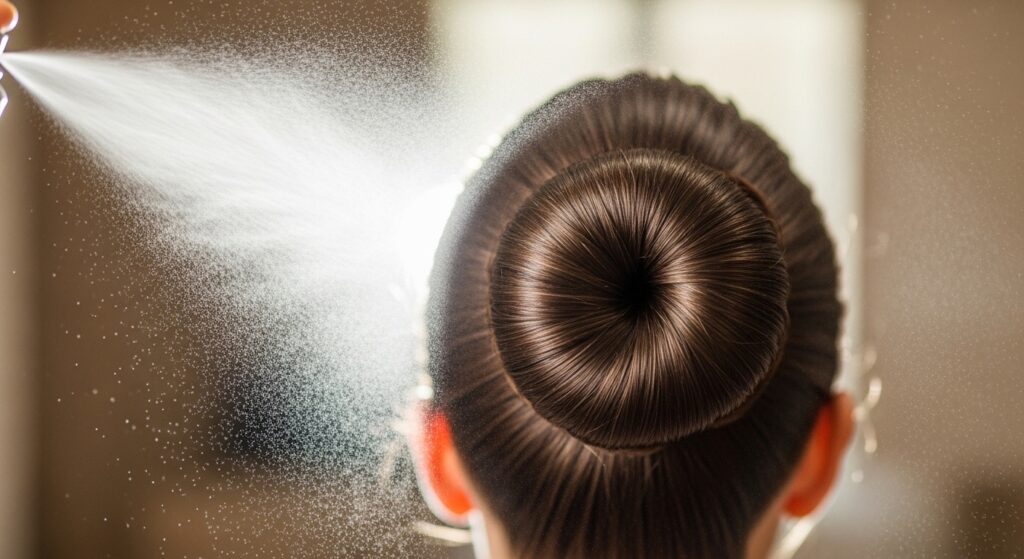
To set everything without flattening it, use the “cloud” method. Hold your hairspray can about 10-12 inches away from your bun. Spray a light, misty cloud of hairspray over the entire style.
Let it settle gently over the bun. This provides hold without any wetness or crunch that could weigh down the texture and volume you just worked so hard to create. It’s the perfect finishing touch.
How to Make It Last All Day & Night
You’ve built this beautiful, full bun—let’s make it stay. After the initial style, do a quick check after 30 minutes. Sometimes hair settles. Gently pancake any sections that have flattened and add a pin or two if needed.
Carry a few extra bobby pins and a travel hairspray. A quick midday touch-up with the cloud method will lock it back in place. This is how you go from a day bun to an elegant evening look effortlessly.
Adapting This for Short Hair (Yes, It’s Possible!)
If you have a quiet luxury bob or an asymmetrical lob, you can still do this. Use a mini hair donut. Create a half-up ponytail with just your top section.
Follow the same stuffing and wrapping techniques. The result will be a cute, full mini-bun or a twisted knot at the crown. It adds instant polish and volume to shorter 2026 hairstyles, proving length isn’t everything.
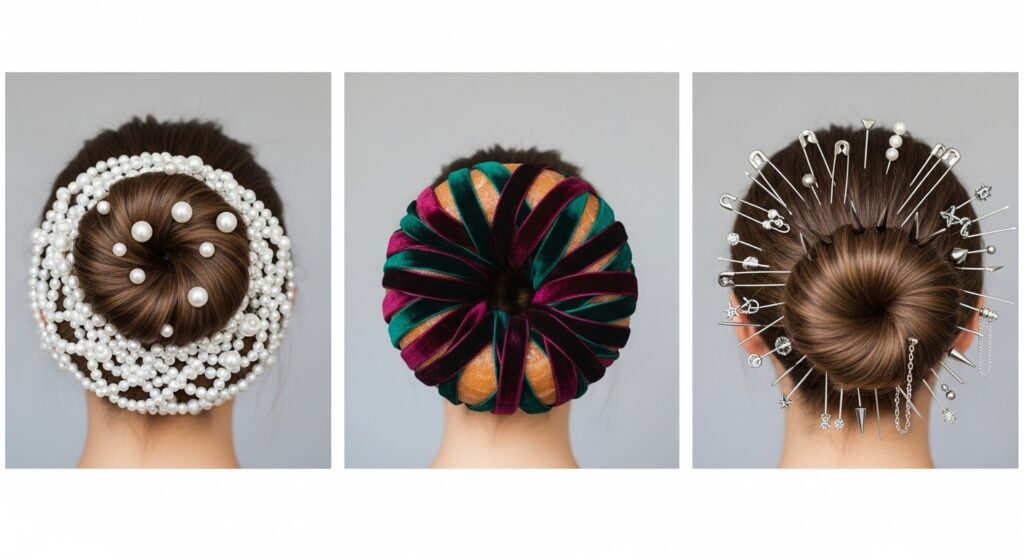
Adding Ribbons or Scrunches for Extra Flair
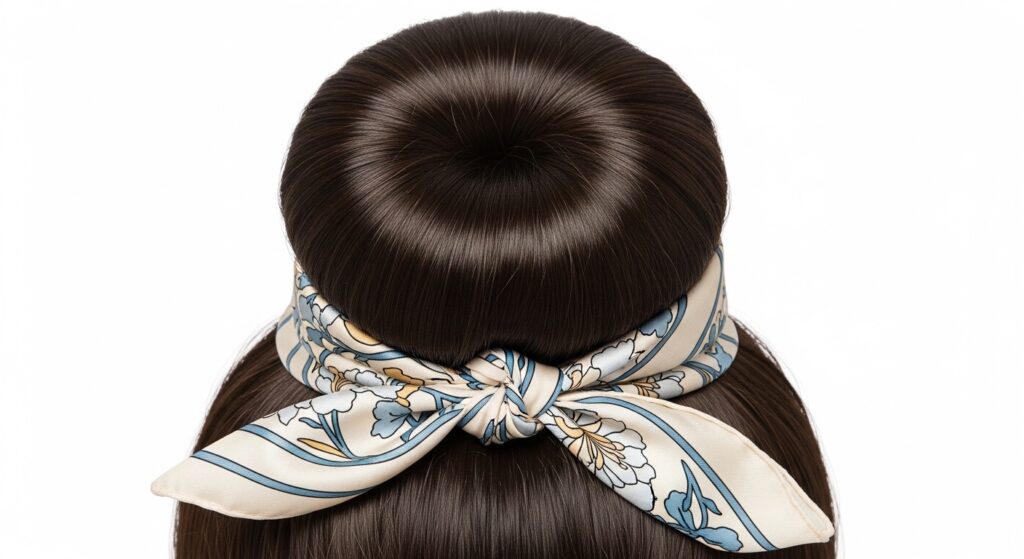
Once your bun is full and perfect, accessorize! Take a thin ribbon or a sleek scarf and tie it around the base of the bun. You can also use a chic, velvet scrunchie to cover the hair tie.
This not only looks beautiful, echoing old money hair aesthetics, but it also covers any last-minute imperfections or pins at the base. It’s the final layer that makes the style look intentional and expensive.
What to Do If Your Hair is Slippery or Silky
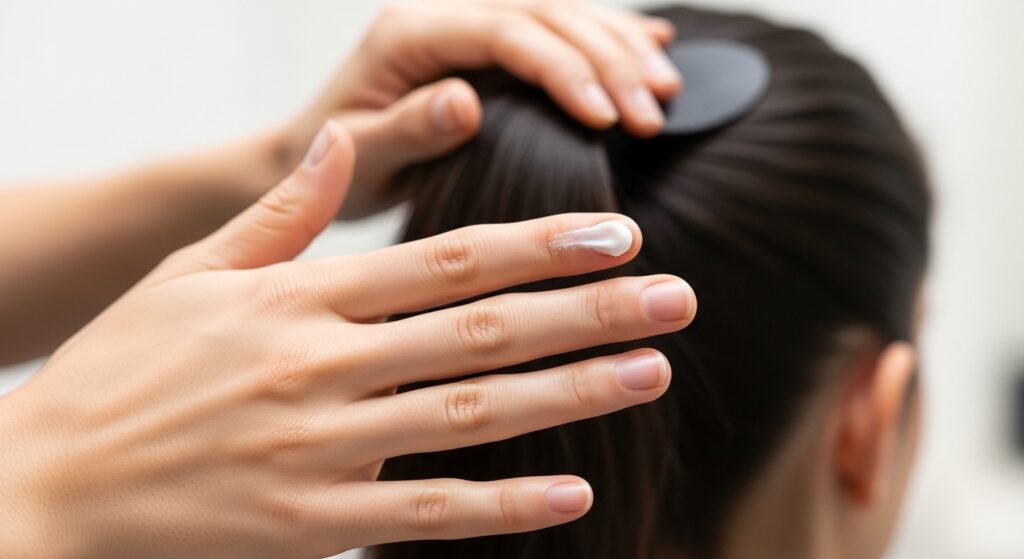
Super silky hair needs extra help. Before making your ponytail, rub a tiny dab of texturizing paste or pomaxe between your fingers. Then, run your hands lightly over the hair you’ll be putting into the ponytail.
This gives the silkiest hair something to grip. Combined with dry shampoo, it creates the perfect texture for wrapping and stuffing without a single slip. It’s a game-changer for stubbornly smooth hair.
The Quick Refresh for Day-Old Hair
Second or third-day hair is actually IDEAL for this style. The natural oils add texture and hold. If it feels too flat, spray dry shampoo at the crown and massage it in before taking the bun down.
Re-do your ponytail, maybe adding a little extra tissue stuffing. The existing texture will make the new bun look even thicker and fuller than it did on day one. It’s the best lazy-girl hack.
Matching This Bun to Different Aesthetics
This bun is a blank canvas. For romantic goth hairstyles, add dark ribbon or crystal hair pins. To channel glitchy glam hair, incorporate a few face-framing pieces with a contrasting highlight or a glitter gel.
For a vibe that’s more vampire haircut or hime cut adjacent, keep it super sleek and jet-black, with a sharp center part leading into the bun. One technique, a million different moods.
Common Mistakes That Flatten Your Bun
Avoid these flattening errors: Using a donut that’s too small for your hair volume, wrapping the hair too tightly around the donut, and skipping the teasing/texturizing step.
Also, not stuffing the center hole is a missed opportunity for instant bulk. And finally, using a heavy, wet-hold hairspray can crush all your volume. Stick to light, flexible sprays.
My Favorite Products for Maximum Hold
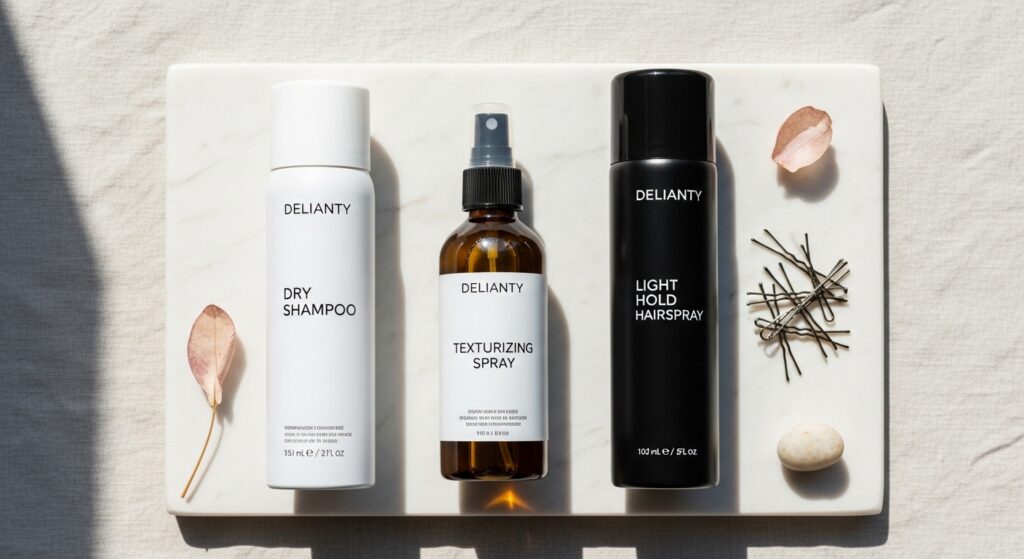
I keep it simple. A strong-hold dry shampoo for texture, a light texturizing mist (not a heavy sea salt spray), and a flexible-hold hairspray. For bobby pins, I always use the kind with a little matte coating—they grip better than shiny metal ones.
That’s really it. You don’t need a cabinet full of products. These three, combined with the stuffing hacks, will give you that perfect, full bun every single time.
When to Skip the Donut & Try a Sock
Go back to the sock bun if your hair is very fine or the foam donut just isn’t working. The sock is softer, so it molds to your head shape better and can create a less perfect, more organic-looking fullness.
It’s also gentler on your hair because there’s no rough foam texture. Sometimes, the simplest, cheapest hack (an old sock!) is the one that gives you the most luxurious-looking result.
Final Touches: The Mirror Check
Before you walk out the door, do the full mirror check. Look at your bun from the front, sides, and back. Gently pull out any tiny bumps for a smoother look, or pancake any spots that need more width.
This 30-second check ensures there are no gaps, the bun is centered, and the volume is even all the way around. It’s the difference between a good bun and a great one.
And there you have it—my full playbook for a donut bun that looks like you have a head full of extensions, using nothing but your own hair and some clever tricks. It took me years of flat buns to figure this out, so I’m thrilled to pass it along to you.
Remember, great hairstyles aren’t about having the most hair; they’re about knowing how to work with what you’ve got. Whether you’re aiming for old money hair elegance or just a reliably pretty updo, these hacks are your new best friend.
Save this post to Pinterest so you always have these tips handy for your next hair day! Did you try a hack? Tell me in the comments which one gave you the most amazing volume—I love hearing what works for you!