Back-to-School Hair, Sorted: Easy Hairstyles for School Mornings When You’re Running Late
School mornings are a race against the clock. There is a uniform to find, a bag to pack, breakfast to eat, and somehow hair still needs to look neat before the first bell. The best hairstyles for school are the ones that take minutes, not half an hour, and still look tidy at home time.
In this guide you will find 43 easy hairstyles for school, plus the rules, routines and quick fixes that make them work. Every style here is classroom-appropriate, keeps hair off the face, and is designed to last through lessons, lunch and PE. No salon skills needed, and no style that falls apart by break time.
Whether you have short, medium or long hair, and whether you can braid or are just learning, there is a style here for your morning. Pick one to try tomorrow, practise it once on a relaxed evening, and it will become a five-minute habit.
School Hair Rules, Decoded
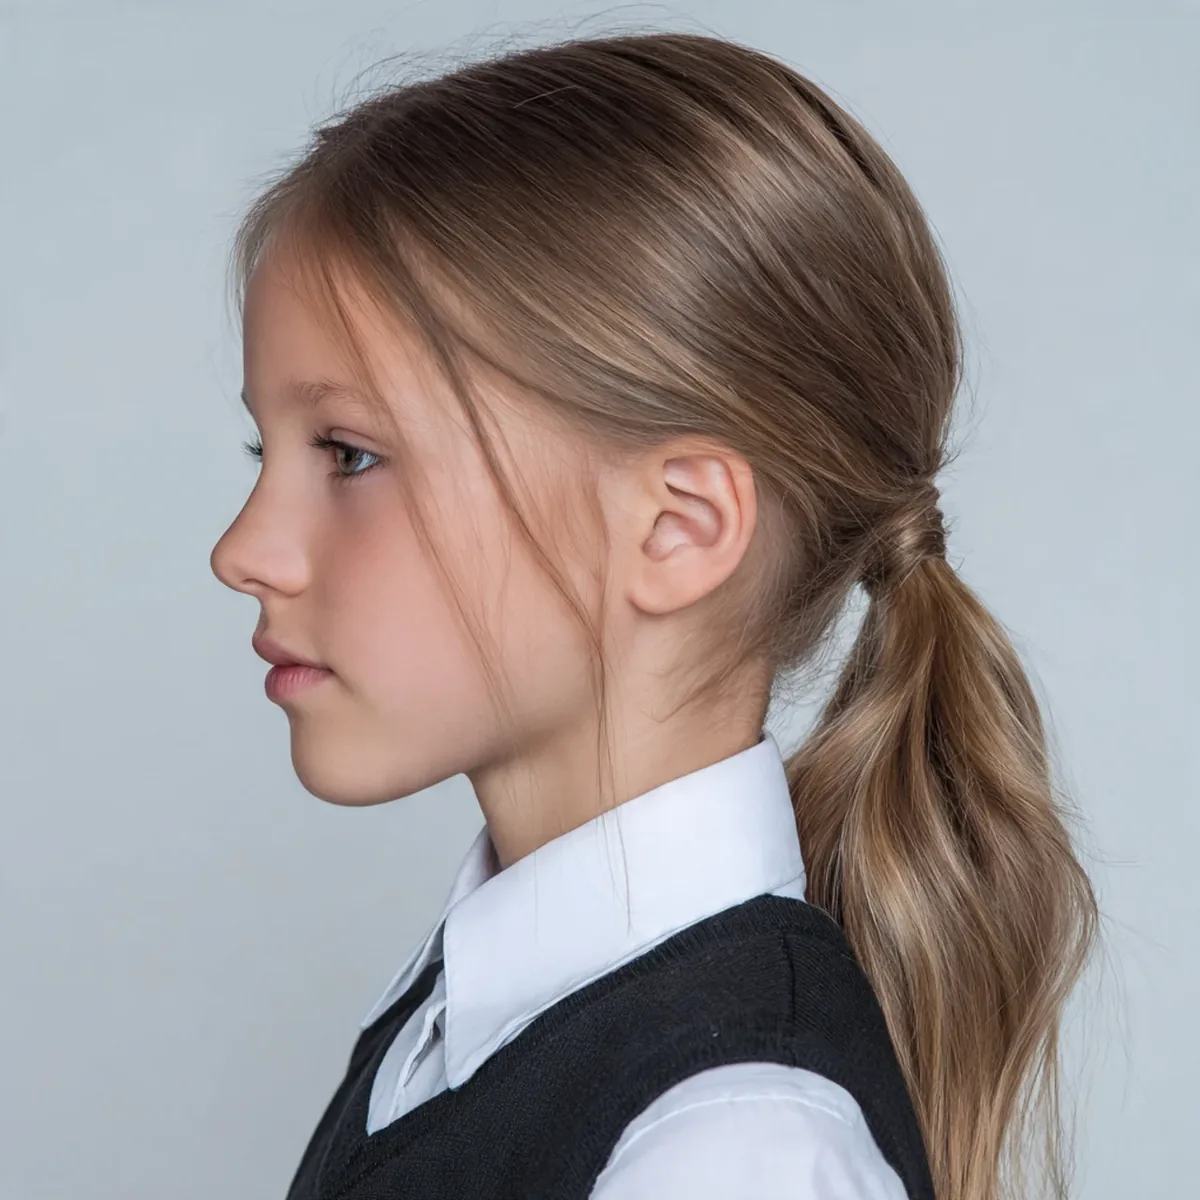
Most schools ask for the same few things: hair off the face, no extreme colours, and styles that stay tidy. That rules out very little in this guide, because braids, ponytails and buns are exactly what dress codes are designed to allow.
When in doubt, check three things: can you see your eyes clearly, does the style stay put without constant fixing, and would it look the same at 3 pm as it did at 8 am? If the answer is yes to all three, the style is almost certainly school-appropriate.
If your school bans loose hair past a certain length or requires hair tied up for science and PE, keep two or three tied styles in your weekly rotation so you are never caught out.
A Morning Routine That Takes Under 10 Minutes
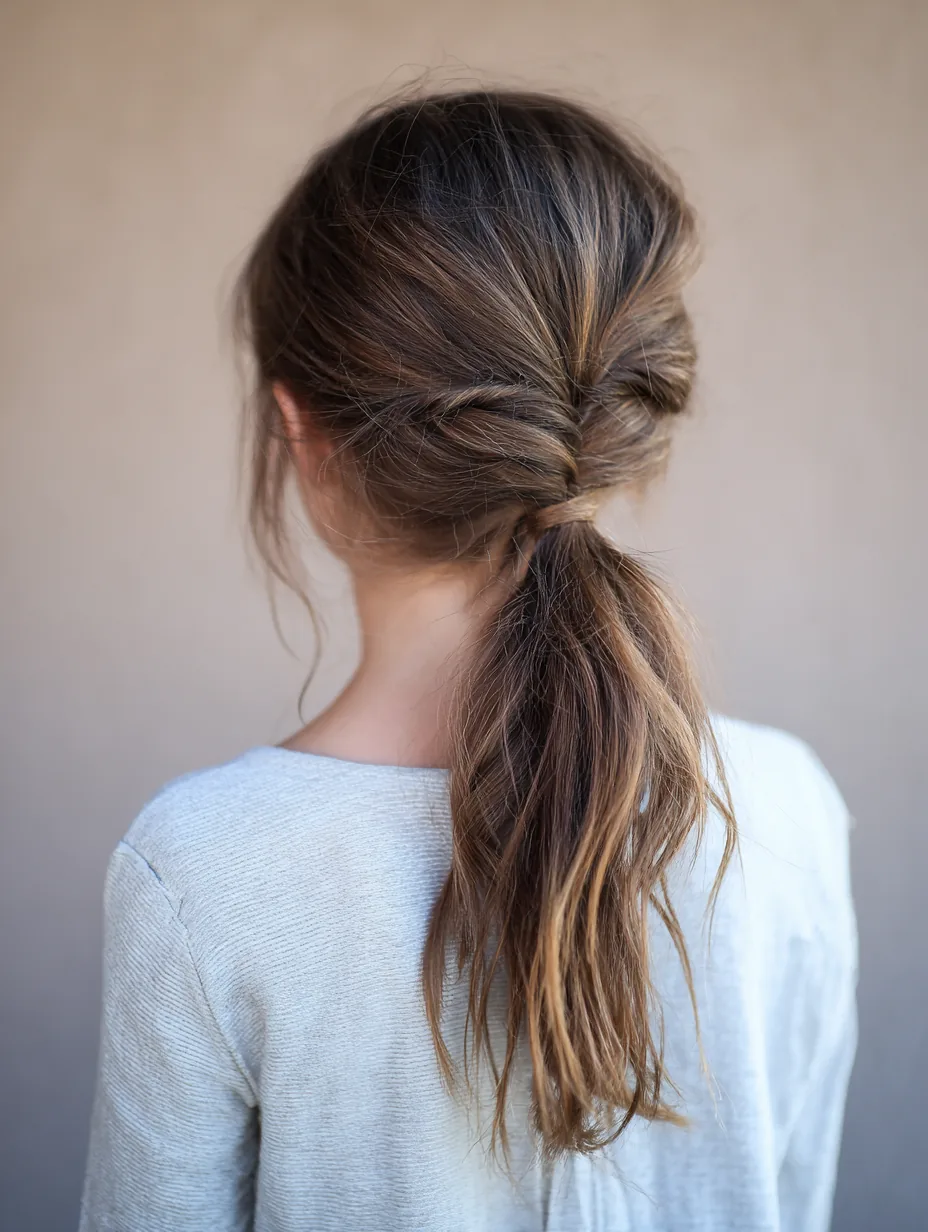
The secret to a fast school morning is doing the hard part the night before. Braid hair loosely before bed, or brush it out and tie it in a loose top knot, and you will wake up with smooth, tangle-free hair that styles in minutes.
Keep a small morning kit by the mirror: a brush, two elastics, a few pins and a spray bottle of water. With those four things you can do almost every style in this guide without hunting through drawers.
On the tightest mornings, pick a two-minute style: a high ponytail, a low bun, or a half-up twist. Save the crown braid and the milkmaid braids for days when you have ten spare minutes.
Quick Picks by Hair Length for School
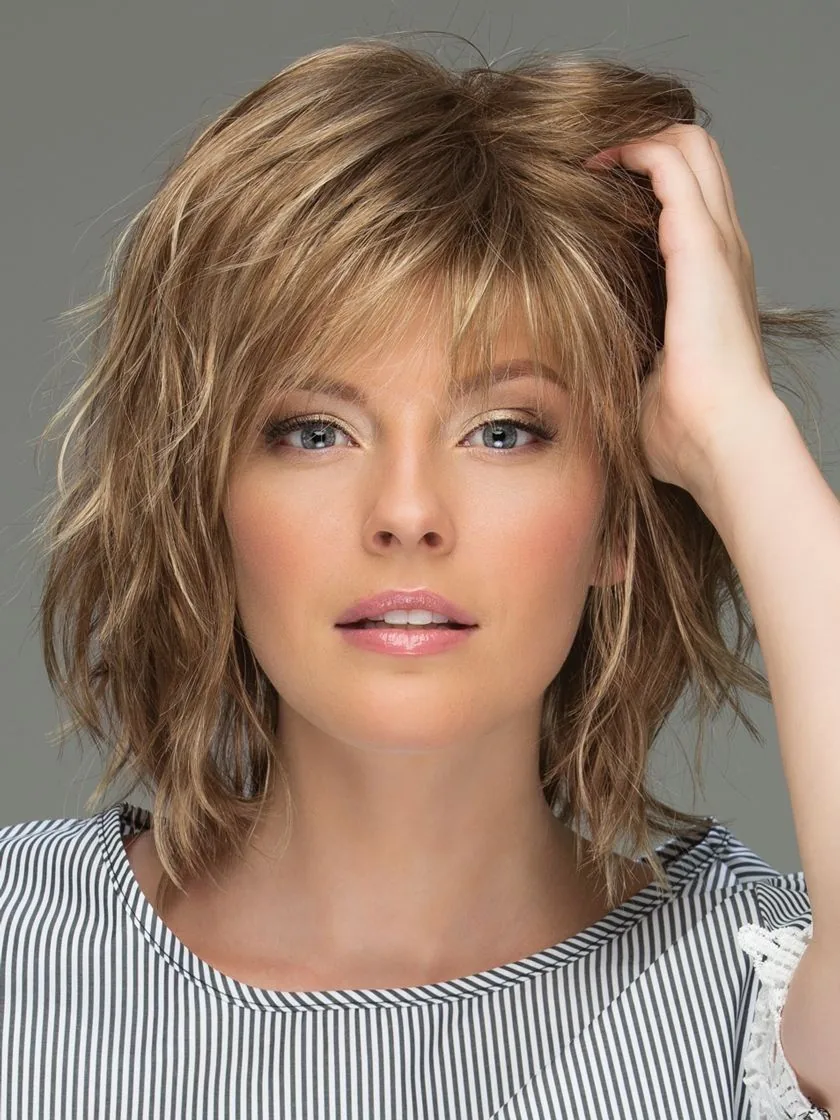
Short hair, around chin to shoulder length, suits half-up twists, claw-clip styles, low ponytails and small braids along the hairline. The headband braid is especially useful here because it tames short layers that fall forward.
Medium hair, around shoulder to chest length, can do almost everything in this guide: French braids, fishtails, bubble ponytails, top knots and space buns all work well at this length.
Long hair, past chest length, needs styles with real hold: double Dutch braids, French braid pigtails, braided buns and braided ponytails. Loose styles on very long hair tend to tangle by lunch, so tie the length away whenever the day is busy.
Styles That Stay Put Through PE and Playtime
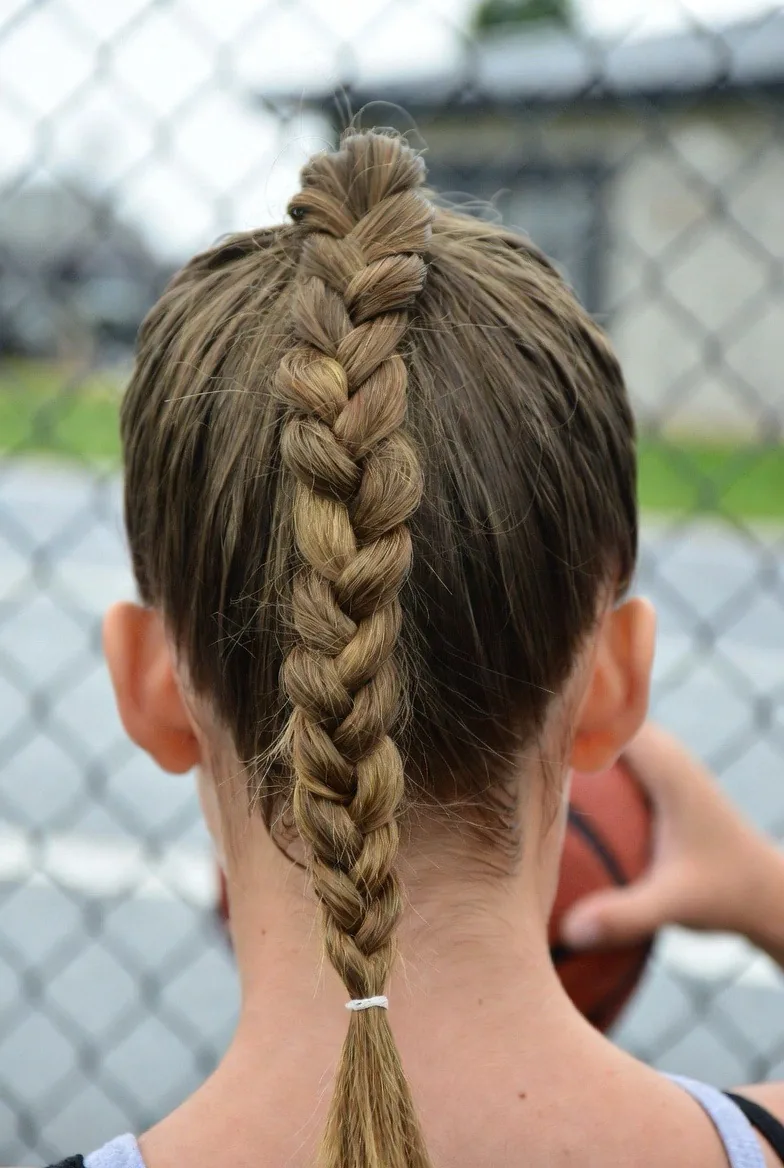
For PE and playtime, the rule is simple: the closer the style sits to the head, the longer it lasts. Double Dutch braids, French braid pigtails and a braided bun are the most reliable choices because there is almost nothing loose to come undone.
If you prefer a ponytail for sport, choose a braided ponytail or a bubble ponytail over a plain one, and use a strong elastic rather than a decorative scrunchie. A second elastic at the base stops the whole style sliding down.
After PE, a quick refresh is all you need: smooth flyaways with damp hands, re-pin anything loose, and retie the elastic if it has stretched. Never redo the whole style between lessons.
1. Classic French Braid
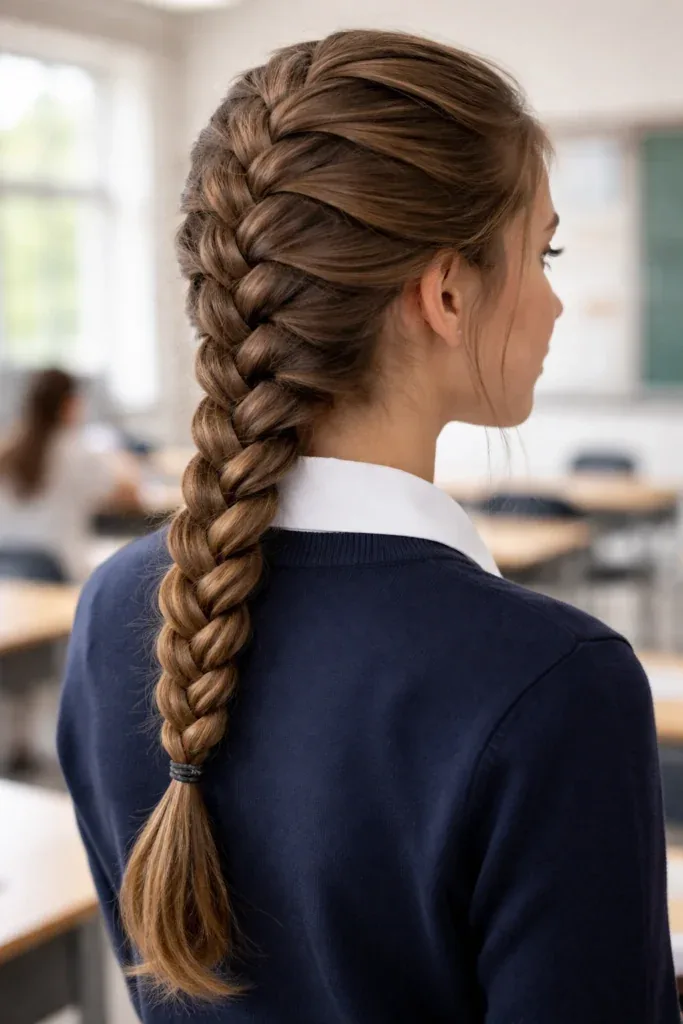
The classic French braid is the school-day workhorse. It pulls every strand away from the face, keeps hair tidy from first bell to last, and works on straight, wavy and textured hair alike. Once you learn the rhythm, it takes under five minutes.
Quick verdict: Best for students who want one neat style that survives classes, lunch and PE without a single redo.
Common mistakes:
- Starting the braid too far back, so loose strands fall into the face by mid-morning.
- Pulling each section too tight, which causes headaches and bumps along the scalp.
- Skipping a small elastic at the end, so the braid unravels in a school bag strap.
Styling steps:
- Brush hair smooth and part it however you like, or skip the part entirely.
- Take a section at the front hairline and split it into three equal strands.
- Cross the side strands over the middle, adding a new slice of hair each time.
- Secure with a small elastic, then gently tug the braid edges for softness if you like.
2. Double Dutch Braids
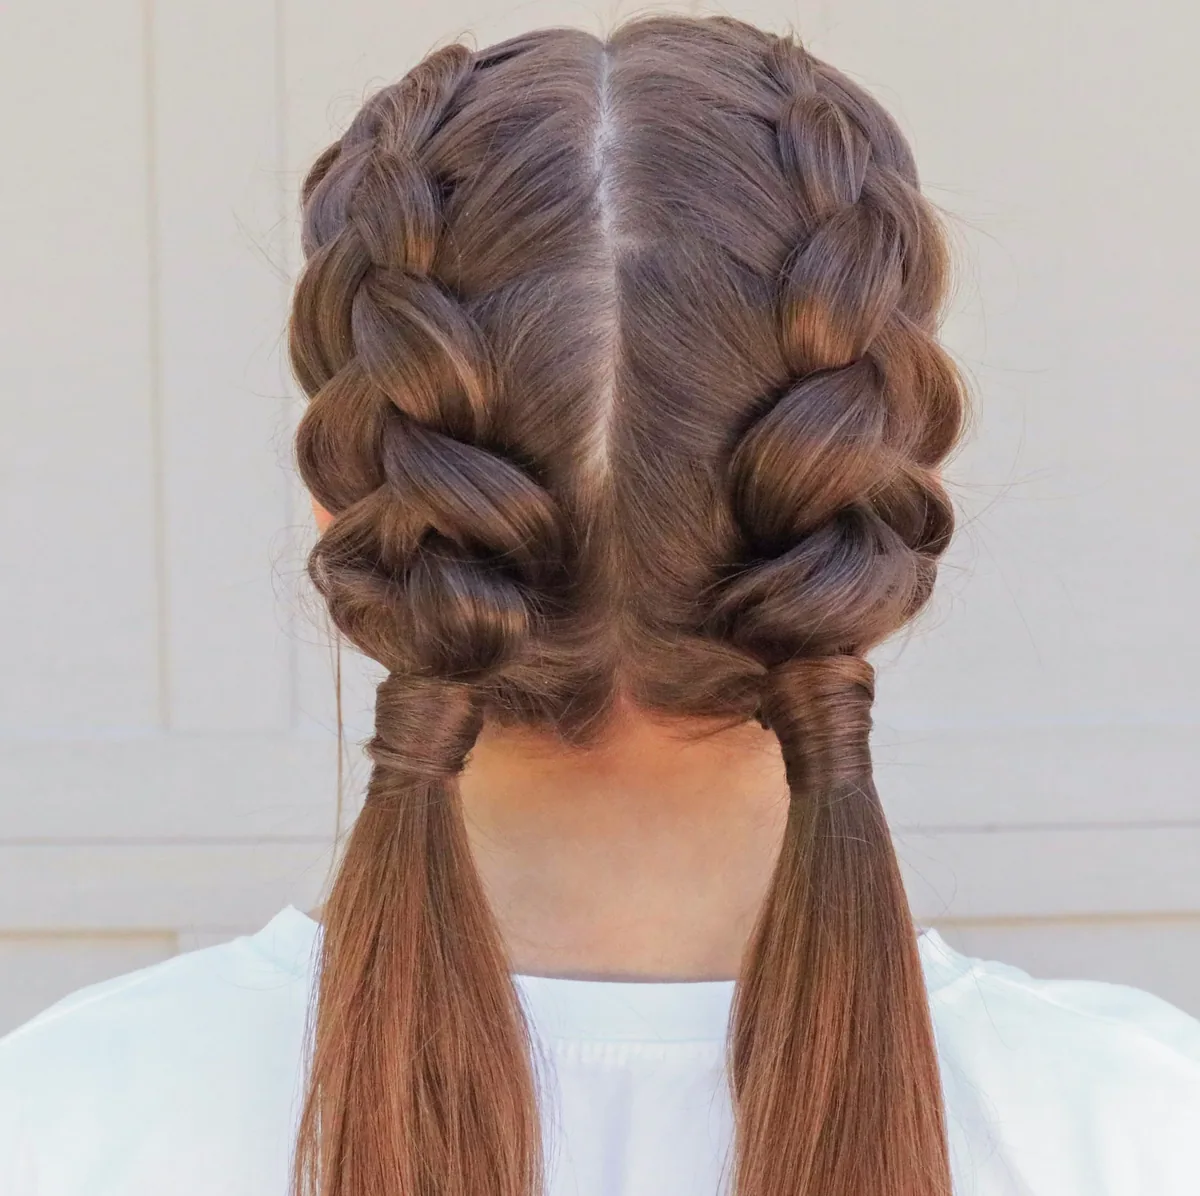
Double Dutch braids, also called boxer braids, sit raised on the head and hold their shape better than almost any other school style. They keep hair completely out of the way, which makes them a favourite for sports days and long school trips.
Quick verdict: Best for active students and anyone with thick or long hair that slips out of looser styles.
Common mistakes:
- Parting the hair unevenly down the middle, so one braid ends up much thicker than the other.
- Braiding under too loosely, which makes the braids puff up and loosen by lunch.
- Forgetting to smooth flyaways with a little water or cream before starting.
Styling steps:
- Part hair cleanly down the middle and clip one side out of the way.
- Dutch-braid the first side by crossing strands under the middle and adding hair as you go.
- Repeat on the second side, keeping the tension even on both sides.
- Tie both ends with elastics and tuck any stray ends under.
3. Fishtail Braid
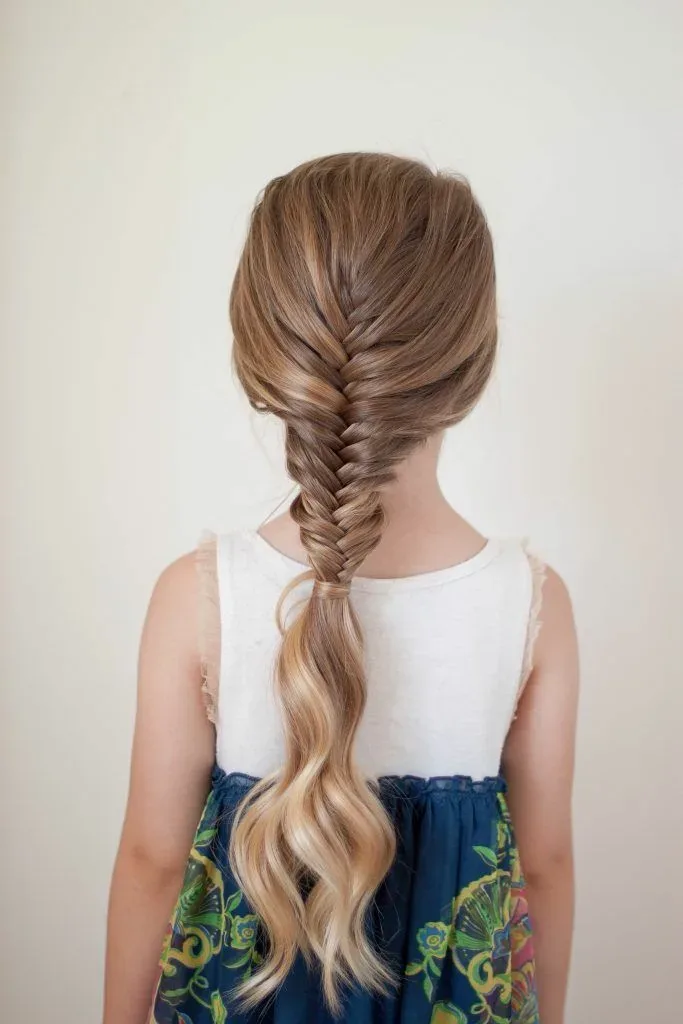
A fishtail braid looks far fancier than it is. It uses just two sections instead of three, and the woven pattern gives a pretty, detailed finish that still counts as neat and school-appropriate. It works best on medium to long hair.
Quick verdict: Best for students who want a braid that looks special but still passes a strict dress code.
Common mistakes:
- Taking thick chunks, which hides the fishtail pattern and makes it look like a plain braid.
- Letting the two sections twist around each other instead of staying flat.
- Braiding on tangled hair, which makes the small pieces snag and frizz.
Styling steps:
- Smooth hair into a low ponytail or leave it loose, then split it into two equal sections.
- Take a thin strand from the outside of the left section and cross it to the inside of the right.
- Repeat from the right side, keeping the strands thin and even.
- Secure the end, then gently pull the braid wider for a fuller look.
4. Side Braid
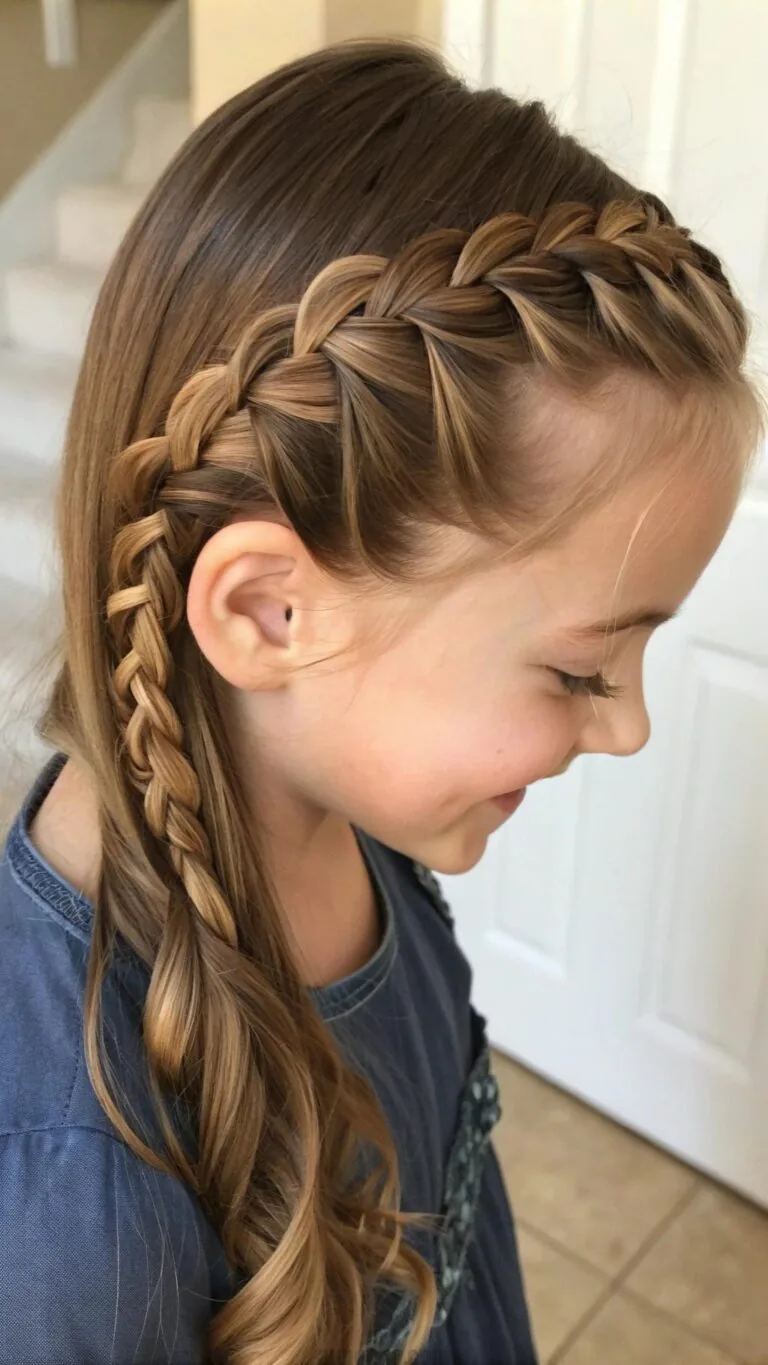
A side braid sweeps all the hair over one shoulder, so it never falls forward onto a desk or a book. It is quick, comfortable with a school bag, and it softens the look of a plain braid by sitting to one side.
Quick verdict: Best for students with long hair who find a back braid uncomfortable against a chair or bag strap.
Common mistakes:
- Braiding straight down the back and then dragging it to the side, which creates a kink.
- Starting too high, so the braid pulls awkwardly across the neck.
- Using a heavy elastic that slides down the braid during the day.
Styling steps:
- Brush all the hair over to your chosen shoulder.
- Split it into three sections and braid normally down the length.
- Keep the braid relaxed rather than pulled drum-tight.
- Tie it off and loosen the top slightly so it sits naturally.
5. Crown Braid
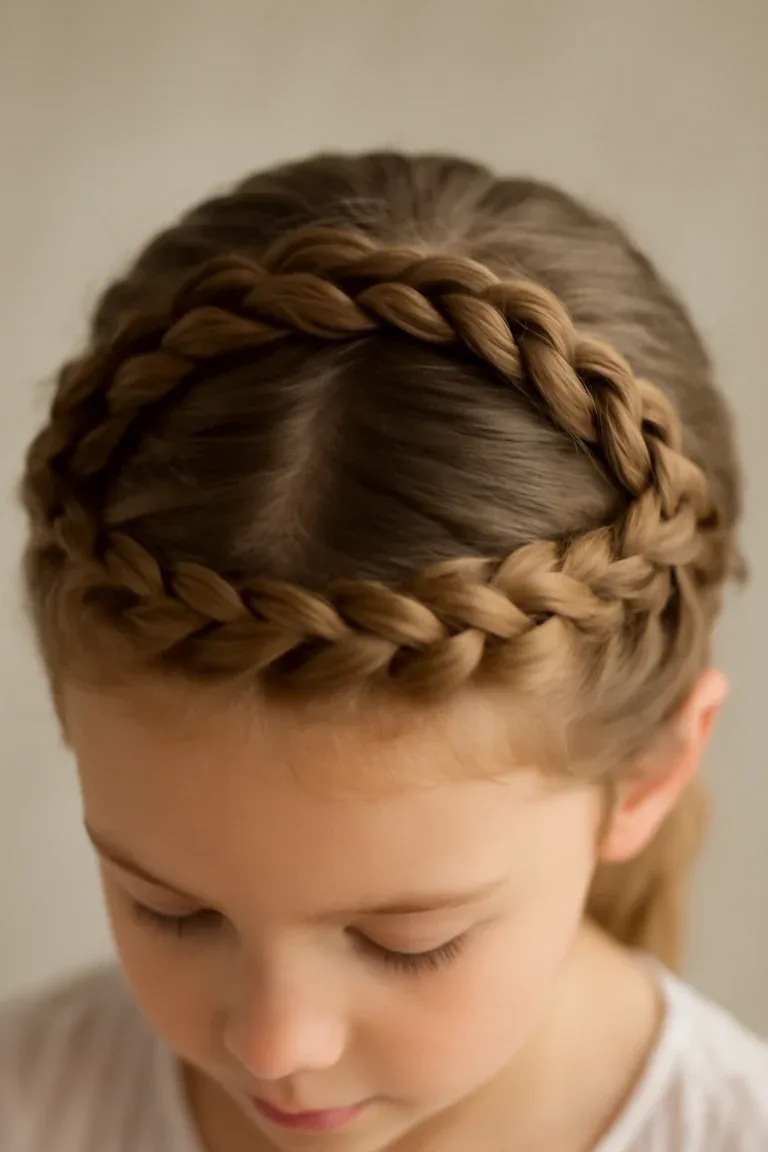
A crown braid wraps around the head like a headband made of hair. It keeps every strand off the face and neck, looks polished for assemblies and photos, and stays put far better than a loose style.
Quick verdict: Best for picture days, assemblies and students who hate hair touching their neck.
Common mistakes:
- Braiding too loosely around the curve, so the braid sags by midday.
- Pinning with too few pins, which lets one side slip down.
- Starting the braid at the wrong spot, so it ends up lopsided.
Styling steps:
- Part hair to one side and begin a Dutch or French braid along the hairline.
- Follow the curve of the head all the way around, adding hair as you go.
- When you reach the start, braid the remaining length and wrap it along the crown.
- Pin the tail flat underneath and add pins wherever the braid feels loose.
6. Braided Ponytail
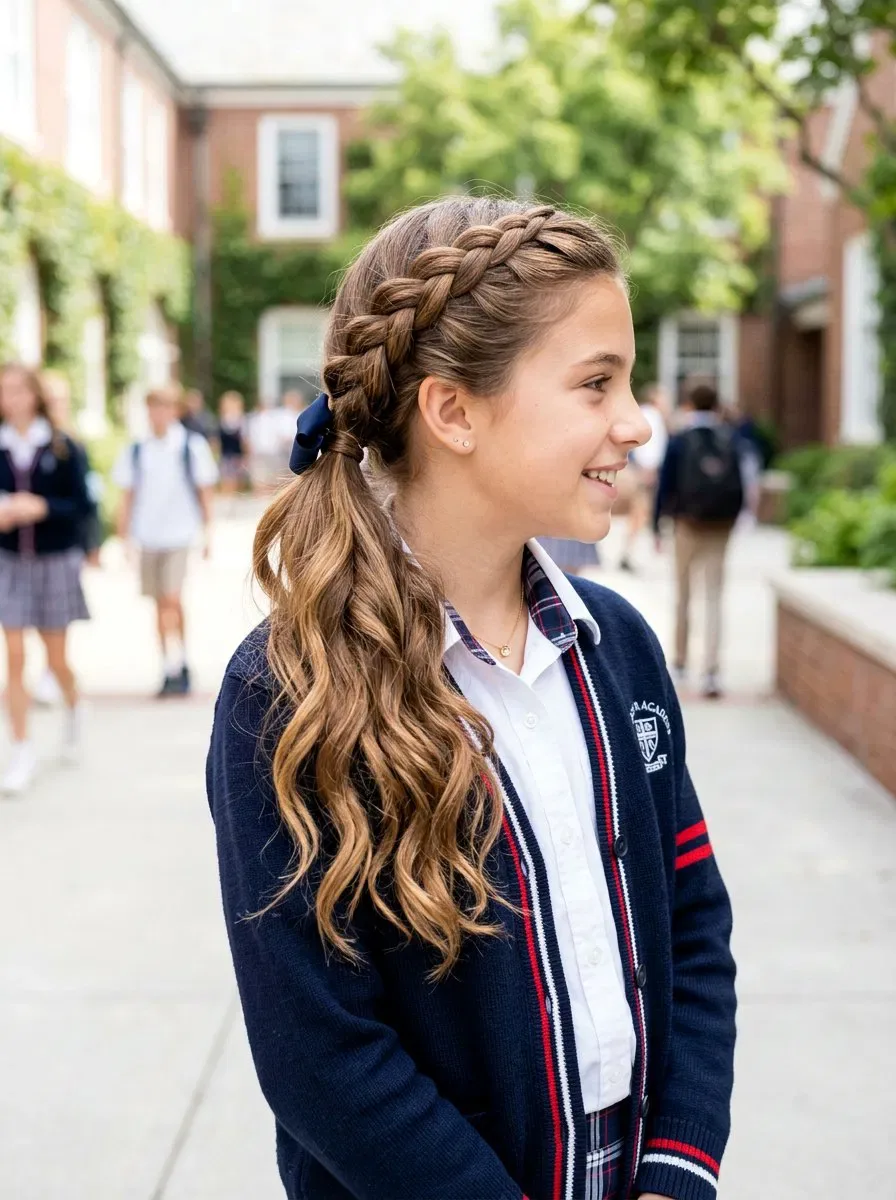
A braided ponytail combines the speed of a ponytail with the staying power of a braid. The ponytail goes up in seconds, the braid keeps the length tidy, and the whole style survives a full school day without escaping strands.
Quick verdict: Best for busy mornings when a plain ponytail always seems to fall apart by lunch.
Common mistakes:
- Securing the ponytail too loosely, so the braid drags it down.
- Braiding the ponytail too tightly, which pulls at the hairline.
- Leaving the braid tail unsecured, so it unravels inside a hood or scarf.
Styling steps:
- Brush hair up into a high or mid ponytail and secure it firmly.
- Split the ponytail into three sections and braid to the ends.
- Tie the braid with a small elastic that matches your hair colour.
- Smooth flyaways with a drop of serum or a damp hand.
7. Bubble Ponytail
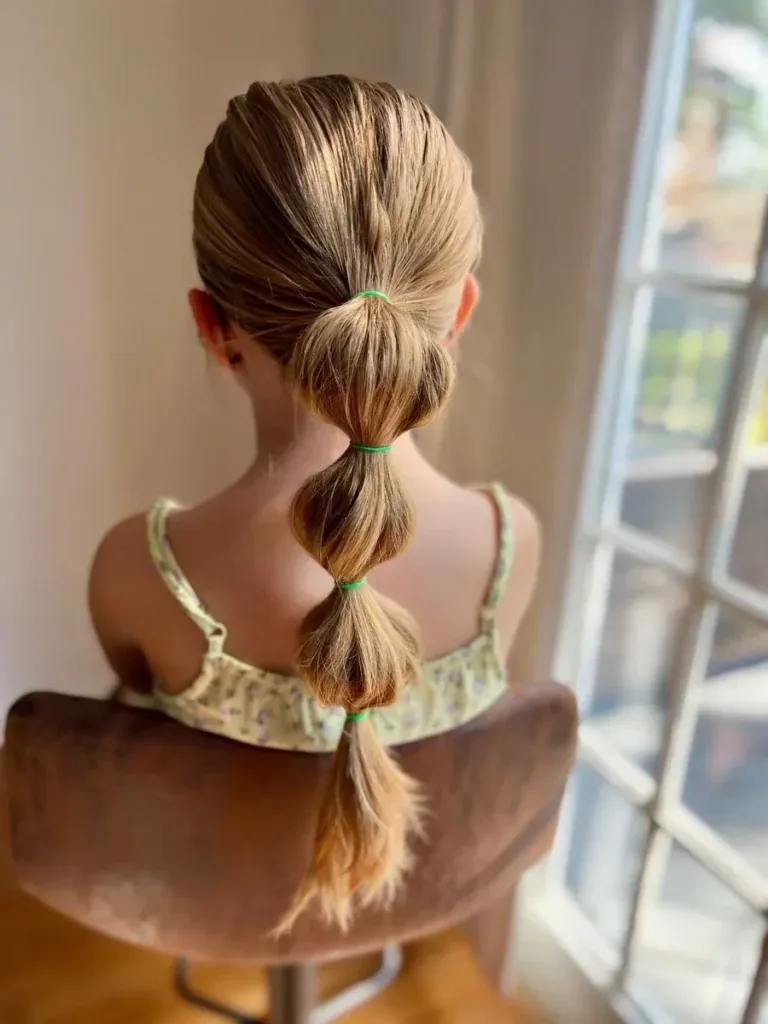
A bubble ponytail turns a basic ponytail into something fun with just a few extra elastics. Sections of hair are puffed out between elastics, creating a row of bubbles that holds its shape all day and works beautifully on long hair.
Quick verdict: Best for students who want a playful style that still looks tidy and takes under five minutes.
Common mistakes:
- Spacing the elastics unevenly, so the bubbles look lopsided.
- Pulling the bubbles too hard, which drags the elastics out of place.
- Using elastics that are too tight, which can snap fine hair.
Styling steps:
- Secure a high or mid ponytail as usual.
- Add elastics down the length, spaced about two finger-widths apart.
- Gently pull each section outward to puff it into a bubble.
- Mist with light hairspray so the bubbles hold their shape.
8. High Ponytail with a Wrapped Base

Wrapping a strand of hair around the base of a high ponytail hides the elastic and instantly makes the style look finished. It is a tiny extra step that takes the most basic school hairstyle from rushed to polished.
Quick verdict: Best for students who want a neat, put-together ponytail for assemblies or presentations.
Common mistakes:
- Wrapping a strand that is too thick, which makes a bulky lump at the base.
- Skipping a pin, so the wrap slides off during the day.
- Pulling the ponytail so high it strains the hairline.
Styling steps:
- Secure a high ponytail firmly with an elastic.
- Take a thin strand from underneath the ponytail and wrap it around the base.
- Keep wrapping until the elastic is fully hidden.
- Pin the end of the strand underneath with a bobby pin.
9. Low Sleek Ponytail
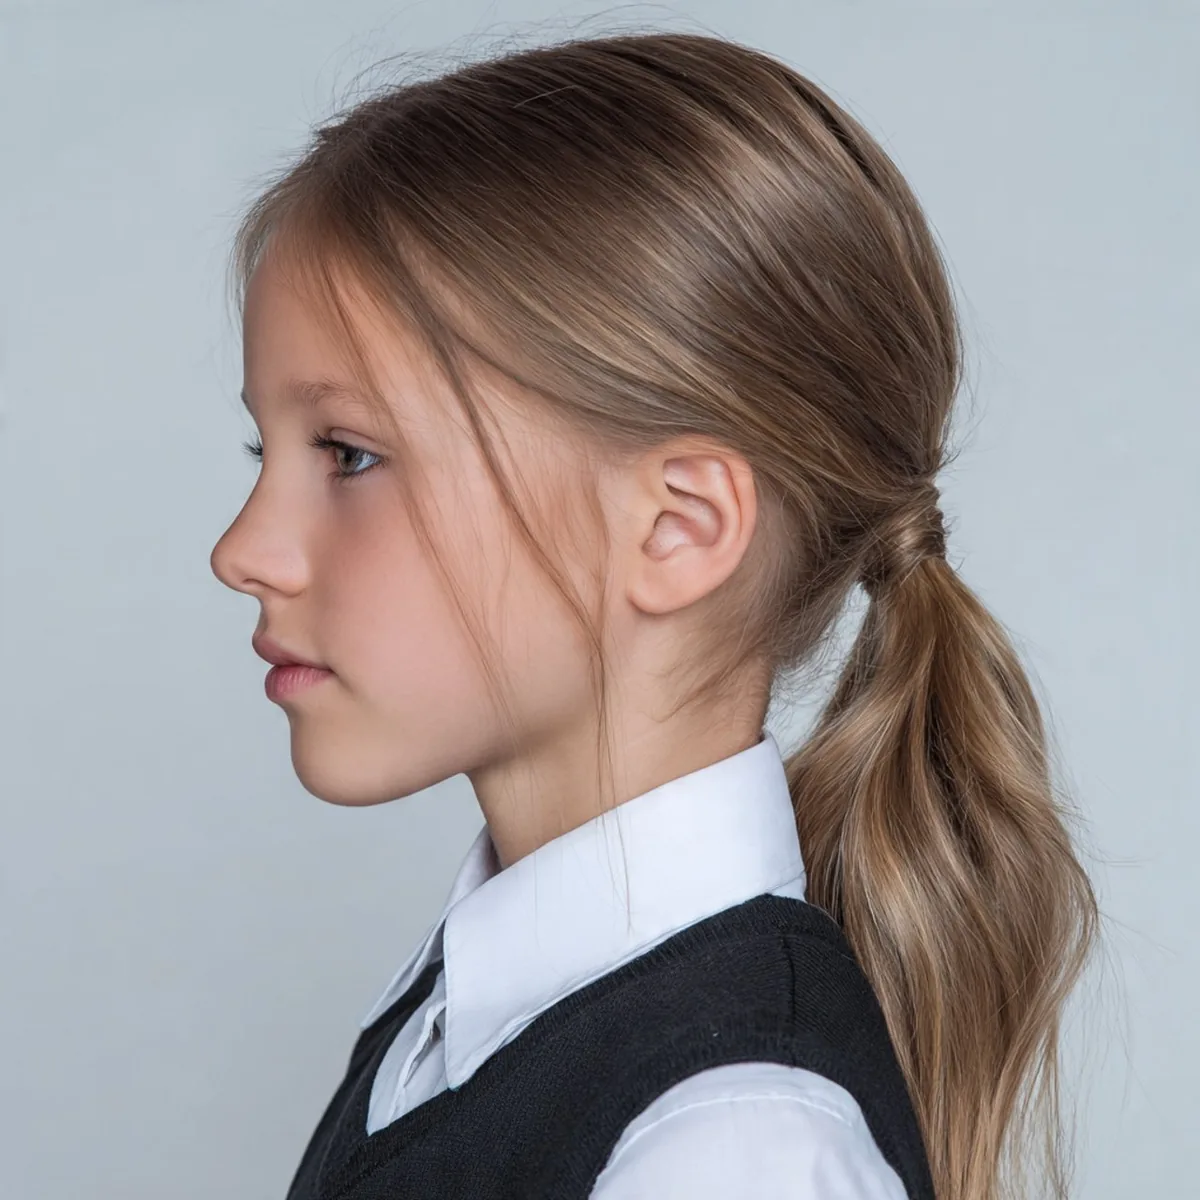
A low sleek ponytail sits at the nape and looks calm, tidy and grown-up without any fuss. It suits strict dress codes, keeps hair off the face, and pairs well with a uniform because it never distracts.
Quick verdict: Best for students with straight or smoothed hair who need a reliably neat, dress-code-safe style.
Common mistakes:
- Brushing straight back without smoothing the sides, which leaves bumps.
- Placing the ponytail too high for a low style, so it swings into the face.
- Using a stretched-out elastic that lets the ponytail sag by afternoon.
Styling steps:
- Brush hair back smoothly, checking the sides and top for bumps.
- Gather it at the nape and secure with a strong elastic.
- Smooth the top with a brush or a little smoothing cream.
- Wrap a small strand around the base if you want a cleaner finish.
10. Side Ponytail
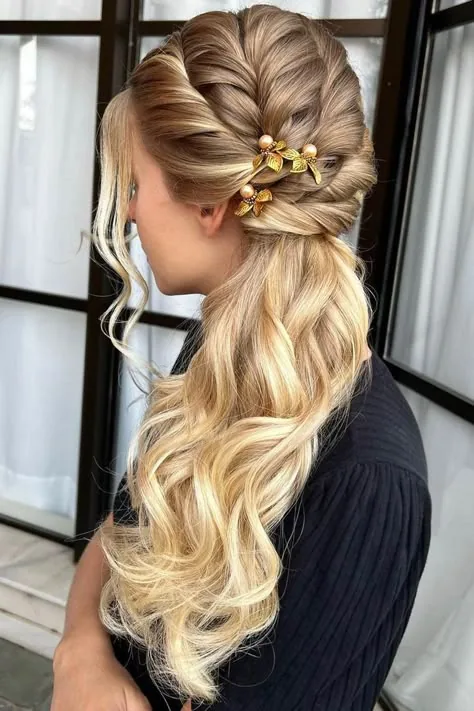
A side ponytail gathers hair over one shoulder for a soft, relaxed school look. It is kinder on the neck than a high ponytail, keeps hair out of the way of bag straps, and takes about a minute.
Quick verdict: Best for students who want a quick, comfortable style with a bit more personality than a plain ponytail.
Common mistakes:
- Securing it at the back and then pulling it to the side, which twists the hairline.
- Letting it sit too far forward, so it falls onto the chest and gets in the way.
- Using a heavy scrunchie that drags the ponytail down.
Styling steps:
- Brush all the hair to one side, behind the ear on that side.
- Gather it just below the ear and secure with an elastic or scrunchie.
- Smooth the opposite side so no bumps show.
- Loosen a few face-framing strands if your school allows them.
11. Classic Pigtails
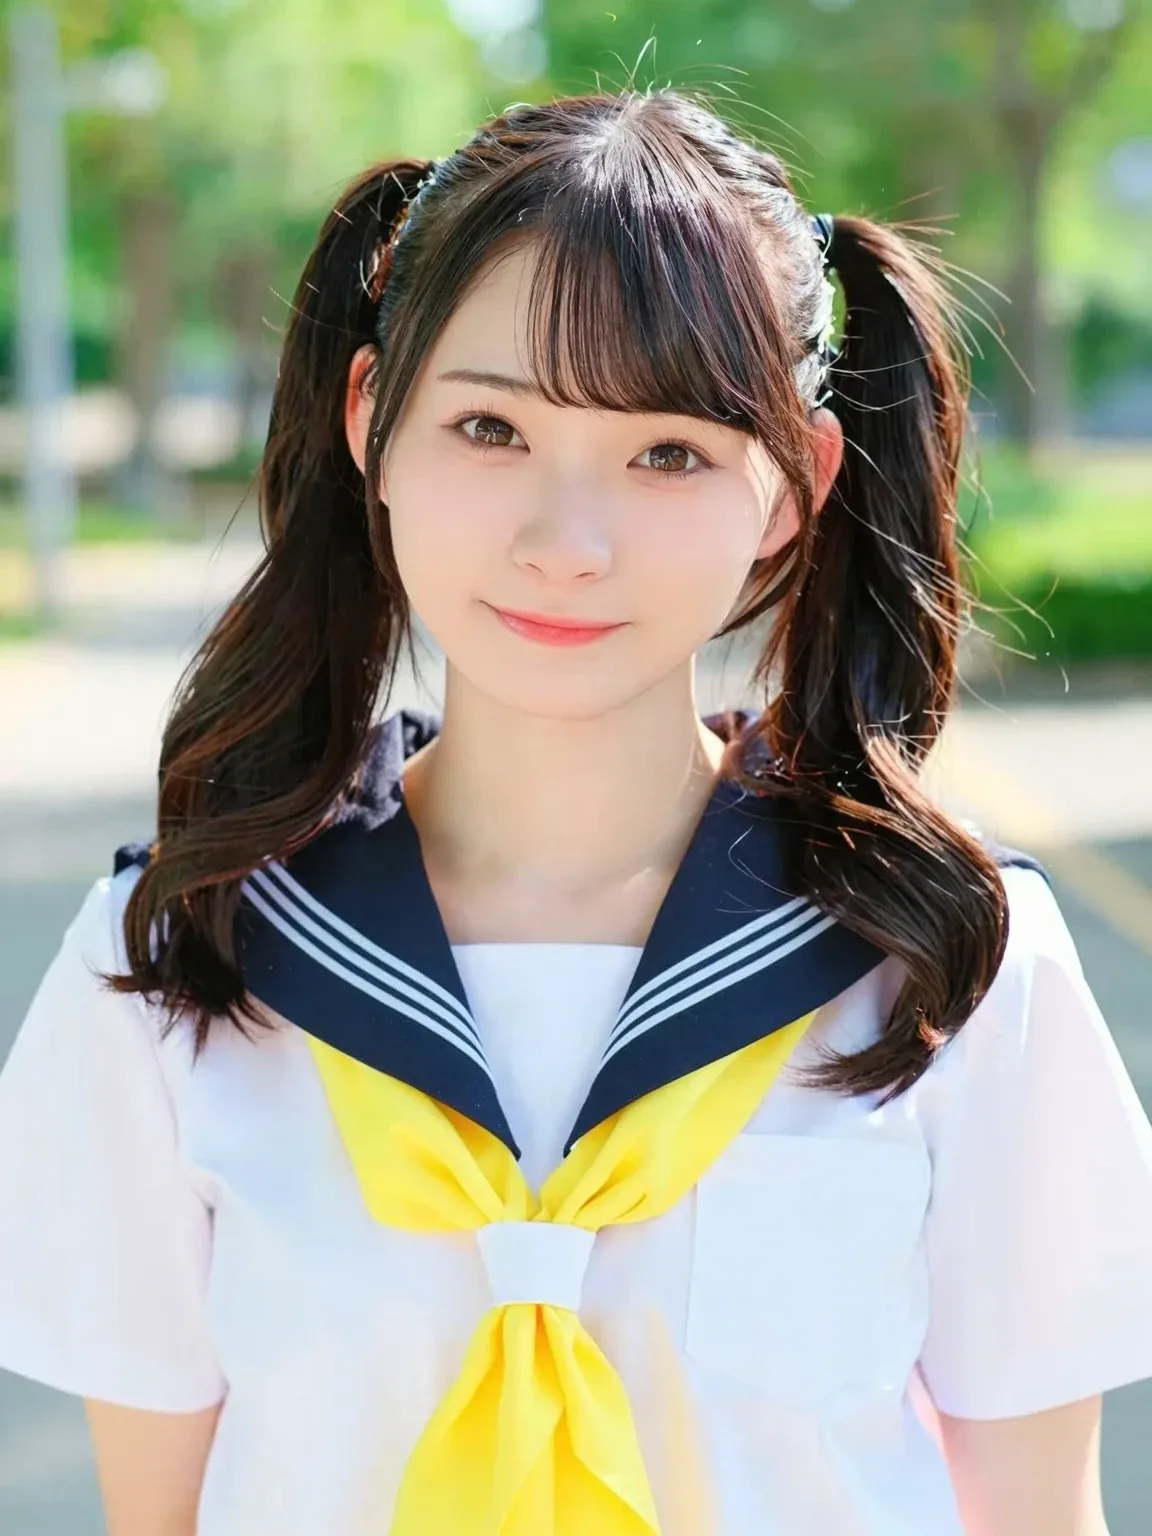
Classic pigtails are the simplest school style of all: hair split in two and tied low or mid-height on each side. They balance the weight of the hair, keep it off the face, and suit younger students perfectly.
Quick verdict: Best for younger students and anyone who wants the fastest possible neat style.
Common mistakes:
- Parting the hair crookedly, so the pigtails sit at different heights.
- Tying one side tighter than the other, which feels uncomfortable all day.
- Skipping detangling first, so knots gather at the nape.
Styling steps:
- Part hair down the middle from forehead to nape.
- Brush each side smooth and gather it at the same height.
- Secure both sides with matching elastics or scrunchies.
- Check in a mirror that both pigtails sit evenly.
12. Twisted Pigtails
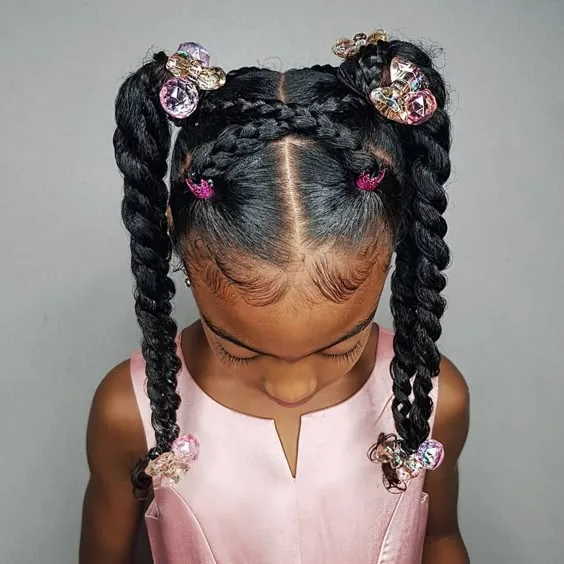
Twisted pigtails swap braiding for simple two-strand twists, which makes them faster to learn and gentler on tender heads. They look neat, hold well, and are a great first step before learning full braids.
Quick verdict: Best for younger students or anyone still learning to braid who wants a tidy twisted style.
Common mistakes:
- Twisting both sections in the same direction, which makes them unravel.
- Letting the twist loosen halfway down, so the ends puff out.
- Forgetting to secure the twist firmly at the end.
Styling steps:
- Part hair down the middle and gather each side into a section.
- Split one side into two strands and twist them around each other.
- Keep the twist snug all the way to the ends and secure with an elastic.
- Repeat on the other side, matching the height and tightness.
13. Top Knot
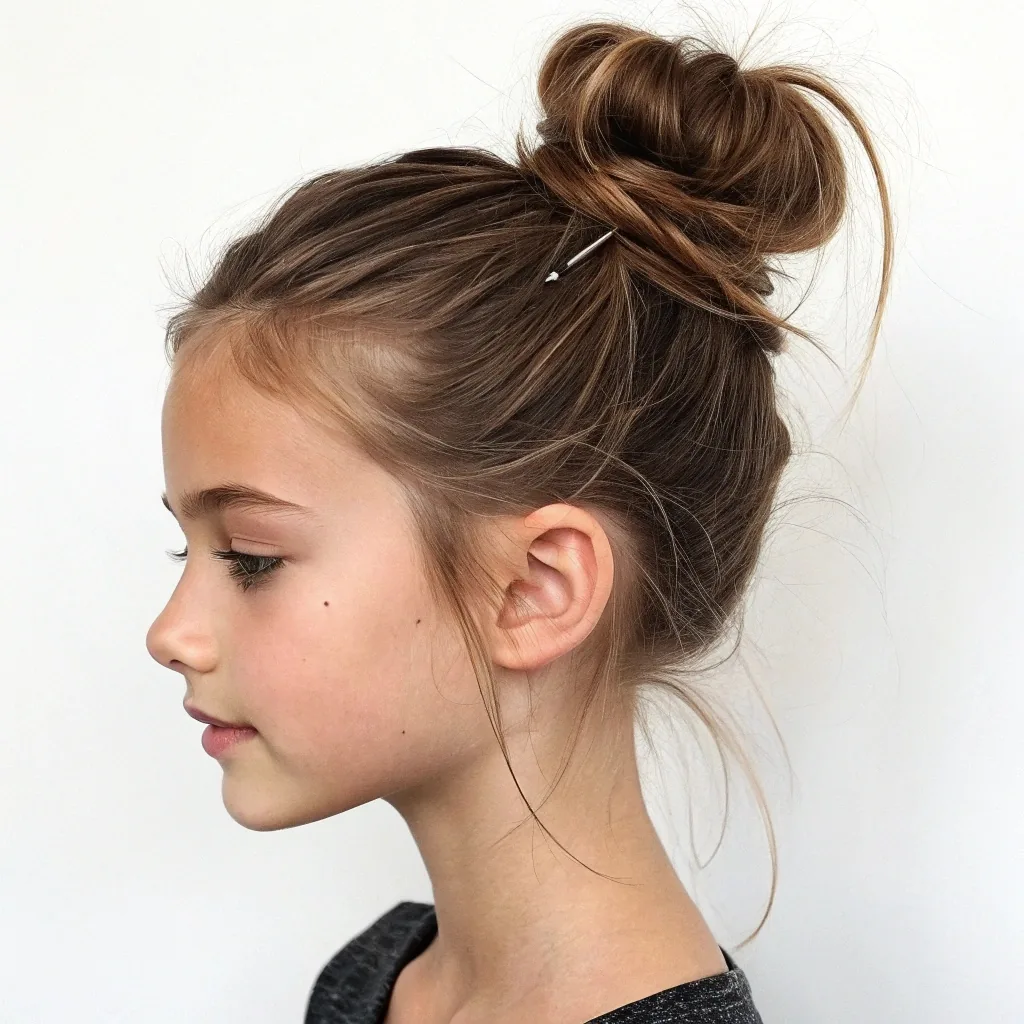
A top knot piles hair into a bun on top of the head, keeping it completely off the face, neck and uniform collar. It is the fastest updo for hot days and the easiest fix for a morning when hair will not behave.
Quick verdict: Best for hot weather, PE days and mornings when there is no time for anything complicated.
Common mistakes:
- Wrapping the bun so tightly it pulls at the hairline and hurts by lunch.
- Leaving the bun lopsided because it was twisted without checking a mirror.
- Using only one pin, so the knot droops as the day goes on.
Styling steps:
- Gather hair high on the crown and secure it into a ponytail.
- Twist the ponytail around its base into a bun shape.
- Tuck the ends under and pin them flat.
- Add a scrunchie or extra pins for hold, and smooth flyaways.
14. Low Bun
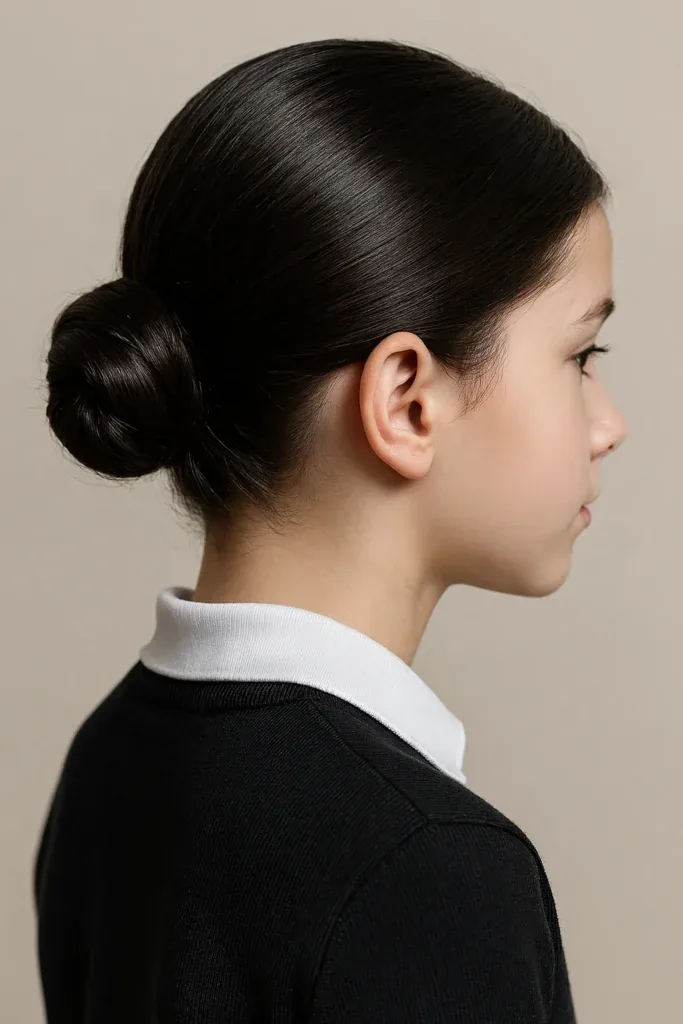
A low bun sits neatly at the nape and is one of the most dress-code-friendly styles there is. It keeps hair contained, looks tidy from every angle, and works for everything from exams to school photos.
Quick verdict: Best for students who need a guaranteed neat style for formal school days.
Common mistakes:
- Twisting the bun too loosely, so it sags within an hour.
- Leaving the nape messy, which ruins the tidy effect from behind.
- Pinning only at the top, so the bottom of the bun flops.
Styling steps:
- Brush hair back into a low ponytail at the nape and secure it.
- Twist the ponytail and coil it around its base.
- Pin the coil in place from several angles.
- Smooth the hairline and nape with a brush or a little cream.
15. Space Buns
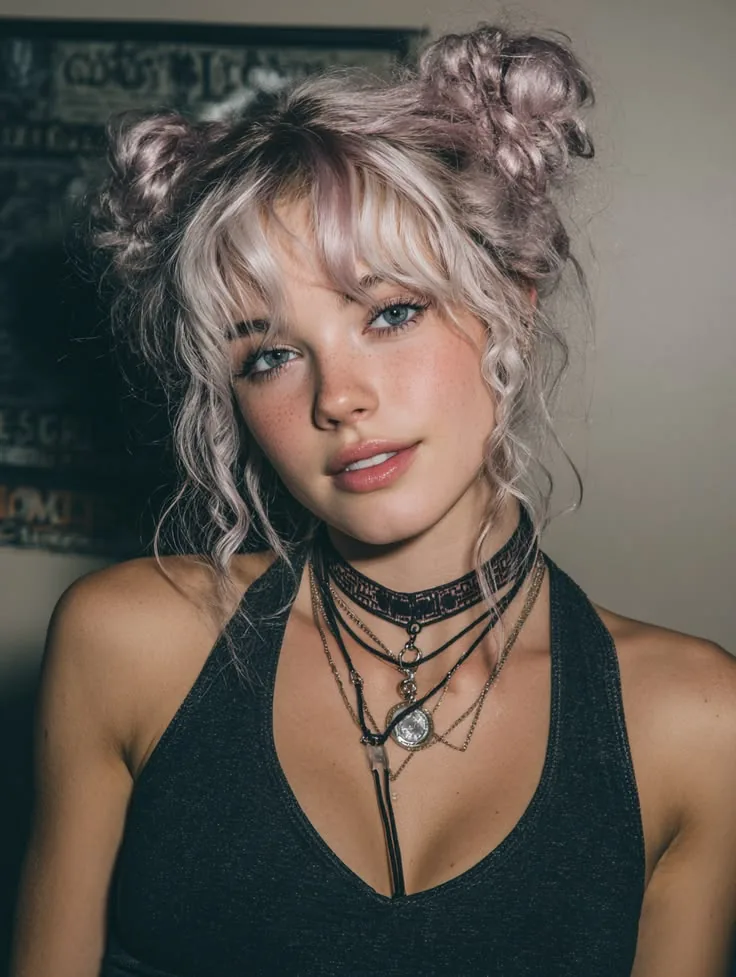
Space buns are two high buns, one on each side of the head, and they are pure fun. They keep hair fully off the face, survive dancing and sports, and are a favourite for themed days and school events.
Quick verdict: Best for fun school days, themed events and students who love a playful style that still stays put.
Common mistakes:
- Placing the buns at different heights, which is very noticeable from the front.
- Making the buns too large, so they feel heavy and pull.
- Skipping pins, so the buns unravel during activity.
Styling steps:
- Part hair down the middle and gather each side into a high ponytail.
- Twist each ponytail around its base into a bun.
- Pin both buns securely and check they match in size and height.
- Smooth flyaways and add matching scrunchies if you like.
16. Braided Bun
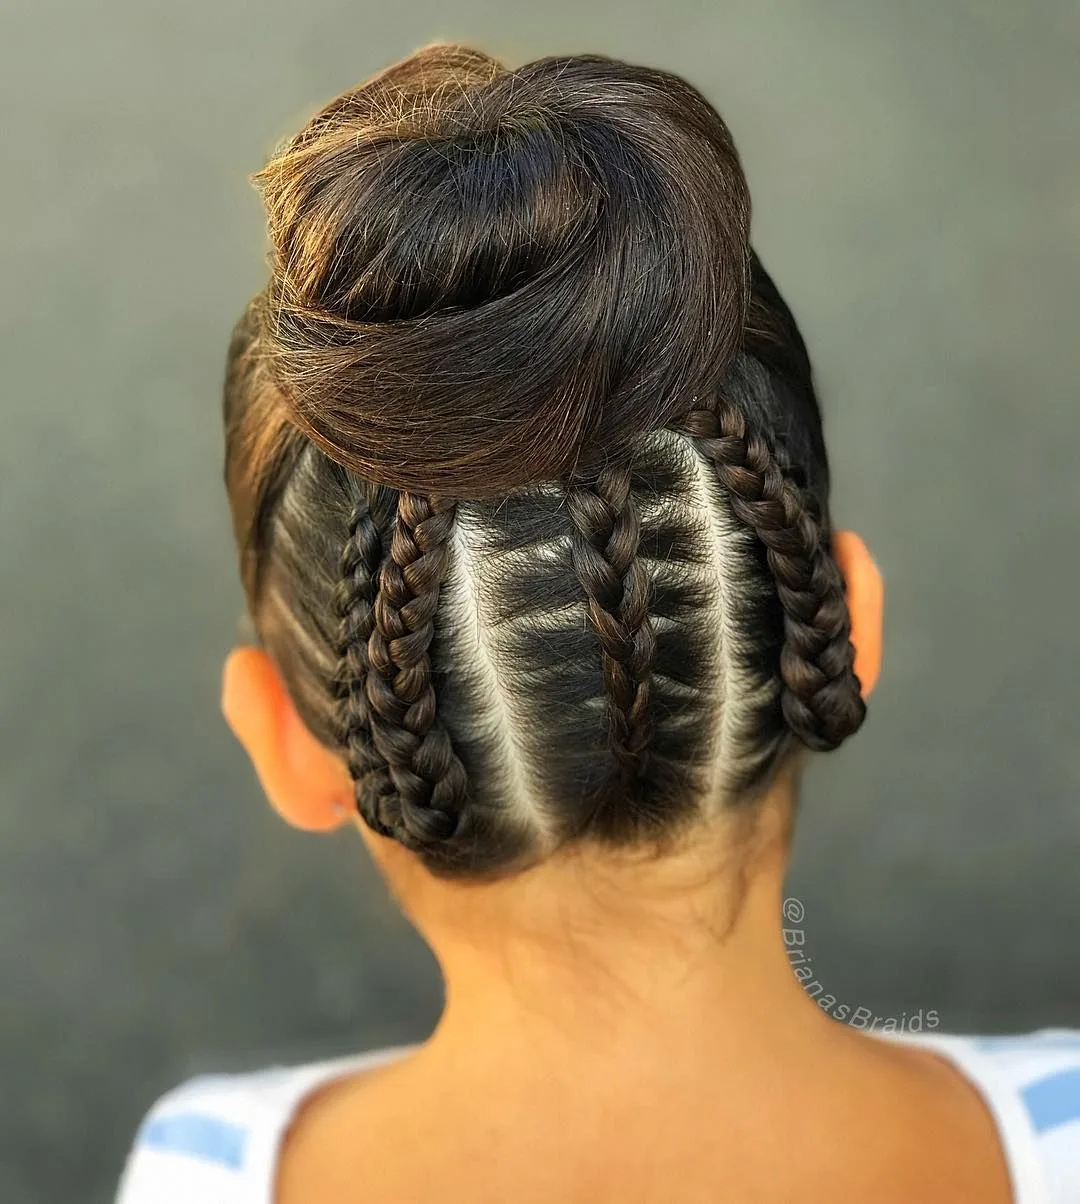
A braided bun starts with a braid and coils it into a bun, giving a textured, detailed updo that grips far better than a plain bun. It is neat enough for formal days but interesting enough to feel special.
Quick verdict: Best for students who want an updo that will not budge, even on the longest school days.
Common mistakes:
- Coiling the braid too loosely, so the bun looks bulky and soft.
- Braiding only halfway and then coiling, which leaves loose hair poking out.
- Pinning the bun in just one spot, so it rotates during the day.
Styling steps:
- Gather hair into a ponytail at your chosen height and braid it fully.
- Coil the braid around the base of the ponytail.
- Pin the coil from several directions until it feels solid.
- Tuck the braid tail underneath and smooth the hairline.
17. Half-Up Top Knot
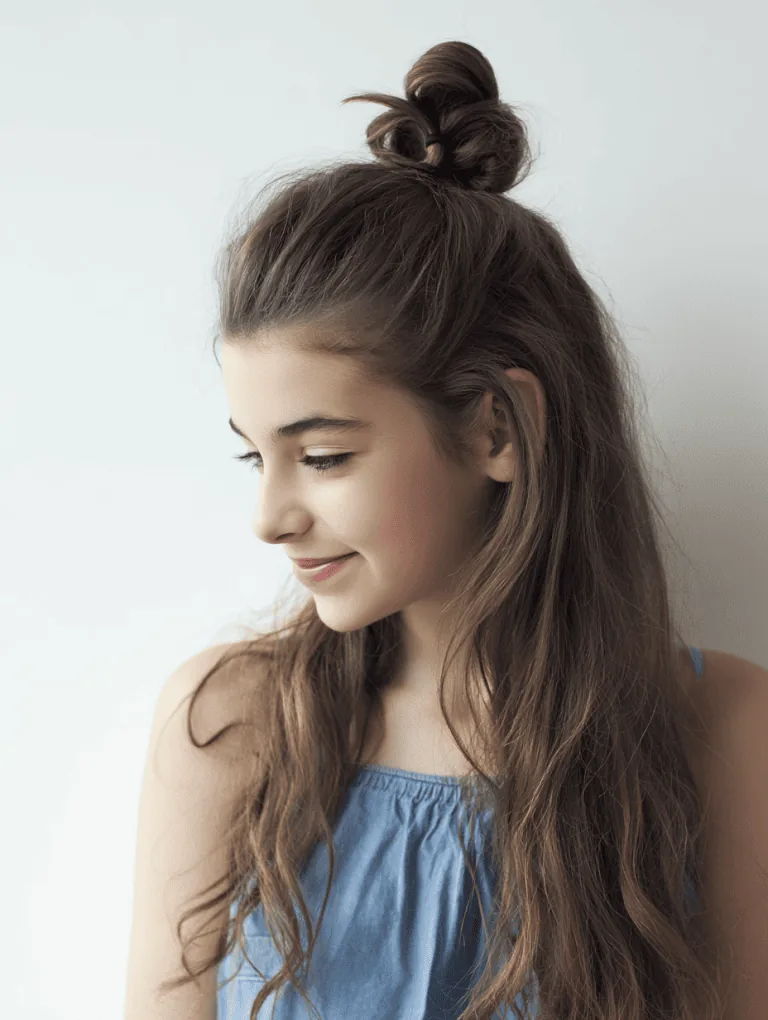
A half-up top knot takes just the top section of hair into a small bun and leaves the rest down. It keeps hair out of the eyes while showing off length, and it is one of the quickest styles in this whole list.
Quick verdict: Best for students who like wearing their hair down but need it out of their face for class.
Common mistakes:
- Taking too much hair into the knot, which leaves the sides looking thin.
- Placing the knot too far back, so it disappears behind the head.
- Making the knot too tight, which pulls at the front hairline.
Styling steps:
- Section off the top layer of hair from temple to temple.
- Gather that section on top of the head and secure it.
- Twist it into a small bun and pin it in place.
- Smooth the loose hair underneath and check the knot sits centrally.
18. Half-Up Ponytail
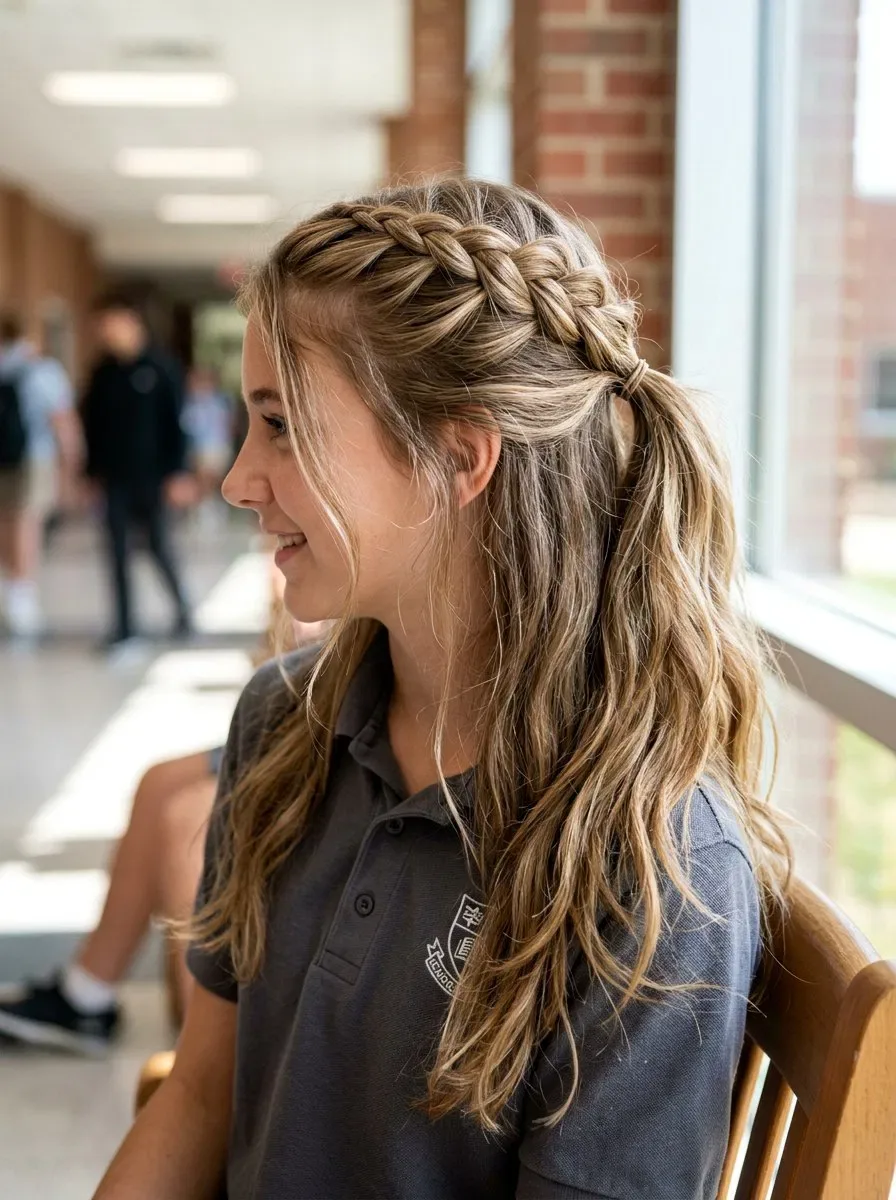
A half-up ponytail lifts the front sections away from the face and ties them at the back, while the rest of the hair hangs free. It is tidy, quick and suits almost every hair type and length past the shoulders.
Quick verdict: Best for students who want to wear their hair down without it falling into their eyes while writing.
Common mistakes:
- Gathering the top section too low, so it slides out during the day.
- Leaving bumps where the section was gathered.
- Using an elastic that is too loose for thick hair.
Styling steps:
- Take the top section of hair from above each ear and gather it at the back.
- Smooth the section with a brush to remove bumps.
- Secure it with an elastic at the crown or mid-back of the head.
- Gently loosen the top for a little volume, if you like.
19. Half-Up Braided Crown
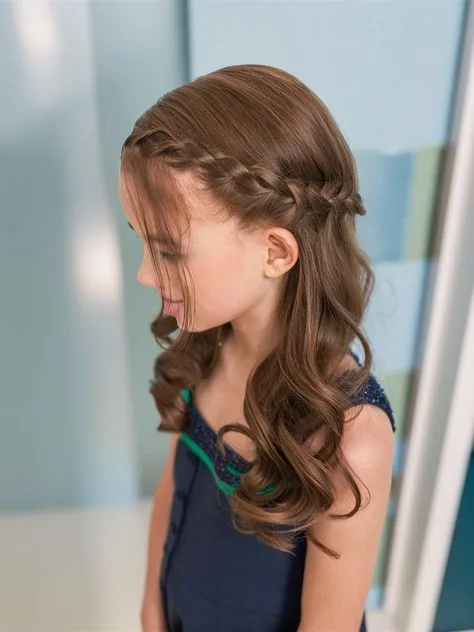
A half-up braided crown braids two small front sections and pins them across the back of the head, like a headband. It keeps the front tidy, looks lovely, and leaves the rest of the hair down.
Quick verdict: Best for students who want a pretty, neat style for assemblies without a full updo.
Common mistakes:
- Braiding the front sections too thick, so they overpower the loose hair.
- Pinning the braids too loosely, so they slip down the back of the head.
- Starting the braids too far back, which leaves the front messy.
Styling steps:
- Take a small section above each ear and braid each one loosely.
- Bring the braids across the back of the head so they meet.
- Pin them in place where they cross, tucking the ends under.
- Smooth the loose hair and check the braids sit evenly.
20. Twisted Half-Up
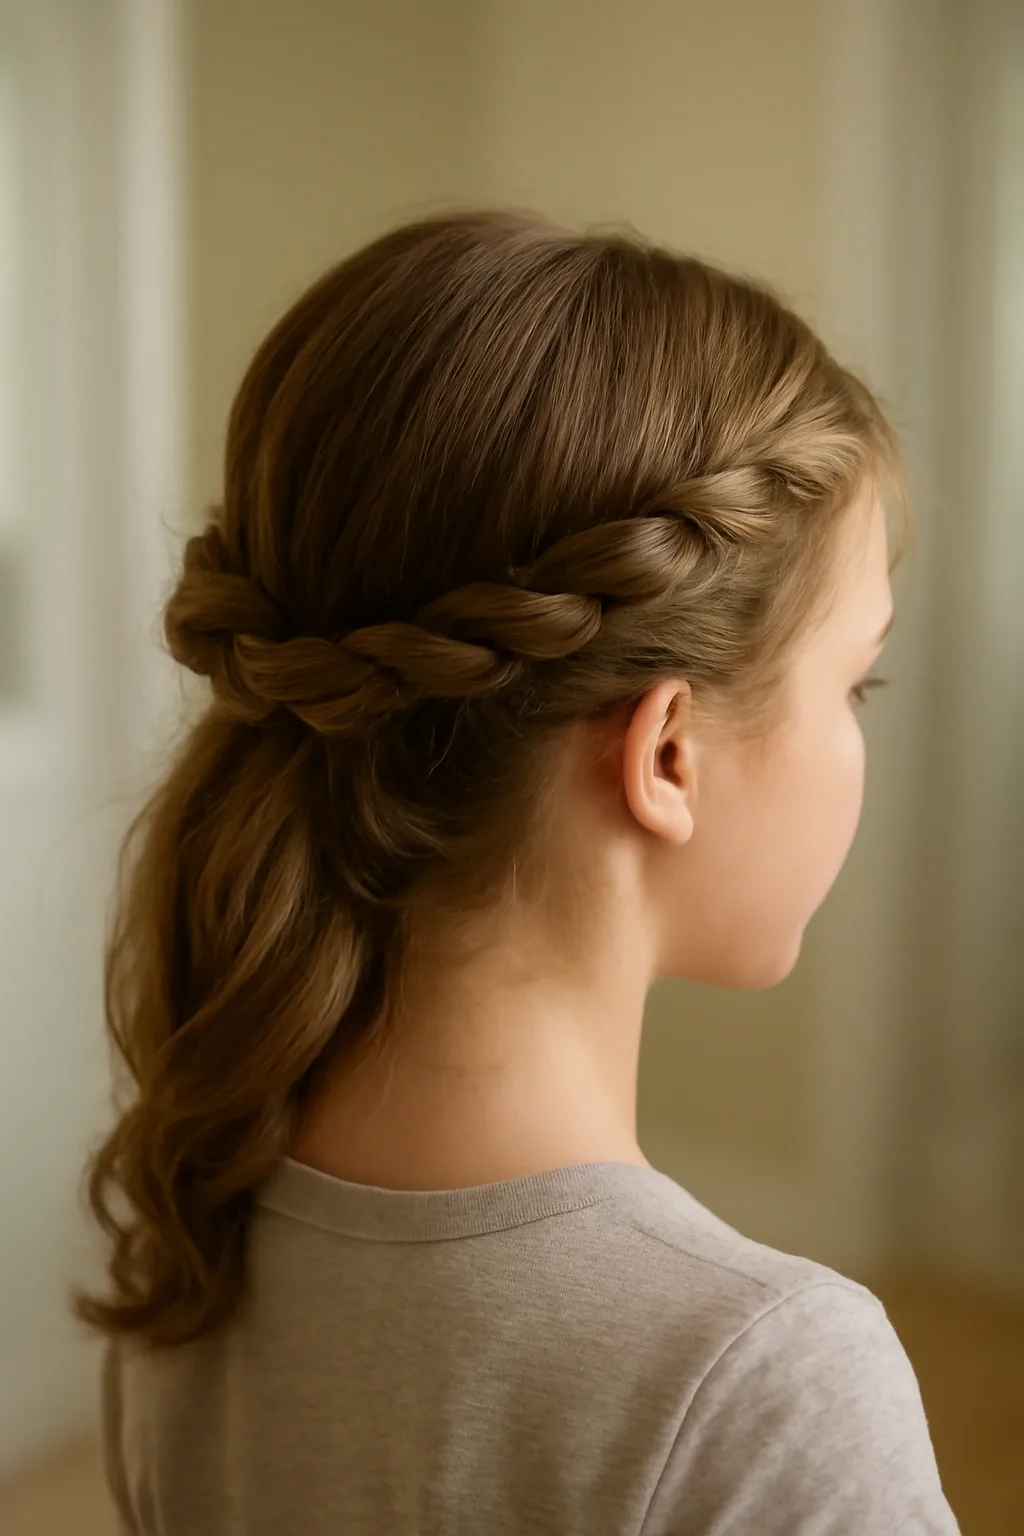
A twisted half-up style twists two front sections back and pins them together, no braiding required. It takes about two minutes, keeps the face clear, and looks polished enough for any school day.
Quick verdict: Best for students who cannot braid yet but want a neat half-up style.
Common mistakes:
- Twisting too loosely, so the twists fall out before first break.
- Taking uneven sections, so one twist is much thicker than the other.
- Pinning the twists with pins that show from the front.
Styling steps:
- Take a section of hair from above each ear.
- Twist each section back toward the middle of the head.
- Cross them over each other and pin them flat at the back.
- Smooth the front and tuck any short layers behind the twists.
21. Rope Braid Ponytail
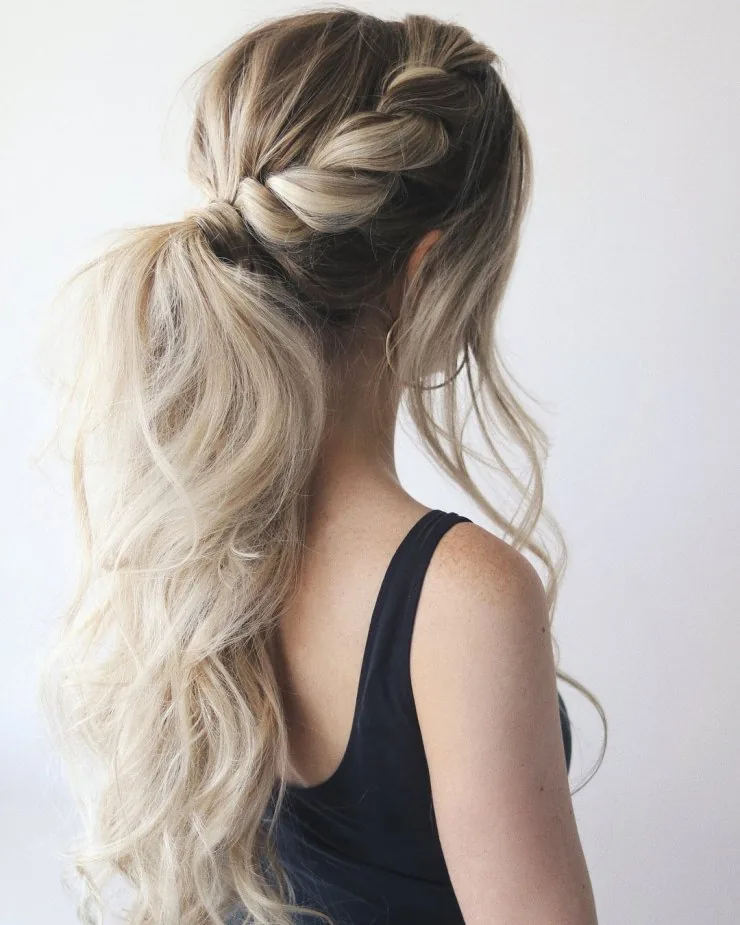
A rope braid twists two strands around each other like a rope, and when it starts from a ponytail it makes a sleek, sporty style. It is faster than a three-strand braid and holds its shape beautifully all day.
Quick verdict: Best for students who want a braid that is quick to learn and very hard to shake loose.
Common mistakes:
- Twisting both strands in the same direction, which makes the rope unravel.
- Forgetting to twist the strands individually as well as around each other.
- Securing the ponytail too loosely, so the rope pulls it sideways.
Styling steps:
- Secure hair into a ponytail at your chosen height.
- Split the ponytail into two equal strands.
- Twist each strand clockwise, then wrap them around each other anti-clockwise.
- Keep going to the ends and tie off with a small elastic.
22. Waterfall Braid
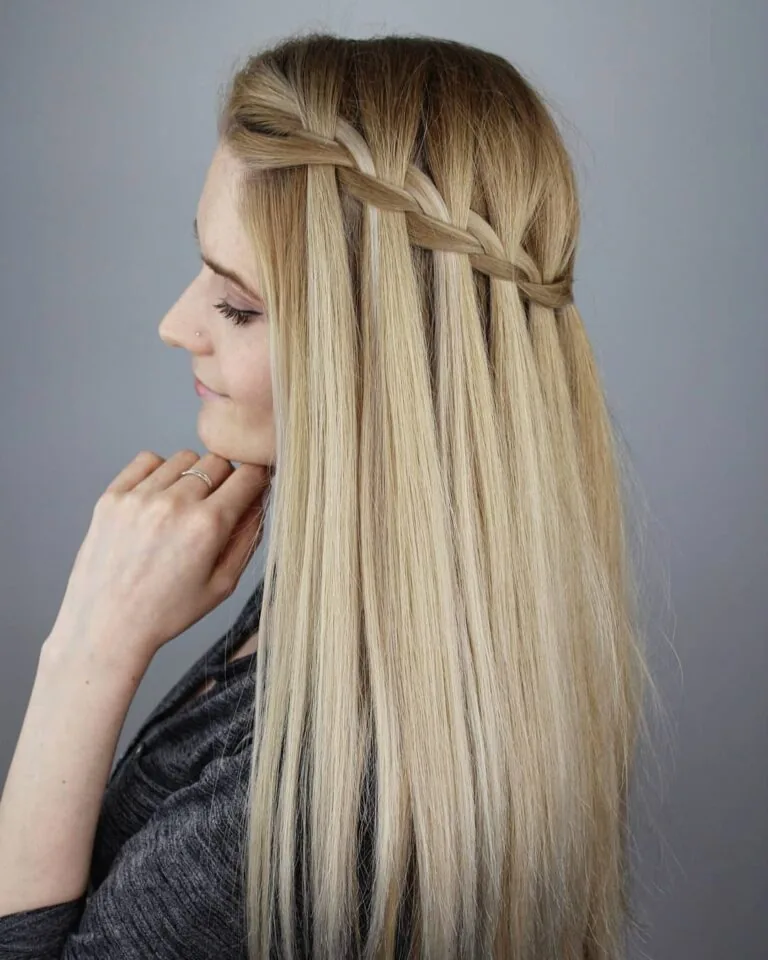
A waterfall braid lets strands drop through the braid like water, leaving soft pieces of hair falling free. It keeps the front neat while showing off length, and it looks far more complicated than it actually is.
Quick verdict: Best for students with medium to long hair who want a pretty style that still keeps hair out of the eyes.
Common mistakes:
- Pulling the dropped strands too tight, which removes the waterfall effect.
- Letting the braid drift downward instead of following a level line.
- Skipping pins at the end, so the braid slides out of longer hair.
Styling steps:
- Part hair to one side and start a French braid near the front hairline.
- Each time you cross a top strand, drop it and pick up a new strand behind it.
- Continue across the head, keeping the braid level.
- Secure the end with a small elastic and pin it behind the ear or at the back.
23. Pull-Through Braid
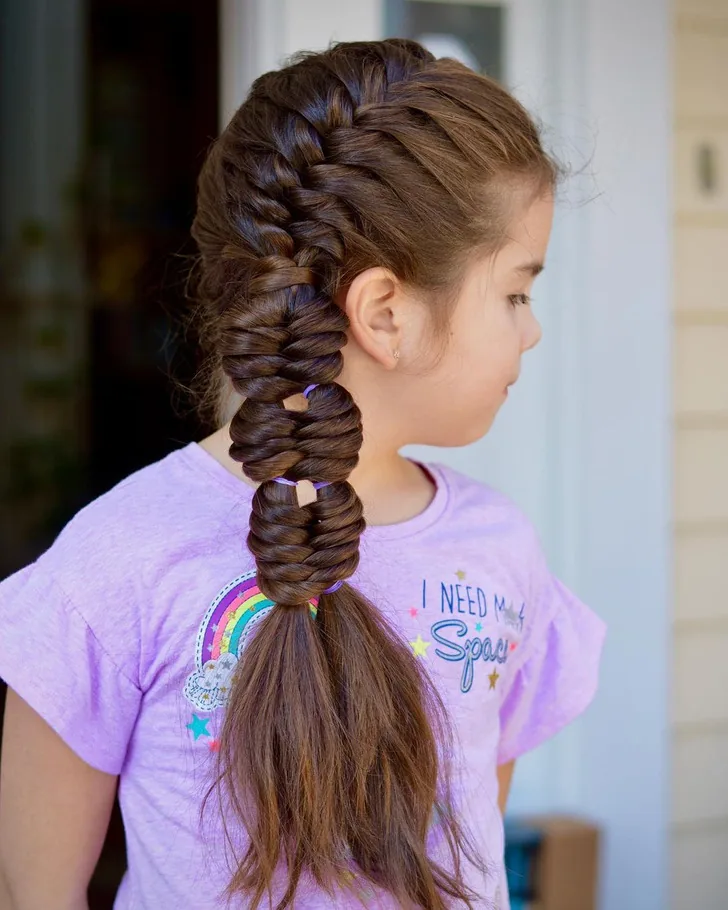
A pull-through braid is made from a row of small ponytails looped through each other, so it looks like a thick braid without any actual braiding. It is a brilliant option for anyone who struggles with braids, and it stays put for hours.
Quick verdict: Best for students who love the look of braids but have not mastered braiding yet.
Common mistakes:
- Using elastics that are too far apart, which makes the braid look gappy.
- Pulling the loops unevenly, so the braid leans to one side.
- Starting with a ponytail that is too loose, so the whole braid sags.
Styling steps:
- Gather hair into a small ponytail at the crown and secure it.
- Make a second ponytail just below it, including the tail of the first.
- Split the first tail in two, bring the halves around the second ponytail, and secure them below it.
- Repeat down the length, then gently puff each section for fullness.
24. Headband Braid
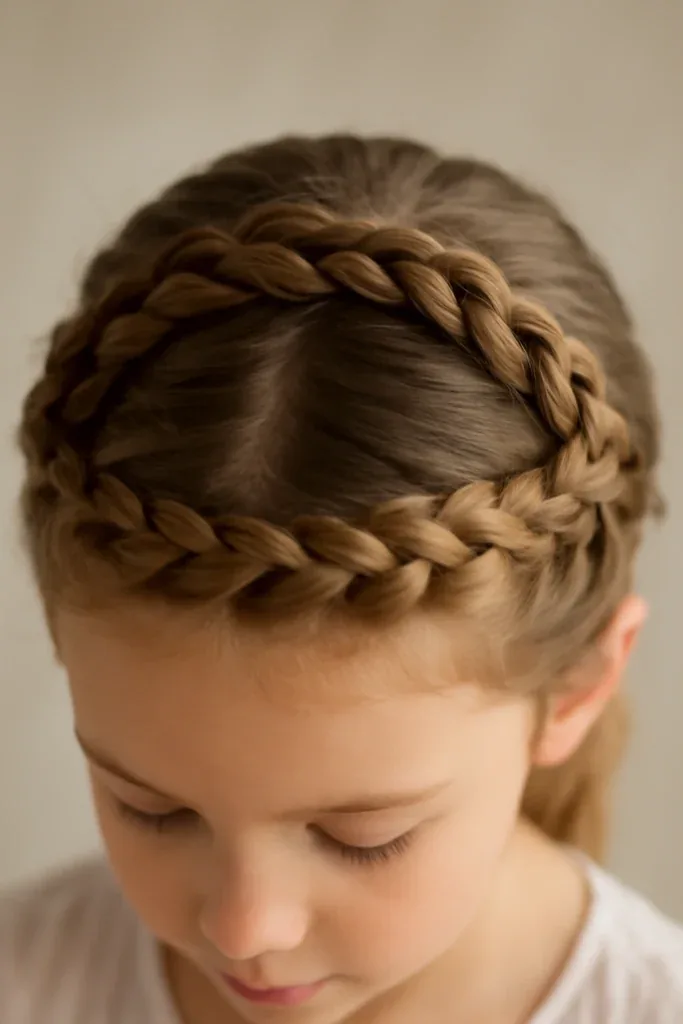
A headband braid runs along the front hairline from one ear to the other, acting like a built-in headband. It keeps the front perfectly tidy, which is ideal for students whose fringe or layers keep falling forward.
Quick verdict: Best for students with a fringe or face-framing layers that constantly fall into their eyes.
Common mistakes:
- Braiding too far back from the hairline, so loose strands escape in front of it.
- Making the braid too thin, so it disappears into the rest of the hair.
- Not pinning the end securely, so it unravels behind the ear.
Styling steps:
- Part hair to one side and take a section near the front hairline.
- Braid along the hairline toward the other ear, adding hair only from the front side.
- Keep the braid snug against the hairline as you go.
- Pin the end behind the opposite ear and blend it into the rest of the hair.
25. French Braid Pigtails
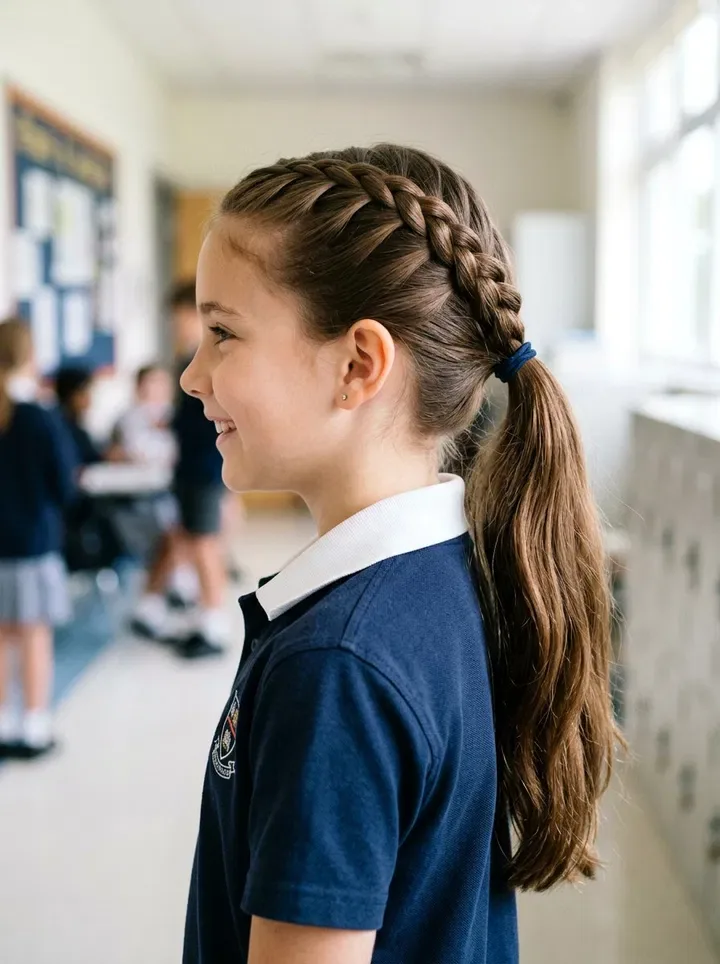
French braid pigtails are two French braids, one on each side, that keep every strand contained from forehead to ends. They are the classic school style for a reason: they survive wind, rain, PE and a whole day of lessons.
Quick verdict: Best for younger students and anyone who needs a style guaranteed to last until home time.
Common mistakes:
- Parting the hair unevenly, so one braid is noticeably thicker.
- Braiding one side tighter than the other, which feels uncomfortable.
- Stopping the French section too early, leaving loose hair that tangles.
Styling steps:
- Part hair cleanly down the middle and clip one side away.
- French-braid the first side from the front hairline to the nape, then braid the tail.
- Repeat on the second side with the same tension.
- Tie both ends and smooth flyaways with a little water or cream.
26. Dutch Braid into a Low Bun
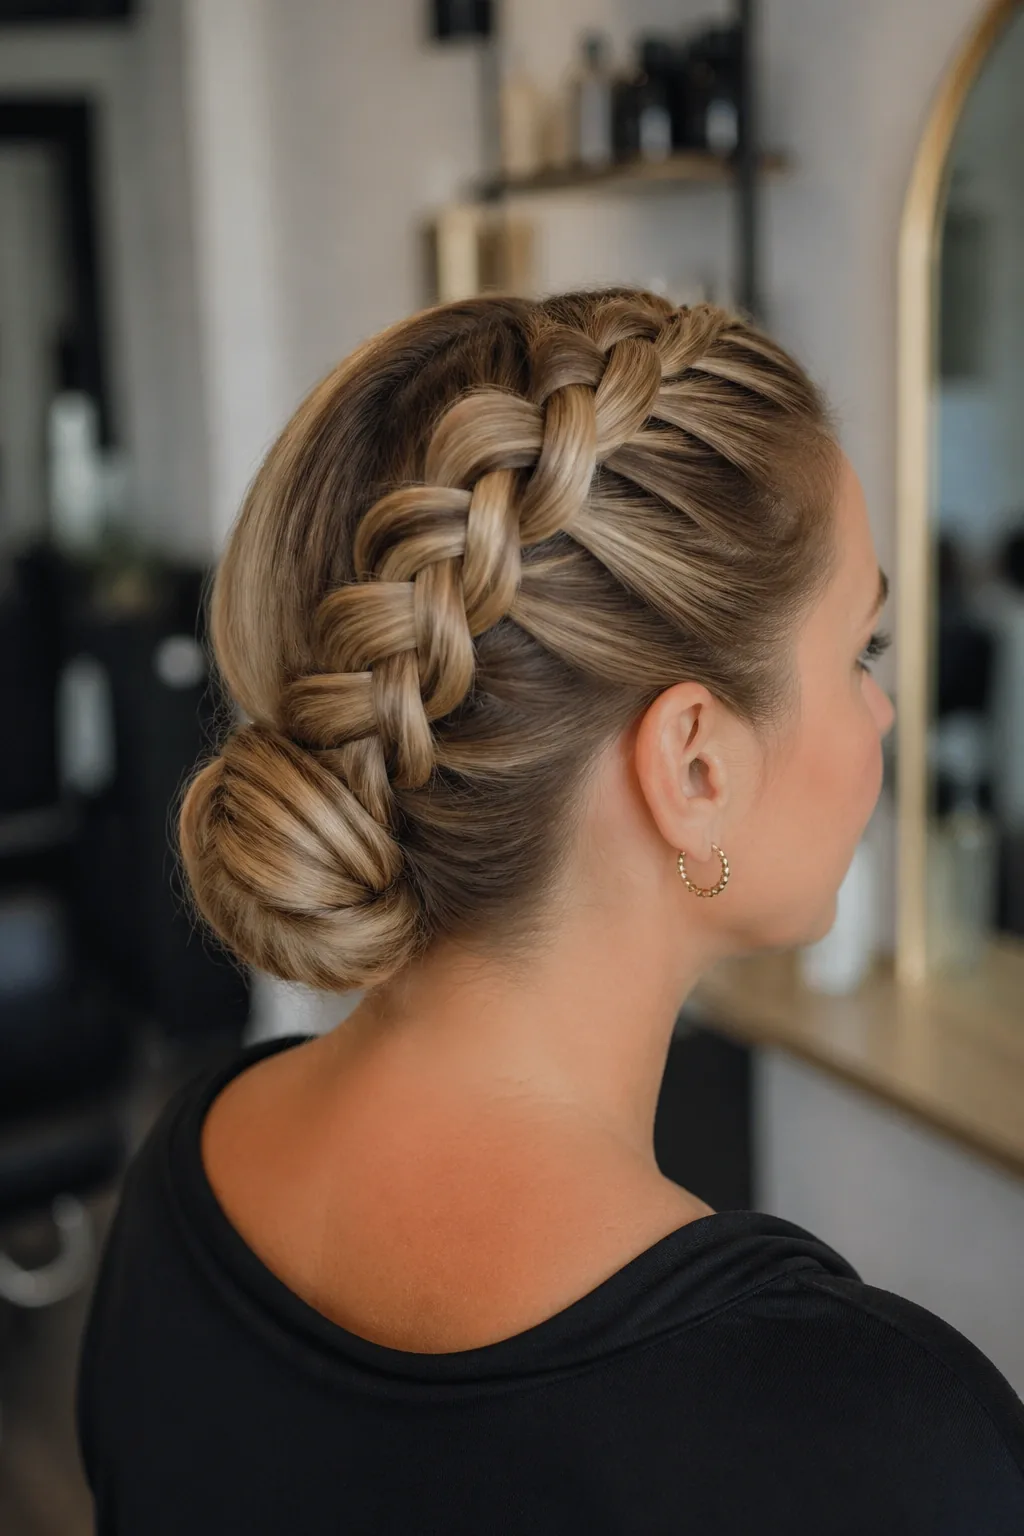
A Dutch braid running into a low bun gives a polished, secure updo with a beautiful braided detail on top. The braid holds the front flat, the bun holds the ends, and nothing moves all day.
Quick verdict: Best for formal school days, photos and students who want a bun with extra detail.
Common mistakes:
- Braiding with uneven tension, so the braid ripples instead of lying flat.
- Coiling the bun too loosely, so it droops by afternoon.
- Leaving the braid tail sticking out of the bun.
Styling steps:
- Start a Dutch braid at the front hairline and braid back to the nape.
- Gather the remaining hair, plus the braid, into a low ponytail.
- Twist and coil the ponytail into a bun at the nape.
- Pin the bun firmly and tuck the ends underneath.
27. Twisted Low Bun
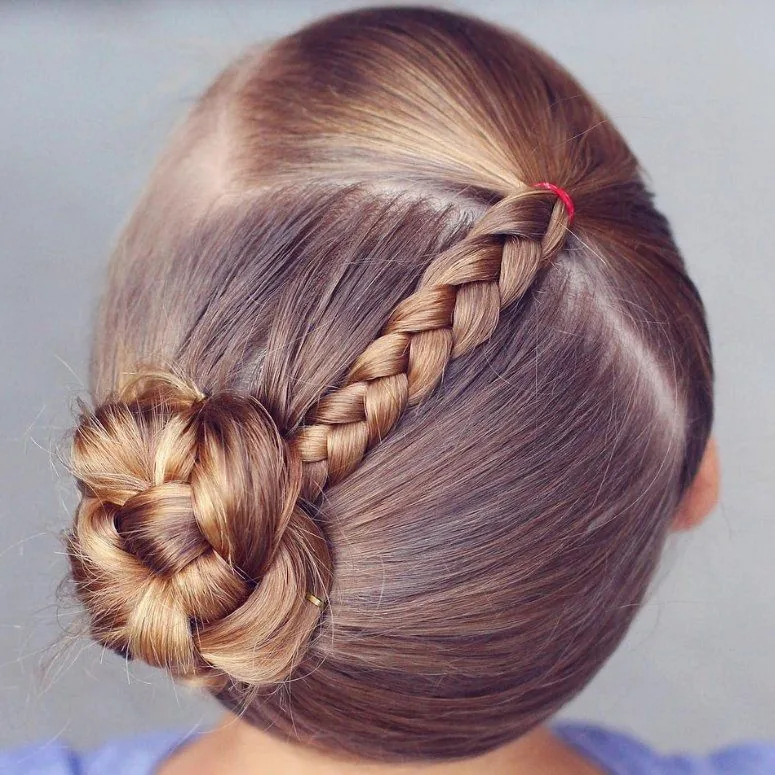
A twisted low bun skips braiding entirely: two sections are twisted and coiled into a neat bun at the nape. It is quicker than a braided bun, looks elegant, and holds well with a few pins.
Quick verdict: Best for students who want a tidy bun but are short on time or new to braiding.
Common mistakes:
- Twisting the sections in opposite directions, so the bun looks uneven.
- Coiling the twists too loosely, which makes the bun sag.
- Using too few pins, so the bun loosens during the day.
Styling steps:
- Part hair down the middle or to one side and gather it low at the nape.
- Split the gathered hair into two sections and twist each one.
- Coil the twists around each other into a bun shape.
- Pin the bun from several angles and smooth the hairline.
28. Side-Swept Low Ponytail
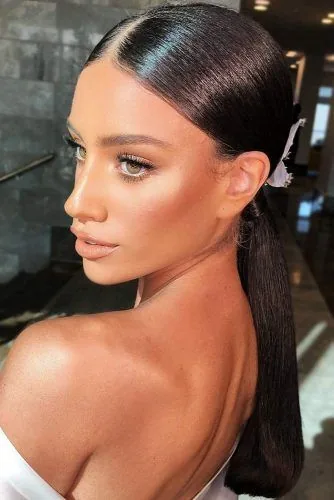
A side-swept low ponytail brushes the front hair to one side before gathering it low at the nape, giving a soft, relaxed finish. It keeps hair tidy while looking less severe than a scraped-back style.
Quick verdict: Best for students who want a gentle, low ponytail with a soft front.
Common mistakes:
- Sweeping the front too far, so hair falls across the eyes.
- Gathering the ponytail off-centre by accident, so it sits crooked.
- Skipping smoothing, which leaves bumps along the sweep.
Styling steps:
- Brush the front hair softly to one side.
- Gather all the hair low at the nape, keeping the sweep intact.
- Secure with an elastic and smooth any bumps with a brush.
- Loosen the sweep slightly for softness, if your school allows it.
29. Middle-Part Low Bun
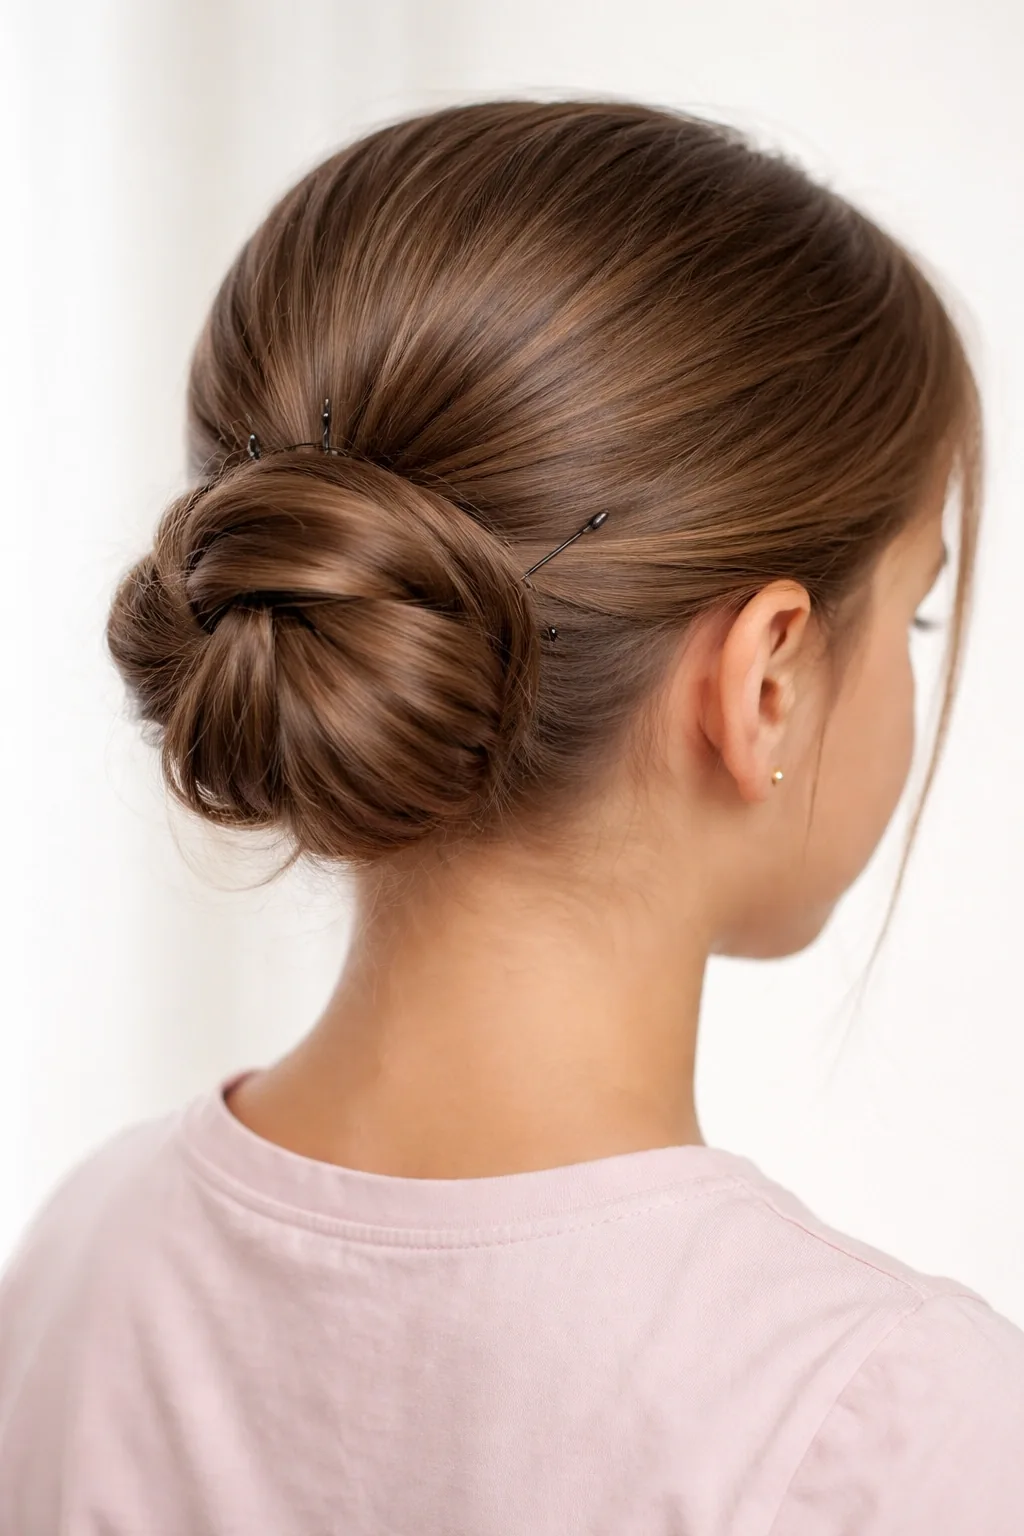
A middle-part low bun is the neatest bun in this guide: a clean centre part, smooth sides and a tidy coil at the nape. It reads as calm and organised, and it suits uniforms and formal school occasions perfectly.
Quick verdict: Best for students who need the tidiest possible style for assemblies, exams or photos.
Common mistakes:
- Parting the hair off-centre by mistake, which shows up immediately in this style.
- Leaving bumps on the sides after brushing back.
- Making the bun too large, which throws off the neat proportions.
Styling steps:
- Part hair precisely down the middle from forehead to nape.
- Brush each side back smoothly and gather at the nape.
- Twist the ponytail into a compact bun and pin it flat.
- Check the part and sides in a mirror and smooth any flyaways.
30. Bow-Tied Ponytail
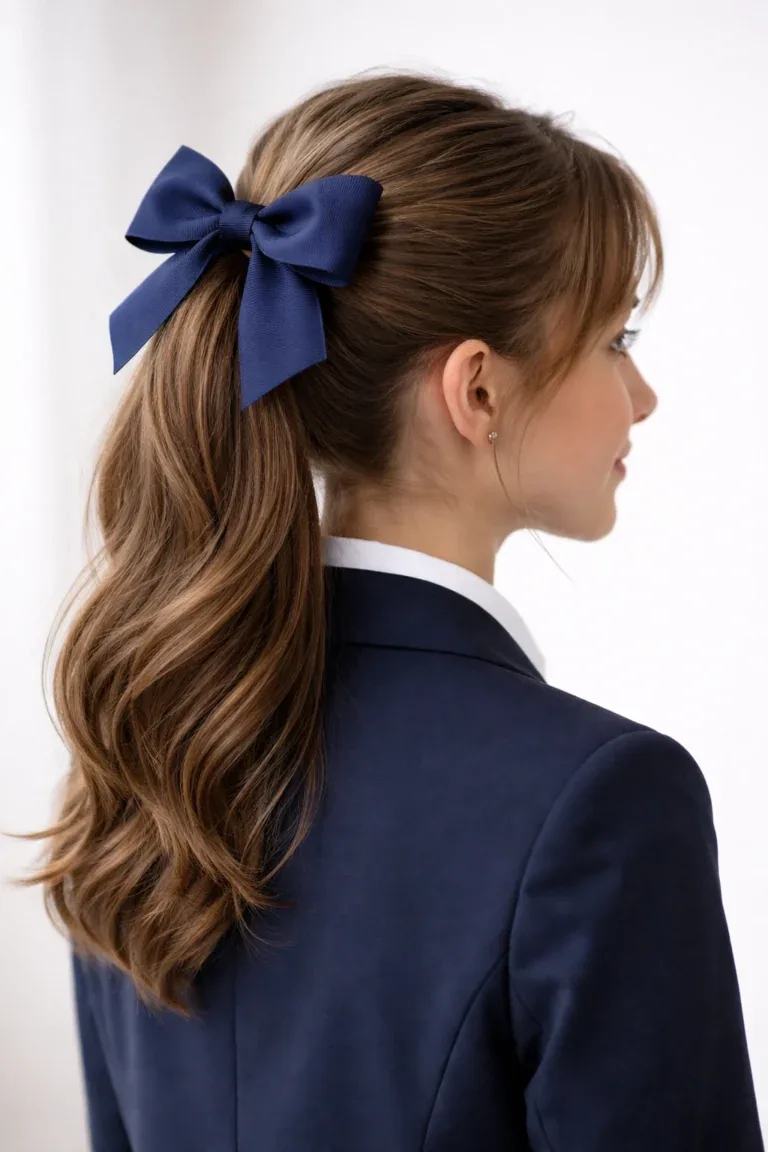
A bow-tied ponytail finishes a simple ponytail with a ribbon tied in a bow at the base. It adds a cheerful, school-spirited touch, works with uniform colours, and takes about thirty seconds extra.
Quick verdict: Best for younger students, themed days and anyone whose school loves a ribbon detail.
Common mistakes:
- Tying the bow too loosely, so it comes undone during the day.
- Using a ribbon that is too short, which makes a tiny, sad bow.
- Placing the bow underneath the ponytail, where it cannot be seen.
Styling steps:
- Secure a ponytail at your chosen height.
- Wrap a ribbon around the base and tie it in a neat bow on top or to the side.
- Trim the ribbon ends evenly, or leave them long if you prefer.
- Give the bow a quick tug to check it will hold all day.
31. Scrunchie Top Bun

A scrunchie top bun wraps a soft scrunchie around a high bun, giving a comfy, gentle hold that does not dent or snag hair. It is the kindest bun for hair, and the scrunchie adds a pop of colour to a uniform.
Quick verdict: Best for students with hair that breaks easily, and for anyone who loves scrunchies.
Common mistakes:
- Wrapping the scrunchie too many times, which squashes the bun flat.
- Using a scrunchie that has lost its stretch, so the bun slips.
- Making the bun before the ponytail is secure, so the whole thing wobbles.
Styling steps:
- Gather hair high and secure it with a regular elastic first.
- Twist the ponytail into a bun and pin it in place.
- Wrap a scrunchie around the base of the bun once or twice.
- Fluff the bun gently and smooth the hairline.
32. Claw-Clip Half-Up Twist
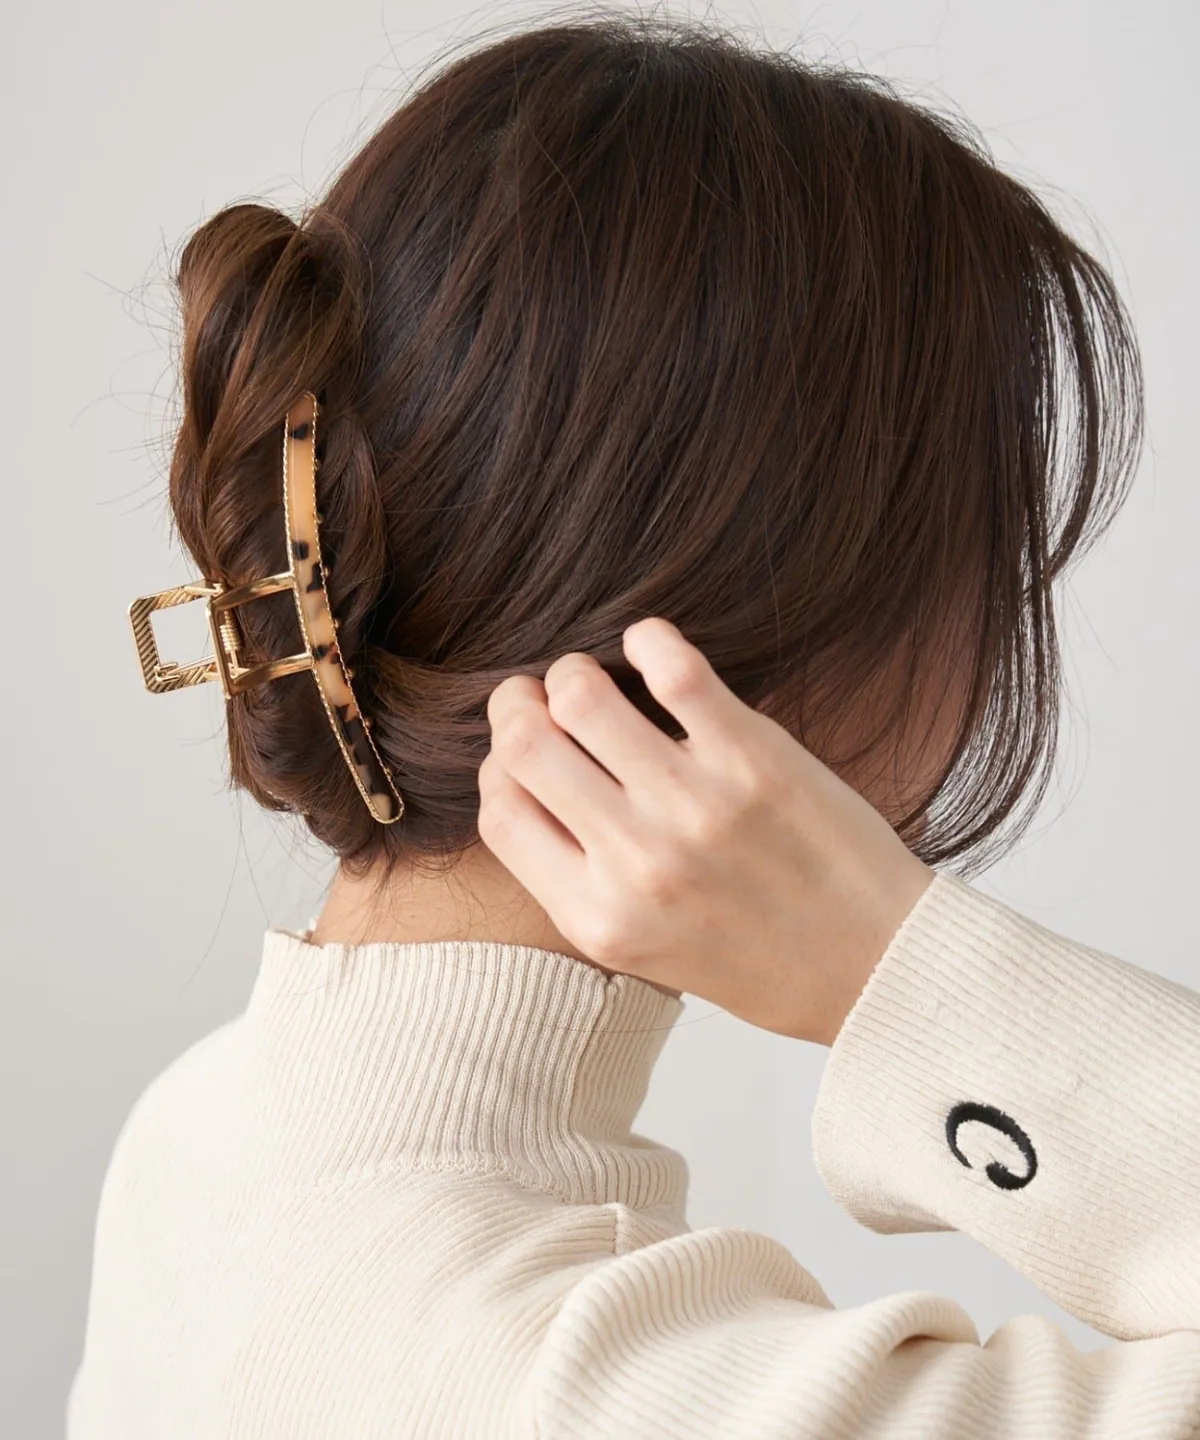
A claw-clip half-up twist gathers the top section, twists it once, and clips it in place with a claw clip. It is the fastest half-up style here, it needs no elastics, and it is easy to redo between lessons.
Quick verdict: Best for students who want a two-minute style they can redo anywhere, even without a mirror.
Common mistakes:
- Using a clip that is too small for the amount of hair, so it pops open.
- Twisting the section too loosely, so it slides out of the clip.
- Clipping too high, so the twist sticks up instead of lying flat.
Styling steps:
- Take the top section of hair from temple to temple.
- Twist the section once or twice at the back of the head.
- Hold the twist flat and clamp a claw clip over it.
- Tuck any escaping strands back into the clip and check it feels secure.
33. Two-Strand Twists
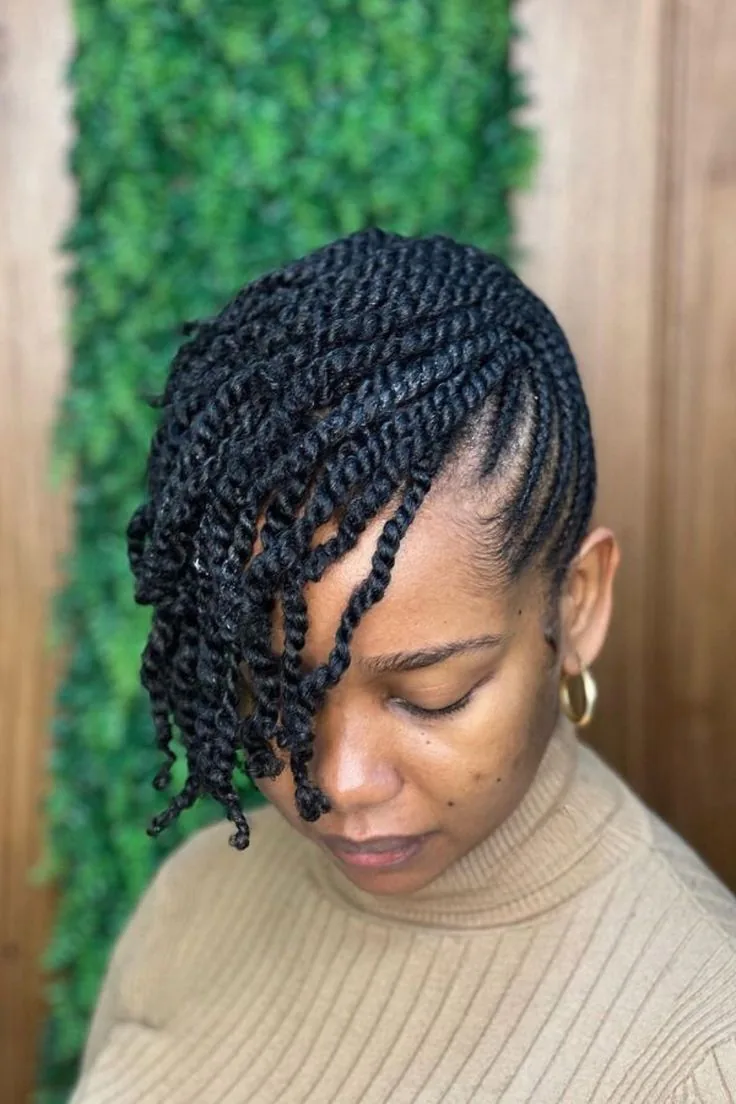
Two-strand twists divide hair into sections and twist each one into a neat rope, which can be worn loose or gathered up. They are protective, tidy and long-lasting, making them a great school style for textured and natural hair.
Quick verdict: Best for students with textured or natural hair who want a protective style that lasts for days.
Common mistakes:
- Twisting sections of very different sizes, which looks untidy.
- Skipping a leave-in product, so the twists frizz and unravel.
- Twisting too tightly at the roots, which pulls and hurts.
Styling steps:
- Start with detangled, slightly damp hair and apply a leave-in cream.
- Part hair into even sections, working from the back to the front.
- Split each section into two strands and twist them around each other to the ends.
- Seal the ends with a small elastic or a twist-and-tuck, and repeat.
34. Knotted Ponytail

A knotted ponytail ties the hair itself into a knot, or a row of knots, instead of relying only on an elastic. It looks clever and unusual, holds surprisingly well, and works best on medium to long hair.
Quick verdict: Best for students who want a ponytail with a twist that nobody else in class is wearing.
Common mistakes:
- Tying the knot too loosely, so it slides apart during the day.
- Using sections that are too thick, which makes a bulky, uneven knot.
- Forgetting a hidden elastic underneath, so the knot bears all the weight.
Styling steps:
- Gather hair into a ponytail and secure it lightly with a thin elastic.
- Split the ponytail into two strands and tie them in a simple knot.
- Tighten the knot gently and add a second knot below it if you like.
- Secure the ends with a small elastic and smooth flyaways.
35. Topsy-Tail Loop Ponytail

A topsy-tail loop ponytail flips a ponytail through itself to create a twisted, looped effect at the base. It takes seconds with a topsy-tail tool or just your fingers, and it turns a plain ponytail into something that looks styled.
Quick verdict: Best for students who want a ponytail that looks done-up without any braiding.
Common mistakes:
- Flipping the ponytail only halfway, which leaves a messy loop.
- Using a ponytail that is too tight to flip through comfortably.
- Pulling the loop too hard, which drags the elastic up and creates bumps.
Styling steps:
- Secure a low or mid ponytail with an elastic.
- Make a small gap in the hair just above the elastic.
- Flip the ponytail up and through the gap from underneath.
- Pull it through fully, tighten gently, and smooth the loop.
36. Side Bun
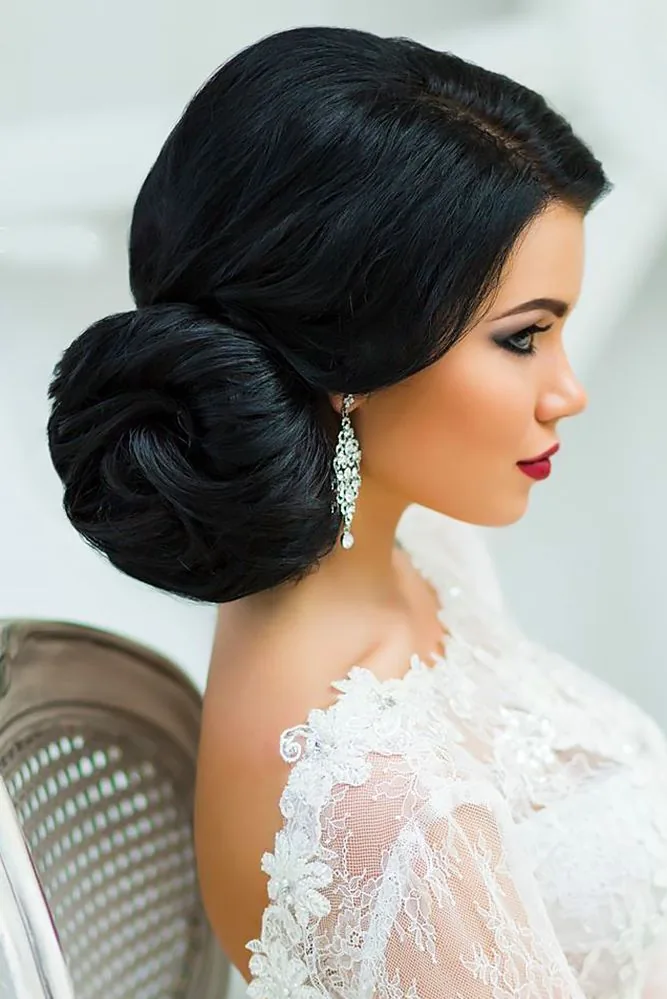
A side bun sits low beside the nape, to one side of the head, giving a soft, slightly vintage feel. It keeps hair off the neck, looks tidy from the front, and is a nice change from a centred bun.
Quick verdict: Best for students who want a bun that feels a little different but is just as neat.
Common mistakes:
- Placing the bun too high on the side, so it sticks out awkwardly.
- Letting the opposite side puff up, which unbalances the look.
- Pinning the bun in only one place, so it rotates as the day goes on.
Styling steps:
- Brush all the hair to one side and gather it low behind the ear.
- Twist the gathered hair and coil it into a bun.
- Pin the bun from several angles until it feels solid.
- Smooth the opposite side flat and check the bun sits neatly.
37. Ribbon Braided Pigtails

Ribbon braided pigtails weave a ribbon into each braid, adding colour that matches a uniform or a school house. The ribbon also helps the braids hold their shape, and the result looks festive without breaking dress codes.
Quick verdict: Best for school events, house days and students who love a ribbon detail in their hair.
Common mistakes:
- Weaving the ribbon too loosely, so it slides out of the braid.
- Using ribbons of different lengths, so the pigtails look mismatched.
- Starting the ribbon halfway down, which leaves the top of the braid plain.
Styling steps:
- Part hair down the middle and tie a ribbon at the top of each side.
- Braid each side, treating the ribbon as an extra strand or weaving it through.
- Keep the ribbon visible by pulling it to the outside of the braid as you go.
- Tie the ribbon ends into a small bow at the bottom of each braid.
38. Double French Braids into a Ponytail

Double French braids that join into a single ponytail give the best of both worlds: a tidy braided front and a free-flowing ponytail behind. It is secure at the front, where it matters, and easy at the back.
Quick verdict: Best for students who like braids but prefer wearing their hair in a ponytail.
Common mistakes:
- Braiding the two sides unevenly, so they meet at different heights.
- Leaving the join messy, which ruins the tidy braided effect.
- Securing the ponytail too loosely, so the braids pull it down.
Styling steps:
- Part hair down the middle and French-braid each side to the crown.
- Bring both braids together at the back of the head.
- Gather the remaining hair with the braid tails into one ponytail.
- Secure firmly, then smooth the braid joins with a little cream.
39. High Puff Ponytail
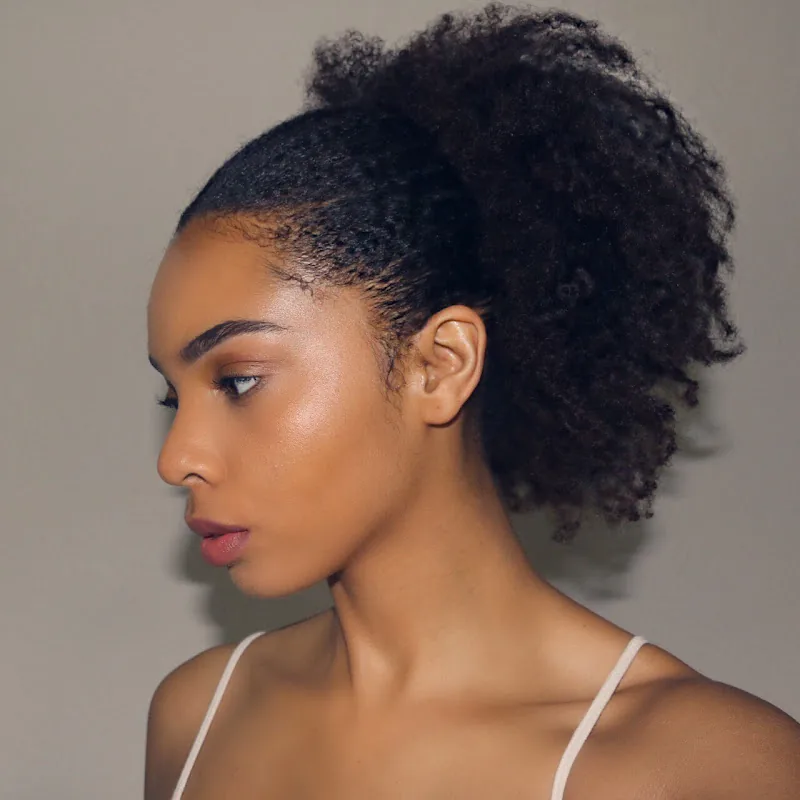
A high puff ponytail gathers natural or textured hair into a full, rounded puff on top of the head. It celebrates natural volume, keeps hair off the face, and is quick once the hair is detangled and moisturised.
Quick verdict: Best for students with natural or textured hair who want a proud, voluminous, school-friendly style.
Common mistakes:
- Gathering the hair while it is dry and tangled, which causes breakage.
- Pulling the puff too tight, which strains the edges.
- Skipping moisturiser, so the puff looks dry and frizzy by lunch.
Styling steps:
- Detangle gently and apply a leave-in moisturiser or cream.
- Brush hair upward with a soft brush, smoothing the edges.
- Secure with a stretchy band or a puff cuff at the crown.
- Shape the puff with your hands and smooth the edges with a little gel.
40. Side Fishtail Braid
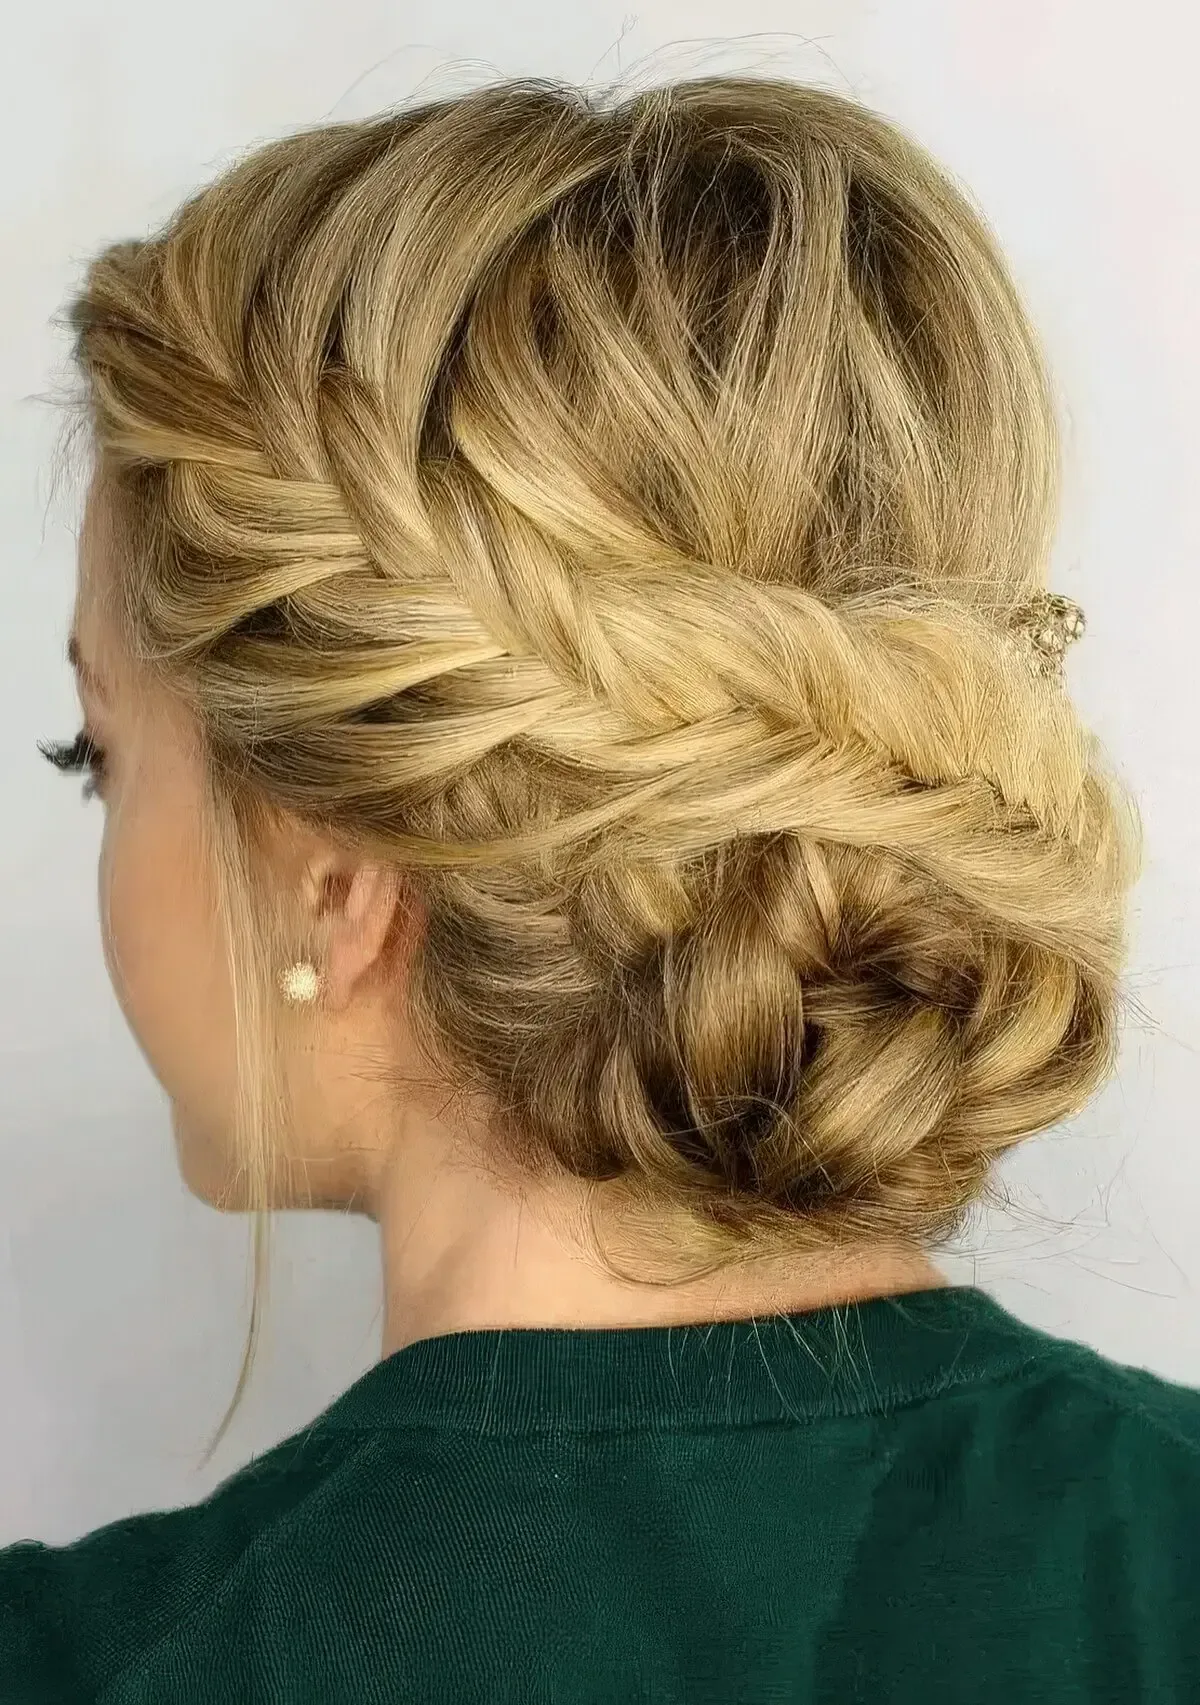
A side fishtail braid moves the fishtail pattern over one shoulder, so the detailed weave is visible from the front and the braid never presses against a chair back. It is a pretty, neat choice for longer hair.
Quick verdict: Best for students with long hair who want a braid that shows off its pattern and stays comfortable.
Common mistakes:
- Braiding down the back first and dragging it sideways, which kinks the braid.
- Using strands that are too thick, which hides the fishtail detail.
- Forgetting to secure the end well, so the fine strands slip out.
Styling steps:
- Brush all the hair over to one shoulder.
- Split it into two sections and fishtail-braid down the length.
- Keep the strands thin and even for a clear woven pattern.
- Tie off the end and gently widen the braid for fullness.
41. Milkmaid Braids
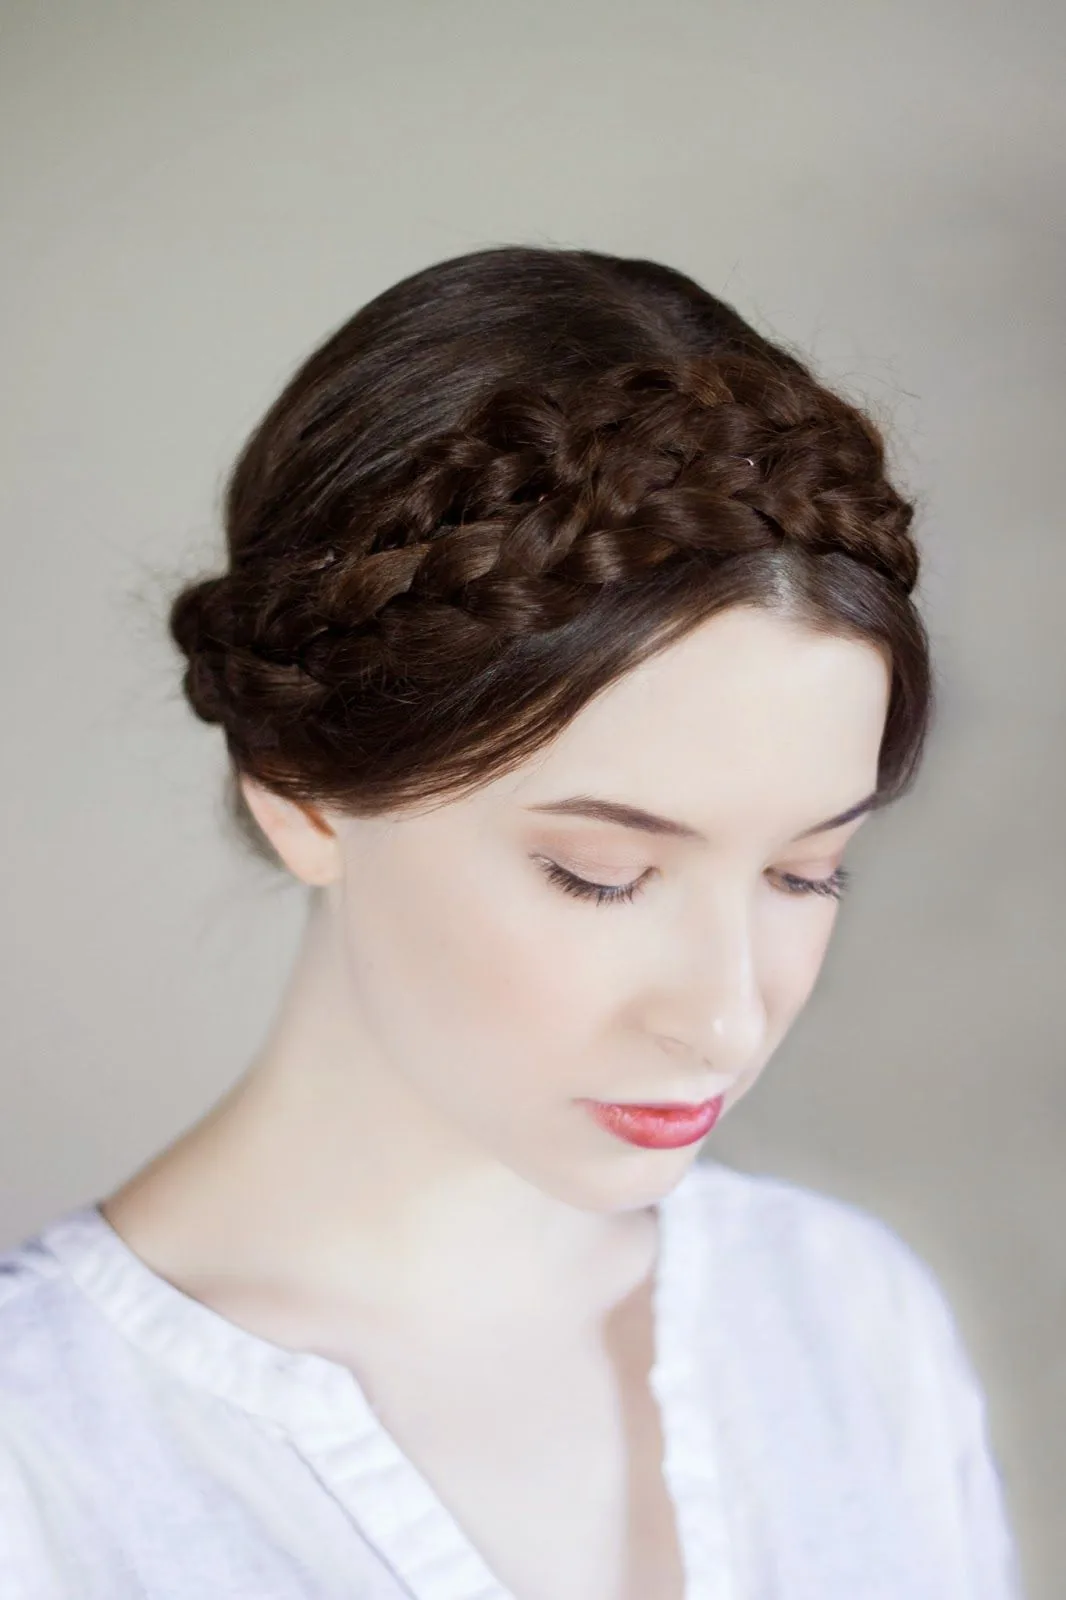
Milkmaid braids are two braids wrapped up and pinned across the top of the head, like a crown made from your own hair. They keep every strand contained, look charming, and are wonderfully secure once pinned.
Quick verdict: Best for students who want a fully contained updo that looks special for photos and events.
Common mistakes:
- Pinning the braids too loosely, so they slide down over the ears.
- Wrapping the braids unevenly, so one side sits higher than the other.
- Leaving the braid tails sticking out at the ends.
Styling steps:
- Part hair down the middle and braid each side fully.
- Bring the left braid up and across the top of the head and pin it.
- Bring the right braid across in the opposite direction and pin it.
- Tuck both braid tails underneath and add extra pins wherever needed.
42. Low Twisted Ponytail
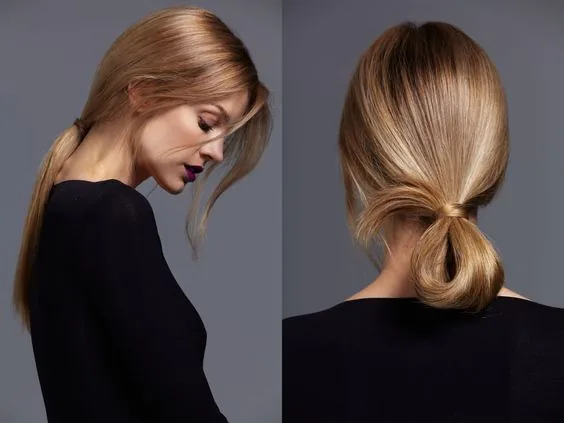
A low twisted ponytail twists the sides of the hair back before gathering it at the nape, adding a subtle twisted detail to the simplest style. It looks considered, takes two extra minutes, and holds neatly all day.
Quick verdict: Best for students who want a low ponytail with a little extra detail for a smart school day.
Common mistakes:
- Twisting the sides too loosely, so they fall out of the ponytail.
- Gathering the ponytail too high, which loses the low, relaxed feel.
- Letting the twists cross unevenly at the back.
Styling steps:
- Take a section from each side of the head, above the ears.
- Twist each section back toward the nape.
- Gather the twists with the rest of the hair into a low ponytail.
- Secure with an elastic and smooth the twists flat.
43. Zigzag-Part Double Braids
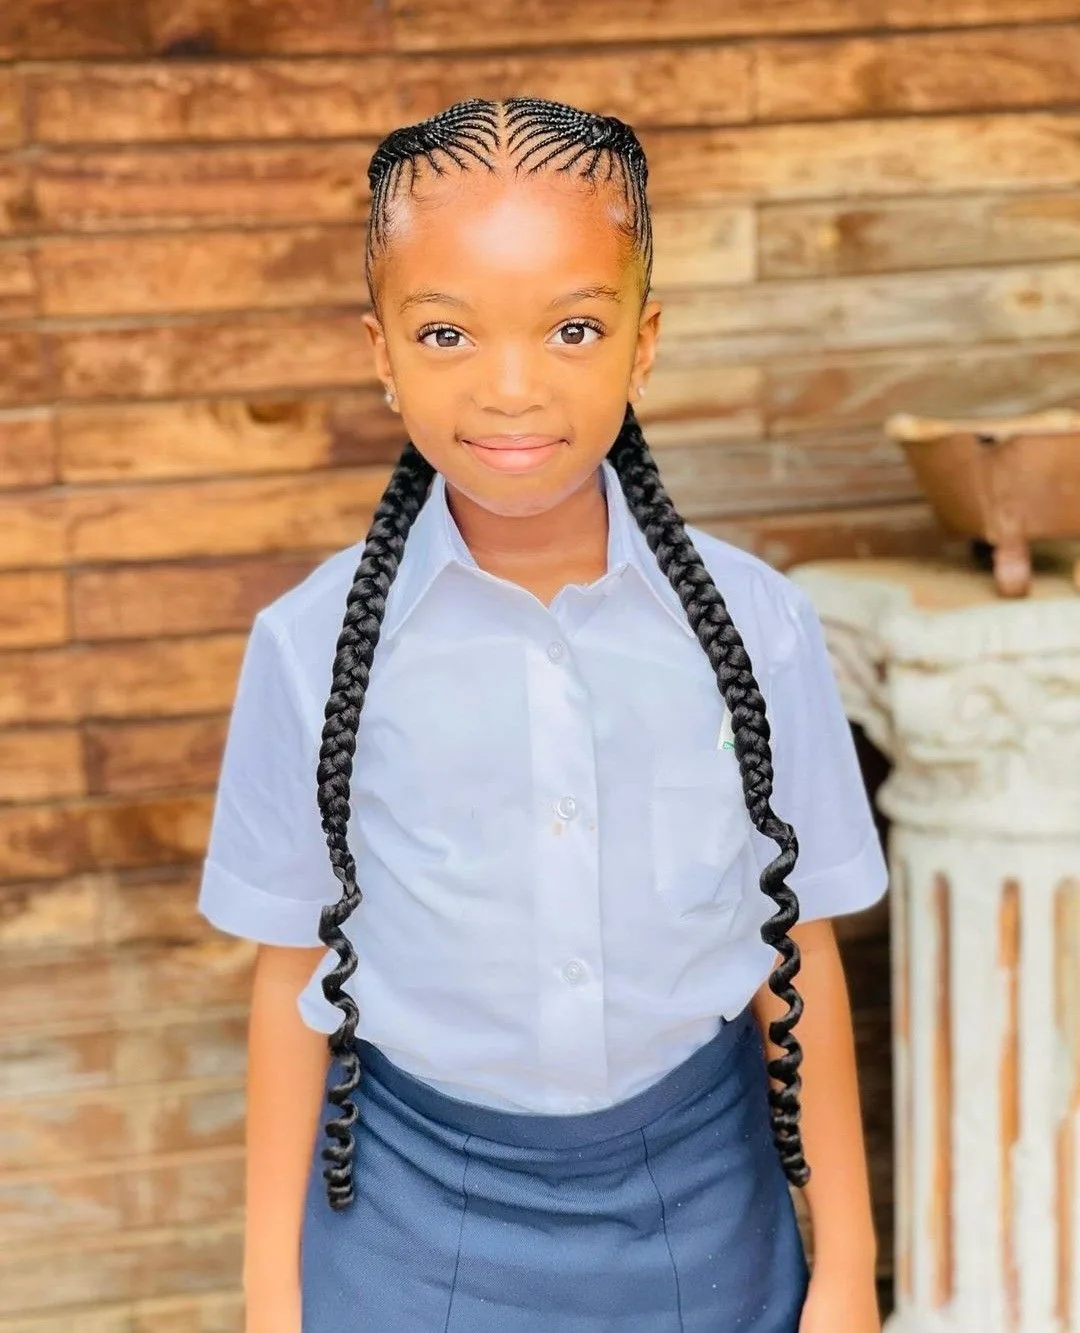
Zigzag-part double braids start with a fun zigzag centre part and finish with two neat braids. The zigzag adds personality without breaking any dress code, and the braids keep everything tidy underneath.
Quick verdict: Best for students who want a small fun detail in an otherwise classic, tidy style.
Common mistakes:
- Rushing the zigzag, so it looks like a crooked straight part instead.
- Making the zigzag too wide, which leaves awkward chunks of hair.
- Braiding the two sides with different tension, so they sit unevenly.
Styling steps:
- Use the tail of a comb to draw a zigzag part down the middle of the head.
- Clip one side away and braid the other side from the front to the ends.
- Repeat on the second side, keeping the tension the same.
- Tie both braids and check the zigzag is still visible at the front.
Classroom-to-After-School Switches
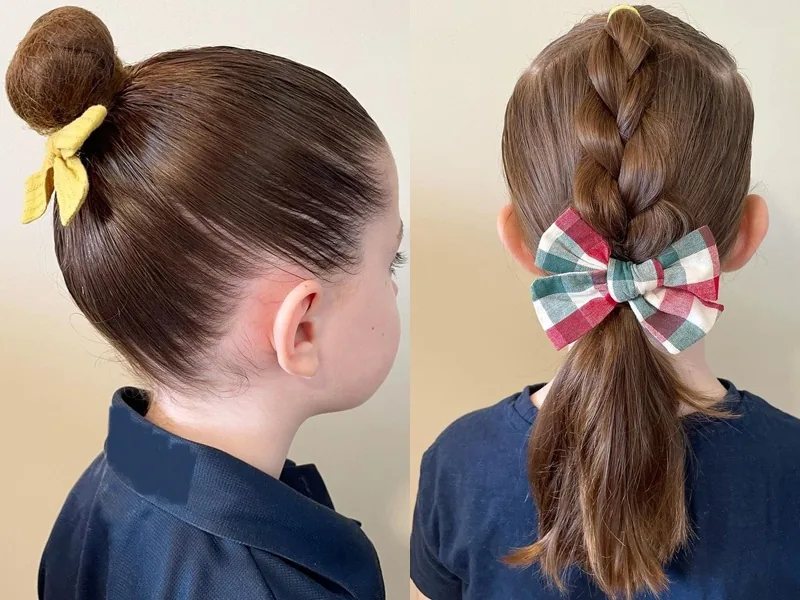
A school style does not have to stay exactly the same all day. Letting a French braid out at home time gives soft waves, and taking a low bun down gives a gentle bend that looks styled without any heat.
For an after-school club or a friend’s house, a quick switch works well: turn a low ponytail into a bubble ponytail by adding elastics, or twist a half-up ponytail into a small top knot. Both take under a minute.
Keep one spare scrunchie and two pins in your bag for switches. That is all you need to turn a classroom style into an after-school one without starting from scratch.
A Hair Kit for Your School Bag
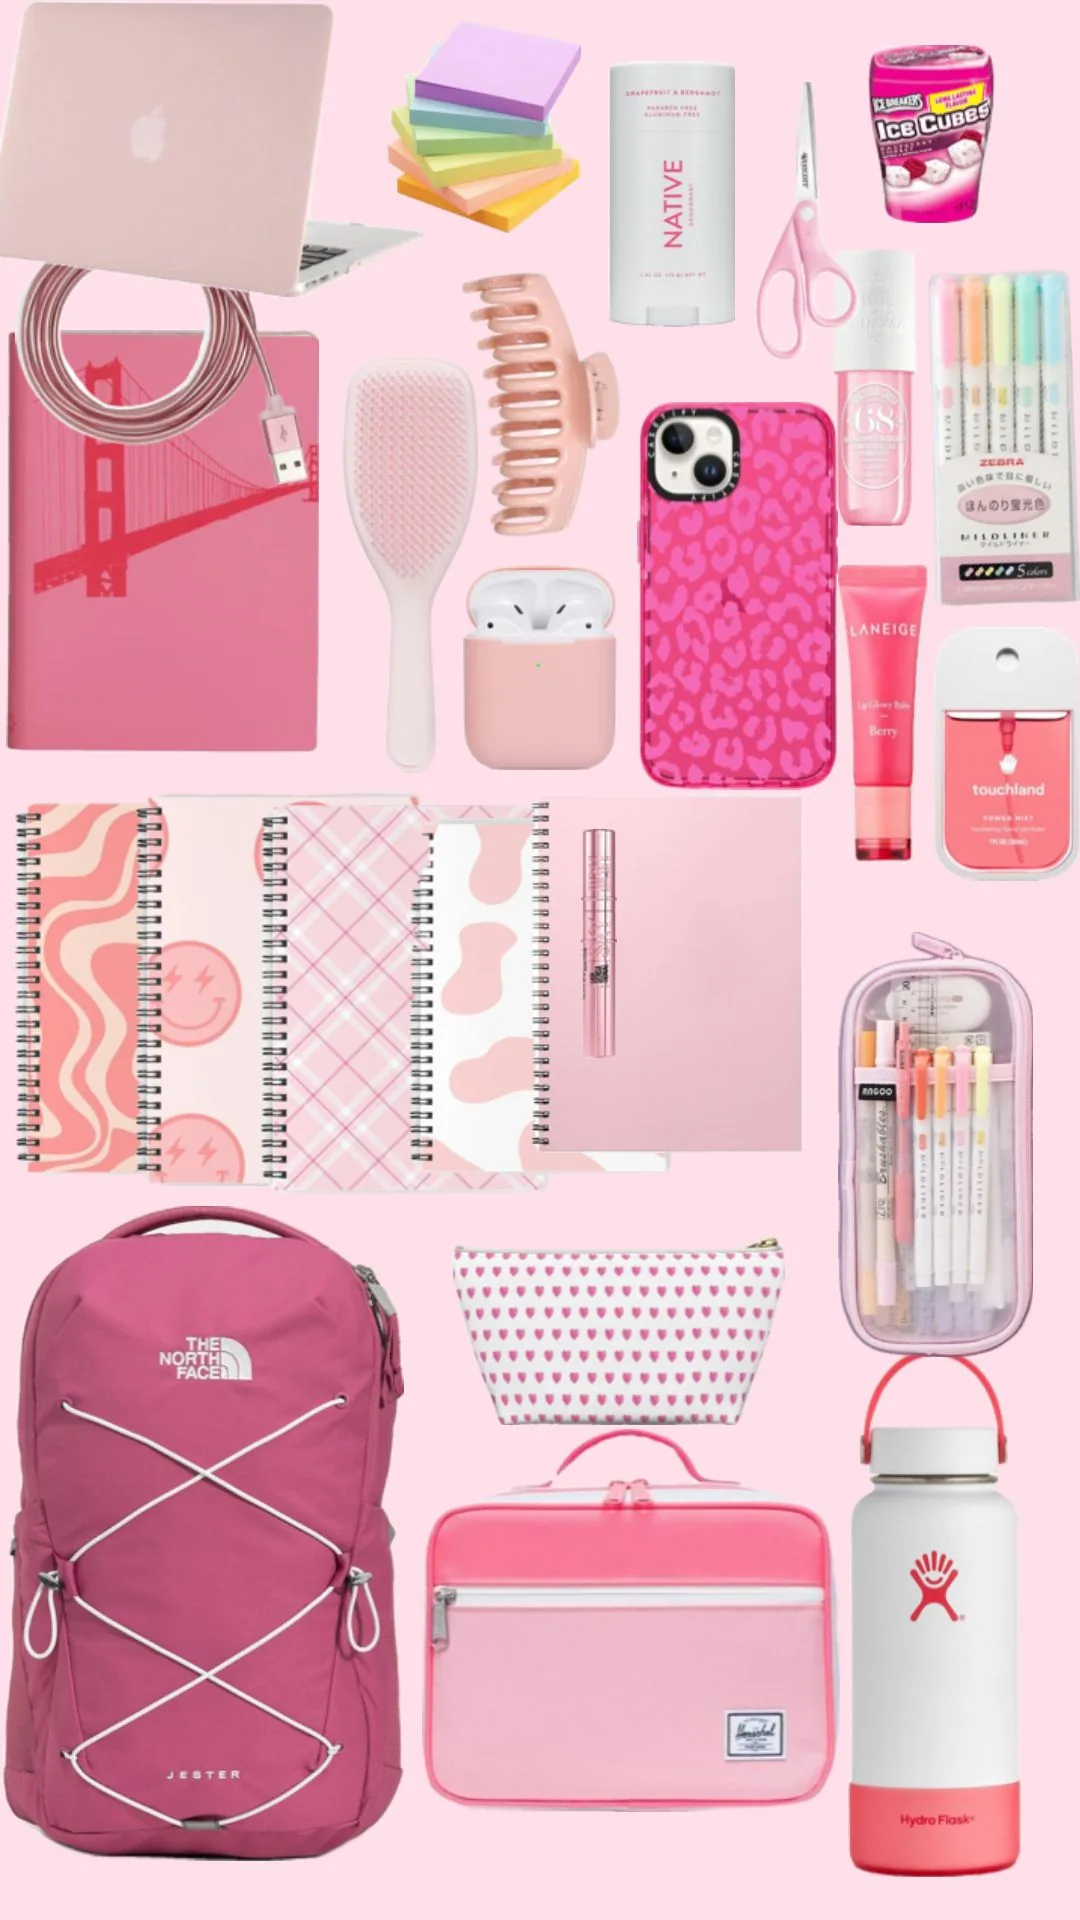
A school-bag hair kit should be tiny: two strong elastics, two small scrunchies, four bobby pins, one claw clip and a small brush or comb. That kit covers every fix you are likely to need during the day.
Add a travel spray bottle of water if your hair frizzes, and a small pot of smoothing cream if you have flyaways. Both weigh almost nothing and save a style that has gone fluffy by lunch.
Check the kit every Sunday night and replace stretched elastics and bent pins. A kit full of worn-out elastics is worse than no kit at all, because it fails exactly when you need it.
Frizz, Rain and Bad Hair Days: Quick Fixes
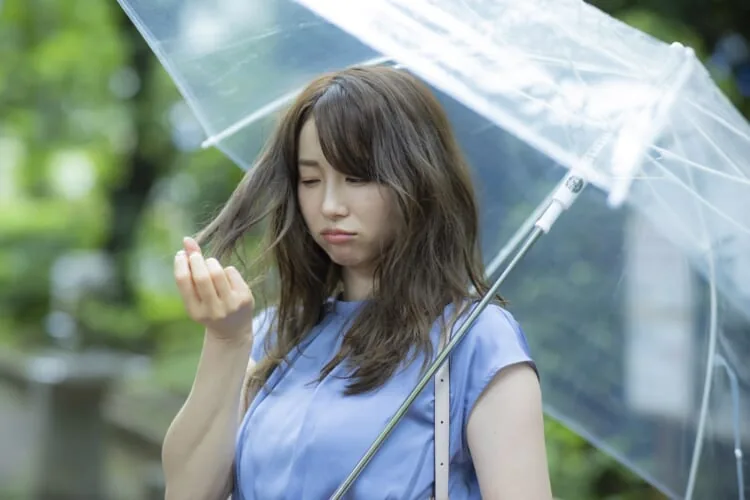
Rain is the enemy of loose styles, so on wet days choose a braid or a bun before you leave the house. A French braid or a low bun laughs at drizzle, while loose hair turns frizzy within minutes.
For frizz that appears during the day, smooth it with damp hands and a drop of cream, working from the top down. Never brush dry frizzy hair, which only makes the frizz bigger.
On a true bad hair day, the top knot or the braided bun is your best friend. Both hide unwashed roots, flatten frizz, and look deliberate rather than rushed. Add a headband braid across the front if the hairline is the problem.
Talking to Your Stylist About a School Cut
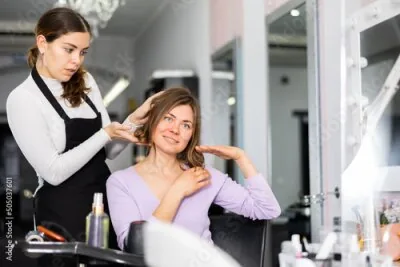
Before a school cut, tell your stylist three things: your school’s hair rules, how long you want to spend styling each morning, and whether you need the hair to tie up fully. Those three facts shape the whole cut.
Bring photos of styles from this guide that you actually wear, not just styles you admire. A stylist can cut layers that braid well, or keep length that ties into a bun, but only if they know which styles you use.
Ask how the cut will look tied up, not just worn down, and how often it needs trimming to keep its shape. A cut that only looks good loose is the wrong cut for a school week.
Frequently Asked Questions (FAQs)
What is the quickest hairstyle for school mornings?
A high ponytail or a low bun is the quickest hairstyle for school, taking under two minutes.
Both styles need only a brush and one elastic, they keep hair off the face, and they pass almost every school dress code. If you have one extra minute, wrap a strand around the base of the ponytail or add a scrunchie to make it look finished.
What hairstyles for school stay put all day?
Double Dutch braids, French braid pigtails and braided buns stay put best all day at school.
These styles hold hair close to the head with very little left loose, so they survive lessons, lunch, PE and wind. Braided ponytails and bubble ponytails are the next most reliable, while loose styles need re-fixing by midday.
Are braids allowed at school?
Yes, braids are allowed at almost every school because they are neat, tidy and keep hair off the face.
French braids, Dutch braids, fishtails and pigtail braids all meet typical dress codes. If your school has specific rules about hair accessories, use plain elastics and small, neat ribbons rather than large decorative pieces.
What is the best hairstyle for school for long hair?
A French braid or a braided ponytail is the best school hairstyle for long hair.
Both styles contain the full length so it cannot tangle, fall onto a desk, or get caught in a bag strap. Double Dutch braids are the best choice for sporty days, while a side braid is the most comfortable for sitting in class.
What is the best hairstyle for school for short hair?
A half-up twist, a claw-clip twist or a headband braid is the best school hairstyle for short hair.
These styles keep the front sections out of the eyes even when the hair is too short to tie up fully. Small front braids along the hairline work the same way, and a low ponytail suits short hair that just reaches the nape.
How can I make my school hairstyle last through PE?
Choose a style that sits close to the head, like double Dutch braids or a braided bun, and use a strong elastic plus pins.
Close-to-the-head styles have nothing loose to shake out during running and jumping. A second elastic at the base, a few extra pins, and a quick smooth-down with damp hands after PE will keep the style neat until home time.
What hairstyles are best for school picture day?
A crown braid, a milkmaid braid or a middle-part low bun photographs best for school picture day.
These styles look tidy from the front and the side, keep the face clear, and hold their shape under camera lights. Practise the style once the day before so picture morning is calm and quick.
How do I stop flyaways in my school hairstyle?
Smooth flyaways with damp hands and a drop of smoothing cream, working from the top of the head downward.
Flyaways are usually caused by dryness or new growth, so a little moisture and cream settles them without making hair greasy. Brushing dry hair makes flyaways worse, so always smooth them while the hair is slightly damp.
Can I wear my hair down at school?
Yes, you can wear your hair down at school if your school allows it and it stays off your face.
Half-up styles are a good compromise: they show off length while keeping the front sections away from the eyes. If your hair constantly falls forward while writing, a headband braid or a twisted half-up will fix it without tying everything up.
How often should I wash my hair for school hairstyles?
Most school students do well washing their hair every two to three days, depending on hair type and activity.
Braids and buns actually work better on day-two hair because it has more grip and less slip. On non-wash days, a dry shampoo at the roots or a braided style will keep hair looking fresh without a full wash.
Conclusion
The best hairstyle for school is the one you can actually do on a busy morning and forget about until home time. Braids, ponytails and buns earn their place in this guide because they do exactly that: they keep hair neat, off the face and out of the way, all day long.
Start with one or two styles that suit your hair length and your morning routine, and practise them until they feel automatic. Once a French braid or a low bun takes you five minutes, school mornings get noticeably easier.
Which of these 43 hairstyles for school will you try first? Tell us in the comments, and share this guide with a friend who is also racing the school-morning clock.