
How to Perfect choppy twist Hair Without a Trip to the Salon
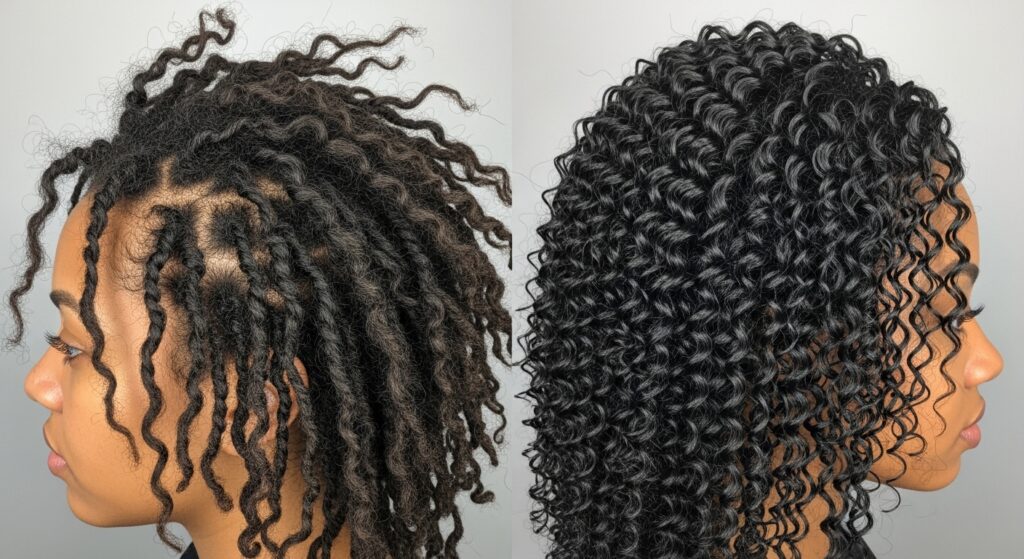
You’ve spent hours meticulously twisting your hair, section by section, only to wake up the next day to a head full of frizz, fuzzy ends, and twists that look more like they’ve been through a storm than a styling session. Sound familiar? Choppy twist hair is a common frustration, but it doesn’t have to be your reality. The good news is that you don’t need to book an expensive salon appointment or even start from scratch to achieve the defined, sleek, and long-lasting twists of your dreams.
This comprehensive guide is your new best friend. We’re diving deep into the why behind choppy twists and the how behind fixing them. Get ready to transform your technique, discover the power of the right products, and learn maintenance secrets that will keep your twists looking fresh for days, if not weeks, on end. Let’s reclaim your time and your style, right from the comfort of your home.
Why Do My Twists Go Choppy? Uncovering the Root Causes
Before we can fix the problem, we need to understand it. Choppy twists don’t just appear out of nowhere; they are almost always the result of a few key missteps. Identifying your personal culprit is the first step toward twist perfection.
Product Pitfalls: Using the wrong products, or not enough of the right ones, is a top offender. A lack of adequate leave-in conditioner or moisturizer can leave your hair dry and prone to frizz from the get-go. Skipping a sealing product like a butter or cream, or using a gel that doesn’t provide a strong enough hold, means your twists simply won’t have the support they need to stay defined.
Technique Troubles: How you twist matters just as much as what you put in your hair. Twisting hair that isn’t thoroughly detangled is a recipe for instant frizz and an uneven appearance. Similarly, twisting hair that is completely dry, rather than in its most pliable, damp state, makes it difficult to achieve a smooth, uniform result. Rushing through the process and creating sections that are too large or inconsistent can also lead to a choppy final look.
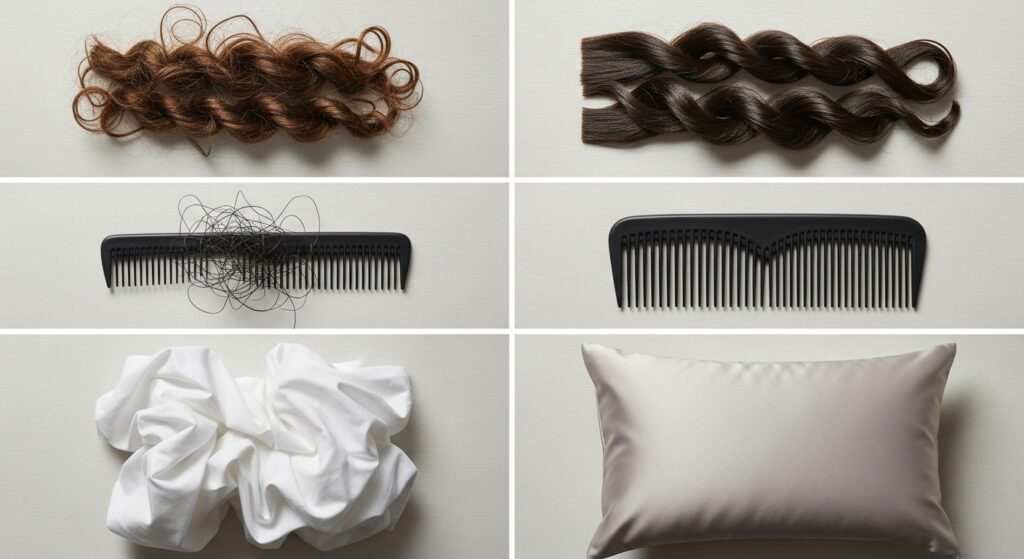
Nighttime Neglect: Your hair needs protection while you sleep. Cotton pillowcases create friction that roughs up the hair cuticle, leading to frizz and misshapen twists. Going to bed without properly securing your hair is one of the fastest ways to undo all your hard work.
The Pre-Twist Prep: Setting the Stage for Success
Perfect twists are built on a foundation of perfectly prepared hair. Skipping this step is like building a house on sand—it might look good at first, but it won’t last. A dedicated pre-twist routine is non-negotiable.
Start with a thorough wash and conditioning session. Use a clarifying shampoo if you have significant product buildup, followed by a deeply hydrating conditioner. This ensures your hair is clean, moisturized, and ready to receive styling products. After rinsing, apply a leave-in conditioner to damp hair, focusing on even distribution from roots to ends. This is your primary source of hydration, so don’t be shy.
Next, detangling is your secret weapon. Work in small sections using a wide-tooth comb or your fingers, starting from the ends and gradually moving up to the roots. This might feel time-consuming, but it is the single most important step for achieving smooth, frizz-free twists. Each section should be completely tangle-free before you even think about twisting it.
Finally, apply a sealing product like a hair butter or rich cream to lock in the moisture from your leave-in conditioner. For areas that need extra definition and hold, like the edges or the entire length for some hair types, a styling gel is your best friend. The goal is to create a slick, well-moisturized base that is easy to manipulate.

The Art of the Twist: Mastering the Technique for Flawless Results
Now for the main event. With your hair perfectly prepped, it’s time to twist with intention. The technique you use here will make all the difference between a style that falls flat and one that turns heads.
First, section your hair neatly. Use the end of a rattail comb to create clean, straight parts. The size of your sections will determine the size of your twists—smaller sections generally lead to more defined, longer-lasting curls. Consistency is key; try to make your sections as uniform as possible for a cohesive look.
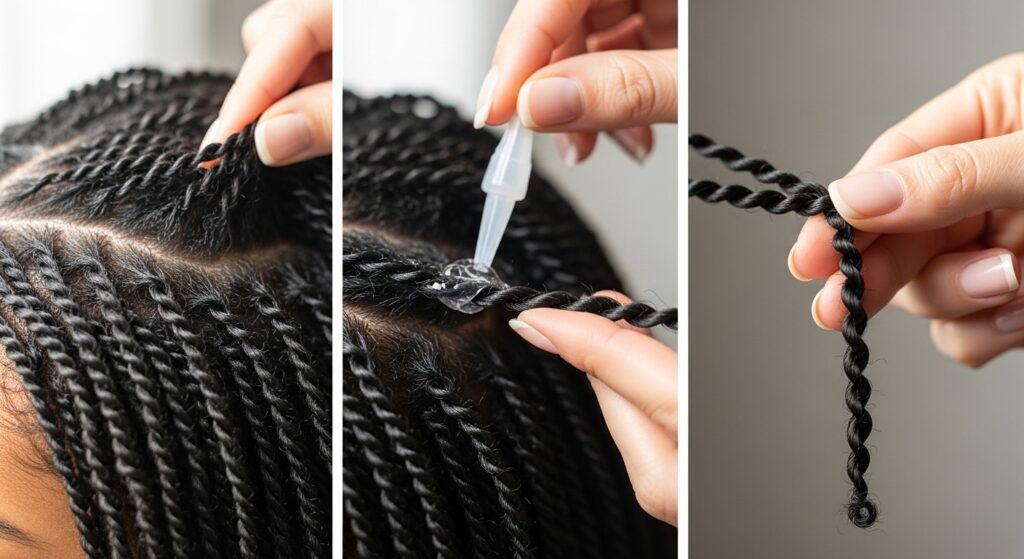
When you begin to twist, focus on tension and smoothness. Hold the section taut at the root to avoid puffy roots, but not so tight that it causes discomfort. As you twist downwards, use your fingers to smooth the hair shaft, ensuring all the strands are incorporated neatly. Pay special attention to the ends. A common mistake is to let the ends become loose and frizzy. Take an extra moment to twist them tightly, or use the “palm rolling” technique—rolling the end of the twist between your palm and finger—to create a perfectly sealed, smooth point.
Remember, damp hair is your ally. If your hair starts to dry out during the process, don’t hesitate to lightly mist a section with water or a water-based moisturizing spray to re-dampen it. Hair is always most manageable and receptive to styling when it’s damp.
The Rescue Mission: How to Fix Existing Choppy Twists
So, you’re already stuck with a head of choppy twists? Don’t panic and don’t take them out! There is a way to salvage your style without starting over. This is your emergency rescue plan.
Your primary tool for this mission is targeted hydration and re-sealing. Mix water and a little leave-in conditioner in a spray bottle. Lightly mist the frizzy or choppy sections of your twists—you want them damp, not soaking wet. Then, take a small amount of your styling cream or butter (and a tiny bit of gel for stubborn areas) and gently smooth it over the problem areas.
Use the “praying hands” method by gliding your product-coated palms down the length of the troubled twist to smooth the frizz and redefine its shape. Follow this up by re-twisting the section, again focusing on maintaining smooth tension from root to tip. You don’t need to redo your entire head; just focus on the twists that have lost their definition. For frizzy ends, a small amount of gel and a quick palm roll will work wonders.
Once you’ve smoothed and re-twisted the offenders, allow your hair to air dry completely or use a hooded dryer on a low, cool setting. This will reset the shape and hold of the twists you just fixed.

Overnight Preservation: The Key to Long-Lasting Style
How you treat your hair at night is just as important as how you style it during the day. A proper nighttime routine is what separates a style that lasts two days from one that lasts two weeks.
The golden rule: always sleep on a satin or silk surface. Ditch the cotton pillowcase immediately and invest in a satin or silk one, or a satin bonnet or scarf. These materials create significantly less friction, which means your twists won’t get roughed up and frizzy as you toss and turn.
Next, protect your style. The pineapple method is excellent for longer hair. Simply gather all your twists at the very top of your head and secure them loosely with a satin scrunchie. This prevents them from being crushed against your pillow. For shorter hair or to preserve a specific shape, you can also wrap your head with a satin scarf, ensuring all your twists are tucked in neatly.
In the morning, a quick steam refresh can bring your twists back to life. Hang your head upside down in the bathroom while you take a hot shower (without getting your hair wet), or use a handheld garment steamer from a safe distance. The steam will re-hydrate your hair and reactivate the products, helping to smooth any minor frizz and revive your curls without any additional product.

Embrace Your Journey to Perfect Twists
Mastering the art of the perfect twist is a journey of understanding your hair’s unique needs and responding with the right techniques and products. It’s about patience, practice, and a little bit of TLC. Choppy hair doesn’t have to be your norm. By prepping your hair correctly, mastering a smooth twisting technique, knowing how to perform quick fixes, and protecting your hard work overnight, you are now equipped with all the knowledge you need to achieve salon-worthy twists at home.